
2004 JDM 500bhp Target


Joined: Nov 2003
Posts: 13,356
Likes: 58
From: in the woods...........555 Wagon Sqn


Do you have contacts for the Kartboy kit and the bushes...i like the look of the

kartboy stuff was all bought from turninconcepts from the USA. $25 postage so not too bad...
just for completeness of records, just softened coils by 5 clocks all round. Poly bushes really are stiff!!
just for completeness of records, just softened coils by 5 clocks all round. Poly bushes really are stiff!!
i got all kartboy stuff and other poly bushes from here as they are more than happy to ship to the UK:
http://turninconcepts.com/
Have placed multiple orders and never had a problem. Usually arrives in a week.
http://turninconcepts.com/
Have placed multiple orders and never had a problem. Usually arrives in a week.
I have never had to pay import duty with them and they have (if my memory serves correctly) declared the full value each time.
Sorry for the delayed response - I just emailed them directly and said please send a paypal invoice for parts X Y Z to be shipped to the UK to this email address. They usually respond within a day (time zone differences) and have been very helpful in helping me chose parts.
Sorry for the delayed response - I just emailed them directly and said please send a paypal invoice for parts X Y Z to be shipped to the UK to this email address. They usually respond within a day (time zone differences) and have been very helpful in helping me chose parts.
Decided to keep rather than let the car go for low offers, so went and got a full geometry setup at subaru4you. excellent job they did too! Now running 1.8 neg camber up front, 1.2 neg camber rear, 1 degree toe in all round and 3.8-4.2 castor front. Where I had been fiddling with fitting ALK, poly bushes and whatnot, the fronts were a bit off. Quite an improvement I must say, probably due to the neg camber up front but boy does it corner now!
Decided to keep rather than let the car go for low offers, so went and got a full geometry setup at subaru4you. excellent job they did too! Now running 1.8 neg camber up front, 1.2 neg camber rear, 1 degree toe in all round and 3.8-4.2 castor front. Where I had been fiddling with fitting ALK, poly bushes and whatnot, the fronts were a bit off. Quite an improvement I must say, probably due to the neg camber up front but boy does it corner now!

How's the bespoke developments going ?
Rob
A command, nicely done! I respond well to those
I will update with plenty of pics of the small things I have done recently. Have been slacking a bit, i know.
As for bespoke developments... A bit distracted from the car project as I have been developing a home automation system to go in the new house!
The shift lights I developed wont be used in this car, as I actually have one already; the one built into the car (light and beep) so no need for progressive lights, sadly.
I do still however fancy finishing my servo controlled screamer pipe. I have all of the parts, just need to do the fabrication. Although the project is more complex than I first thought, because of the servo location half way down the manifold. This might lead to some odd airflow which I cannot predict. We shall see once I rekindle it
Making the most of this nice weather. I did a basic oil/filter change today and also refitted my mud flaps with larger washers.
Fatty vs Skinny oil filters:

Nothing but the best oil:

I fitted a magnetic oil sump plug this time. Yes, not much point as the block is alu but it looks better and is basically the same cost as an OEM replacement

Mudflap before:

Mudflap after:

It didn't clean up perfectly as I only spent a couple of minutes doing so. They are only going to get filthy in days again anyway. Shiny stainless new fittings (larger diameter than before, required the mounts to be drilled larger:

And the finished article. Not bad if i do say so myself! A bit of a headache overall fitting them as the old fittings had seized where they weren't greased properly:

I also noticed while in the engine bay that the dump valve was sticking slightly. Not enough for me to notice while driving, but just while closely observing. Here it is removed from the engine bay:

And in lots of pieces on the floor:

And even more pieces:

Turns out all it needed was a good clean and re-lubricating. Works perfectly as it did before now!
Fatty vs Skinny oil filters:
Nothing but the best oil:
I fitted a magnetic oil sump plug this time. Yes, not much point as the block is alu but it looks better and is basically the same cost as an OEM replacement
Mudflap before:
Mudflap after:
It didn't clean up perfectly as I only spent a couple of minutes doing so. They are only going to get filthy in days again anyway. Shiny stainless new fittings (larger diameter than before, required the mounts to be drilled larger:
And the finished article. Not bad if i do say so myself! A bit of a headache overall fitting them as the old fittings had seized where they weren't greased properly:
I also noticed while in the engine bay that the dump valve was sticking slightly. Not enough for me to notice while driving, but just while closely observing. Here it is removed from the engine bay:
And in lots of pieces on the floor:
And even more pieces:
Turns out all it needed was a good clean and re-lubricating. Works perfectly as it did before now!
Well the servicing continued this weekend. Gearbox oil change. Was going to do rear diff as well but I got sidetracked with the grille!
5l of Fuchs Titan Syn 5

So I decided that I wasn't happy with the finish on the grille. It has been resprayed at some point (to be honest, its a pretty good job considering that it is made of ABS - not the easiest to get adhesion to). The aim was to debadge it fully and get it professionally sprayed in either satin black to match the rest of the front of the car, or colour coded to the metallic blue. I haven't decided which yet. Here it is before I got to work:

Here it is without the STI badge:

And finally without the subaru emblem:

I have been sanding it down to get a perfect finish, but quite a bit more sanding is required before it gets sent off to be painted. I have taken off the horns to get resprayed and while im down there, and I might as well respray the power steering lines and intercooler as stones take their toll! To be updated this weekend, weather permitting.
5l of Fuchs Titan Syn 5
So I decided that I wasn't happy with the finish on the grille. It has been resprayed at some point (to be honest, its a pretty good job considering that it is made of ABS - not the easiest to get adhesion to). The aim was to debadge it fully and get it professionally sprayed in either satin black to match the rest of the front of the car, or colour coded to the metallic blue. I haven't decided which yet. Here it is before I got to work:
Here it is without the STI badge:
And finally without the subaru emblem:
I have been sanding it down to get a perfect finish, but quite a bit more sanding is required before it gets sent off to be painted. I have taken off the horns to get resprayed and while im down there, and I might as well respray the power steering lines and intercooler as stones take their toll! To be updated this weekend, weather permitting.
Sneaky mid-week update. I sourced some KICS project wheelnuts so decided to fit them! They are the R40 model, so they weigh 40g each. I chose these because they are made of steel rather than the usual wheelnuts you see everywhere (D2 etc) which are made of aluminium and have known to fail. Also they are beautiful! Here they are:

Up close:


Before:

After:

Its a shame im still running the standard wheels, as they dont do the nuts justice!!! Also the weight savings from old to new nuts are wasted
Finally, I continue my project "tarten up front of car" by spraying the horns:

The finish wasn't as good as I had hoped for, so I will take it off and give it another go with a bit more prep this time. I still plan to repaint the intercooler, power steering line and grille... when I get a chance.
Up close:
Before:
After:
Its a shame im still running the standard wheels, as they dont do the nuts justice!!! Also the weight savings from old to new nuts are wasted
Finally, I continue my project "tarten up front of car" by spraying the horns:
The finish wasn't as good as I had hoped for, so I will take it off and give it another go with a bit more prep this time. I still plan to repaint the intercooler, power steering line and grille... when I get a chance.

Seriously though, they look cracking in the flesh. Steel was a must - have read too many horror stories of alloy nuts.
Joined: Nov 2003
Posts: 13,356
Likes: 58
From: in the woods...........555 Wagon Sqn
Mmmm, I have alloy Rays nuts and some alloy cheapy nuts too...I'll be selling both and going OE until I can get my head around the cost of bling ones
"Tuner" steel nuts can be had off the bay with an internal drive (like my existing beaten up ones above) for about �20 new. They are probably about 50-60g each rather than 40g of my new ones and they dont look too bad. Can be had in black and blue etc. I did just consider buying direct replacements as I do quite like them, but I decided when I finally get a proper set of alloys on there (depending on current situation) it would be a shame to bring them down with a set of "normal" nuts.
OK so the service continues. It is hugely dragged out due to the heat and chilled approach I am taking.
It took me 2 hours to get my spanners and sockets out from the garage. Then 5 mins changing the rear diff oil.
Gotta love the smell of diff oil!! Not. The oil was actually pretty clean. Cleaner than my previous type R thats for sure.
The previous owner has definately maintained this properly! So on with the mandatory pictures. This model has a sensor
at the top plug location unlike my previous experiences. I guess its oil temperature? No idea if it even works. The dash
has never complained so I guess it does...
Cleaned upper diff plug:

And a close up because it looks quite nice:

A peak inside:


Then on refill, filled just to the point where it starts to trickle out of the diff while level:

Great success! I also continued with sanding the grille down ready for painting, but I didn't finish so pictures still to come...
It took me 2 hours to get my spanners and sockets out from the garage. Then 5 mins changing the rear diff oil.
Gotta love the smell of diff oil!! Not. The oil was actually pretty clean. Cleaner than my previous type R thats for sure.
The previous owner has definately maintained this properly! So on with the mandatory pictures. This model has a sensor
at the top plug location unlike my previous experiences. I guess its oil temperature? No idea if it even works. The dash
has never complained so I guess it does...
Cleaned upper diff plug:
And a close up because it looks quite nice:
A peak inside:
Then on refill, filled just to the point where it starts to trickle out of the diff while level:
Great success! I also continued with sanding the grille down ready for painting, but I didn't finish so pictures still to come...

DAMD D wheel. Beautiful piece of kit. Just waiting for it to arrive now.
For my car, the buttons are replaced with blanking panels. For 2005+, the buttons are for cruise control and stereo but obviously mine doesn't have those features.
As for a direct fit... it is a direct replacement bar the airbag cover. I think mine is 4mm less wide either side but we will see. I might have to buy the cover from an 08 car. All a bit unknown right now. All I knew was that I needed to have it in my life haha.
Shift *****. 3 companies I am interested in:
http://www.shopflossy.com/
http://www.twmshiftknobs.com
http://www.lathewerks.com
Some pictures of potentials:


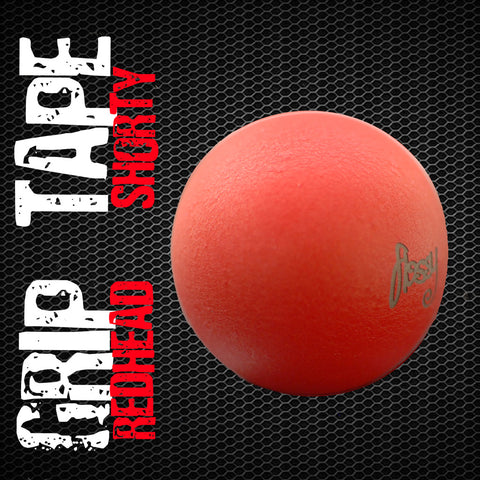
If I go with lathewerks... I could get a reverse ring too...

Decisions decisions!!!
http://www.shopflossy.com/
http://www.twmshiftknobs.com
http://www.lathewerks.com
Some pictures of potentials:
If I go with lathewerks... I could get a reverse ring too...
Decisions decisions!!!

