
my DIY alloy wheel colour change (project: Peppermint)


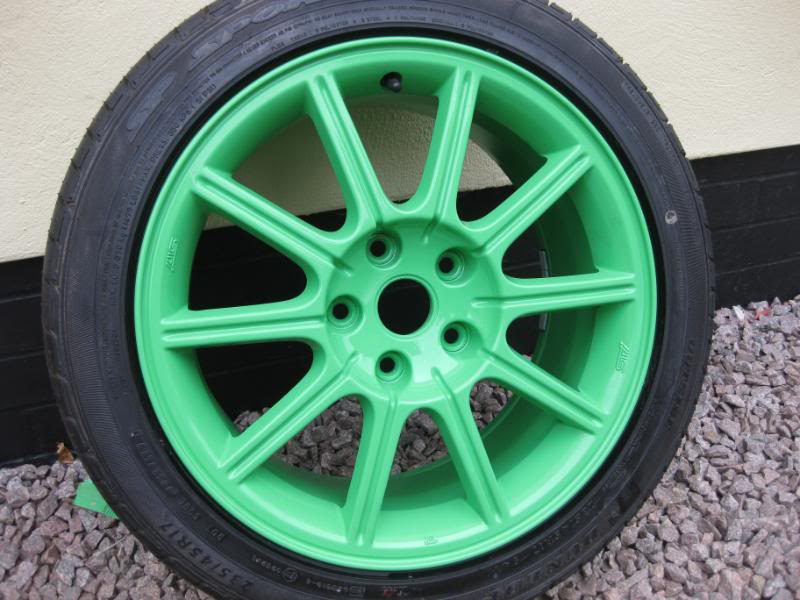
The finishing coats of the shine green went on this afternoon... 15mins between coats, then after about 45mins the 1st coat of lacquer went on after removing the newspaper making around the centre.
Two hours later a 2nd coat of lacquer.
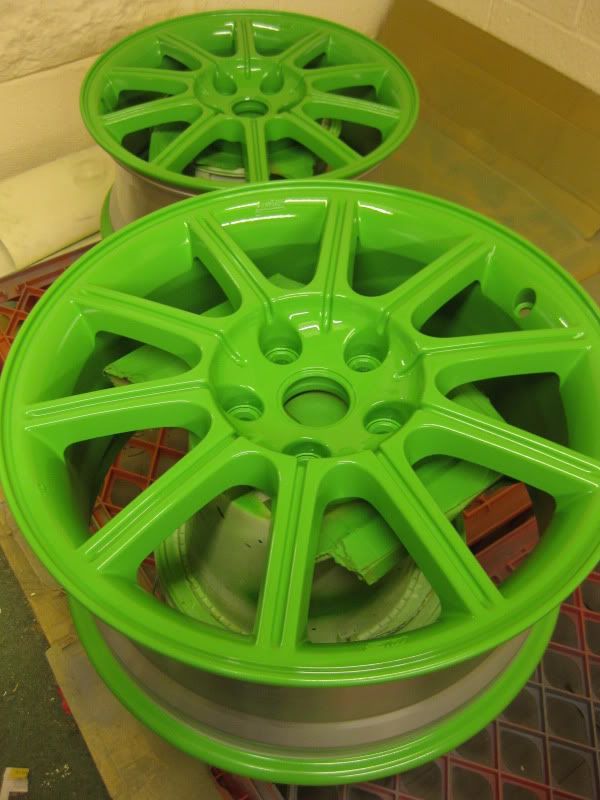

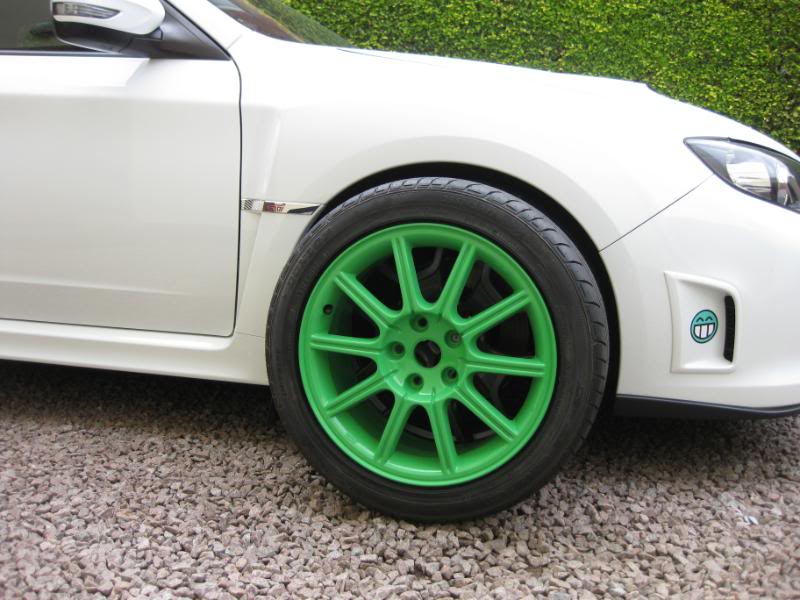
The pictures don't do the finish justice to how good they look
A final lacquer coat will go on tomorrow to finish them off. Then a general check round to make sure all is good then I'll leave a few days to harden off before the rubber goes back on.
Two hours later a 2nd coat of lacquer.
The pictures don't do the finish justice to how good they look
A final lacquer coat will go on tomorrow to finish them off. Then a general check round to make sure all is good then I'll leave a few days to harden off before the rubber goes back on.
Thread Starter
Scooby Senior


Joined: Feb 2000
Posts: 15,078
Likes: 46
From: Nottm
lol, yep, camera, Light and wether I have the flash on or now.
These are taken inside, with strip lighting and depending on how I take the pic the colour looks different.
But when you see it in real life.. its GREEN
These are taken inside, with strip lighting and depending on how I take the pic the colour looks different.
But when you see it in real life.. its GREEN

Thread Starter
Scooby Senior
Joined: Feb 2000
Posts: 15,078
Likes: 46
From: Nottm
This afternoon I took my alloys to get the rubber fitted. I hope to fit these to my car nearer the end of November when the winter gets here.
Paint/lacquer felt hard enough and I had the thought if it were to come off it would either come off now or later if I left them longer to cure anyway.
Seeing I wanted to get the tyres back on, I though they could harden off once the tyres were on.
Really pleased with the final look. The tyre fitter was very careful not to damage anything on the wheel, only a couple of scuffs of paint on the inner rim of the alloy, mainly from the clamps that hold the alloy in place whilst the tyre gets put on. Once I got home I lightly sanded the scuffs and touched up the parts of the inner rim that needed touching up.. I just used a fine sign writing brush... the scuffs were that small.
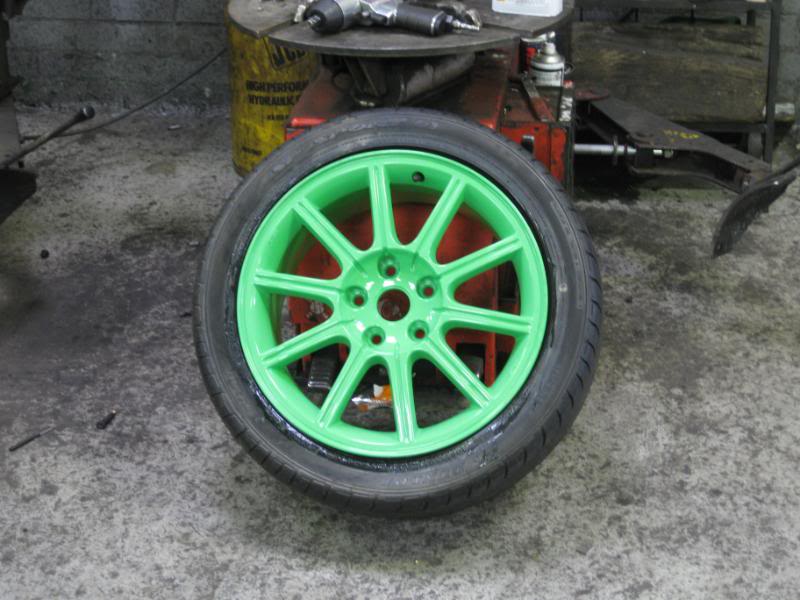
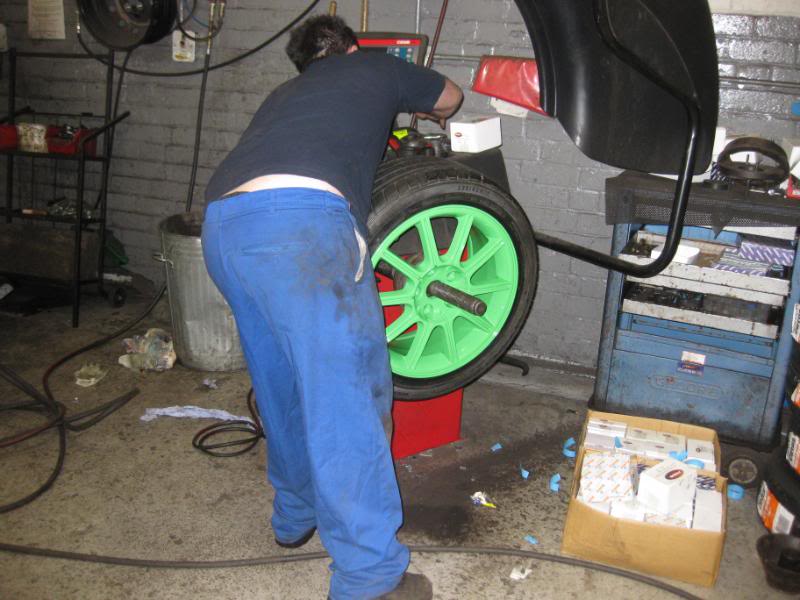
When Richard balanced them he used the stick on weights and fitted on the inside of the alloy

Back home
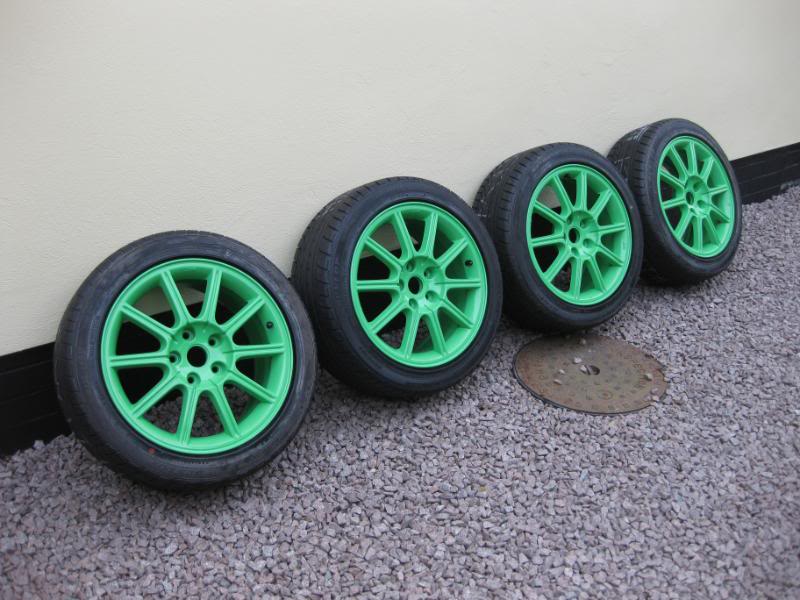
Maybe the wheels are too wide
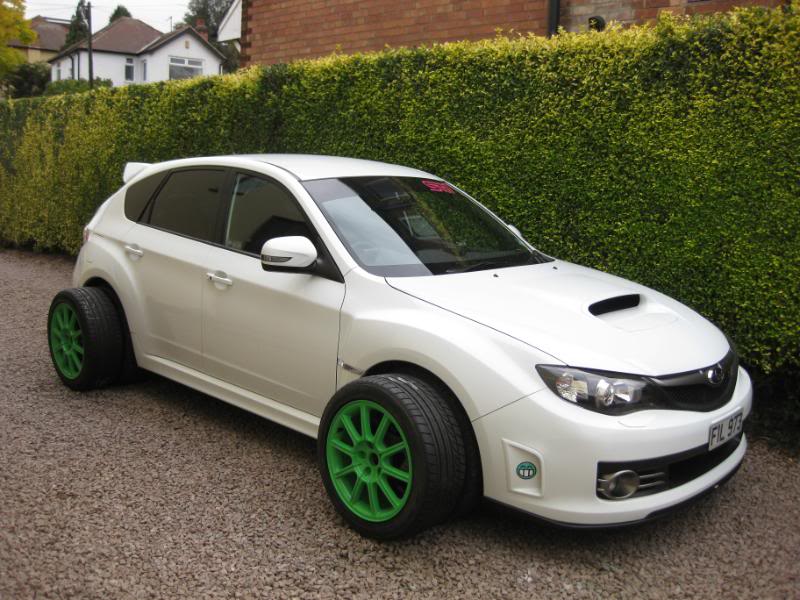
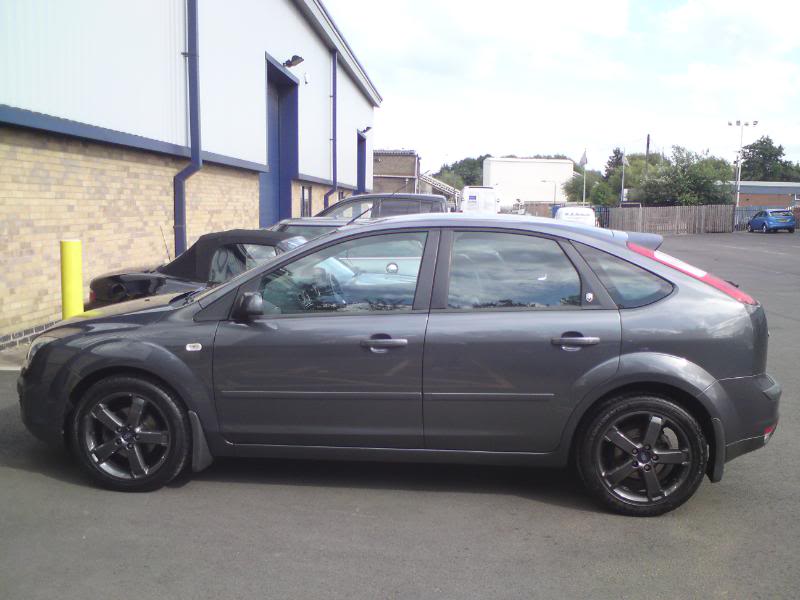
Offering them up against the 19" that are on the car now, you can see that the overall height of the tyre and 17" alloy matches the height of what the 19" is, hopefully there shouldn't be any large gaps between tyre and wheel arch when the Green wheels go on the car.
Really pleased with the DIY out come using rattle cans, in all I've spent �70.88 on etch primer (2x 400ml cans �6.99 each) + paint (6x 300ml �3.99 each + 2x 150ml �4.50 each!!!!cans) + lacquer (2x 500ml cans �5.99 each/ 1x 500ml + extra 25% extra free �4.99!!). Knowing what I know now, I'd say it could be done with less spray paint (as I over bought and gave more coats that really needed, could have done it with 5-6 300ml cans, if I'd have bought just two lacquer cans that had 25% extra free I'd have had plenty).
Lets say I could have used �50 on materials, so it could have cost me �12.50 per alloy to paint.
Tyre removal/re-fit + new valve and balance cost me �48.
I've still spent a lot less than having them powder coated in Green.
If anyone fancies doing their own alloys I'd say go for it... just make sure you prep well, buy a quality etch primer and quality brand spray cans, as it makes it so much easier to spray.
Paint/lacquer felt hard enough and I had the thought if it were to come off it would either come off now or later if I left them longer to cure anyway.
Seeing I wanted to get the tyres back on, I though they could harden off once the tyres were on.
Really pleased with the final look. The tyre fitter was very careful not to damage anything on the wheel, only a couple of scuffs of paint on the inner rim of the alloy, mainly from the clamps that hold the alloy in place whilst the tyre gets put on. Once I got home I lightly sanded the scuffs and touched up the parts of the inner rim that needed touching up.. I just used a fine sign writing brush... the scuffs were that small.
When Richard balanced them he used the stick on weights and fitted on the inside of the alloy
Back home
Maybe the wheels are too wide
Offering them up against the 19" that are on the car now, you can see that the overall height of the tyre and 17" alloy matches the height of what the 19" is, hopefully there shouldn't be any large gaps between tyre and wheel arch when the Green wheels go on the car.
Really pleased with the DIY out come using rattle cans, in all I've spent �70.88 on etch primer (2x 400ml cans �6.99 each) + paint (6x 300ml �3.99 each + 2x 150ml �4.50 each!!!!cans) + lacquer (2x 500ml cans �5.99 each/ 1x 500ml + extra 25% extra free �4.99!!). Knowing what I know now, I'd say it could be done with less spray paint (as I over bought and gave more coats that really needed, could have done it with 5-6 300ml cans, if I'd have bought just two lacquer cans that had 25% extra free I'd have had plenty).
Lets say I could have used �50 on materials, so it could have cost me �12.50 per alloy to paint.
Tyre removal/re-fit + new valve and balance cost me �48.
I've still spent a lot less than having them powder coated in Green.
If anyone fancies doing their own alloys I'd say go for it... just make sure you prep well, buy a quality etch primer and quality brand spray cans, as it makes it so much easier to spray.

Aye, full job here for �200, including oven slow bake at a low temperature.
Or �30 a wheel if only light scuffing, or you do the prep-work.
HOWEVER: I seriously doubt that a) you'd get the level of care taken that Phil has shown, and b) the amount of paint, it's thickness would be the same.
Well done mate...........now to get a decent car, eh?
Or �30 a wheel if only light scuffing, or you do the prep-work.
HOWEVER: I seriously doubt that a) you'd get the level of care taken that Phil has shown, and b) the amount of paint, it's thickness would be the same.
Well done mate...........now to get a decent car, eh?
Thread Starter
Scooby Senior
Joined: Feb 2000
Posts: 15,078
Likes: 46
From: Nottm
there's only THE WHEEL SPECIALIST I would let Powder Coat my wheels, and you don't get it done for �180 up here.
They sand blast off, prep, prime, spray, etc, bake and all in ONE DAY turn around.
basic colours (not GREEN) on 17" alloys you're looking at �250+ with tyre removal/refit.
Green would be more money.
A top job is done, I know, my wife Jo had hers done and thay are awesome...
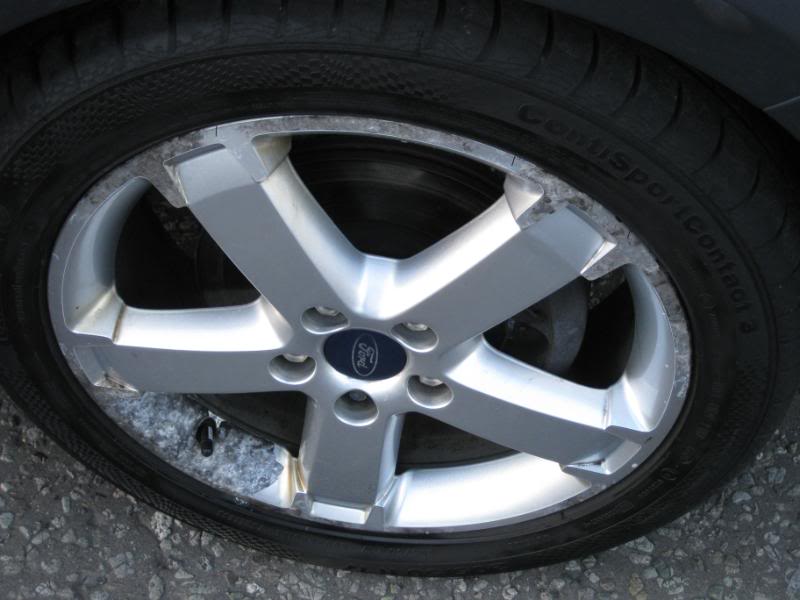
She was loosing tyre pressure because the lacquer had broke down letting the air slowly out.
before...
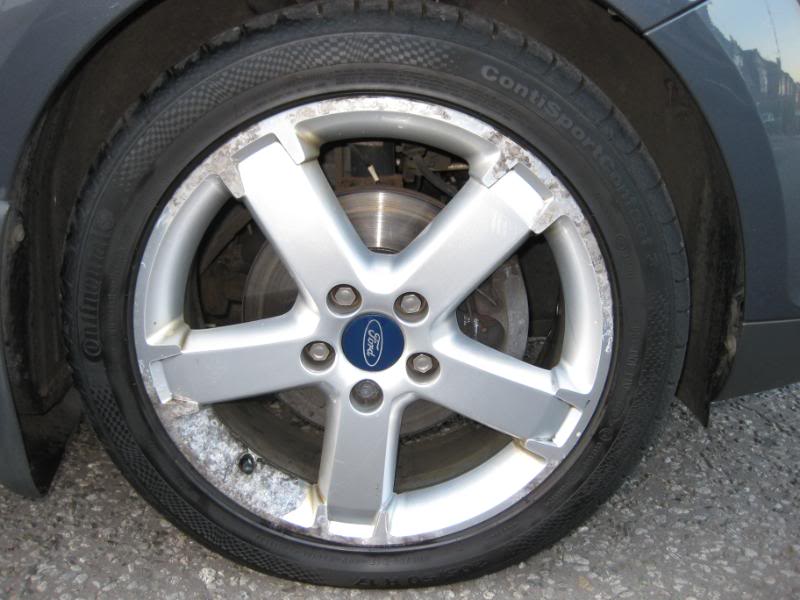
after...
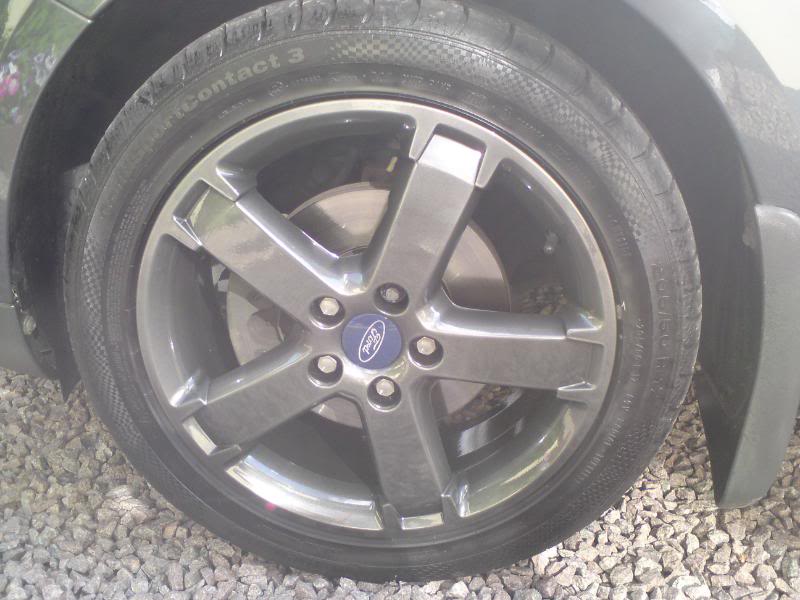
Dropped off at 8am.. picked up at 5pm ..all done
They sand blast off, prep, prime, spray, etc, bake and all in ONE DAY turn around.
basic colours (not GREEN) on 17" alloys you're looking at �250+ with tyre removal/refit.
Green would be more money.
A top job is done, I know, my wife Jo had hers done and thay are awesome...
She was loosing tyre pressure because the lacquer had broke down letting the air slowly out.
before...
after...
Dropped off at 8am.. picked up at 5pm ..all done
Last edited by salsa-king; Oct 22, 2011 at 09:04 AM.
I recently had my wheels refurbed locally (JP Polishing) and the process he goes through is tgo blast off, prep Powder coat and bake, being a powder coat, it is a more OE finish. The cost of the full job including removal/refitting of tyres and valves was �200 for a set of 18"s
A lot of people this way swear by JP, and after having him do my wheels, I can see why.
My wheels were tunred around over 3 daya, but mainly because I told him there was no rush as the car doesn't get used much.
Looking good bud, but the real test with cellulose jobs is winter/salt and continuous cleaning, i sprayed my motorbike wheels Dayglo ornage as alot of places wouldnt do it, i can see why LOL, anyhoo, the job was sweet but after 2 yrs of cleaning/use etc you can see the flaws, hope yours last the test of time, again, good job and nice colour
Thread Starter
Scooby Senior
Joined: Feb 2000
Posts: 15,078
Likes: 46
From: Nottm
fare point, but they'll only be on the car 5months of the year and iy wouldn't be a hard just to wft th over in a coupke of years, no need to remove tyres next time.. all the hard work's been done 
Anyway.. two years time.. they might be HOT PINK #
Anyway.. two years time.. they might be HOT PINK #

I used wire wool wrapped around a steel bar in a drill to help get in all the round bits when i did mine, reckon it saved quite some time
They look great and your def right the finish is only as good as the prep...dont rush!
I sprayed lots of wheels now, 3 coats paint, 3 coats lacquer, seems to have withstood time ok.
Im liking the green
They look great and your def right the finish is only as good as the prep...dont rush!
I sprayed lots of wheels now, 3 coats paint, 3 coats lacquer, seems to have withstood time ok.
Im liking the green
Thread Starter
Scooby Senior
Joined: Feb 2000
Posts: 15,078
Likes: 46
From: Nottm
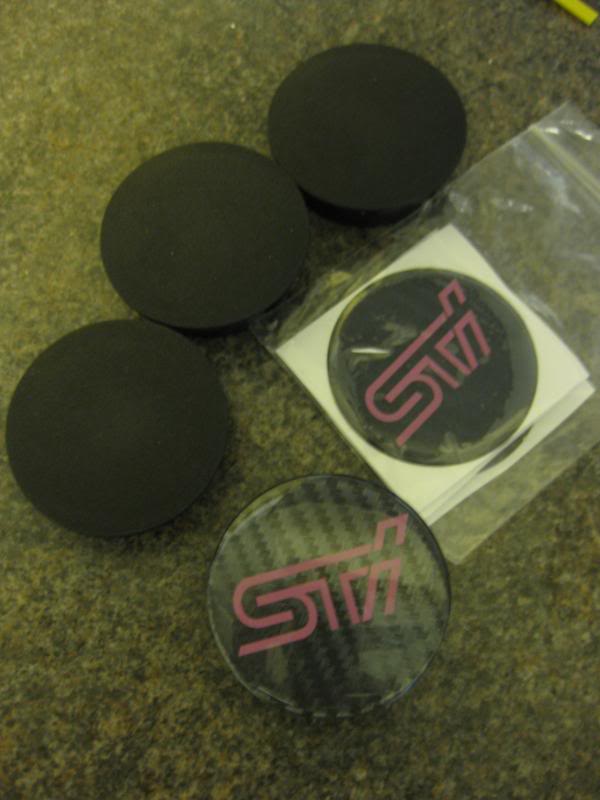
60mm Centre caps arrived yesterday and the 60mm STI trims arrived today.
I've had to cut a bit off the back of the centre cap to make it go in easier.. but they do fit
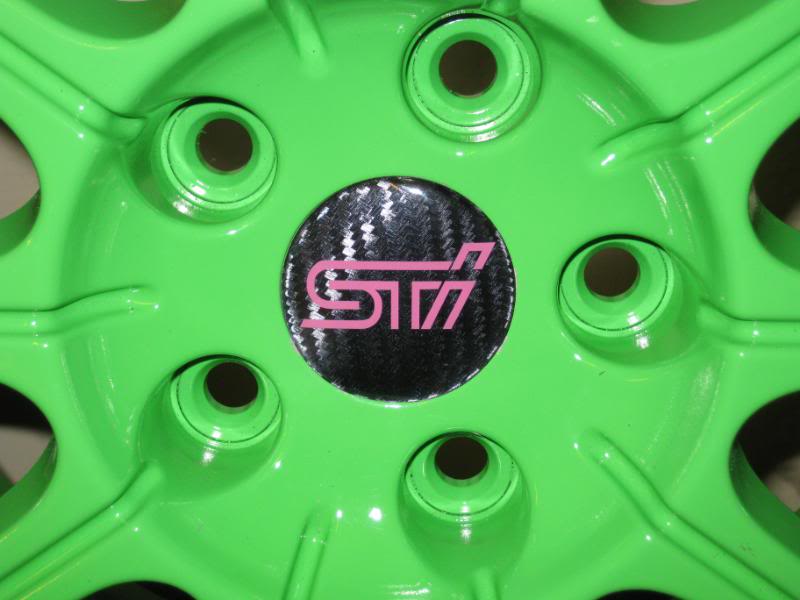
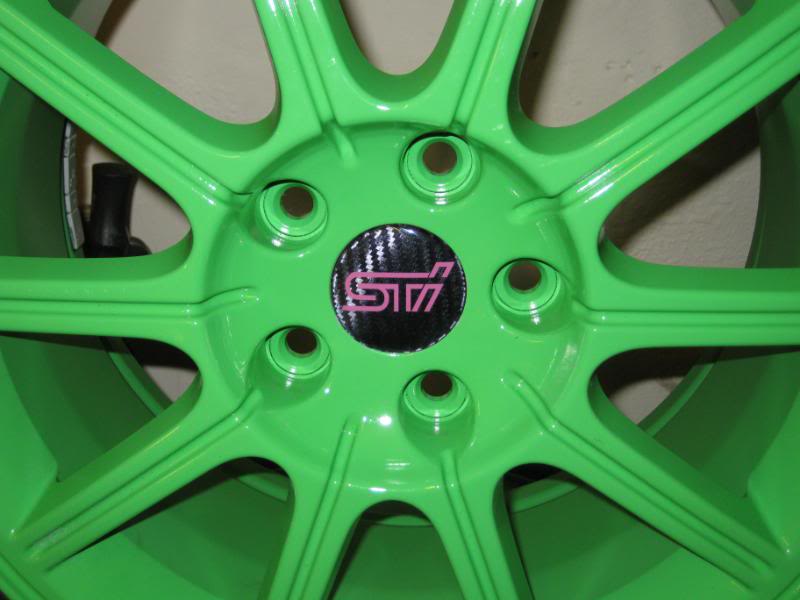
well chuffed.
Phil
I've had to cut a bit off the back of the centre cap to make it go in easier.. but they do fit
well chuffed.
Phil
Scooby Regular

Joined: Feb 2003
Posts: 7,841
Likes: 834
From: Harpenden
Phil,
Nice job on the wheels
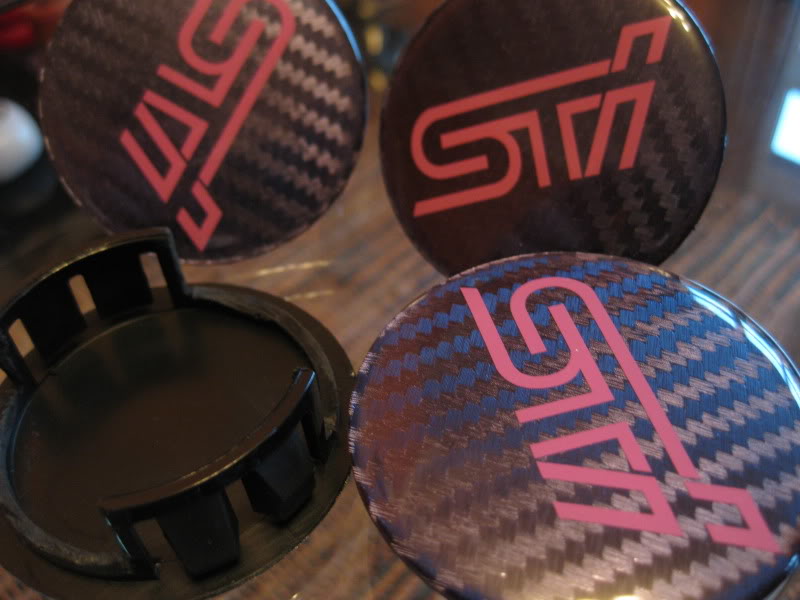
I purchased the 50mm version of your badges for my winter centre caps.
However, thought they looked tooo purple as against STi pink for my liking, so the Ebay vendor had some made up in red for me which arrived this AM..............

Nice job on the wheels
I purchased the 50mm version of your badges for my winter centre caps.
However, thought they looked tooo purple as against STi pink for my liking, so the Ebay vendor had some made up in red for me which arrived this AM..............
Thread Starter
Scooby Senior
Joined: Feb 2000
Posts: 15,078
Likes: 46
From: Nottm
Don, I'm pleased with the PINK, some say I should have ask for Green, but I like the pink as it matches the PINK STi logo on my sun strip
I just need a fine cutting wheel of my drimmel, so I can trim a bit more of the deep dished back of the centre caps, that way they will fit snug and neater than they are now
The STi sticker caps look the biz though in RED too
I just need a fine cutting wheel of my drimmel, so I can trim a bit more of the deep dished back of the centre caps, that way they will fit snug and neater than they are now
The STi sticker caps look the biz though in RED too
Thread Starter
Scooby Senior
Joined: Feb 2000
Posts: 15,078
Likes: 46
From: Nottm
Yep.. the car will only go out in dry weather once they get fitted lol
Centre caps now sorted...I had to do a bit of trimming down on the rear of them (you can see from the pic) as it originally was a bit deep to the back, now cut/trimmed the caps fit nicely into the recess that is the centre cap area (how good are Draper - hobby craft cutting wheels & sanding discs!!) .
Before applying the STi sticker to the plastic cap I made sure it was decreased with some brake cleaner.. as that's all I had to hand I also warmed the sticker up in the palm of my hand so it went soft making it easy to fit/stick into place on the cap. I'll leave them in the house a few days... so the sticky on the back of the sticker can set up and bond to the centre cap face.
Centre caps now sorted...I had to do a bit of trimming down on the rear of them (you can see from the pic) as it originally was a bit deep to the back, now cut/trimmed the caps fit nicely into the recess that is the centre cap area (how good are Draper - hobby craft cutting wheels & sanding discs!!) .
Before applying the STi sticker to the plastic cap I made sure it was decreased with some brake cleaner
.. as that's all I had to hand I also warmed the sticker up in the palm of my hand so it went soft making it easy to fit/stick into place on the cap. I'll leave them in the house a few days... so the sticky on the back of the sticker can set up and bond to the centre cap face.
Last edited by salsa-king; Oct 27, 2011 at 05:16 PM.
Thread Starter
Scooby Senior
Joined: Feb 2000
Posts: 15,078
Likes: 46
From: Nottm
Scooby Regular
Joined: Nov 2010
Posts: 481
Likes: 0
From: bath/Bristol area
�70.88 on etch primer (2x 400ml cans �6.99 each) + paint (6x 300ml �3.99 each + 2x 150ml �4.50 each!!!!cans) + lacquer (2x 500ml cans �5.99 each/ 1x 500ml + extra 25% extra free �4.99!!). Knowing what I know now, I'd say it could be done with less spray paint (as I over bought and gave more coats that really needed, could have done it with 5-6 300ml cans, if I'd have bought just two lacquer cans that had 25% extra free I'd have had plenty).
Brilliant job there Phil very impressive indeed. I know you are a cleaning man as well there I'm not sure which products you use but a few coats of Poorboys Wheel Sealent would get them ready for the winter nicely and protect them from the grime on the roads. I think a lot of people go wrong cleaning wheels with products they use and it's got little to do with salt a lot of the time as its the cleaning products that do the damage that then lets the salt in. I personally just use Poorboys and the remnants of my bucket to was mine these days.