PICK MY RS FOCUS UP ON TUESDAY

 10 October 2009, 06:02 PM
#63
BANNED

Join Date: Mar 2002
Location: LIVERPOOL THE CENTRE OF EXCELLENCE
Posts: 8,511
Likes: 0
Received 0 Likes
on
0 Posts
I like them, we have about 30 parked at the rail head at Halewood awaiting pickup.
They look mean in the flesh, I have metioned buying the Mrs one, she told me to **** awf...")
So thats the end of that.
Enjoy.
They look mean in the flesh, I have metioned buying the Mrs one, she told me to **** awf...
So thats the end of that.
Enjoy.
10 October 2009, 06:14 PM
#64
Scooby Regular
Yep agreed to , in fact my 1st mod was to DE badge the focus bit 
Looks better IMHO

Nice one YATESY , Absolutely cracking car to drive & just so much fun
Get yourself registered over here to mate
Focus RS Owners Club - Unreal Portal
Enjoy

Looks better IMHO
Nice one YATESY , Absolutely cracking car to drive & just so much fun
Get yourself registered over here to mate
Focus RS Owners Club - Unreal Portal
Enjoy
10 October 2009, 08:06 PM
#65
Scooby Regular
Join Date: Dec 2004
Location: cant spell WGAF
Posts: 3,399
Likes: 0
Received 0 Likes
on
0 Posts
the car looks great yatesey as it should ive lost one of my headlight washer covers (getting replaced by ford) also check the screws under the wheel archers they can come loose beside that awsome
i love them pictures tiny
i love them pictures tiny
10 October 2009, 09:38 PM
#66
Scooby Regular
Thread Starter
Join Date: Apr 2006
Location: mmmmmmmmm now let me see
Posts: 4,372
Likes: 0
Received 0 Likes
on
0 Posts
paul thanks for that mate ill check them tommorrow i apprecate that the headlight washers covers ??? are they just pushed on paul ???

 10 October 2009, 11:22 PM
#71
Scooby Regular
iTrader: (4)
Join Date: Jan 2006
Location: "In a distant land,far far away!"
Posts: 1,244
Likes: 0
Received 1 Like
on
1 Post
[QUOTE=paulwrxboro;8990554]the car looks great yatesey as it should ive lost one of my headlight washer covers (getting replaced by ford) also check the screws under the wheel archers they can come loose beside that awsome
Lads.
Make sure that these aren't being nicked when you're parking up.A mate of mine has had two sets nicked (albeit from an ST) and they cost a packet to replace and respray.
Hope this isn't the case and your cars look fantastic btw
Lads.
Make sure that these aren't being nicked when you're parking up.A mate of mine has had two sets nicked (albeit from an ST) and they cost a packet to replace and respray.
Hope this isn't the case and your cars look fantastic btw

 11 October 2009, 05:35 PM
#75
Scooby Regular
11 October 2009, 07:25 PM
#77
Scooby Regular
There are two main problems with the Headlight Washer covers .
1 . They may be loose against the surface of the bumper .
2 . They often fall off or come off in your hand when cleaning etc.
The following is a solution to both of these problems .
The first thing to do is to remove the covers , as we know this is not a problem , but simply take hold of the cover and pull the whole washer jet out and slightly upwards , the cover will either come off in your hand or if it doesn't you can just unclip it from the jet .
Next step is to remove the washer jet , you will need a piece of string and a small flat screwdriver . Loop the string round the washer jet and pull it out from the bumper , then lever the screwdriver under the ratchet tab as shown in pic 1 . the jet will come out of the main body of the washer , which will then retract .
Resized to 94% (was 1024 x 768) - Click image to enlarge
Once you have both removed , clip the jets and the covers together as they should be , they are LEFT and RIGHT handed but don't worry , they have L and R marked on the jets . (Just be aware when it comes to reassembly)
Resized to 94% (was 1024 x 768) - Click image to enlarge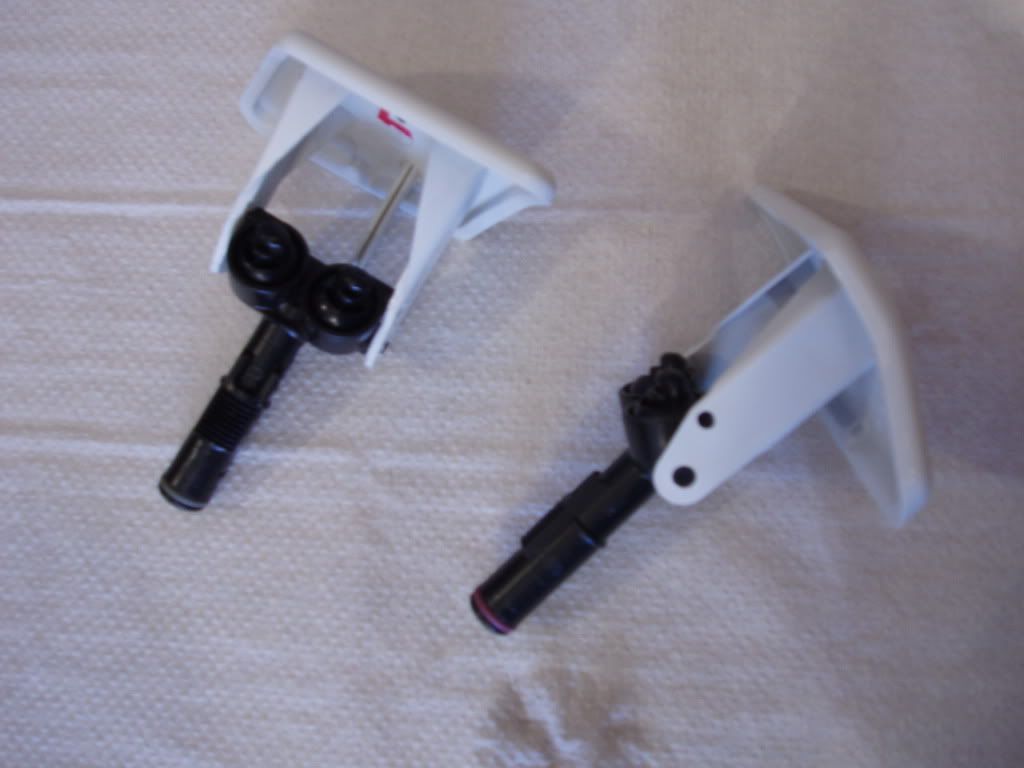
Next comes the mod , you'll need 4 , 4mm washers and a glue heat gun or some quick setting epoxy resin .
Place a 4mm washer over the washer cover locating peg and apply a blob of glue (glue gun in deffinately preferred) , the idea is to glue the 4mm washer to the black locating peg on the washer jet , the 4mm washer also stops you from glueing the washer jet cover to the washer jet itself .
Resized to 94% (was 1024 x 768) - Click image to enlarge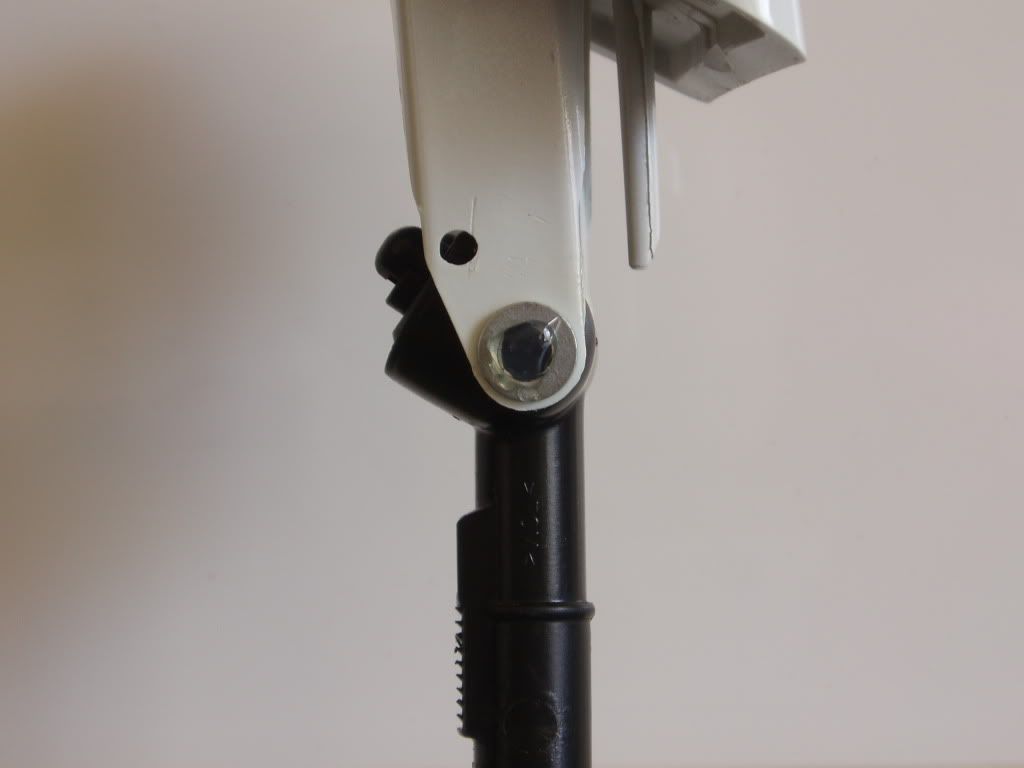
Repeat this with the other 3 locating pegs . once the glue has set Make sure the washer jet cover is NOT glued to the washer jet , there needs to be the slight up/down movement on the cover to allow it to 'seat' correctly against the bumper .
Almost ready to replace the washer jets but first it's a good idea to clean and polish the jet covers and the area around the holes in the bumper . Remember Left and Right , carefully put the jet through the hole in the bumper and into the washer body , it will self locate , as soon as it's located in the body it will start to 'click' on the ratchet mechanism , gently push it in until it is tight up against the bumper , about 8 or 9 clicks .
Resized to 94% (was 1024 x 768) - Click image to enlarge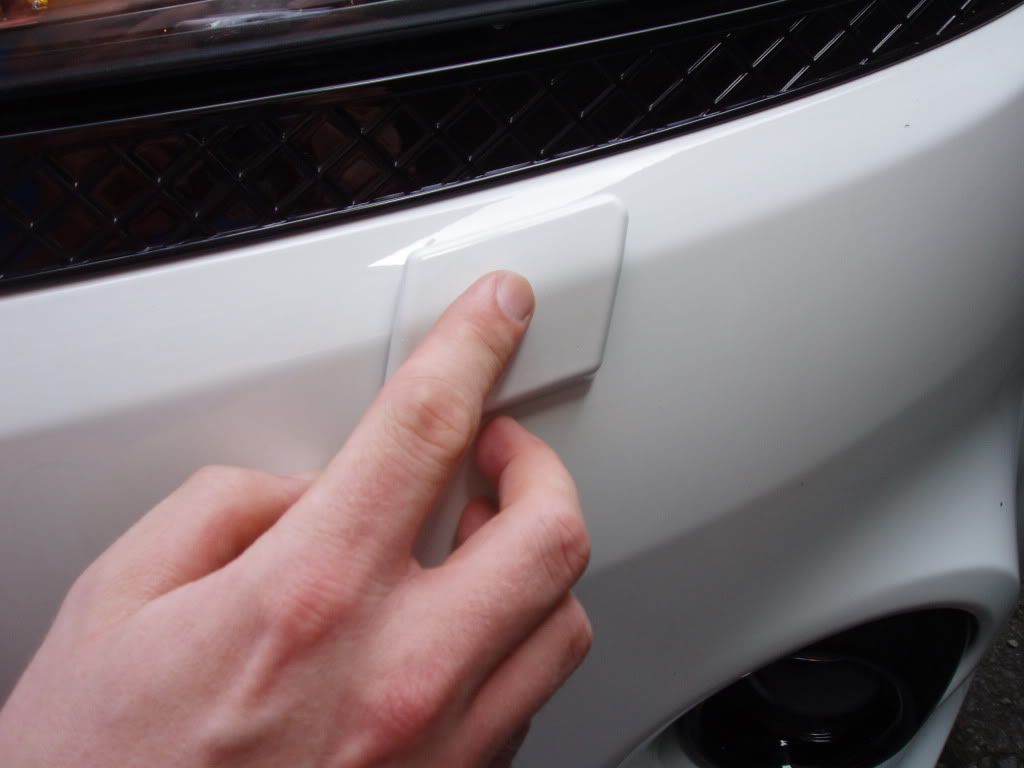
The jets push back in quite easily but won't pull back out because of the ratchet , you can't push them in too far but once they are pushed right in they shouldn't be loose against the bumper and they should NEVER fall off again .
Good Luck .


 12 October 2009, 07:44 PM
#84
Scooby Regular

Join Date: Jul 2001
Location: Darlington
Posts: 980
Likes: 0
Received 0 Likes
on
0 Posts

Thread
Thread Starter
Forum
Replies
Last Post