
Hill Climb and Sprint RA Project thread eventually


Scooby Regular
Joined: Aug 2005
Posts: 9,073
Likes: 0
From: My turbo blows, air lots of it!!
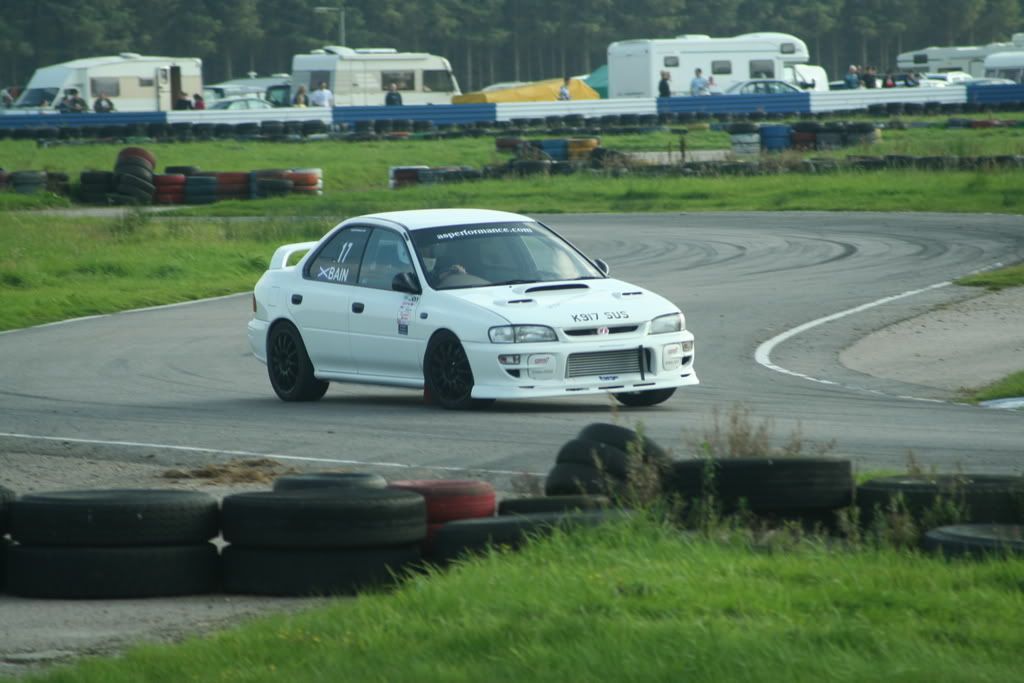
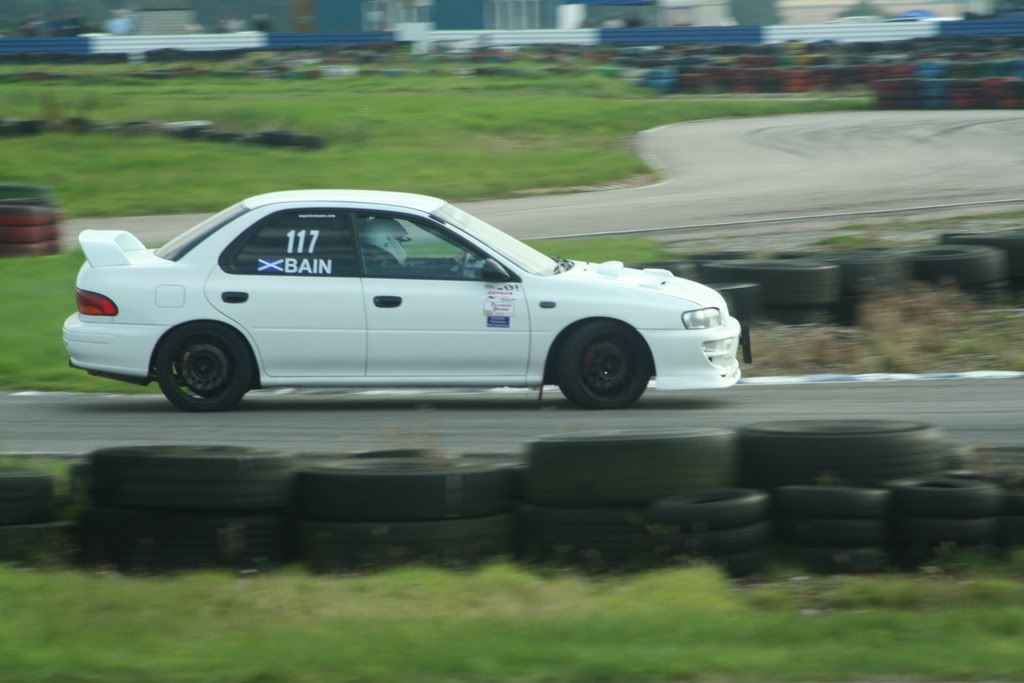
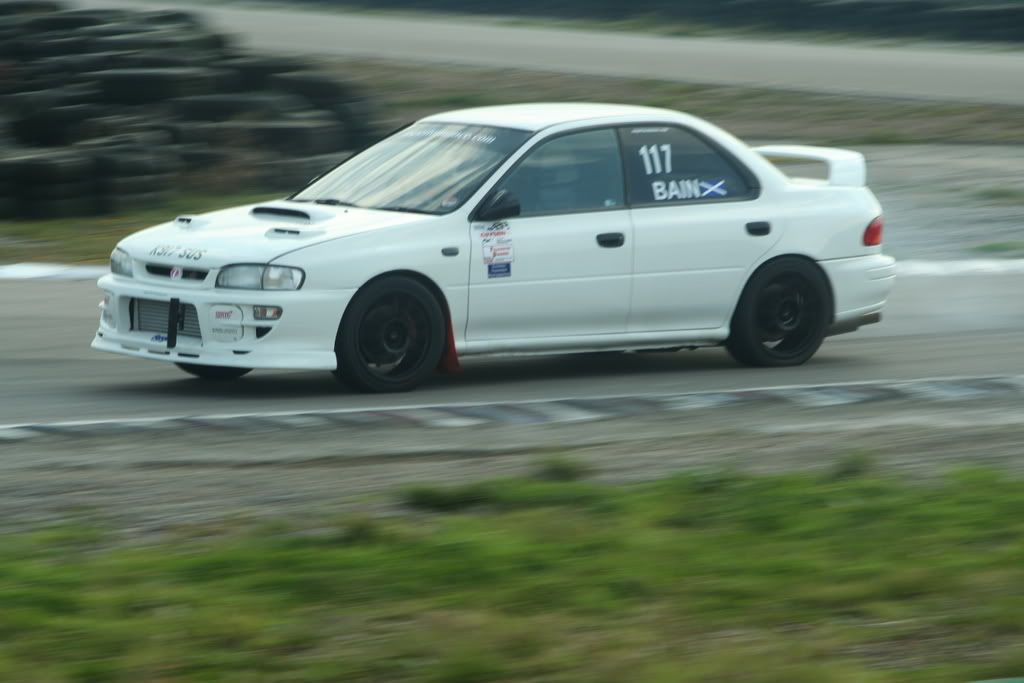

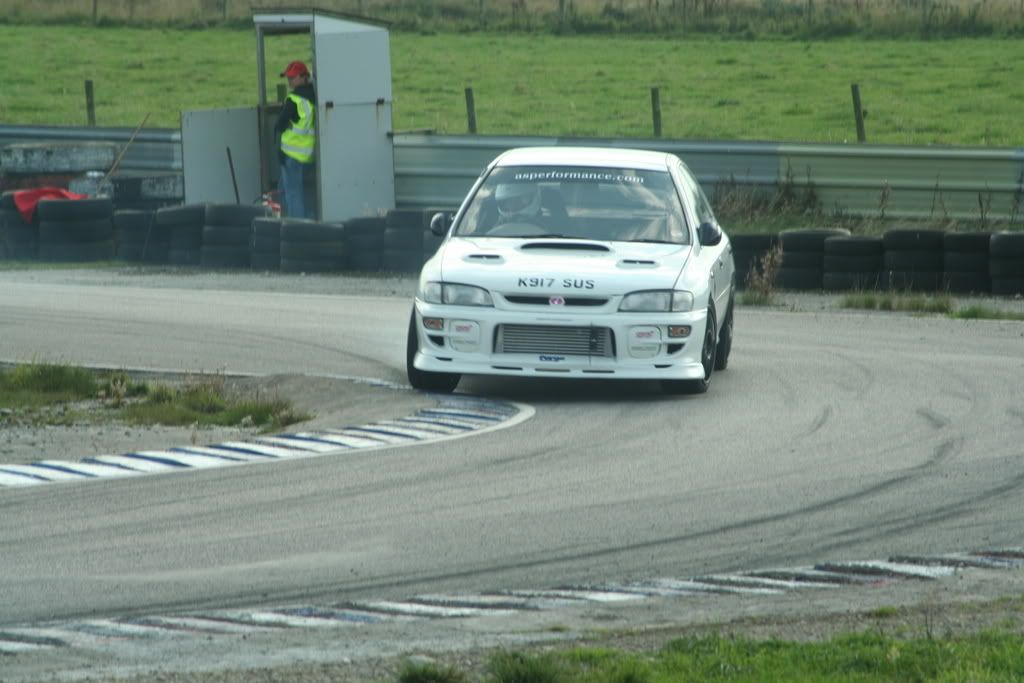
Thanks for them  The first one is me the rest are John St. John snapped a cam shaft on the Sat so we both drove my car on the Sun, John was 117 and I was 17
The first one is me the rest are John St. John snapped a cam shaft on the Sat so we both drove my car on the Sun, John was 117 and I was 17
Last edited by Arch; Jan 29, 2009 at 12:12 AM.


Scooby Regular
Joined: Jan 2001
Posts: 1,694
Likes: 0
From: Powered by "SOLARIS"
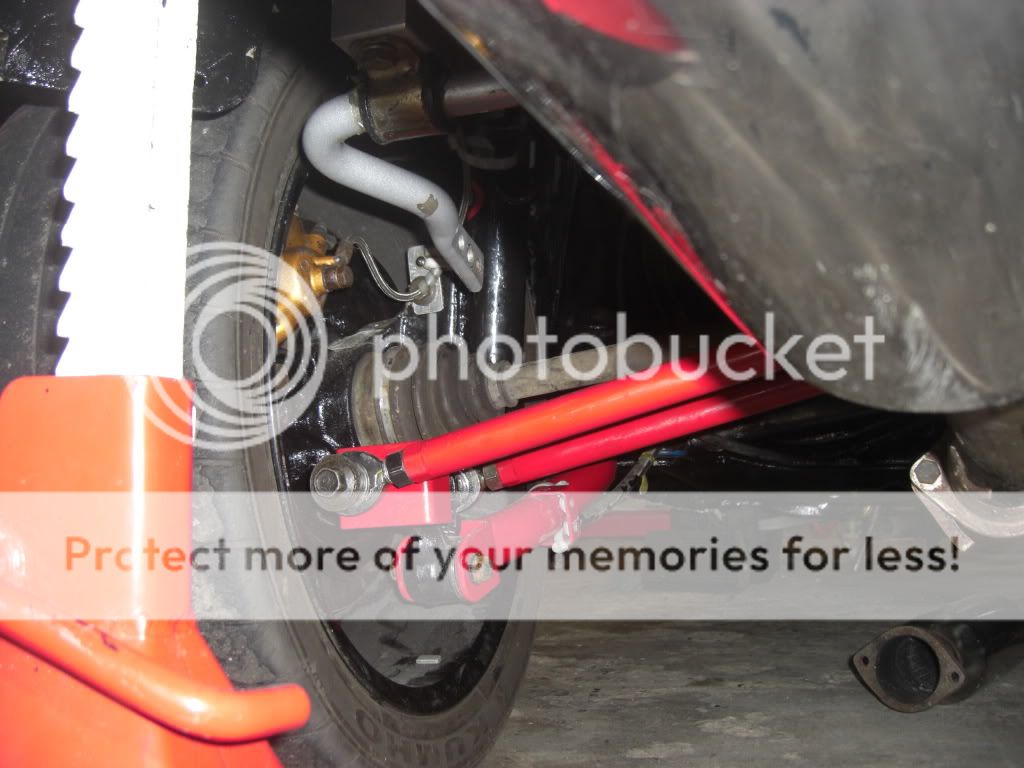
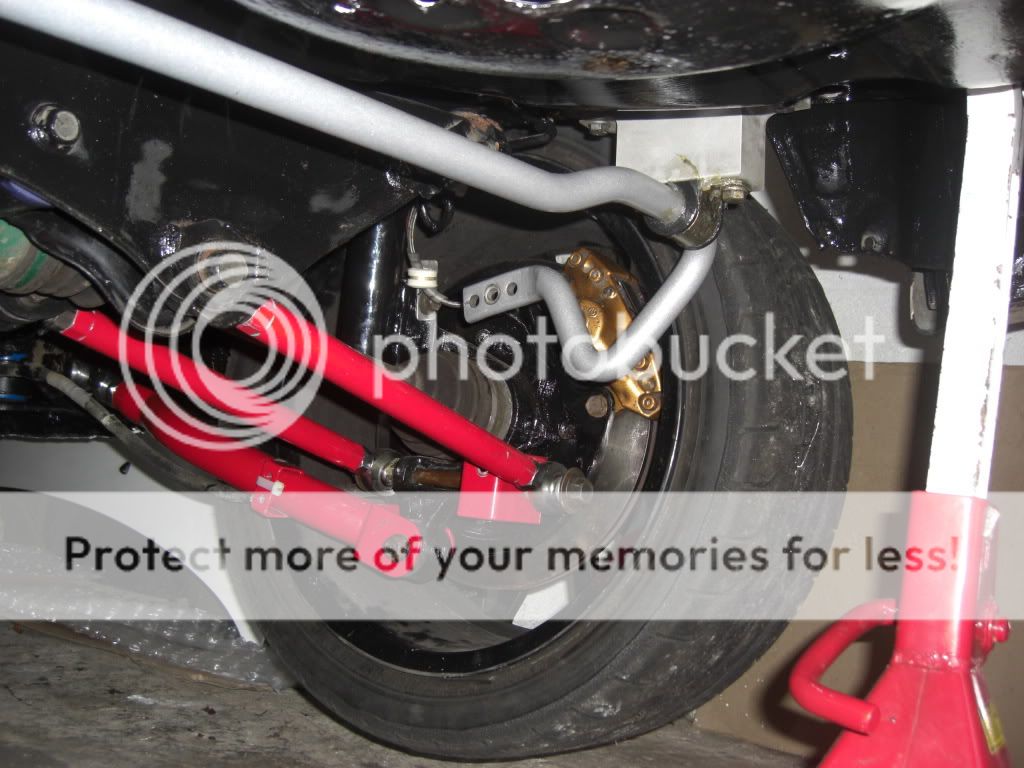
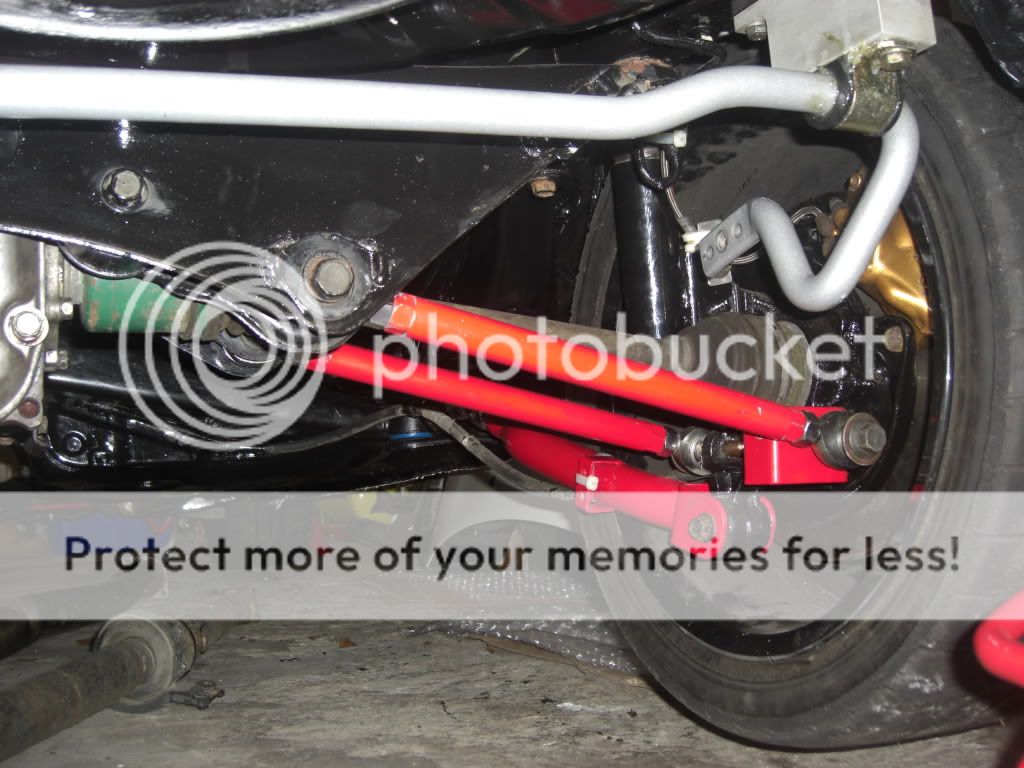
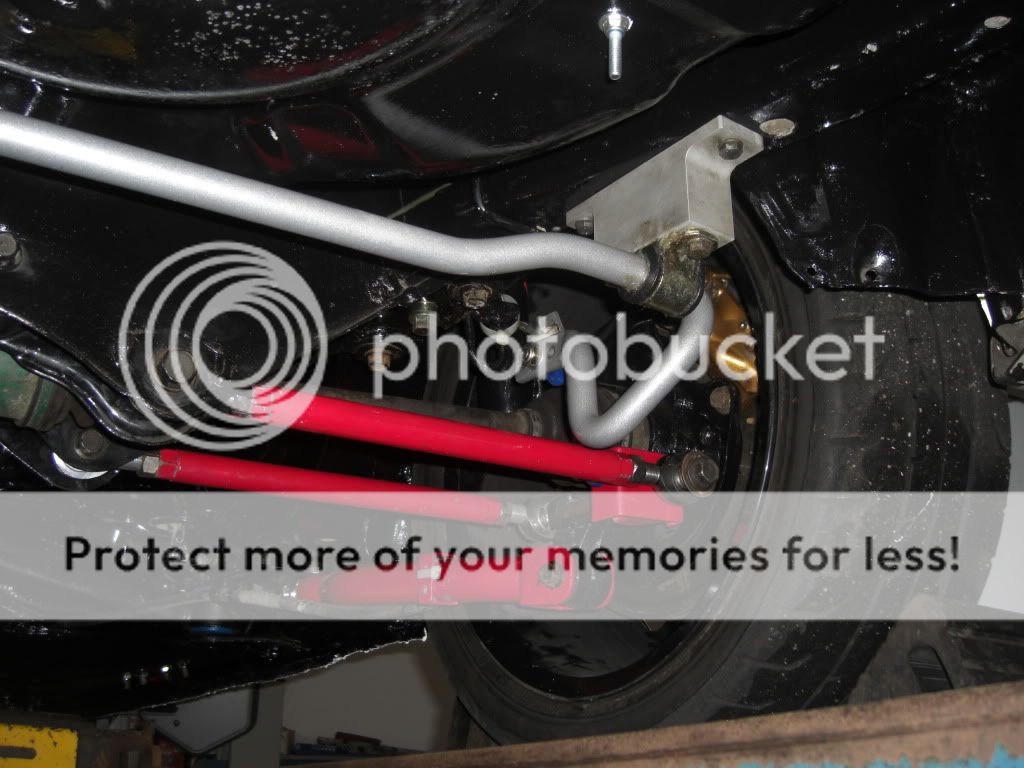
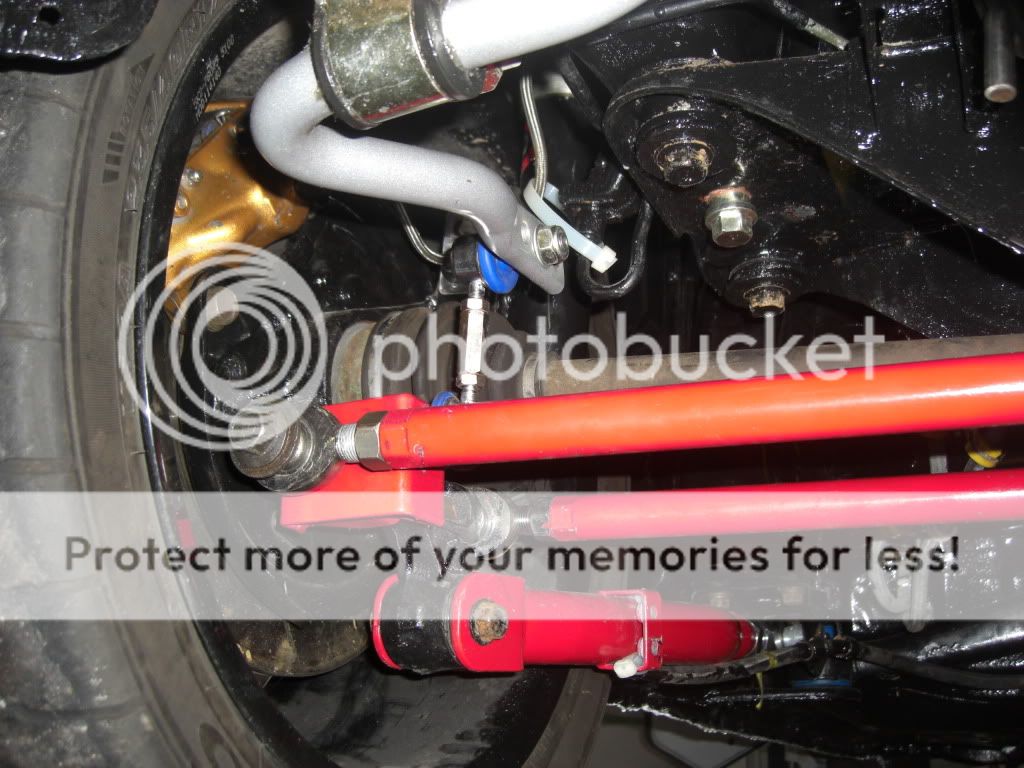
The drop links and roll bar are only at that angle as they are just bolted into position and everything is just hanging at maximum extension. Once the car is down with the weight on the wheels the roll bar and links will return to their natural position.
The drop links are the items that come with the kit, the lateral arms have a different mounting point for the drop links so the standard style of rear links cannot be used. I did offer up a front whiteline spherical link but it is too short. The whiteline ones come in a variety of lengths so that may be an option in the future but the same set up worked well for John last year so cant see any reason to change it
Well the rear end is pretty much completed just the diff to fit when it comes back from being set up. I am having some clearance issues with the rear coilovers but will hopefully sort that out pretty quickly.
Next its time to pull the front suspension off and give it the once over and a few upgrades
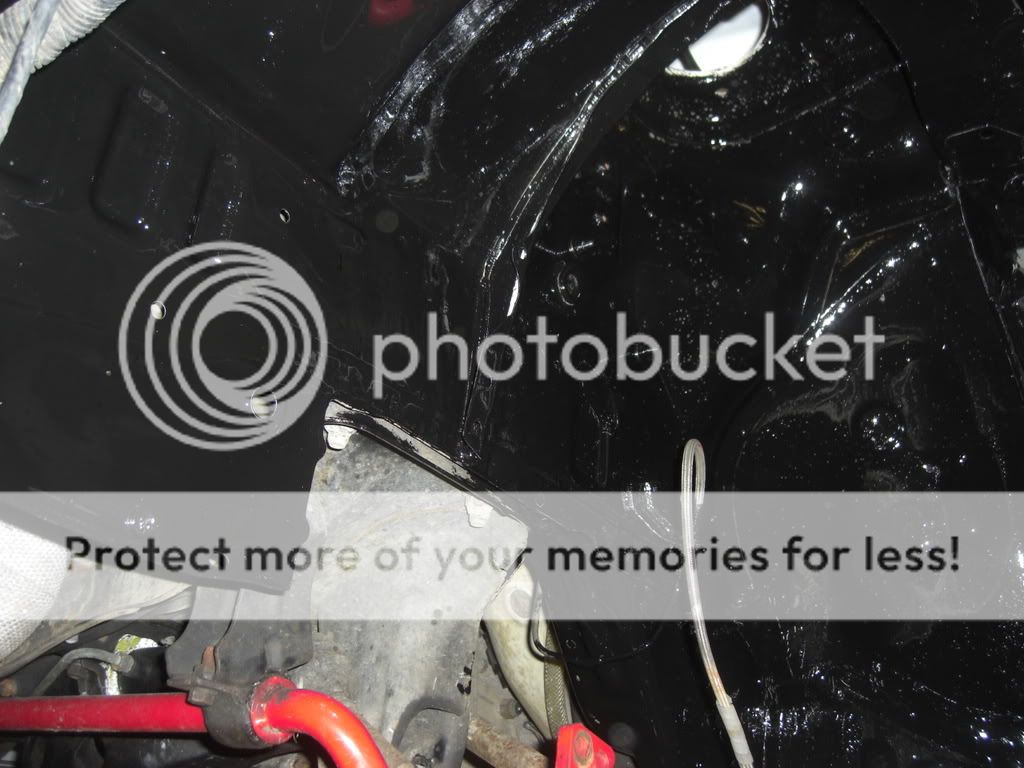
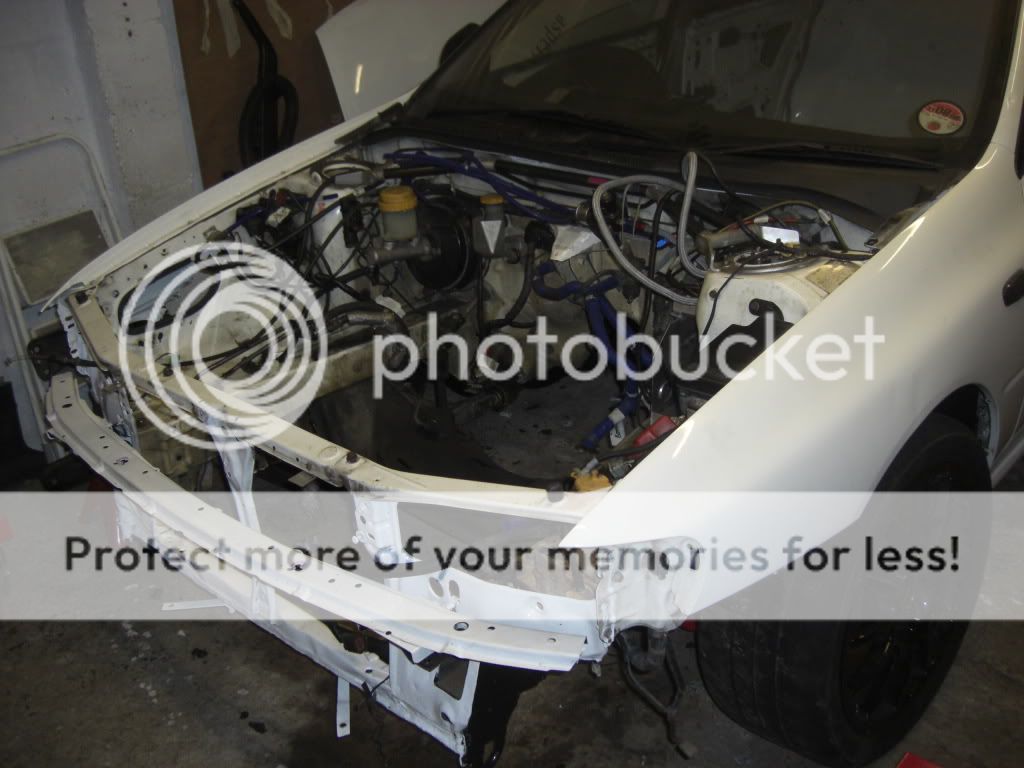
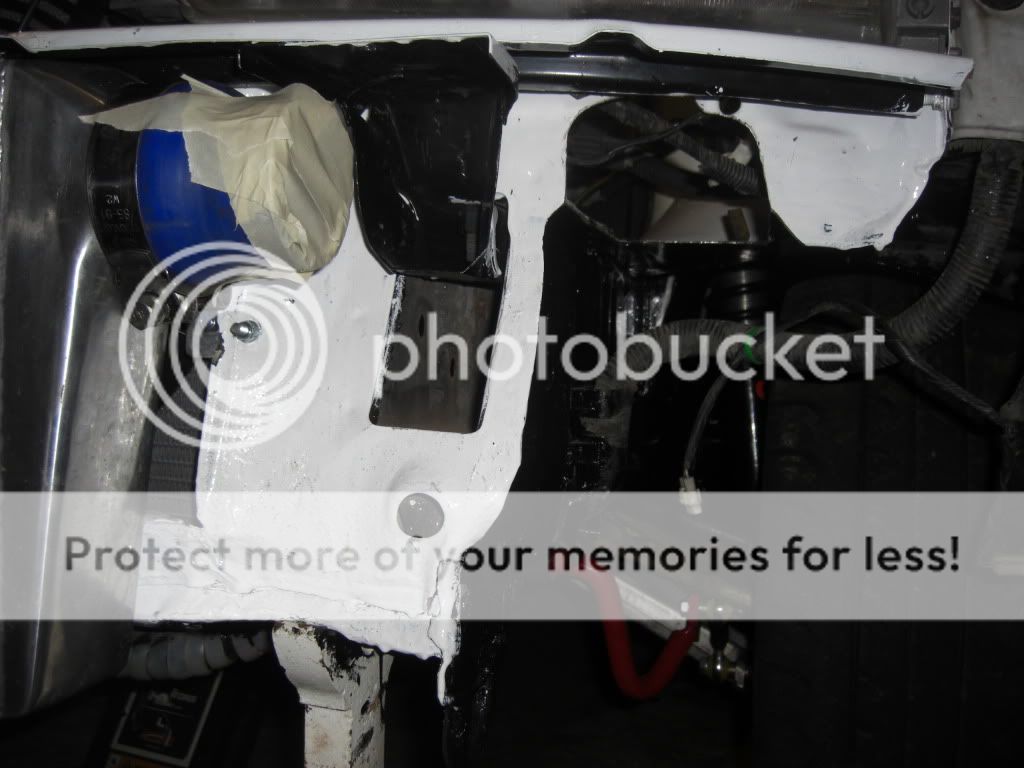
I have removed the coilovers, hubs, brakes and alloy arms so that I clean up and paint the wheel well and surrounding area and fit new front bushes to the alloy arms and the new front brakes and coilovers.
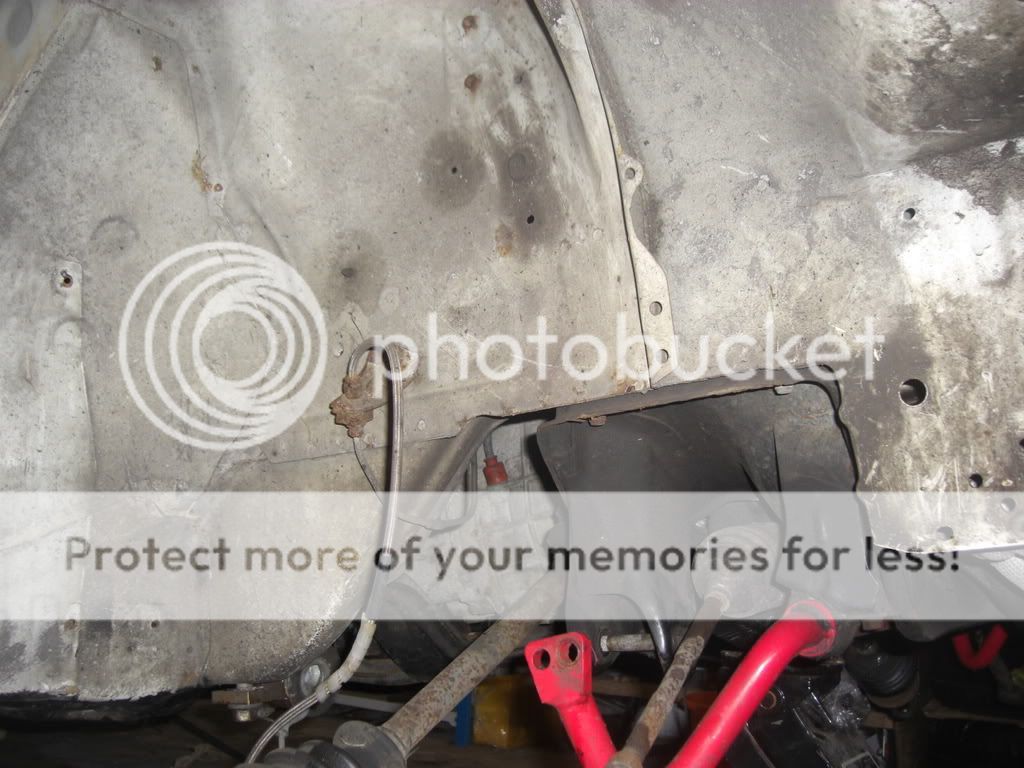
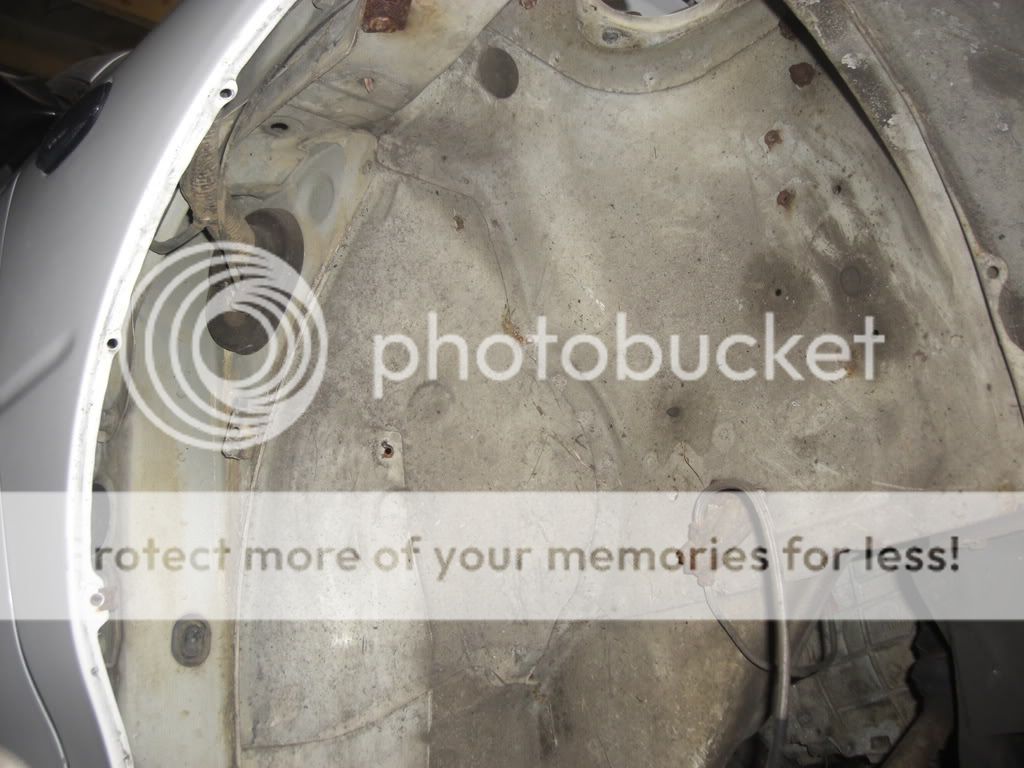
Once cleaned up the inner wing area is actually in pretty good condition which is a theme with this shell there is virtually no rust on the car. After a rub down with a green pad and a clean over it is ready to paint.
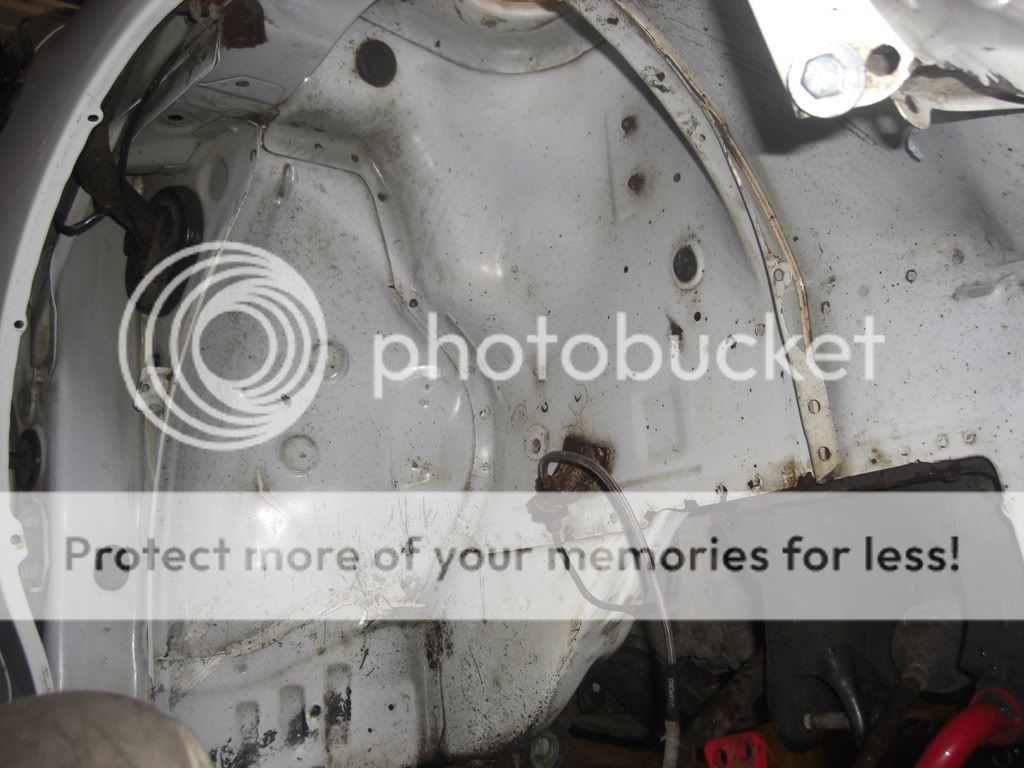
One thing I did find when I removed the front hubs is that both front wheel bearings are totally gone I am amazed that i didnt feel this at the last event but just shows how important a winter strip down is as the amount of movement in the bearings is scary
Next its time to pull the front suspension off and give it the once over and a few upgrades
I have removed the coilovers, hubs, brakes and alloy arms so that I clean up and paint the wheel well and surrounding area and fit new front bushes to the alloy arms and the new front brakes and coilovers.
Once cleaned up the inner wing area is actually in pretty good condition which is a theme with this shell there is virtually no rust on the car. After a rub down with a green pad and a clean over it is ready to paint.
One thing I did find when I removed the front hubs is that both front wheel bearings are totally gone I am amazed that i didnt feel this at the last event but just shows how important a winter strip down is as the amount of movement in the bearings is scary
Well more of the same really  At this point its hard to keep motivated as things are going backwards and it seems there is so much still to do.
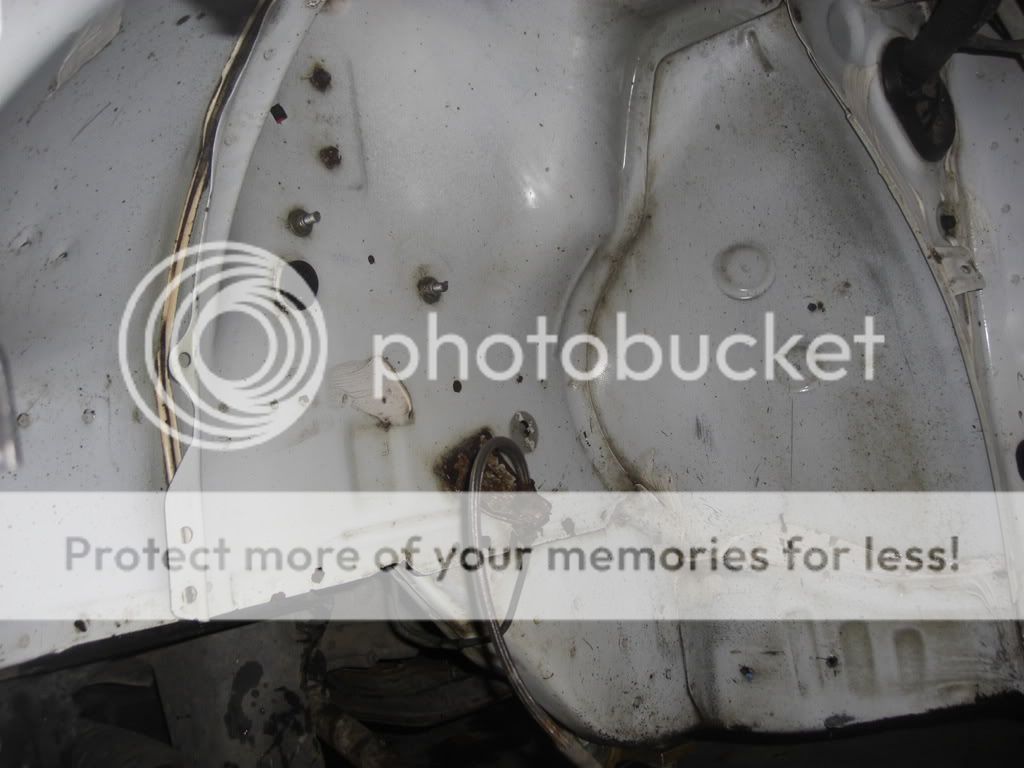
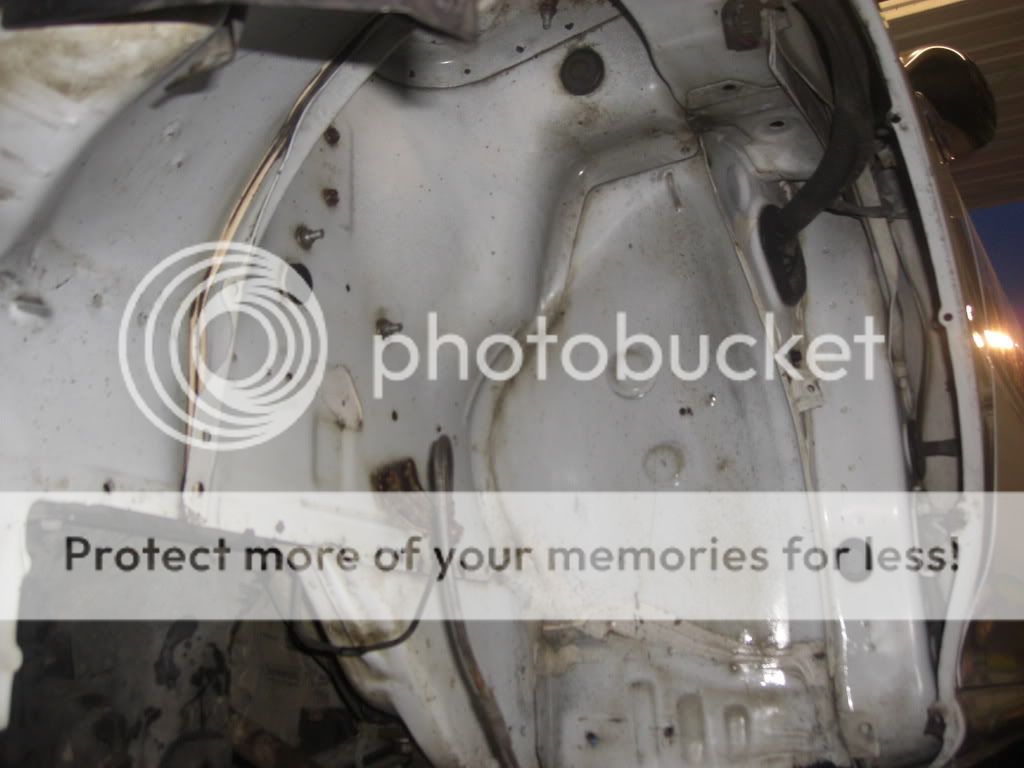
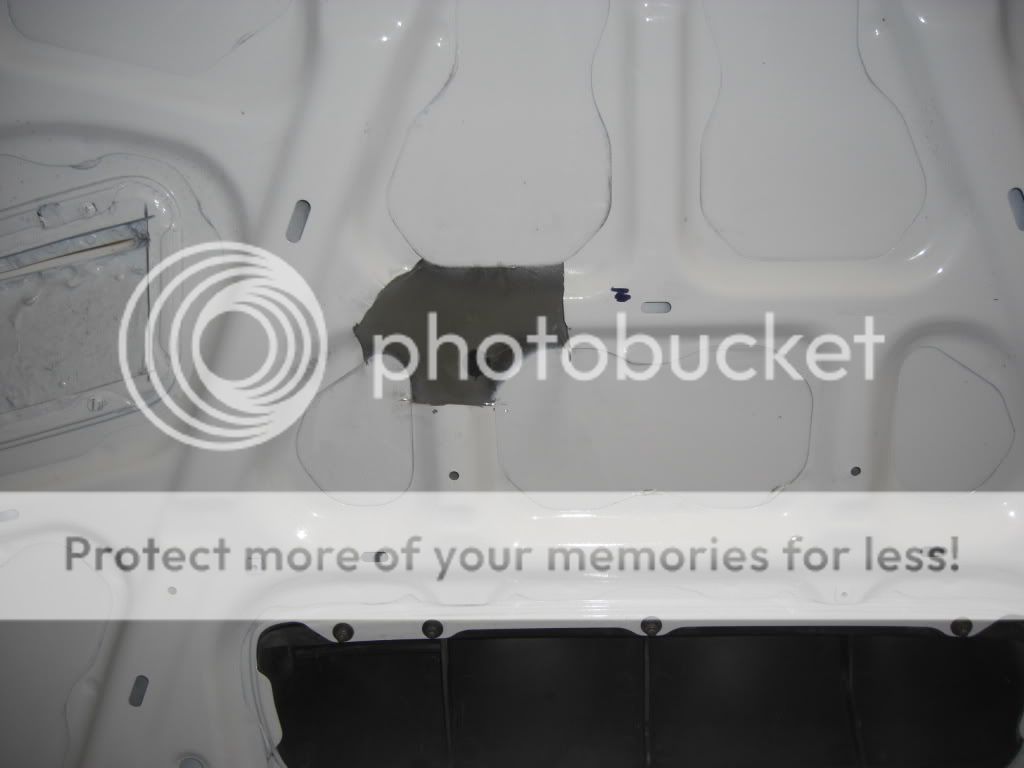
Yesterday I painted the front wheel well areas which really tidys that area up and protects it as I wont be refitting the inner wheel well plastic guards.
I also removed the intercooler in preperation for its change of mounting and removed a bit of the panels that wont be required and may get in the way when it is refitted later.
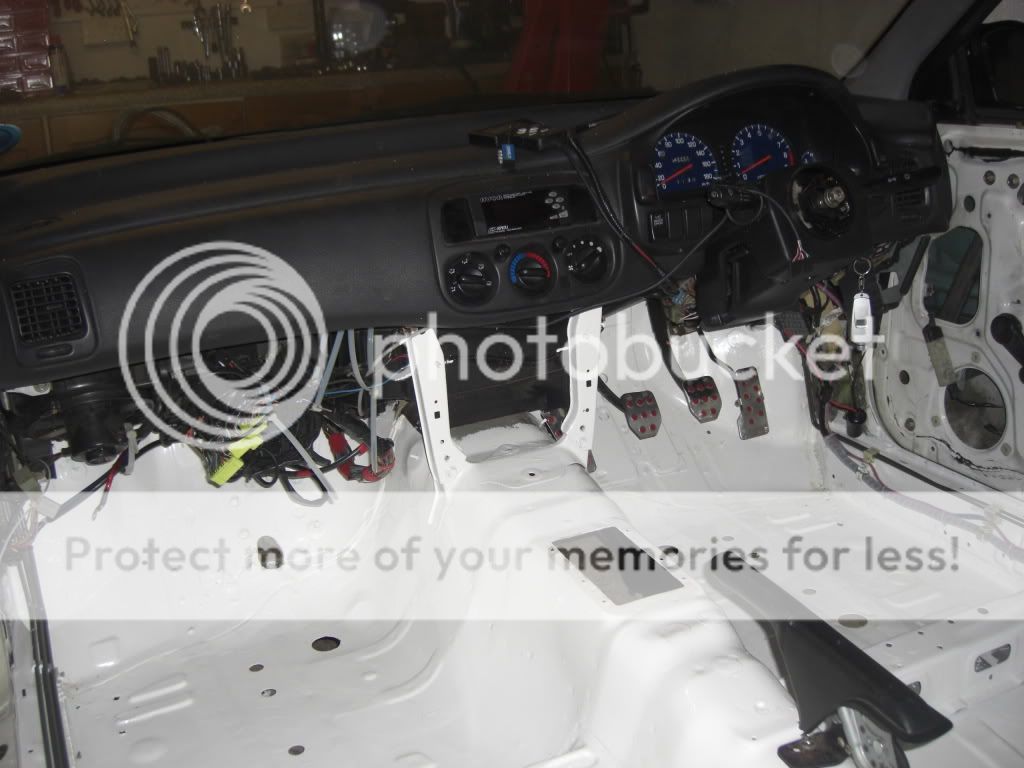
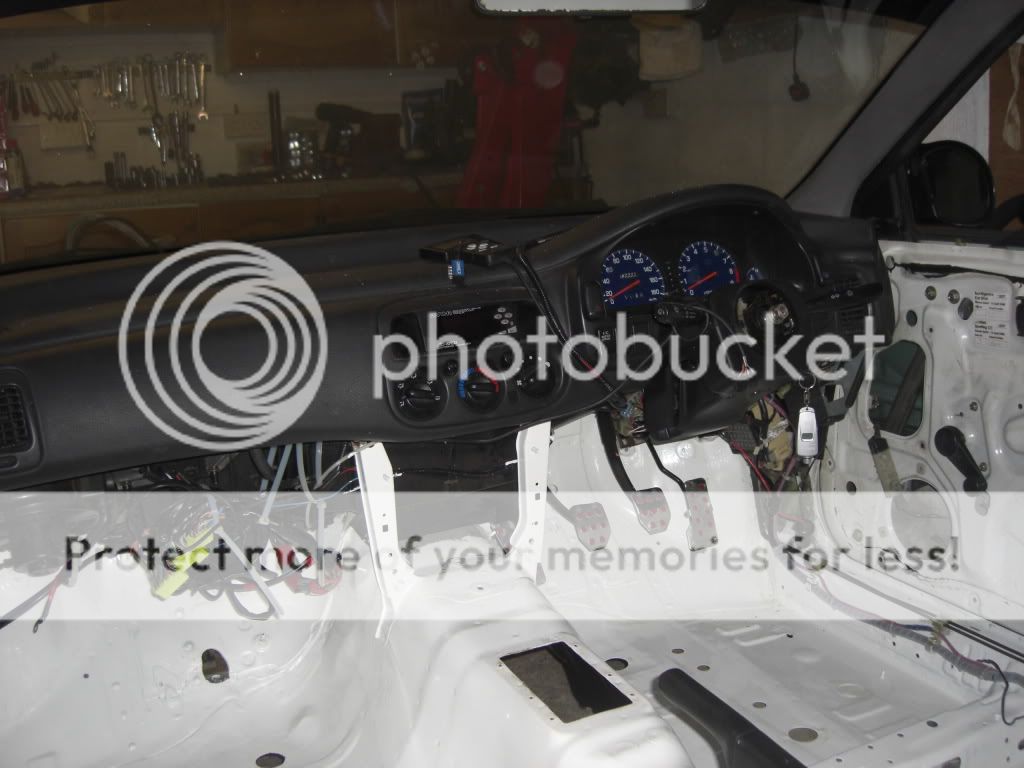
Then I attacked the dash, it was a bit of a nightmare to get out but after it was persuaded it seen sense and came out
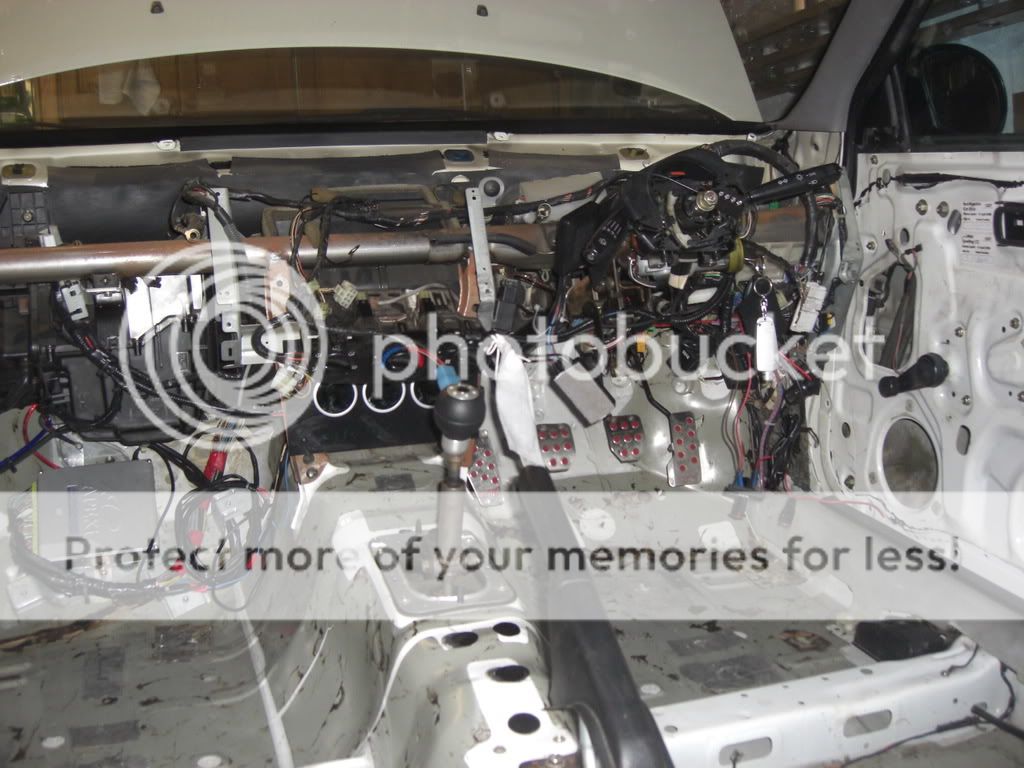
I have removed the dash to move some wiring and remove some wiring that will no longer be required. I also want to change the dash as it has faded badly and looks terrible. It will also give me a chance to change the routing of some of the wiring so that the dash can be removed quickly in future. There is also still some sound proofing in there that I couldnt reach before so it obviously has to go
At this point its hard to keep motivated as things are going backwards and it seems there is so much still to do.Yesterday I painted the front wheel well areas which really tidys that area up and protects it as I wont be refitting the inner wheel well plastic guards.
I also removed the intercooler in preperation for its change of mounting and removed a bit of the panels that wont be required and may get in the way when it is refitted later.
Then I attacked the dash, it was a bit of a nightmare to get out but after it was persuaded it seen sense and came out
I have removed the dash to move some wiring and remove some wiring that will no longer be required. I also want to change the dash as it has faded badly and looks terrible. It will also give me a chance to change the routing of some of the wiring so that the dash can be removed quickly in future. There is also still some sound proofing in there that I couldnt reach before so it obviously has to go
Last edited by Arch; Feb 6, 2009 at 01:28 PM.
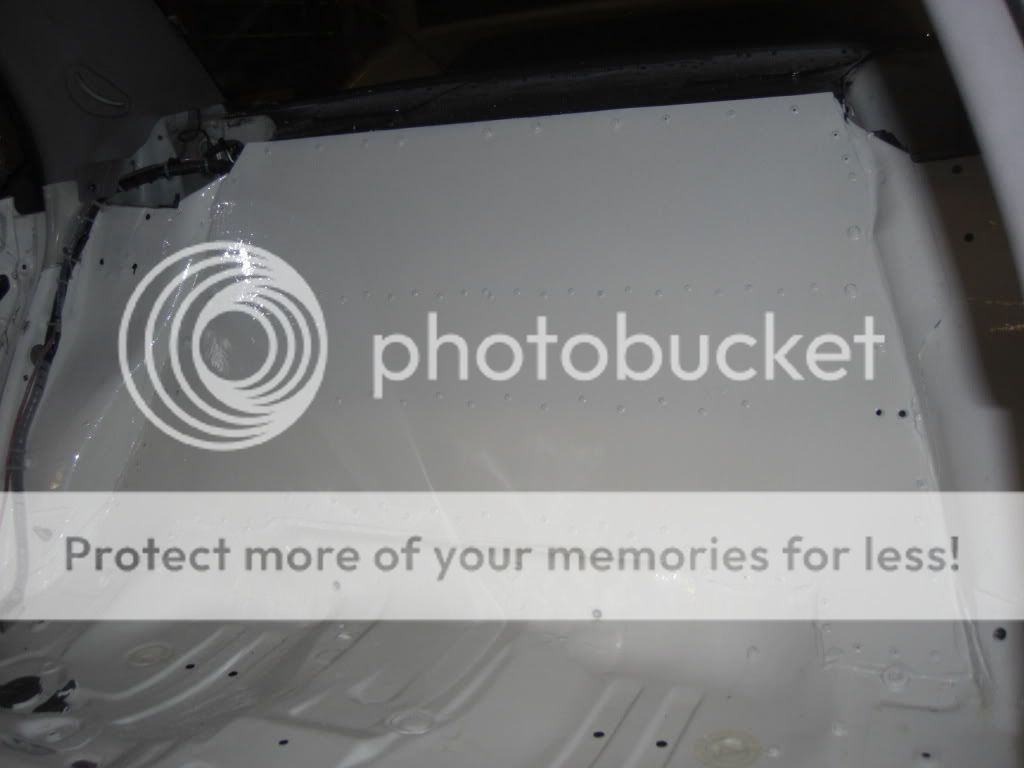
Jay I used the 6 small tins but that done the rear underside from the end of the tunnel back and front and rear wheel wells. I also gave the rear hubs a coat, the rear subframe and the front panel around the headlight area as you can see from the pics and that basically used the 6 small tins.
Last year I got the quart tin and done the centre under floor minus the tunnel, the rear seat fire wall panel and again a set of rear hubs. I found the quart tin less efficient as the paint really does not like being in contact with air. I lost about a 1/4 of the quart tin as it went really thick and unuseable when left in the tin for 2 weeks.
Not sure if you have used it before but it really goes on nice it looks like it has been sprayed on and has a high gloss finish, just dont get it on your hands or face it really really does not come off.
Last edited by Arch; Mar 20, 2009 at 02:45 AM.
Scooby Regular
iTrader: (2)
Joined: May 2000
Posts: 8,626
Likes: 1
From: Class record holder at Pembrey Llandow Goodwood MIRA Hethel Blyton Curborough Lydden and Snetterton
No I haven't used it yet but every time I pick up the Frost catalogue its one of those things that reminds me that the car is 14 years old and has minimal underseal..!
Thanks for the detailed reply, great info there - I really must get mine done this summer
Thanks for the detailed reply, great info there - I really must get mine done this summer
Its been a while since I updated the thread with some progres. The time available on the car has been severely hampered by work comittments which included nearly 3 weeks away working in Budapest. Nice city, well the pubs are nice anyway  especially the ones where it was only 90p a pint -
  result
  this, however, didnt help getting the car ready.
The suspension is pretty much now all in place with the rear drop links to fit and the Geometry to be set up by John at Progrip.

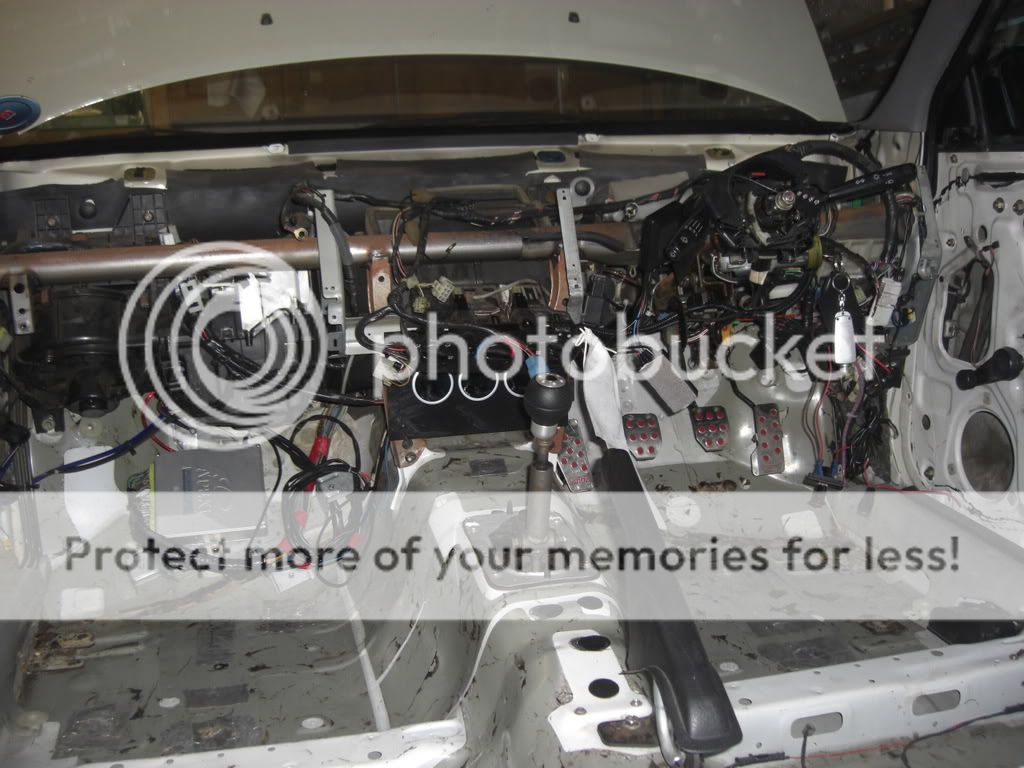
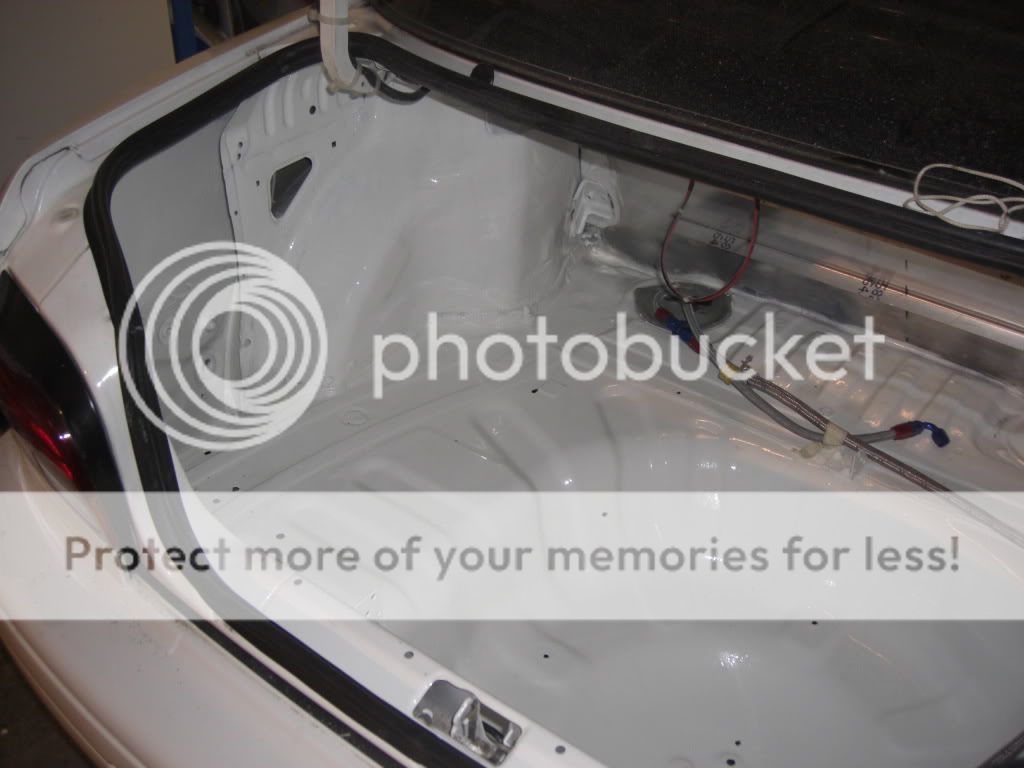
I have spent a little bit of time tarting up the inside as it was a bit of a mess last year so I have stripped everything out and painted the inside and the boot. I have also fitted a new dash as supplied by Stevenson Motorsport spares and repairs.
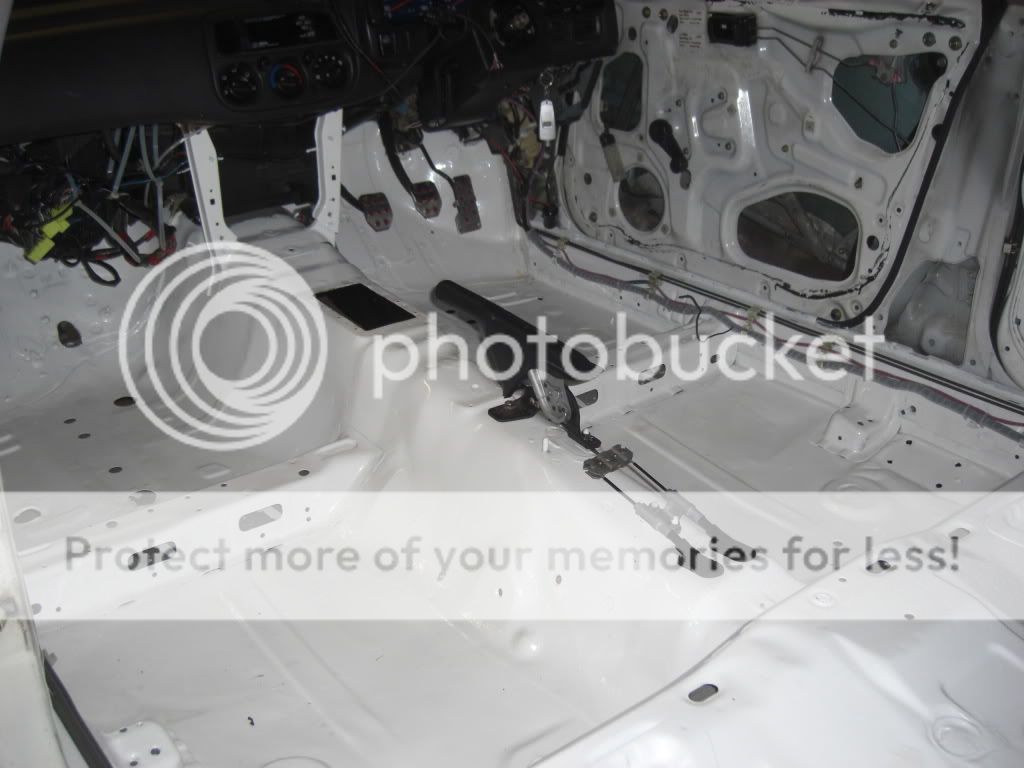
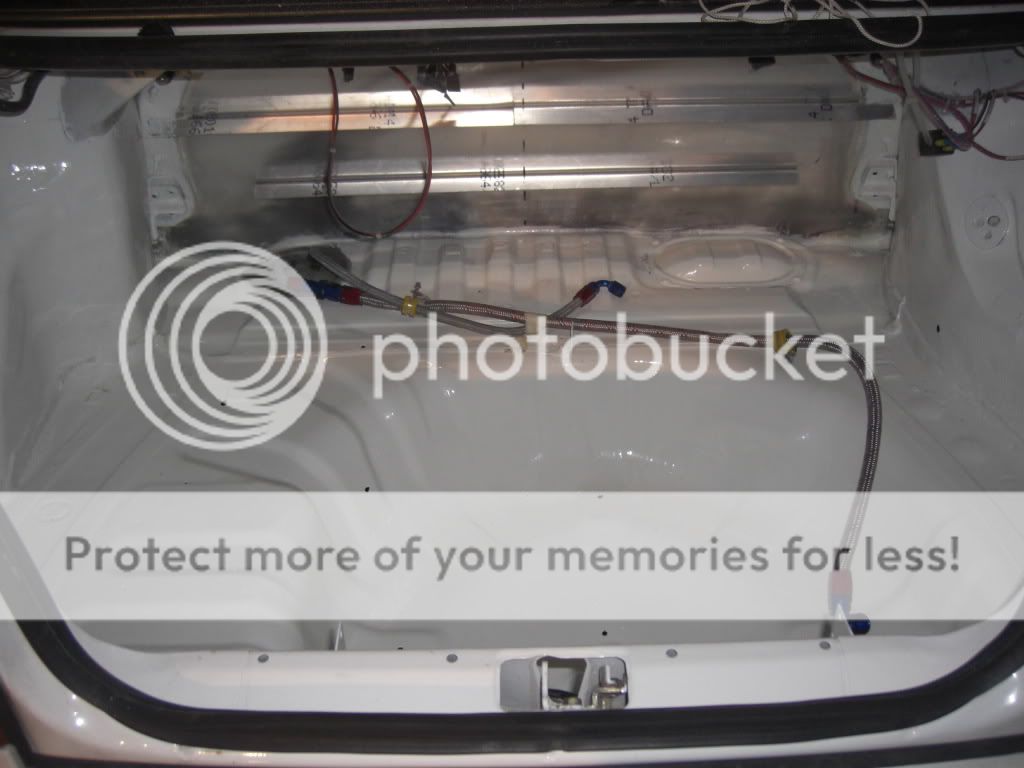
Its not perfect but looks a lot better than before and it really isnt worth spending a great deal of time on this side of things anyway.
Next it was time to remove the gearbox and Engine which were removed in quick time.
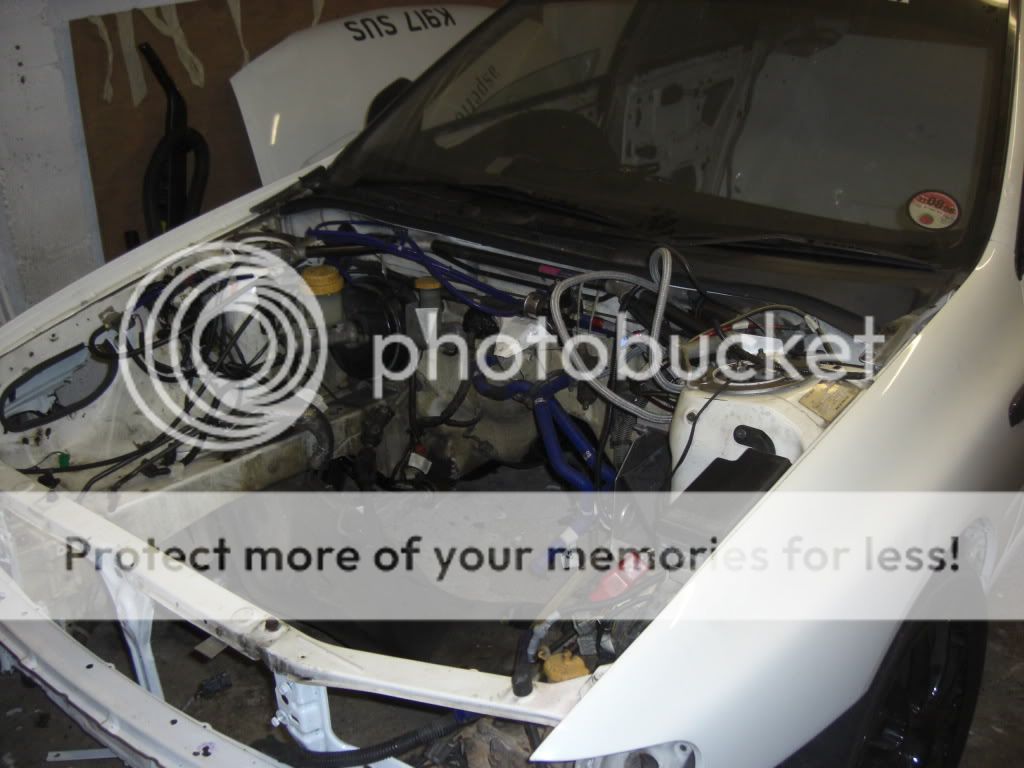

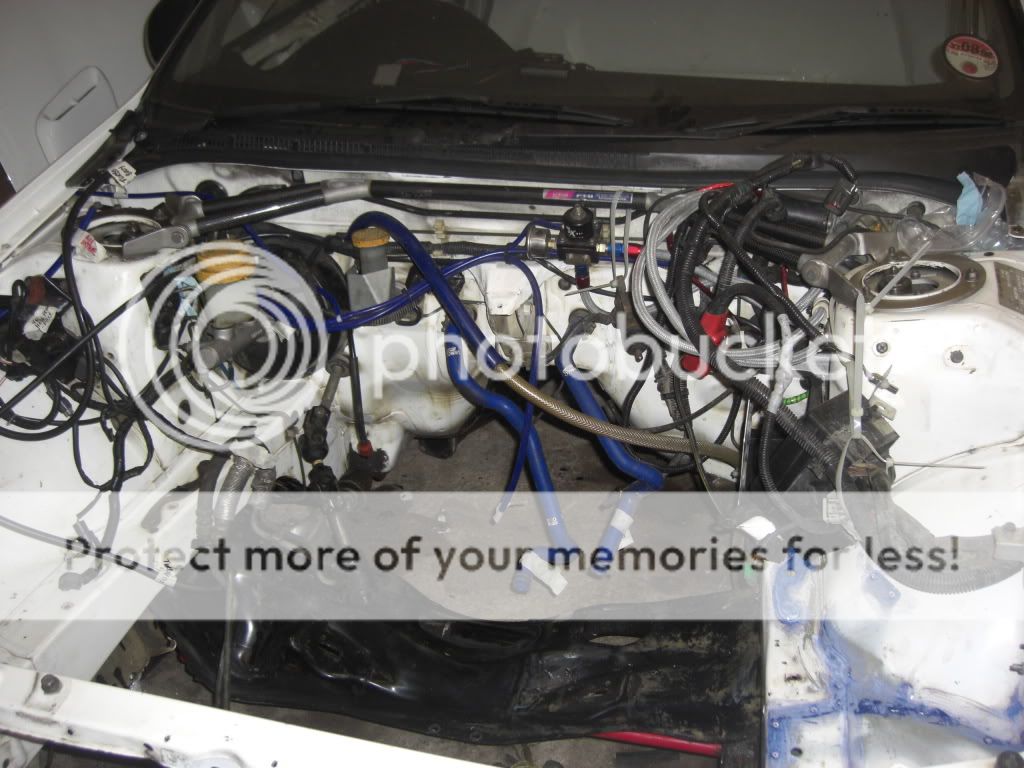
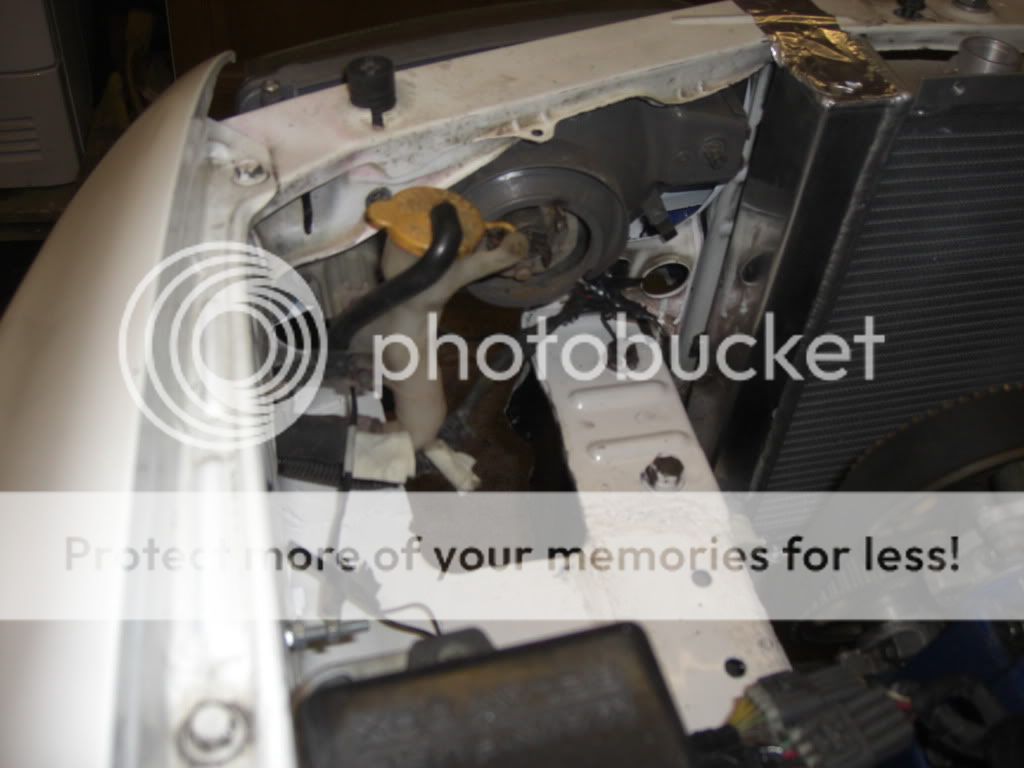
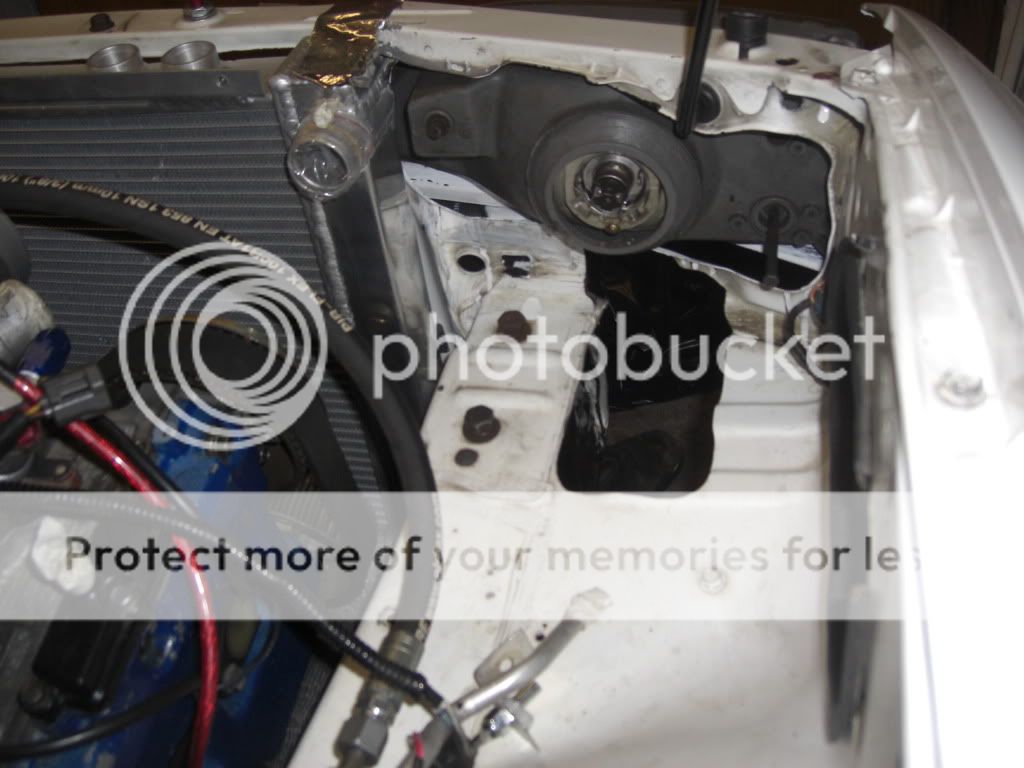
With the engine out an hour with a green pad and some elbow grease cleaned the engine bay up a treat. At the same time I removed the battery tray and washer bottle bottom mount which are both surplus and just getting in the way and adding weight so they had to go.

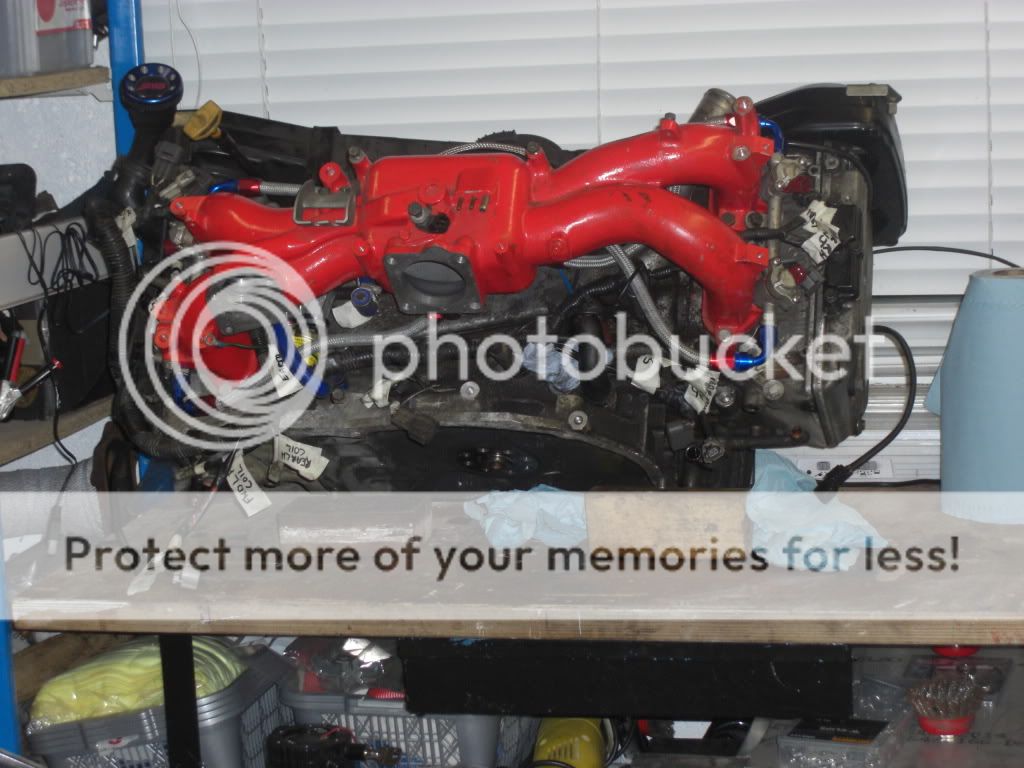
The new engine is now sitting waiting to be fiitted This is one of Chy at Pennine Subaru's quality items and cant wait to see how it runs although I wont be using it anywhere near its capabilities this year.
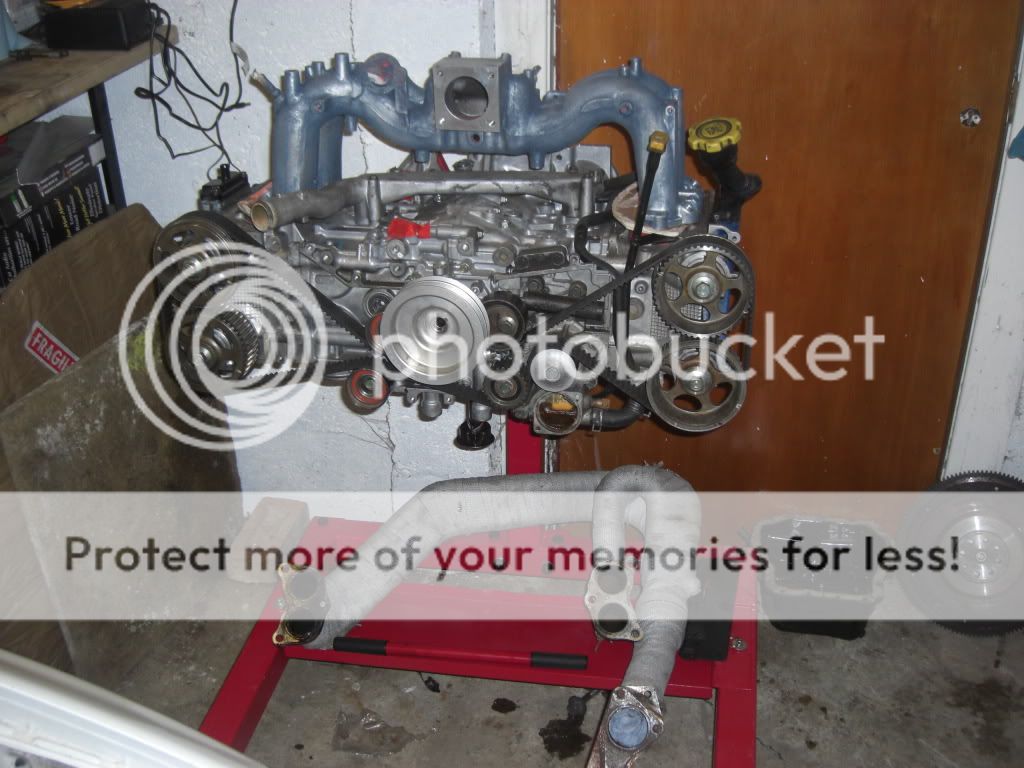
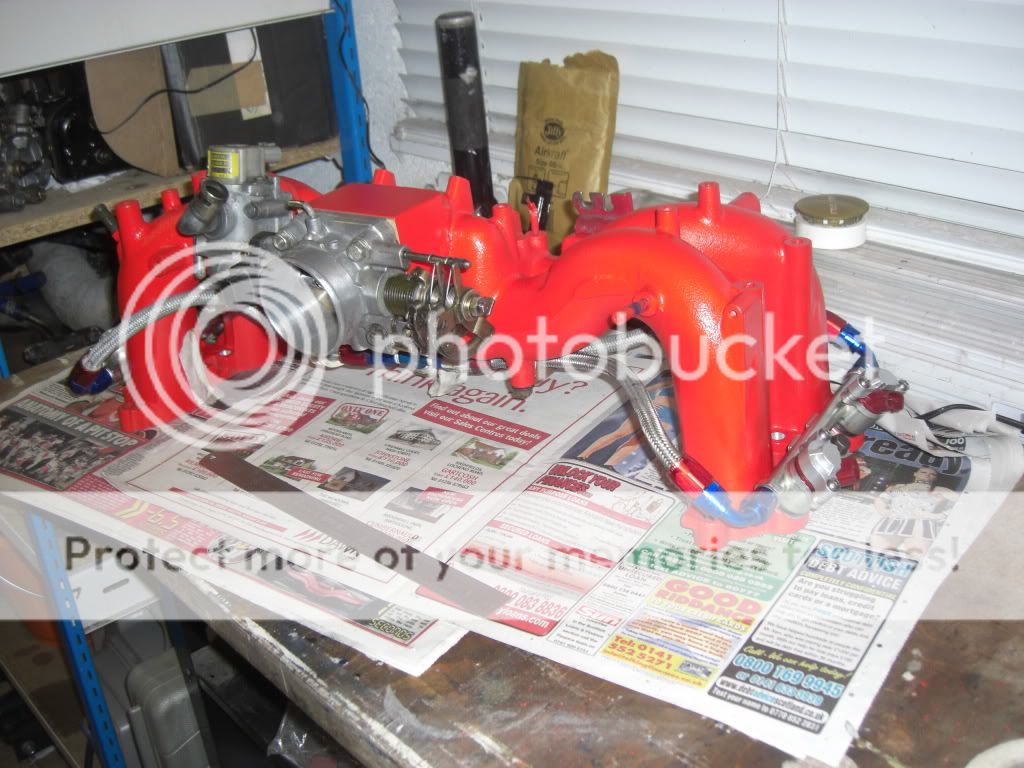
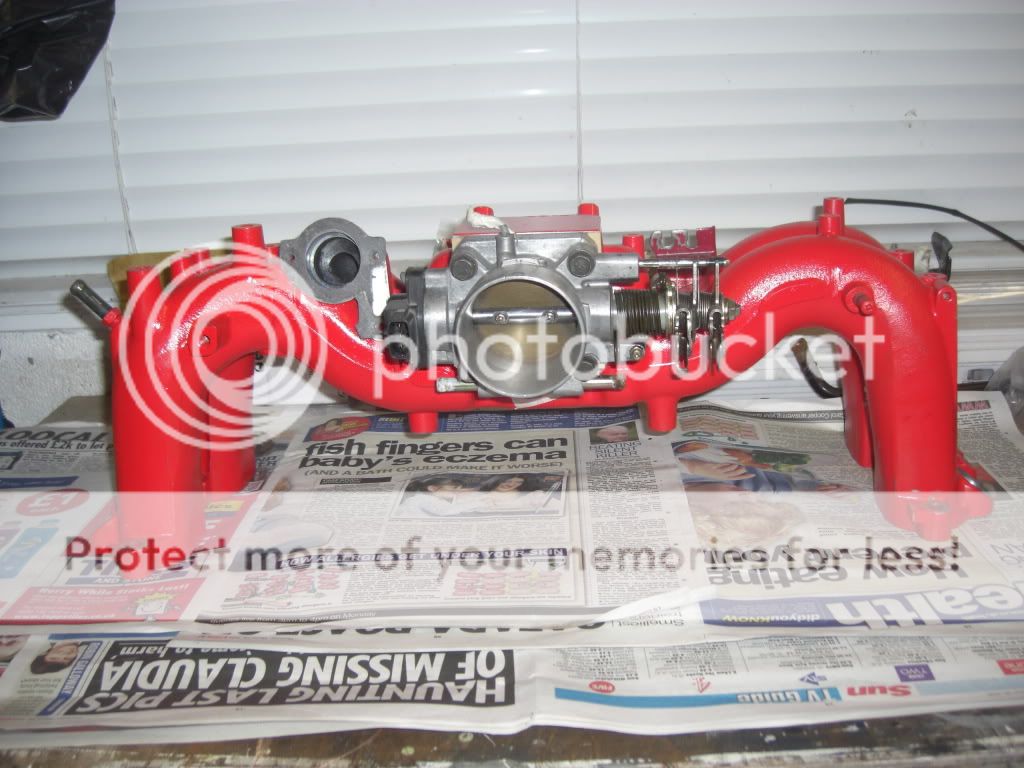
First I need to finish painting the new inlet manifold and then swap the required sensors wiring and fuel pipework across to the new engine as well as the sump and headers. I am also going to fit a 71 deg thermostat just to keep the engine a little cooler as I had a lot of over heating issues last year. The inlet manifold turned out really well, the wedge was supplied by Carl Davey, top work as usual Carl thanks for the help :icon_salut: and the welding was done by Les Mutch from near Ellon up in Aberdeen. Les also competes in the Scottish Hillclimb and Sprint Championship and owns his own business doing lots of welding amongst other enginerring things. If anyone is looking at rotating their phase 1 or phase 1.5 manifold drop Les an email he is a top guy and will sort you out and knows what he is doing as he has rotated a phase 1 and a phase 1.5 for me .
Carl Davey, specialist Subaru Impreza parts supply
MJ Engineering (Scotland) Limited, Mild Steel Fabrication, Stainless Steel Fabrication, Aberdeen, Scotland
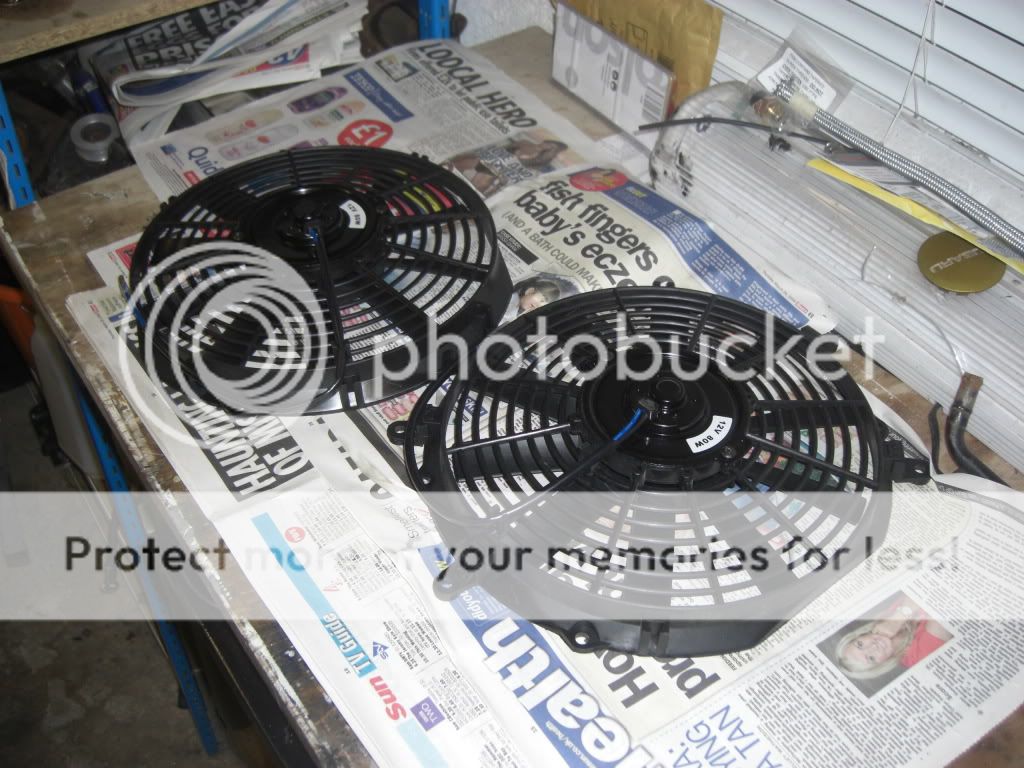
There is still a fair bit to do and time is rapidly running out. There is some fabrication required to completely change the routing of the intercooler pipework, change the radiator to an alloy one and fit smaller fans in a different location as well as have some new power steering pipework made up and ........ the list goes on and on
Just waiting on a some goodies arriving from AS Performance so I can carry on, I think Alyn down at ASP has a bigger alladins cave than John St as he always seems to have everything in stock as well as some obscure things that I just couldnt find - result.
AS Performance - Rally Motorsport Specialists
especially the ones where it was only 90p a pint - result this, however, didnt help getting the car ready.The suspension is pretty much now all in place with the rear drop links to fit and the Geometry to be set up by John at Progrip.
I have spent a little bit of time tarting up the inside as it was a bit of a mess last year so I have stripped everything out and painted the inside and the boot. I have also fitted a new dash as supplied by Stevenson Motorsport spares and repairs.
Its not perfect but looks a lot better than before and it really isnt worth spending a great deal of time on this side of things anyway.
Next it was time to remove the gearbox and Engine which were removed in quick time.
With the engine out an hour with a green pad and some elbow grease cleaned the engine bay up a treat. At the same time I removed the battery tray and washer bottle bottom mount which are both surplus and just getting in the way and adding weight so they had to go.
The new engine is now sitting waiting to be fiitted
This is one of Chy at Pennine Subaru's quality items and cant wait to see how it runs although I wont be using it anywhere near its capabilities this year.First I need to finish painting the new inlet manifold and then swap the required sensors wiring and fuel pipework across to the new engine as well as the sump and headers. I am also going to fit a 71 deg thermostat just to keep the engine a little cooler as I had a lot of over heating issues last year. The inlet manifold turned out really well, the wedge was supplied by Carl Davey, top work as usual Carl thanks for the help :icon_salut: and the welding was done by Les Mutch from near Ellon up in Aberdeen. Les also competes in the Scottish Hillclimb and Sprint Championship and owns his own business doing lots of welding amongst other enginerring things. If anyone is looking at rotating their phase 1 or phase 1.5 manifold drop Les an email he is a top guy and will sort you out and knows what he is doing as he has rotated a phase 1 and a phase 1.5 for me
.Carl Davey, specialist Subaru Impreza parts supply
MJ Engineering (Scotland) Limited, Mild Steel Fabrication, Stainless Steel Fabrication, Aberdeen, Scotland
There is still a fair bit to do and time is rapidly running out. There is some fabrication required to completely change the routing of the intercooler pipework, change the radiator to an alloy one and fit smaller fans in a different location as well as have some new power steering pipework made up and ........ the list goes on and on
Just waiting on a some goodies arriving from AS Performance so I can carry on, I think Alyn down at ASP has a bigger alladins cave than John St as he always seems to have everything in stock as well as some obscure things that I just couldnt find - result.
AS Performance - Rally Motorsport Specialists
Last edited by Arch; Apr 11, 2009 at 02:22 AM.


Joined: Nov 2003
Posts: 13,356
Likes: 58
From: in the woods...........555 Wagon Sqn
Well a combination of work and some problems along the way have resulted in progress being painfully slow.
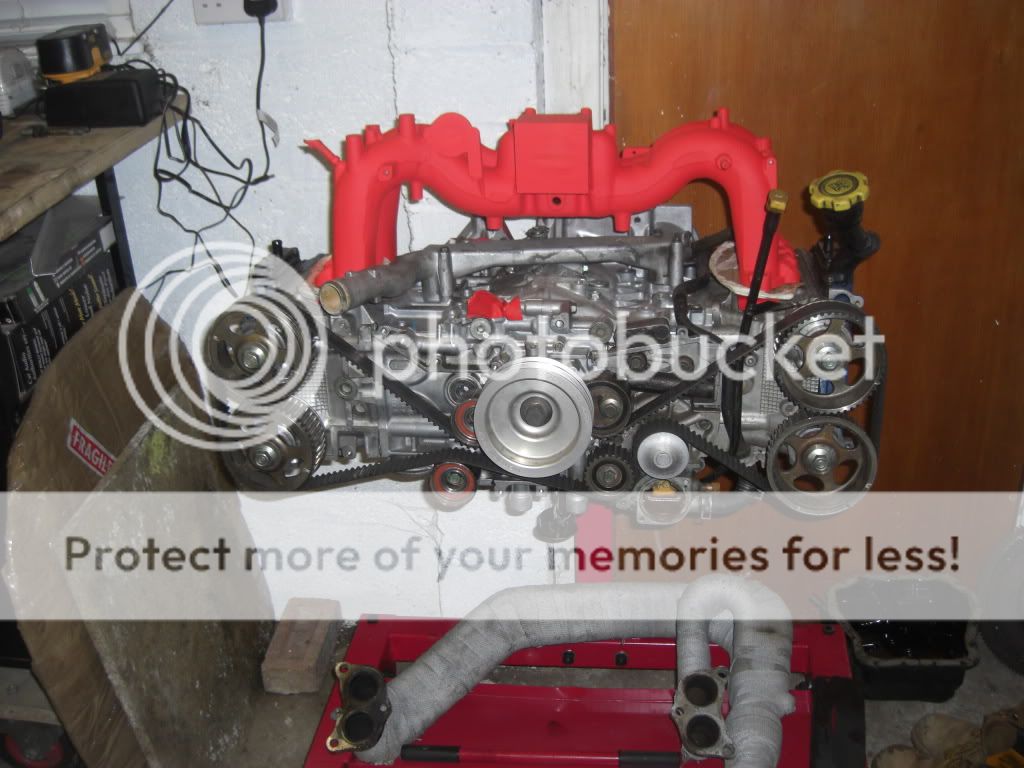
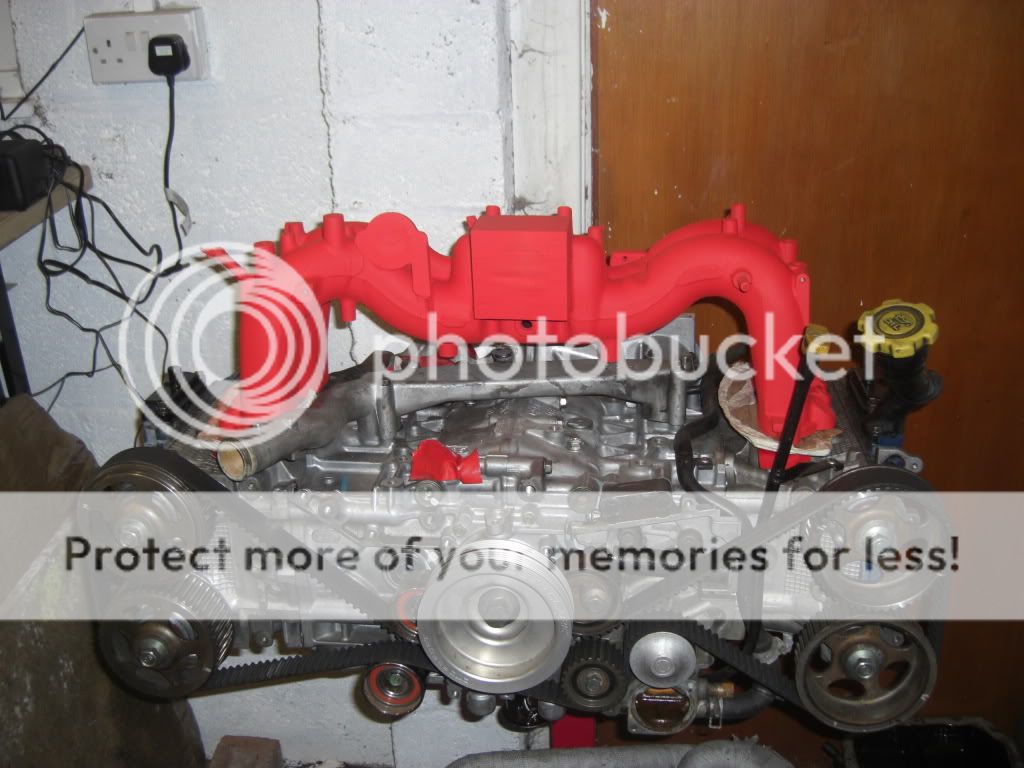
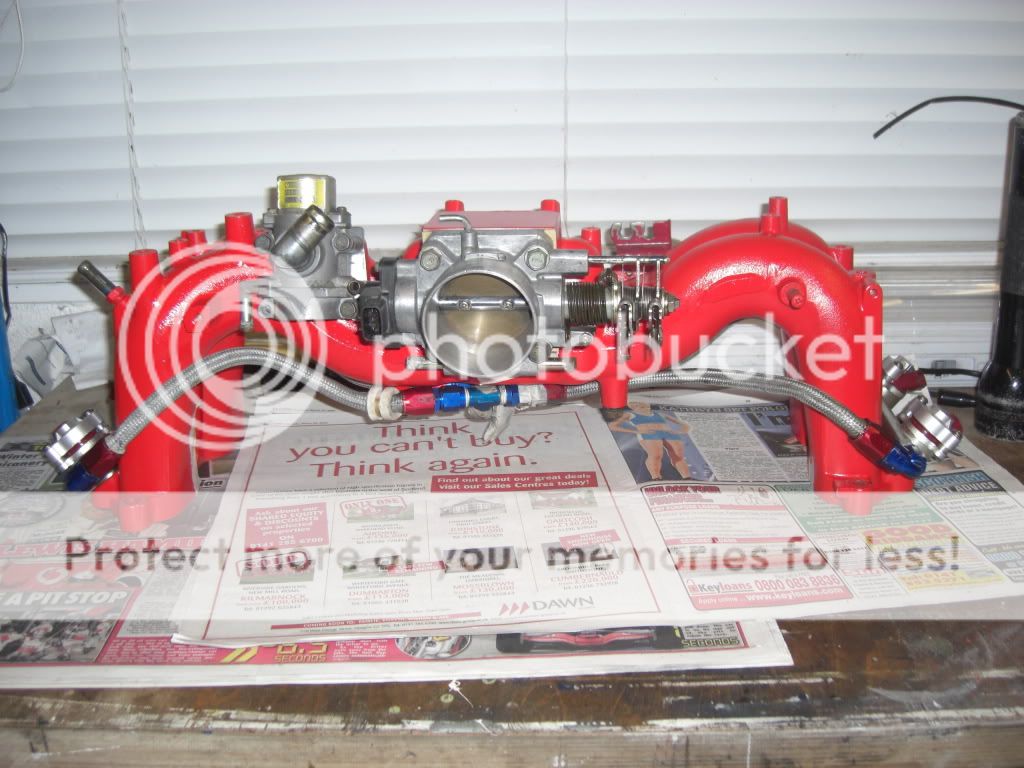
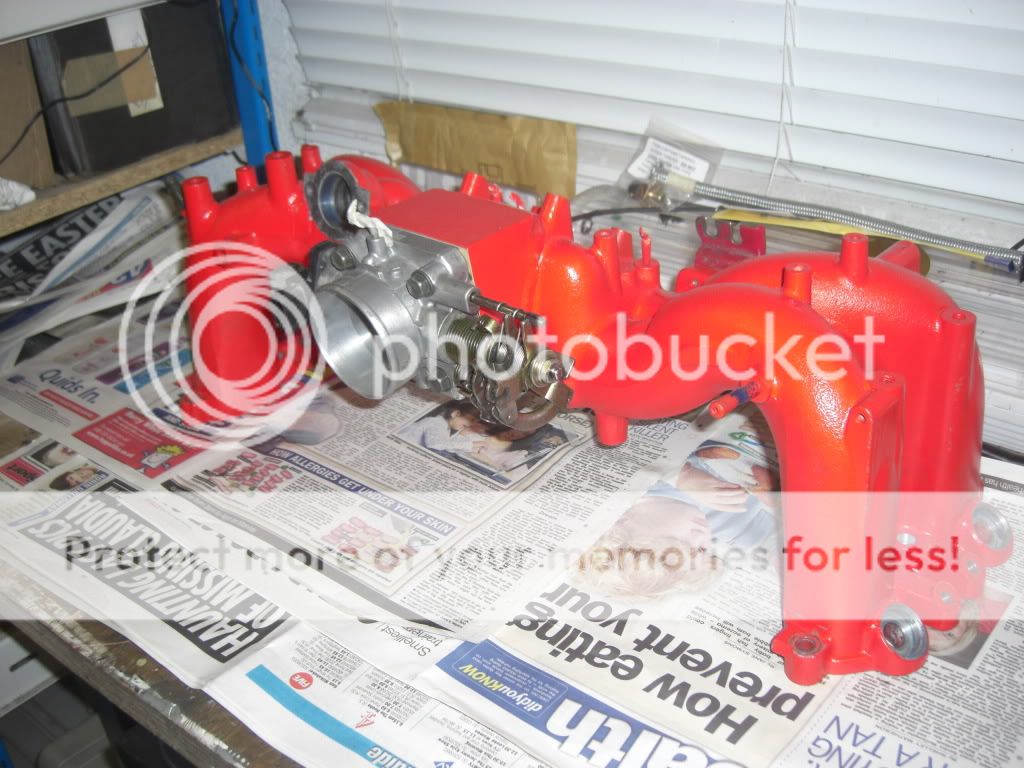
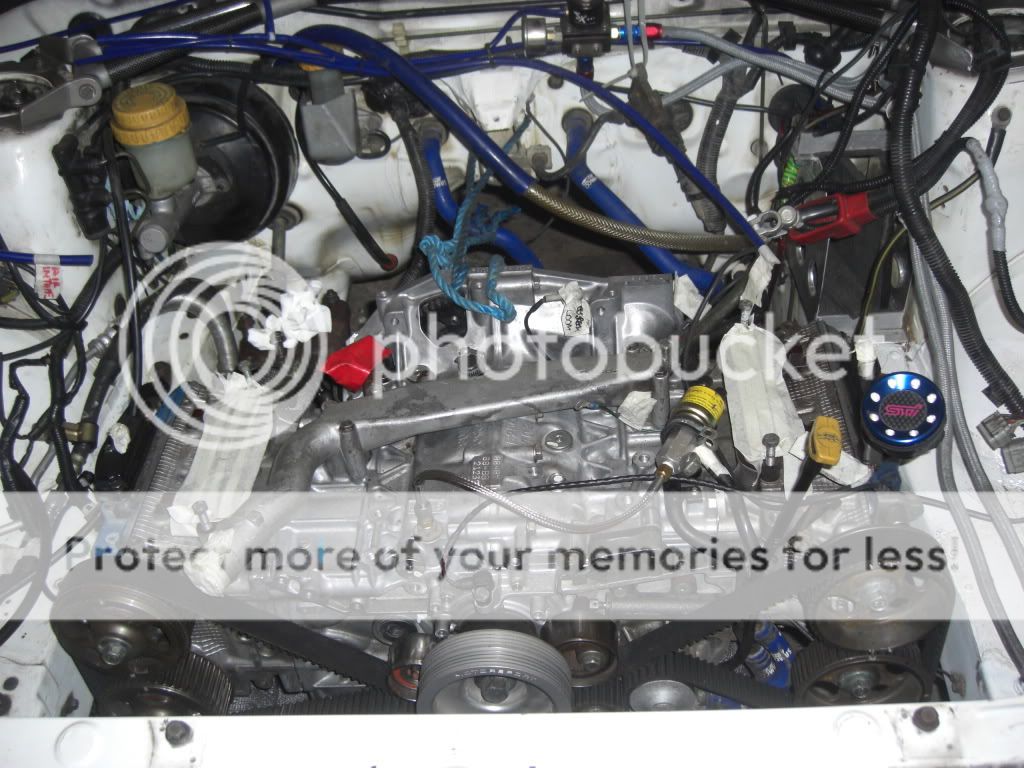
The inlet manifold is painted and the fuel rails etc all fitted. I have also cleaned up a phase 1.5 throttle body and ICV and fitted them to the manifold.
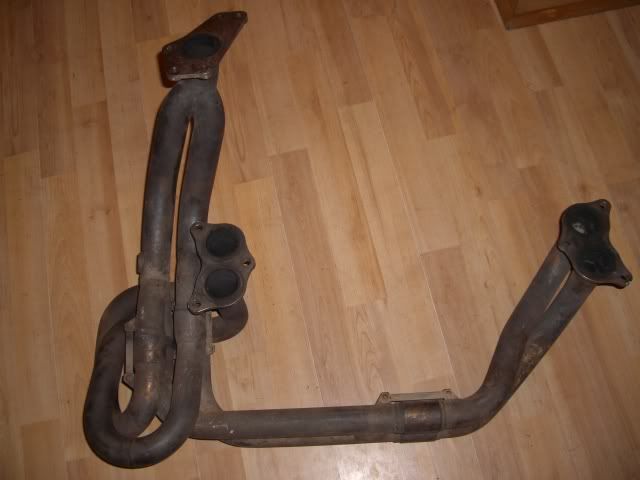
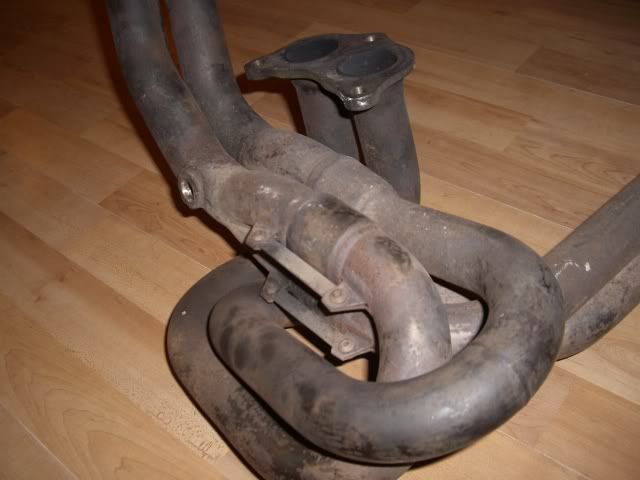
I have also fitted a new set of headers supplied by Stevenson Motorsports for all aspects of Subaru tuning, spares new and used
These have been heat wrapped and sprayed to protect them from water ingress and fluid spills.
The engine is now in the car which is the easy part getting everything to fit and work together is the hard part.
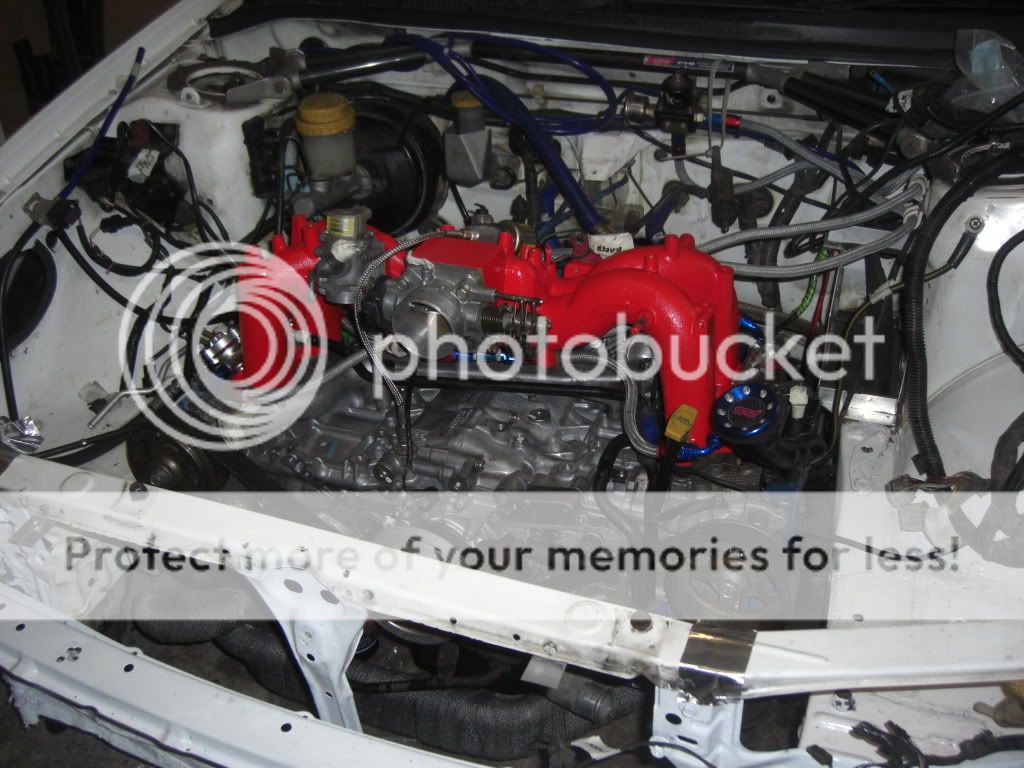
One problem I have found already is that the ICV hits the bonnet and stops it closing properly. I have already cut a section of the bracing out but it still touches.
The manifold spacers i have fitted are 18mm thick so I am sure that fitting a set of 10mm spacers will buy me the room I need. I will also have to change back to the phase 1 ICV as the angle of the ICV pipework just wont work but that is not an issue.
The inlet manifold is painted and the fuel rails etc all fitted. I have also cleaned up a phase 1.5 throttle body and ICV and fitted them to the manifold.
I have also fitted a new set of headers supplied by Stevenson Motorsports for all aspects of Subaru tuning, spares new and used
These have been heat wrapped and sprayed to protect them from water ingress and fluid spills.
The engine is now in the car which is the easy part getting everything to fit and work together is the hard part.
One problem I have found already is that the ICV hits the bonnet and stops it closing properly. I have already cut a section of the bracing out but it still touches.
The manifold spacers i have fitted are 18mm thick so I am sure that fitting a set of 10mm spacers will buy me the room I need. I will also have to change back to the phase 1 ICV as the angle of the ICV pipework just wont work but that is not an issue.
Last edited by Arch; Apr 17, 2009 at 04:46 AM.
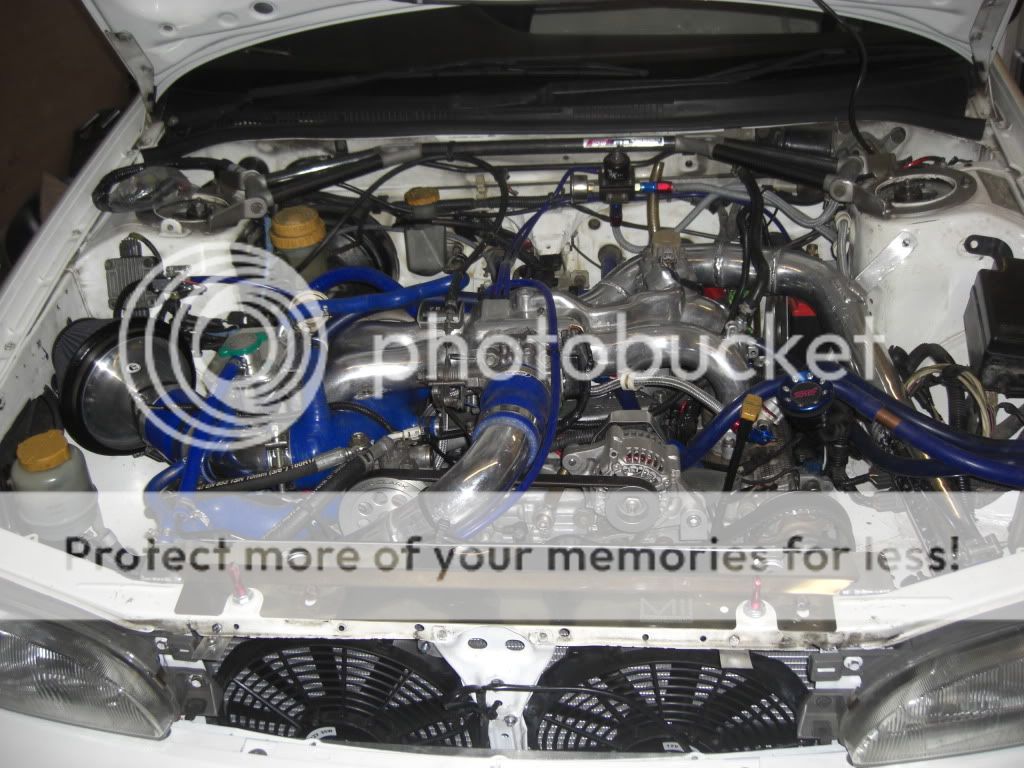
Once again due to work etc I have not touched the car for a week but managed a full day on the car today and achieved quite a lot.
I have finally got round to mounting my ECU in its new bracket
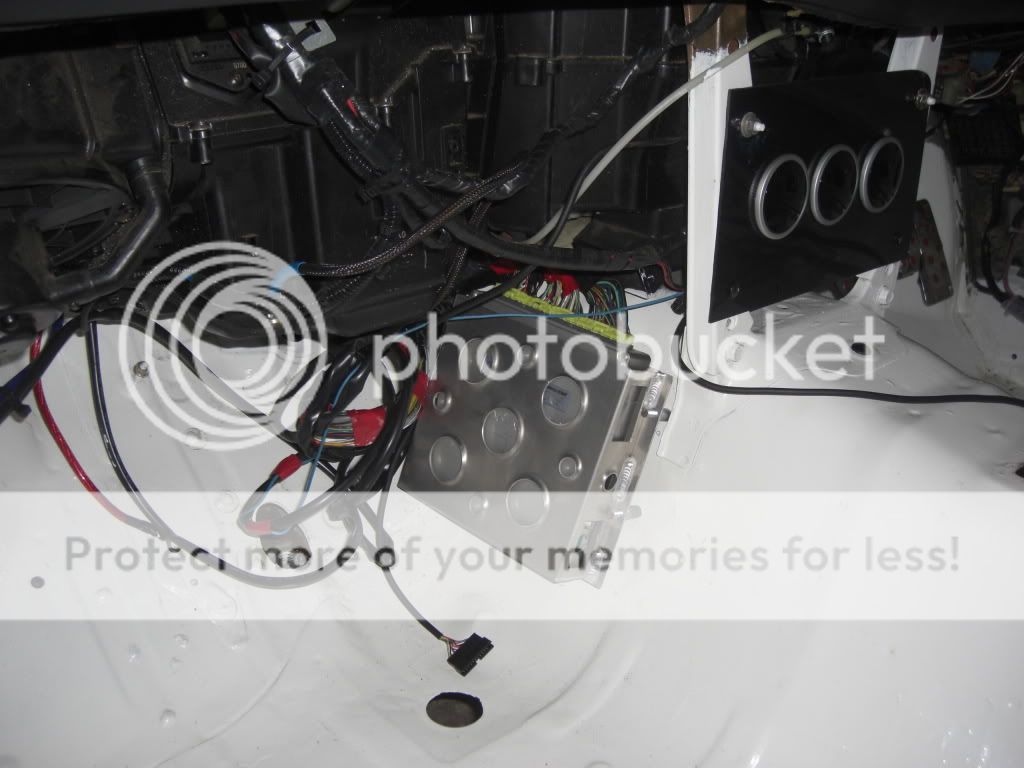
Still have some tidying up to do but all the wiring inside the car is pretty much complete
I have solved the clearance issues with the phase 1.5 manifold by removing my 18mm spacers and fitting a set of 10mm ones which Carl Davey posted rapido after a call for help - thanks Carl can always rely on you in a crisis :icon_salut:
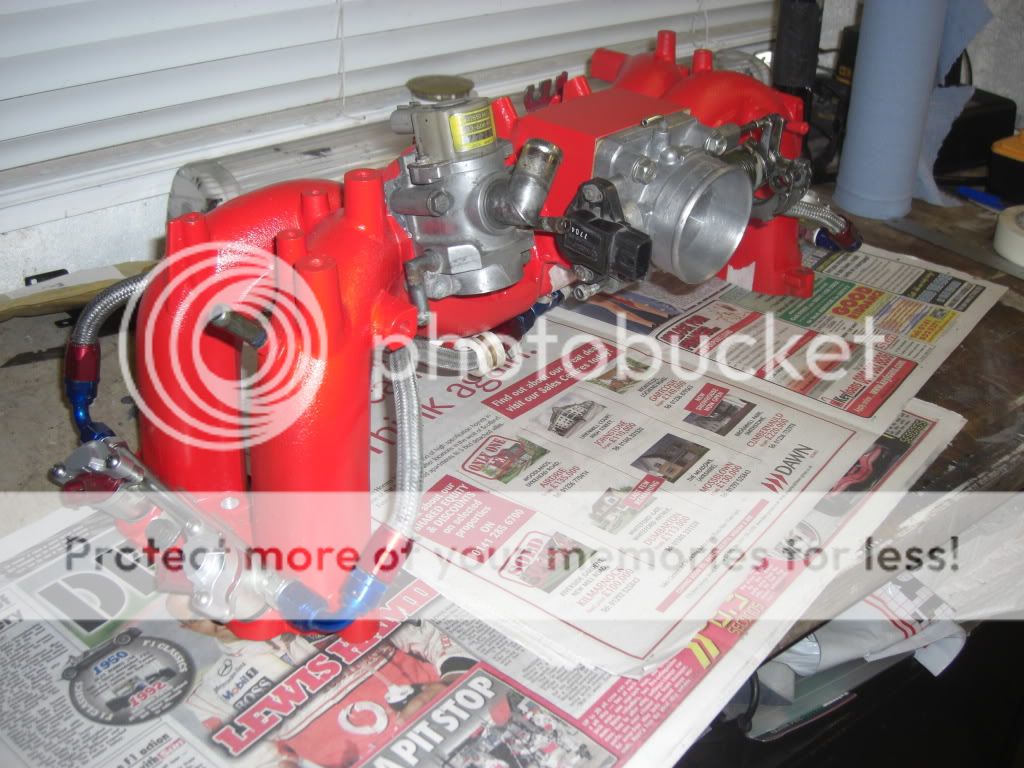
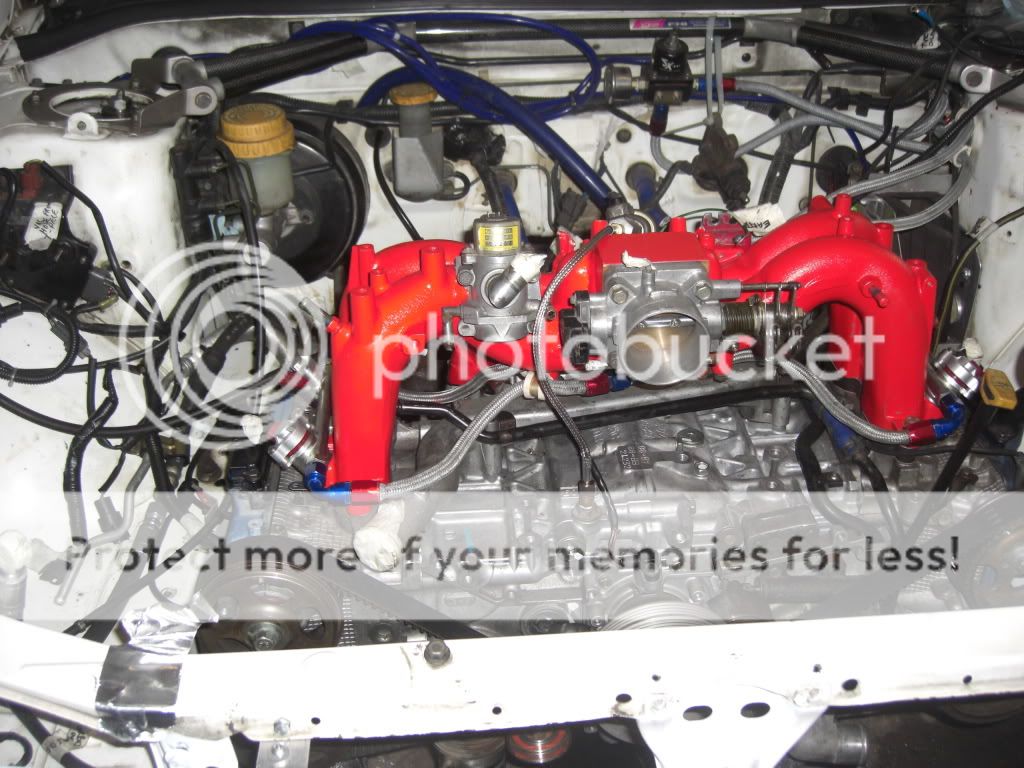
However after solving the problem I have had a change of plans and the phase 1.5 manifold that looks so shiny is now sat here. Anyone after a nice shiny rotated phase 1.5 manifold
So with no manifold it looks like this again :mellow:
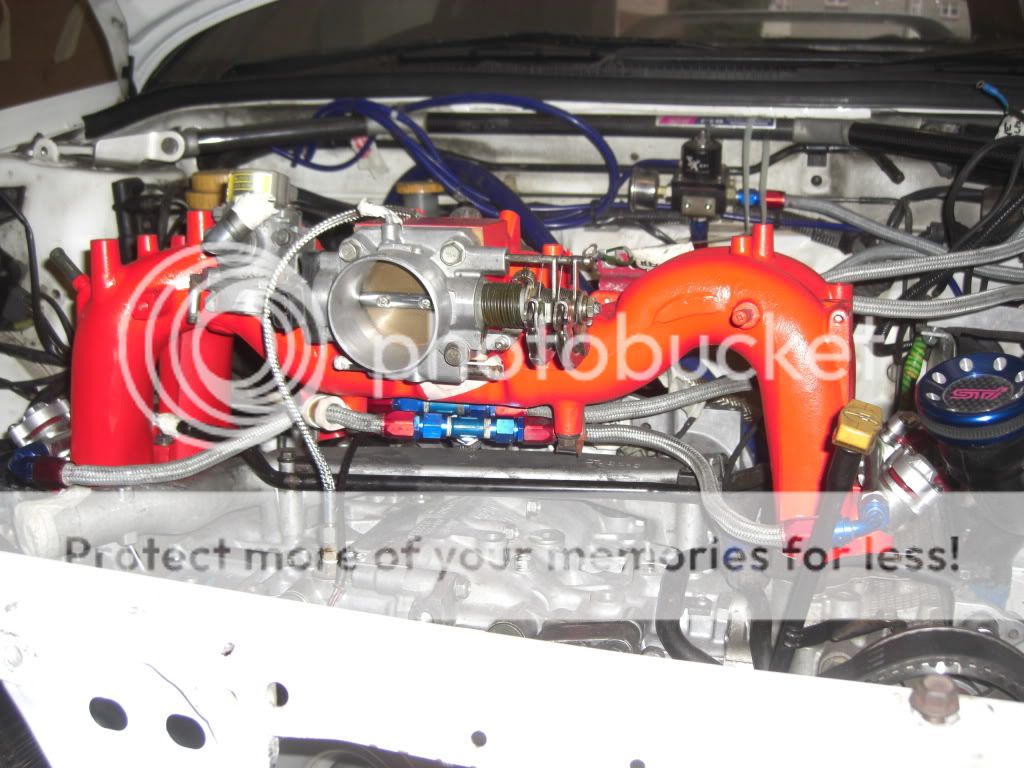
But as I said a change of plans another quality item from Stevenson's Motorsport spares just happened to find its way to my garage
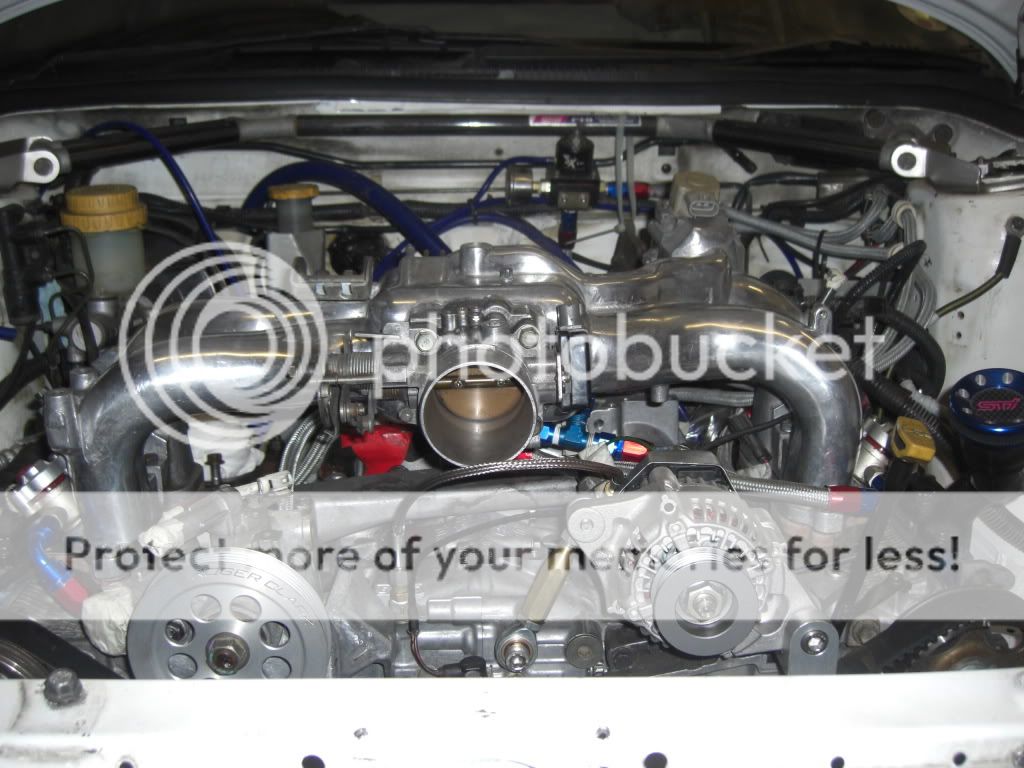
Well be honest it really is to shiny to say no to This meant changing back to my original phase 1 fuel rails and swapping the injectors etc back over. While doing this I changed a couple of the fuel hoses as I wanted them a little longer so they can be routed as much as possible away from the water pipes and the block. I have used the two sets of spacers with the phase one manifold which spaces the manifold up a total of 28mm. This gives me plenty clearance under the manifold I have also changed back to my phase one throttle body and ICV. The only reason to going back to the phase 1 ICV is the pipe is in a better position for my plans and I know it works
I have also fitted Carl's alternator bracket and a light weight alternator. This bracket is brilliant it weighs next to nothing and fits perfectly with the Denso 40 Amp alternator which I sourced from ebay seller Electrostart2006.
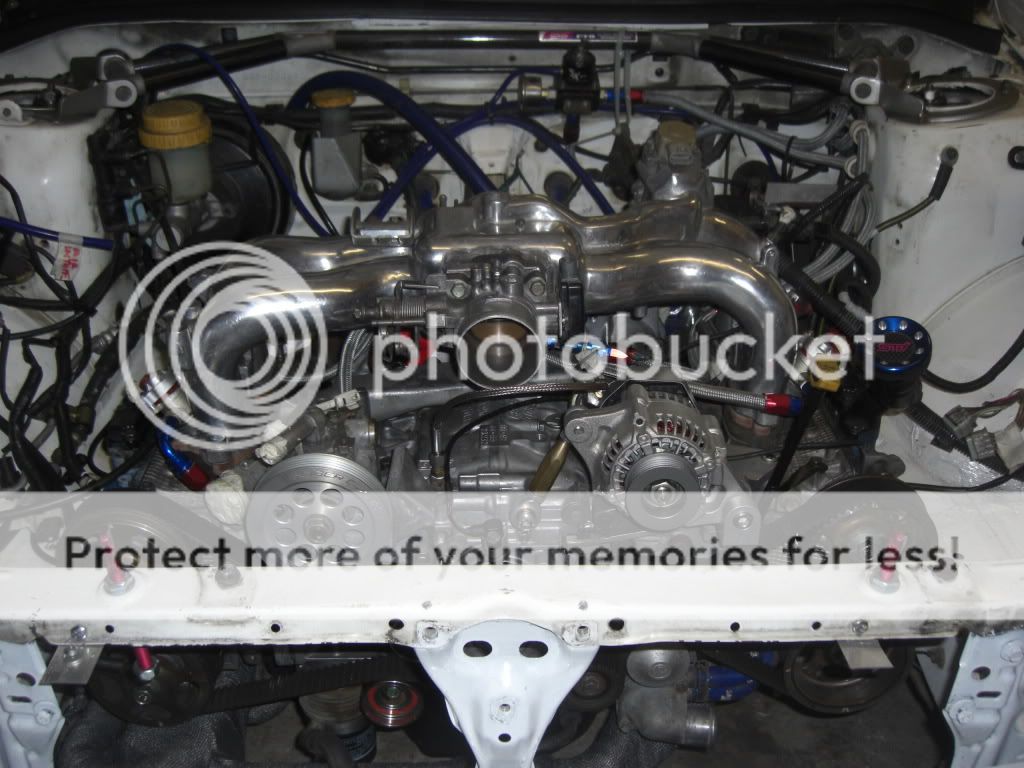
I have also fitted a newage power steering pump and lightened the bracket, which is lighter than the standard bracket anyway. As well as lightening it also creates a bit more space for some pipework . I have had the newage power steering supply pipe modded at Pirtek to give me the length I need. I will also fit a newage remote resevoir.
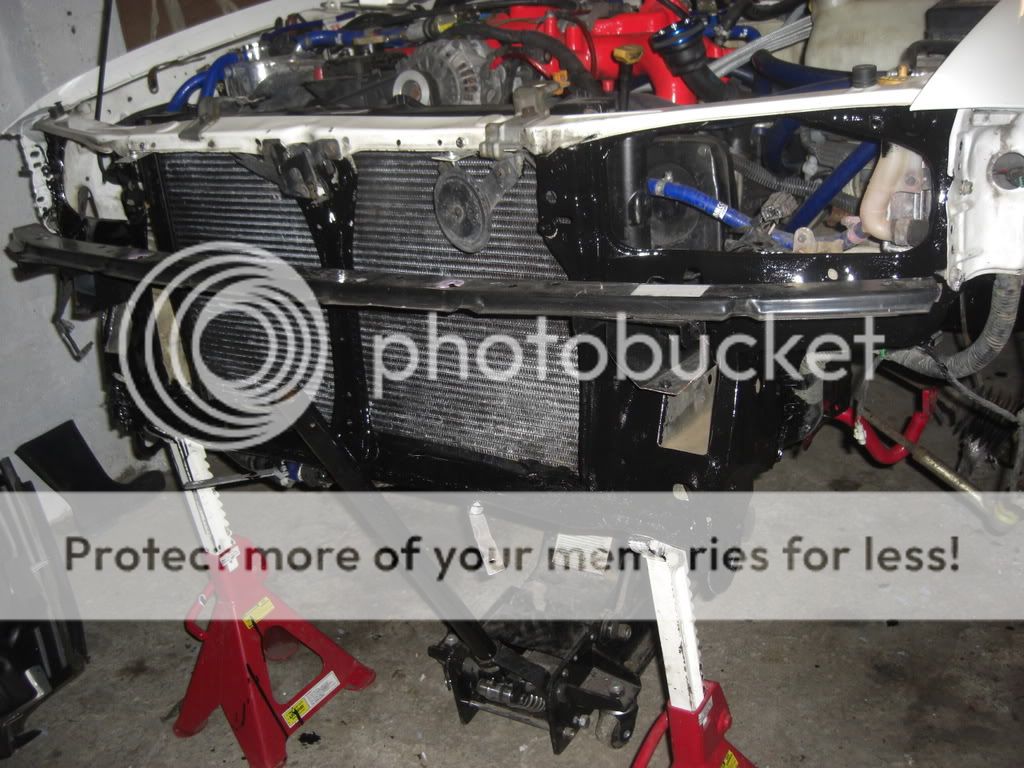
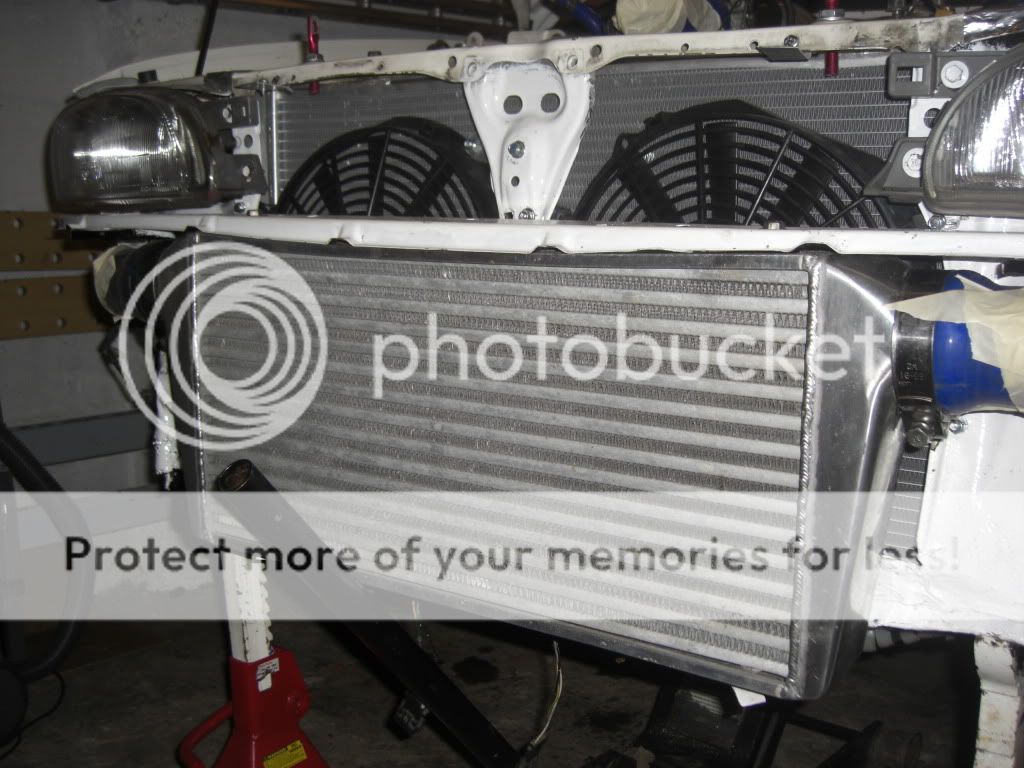
I have sat the new alloy radiator in place to measure up fitment of these
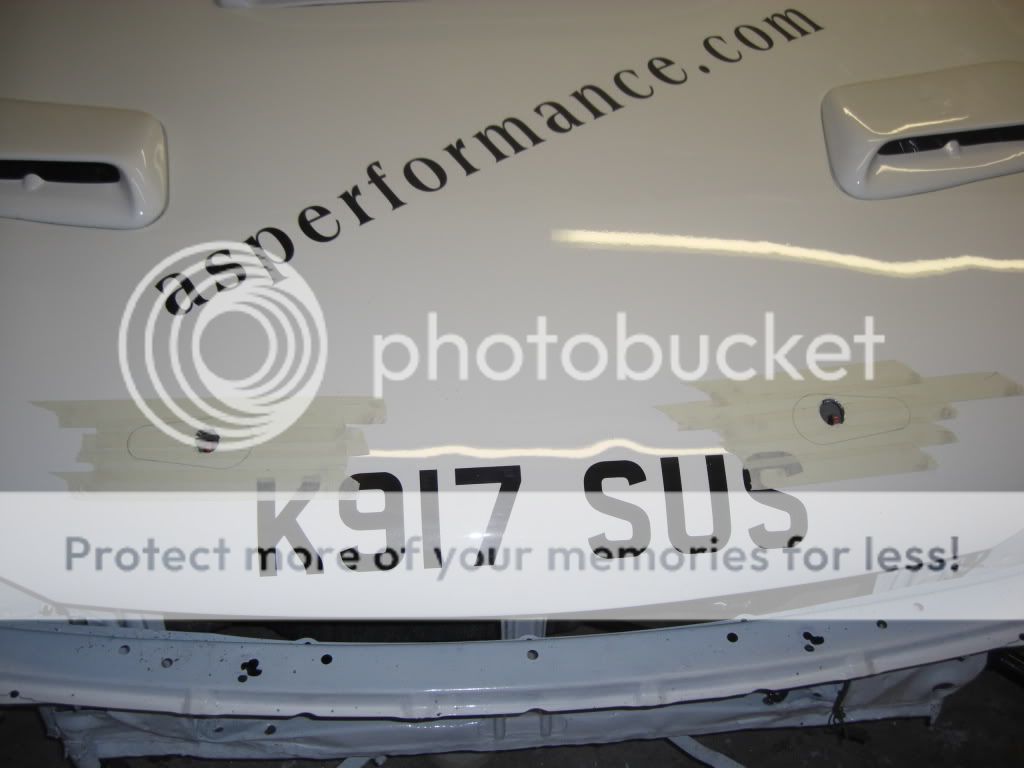
The last thing i got done today was cutting the bonnet for a set of aero catches. After my slight excursions at Doune last season the bonnet never really sat properly so decided to fit these so that it can be adjusted easier than just using the normal centre striker. They are not that hard to fit when the radiator is out. The first thing I done was mount the pins. I used the pads on the slam panel where the centre rubber bungs strike the slam panel. I then closed the bonnet marked where the pins struck the bonnet, I did this by lying down and marking the underside of the bonnet through the hole where the radiator usually sits. I then cut a hole in the inner skin with a hole saw so that I could see where the pins strike the outer skin.
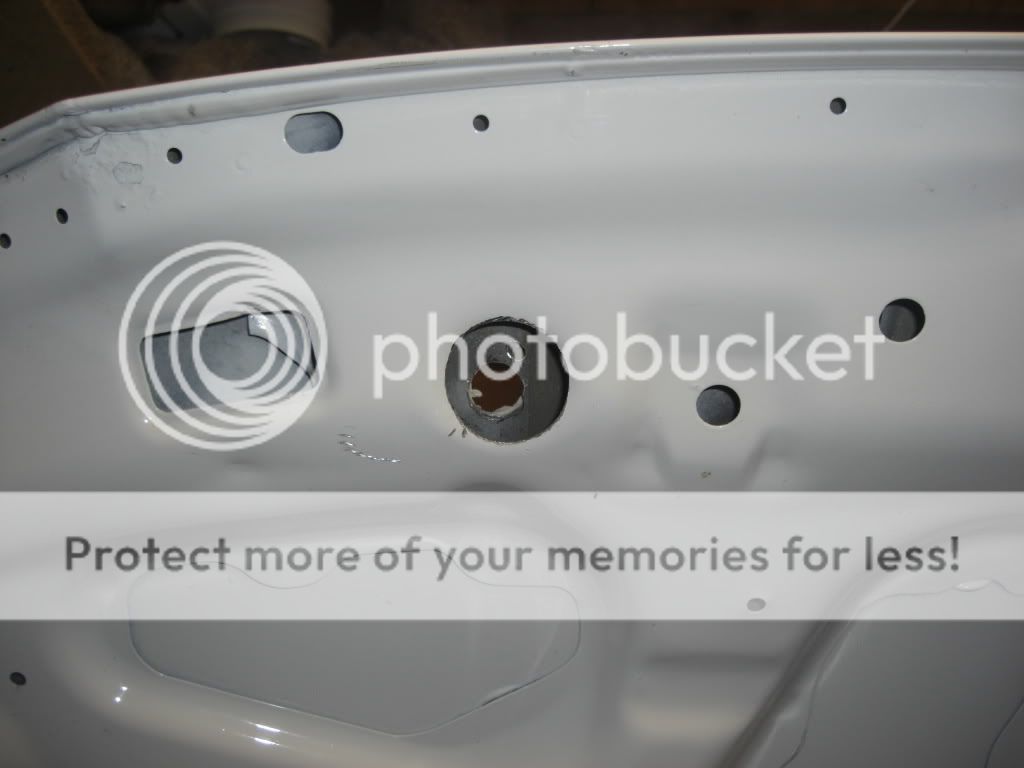
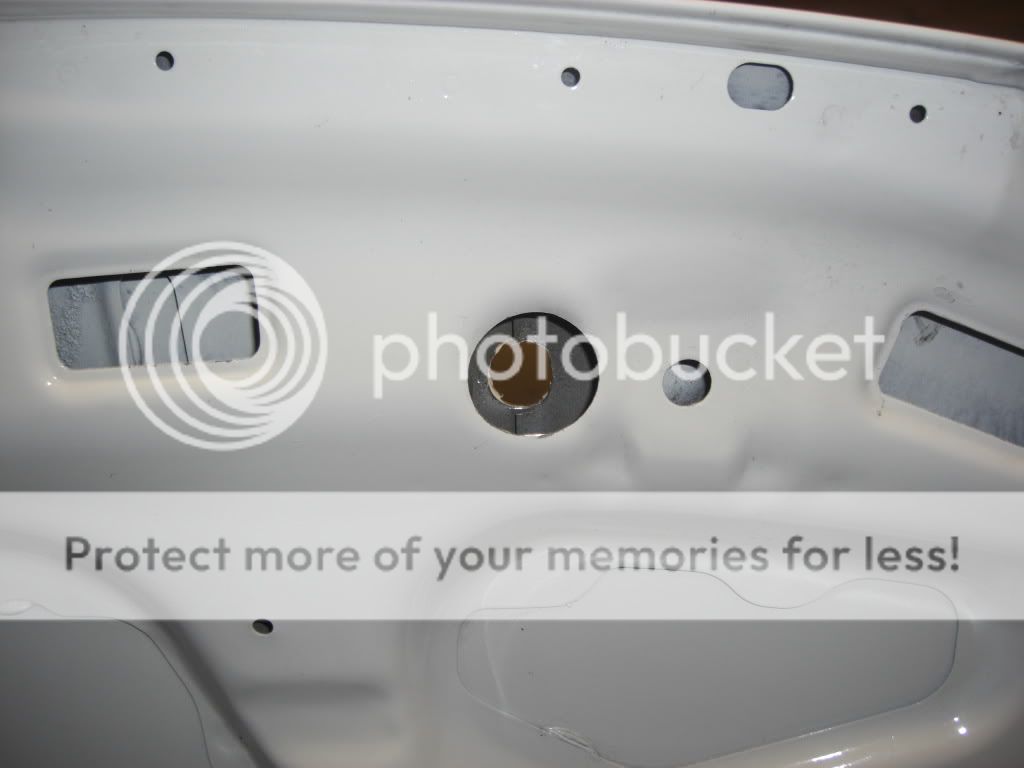
Having done this I drilled a pilot hole from the underside right in the centre of the mark where the pins struck the outer skin. Now working from the top I drilled a another hole with a hole saw just big enough to allow the pins to come through the bonnet.
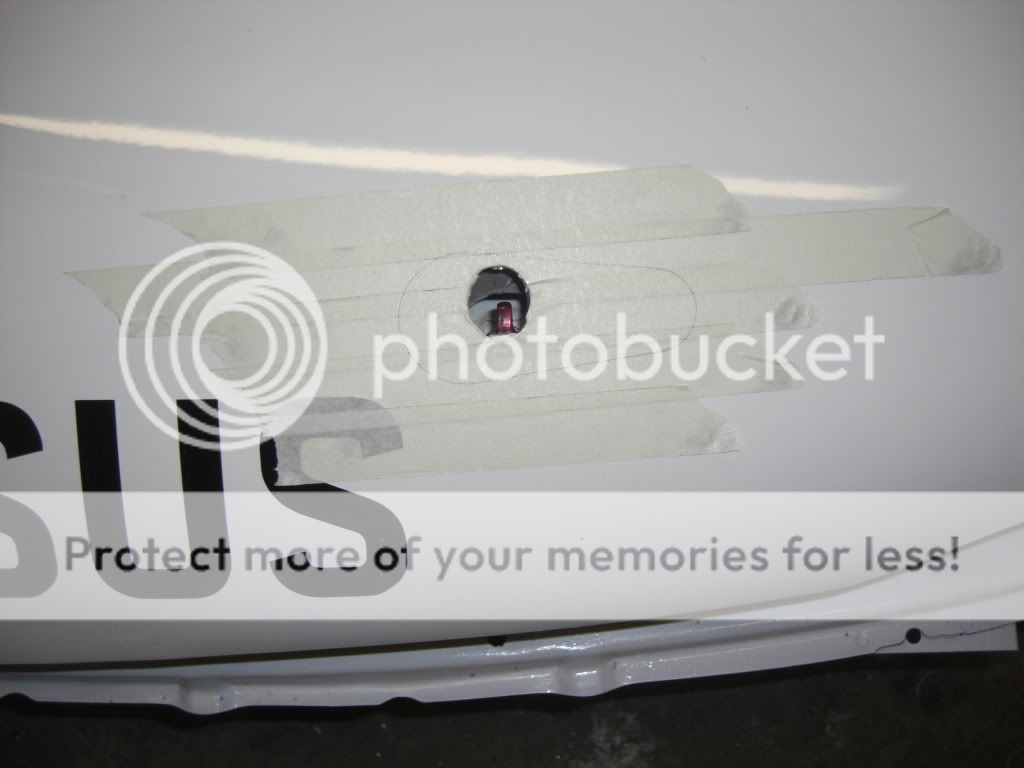
With the pins through the bonnet I used the template provided to mark out the area to be cut out.
I then used a couple of hole saws smaller than the diameter of the two ends to cut out as close as possible to the template. I then used a pad saw to cut the straights. It did need a fair bit of work with a file to get them to fit snuggly.
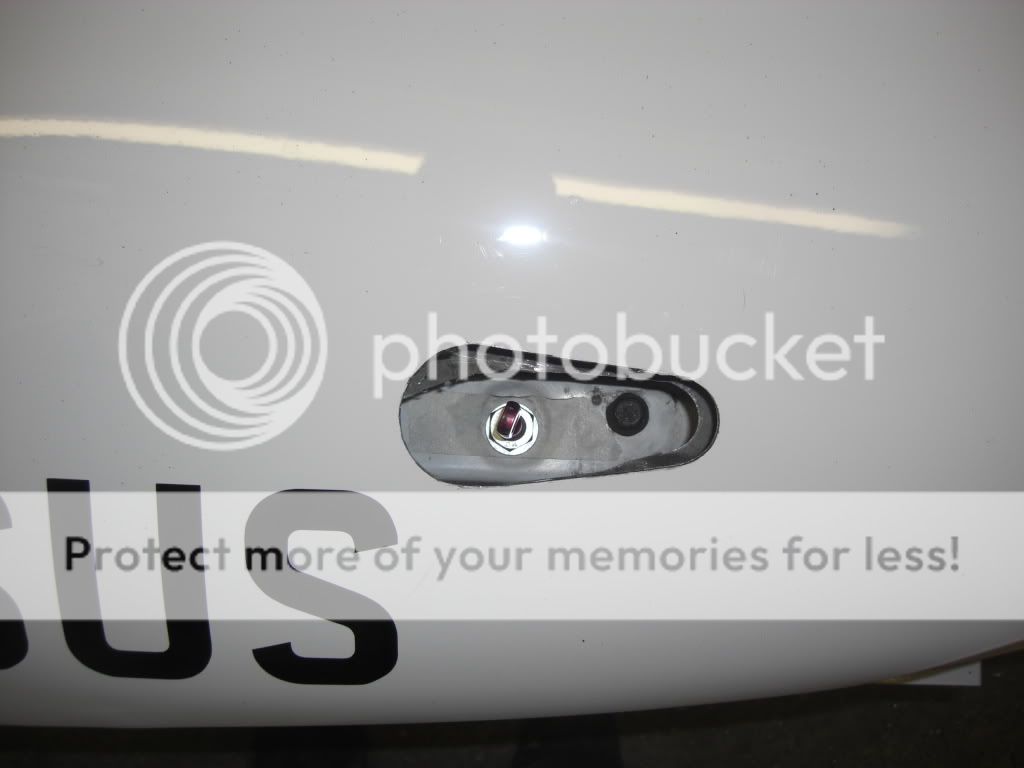
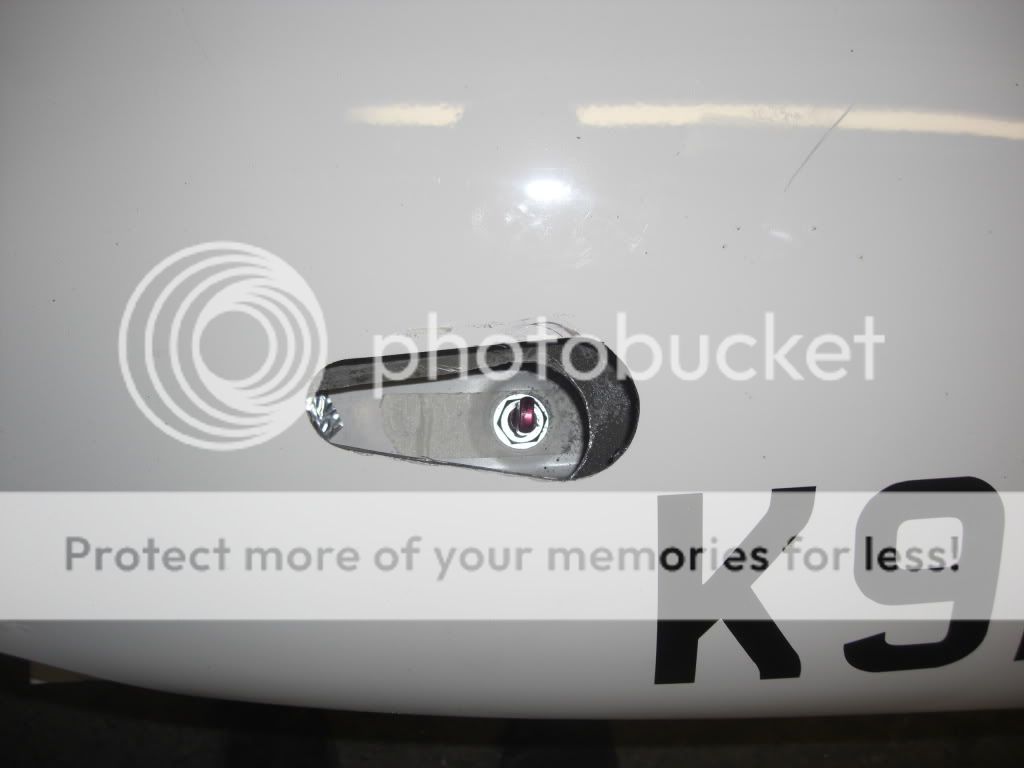
Then its just a case of using the catches to mark and drill the mounting bolt holes
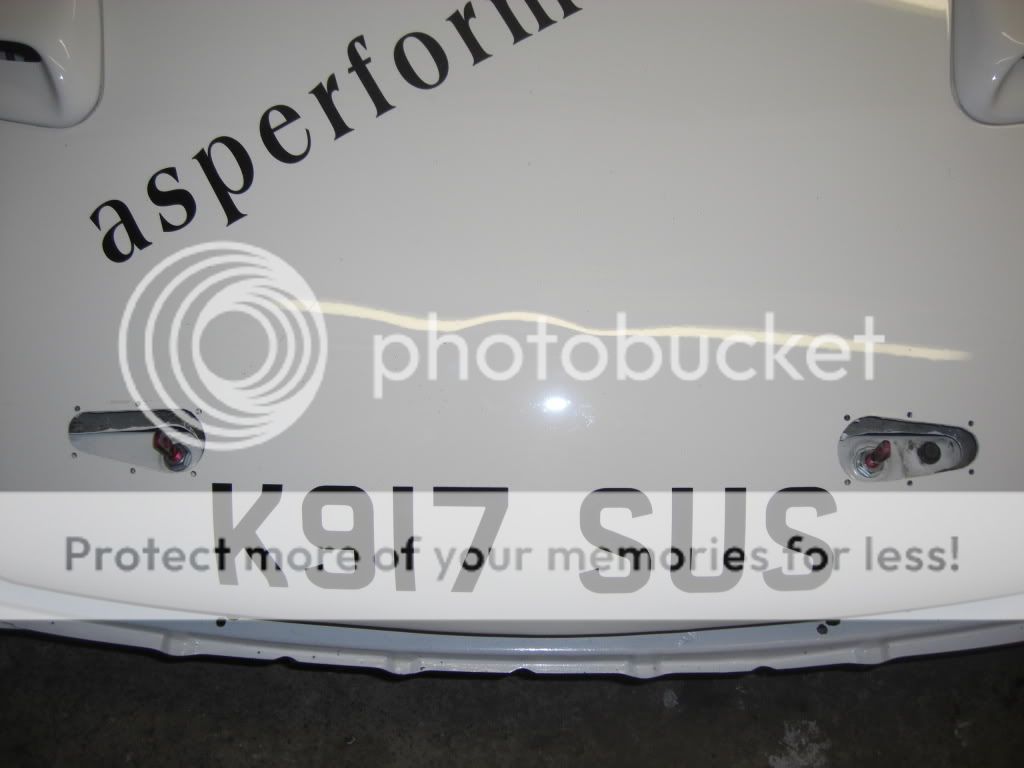
Didnt bolt the catches on straight away as I wanted to paint the edges to seal the bare alloy where I had been cutting.
Still have a fair bit to do including mounting the front calipers and PF pads.
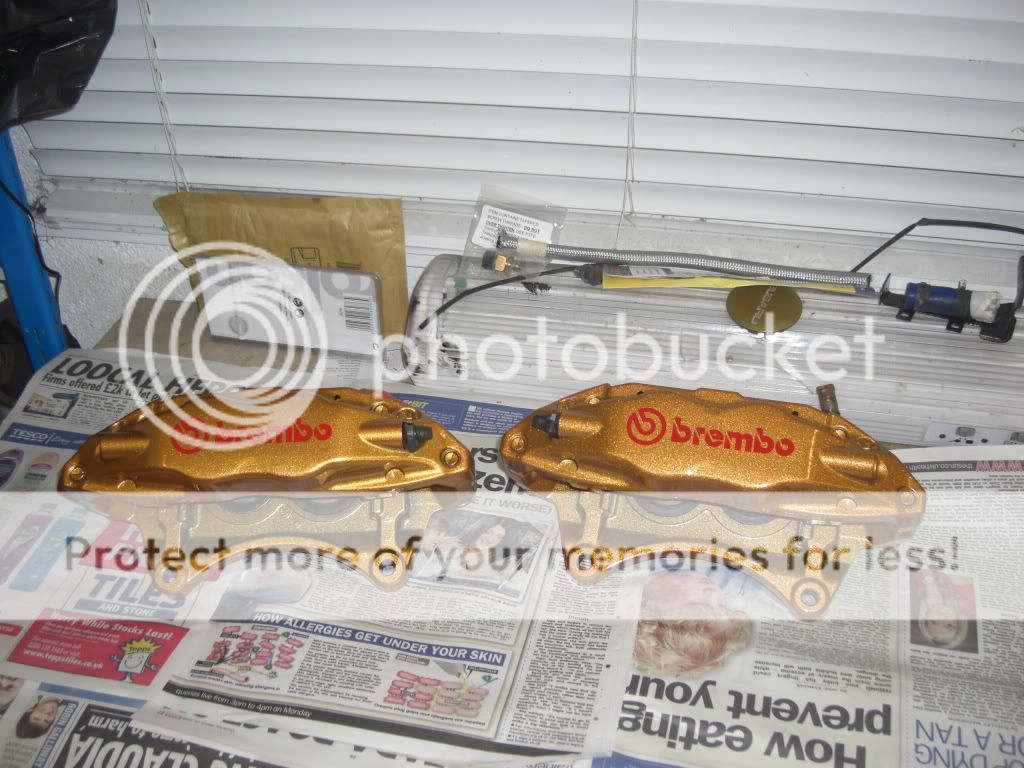
Thanks again to Alyn at AS Perfiormance for help with many of the parts and for digging out a set of caliper mounting bolts so that I dont have to go to the stealers and pay �6 ish a bolt
Feeling a bit happier about the car and confident now that the car will be ready for the Machars Sprint.
I have finally got round to mounting my ECU in its new bracket
Still have some tidying up to do but all the wiring inside the car is pretty much complete
I have solved the clearance issues with the phase 1.5 manifold by removing my 18mm spacers and fitting a set of 10mm ones which Carl Davey posted rapido after a call for help - thanks Carl can always rely on you in a crisis :icon_salut:
However after solving the problem I have had a change of plans and the phase 1.5 manifold that looks so shiny is now sat here. Anyone after a nice shiny rotated phase 1.5 manifold
So with no manifold it looks like this again :mellow:
But as I said a change of plans another quality item from Stevenson's Motorsport spares just happened to find its way to my garage
Well be honest it really is to shiny to say no to
This meant changing back to my original phase 1 fuel rails and swapping the injectors etc back over. While doing this I changed a couple of the fuel hoses as I wanted them a little longer so they can be routed as much as possible away from the water pipes and the block. I have used the two sets of spacers with the phase one manifold which spaces the manifold up a total of 28mm. This gives me plenty clearance under the manifold I have also changed back to my phase one throttle body and ICV. The only reason to going back to the phase 1 ICV is the pipe is in a better position for my plans and I know it works I have also fitted Carl's alternator bracket and a light weight alternator. This bracket is brilliant it weighs next to nothing and fits perfectly with the Denso 40 Amp alternator which I sourced from ebay seller Electrostart2006.
I have also fitted a newage power steering pump and lightened the bracket, which is lighter than the standard bracket anyway. As well as lightening it also creates a bit more space for some pipework
. I have had the newage power steering supply pipe modded at Pirtek to give me the length I need. I will also fit a newage remote resevoir. I have sat the new alloy radiator in place to measure up fitment of these
The last thing i got done today was cutting the bonnet for a set of aero catches. After my slight excursions at Doune last season the bonnet never really sat properly so decided to fit these so that it can be adjusted easier than just using the normal centre striker. They are not that hard to fit when the radiator is out. The first thing I done was mount the pins. I used the pads on the slam panel where the centre rubber bungs strike the slam panel. I then closed the bonnet marked where the pins struck the bonnet, I did this by lying down and marking the underside of the bonnet through the hole where the radiator usually sits. I then cut a hole in the inner skin with a hole saw so that I could see where the pins strike the outer skin.
Having done this I drilled a pilot hole from the underside right in the centre of the mark where the pins struck the outer skin. Now working from the top I drilled a another hole with a hole saw just big enough to allow the pins to come through the bonnet.
With the pins through the bonnet I used the template provided to mark out the area to be cut out.
I then used a couple of hole saws smaller than the diameter of the two ends to cut out as close as possible to the template. I then used a pad saw to cut the straights. It did need a fair bit of work with a file to get them to fit snuggly.
Then its just a case of using the catches to mark and drill the mounting bolt holes
Didnt bolt the catches on straight away as I wanted to paint the edges to seal the bare alloy where I had been cutting.
Still have a fair bit to do including mounting the front calipers and PF pads.
Thanks again to Alyn at AS Perfiormance for help with many of the parts and for digging out a set of caliper mounting bolts so that I dont have to go to the stealers and pay �6 ish a bolt
Feeling a bit happier about the car and confident now that the car will be ready for the Machars Sprint.
Last edited by Arch; Apr 19, 2009 at 03:06 AM.
I suspect your car is fitted with a std Master cylinder (ie 25.4mm dia), Its Very worthwhile going to a newage STI version, its a slightly larger 27mm and matched to the Brembo's.
Pedal feel is vastly improved.
Stu.
Pedal feel is vastly improved.
Stu.
Steven yes it did thanks, will send payment down with John next weekend. thanks again.
Mark the alternator is a straight fit mecahnically. You will need to get a new belt though as the current set up will be a different length. You do have to alter the wiring to the Alternator but it is straight forward. i will put a simple explanation up once I have done mine and had a chance to take some pics.
Mark the alternator is a straight fit mecahnically. You will need to get a new belt though as the current set up will be a different length. You do have to alter the wiring to the Alternator but it is straight forward. i will put a simple explanation up once I have done mine and had a chance to take some pics.
Well its been quite a while since I updated the thread mainly due to the amount of hours I have spent on the car over the last 2 months.
I have made good progress with the car and sorted out a lot of the issues that were holding me up. That said I have found more and sometimes it feels like you solve one problem and find 4 new ones.
The first issue that was a real problem was the gearbox to diff gearing. I have fitted a rear R180 3.9 diff but in order to mate this with my gearbox I needed to change the 1:1.1 drop gears to a 1:1 ratio. Should have been pretty straight forward pick up a set of 754 1:1 drop gears swap them over job done. Well not so simple. I managed to pick up some 1:1 754 and 752 drop gears from Ali Burrows Motorport ( Welcome to Ali Burrows Motorsport ). Cant recommend these guys highly enough, dealt with Ali myself and he is a cracking guy and very helpful.
The problem is that there are two different types of 754 drop gears some use a normal bearing and some use a taper bearing and surprisingly enough I needed the taper bearing type and could only source the normal bearing type.
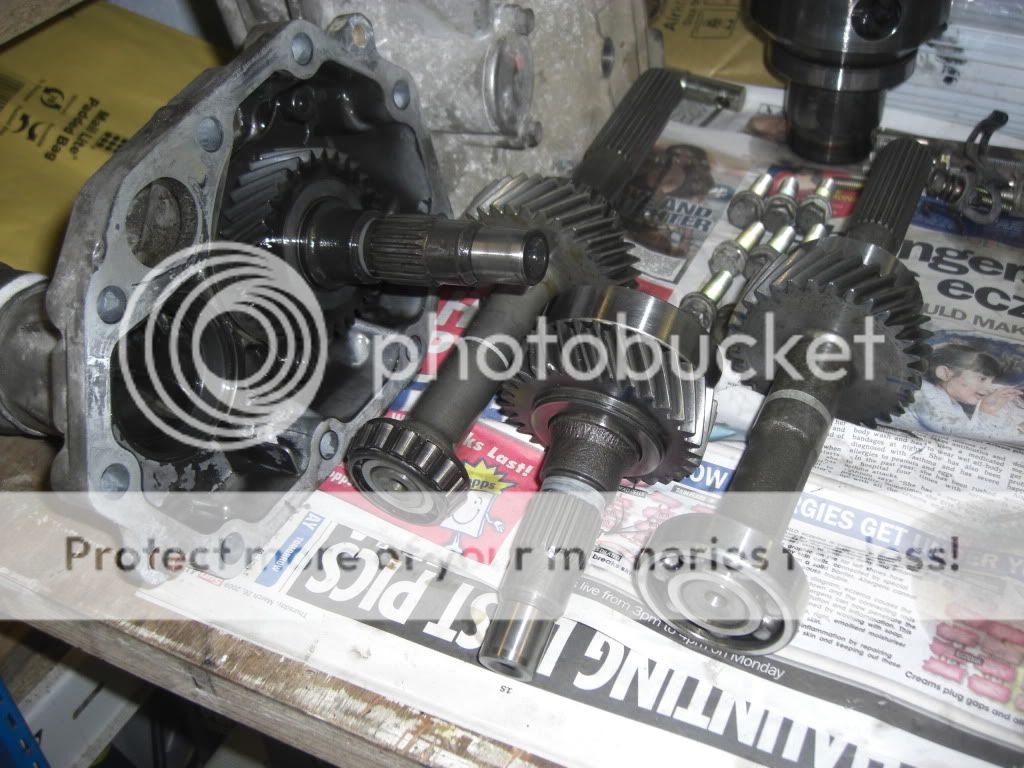
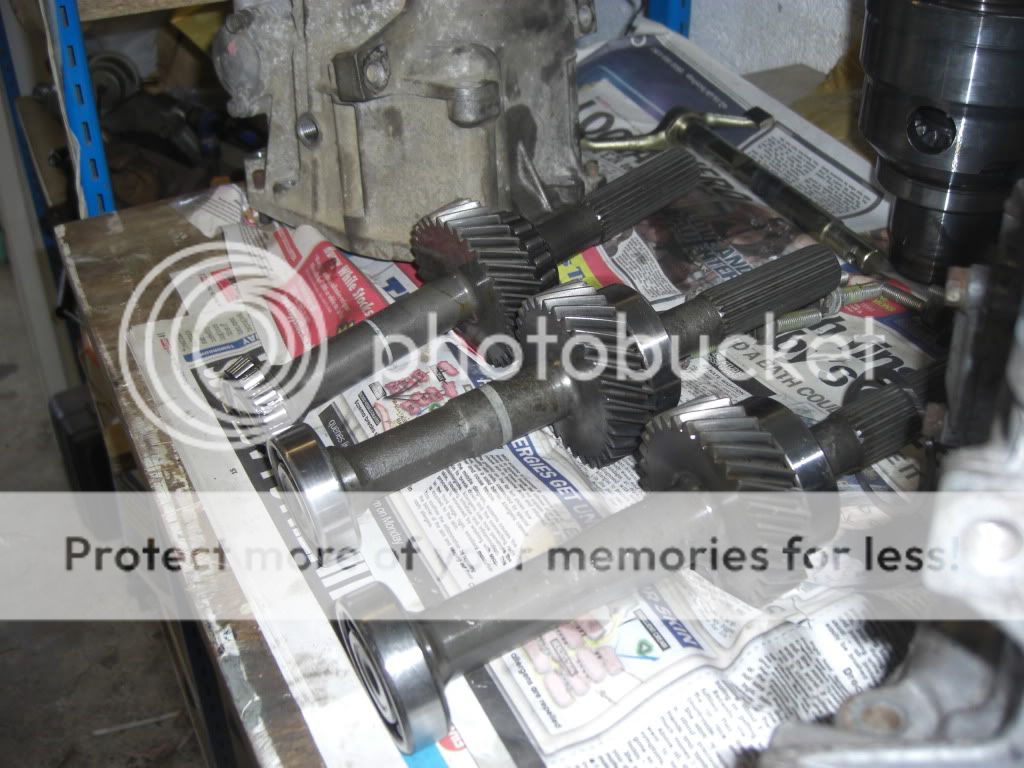
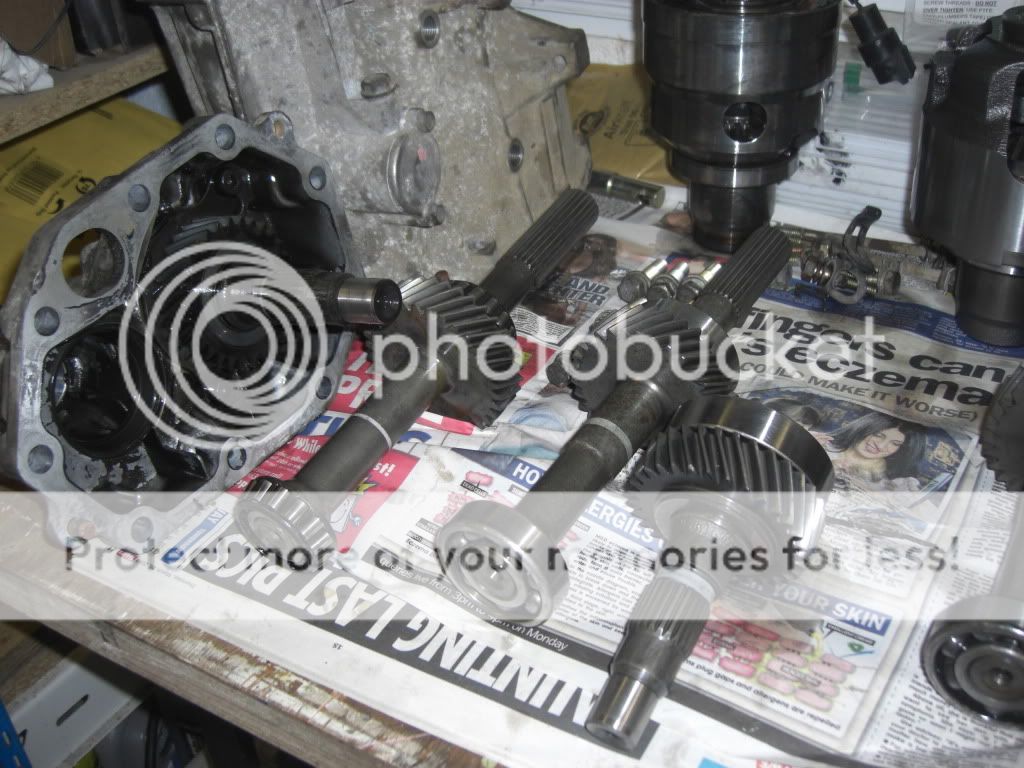
The only fix open as a quick option was to use a set of 752 drop gears and a 752 rear tail casing, this is not detrimental in any way just a little more work. so once done got the gear box back in and could concentrate on sorting out the inlet manifold and engine ancilliries.
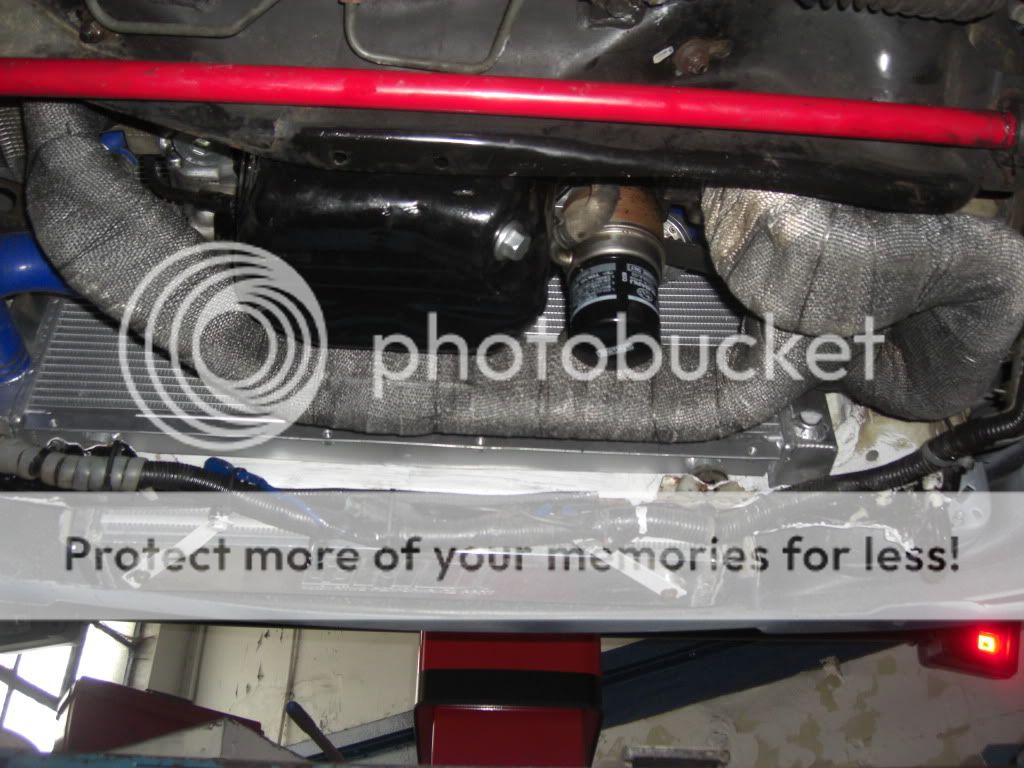
The next task was to cut out the holes for the intercooler pipework and start thinking about the routing of the pipework. I made the cuts in the inner wing areas to bring the pipes through using a hole saw and and an air driven pad saw which made quite a neat job of it.
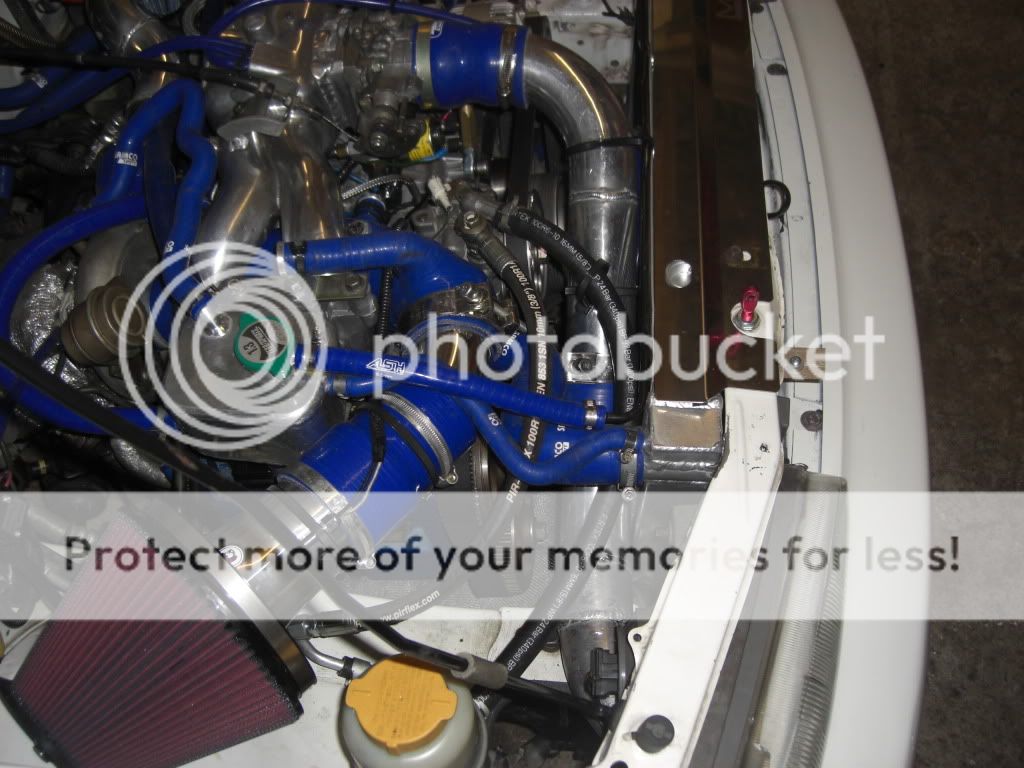
Once I had done this my intention was to cut the intercooler pipework I had and use joiners to make up the necessary bends. It became obvious straight away that this would be an impossible task and would always be a bodge. I knew Peter (Fai17) had used the guys down at Meercat a lot so he contacted them and they managed to fit me in at VERY short notice. I had used Wullie and Scott for the exhaust on my road car so knew their work was first class. So I trailered the car down to kilbirnie and they sorted it out quick style using my alloy pipes. They made a cracking job of the pipework and the routing is perfect - thanks guys reall apprecuiate the help :icon_salut:
Meercat Custom Exhausts and Performance Centre
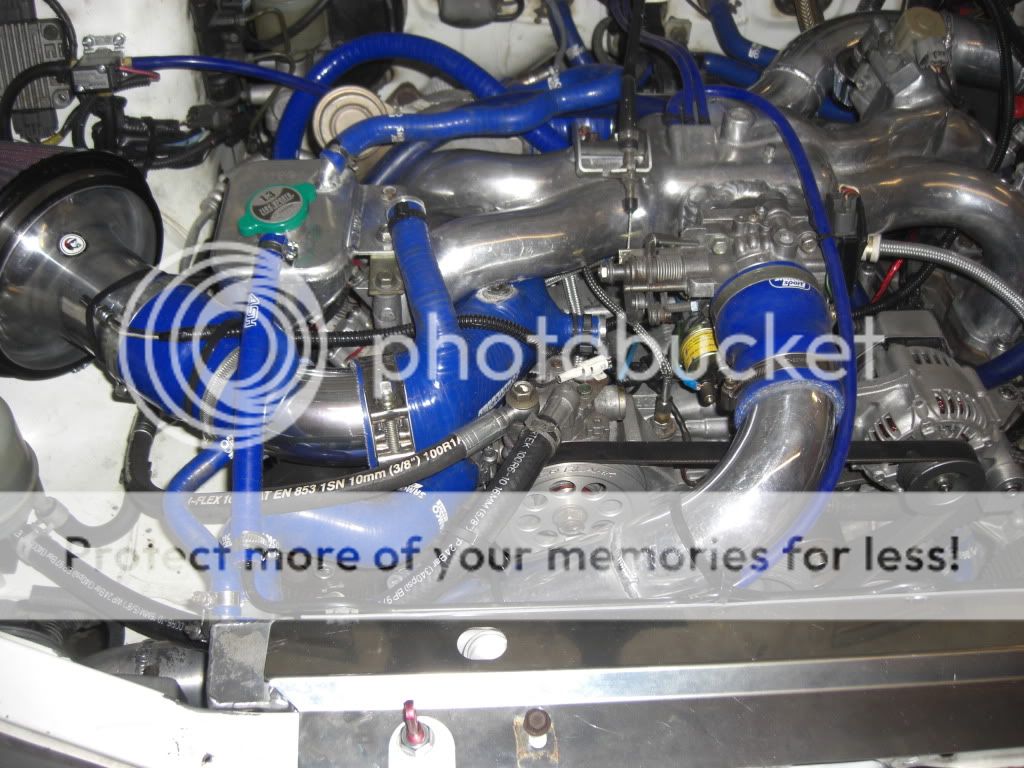
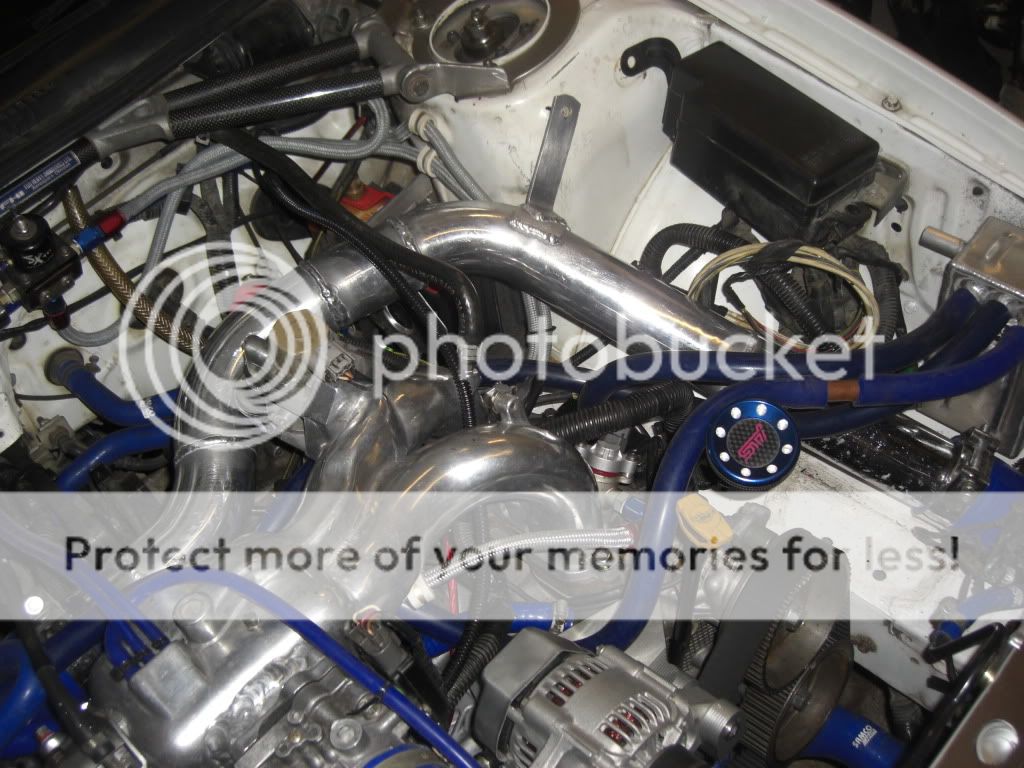
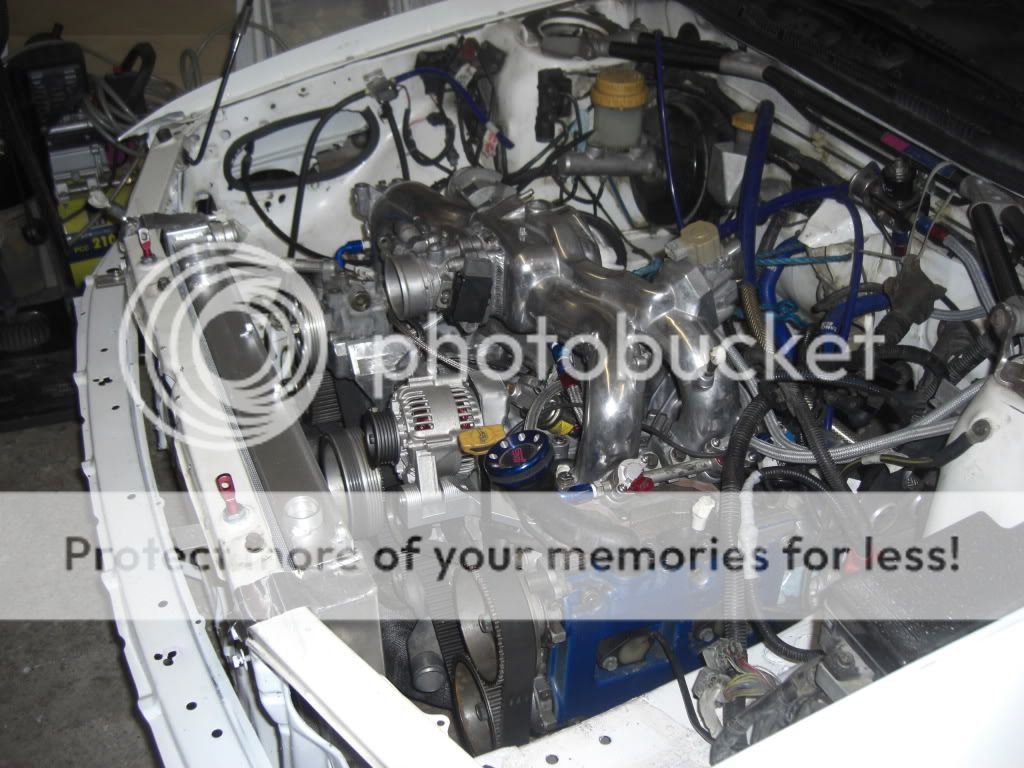
With the intercooler pipework done it was a case of starting to connect everything up. I had to use a 45 deg bend to allow the fitment of the filter and a new inlet filter trumpet from RCM, big thanks to Tom Hayes from RCM for all his help :thumbup:
I also had to mount and plumb the remote resevoir for the power steering which was a pretty quick job.


I also had to fit the cage which took quite a while and fought me all the way but its in now and will get some pics later.
I had a few fuel leaks when I leak checked the system so had to remake a few unions which was time consuming but all sorted now.
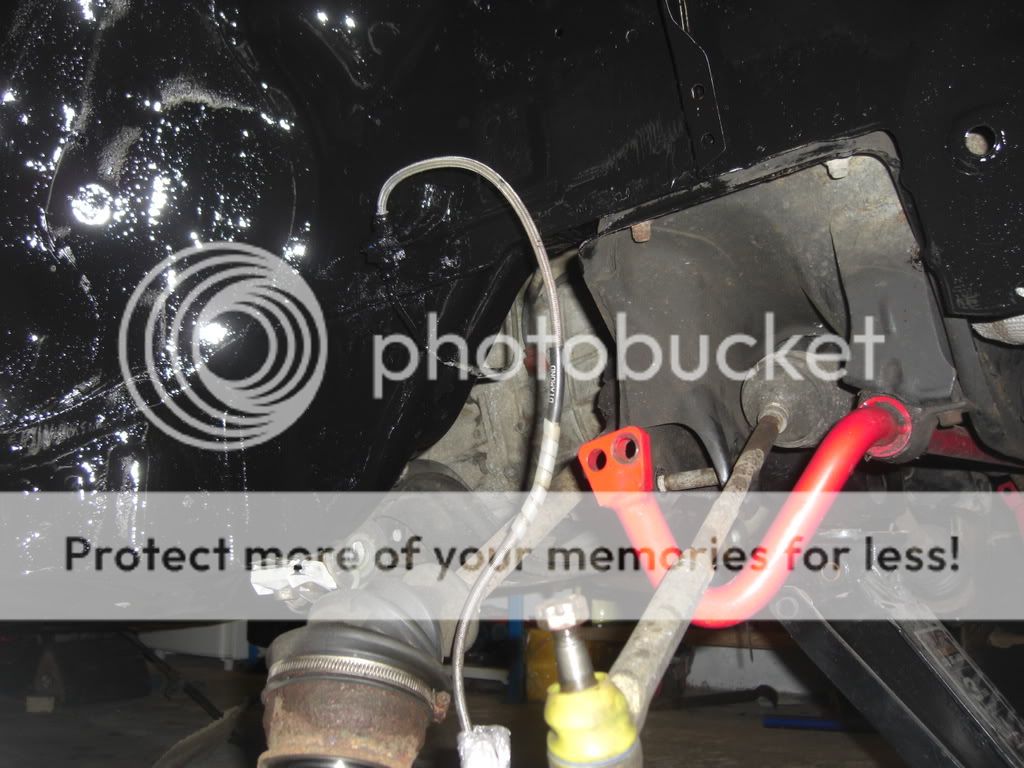
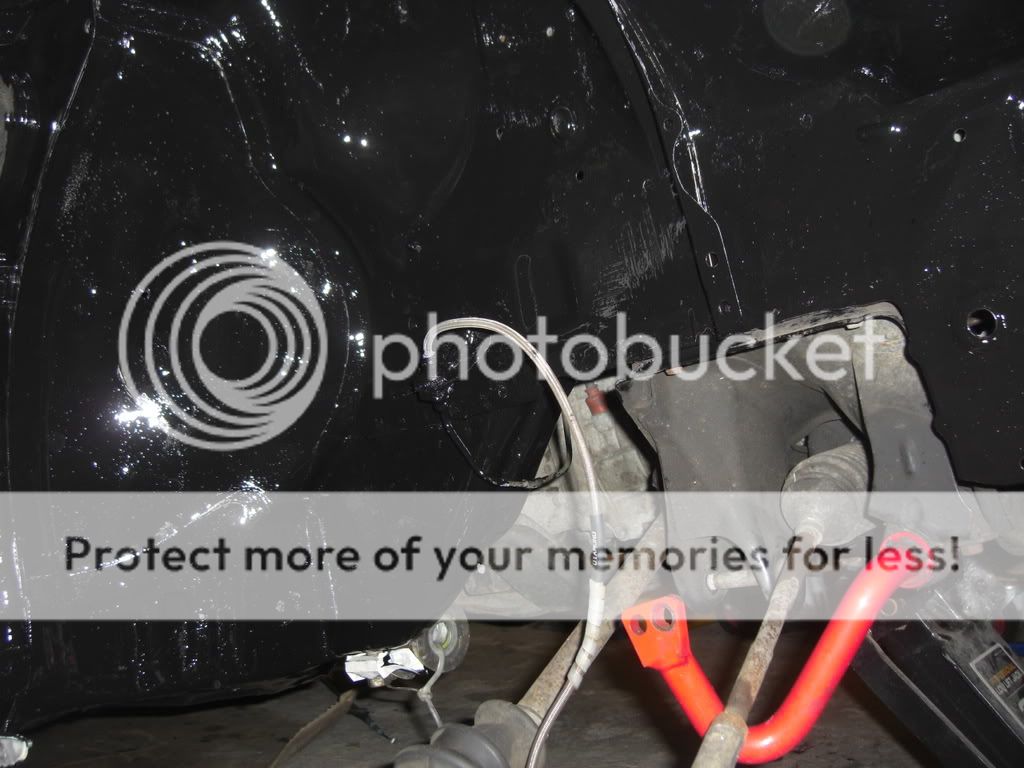
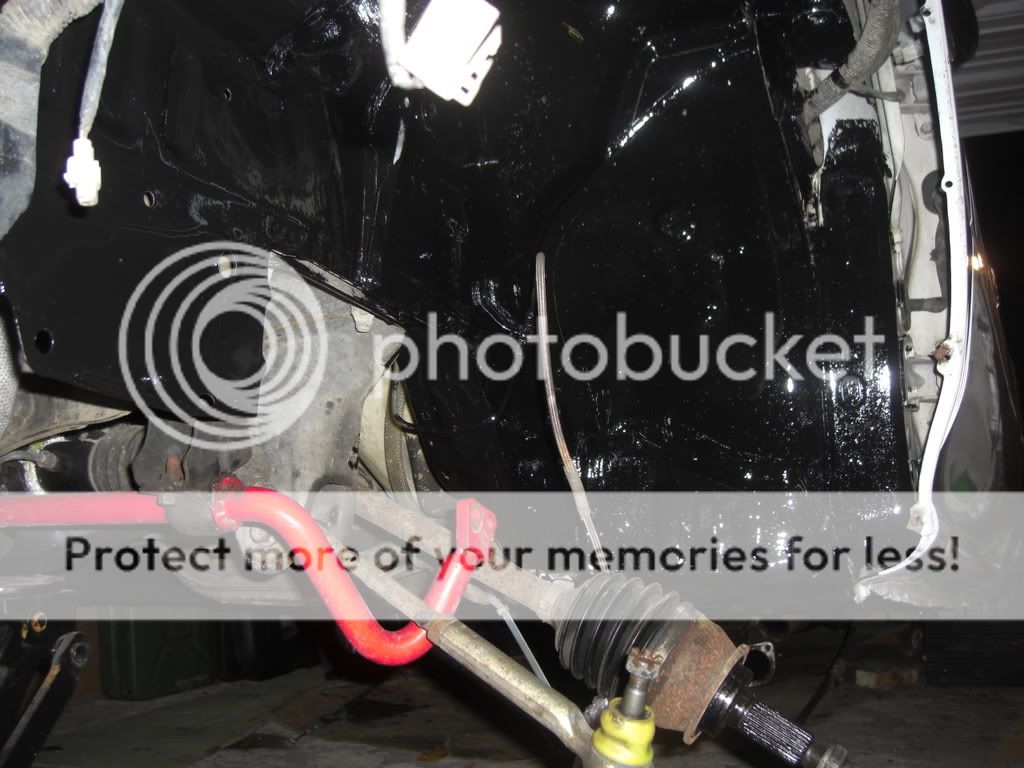
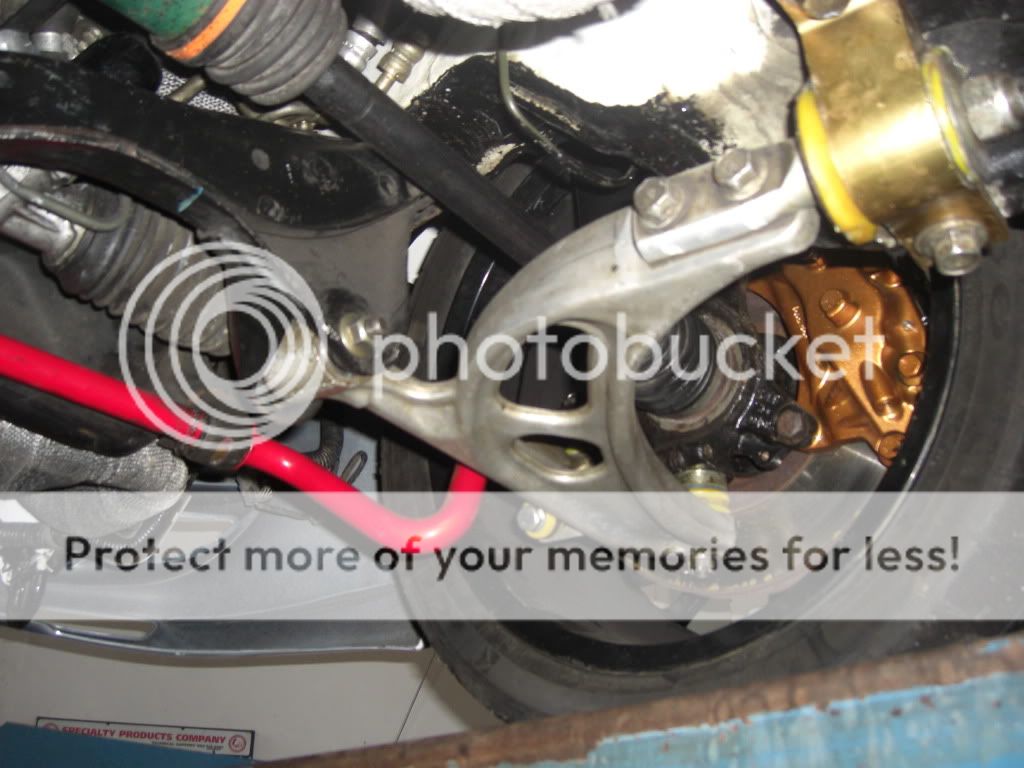
Next I had to get the geometry set up so it was off to progrip in Bonneybridge for John to apply some Stevenson settings
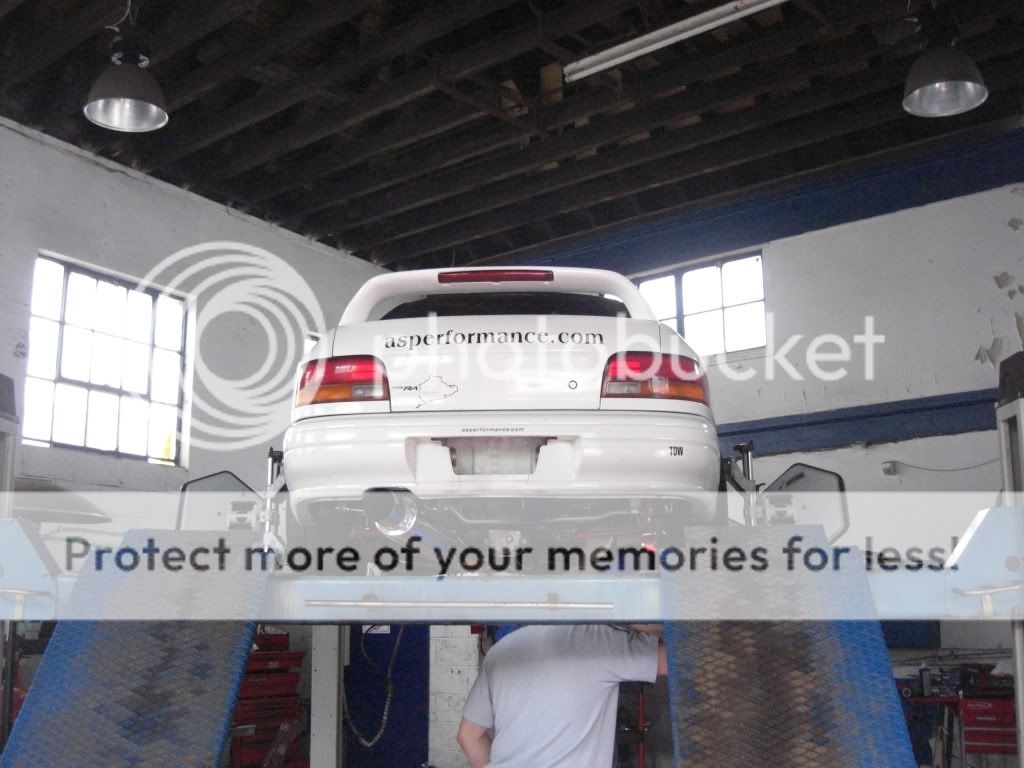
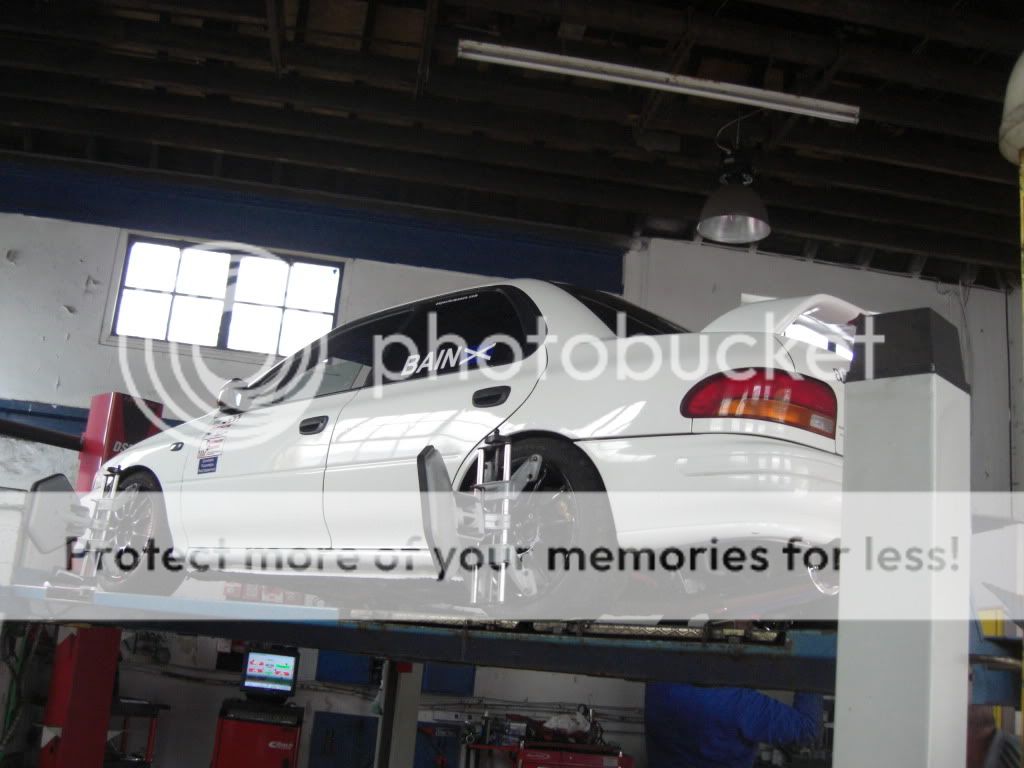
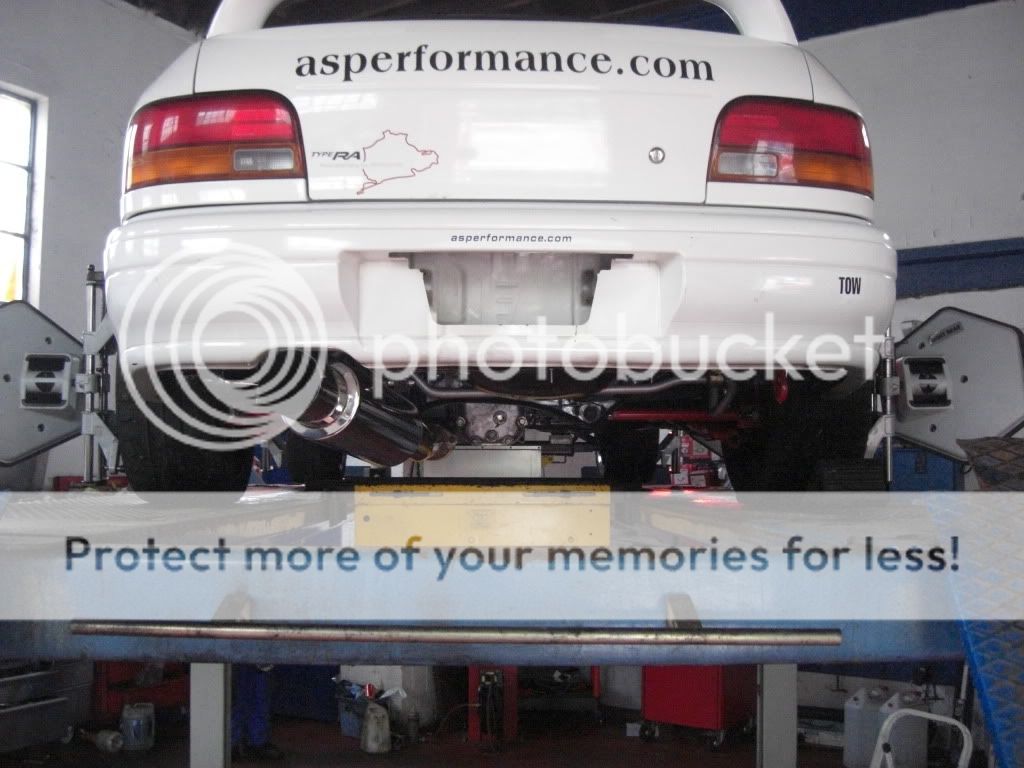
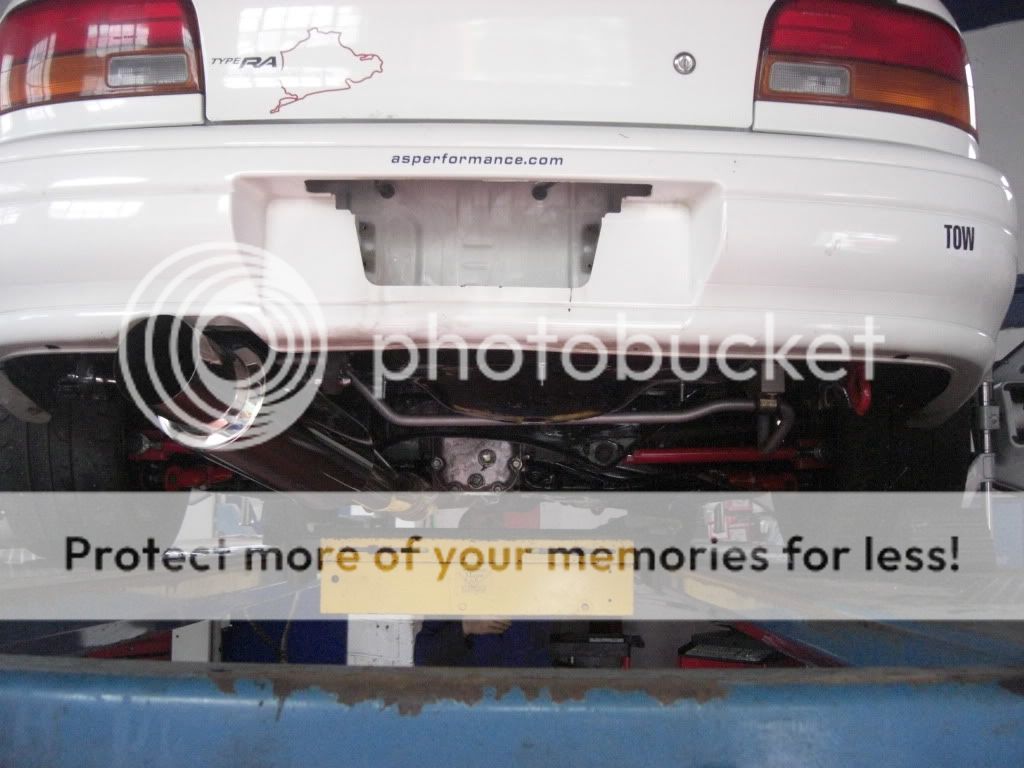
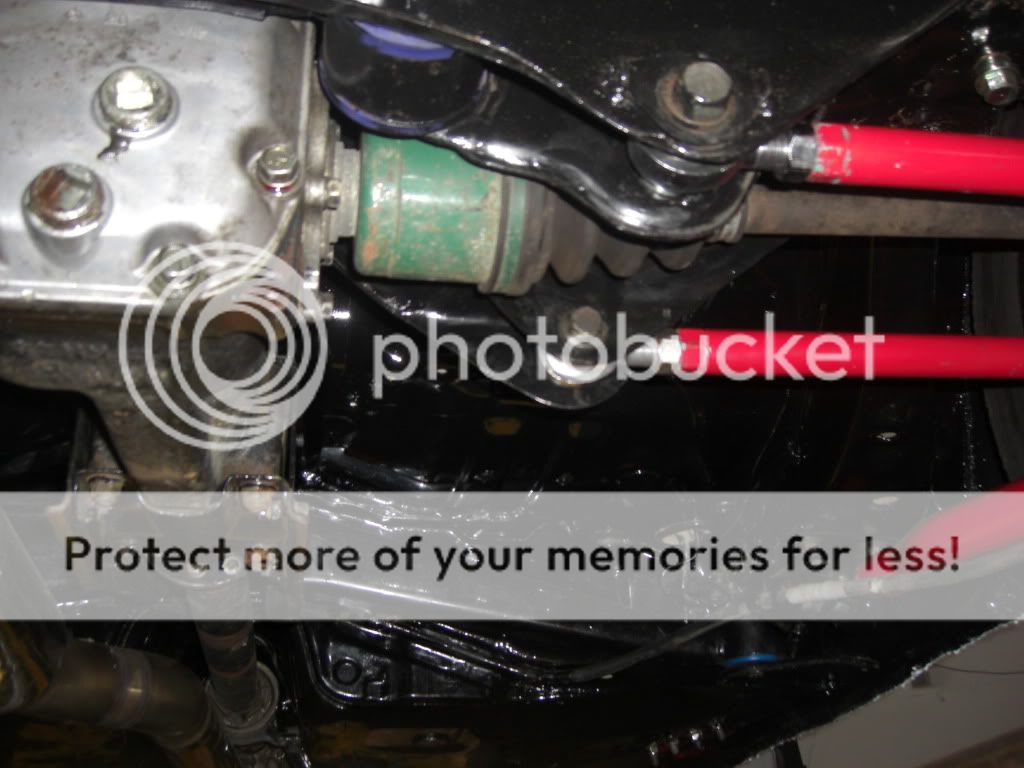
This gave me a chance to get some pics of the underside that didnt invole me lying on my back on the floor under the car.
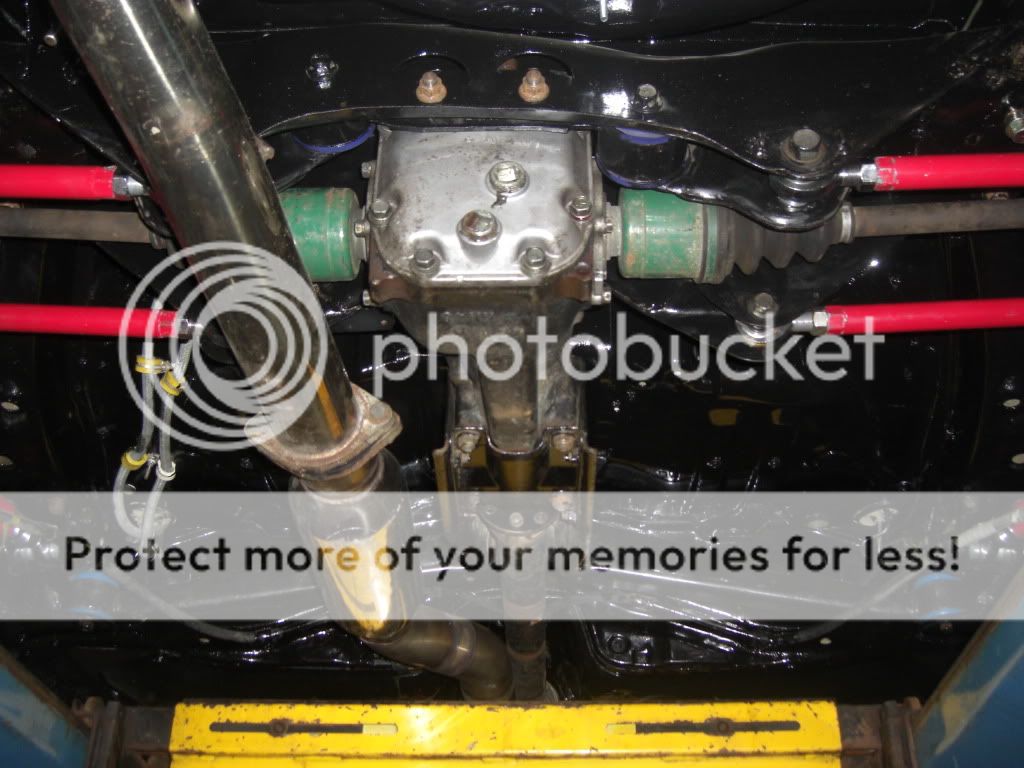

This really has not been a smooth build this year and has caused me no end of grief. I still have running issues and was unable to get the car mapped today due to these. Sorry Andy This is a bit of a concern but hopefully will find a solution very soon.
I also have some suspension niggles, but hopefully I will be able to this sort out. I also have to rewire the alternator feed to give it a switched 12v supply but that is a quick and easy job. Oh and sort the breather hose the copper joiner is temporary honest
I have made good progress with the car and sorted out a lot of the issues that were holding me up. That said I have found more and sometimes it feels like you solve one problem and find 4 new ones.
The first issue that was a real problem was the gearbox to diff gearing. I have fitted a rear R180 3.9 diff but in order to mate this with my gearbox I needed to change the 1:1.1 drop gears to a 1:1 ratio. Should have been pretty straight forward pick up a set of 754 1:1 drop gears swap them over job done. Well not so simple. I managed to pick up some 1:1 754 and 752 drop gears from Ali Burrows Motorport ( Welcome to Ali Burrows Motorsport ). Cant recommend these guys highly enough, dealt with Ali myself and he is a cracking guy and very helpful.
The problem is that there are two different types of 754 drop gears some use a normal bearing and some use a taper bearing and surprisingly enough I needed the taper bearing type and could only source the normal bearing type.
The only fix open as a quick option was to use a set of 752 drop gears and a 752 rear tail casing, this is not detrimental in any way just a little more work. so once done got the gear box back in and could concentrate on sorting out the inlet manifold and engine ancilliries.
The next task was to cut out the holes for the intercooler pipework and start thinking about the routing of the pipework. I made the cuts in the inner wing areas to bring the pipes through using a hole saw and and an air driven pad saw which made quite a neat job of it.
Once I had done this my intention was to cut the intercooler pipework I had and use joiners to make up the necessary bends. It became obvious straight away that this would be an impossible task and would always be a bodge. I knew Peter (Fai17) had used the guys down at Meercat a lot so he contacted them and they managed to fit me in at VERY short notice. I had used Wullie and Scott for the exhaust on my road car so knew their work was first class. So I trailered the car down to kilbirnie and they sorted it out quick style using my alloy pipes. They made a cracking job of the pipework and the routing is perfect - thanks guys reall apprecuiate the help :icon_salut:
Meercat Custom Exhausts and Performance Centre
With the intercooler pipework done it was a case of starting to connect everything up. I had to use a 45 deg bend to allow the fitment of the filter and a new inlet filter trumpet from RCM, big thanks to Tom Hayes from RCM for all his help :thumbup:
I also had to mount and plumb the remote resevoir for the power steering which was a pretty quick job.
I also had to fit the cage which took quite a while and fought me all the way but its in now and will get some pics later.
I had a few fuel leaks when I leak checked the system so had to remake a few unions which was time consuming but all sorted now.
Next I had to get the geometry set up so it was off to progrip in Bonneybridge for John to apply some Stevenson settings
This gave me a chance to get some pics of the underside that didnt invole me lying on my back on the floor under the car.
This really has not been a smooth build this year and has caused me no end of grief. I still have running issues and was unable to get the car mapped today due to these. Sorry Andy
This is a bit of a concern but hopefully will find a solution very soon.I also have some suspension niggles, but hopefully I will be able to this sort out. I also have to rewire the alternator feed to give it a switched 12v supply but that is a quick and easy job. Oh and sort the breather hose the copper joiner is temporary honest
Last edited by Arch; May 22, 2009 at 01:23 PM.
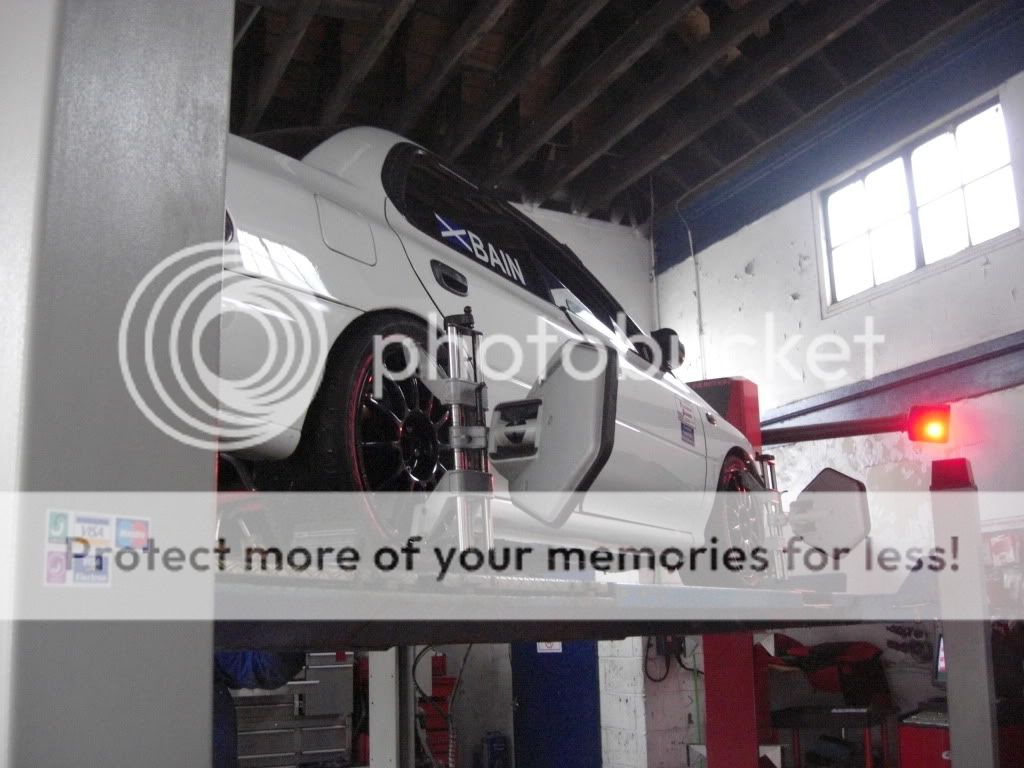
Well I think i may have found the reason for my suspension issues. I had trouble getting the rear camber i wanted via the camber bolts as any adjustment to the camber bolts was bringing the strut to close to the tyre for comfort. I therefore had to achieve the camber by use of the top mounts and the adjustable lateral arms. This had the result of widening the track too far as the wheels protruded well beyond the wheel arch.
This would not normally be a problem using a 7.5" rim and a 215 or 225 tyre as there would be plenty clearance for camber adjustment but me being greedy and wanting an 8" rim and 235 tyres as well as more than normal rear camber has just streatched the limits of what the AVO set up will allow. Now I could go back to a 7.5" rim and narrower tyres but where would the fun be in that. Apparently the width of your tyres is directly proportional to the size of your gonads mmm maybe a 135 would be more appropriate then
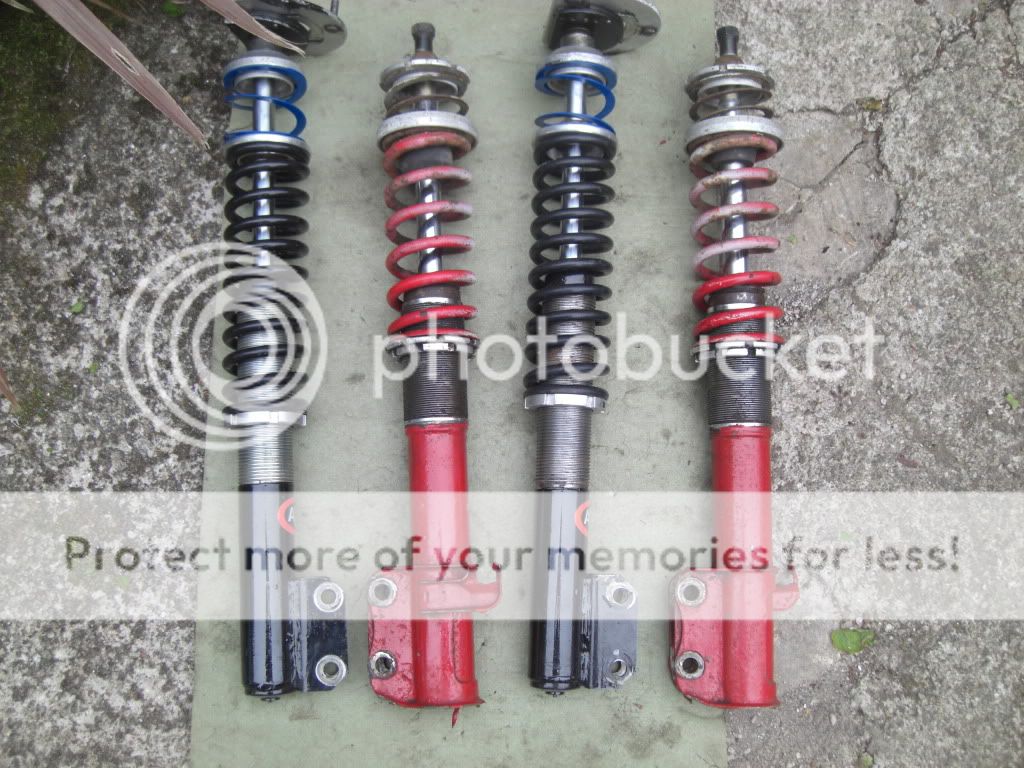
The Eibach's on the right fitted fine last year and the AVO's on the left dont. The Eibachs spring seat sits 2" higher and the springs are 2" shorter than the AVO's. This would have meant the Eibach spring seat would have sat just above the tyre and would have allowed the adjustment.
So the search is now on for something that will fit but its a bummer as I just spent a fortune having the AVO's compeletely overhauled by AVO with completely new internals, seals and damper struts, new springs, new helper springs and had them valved at the fast road race setting. This with a reasonably soft spring would have made a cracking set up which would have enough give to allow me to hammer over the kerbs without upsetting the car the way some cars are that are too hard and over sprung just cant. Oh well anyone looking for some new coilovers, guess the fronts will be coming off tomorrow. They have only been on the car for a few weeks and have only been pushed onto the ramp at Progrip and back off again - bummer.
This would not normally be a problem using a 7.5" rim and a 215 or 225 tyre as there would be plenty clearance for camber adjustment but me being greedy and wanting an 8" rim and 235 tyres as well as more than normal rear camber has just streatched the limits of what the AVO set up will allow. Now I could go back to a 7.5" rim and narrower tyres but where would the fun be in that. Apparently the width of your tyres is directly proportional to the size of your gonads mmm maybe a 135 would be more appropriate then
The Eibach's on the right fitted fine last year and the AVO's on the left dont. The Eibachs spring seat sits 2" higher and the springs are 2" shorter than the AVO's. This would have meant the Eibach spring seat would have sat just above the tyre and would have allowed the adjustment.
So the search is now on for something that will fit but its a bummer as I just spent a fortune having the AVO's compeletely overhauled by AVO with completely new internals, seals and damper struts, new springs, new helper springs and had them valved at the fast road race setting. This with a reasonably soft spring would have made a cracking set up which would have enough give to allow me to hammer over the kerbs without upsetting the car the way some cars are that are too hard and over sprung just cant. Oh well anyone looking for some new coilovers, guess the fronts will be coming off tomorrow. They have only been on the car for a few weeks and have only been pushed onto the ramp at Progrip and back off again - bummer.