
WRX Forged Rebuild

Thread Starter

Joined: Feb 2008
Posts: 1,654
Likes: 0
From: Merthyr Tydfil
thanks mate, not had chnace to touch it tonight, took bits to work and cleaner, and plan was to re seat vales and fit heads and cams and work out shims sizes i need.
but my bro in law made light work of that, nabbed me on way home, and now i got home. problems with hit mitsubishi fto.
think im just too nice 2 ppl.
but my bro in law made light work of that, nabbed me on way home, and now i got home. problems with hit mitsubishi fto.
think im just too nice 2 ppl.
Thread Starter
Joined: Feb 2008
Posts: 1,654
Likes: 0
From: Merthyr Tydfil
hand a good 2 hrs on it tonight, manages to re seat valves and switch valve train over from old head to new. fitted head back to block and toqued down and checked valve clearances and noted all then measurments.
tomorro cams and shims are back off for measuring to work out what size shims i need for corect clearance, easy job but time consuming, and may av 2 get shims ordered, but i have 32 shims here to measure so hopefully 16 will all b in tolerance and i can get rocker covers on and start the bolting things back on.
il post a few pics 2morro and small formula for working out clearances etc.
looking to fit engine by end of january providing i dont deciede to chnage anything along the way.

Thread Starter
Joined: Feb 2008
Posts: 1,654
Likes: 0
From: Merthyr Tydfil
made a nice bit of progress on heads tonight, managed to work out what size shims i need. i measured all 16 i had a put in table below showing working out and showing how to do the calculations.

also pics of the equiptment used below. feeler gauge, digital verniers and micrometer

below im checking valve clearance with feeler gauge


Shim off bucket ready for measuring

Micrometer

digital verniers
due to problem i had with my old head i had 2 buy a pair of heads which has worked out great as iv got an extra 16 shims.

iv also measured them and seems lady luck was on my side as i have all the shim sizes i need to assemble heads fully and final time 2morro evening.
got a new water pump gasket on order with subaru and cam covers in work ready for some paint, going blue.
The only difficulty i may have now is timing. but im very confident
then it seems it all bolt on stuff and making any extra parts such parallel fuel mod and decieding to fit lightweight flywheel now or after run in. decisions.
if i wait then it delays me getting it back on rd. if i dont, extra wrk for myself.
also pics of the equiptment used below. feeler gauge, digital verniers and micrometer
below im checking valve clearance with feeler gauge
Shim off bucket ready for measuring
Micrometer
digital verniers
due to problem i had with my old head i had 2 buy a pair of heads which has worked out great as iv got an extra 16 shims.
iv also measured them and seems lady luck was on my side as i have all the shim sizes i need to assemble heads fully and final time 2morro evening.
got a new water pump gasket on order with subaru and cam covers in work ready for some paint, going blue.
The only difficulty i may have now is timing. but im very confident
then it seems it all bolt on stuff and making any extra parts such parallel fuel mod and decieding to fit lightweight flywheel now or after run in. decisions.
if i wait then it delays me getting it back on rd. if i dont, extra wrk for myself.
Thread Starter
Joined: Feb 2008
Posts: 1,654
Likes: 0
From: Merthyr Tydfil
ok, tonight ive fitted new shims in place and re checked for clearances, 3 cams worked out brillain all in tolerances desired, but one cam was a bit rogue and took 3 attempts. 1 shim didnt want to give me the correct clearance. As i had all shim sizes 0.99 0.98 0.97 etc, i decresed shim by 0.01 untill i had desired clearance. i started with a 0.10 shim and had correct clearance at 0.98. so im very happy with the head building.
now im waiting on myself to get rocker covers 2nd coat done and finish paint work on block.
tomorrow im tackling parallel fuel mod and preping cam covers.
then a big sort out and make sure i have the bits it need and get them organised ready to be fitted.
now im waiting on myself to get rocker covers 2nd coat done and finish paint work on block.
tomorrow im tackling parallel fuel mod and preping cam covers.
then a big sort out and make sure i have the bits it need and get them organised ready to be fitted.

Scooby Regular
Joined: Aug 2005
Posts: 3,957
Likes: 1
From: East coast.
Keep it up, you're doing great now. I feared the timing stage myself, but in the end it was a piece of **** with the engine sat there in front of me on the stand. Once I'd put the ex and in cams the right way round that is LOL
Thread Starter
Joined: Feb 2008
Posts: 1,654
Likes: 0
From: Merthyr Tydfil
yeh, i read that lol, so easy to do tho mate. especially when progress is being made. the way i see it now, end of january il be fitting engine. but all depends if i deciede to fit harveys heads n up pipe, or run and and then fit at a later date, just i kno the up pipe is horrible to change once fitted.
i guess il see how progress goes, as im waiting on myself to paint bits on work and do the little jobs now.
i guess il see how progress goes, as im waiting on myself to paint bits on work and do the little jobs now.
Thread Starter
Joined: Feb 2008
Posts: 1,654
Likes: 0
From: Merthyr Tydfil
painted block about 5 mins ago and end coat on rockers, havent painted underside of engine yet as waiting before i can tuen engine over, decieded while im there to paint sump blue 
took a while, about hours and half to do, its not perfect and some areas will ne touching up with a smaller brush, but it will look good in the engine bay, even tho most is out of sight, only applied one coat as dont want to affect the heat soack too much, but to help this the race rad will be fitted to keep things cooler.
also put come colour on crank pulley, make it llok nice against blue cam covers
now im going to do fuel mod so i guess il post in a bit aswell.

Thread Starter
Joined: Feb 2008
Posts: 1,654
Likes: 0
From: Merthyr Tydfil
ok, im now done for today ordered chinese, so a quick write up.
iv painted the underside of block and sump blue.
made my parallel fuel mod but unfortunatly i need a 8mm brass elbow to run my aftermarket fpr, im getting this of carl davey webside, so should b here in a few days. iv taken pics of every stage i done as when looking in search on sn, i cudnt find stage by stage only complete diagrams. its not the best but it should help. i havent fitted any clips yet.
pipe cutter used

Brass t-pieces

assembled off manifold ready for cutting

Cut 1 also shown on manifold


Cuts 2 and 3, also shown on manifold


Injectors in place, 1st fuel line run in

1st fuel line with t piece installed

2nd fuel line run in

2nd fuel line t-piece installed

Fuel inlet and output line in, fpr for display purposes showing where pipes lead

Fuel mod shown with no manifold, showing setup from injectors and inlet,output lines

need to fit 8mm brass elbow here to run fpr

Underside of engine painted and blue sump


iv painted the underside of block and sump blue.
made my parallel fuel mod but unfortunatly i need a 8mm brass elbow to run my aftermarket fpr, im getting this of carl davey webside, so should b here in a few days. iv taken pics of every stage i done as when looking in search on sn, i cudnt find stage by stage only complete diagrams. its not the best but it should help. i havent fitted any clips yet.
pipe cutter used
Brass t-pieces
assembled off manifold ready for cutting
Cut 1 also shown on manifold
Cuts 2 and 3, also shown on manifold
Injectors in place, 1st fuel line run in
1st fuel line with t piece installed
2nd fuel line run in
2nd fuel line t-piece installed
Fuel inlet and output line in, fpr for display purposes showing where pipes lead
Fuel mod shown with no manifold, showing setup from injectors and inlet,output lines
need to fit 8mm brass elbow here to run fpr
Underside of engine painted and blue sump
Thread Starter
Joined: Feb 2008
Posts: 1,654
Likes: 0
From: Merthyr Tydfil
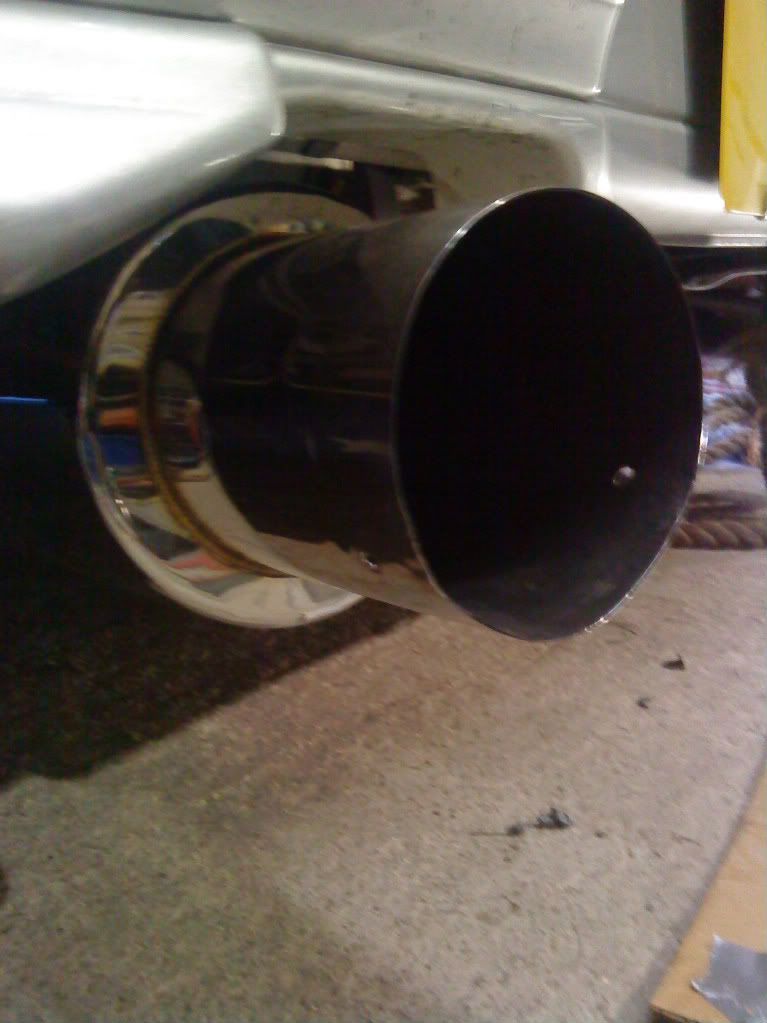
it is what it is, and it does the job, they will be braided over to look bit better but as they arnt exactly in your face in engine bay, and i cant see them when im driving, so i went for the budget model.
Thread Starter
Joined: Feb 2008
Posts: 1,654
Likes: 0
From: Merthyr Tydfil
Scooby Regular
Joined: Aug 2005
Posts: 3,957
Likes: 1
From: East coast.
Well mine are the same - rails cut with a pipe cutter and deburred, standard 8mm fuel hose and brass tee pieces, doubled jubilee clips at each tail to be on the safe side, job done - no problems, no leaks. And it all fits easily under the manifold even if it doesn't look fancy or over engineered.
Thread Starter
Joined: Feb 2008
Posts: 1,654
Likes: 0
From: Merthyr Tydfil
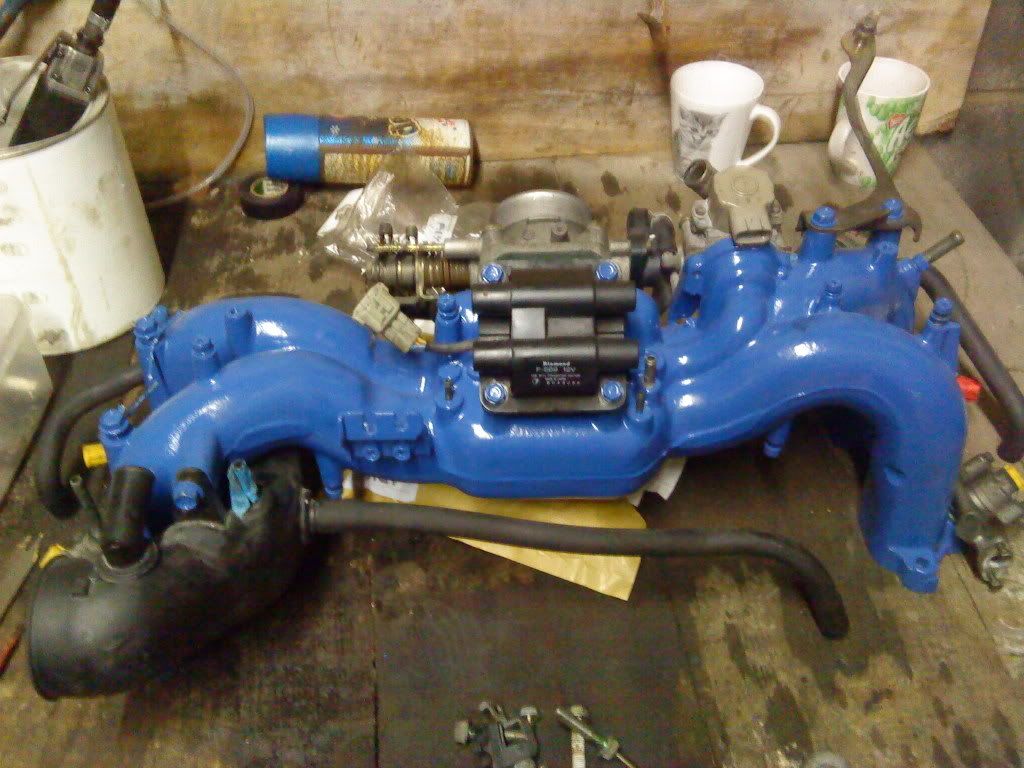
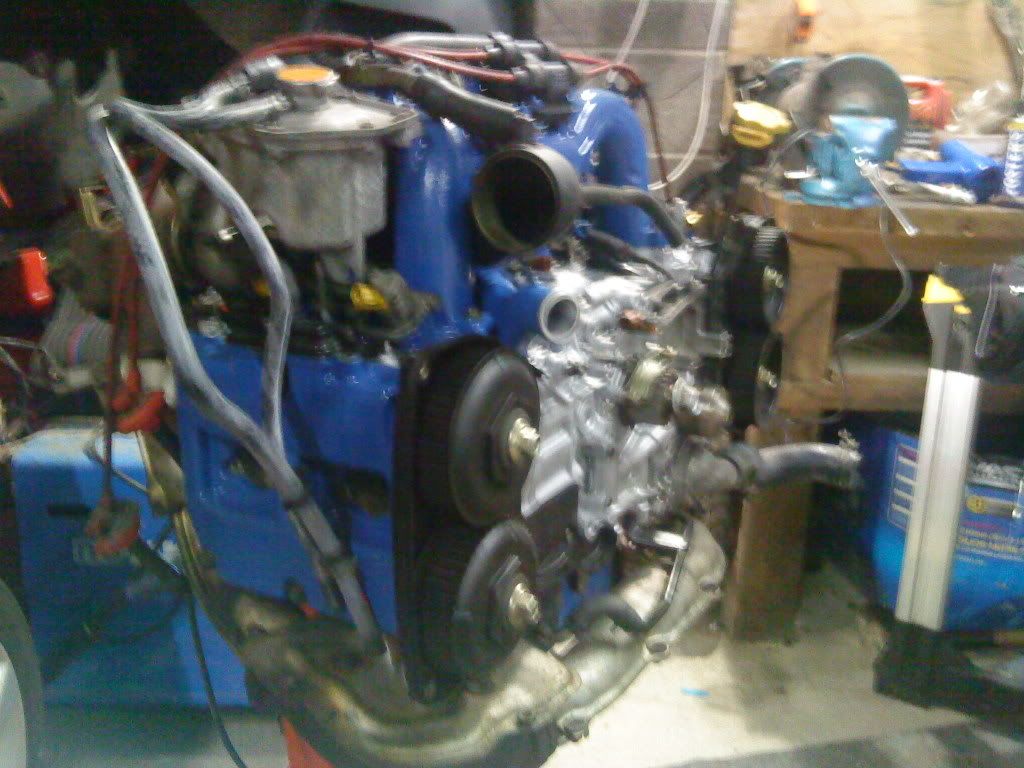
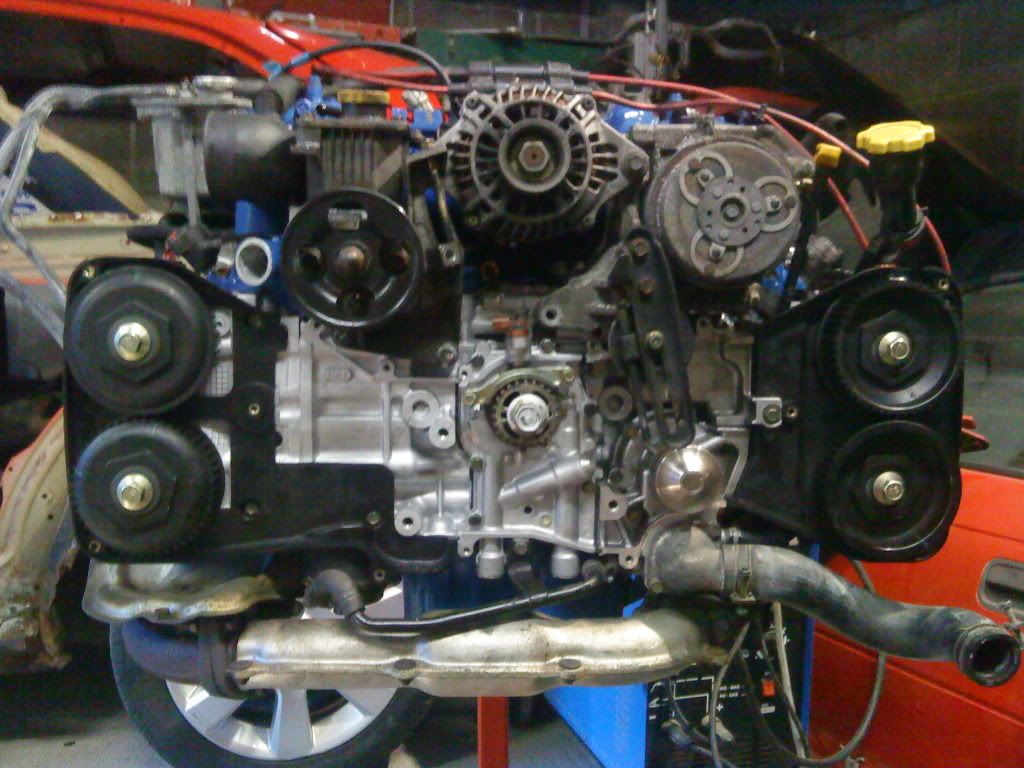
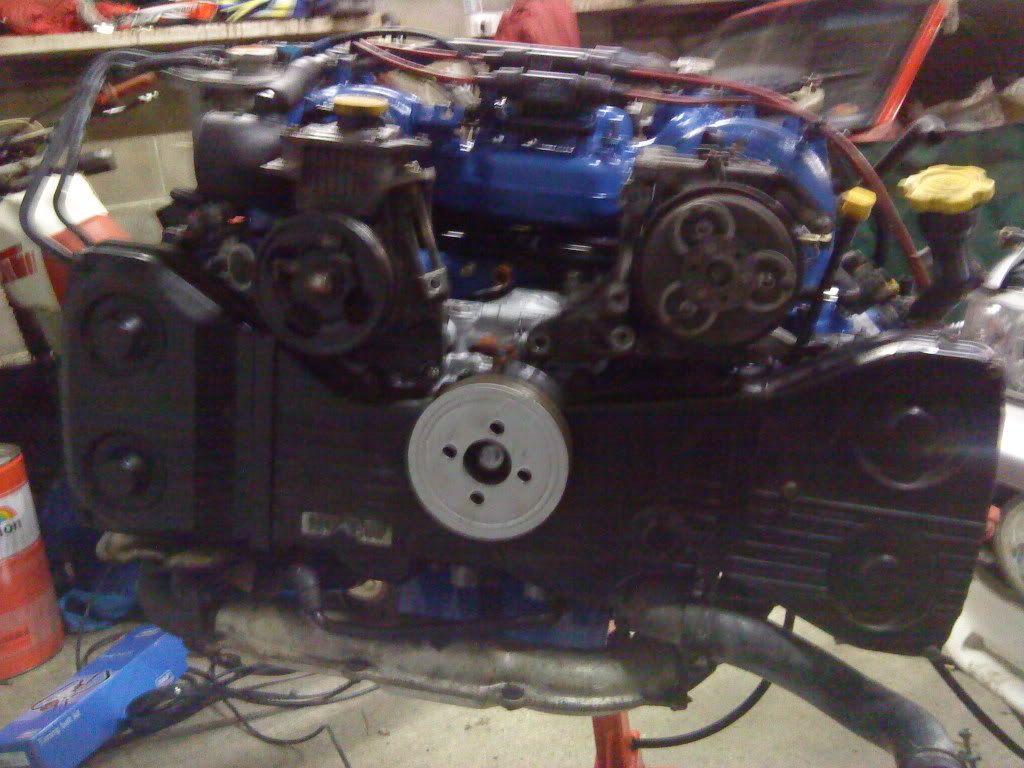
ok, done a little bit more this morning, managed to fit rocker covers, water pump and some timing covers are on. also painted inlet manifold in work. may paint a few brackets 2 add some more colour.
next step is to carry engine into garage and build and fit manifold, turbo, headers, exhaust, timing, flywheel, clutch, alternator, powersteering, starter motor and connect electrics and hoses, breathers etc
decieded to wait for clutch do wear before i fit lightened flywheel and probably same time fit ppg box, race clutch, give me time 2 save.
heres a few updated pics
Thread Starter
Joined: Feb 2008
Posts: 1,654
Likes: 0
From: Merthyr Tydfil
i like tha, lol, didnt notice
well new water pump gasket arrived, so has inlet and fpr bypass adapter,
so tomorro the engine is being transported to garage and built up ready for aimed start date 1st feb. mayb... if i do some serious work
well new water pump gasket arrived, so has inlet and fpr bypass adapter,
so tomorro the engine is being transported to garage and built up ready for aimed start date 1st feb. mayb... if i do some serious work
Thread Starter
Joined: Feb 2008
Posts: 1,654
Likes: 0
From: Merthyr Tydfil
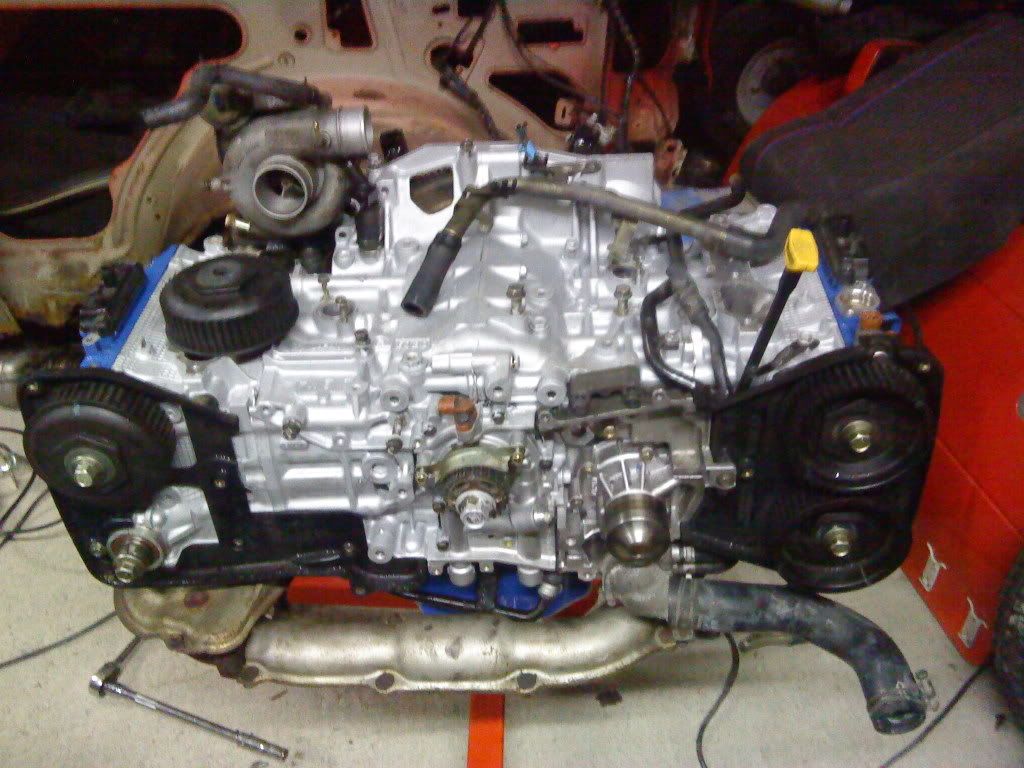
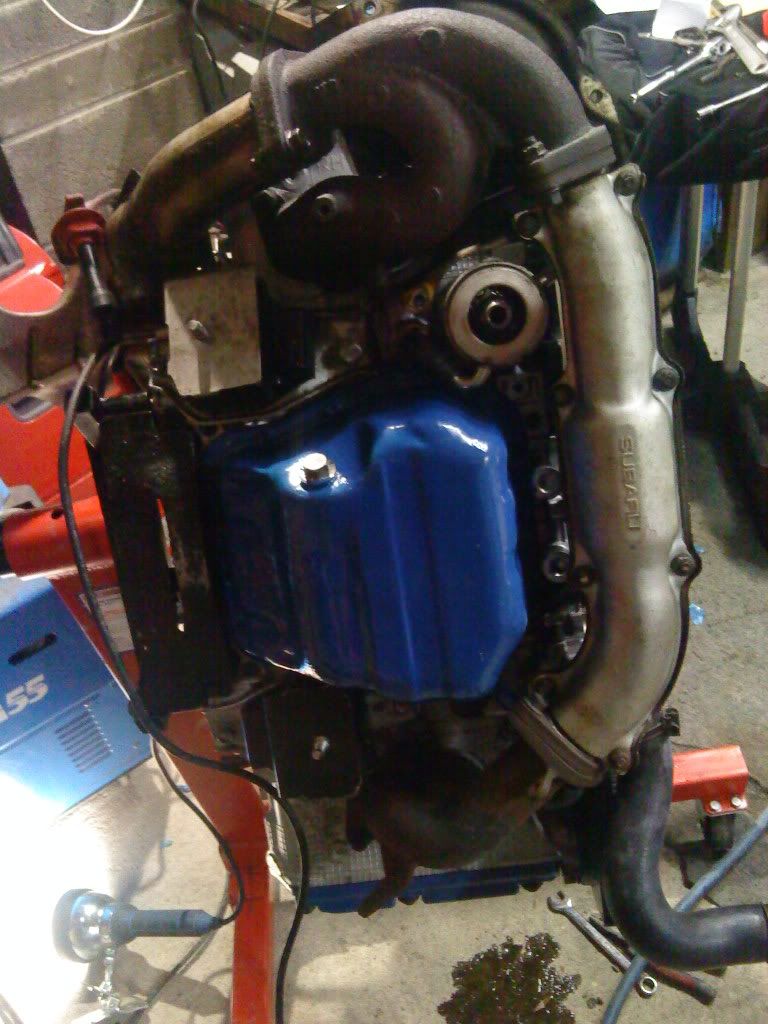
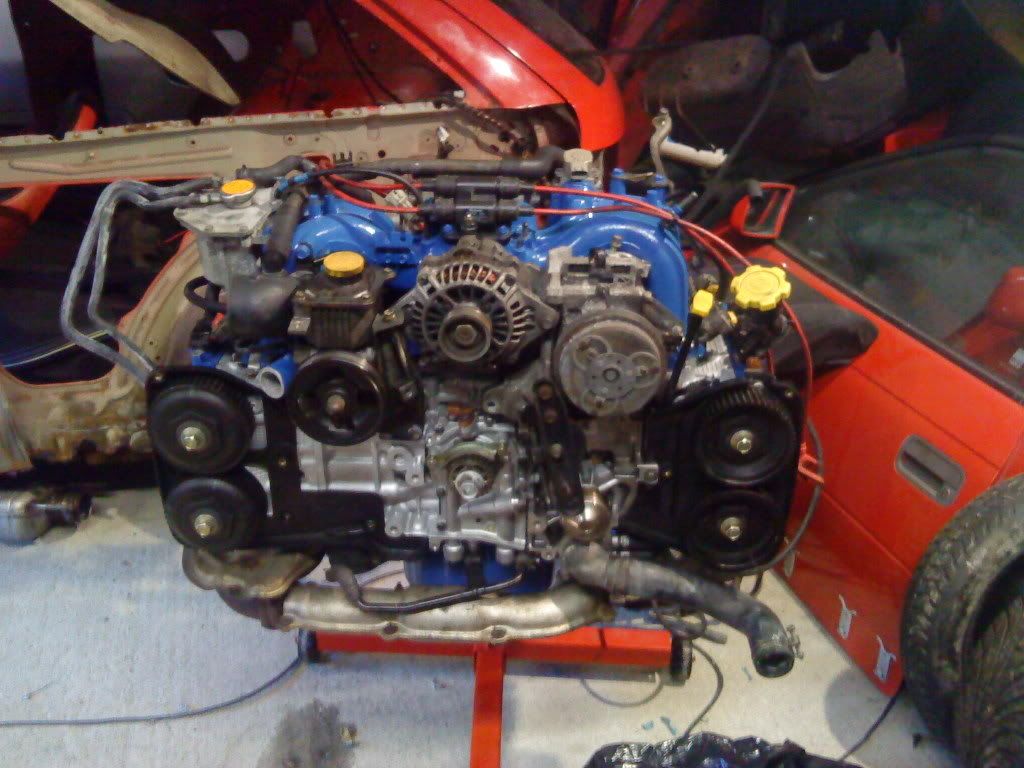
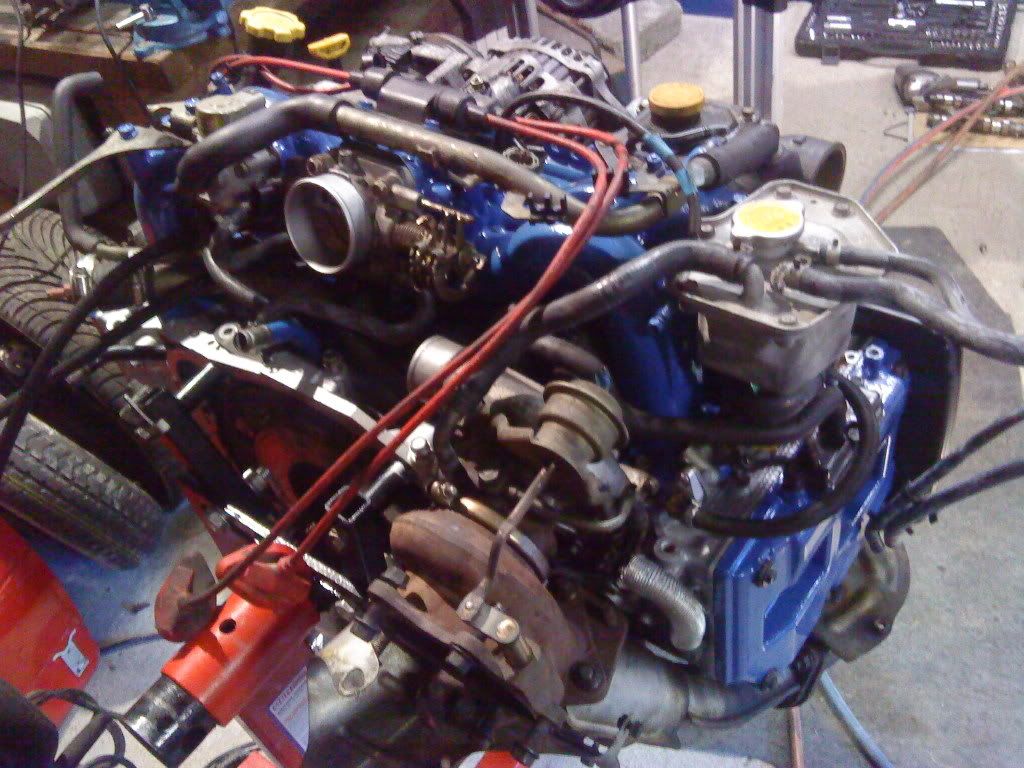
moved engine from bk bedroom to garage tonight, help of a mate. gitted new water pump gasket, headers, uppipe, turbo and flywheel.
inlet manifold is 90% assembled and tomorro im taking water pipe to work that runs over block. timing belt will be here saturday and engine fully build up by staurday evening. thinking of trying to fit engine sunday. good weekend finishing off.
few pics of 2day
inlet manifold is 90% assembled and tomorro im taking water pipe to work that runs over block. timing belt will be here saturday
and engine fully build up by staurday evening. thinking of trying to fit engine sunday. good weekend finishing off.few pics of 2day


Thread Starter
Joined: Feb 2008
Posts: 1,654
Likes: 0
From: Merthyr Tydfil
ordered timing belt kit ftom AS Performace today. �200 delivered. should arrive monday - tuesday. all is on track for a week sunday start. lots to do over weekend so il post 2moz evening.
Thread Starter
Joined: Feb 2008
Posts: 1,654
Likes: 0
From: Merthyr Tydfil
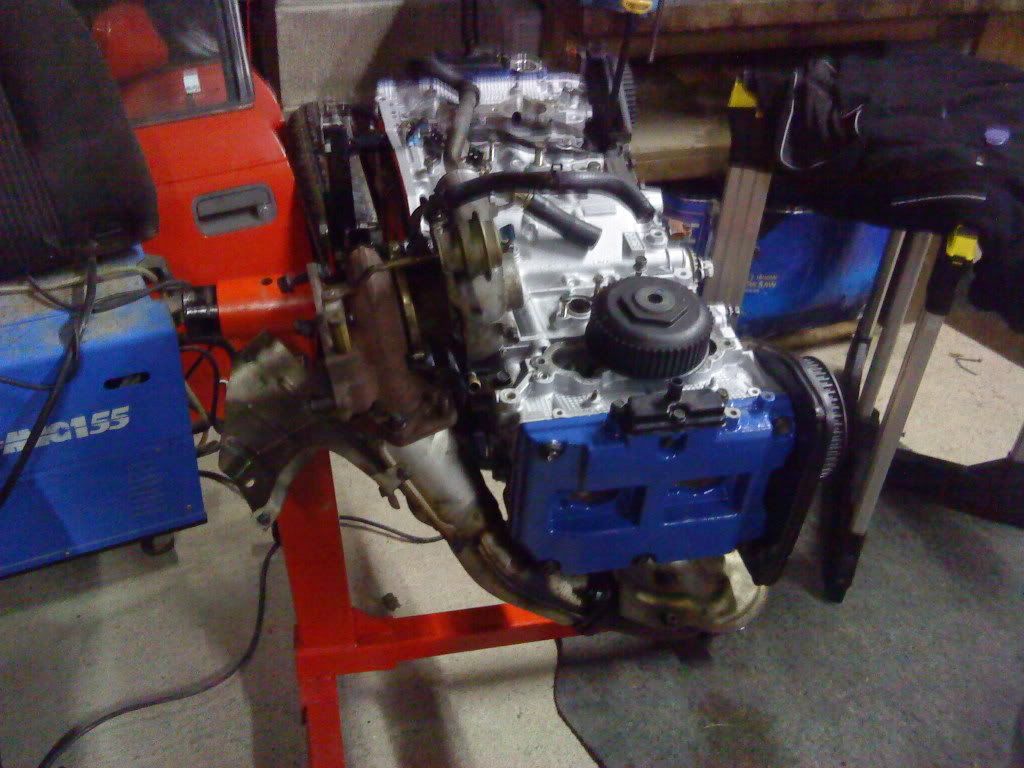
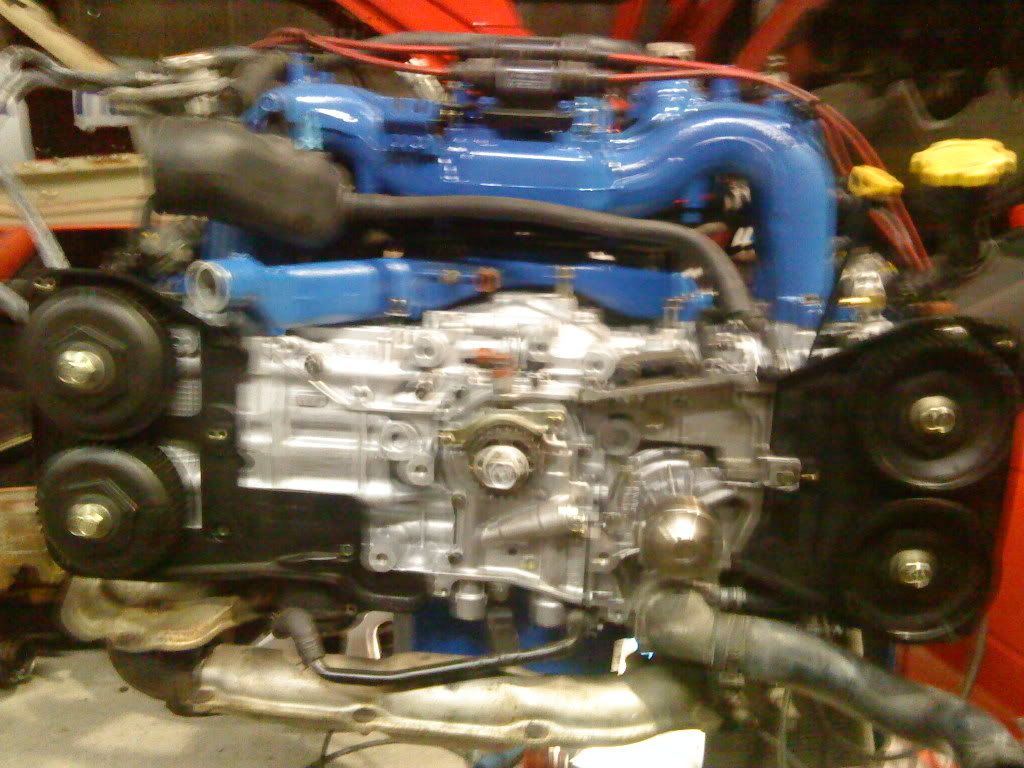
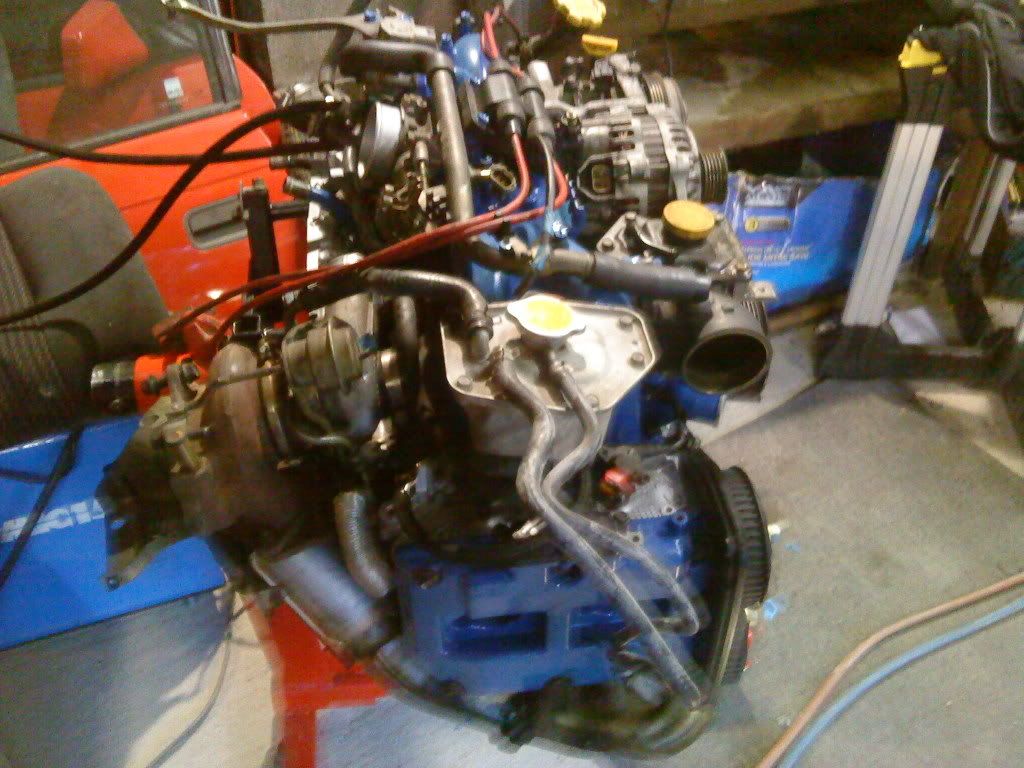
back down the garage this morning to fit a few more bits. fitted the exhaust now ready and parallel fuel mod is in place. power steering, alternator and air con units r in place, although the alternator isnt bolted up, as i need 2 prime the pump. need to find out exactl;y where the knock sensor goes, had a look, bit unsire, so think il search that. everything seems to be going to plan, manifold can get a bit messy rtunnign all the pipes bk in. i shud av fitted fuel mod and pipe from block to header tank before i bolted manifold down.
waiting on timing kit tommorrow and also need 2 to torque cam pulleys, crank pully.
for this im gonna use old belt and maul grips to keep tension so cam doesnt rotate when torquing.
all thats left now is to give engine bay a quick clean with gunk, not gonna go 2 mad, after all its is a engine bay.
any1 give me advise on how to fit clutch fork. do i bolt engine to box and then fit it, or can u fit it to clutch and then line engine up 2 box and angle it out of the hole?
heres some pics, and for those who notcie, the subaru logo on the boot is upside down, lol

Scooby Newbie
Joined: Jan 2009
Posts: 12
Likes: 0
Before dropping the engine in, fit the release bearing to the driveshaft and the fork, insert the pivoting dowel through the side of gearbox and then the blanking bolt. I find it much easier doing that than having the bearing already on the clutch.
Thread Starter
Joined: Feb 2008
Posts: 1,654
Likes: 0
From: Merthyr Tydfil
quick update, nothing done, not happy, waiting for a timing kit that should have turned up yesterday, so lost 2 days building, doubt il make my time scale now, very gutted, and got a busy week ahead so not working on my car. i love **** companies
Thread Starter
Joined: Feb 2008
Posts: 1,654
Likes: 0
From: Merthyr Tydfil
well it wasnt the companies fault on timing belt, my neighbour had it since 11.30 monday morning. after giving companty and couriers grief, they said its been signed for by no.4, great, how then kept in it there house untill i knocked tonight at 7pm. thanks, lol
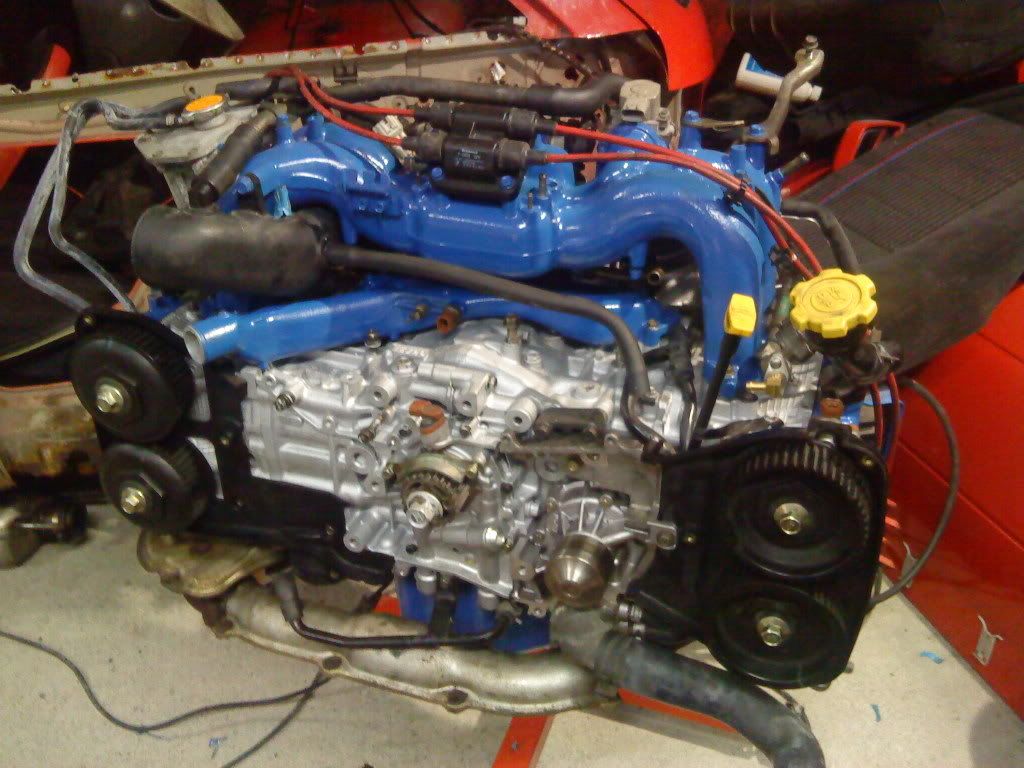
well iv timed the engine and fitted covers tonight, was all correct 1sty time around, turned engine over, turned smoothly, so very happy. coveres all fitted, ready for fitting friday night as im busy tomorro, gutted.
doubt i will be on for a sunday start now, but il do my best fri night, sat n sun.
just gotta buy 4 oil filters and i think 10w 40 oil to run in. changes after 1st 15min run, then 100 miles, then 500 and eventually 1000 with better oil.
as it stood when i just left garage

