
wagon fettle


Thread Starter
Joined: Nov 2003
Posts: 13,356
Likes: 58
From: in the woods...........555 Wagon Sqn
I'll save the draft this time...doh.
Chris came round again last week and he removed all the fibreglass filler and added some mesh reinforcement and started again...thanks Chris Shame the damn thing cracked again, think I'll have to admit defeat and send it to a body shop

Sourced a 22mm rear ARB; normal sound Whiteline build and shocking finish so I made it pretty...

After a short period of air die grinder assisted neighbour annoying...

After a blast of straight to rust Hammerite...might have to do the front one too now

Final job before bottom end build can commence, one I've been putting off tbh...I hate masking stuff; almost two hours later

Finished with silver engine enamel, roll on the build

Chris came round again last week and he removed all the fibreglass filler and added some mesh reinforcement and started again...thanks Chris
Shame the damn thing cracked again, think I'll have to admit defeat and send it to a body shop Sourced a 22mm rear ARB; normal sound Whiteline build and shocking finish so I made it pretty...
After a short period of air die grinder assisted neighbour annoying...
After a blast of straight to rust Hammerite...might have to do the front one too now
Final job before bottom end build can commence, one I've been putting off tbh...I hate masking stuff; almost two hours later
Finished with silver engine enamel, roll on the build
Thread Starter
Joined: Nov 2003
Posts: 13,356
Likes: 58
From: in the woods...........555 Wagon Sqn
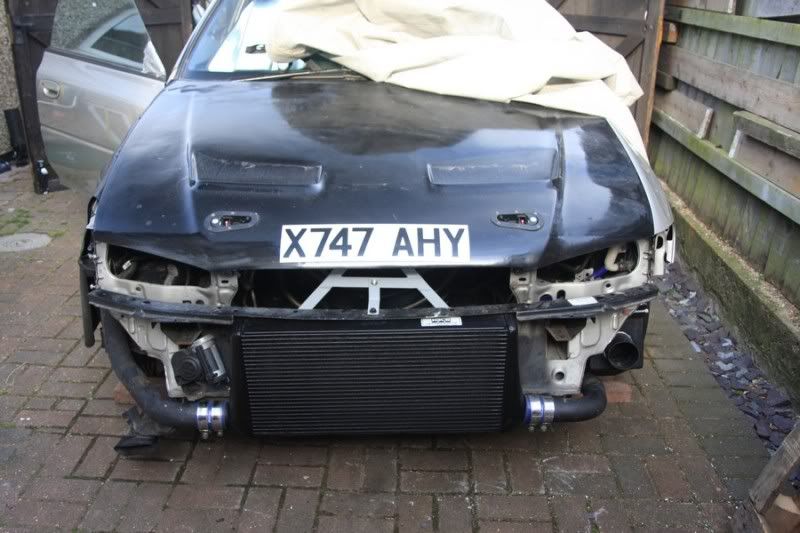
well the good news is that it was incorrectly labelled hose and not me messing up for a change, returned and correct size en route. Rad and fmic now sprayed black with radiator specific paint.


started cleaning up the sump ready for assembly...liquid gasket is horrible stuff to remove Just need to clean the sump itself and loctite the baffle in place.


24mm arb off and all the associated gubbins removed to be cleaned and painted. I'm going to get a plate welded on the arb supports; not as pretty as the Whiteline or Perrin stout mounts but just as effective and way cheaper

started cleaning up the sump ready for assembly...liquid gasket is horrible stuff to remove
Just need to clean the sump itself and loctite the baffle in place.24mm arb off and all the associated gubbins removed to be cleaned and painted. I'm going to get a plate welded on the arb supports; not as pretty as the Whiteline or Perrin stout mounts but just as effective and way cheaper

You still not finished this yet
The only way you'll stop your vent from cracking is to plastic weld some plastic into the spaces I'm afraid, it'll keep cracking otherwise. Shame you're so far away from me.......
Will look smart when its done though
The only way you'll stop your vent from cracking is to plastic weld some plastic into the spaces I'm afraid, it'll keep cracking otherwise. Shame you're so far away from me.......
Will look smart when its done though


Thread Starter
Joined: Nov 2003
Posts: 13,356
Likes: 58
From: in the woods...........555 Wagon Sqn
cheers Trev...picked the heads up and dropped them at SMG today so getting there 
I'll rip out what's there are try and borrow a plastic weld kit, I've still got the butchered pieces so will give it ago. Ta for the advice
think the rust is pretty cosmetic SD69, although my rose joint front drop links do look a bit fooked...guess it depends on the component...
thanks Jura, way better than the nasty shiny ally finish i think
thanks Frayz, hope you had a good break...I'll drop you a line later this week about that last piece

Thread Starter
Joined: Nov 2003
Posts: 13,356
Likes: 58
From: in the woods...........555 Wagon Sqn
Thread Starter
Joined: Nov 2003
Posts: 13,356
Likes: 58
From: in the woods...........555 Wagon Sqn
a few more bits done and some more pics...hald the AVCS loom complete, I need to source some shielded wire to link up with the rest of the loom...not quite sure where from yet though, I'll try Maplin

Some more rust dealt with, this time ARB bracket and foglamp cover brackets...


core back on
ARB supports before clean up with rough cut reinforcement plates

Preped and ready to be welded...thanks Gav; pics Monday night when I get them back

Picked up the last induction trumpet from Frayz yesterday, thanks matie

Some more rust dealt with, this time ARB bracket and foglamp cover brackets...
core back on
ARB supports before clean up with rough cut reinforcement plates
Preped and ready to be welded...thanks Gav; pics Monday night when I get them back
Picked up the last induction trumpet from Frayz yesterday, thanks matie
Last edited by trails; Jun 5, 2011 at 04:36 PM.

Thread Starter
Joined: Nov 2003
Posts: 13,356
Likes: 58
From: in the woods...........555 Wagon Sqn
I was going to wait until tomorrow to save Mr Mitchell from heart failure but I'll risk it with another update 
sorted the induction trumpet; marked, trimmed and fixed in place with tigerSeal, just need the hose and then I can slap my wing back on

Minor hammer based persuasion required for a flat bonding surface...never straight forward these things


Unwrapped my rad and attached the fan and replaced the broken drain plug with a nice brass one

Engine gunk and jet wash to clean up the sump, baffle and fixings

masked off the body of the sump and painted the wire brush ravaged edges with hi-temp black...

Swapped the now rusty black allen head bolts back to stainless


got a new wiper blade and finally fitted the wiper arm to the GL boot

While I was looking for the wiper arm I stumbled across my thermostat housing...far too messy to go on a nice clean engine.

wire brush and some rubbing down cleaned it up and removed all the cast markings.

a bit of filler primer before paint...black i think

sorted the induction trumpet; marked, trimmed and fixed in place with tigerSeal, just need the hose and then I can slap my wing back on
Minor hammer based persuasion required for a flat bonding surface...never straight forward these things
Unwrapped my rad and attached the fan and replaced the broken drain plug with a nice brass one
Engine gunk and jet wash to clean up the sump, baffle and fixings
masked off the body of the sump and painted the wire brush ravaged edges with hi-temp black...
Swapped the now rusty black allen head bolts back to stainless
got a new wiper blade and finally fitted the wiper arm to the GL boot
While I was looking for the wiper arm I stumbled across my thermostat housing...far too messy to go on a nice clean engine.
wire brush and some rubbing down cleaned it up and removed all the cast markings.
a bit of filler primer before paint...black i think
Last edited by trails; Jun 5, 2011 at 07:57 PM.

Thread Starter
Joined: Nov 2003
Posts: 13,356
Likes: 58
From: in the woods...........555 Wagon Sqn
you love the attention Iain
Thanks Clive, slowly but surely
lol me too Trev wouldn't do making a hash of cutting one there
Cheers shane, got them on e-bay; I brought a bag of about 50 ages ago
Thanks Clive, slowly but surely
lol me too Trev wouldn't do making a hash of cutting one there
Cheers shane, got them on e-bay; I brought a bag of about 50 ages ago

