
'Budget' DIY Engine Rebuild


I was bloody lucky and picked up a brand new modine for 10 quid on ebay! Naturally I've never seen one on there since 
Try speaking to suppliers like Zen, RCMS and Lateral for parts at competitive prices they should be able to help
Have you downloaded a workshop manual yet?
Try speaking to suppliers like Zen, RCMS and Lateral for parts at competitive prices they should be able to help
Have you downloaded a workshop manual yet?

I was bloody lucky and picked up a brand new modine for 10 quid on ebay! Naturally I've never seen one on there since
Try speaking to suppliers like Zen, RCMS and Lateral for parts at competitive prices they should be able to help
Have you downloaded a workshop manual yet?
Try speaking to suppliers like Zen, RCMS and Lateral for parts at competitive prices they should be able to help
Have you downloaded a workshop manual yet?

Thread Starter
Scooby Regular
Joined: Aug 2005
Posts: 3,957
Likes: 1
From: East coast.
Well I'm down to �95 so far, which I think I'll go with, barring an ebay miracle. Crank's still not out - I spent most of the evening rearranging the garage so I've got room to work. It's incredible how much space a stripped engine takes when you have to put everything out separate!
Quick question before I forget - can a later model cambelt tensioner (the blue wheel one in the photo) be fitted to an early block with the early type tensioner which looks like a miniature clutch slave cylinder?
Anyway, I'm gonna have to go and find a 24mm deep socket or offset spanner tomorrow to get the modine off, but everything else is going to plan. I've taken the plugs out in the front side of the block that reveal the gudgeon pins and circlips. Seems straightforward enough to get the circlips out, but then what?
After removing circlips you need to pull out the pins, i got a length(18 inches) of bar small enough to fit inside pin and cut a hook at one end to go through pin to grab on the edge of it and a 90 degree upturn at the other end so you can give it a tap to dislodge.
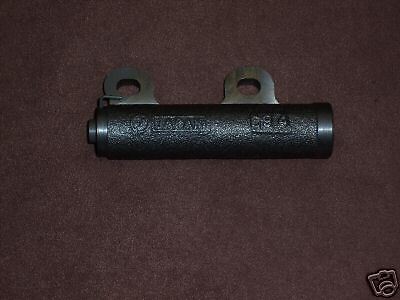
If you've taken it off the car you should compress it again as soon as possible. You compress the plunger back into the body until you can get a locking pin through the hole in the body and the end of the plunger. You can do this in a decent vice, BUT you must wind it in very very very very very slowly...very slowly ok
 Push the plug and screw into the centre of the pin, wind the crew in so the plug expands to grip the pin then pull it out
Thread Starter
Scooby Regular
Joined: Aug 2005
Posts: 3,957
Likes: 1
From: East coast.
OK that's enough ideas to get me started, cheers! I'm only thinking of reusing the later tensioner on my CDB because it looks brand spanking new and the older one doesn't. The later tensioner looks like a solid arm with an idler wheel on the end of it. This is the one I've taken off. WIthout looking at it, I can't think which bit would need compressing. I'll go and see.


Thread Starter
Scooby Regular
Joined: Aug 2005
Posts: 3,957
Likes: 1
From: East coast.
Excellent thanks. OK next problem...I must be some kind of idiot; I just can't get my head around how these piston pins come out?
I've taken the outer circlips off all four pistons through the access holes. However, the pins don't want to budge. I kept looking in to see what was going on and can clearly see there are another four circlips in there, on the inner side of each pin! The Scoobyclinic walkthrough in last month's Jap Performance talks about just knocking them through with a bar of some kind - if you do that, where do they end up? Everything on here makes me think they should just pull out with a hooked tool, which they won't, because there's another circlip there. I can't see how you can get at them from the underneath of the crankcase because they don't come down far enough. Even the workshop manual's schematic doesn't show these inner circlips nor make any mention of how to get them out.
WTF I think is the choice phrase here LOL
I must be missing something really obvious.
You have to pull the pin out through the access hole in the corresponding bore, you pull them out of the same bore access hole as the piston you're working on. Quite a lot of the time the pistons have burrs that stop the pin being pulled out easily.
If you're struggling to pull them out then a long rod lined up with the pin from the opposite side access hole where the circlip you can't get at is (the rod on that side will just be out of the way) can be used with a mallet to drive the pin ..
If you're struggling to pull them out then a long rod lined up with the pin from the opposite side access hole where the circlip you can't get at is (the rod on that side will just be out of the way) can be used with a mallet to drive the pin ..

Thread Starter
Scooby Regular
Joined: Aug 2005
Posts: 3,957
Likes: 1
From: East coast.
OK, so is this how it works? The outer circlip sits in a groove in the piston, preventing the pin from coming out sideways. Take the outer circlip out and then the pin should be able to slide out through the access hole, but can't go in the opposite direction, because of the circlip at the other end. So when the pin pops out, eventually, the other circlip just stays with the piston and doesn't just drop out or anything?
Last edited by silent running; Apr 20, 2008 at 08:37 PM.

Scooby Senior
Joined: Feb 2003
Posts: 1,903
Likes: 0
From: West Midlands
OK, so is this how it works? The outer circlip sits in a groove in the piston, preventing the pin from coming out sideways. Take the outer circlip out and then the pin should be able to slide out through the access hole, but can't go in the opposite direction, because of the circlip at the other end. So when the pin pops out, eventually, the other circlip just stays with the piston and doesn't just drop out or anything?
Just looking at your pics of the RH cylinder head - looks like No 3.big end has gone as the piston has come up and hit the combustion chamber leaving an inprint of the piston identification letter.
Keep the updates going
Keep the updates going
Thread Starter
Scooby Regular
Joined: Aug 2005
Posts: 3,957
Likes: 1
From: East coast.
OUCH! You're right. Now you mention it I can see the R stamp on #3 just above the inlet valves. I've finally got the pistons out after quite a struggle, so maybe I'll split the block tomorrow. Latest pics:
Early WRX heads, cams & hydraulic tappets out on bench:

Number 2 access hole, circlip already removed with long nose pliers. You need a 14mm allen bit to get the plug off first.

Engine upside down for sump removal with the aid of a rubber mallet. Underneath is the oil strainer and baffle plate:

A fair bit of metal swarf in the sump that didn't come out when I drained the oil:

First look at the crank assembly:

Taking out the crankcase bolts along the backbone of the block:

The block is now light enough to be taken off the engine stand and hefted around on the workbench. Tea is the most essential part of the stripdown:

HELP! The water jacket contains 2 12-sided bolts one side, and 4 the other. One of these for some reason didn't have enough clearance between the top of the crankcase and the cylinder wall to get my socket down. After a lot of head scratching and hammering, I hit upon the idea of 'machining' out more clearance with a bloody great drill bit which, I am pleased to say, worked. I had thought of getting a 3/8" socket set to do the job but I would have snapped it with the amount of torque needed to shift those crankcase bolts in there.

Another problem! Can't get the piston pin out! I can see the inner circlip still in there - how on earth does it all work? See above - I figured it out in the end with a lot of help!

Pistons and pins all out and numbered. Also shown are the weapons of choice for this job. In the end I went with knocking the pins through from the opposite side. If you have the right kind of flat, long, hard and thin tool, there's just enough clearance to poke it over/under the con rod closest to the access hole you're going in through. It then passes basically right through the bottom of that cylinder, through another hole that joins adjacent cylinders together, then if you're lucky it finishes up pushing on the other piston's pin. Then a good whack with a hammer is needed to budge it and it gradually comes out most of the way. Even once mostly out, I ran out of 'whacking length' and couldn't push it any further. Mole grips and a twisting motion, plus my home made hooking tool did the final pulling out.

The block minus pistons and pins, con rods just sitting there in the cylinders. I struggled at first to pop the pistons out even once the pin was removed, but then found that if you turn the crank to push the piston in question out to the top, then turn it by hand anywhere between 45 and 90 degrees, keep cranking and the next time the rod comes up it pushes it well clear of the deck - no struggle at all.

Early WRX heads, cams & hydraulic tappets out on bench:
Number 2 access hole, circlip already removed with long nose pliers. You need a 14mm allen bit to get the plug off first.
Engine upside down for sump removal with the aid of a rubber mallet. Underneath is the oil strainer and baffle plate:
A fair bit of metal swarf in the sump that didn't come out when I drained the oil:
First look at the crank assembly:
Taking out the crankcase bolts along the backbone of the block:
The block is now light enough to be taken off the engine stand and hefted around on the workbench. Tea is the most essential part of the stripdown:
HELP! The water jacket contains 2 12-sided bolts one side, and 4 the other. One of these for some reason didn't have enough clearance between the top of the crankcase and the cylinder wall to get my socket down. After a lot of head scratching and hammering, I hit upon the idea of 'machining' out more clearance with a bloody great drill bit which, I am pleased to say, worked. I had thought of getting a 3/8" socket set to do the job but I would have snapped it with the amount of torque needed to shift those crankcase bolts in there.
Another problem! Can't get the piston pin out! I can see the inner circlip still in there - how on earth does it all work? See above - I figured it out in the end with a lot of help!
Pistons and pins all out and numbered. Also shown are the weapons of choice for this job. In the end I went with knocking the pins through from the opposite side. If you have the right kind of flat, long, hard and thin tool, there's just enough clearance to poke it over/under the con rod closest to the access hole you're going in through. It then passes basically right through the bottom of that cylinder, through another hole that joins adjacent cylinders together, then if you're lucky it finishes up pushing on the other piston's pin. Then a good whack with a hammer is needed to budge it and it gradually comes out most of the way. Even once mostly out, I ran out of 'whacking length' and couldn't push it any further. Mole grips and a twisting motion, plus my home made hooking tool did the final pulling out.
The block minus pistons and pins, con rods just sitting there in the cylinders. I struggled at first to pop the pistons out even once the pin was removed, but then found that if you turn the crank to push the piston in question out to the top, then turn it by hand anywhere between 45 and 90 degrees, keep cranking and the next time the rod comes up it pushes it well clear of the deck - no struggle at all.
Last edited by silent running; Apr 20, 2008 at 11:03 PM.
I'll be watching this thread to see how it all goes.
Gotta say a big thanks for sharing the knowledge & taking the pics.
Probably not much use to you now but I stumbled accross this...
YouTube - pulling pistons out of Subaru block
Still, might come in usefull when someone else reads through your thread & wants to attemp a rebuild.
Keep it up bud & best of luck putting it all back together!
Thread Starter
Scooby Regular
Joined: Aug 2005
Posts: 3,957
Likes: 1
From: East coast.
Well it's nice to know it's useful to some of you out there. I think it's easy to imagine that everyone on SN is either rich enough to pay someone else to do all their work, or is a mechanic with half a dozen mechanic friends and their own engineering works. Well I'm not ashamed to say I can't afford to pay others to do things I could have a crack at learning to do myself, and I am actually really enjoying doing it. Whether it will go back together again and run, I don't know!
I actually realised what the stupid mistake was that I made with the circlips/pistons/pins. I was imagining a groove in each end of the pin with the circlips sitting in these grooves, holding the pin from moving either way sideways. Hence why I panicked when I looked through and saw the inner circlips because I couldn't imagine how you'd ever get the pins out. I hope I'm not alone in making this mistake - so for future reference, first time engine builders; the circlips are captive in the piston pin hole which is part of the piston, not in the pin itself!
I actually realised what the stupid mistake was that I made with the circlips/pistons/pins. I was imagining a groove in each end of the pin with the circlips sitting in these grooves, holding the pin from moving either way sideways. Hence why I panicked when I looked through and saw the inner circlips because I couldn't imagine how you'd ever get the pins out. I hope I'm not alone in making this mistake - so for future reference, first time engine builders; the circlips are captive in the piston pin hole which is part of the piston, not in the pin itself!
Great thread and excellent photos. I also watched the YouTube clip which I thought was great info. Be interested to know how you do the reverse - that is get the Little End connected and lined up on re-assembly. It must be a bitch to line up if it has to be done with the piston in the cylinder ?.
Last one I did was 30 years ago on a Ford Cortina - bit simpler
Last one I did was 30 years ago on a Ford Cortina - bit simpler
Thread Starter
Scooby Regular
Joined: Aug 2005
Posts: 3,957
Likes: 1
From: East coast.
LOL - don't! I was thinking the exact same thing. Still, I'll cross that bridge when I come to it. I'm about to split the block with a bottle jack, so we'll see how that goes...
Thread Starter
Scooby Regular
Joined: Aug 2005
Posts: 3,957
Likes: 1
From: East coast.
The damage is revealed! Read on to find out more...
Had a big tidy up last night because I was tripping over stuff. Giving myself plenty of room to work really made a difference:

The two blocks - on the bench is my WRX v4 with the rattle to be investigated; on the floor is my early closed deck block to be used for the new build:

Cracking the two crankcase halves with a bottle jack. Not much fun when you've overlooked two crankcase bolts that are still holding everything together! At first I thought it was some serious sealant keeping everything in place. Once I'd released the last two bolts (in the side of the bellhousing part), the block just popped apart. Two dowels keep it from falling off so it needs lifting straight apart.

The crack opens! Wedged with screwdrivers.

Crankcase finally separated!

Crank sitting in block on main bearings:

The two halves of the block, minus crankshaft:

Crank out on the bench, connecting rods still attached:

Bare crank with rods and big end bearing shells removed. Number 3 rod could be easily waggled up and down even before undoing the conrod bolts. Not a good sign!

The problem is revealed. Number 3 crank pin - hmmm, not quite the mirror finish it's supposed to have. This not only looks rough, but actually feels chewed up as well.

Number 2 bearing shells - one is noticeably grooved, the other has a deep patch in the bottom where the copper is virtually worn through. The best is yet to come...

Where did all the copper layer go? These number 3 big end shells are truly thrashed. They're right down to the underneath metal layer and ploughed like a farmer's field. That would explain why the con rod was rattling on the crank and also how the #3 piston ended up stamping its mark on its combustion chamber...

Had a big tidy up last night because I was tripping over stuff. Giving myself plenty of room to work really made a difference:
The two blocks - on the bench is my WRX v4 with the rattle to be investigated; on the floor is my early closed deck block to be used for the new build:
Cracking the two crankcase halves with a bottle jack. Not much fun when you've overlooked two crankcase bolts that are still holding everything together! At first I thought it was some serious sealant keeping everything in place. Once I'd released the last two bolts (in the side of the bellhousing part), the block just popped apart. Two dowels keep it from falling off so it needs lifting straight apart.
The crack opens! Wedged with screwdrivers.
Crankcase finally separated!
Crank sitting in block on main bearings:
The two halves of the block, minus crankshaft:
Crank out on the bench, connecting rods still attached:
Bare crank with rods and big end bearing shells removed. Number 3 rod could be easily waggled up and down even before undoing the conrod bolts. Not a good sign!
The problem is revealed. Number 3 crank pin - hmmm, not quite the mirror finish it's supposed to have. This not only looks rough, but actually feels chewed up as well.
Number 2 bearing shells - one is noticeably grooved, the other has a deep patch in the bottom where the copper is virtually worn through. The best is yet to come...
Where did all the copper layer go? These number 3 big end shells are truly thrashed. They're right down to the underneath metal layer and ploughed like a farmer's field. That would explain why the con rod was rattling on the crank and also how the #3 piston ended up stamping its mark on its combustion chamber...
Excellent detail - nothing like burning the midnight oil !. Some serious BE damage - it must have been running rough with a lot of noise ?.
Do you think it's possible to re-assemble with the pistons connected to the Little Ends before you re-join the two crank halves. Seems difficult but there do not seem to be easy options ?.
Do you think it's possible to re-assemble with the pistons connected to the Little Ends before you re-join the two crank halves. Seems difficult but there do not seem to be easy options ?.
The main bearing supports will stop you from feeding the pistons in from the bottom. Plus, how would you get the piston ring compressor in?
Wayne.
Thread Starter
Scooby Regular
Joined: Aug 2005
Posts: 3,957
Likes: 1
From: East coast.
Good question and equally good answer!
It was actually running pretty good, it just started rattling quietly at first at certain throttle openings, then this got gradually louder and more widespread throughout the rev range, so I took it easy and limped home. In the end it was rattling all the time.
The work now begins on seeing what is salveageable from the old engine so I can ebay some bits to raise funds for the rest of the build. The pistons and rods look OK to me. A lot of the valves look virtually new from when it was 'rebuilt' 10k miles ago. My mission over the next few evenings will be to repeat this whole stripdown process with the CDB, although the heads are already off so it'll be a lot more straightforward, especially now I know what I'm doing a bit better.
Last edited by silent running; Apr 22, 2008 at 07:26 PM.
Sorry about my post above. After re reading it, it looks a bit harsh. Just wondered where you were coming from and if I had missed something obvious when replacing the pistons.
Cheers,
Wayne.
Hey Wayne,
No problem. I've nevere had a flat four apart and the last engine I did take apart was 30 years ago. I now have two Scoobs and don't plan on this level of TLC - but you never know
Great thread and I like to read the details and ponder how I would do it.
Keith.
No problem. I've nevere had a flat four apart and the last engine I did take apart was 30 years ago. I now have two Scoobs and don't plan on this level of TLC - but you never know
Great thread and I like to read the details and ponder how I would do it.
Keith.

Thread Starter
Scooby Regular
Joined: Aug 2005
Posts: 3,957
Likes: 1
From: East coast.
Thanks for all the votes of support. Next item will be coming soon, the dismantling of the CDB. Will the crank be OK? Will it be knackered? Will I even be able to tell with just the naked eye and a digital calipers? Who knows...