
MY00 Projector Retrofit Project


Cheers mate. 
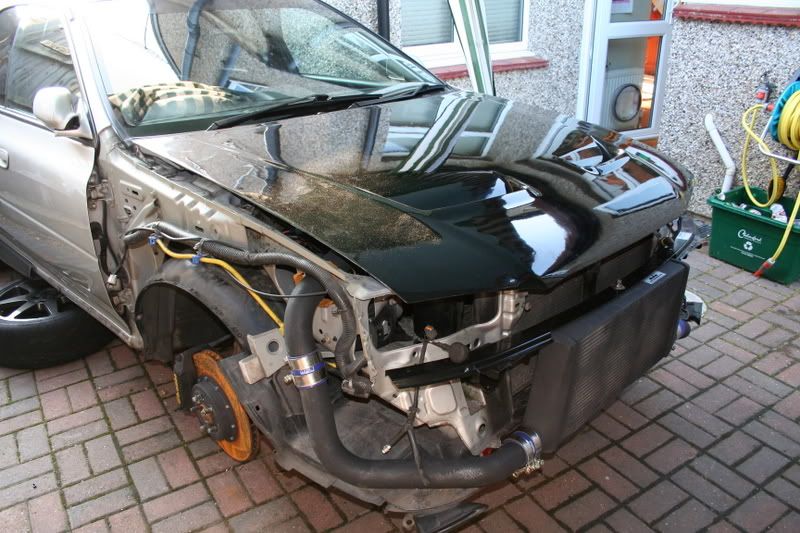
Been hunting on the net last night and found these end caps Fernco, Inc. for sealing the rear of the headlight.
It also looks like I'll have to move the caron filter thing (think thats what it is ) about half an inch away from the headlight, as my projectors are quite long.

Here's the bracket which will need a bit of tweeking

Been hunting on the net last night and found these end caps Fernco, Inc. for sealing the rear of the headlight.
It also looks like I'll have to move the caron filter thing (think thats what it is
) about half an inch away from the headlight, as my projectors are quite long.Here's the bracket which will need a bit of tweeking
Last edited by darms; Jan 2, 2008 at 08:10 AM.


Joined: Nov 2003
Posts: 13,356
Likes: 58
From: in the woods...........555 Wagon Sqn
Darms, removing the carbon can is (one of many  ), outstanding jobs on my list; its easy enough and there are no issues i am aware of other than the chance of a smellier engine bay!
Just stick a filter on the fuel tank vent, (which you can terminate closer to the bulk head vent pipe if required), T the other two hoses together and add another filter to the T'd hose. Lots of people just vent them to atmosphere but I'll be using the filters to minimise any nasty engine bay odours
project is looking really OEM, I'm looking forward to seeing them finished.
), outstanding jobs on my list; its easy enough and there are no issues i am aware of other than the chance of a smellier engine bay!Just stick a filter on the fuel tank vent, (which you can terminate closer to the bulk head vent pipe if required), T the other two hoses together and add another filter to the T'd hose. Lots of people just vent them to atmosphere but I'll be using the filters to minimise any nasty engine bay odours
project is looking really OEM, I'm looking forward to seeing them finished.
Trails, great info.....
Not having done much engine work - any more detailed guides (inc Pics) on removing the carbon can?
Cheers
Not having done much engine work - any more detailed guides (inc Pics) on removing the carbon can?
Cheers
Darms, removing the carbon can is (one of many ), outstanding jobs on my list; its easy enough and there are no issues i am aware of other than the chance of a smellier engine bay!
Just stick a filter on the fuel tank vent, (which you can terminate closer to the bulk head vent pipe if required), T the other two hoses together and add another filter to the T'd hose. Lots of people just vent them to atmosphere but I'll be using the filters to minimise any nasty engine bay odours
project is looking really OEM, I'm looking forward to seeing them finished.
), outstanding jobs on my list; its easy enough and there are no issues i am aware of other than the chance of a smellier engine bay!Just stick a filter on the fuel tank vent, (which you can terminate closer to the bulk head vent pipe if required), T the other two hoses together and add another filter to the T'd hose. Lots of people just vent them to atmosphere but I'll be using the filters to minimise any nasty engine bay odours
project is looking really OEM, I'm looking forward to seeing them finished.
Joined: Nov 2003
Posts: 13,356
Likes: 58
From: in the woods...........555 Wagon Sqn

Update….
The Valeo ballasts I’m using are like any other OEM ballast, they need to be fitted correctly. Originally they were screwed into a moulded section of the underside of the Jaguar headlight, allowing heat to escape from the front.
How to do this in a Scooby After a lot of searching I managed to find some small food containers which were perfect size
I decided to mount them at an angle within the containers and fitted a bracket on the rear for mounting on the vehicle.

Rear

Side

Fixing bolt

Moved onto working on the car today……After getting some great advice I remove the Carbon Canister - Thanks for all the info Trails and David at API

Looking at the drivers side - I still had the redundant Horn bracket, so rather it being a problem later thought I’d get it out of the way too


After a bit of force got it down to

Nice and out of the way

After a cup of coffee to warm up - on with the Ballasts


Both fitted just fine and so did the new Bumper Beam


Routed all the cabling (out of sight )
)

Then it was inside the car to finish off the switch for the Angel Eyes

The other two are for 007 gadgets, before you ask
Gotta start on this in the morning


The Valeo ballasts I’m using are like any other OEM ballast, they need to be fitted correctly. Originally they were screwed into a moulded section of the underside of the Jaguar headlight, allowing heat to escape from the front.
How to do this in a Scooby
After a lot of searching I managed to find some small food containers which were perfect size I decided to mount them at an angle within the containers and fitted a bracket on the rear for mounting on the vehicle.
Rear
Side
Fixing bolt
Moved onto working on the car today……After getting some great advice I remove the Carbon Canister - Thanks for all the info Trails and David at API
Looking at the drivers side - I still had the redundant Horn bracket,
so rather it being a problem later thought I’d get it out of the way tooAfter a bit of force got it down to
Nice and out of the way
After a cup of coffee to warm up - on with the Ballasts
Both fitted just fine and so did the new Bumper Beam
Routed all the cabling (out of sight
)Then it was inside the car to finish off the switch for the Angel Eyes
The other two are for 007 gadgets, before you ask
Gotta start on this in the morning
Last edited by darms; Jan 6, 2008 at 01:02 AM.
Think my Mrs is at the top of the list  she just wants it over and done with
Anyway - Bad news on the project update today.....
I recon I may have over done the pics yesterday Today my Sony T1 camera has started to act up - its like every shot I take is being taken in pitch black 
she just wants it over and done withAnyway - Bad news on the project update today.....
I recon I may have over done the pics yesterday
Today my Sony T1 camera has started to act up - its like every shot I take is being taken in pitch black
Joined: Nov 2003
Posts: 13,356
Likes: 58
From: in the woods...........555 Wagon Sqn


took a bit of time to register, but lets just hope its not another expense.
Fired them up today just wait till you see them mate and completed the final alignment test.
I did have an issue with the CCFL's (aka Angel Eyes) - they wouldnt fire up - After a bit of bypassing it looks like I've got an issue with the switch. As it was getting dark thought I'd leave this till next weekend.
Moving back inside I removed the inner casing of the lights and using JB Weld (this is great stuff) glued the Projector bolts in place.
Fired them up today
just wait till you see them mate and completed the final alignment test.I did have an issue with the CCFL's (aka Angel Eyes) - they wouldnt fire up
- After a bit of bypassing it looks like I've got an issue with the switch. As it was getting dark thought I'd leave this till next weekend.Moving back inside I removed the inner casing of the lights and using JB Weld (this is great stuff) glued the Projector bolts in place.
Joined: Nov 2003
Posts: 13,356
Likes: 58
From: in the woods...........555 Wagon Sqn


Joined: Nov 2003
Posts: 13,356
Likes: 58
From: in the woods...........555 Wagon Sqn
Lets get back the thread 
Update…
Managed to find the problem the the Angel Eyes today, was a loose connection on the switch as expected. [pics from mobile]
Managed to JB Weld both bezels around the projector lenses today.


And made a visit to my local plumbing shop, walked in holding this…..

Yeah it looked weird but managed to find this, so I got two…..

After some Dremel work, I trimmed it down to size

Perfect fit and the grey colour is almost the same shade as the headlight surround

On with some more JB Weld and managed to clay bar the headlight glass (inside and out) till tomorrow
Update…
Managed to find the problem the the Angel Eyes today, was a loose connection on the switch as expected.
[pics from mobile] Managed to JB Weld both bezels around the projector lenses today.
And made a visit to my local plumbing shop, walked in holding this…..
Yeah it looked weird but managed to find this, so I got two…..
After some Dremel work, I trimmed it down to size
Perfect fit and the grey colour is almost the same shade as the headlight surround
On with some more JB Weld and managed to clay bar the headlight glass (inside and out)
till tomorrow
Last edited by darms; Jan 12, 2008 at 11:31 PM.
Update..
I’ve managed to get only a few things done since my last update….
Attached the Angel Eyes and JB Welded the cables in place (supporting tape later removed once dried)

Completed headlights (Glass will be going on once I’ve done a test on the weekend)

Moving away from the lights, after a bit of searching I found LMA Performance Homepage - UK Supplier of Car / Automobile Custom Parts and Accessories who were able to supply the appropriate hose connectors for the re-plumbing of the Carbon Canister hoses.
This is what I ordered

For anyone that’s interested – I thought I’d go a quick diagram with the appropriate LMA item numbers. Hope it helps guys.

CORRECTION TO THE ABOVE DIAG. REPLACE LMA308 as the reducer to LMA318
Till the weekend.
I’ve managed to get only a few things done since my last update….
Attached the Angel Eyes and JB Welded the cables in place (supporting tape later removed once dried)
Completed headlights (Glass will be going on once I’ve done a test on the weekend)
Moving away from the lights, after a bit of searching I found LMA Performance Homepage - UK Supplier of Car / Automobile Custom Parts and Accessories who were able to supply the appropriate hose connectors for the re-plumbing of the Carbon Canister hoses.
This is what I ordered
For anyone that’s interested – I thought I’d go a quick diagram with the appropriate LMA item numbers. Hope it helps guys.
CORRECTION TO THE ABOVE DIAG. REPLACE LMA308 as the reducer to LMA318
Till the weekend.
Last edited by darms; Mar 29, 2008 at 05:40 PM.
Cheers mate...
I think about how I can make my scooby even more indivdual. when I have time away from my IT job.
u?
what do you do for a living if you don't mind me asking?!?
when I have time away from my IT job. u?
Joined: Nov 2003
Posts: 13,356
Likes: 58
From: in the woods...........555 Wagon Sqn
Update�
It�s been a very busy week, didn�t get much done
Re-plumbed all the vacuum hoses neatly out of the way.

Opted to VTA here

Lights went back into the oven for a few minutes to soften the original glue. Back on with the glass and clamped tight.

While the lights were cooling down, I made a bracket to hold the 3 relays, again sprayed with Etch Primer and heat proof matt black paint.

This nicely connects to one of the battery clamp rods and sits round the battery

Both lights completed and fully sealed.

The end is near��.. (next week!)
It�s been a very busy week, didn�t get much done
Re-plumbed all the vacuum hoses neatly out of the way.
Opted to VTA here
Lights went back into the oven for a few minutes to soften the original glue. Back on with the glass and clamped tight.
While the lights were cooling down, I made a bracket to hold the 3 relays, again sprayed with Etch Primer and heat proof matt black paint.
This nicely connects to one of the battery clamp rods and sits round the battery
Both lights completed and fully sealed.
The end is near��.. (next week!)

Scooby Regular
Joined: May 2006
Posts: 927
Likes: 0
From: Ireland
Absolutely brilliant thread. Fair play to you.
But would it not have been easier just to buy these...
http://www.motorenergy.com/images/95..._pro_bk_jy.jpg
But would it not have been easier just to buy these...
http://www.motorenergy.com/images/95..._pro_bk_jy.jpg