
Prodrive Grp.N. chassis street build


Scooby Regular
Joined: May 2004
Posts: 11,341
Likes: 1
Built for the job!
Fed-up of modifying road cars to go faster, where a real hillclimb car is engineered for the purpose.
Thinking Lola T 492 or Ginetta G12 or even G4/G22

Fed-up of modifying road cars to go faster, where a real hillclimb car is engineered for the purpose.
Thinking Lola T 492 or Ginetta G12 or even G4/G22
Last edited by 911; Mar 30, 2008 at 07:53 AM.

Thread Starter
Scooby Regular
Joined: Dec 2002
Posts: 458
Likes: 0
Nice,
It's a bummer we don't have that much Hills here in Holland.
Got a whirlpot today.
It's not the one I thought it would be, I expected a ATL in somewhat bigger size.
Ohh well, if it works it works.
It's a bummer we don't have that much Hills here in Holland.
Got a whirlpot today.
It's not the one I thought it would be, I expected a ATL in somewhat bigger size.
Ohh well, if it works it works.
Thread Starter
Scooby Regular
Joined: Dec 2002
Posts: 458
Likes: 0
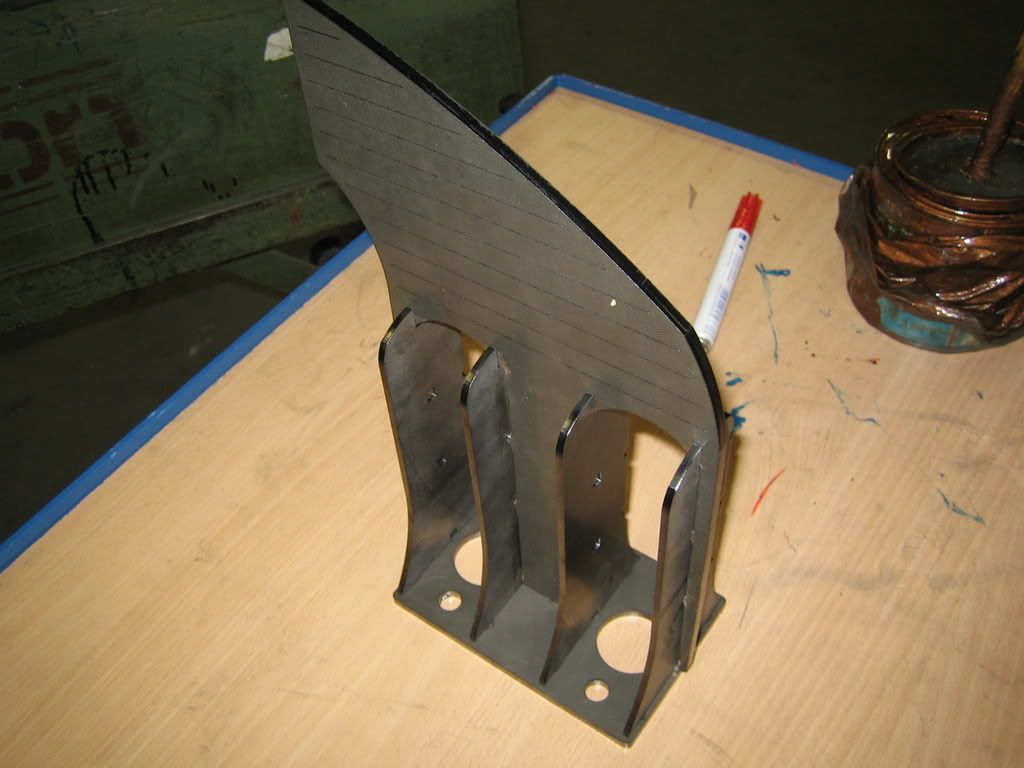
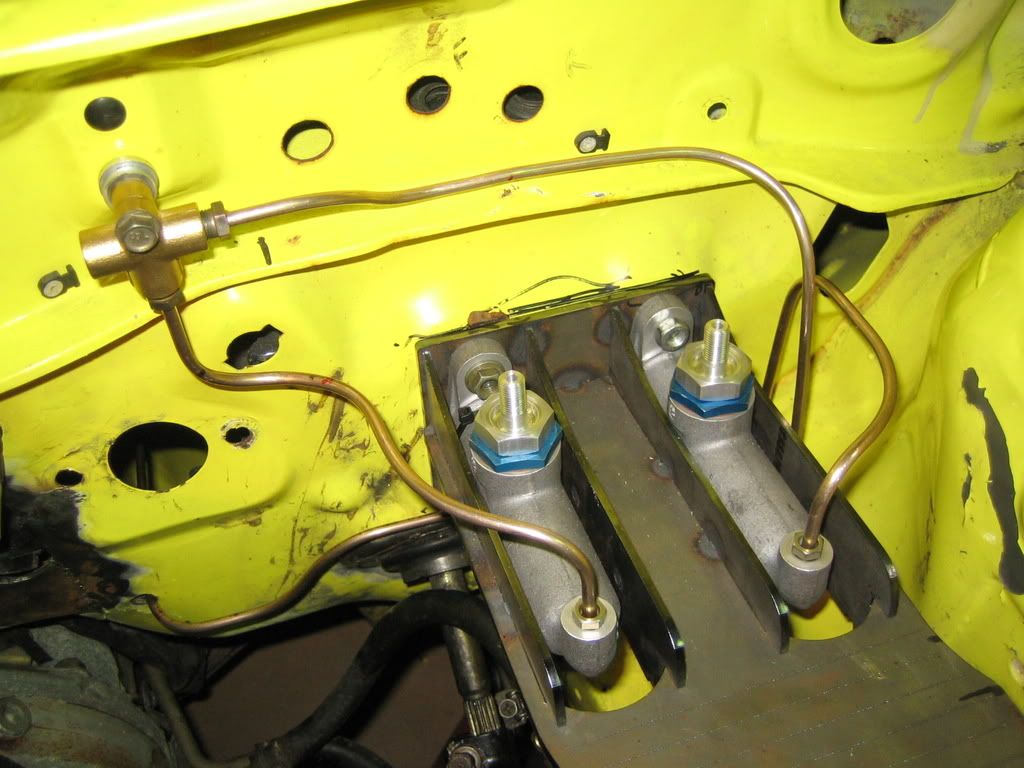
Because the mastercilinder mounting on the firewall is crooked I had to adress this.
So I decided to incorperate this on a brake bracklet aswell.
I designed a experimental version on autocad from which I will develop the final version.
I will keep it steel for now, but the final version will be aluminium.
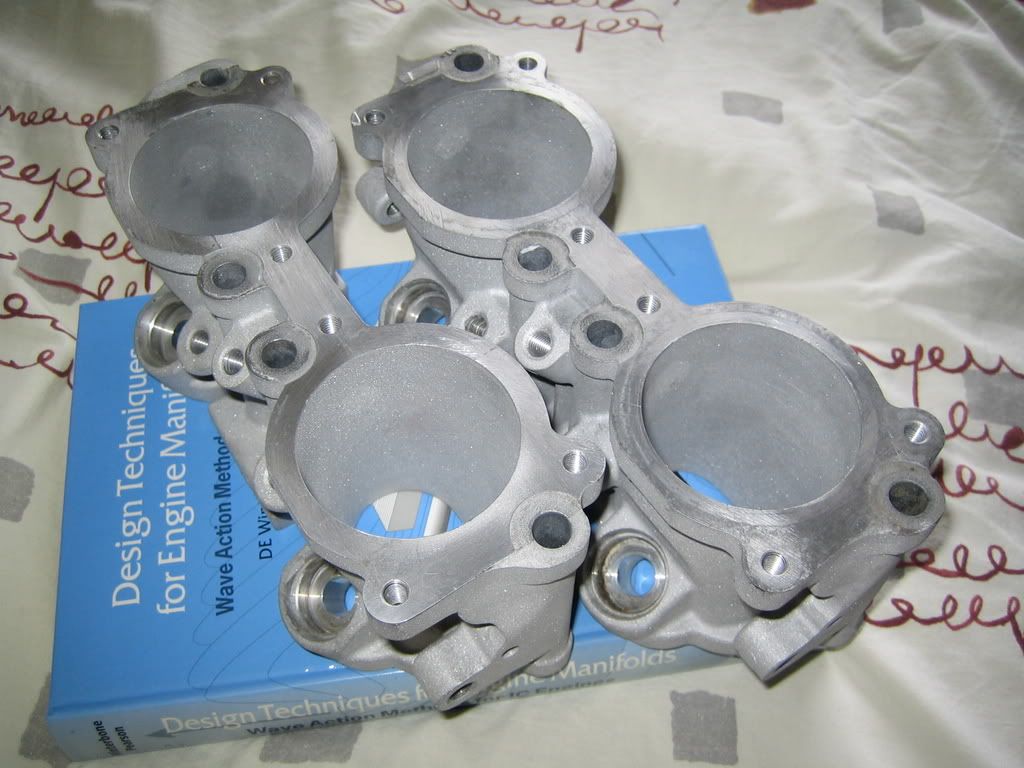
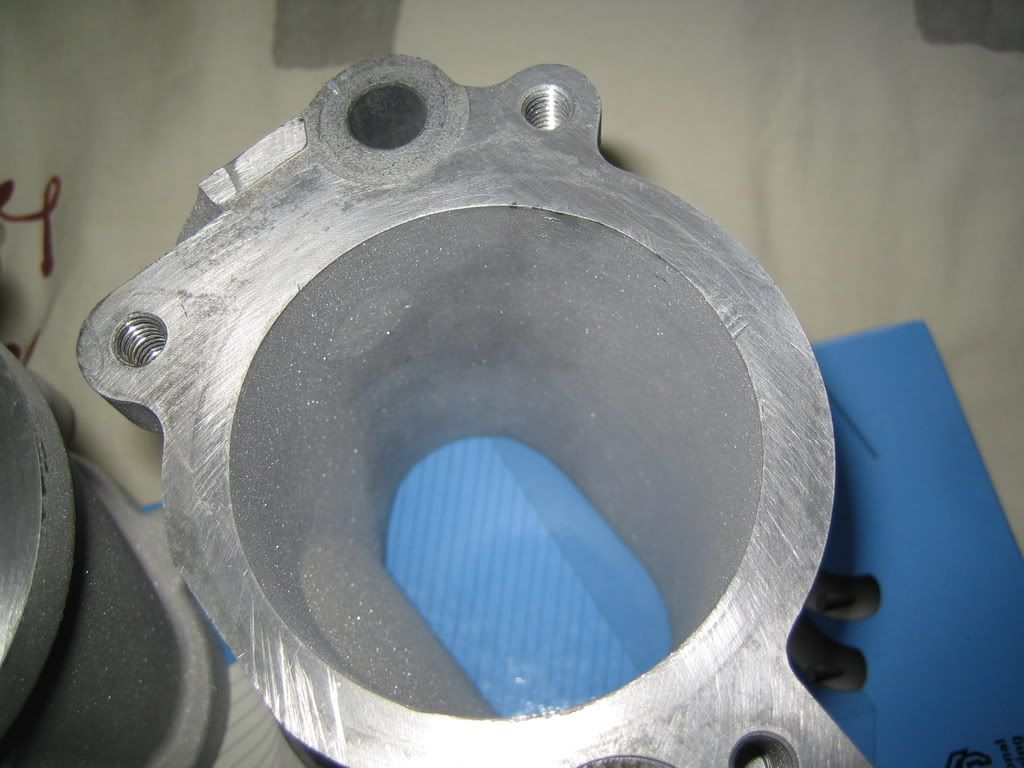
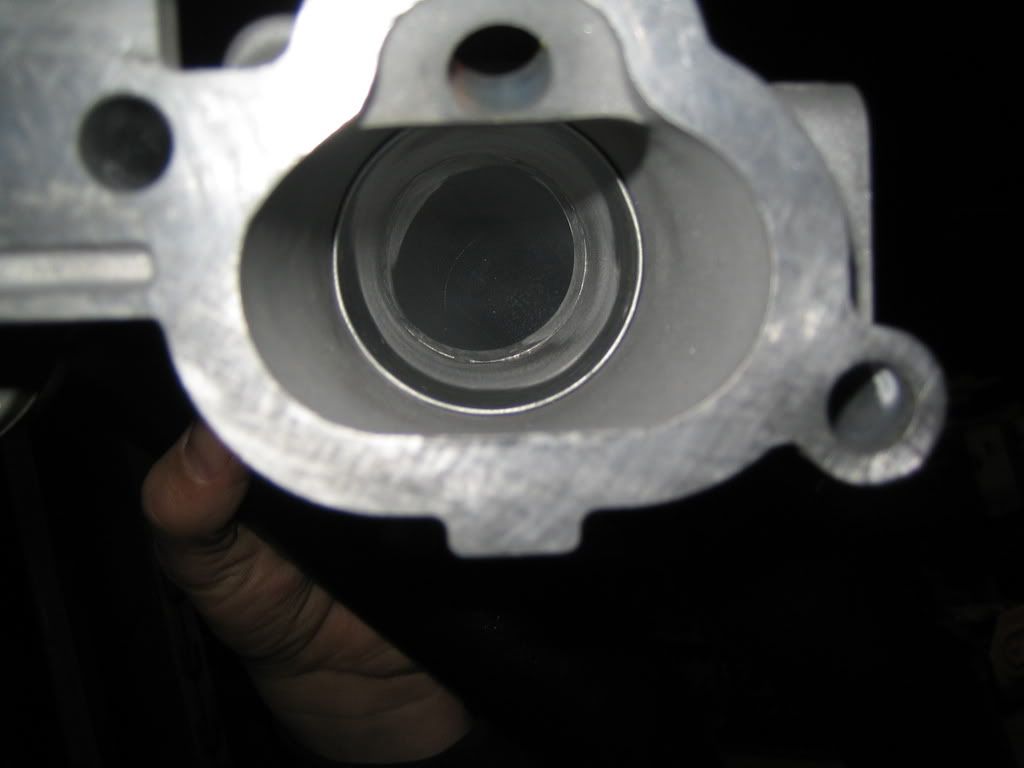
I began cleaning up the throttle bodies.
They are full of environmental valves etc. that seriously restrict the flow.
Today I started milling a bit on them.
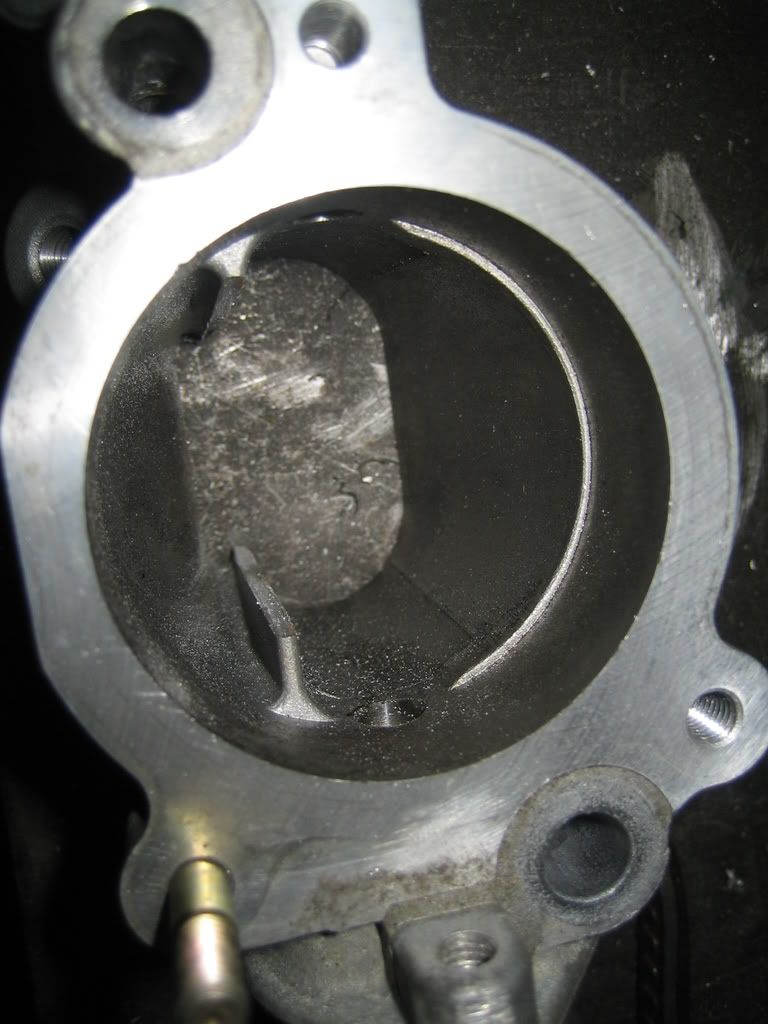
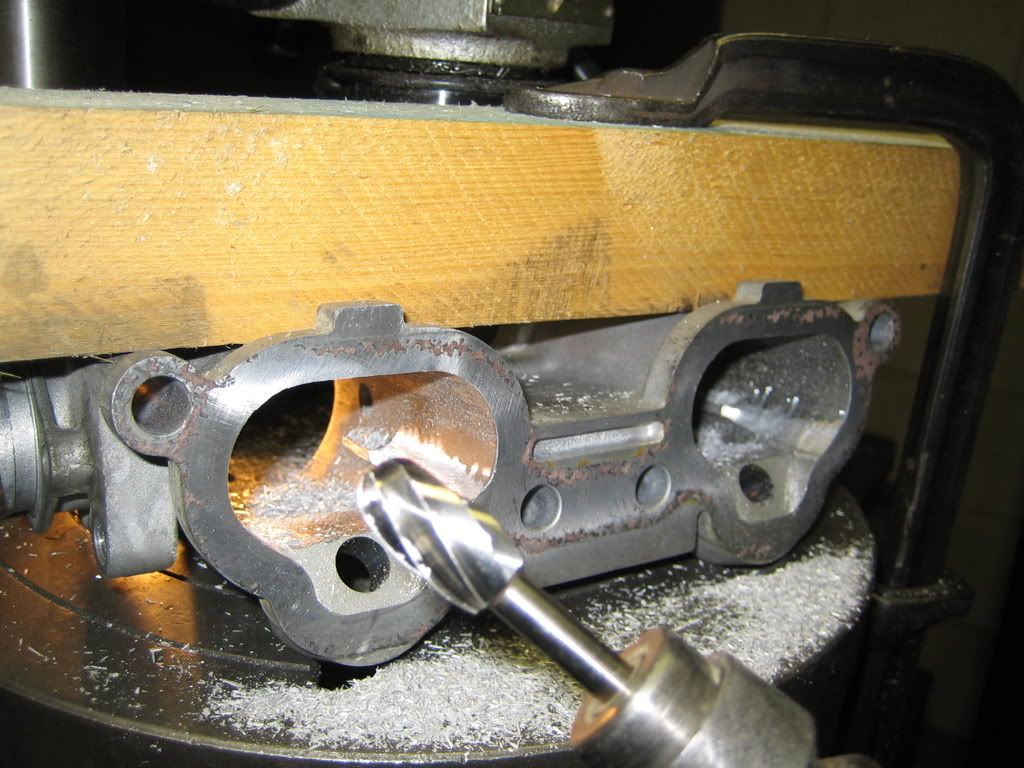
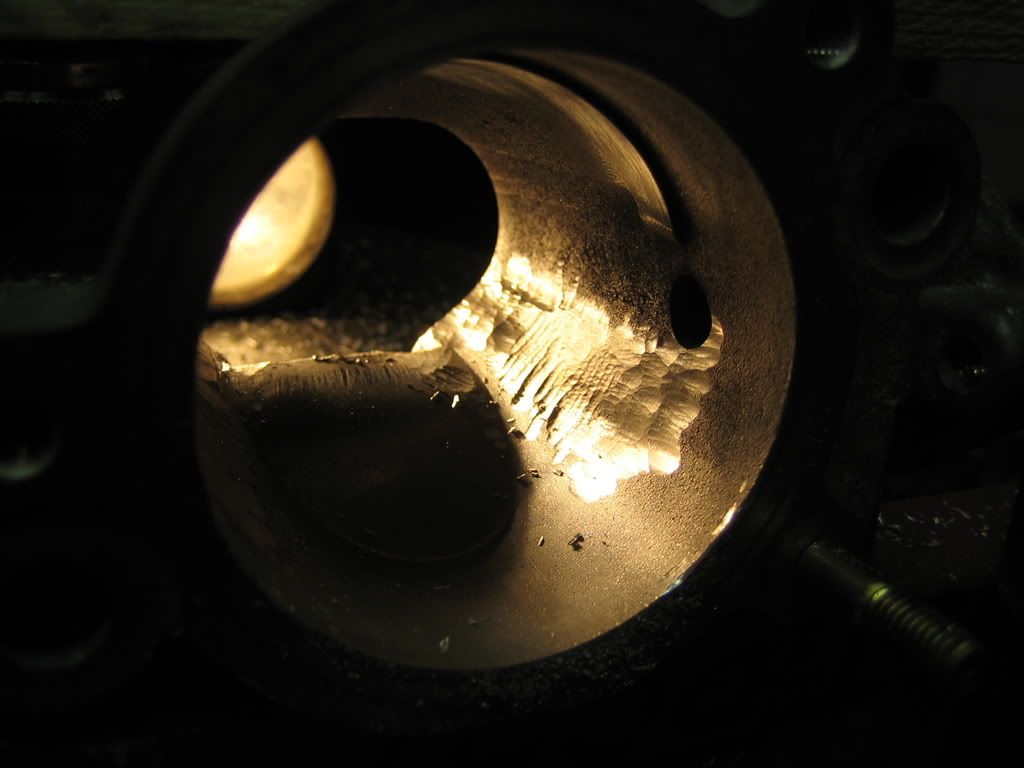
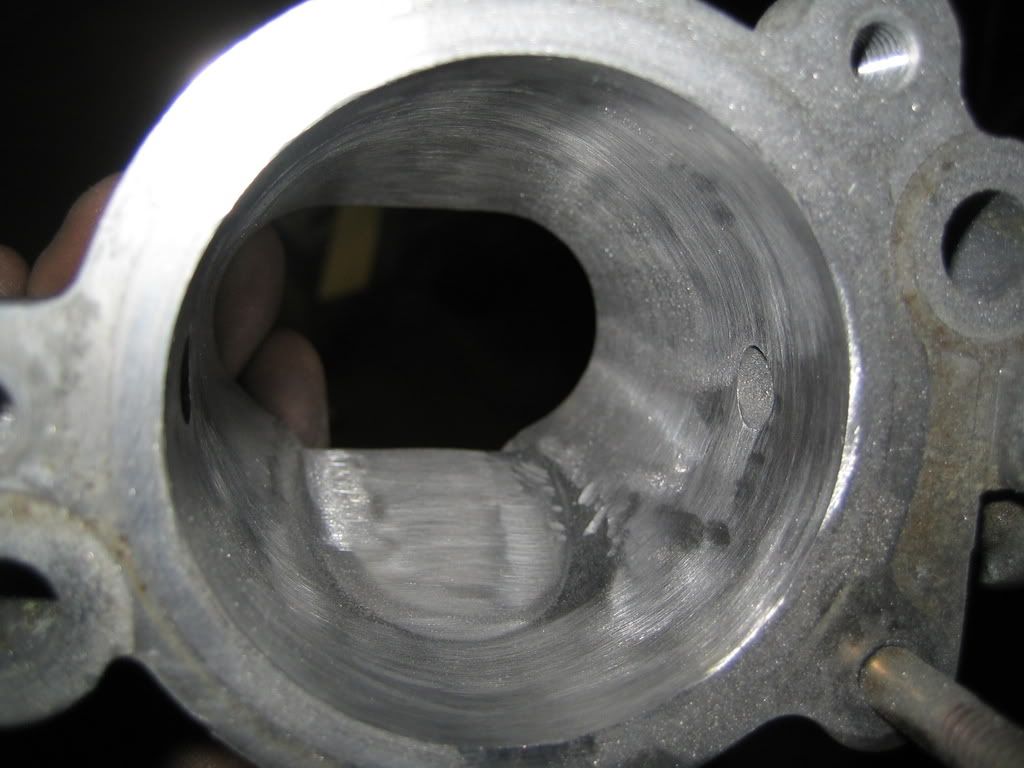
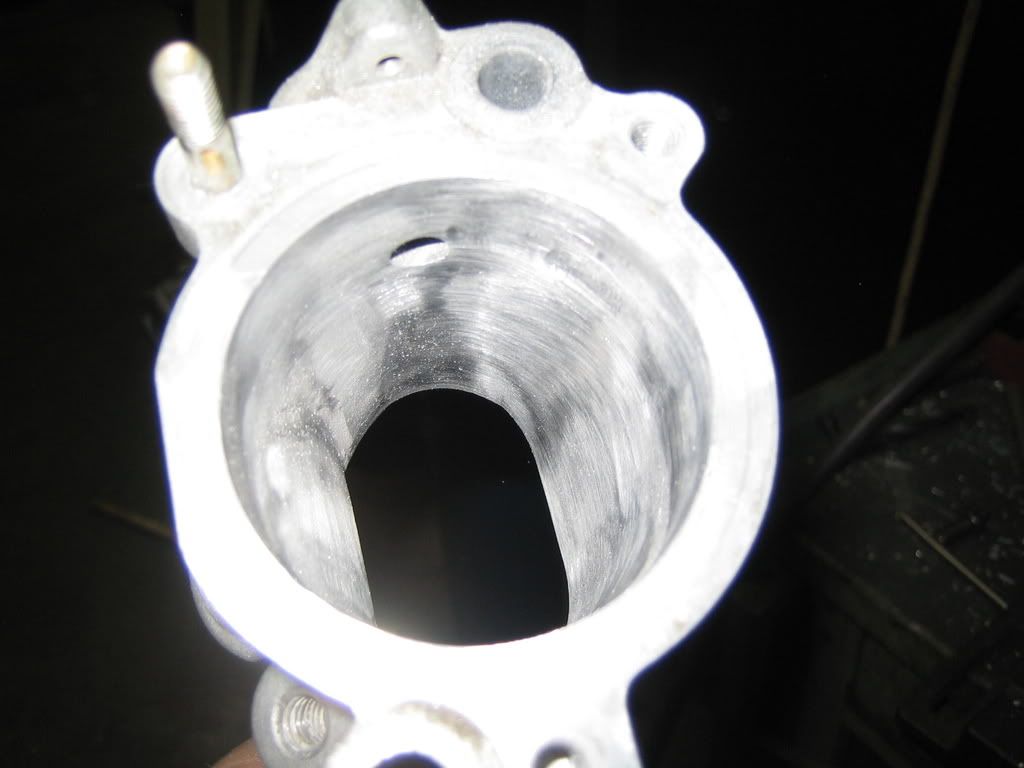
More later.
So I decided to incorperate this on a brake bracklet aswell.
I designed a experimental version on autocad from which I will develop the final version.
I will keep it steel for now, but the final version will be aluminium.
I began cleaning up the throttle bodies.
They are full of environmental valves etc. that seriously restrict the flow.
Today I started milling a bit on them.
More later.

Thread Starter
Scooby Regular
Joined: Dec 2002
Posts: 458
Likes: 0
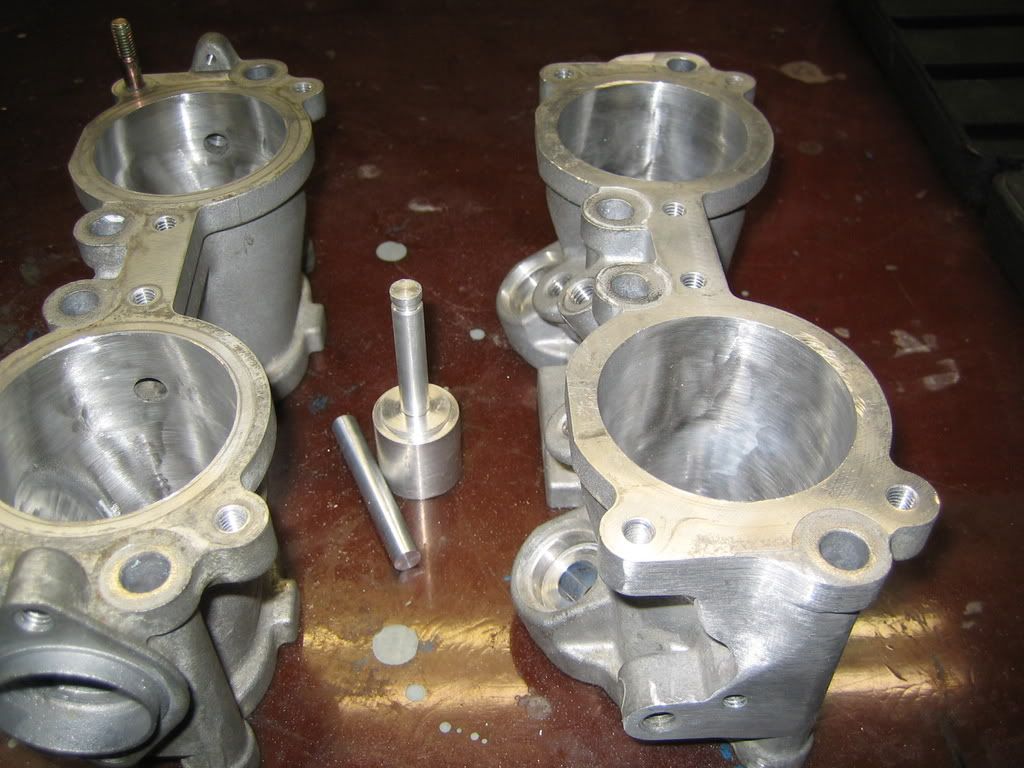
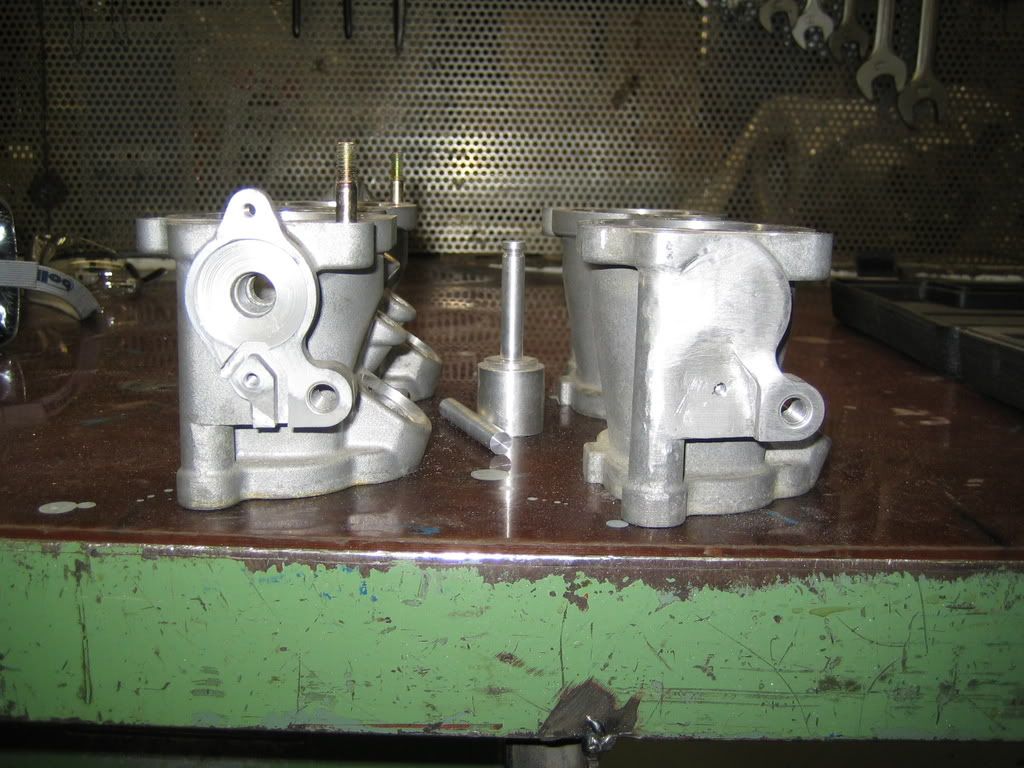
I will match evertything later, but I think it's quite good already.
It's nice to do some other stuff now hehehe.
Today I kinda finished my body's, sandblasted them a bit etc.
Maybe I'll have the outside shotpeened, because the surface is "open" after sandblasting it, so dirt sticks to it very easily.

It's nice to do some other stuff now hehehe.
Today I kinda finished my body's, sandblasted them a bit etc.
Maybe I'll have the outside shotpeened, because the surface is "open" after sandblasting it, so dirt sticks to it very easily.
Thread Starter
Scooby Regular
Joined: Dec 2002
Posts: 458
Likes: 0
Not much of an update but I am trying to get my car registered on the road which has a few glitches.
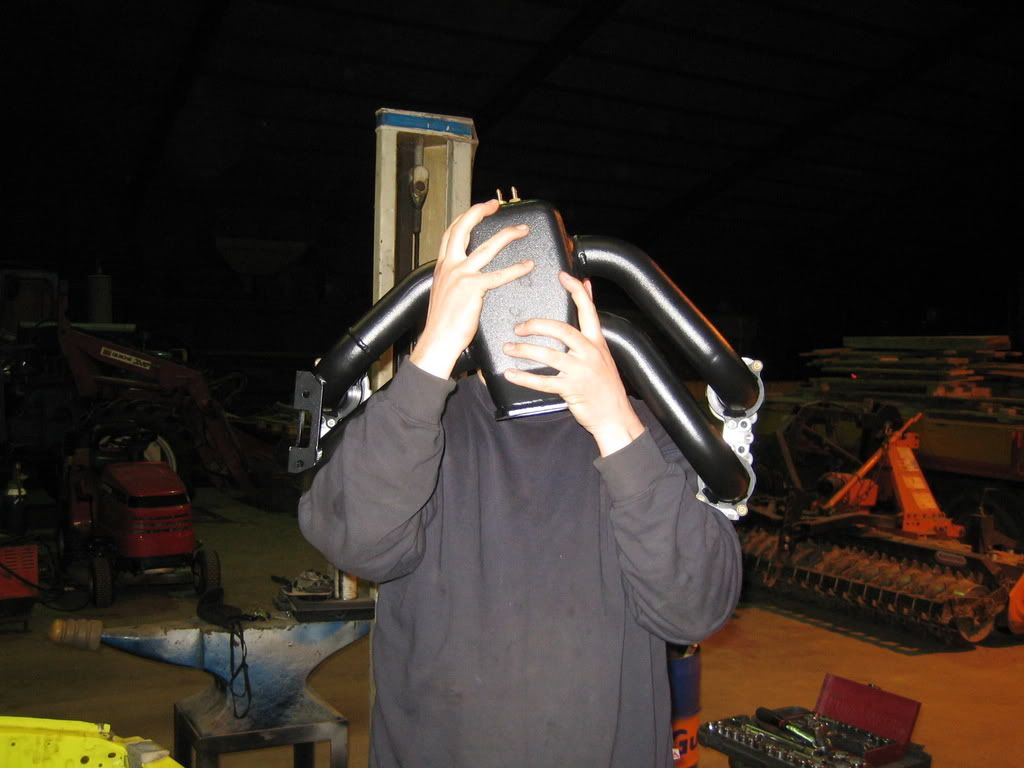
Anyway, I got my turbo set-up this weekend, it is a Garrett GT30 kit by Perrin.
Here some shots of the set on the floor and in the car:
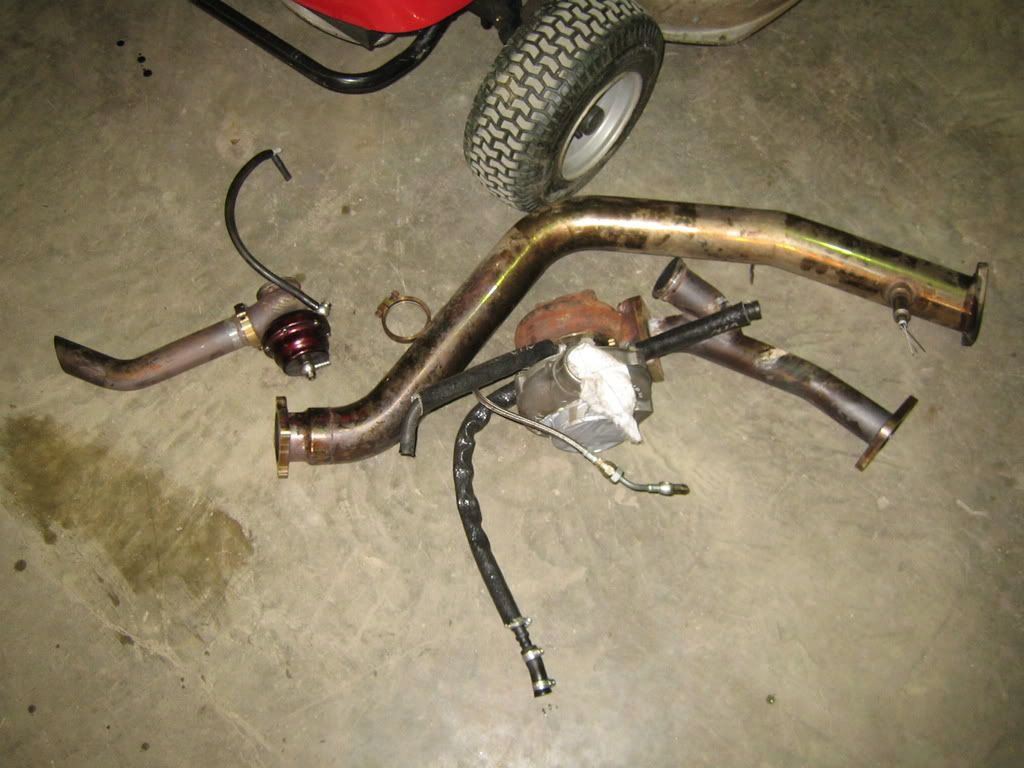
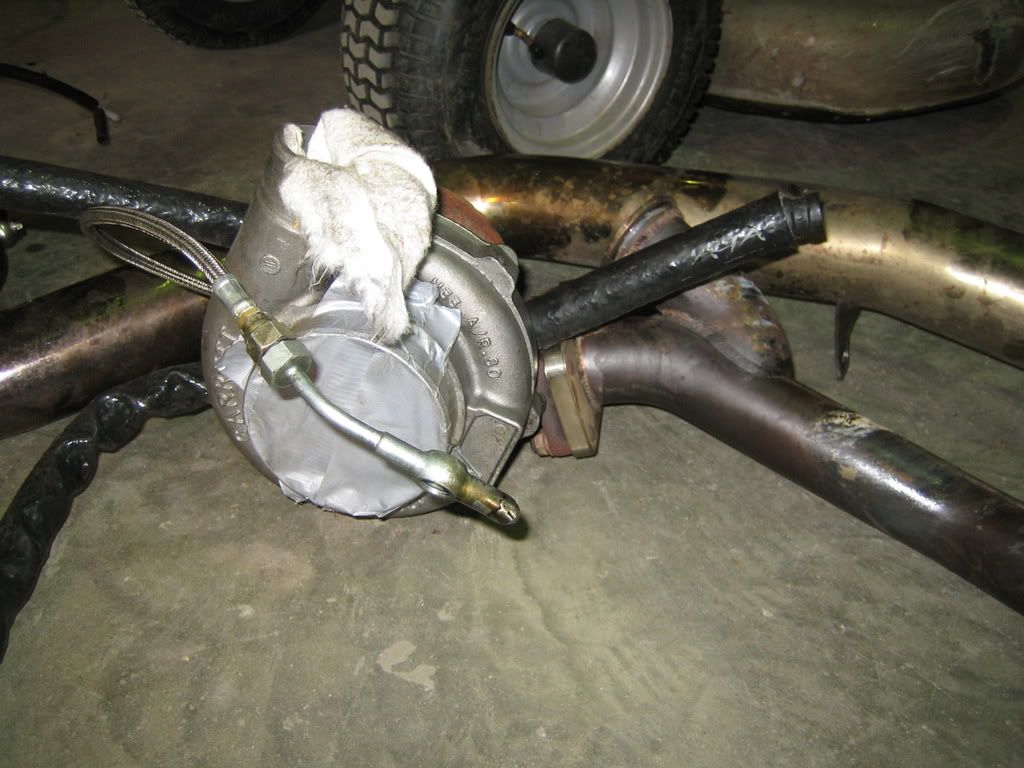
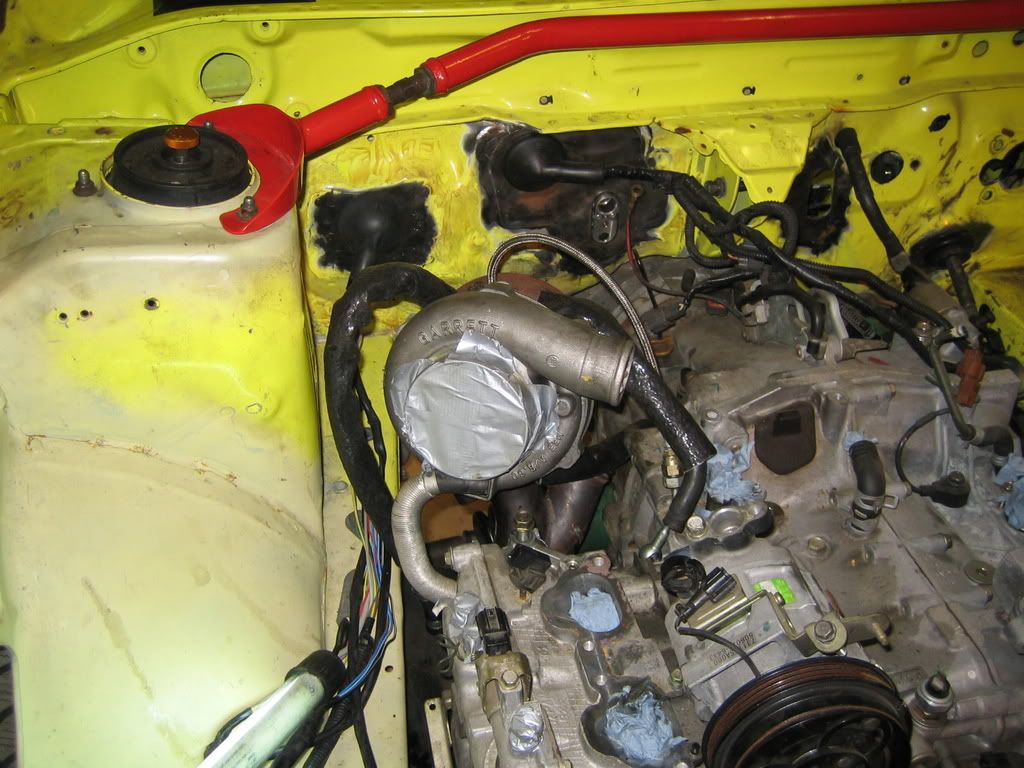
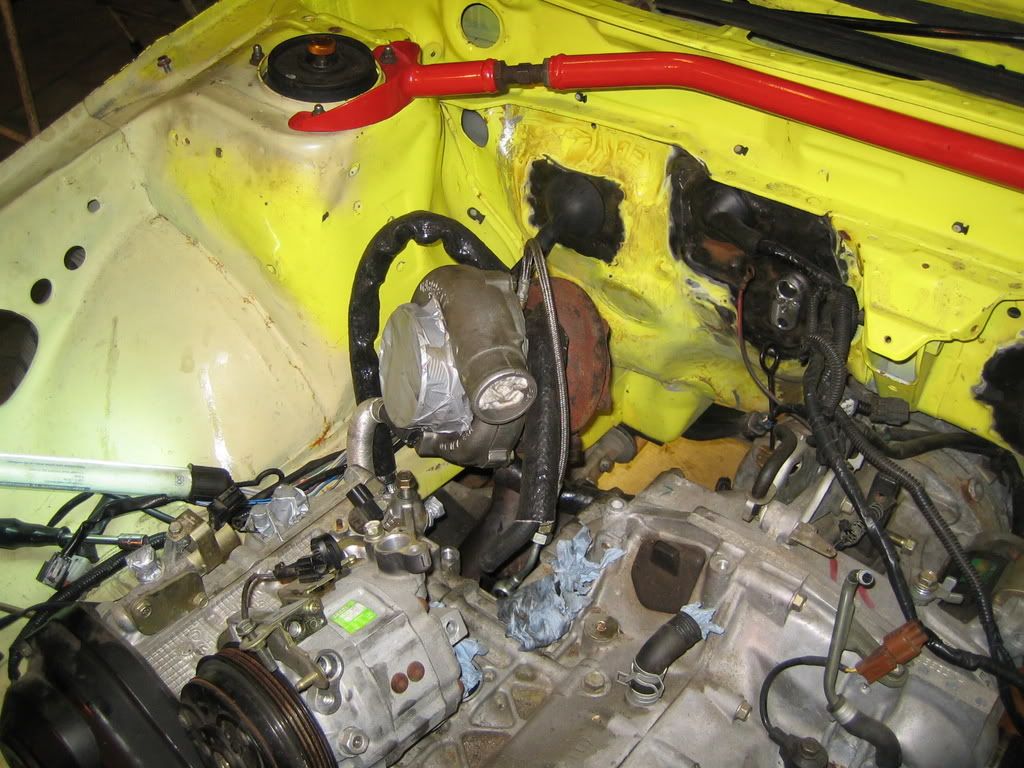
Anyway, I got my turbo set-up this weekend, it is a Garrett GT30 kit by Perrin.
Here some shots of the set on the floor and in the car:
Thread Starter
Scooby Regular
Joined: Dec 2002
Posts: 458
Likes: 0
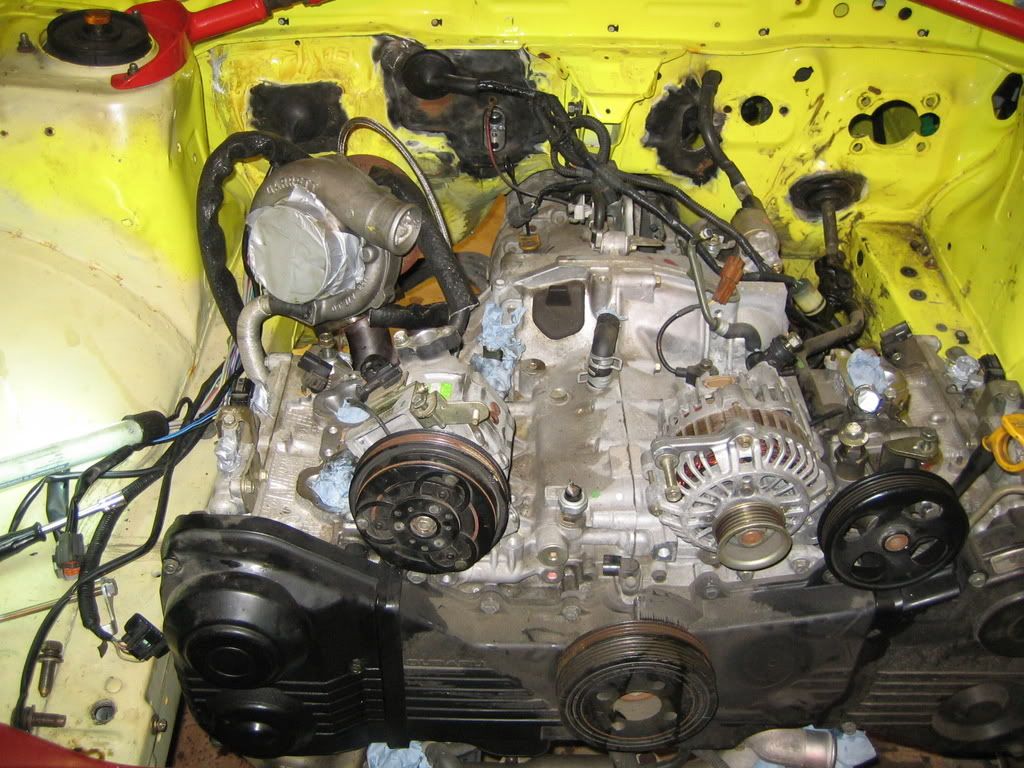
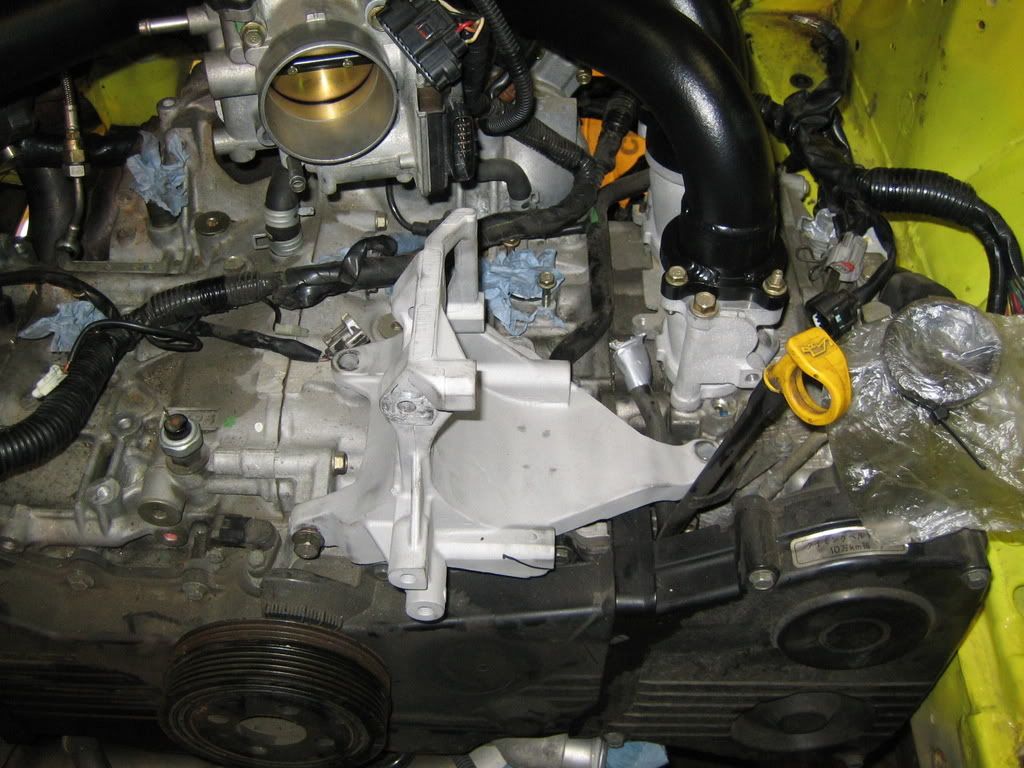
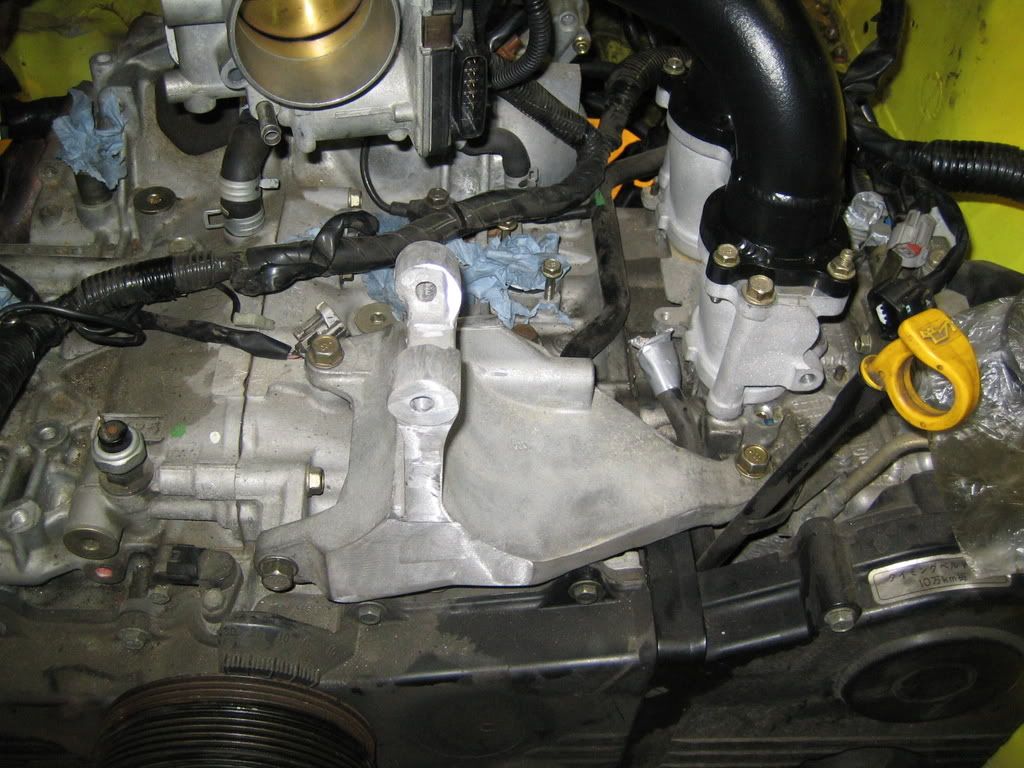
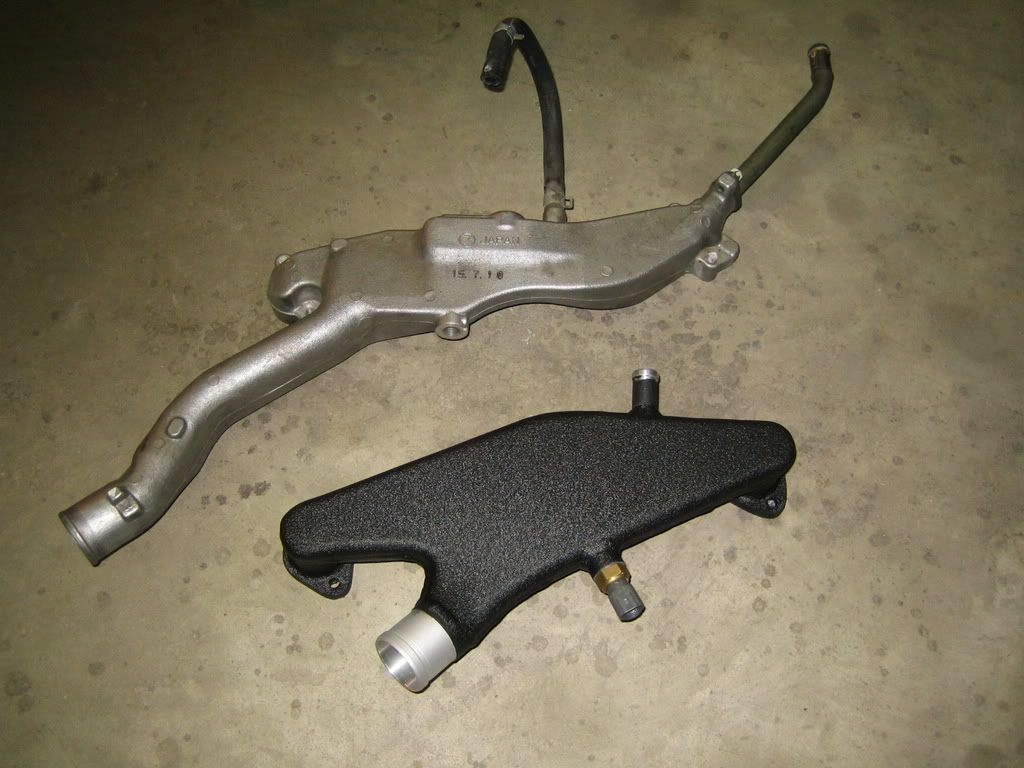
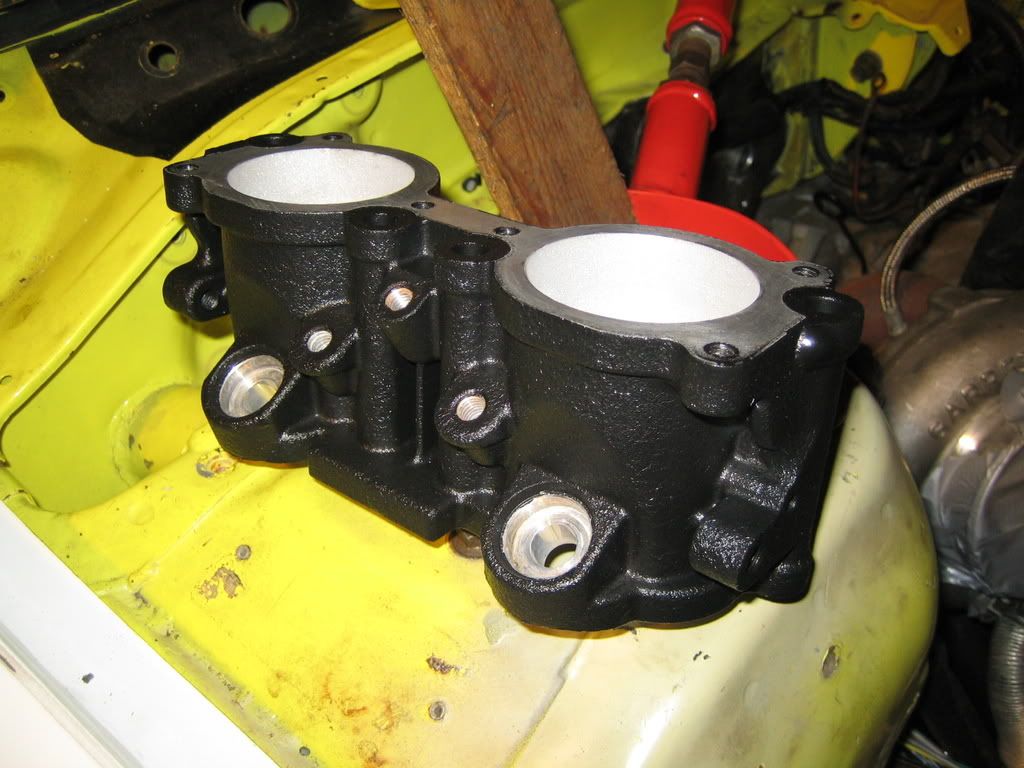
Yesterday I picked up my new inlet and water manifold.
There are a few small glitches that I have to work out but it's 99% perfect fit.
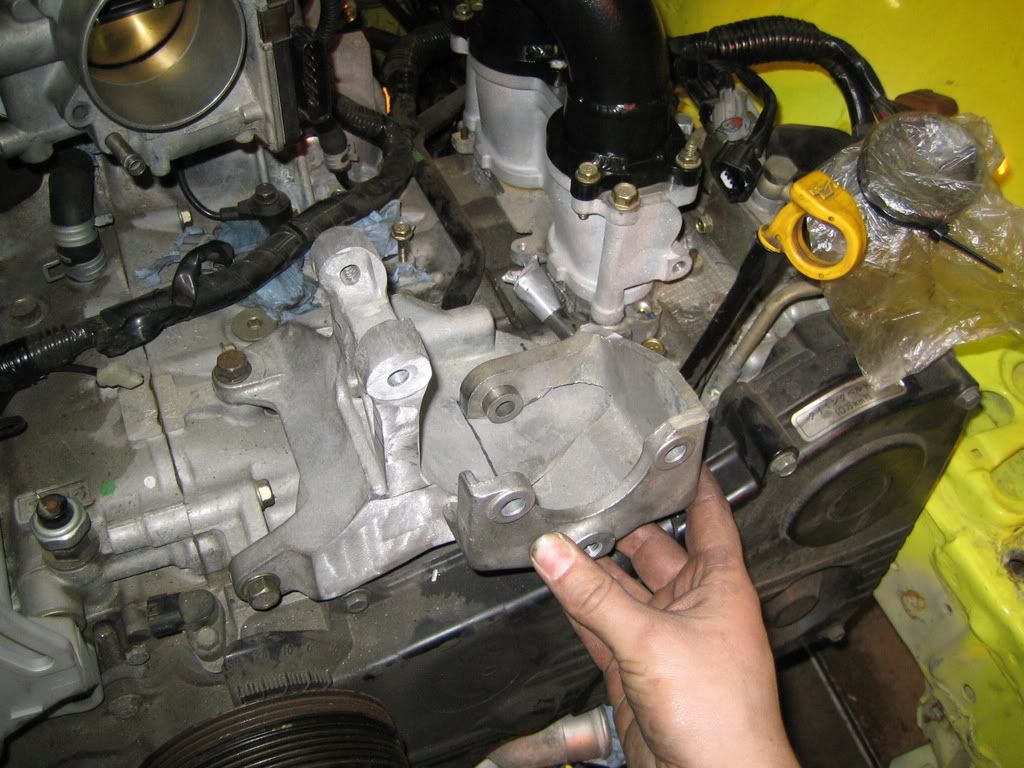
As I'm switching the airco and steerpumps I need to make new brackets.
I though it was smart to get 2 identical brackets and then switch bottoms and tops with each other.
So I started with the steering pump, but it turned out to high, so I will start from scratch again.
Everything needs to be as low as possible on the engine, first because of the FMIC/radiator shrouding and because of the FMIC piping from the manifold that has to run over them.
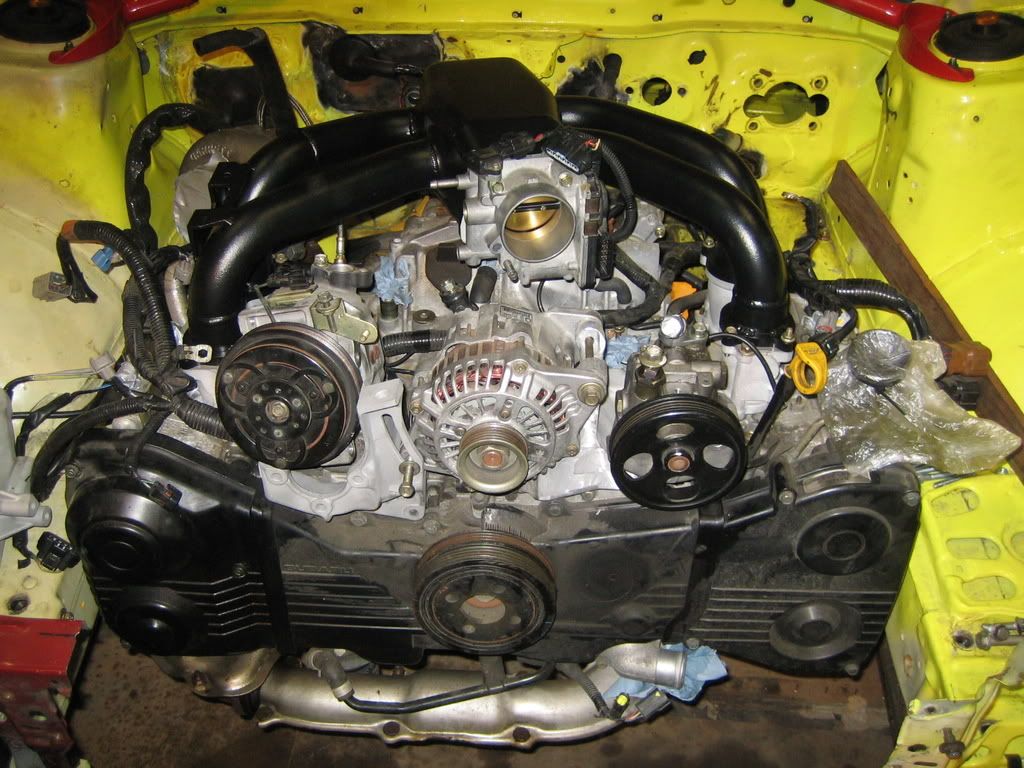
The body's in their place:
Alien!!!!! Aarghh.... uhm, sorry.
Well finished!:
In it's place:
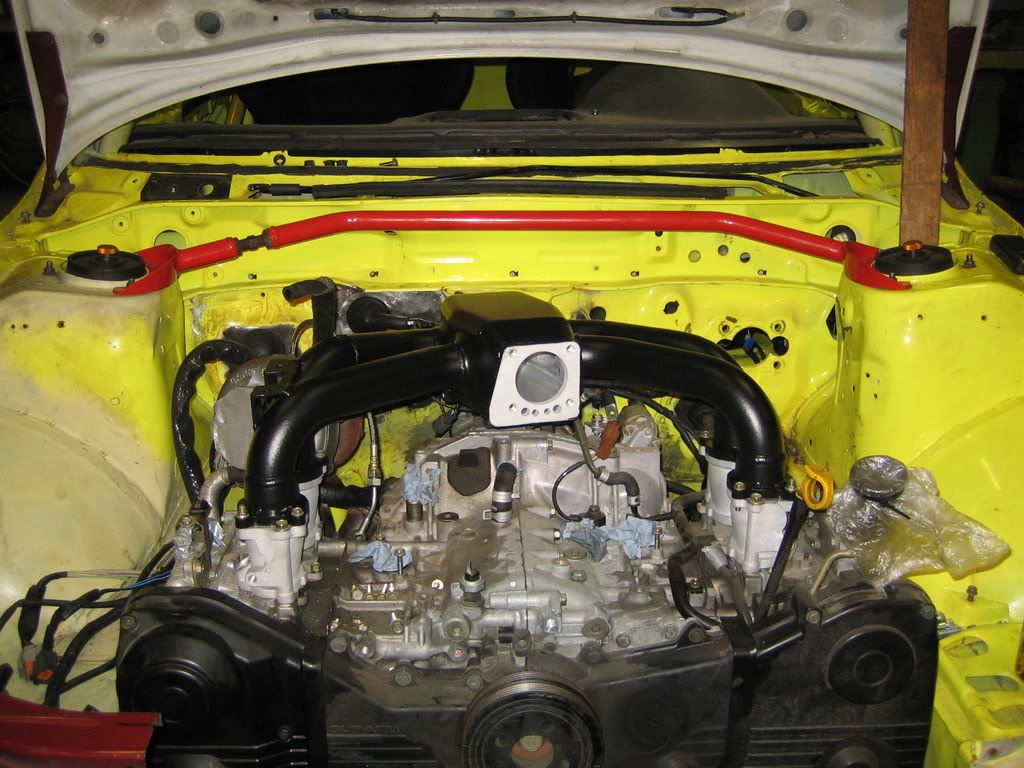
Look how neat the FMIC can go underneath:
There are a few small glitches that I have to work out but it's 99% perfect fit.
As I'm switching the airco and steerpumps I need to make new brackets.
I though it was smart to get 2 identical brackets and then switch bottoms and tops with each other.
So I started with the steering pump, but it turned out to high, so I will start from scratch again.
Everything needs to be as low as possible on the engine, first because of the FMIC/radiator shrouding and because of the FMIC piping from the manifold that has to run over them.
The body's in their place:
Alien!!!!! Aarghh.... uhm, sorry.
Well finished!:
In it's place:
Look how neat the FMIC can go underneath:
Thread Starter
Scooby Regular
Joined: Dec 2002
Posts: 458
Likes: 0
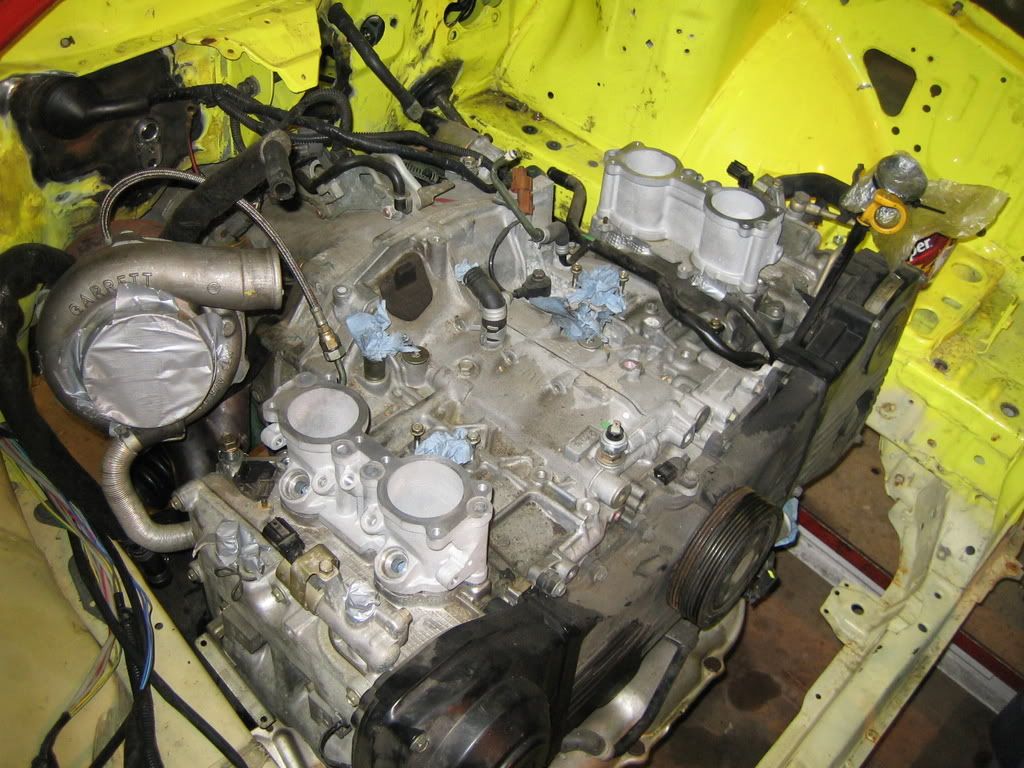
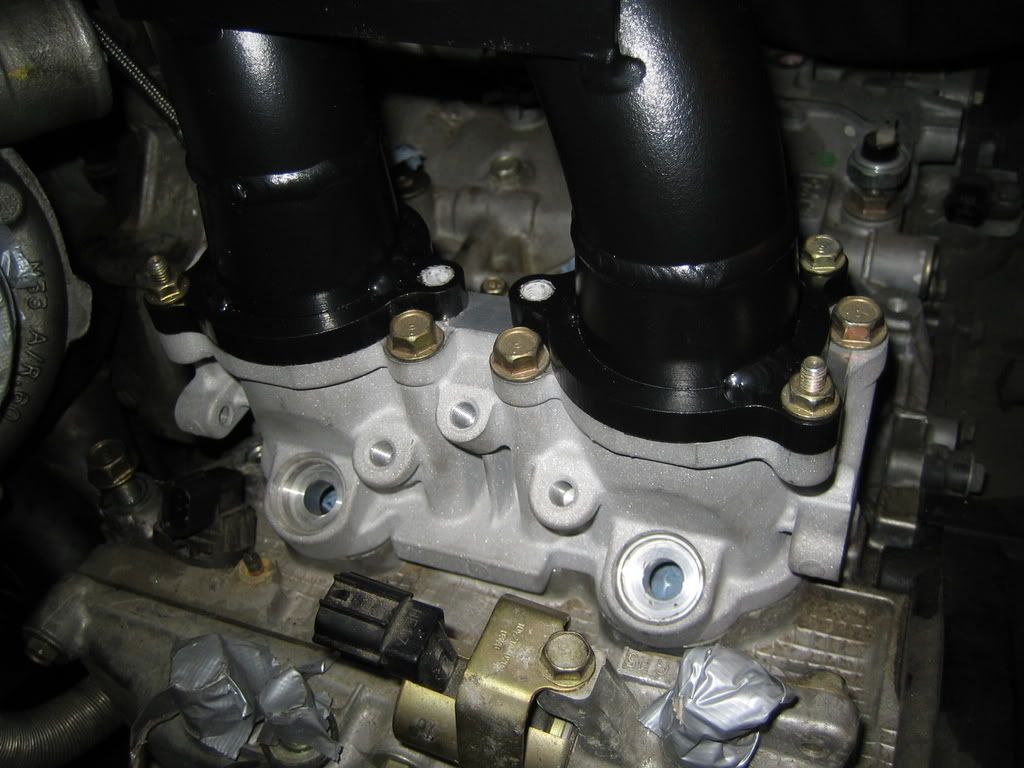
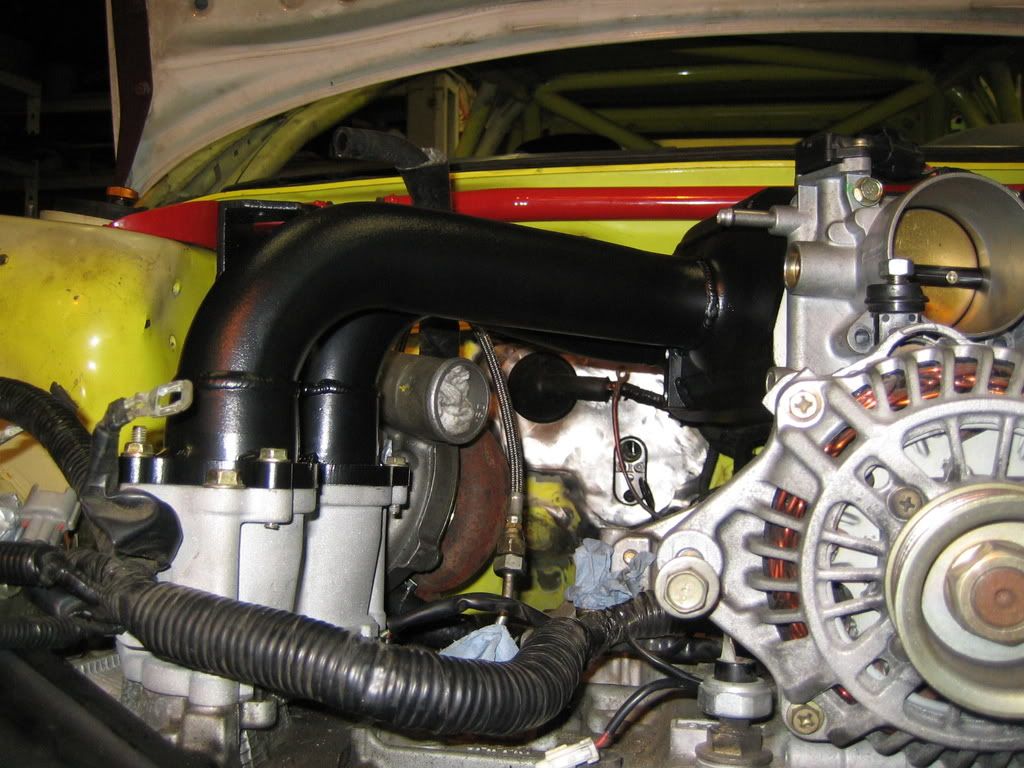
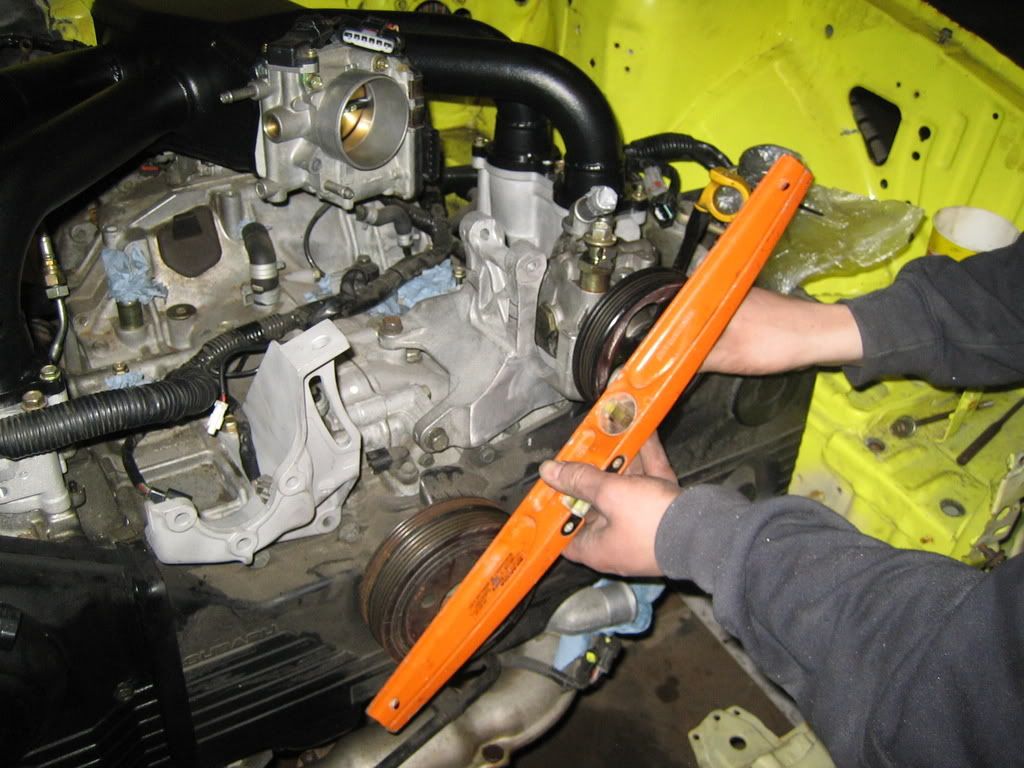
Some pics, I got the inlet manifold back, it has the throttlvalve attached now.
Throttlebody's have the same coating as the water and inlet manifold.
The positive connector on the alternator has moved from the top to the back, this is beter as the FMIC piping runs over it.
It's a bit more shiny to now.
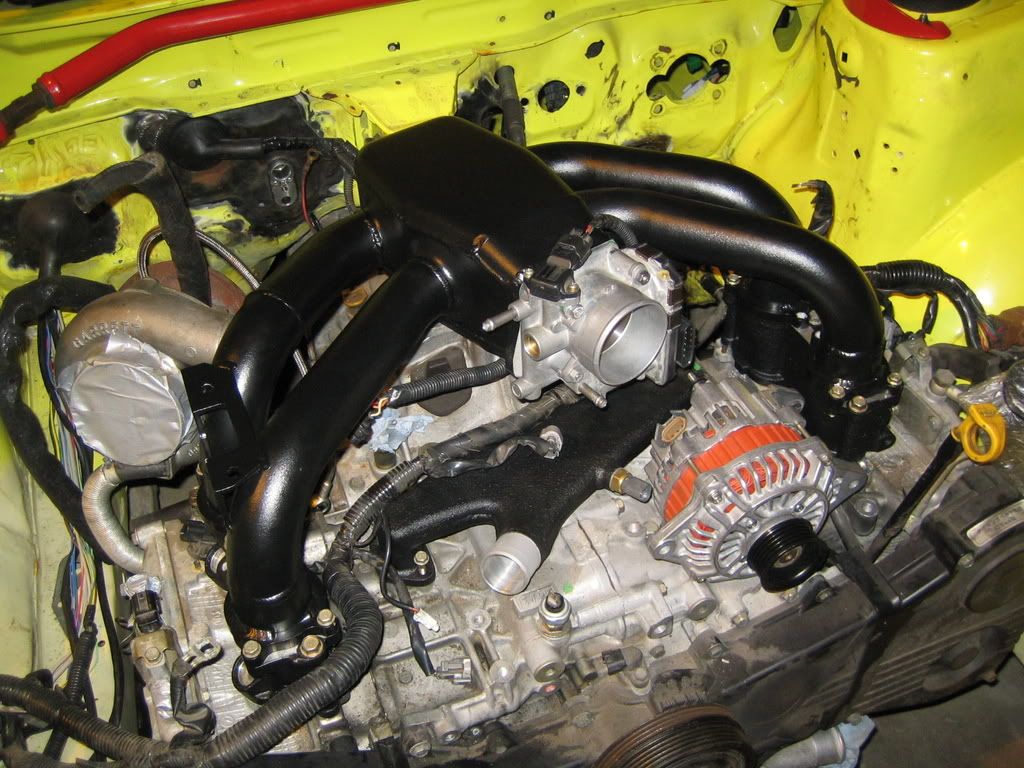
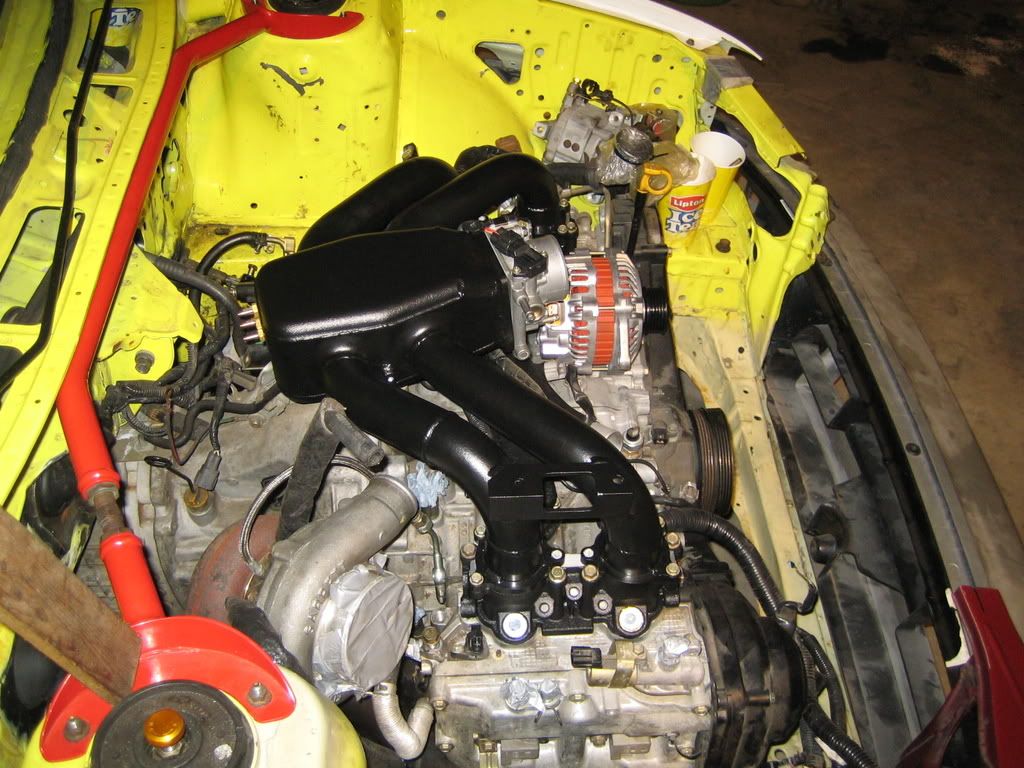

Replacement exit for crank oil fumes that sits on top of the engine, the new watermanifold sat over it so it has to be adjusted:
Throttlebody's have the same coating as the water and inlet manifold.
The positive connector on the alternator has moved from the top to the back, this is beter as the FMIC piping runs over it.
It's a bit more shiny to now.
Replacement exit for crank oil fumes that sits on top of the engine, the new watermanifold sat over it so it has to be adjusted:
Thread Starter
Scooby Regular
Joined: Dec 2002
Posts: 458
Likes: 0
Small update,
Did some stuff today after a small summer dip.
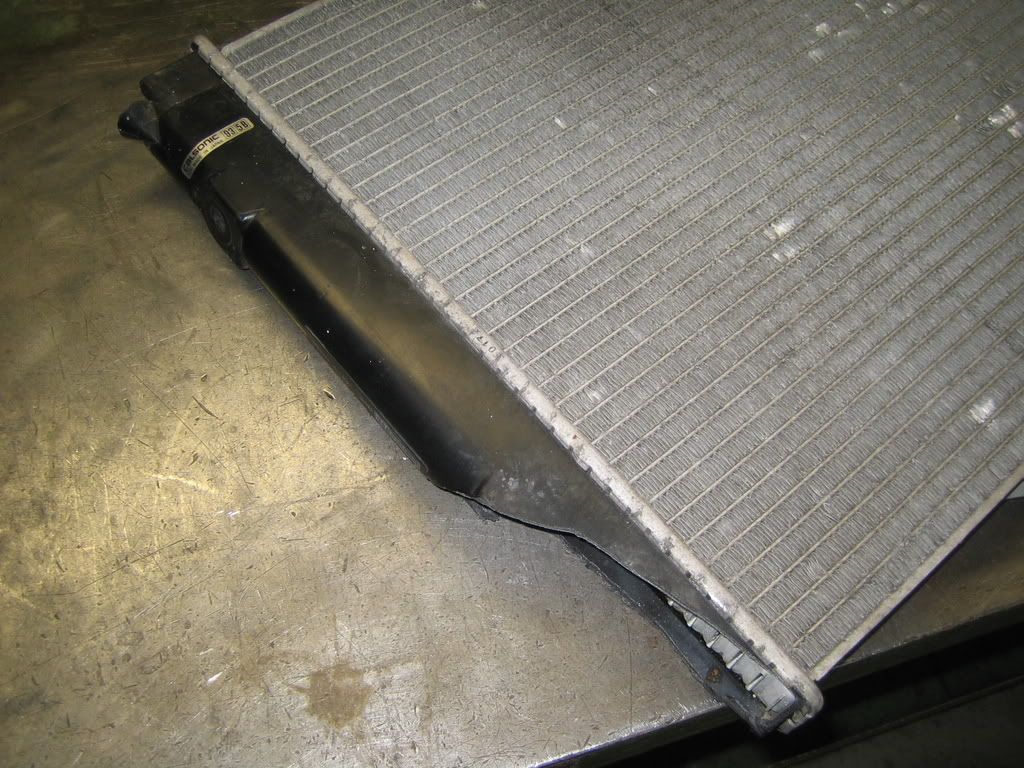
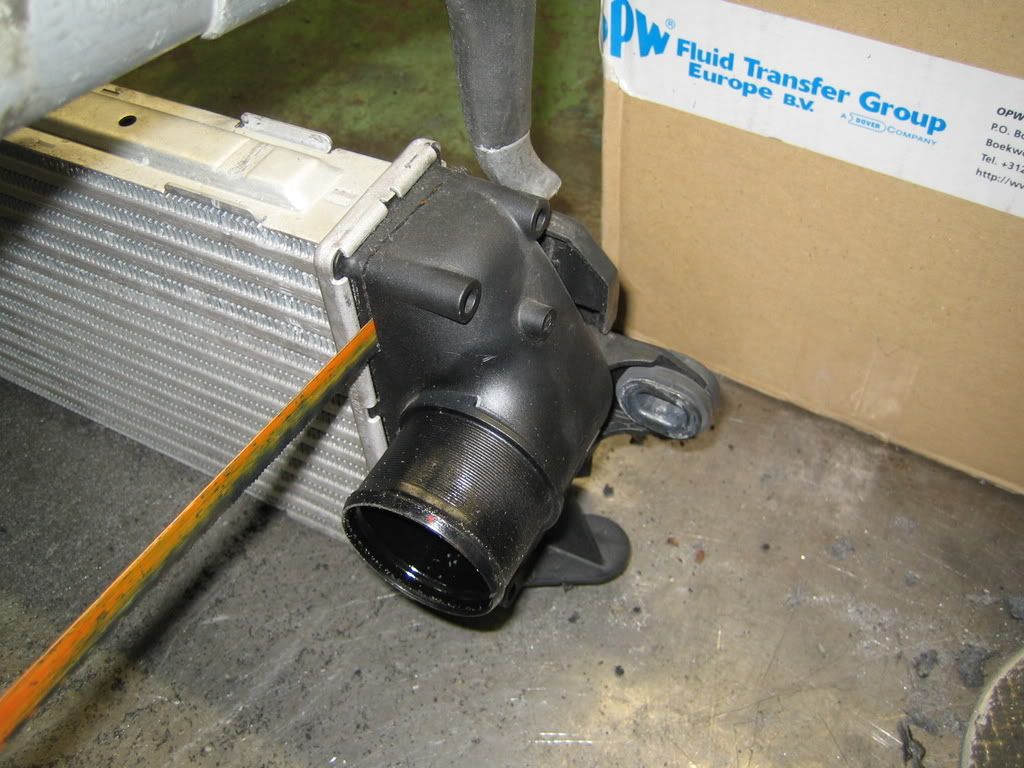
Radiator and intercooler time!
The standard GC8 radiator is very good, the only problem are the plastic end tanks which are prone to cracking on the seams after a few years.
So i needed to check if I could weld on aluminum ones.
Luckily I had an old radiator somewhere which I could use for experimenting.
If this works I'll buy a new radiator for the real thing.
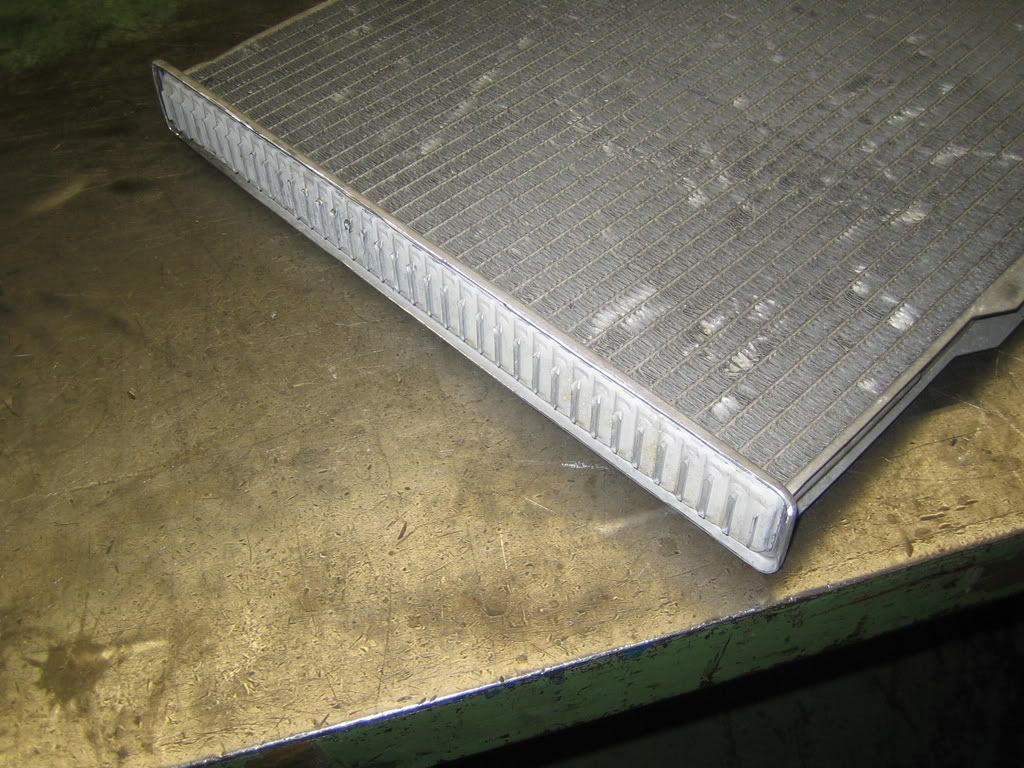
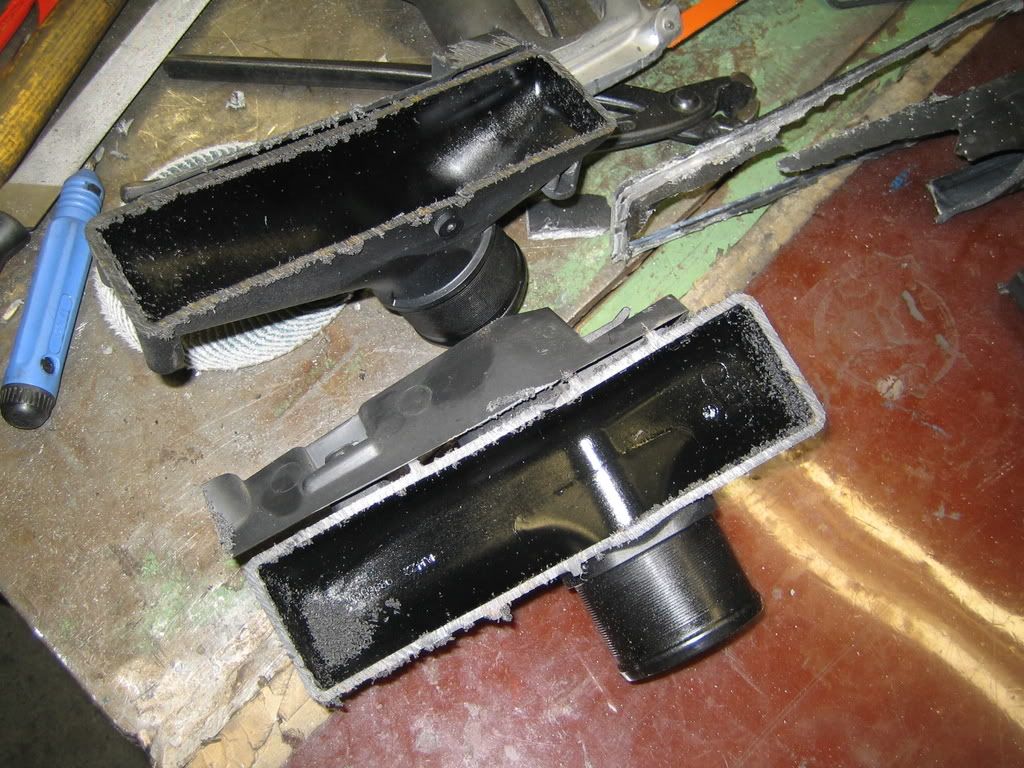
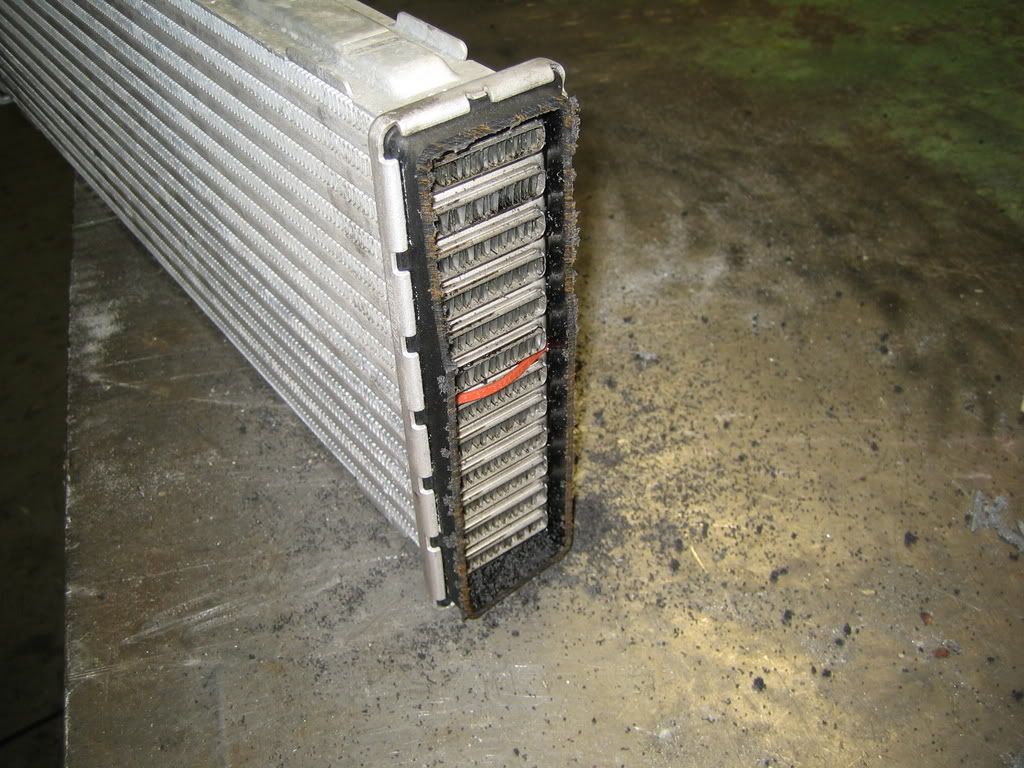
Old radiator:
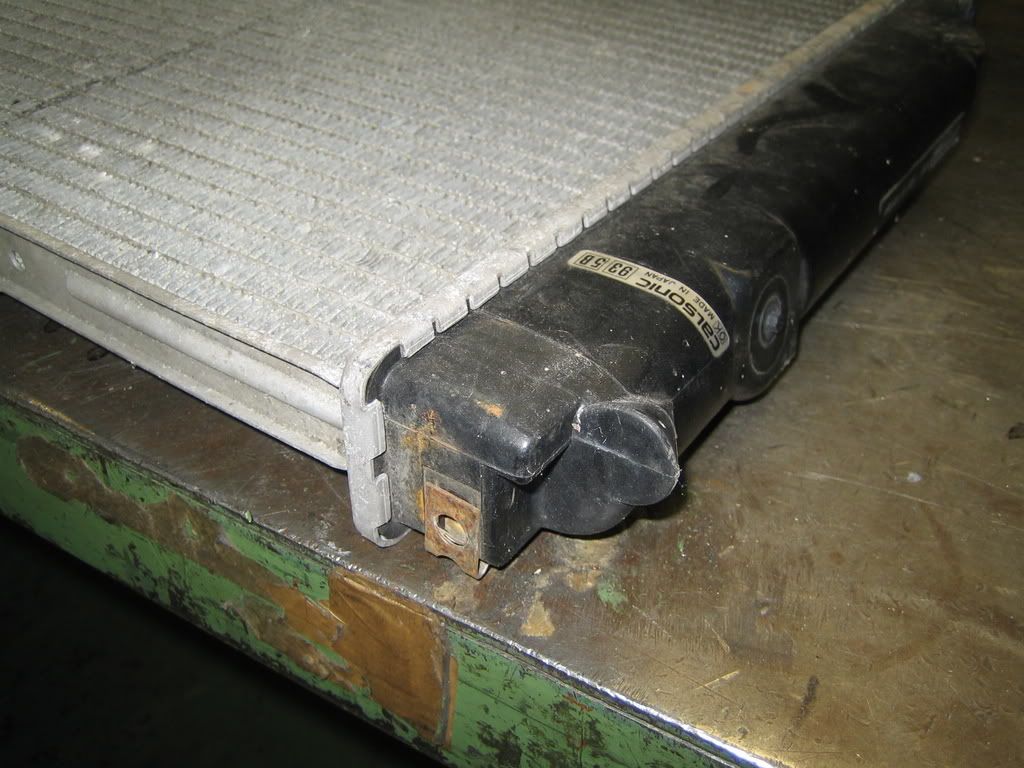
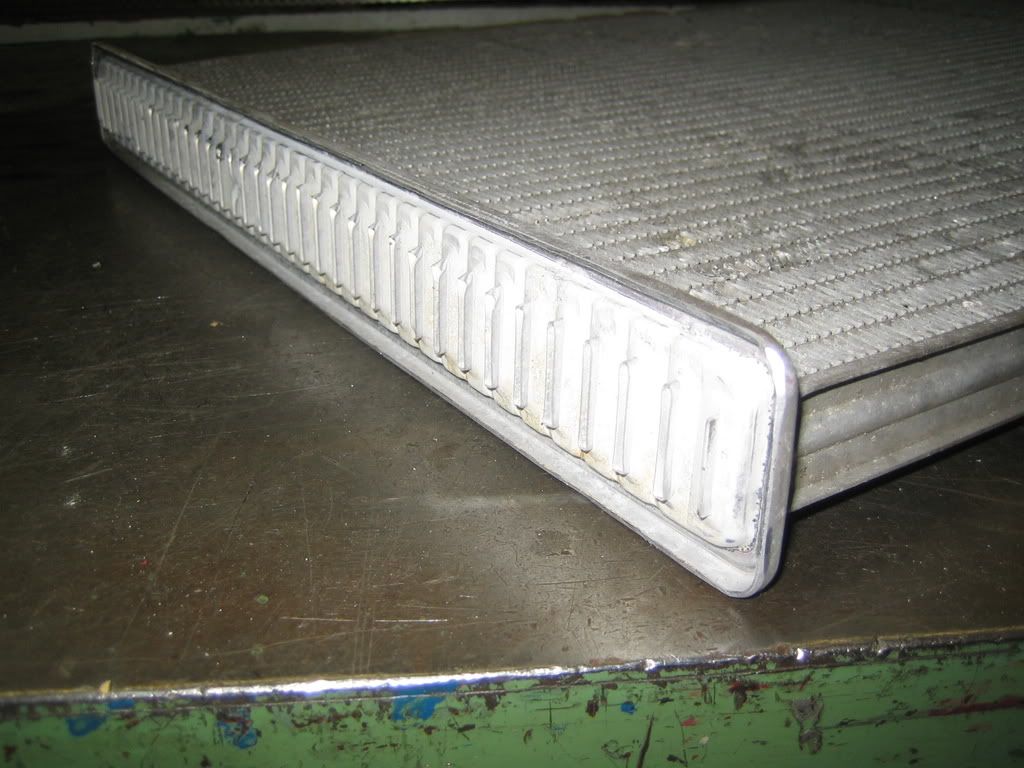
First bits off:
Endtanks gone and behold a nice weld-able core .
Did some stuff today after a small summer dip.
Radiator and intercooler time!
The standard GC8 radiator is very good, the only problem are the plastic end tanks which are prone to cracking on the seams after a few years.
So i needed to check if I could weld on aluminum ones.
Luckily I had an old radiator somewhere which I could use for experimenting.
If this works I'll buy a new radiator for the real thing.
Old radiator:
First bits off:
Endtanks gone and behold a nice weld-able core .
Thread Starter
Scooby Regular
Joined: Dec 2002
Posts: 458
Likes: 0
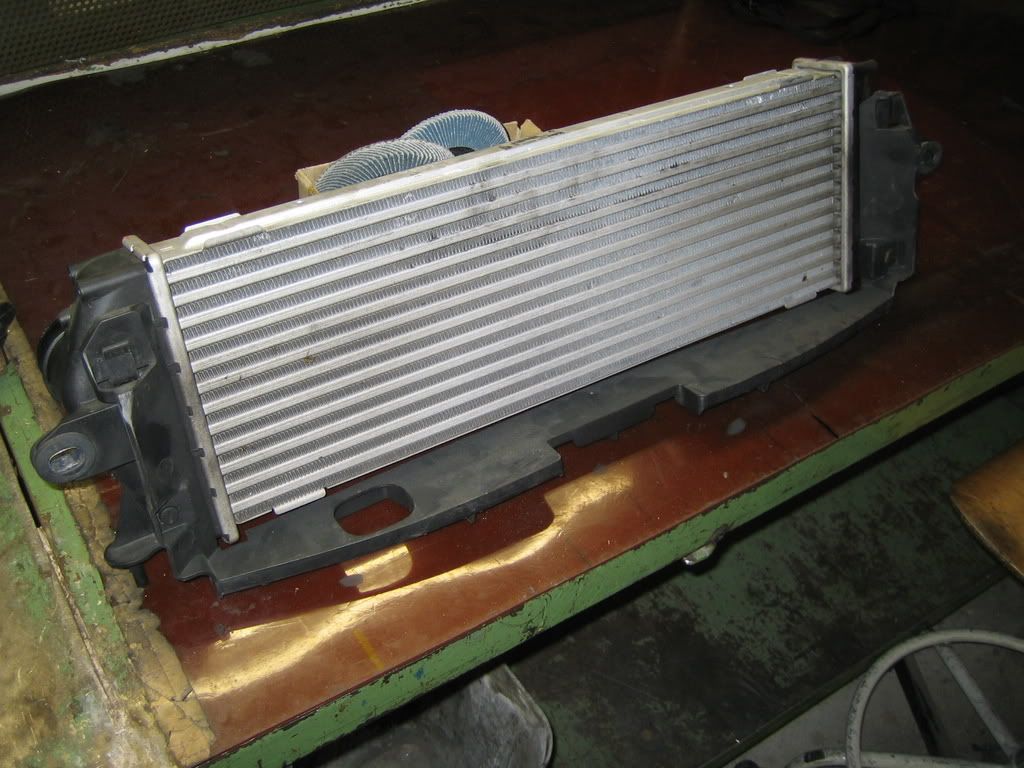
I'm not convinced by the 300 dollar taiwanese FMIC kits somehow, and I'm not the only one it seems.
After talking to some pro's the next best thing to mega expensive rally/race cores were actually cores used in production cars.
Now it was only a matter of searching for the right one.
It has to have the right measurements of course, with as much fins per inch as possible.
Also it should be thin, thick cores are not as good as a thin one with a big frontal area.
Problem is that the air going through the core is at core temp halfway through the core thus not cooling anymore.
In the end I went to a big car scrapyard searching through tons of cores.
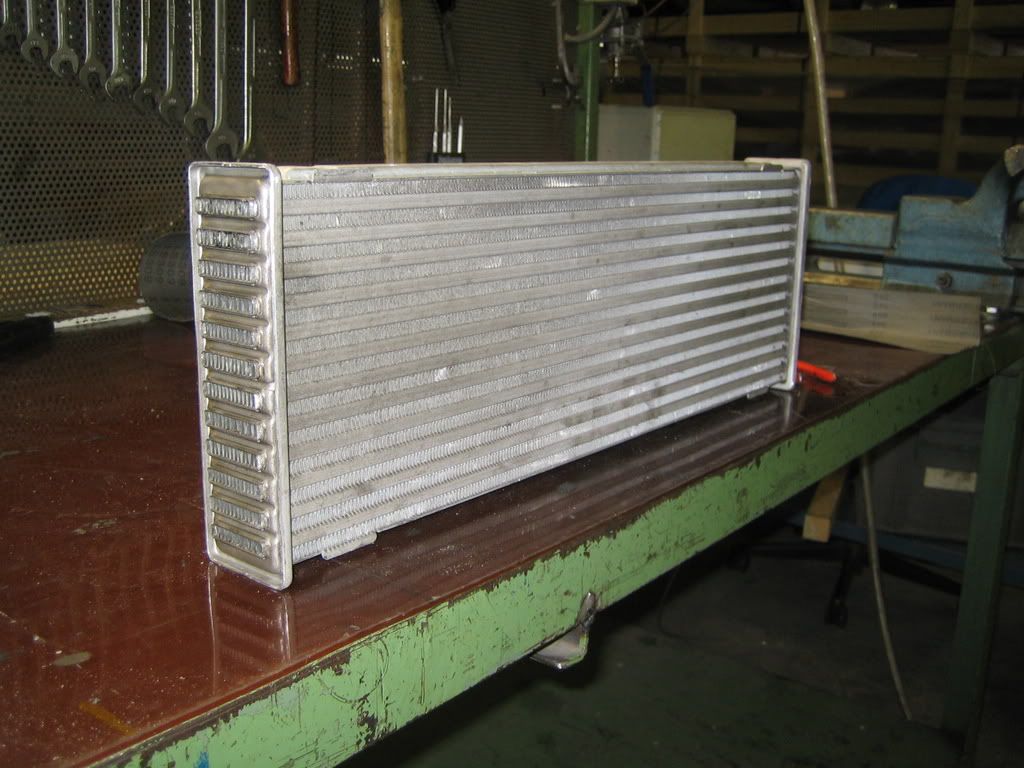
I found one with all that I needed, except the height, so I need a second one to weld to this one.
It's from a Renault trafic from 2007.
It also has plastic end tanks, so they need to come off as well.
This is how it looks like new:
Sawing off the first pieces:
Debris:
Ready for more torture:
Viola:
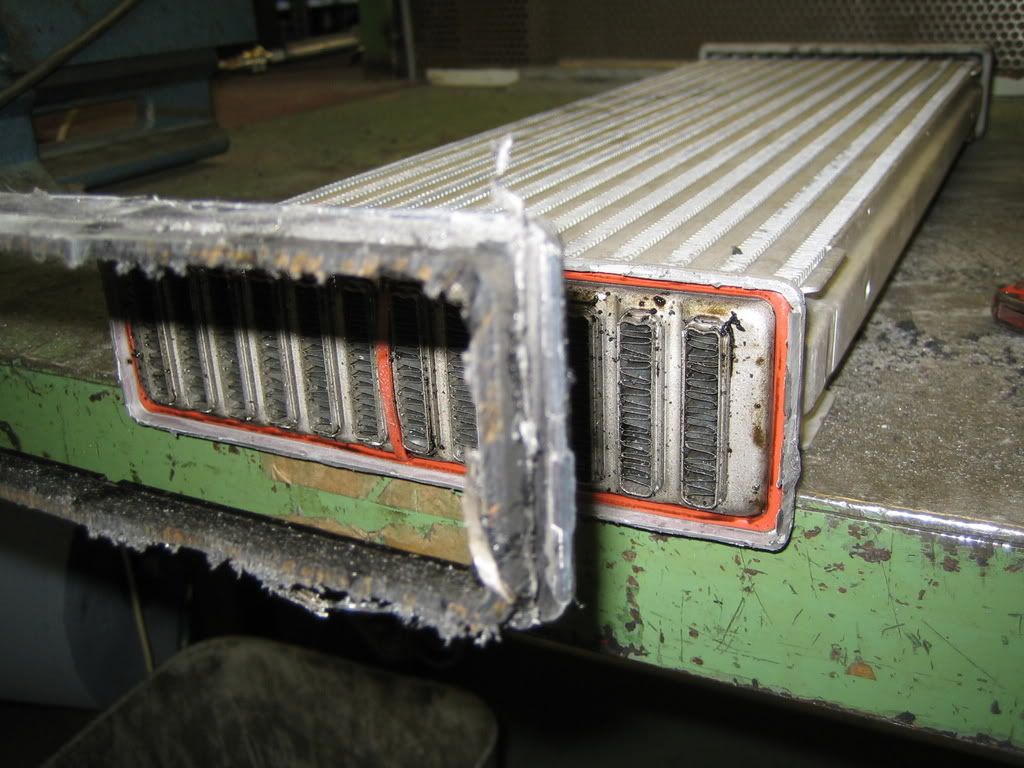
The red gasket for the plastic endtanks, check the fins in the core:
A core ready for some nice endtanks:
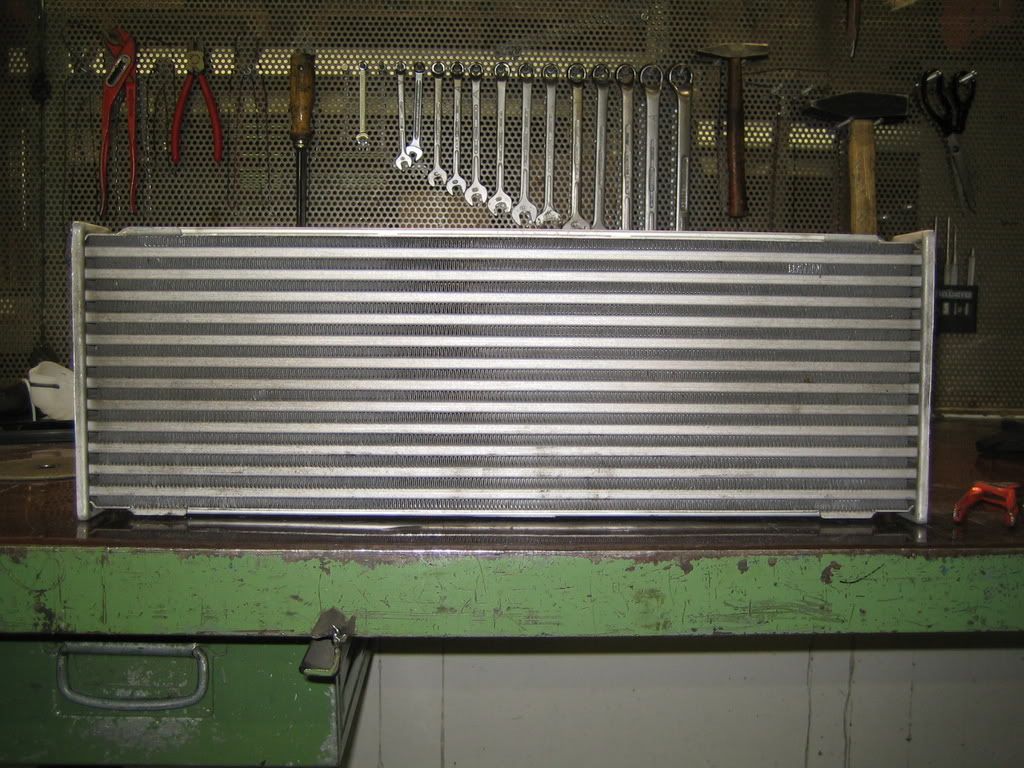
That was it for now!
After talking to some pro's the next best thing to mega expensive rally/race cores were actually cores used in production cars.
Now it was only a matter of searching for the right one.
It has to have the right measurements of course, with as much fins per inch as possible.
Also it should be thin, thick cores are not as good as a thin one with a big frontal area.
Problem is that the air going through the core is at core temp halfway through the core thus not cooling anymore.
In the end I went to a big car scrapyard searching through tons of cores.
I found one with all that I needed, except the height, so I need a second one to weld to this one.
It's from a Renault trafic from 2007.
It also has plastic end tanks, so they need to come off as well.
This is how it looks like new:
Sawing off the first pieces:
Debris:
Ready for more torture:
Viola:
The red gasket for the plastic endtanks, check the fins in the core:
A core ready for some nice endtanks:
That was it for now!
Thread Starter
Scooby Regular
Joined: Dec 2002
Posts: 458
Likes: 0
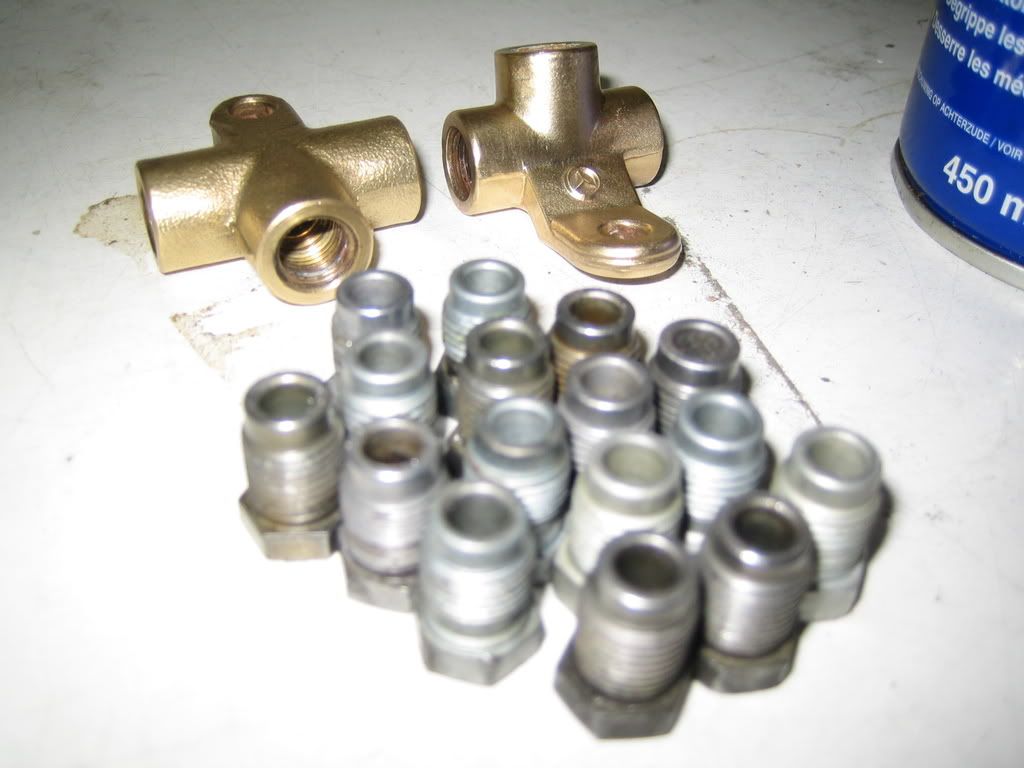
Started working on the brake lines
I had to get some stuff before I could start, so I went to the scrapyard and took nipples I needed, from the newest cars they had, coz then they are still shiny.
I also took 2 T-pieces which cost almost 40 euro a pop at the shop.
Nipples:
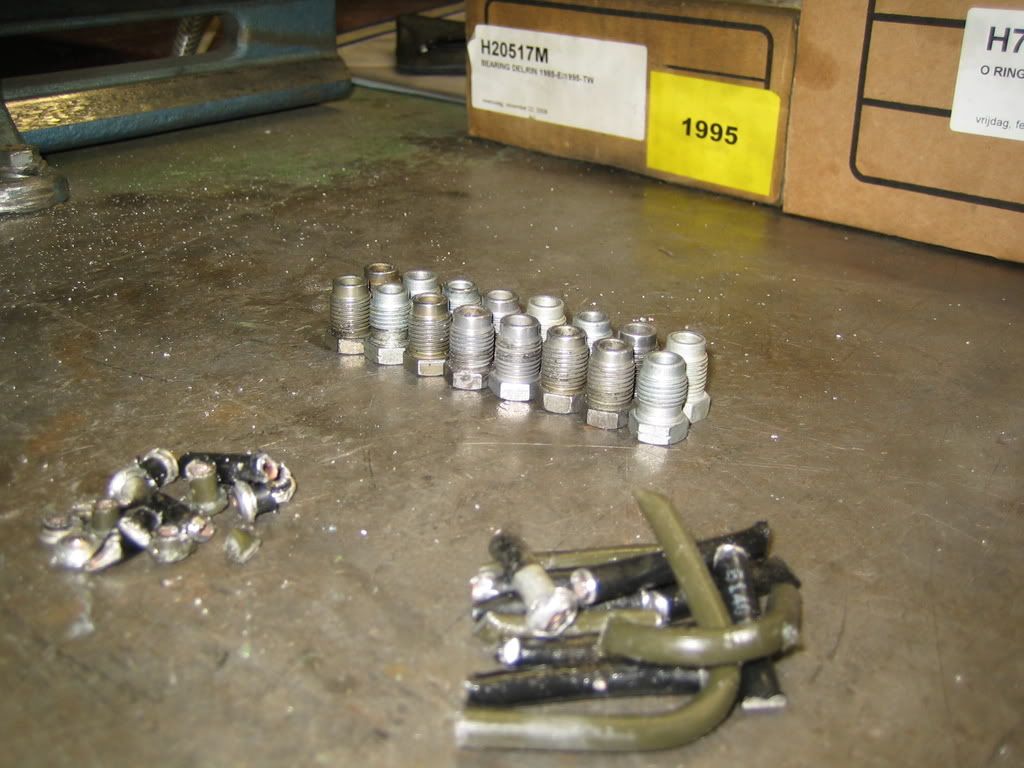
T-pieces:
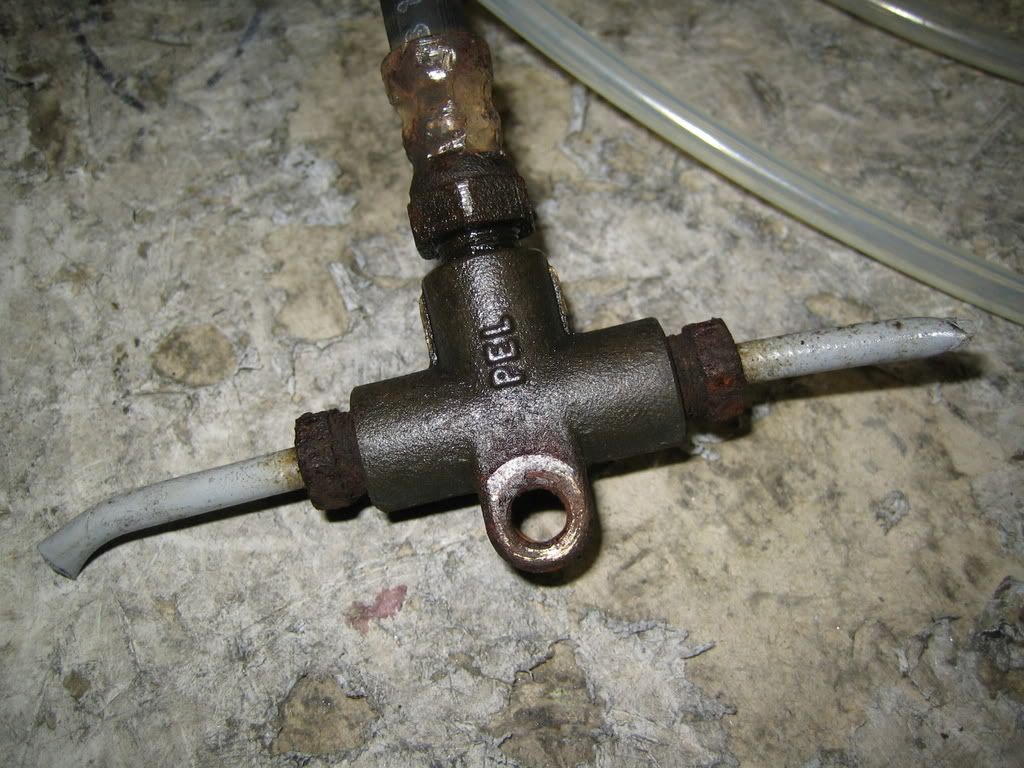
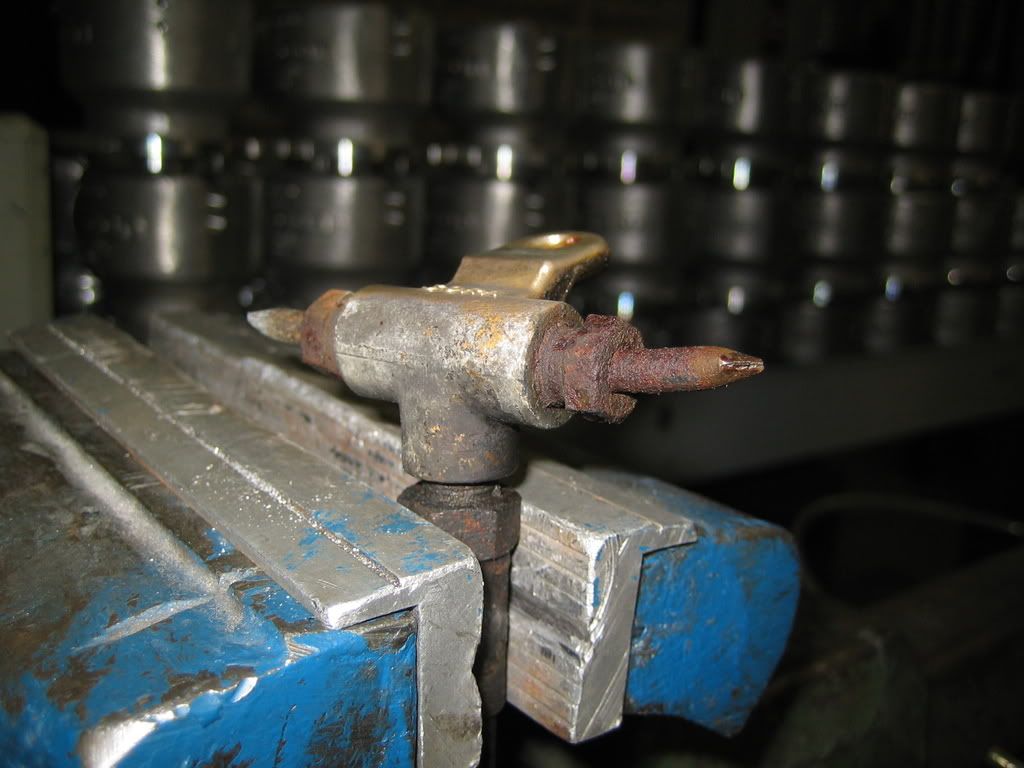
Looks like donkey *****, so I polished them a bit.
As new!!:
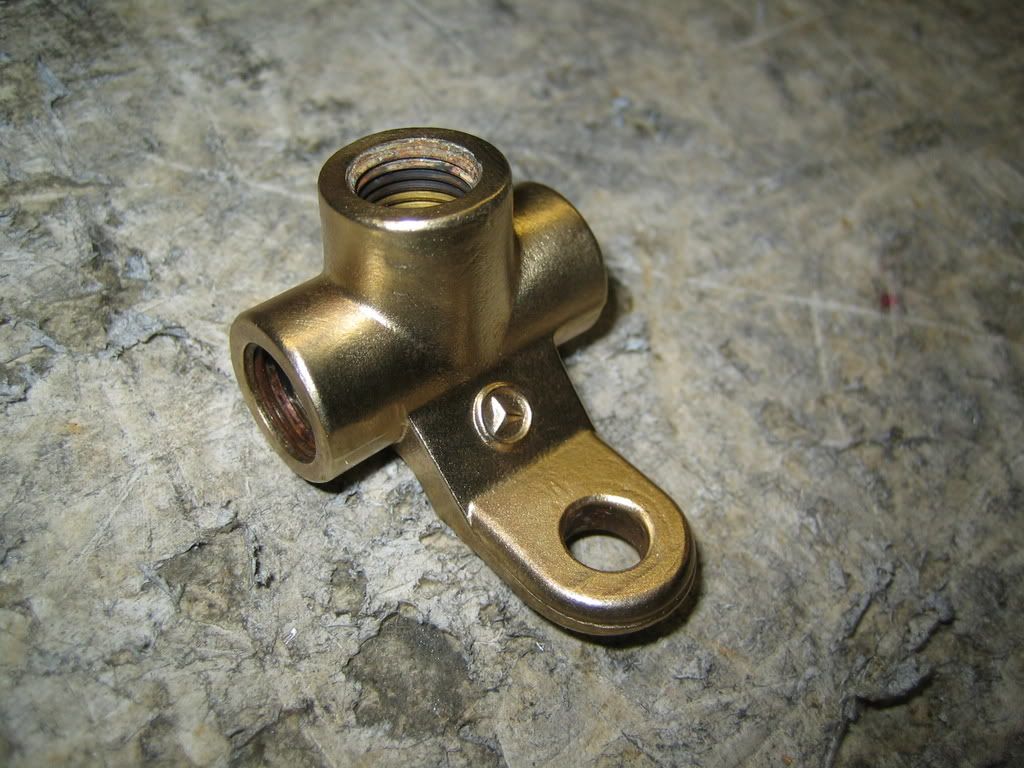
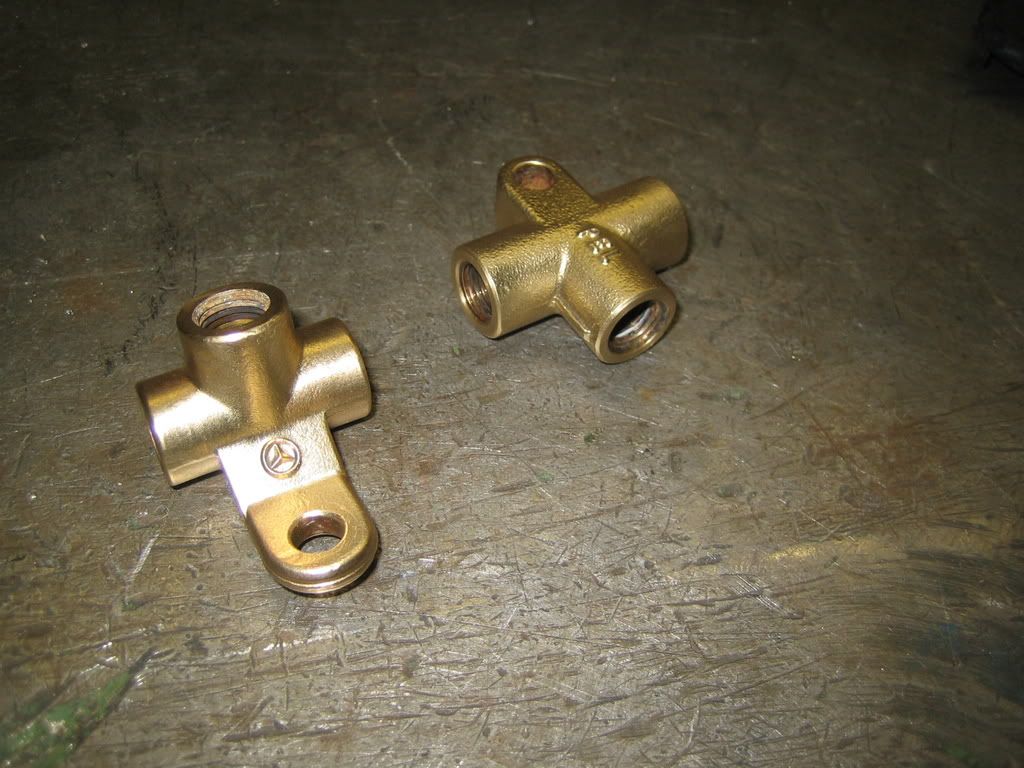
Everything together, in the shop almost a 100 euro's, at the scrapyard 10 euro. :
I had to get some stuff before I could start, so I went to the scrapyard and took nipples I needed, from the newest cars they had, coz then they are still shiny.
I also took 2 T-pieces which cost almost 40 euro a pop at the shop.
Nipples:
T-pieces:
Looks like donkey *****, so I polished them a bit.
As new!!:
Everything together, in the shop almost a 100 euro's, at the scrapyard 10 euro.
:
Thread Starter
Scooby Regular
Joined: Dec 2002
Posts: 458
Likes: 0
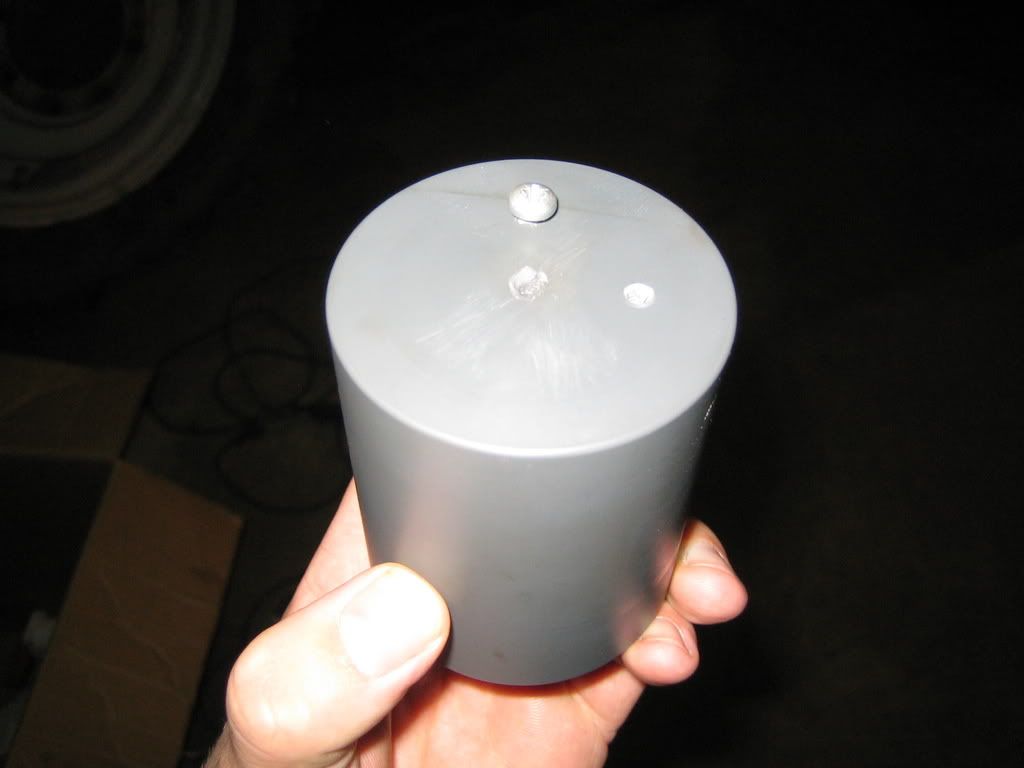
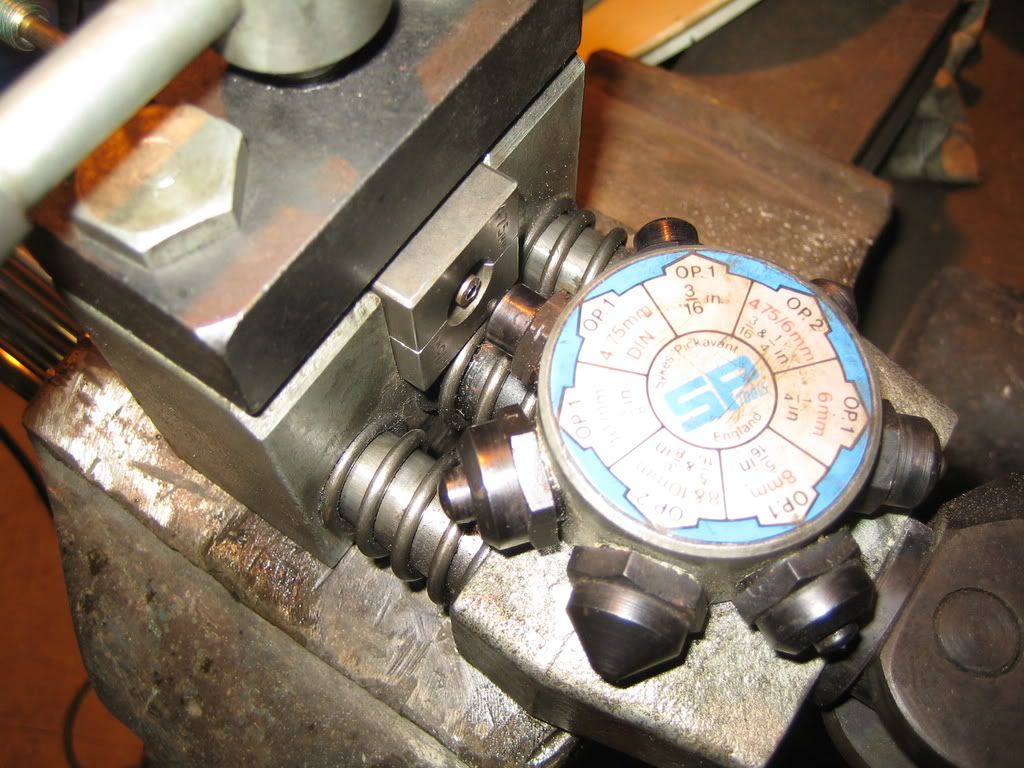
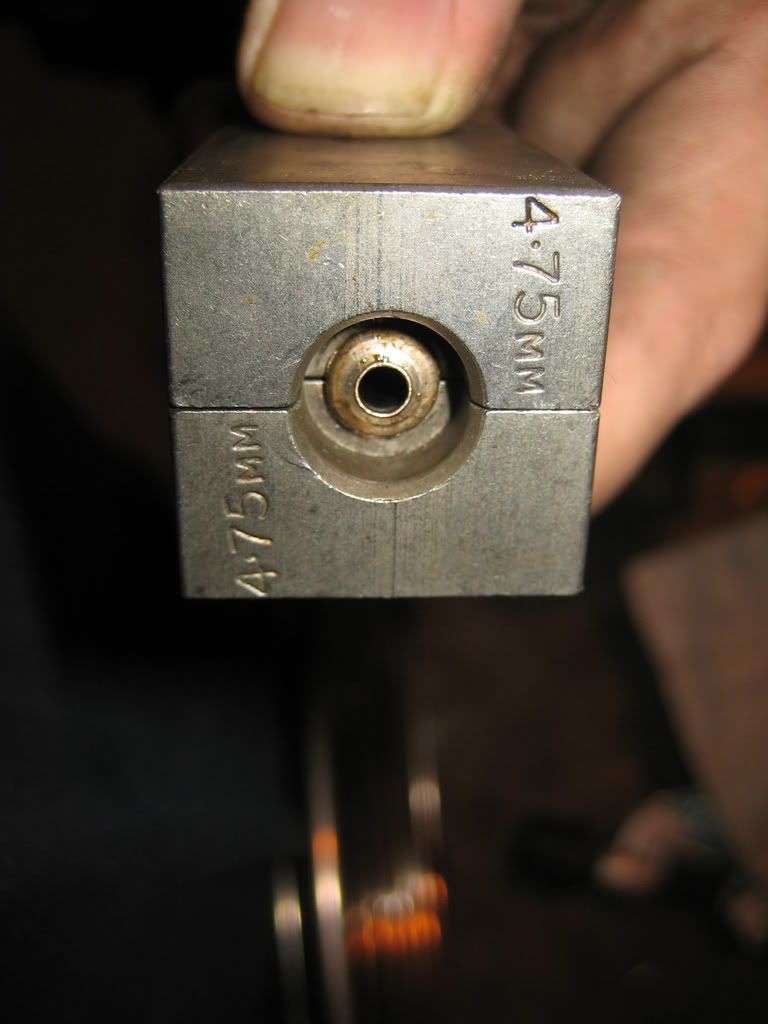
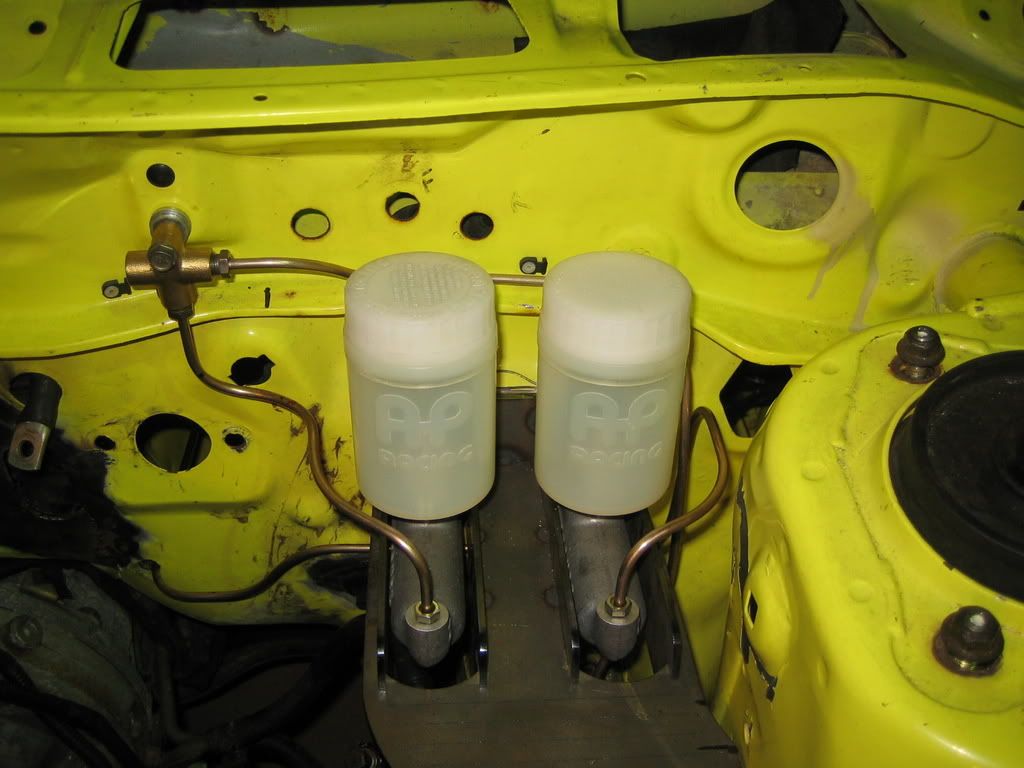
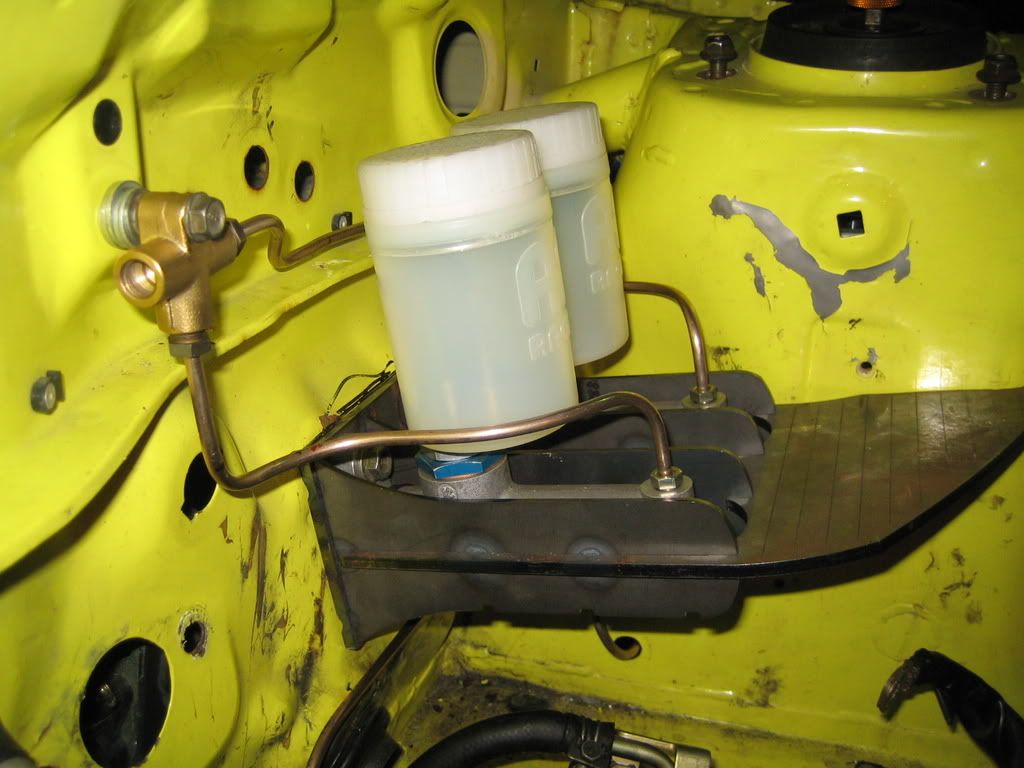
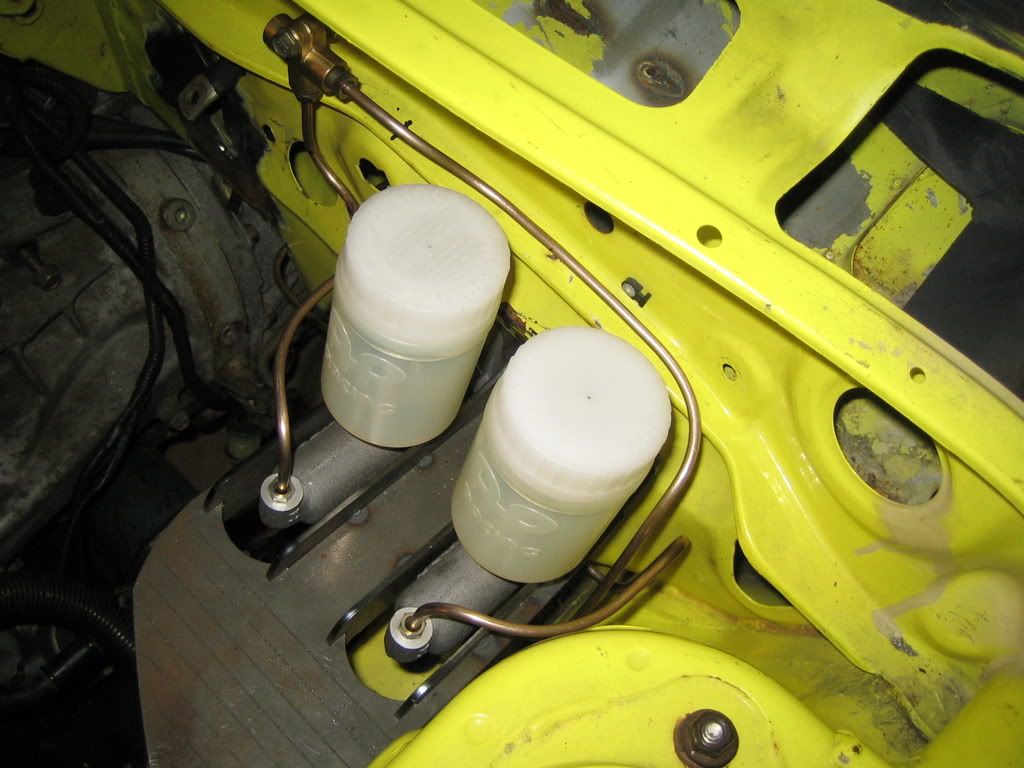
I found the measurements of the AP-Racing brake fluid reservoirs I am going to buy, so I turned a dummy from plastic:
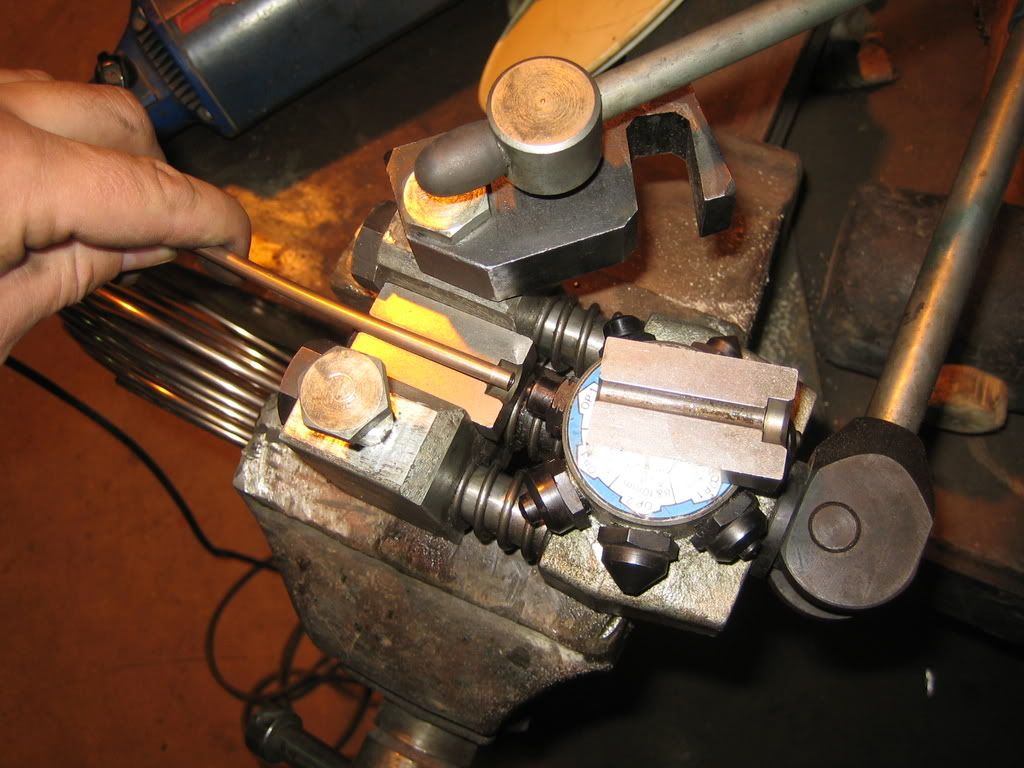
Friend of mine had a "bead" machine which I borrowed, but before using it the line had to be cut off:
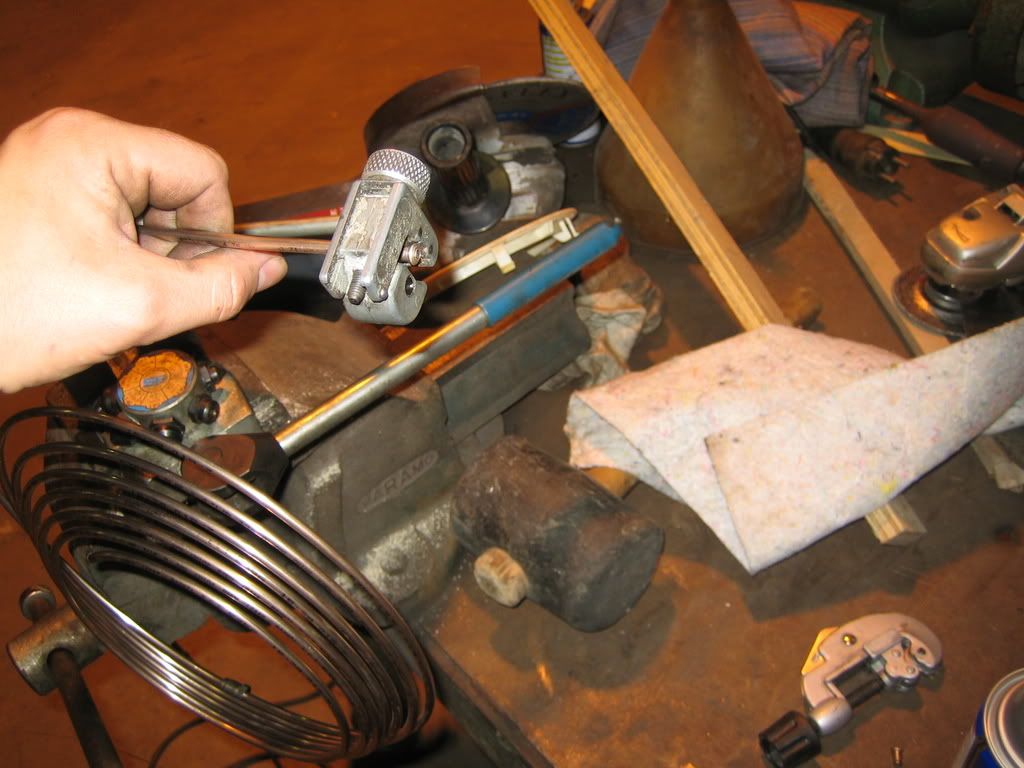
This is how it works:

Friend of mine had a "bead" machine which I borrowed, but before using it the line had to be cut off:
This is how it works:
Thread Starter
Scooby Regular
Joined: Dec 2002
Posts: 458
Likes: 0
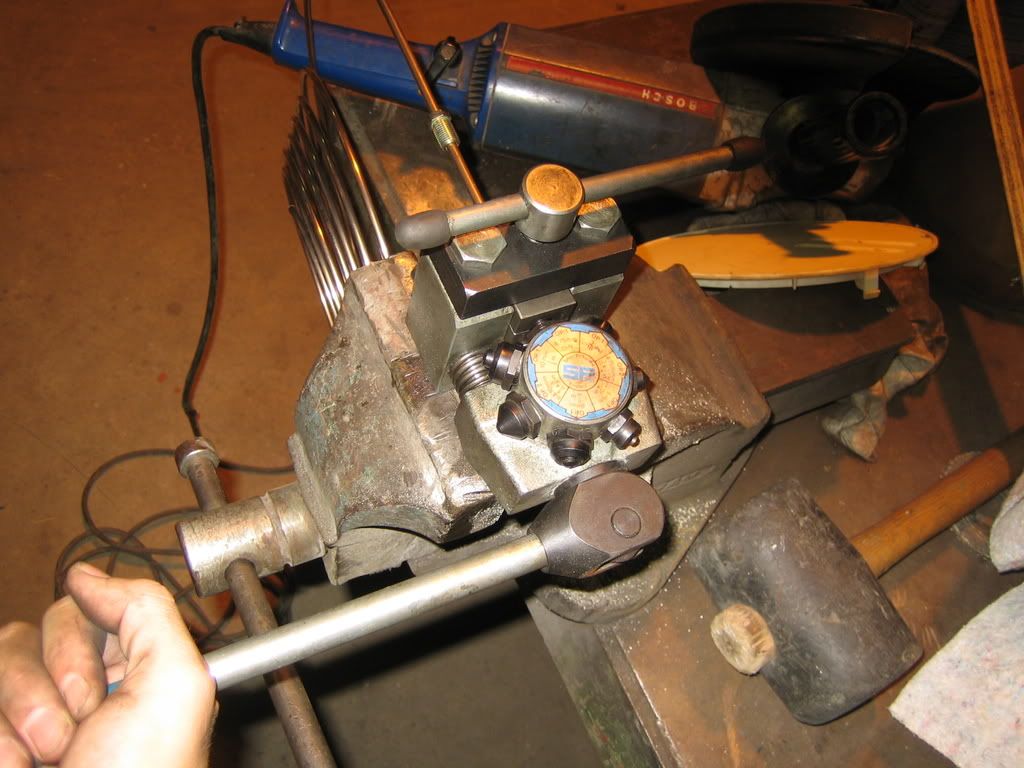
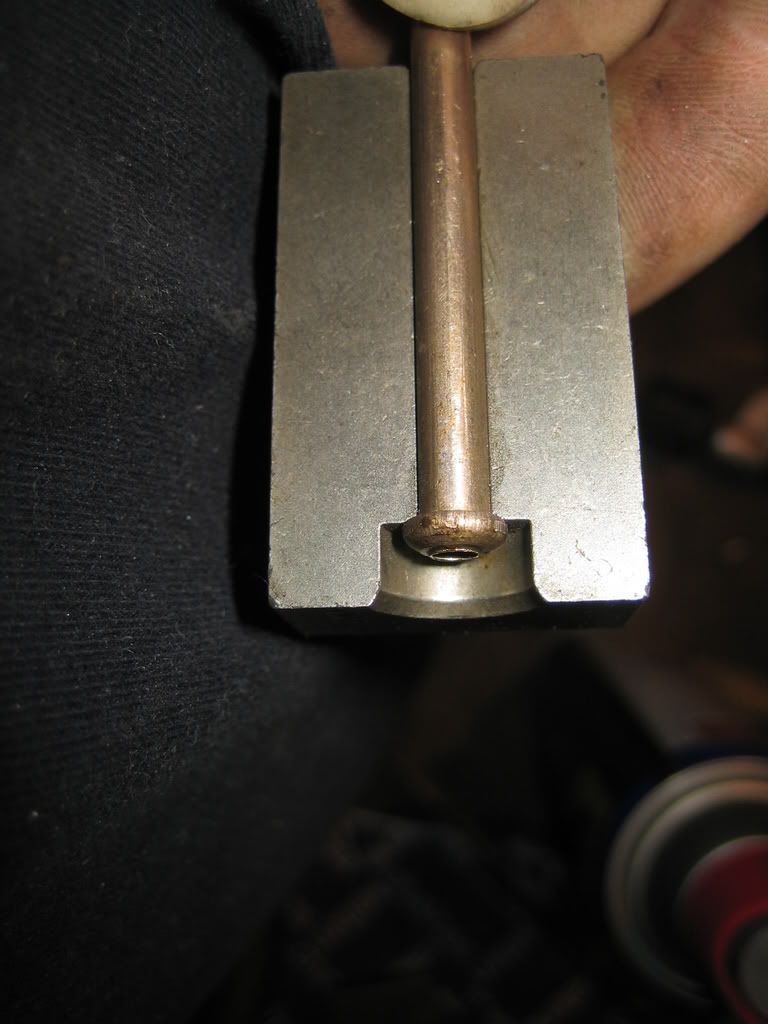
For assisting me with the shape I found a piece of solid core wire.
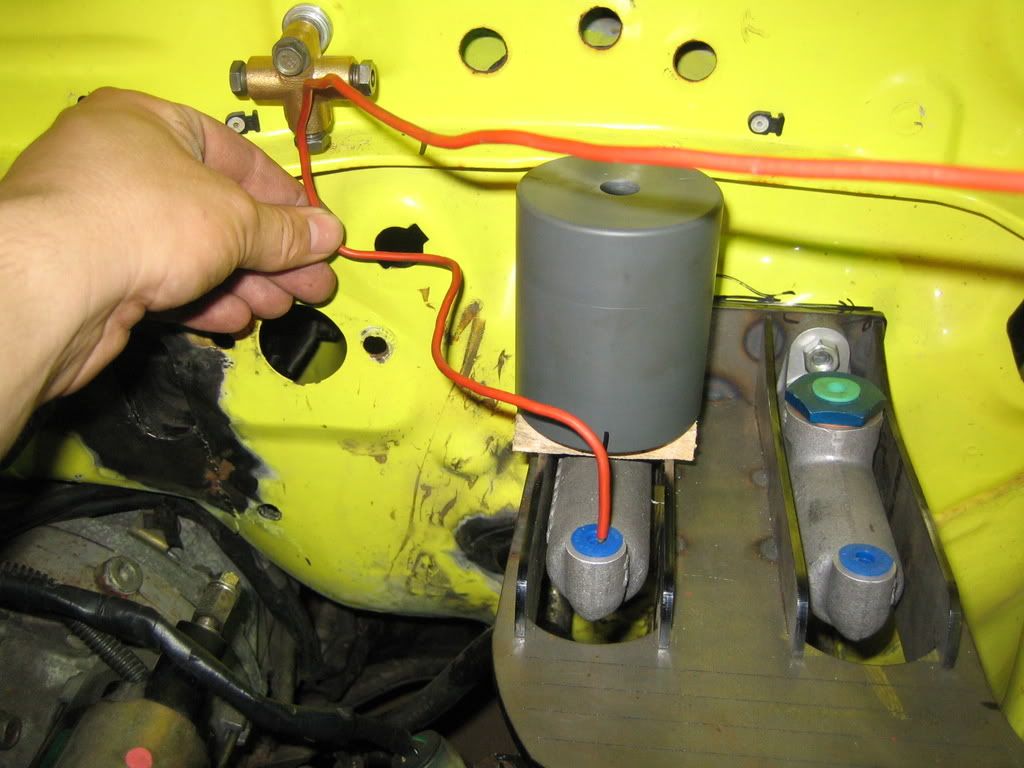
Then the real work started:
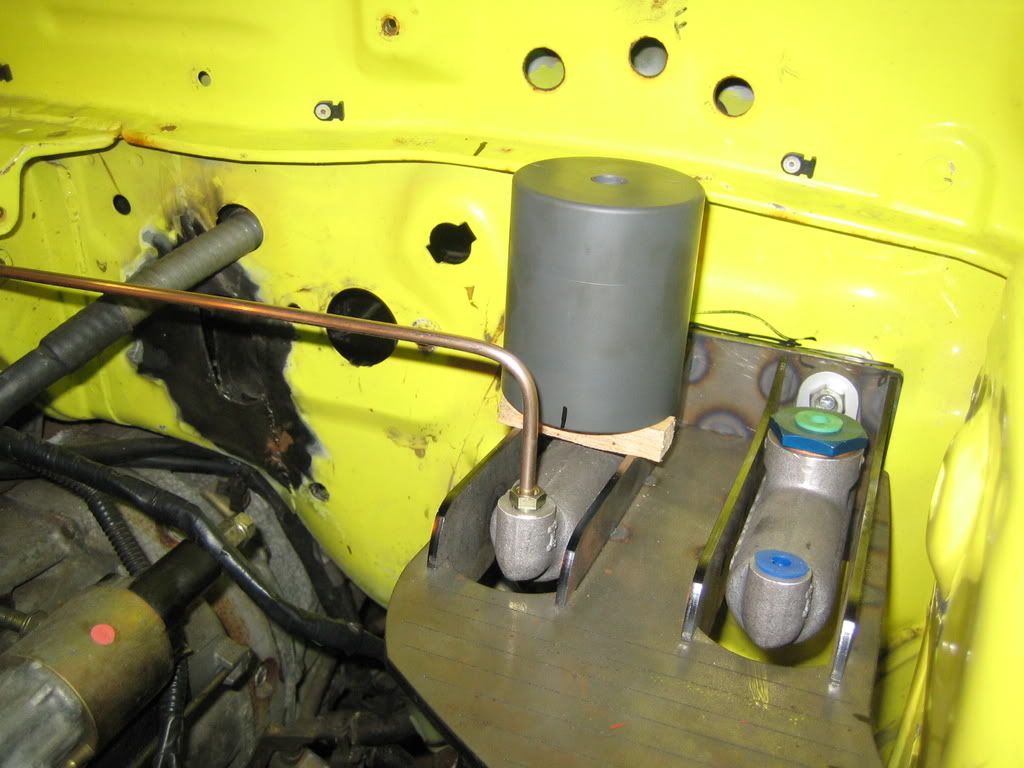
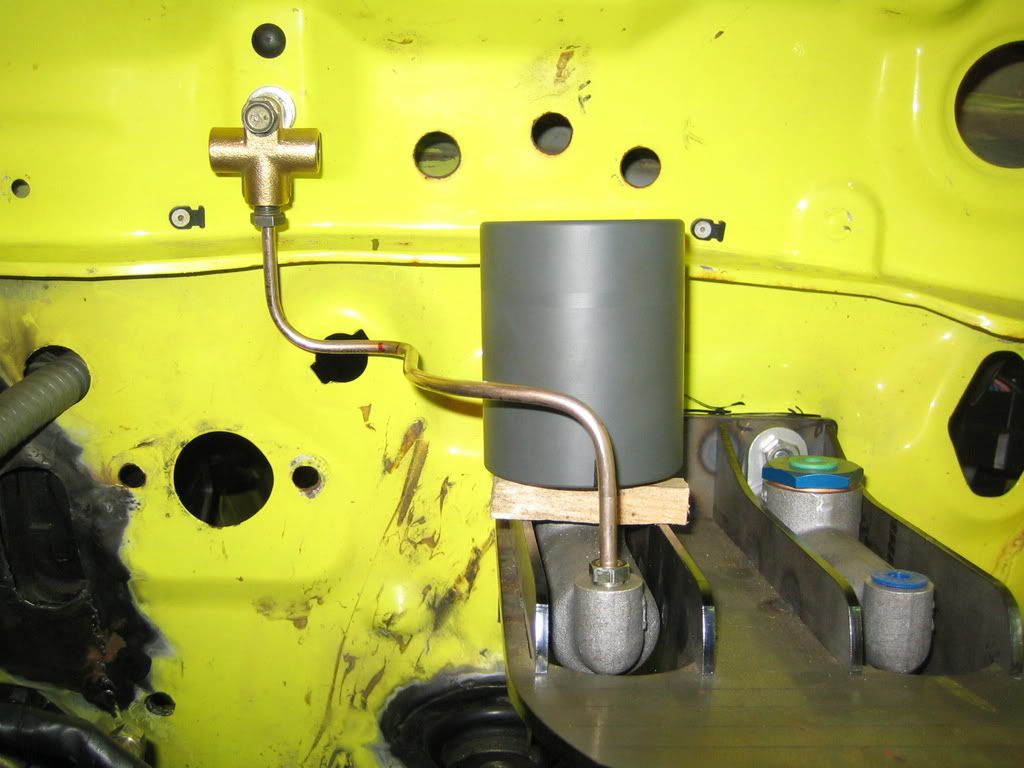

This was ok, but I wasn't really satisfied.
So today I redid the whole thing, and now I iz happeee:
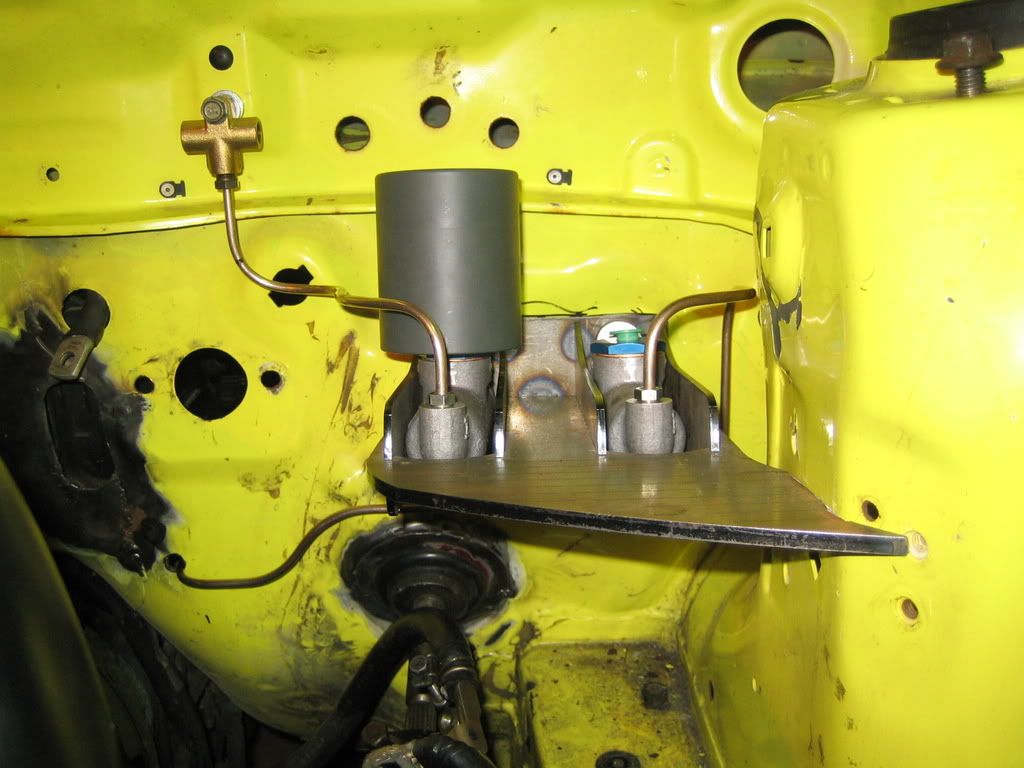


Now the rest.
Then the real work started:
This was ok, but I wasn't really satisfied.
So today I redid the whole thing, and now I iz happeee:
Now the rest.


I too am interested in your approach to the FMIC. You are right and some of the OEM cores have had far more development than some of the Far Eastern kits, so well done for finding the Renault one. Where did the inlet manifold come from (sorry if you've already mentioned it)?
Thread Starter
Scooby Regular
Joined: Dec 2002
Posts: 458
Likes: 0
The FMIC/rad thing is still ongoing, but I'm waiting for parts.
There are some changes between the a 2004 and 2007 core from that Renault.
The radiator I bought second hand was not square it turned out, so I am still contemplating what to do.
The inlet I bought from a guy here, but new you can buy them from Tracktive.
greets.
There are some changes between the a 2004 and 2007 core from that Renault.
The radiator I bought second hand was not square it turned out, so I am still contemplating what to do.
The inlet I bought from a guy here, but new you can buy them from Tracktive.
greets.
Thread Starter
Scooby Regular
Joined: Dec 2002
Posts: 458
Likes: 0
Small update,
Did another small piece of brakeline, the part to the left front wheel:
AP-racing fluid reservoirs have arrived, my dummy worked pretty good I must say!:
An air exit for the bonnet, WRC replica.


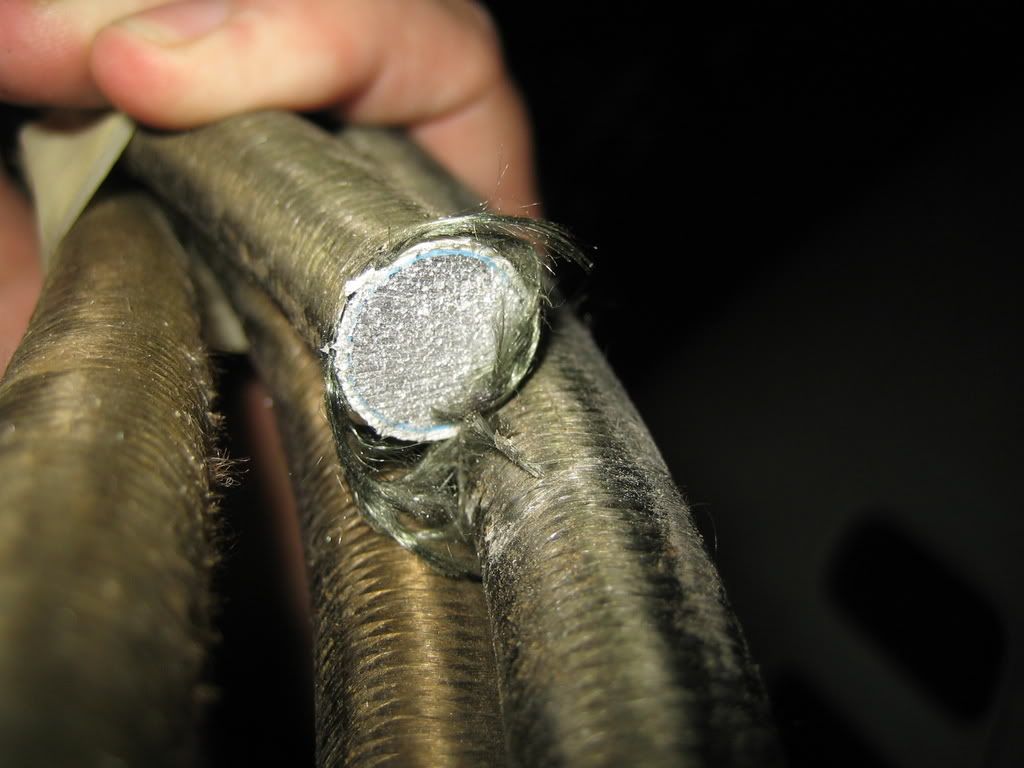
This is something else that crossed my path, a new cable for the battery.
It's aluminum with a silver coating, used in proffesional racing apparently.
A bit bizarre, it's fingersize but weigh's nearly nothing:
Did another small piece of brakeline, the part to the left front wheel:
AP-racing fluid reservoirs have arrived, my dummy worked pretty good I must say!:
An air exit for the bonnet, WRC replica.
This is something else that crossed my path, a new cable for the battery.
It's aluminum with a silver coating, used in proffesional racing apparently.
A bit bizarre, it's fingersize but weigh's nearly nothing:


Thread Starter
Scooby Regular
Joined: Dec 2002
Posts: 458
Likes: 0
@Optical,
A friend who has connections in the rallyworld.
@ScuuBdoo
Thanks!
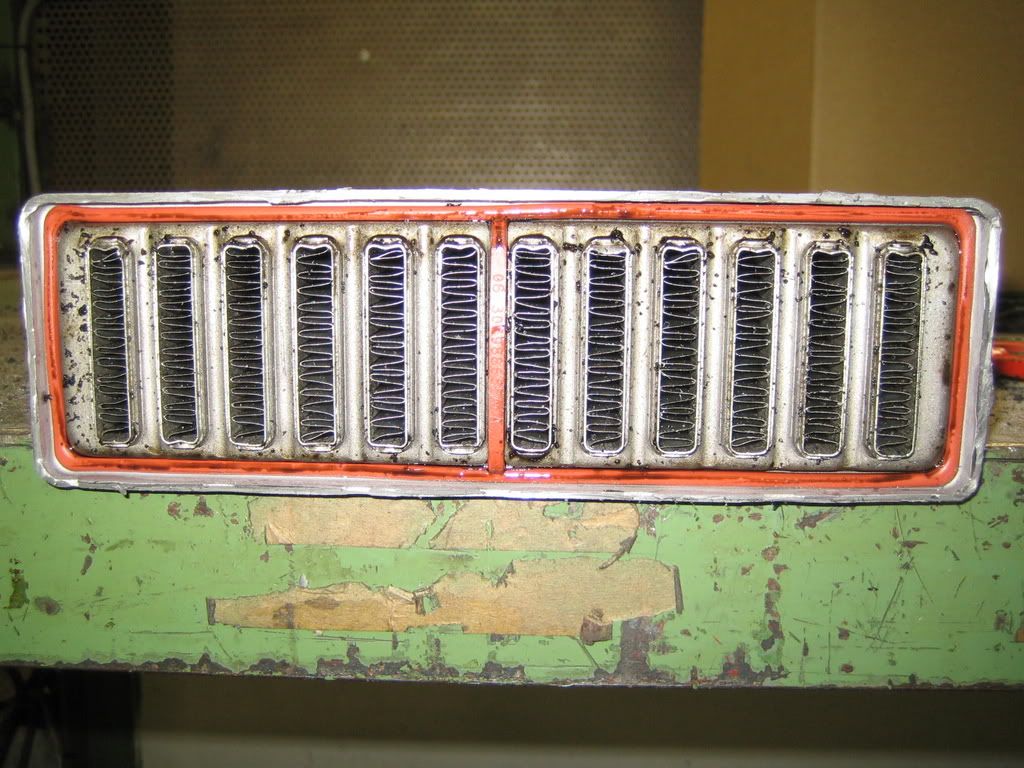
FMIC time!
This job was sidelined for a bit but today I got some inspiration again.
The endtank attachments had to be worked.
There was a difference in width between the cores, so after contemplating a bit it was decided to change them altogether and make them as small as possible.
So a tool was made and used:


The IC needed to be heated up so the material would get softer and more workable.
Fire up the ovens:

Unfortunatly it cooled down rather quick, so I used a torch later.
Mutilated a plier:


First flattening occured:


After that my new tool came into action:

Viola, the result and difference:


Next week I'll rework the radiator the same way.
Now the 2 cores have to be welded together which is pretty risky, if that fails all this work has been done for nothing!
Received some parts today, alloy tube and connectors:

Next week more parts should follow, so more updates then.
A friend who has connections in the rallyworld.
@ScuuBdoo
Thanks!
FMIC time!
This job was sidelined for a bit but today I got some inspiration again.
The endtank attachments had to be worked.
There was a difference in width between the cores, so after contemplating a bit it was decided to change them altogether and make them as small as possible.
So a tool was made and used:
The IC needed to be heated up so the material would get softer and more workable.
Fire up the ovens:
Unfortunatly it cooled down rather quick, so I used a torch later.
Mutilated a plier:
First flattening occured
:After that my new tool came into action:
Viola, the result and difference:
Next week I'll rework the radiator the same way.
Now the 2 cores have to be welded together which is pretty risky, if that fails all this work has been done for nothing!
Received some parts today, alloy tube and connectors:
Next week more parts should follow, so more updates then.
Thread Starter
Scooby Regular
Joined: Dec 2002
Posts: 458
Likes: 0
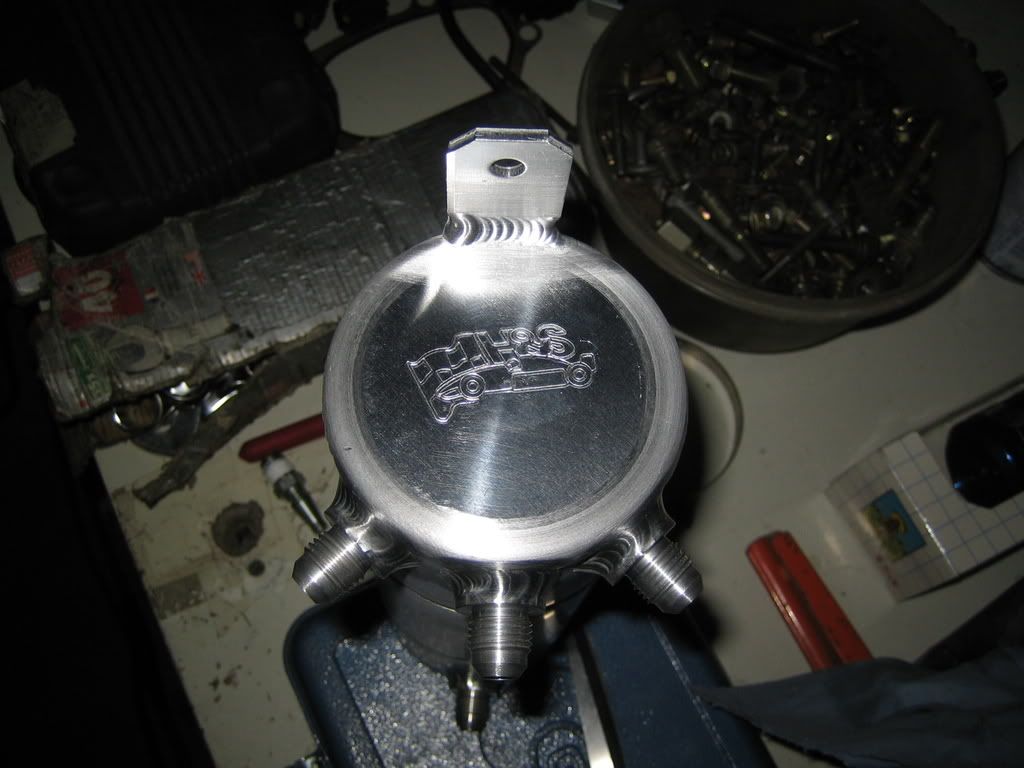
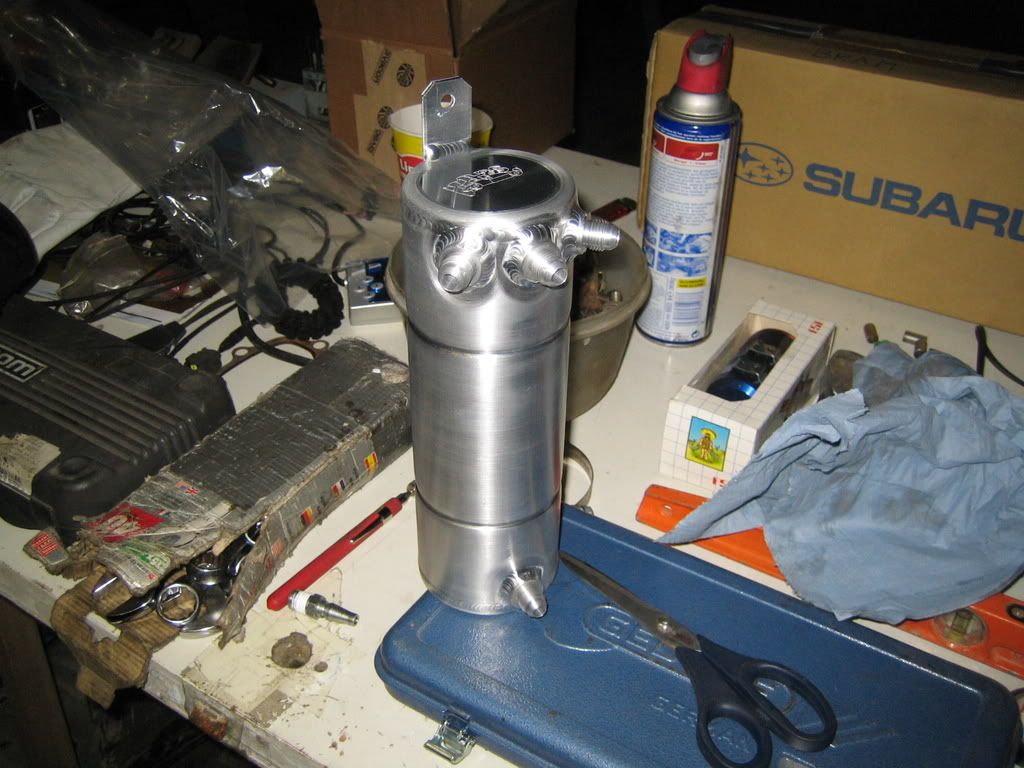
Picked up the collector tank today, I already had one but this one has the pump inside it.
This is to cool down the pump, like it does in the original tank.


Fuel line nipples:

SS brakeline nipples:

This is to cool down the pump, like it does in the original tank.
Fuel line nipples:
SS brakeline nipples:


