Prodrive Grp.N. chassis street build
 27 January 2008, 05:48 PM
#91
Scooby Regular
Thread Starter

Join Date: Dec 2002
Posts: 458
Likes: 0
Received 0 Likes
on
0 Posts
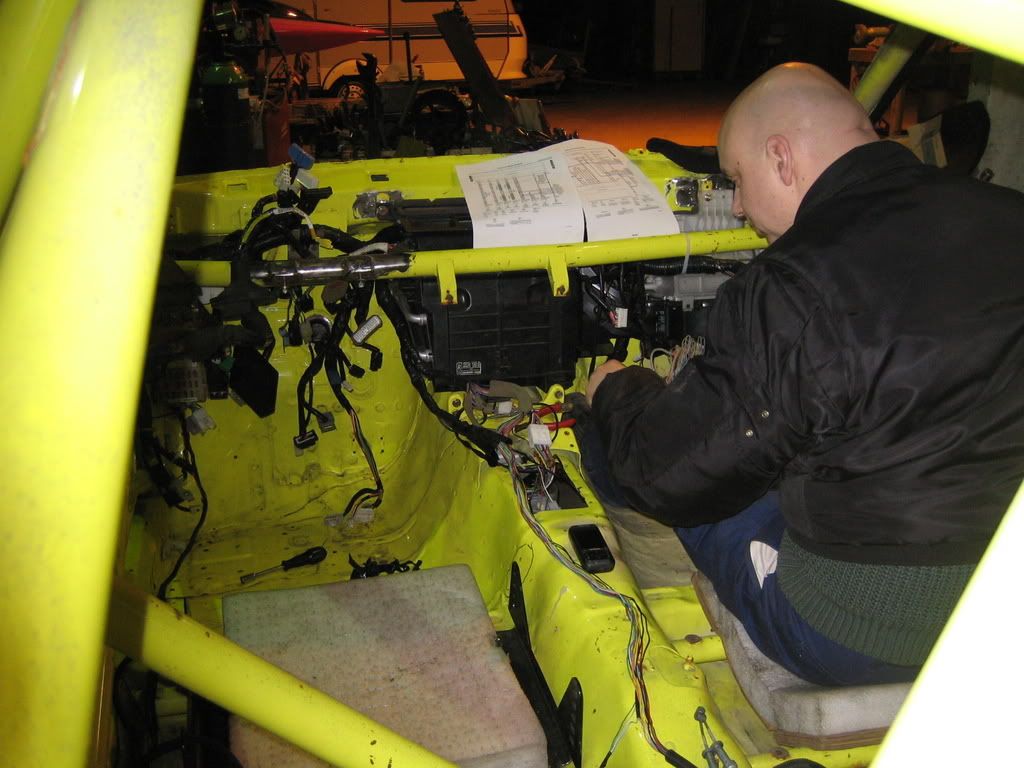
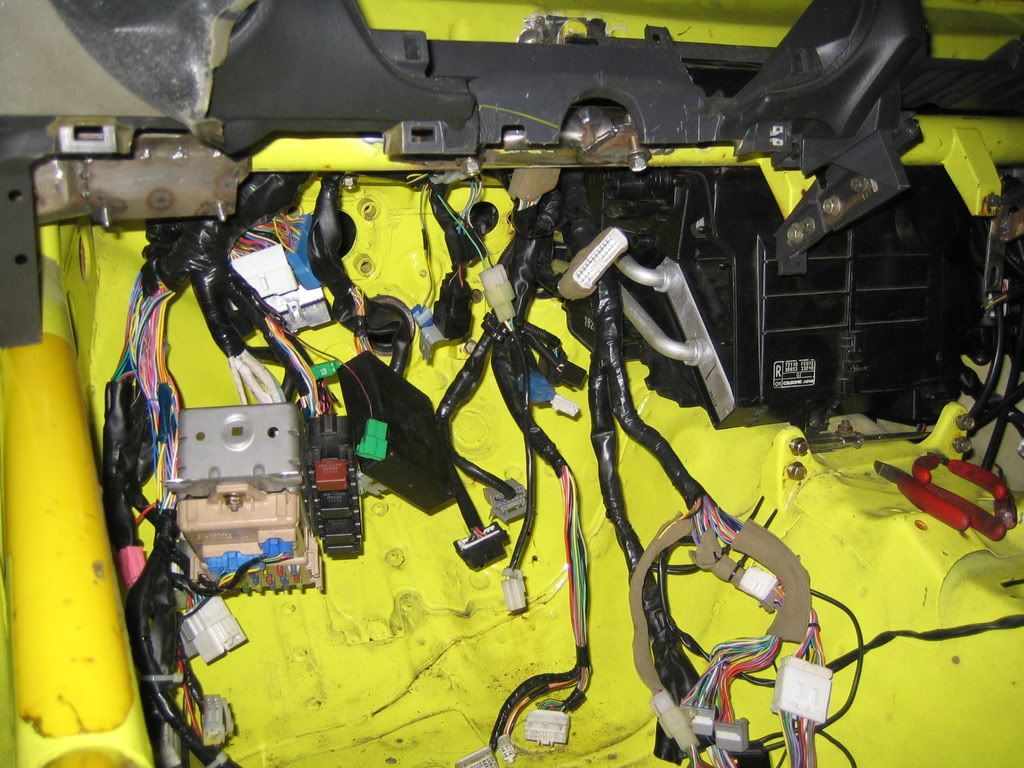
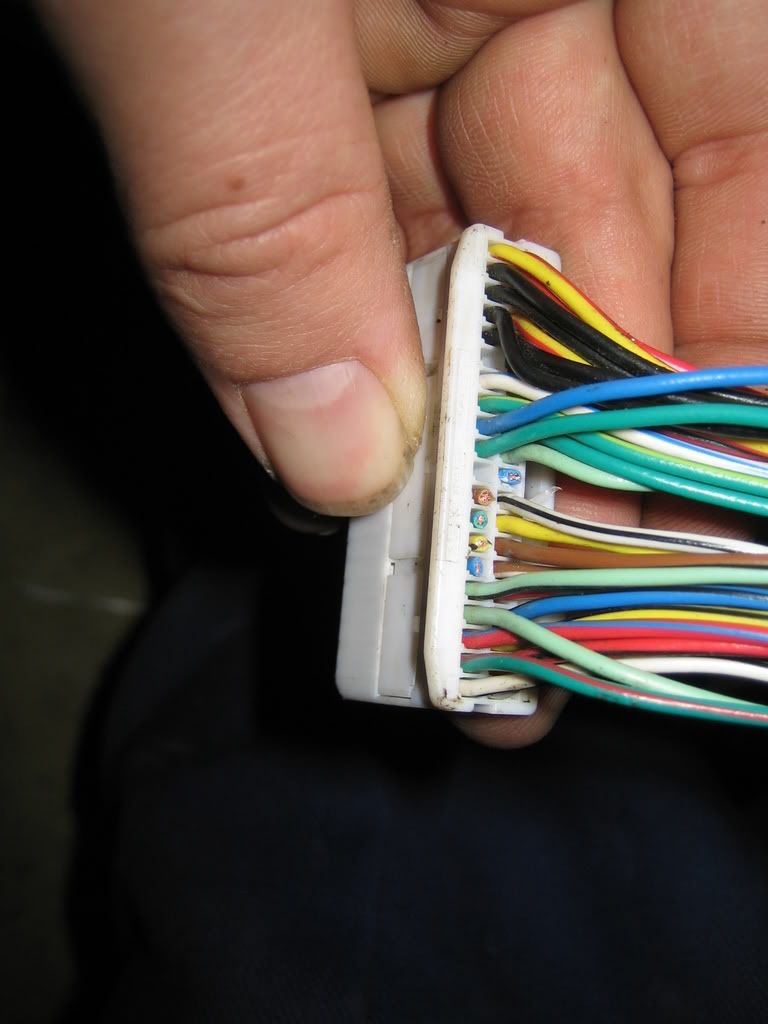
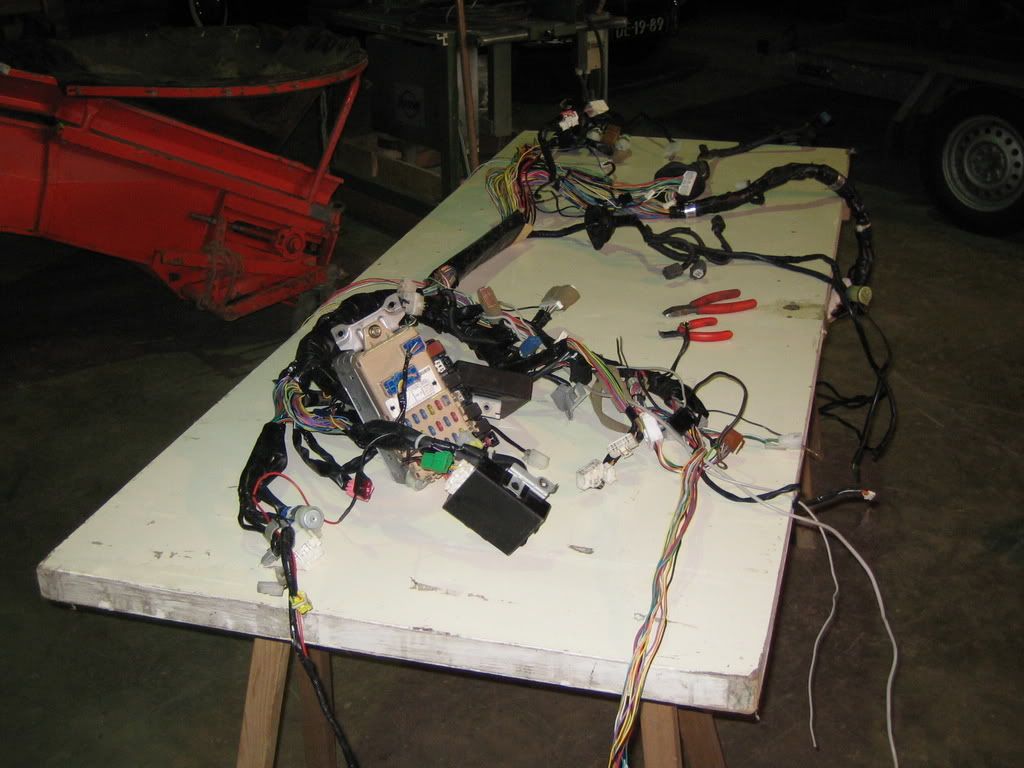
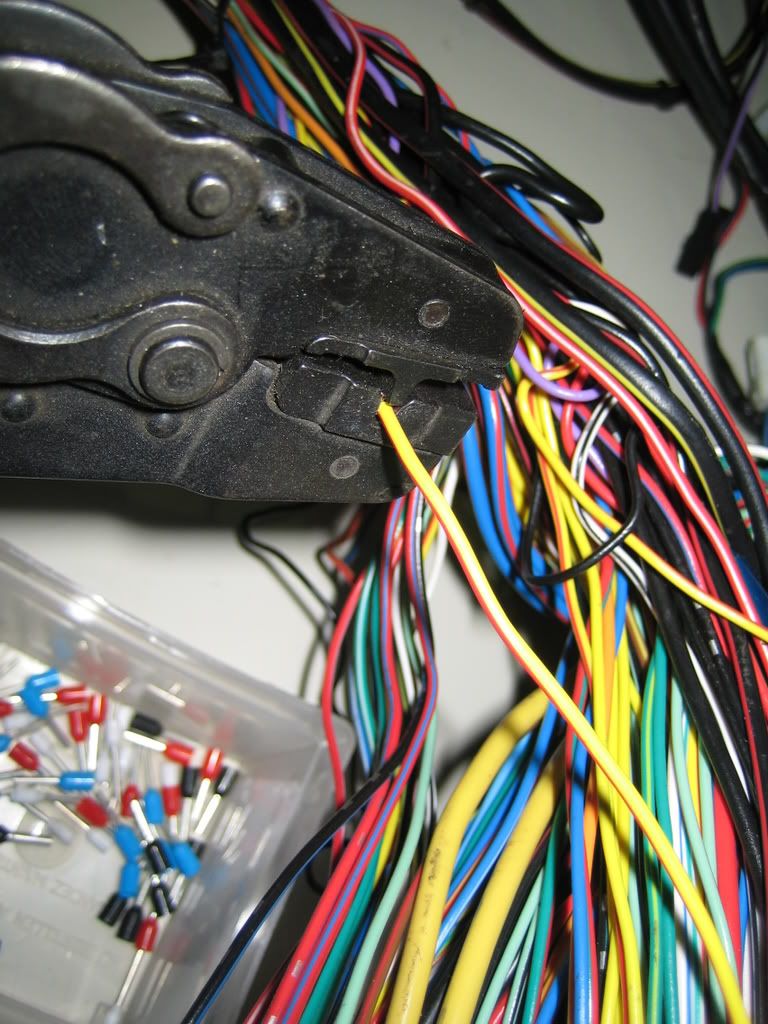
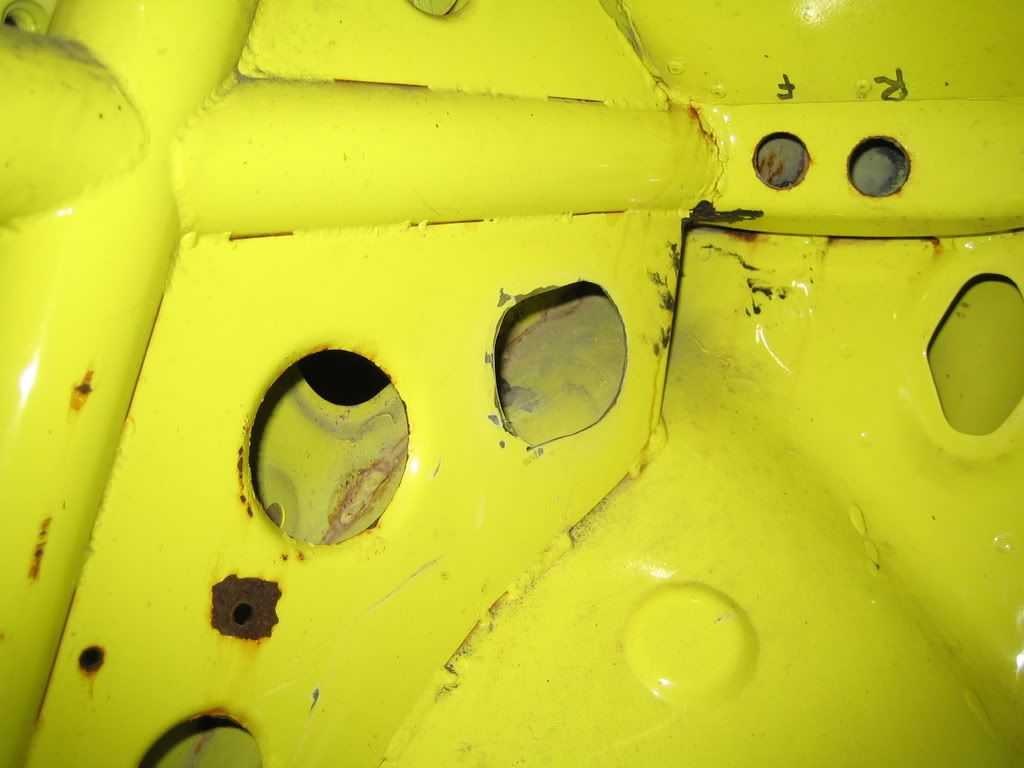
This week I addressed the loom.
There are 2 main looms, one under the dash and one running from the dash to the engine on the left hand side of the enginebay under the fender.
On the right side of the engine bay there is a loom also, this one consist of 96% ABS wiring, only 2 wires are for the blinkers.
Because of the cage and therefore even less space available between the heater and chassis I wanted to get rid of the ABS wiring, as I won't be using it anyway.
So I spent this week cutting the loom and researching the wiring diagrams.
Today I finished cutting and this coming week I will install the cable as is and reroute it so it fits nicely and without stres.
Then I will tiewrap it in place and tape it shut, resulting in a loom that won't scrape anywhere and is fits stressless between all the components.
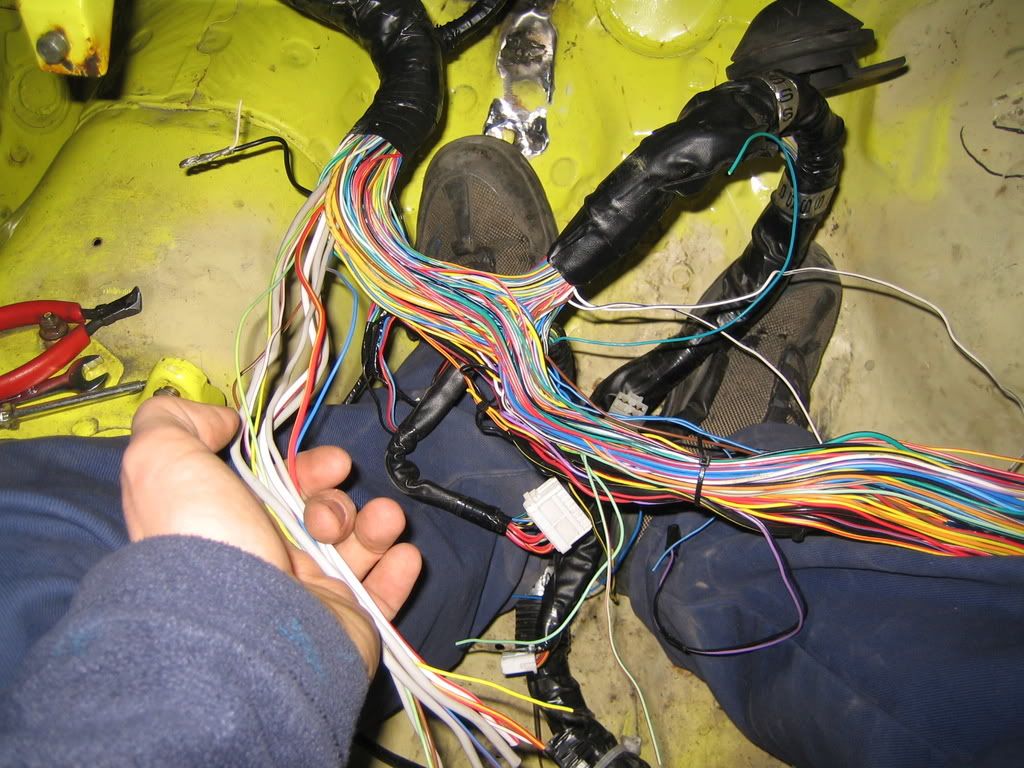
Starting with diagrams in reach :
Chaos to everyone who doesn't where everything goes, so that's everyone but my I guess
ABS wiring:
This is how the put together wiring t the factory, no welding, cold fusion rules :
There are 2 main looms, one under the dash and one running from the dash to the engine on the left hand side of the enginebay under the fender.
On the right side of the engine bay there is a loom also, this one consist of 96% ABS wiring, only 2 wires are for the blinkers.
Because of the cage and therefore even less space available between the heater and chassis I wanted to get rid of the ABS wiring, as I won't be using it anyway.
So I spent this week cutting the loom and researching the wiring diagrams.
Today I finished cutting and this coming week I will install the cable as is and reroute it so it fits nicely and without stres.
Then I will tiewrap it in place and tape it shut, resulting in a loom that won't scrape anywhere and is fits stressless between all the components.
Starting with diagrams in reach :
Chaos to everyone who doesn't where everything goes, so that's everyone but my I guess
ABS wiring:
This is how the put together wiring t the factory, no welding, cold fusion rules :


 27 January 2008, 05:51 PM
#93
Scooby Regular
Thread Starter
Join Date: Dec 2002
Posts: 458
Likes: 0
Received 0 Likes
on
0 Posts
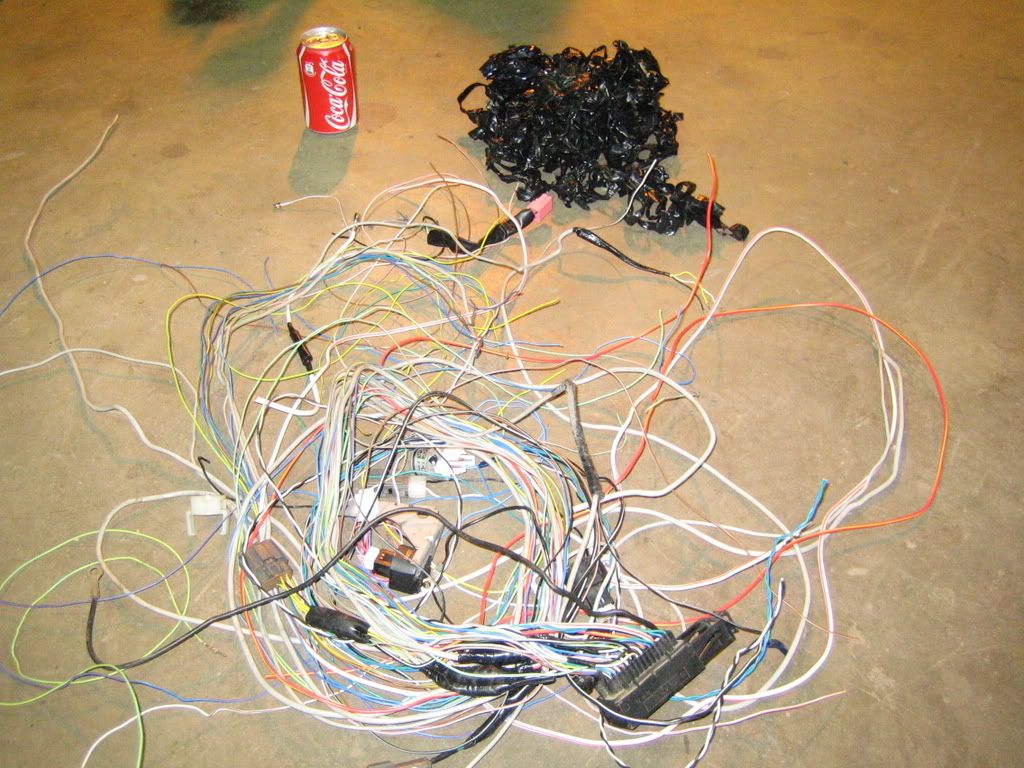
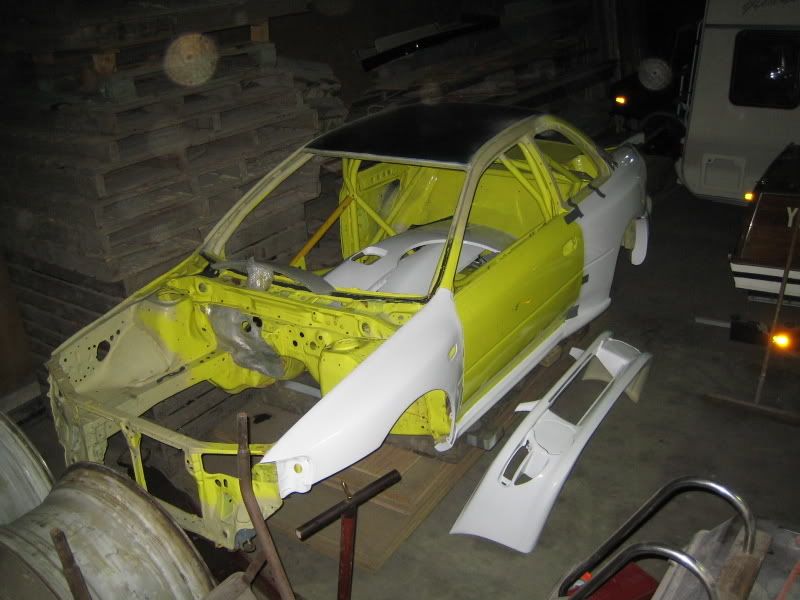
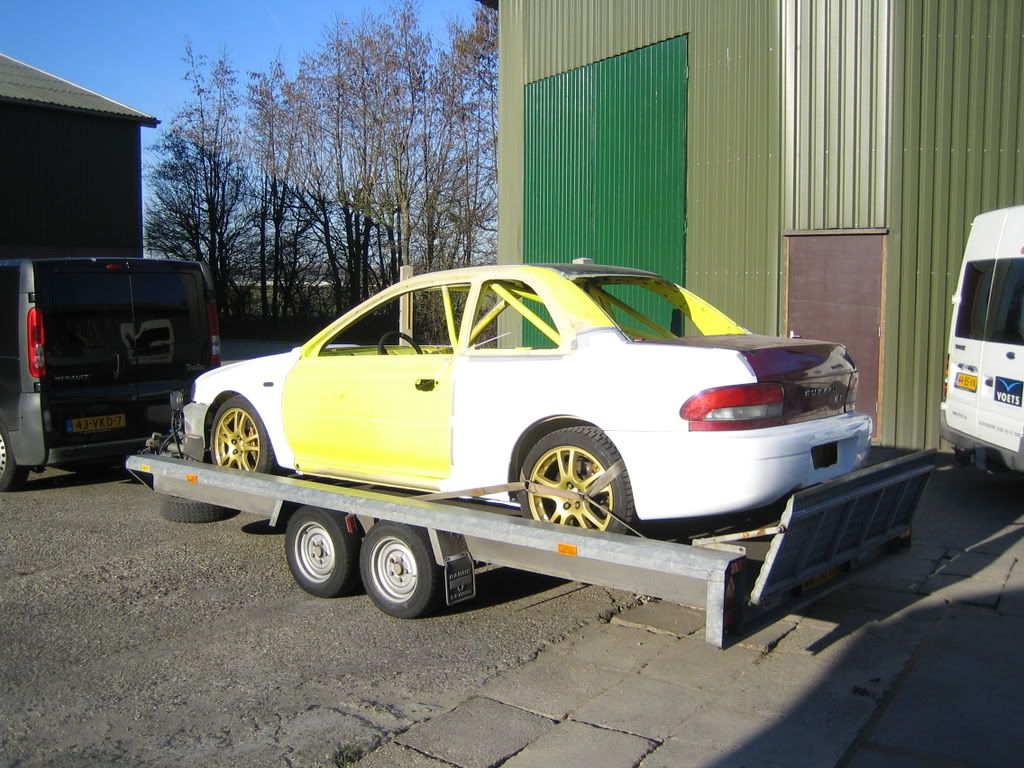
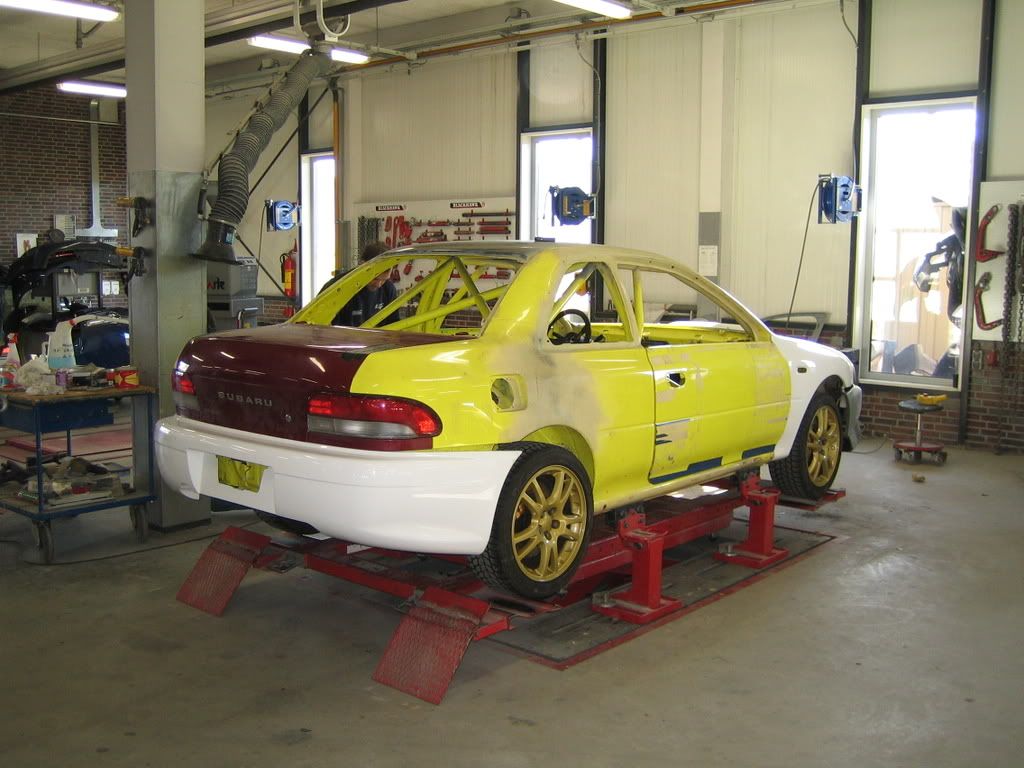
The result:
Tim, a friend of mine, was working on the dashboard:
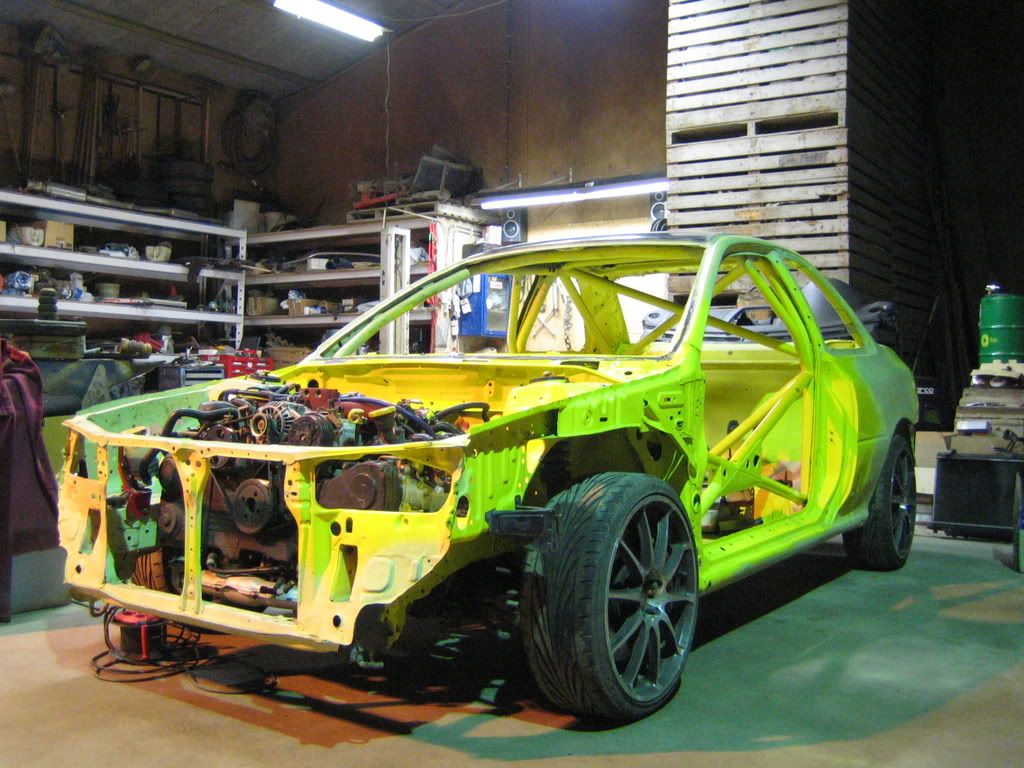
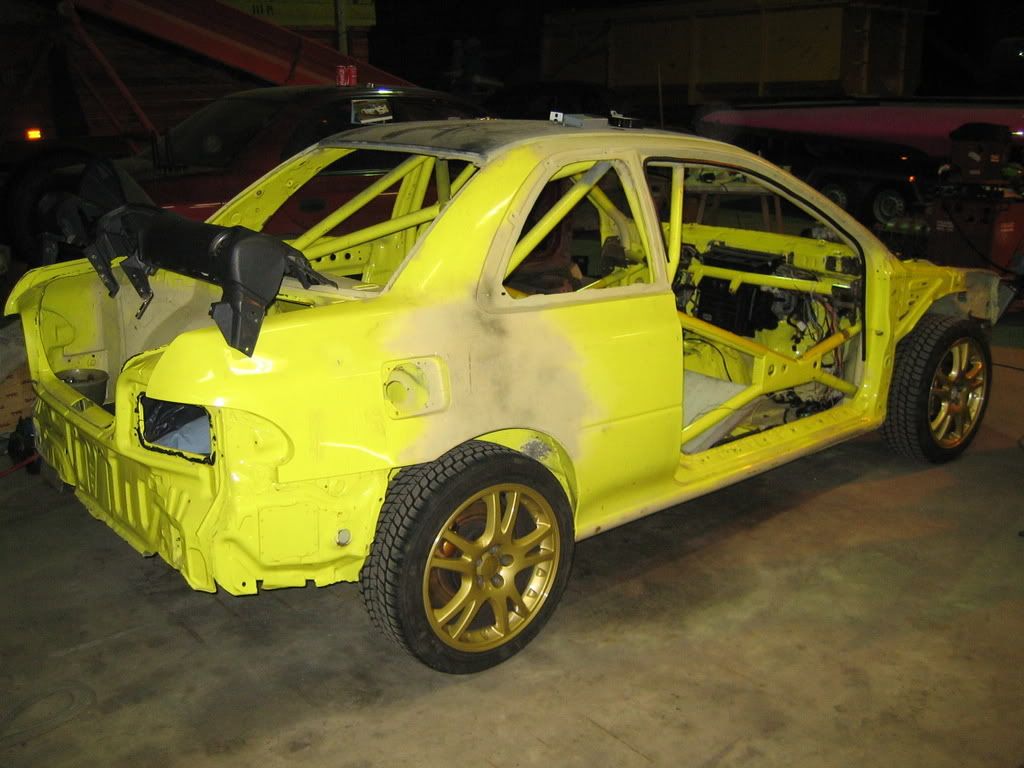
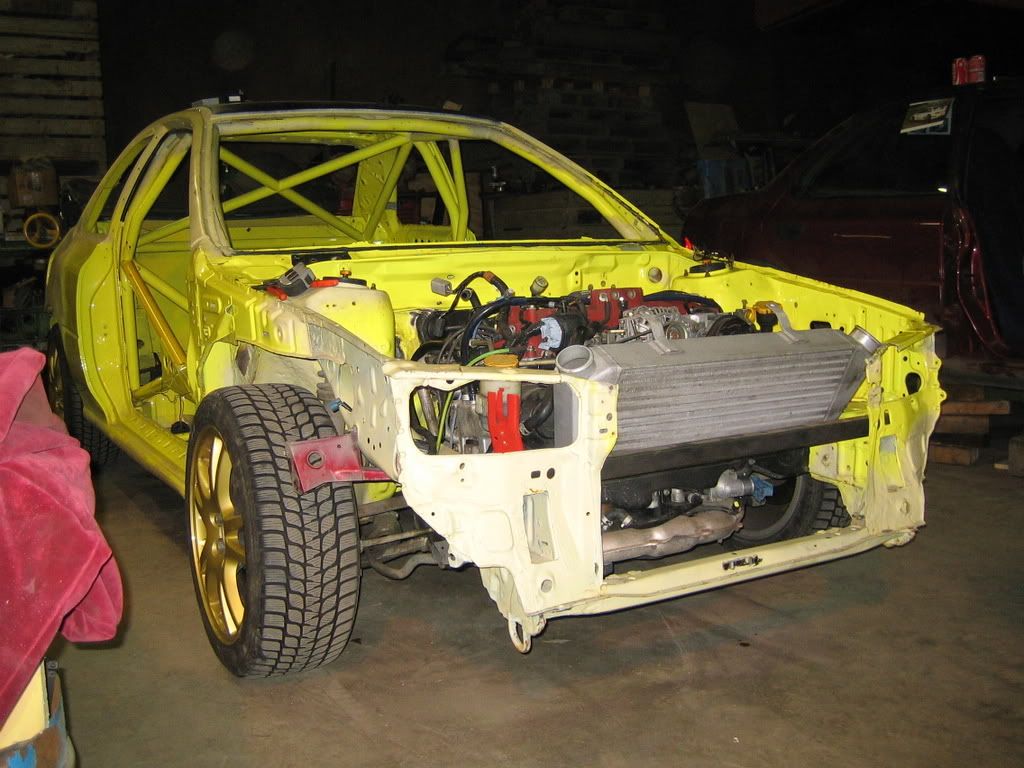
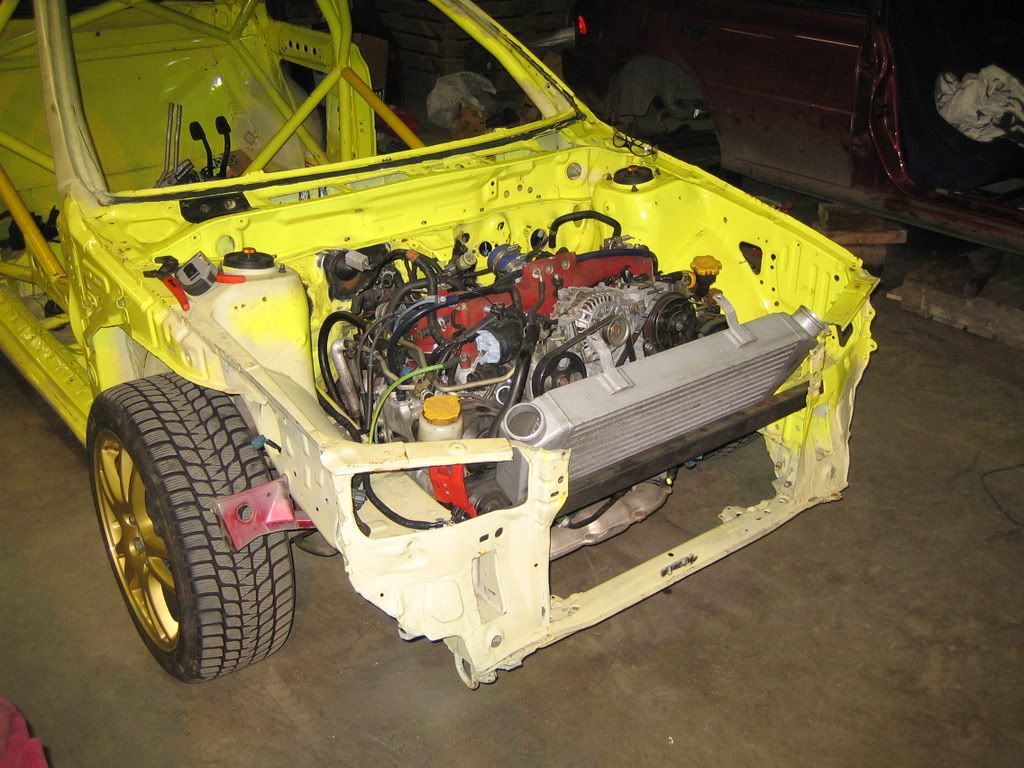
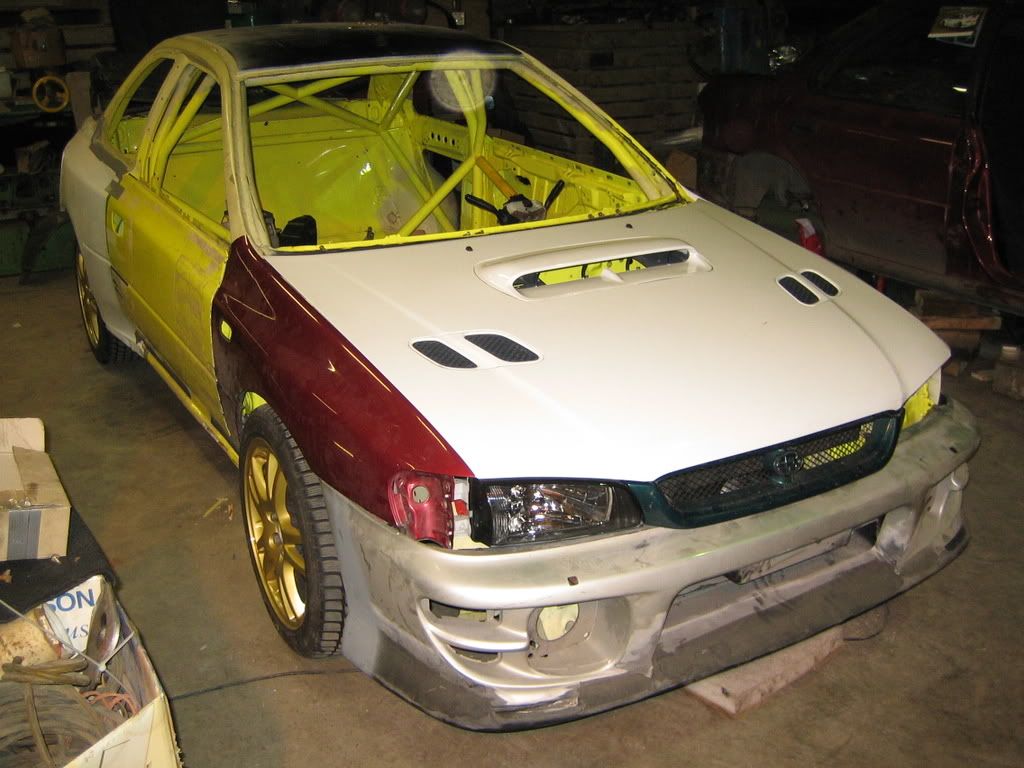
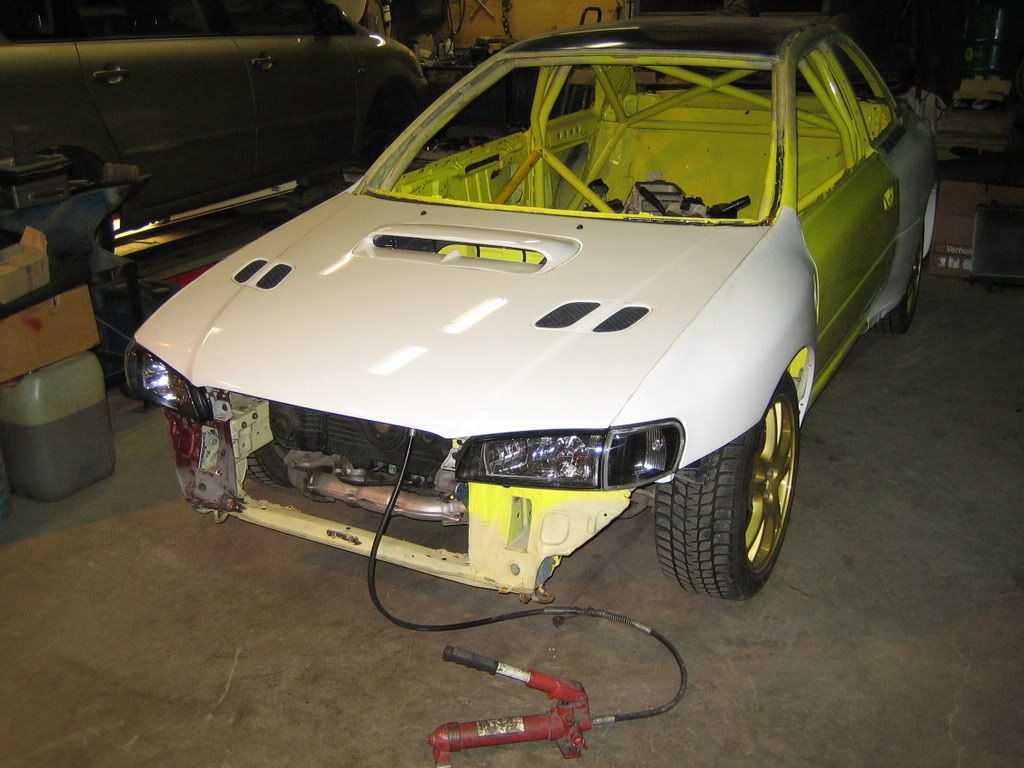
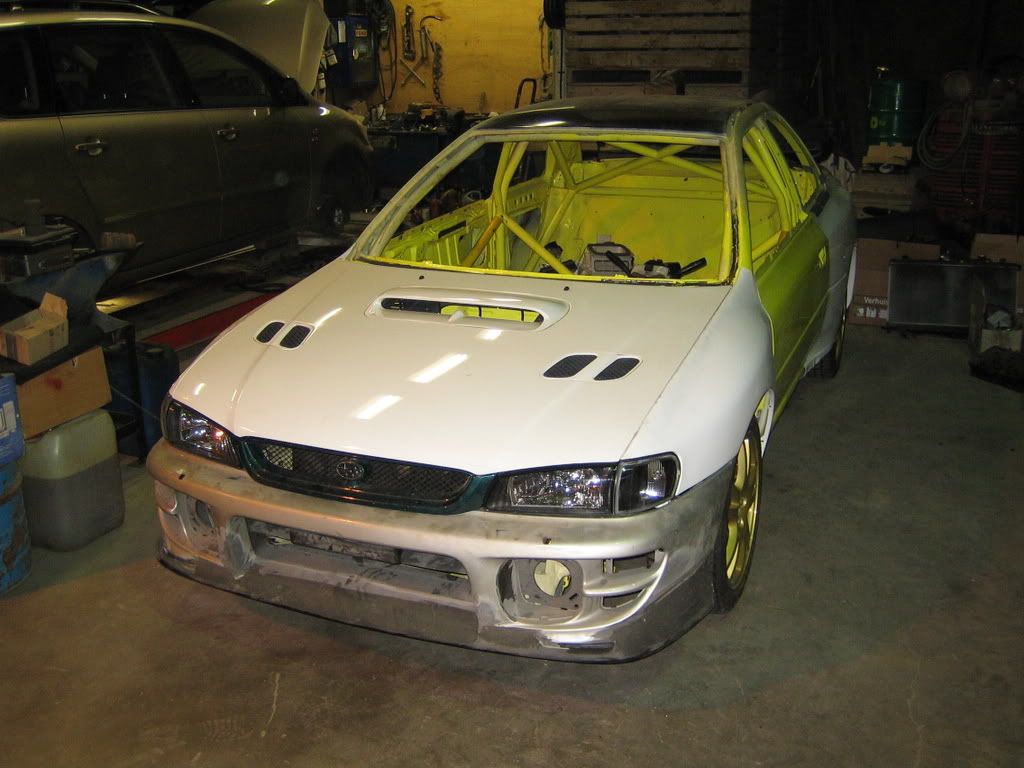
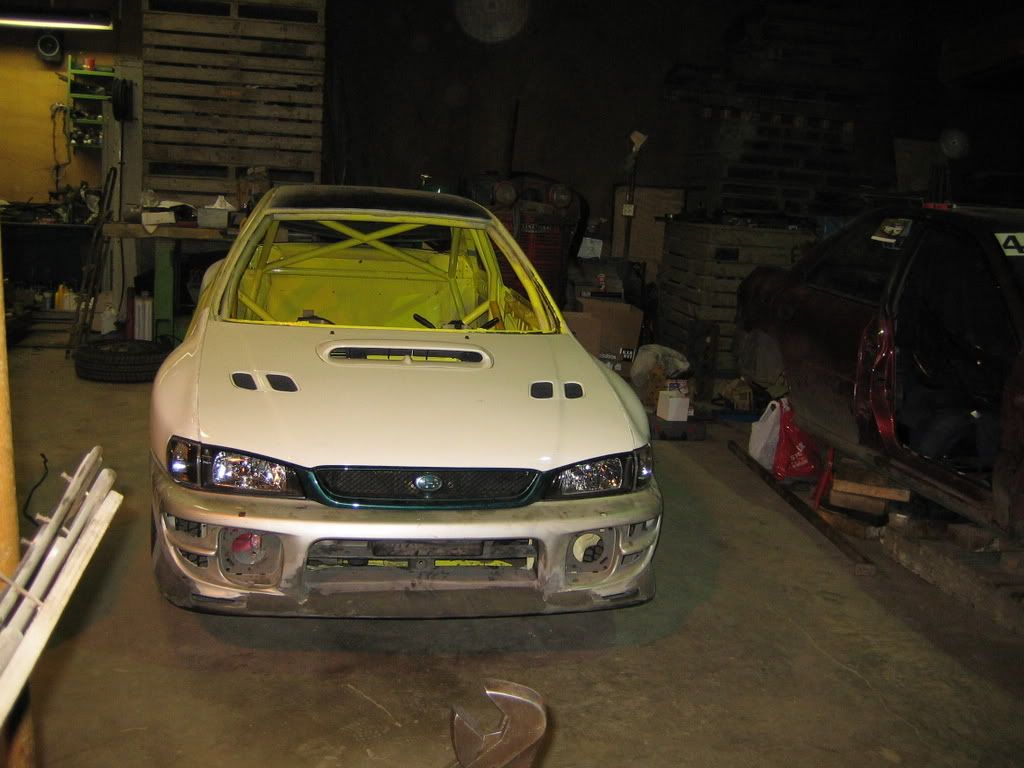
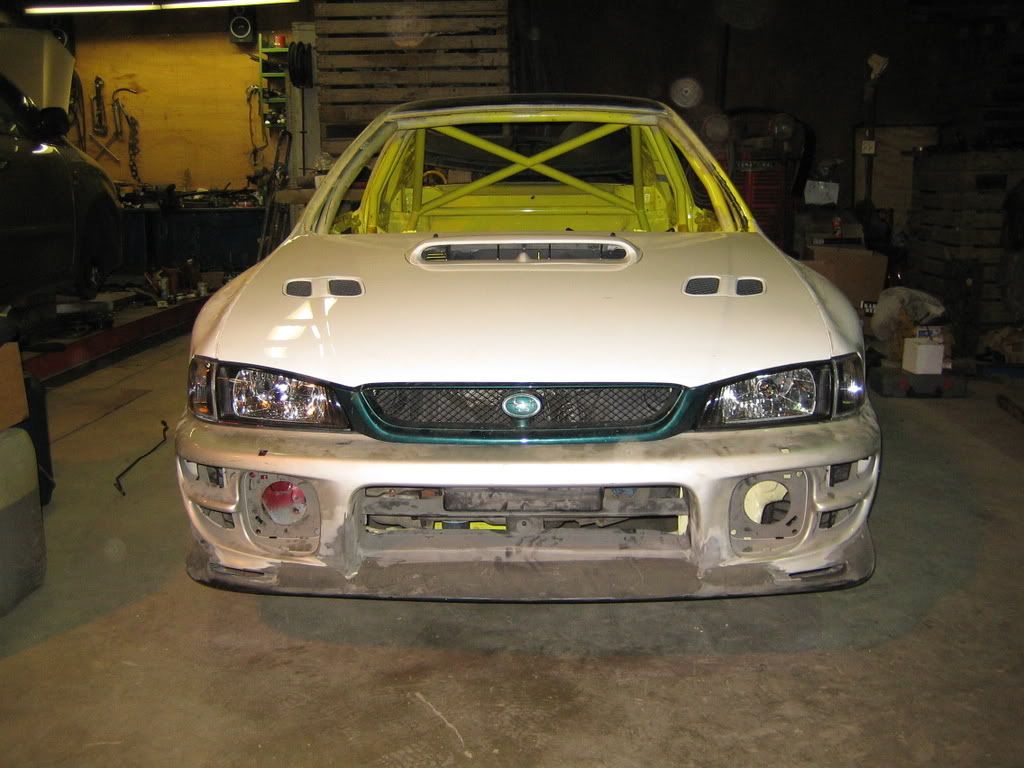
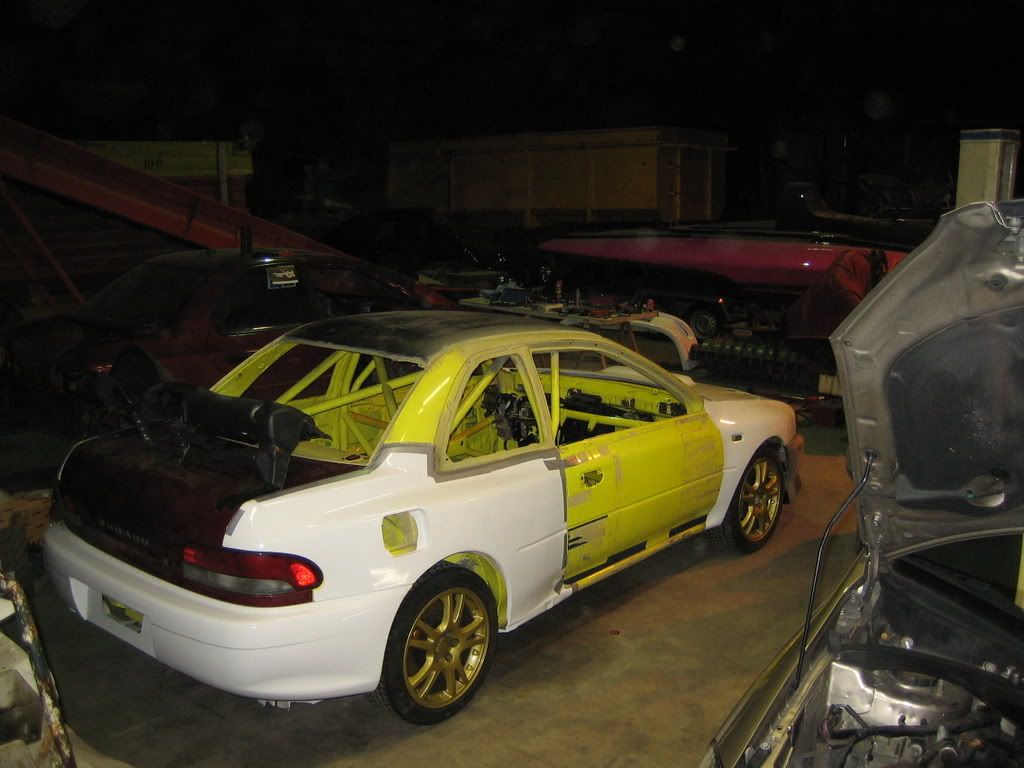
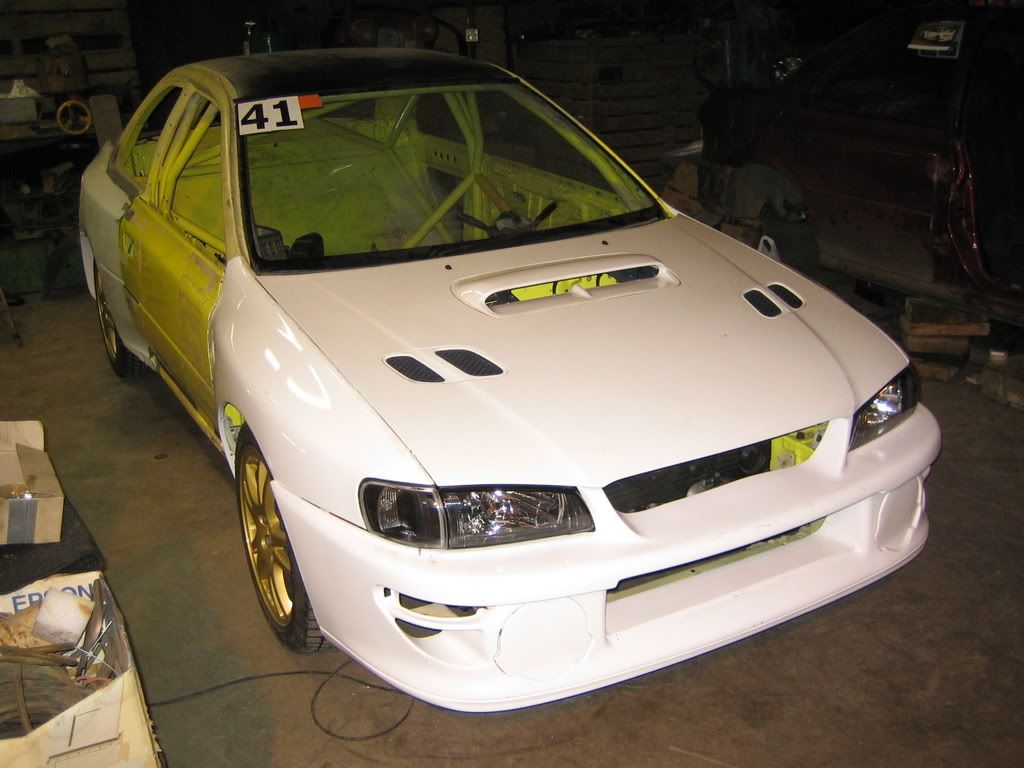
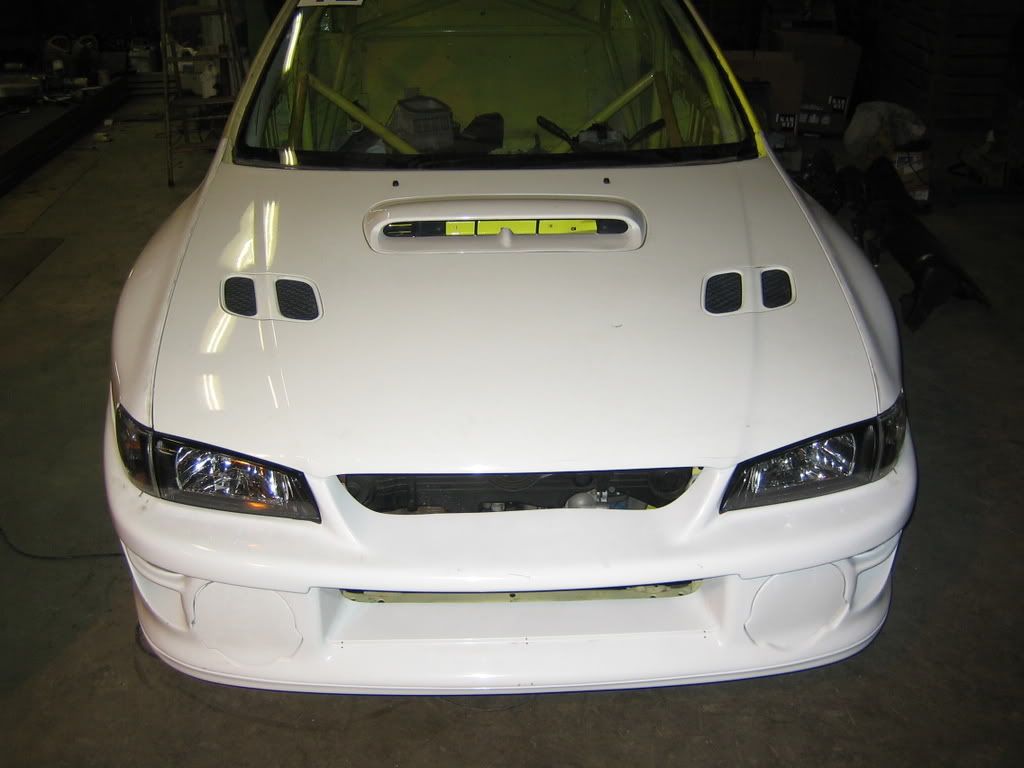
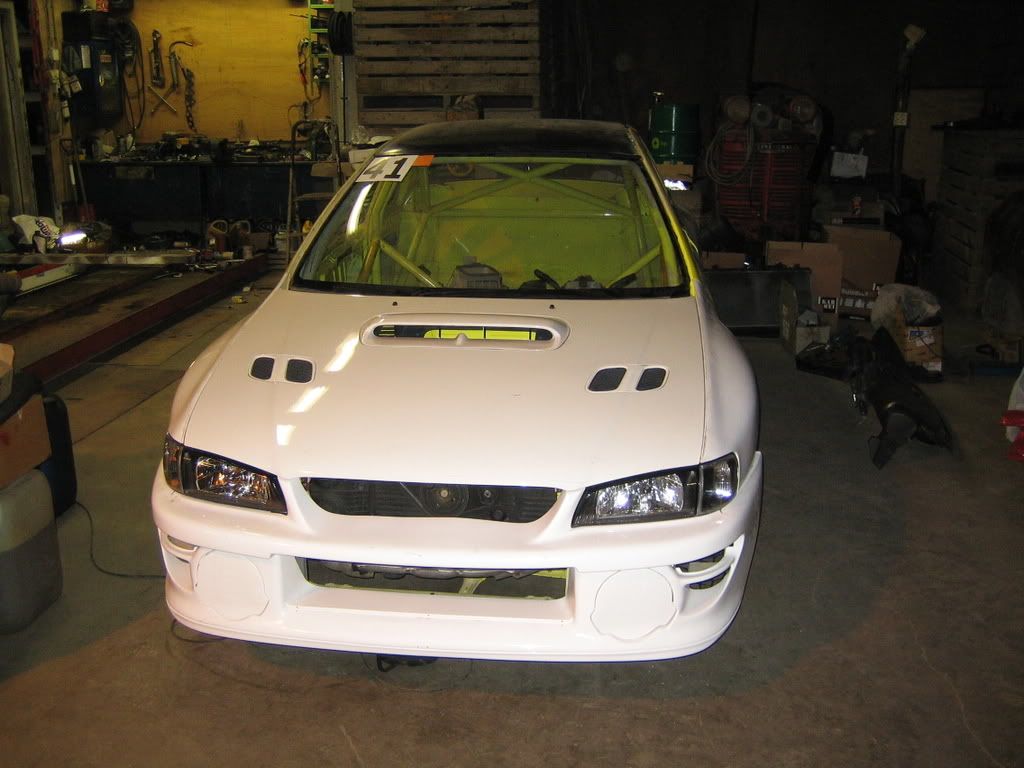
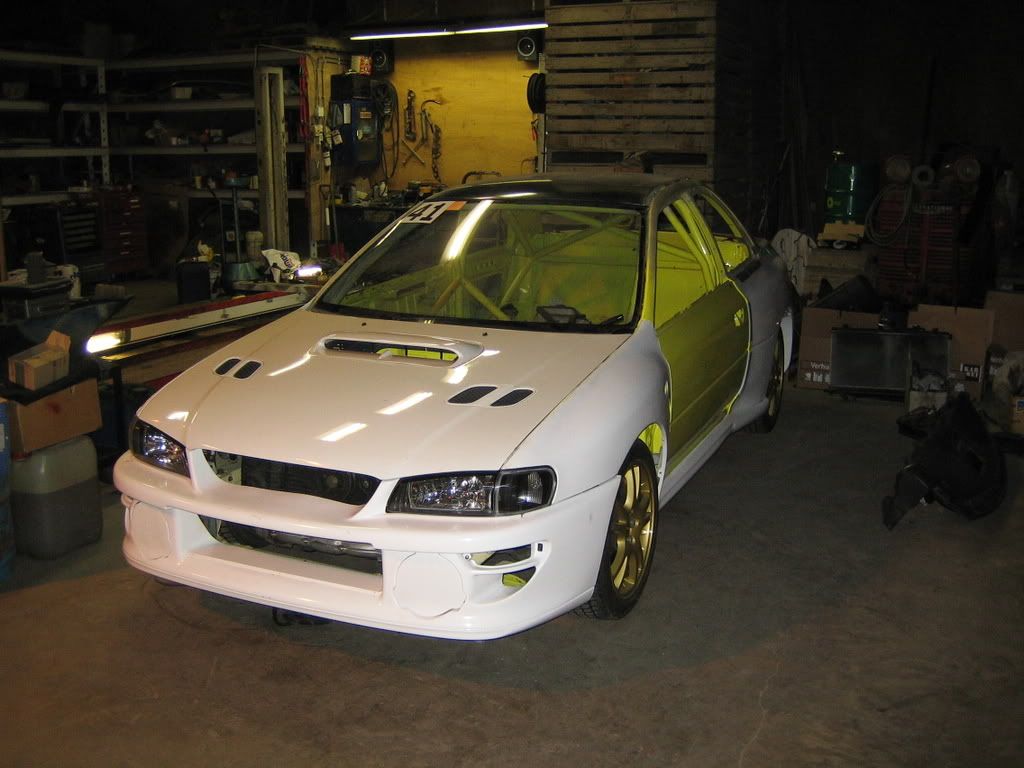
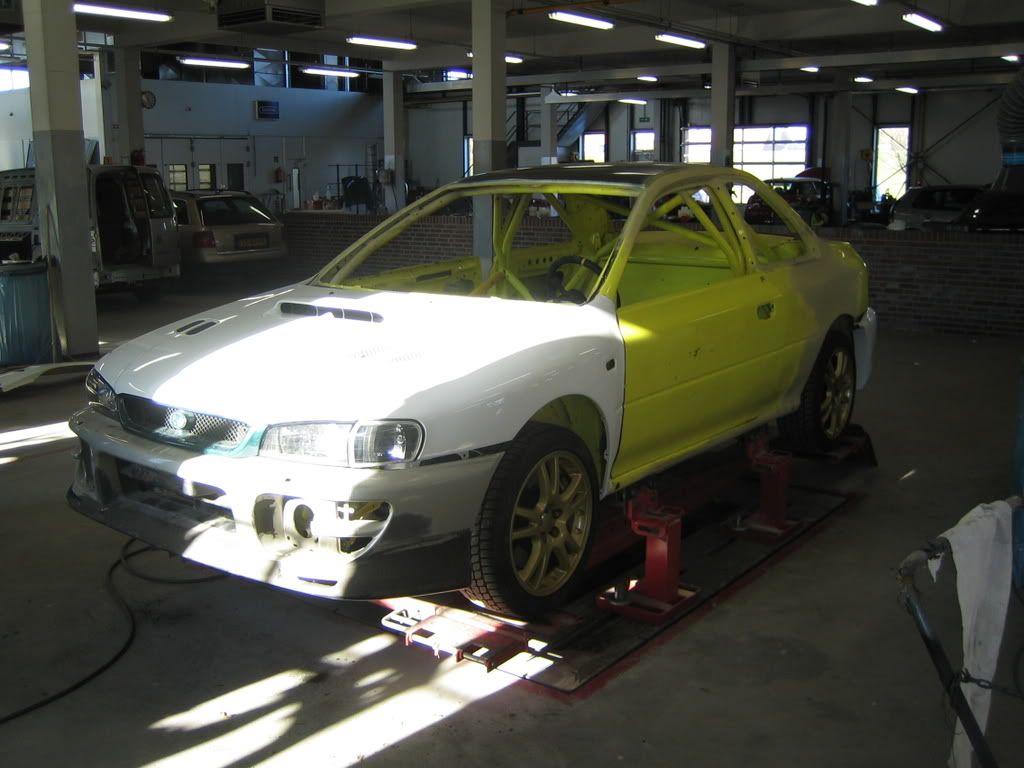
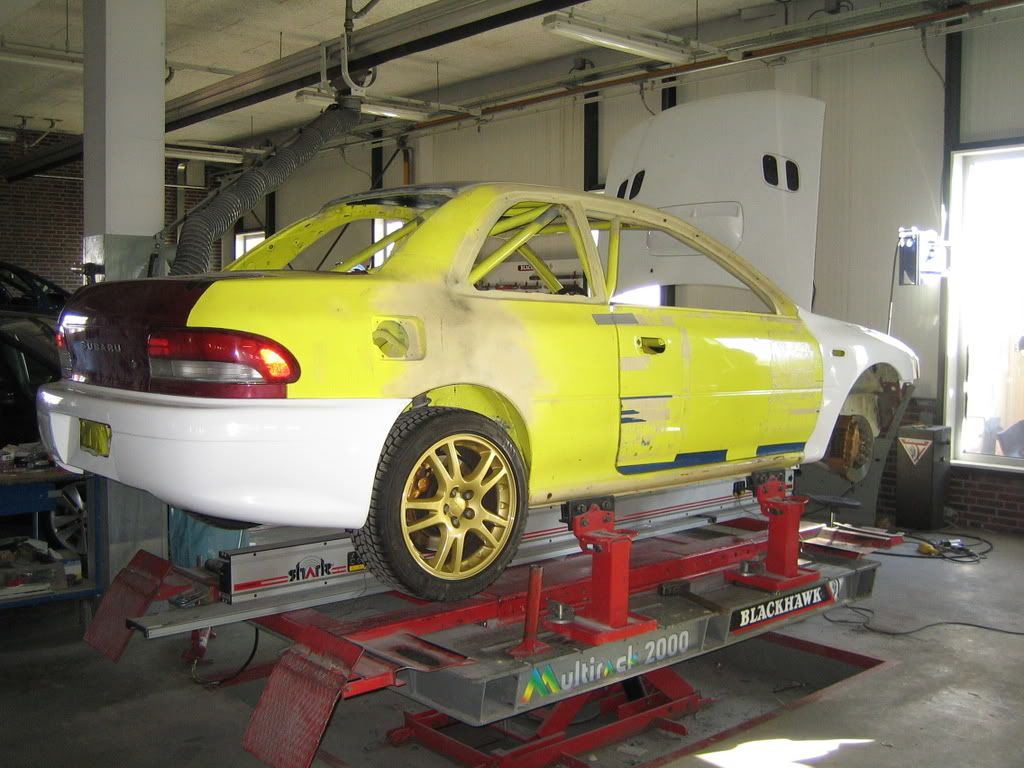
Random pic of the car:
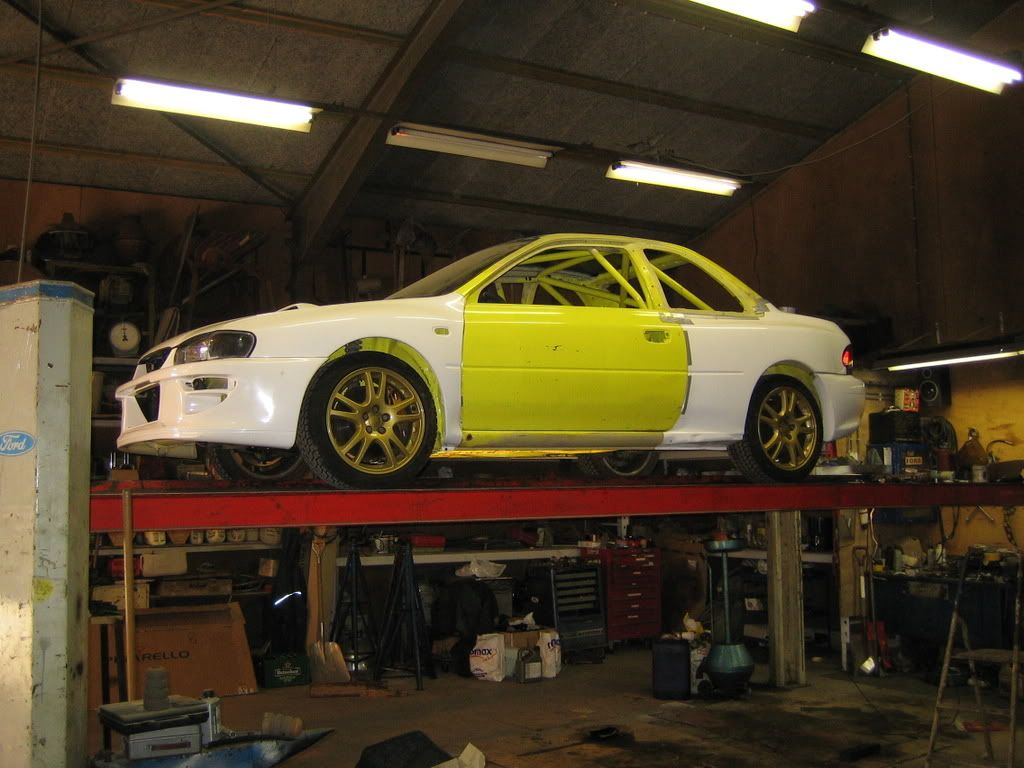
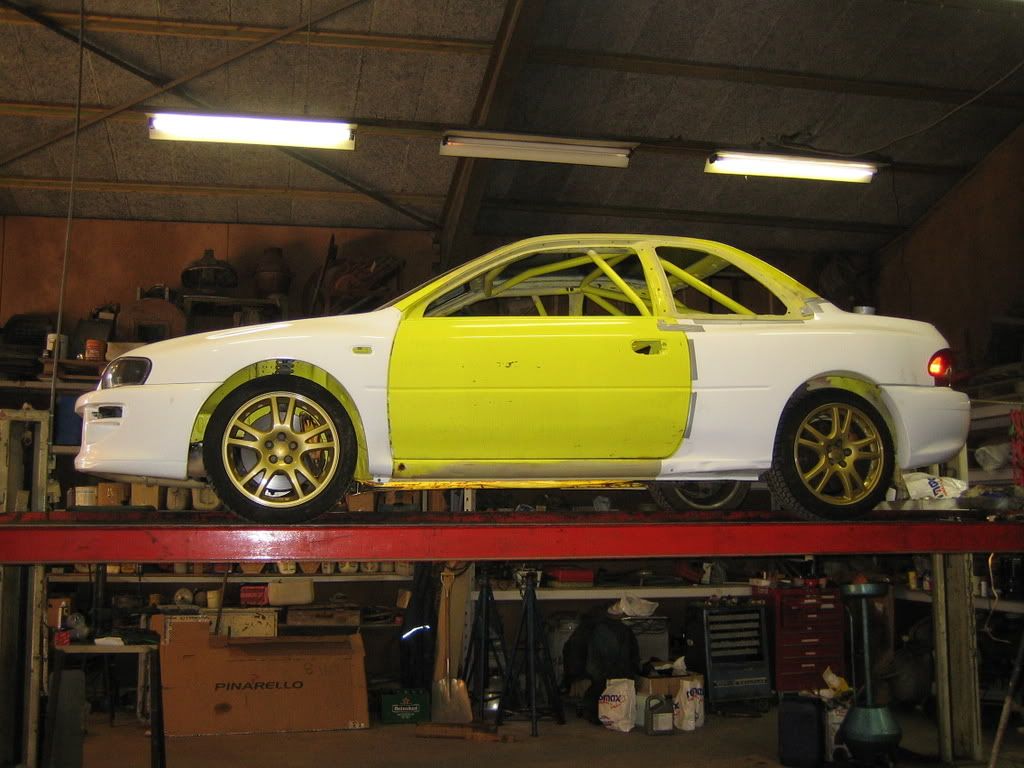
This is the color combo I was thinking of, maybe a bit lighter shade of grey though:


Tim, a friend of mine, was working on the dashboard:
Random pic of the car:
This is the color combo I was thinking of, maybe a bit lighter shade of grey though:
29 January 2008, 11:23 PM
#94
Scooby Regular
Thread Starter
Join Date: Dec 2002
Posts: 458
Likes: 0
Received 0 Likes
on
0 Posts
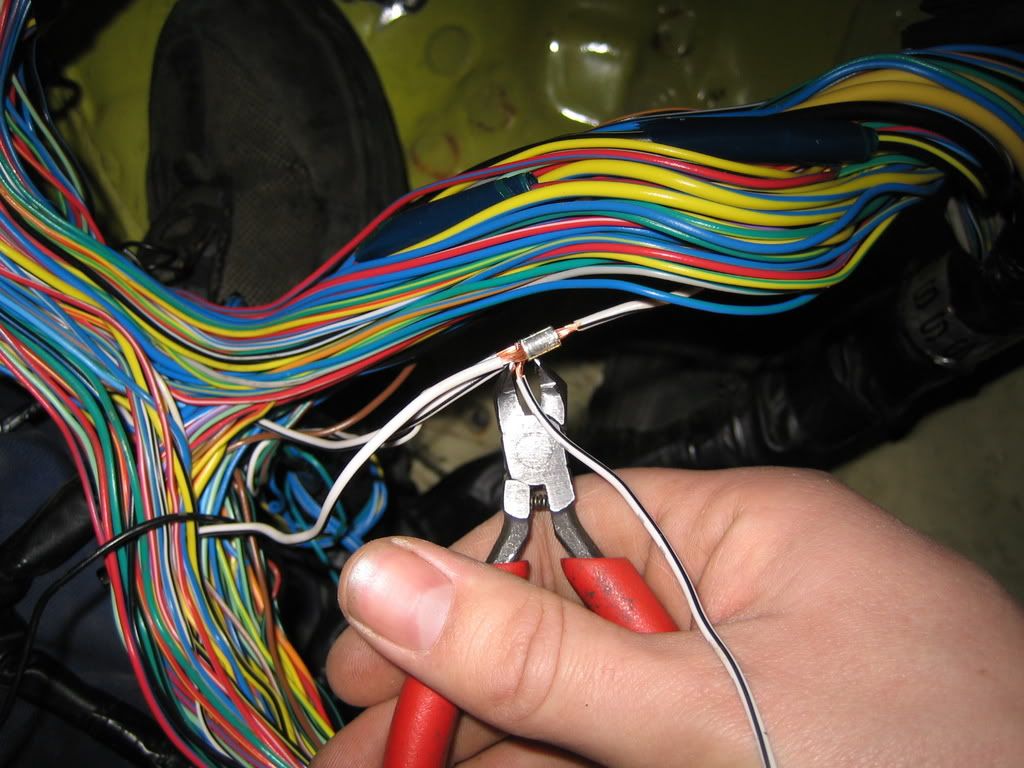
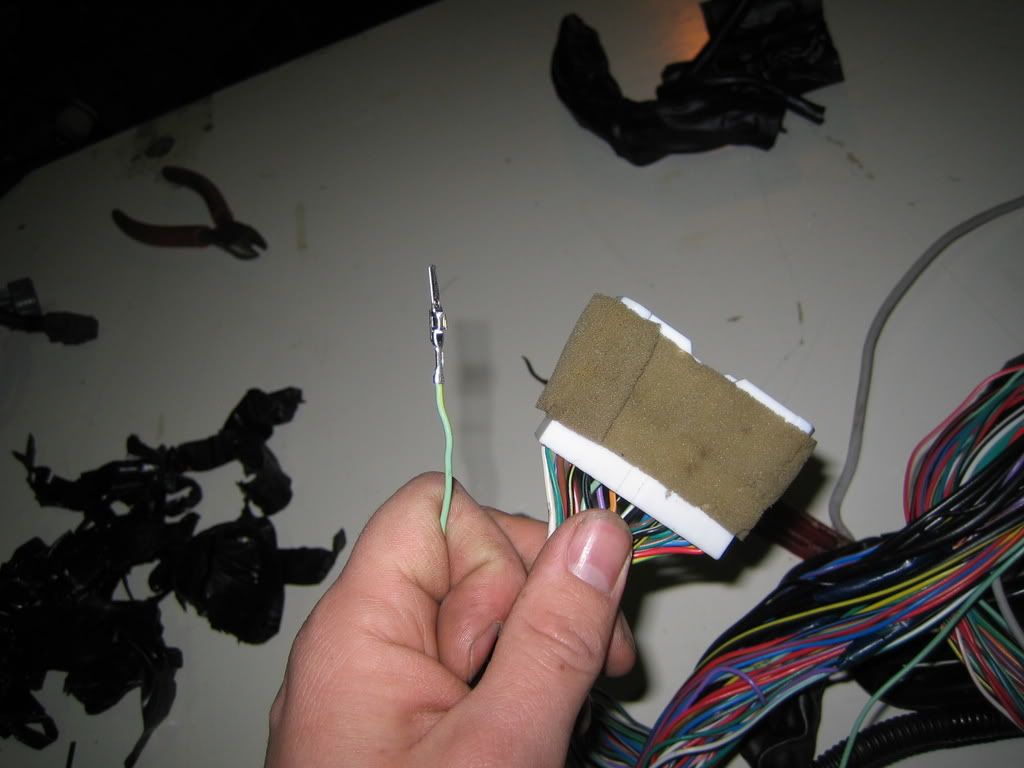
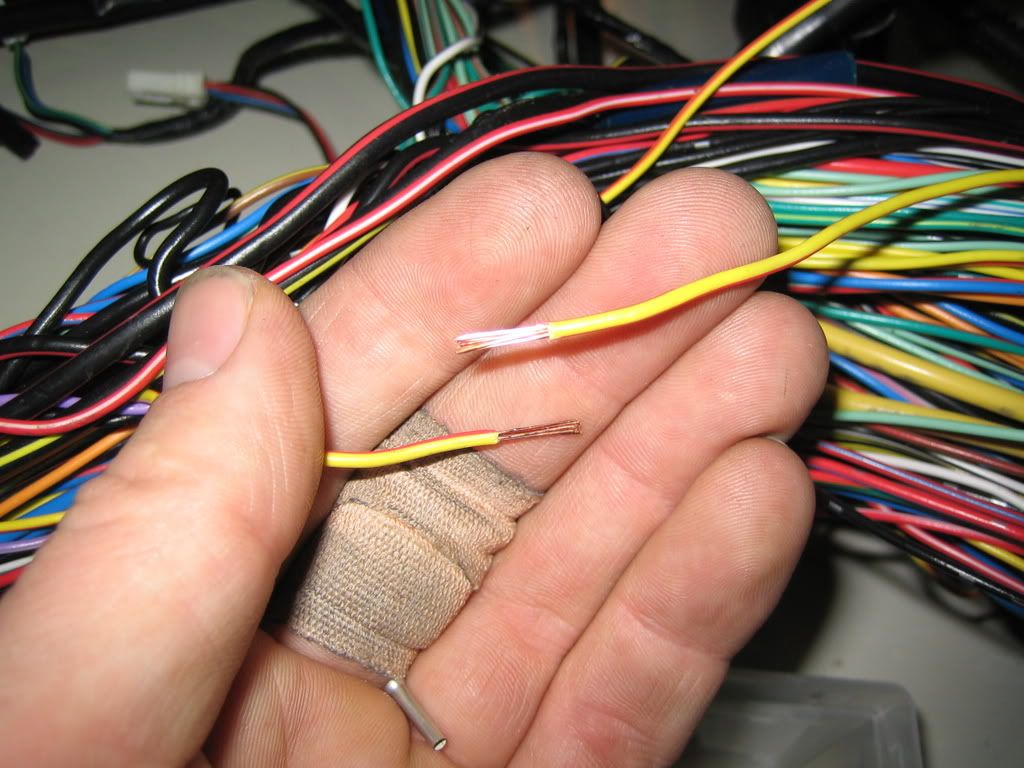
While removing tape from the loom I accidently had cut of a wire that I had to repair.
I figured why not take pics of the proces?
So I did.
Strip the 2 wire ends:
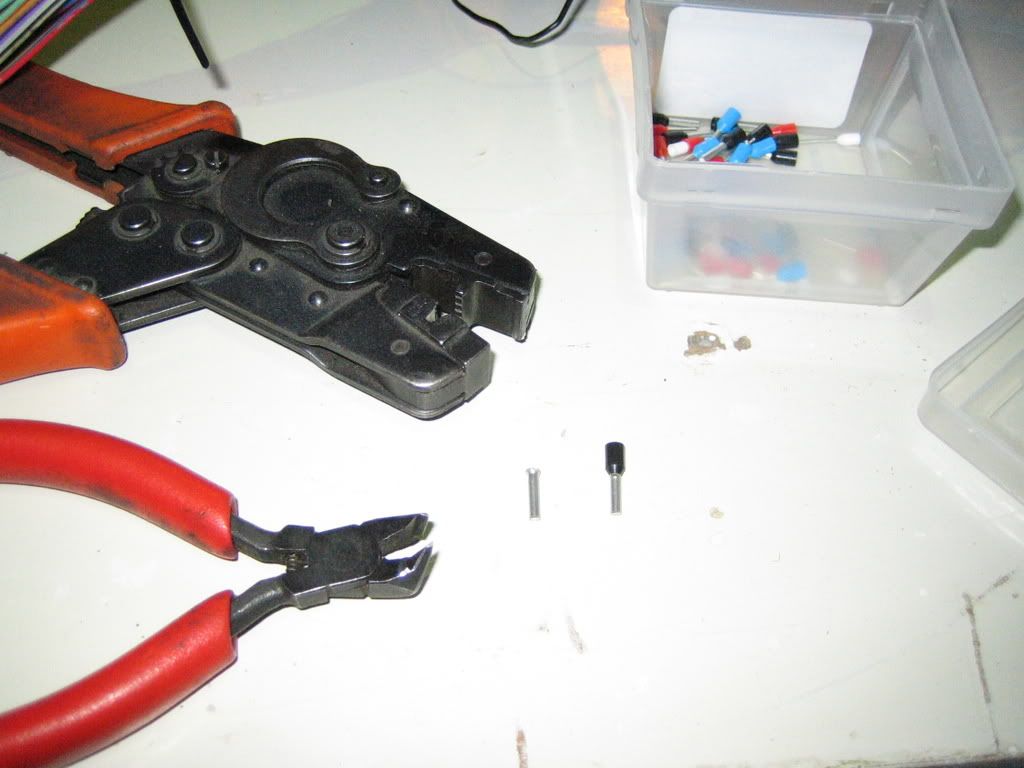
Take a wire-end shell (most likely not the correct word for this item, if anyone knows please say it ) and remove the plastic end of it:
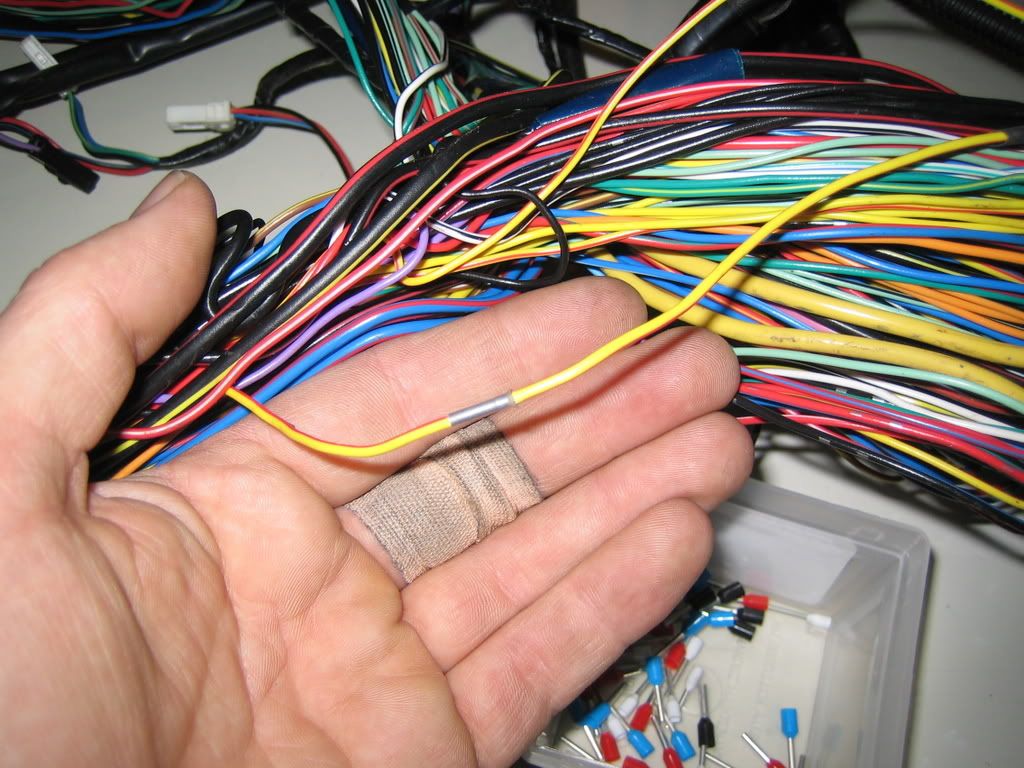
Put the 2 wire ends in at either side of the shell:
Use the special tool:
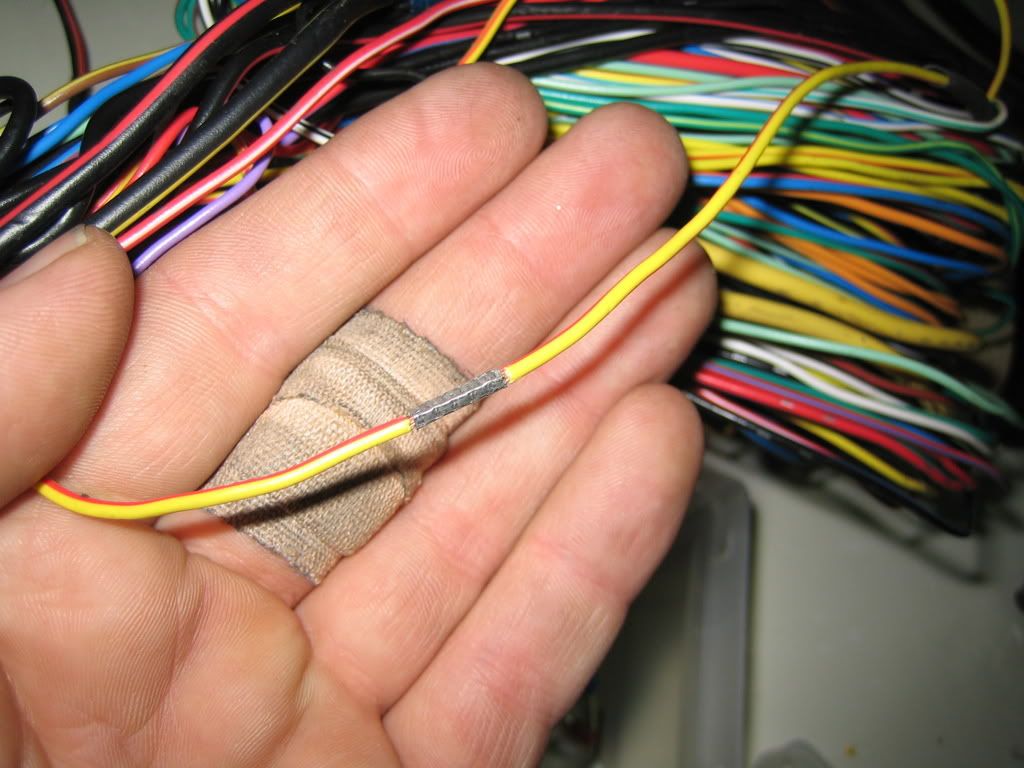
And finish it off with some isolation:
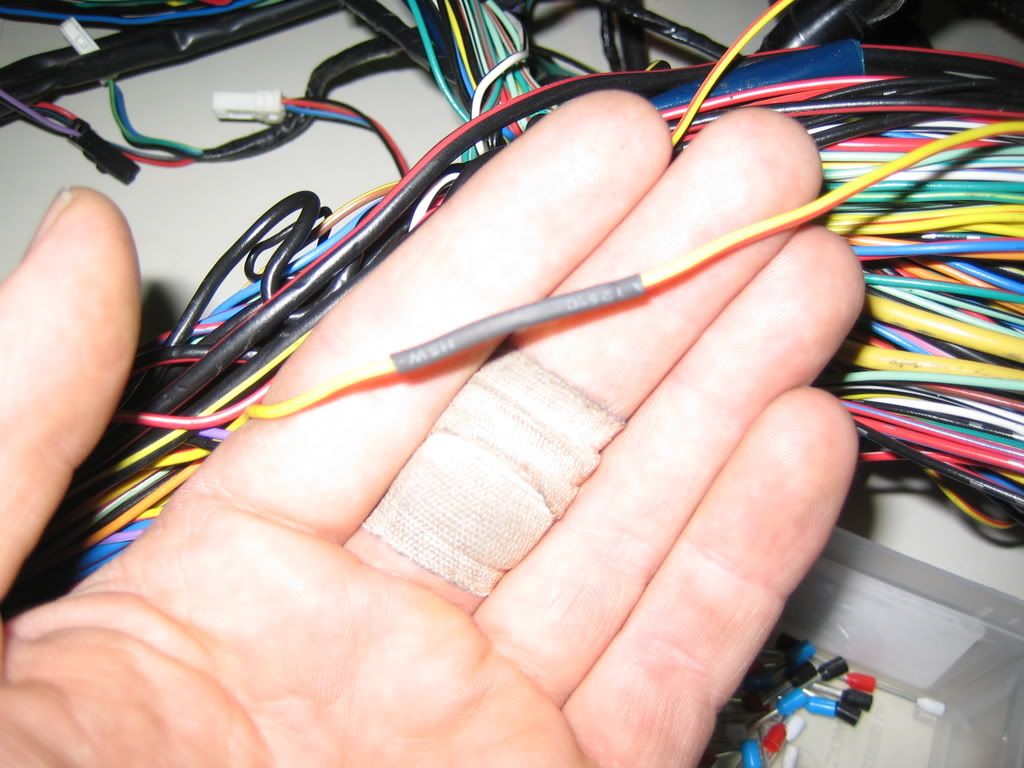
Simple really.
I figured why not take pics of the proces?
So I did.
Strip the 2 wire ends:
Take a wire-end shell (most likely not the correct word for this item, if anyone knows please say it
) and remove the plastic end of it:Put the 2 wire ends in at either side of the shell:
Use the special tool:
And finish it off with some isolation:
Simple really.
29 January 2008, 11:23 PM
#95
Scooby Regular
Thread Starter
Join Date: Dec 2002
Posts: 458
Likes: 0
Received 0 Likes
on
0 Posts
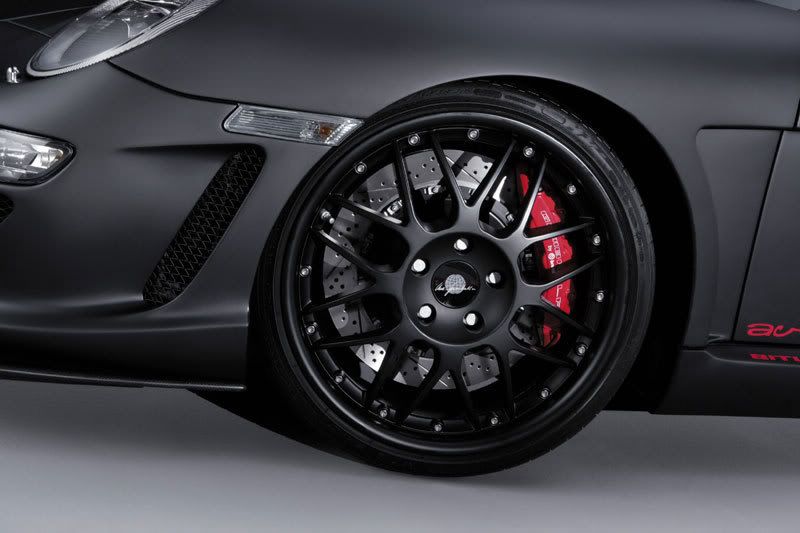
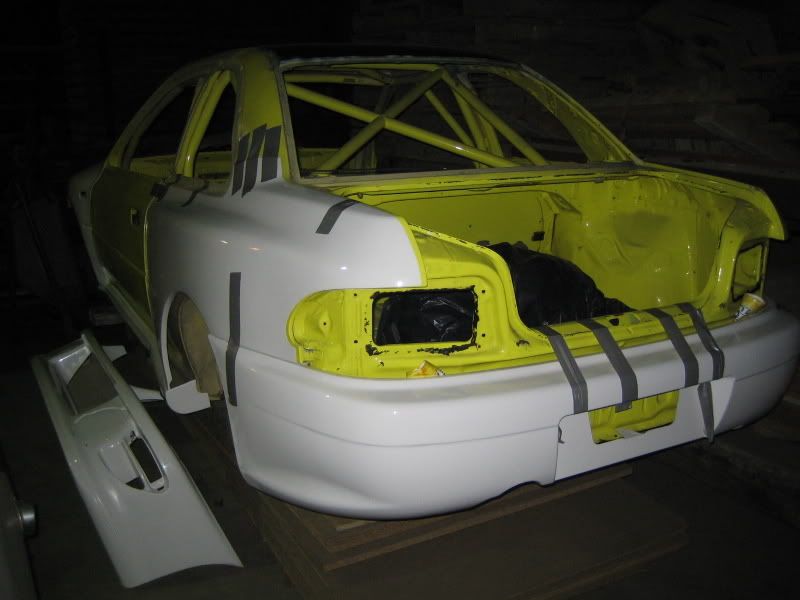
The car is on some STI wheels now, the Rota's are going back for repairs and won't return, time for some different wheels:
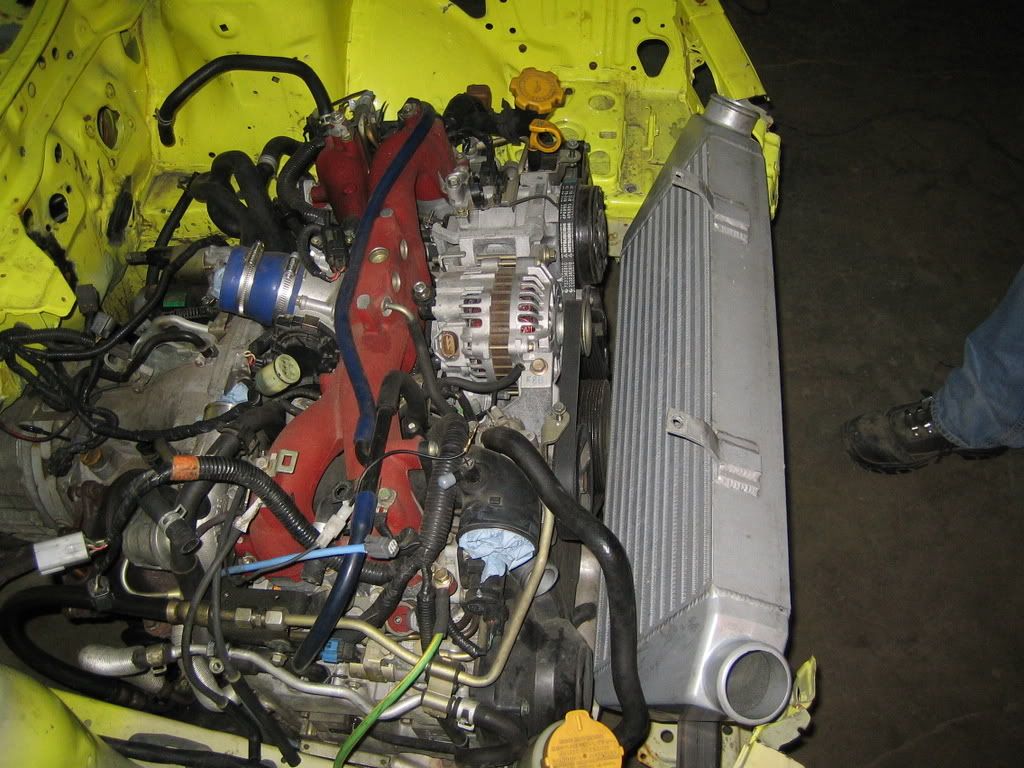
A friend of mine dropped by and we started on the FMIC set-up.
So we started of by cutting stuff away.
I must say, this going to be very nice indeed:
The loom is in the car again, ready to be tie-wrapped in place:
A friend of mine dropped by and we started on the FMIC set-up.
So we started of by cutting stuff away
.I must say, this going to be very nice indeed:
The loom is in the car again, ready to be tie-wrapped in place:
03 February 2008, 06:07 PM
#96
Scooby Regular
Thread Starter
Join Date: Dec 2002
Posts: 458
Likes: 0
Received 0 Likes
on
0 Posts
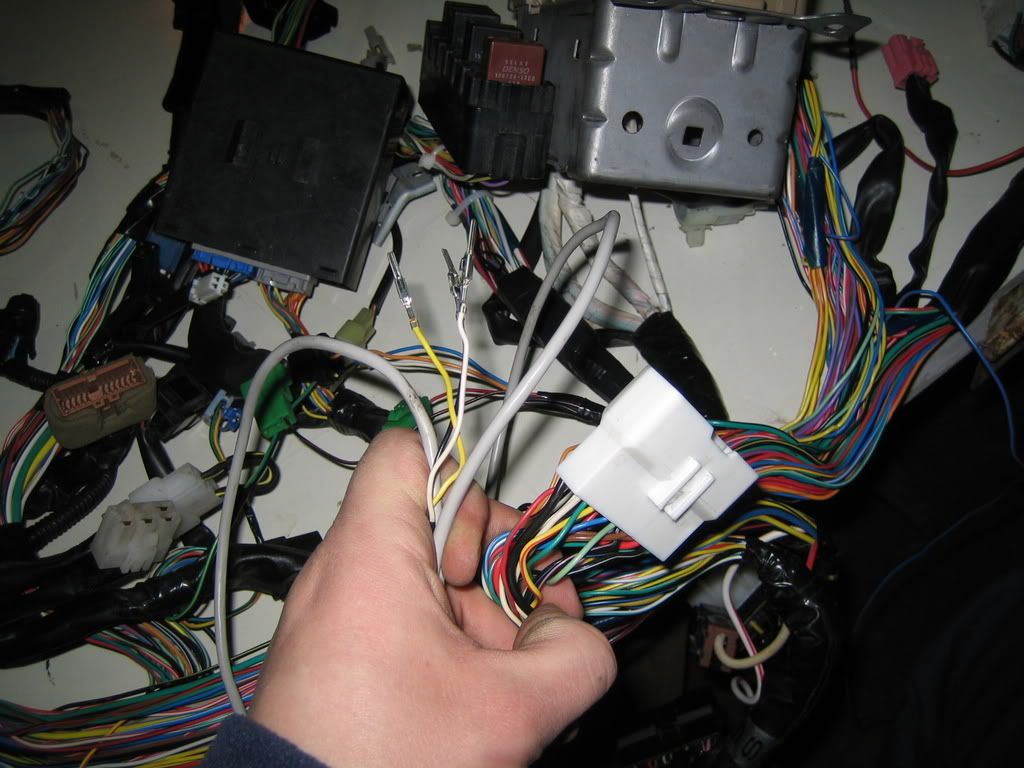
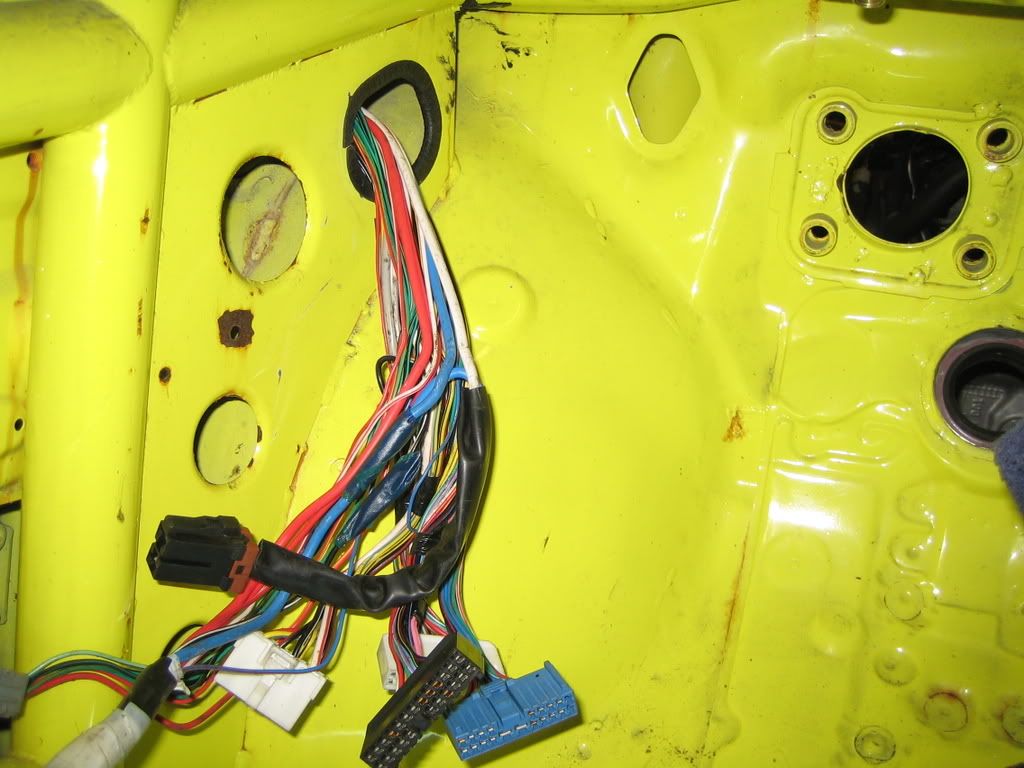
Small update:
The loom isn't finished yet, but I had some progress this week.
First up was the fusebox, I had the old fixation points from the previous car but one of the round relais on the side was in the way of the cage.
When removing the ABS wiring from the loom one of those relais was gone so now it did fit.
Here it sits after retaping the wires again:
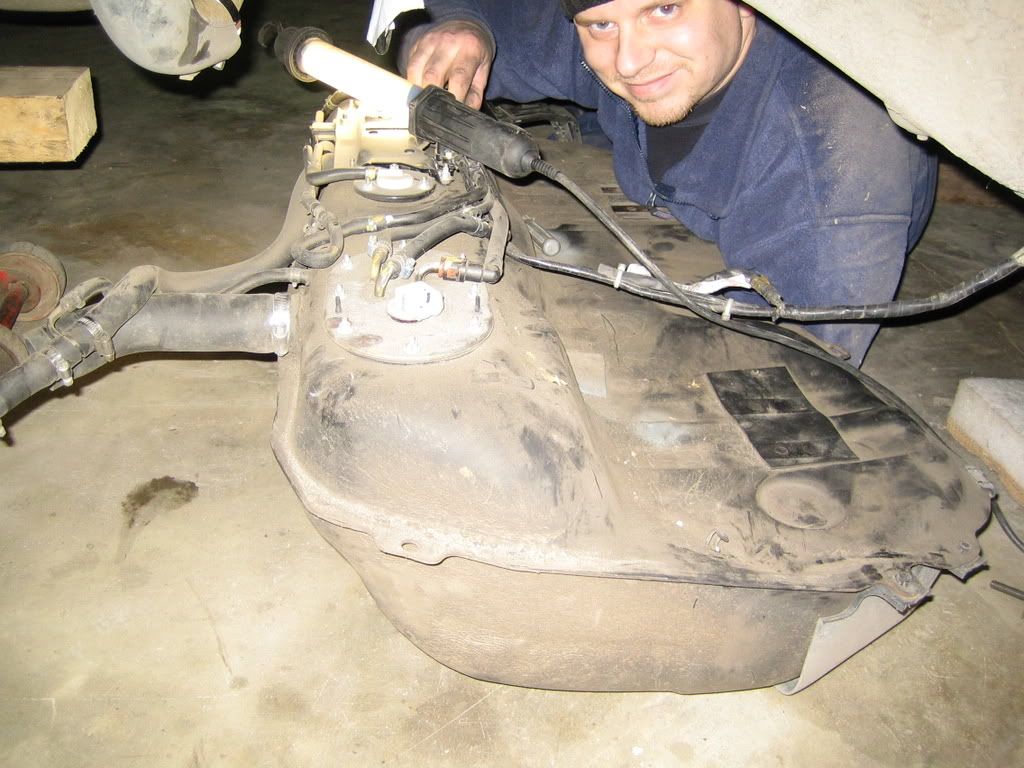
Meanwhile the tank and some other stuff was removed from the old car, it's getting very empty now:
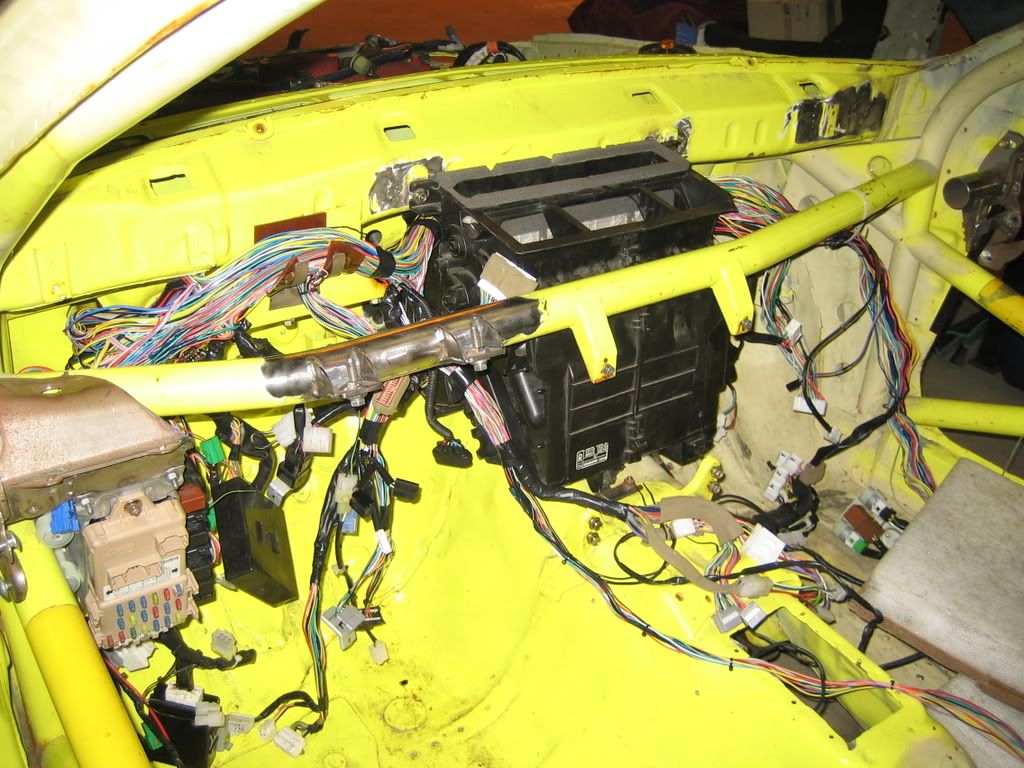
Then the engine loom had to find it's way into the cabin, but there was a cage in it's way now.
So I had to open up one of the holes:
As it was:
After some cutting:
And viola, enter ye, enter ye....:
The loom isn't finished yet, but I had some progress this week.
First up was the fusebox, I had the old fixation points from the previous car but one of the round relais on the side was in the way of the cage.
When removing the ABS wiring from the loom one of those relais was gone so now it did fit.
Here it sits after retaping the wires again:
Meanwhile the tank and some other stuff was removed from the old car, it's getting very empty now:
Then the engine loom had to find it's way into the cabin, but there was a cage in it's way now.
So I had to open up one of the holes:
As it was:
After some cutting:
And viola, enter ye, enter ye....:
03 February 2008, 06:08 PM
#97
Scooby Regular
Thread Starter
Join Date: Dec 2002
Posts: 458
Likes: 0
Received 0 Likes
on
0 Posts
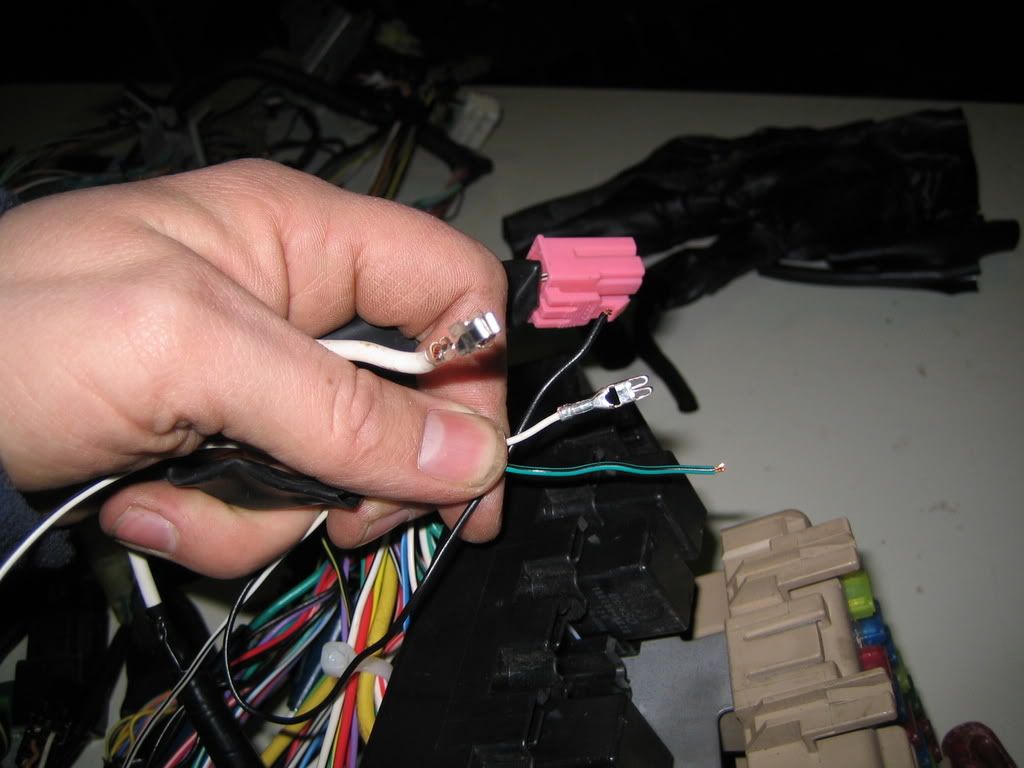
I found some airbag cables in the loom while removing ABS so of course it was exit --->:

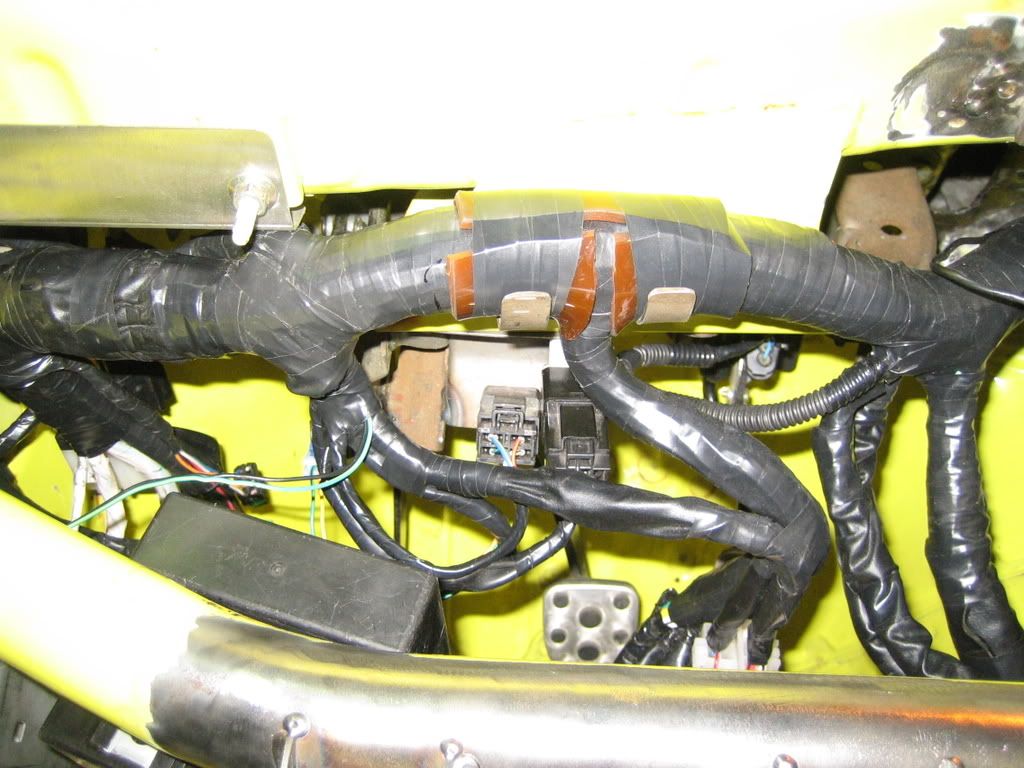
First steps in the retaping of the loom, some small wires:
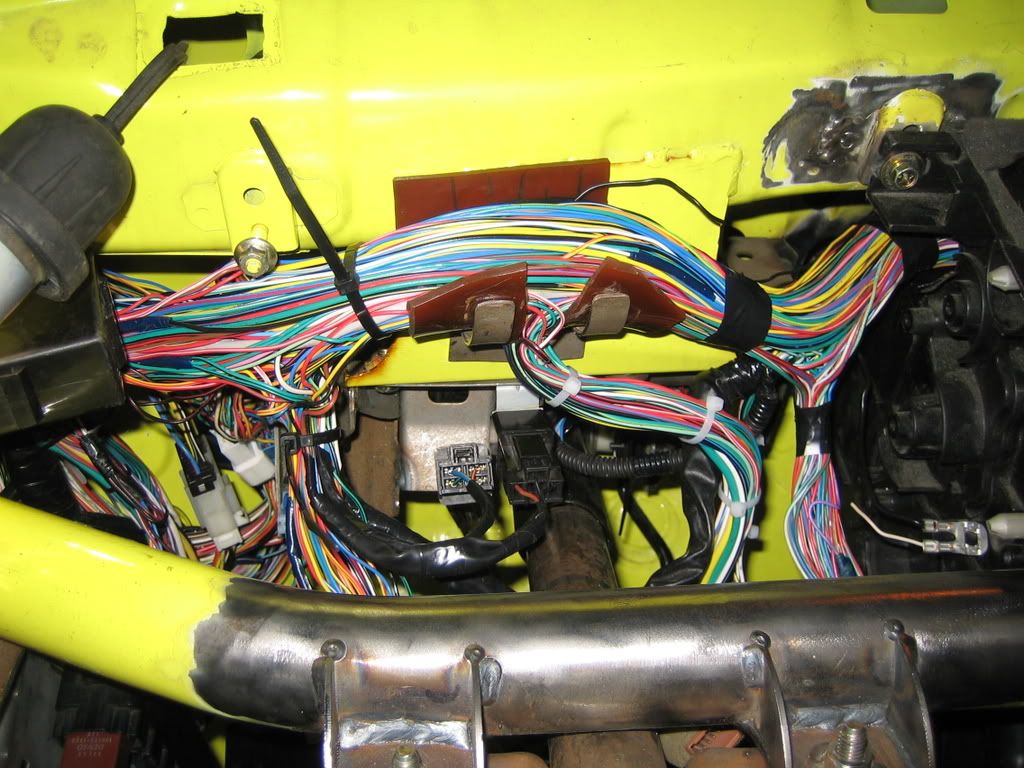
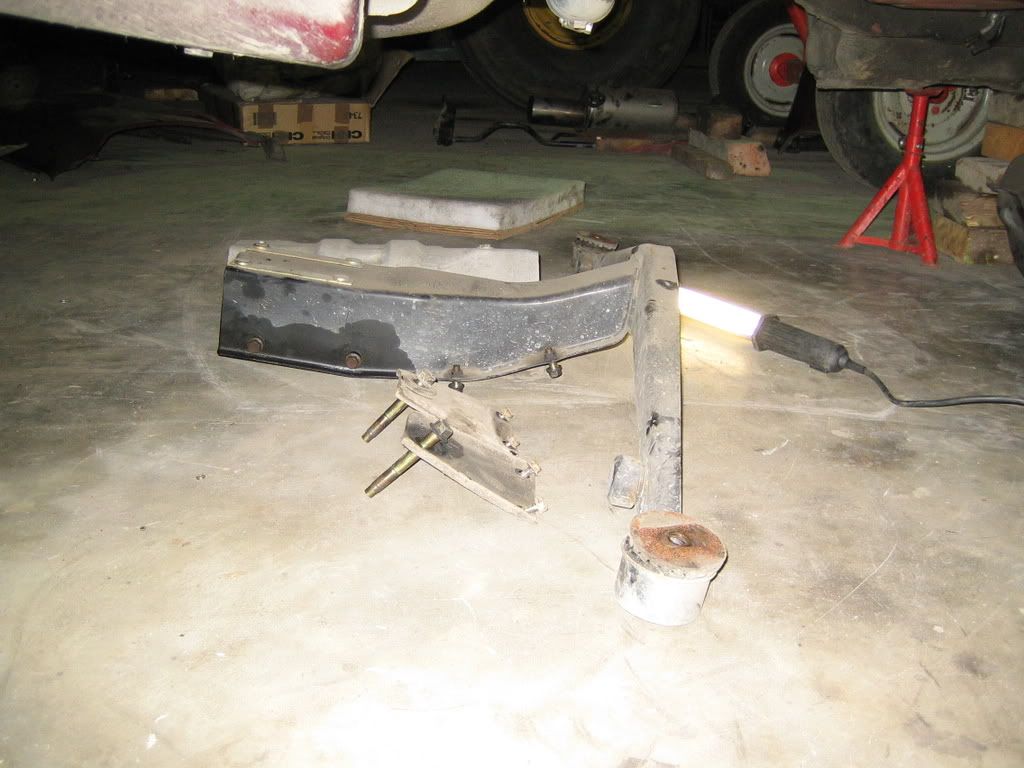
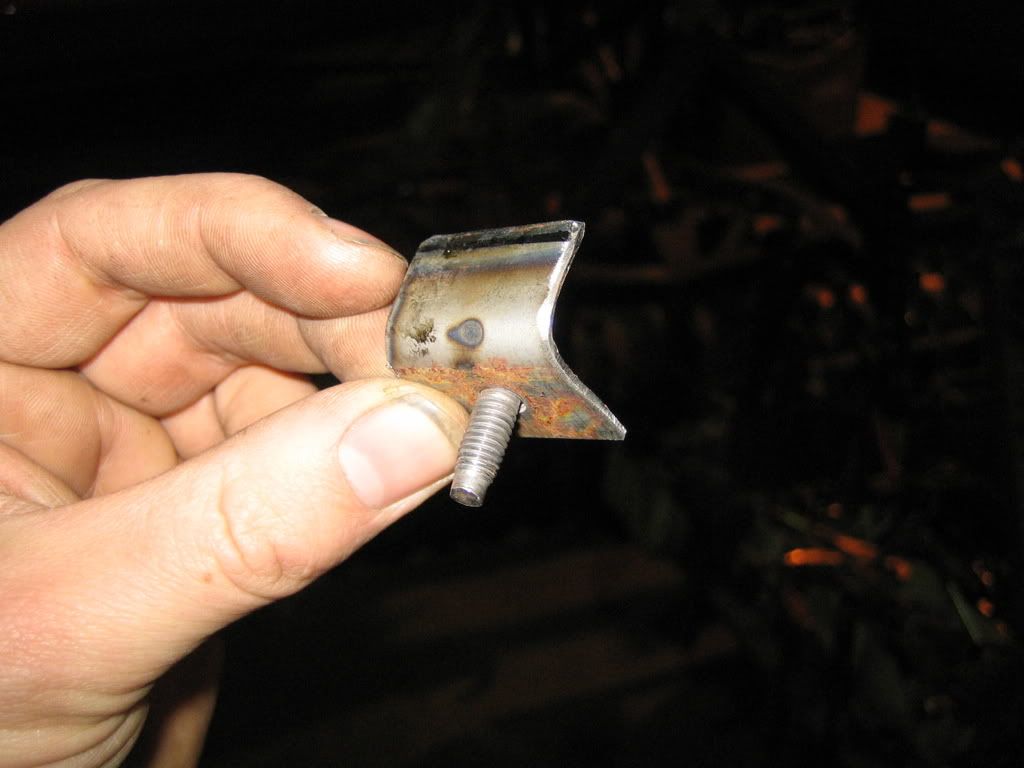
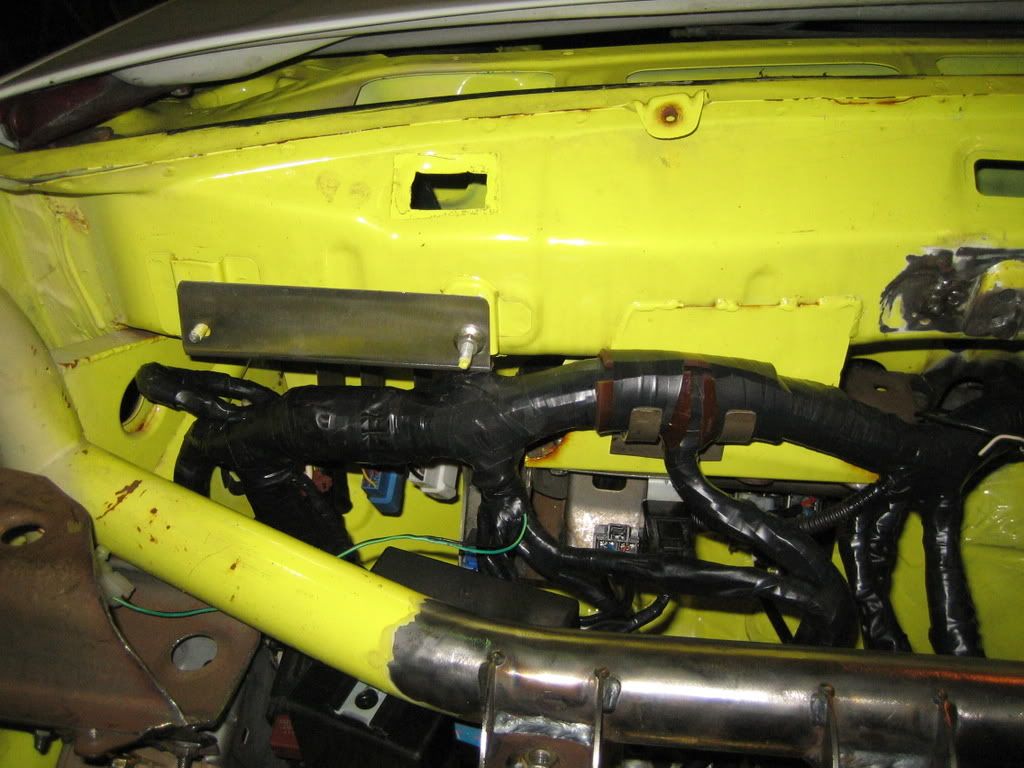
3 major connectors needed a fixed place somewhere, in the other car they were hanging loose, I didn't like that so it had to be fixed in this car.
This is the best place for them but nothing to fix them to:
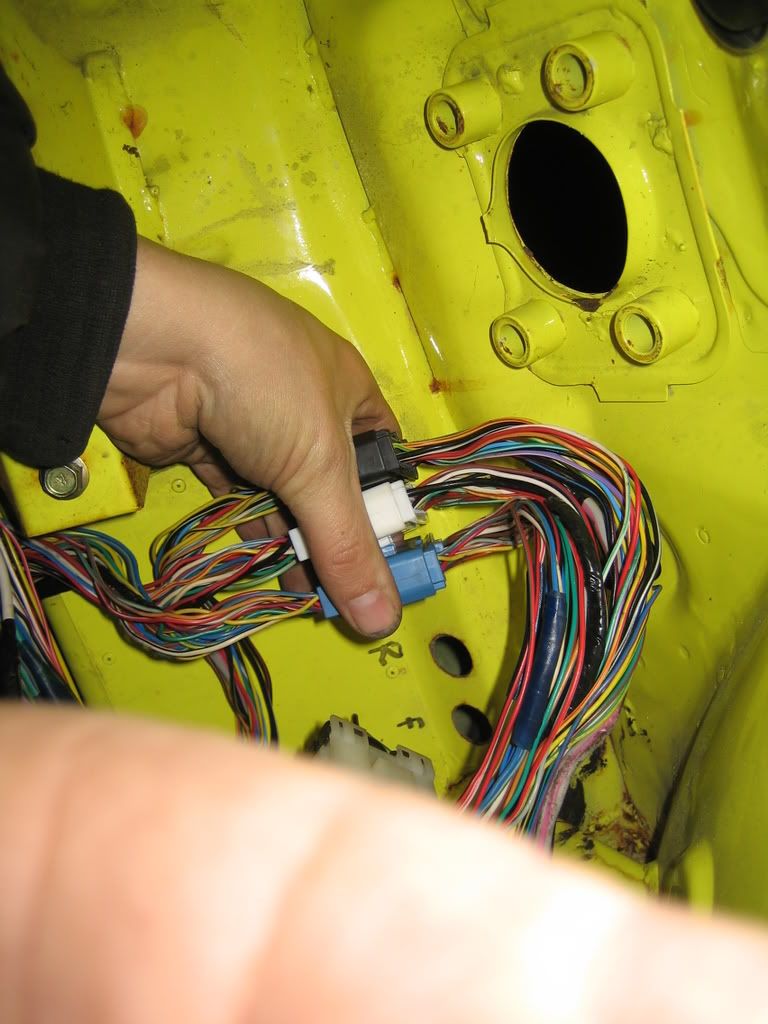
So we made a rather large bracket for them, after a afternoon of measuring grinding and welding this came out:

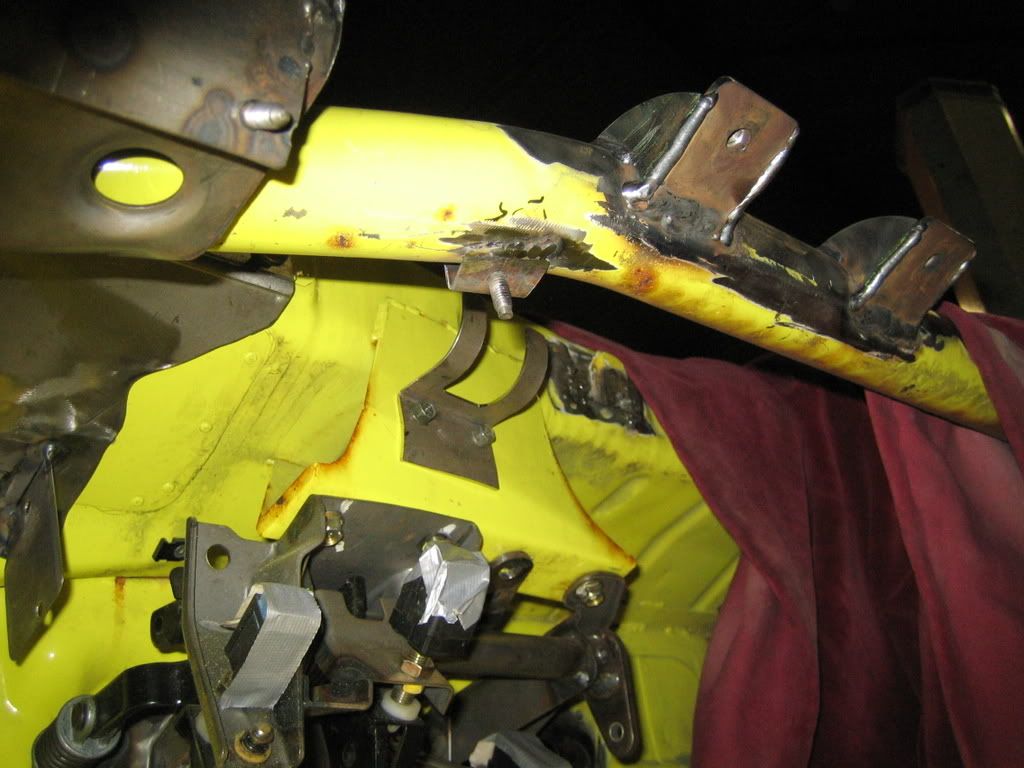
And this is how it is in the car:
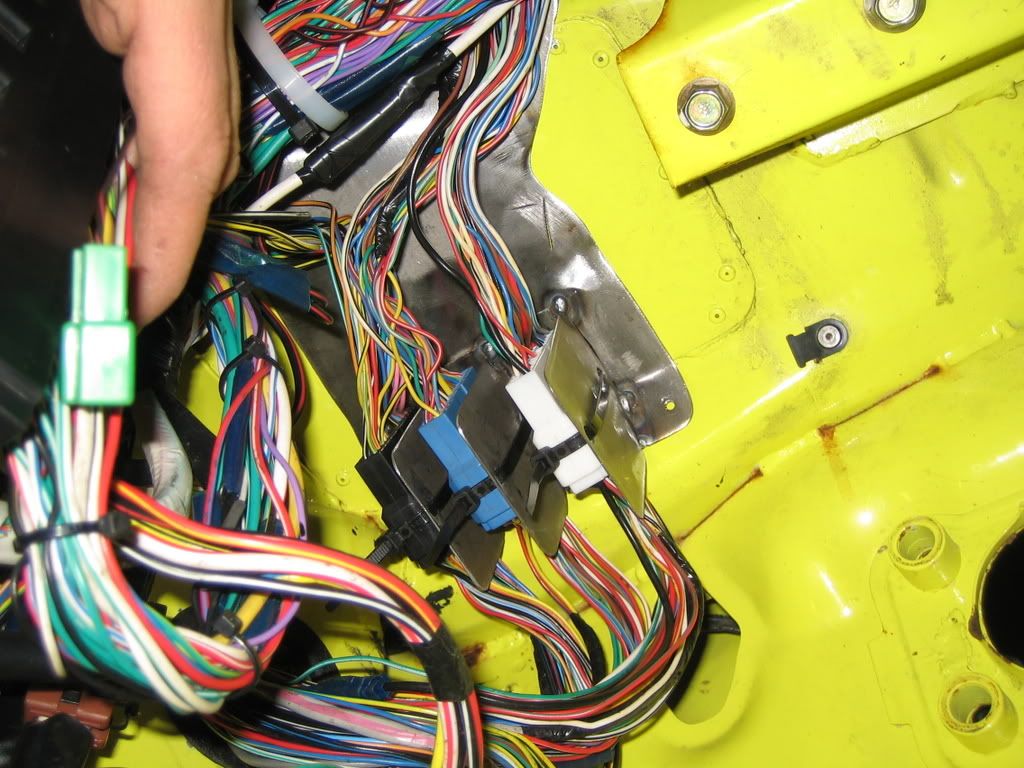
I'm pretty happy with the resluts actually.
The loom is nearing completion now, and not a minute to soon, I'm getting fed up with it.
First steps in the retaping of the loom, some small wires:
3 major connectors needed a fixed place somewhere, in the other car they were hanging loose, I didn't like that so it had to be fixed in this car.
This is the best place for them but nothing to fix them to:
So we made a rather large bracket for them, after a afternoon of measuring grinding and welding this came out:
And this is how it is in the car:
I'm pretty happy with the resluts actually.
The loom is nearing completion now, and not a minute to soon, I'm getting fed up with it.
09 February 2008, 05:59 PM
#99
Scooby Regular

Join Date: Aug 2007
Posts: 34
Likes: 0
Received 0 Likes
on
0 Posts
 17 February 2008, 05:53 PM
#101
Scooby Regular
Thread Starter
Join Date: Dec 2002
Posts: 458
Likes: 0
Received 0 Likes
on
0 Posts
It's been a while since my last update, and with good reason, I didn't feel like it, in the last few postst you will see why.
I found out the history of my chassis, which is not as good as I was told.
It seems that the small damage in front and rear was actually more something like a megacrash.
It has been rolled etc. in 2000 somewhere.
I now know the whole route it has been on since 2000 untill it came in my possesion, which is nice to know, although the guy has not been very honest about it as it seems.
Ohh well....
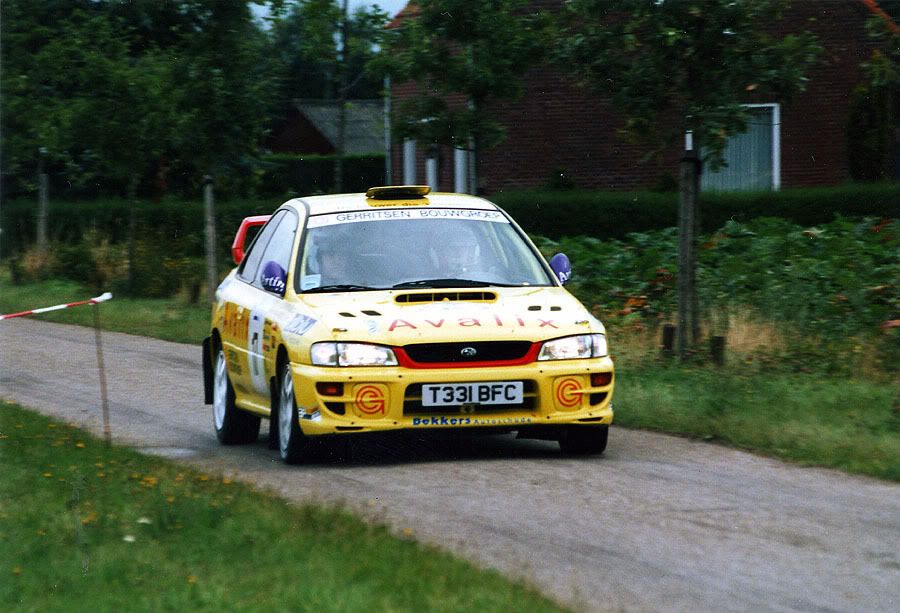
I have found 2 pictures of the car when it was still in anger on the stages in europe:

I found out the history of my chassis, which is not as good as I was told.
It seems that the small damage in front and rear was actually more something like a megacrash.
It has been rolled etc. in 2000 somewhere.
I now know the whole route it has been on since 2000 untill it came in my possesion, which is nice to know, although the guy has not been very honest about it as it seems.
Ohh well....
I have found 2 pictures of the car when it was still in anger on the stages in europe:
17 February 2008, 05:53 PM
#102
Scooby Regular
Thread Starter
Join Date: Dec 2002
Posts: 458
Likes: 0
Received 0 Likes
on
0 Posts
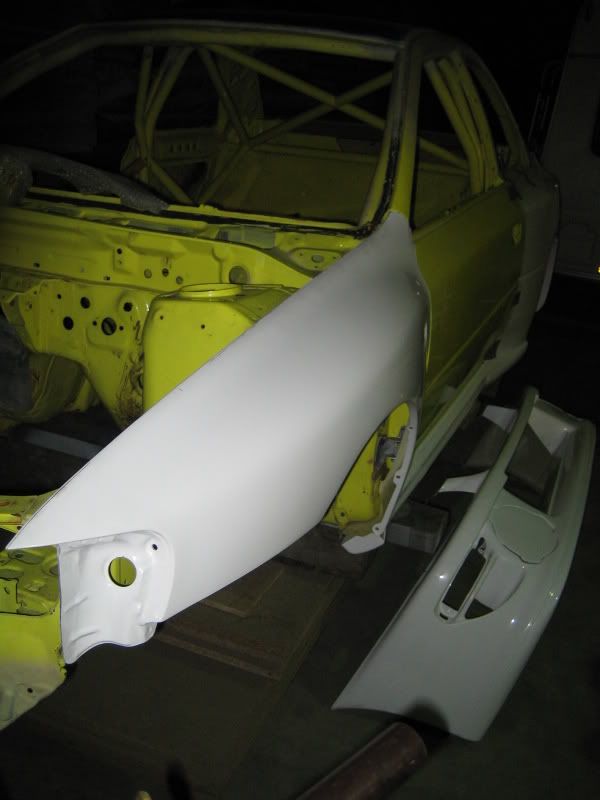
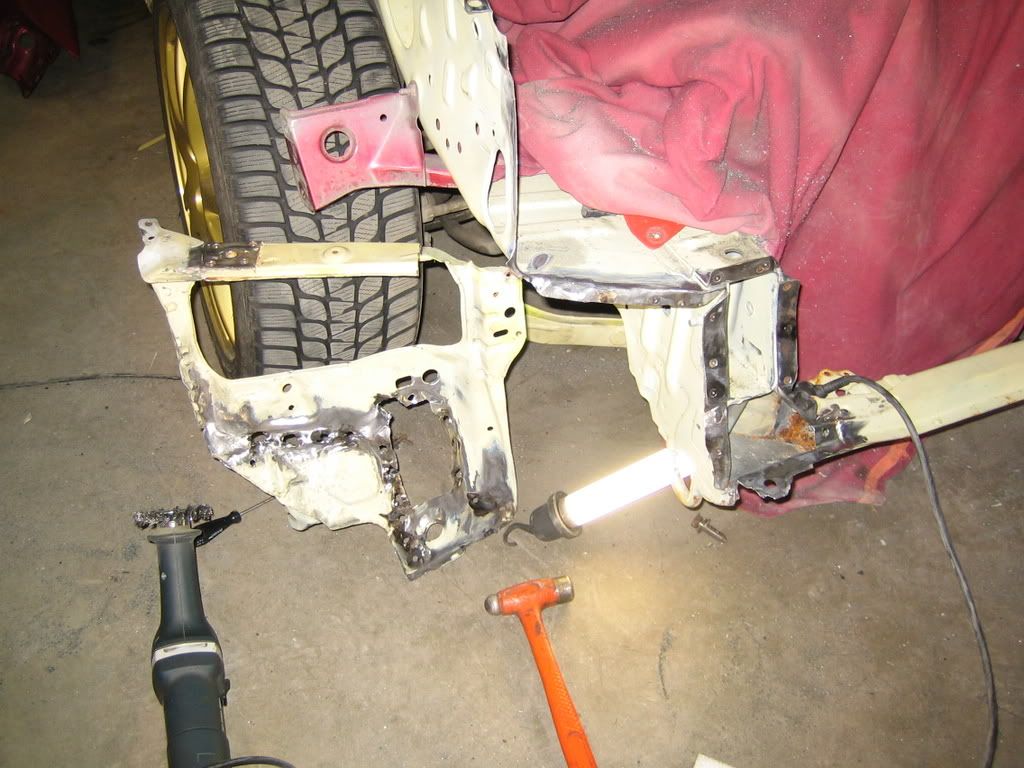
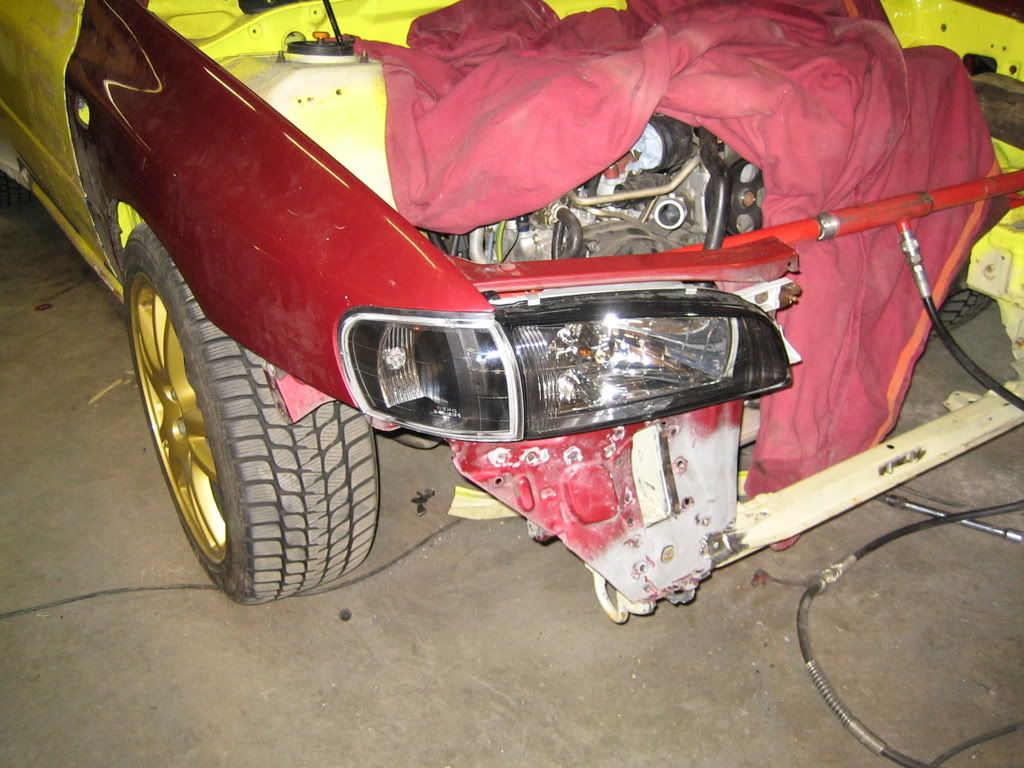
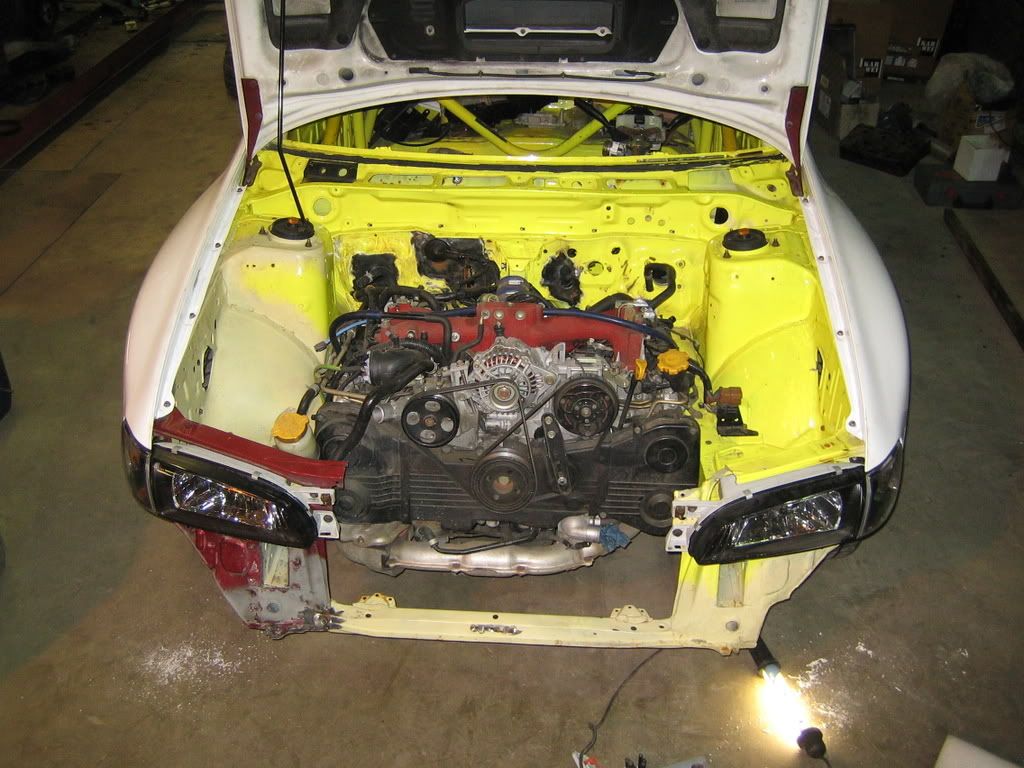
A friend of mine who owns his own wheel shop was going to drop by with some stuff to determine the offset that is best for my new wide fenders, the official S5 WRC car uses +12 which I think is best for mine aswel.
So I wanted to mount all fenders, lights and bumpers to see the end result, a 15 minute job normaly, it took me 2 weeks....
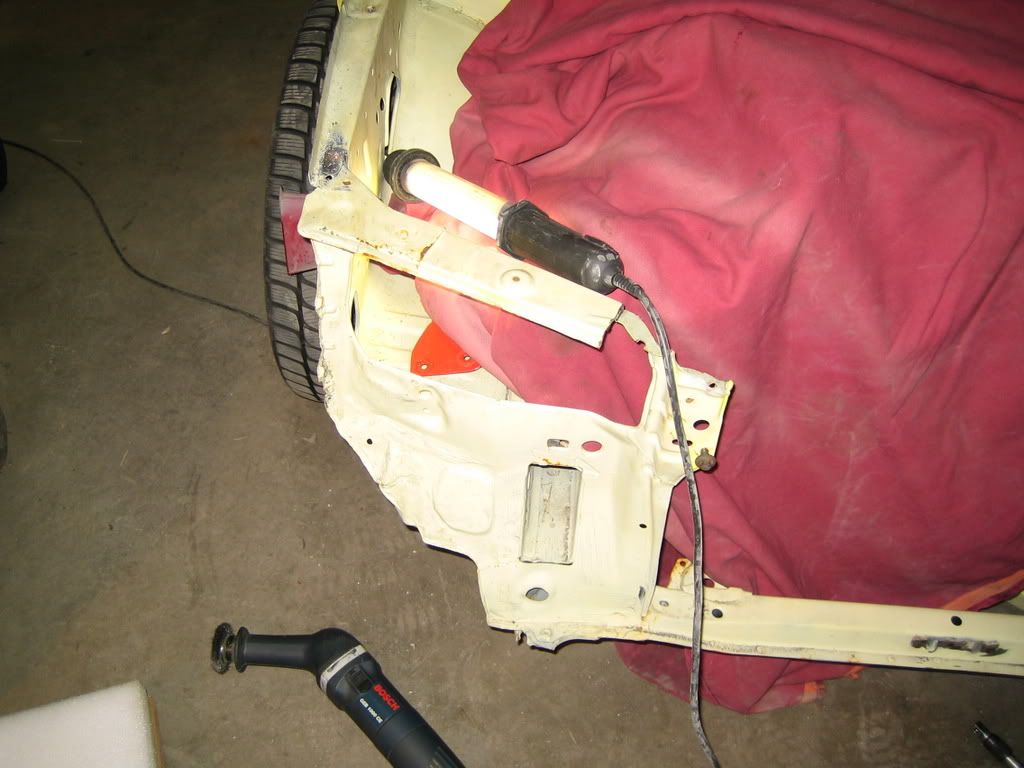
To cut thing short, the right front inner wing is 5mm to short, the last 2 holes on top of the fender are not in line, the ones near the headlights I mean.
And the 2 innerwings are 10mm to close to each other, which means the hood won't close etc.
I know this by cross measurig the chassis with my old red chassis.
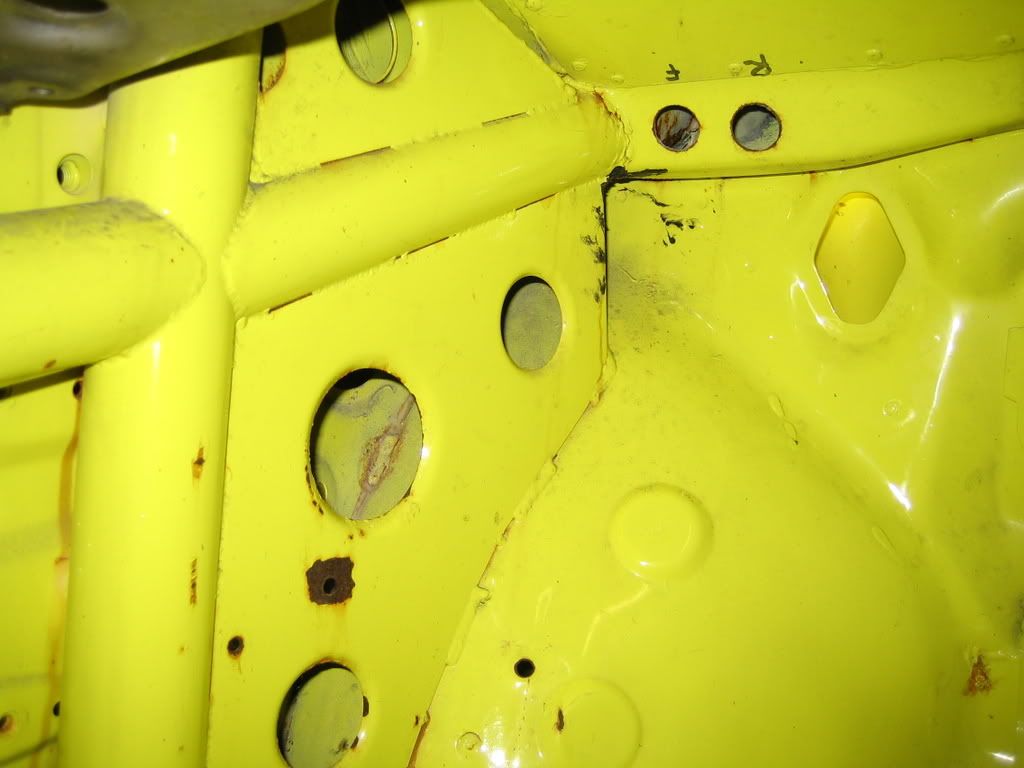
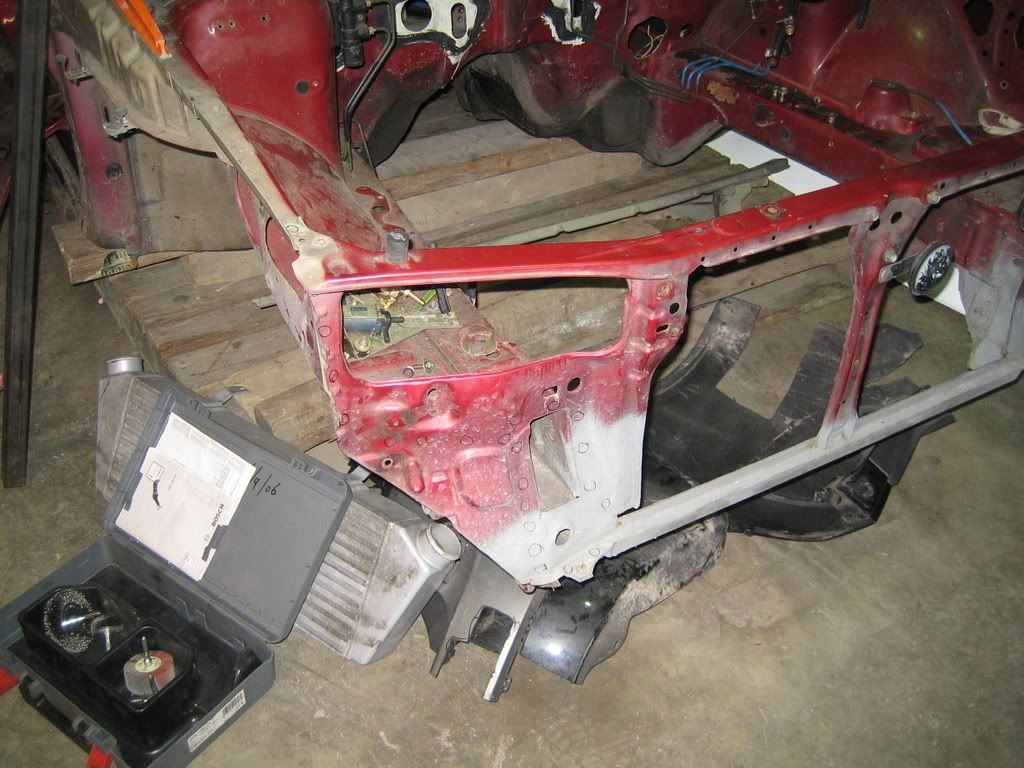
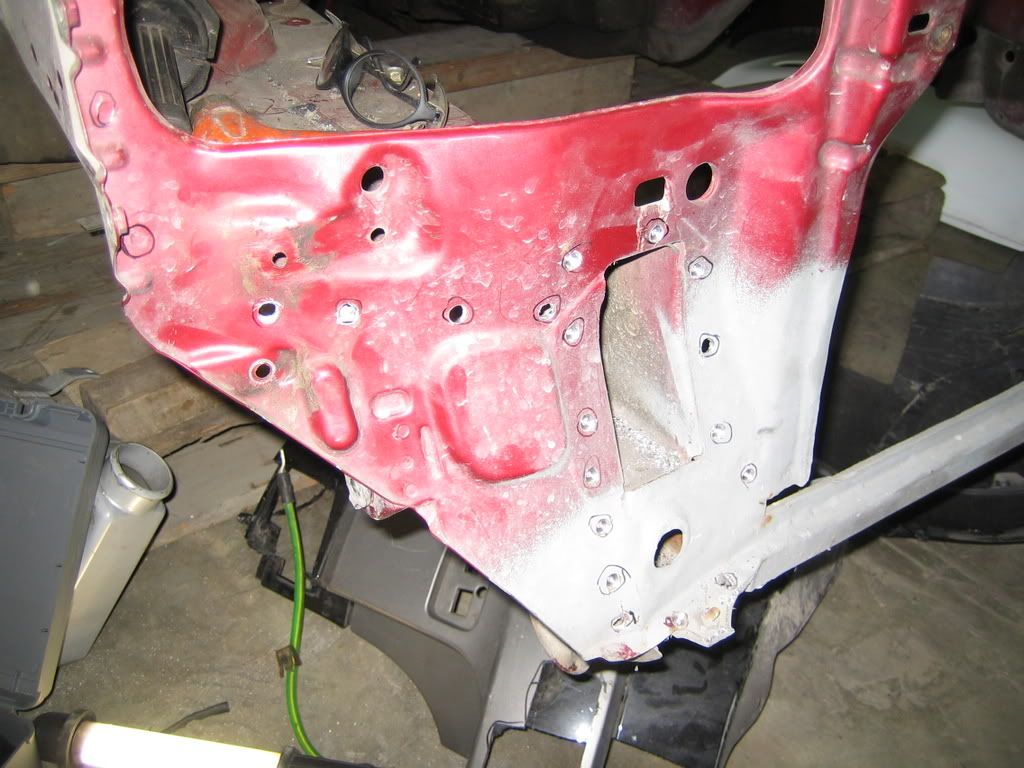
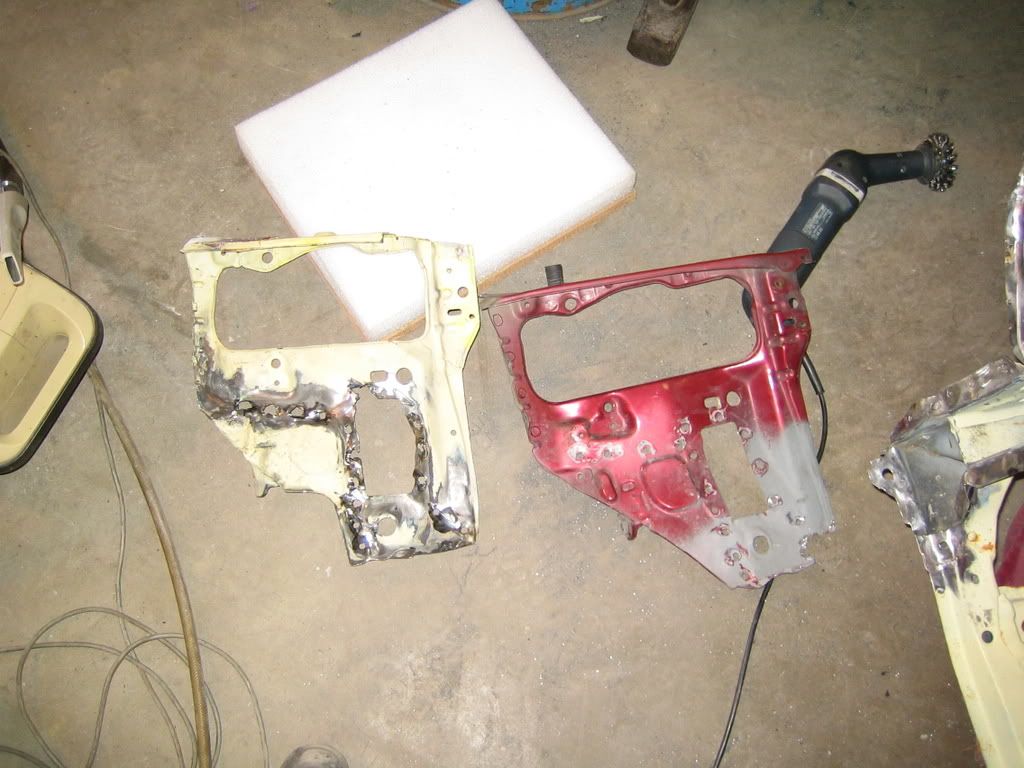
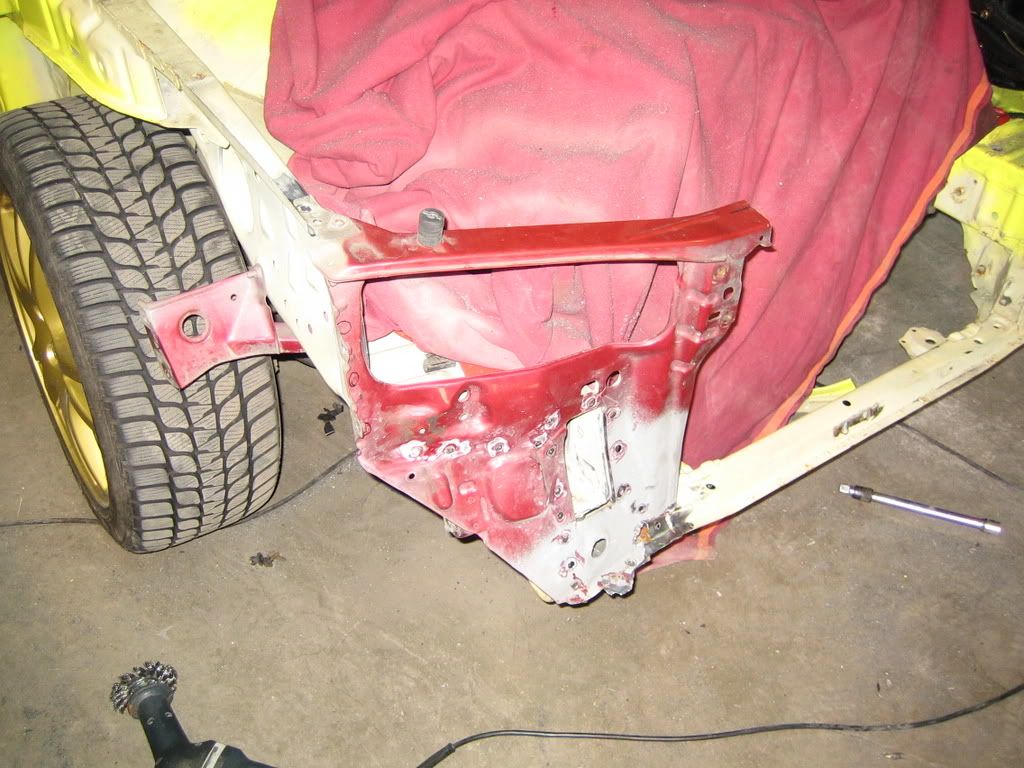
So I decided to do some panelwork on my car, which is a first for me.
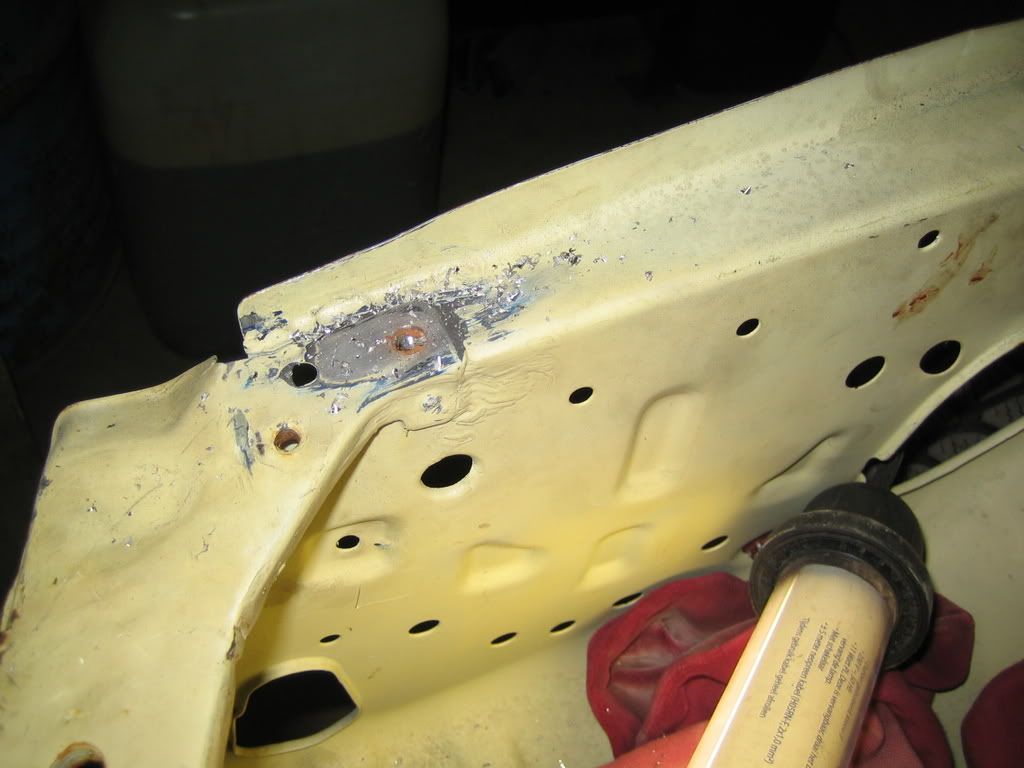
The headlight panel was to high and to far back so that was going to be replaced, solving 2 problems.
First the panel was welded a bit to high on the inner wing and I could weld the panel 5mm forward so the fender would fit.
The 10mm shortage in the width I'd solve by makes sleeveholes for the fenders, moving them outwards, noone would see it afterwards.
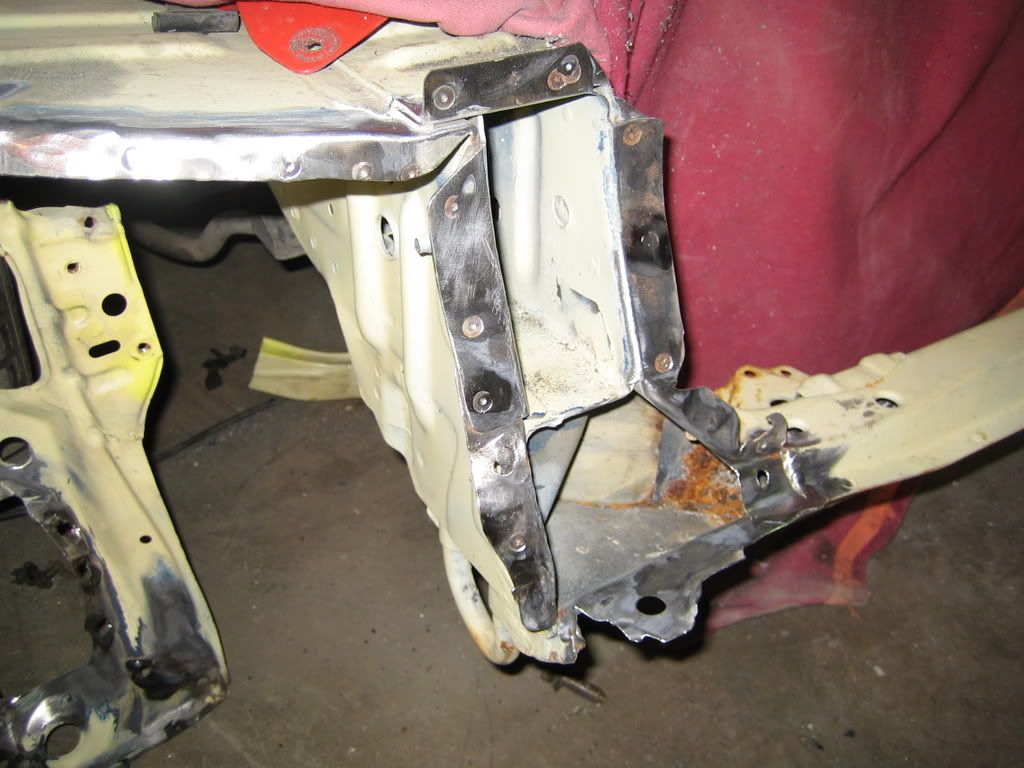
Here I fixed the panels and headlight, the fender is not attached to the innerwing here:
Let's do it:
Drilling the welds:
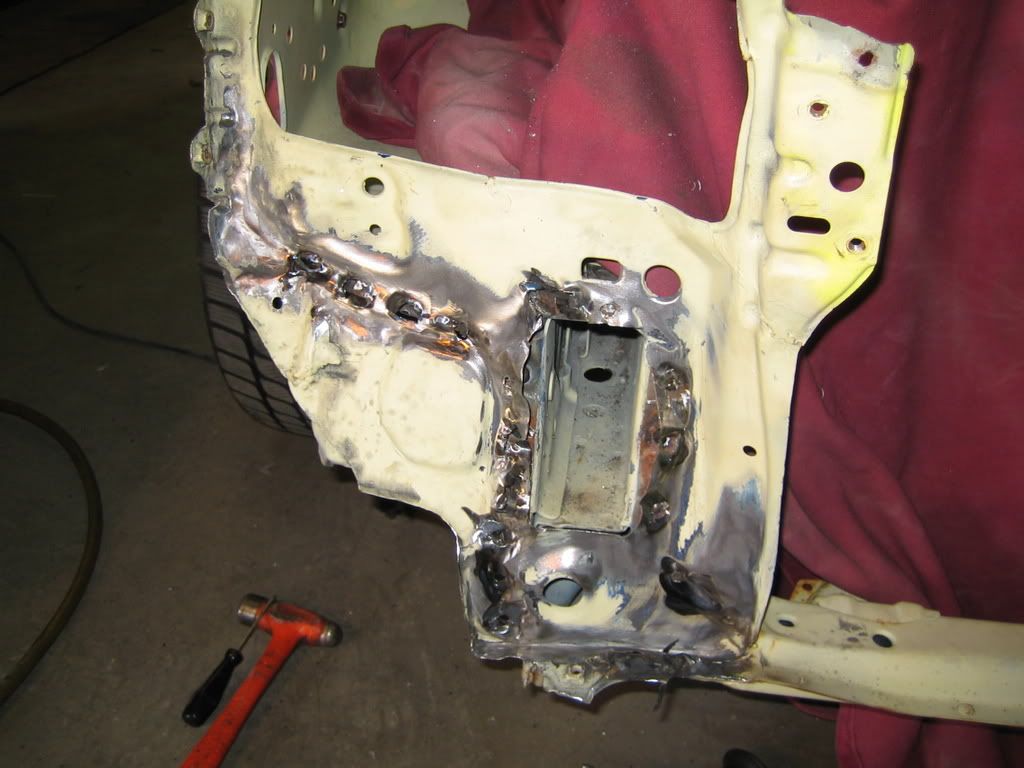
Face off:
So I wanted to mount all fenders, lights and bumpers to see the end result, a 15 minute job normaly, it took me 2 weeks....
To cut thing short, the right front inner wing is 5mm to short, the last 2 holes on top of the fender are not in line, the ones near the headlights I mean.
And the 2 innerwings are 10mm to close to each other, which means the hood won't close etc.
I know this by cross measurig the chassis with my old red chassis.
So I decided to do some panelwork on my car, which is a first for me.
The headlight panel was to high and to far back so that was going to be replaced, solving 2 problems.
First the panel was welded a bit to high on the inner wing and I could weld the panel 5mm forward so the fender would fit.
The 10mm shortage in the width I'd solve by makes sleeveholes for the fenders, moving them outwards, noone would see it afterwards.
Here I fixed the panels and headlight, the fender is not attached to the innerwing here:
Let's do it:
Drilling the welds:
Face off:


 17 February 2008, 05:56 PM
#107
Scooby Regular
Thread Starter
Join Date: Dec 2002
Posts: 458
Likes: 0
Received 0 Likes
on
0 Posts
Then I noticed that my right front wheel was leaning too far back.
Err....??... so I pushed it onto the carlift.
Spend an afternoon measuring the whole bottom of the car and found a few things which did not make me happy, my enthusiasm was fading even more after it already had been dampened by finding out the not so glorious past of the car.
Measured everything and compared it with my red chassis which never had any damage.
I found that cross measured eveything was ok, max 2mm from front to rear, but the width was wrong.
It turned out that the whole front of the car was 10mm too narrow.
Aaarggggggggggggghhh....
Car on the carlift, front wheel on the other side was to far back:
I was afraid the right chassisbeam was leaning in 10mm which would f**k up my suspension geometry so I feared it would have to end up on the straightening bench for the 3rd time.
I spoke to the guy who had repaired the chassis and he told me he had used the original templates when restoring it, so at least the suspesion points were 100% correct, well it turned out not to be so.
Then when I had bought it I had it checked again to make really sure it was ok, and again they said it was ok, but again, not!.
Luckily a friend of mine works in a repair shop where they have lasertool to measure everything which I could use.
So yesterday it went to the garage once again:
17 February 2008, 05:58 PM
#108
Scooby Regular
Thread Starter
Join Date: Dec 2002
Posts: 458
Likes: 0
Received 0 Likes
on
0 Posts
It would only be measured but the guy doing the measuring was very helpfull and soon he was using his 10ton press on the car.
It turned out the front was 3mm to narrow on both sides and the rear 2mm on both sides, so I had a gap of 6 and 4mm.
After using his press the figures wre 0 and 0, it was square and straight as could be!!
So the car had the color of a banana but not the shape thank god.
The only thing we could not fix was the 5mm shortness which was actually far more than only the front inner wing.
It goes bak through the whole leg, so the rear mounting points of the front right suspension arm is 5mm back also.
Luckily Mr. Subaru has made some sleeve holes in the subframe and mounting points so that 5mm gap should be overcome quite easily making the suspesion 100% ok!
The 10mm narrower inner wings we left as they were the sleeve holes in the fenders fix it well enough, pushing them apart would only tear things up.
After a lousy 2 weeks I can now work again with full confidence on my Chiquita!
Car on the straightening bench:

Next installments hopefull sooner than last time.
It turned out the front was 3mm to narrow on both sides and the rear 2mm on both sides, so I had a gap of 6 and 4mm.
After using his press the figures wre 0 and 0, it was square and straight as could be!!
So the car had the color of a banana but not the shape thank god.
The only thing we could not fix was the 5mm shortness which was actually far more than only the front inner wing.
It goes bak through the whole leg, so the rear mounting points of the front right suspension arm is 5mm back also.
Luckily Mr. Subaru has made some sleeve holes in the subframe and mounting points so that 5mm gap should be overcome quite easily making the suspesion 100% ok!
The 10mm narrower inner wings we left as they were the sleeve holes in the fenders fix it well enough, pushing them apart would only tear things up.
After a lousy 2 weeks I can now work again with full confidence on my Chiquita!
Car on the straightening bench:
Next installments hopefull sooner than last time.
17 February 2008, 08:42 PM
#110
Scooby Regular
Thread Starter
Join Date: Dec 2002
Posts: 458
Likes: 0
Received 0 Likes
on
0 Posts
Not really, it was very cheap, done in the own time of these guys.
They like the project so they helped me for almost nothing, which is good because I'm broke.
They like the project so they helped me for almost nothing, which is good because I'm broke.
18 February 2008, 07:31 AM
#111

Heady stuff when something like this comes along mid-build.
Some of us have been there (me with my 911) but you know you have a straight foundation now.
Onwards to infinity!
ps: If you do cars like us, you will always be broke.
Some of us have been there (me with my 911) but you know you have a straight foundation now.
Onwards to infinity!
ps: If you do cars like us, you will always be broke.
20 February 2008, 11:23 PM
#112
Scooby Regular
Thread Starter
Join Date: Dec 2002
Posts: 458
Likes: 0
Received 0 Likes
on
0 Posts
I bought it from a guy here, but they are for sale at Japanparts: japanparts.com : PARTS DATABASE
I'm not going to rally the car but I don't think it is Group-N legal
greets
20 February 2008, 11:26 PM
#113
Scooby Regular
Thread Starter
Join Date: Dec 2002
Posts: 458
Likes: 0
Received 0 Likes
on
0 Posts
Yeah, I'm just glad it is ok again!
You have some sort of report from your 911 build up somewhere?
21 February 2008, 07:09 AM
#114
No, as it was before even 'emails'!
I bought the German sourced car as a wreck in 1988 to restore as relief from a very busy work schedule (I used to travel the world literally), and when finished, I started to hillclimb the 911.
In the early 90's on a fast hillclimb a big old tree came out of the track and hit me very hard and jumped back in!
I was driving badly and the car got well away from me. The resulting damage was not too bad, but on jigging the car back straight (it took 14 tonne to pull it out I was told on a Cellette jig)we found the front end was all over the place before the crash. The car in it's youth had been crunched.....
When all this episode was over, the chassis was true to 1mm everywhere and i re assembled it, did the alignment and corner weights.
Next race was a revelation!
Talk about driving 'straight and true' just amazing how better the car was, and I'm sure what you have found/done will be fantastic in the end.
I think I speak for many on here and 22B your project and a select few others are really good to follow and quite inspirational.
I do not have the patience for Big Builds any more but have done 3 in my 'time', left hand drive to right hand drives etc etc and 6 engine swops for bigger and better!
Now: stop all this thread reporting and get on with that car, we are all busy waiting for the next stage!
Mr Impatient (and just a bit envious)
https://www.scoobynet.com/scooby.php...to&photoid=608
https://www.scoobynet.com/scooby.php...to&photoid=606
Last edited by 911; 21 February 2008 at 07:12 AM.
21 February 2008, 06:20 PM
#115
Scooby Regular
Thread Starter
Join Date: Dec 2002
Posts: 458
Likes: 0
Received 0 Likes
on
0 Posts
Hehehe, I bet the Porsche was a whole lot better to drive afterwards, that's why i really wanted my chassis to be 100% straight!
A real pitty there was no internet back then coz I would have loved to see that in words and images!
Those wheels on the Porsche are pretty rare nowadays, they are consumed by autocross teams because they are very light and very strong!
I have worked on my car too, well I disassambled the red car anyway, pics and story follow soon.
BTW, I did read your topic on the Impreza, but have you sold it now??
21 February 2008, 06:29 PM
#116
No. Just do not know what to do with it at the moment, so it is exactly as it came off the road in October last year. The plan was to gut it and try for a 1050Kg car with 450 bhp even 500, but this is not practical today, so it all works superbly and rests!
This is why yours and Zen's car projects are so interesting, it makes me think about a big Biuld again, but i really want to do this:
SXOC Bulletin Board - View Single Post - MadMinor project - not 56k friendly though
I am only interested to make a car for hillclimbing today, but used to drag race in the 70's!
21 February 2008, 07:52 PM
#117
Scooby Regular

Join Date: Jan 2007
Location: Buckinghamshire
Posts: 2,272
Likes: 0
Received 0 Likes
on
0 Posts
No. Just do not know what to do with it at the moment, so it is exactly as it came off the road in October last year. The plan was to gut it and try for a 1050Kg car with 450 bhp even 500, but this is not practical today, so it all works superbly and rests!
This is why yours and Zen's car projects are so interesting, it makes me think about a big Biuld again, but i really want to do this:
SXOC Bulletin Board - View Single Post - MadMinor project - not 56k friendly though
I am only interested to make a car for hillclimbing today, but used to drag race in the 70's!
This is why yours and Zen's car projects are so interesting, it makes me think about a big Biuld again, but i really want to do this:
SXOC Bulletin Board - View Single Post - MadMinor project - not 56k friendly though
I am only interested to make a car for hillclimbing today, but used to drag race in the 70's!
I agree with 911 about the jig work, my car has just come back from some extensive work on the jig (6 weeks in the body shop) and it makes a world of difference - even if your car has not been pranged I think it's worthing getting older car's checked up on the jig.
My car feels more planted on the road and you can feel it gripping better, much better power delivery through the 4-wheel drive (prior to the jig work the car felt unstable). I had a fairly nasty nock on my car on the driver side, chassis was twisted up but we found it had some previous damage that was not put right so I spent ���� getting the chassis correct.. worth the money imo as I know at the end of it I will have a car that is as good if not better than it came out of the factory meaning it will perform properly when pushed hard on a track.
Looking forward to seeing your car complete
27 February 2008, 10:03 PM
#118
Scooby Regular
Thread Starter
Join Date: Dec 2002
Posts: 458
Likes: 0
Received 0 Likes
on
0 Posts
Another update.
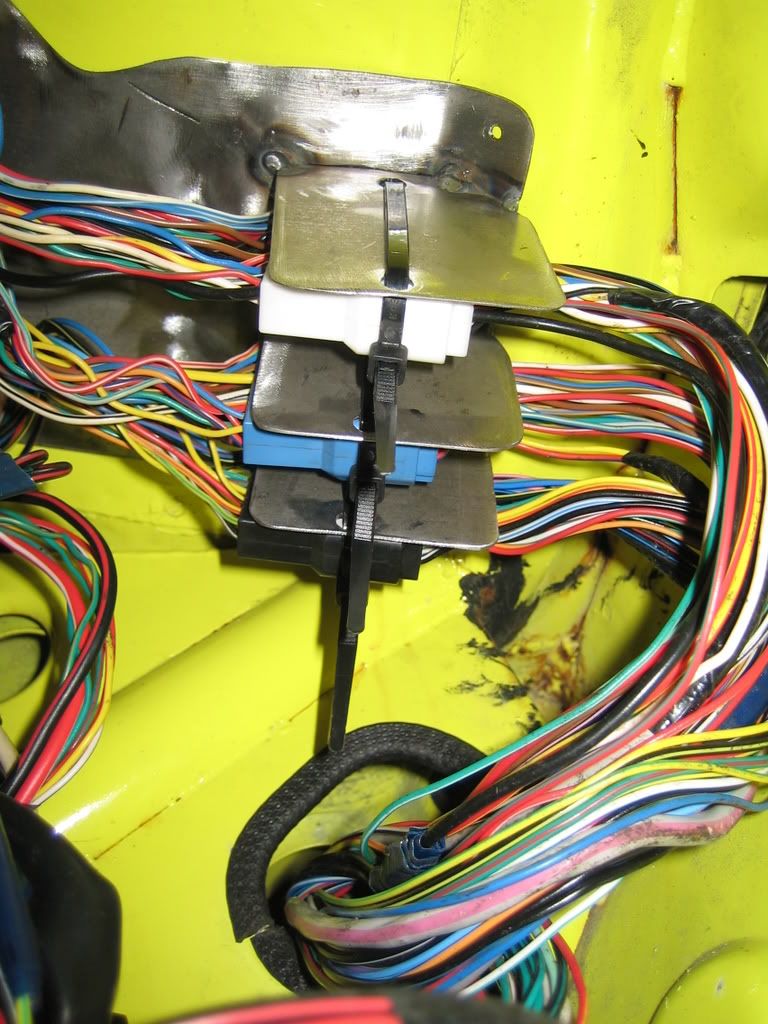
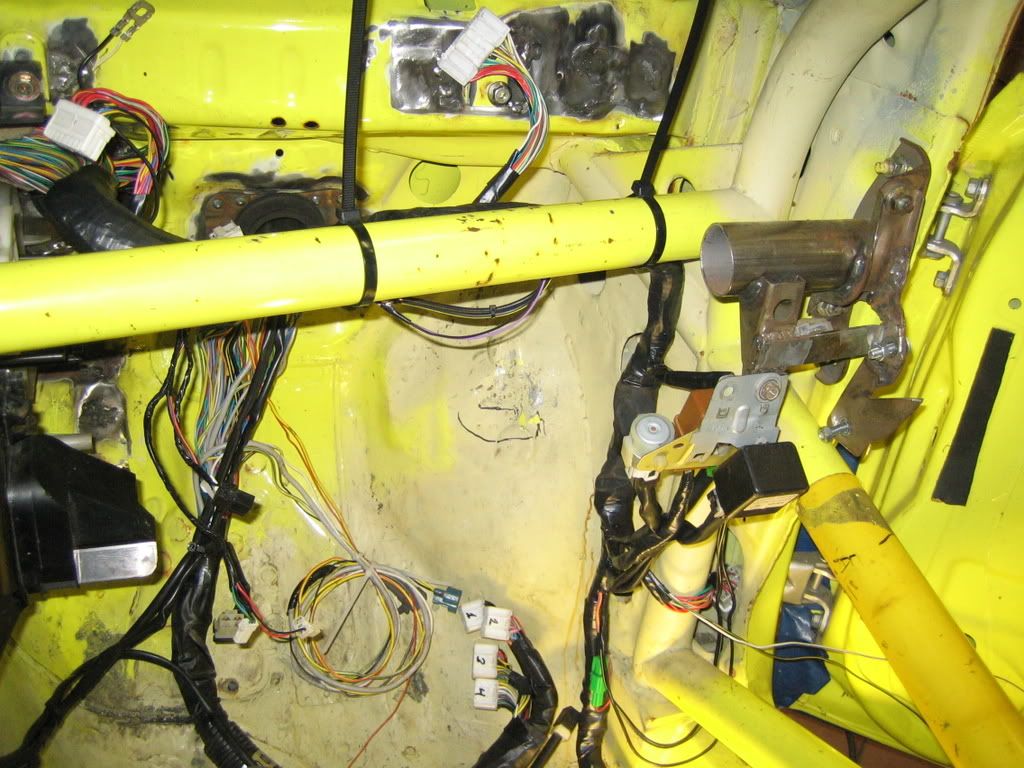
Last work on the loom on the driver side, 2 more boxes had to have a place to sit.
Of course it had to be out of the way of everything and the cable had to run to the boxes without stress.
In the end I put them on the dash bar.
Bracket to fit the boxes on:
Welded in place:
And they are on!:
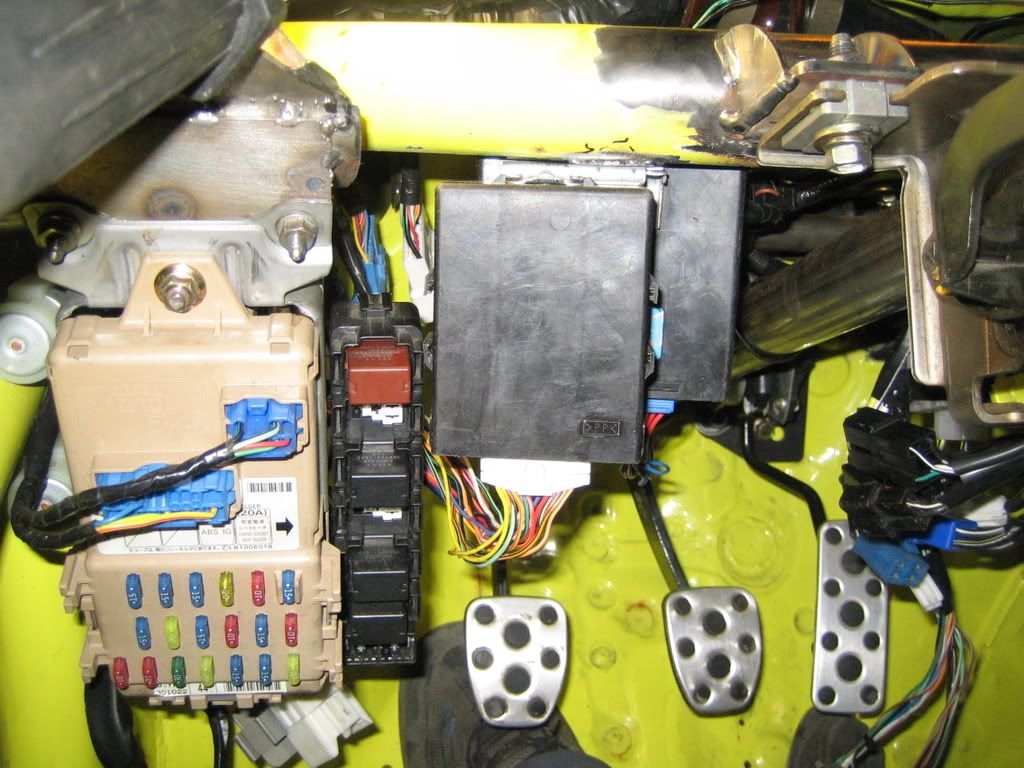
After that everything could be taped in.
Driverside finished:
Last work on the loom on the driver side, 2 more boxes had to have a place to sit.
Of course it had to be out of the way of everything and the cable had to run to the boxes without stress.
In the end I put them on the dash bar.
Bracket to fit the boxes on:
Welded in place:
And they are on!:
After that everything could be taped in.
Driverside finished:
27 February 2008, 10:04 PM
#119
Scooby Regular
Thread Starter
Join Date: Dec 2002
Posts: 458
Likes: 0
Received 0 Likes
on
0 Posts
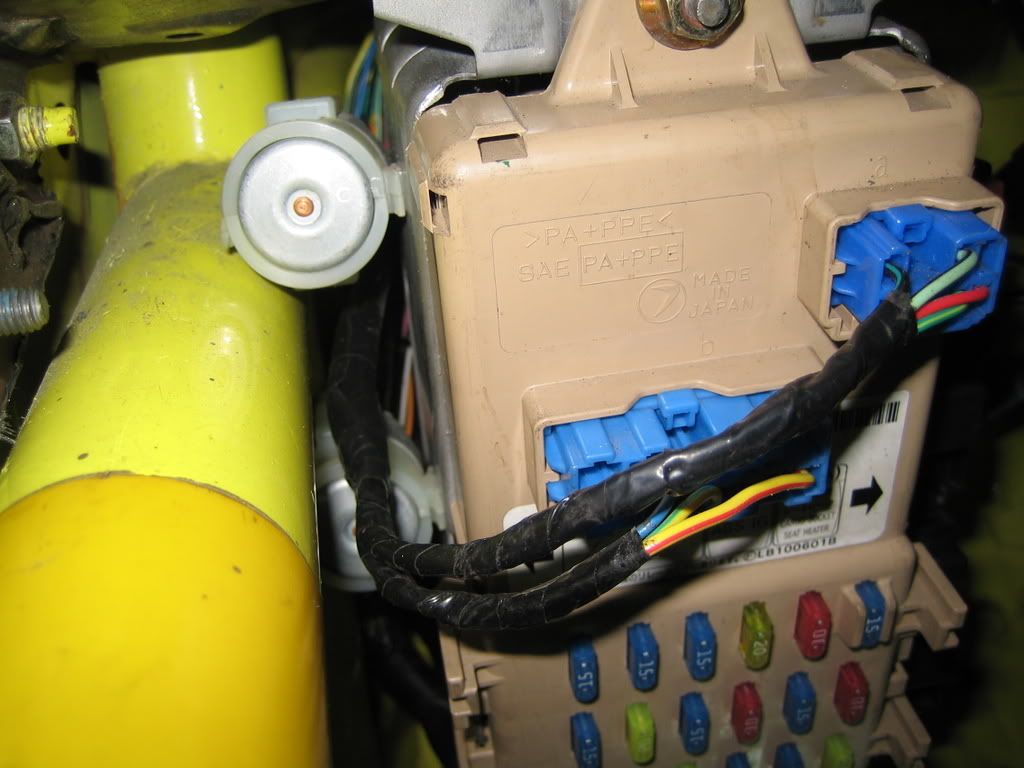
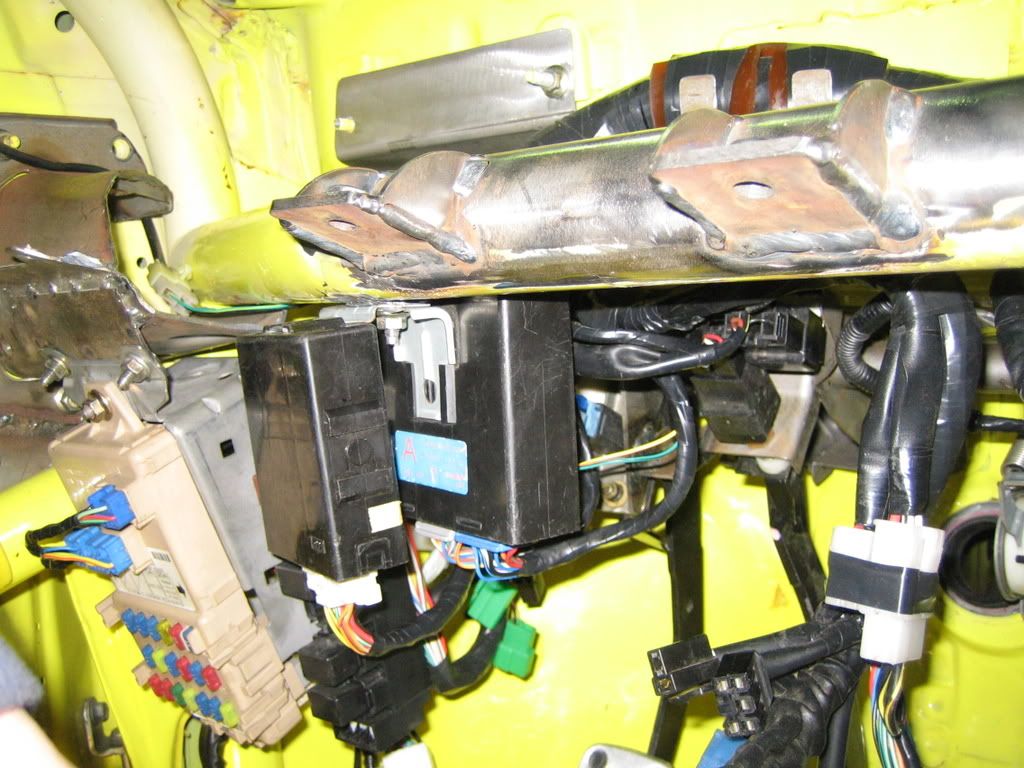
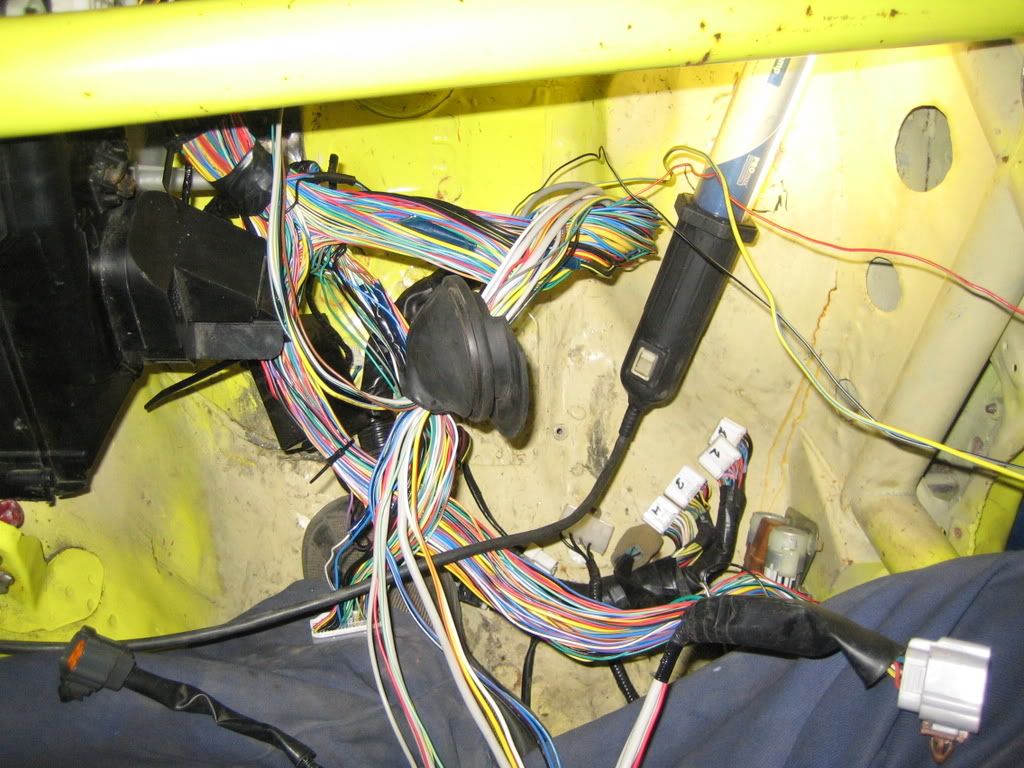
After that I went on with the passenger side.
A mess:
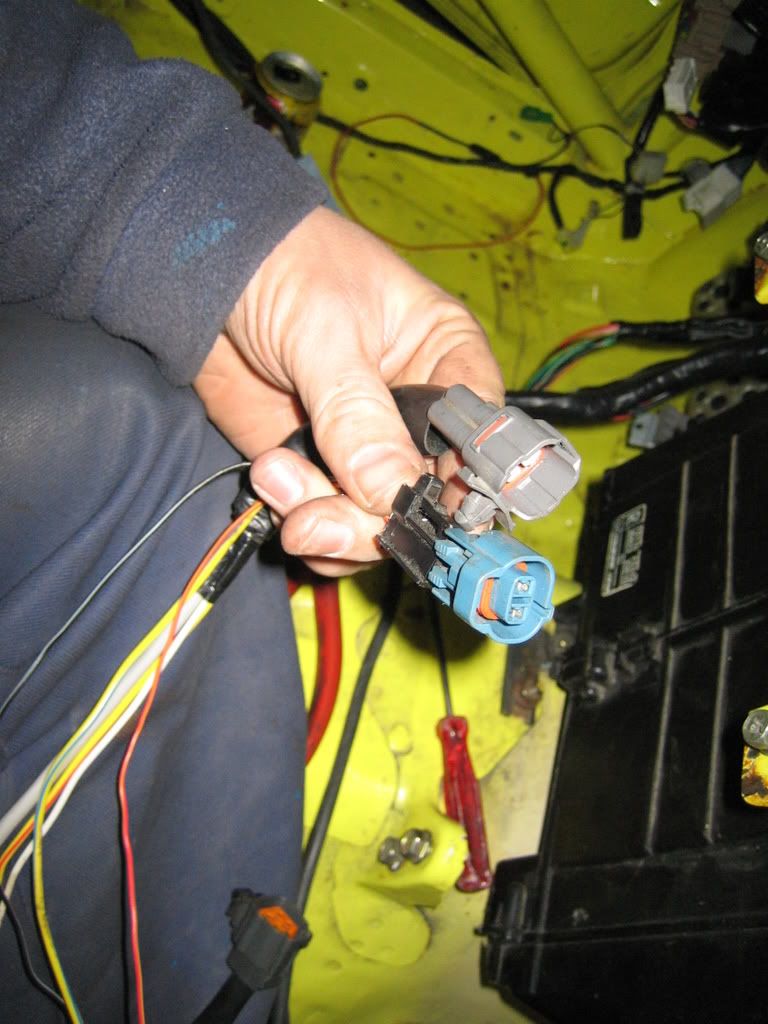
I pulled 2 obsolete connectors from the enginebay, this because I use an Apexi AVC-R boostcontroller:
AVC-R cables into the enginebay through the original rubber:
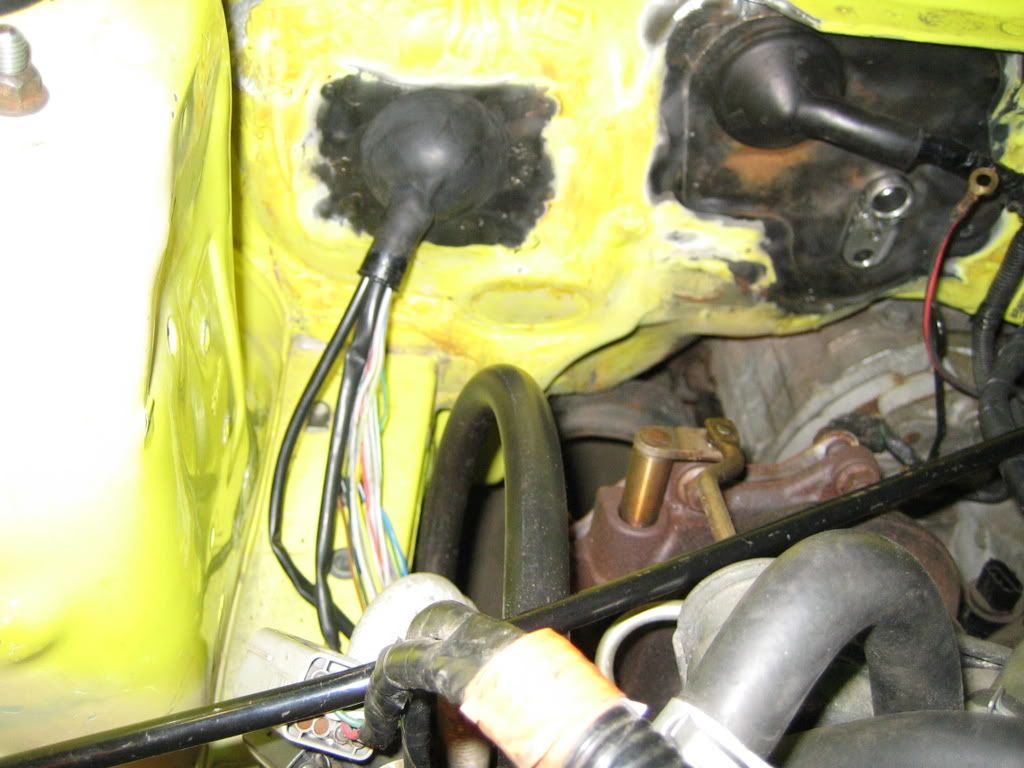
All cables had to be routed with the heater in place.
The result:


A mess:
I pulled 2 obsolete connectors from the enginebay, this because I use an Apexi AVC-R boostcontroller:
AVC-R cables into the enginebay through the original rubber:
All cables had to be routed with the heater in place.
The result:
27 February 2008, 10:05 PM
#120
Scooby Regular
Thread Starter
Join Date: Dec 2002
Posts: 458
Likes: 0
Received 0 Likes
on
0 Posts
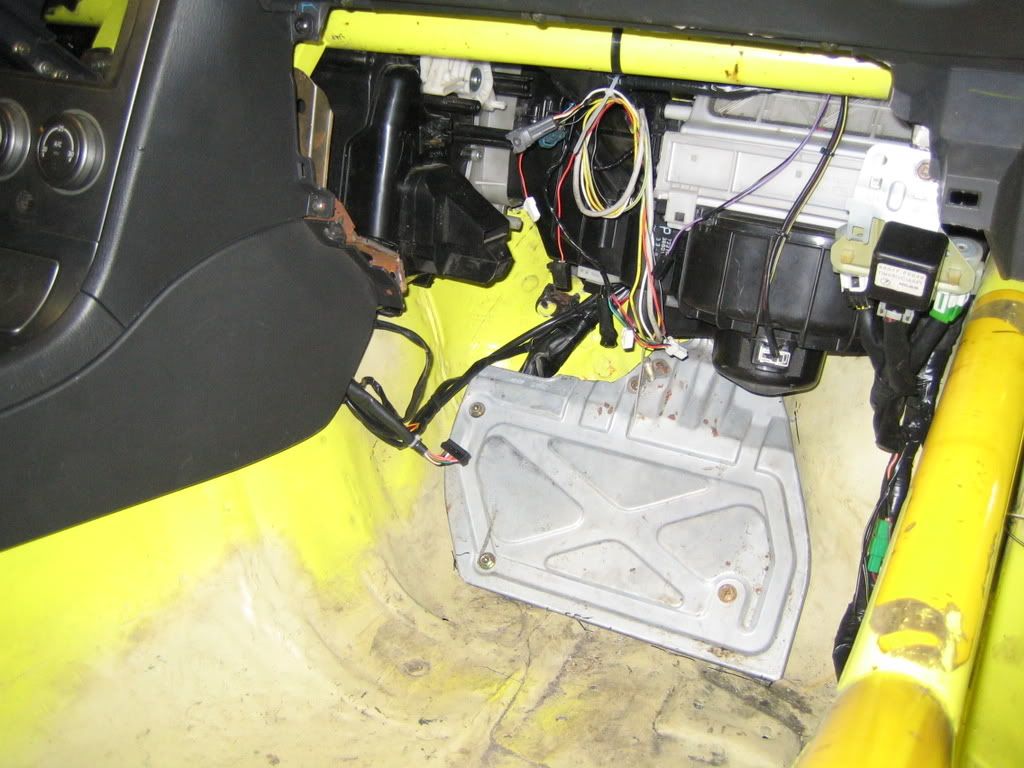
I put the ECU casing in, but I still need to fabricate the fixation points:
A few weeks ago I had cut a hole in the bottom part of the dash on the drivers side to make it fit around the cage:
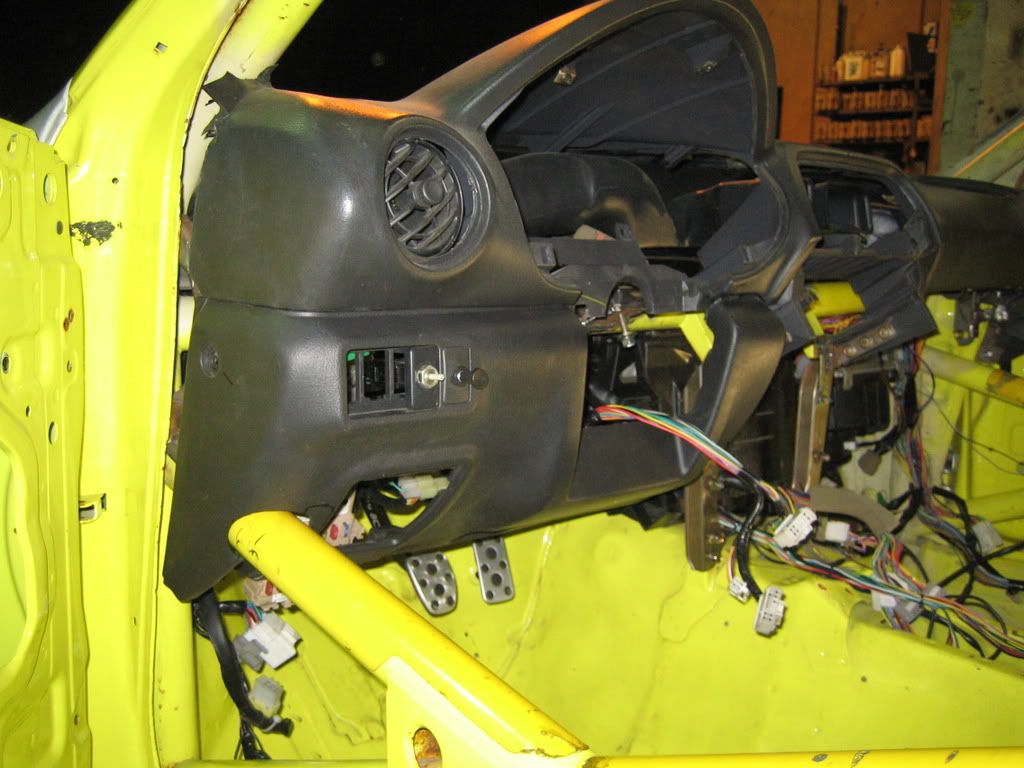
So now the passenger side had to be done, to prevent cutting it up wrong I made a mould:
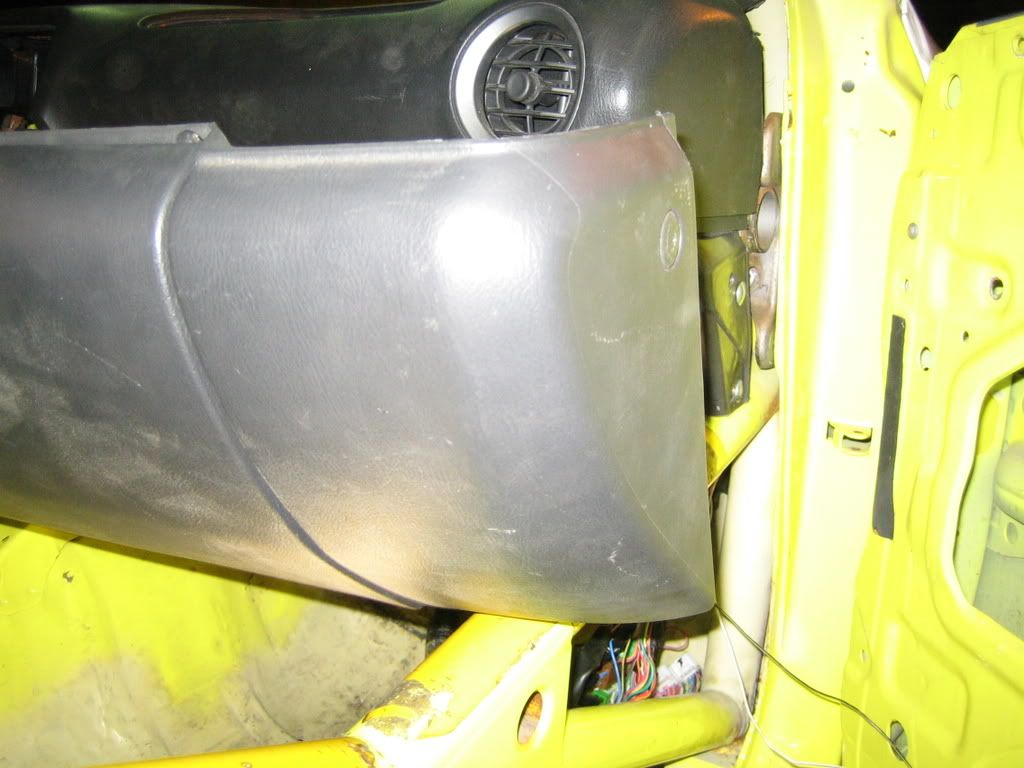
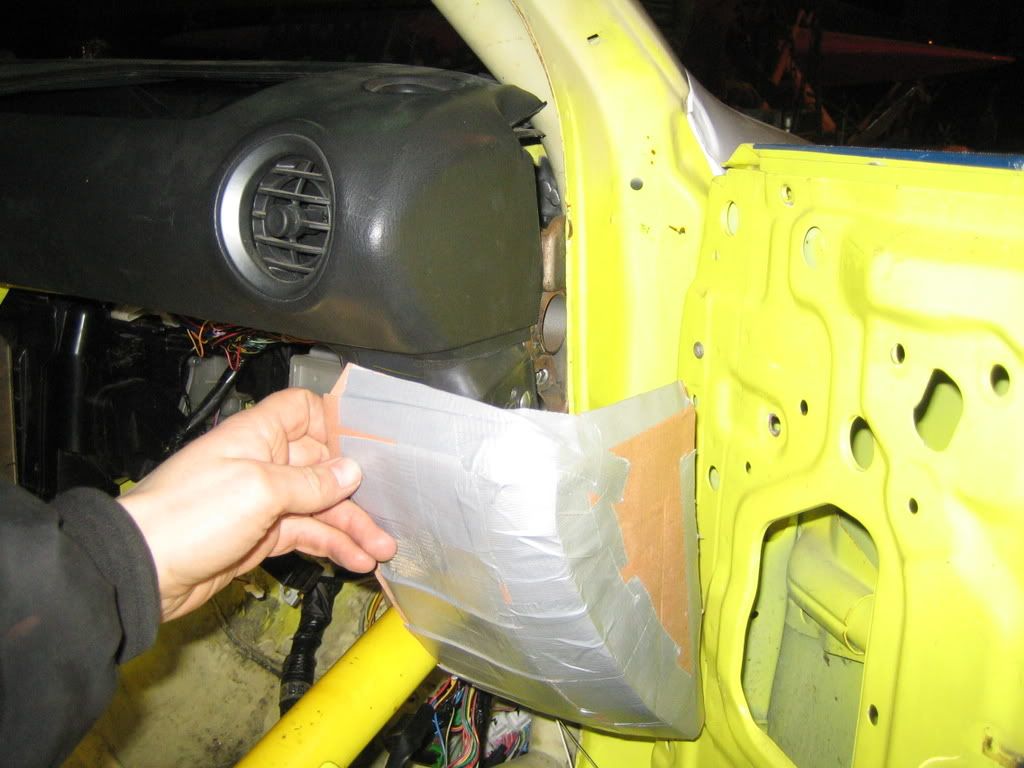
And with the hole cut in:
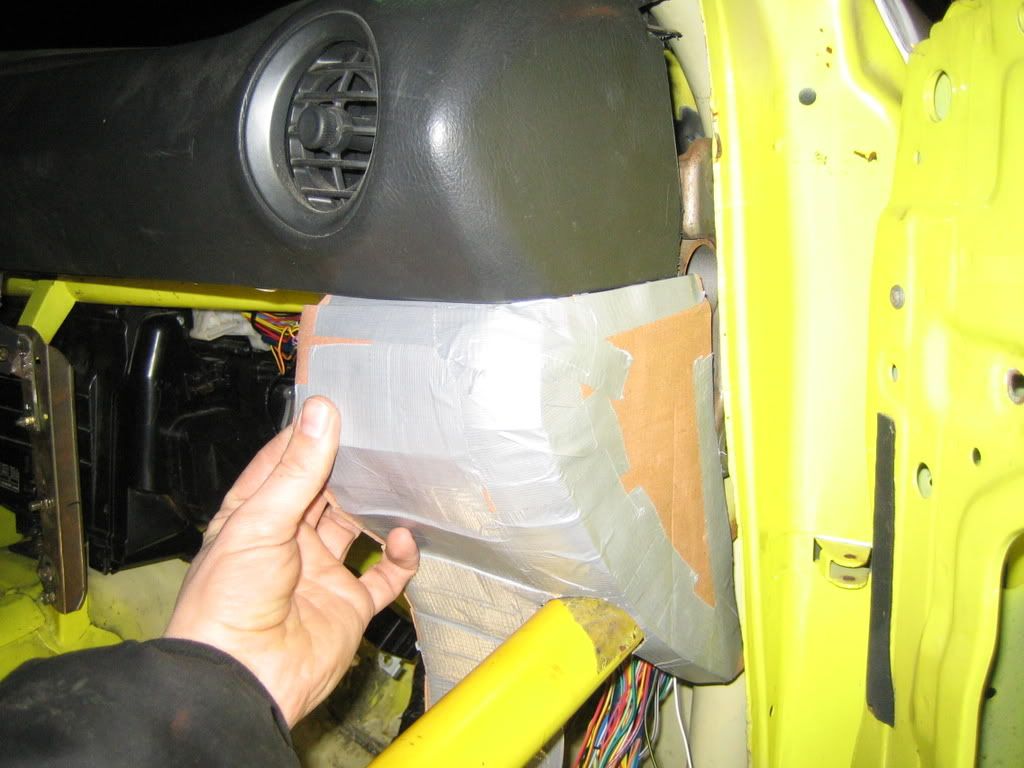
Result:

A few weeks ago I had cut a hole in the bottom part of the dash on the drivers side to make it fit around the cage:
So now the passenger side had to be done, to prevent cutting it up wrong I made a mould:
And with the hole cut in:
Result: