Prodrive Grp.N. chassis street build
 30 December 2007, 06:56 PM
#61
Scooby Regular

Join Date: Jan 2007
Location: Buckinghamshire
Posts: 2,272
Likes: 0
Received 0 Likes
on
0 Posts
Looking good, got a bit confused following the thread but I assume the GL is no a parts donor for the yellow chassis.
Gotta love the newage dash, should inspire some UK owners to do the same!
Gotta love the newage dash, should inspire some UK owners to do the same!

 05 January 2008, 11:52 PM
#63
Scooby Regular
Thread Starter

Join Date: Dec 2002
Posts: 458
Likes: 0
Received 0 Likes
on
0 Posts
Today and Thursday I did a bit of work on the car.
Thursday:
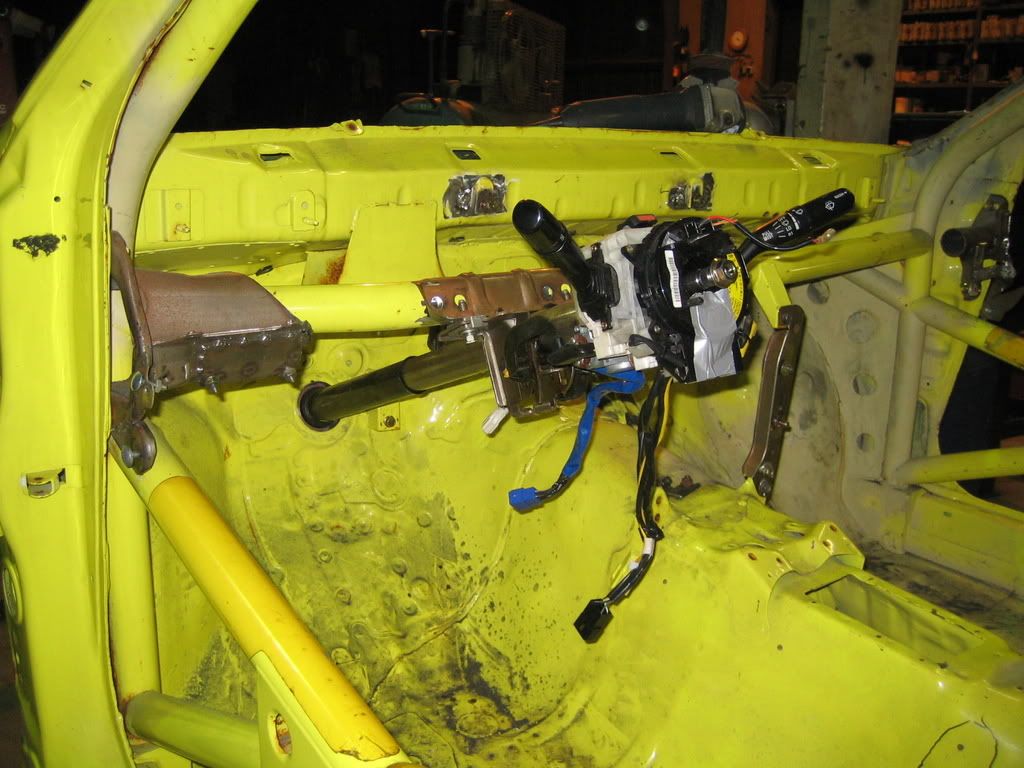
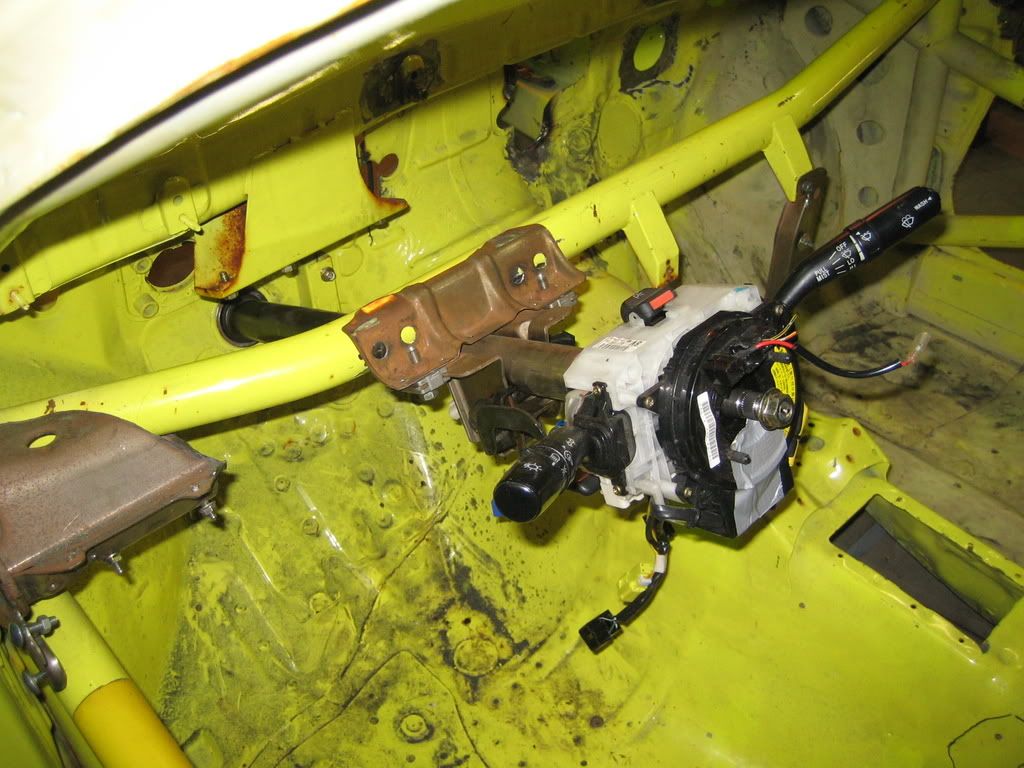
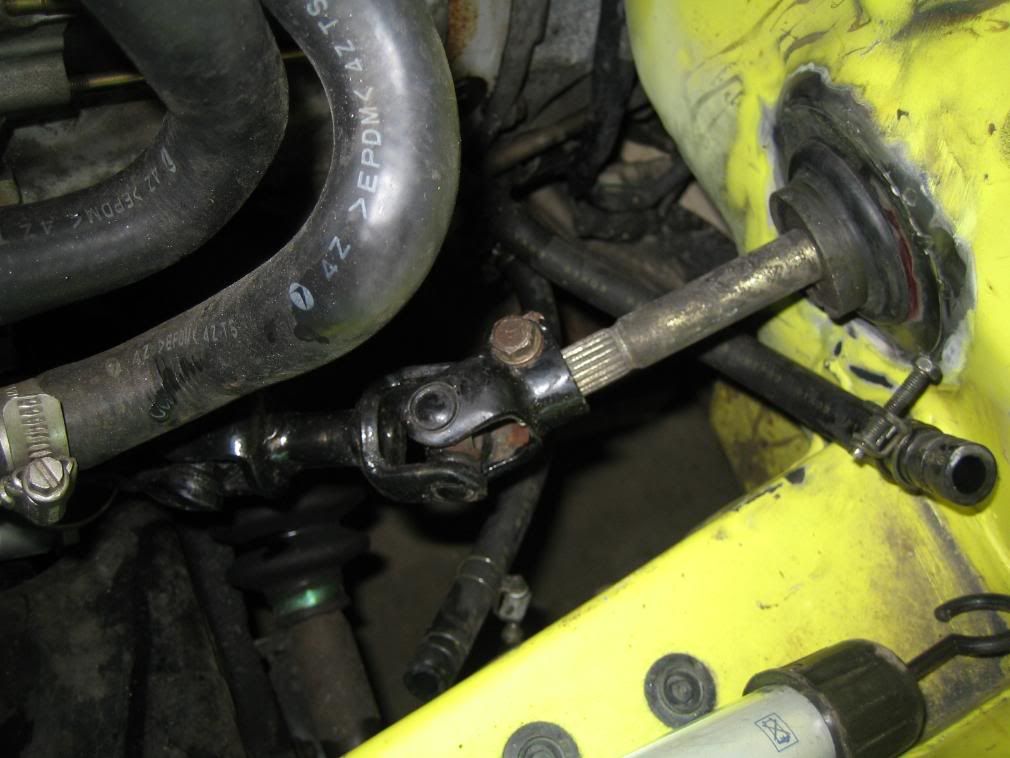
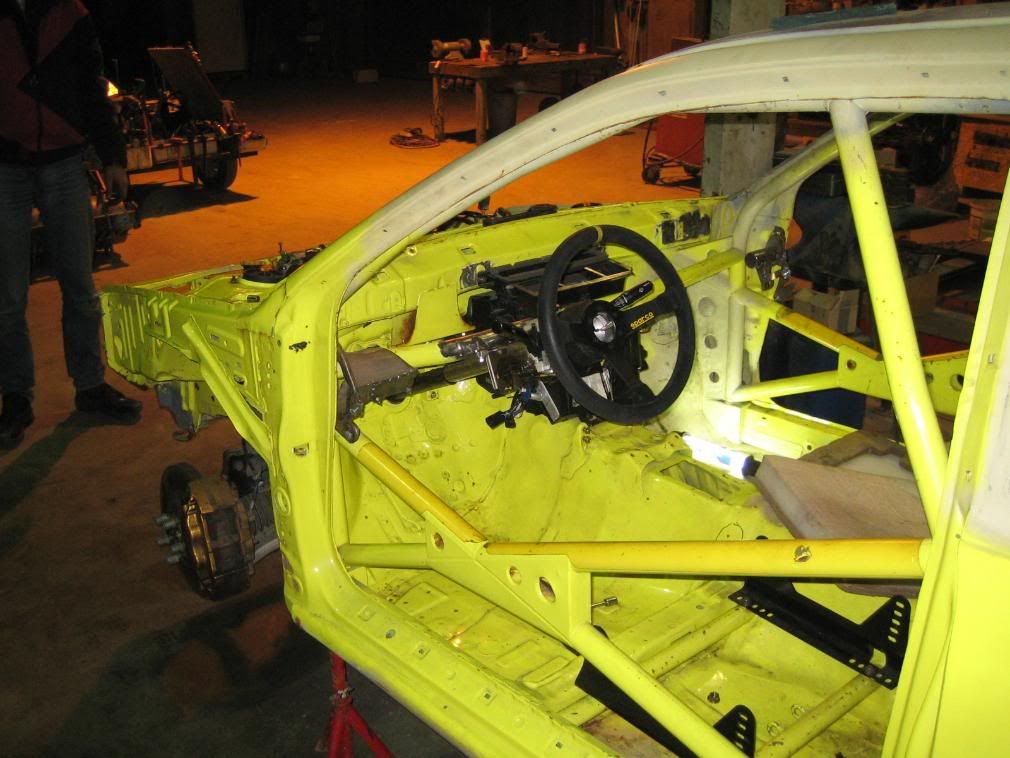
I did a little bit more on the steering column, it didn't fit on either side, it needed attention.
First I cut of the fixation plate from the bar that runs underneath the dashbord, so it can be welded to the new chassis:
And we fixed the last bracket on the heater, now it is locked down really well:

Today:
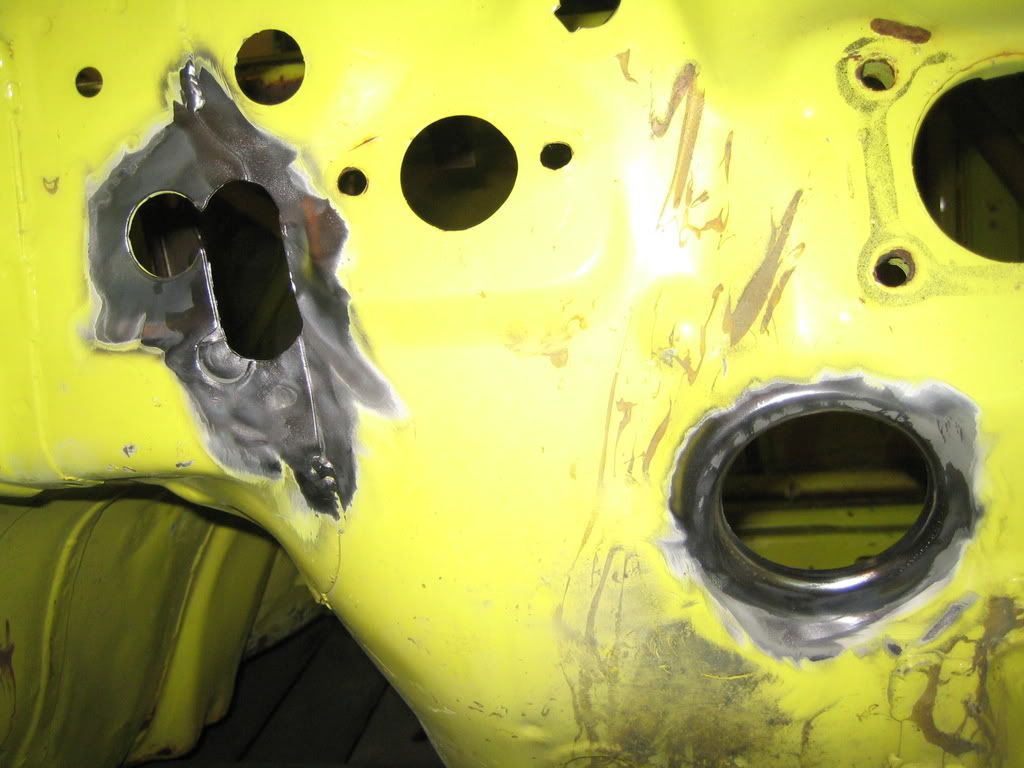
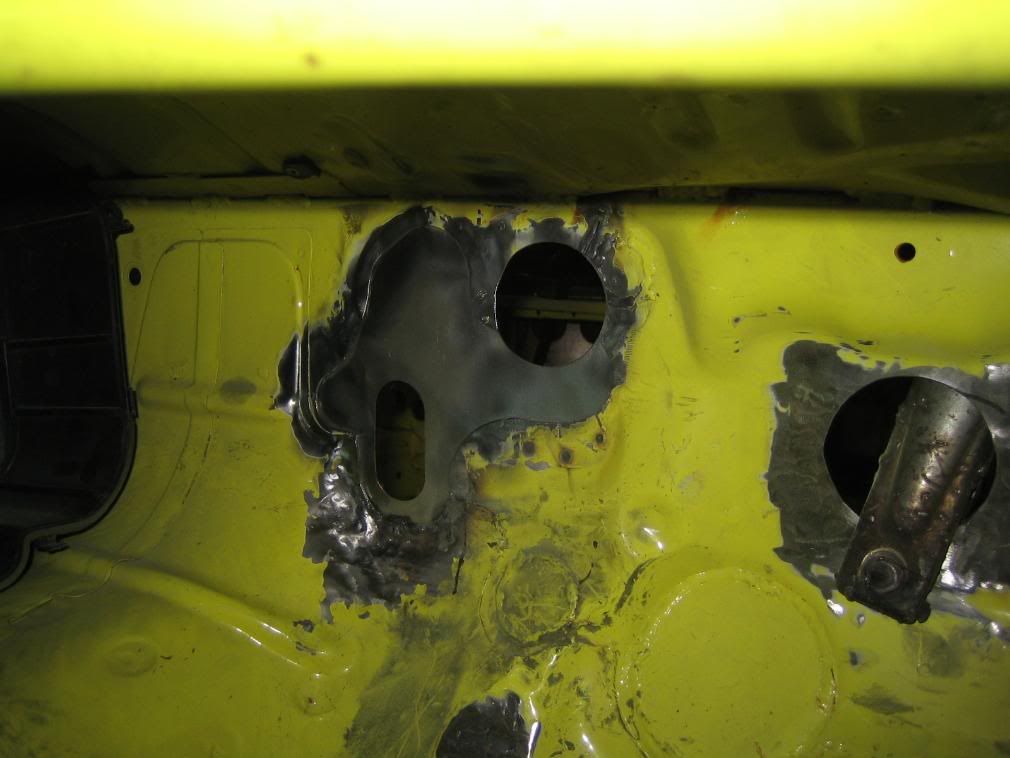
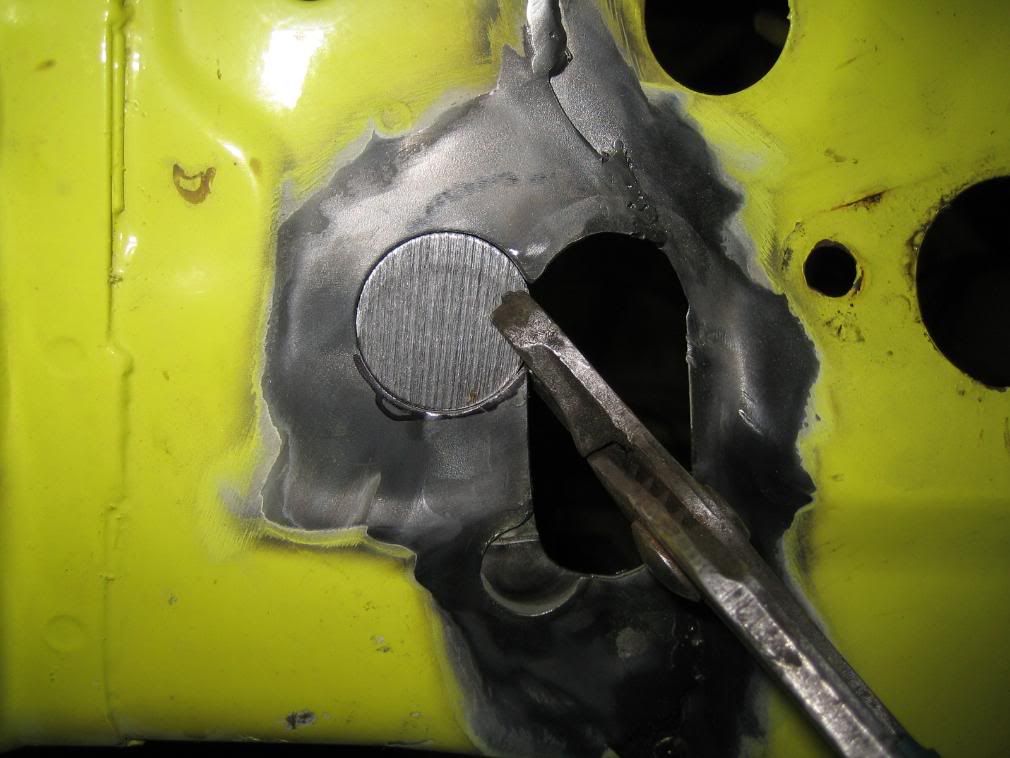
I had to cut out a piece of firewall from my old car to fit into the hole in the new chassis.
But I had to remove the master brake cilinder first:
So the fuel filter has to be removed and my home made brake bracket:

Thursday:
I did a little bit more on the steering column, it didn't fit on either side, it needed attention.
First I cut of the fixation plate from the bar that runs underneath the dashbord, so it can be welded to the new chassis:
And we fixed the last bracket on the heater, now it is locked down really well:
Today:
I had to cut out a piece of firewall from my old car to fit into the hole in the new chassis.
But I had to remove the master brake cilinder first:
So the fuel filter has to be removed and my home made brake bracket:

 05 January 2008, 11:53 PM
#65
Scooby Regular
Thread Starter
Join Date: Dec 2002
Posts: 458
Likes: 0
Received 0 Likes
on
0 Posts
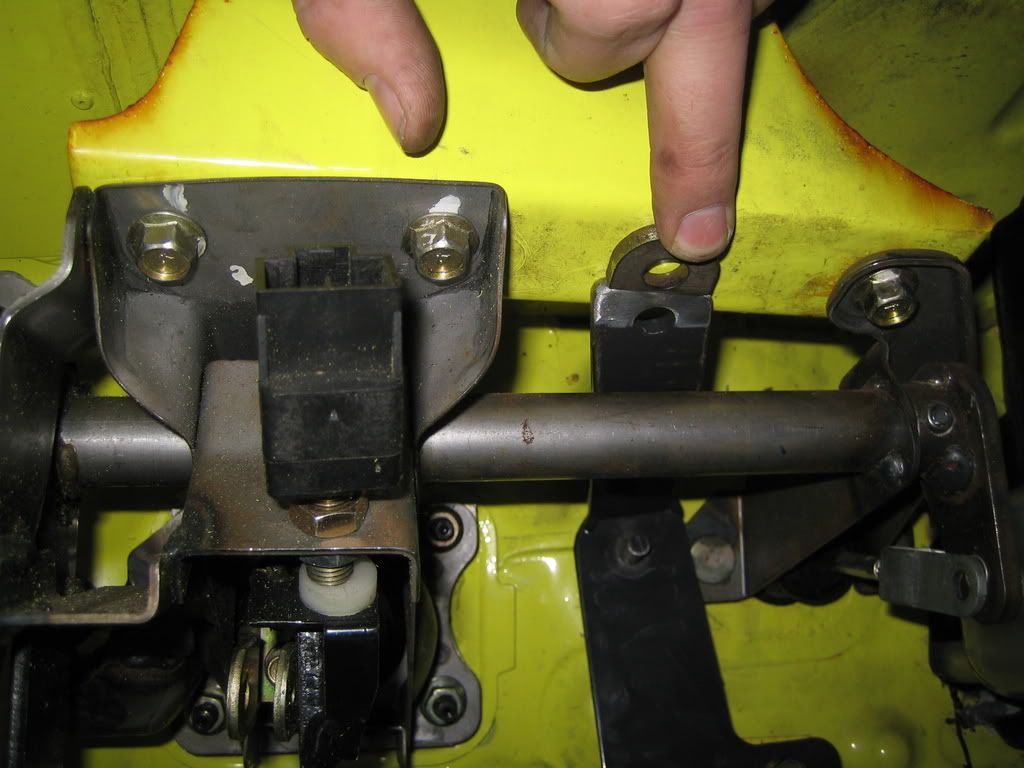
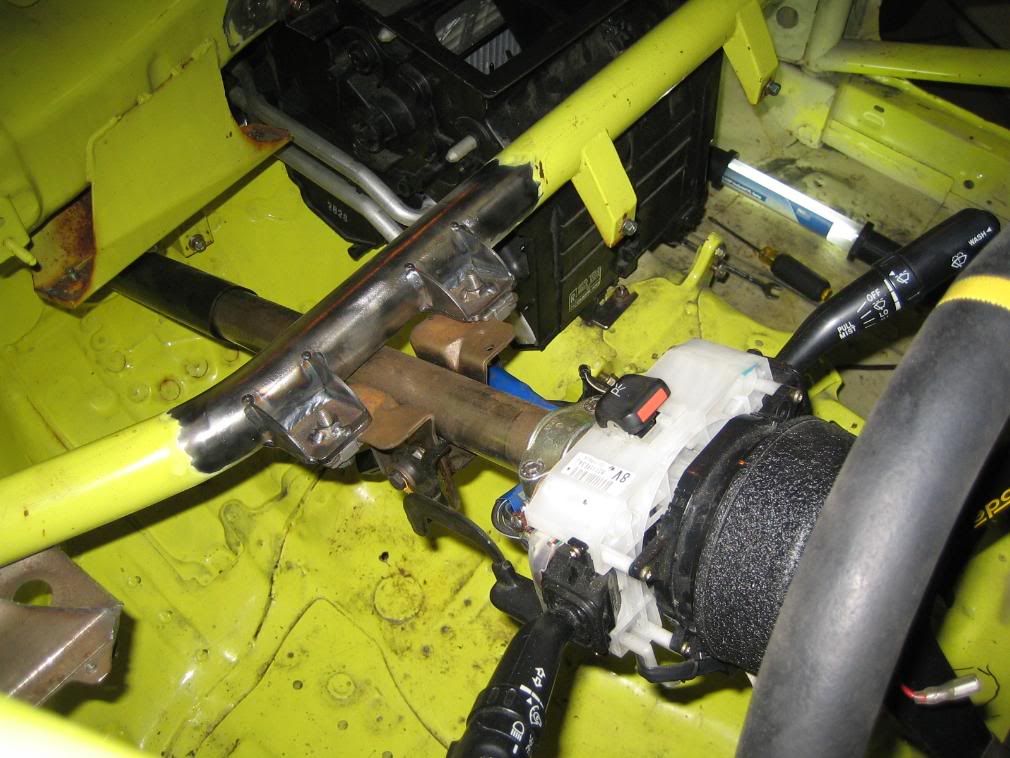
Then a sorry attempt to weld.
I only spot welded the plate for the steering column because I need to check if it is in the correct place later when then steeringhouse and subframe are attached:

It's in!!
Well almost, I still need to weld the fixation points on the dashbar, that will happen soon:
I only spot welded the plate for the steering column because I need to check if it is in the correct place later when then steeringhouse and subframe are attached:
It's in!!
Well almost, I still need to weld the fixation points on the dashbar, that will happen soon:
 08 January 2008, 10:47 PM
#67
Scooby Regular
Thread Starter
Join Date: Dec 2002
Posts: 458
Likes: 0
Received 0 Likes
on
0 Posts
Thanks Floyd 
Was a busy night but for some reason it doesn't look like much was done.
Probably because most of the time was spent building the components in and out of the car.
Anyway,
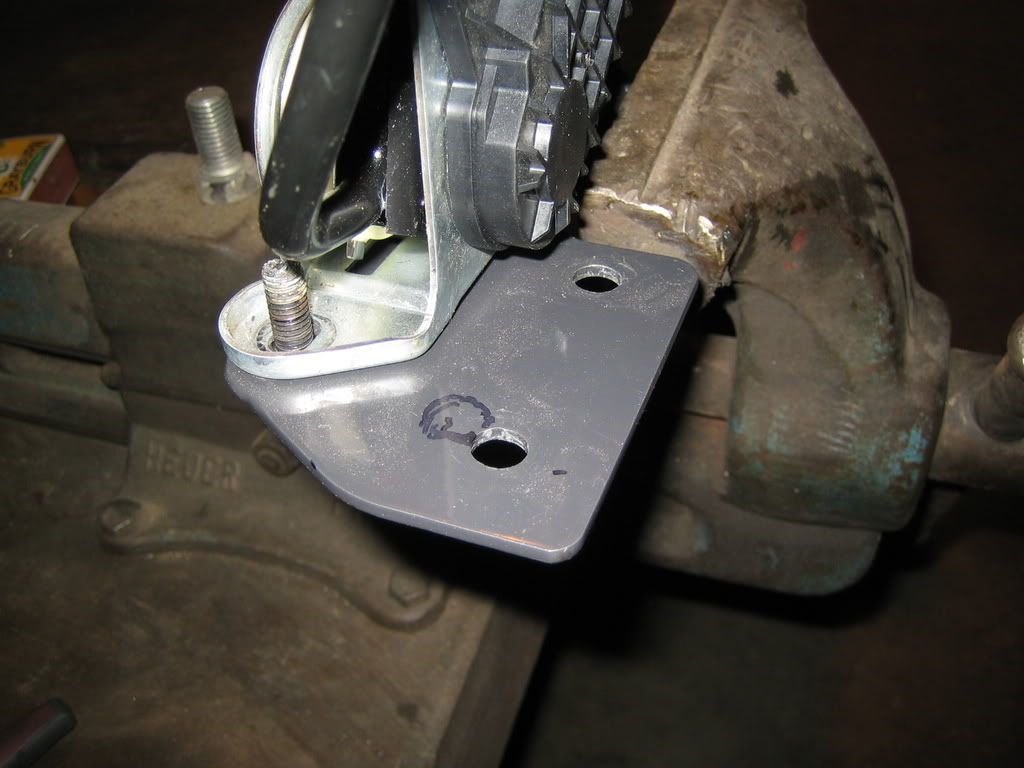
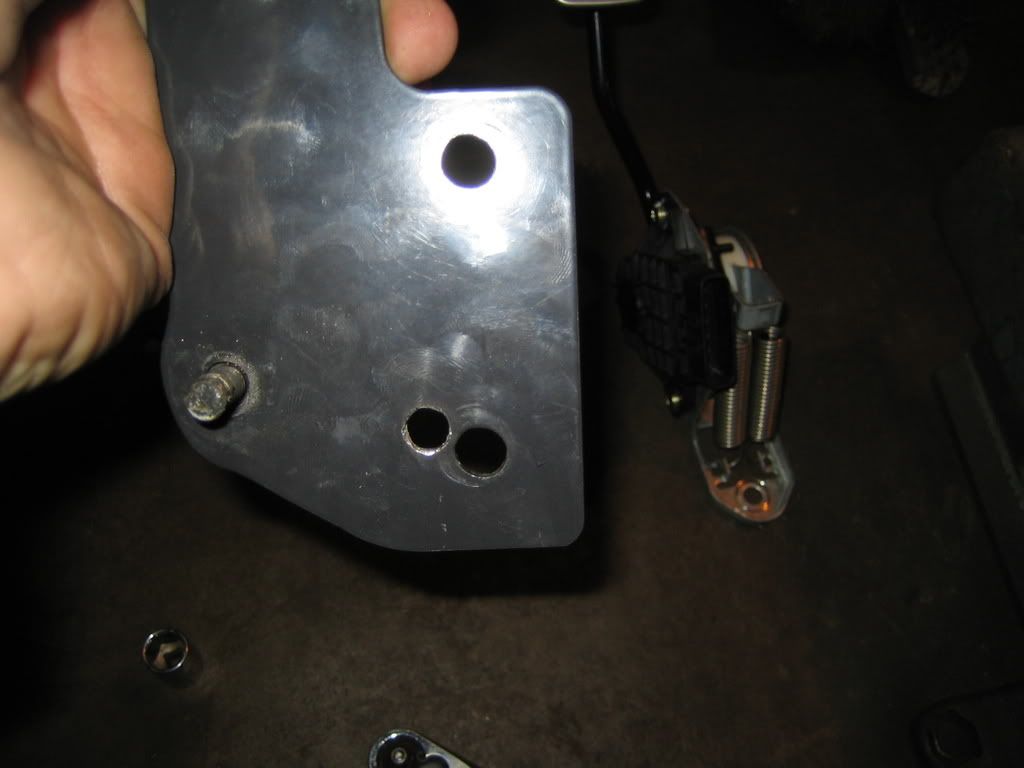
I wanted to fix the other side of the steering column, for which I removed the original fixation plate.
Unfortunatly it didn't fit very well so something new had to be found.
We had a strip of metal lying about with just the right thickness and width plus on top 2 holes that the bolts fit through.
So we cut it in half and used both parts.
As said it doesn't sound like much but it was pretty much work anyhow.
Testing:

Test positioning from the driver view:


Finaly on it's final resting place:

Cardboard design, this will be lasered from metal sheet:

More to come.
Was a busy night but for some reason it doesn't look like much was done.
Probably because most of the time was spent building the components in and out of the car.
Anyway,
I wanted to fix the other side of the steering column, for which I removed the original fixation plate.
Unfortunatly it didn't fit very well so something new had to be found.
We had a strip of metal lying about with just the right thickness and width plus on top 2 holes that the bolts fit through.
So we cut it in half and used both parts.
As said it doesn't sound like much but it was pretty much work anyhow.
Testing:
Test positioning from the driver view:
Finaly on it's final resting place
:Cardboard design, this will be lasered from metal sheet:
More to come.
12 January 2008, 07:56 PM
#68
Scooby Regular
Thread Starter
Join Date: Dec 2002
Posts: 458
Likes: 0
Received 0 Likes
on
0 Posts
Got me a brakebalance devider:

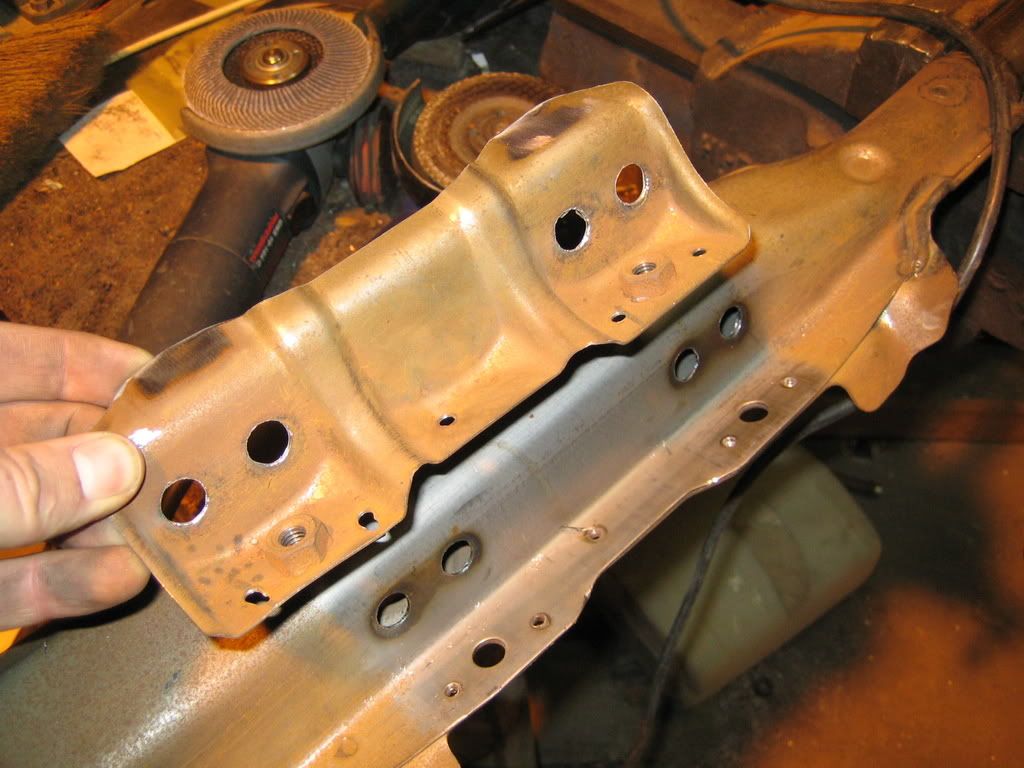
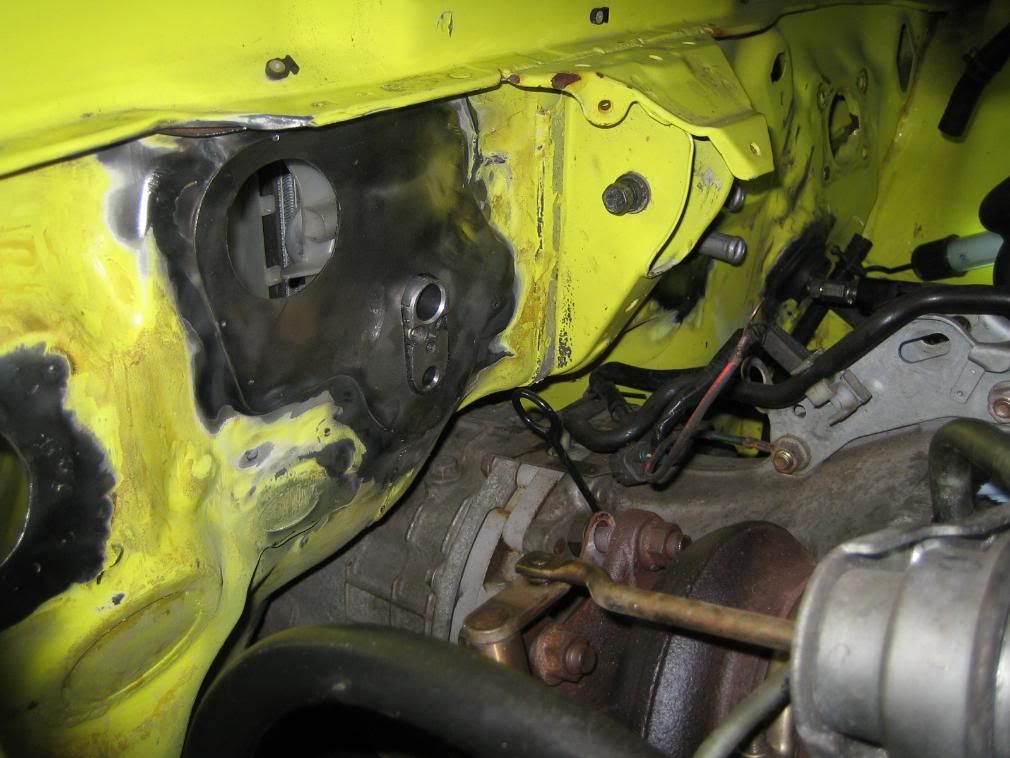
Friday I started on the throttle, the fixation points on the chassis were slightly different to the GL.
So a hole needed to be drilled and a piece of metal needed to be welded:

Friday I started on the throttle, the fixation points on the chassis were slightly different to the GL.
So a hole needed to be drilled and a piece of metal needed to be welded:
12 January 2008, 07:57 PM
#69
Scooby Regular
Thread Starter
Join Date: Dec 2002
Posts: 458
Likes: 0
Received 0 Likes
on
0 Posts
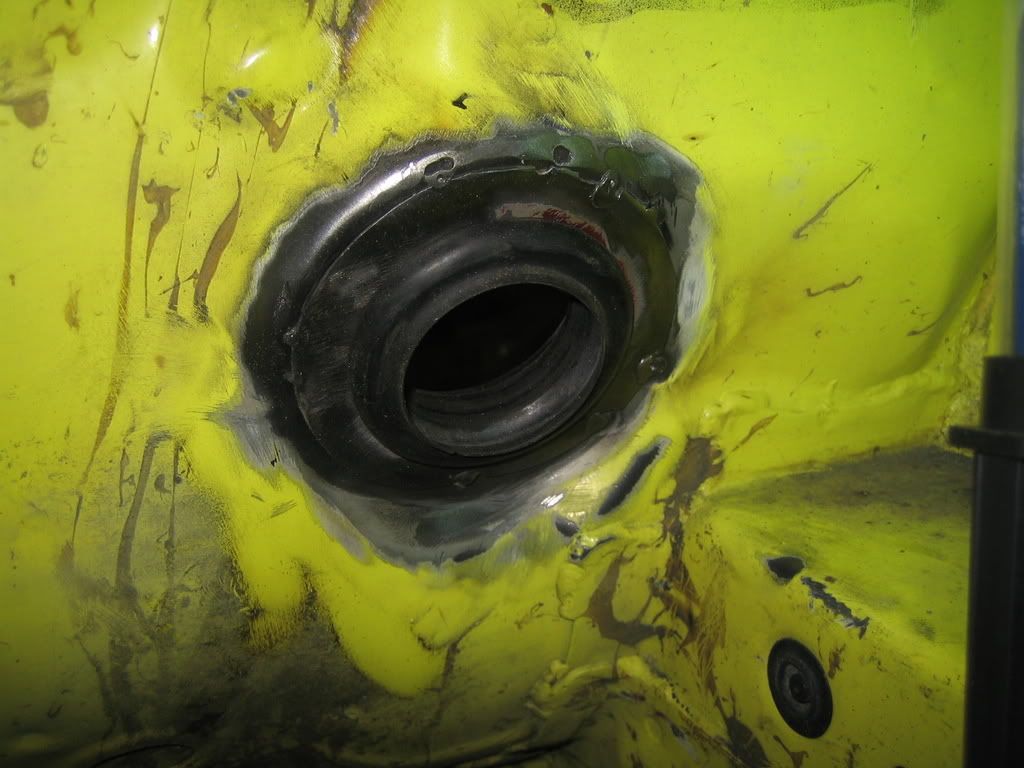
Then the final part of the heater, this ould fit easily I already noticed:

Because the cage sits in the corner the heater cannot go into it's original position so it has to move to centre of the car a bit, making it to small to fit between the cage and the other heater part.
So I cut a small part of and it fits immediatly!
Meanwhile I cut the fixationpoint and welded it into the correct place:
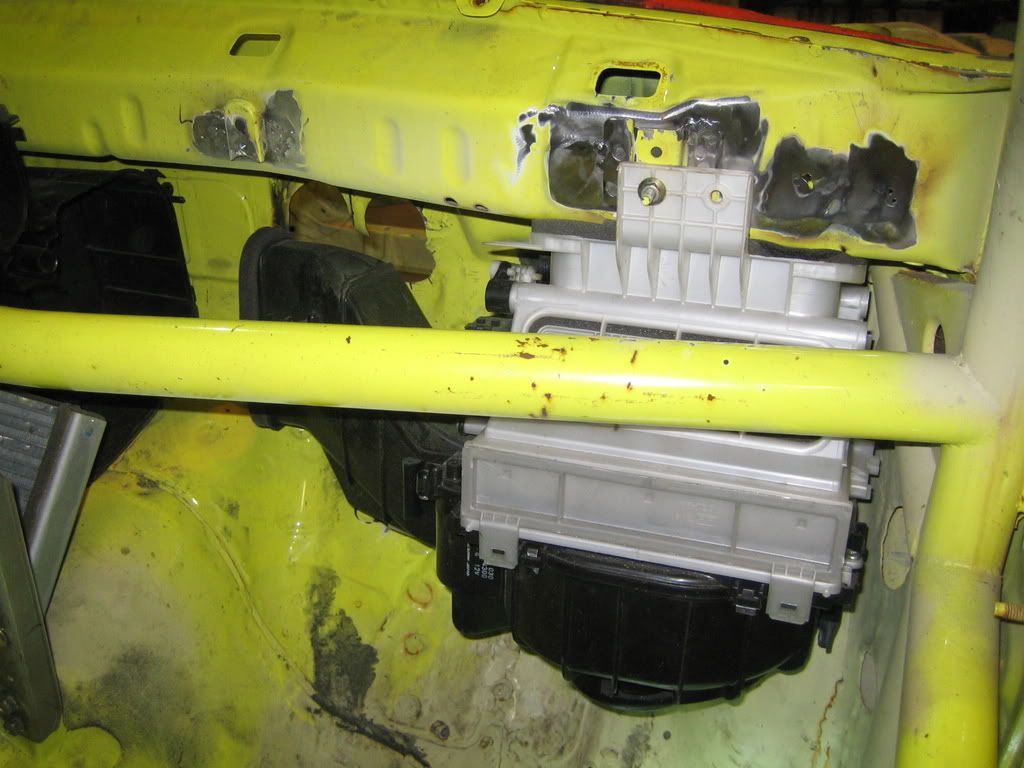
Finaly I had tap a bulge in the fender for a better fit:
It fits, Aram happy!:
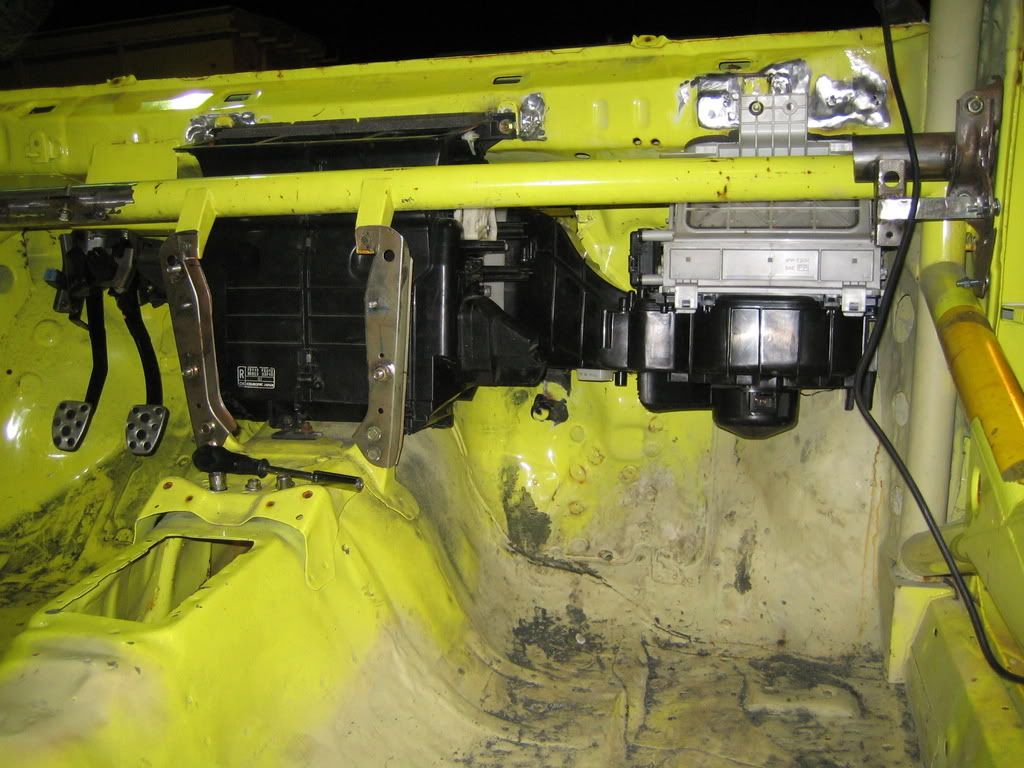
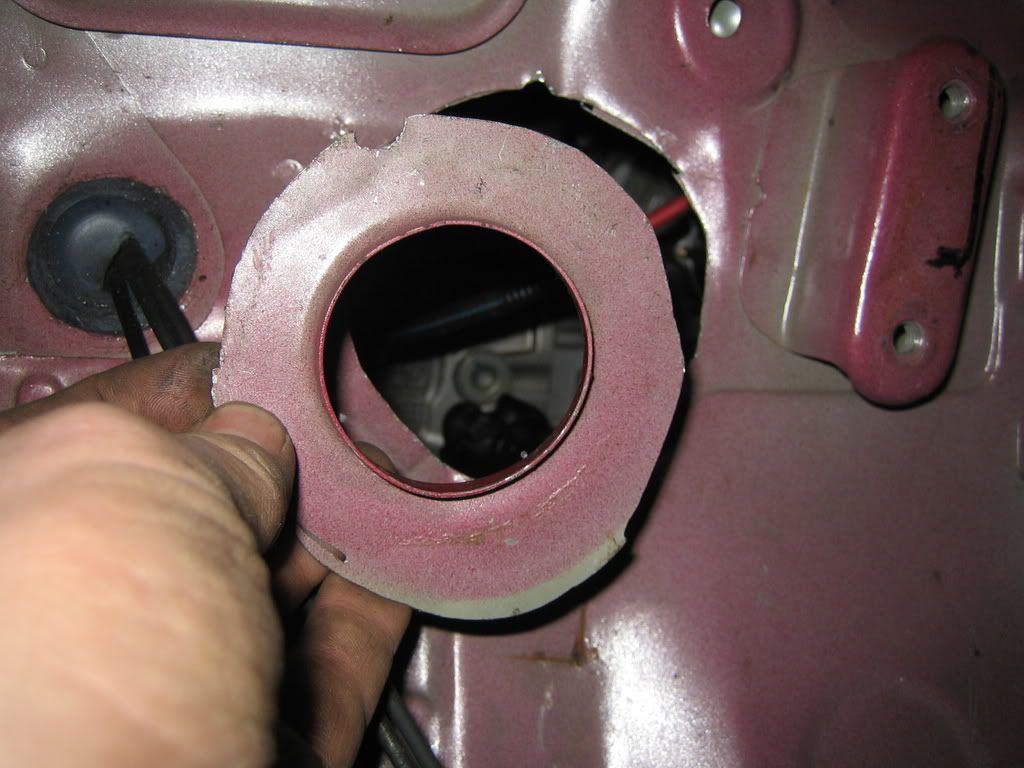
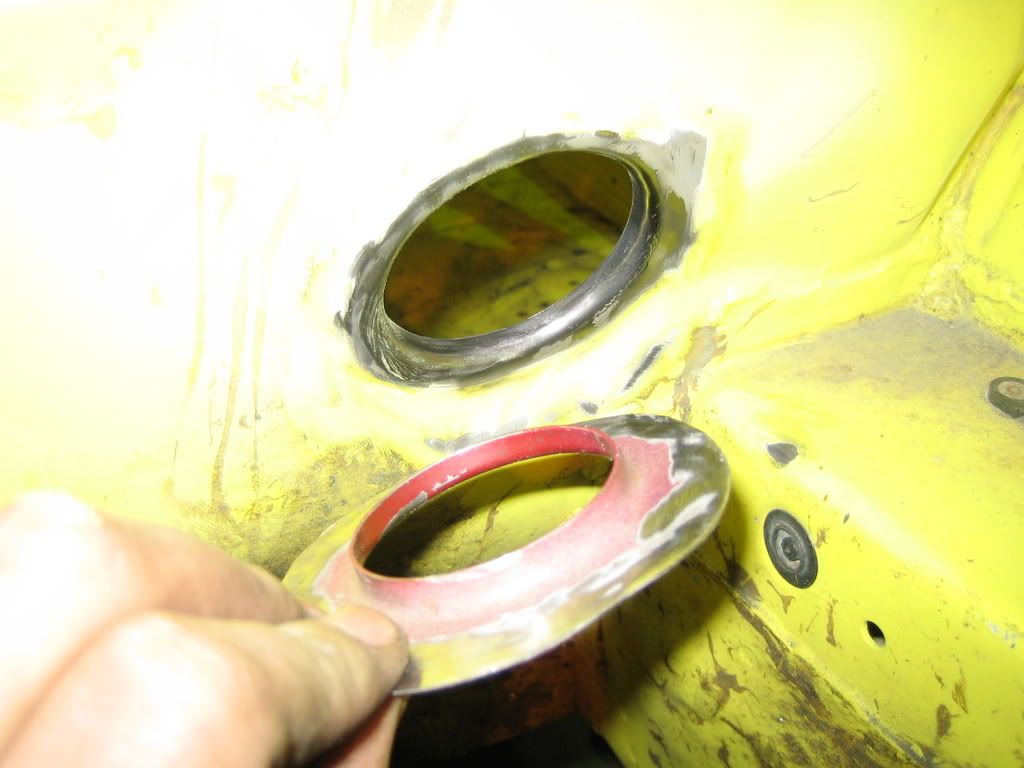
Because it has moved a bit to the centre of the car I have to adjust the opening in the chassis too, that's why I made a cardboard version that can be lasered from metal later:

Because the cage sits in the corner the heater cannot go into it's original position so it has to move to centre of the car a bit, making it to small to fit between the cage and the other heater part.
So I cut a small part of and it fits immediatly!
Meanwhile I cut the fixationpoint and welded it into the correct place:
Finaly I had tap a bulge in the fender for a better fit:
It fits, Aram happy!:
Because it has moved a bit to the centre of the car I have to adjust the opening in the chassis too, that's why I made a cardboard version that can be lasered from metal later:
12 January 2008, 07:58 PM
#70
Scooby Regular
Thread Starter
Join Date: Dec 2002
Posts: 458
Likes: 0
Received 0 Likes
on
0 Posts
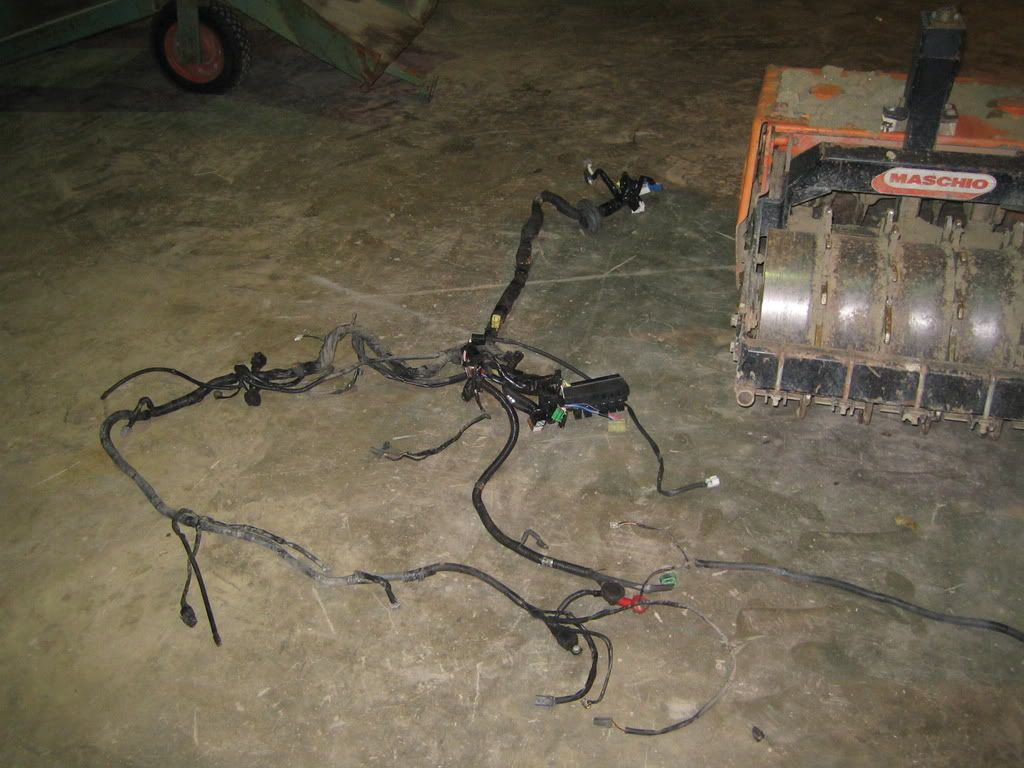
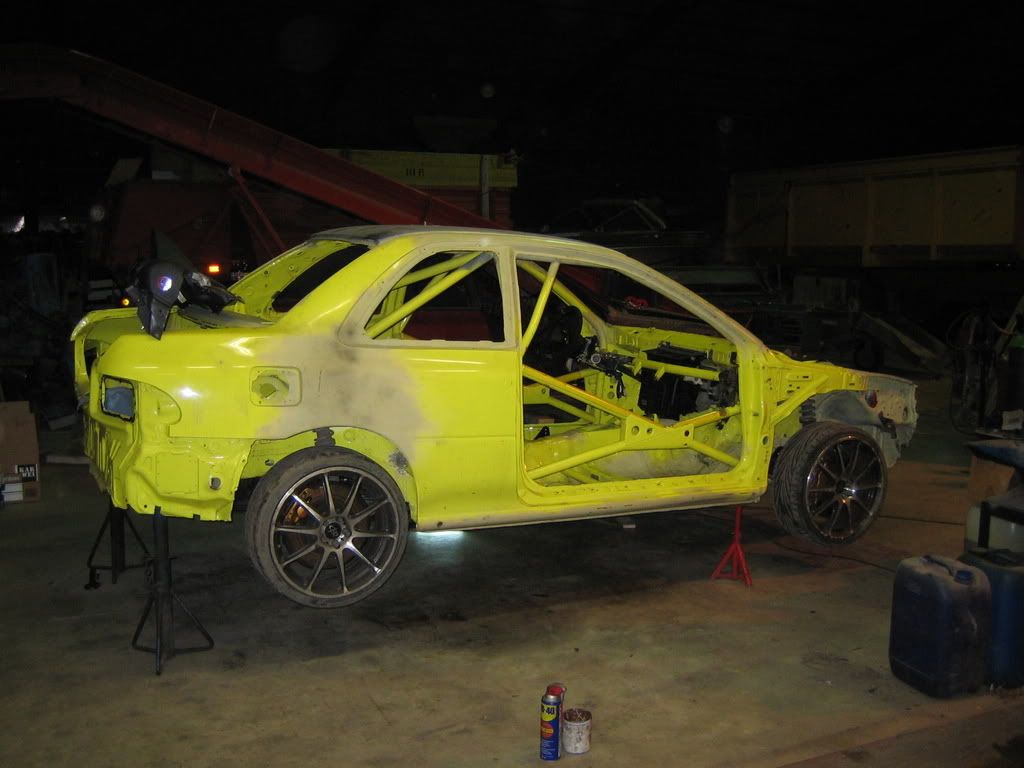
Now that most work on the dash is done, I can concentrate on the final part, the loom, after that the interior is almost done!
Today I started tearing the GL down a bit more, starting with the most important now, the looms:

After putting the GL on a steeck, I drained the iols and removed the exhaust, next is the engine/drivetrain:

This aluminium after 2 years on a car, the smooth piece is original:

Tommorow we continue!
Today I started tearing the GL down a bit more, starting with the most important now, the looms:
After putting the GL on a steeck, I drained the iols and removed the exhaust, next is the engine/drivetrain:
This aluminium after 2 years on a car, the smooth piece is original:
Tommorow we continue!
 13 January 2008, 10:52 AM
#72
Scooby Regular
Join Date: May 2006
Location: Leamington Spa
Posts: 1,099
Likes: 0
Received 0 Likes
on
0 Posts
Just read this thread, a really interesting read. You are very skilled with fabrication etc. I wish I could work on my car this way.
Did you consider a heated screen instead of all the trouble/weight with the heater unit?
Keep up the good work!
Rob.
Did you consider a heated screen instead of all the trouble/weight with the heater unit?
Keep up the good work!
Rob.
13 January 2008, 10:17 PM
#73
Scooby Regular
Thread Starter
Join Date: Dec 2002
Posts: 458
Likes: 0
Received 0 Likes
on
0 Posts
Rob,
I will get a heated window too, but then the moist will stay inside the car, I need the AC to get that out.
That's a downside of no interior.
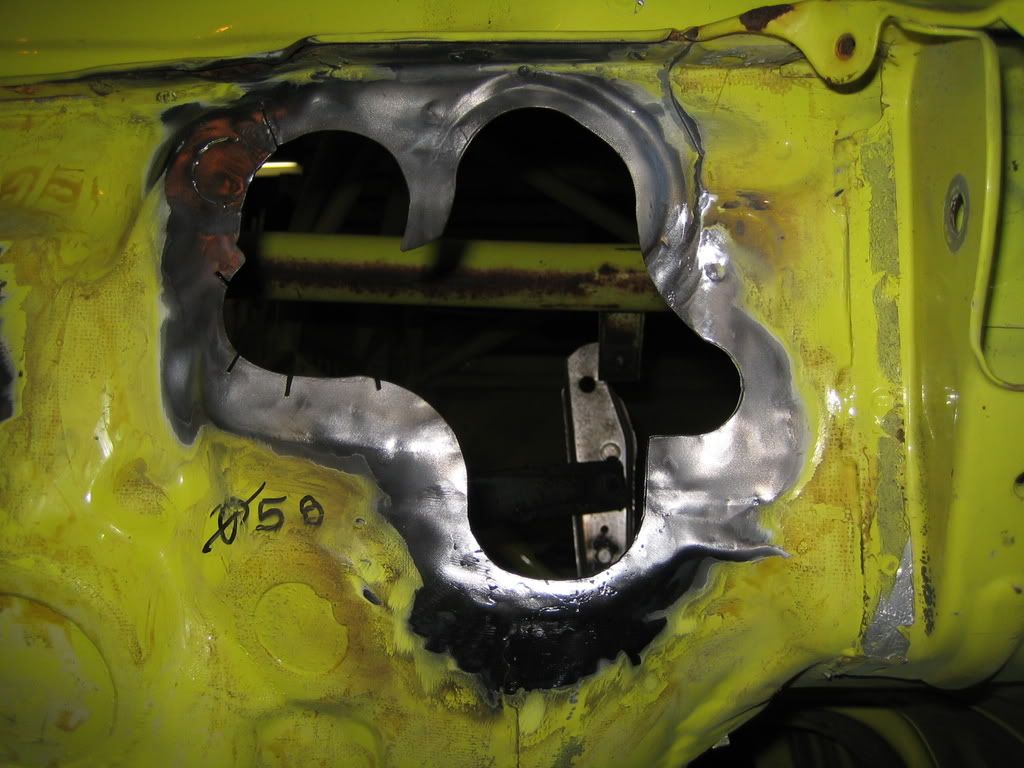
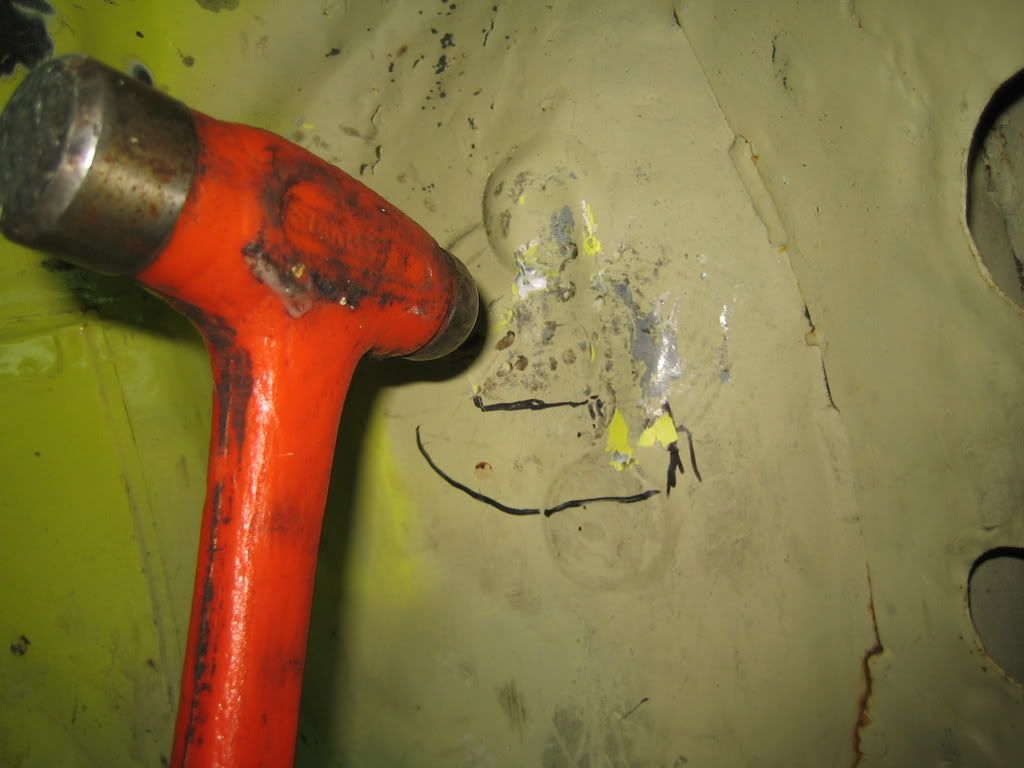
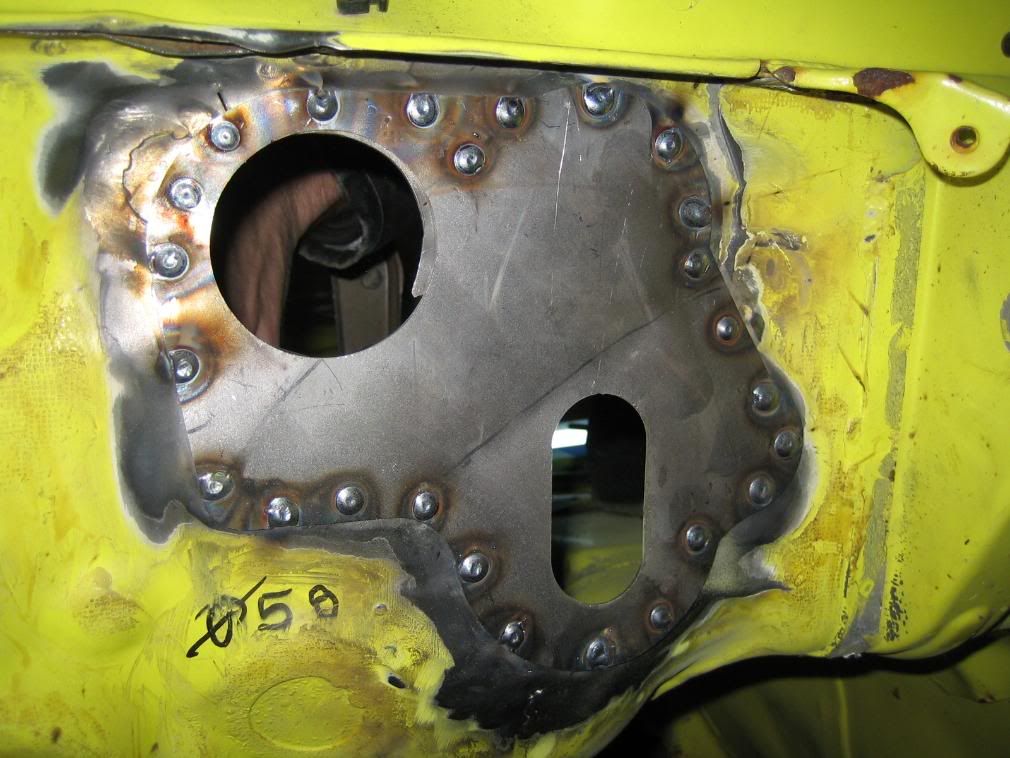
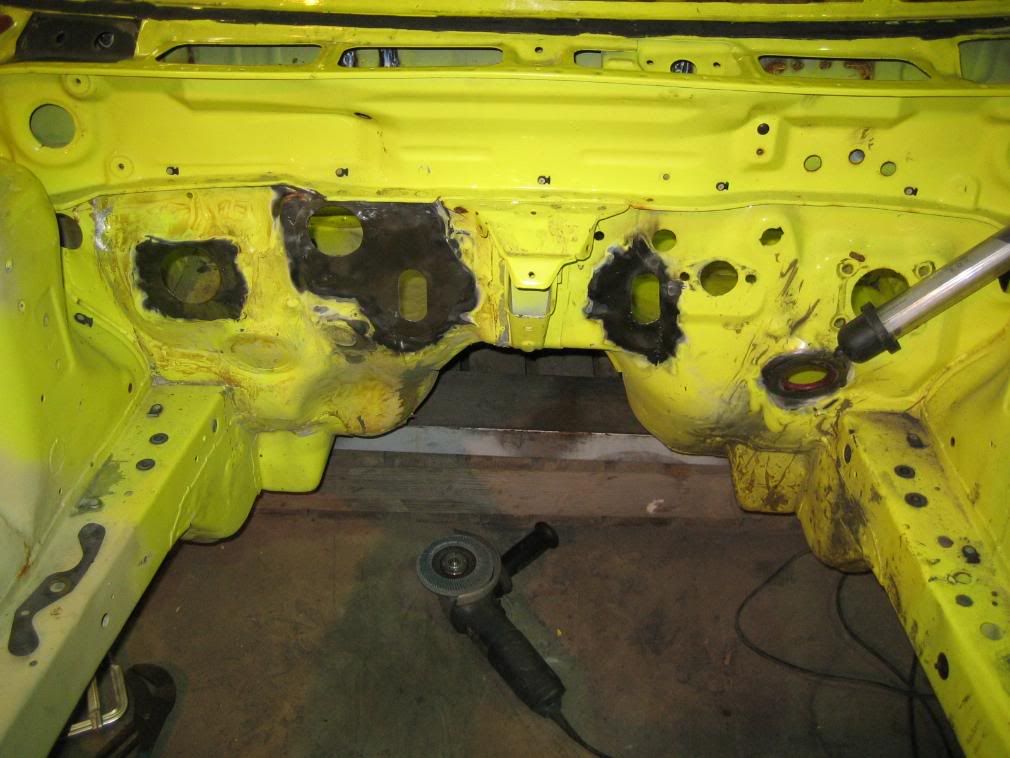
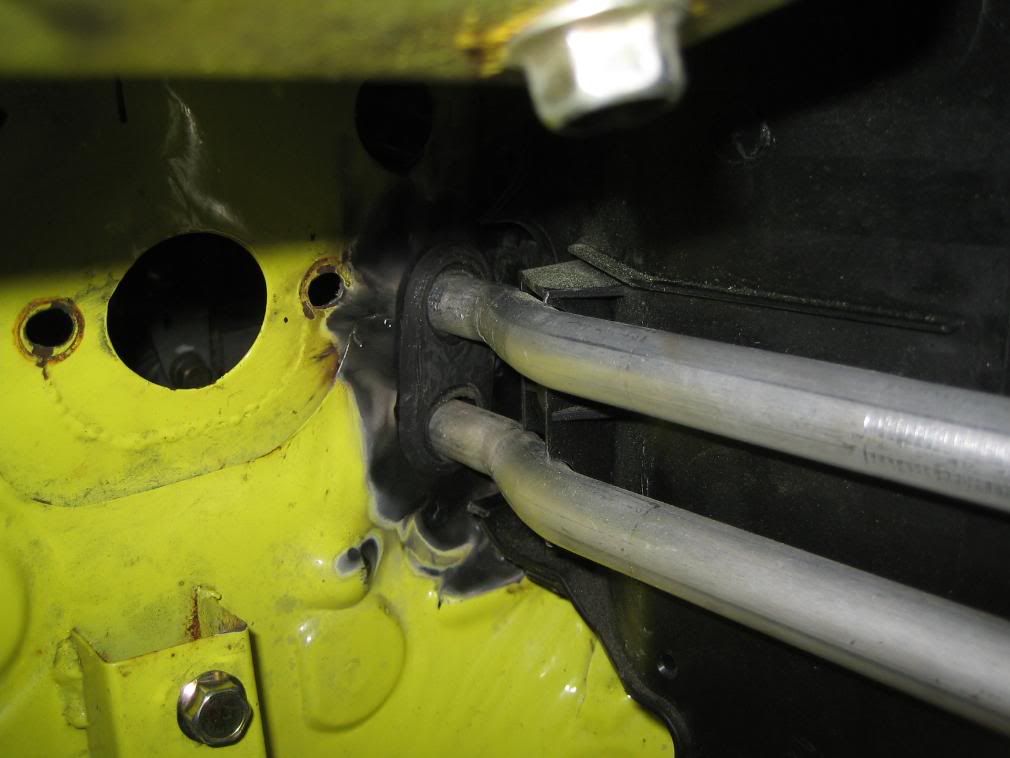
Today I started with the welding of the lasered plates on the firewall:

So that's where my money disappears....:

I could just save it and replace it by something cheaper:
I will get a heated window too, but then the moist will stay inside the car, I need the AC to get that out.
That's a downside of no interior.
Today I started with the welding of the lasered plates on the firewall:
So that's where my money disappears....:
I could just save it and replace it by something cheaper:
13 January 2008, 10:18 PM
#74
Scooby Regular
Thread Starter
Join Date: Dec 2002
Posts: 458
Likes: 0
Received 0 Likes
on
0 Posts
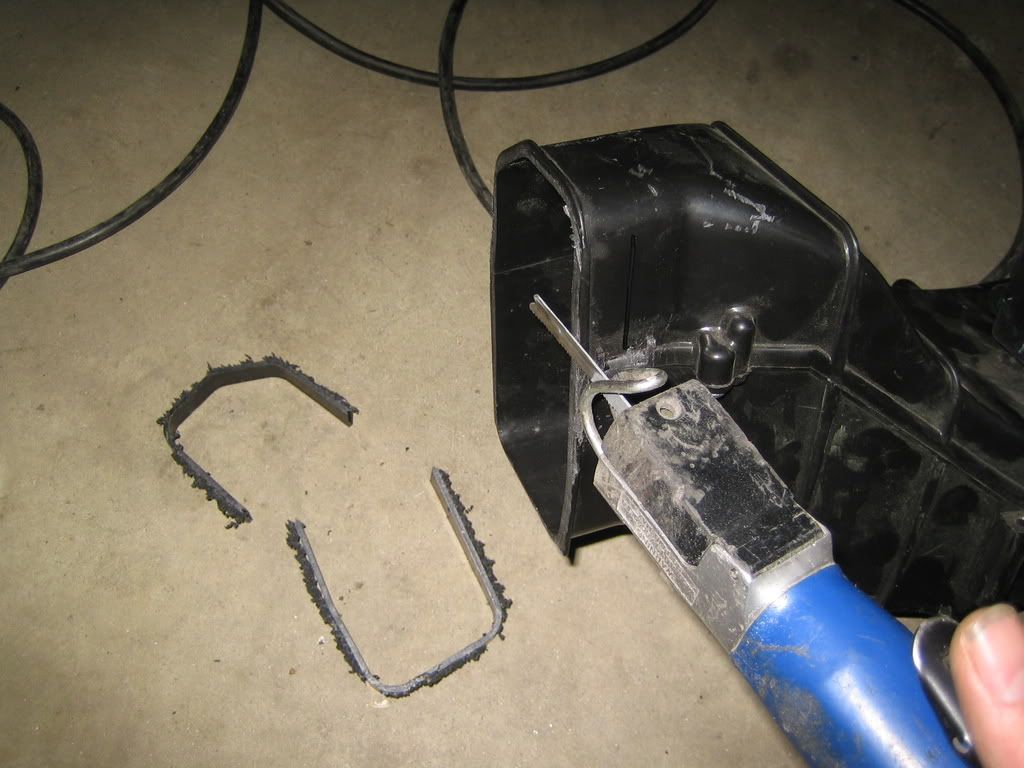
My friend Alex lasered the sharkfins I made the cardboard copy for, so we welded them in also:
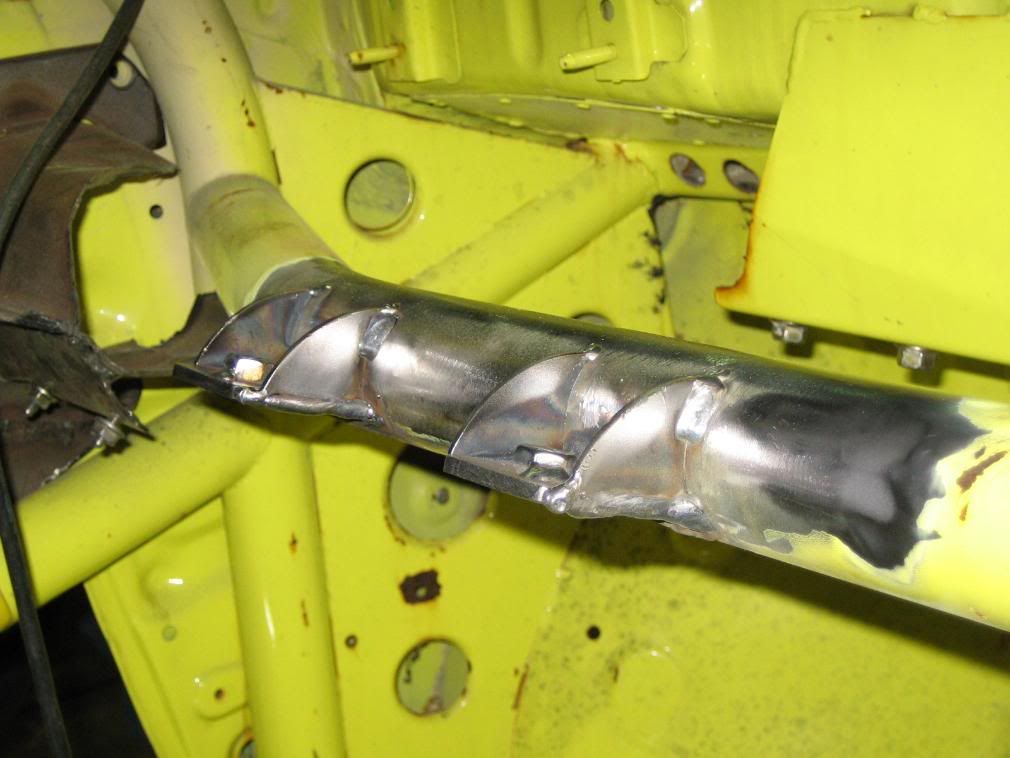
So now almost everything is colmplete concerning the firewall, just a few small things left to do.
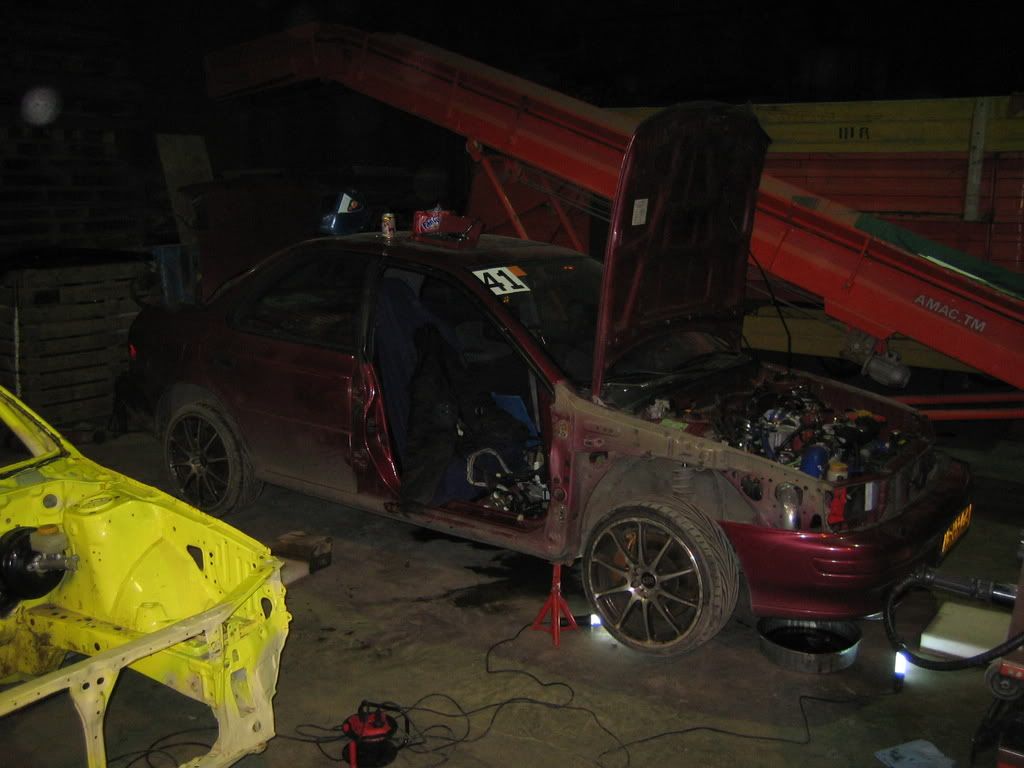
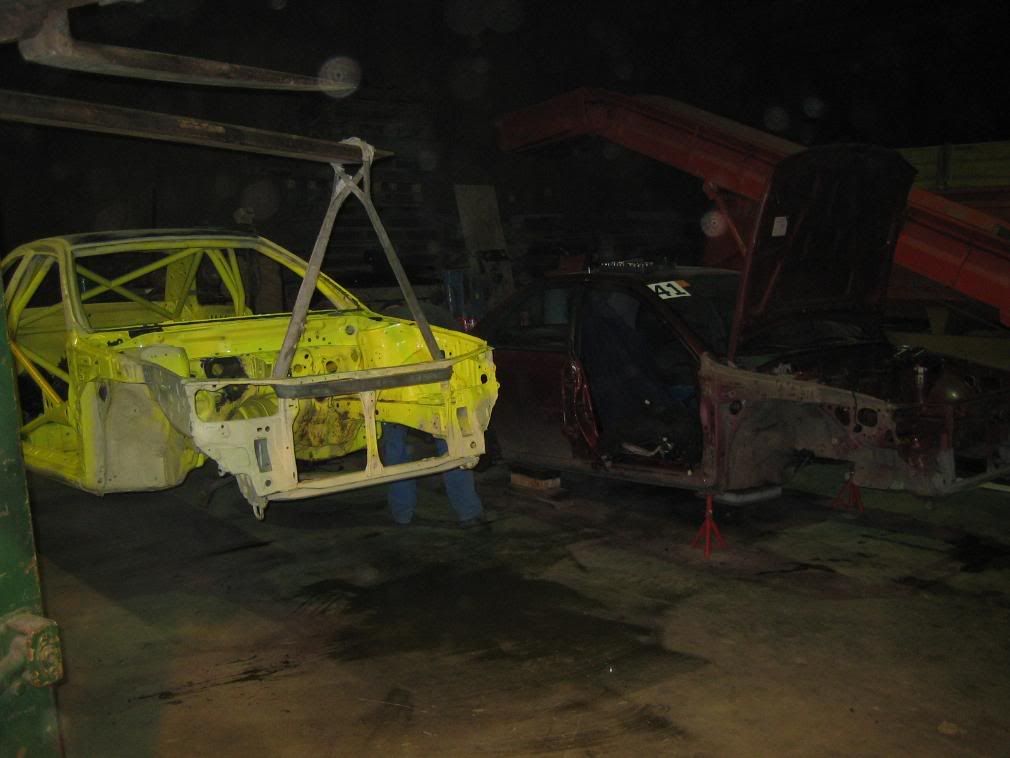
After that we started on the old car, removing the internals.
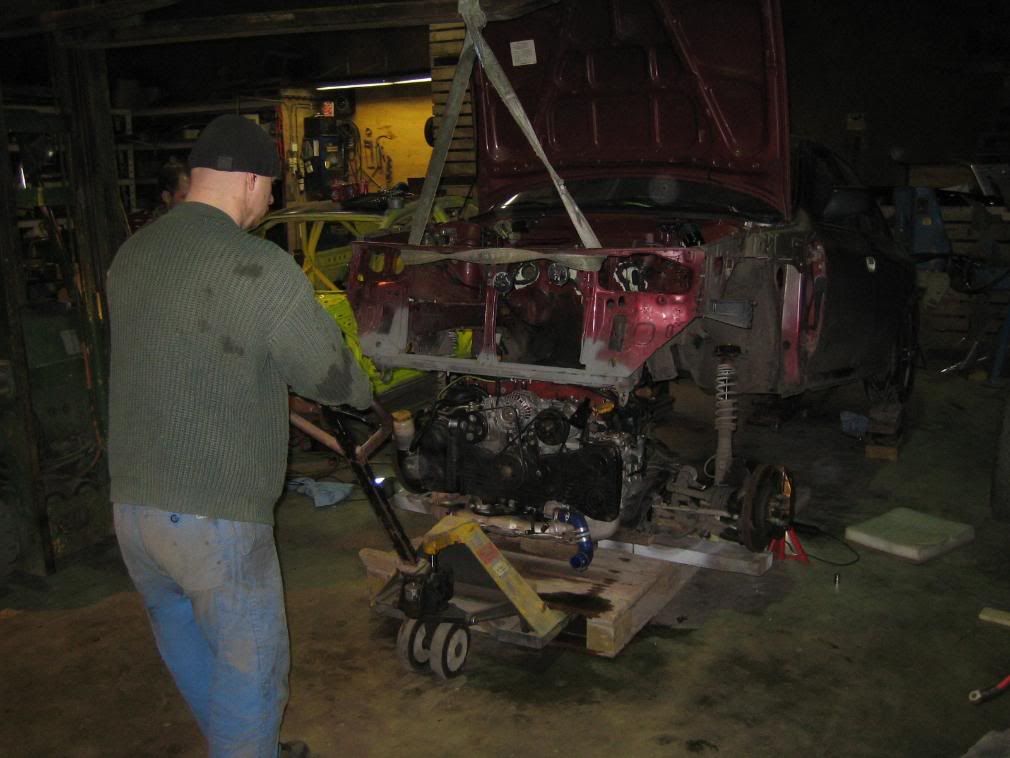
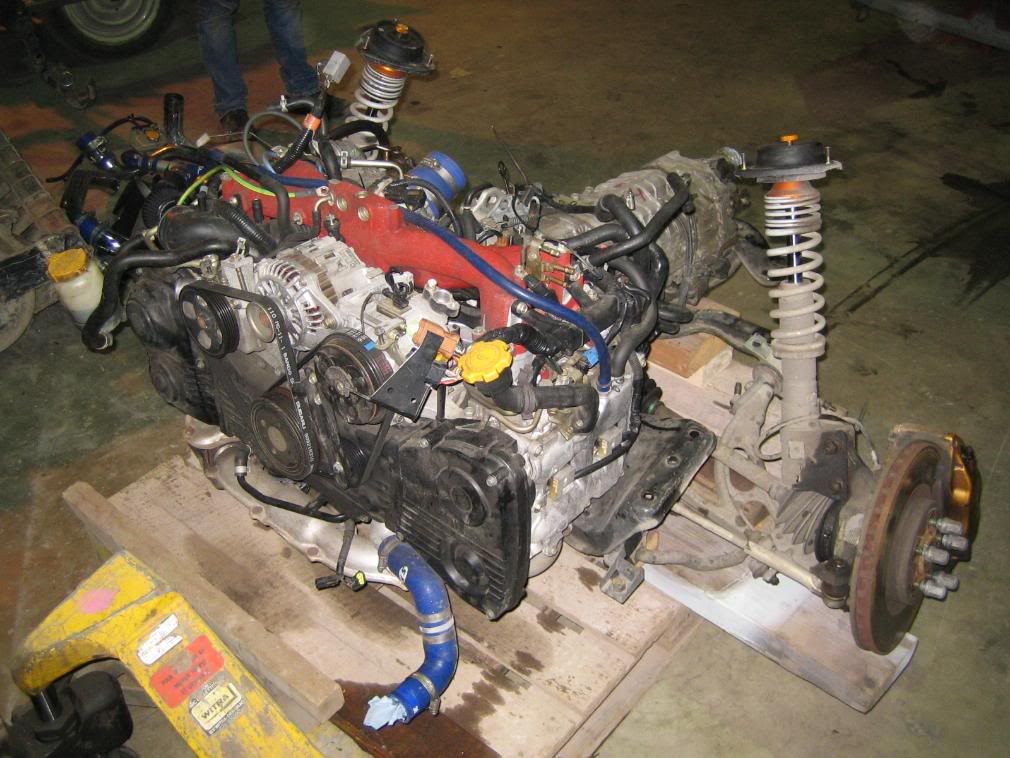
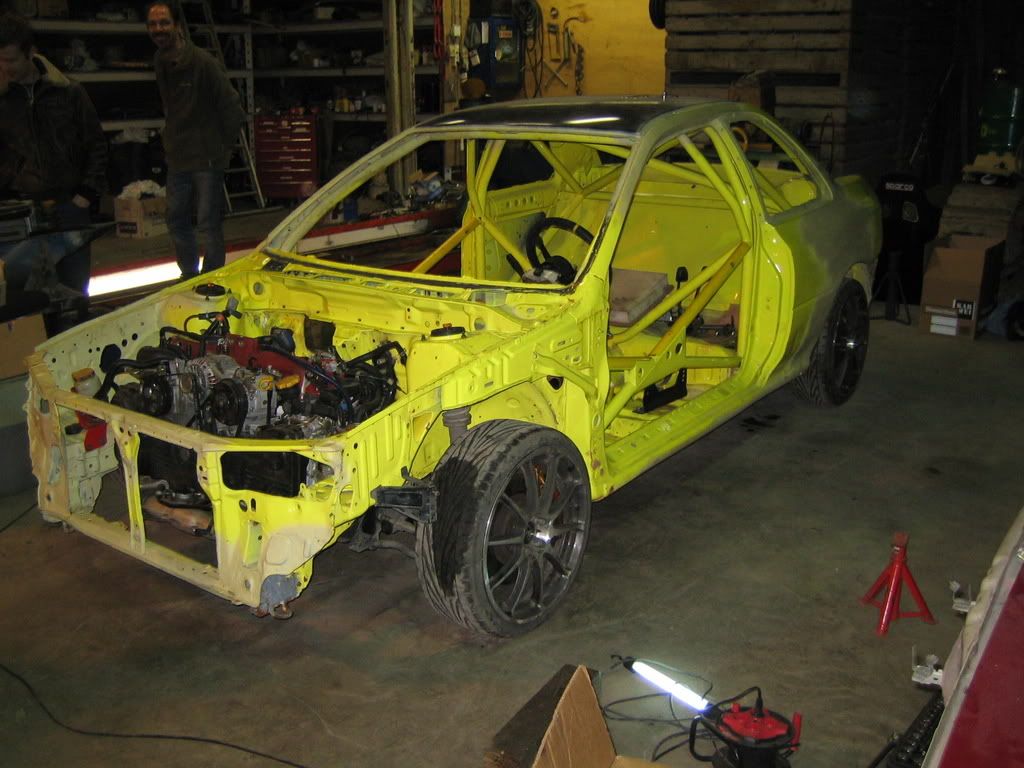
I wanted the subframe to fit into the the chassis, to see if the steering column is in the correct place.
I didn't like the idea of removing all parts one by one, so I put a pallet under the engine etc. and lowered eveything on there.
After that we just lifted the body up.

So now almost everything is colmplete concerning the firewall, just a few small things left to do.
After that we started on the old car, removing the internals.
I wanted the subframe to fit into the the chassis, to see if the steering column is in the correct place.
I didn't like the idea of removing all parts one by one, so I put a pallet under the engine etc. and lowered eveything on there.
After that we just lifted the body up.
13 January 2008, 10:19 PM
#75
Scooby Regular
Thread Starter
Join Date: Dec 2002
Posts: 458
Likes: 0
Received 0 Likes
on
0 Posts
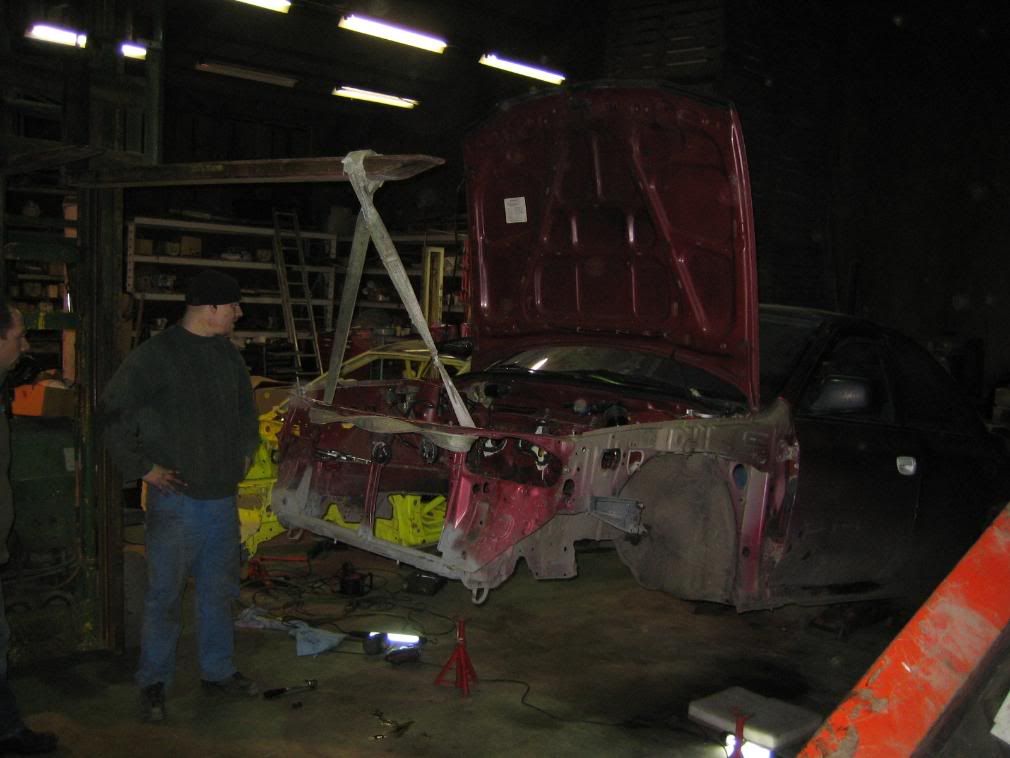
But after that much work sometimes you kinda had it:

And you start to make mistakes:
If that happens you know you gotta rest, so we did :

After a good nap I had decided to mount the whole thing into the new chassis, instead of just the subframe:


And you start to make mistakes:
If that happens you know you gotta rest, so we did
:After a good nap I had decided to mount the whole thing into the new chassis, instead of just the subframe:
13 January 2008, 10:19 PM
#76
Scooby Regular
Thread Starter
Join Date: Dec 2002
Posts: 458
Likes: 0
Received 0 Likes
on
0 Posts
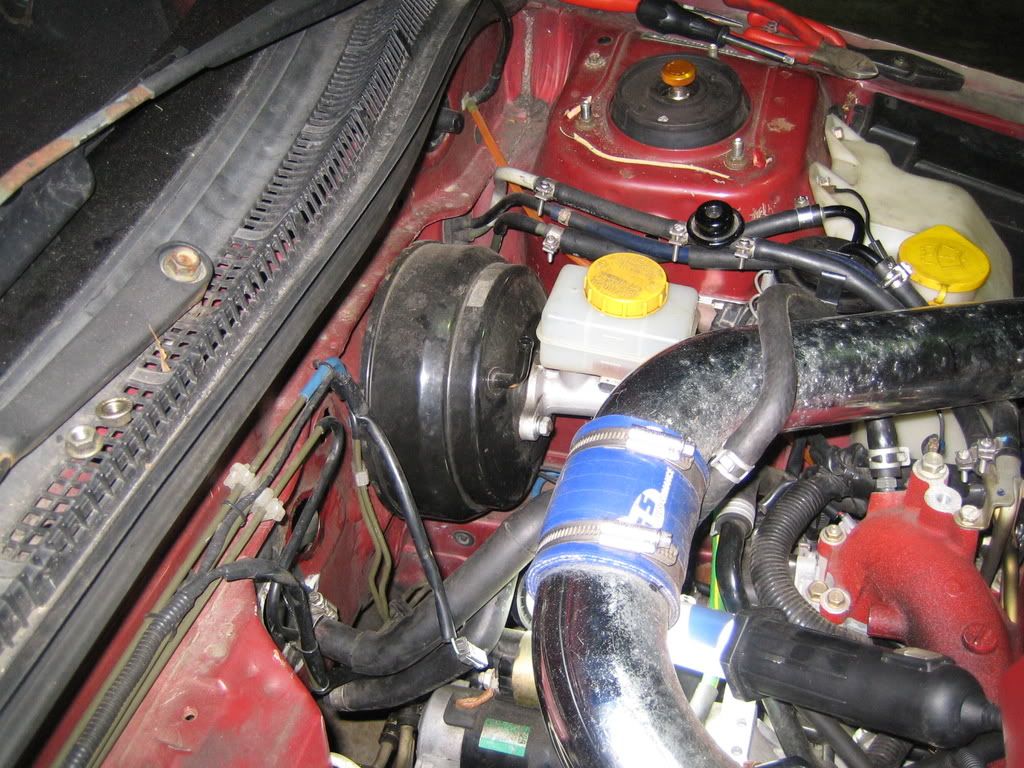
After that I checked if the steering column was ok and put the heater back in for trial fitting:


There's a lot left to do but I'm very happy with the progress sofar, I hope we can keep up this speed.
There's a lot left to do but I'm very happy with the progress sofar, I hope we can keep up this speed.

 15 January 2008, 11:08 PM
#80
Scooby Regular
iTrader: (4)
Join Date: Nov 2004
Location: where there are no gatsos and no speed limits
Posts: 765
Likes: 0
Received 0 Likes
on
0 Posts
hi, first of all, congratulations on this super fun and exciting thread. i am especially following your thread closely because i am also getting ready to do a very similar project. (although i am nowhere near as skilled and crafted as you ) i have a my01 1.6ts in which i will be doing an sti swap. you know ''lock, stock the f***ing lot''. the problem (and the question i want to ask you) is this...
i have been buying all the components from the uk as the parts are much cheaper and bringing them to greece, where i live. (i am turkish by the way)what i can not get from the uk though is the lhd pedals with electronic throttle etc. which is a must for this transplant. so i have been looking at the states and found a guy braking his newage wrx. i bought the pedals off his car and told him to send me the whole system. and he sent me this...


since you did all this work in to a 1.8 with same pedals. i thought maybe you can tell me what is missing here, furthermore if you still have any of these components left over from that donor forester (or any other car)i would also be interested in buying them off you.
keep them nice pics and humour coming
) i have a my01 1.6ts in which i will be doing an sti swap. you know ''lock, stock the f***ing lot''. the problem (and the question i want to ask you) is this...i have been buying all the components from the uk as the parts are much cheaper and bringing them to greece, where i live. (i am turkish by the way)what i can not get from the uk though is the lhd pedals with electronic throttle etc. which is a must for this transplant. so i have been looking at the states and found a guy braking his newage wrx. i bought the pedals off his car and told him to send me the whole system. and he sent me this...
since you did all this work in to a 1.8 with same pedals. i thought maybe you can tell me what is missing here, furthermore if you still have any of these components left over from that donor forester (or any other car)i would also be interested in buying them off you.
keep them nice pics and humour coming
18 January 2008, 08:41 PM
#81
Scooby Regular
Thread Starter
Join Date: Dec 2002
Posts: 458
Likes: 0
Received 0 Likes
on
0 Posts
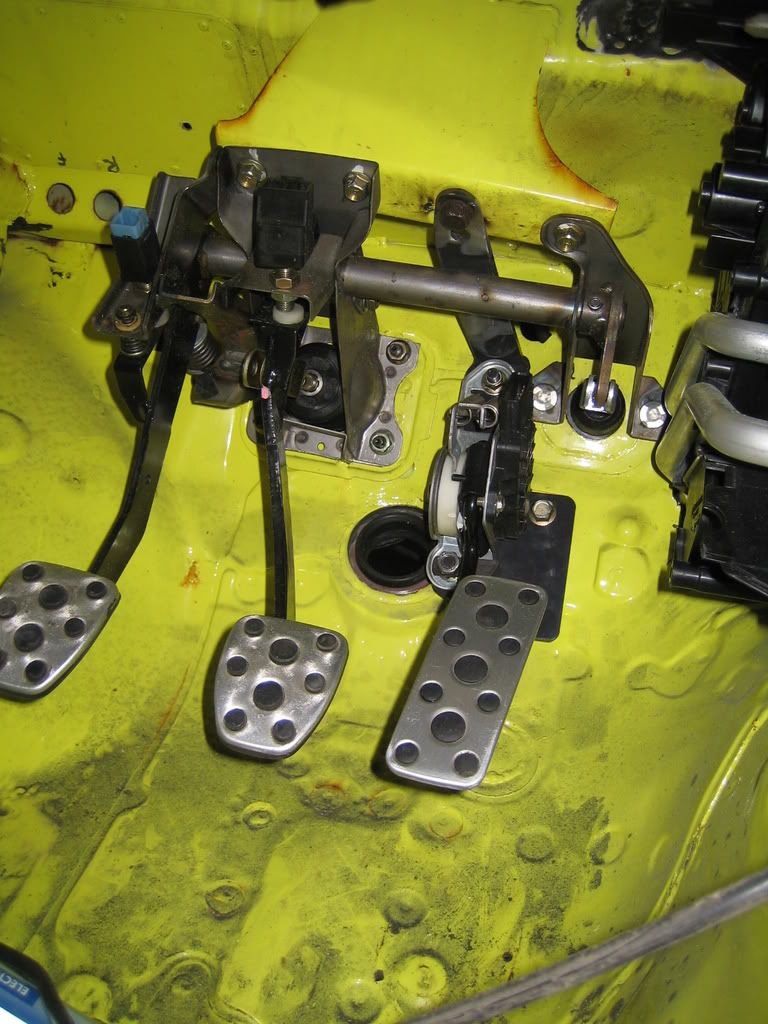
Hi Duraman,
The cluth and brake pedal look ok to me, but one of the clutchreservior holders looks bent on the picture.
The gaspedal is no drive by wire model, so it's no use to you I think.
I know a place where there a few lying about, but I think in this case you can use the UK version, they are the same as the LHD ones I think.
The brake and clutch pedals are different.
The owner of the place these pedals are is out of town though and won't be coming back soon.
I'd look in the UK and if you find one ask for a picture first.
You can compare it with the one from my pictures here.
You have a thead on the build up of your car?
18 January 2008, 08:42 PM
#82
Scooby Regular
Thread Starter
Join Date: Dec 2002
Posts: 458
Likes: 0
Received 0 Likes
on
0 Posts
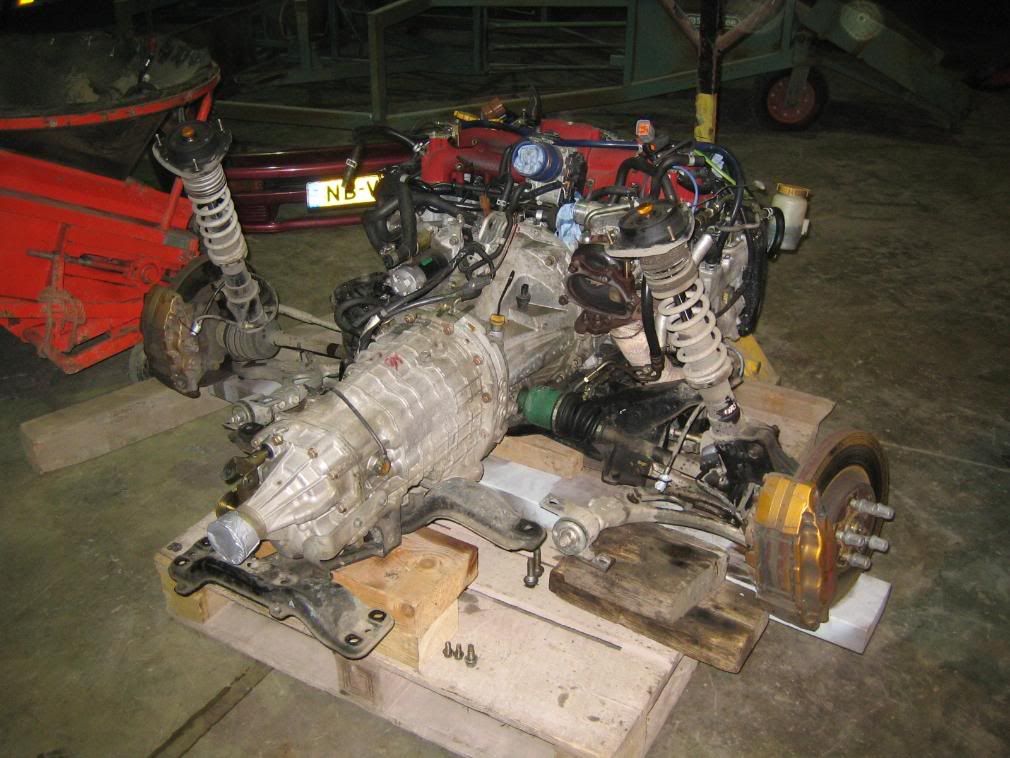
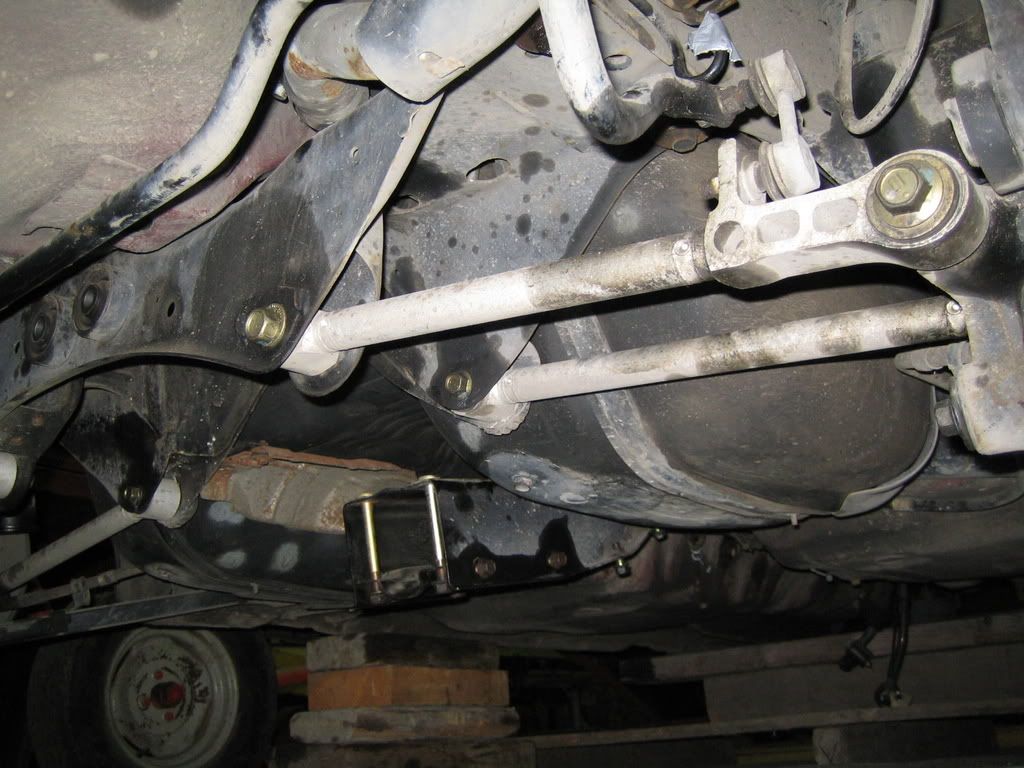
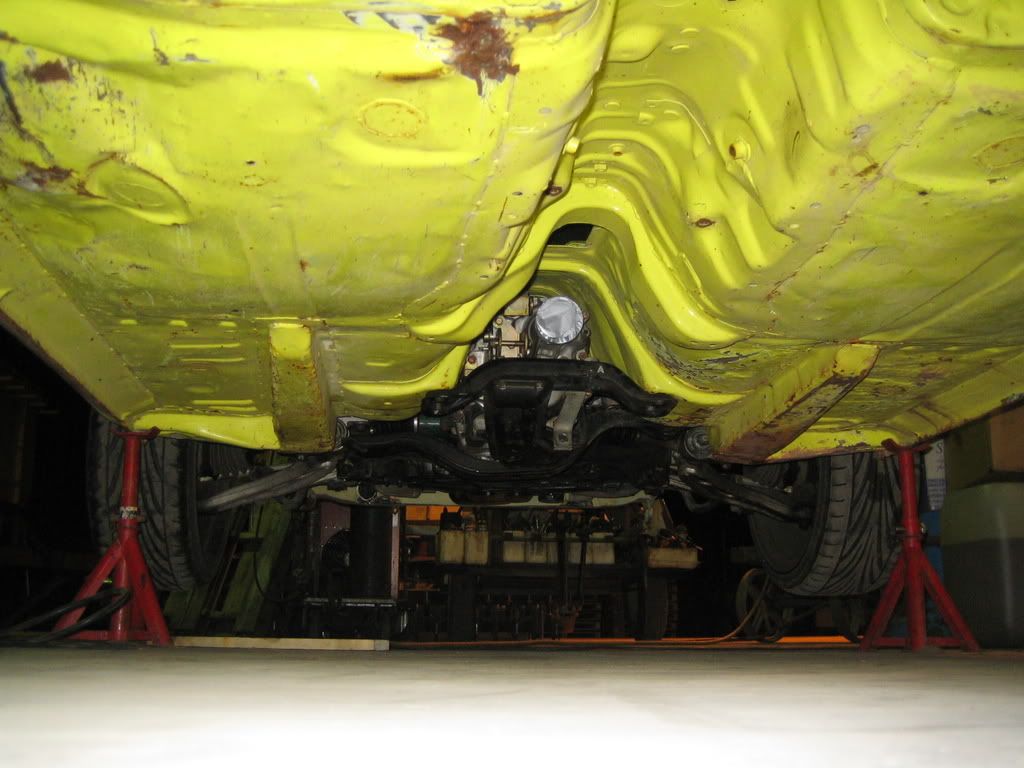
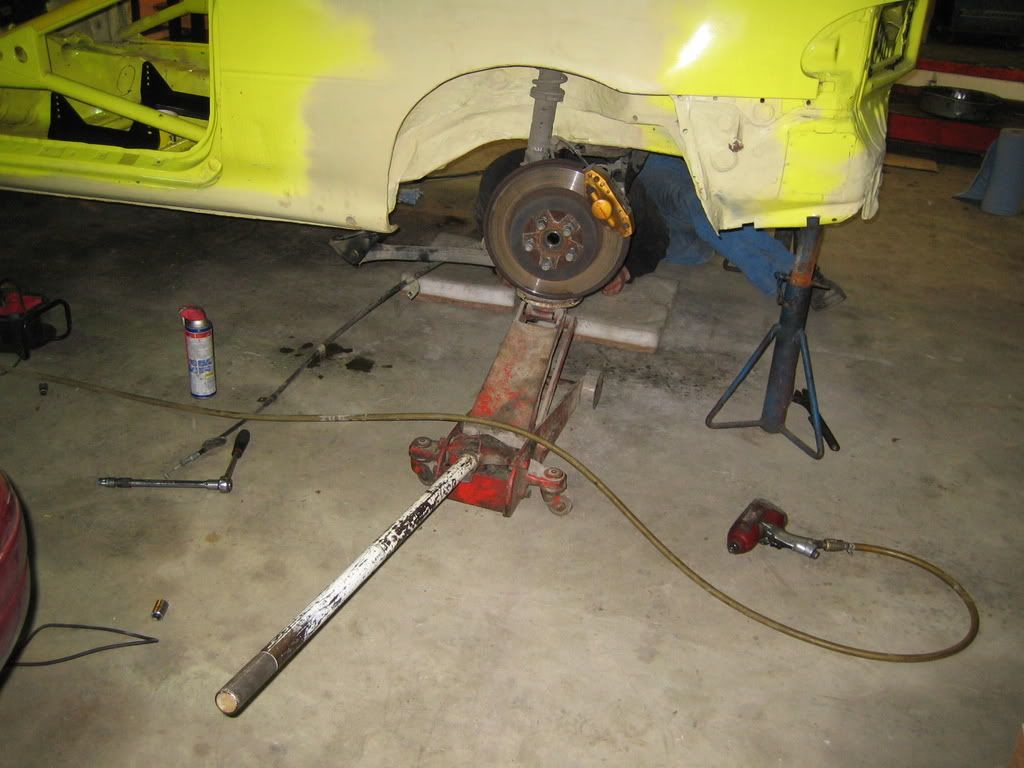
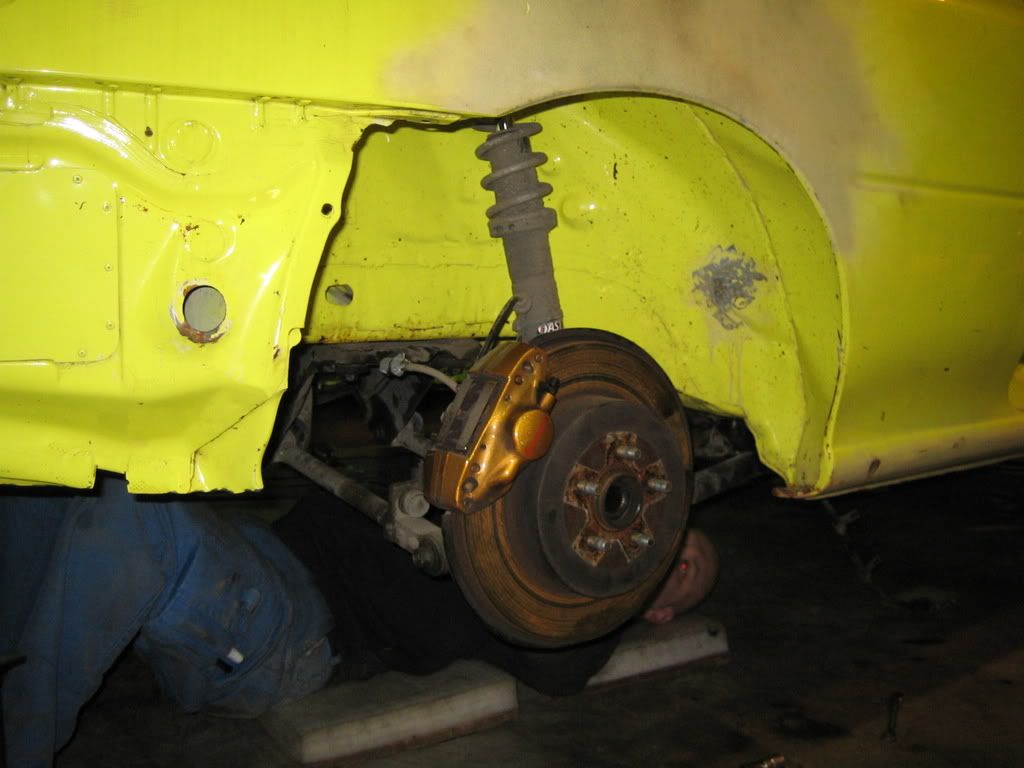
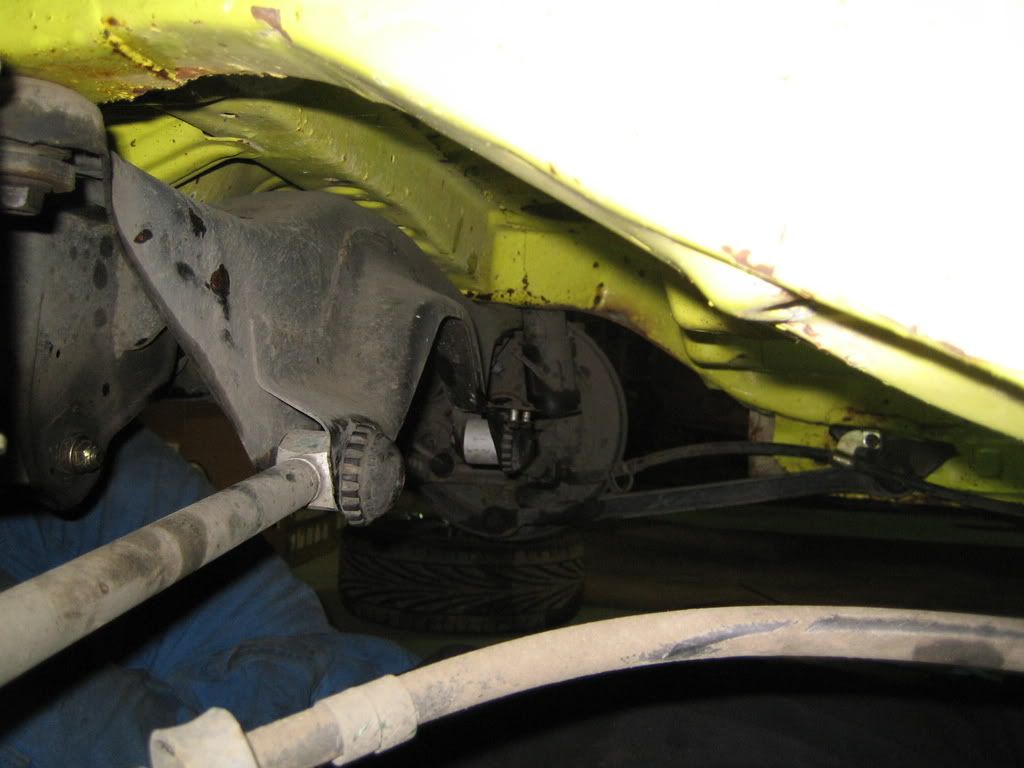
Teusday I fitted the gearbox subframe and the rear of the front wishbones.
I thought the thread was rusted so brought some tools to repair but it turned out that the threads were good enough to use after sitting outside for quite some time.
I also removed the rear diff and axels:

Yesterday we did alot more thankfully. 8)
We changed the whole rear suspension.
Remove from the donor:

First of 3 parts:
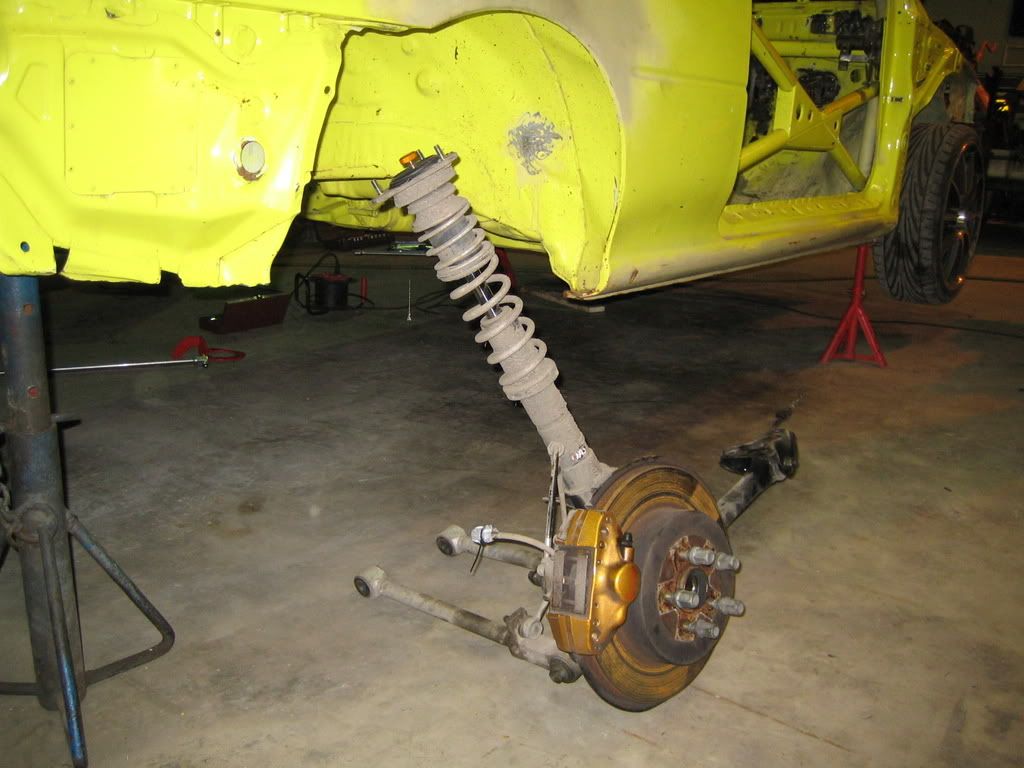
View on the front:
I thought the thread was rusted so brought some tools to repair but it turned out that the threads were good enough to use after sitting outside for quite some time.
I also removed the rear diff and axels:
Yesterday we did alot more thankfully. 8)
We changed the whole rear suspension.
Remove from the donor:
First of 3 parts:
View on the front:


 18 January 2008, 08:43 PM
#84
Scooby Regular
Thread Starter
Join Date: Dec 2002
Posts: 458
Likes: 0
Received 0 Likes
on
0 Posts
Later that evening 2 friends dropped by, Bjorn and Tim.
Tim can weld plastic and my dashbord has quite some welding to be done to.
Working together:
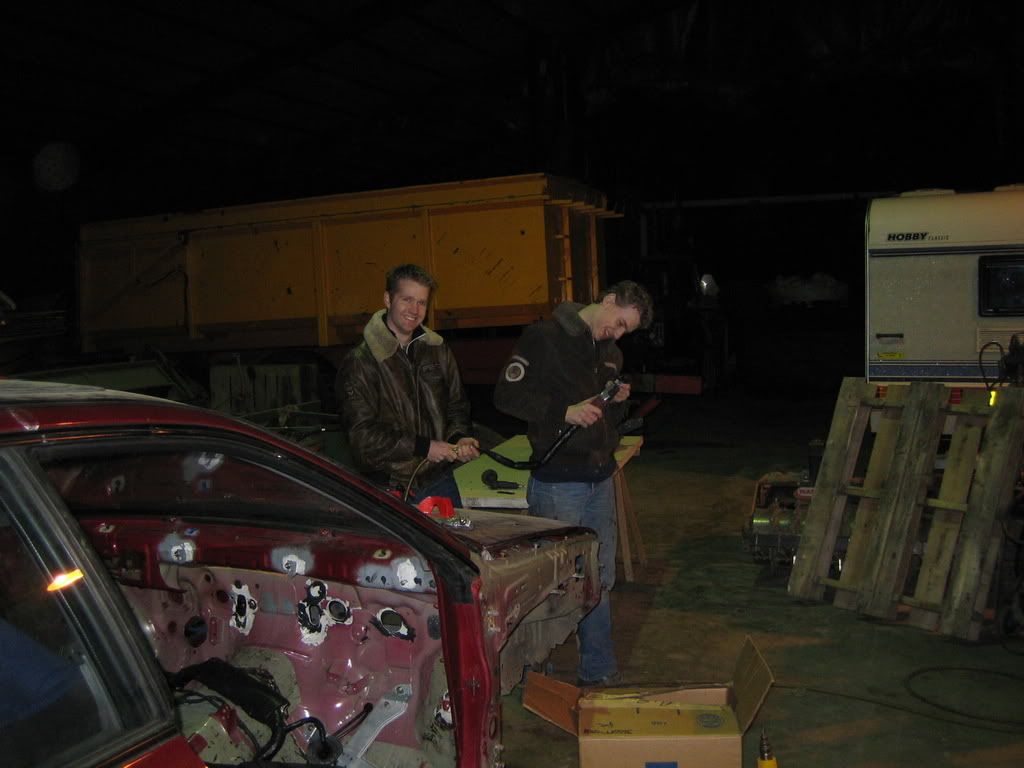
Fitting and measuring:

More next time!
Tim can weld plastic and my dashbord has quite some welding to be done to.
Working together:
Fitting and measuring:
More next time!
22 January 2008, 09:43 PM
#85
Scooby Regular
Thread Starter
Join Date: Dec 2002
Posts: 458
Likes: 0
Received 0 Likes
on
0 Posts
Today I tried the dash loom in.
I had some doubts on wether it would fit or not, mainly the heater could give some problems.
GL very empty:

The big question, will the heater fit with the loom inside?
Well, part 1 is in:


Part 2 is in:

En waddayaknow, the blower fits also!!:


Now I'm going to look if I can cut some more wire from the loom, that will save some weight and make it a bit easier to fix.
I had some doubts on wether it would fit or not, mainly the heater could give some problems.
GL very empty:
The big question, will the heater fit with the loom inside?
Well, part 1 is in:
Part 2 is in:
En waddayaknow, the blower fits also!!:
Now I'm going to look if I can cut some more wire from the loom, that will save some weight and make it a bit easier to fix.
23 January 2008, 07:08 PM
#87
Scooby Regular
Thread Starter
Join Date: Dec 2002
Posts: 458
Likes: 0
Received 0 Likes
on
0 Posts
Hehehe, I'm still after steel rear fenders, I'm saving that for last.
I have a friend in Holland somewhere who has a great panelbeater I'm having a meeting with them as soon as I'm ready.
If it doesn't work out I'll put on the poly ones.
But sometime soon i will put on all the panels to see how it all fits, so the front fenders will go on.
I have a friend in Holland somewhere who has a great panelbeater I'm having a meeting with them as soon as I'm ready.
If it doesn't work out I'll put on the poly ones.
But sometime soon i will put on all the panels to see how it all fits, so the front fenders will go on.
23 January 2008, 08:15 PM
#88
Scooby Regular

Join Date: Feb 2003
Location: Zed Ess Won Hay Tee
Posts: 21,611
Likes: 0
Received 0 Likes
on
0 Posts
its the rear fenders i want to see you fit
they are a bigger job then you first think, i was a bit niave in thinking i could bond them on with minimal amount of blending but i was wrong
nearly finished mine, although i only work on it in bits and bobs, when i have free time at work
they are a bigger job then you first think, i was a bit niave in thinking i could bond them on with minimal amount of blending but i was wrong
nearly finished mine, although i only work on it in bits and bobs, when i have free time at work
 25 January 2008, 09:05 PM
#90
Scooby Regular
iTrader: (4)
Join Date: Nov 2004
Location: where there are no gatsos and no speed limits
Posts: 765
Likes: 0
Received 0 Likes
on
0 Posts
Hi Duraman,
The cluth and brake pedal look ok to me, but one of the clutchreservior holders looks bent on the picture.
The gaspedal is no drive by wire model, so it's no use to you I think.
I know a place where there a few lying about, but I think in this case you can use the UK version, they are the same as the LHD ones I think.
The brake and clutch pedals are different.
The owner of the place these pedals are is out of town though and won't be coming back soon.
I'd look in the UK and if you find one ask for a picture first.
You can compare it with the one from my pictures here.
You have a thead on the build up of your car?
The cluth and brake pedal look ok to me, but one of the clutchreservior holders looks bent on the picture.
The gaspedal is no drive by wire model, so it's no use to you I think.
I know a place where there a few lying about, but I think in this case you can use the UK version, they are the same as the LHD ones I think.
The brake and clutch pedals are different.
The owner of the place these pedals are is out of town though and won't be coming back soon.
I'd look in the UK and if you find one ask for a picture first.
You can compare it with the one from my pictures here.
You have a thead on the build up of your car?
hi, sorry for the late reply, and thanx for the help. i was getting a bit worried, so it is not all bad. i will get the gas pedal from the uk. apperantly i also need the brake servo and the hydrolic system for the clutch, too. i have no idea what these look like but i'll manage, i think... as soon as the engine arrives i will start my thread aswell. keep the pics coming i am learning a lot from them. good luck with the rear quarters.
