

Well after only recently buying the RB5 i felt this was one of the first jobs that needed tackling.
the car came with the mighty Prodrive Alcons with 330mm discs and Prodrive Pads
awesome stopping power but the pedal and feel wasnt just as good as it should be due to some sticky pistons in the caliper and very worn brake pads.
I contacted alcon and bought a new seal kit (insanely expensive!) some ferrodo ds2500's and a master cylinder brace all to be fitted once the calipers had been sprayed and rebuilt.
Ill let the pictures do the talking but hopefully its pretty much self explanitory
any questions just ask. I hope this thread might help others see how its done.
all in all id say it took a good 30 hours from start to finish at least between the stripping, priming, painting and rebuilding and then refitting to the car.
I know i could have done things in a different order but hey, thats hindsight for you and they turned out great anyway so its all good!
originally on the car

you can see the state of them off the car and i was very keen to retain all the orginal stickers so i had to mask these off during spraying and hope they stayed put (which they did!)


luckily working for an engineering company has some perks and i was able to get the pistons all popped out using a hyrdaulic ram with a fitting hooked up to the back of each caliper. this made it a fairly easy task compared with normal approach.
once the pistons where out, i cleaned and degreased each caliper and then began building up light coats of acid etch primer. i think each caliper had 6 coats before paint.


both calipers where done exactly the same so no real point showing both at this point.
once fully cured and dry i set about rubbing down lightly and spraying with the silver paint. I only wanted them to be OEM so a satin finish was more than fine for me so i wasnt going to be putting laquer on them. I put at least four coats of silver on each caliper,


now while all this was drying etc i was doing a few other things such as getting the paint for the lettering and painting some other small parts for them as well as gathering the seals etc and pads together. I also painted the centre of each disc as they looked pretty rough sitting all rusty looking! not a good look!
disc center painted

paint for the lettering colour matched and ready to go

brake brace, ferrodo ds2500's and genuine prodrive alcon refurb kit!

caliper pad springs painted with a light coat of paint

the car came with the mighty Prodrive Alcons with 330mm discs and Prodrive Pads
awesome stopping power but the pedal and feel wasnt just as good as it should be due to some sticky pistons in the caliper and very worn brake pads.
I contacted alcon and bought a new seal kit (insanely expensive!) some ferrodo ds2500's and a master cylinder brace all to be fitted once the calipers had been sprayed and rebuilt.
Ill let the pictures do the talking but hopefully its pretty much self explanitory
any questions just ask. I hope this thread might help others see how its done.
all in all id say it took a good 30 hours from start to finish at least between the stripping, priming, painting and rebuilding and then refitting to the car.
I know i could have done things in a different order but hey, thats hindsight for you and they turned out great anyway so its all good!
originally on the car
you can see the state of them off the car and i was very keen to retain all the orginal stickers so i had to mask these off during spraying and hope they stayed put (which they did!)
luckily working for an engineering company has some perks and i was able to get the pistons all popped out using a hyrdaulic ram with a fitting hooked up to the back of each caliper. this made it a fairly easy task compared with normal approach.
once the pistons where out, i cleaned and degreased each caliper and then began building up light coats of acid etch primer. i think each caliper had 6 coats before paint.
both calipers where done exactly the same so no real point showing both at this point.
once fully cured and dry i set about rubbing down lightly and spraying with the silver paint. I only wanted them to be OEM so a satin finish was more than fine for me so i wasnt going to be putting laquer on them. I put at least four coats of silver on each caliper,
now while all this was drying etc i was doing a few other things such as getting the paint for the lettering and painting some other small parts for them as well as gathering the seals etc and pads together. I also painted the centre of each disc as they looked pretty rough sitting all rusty looking! not a good look!
disc center painted
paint for the lettering colour matched and ready to go
brake brace, ferrodo ds2500's and genuine prodrive alcon refurb kit!
caliper pad springs painted with a light coat of paint
so once the calipers where dry i started pulling the old seals out and refitting with the new items. A fiddly task but enjoyable to know youre getting peace of mind with the new items.
the pictures tell the story but basically, each part was VERY thoroughly cleaned and degreased before the new seals where installed, as where the pistons.
pulling old seals out, they where fairly stubborn!
seals removed and you can see the dirt and grit left behind in the caliper, not what we want at all for the new seals etc!
after a really good clean theyre ready for the seals
the old seals beside the new ones before fitting. hard to see but the old ones where badly degraded
new ones fitted! nice and clean! its important to note that the seals have all been given a thin coating in the special grease you get with caliper refurb kits so they havent just been put in dry! this would be pointless and only help them to break down quicker so the grease provides protection to keep the seals in good shape for longer etc
both calipers all done and ready for the next step
the pistons where also very well cleaned and checked for any corrosion and deposits on the side walls that would foul the seal and affect the quality of seal. once happy i offered them up to the caliper, again getting a thin film of the special grease that comes with the kit (and yes i know theyre on the wrong sides )
moment of truth to see if it has all paid off!
push them home by hand, lovely jubbly
all fitted and ready to now do the "Prodrive" lettering. incredibly fiddly and lots of swearing along the way!
ready to paint, before:
during:
finished! phew!
very small hand wobble on the first "e" on the left one but it was sorted before they went on the car!doh!
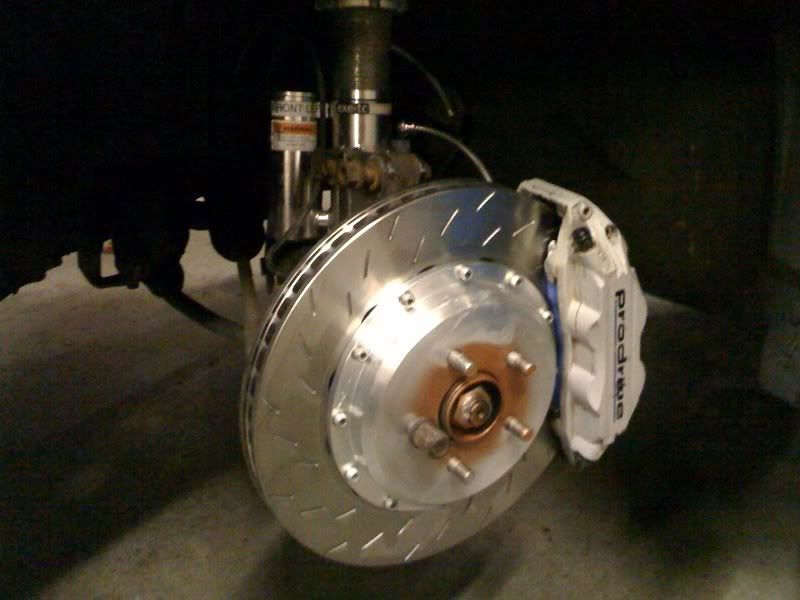
here you can see them in all their glory refitted and ready to go and even with the original stickers so my masking off worked a treat and they came away as good as new and totally unscathed from the whole process. i was a happy man at this stage!
also fitted (as should always be the case) some nice new copper washers as the last ones where totally wrecked
brake brace fitted and the system bled and we're good to go! finally!
and thats pretty much it, i think!
there has been some other small details, such as the ferrodo pads didnt actually fit by about .5mm (all four where the same but this was due to the calipers, not the pads) so i had to take a very small amount of the edge of each pad backing plate to allow them to fit and slide freely.
hopefully this is of help to the forum and other users who might be unsure of how to tackle a job like this.
if youre unsure on brakes or not handy with a spanner then avoid it because it is fiddly and not to be taken on if youre useless with a spanner.
or if you arent able or confident in bleeding the brake system when you're finished.
any questions and ill do my best to answer
Pete.


Quote:
PeteS
They are �110 an axle set !Originally Posted by PeterStone
How much was the seal-kit out of interest?PeteS
Cheers Ian

Scooby Regular
hello there,
Any possibility of showing the rest of the pictures Pete?
Thanks
Any possibility of showing the rest of the pictures Pete?
Thanks
Scooby Regular
That's ok.
Many Thanks for your help
Great job on your calipers by the way
cheers
Many Thanks for your help
Great job on your calipers by the way
cheers
Scooby Regular
Will you come and do mine Pete, they are looking a bit sorry for themselves! 

Scooby Regular
They're Performance Friction ones, but AP rotors are interchangeable.
Meant to say great job on the calipers Pete
Meant to say great job on the calipers Pete
We also supply 2 piece discs for this set up
With our own discs and bells for �395 a pair
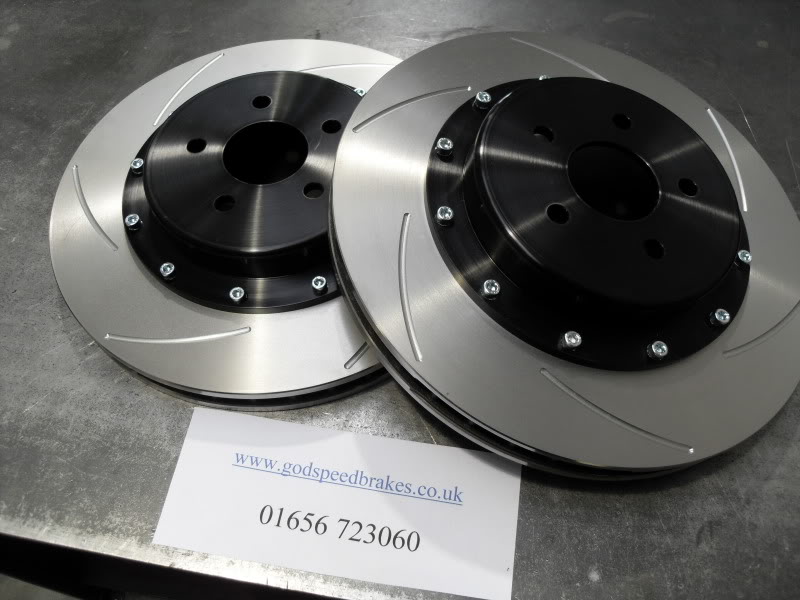
Or AP discs with our bells for �650
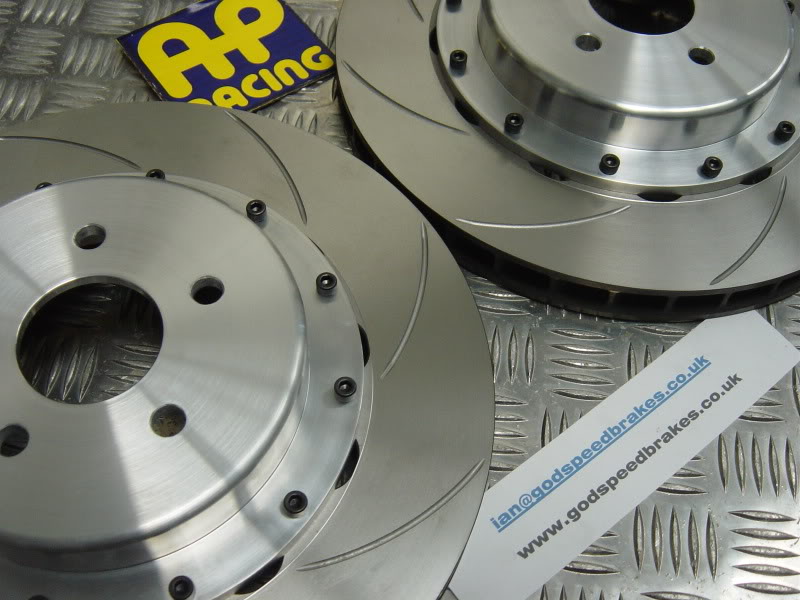
We could also do them with the PF discs for �650
Cheers Ian
With our own discs and bells for �395 a pair
Or AP discs with our bells for �650
We could also do them with the PF discs for �650
Cheers Ian
Scooby Regular
Quote:
two piece conversion would finish it off
hi mate where did you get the bells from for the alcons?? are they p/f ?? cheersOriginally Posted by Fat Boy
two piece conversion would finish it off
