When you click on links to various merchants on this site and make a purchase, this can result in this site earning a commission. Affiliate programs and affiliations include, but are not limited to, the eBay Partner Network.
So the task of removing the rust from around the 20yr old impreza has began. Will be posting updates as I go but was a basic start after work last night.
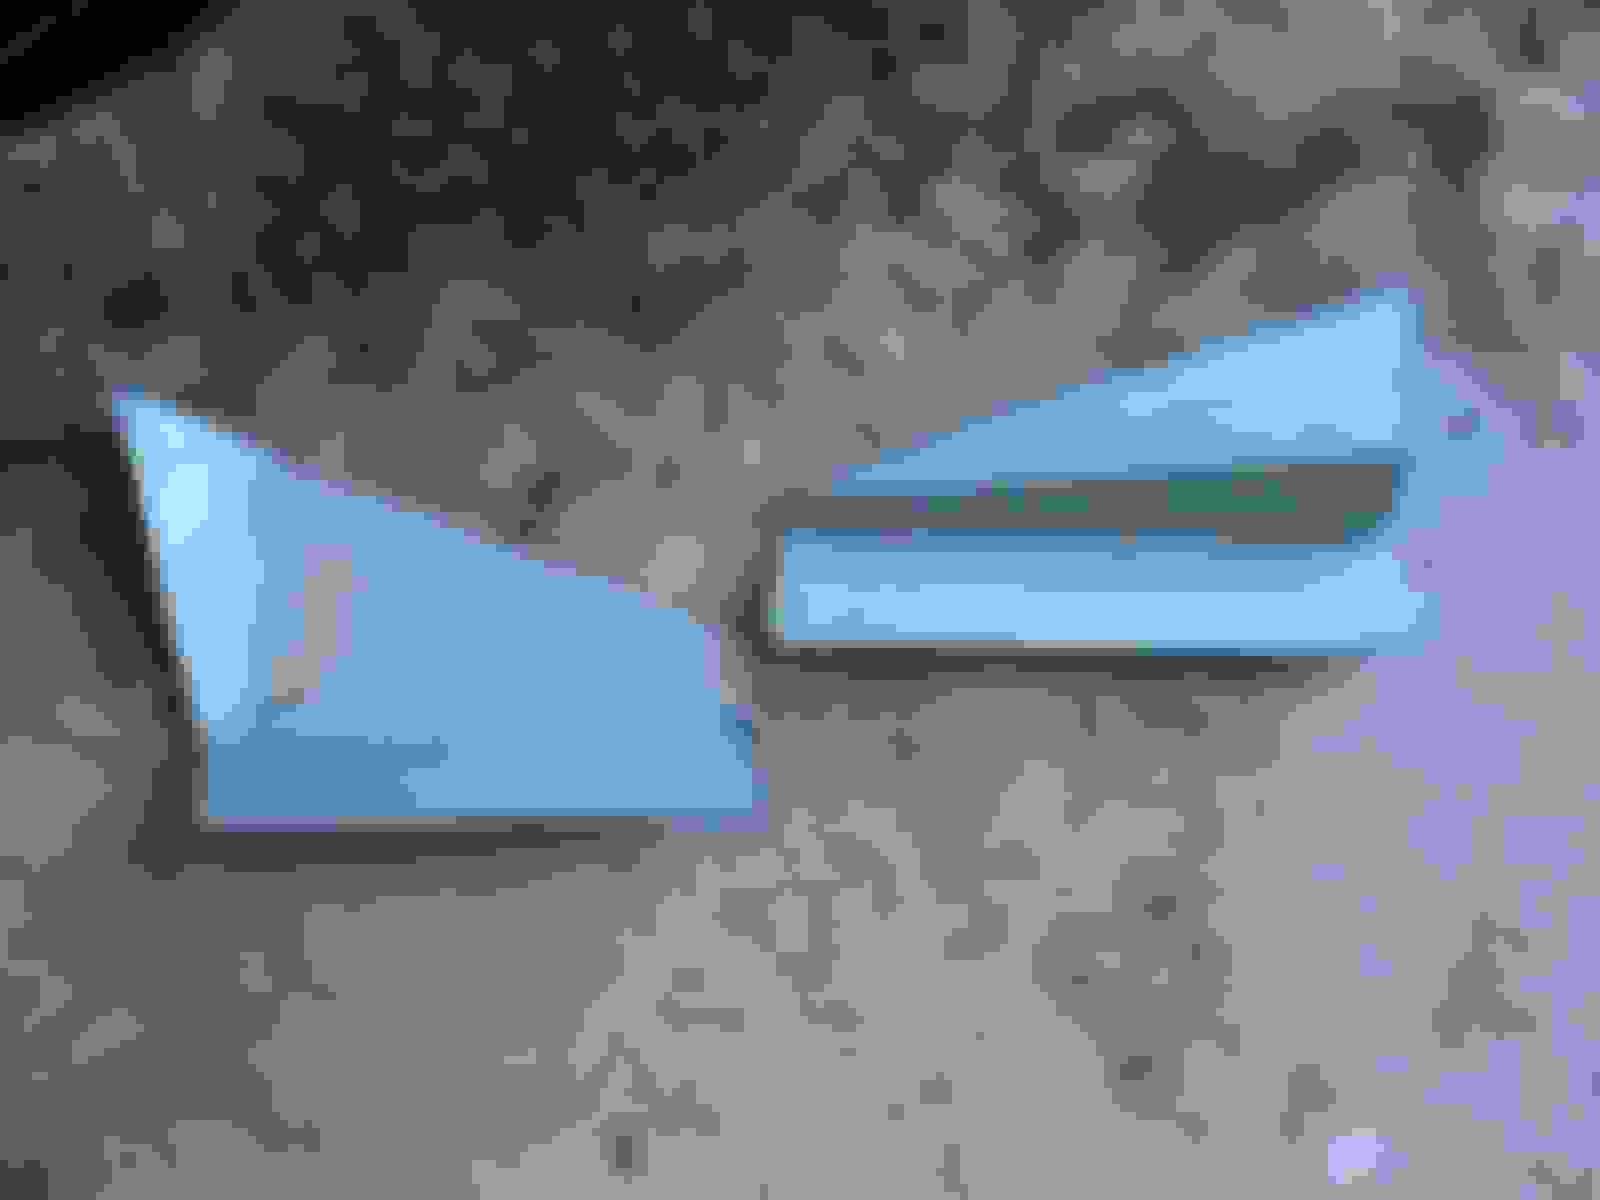
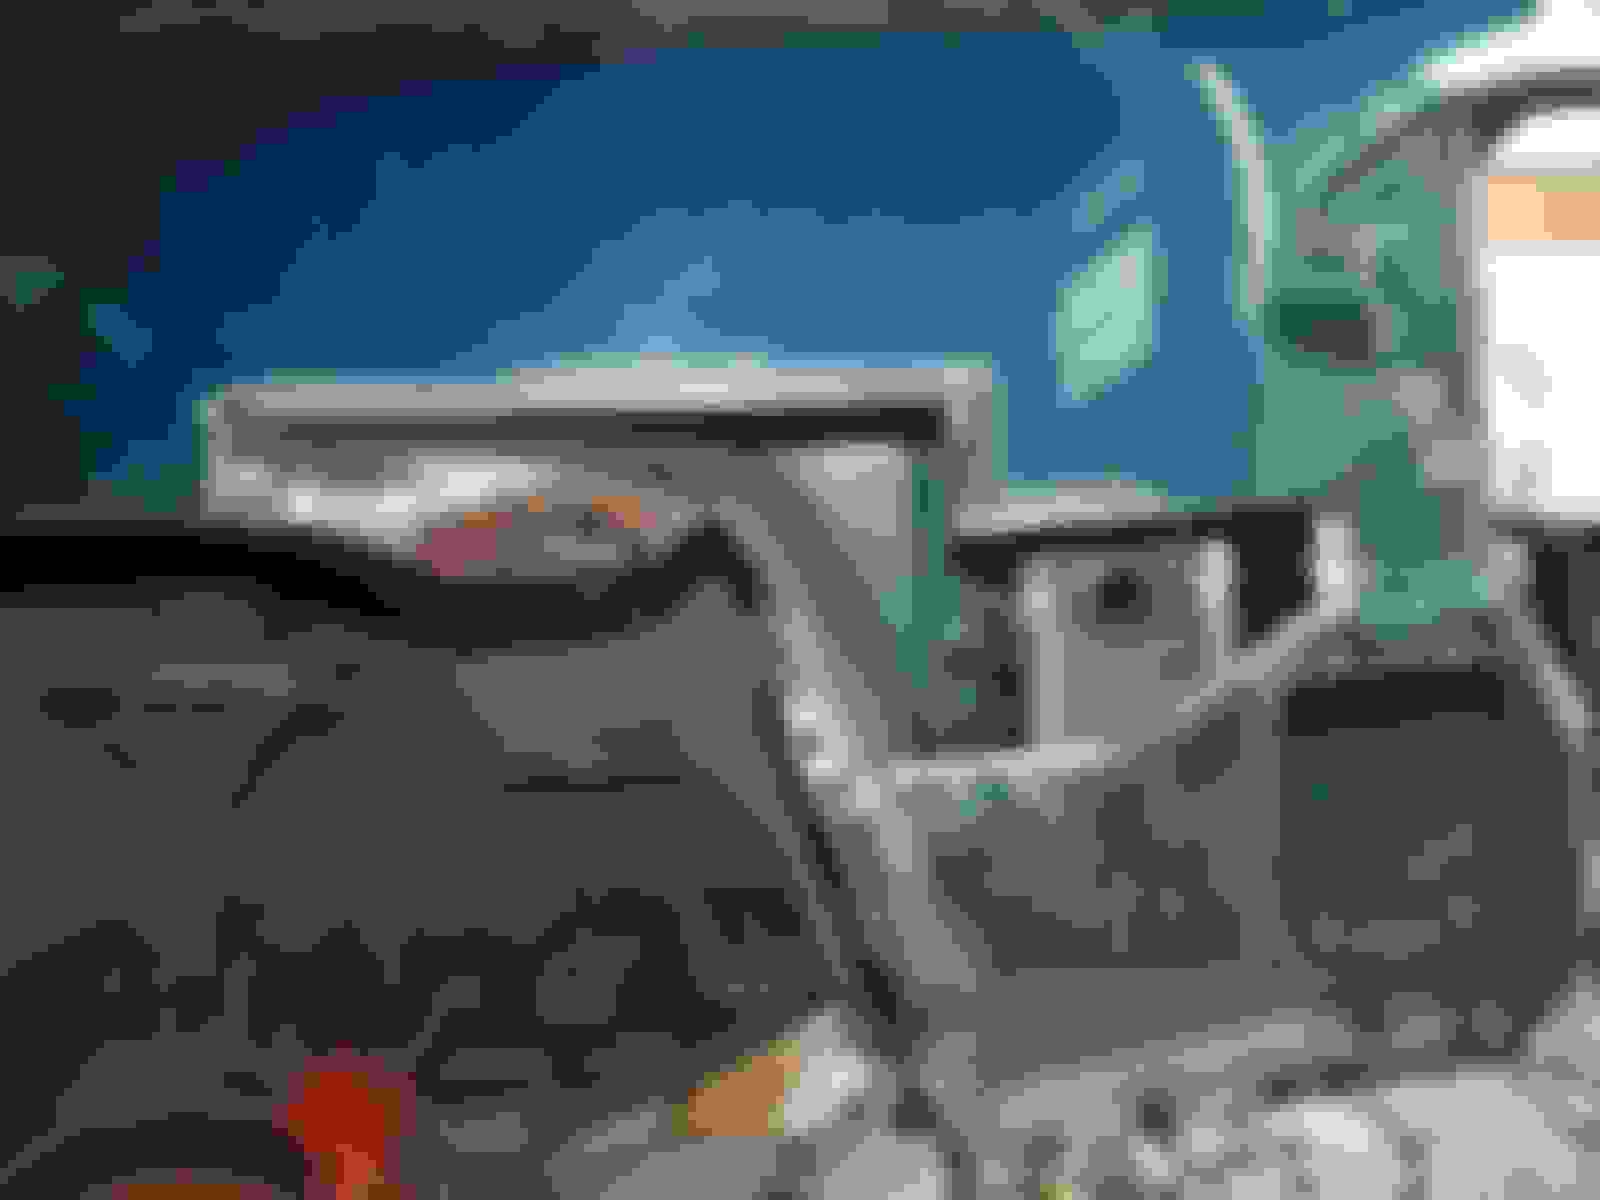
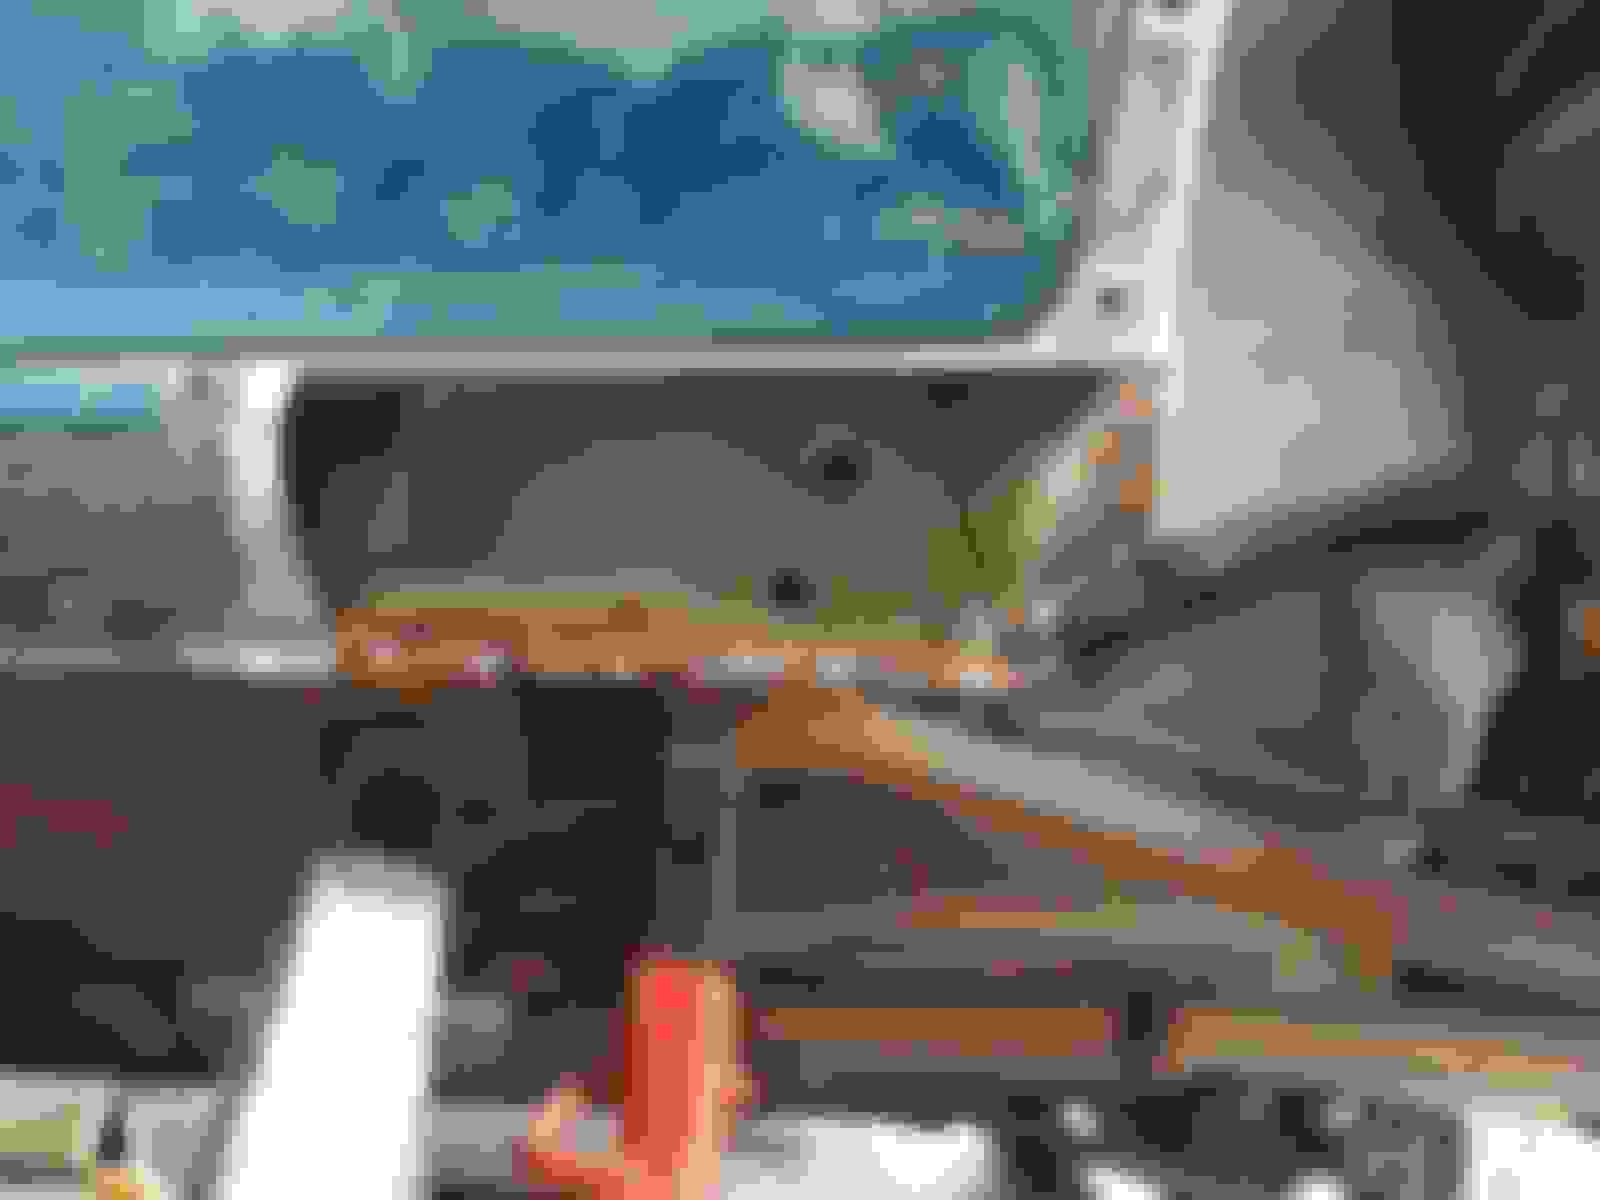
This is the O/S rear arch full of rust. There had been a very badly done patch up from the previous owner both in rear quater and a rivited patch in the sill.
The N/S rear arch is the same and after removing the bumper a little more is exposed.
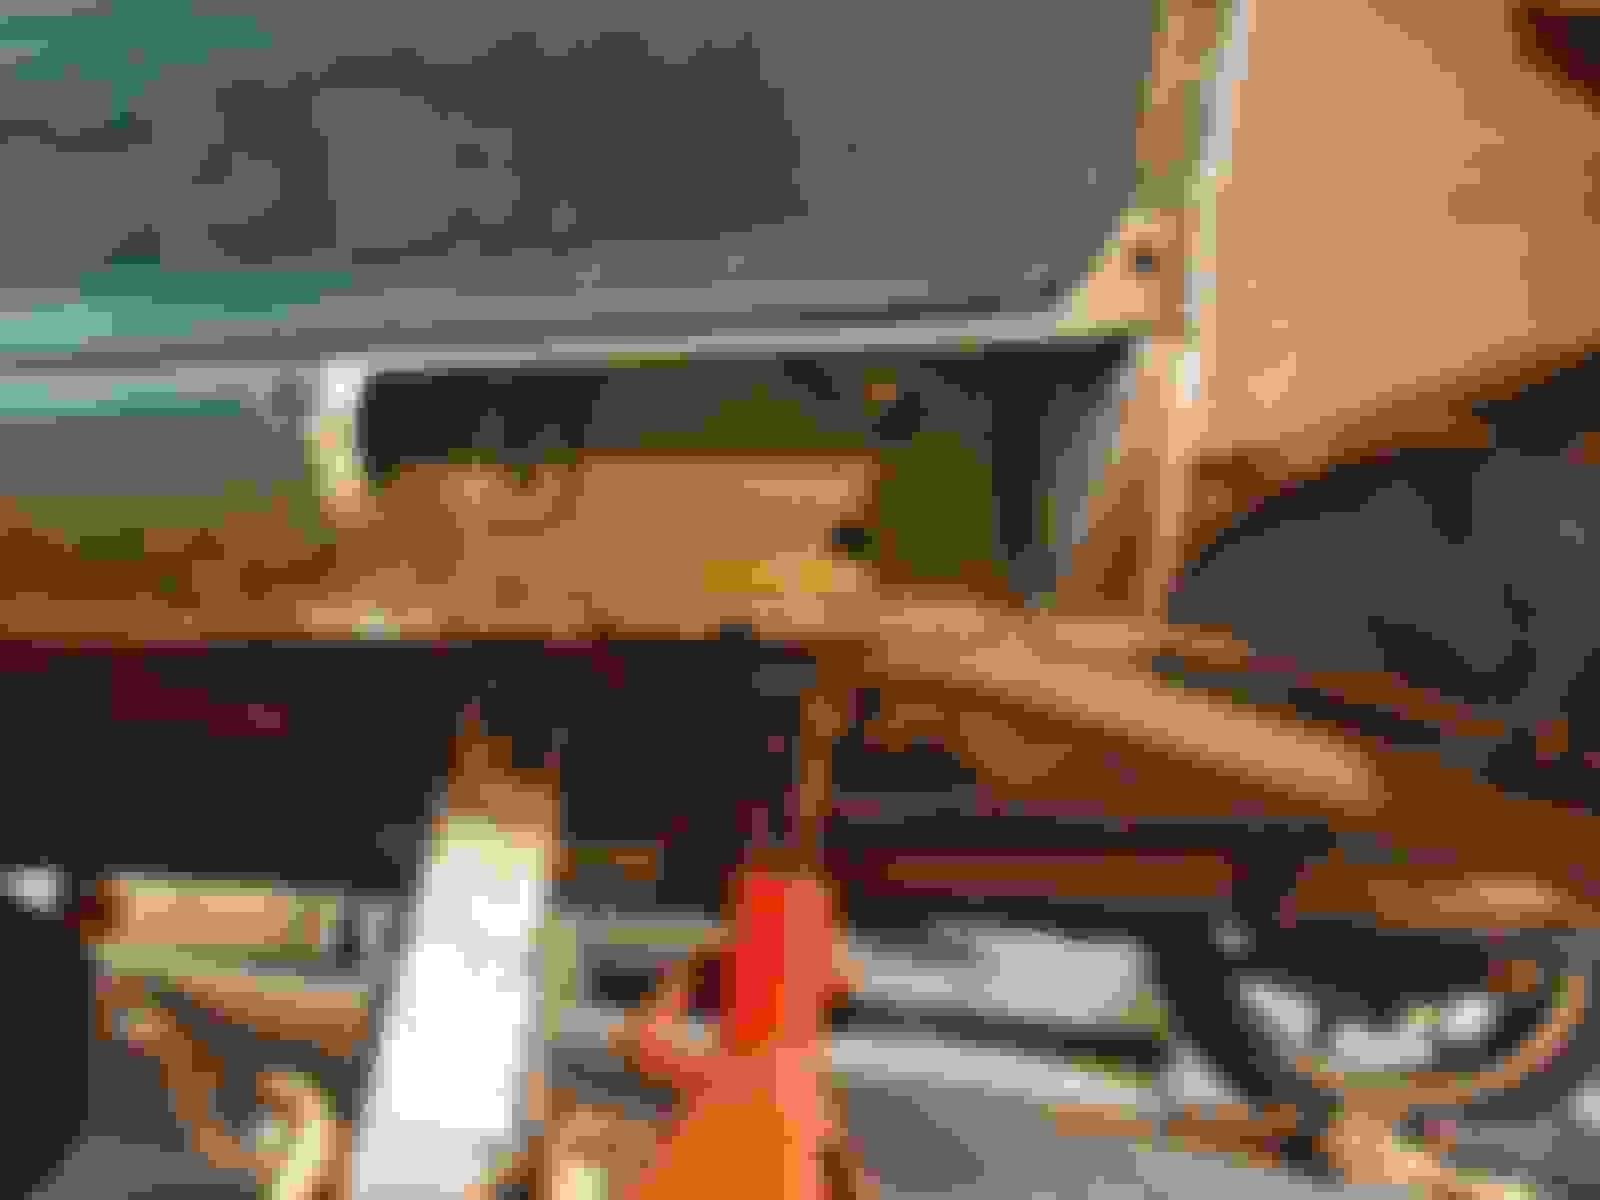
First lot of patches cut and shaped ready to cut out the old and weld these new in
First few patches in place and welded up. Not 100% sure my welding looks all too great but in my defence I've not done much and there was not much space. Might leave the awkward stuff for my brother.
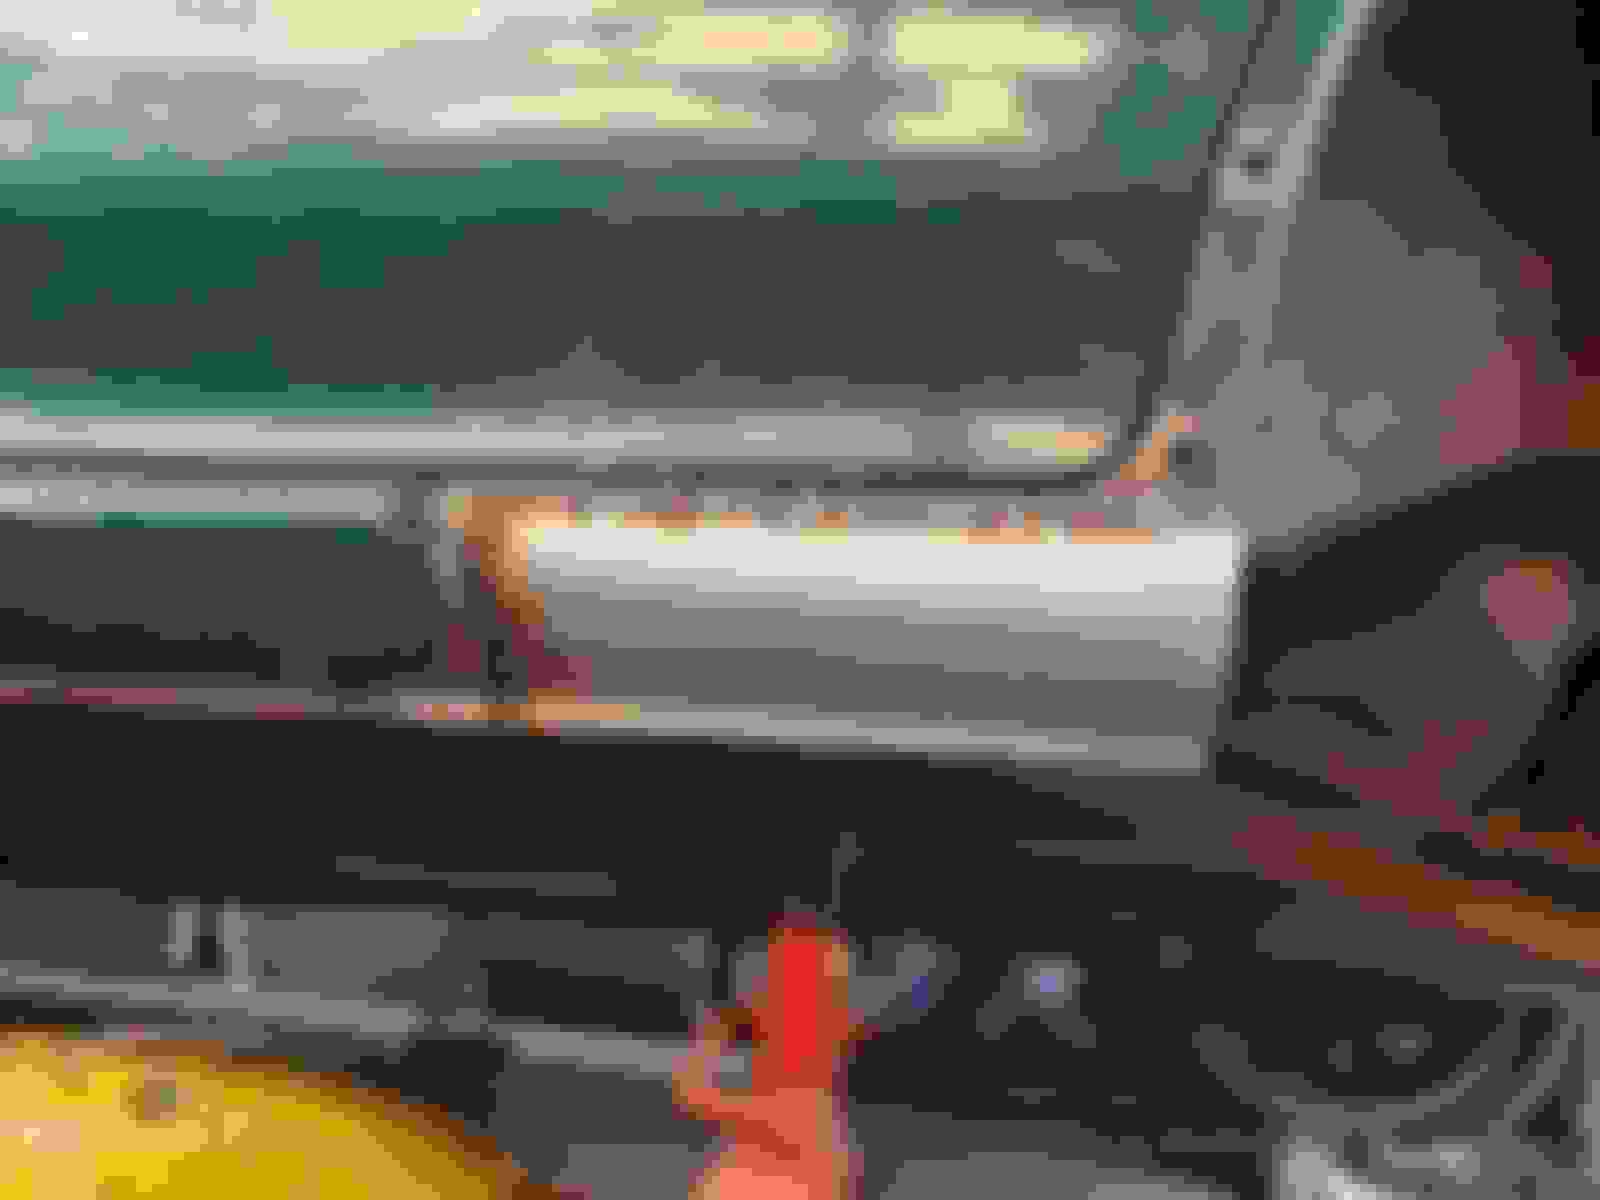
So my brother had finished off the lower rear N/S panel over Sunday with some really good results.
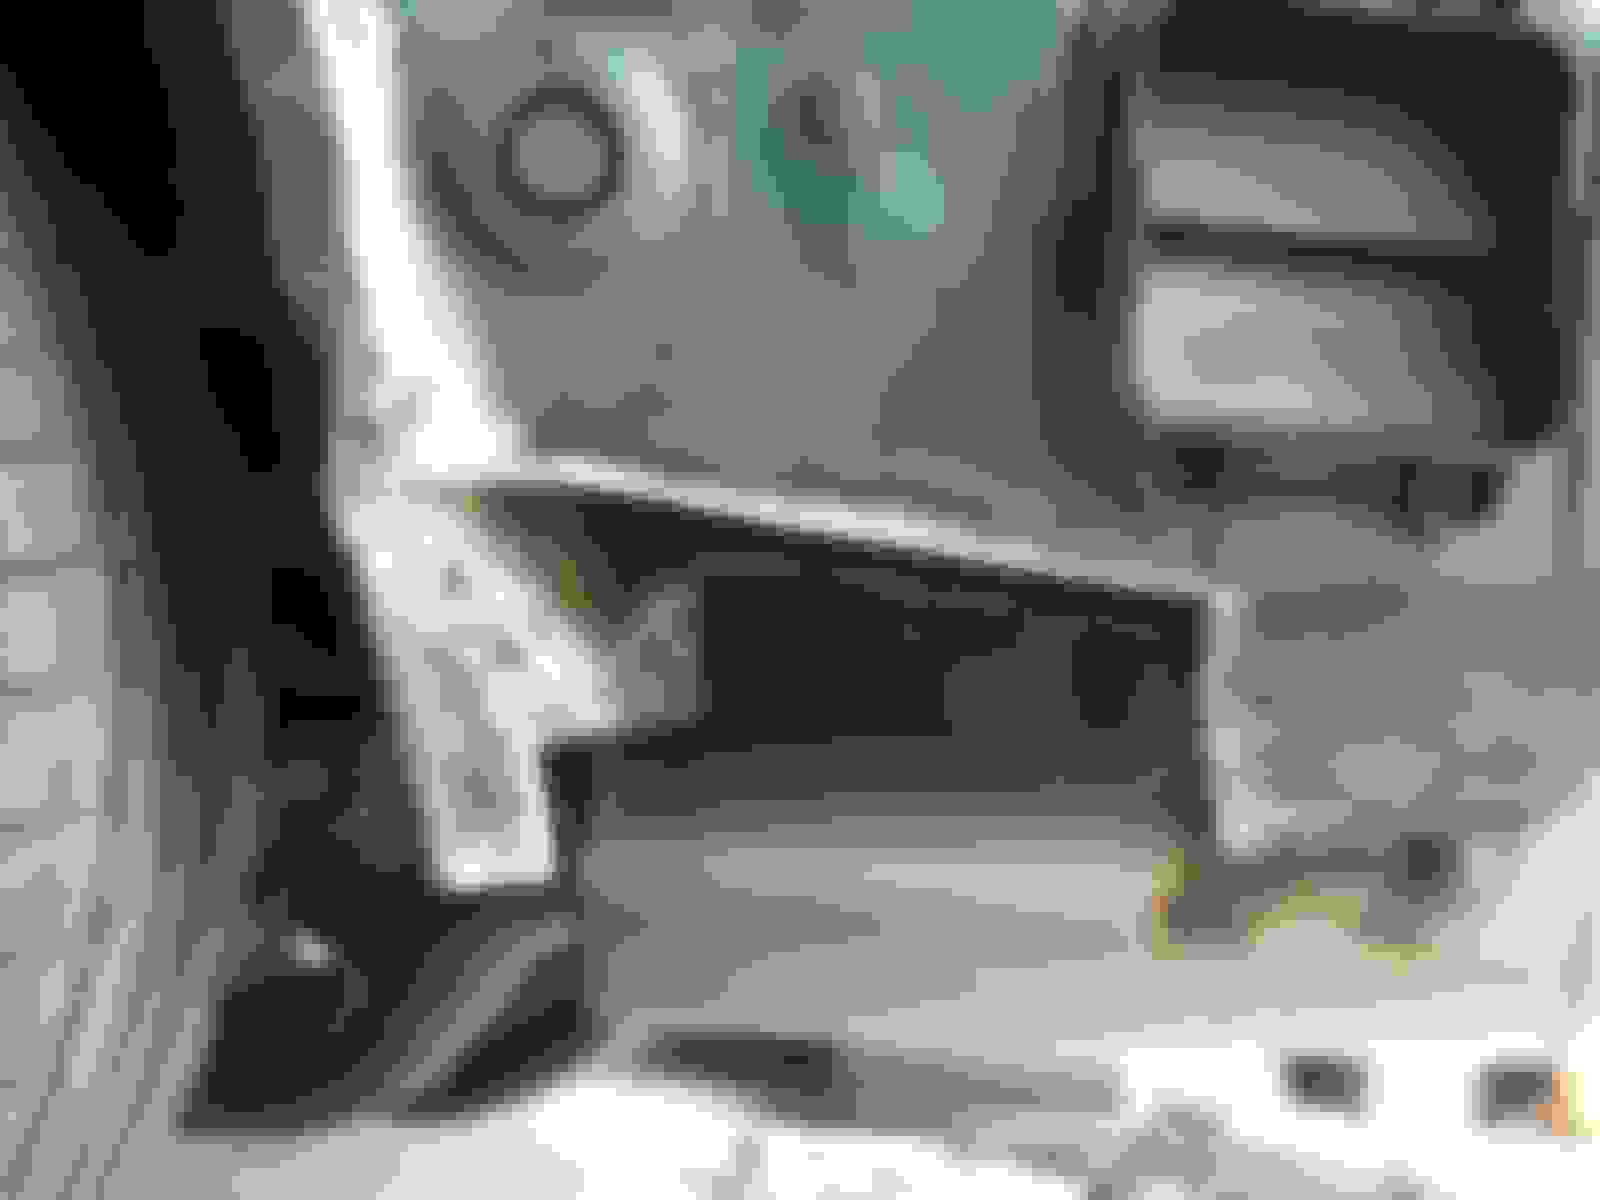
The other patch of rot being cut and a little more fettling to get the panel to correct shape after grinding back to find some decent metal.
Last edited by Evansawd; Aug 22, 2016 at 09:29 AM.
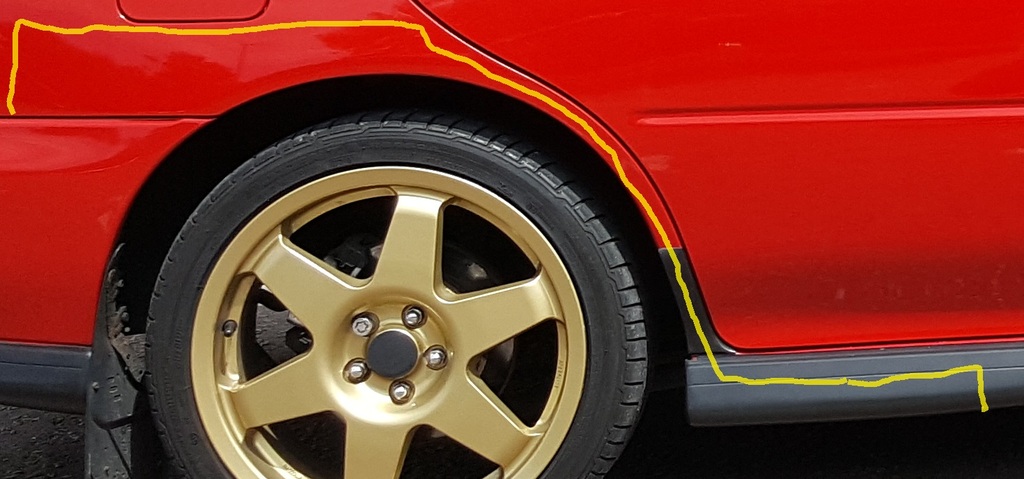
Wish I'd had mine photographed and documented by the body shop that did it. I've got it up for sale but I've been asked a few times for photos of the work being carried out. Mine was much the same, basically everything below the yellow lines was cut out and replaced including the inner wheel arch and jacking points.
Good luck, it's well worth doing and makes washing the car so much nicer when you don't have wash carefully round the bubbly bits.
Yeh mine will be very much the same by the looks. The n/'s seems to have been worse affected and the large hole might explain the wet boot.
Interesting to see whats involved, My dads Bugeye had the dreaded rusty arches, but he took it to Jake on here who works at PanelCare in Rochdale and he sorted it out, 2 years on and they still look as good as when it was done!!!
Interesting to see whats involved, My dads Bugeye had the dreaded rusty arches, but he took it to Jake on here who works at PanelCare in Rochdale and he sorted it out, 2 years on and they still look as good as when it was done!!!
To be fair were probably going well over board. Repairing any rusted area not just the arches. Probably overkill as the car is 20yr old and sure the rest of it will give out before the rust kills it. The arches were the main reason to start but after removing bumbles and trims you just find more and more so it's a case of where do you stop.
Yeh mine will be very much the same by the looks. The n/'s seems to have been worse affected and the large hole might explain the wet boot.
Updated today
When I bought mine it was the o/s that looked worse with just a small bubble on the n/s, 2 years later the o/s hadn't progressed and the n/s had spread.
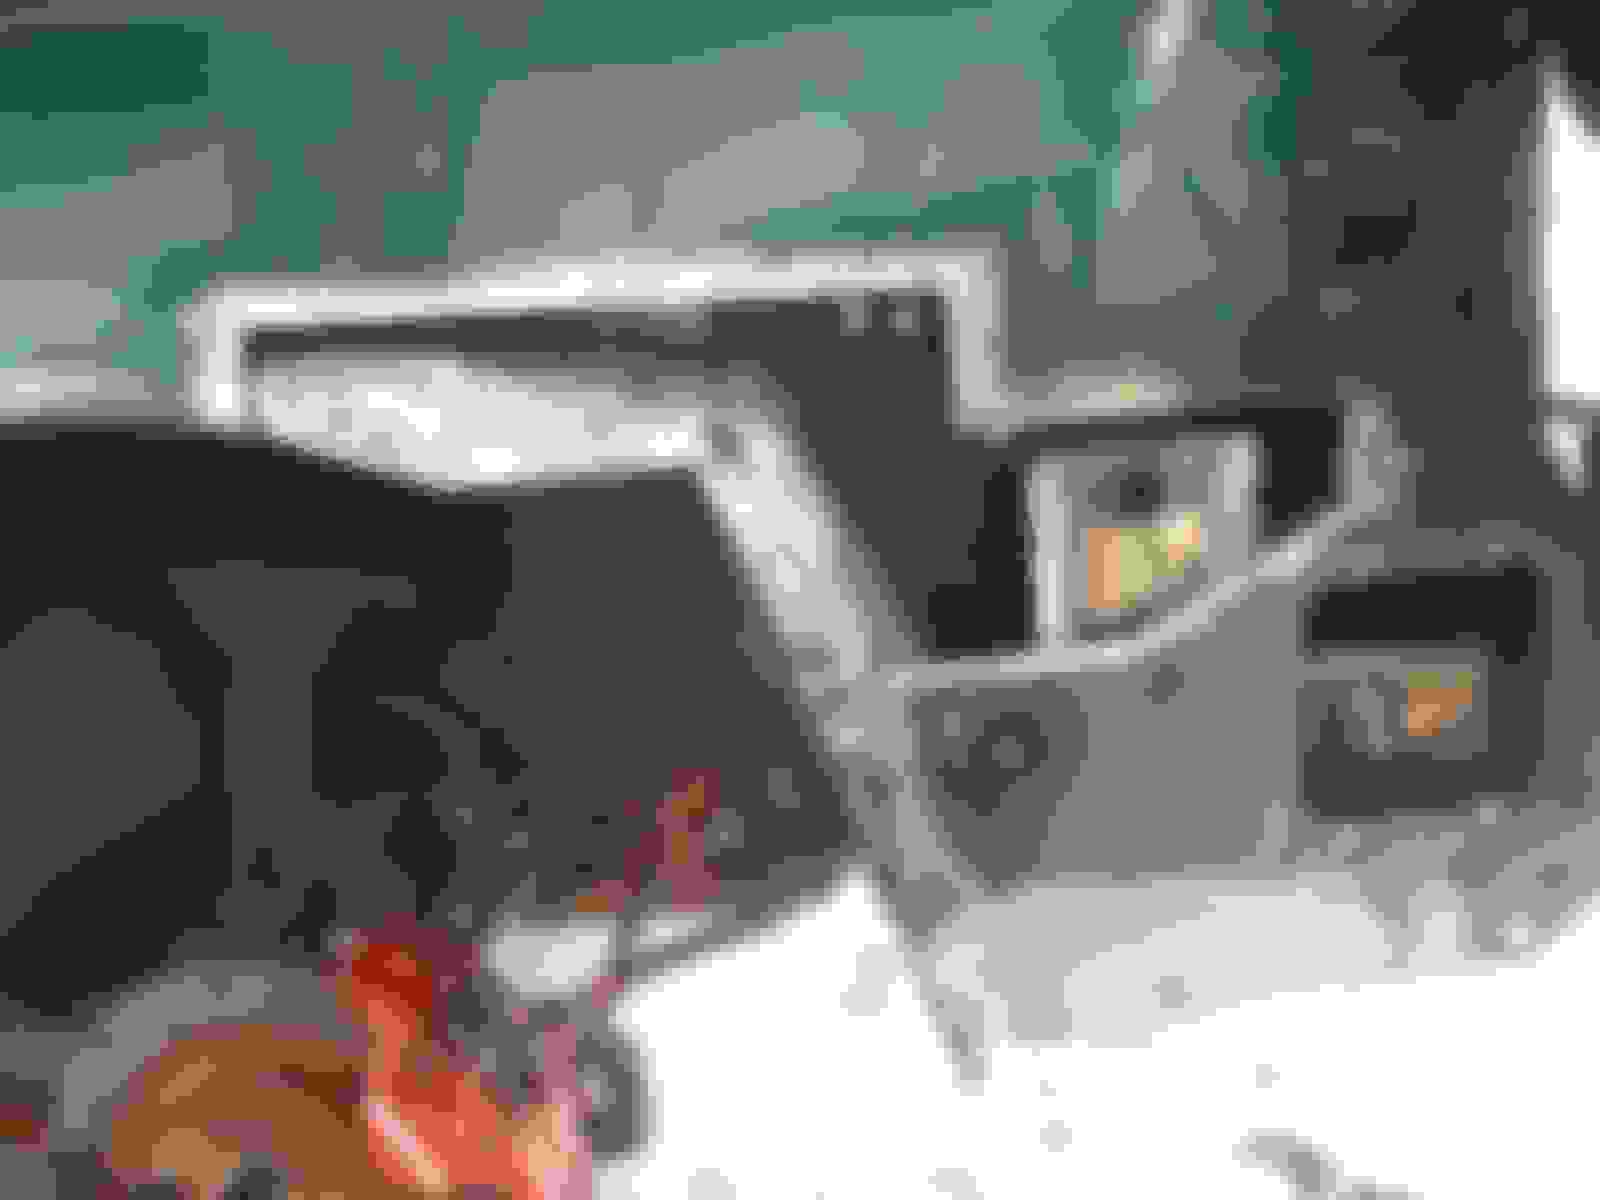
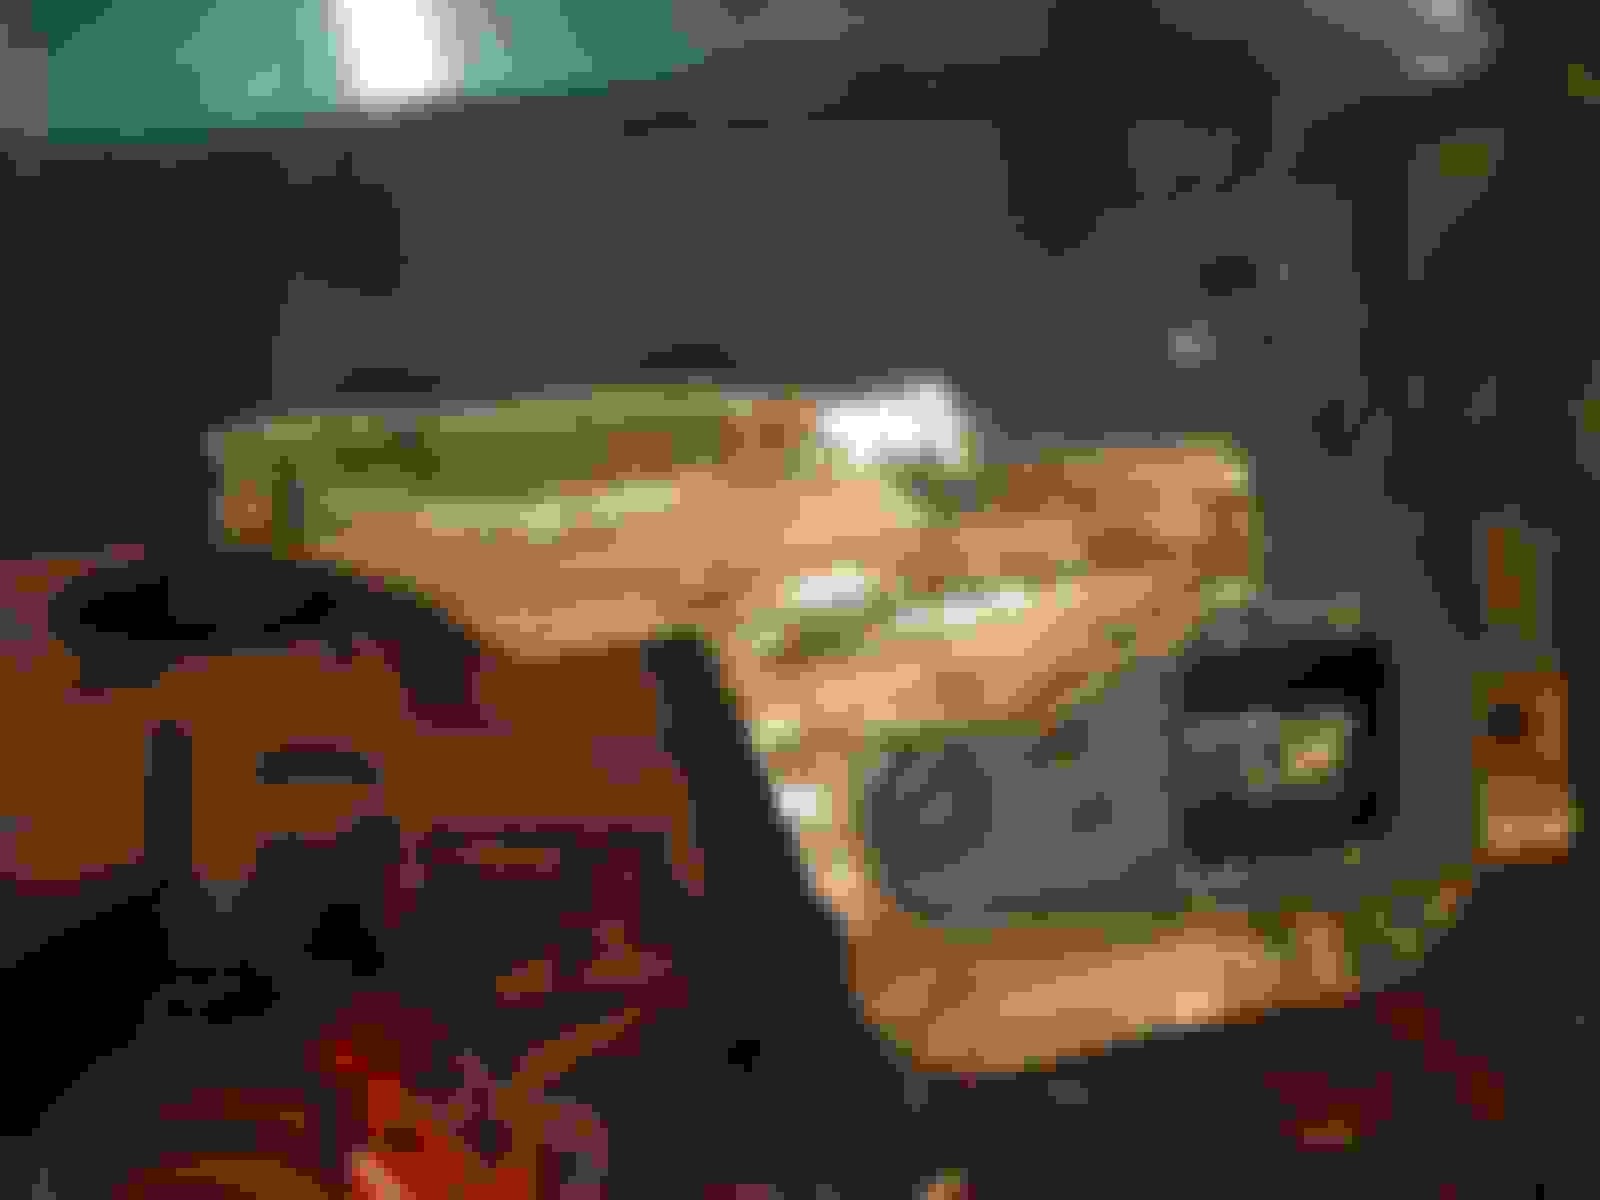
Little update of today's are work progress and some very fine fettling involved to sort this inner arch panel. The pictures don't do justice to how complex a shape that inner skin is but after many hours it was in.
Looking good. I remember you posted on my previous thread regarding the eBay arches and inspired me to finally take the plunge and get involved.....with the grinfer and welder ha ha. Cheers
That looks like pain stakingly slow and involved work, well done mate, you have some metal work skills there!
How do you protect the bare metal inside the wings etc after welding? I would be trying to get as much paint inside as possible before closing the sections up, or can these be access from inside the boot?
It certainly is a long pain staking process and probably slightly overkill but should see the body work right for another 20years lol.
I have to admit my brother is the one that has been doing the complicated metalwork, he has practiced by doing all the bodywork repair on the family fourtrak and so somewhat perfected the proces's, I am still learnin and developing old skills.
You can access 99% through either the boot area or through the vents that are removed in the later photos. Will be spraying (or brushing depending) all bare metal with epoxy primer. Followed by some seam sealer over all joints and another coat of epoxy, effectively sandwiching the sealer between 2 layers of very good primer. This will then be over sealed with cavity wax or something to that effect (inner areas only obviously). My brother tells me he has researched a huge amount and this would be the preferred and adopted method on high end restoration projects.
very interested in this. will be needing to replace both rear arches (have just replaced the front wings with rust free ones) and it looks a lot harder than simply replacing the part, as the part is the whole frame of the car! If you were closer to me i'd be asking you to do it for me!
Been a bit quiet last week or so, with work and weddings I've not had much time to do play.
So been waiting for a decent day to prime the areas that have been exposed but alas it's been raining and drizzling so no go.
I noticed a little rusting in the spare wheel well as it had seen water sat in where it has been getting into the boot. After scratching away the rust I found it was completely gone.....so more cutting. Luckily I had the old donor scooby so after some jigery pokery the wheel well is rust free.
Cracking work and great photos. Useful to see the cutaway panels & sills. Getting my RB5 rusty rear turrets repaired this week, hopefully be able to add some pics later.
Noticed my spare wheel well was full of water a year ago, turned out water from the drainage channel running around the boot opening was getting behind the rear light cluster that I'd recently refitted. Cork gasket soon cured it.
Brilliant work. . I'm doing the same to my sti and p1 over the winter. Especially the rear sill section.
Did you just drill the welds at the bottom lip of the sill then cut along the top? And it came away?
I have ordered new sills fully but can't see me needing them as it's just the rear patches needing done
Keep up the good work
Sorry for the late reply. Been nursing some silly injuries and had a few days off with the Mrs.
To answer Yeh drilled the spot welds out and cut the sill at the top (and sides) and it just peels out.
The sill shape was fabricated over a steel pipe and just fettled till it fit right so didn't bother with buying sill panels.
One great bit of kit (if you want to call it that) has been dinitrol rust converter. Any areas that have shown a little surface rust but would take over the odds in time and effort were scrubbed back and coated and we'll the results speak for themselves. Will upload some more work in progress pics as soon as but for now......
This kids is why you treat power tools with respect and not wear loose clothing while using a gringer. All glued up nicely tho.
Had a small piece of rust slap me square in the cheek (I was wearing goggles) and my reaction while letting go of the trigger was to flinch. The wire grinding wheel decided to then entangle on a piece of wire twisting itself up, slicing my wrist and then reacting to that pain caused me to drop it into my t-shirt and try a cheap liposuction job. Looking back with luckily only some bodywork issues on myself it would have been very comical in slow motion.
OK so I've been fairly quiet on the thread for a while. Between work and healing from my grinding incident it's been slow progress lately. That couples with the fact that this side has rotten in almost exactly the same areas. To save some space on snet pages and for fear of repeating the same ohoto's I decided to do a before and after photo of the offside.
On a slightly different note before parking the wrx up for welding I had been noticing a bad smell of fuel coming from the car, especially when the windows were wound down......the filler neck perhaps......
Alas after removing the ridiculous plastic crap collector with no drain holes that surrounded the metal filler neck (why fuji industry did you choose such a design!!) I believe I found the culprit.....
Take note of the hole in the inner arch through to the boot that again was caused by the amount of mud packed tightly between plastic filler cover and bodywork.
Hopefully by tomorrow I will have more to show you regarding off side progress
I probably cut more off my front and rear arches on my RA but that was for wheel clearance it was amazing as the car is a 1992 and there was not a spot of rust on the material removed.


 .
.