Project Scooby Wagon....

Thread Starter
Scooby Regular
Joined: Jan 2013
Posts: 98
Likes: 0
From: Dunstable
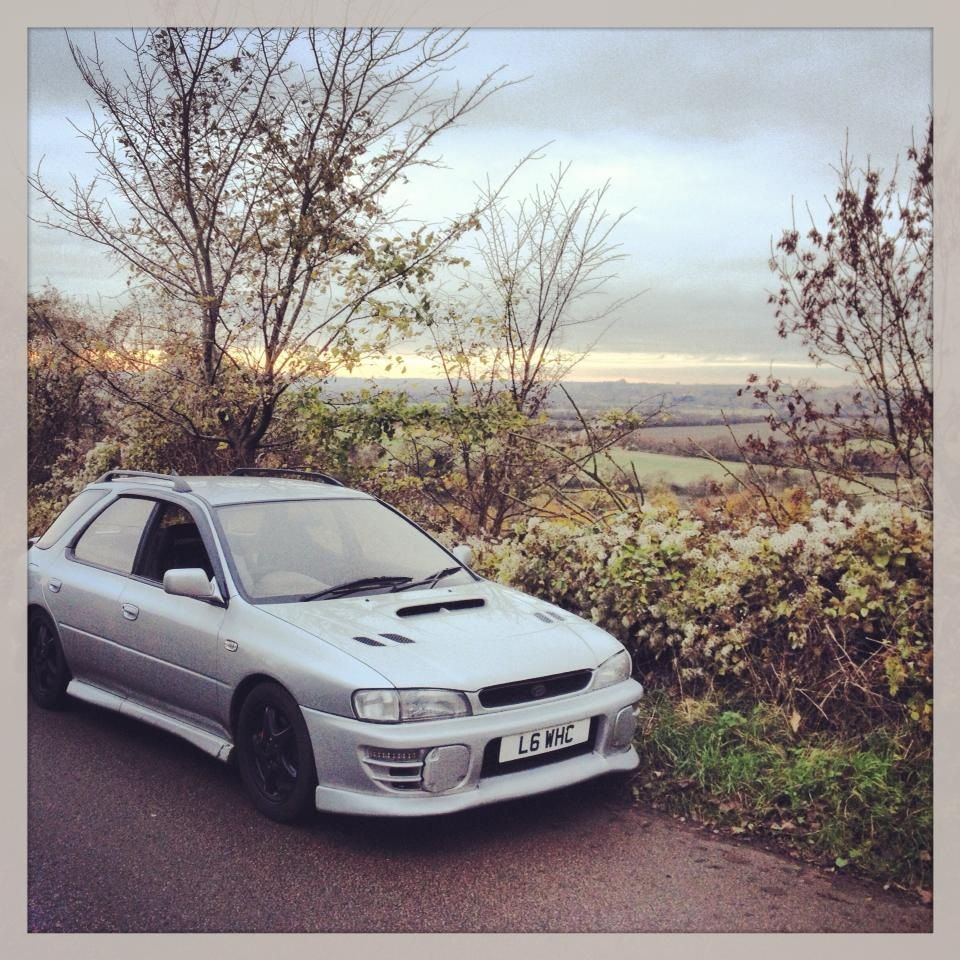
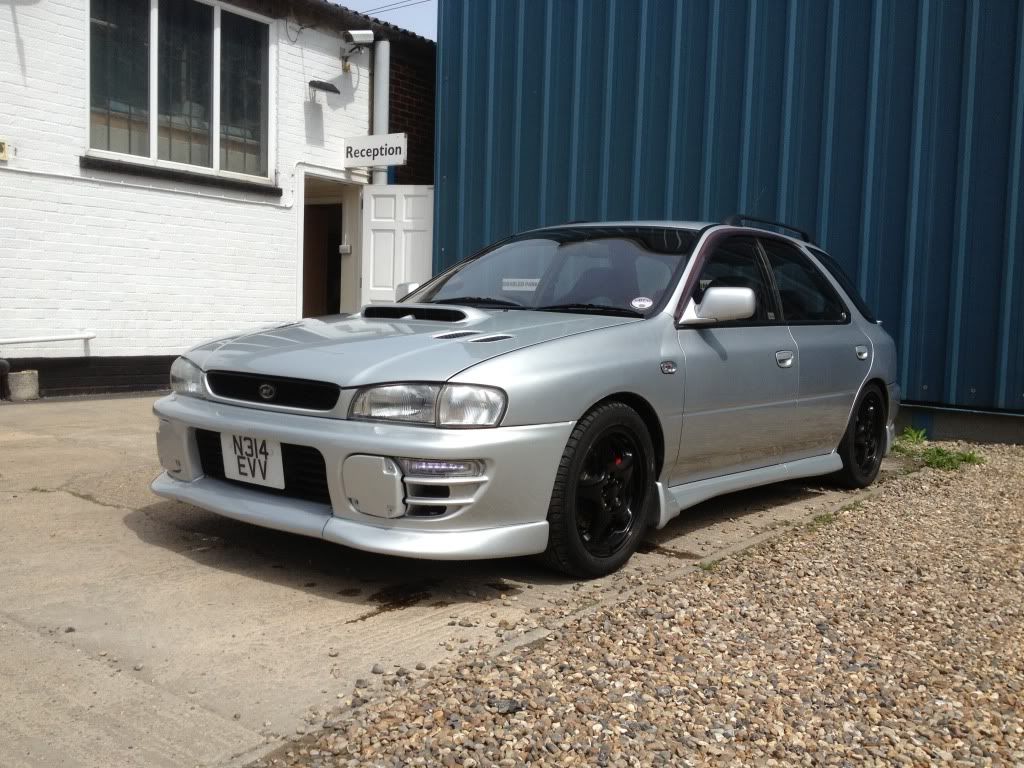
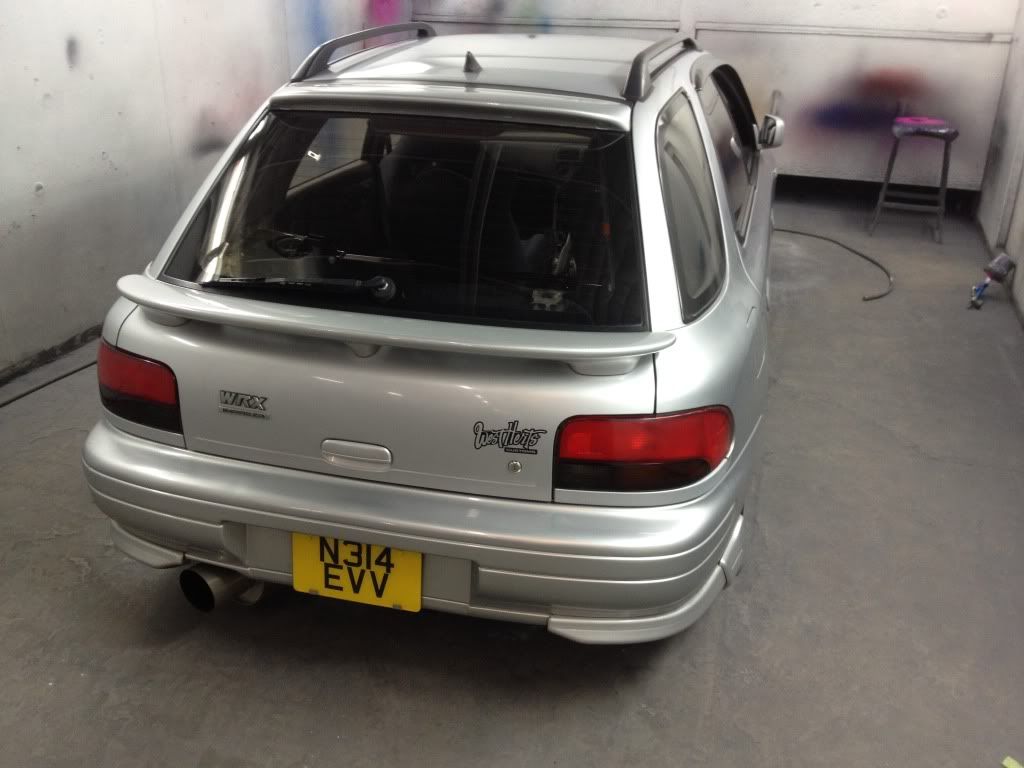
So here is my new toy, a completely standard(for now) 96 WRX Wagon with only 76k on the clock.
After spending too much time on building cars for everyone else, or demos for work, ive taken the step to actually build something for me. When finished, she'll be running around 300bhp, slammed with phat rims and a pukka paintjob thats so aggressive, you'll think it wants to fight anything when parked up....
Progress pics will be posted throughout the build....
Thread Starter
Scooby Regular
Joined: Jan 2013
Posts: 98
Likes: 0
From: Dunstable
Right, from the journey home it soon became apparent that there was no boostings going on. Upon a quick inspection the actuator was not working and therefore letting all the gasses pass straight through to the exhaust, which was blowing heavily from numerous places. Kinda expected a few things like this as the car had sat in a garage lock up for nearly 2 years...
Luckily the car came supplied with an aftermarket exhaust system and decat that the previous owner never got round to fitting. And as it was cheaper to get a used turbo than a new actuator, i decided to upgrade to a td05 right away.... The sound from the exhaust is awesome, much better than i thought it was going to be and the turbo works lovely, bit too good some times as the increased boost activates the fuel cut off system...

Luckily the car came supplied with an aftermarket exhaust system and decat that the previous owner never got round to fitting. And as it was cheaper to get a used turbo than a new actuator, i decided to upgrade to a td05 right away.... The sound from the exhaust is awesome, much better than i thought it was going to be and the turbo works lovely, bit too good some times as the increased boost activates the fuel cut off system...
Thread Starter
Scooby Regular
Joined: Jan 2013
Posts: 98
Likes: 0
From: Dunstable
As soon as the turbo was working, it suddenly became clear that the clutch wasnt up to the job as it kept slipping all the time....
So a new Exedy was fitted and now all is good again...

So a new Exedy was fitted and now all is good again...

Thread Starter
Scooby Regular
Joined: Jan 2013
Posts: 98
Likes: 0
From: Dunstable
Next on the list is some alteration within the ecu. As the car has now got a bigger exhaust and a fully opened decat, as well as a bigger turbo, the car overboosts very easily according to the standard factory settings. Time to save some pennies to have the ecu workings altered....
Thread Starter
Scooby Regular
Joined: Jan 2013
Posts: 98
Likes: 0
From: Dunstable
But that doesnt stop the car from getting some other smaller bits changed. First out was the steering wheel, I dont like the big skinny rimmed Nardi that was on the car so I got something a bit smaller and sportier...

Trending Topics


Thread Starter
Scooby Regular
Joined: Jan 2013
Posts: 98
Likes: 0
From: Dunstable
Then while still waiting to do the ecu, i got itchy feet and had to do something to the car, so the suspension has now been played with to set the ride height just where i want it....
Only thing is now i have to save again to get some coil overs to make it a permenant thing...


Only thing is now i have to save again to get some coil overs to make it a permenant thing...
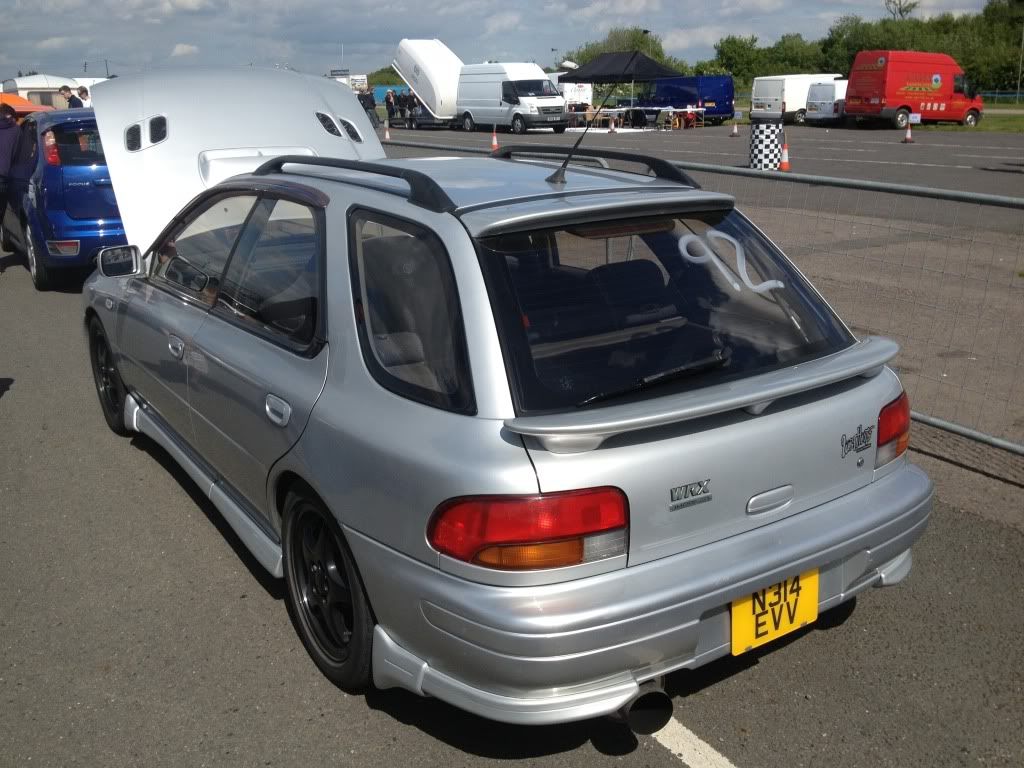
 the black wheels really contrast well with the silver.SJ.
Thread Starter
Scooby Regular
Joined: Jan 2013
Posts: 98
Likes: 0
From: Dunstable
Well progress has slowed a little bit of late, mainly due to an overboost creeping problem I'm having trouble sourcing, and more importantly, the news that the head gasket is starting to go. So with that in mind, I've cracked on with getting it all fixed so it can run properly and fix the boost issues....
While its having these fixed, it may get its facelift too...
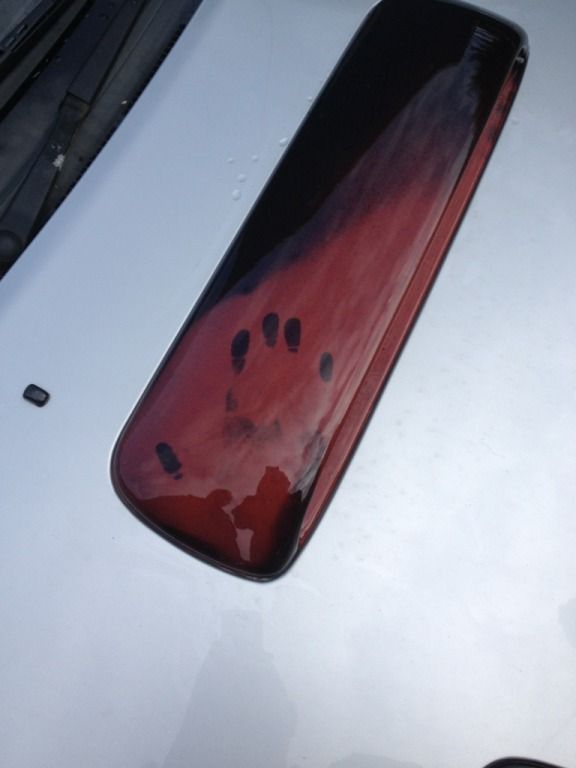
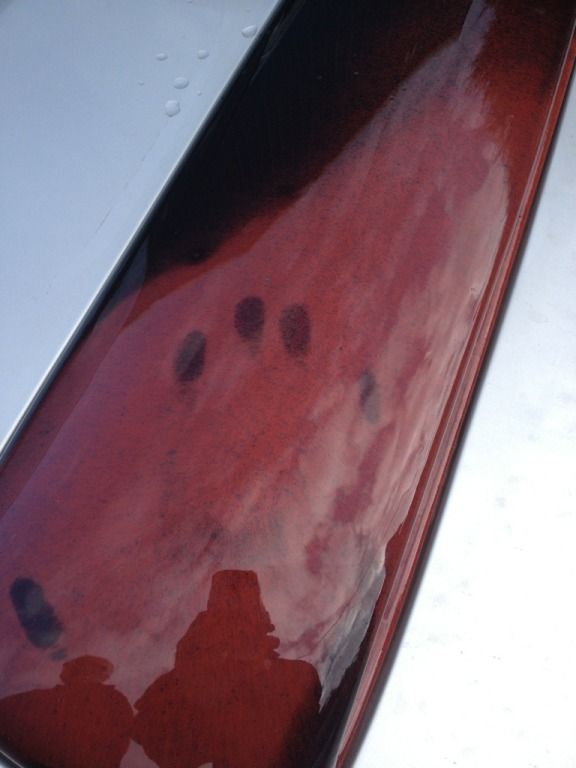
But a week or so ago I able the scoop a little coating in an experimental coating I've got. Thermochromic coating coloured black, changes to a clear coat when exposed to 30*C or higher and reveals any colour you may have underneath. The bonnet scoop is perfect for letting the heat out, as you can see. More pics when I have them...
While its having these fixed, it may get its facelift too...
But a week or so ago I able the scoop a little coating in an experimental coating I've got. Thermochromic coating coloured black, changes to a clear coat when exposed to 30*C or higher and reveals any colour you may have underneath. The bonnet scoop is perfect for letting the heat out, as you can see. More pics when I have them...


Thread Starter
Scooby Regular
Joined: Jan 2013
Posts: 98
Likes: 0
From: Dunstable
....so the story continues....
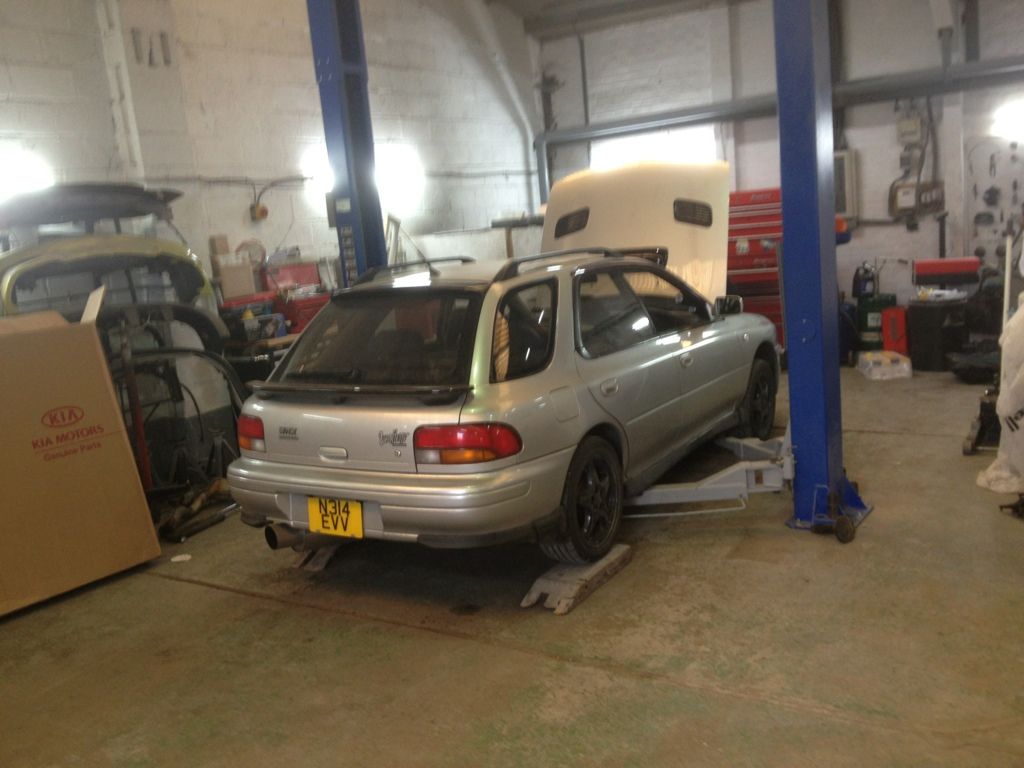
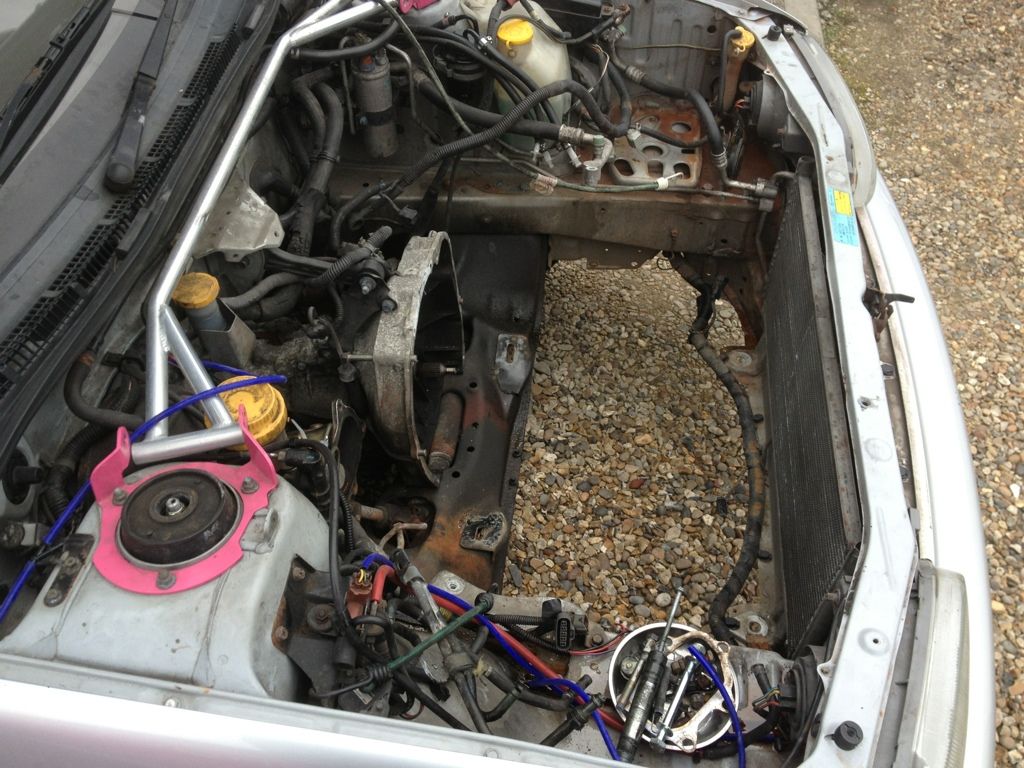
While the engine was out having the head gaskets done I decided to freshen up the cylinder heads. All the valves where removed, reground and reseated and new valve stem seals fitted. The turbo was ported on the exahust side to help with the over boost problem but the issue with over boosting was solved eventually by finding the adjustment on the actuator was incorrect, allowing more boost and cutting fuel. The engine was rebuilt with new gaskets, rcm uprated oil pump, new cambelt and tensioners, new water pump, new thermostat and new radiator....
Unfortunately after all this work a problem developed with the new thermostat. After only 60 miles of running the stat stuck shut and cooked the piston adjacent to it, the resulting damage requiring either another rebuild or a new engine....

Thread Starter
Scooby Regular
Joined: Jan 2013
Posts: 98
Likes: 0
From: Dunstable
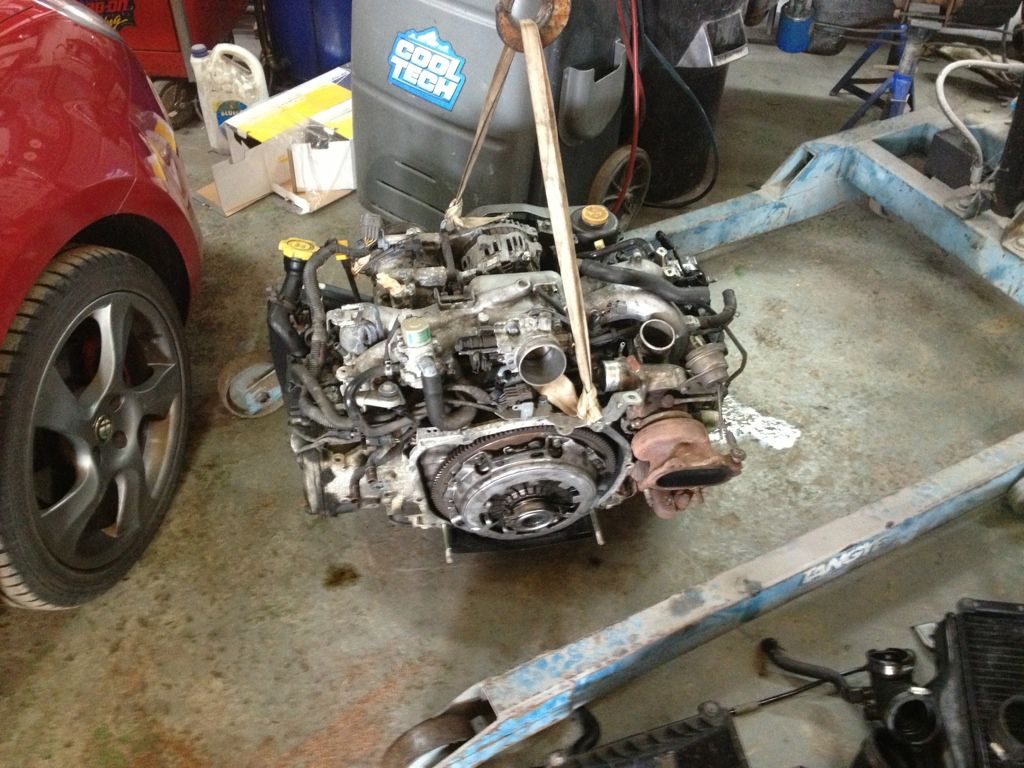
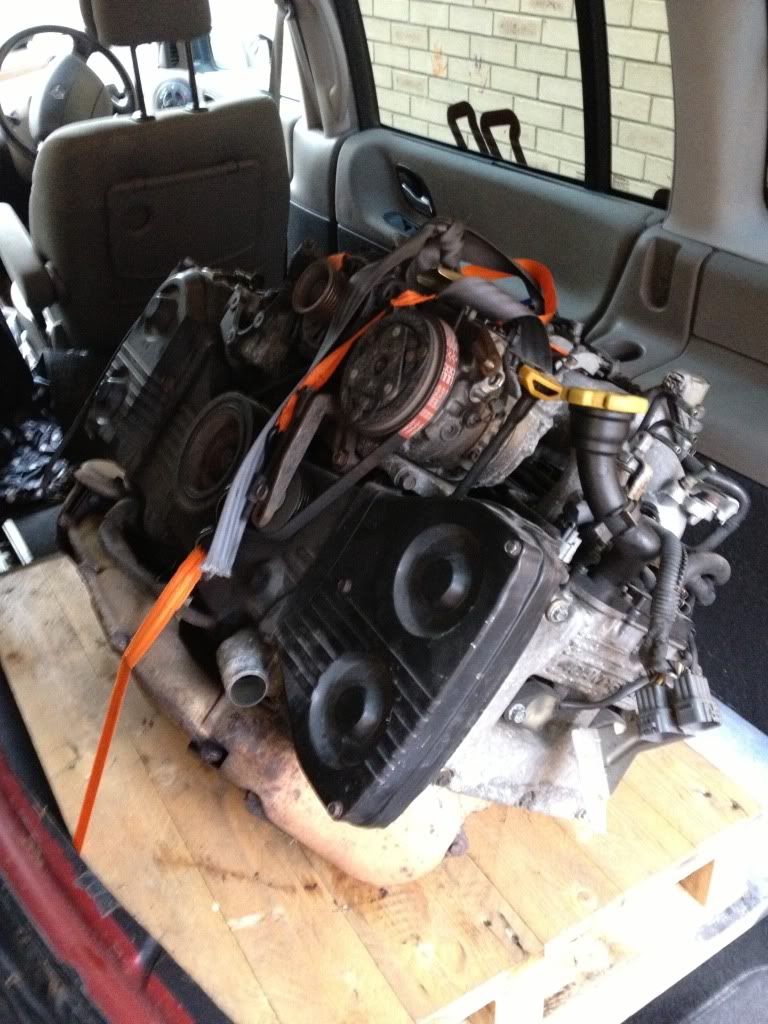
Decision was made that it was gonna be cheaper to drop another engine in rather than repair the current one. The metal particles in the oil had travelled too far and could cause problems later. So a nice 85k complete engine came up and it was soon purchased ready for part 2 of the engine build....

Thread Starter
Scooby Regular
Joined: Jan 2013
Posts: 98
Likes: 0
From: Dunstable
Aug/Sept 2013:
During the 3 months the car was off the road and while the engine was out, the car was rolled in the to spray booth to have some work done on the bay. This would be a major start into the theme of the car and is still continued today....

During the 3 months the car was off the road and while the engine was out, the car was rolled in the to spray booth to have some work done on the bay. This would be a major start into the theme of the car and is still continued today....

Last edited by nice-one-bruv; Sep 14, 2014 at 11:02 AM.

Thread Starter
Scooby Regular
Joined: Jan 2013
Posts: 98
Likes: 0
From: Dunstable
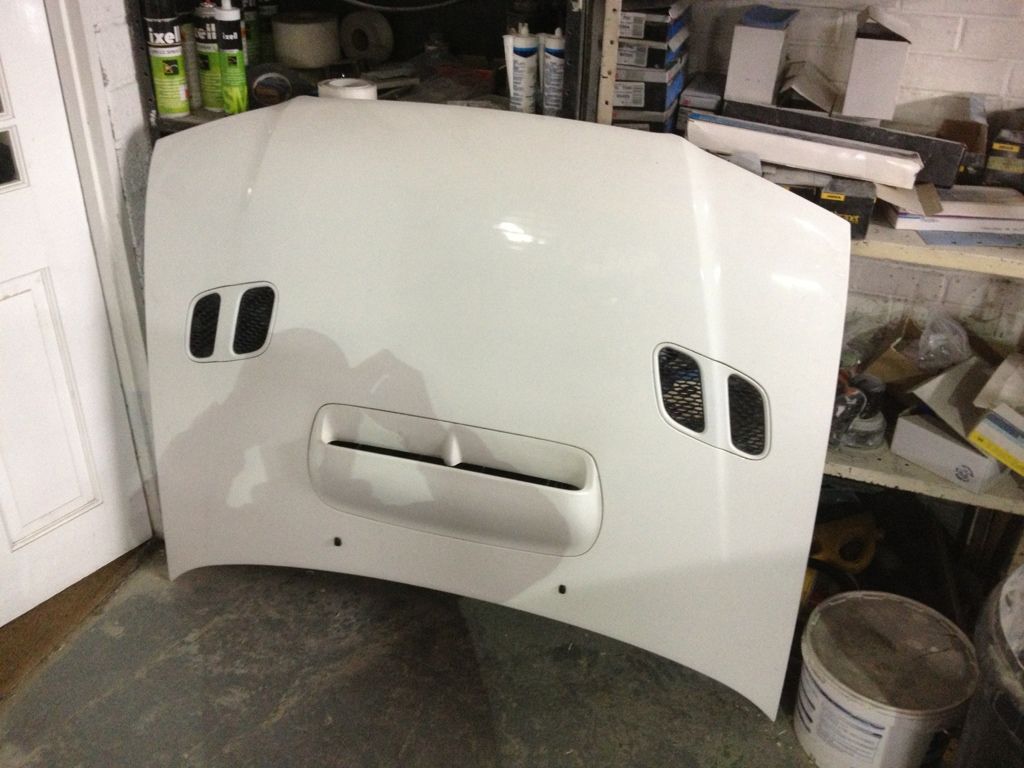
With the engine back in the facelift panels from a later v4 sti were added (alloy bonnet, headlamps and grille) and also a spoiler added to the bumper. While that was being done, the plastics were coloured to match the body (side skirts & spats)

Thread Starter
Scooby Regular
Joined: Jan 2013
Posts: 98
Likes: 0
From: Dunstable
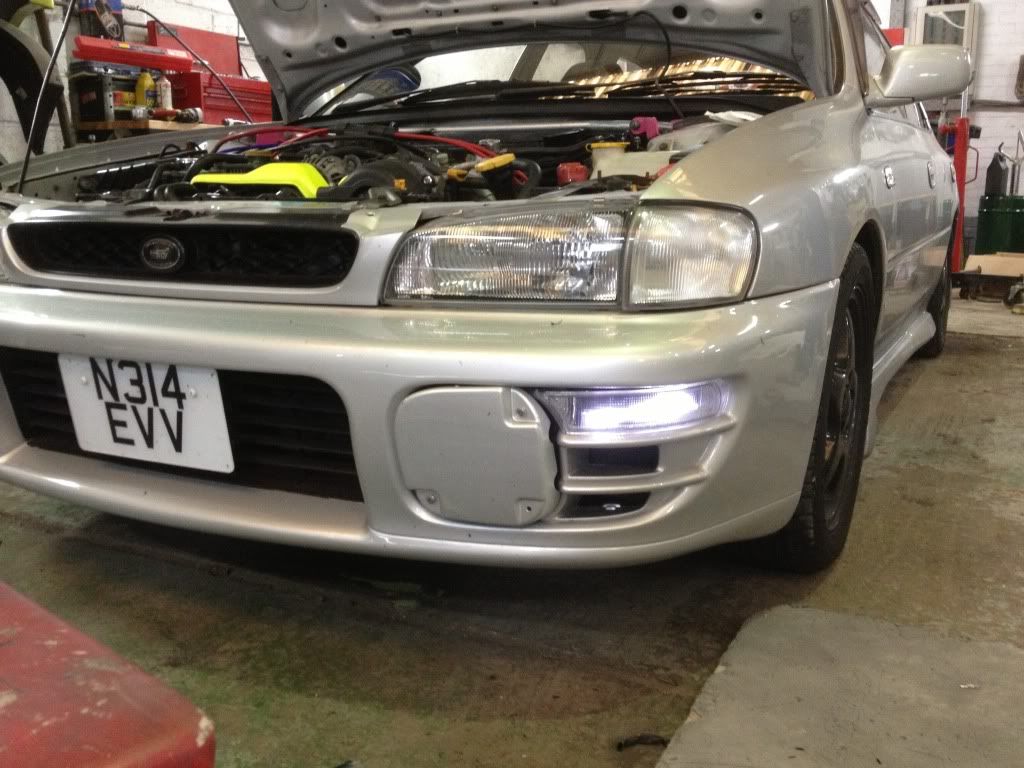
Another mod carried out while it was still in the workshop which I forgot to mention was switching the position of the side lamps and indicator lamps. Using LEDs the car now has DRL style side lights rather than the small side lamps next to the head lamp

Thread Starter
Scooby Regular
Joined: Jan 2013
Posts: 98
Likes: 0
From: Dunstable
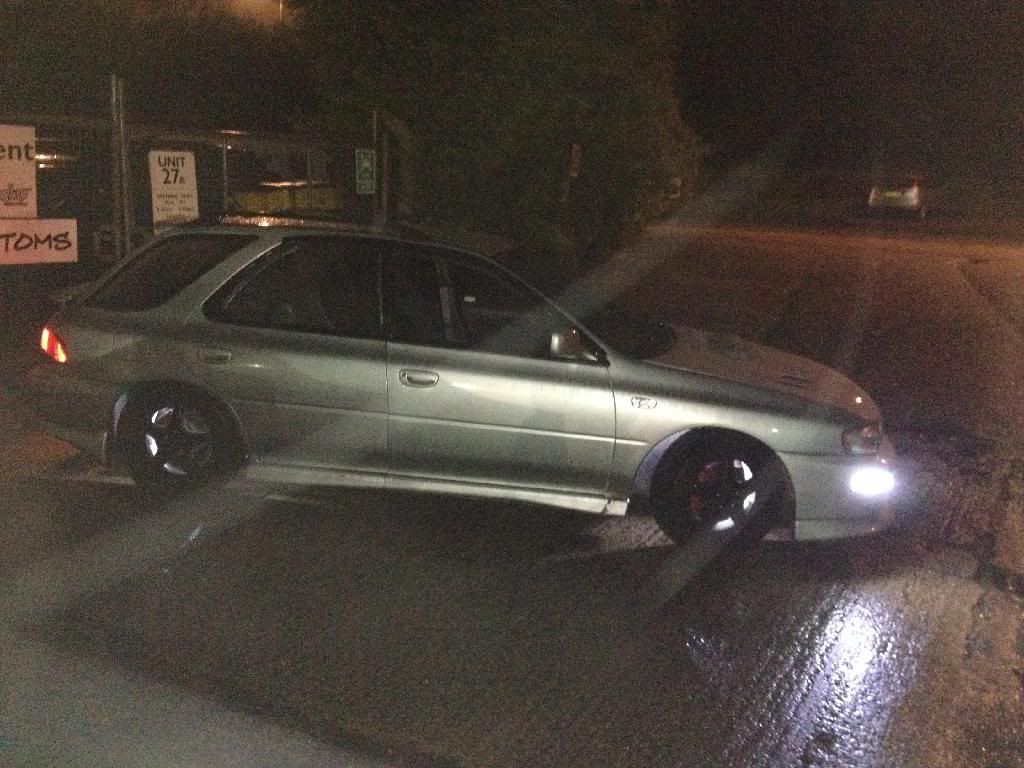
With the car running well again a small trip to Santa Pod was the reward.... Benchmark time was set at 14.4secs which i didn't think was too shabby and at least had a scope for improvement.


Thread Starter
Scooby Regular
Joined: Jan 2013
Posts: 98
Likes: 0
From: Dunstable
Oct/Nov 2013
With the shows and cruises ending for the year only a couple more mods took place before a big change for the new year...
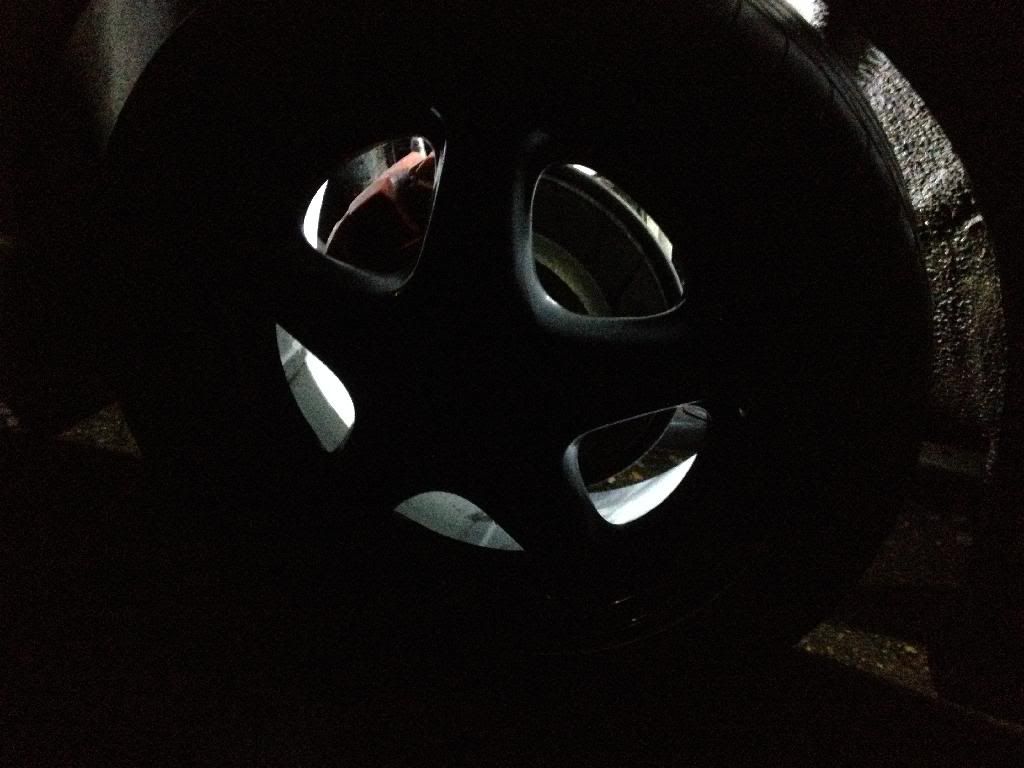
Rear lamps had the amber section tinted and for the Children In Need cruise the wheels had experimental back lighting fitted..... Not to everyone's taste I know but just wanted to try sommat different

With the shows and cruises ending for the year only a couple more mods took place before a big change for the new year...
Rear lamps had the amber section tinted and for the Children In Need cruise the wheels had experimental back lighting fitted..... Not to everyone's taste I know but just wanted to try sommat different


Thread Starter
Scooby Regular
Joined: Jan 2013
Posts: 98
Likes: 0
From: Dunstable
So as winter was approaching decisions had to be made on the car for it's new look in the new year....this was the last pic if the car as it stood for 2013...2014 was gonna be a big change