
Mixer Project

Thread Starter
18 June 1815 - Waterloo
iTrader: (31)
Joined: Dec 2004
Posts: 19,156
Likes: 15
From: To the valley men!
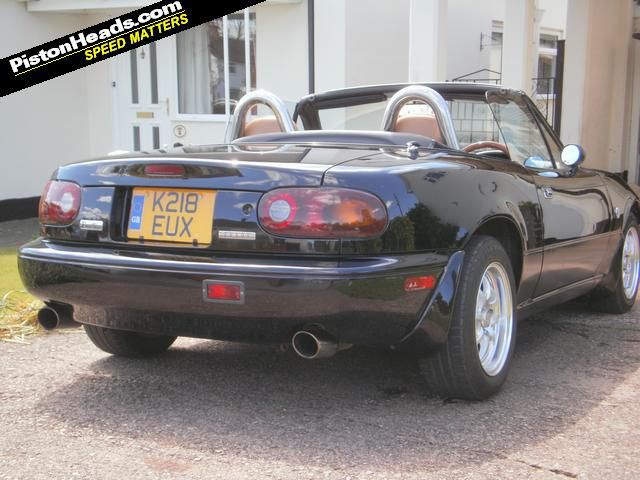
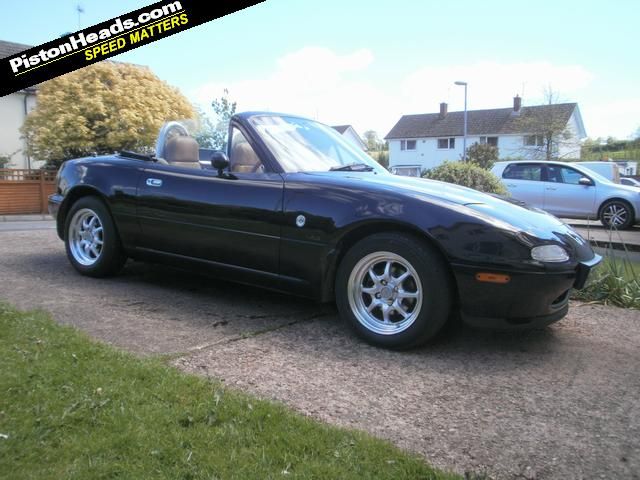
Well the Scoob as gone to a new owner and it's time to get amongst the new project. I currently run a V-Spec Eunos as a daily, it's only done 105k km's, so is still pretty good and soooo much fun. After the running costs of the Scoob it's been a revelation. It's pretty standard apart for some very nice J-Speed Enkei's, twin exhaust and Mk2 mohair roof with heated rear window. It's got the OE headrest speakers, new stereo, OE V-Spec mats, Nardi Wood wheel and gear ****, is de-catted and a Blitz induction kit amongst other things. The interior is OE but looking tired and will get the treat ment too.
The Project order will be:-
1. Shocks, Brakes and Chassis.
2. Body work and exterior.
3. Interior fittings.
4. Engine.
The intent is to freshen up the old worn stuff you cannot see and then start on the visuals, not track but just fun spirited driving. Like most plans this will probably hit the wall after week two . The idea is to start on the visible chassis bit's and work inwards then up. I have already purchased a few item's to get things going. The cost as been tiny compared to the Scoob, so here goes with the newest purchases.
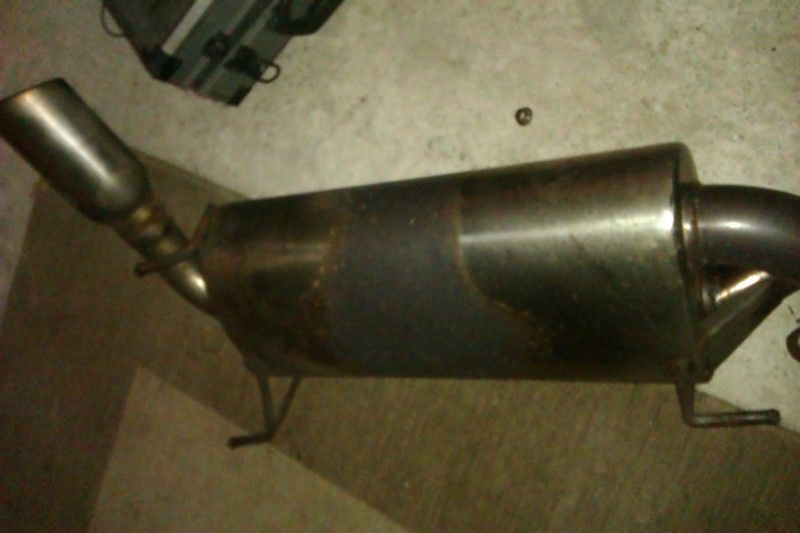
1. MX5 Parts Stainless Twin Exhaust - �155 (Ebay Auction by MX5Parts)
2. 4 x KYB Adjustable shocks and springs - �427
3. Full set of Fr and Rr Discs and pads - �90
4. Full Fr and Rr ARB and Drop Link Polybush Kit - �40
Once the Calipers have been removed, scrubbed and painted the shocks and ARB stuff will go on.
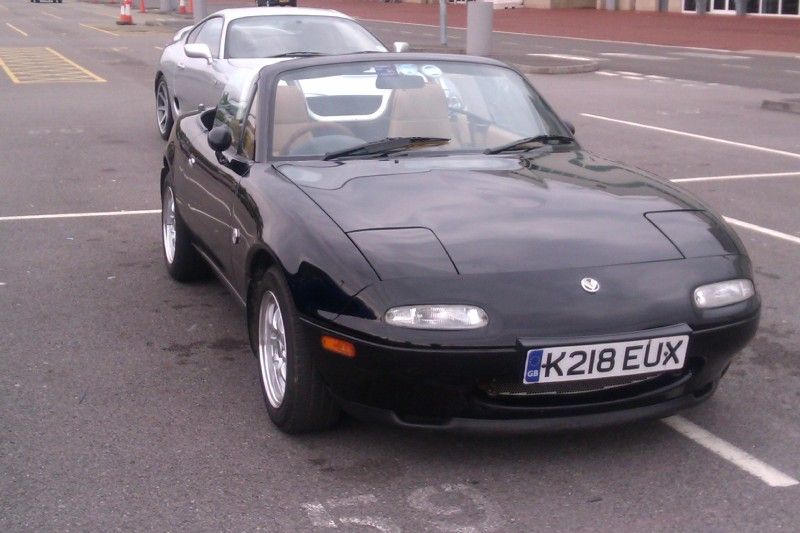
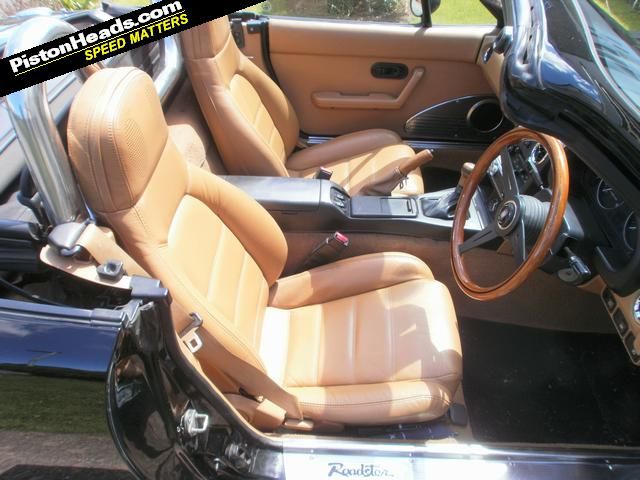
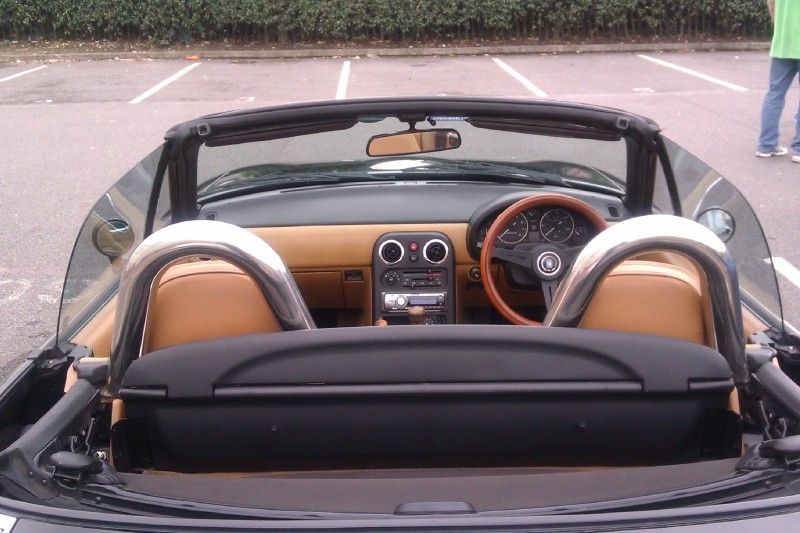
And some of the original PH advert pics.
The Project order will be:-
1. Shocks, Brakes and Chassis.
2. Body work and exterior.
3. Interior fittings.
4. Engine.
The intent is to freshen up the old worn stuff you cannot see and then start on the visuals, not track but just fun spirited driving. Like most plans this will probably hit the wall after week two
. The idea is to start on the visible chassis bit's and work inwards then up. I have already purchased a few item's to get things going. The cost as been tiny compared to the Scoob, so here goes with the newest purchases.1. MX5 Parts Stainless Twin Exhaust - �155 (Ebay Auction by MX5Parts)
2. 4 x KYB Adjustable shocks and springs - �427
3. Full set of Fr and Rr Discs and pads - �90
4. Full Fr and Rr ARB and Drop Link Polybush Kit - �40
Once the Calipers have been removed, scrubbed and painted the shocks and ARB stuff will go on.
And some of the original PH advert pics.
Last edited by The Trooper 1815; Jan 16, 2013 at 06:46 PM.
Hmm want to see photos of this,
Have you thought about a turbo conversion, not that expensive and can easily achive 200hp on stock motor and more with aftermarket ecu. (my next track car/project)
And you could of got gaz coilovers which seem to be the ones to go for apart from tien flex.
But I see you have already bought these parts.
But can't wait to see this (proper fun toy -the looks imo lol)


Lovley, in best colour too, noticed that it has dual exhausts on already, were they not suitable or something?
V limited too, nice, is that the one without abs? And has it got LSD as standard? A quite rare spec. Is it the 1.6?
Lovley cheap car to buy and mod and probably the most fun too.
V limited too, nice, is that the one without abs? And has it got LSD as standard? A quite rare spec. Is it the 1.6?
Lovley cheap car to buy and mod and probably the most fun too.
Trending Topics
Thread Starter
18 June 1815 - Waterloo
iTrader: (31)
Joined: Dec 2004
Posts: 19,156
Likes: 15
From: To the valley men!
Lovley, in best colour too, noticed that it has dual exhausts on already, were they not suitable or something?
V limited too, nice, is that the one without abs? And has it got LSD as standard? A quite rare spec. Is it the 1.6?
Lovley cheap car to buy and mod and probably the most fun too.
V limited too, nice, is that the one without abs? And has it got LSD as standard? A quite rare spec. Is it the 1.6?
Lovley cheap car to buy and mod and probably the most fun too.
I have the OE V Spec mats too.
Not on mx5nuts but I have signed up on the Moorakers site, no cream teas lol.
Thread Starter
18 June 1815 - Waterloo
iTrader: (31)
Joined: Dec 2004
Posts: 19,156
Likes: 15
From: To the valley men!
I have changed my mind on the shocks and bought the KYB Excel - G to match the springs, no price change  .
.
The scoob will be out of the garage in a week or so and I can get it on the axle stands.
.The scoob will be out of the garage in a week or so and I can get it on the axle stands.
 .
.
Thread Starter
18 June 1815 - Waterloo
iTrader: (31)
Joined: Dec 2004
Posts: 19,156
Likes: 15
From: To the valley men!
A few more bit's arrived today.

The Scoob goes this weekend ( ) so the Mixer can get tucked up ready for the removal of:-
1. Wheels
2. ARB's
3. Drop Links
4. Discs
5. Pads and Brakes.
Pics coming.
The Scoob goes this weekend (
) so the Mixer can get tucked up ready for the removal of:-1. Wheels
2. ARB's
3. Drop Links
4. Discs
5. Pads and Brakes.
Pics coming.
Thread Starter
18 June 1815 - Waterloo
iTrader: (31)
Joined: Dec 2004
Posts: 19,156
Likes: 15
From: To the valley men!
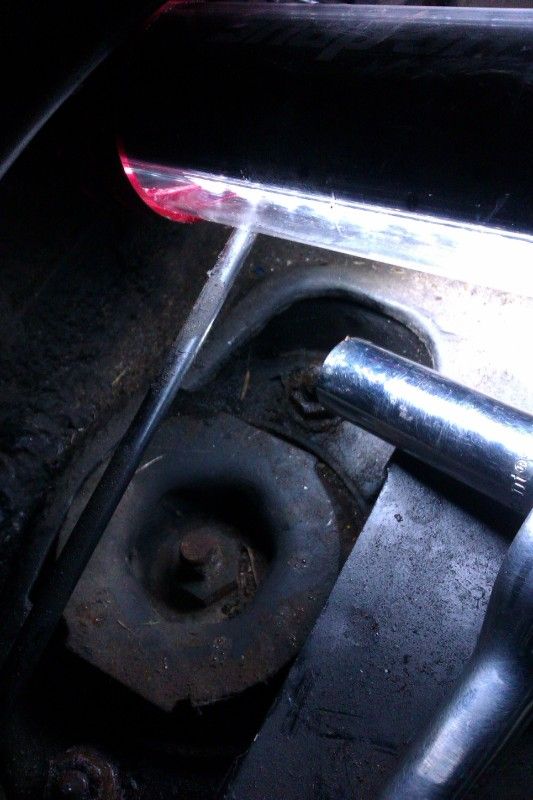
Well the fun began with removing the wing mirror's. They are after market and look pretty good but as soon as they where removed it became apparent that they would need replacing.


Not detered I set about the undercarriage and dropped the ARB's and drop links. Compared to the Scoob it was a doodle. Like the Scoob they need to removed with the wheels supported and not under tension. A 14mm sockets and spanners and they where off in about ten minutes.


Once the drop links where disconnected the ARB was removed.

At this point I was beginning to worry as there was not problem with corrosion or nuts or bolts being welded in place by age. The previous owner had pretty much covered everything in Waxoyl and it made an hell of a difference.
I then removed the calipers, pads and discs. A mix of 12, 14 and 10 mm sockets and spanners. Each side took about 15 minutes . Simple sliders calipers similar to the rears on a Classic. The handbrake is held in place by two lock nuts. , undo the bottom bolt, rotate upwards and the pads and retaining clips are free to remove.


The discs then slid off easy as you like. The carrier was also removed as as it's getting some paint.


Not detered I set about the undercarriage and dropped the ARB's and drop links. Compared to the Scoob it was a doodle. Like the Scoob they need to removed with the wheels supported and not under tension. A 14mm sockets and spanners and they where off in about ten minutes.
Once the drop links where disconnected the ARB was removed.
At this point I was beginning to worry as there was not problem with corrosion or nuts or bolts being welded in place by age. The previous owner had pretty much covered everything in Waxoyl and it made an hell of a difference.
I then removed the calipers, pads and discs. A mix of 12, 14 and 10 mm sockets and spanners. Each side took about 15 minutes
. Simple sliders calipers similar to the rears on a Classic. The handbrake is held in place by two lock nuts. , undo the bottom bolt, rotate upwards and the pads and retaining clips are free to remove.The discs then slid off easy as you like. The carrier was also removed as as it's getting some paint.
Last edited by The Trooper 1815; Jan 28, 2013 at 07:18 PM.
Thread Starter
18 June 1815 - Waterloo
iTrader: (31)
Joined: Dec 2004
Posts: 19,156
Likes: 15
From: To the valley men!
The next purchase.
http://www.ebay.co.uk/itm/MAZDA-MX5-...item4d06d4a4ff
http://www.ebay.co.uk/itm/MAZDA-MX5-...item4d06d4a4ff
SET INCLUDES:
Front Lower Wishbone Front Bush x 2
Front Lower Wishbone Rear Bush x 2
Front Upper Wishbone Inner Bush x 4
Front Anti Roll Bar Bush x 2
Front Anti Roll Bar Drop Link Bush x 4
Rear Lower Wishbone Outer Bush x 4
Rear Lower Wishbone Inner Bush x 4
Rear Upper Wishbone Outer Bush x 2
Rear Upper Wishbone Inner Bush x 4
Rear Anti Roll Bar Bush x 2
Rear Anti Roll Bar Drop Link Bush x 4
For �80 plus postage, bargain .
.
Front Lower Wishbone Front Bush x 2
Front Lower Wishbone Rear Bush x 2
Front Upper Wishbone Inner Bush x 4
Front Anti Roll Bar Bush x 2
Front Anti Roll Bar Drop Link Bush x 4
Rear Lower Wishbone Outer Bush x 4
Rear Lower Wishbone Inner Bush x 4
Rear Upper Wishbone Outer Bush x 2
Rear Upper Wishbone Inner Bush x 4
Rear Anti Roll Bar Bush x 2
Rear Anti Roll Bar Drop Link Bush x 4
For �80 plus postage, bargain
.
Thread Starter
18 June 1815 - Waterloo
iTrader: (31)
Joined: Dec 2004
Posts: 19,156
Likes: 15
From: To the valley men!
Pictures of the underside next. How's the VW Camper mate?

Scooby Regular
iTrader: (6)
Joined: Aug 2007
Posts: 2,260
Likes: 0
From: Llanelli with a spanner in my hand!
I'll probably get 2nd hand wishbones and get them done up. I'll then rebush and fit. The process so far as been less complex than the Scoob, old tech but so well made. I cannot get over how well the underside is.
Pictures of the underside next. How's the VW Camper mate?
Pictures of the underside next. How's the VW Camper mate?
Thread Starter
18 June 1815 - Waterloo
iTrader: (31)
Joined: Dec 2004
Posts: 19,156
Likes: 15
From: To the valley men!
.Just costed up a full set of 2nd hand wish bones (top and bottom, F and R), with the new poly bushes and paint.
I'll get change out of �180
. Why did I stick with the Scoob running cost for so long!The Miata/MX-5 Haynes manual from the USA is a godsend too.
Last edited by The Trooper 1815; Jan 28, 2013 at 10:43 PM.
Thread Starter
18 June 1815 - Waterloo
iTrader: (31)
Joined: Dec 2004
Posts: 19,156
Likes: 15
From: To the valley men!
I have not been able to get anything done until today, bloody work.
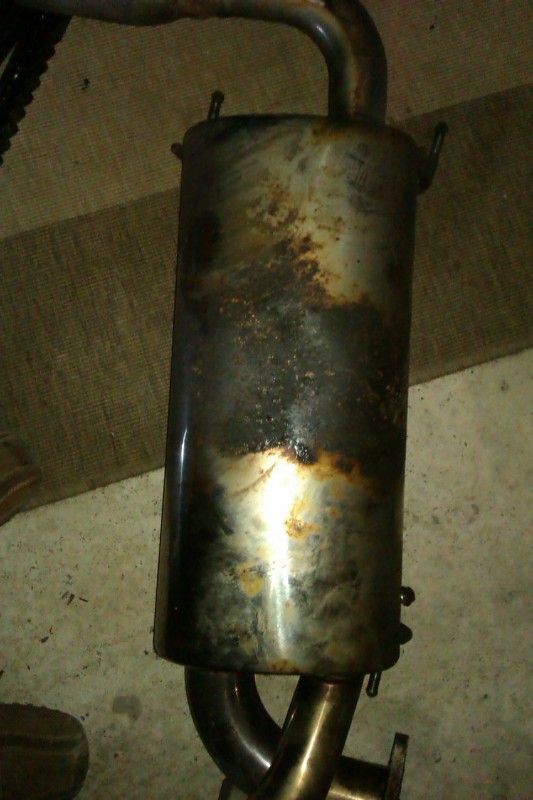
So started with removing the old back box, pretty easy, two bolts to the centre pipe with the normal heat corrosion and the usual exhaust hangers.
It's not in bad condition but the new one is ready in a box.
With the box out of the way I was able to have a look at the area under the boot. It's got very minor surface rust that should be easy to treat and cover with black chip paint.

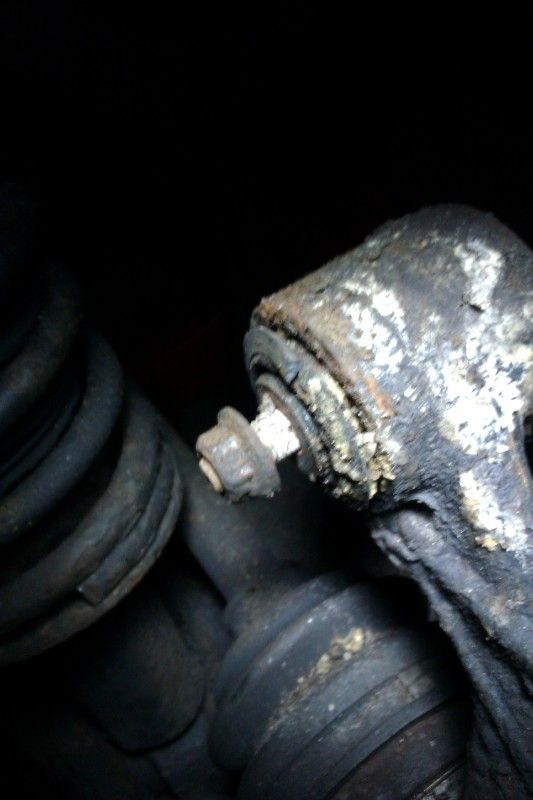
With the exhaust box off the working area is much better. The next stop was the upper wishbones, the offside is a pain as there is a cable and bracket in the way of the front bolt. Near side is easy, 14mm spanner, socket and breaker bar.


What looks like rust is mainly waxoyl and it's doing a fantastic job. It can't save the rubber bushes though.
A full set is on it's way.
While I was near the boot I slackened the suspension top mount nuts ready for when the lower wishbones come off. Off side is easy but it's easier to remove the plate covering the fuel filler for the nearside, these needed some more penertrating oil. But these are not as difficult as a Scoob saloon.

Next stop will be the lower rear wishbones. These suffer from the same problem as Scoob rear hubs, the bolts rust in place .
.
So started with removing the old back box, pretty easy, two bolts to the centre pipe with the normal heat corrosion and the usual exhaust hangers.
It's not in bad condition but the new one is ready in a box.
With the box out of the way I was able to have a look at the area under the boot. It's got very minor surface rust that should be easy to treat and cover with black chip paint.
With the exhaust box off the working area is much better. The next stop was the upper wishbones, the offside is a pain as there is a cable and bracket in the way of the front bolt. Near side is easy, 14mm spanner, socket and breaker bar.
What looks like rust is mainly waxoyl and it's doing a fantastic job. It can't save the rubber bushes though.
A full set is on it's way.
While I was near the boot I slackened the suspension top mount nuts ready for when the lower wishbones come off. Off side is easy but it's easier to remove the plate covering the fuel filler for the nearside, these needed some more penertrating oil. But these are not as difficult as a Scoob saloon.
Next stop will be the lower rear wishbones. These suffer from the same problem as Scoob rear hubs, the bolts rust in place
.
Last edited by The Trooper 1815; Mar 8, 2013 at 10:35 PM.
Thread Starter
18 June 1815 - Waterloo
iTrader: (31)
Joined: Dec 2004
Posts: 19,156
Likes: 15
From: To the valley men!
Been busy on the car tonight and managed to strip out both wheel stations and suspension.
As a test I took the wheel arch liner off to see if there was much work to do underneath. Disappointingly, it was very good, with a bit of a scrub all I found was good paint.
From this:-
to this:-

Here's a patch scrubbed with just a plain cloth.

The wishbones will get "Gunked", scrubbed and then are off to get de-bushed, blasted then some paint.
Finish the rears next.
As a test I took the wheel arch liner off to see if there was much work to do underneath. Disappointingly, it was very good, with a bit of a scrub all I found was good paint.
From this:-
to this:-
Here's a patch scrubbed with just a plain cloth.
The wishbones will get "Gunked", scrubbed and then are off to get de-bushed, blasted then some paint.
Finish the rears next.
Scooby Regular
iTrader: (3)
Joined: Jan 2003
Posts: 5,350
Likes: 0
From: South Wales - Stuck on this rollercoaster, get me off!!
Can't fault it Ian, your attention to detail is great. Looking forward to the end result!
Couple months you can sit back and be pleased with the end result....and think I did that! It's a nice feeling looking back at a car on how you bought it and how it ended up
Si
Couple months you can sit back and be pleased with the end result....and think I did that! It's a nice feeling looking back at a car on how you bought it and how it ended up
Si
Scooby Regular
iTrader: (3)
Joined: Jan 2003
Posts: 5,350
Likes: 0
From: South Wales - Stuck on this rollercoaster, get me off!!
Thread Starter
18 June 1815 - Waterloo
iTrader: (31)
Joined: Dec 2004
Posts: 19,156
Likes: 15
From: To the valley men!
Been a bit dormant over the last few weeks due to work getting in the way. So it was time to pull the finger out and get amongst the rear wishbones. They where a complete pain and just like the Scoob rears they seize in the lower part of the hub.
I ended up burning out the bushes and they hacksawing the bolts. Nightmare.
But in between the frustration and tea I cleaned up the front arches and Chip painted them.
I'll get some pic up after some scoff.
I ended up burning out the bushes and they hacksawing the bolts
. Nightmare.But in between the frustration and tea I cleaned up the front arches and Chip painted them.
I'll get some pic up after some scoff.