
Saloon Arched Wagon Newage

Hello,
Thought I would start a project thread as the car will be moving forward soon in the next few weeks hopefully.
This is my 1st scoob but by no means my 1st performance/modified car.
Needed something to bring the dog along in this time though so a wagon seemed the best option.
Here's the dog!

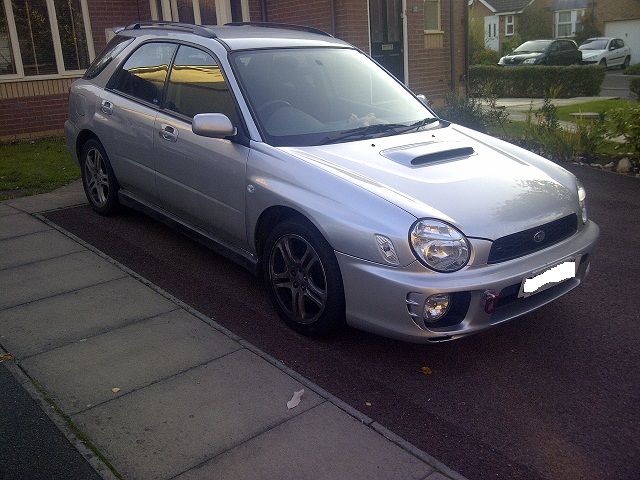
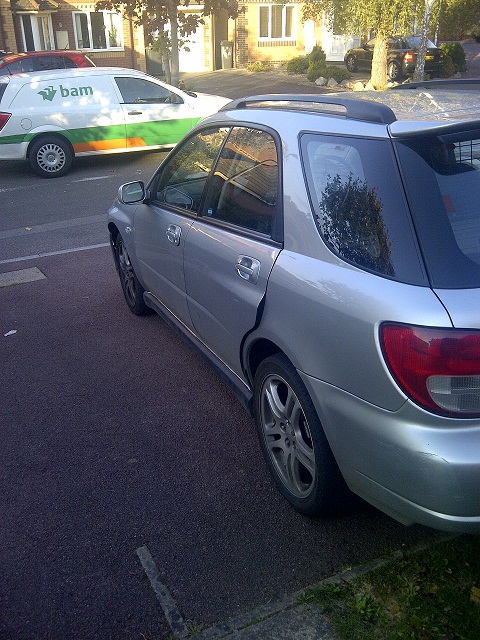
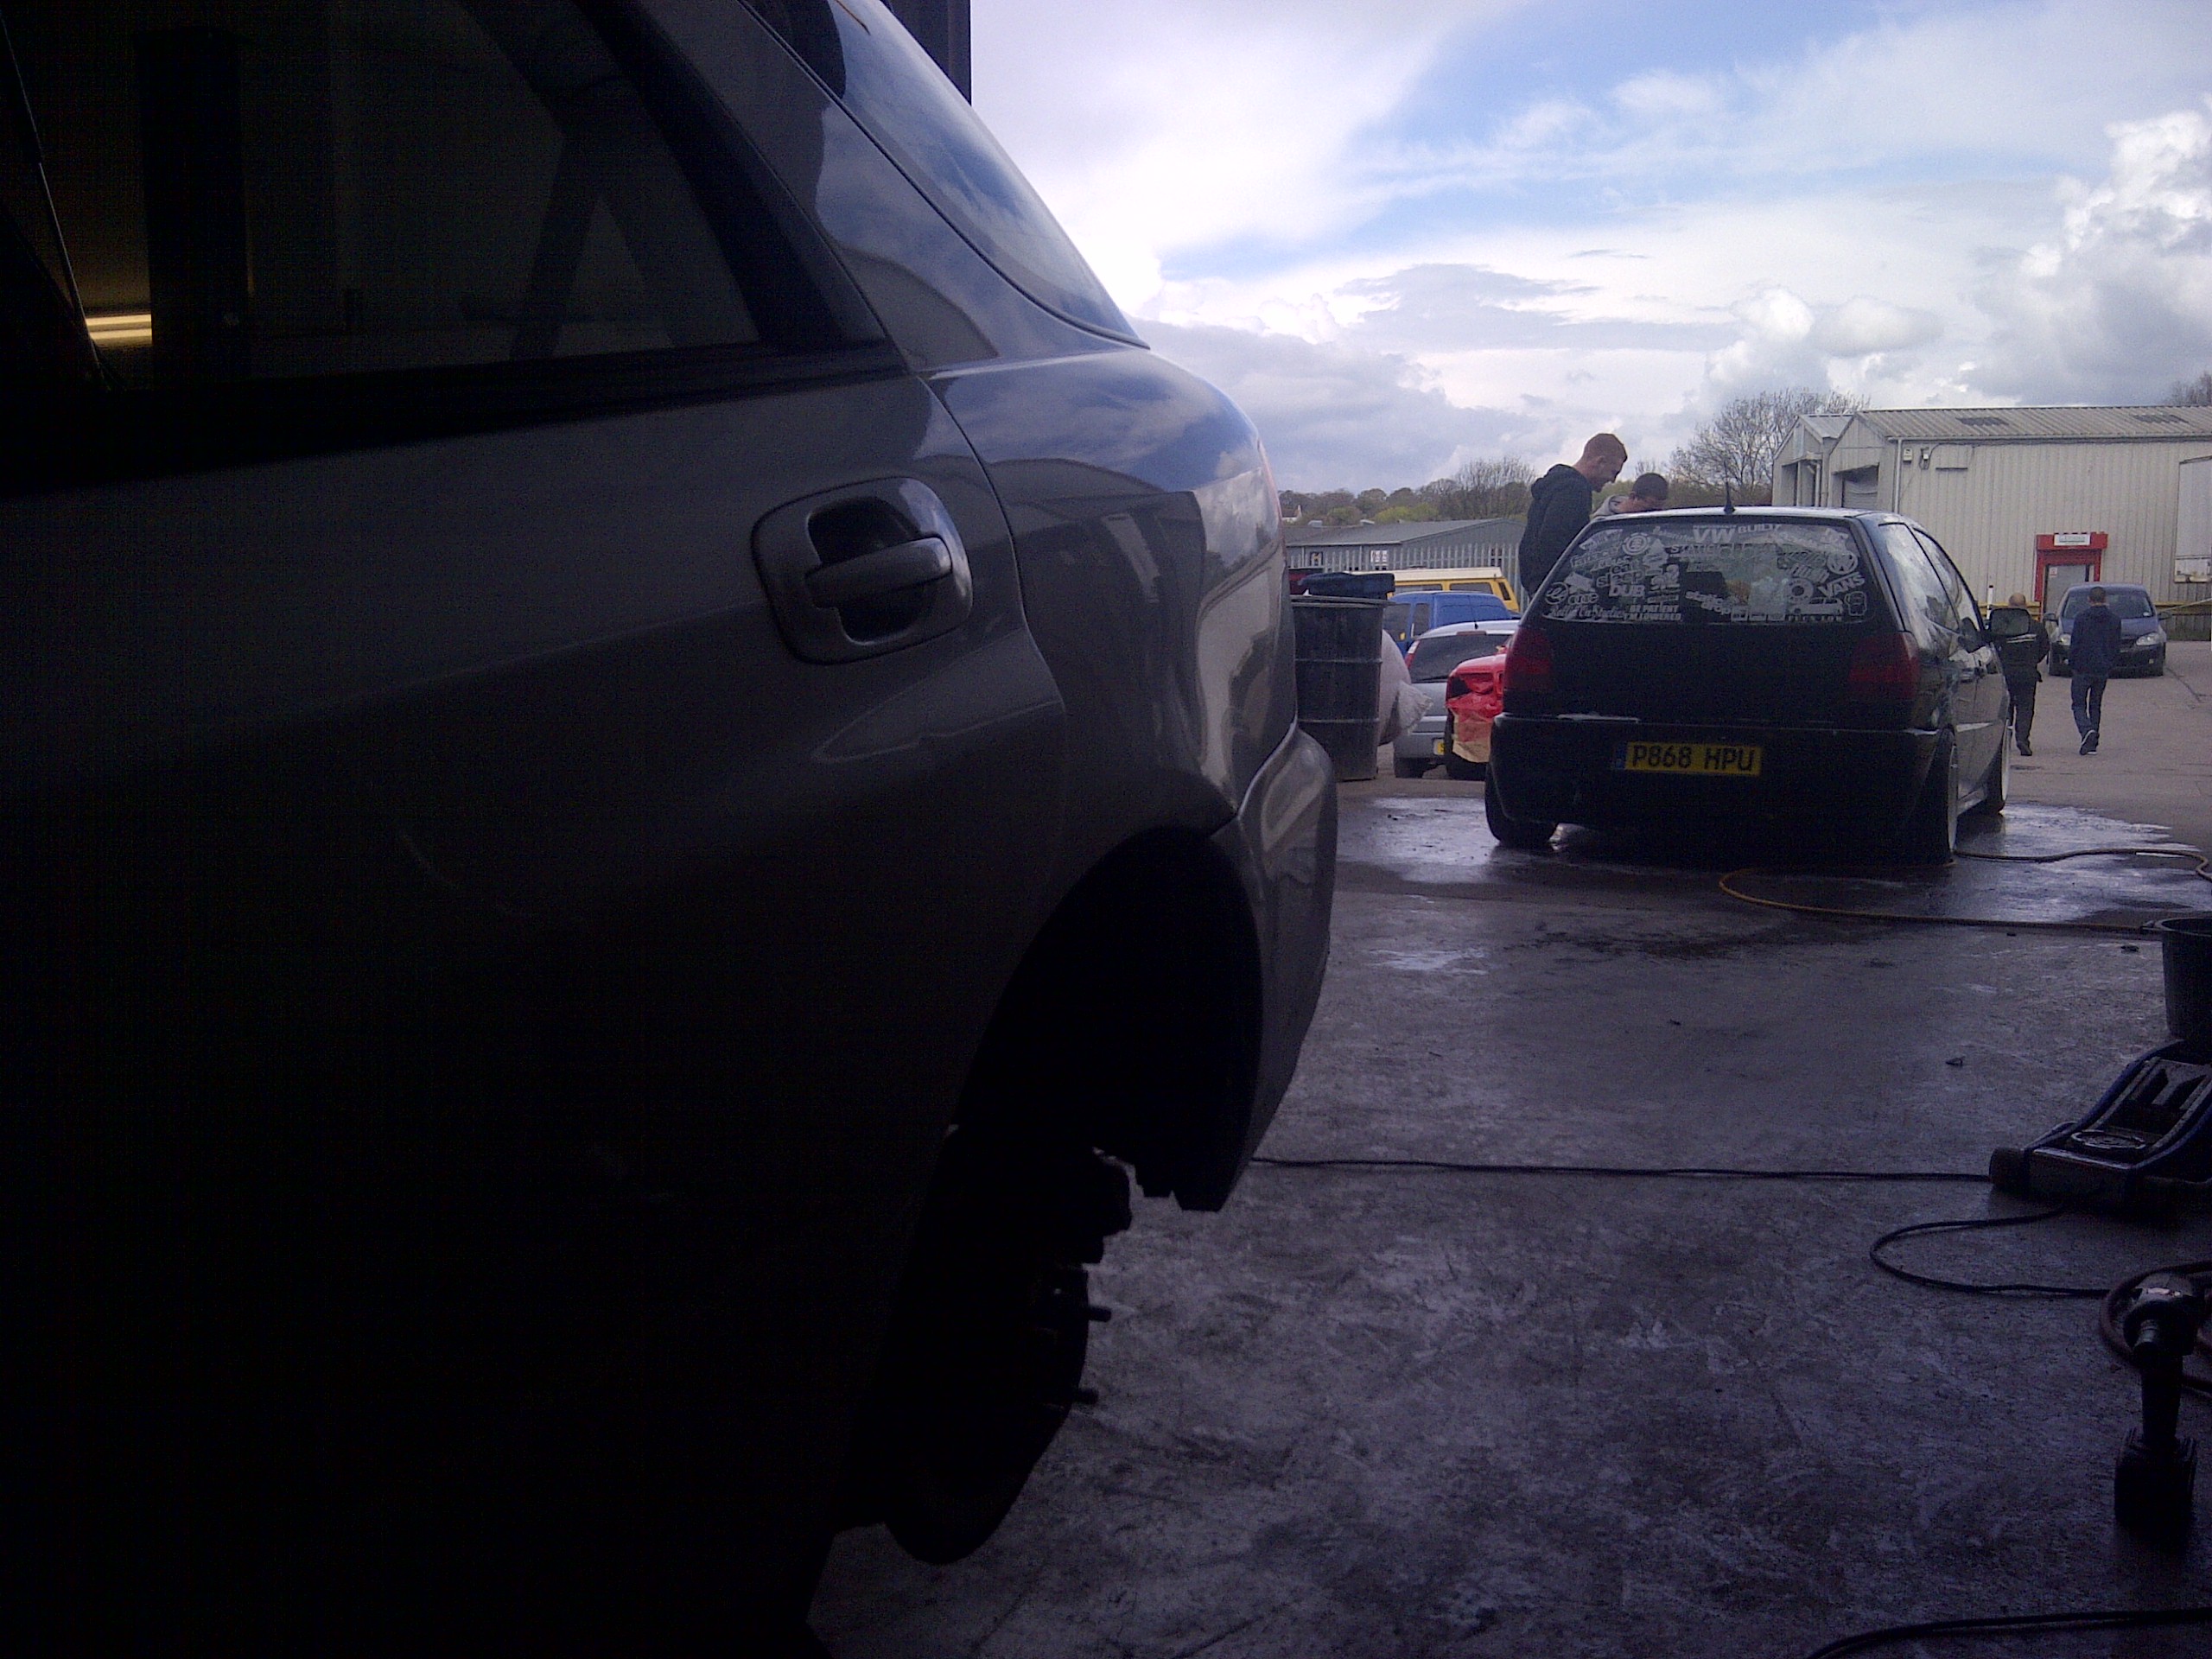
I popped over to Newport auctions 1 evening with a mate of mine who was looking for something cheap & I spotted this while I was there.
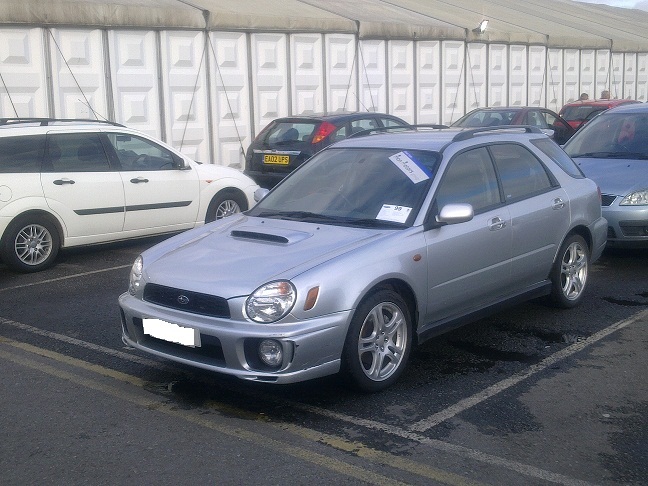
After a bit of discussion with the retailer I secured her for a rock bottom price!
She is totally standard 1 doctor owner with FSH. I tracked down the doctor & had a lil chat with him he sounded some what ancient but was a true petrol head listing a number of cars he'd had previous to this scoob.
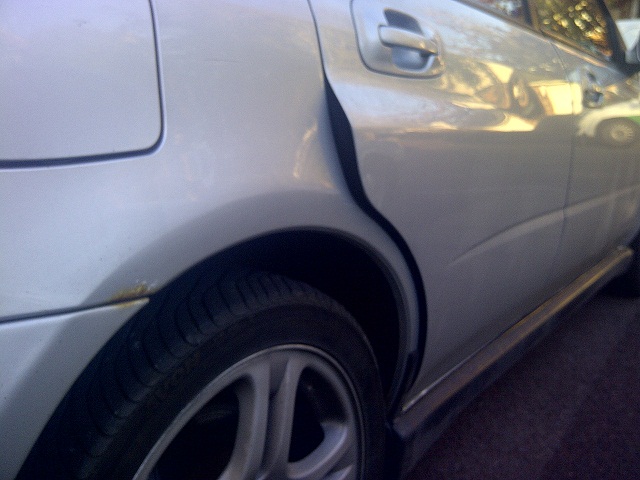
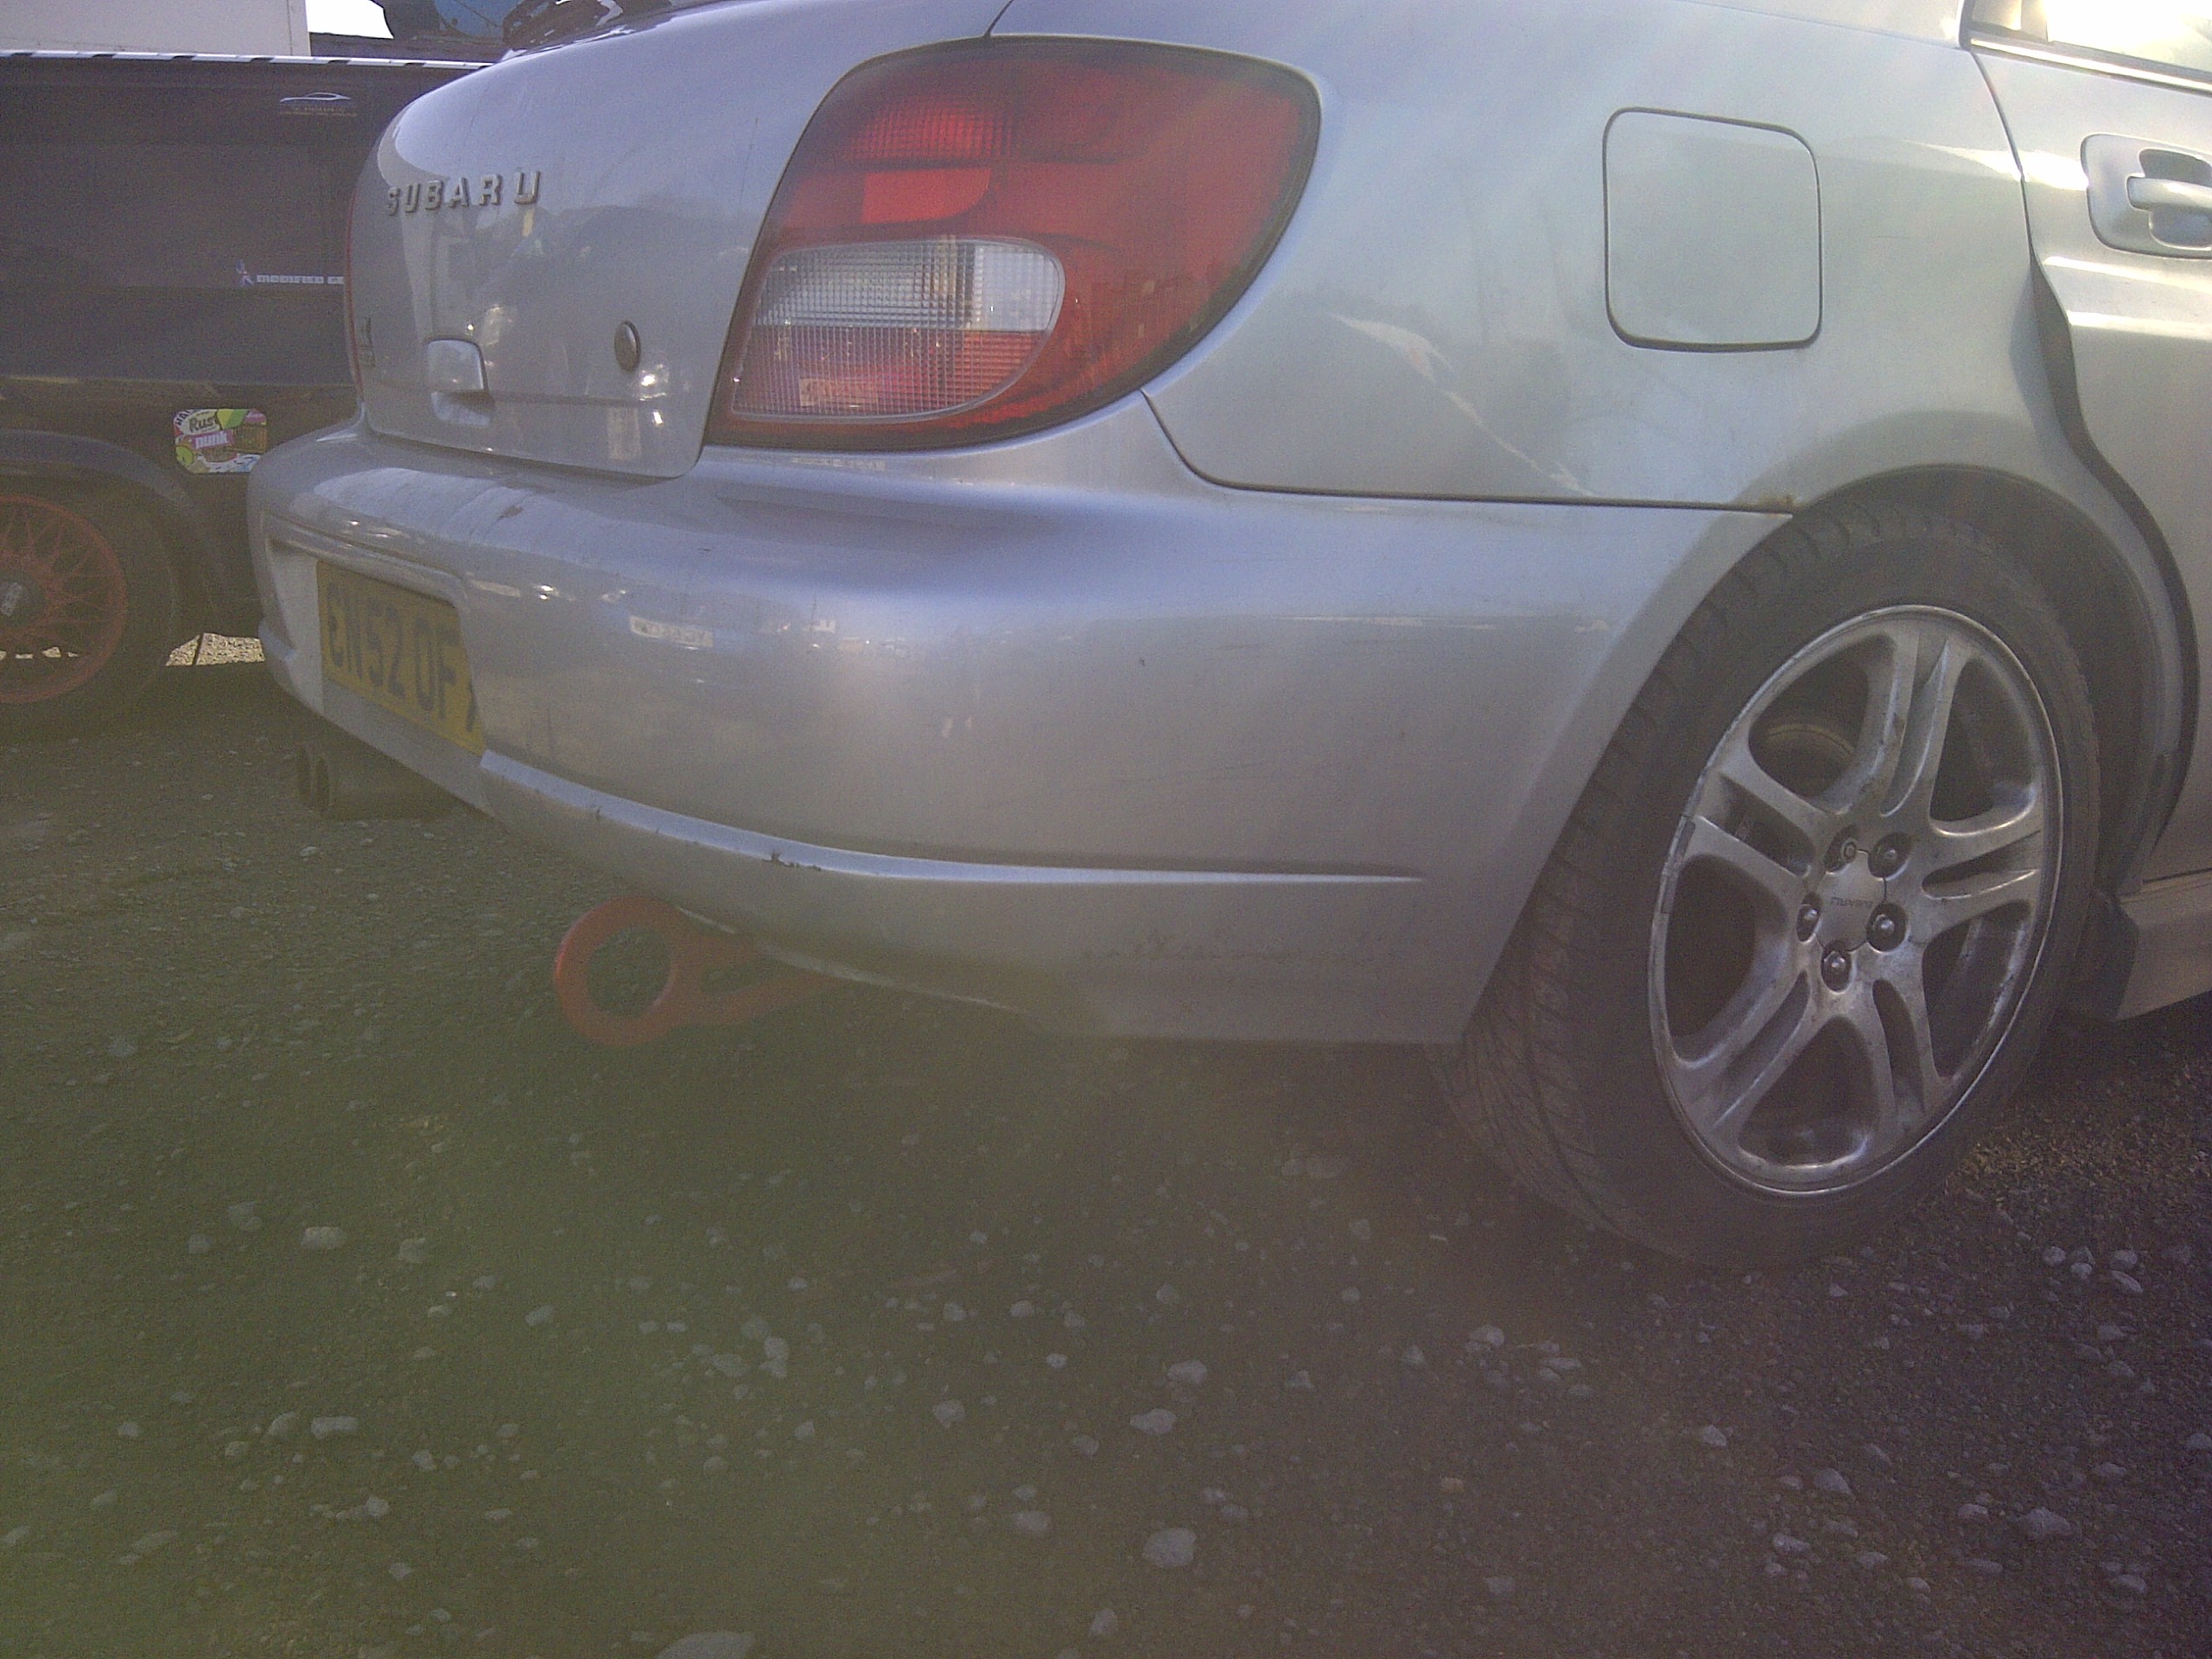
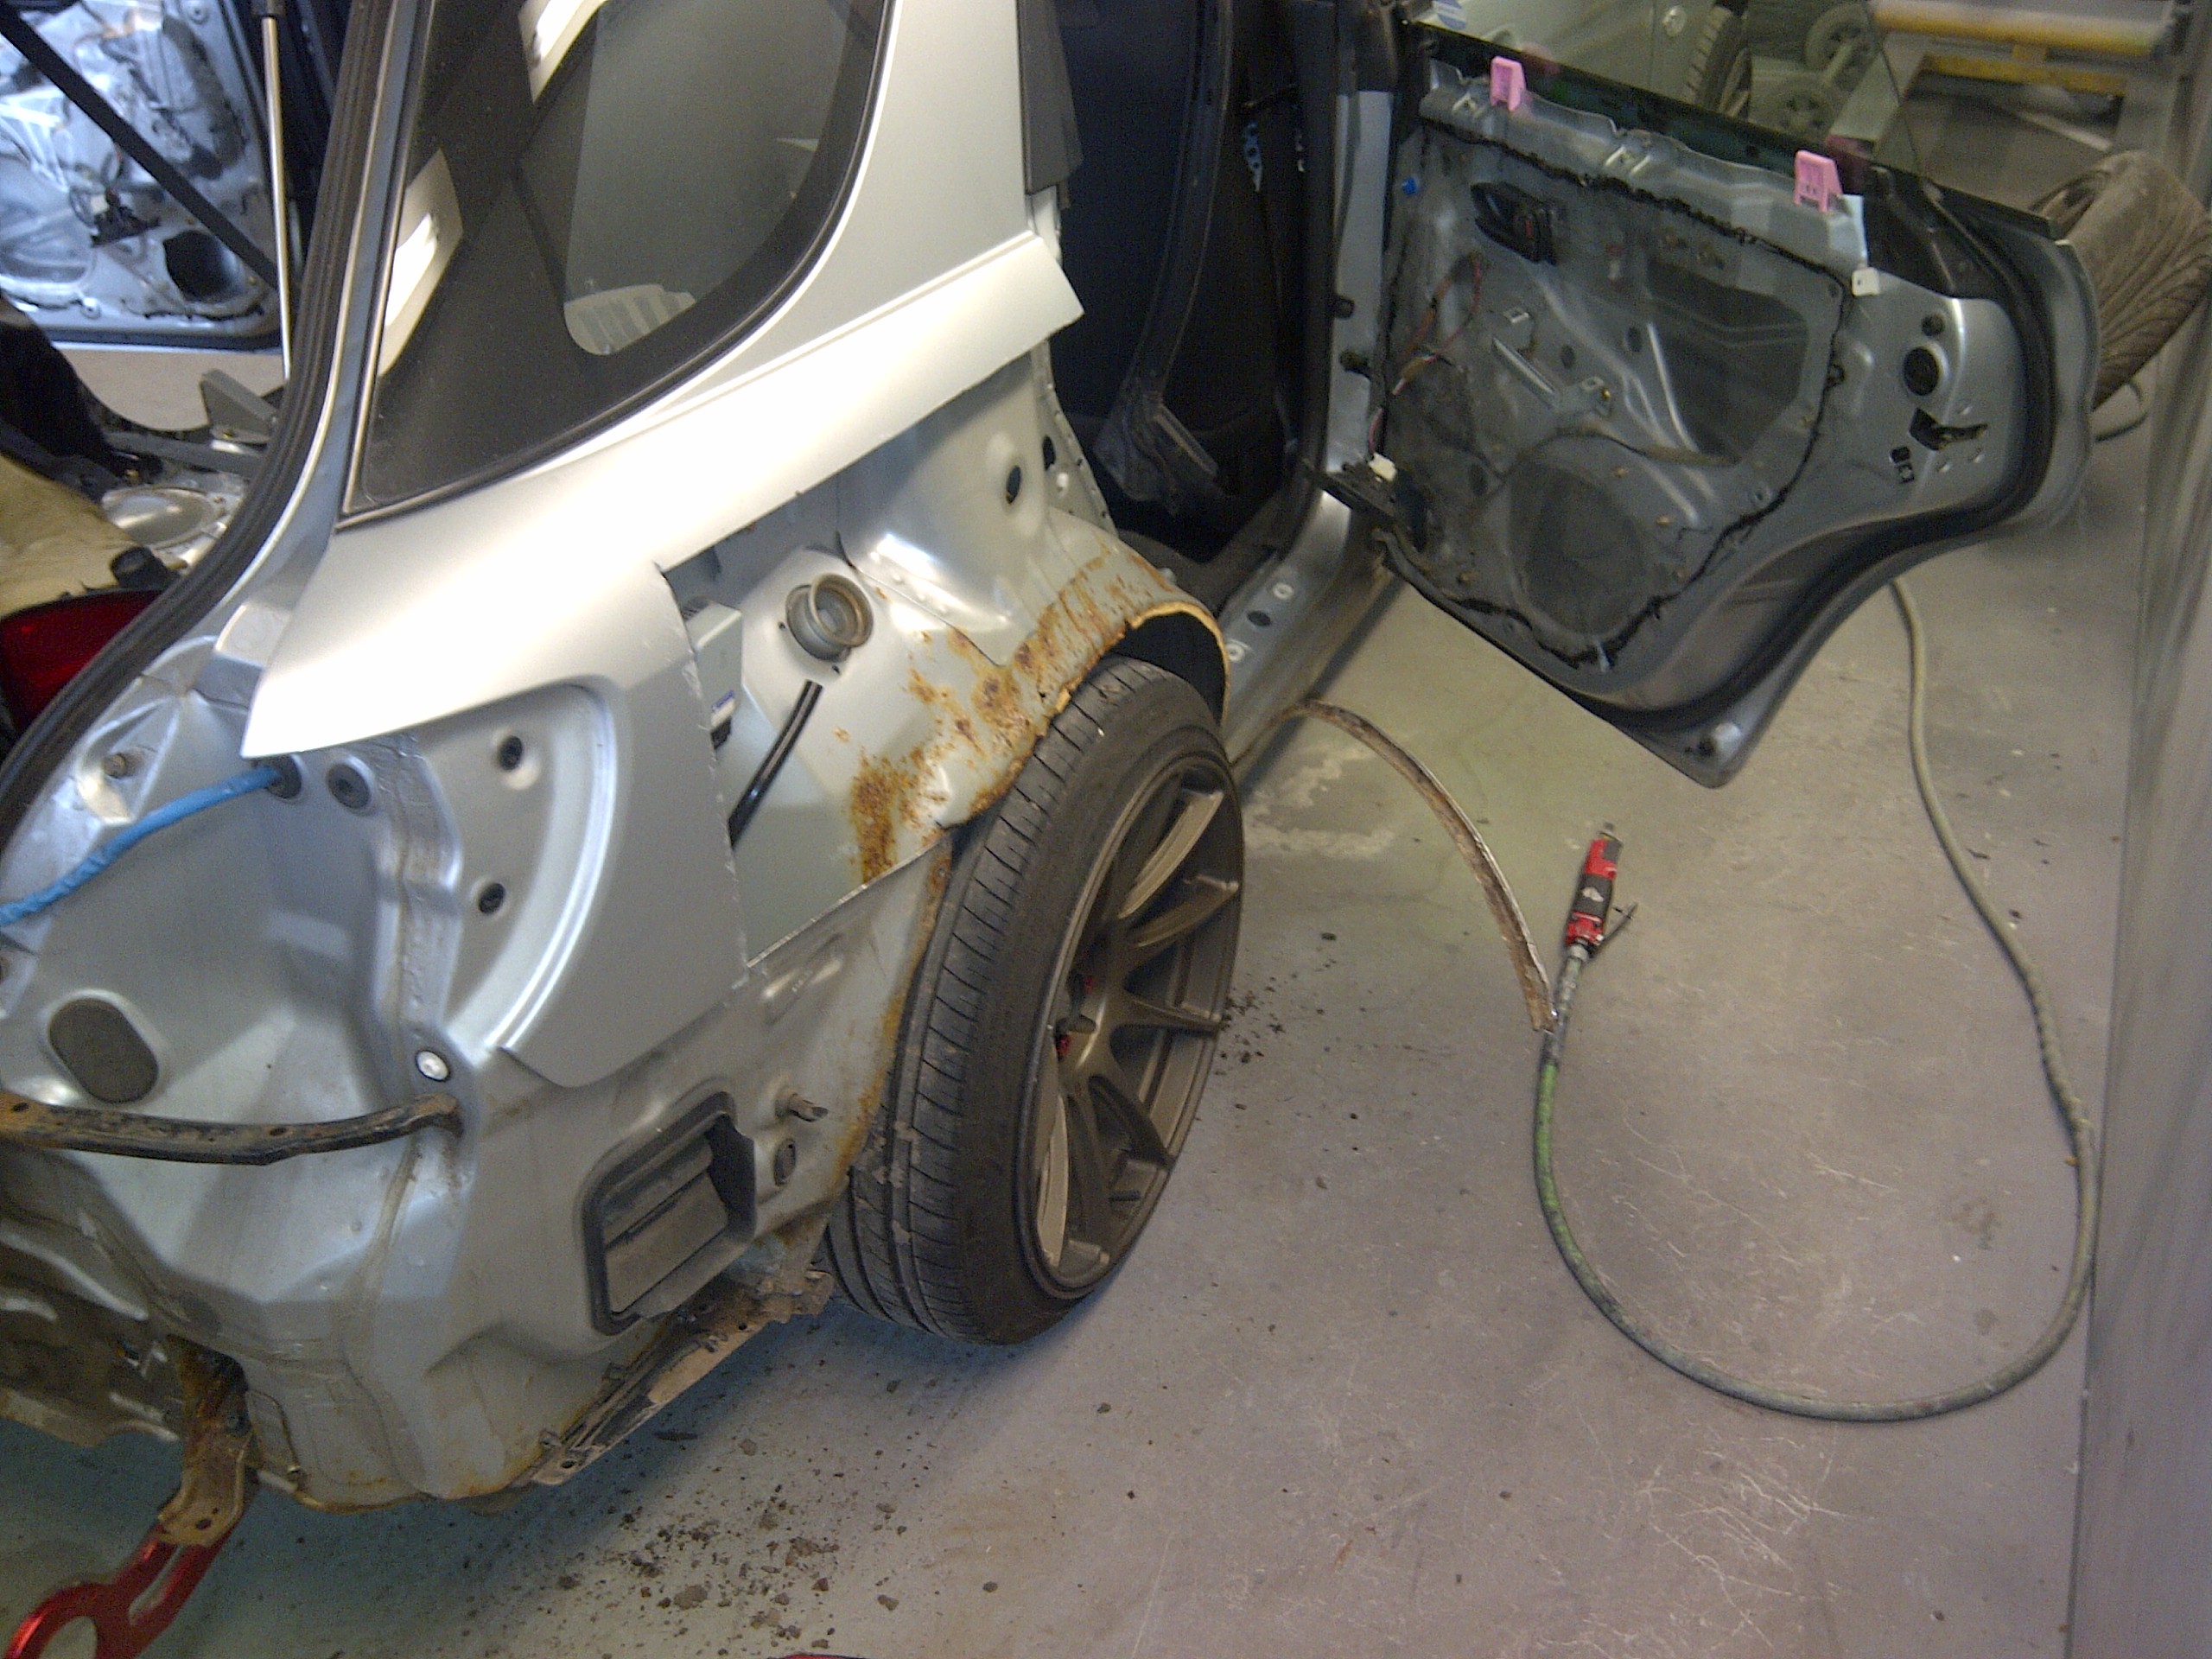
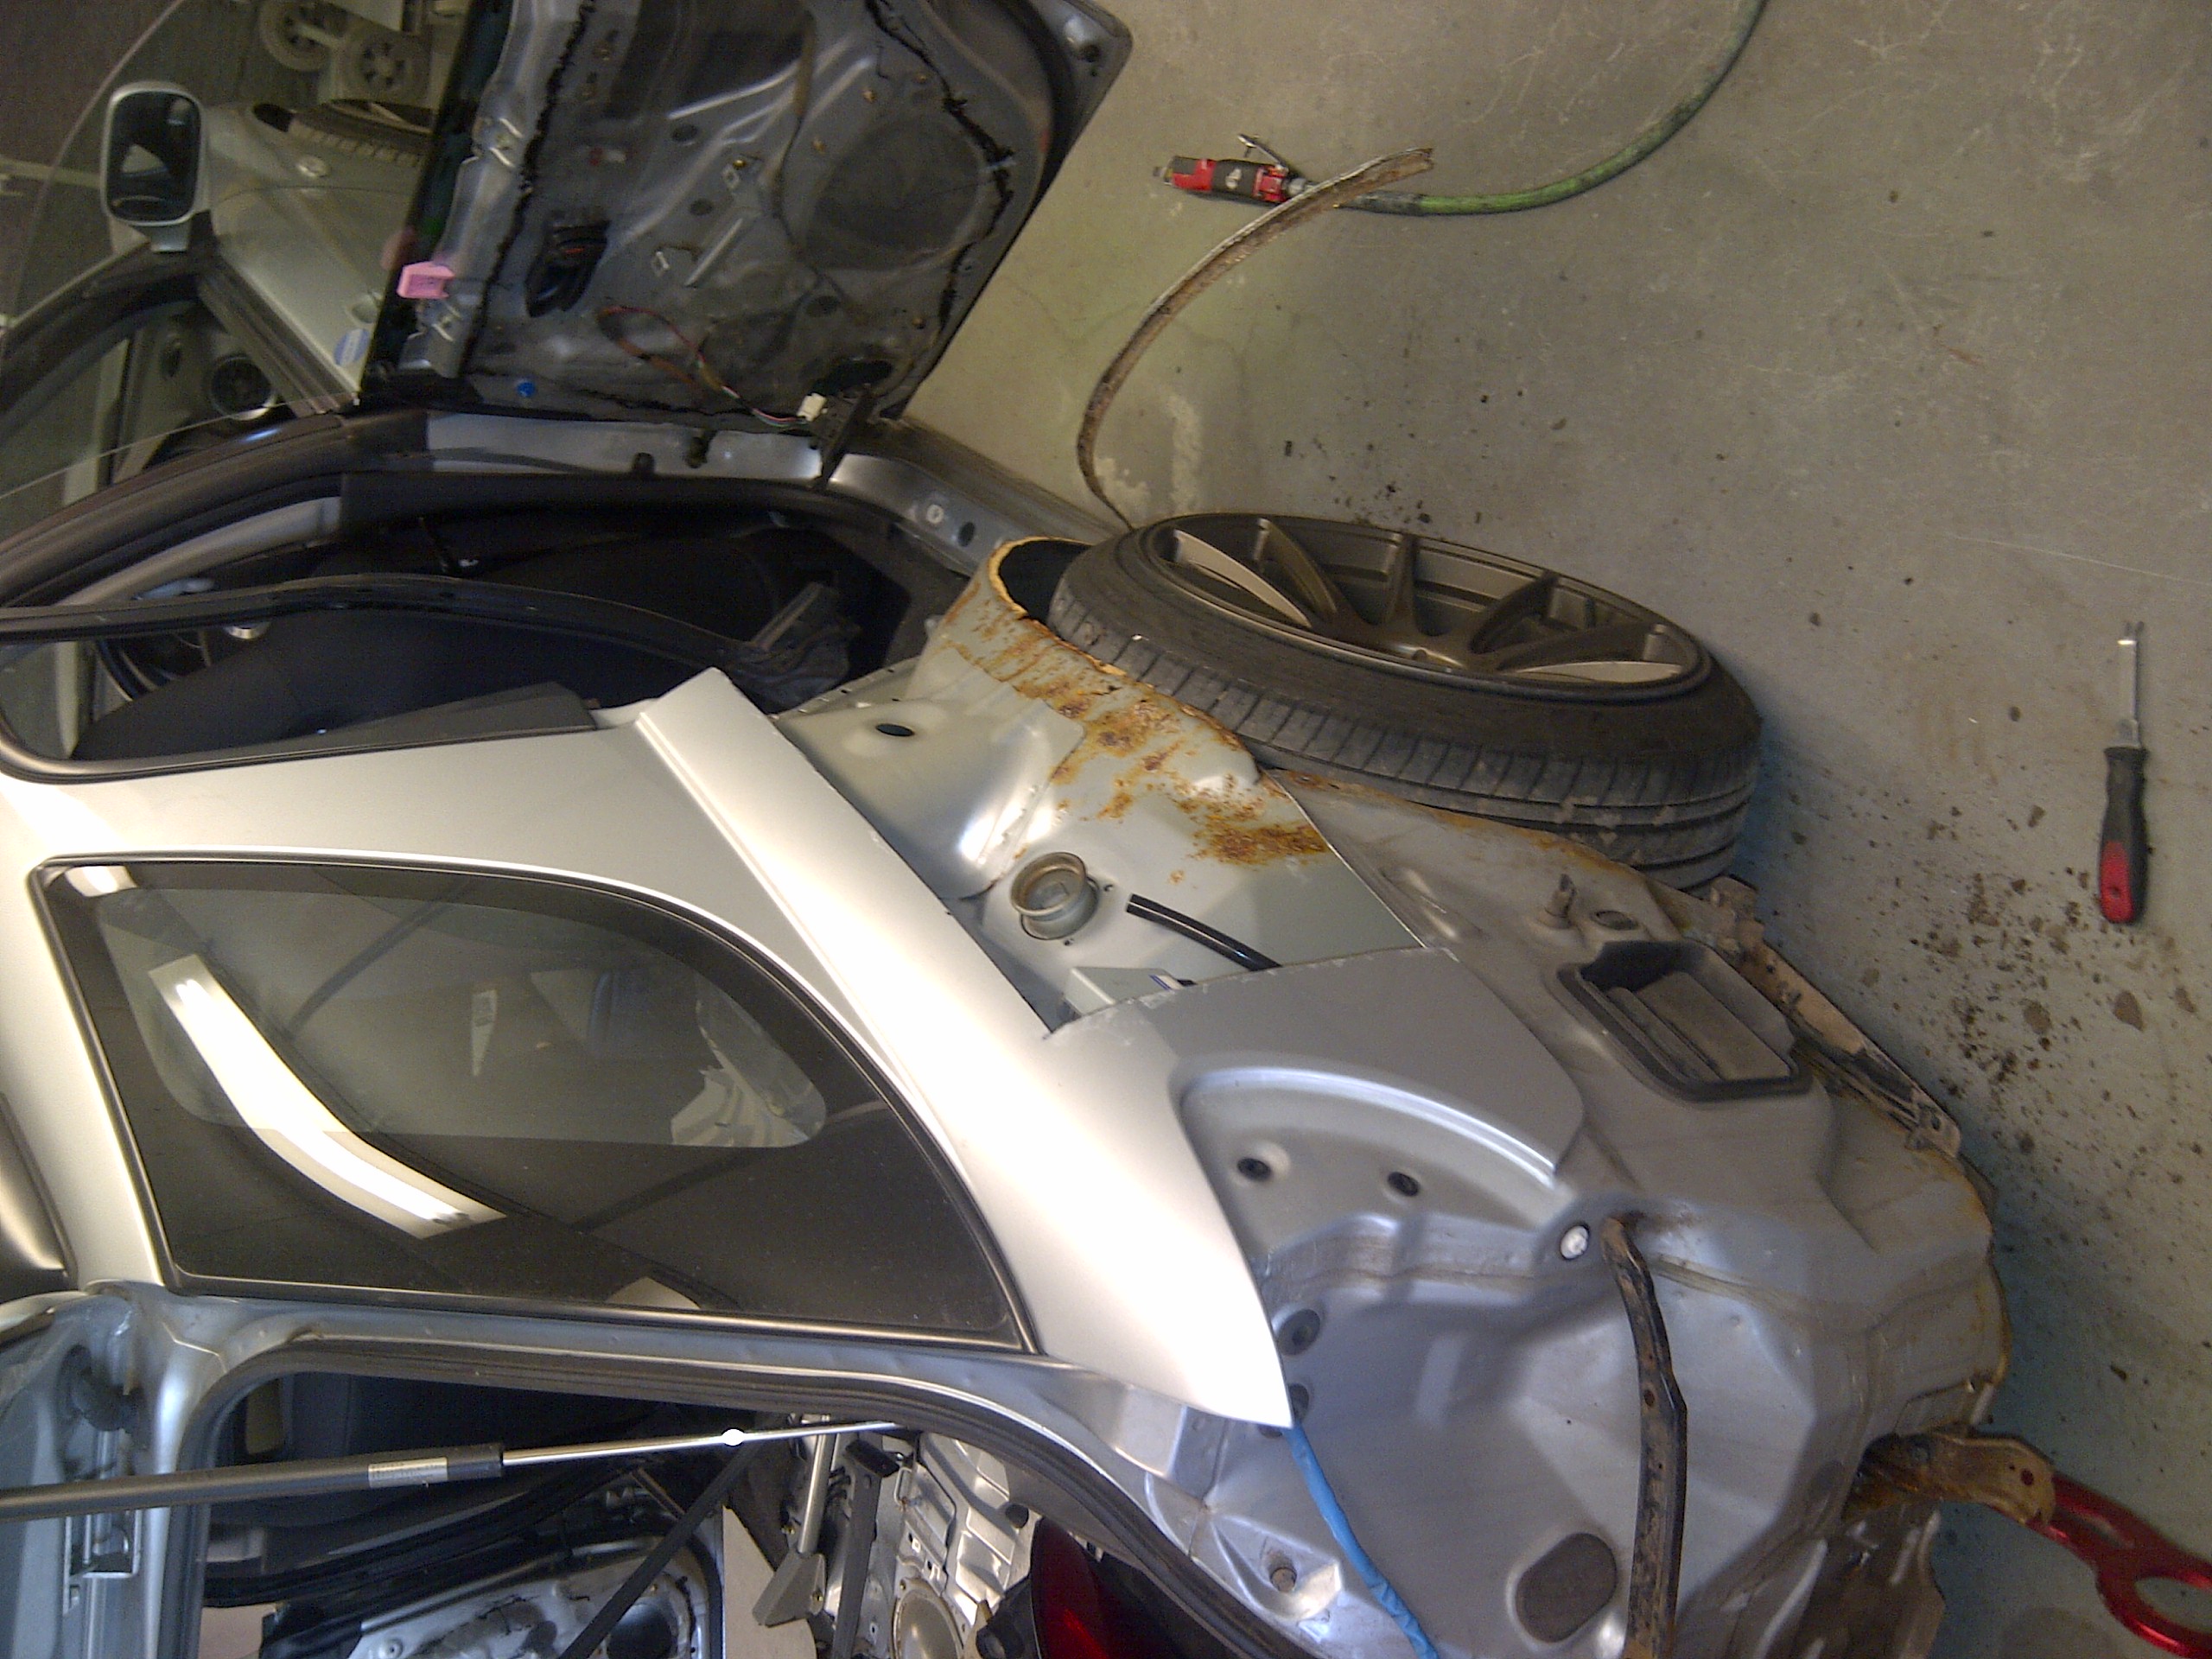
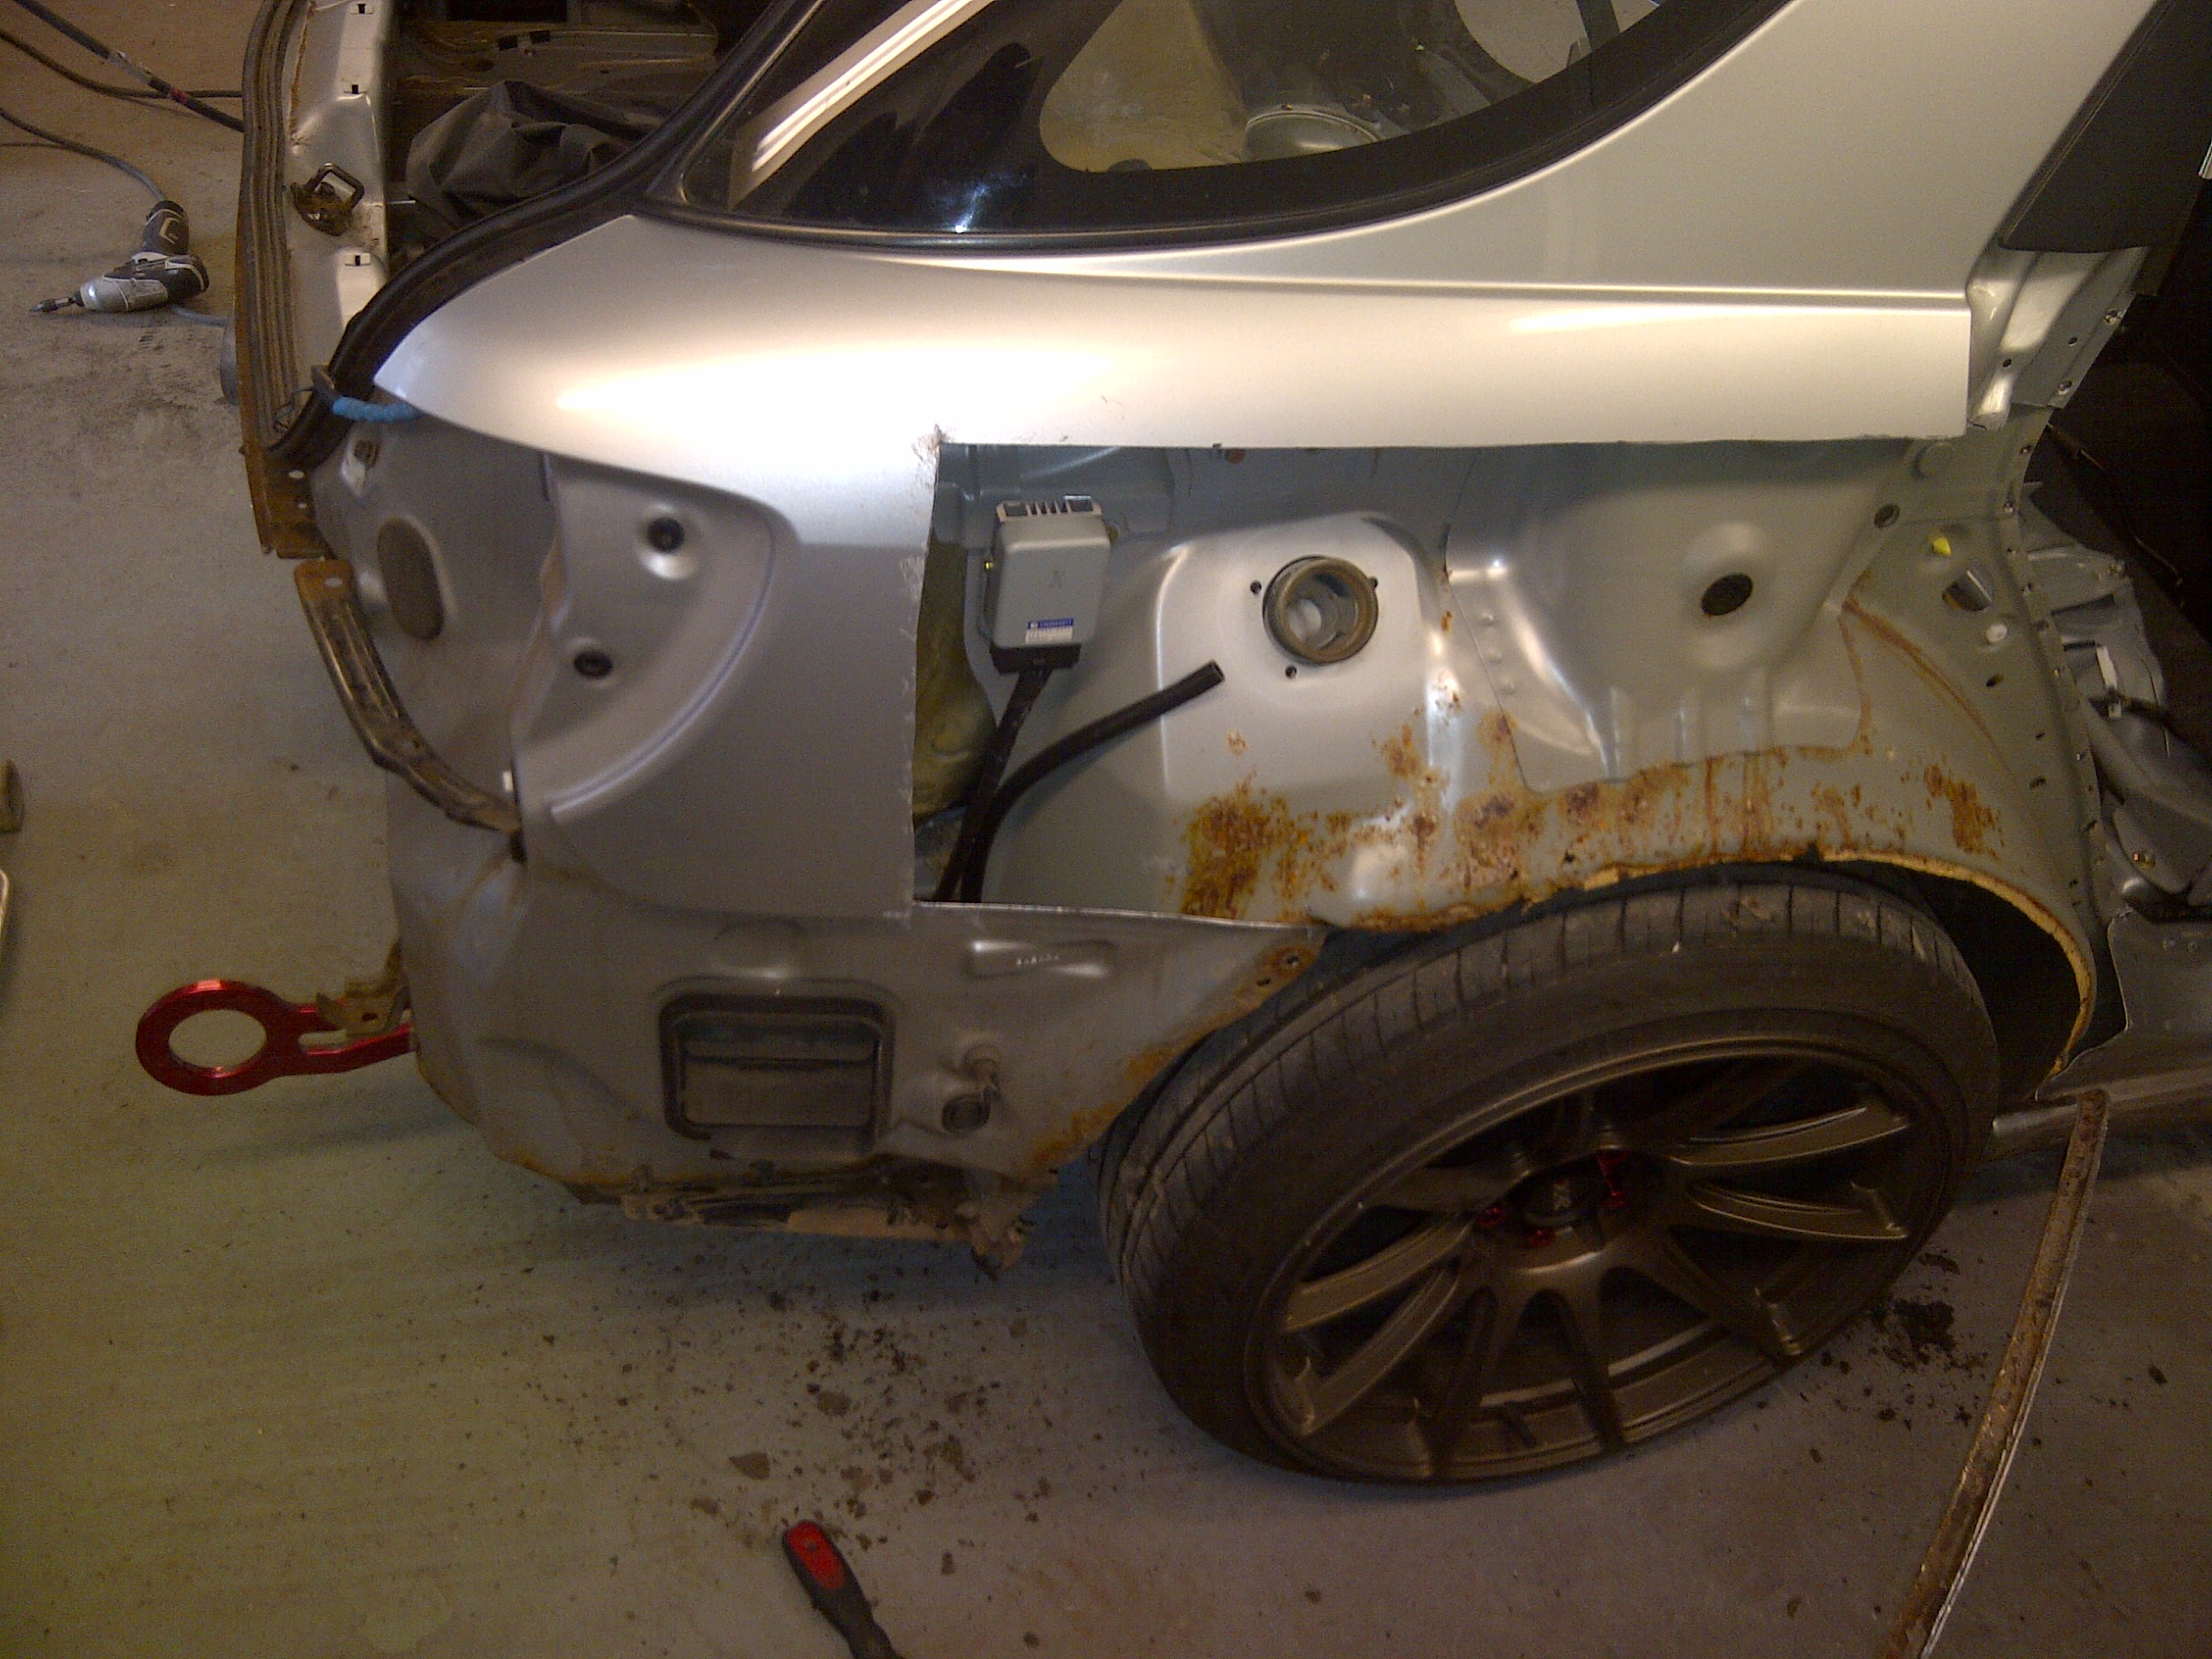
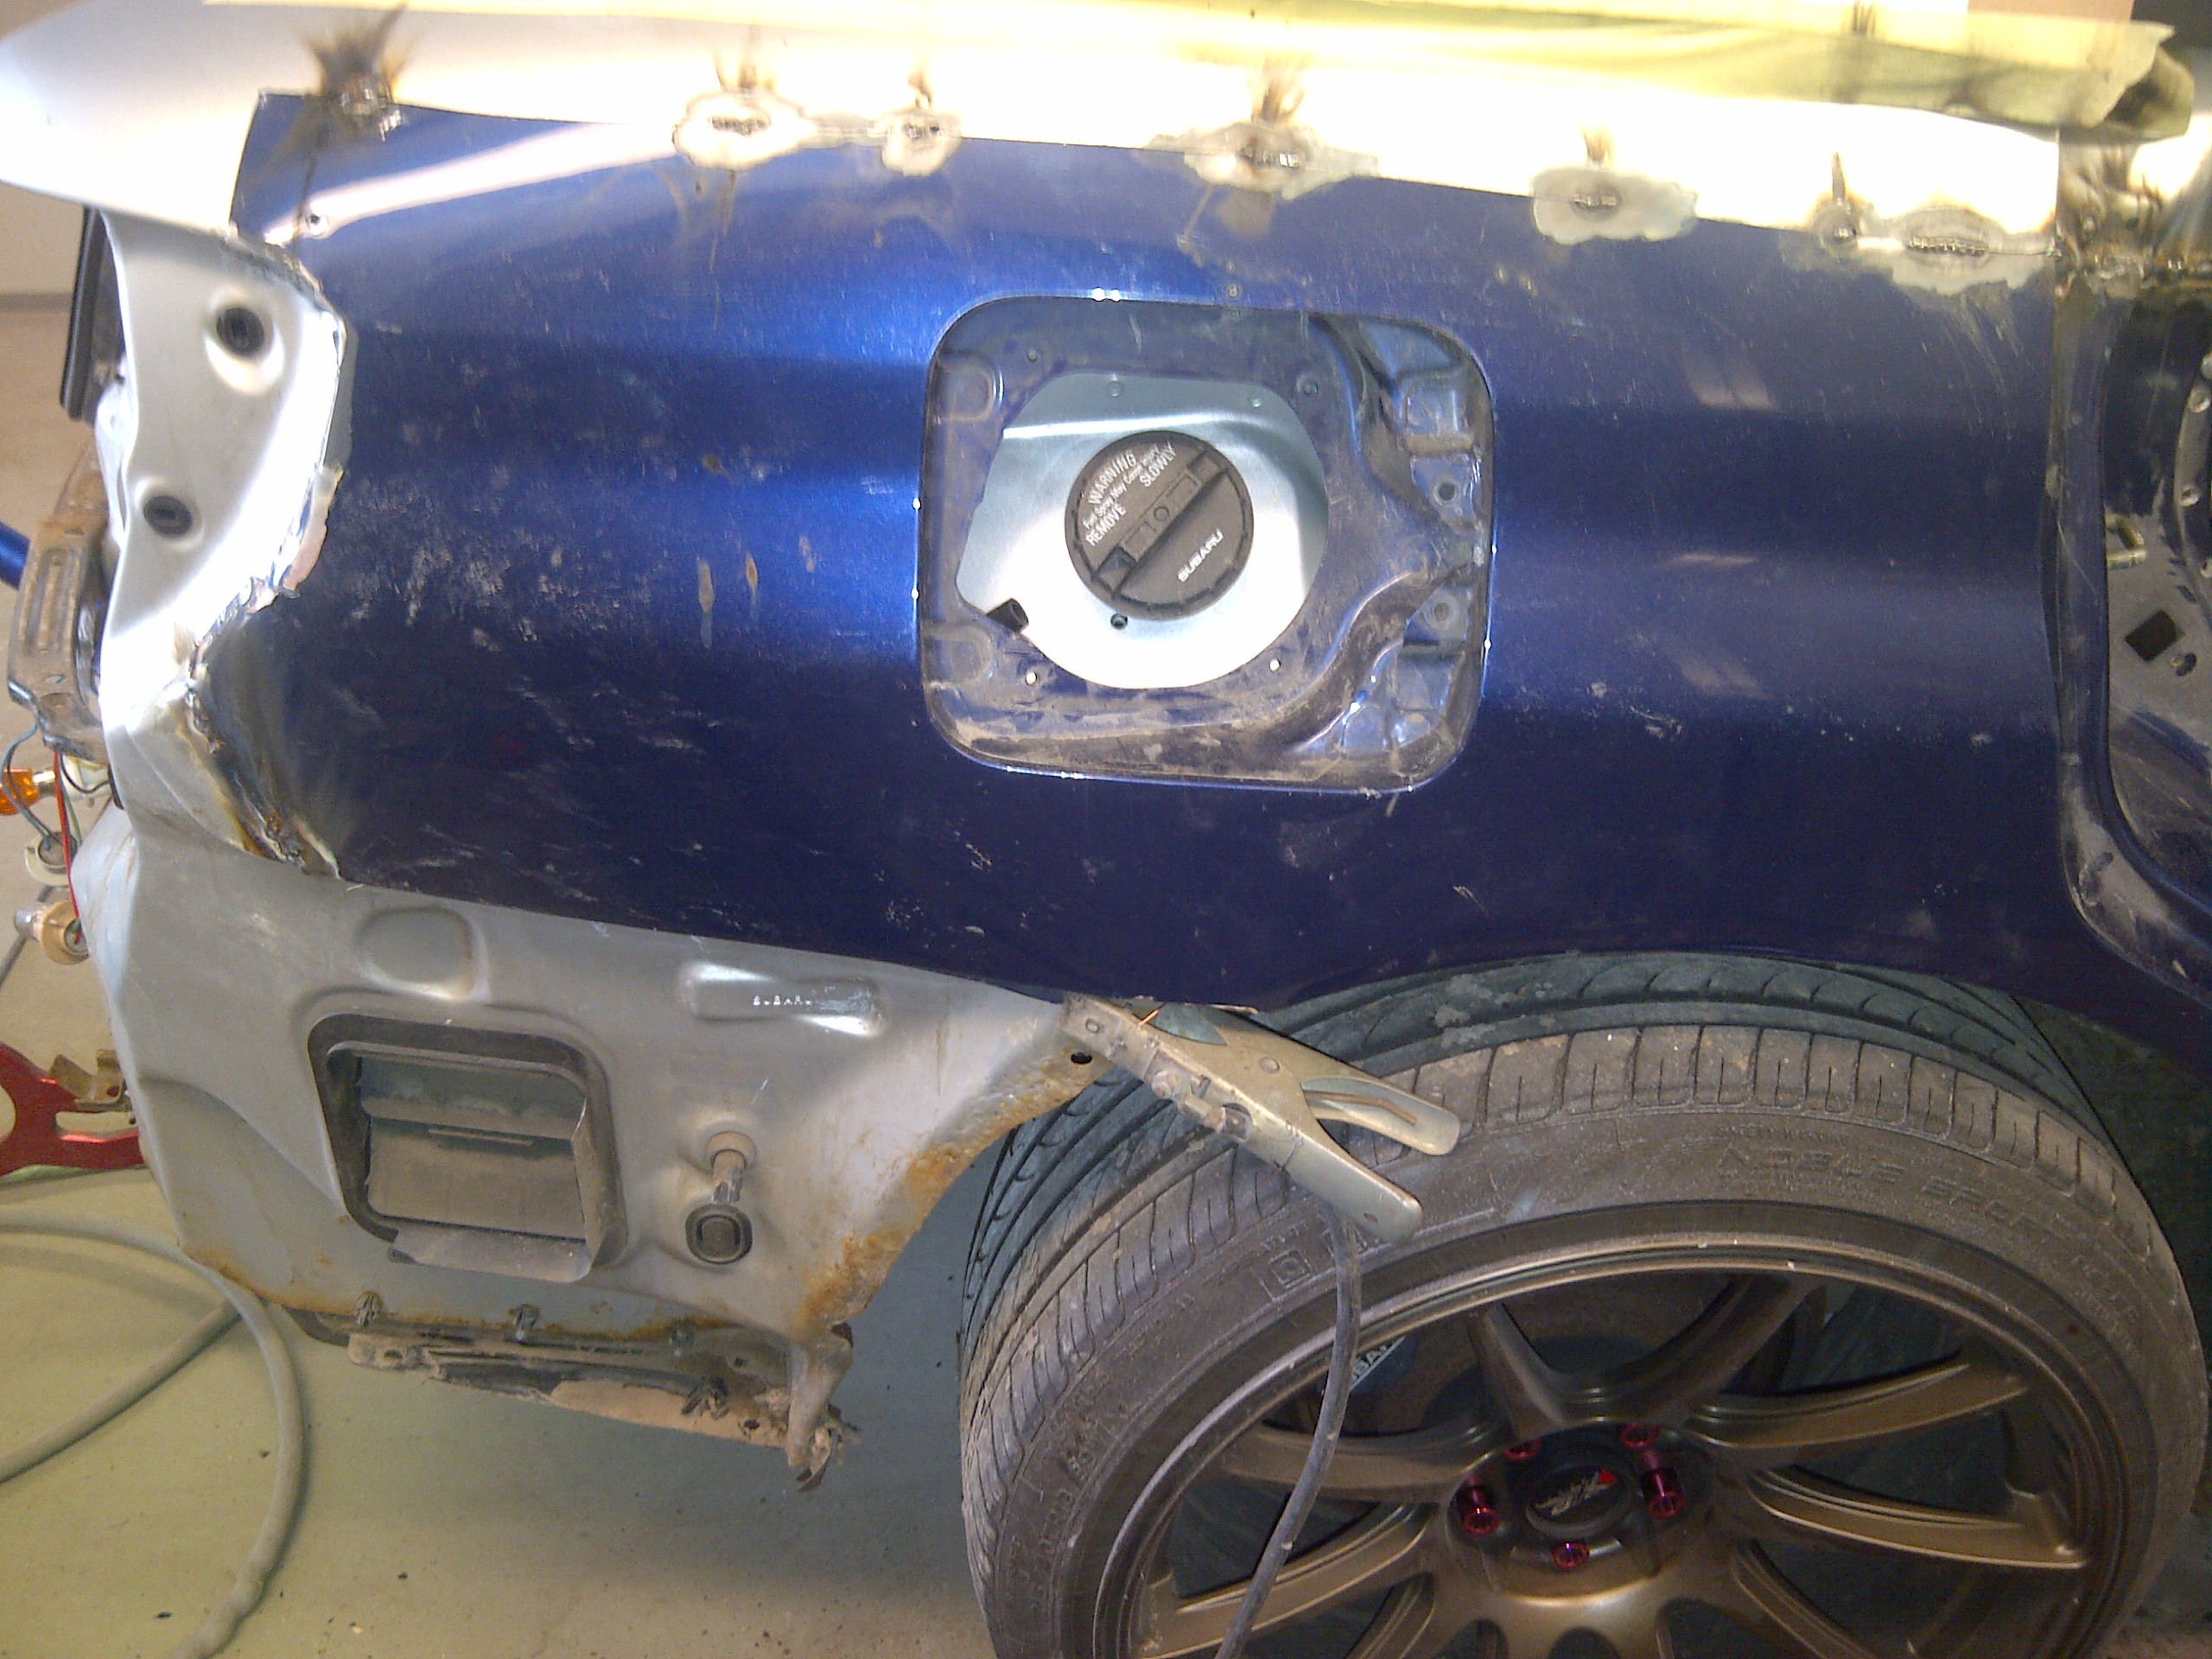
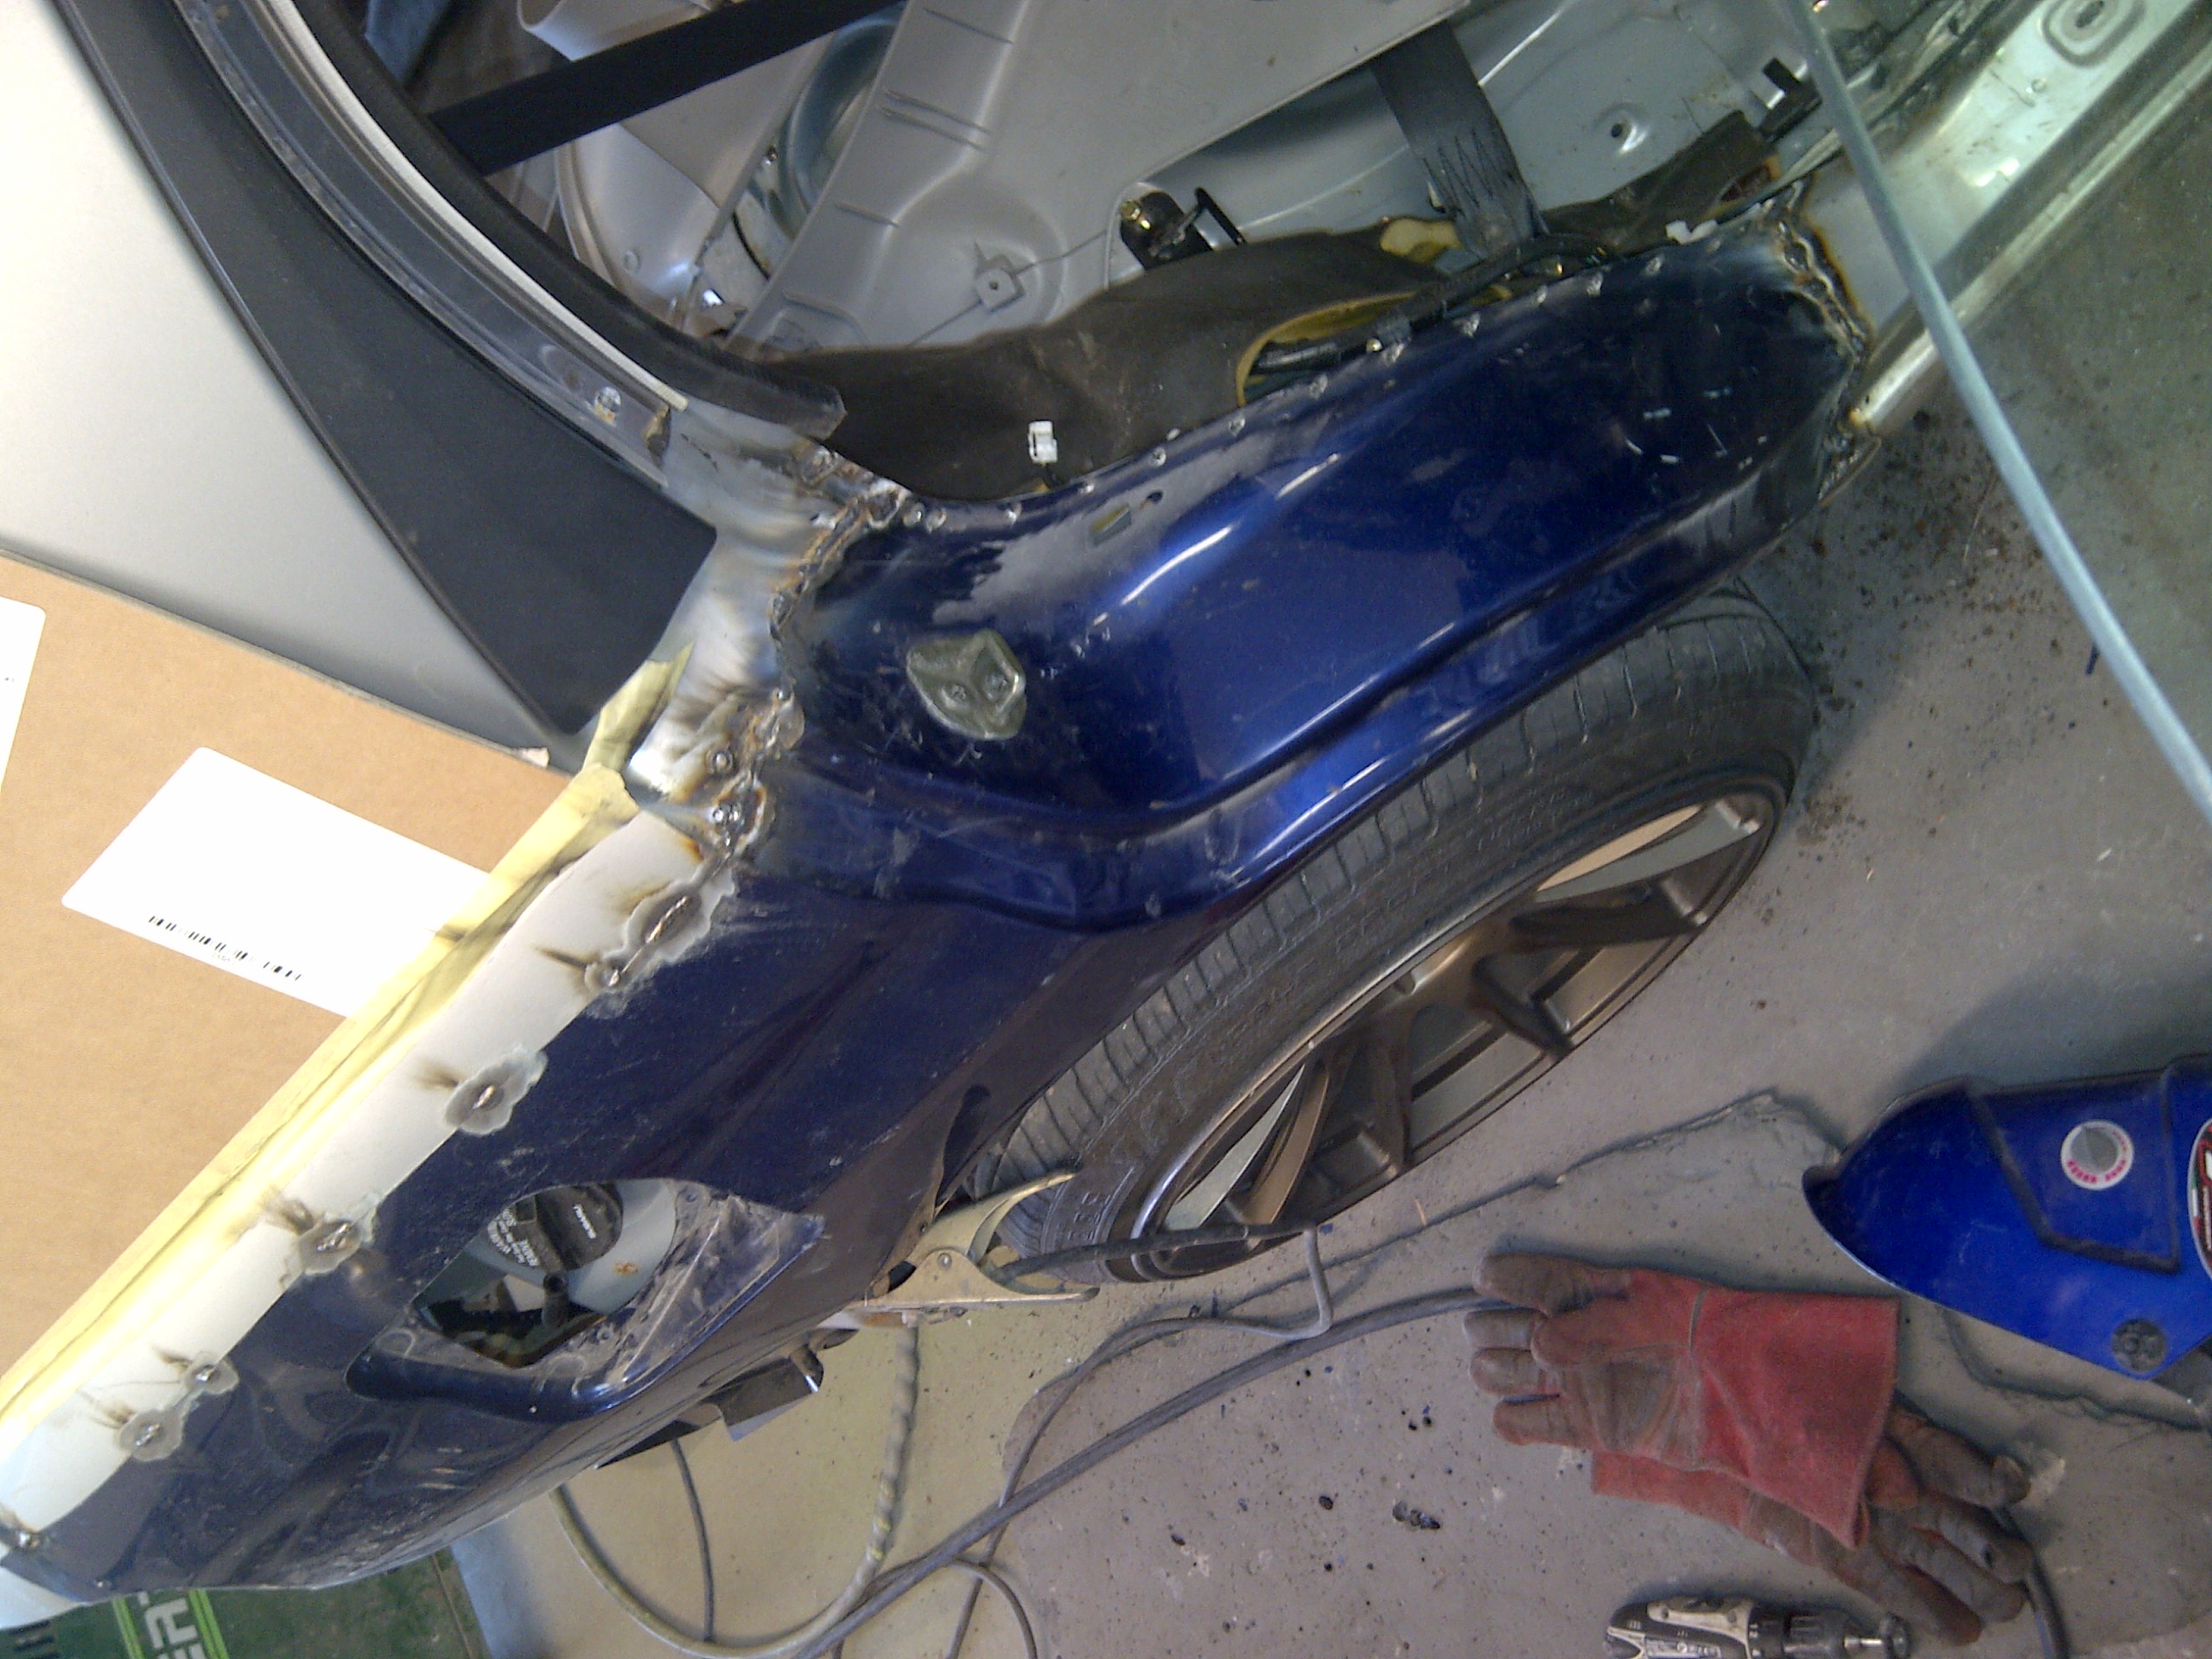
As said I got her for a bargain price this mainly down to the fact I believe the doctor had ran her into a rather large bush & needed some body work on the passenger side nothing major & he must of had a reversing accident as the rear needed attention as well.
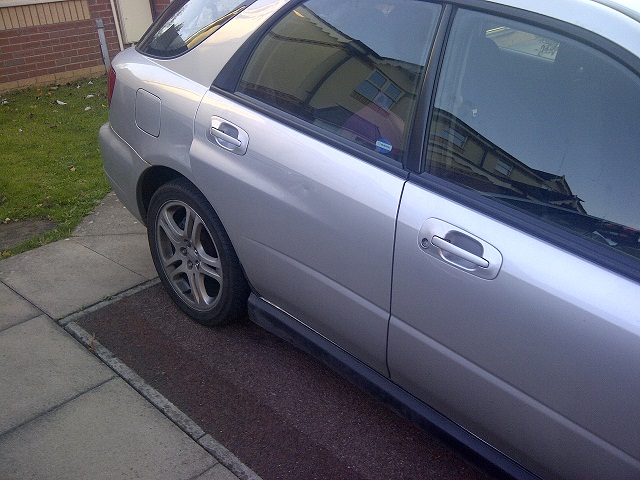
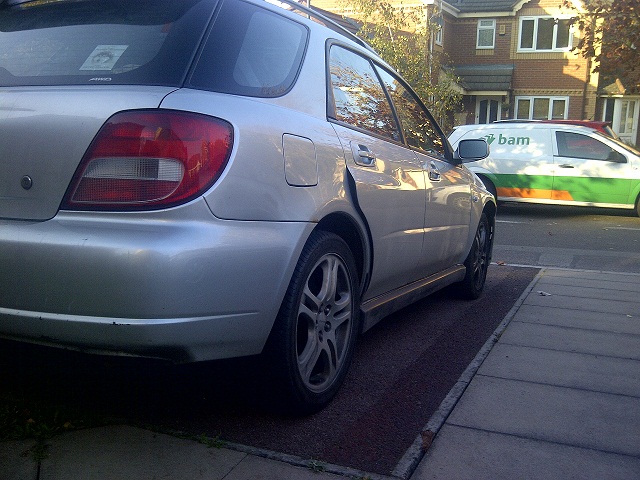
Anyway I logged in here & soon discovered that saloon newage's had wider fenders. So set about to see if things were interchangeable! low & behold they were. So made the decision that instead of replacing the panels like for like I would replace them with saloon item
So began ordering parts from various breakers.
While waiting for the parts I decided to de-tango the front lights & fit some clear side markers & wire them up as side lights.

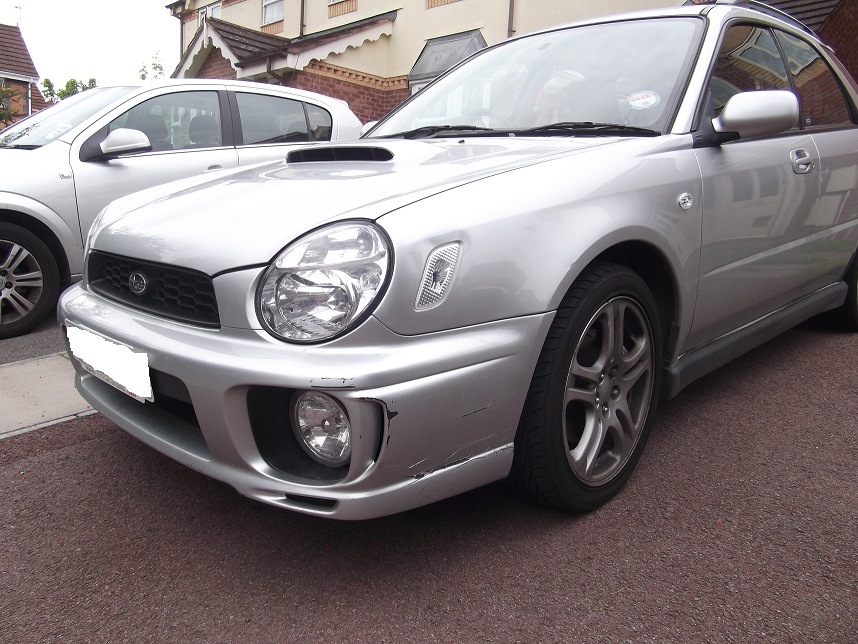
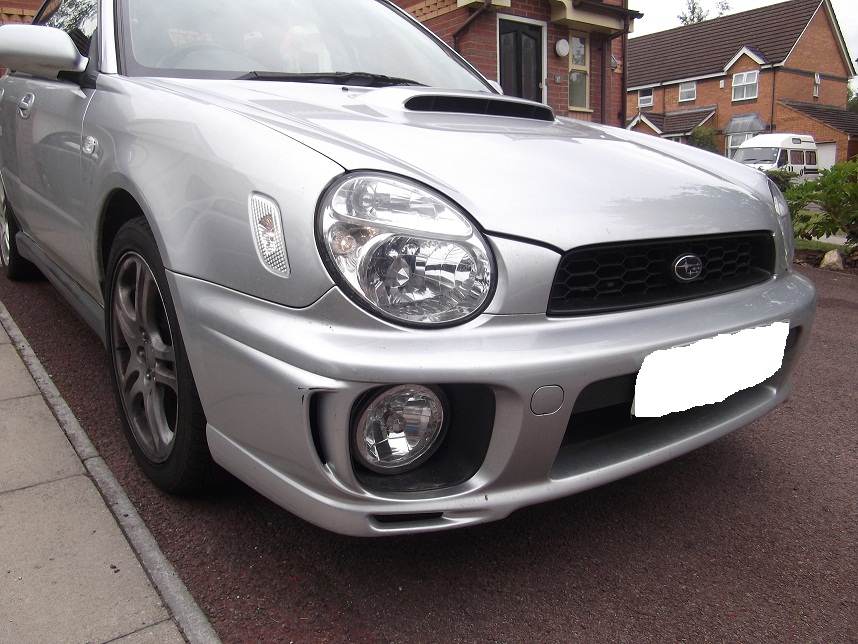
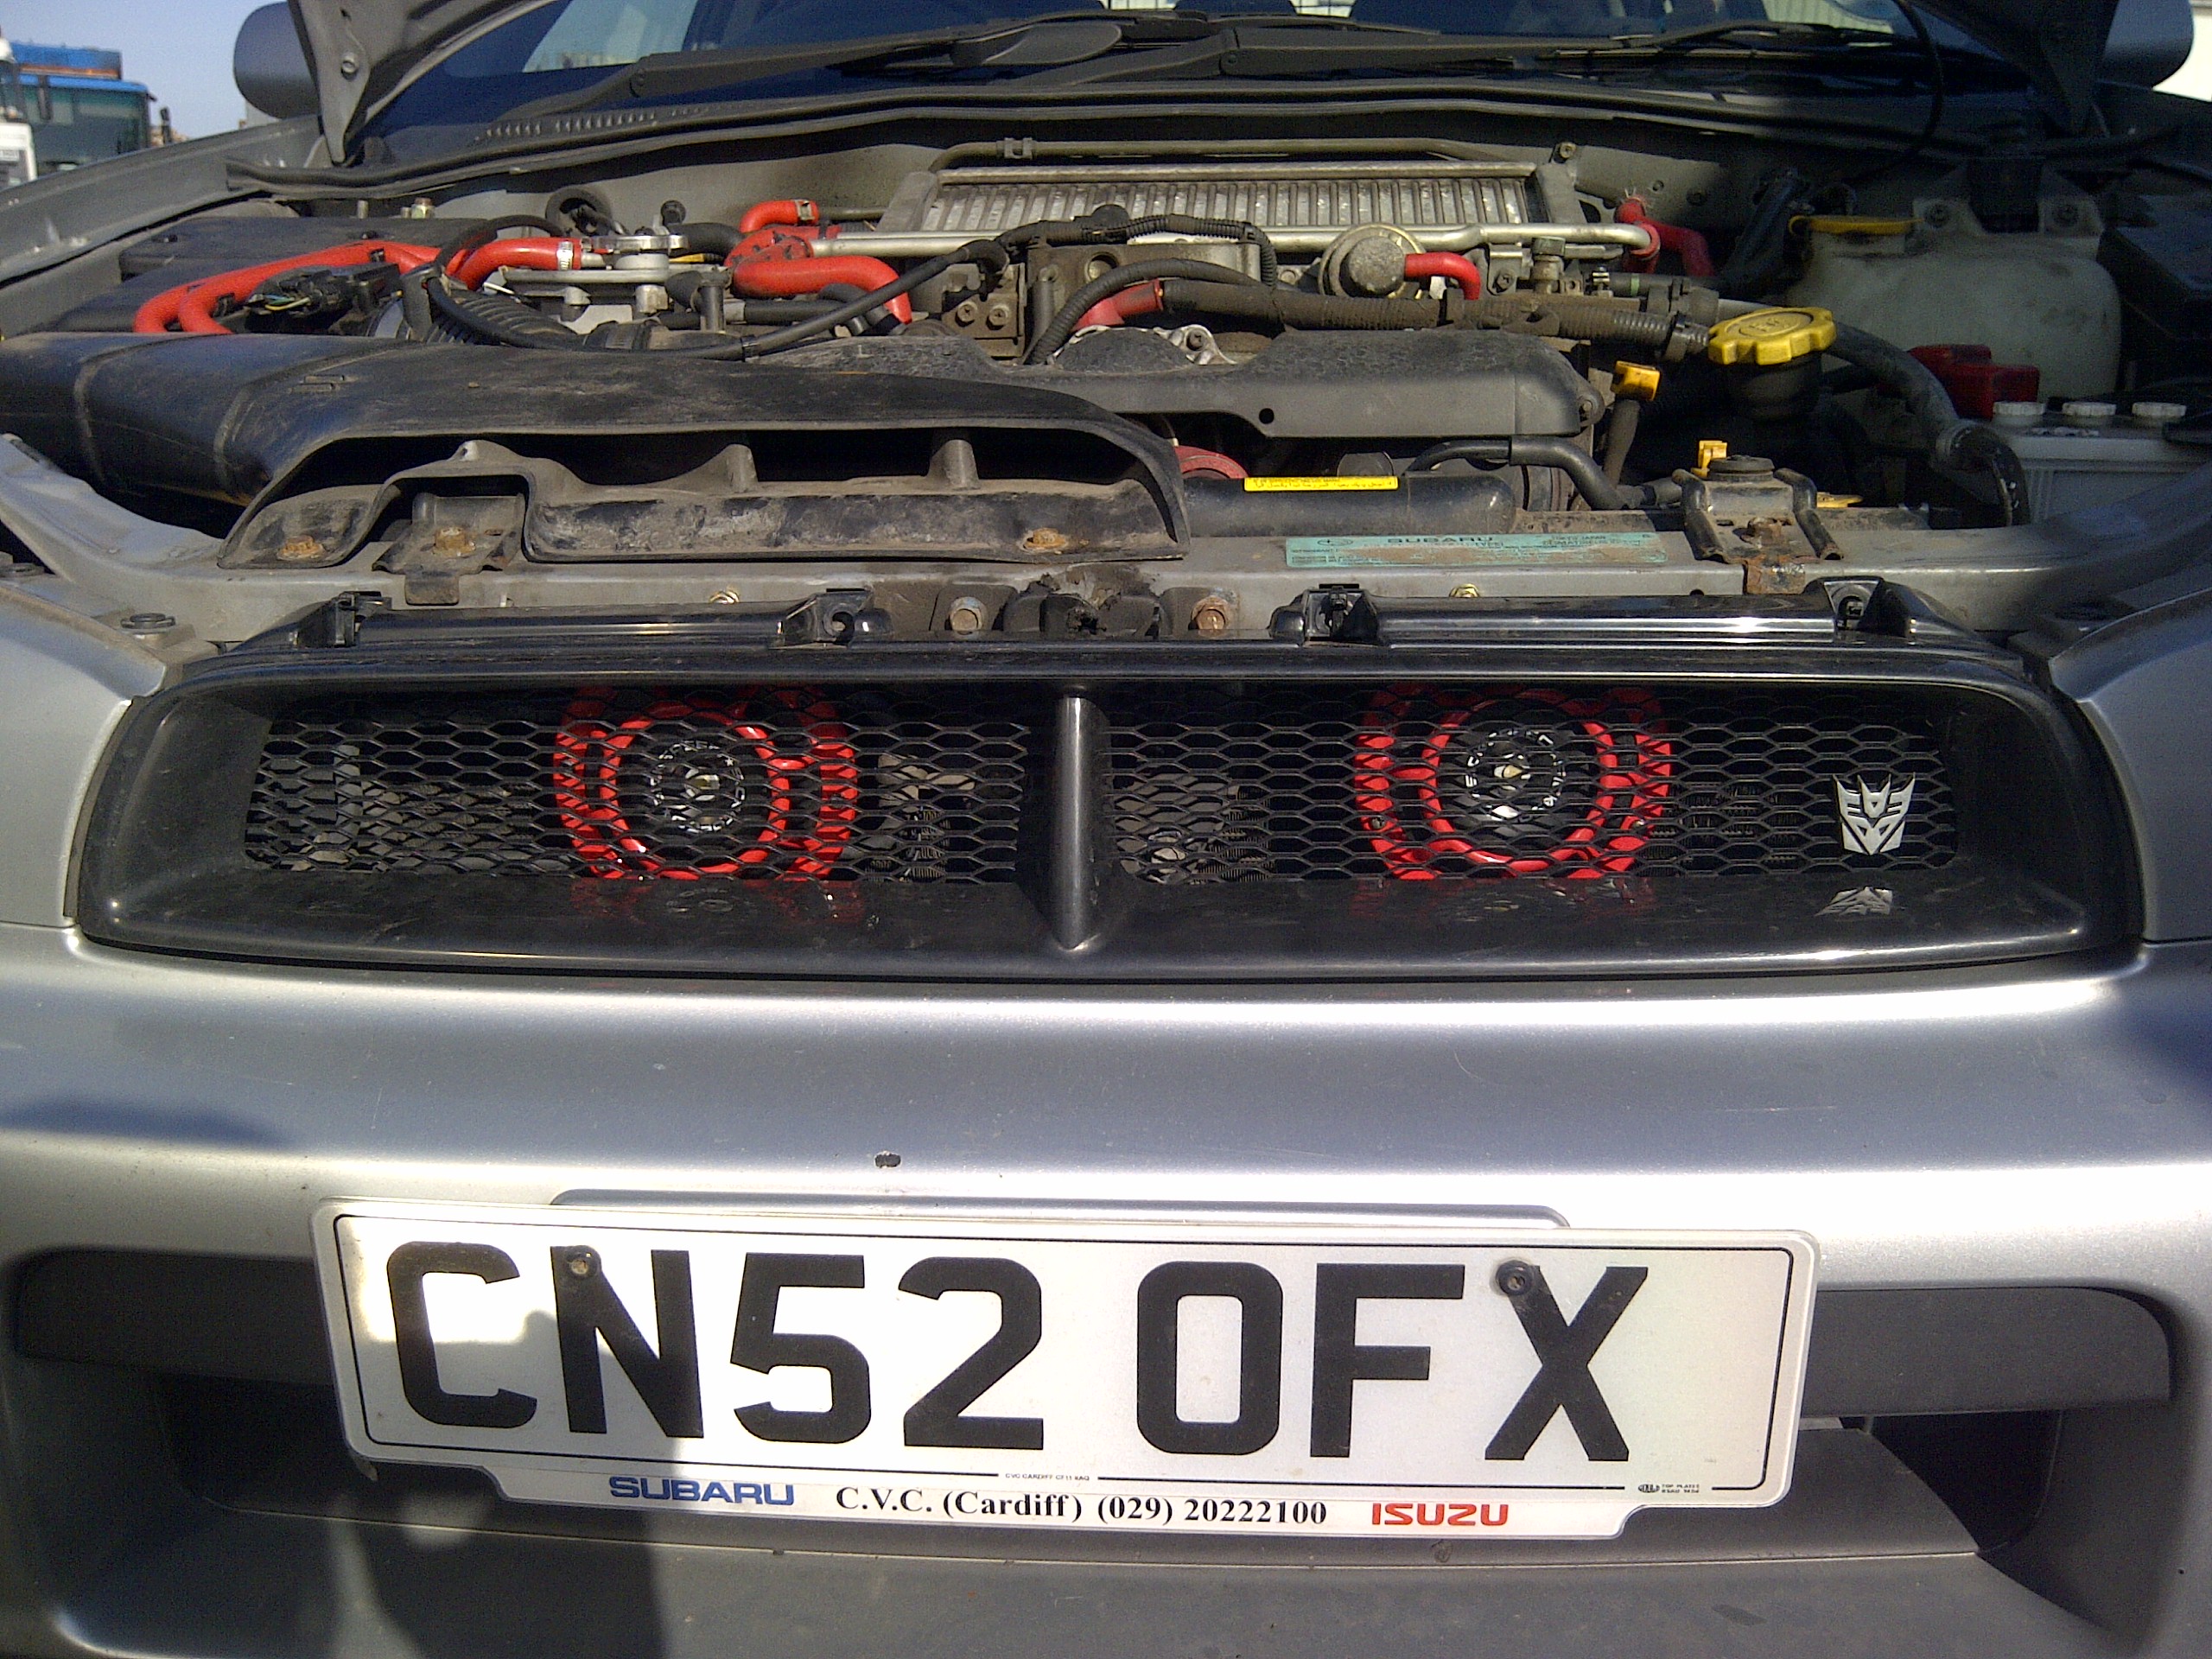
I have also fitted an after market mesh grille which I haven’t got pics of yet & am waiting on some hella supertone horns from the states to arrive to tuck behind that grille. oh & there are tegiwa Newage tow hook's fitted back & front.
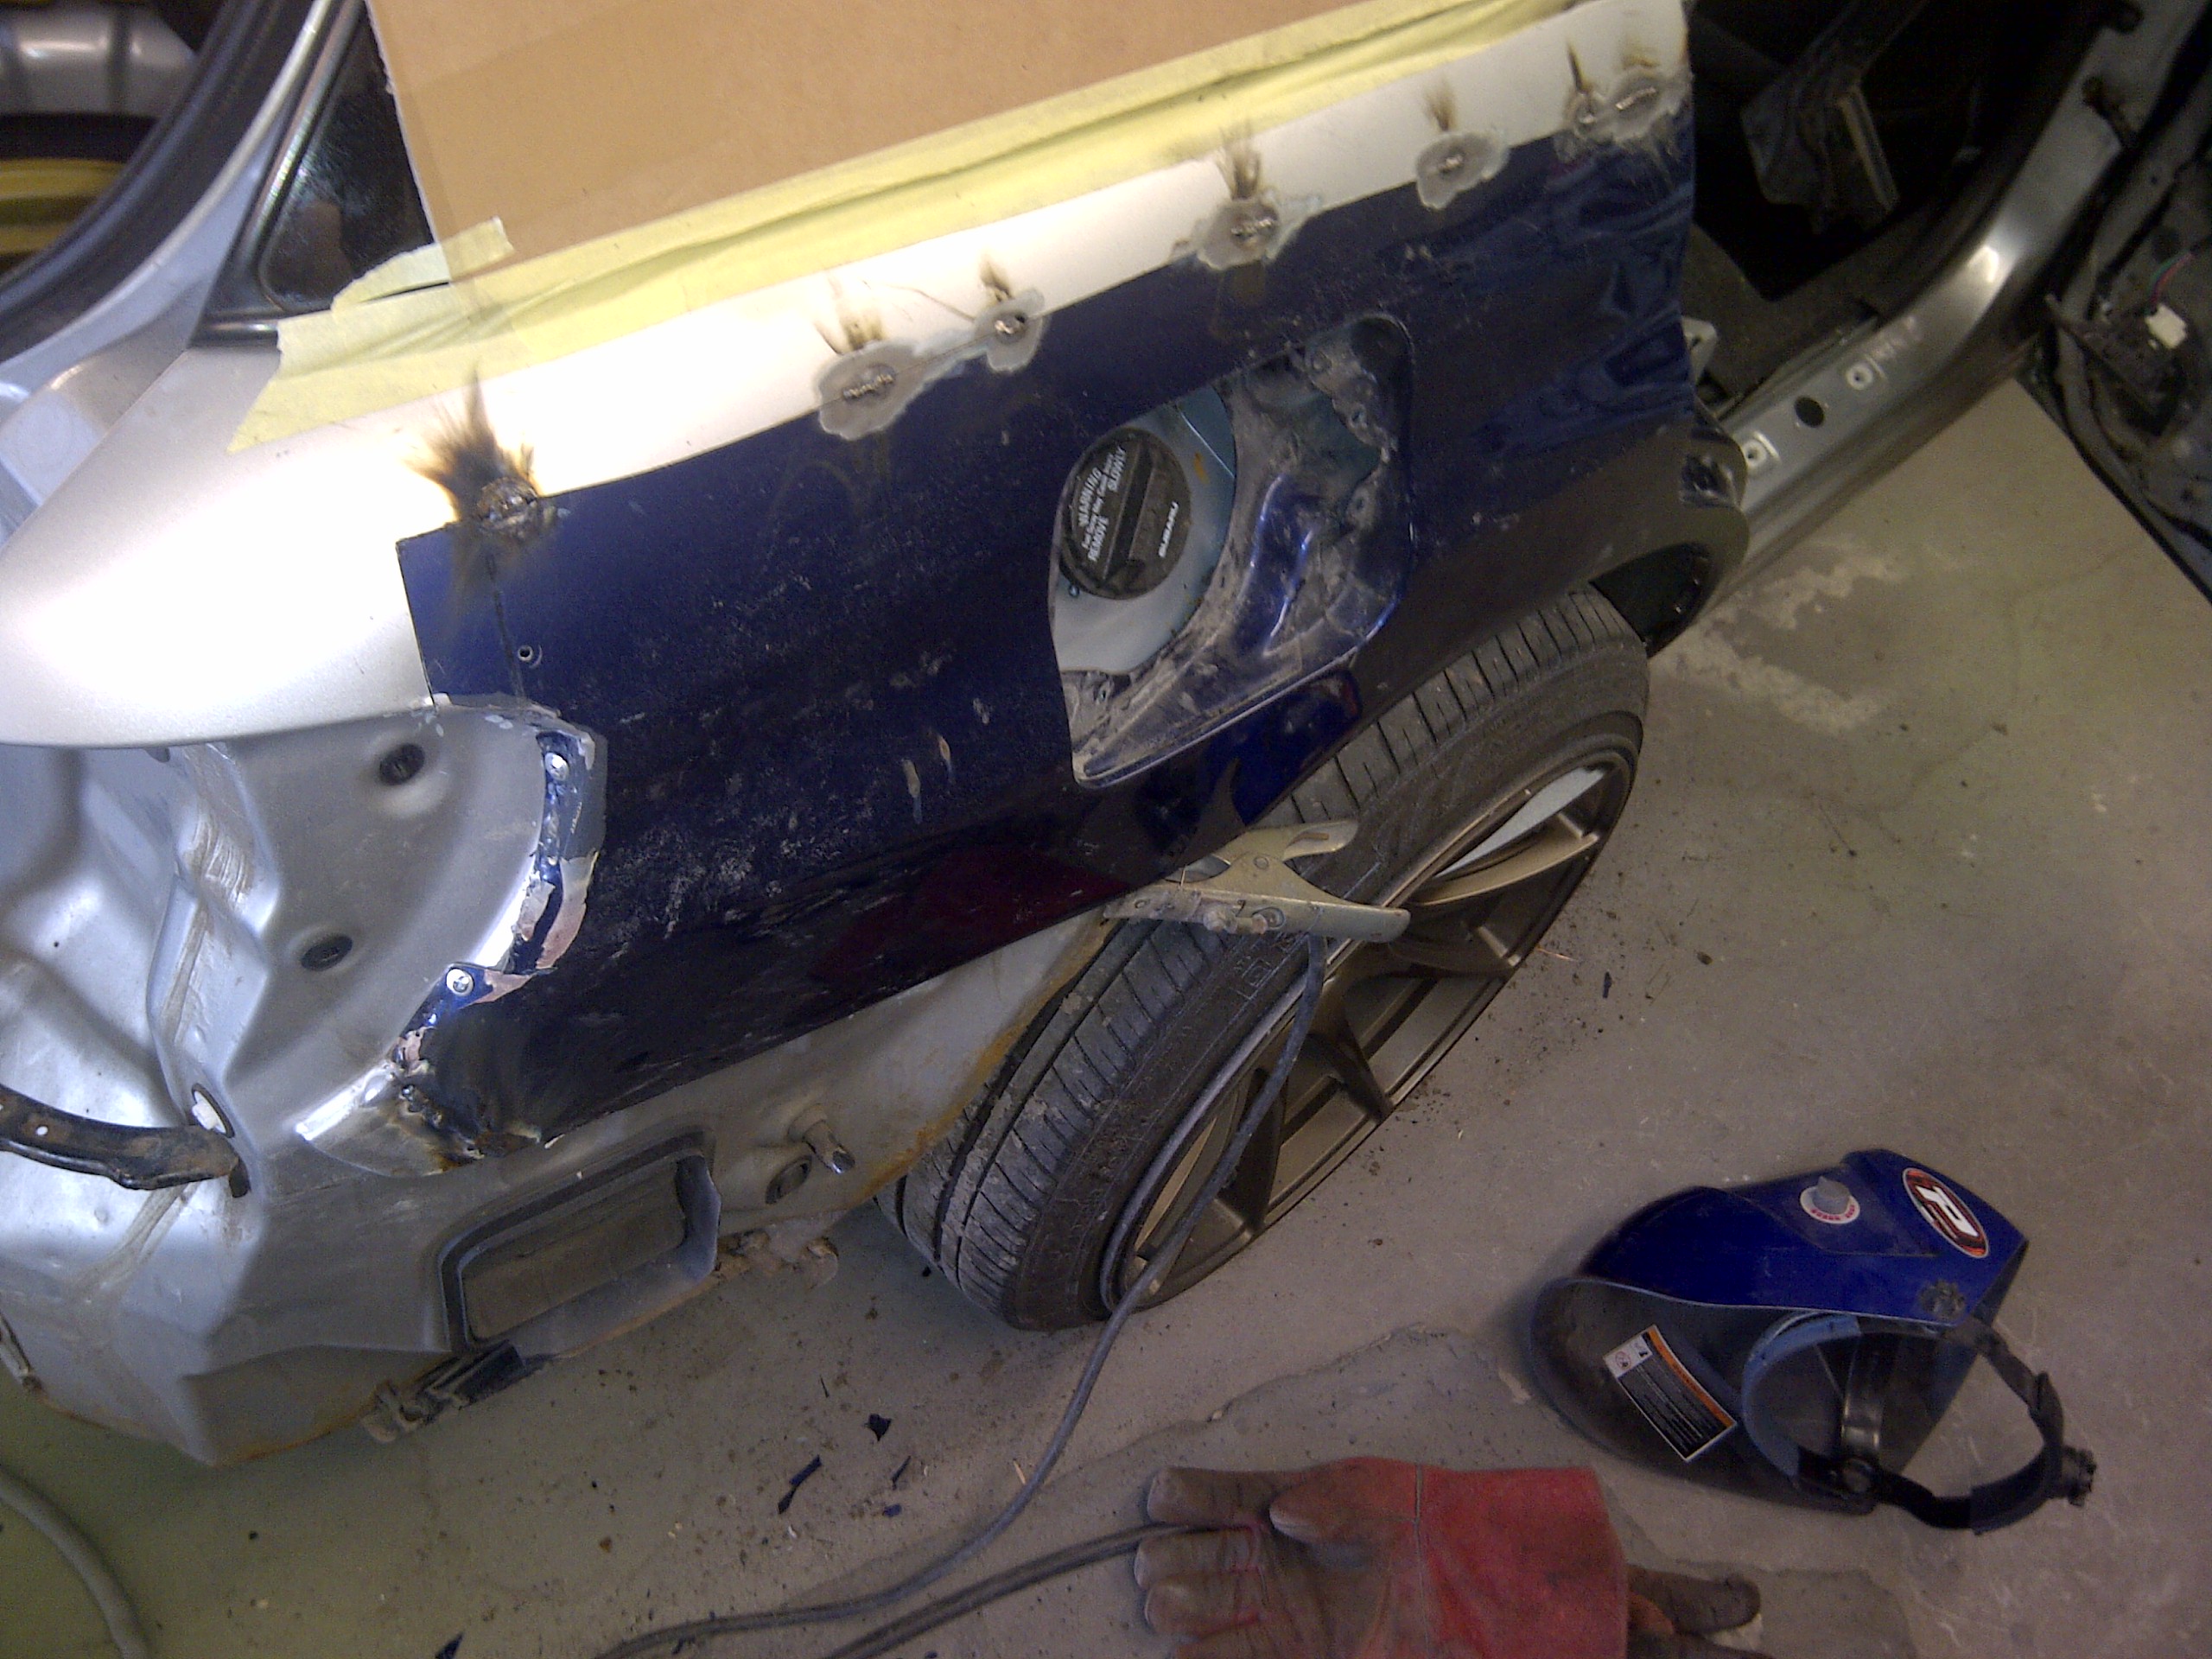
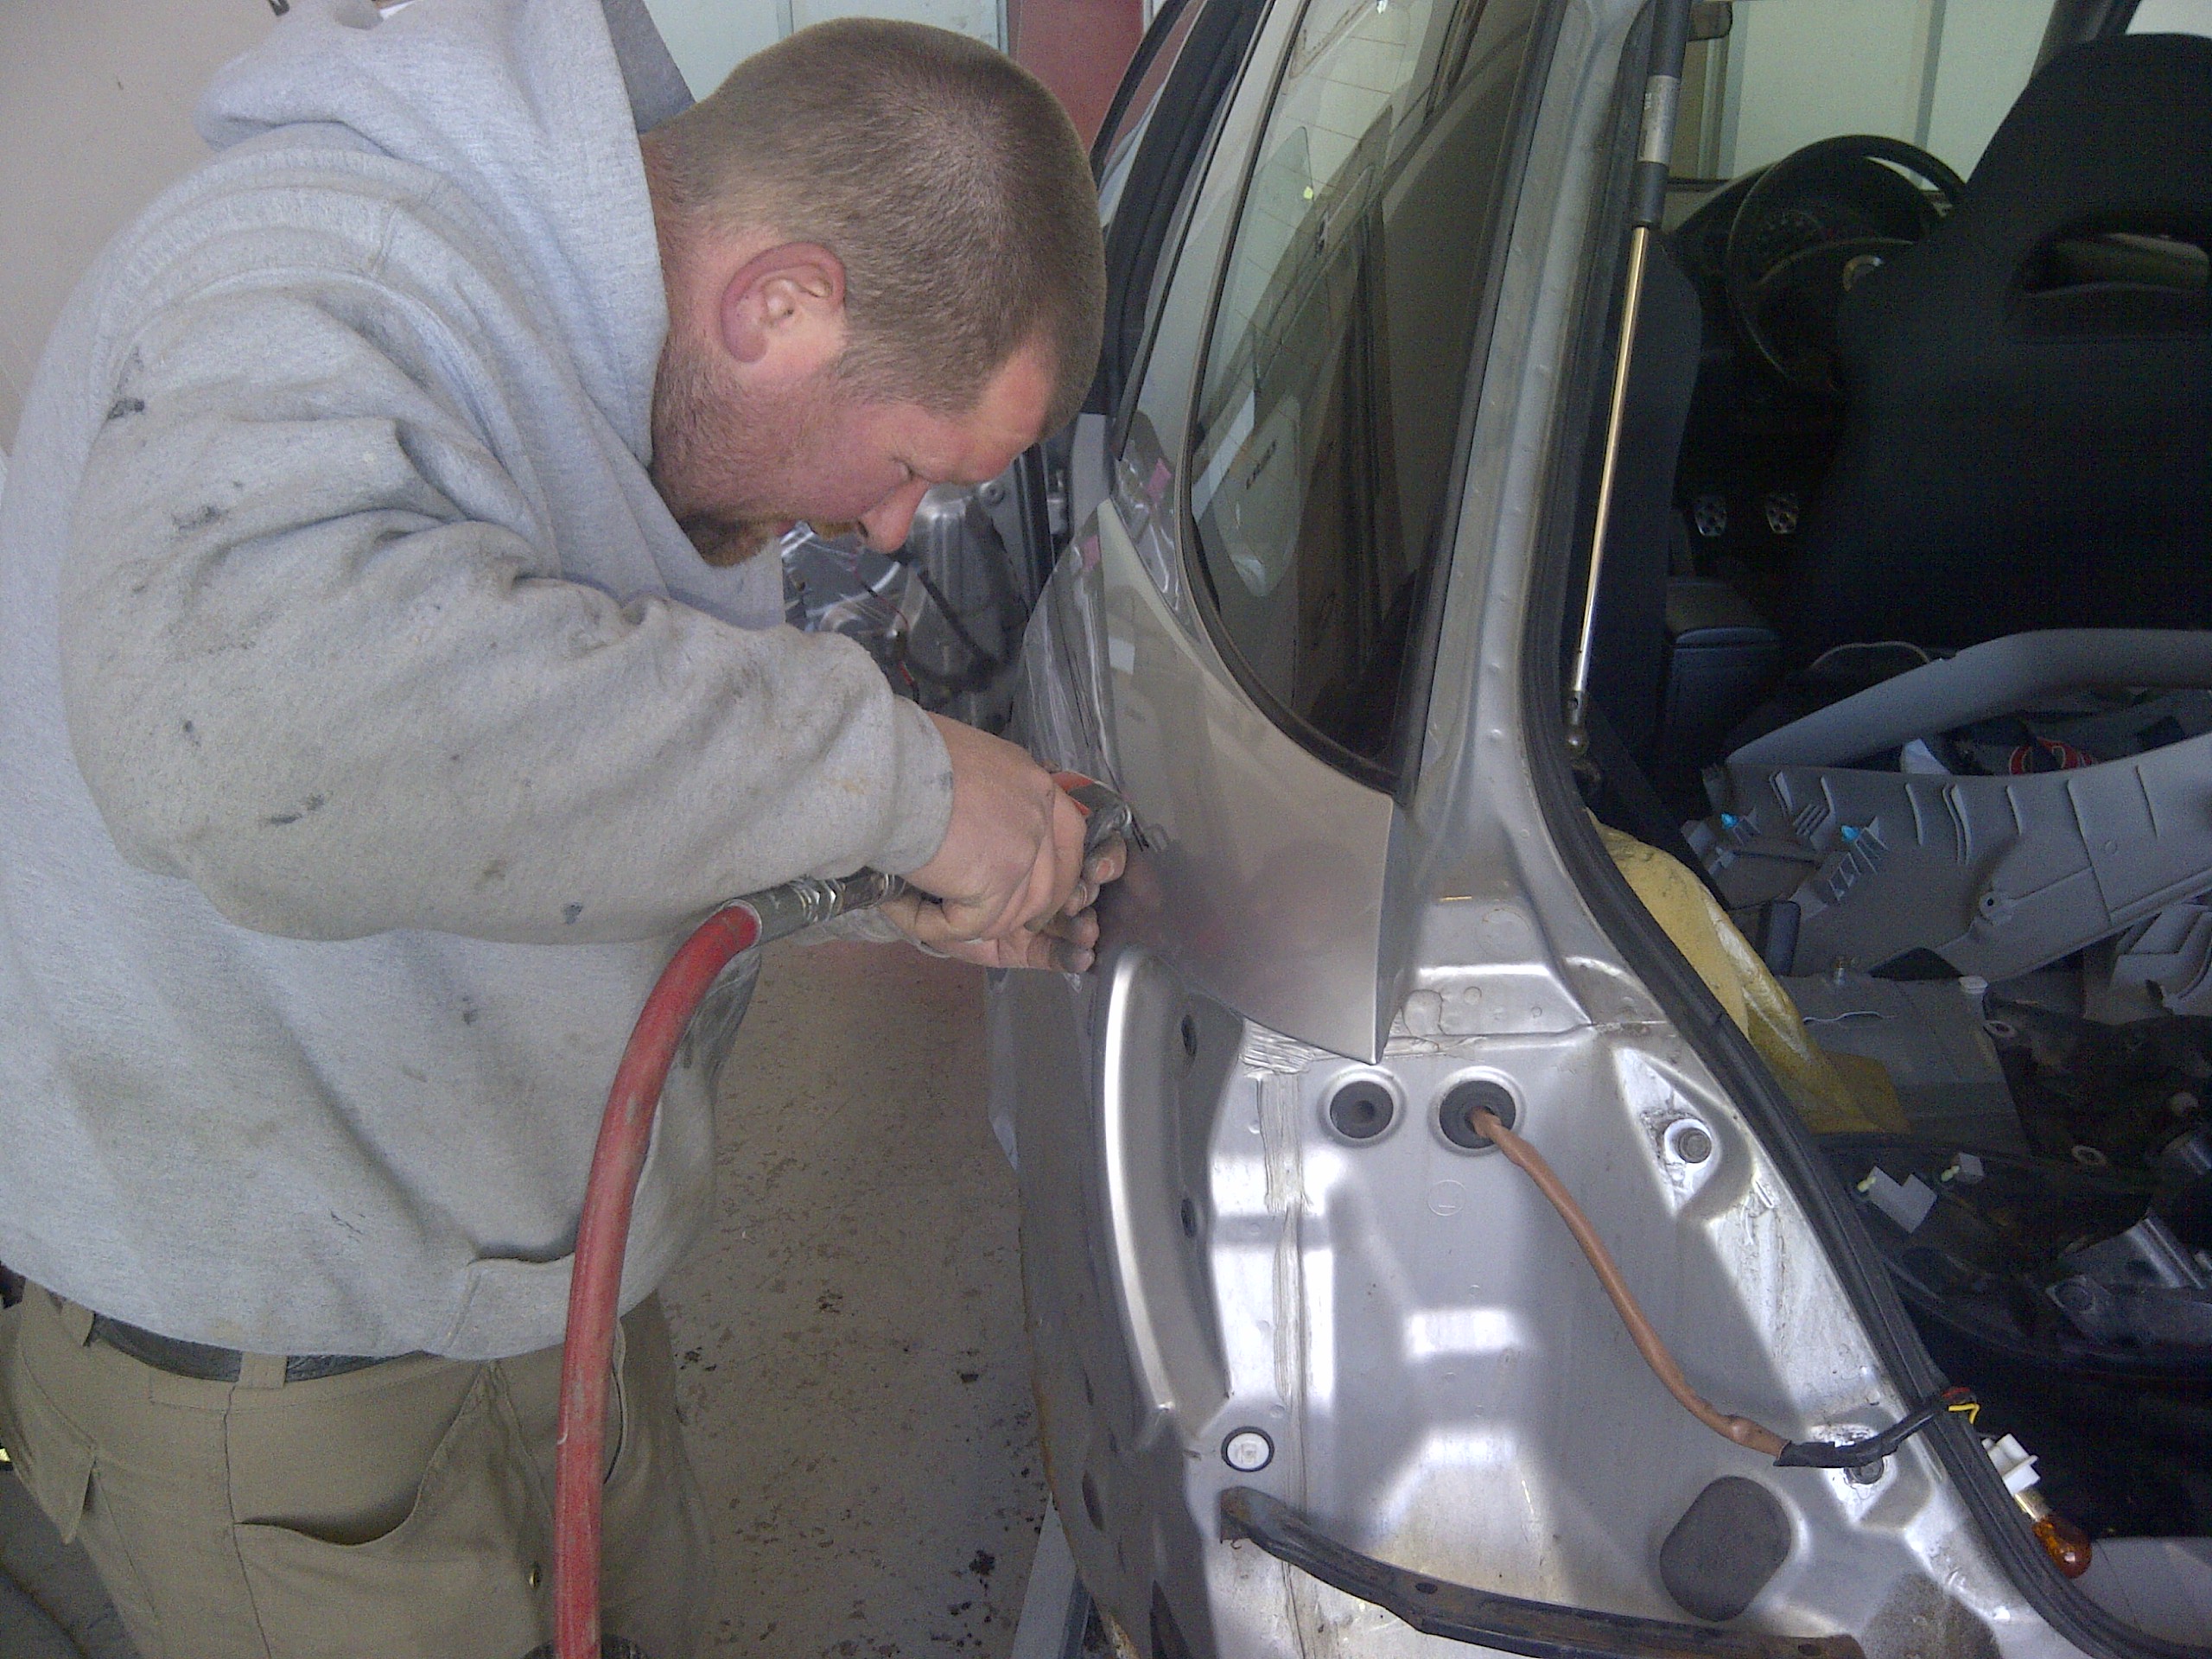
Well as the parts started to turn up I started to bolt them on I tested fitted the front wings & rolled the lips then fired them off to my mate for a quick touch up of paint as 1 wing wasn’t as mint as described & needed to be welded up. Once they were back from the pain shop on they went with the bumper & rear doors.

Thought I would start a project thread as the car will be moving forward soon in the next few weeks hopefully.
This is my 1st scoob but by no means my 1st performance/modified car.
Needed something to bring the dog along in this time though so a wagon seemed the best option.
Here's the dog!
I popped over to Newport auctions 1 evening with a mate of mine who was looking for something cheap & I spotted this while I was there.
After a bit of discussion with the retailer I secured her for a rock bottom price!
She is totally standard 1 doctor owner with FSH. I tracked down the doctor & had a lil chat with him he sounded some what ancient but was a true petrol head listing a number of cars he'd had previous to this scoob.
As said I got her for a bargain price this mainly down to the fact I believe the doctor had ran her into a rather large bush & needed some body work on the passenger side nothing major & he must of had a reversing accident as the rear needed attention as well.
Anyway I logged in here & soon discovered that saloon newage's had wider fenders. So set about to see if things were interchangeable! low & behold they were. So made the decision that instead of replacing the panels like for like I would replace them with saloon item
So began ordering parts from various breakers.
While waiting for the parts I decided to de-tango the front lights & fit some clear side markers & wire them up as side lights.
I have also fitted an after market mesh grille which I haven’t got pics of yet & am waiting on some hella supertone horns from the states to arrive to tuck behind that grille.
oh & there are tegiwa Newage tow hook's fitted back & front. Well as the parts started to turn up I started to bolt them on I tested fitted the front wings & rolled the lips then fired them off to my mate for a quick touch up of paint as 1 wing wasn’t as mint as described & needed to be welded up. Once they were back from the pain shop on they went with the bumper & rear doors.
Last edited by LewisL; Apr 22, 2012 at 11:03 AM.

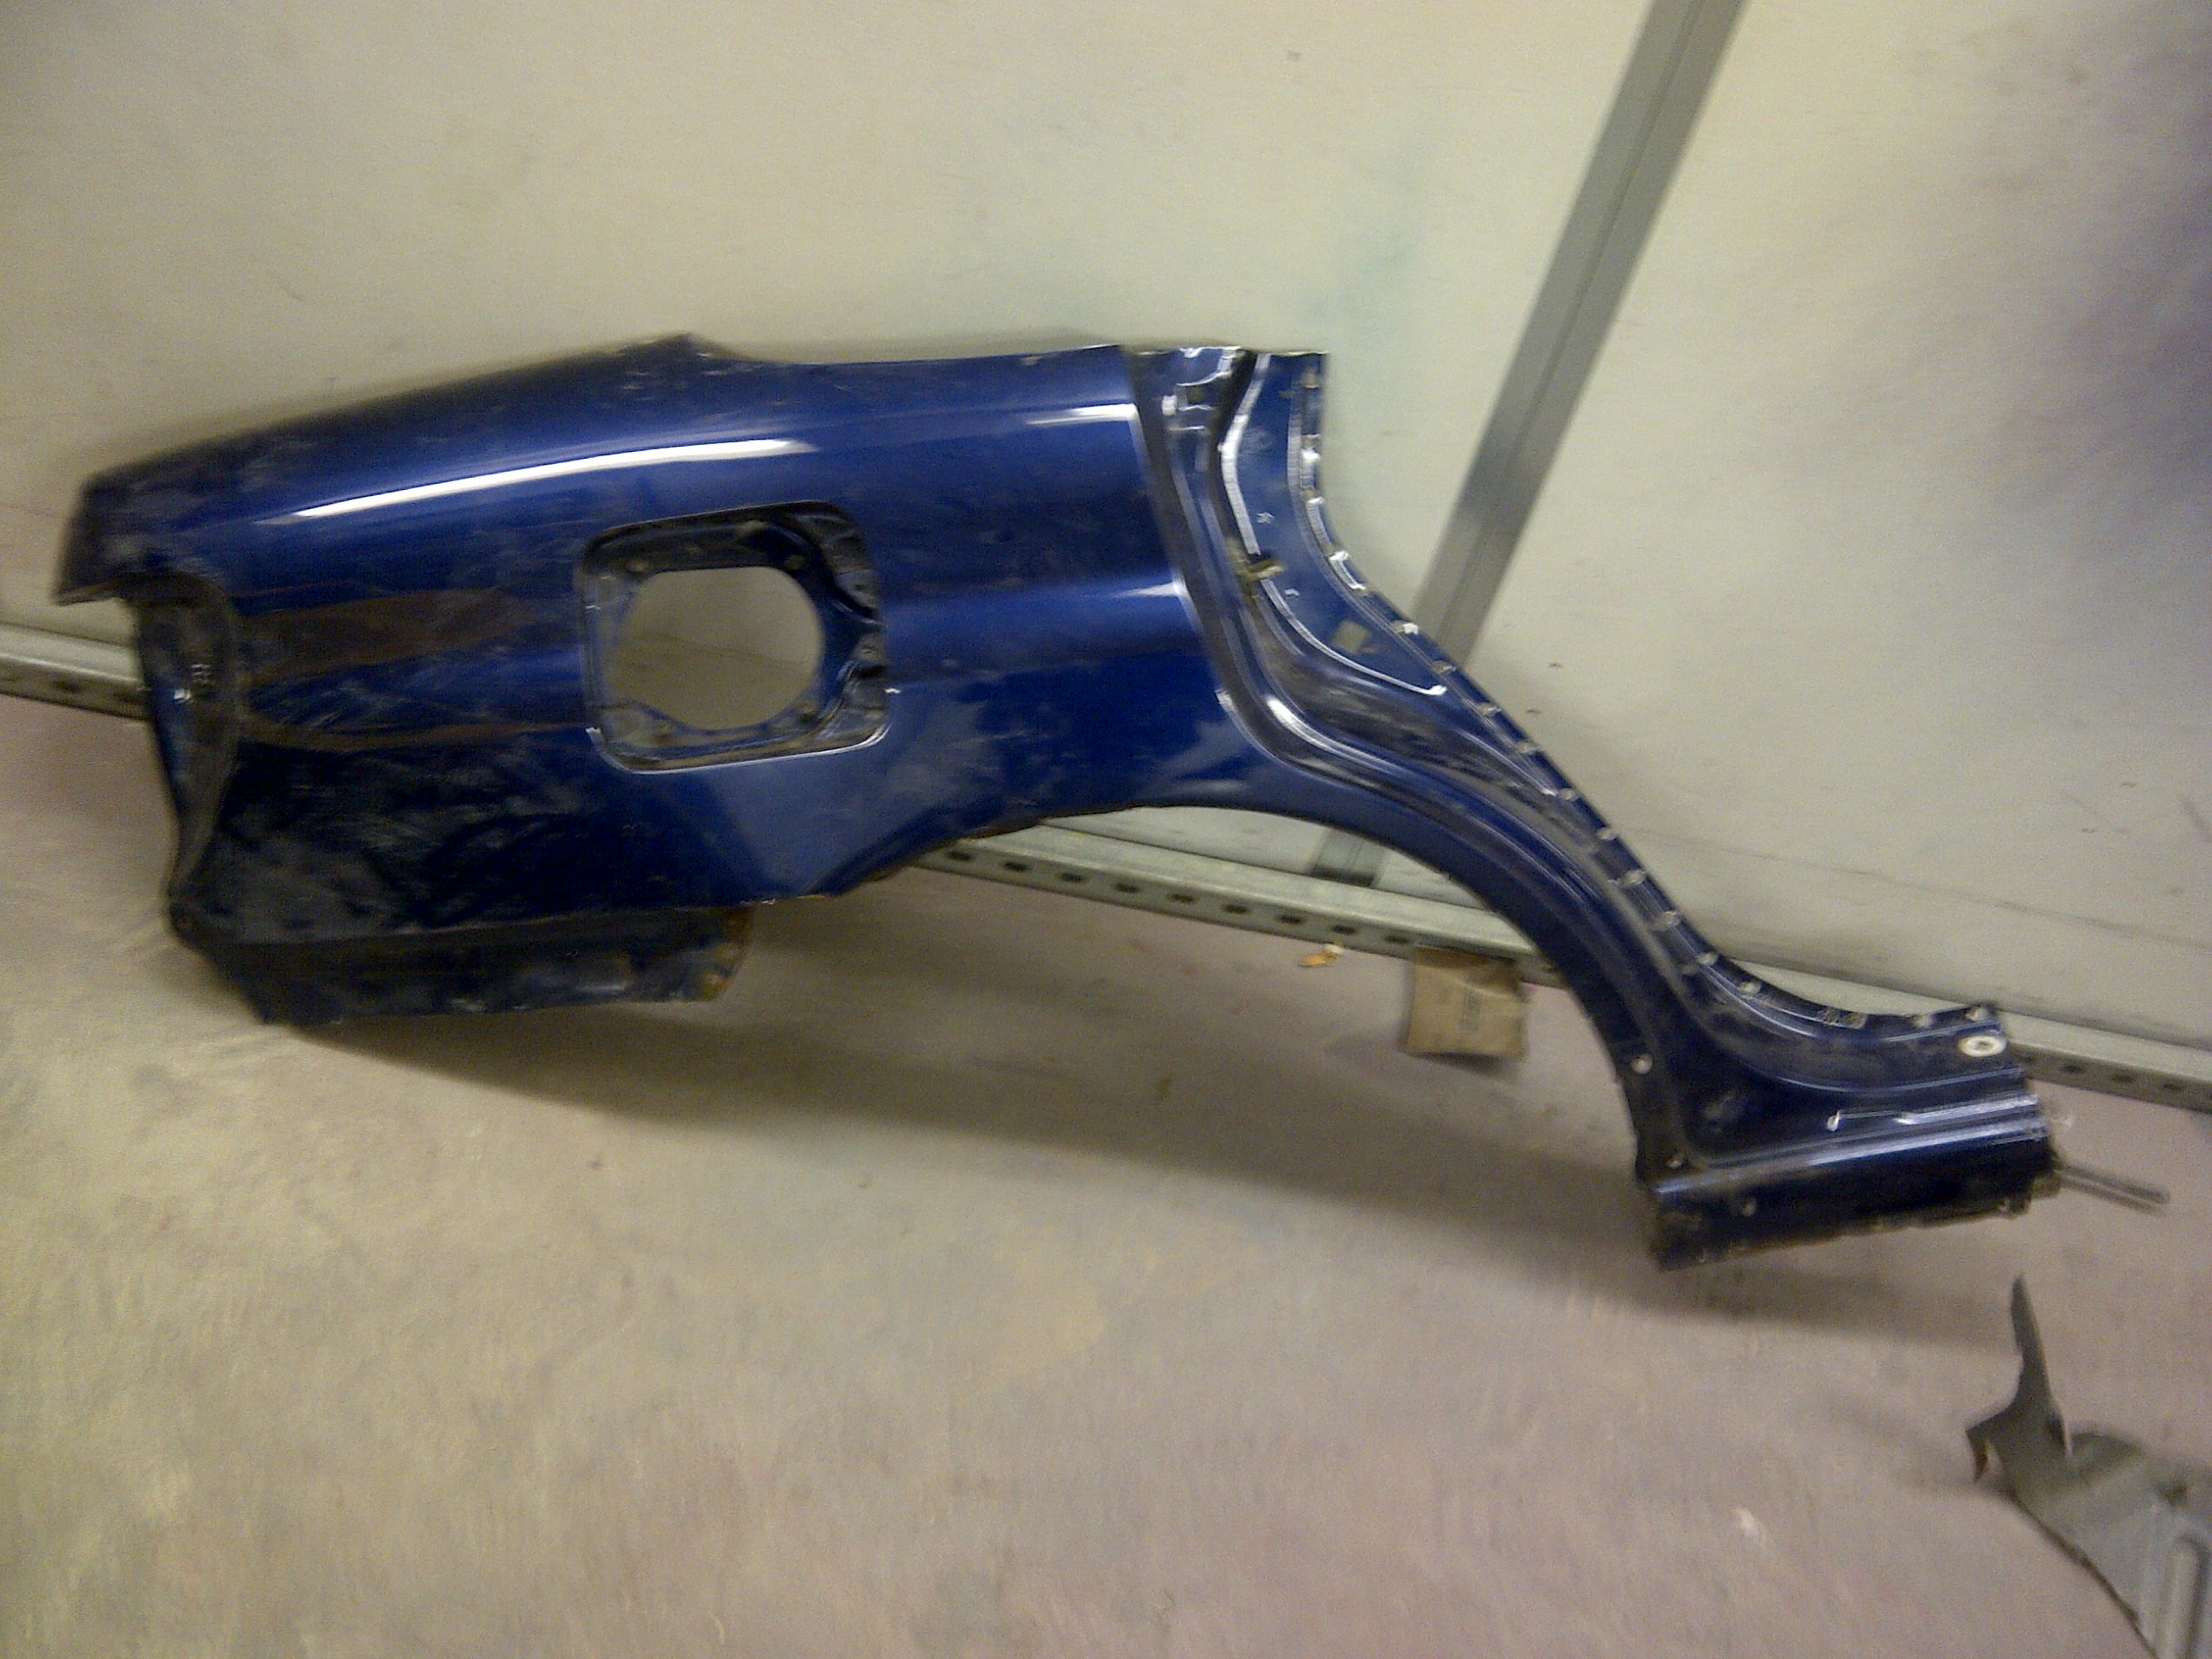
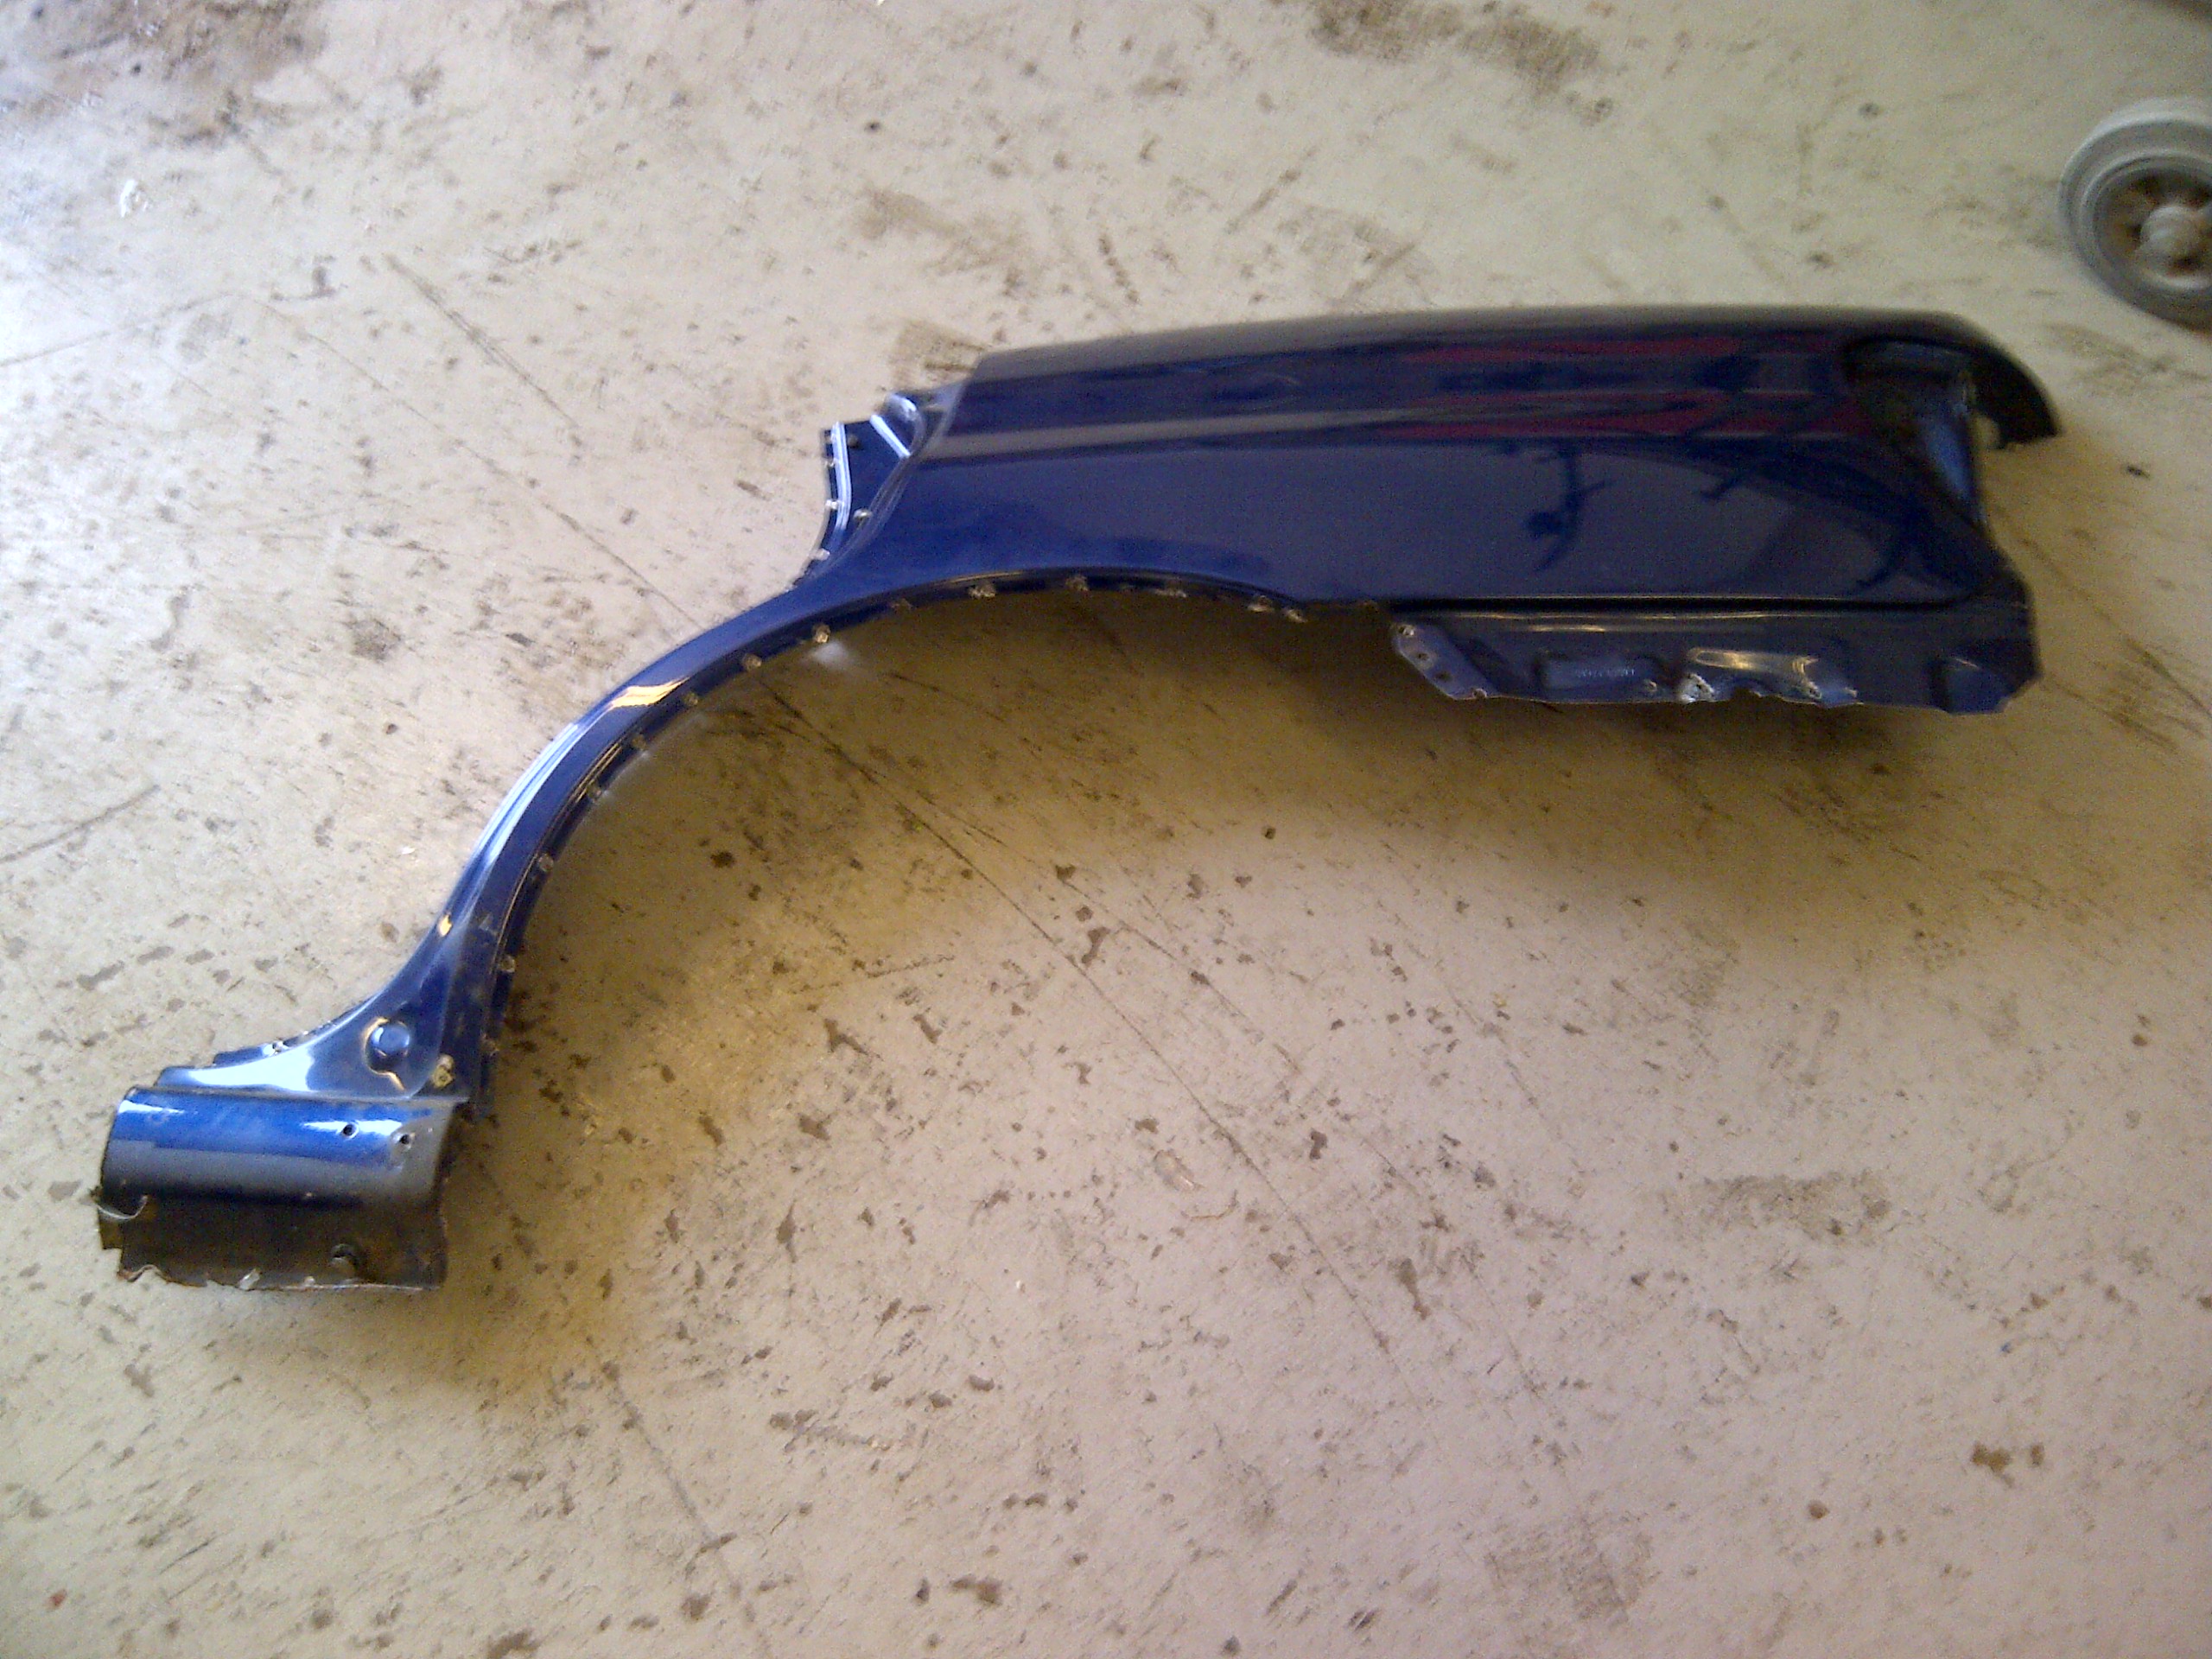
I spent last Friday & part of Saturday morning doing this to a saloon in a breakers yard.
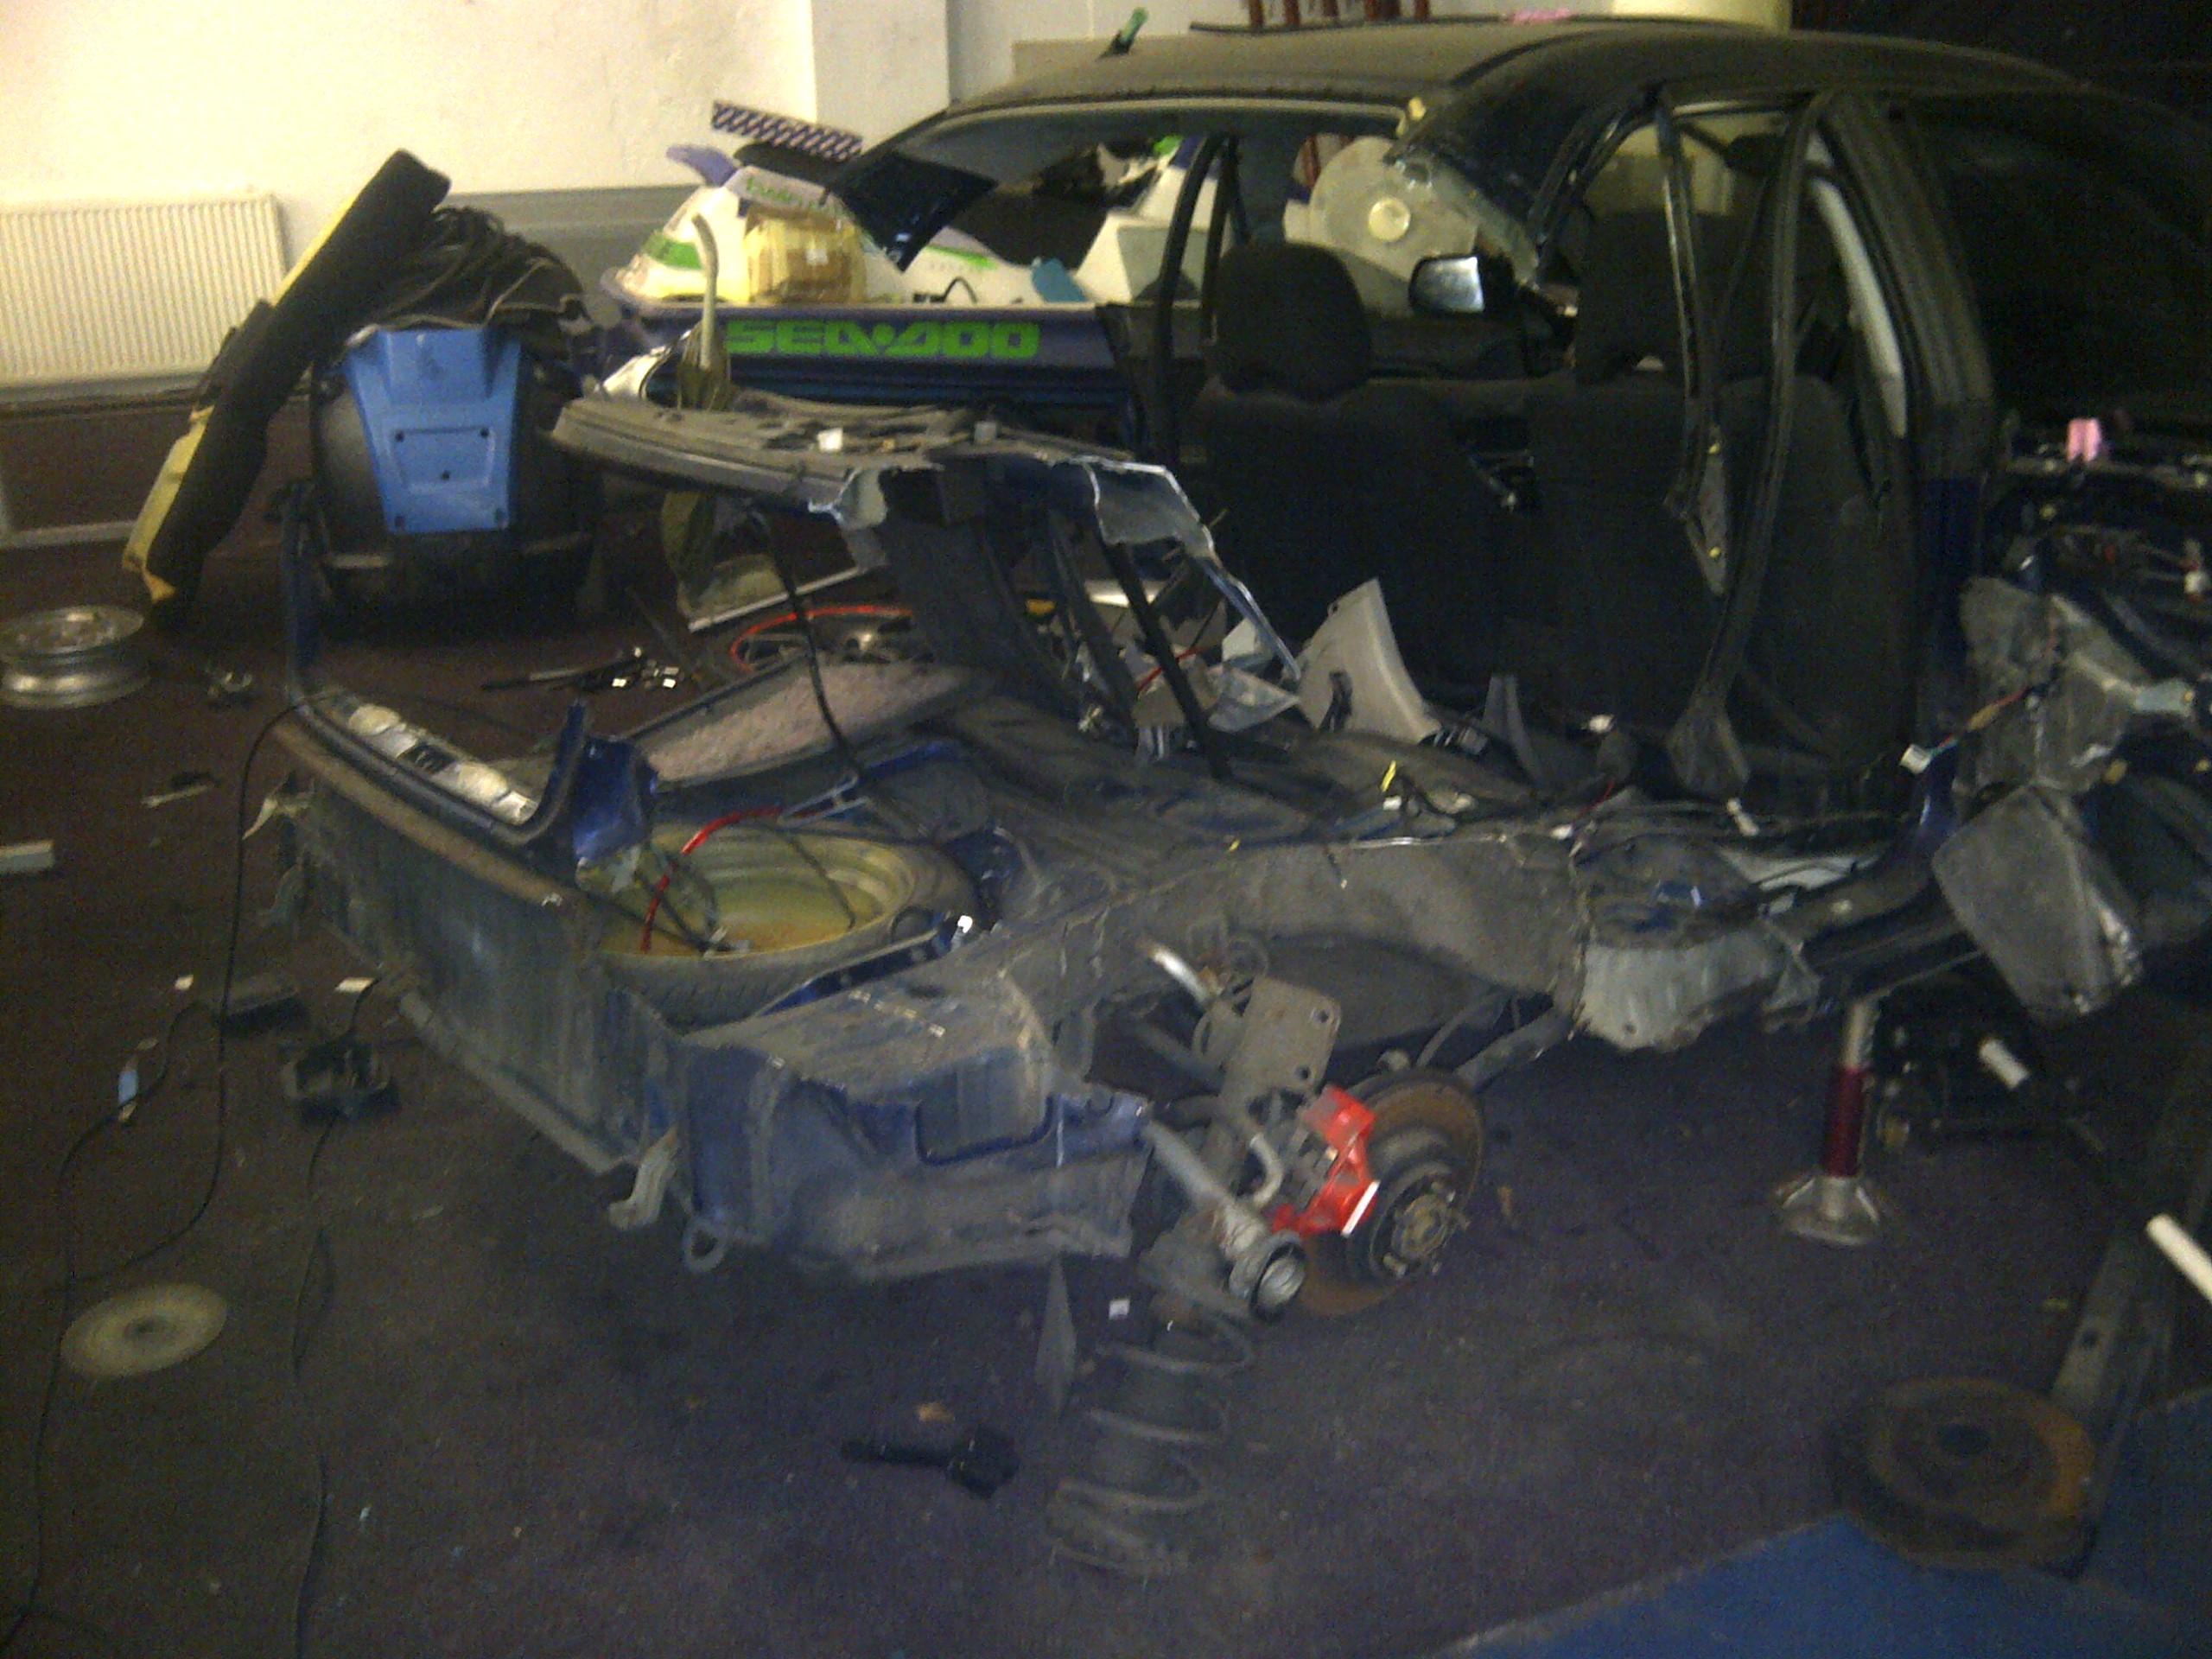

So now just waiting for my mate to have a spare week to start making what came off the saloon fit my wagon!
Will get pics as we do the conversion & we start to chop the wagon

Got the wings all cut out so just waiting for my mate to have afree weekend hoping either this week or next can't wait
So now just waiting for my mate to have a spare week to start making what came off the saloon fit my wagon!
Will get pics as we do the conversion & we start to chop the wagon
Got the wings all cut out so just waiting for my mate to have afree weekend hoping either this week or next can't wait
Last edited by LewisL; Apr 22, 2012 at 11:01 AM.

holy crap, when i read the title i though you meant just the front wings.
respect fella thats a big job!!!
cant wait to see the finished job
respect fella thats a big job!!!
cant wait to see the finished job
Last edited by tubbytommy; Feb 22, 2012 at 02:40 PM.
mate dont talk to me about doing an arch job right, i couldnt agree more....
https://www.scoobynet.com/members-ga...ches-pics.html
https://www.scoobynet.com/members-ga...ches-pics.html
Trending Topics


Lol no mate just need a wide *** set of wheels
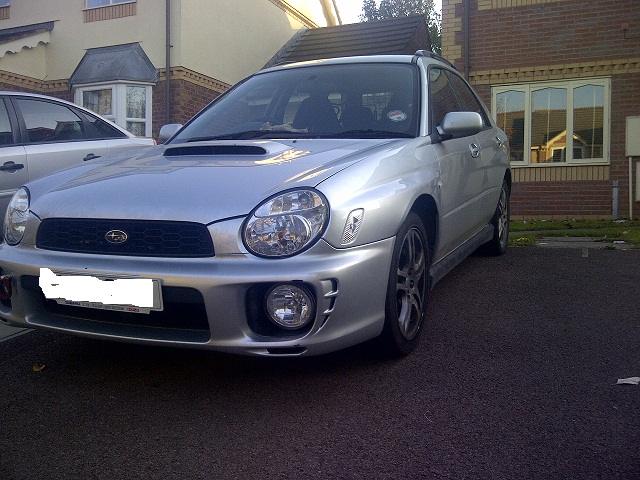
So wanna get on with this just waiting for my mate really as I can't weld lol along with the fab work filler work and paint lol
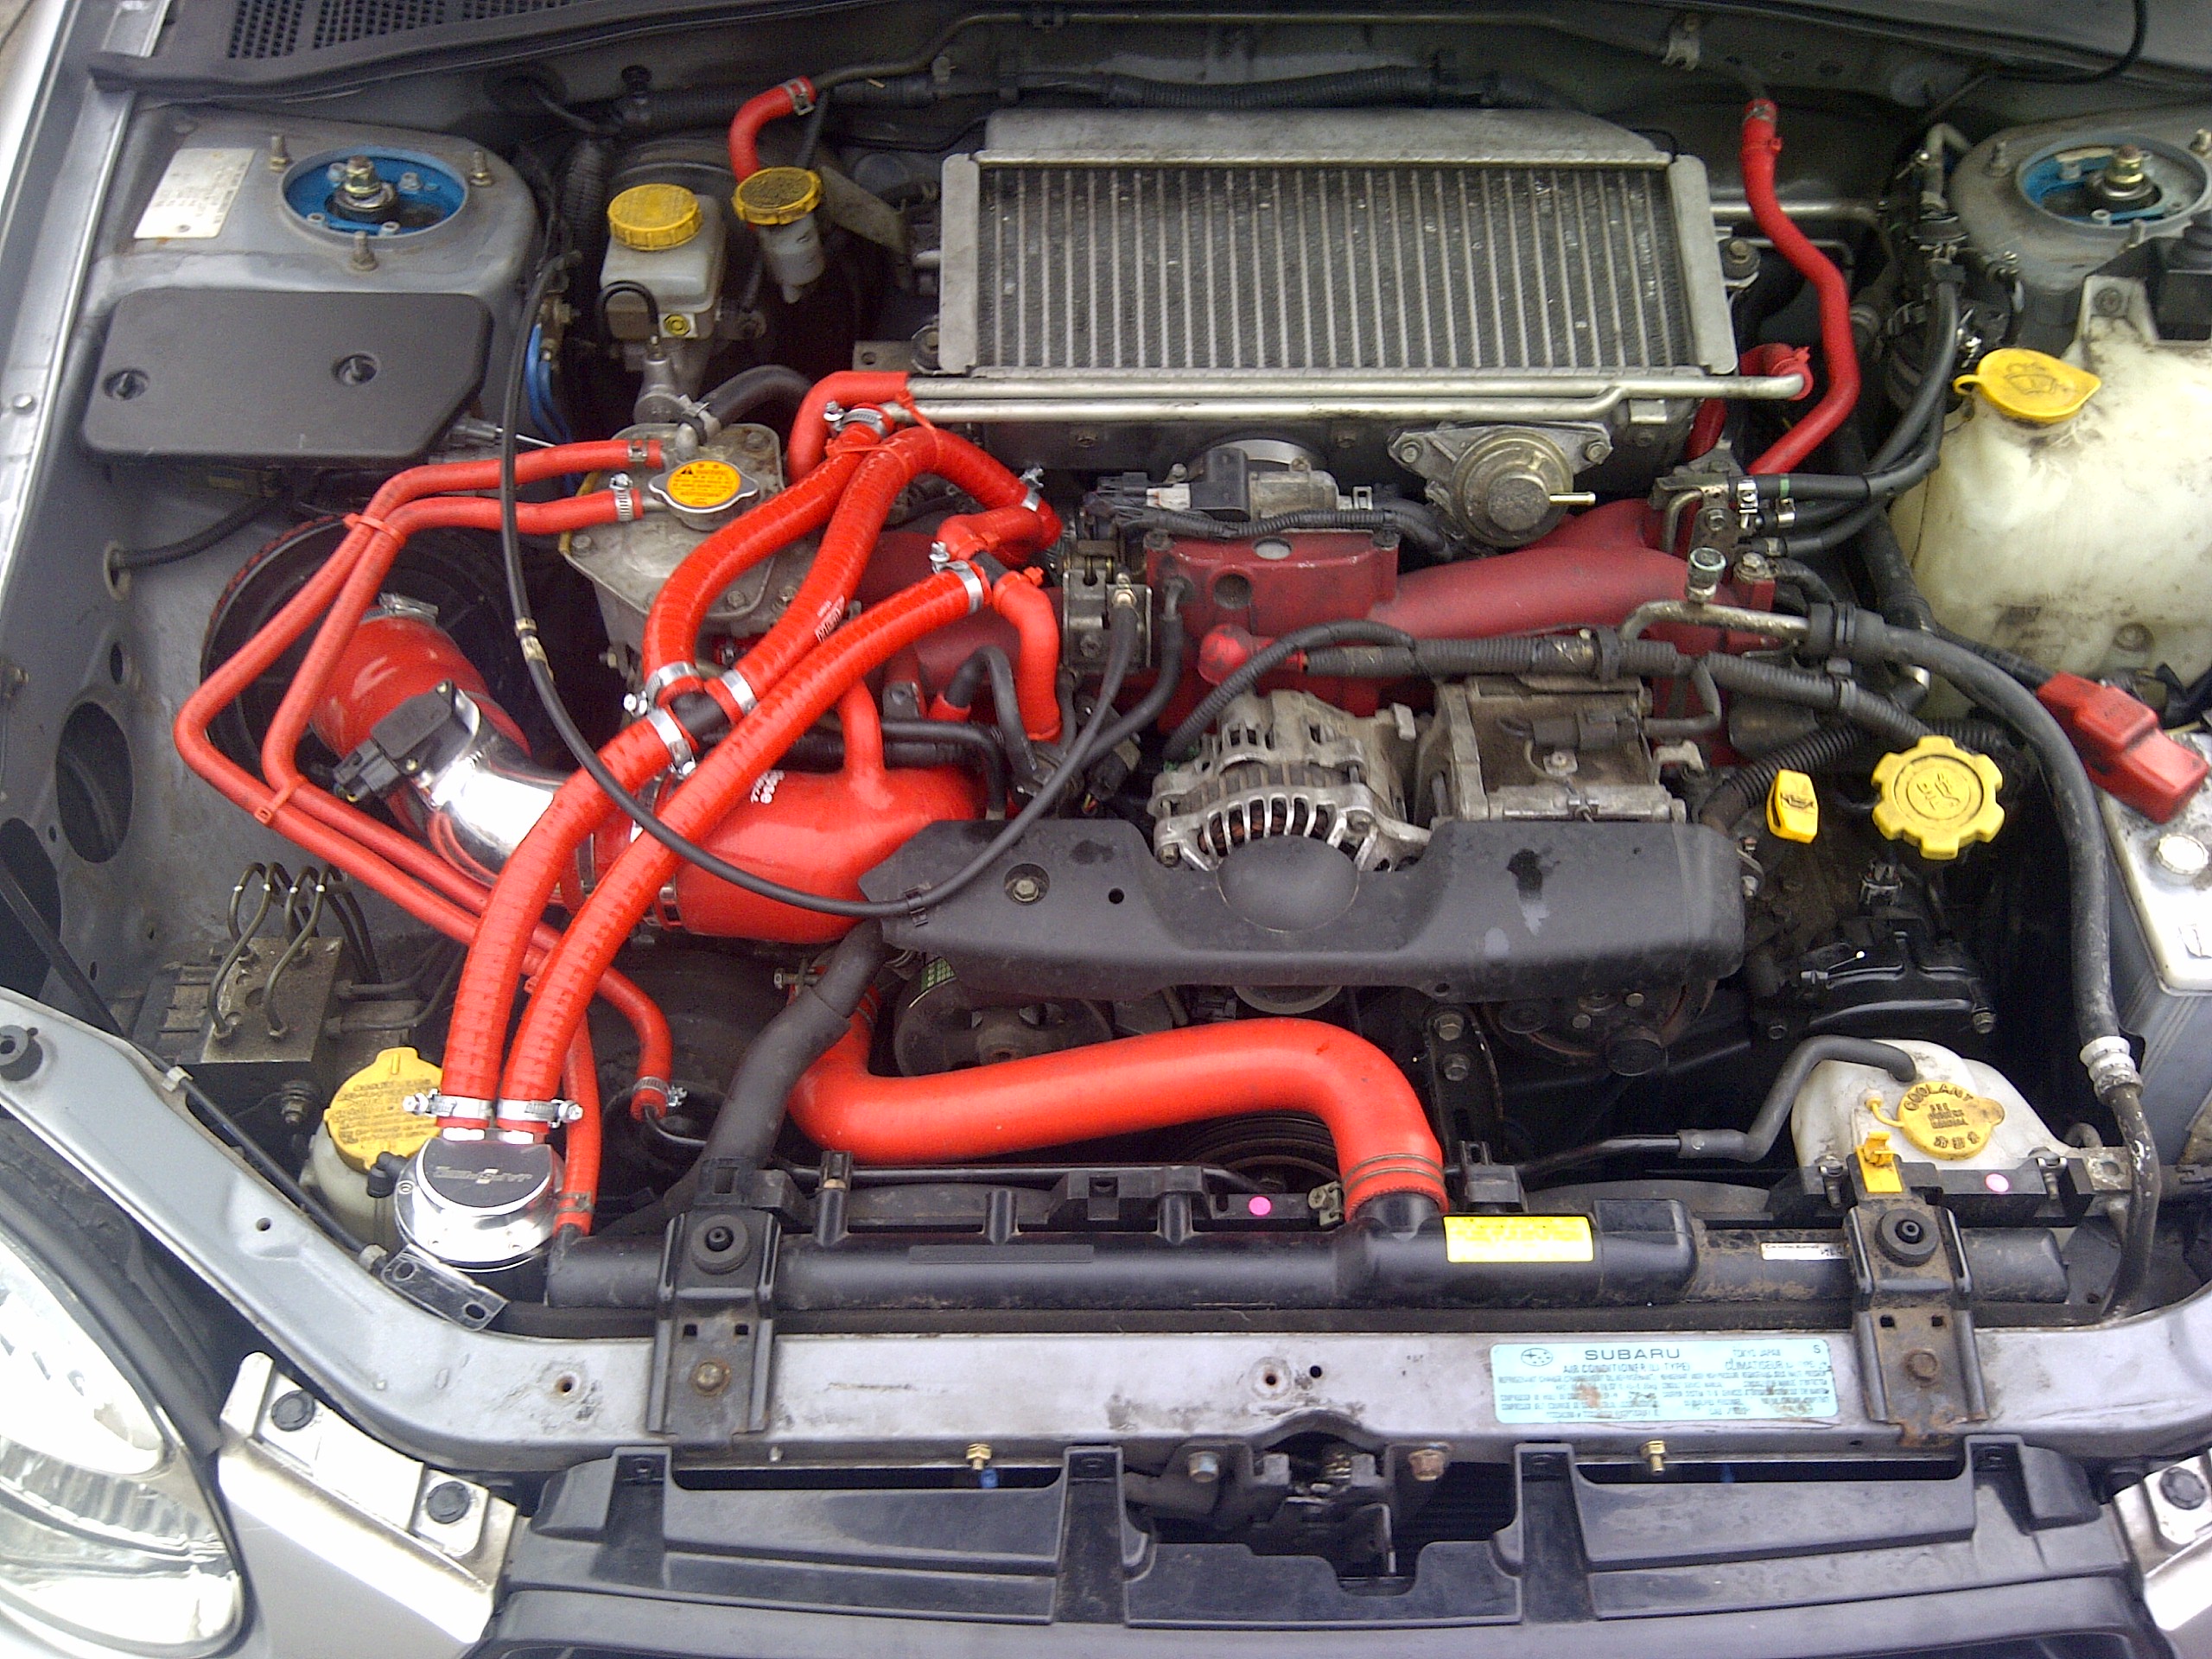
Done a few lil bits while I been waiting though new grill fitted some tow hooks and some nice horns also fitted coilovers and next week induction sti manifold with tgv deletes and full exhaust will be going on.

So wanna get on with this just waiting for my mate really as I can't weld lol along with the fab work filler work and paint lol
Done a few lil bits while I been waiting though new grill fitted some tow hooks and some nice horns also fitted coilovers and next week induction sti manifold with tgv deletes and full exhaust will be going on.
still waiting on my mate to have a free weekend to hit into the rear arches so in the mean time took to fitting this lot which has been sat in the shed for a lil while
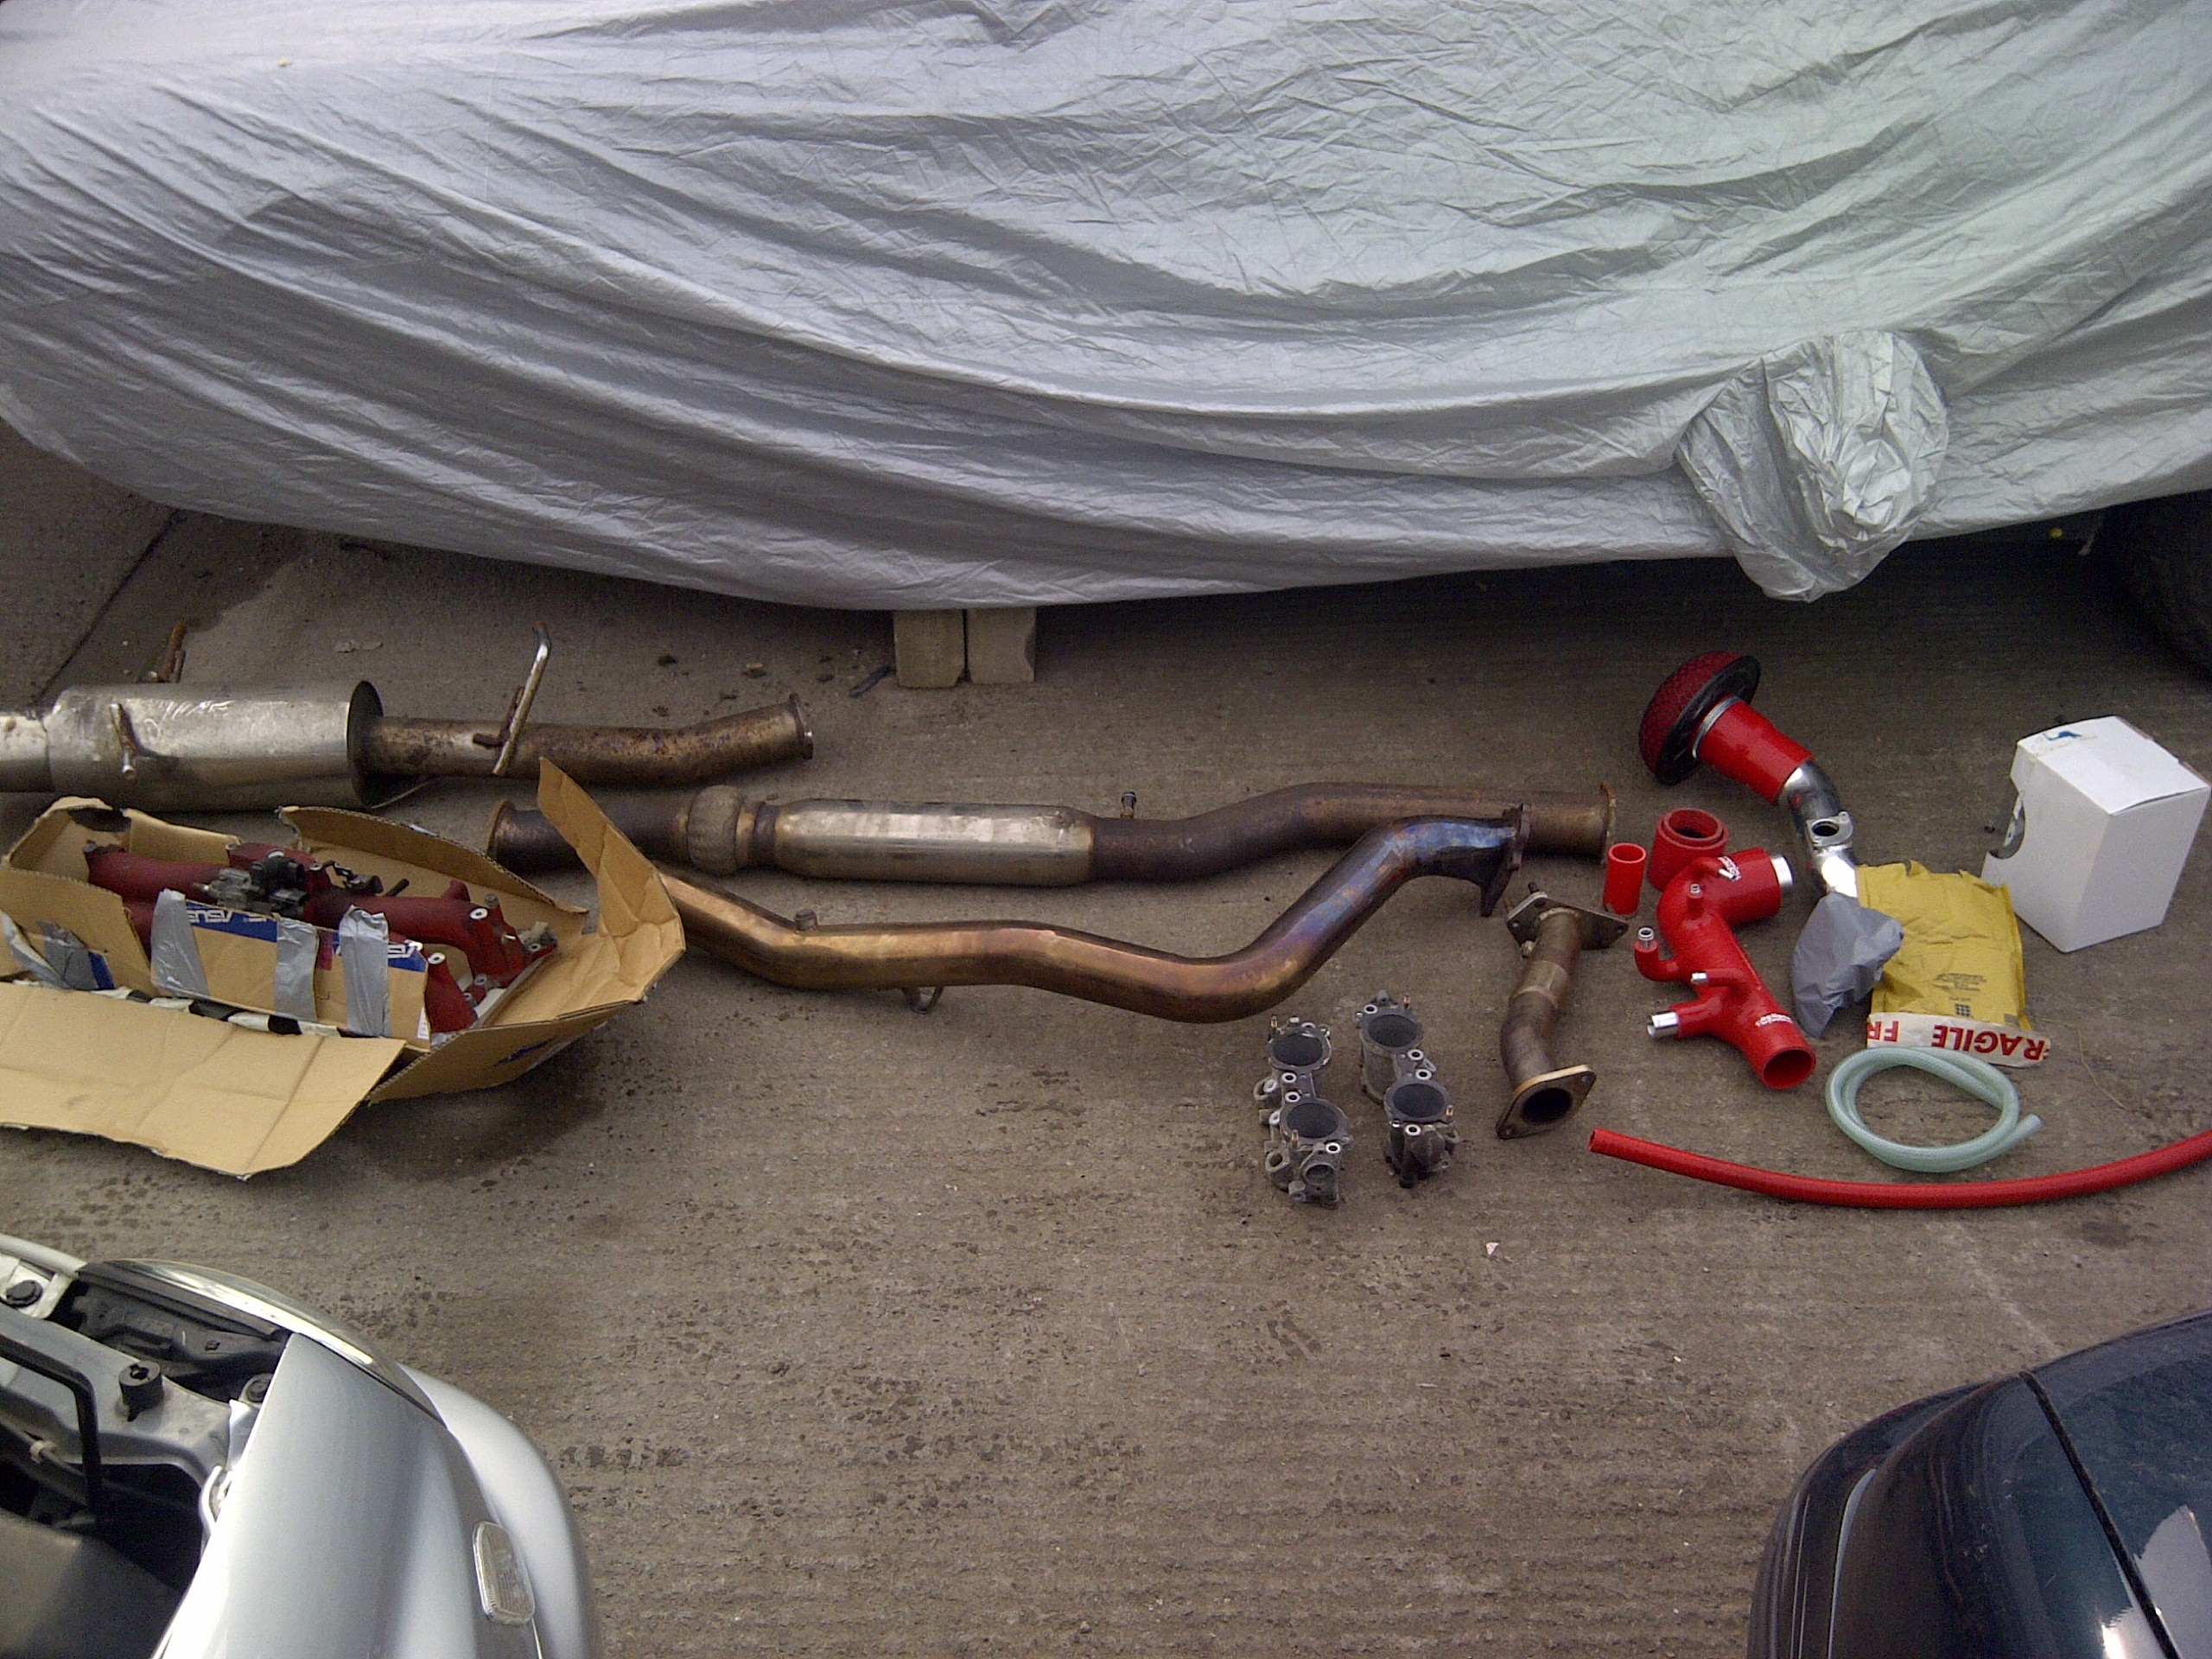
Sti inlet with tgv deletes
full de cat system & decat up pipe
silicon intake pipe
jap speed oil breather/catch can
hks short ram induction kit
engine bay looked like this
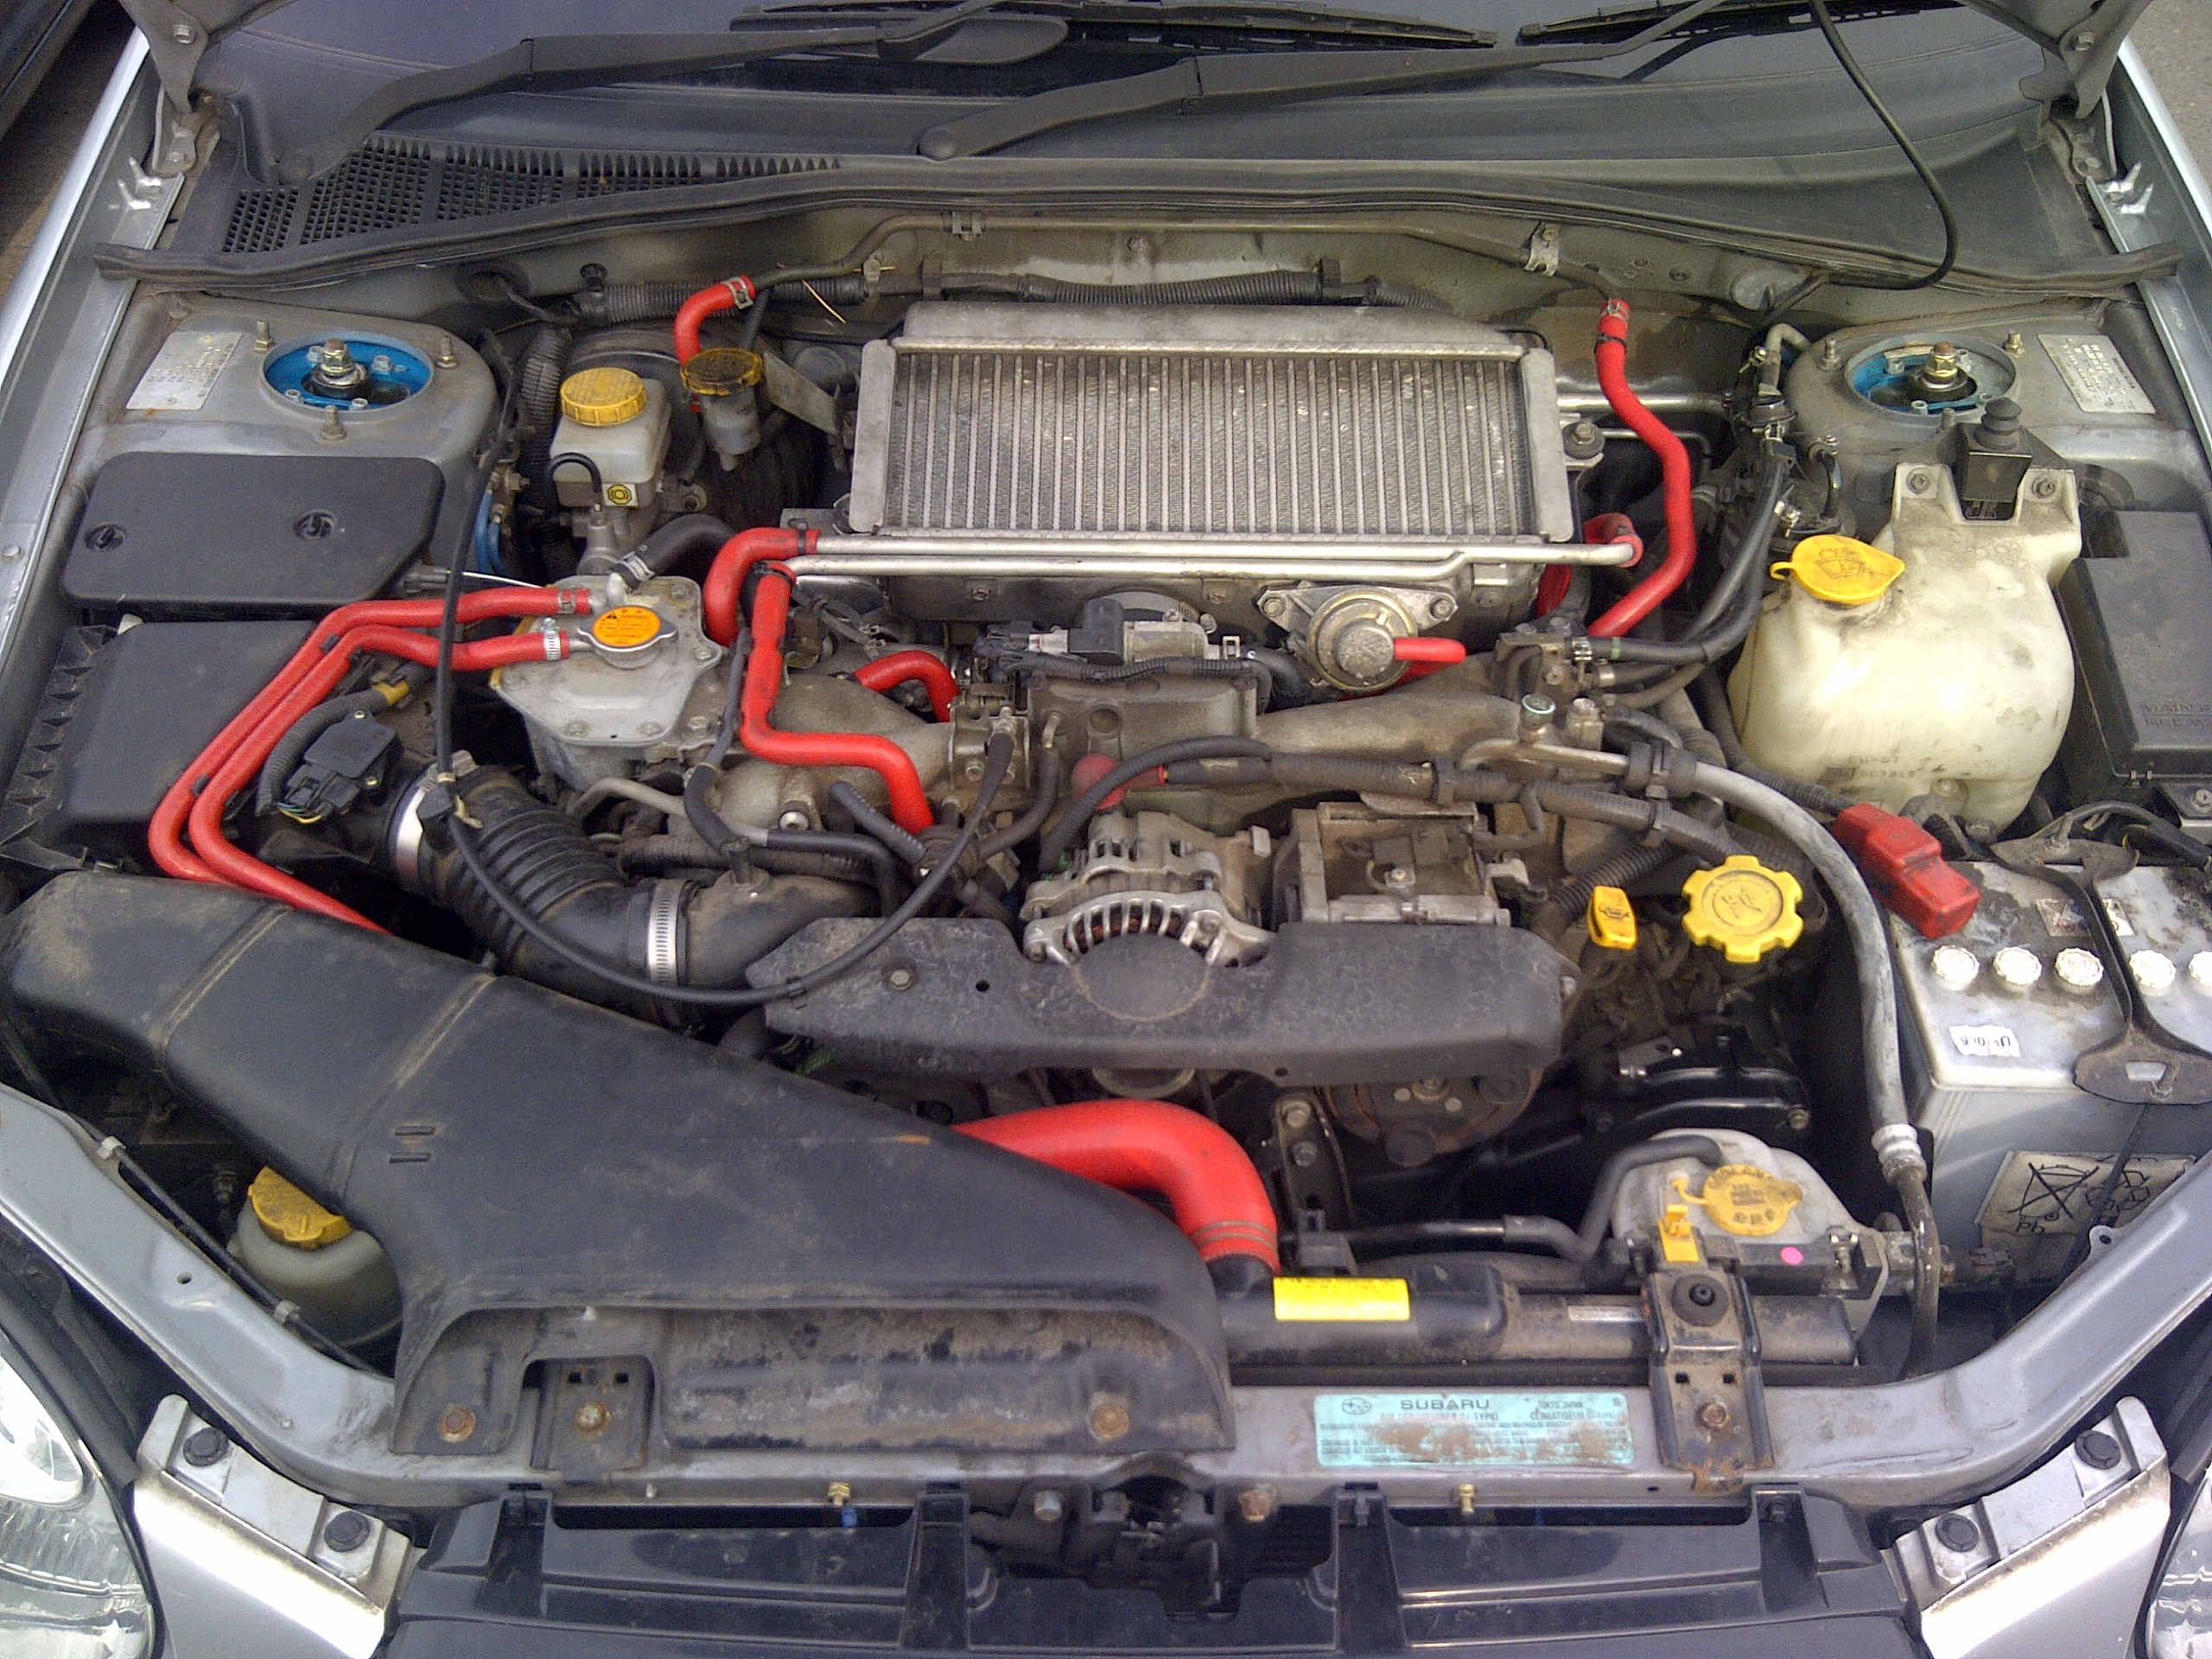
now looks like this
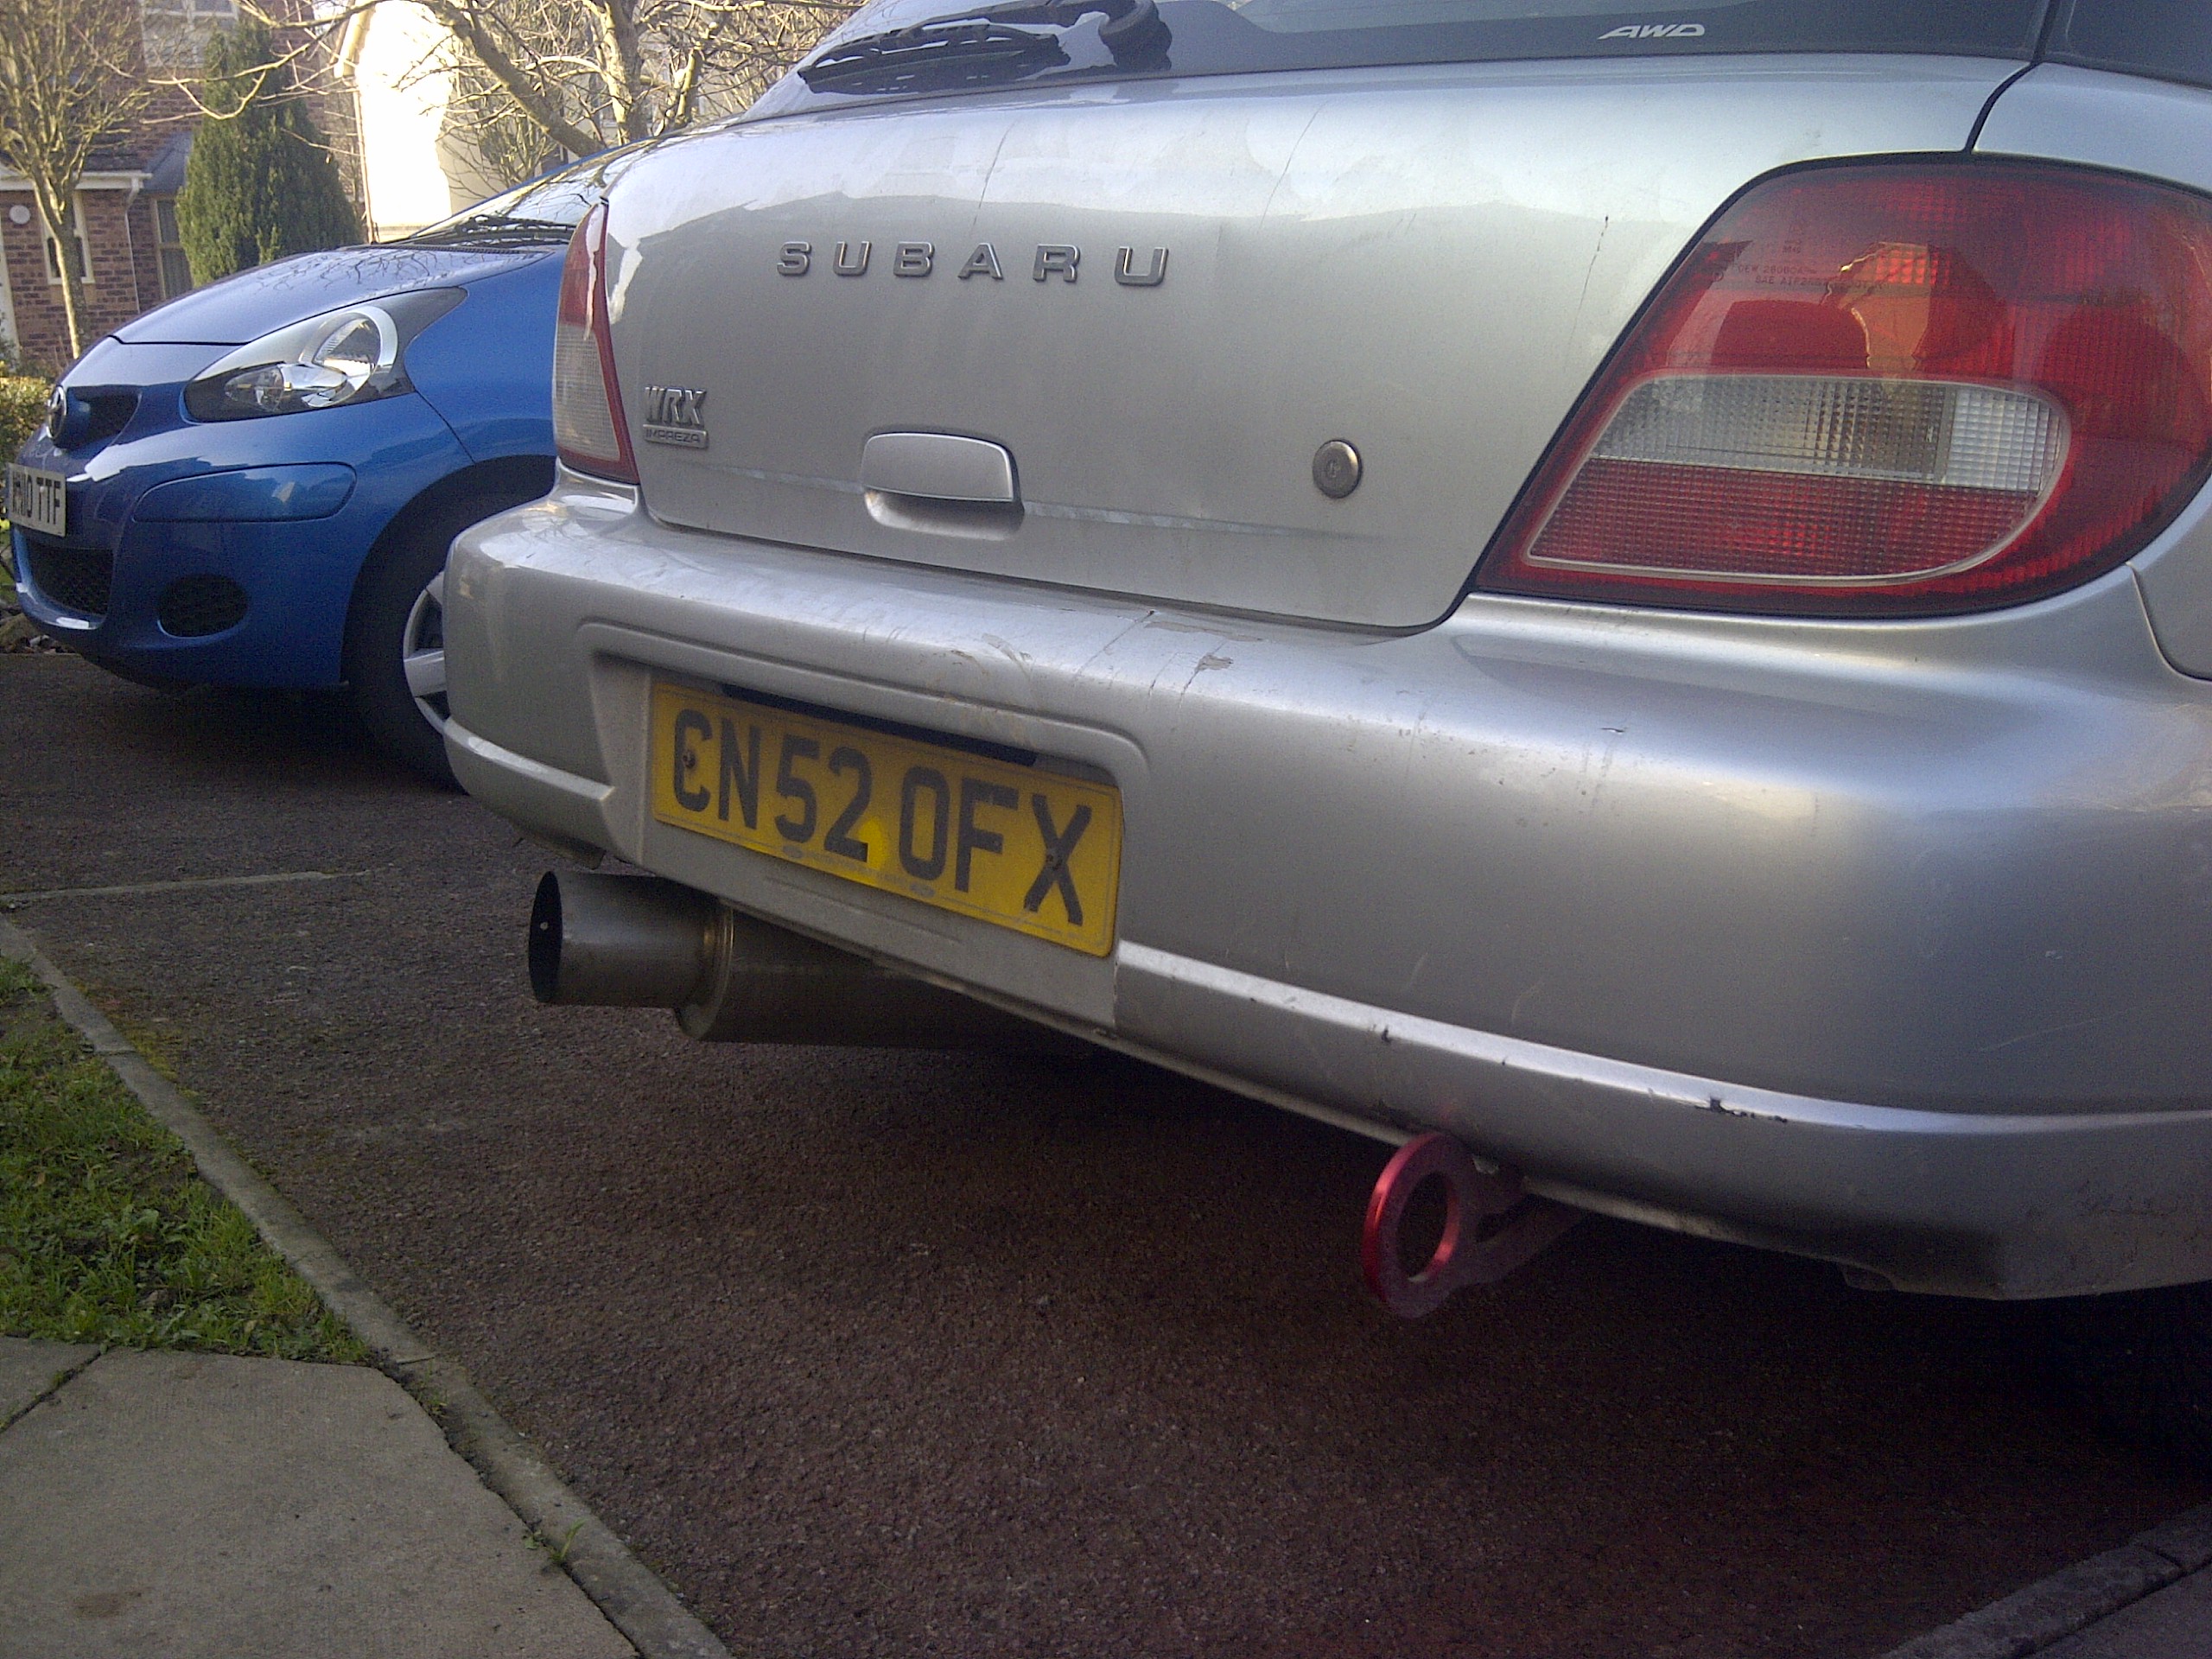
rear end looked like this
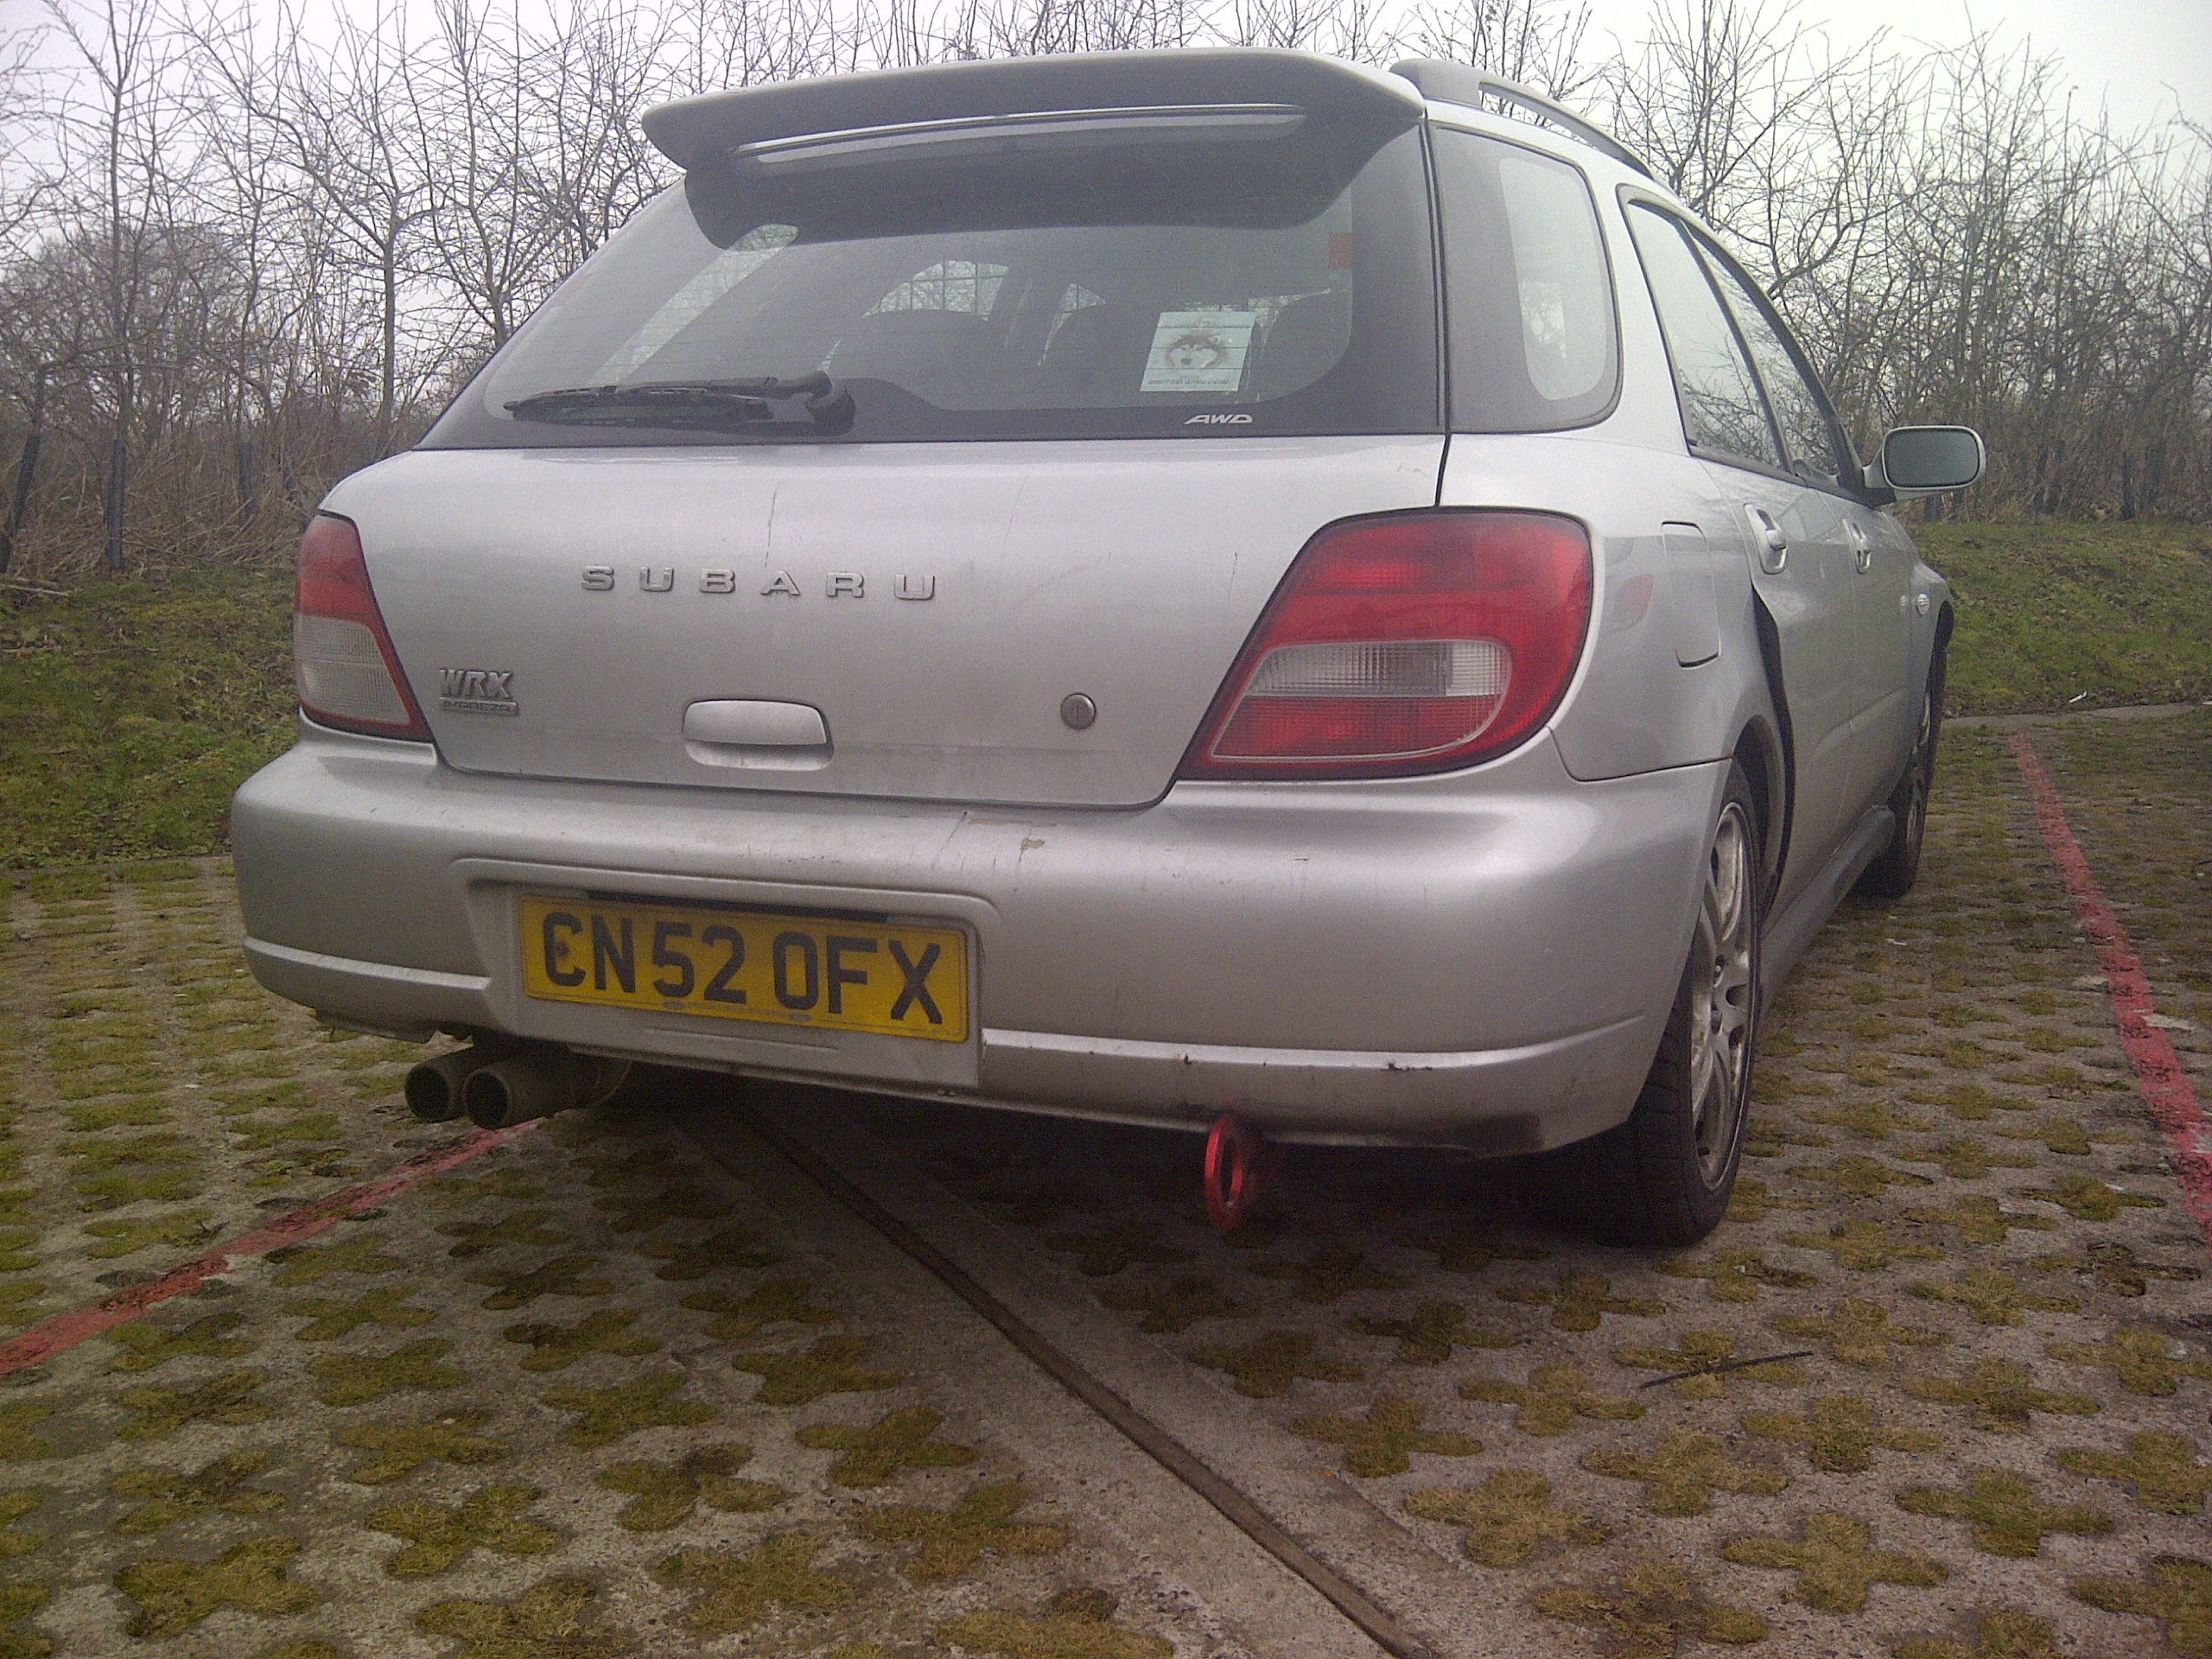
now looks like this
Sti inlet with tgv deletes
full de cat system & decat up pipe
silicon intake pipe
jap speed oil breather/catch can
hks short ram induction kit
engine bay looked like this
now looks like this
rear end looked like this
now looks like this
Hi jura
Yea fmic will be coming but wheels are the next purchase
I really hoped arches would ofbeen on by now but my mate is ridiculously busy and he needs to earn cash this is just soemthing he is doing as a favour so will fit me in as and when
Yea I seen the abw arches I was thinking of adding the saloon 1's to mine if needed see where the wheels sit 1st
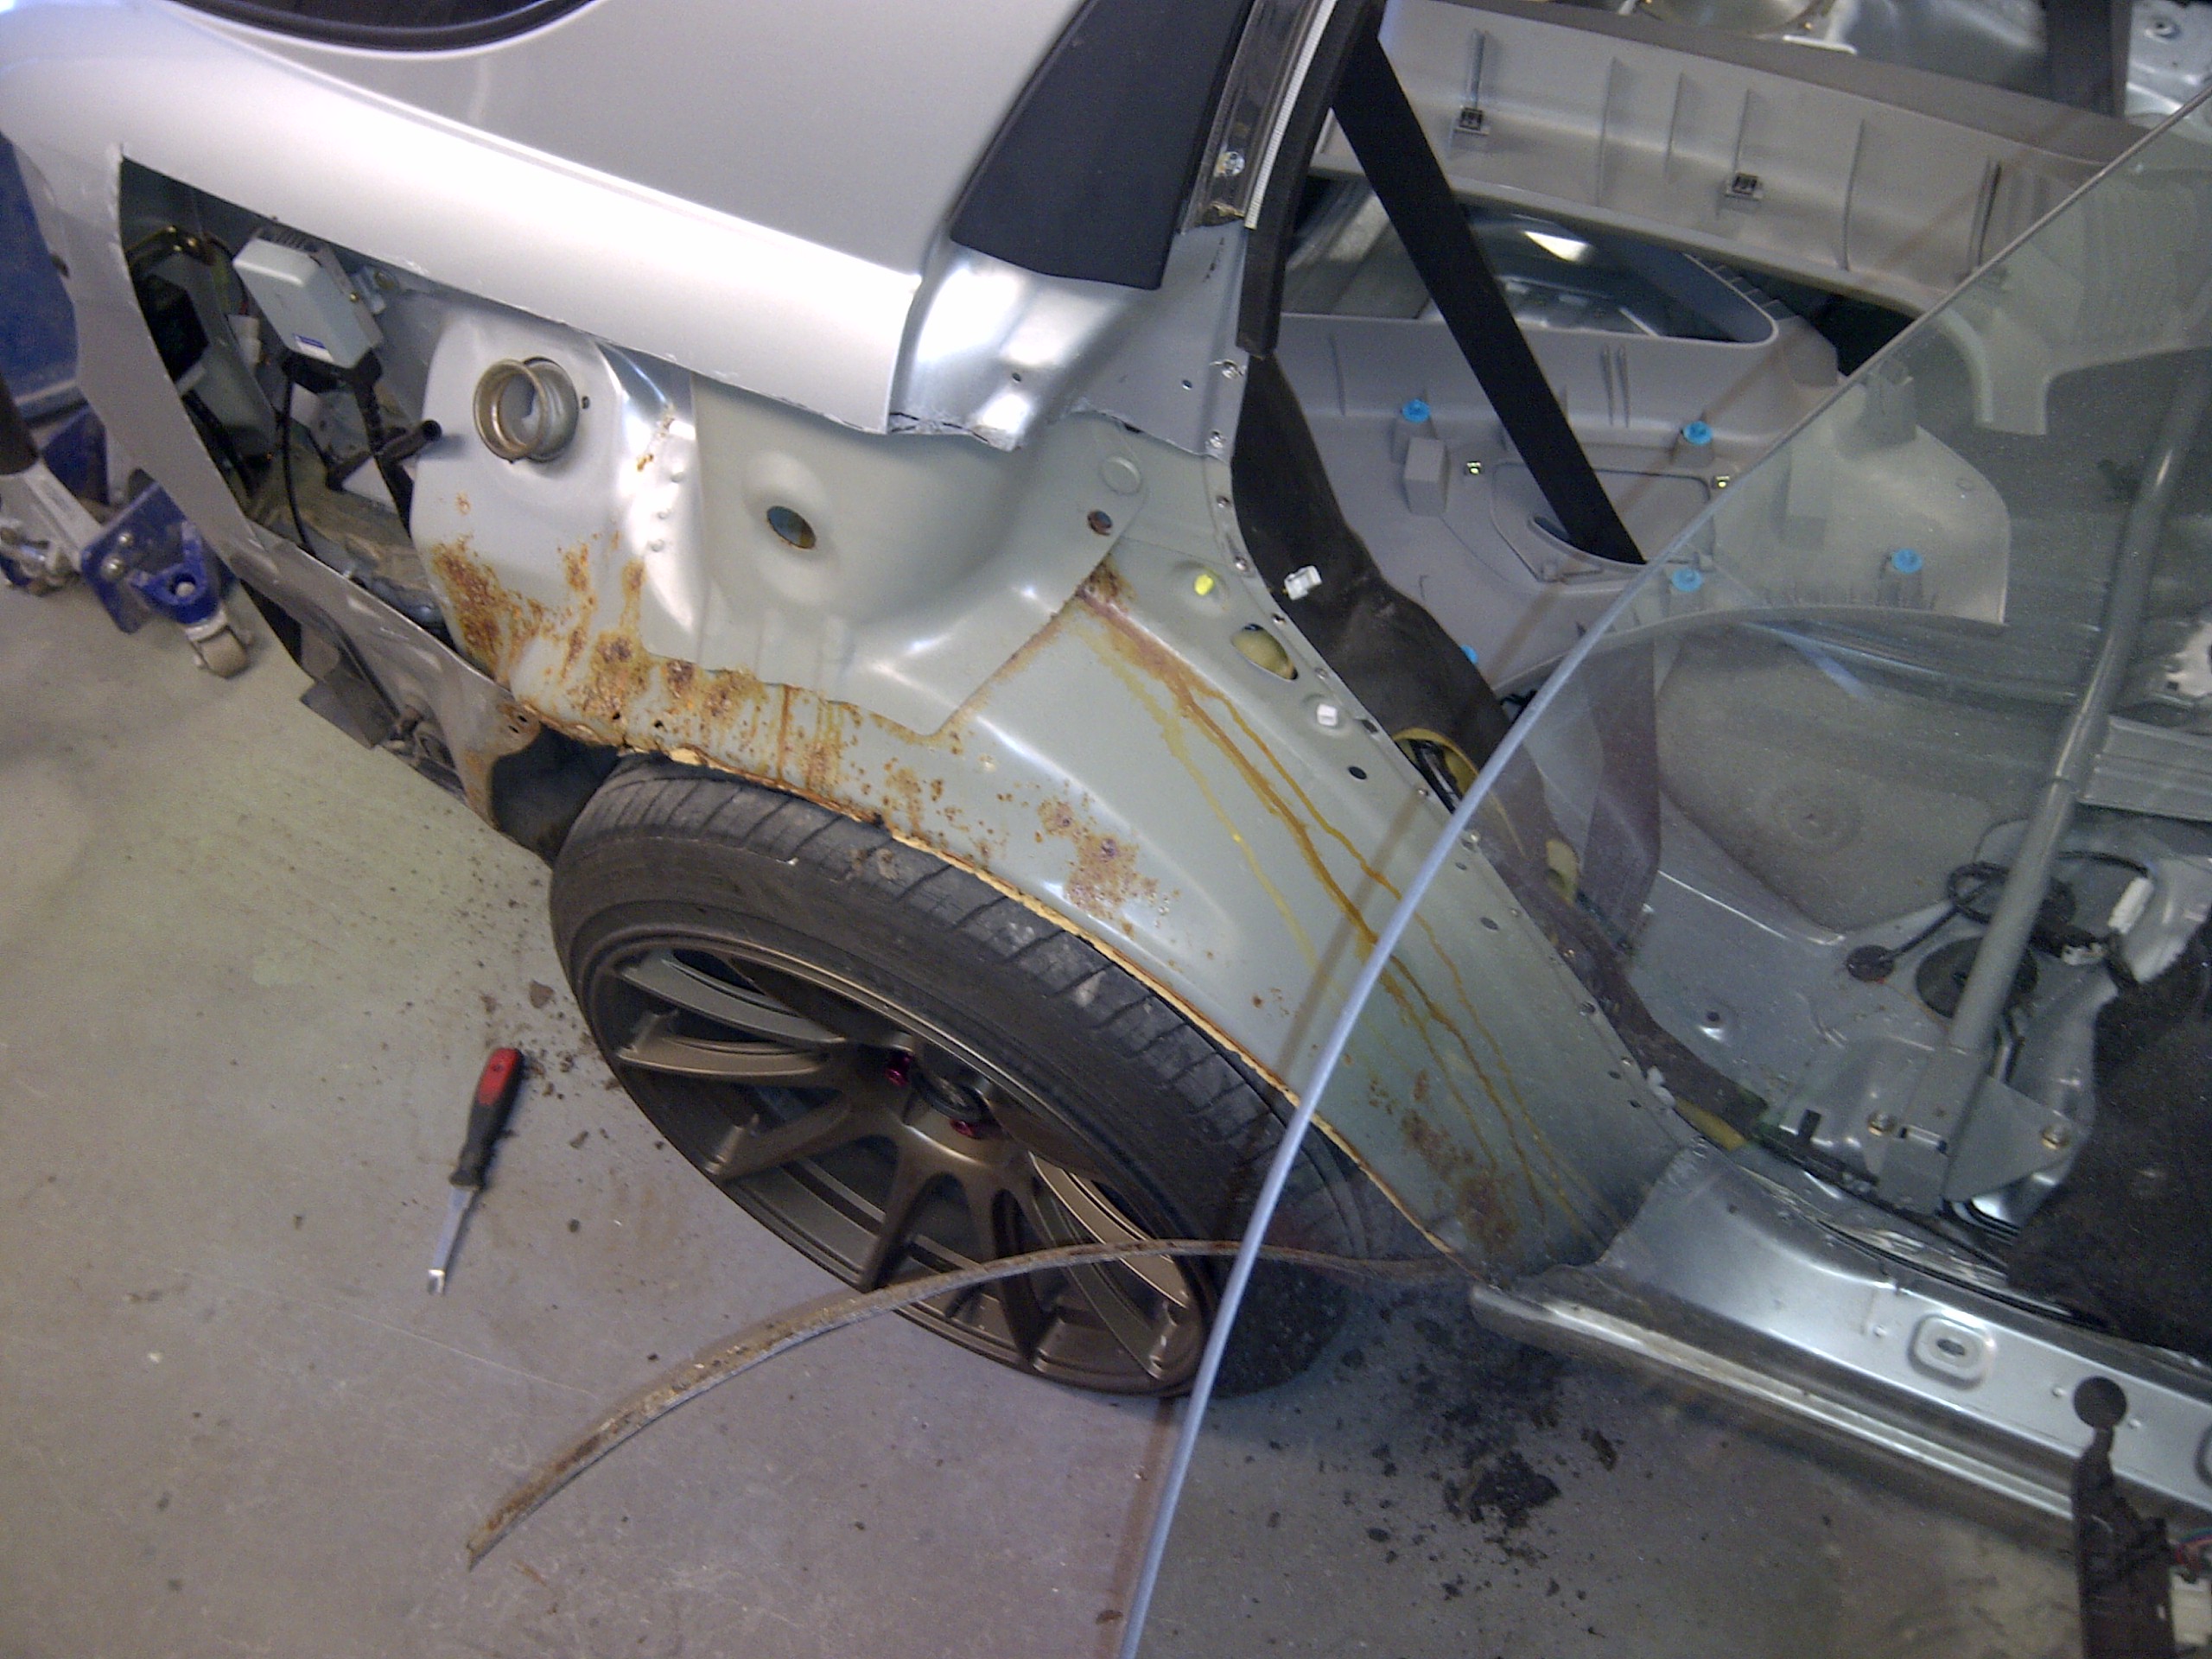
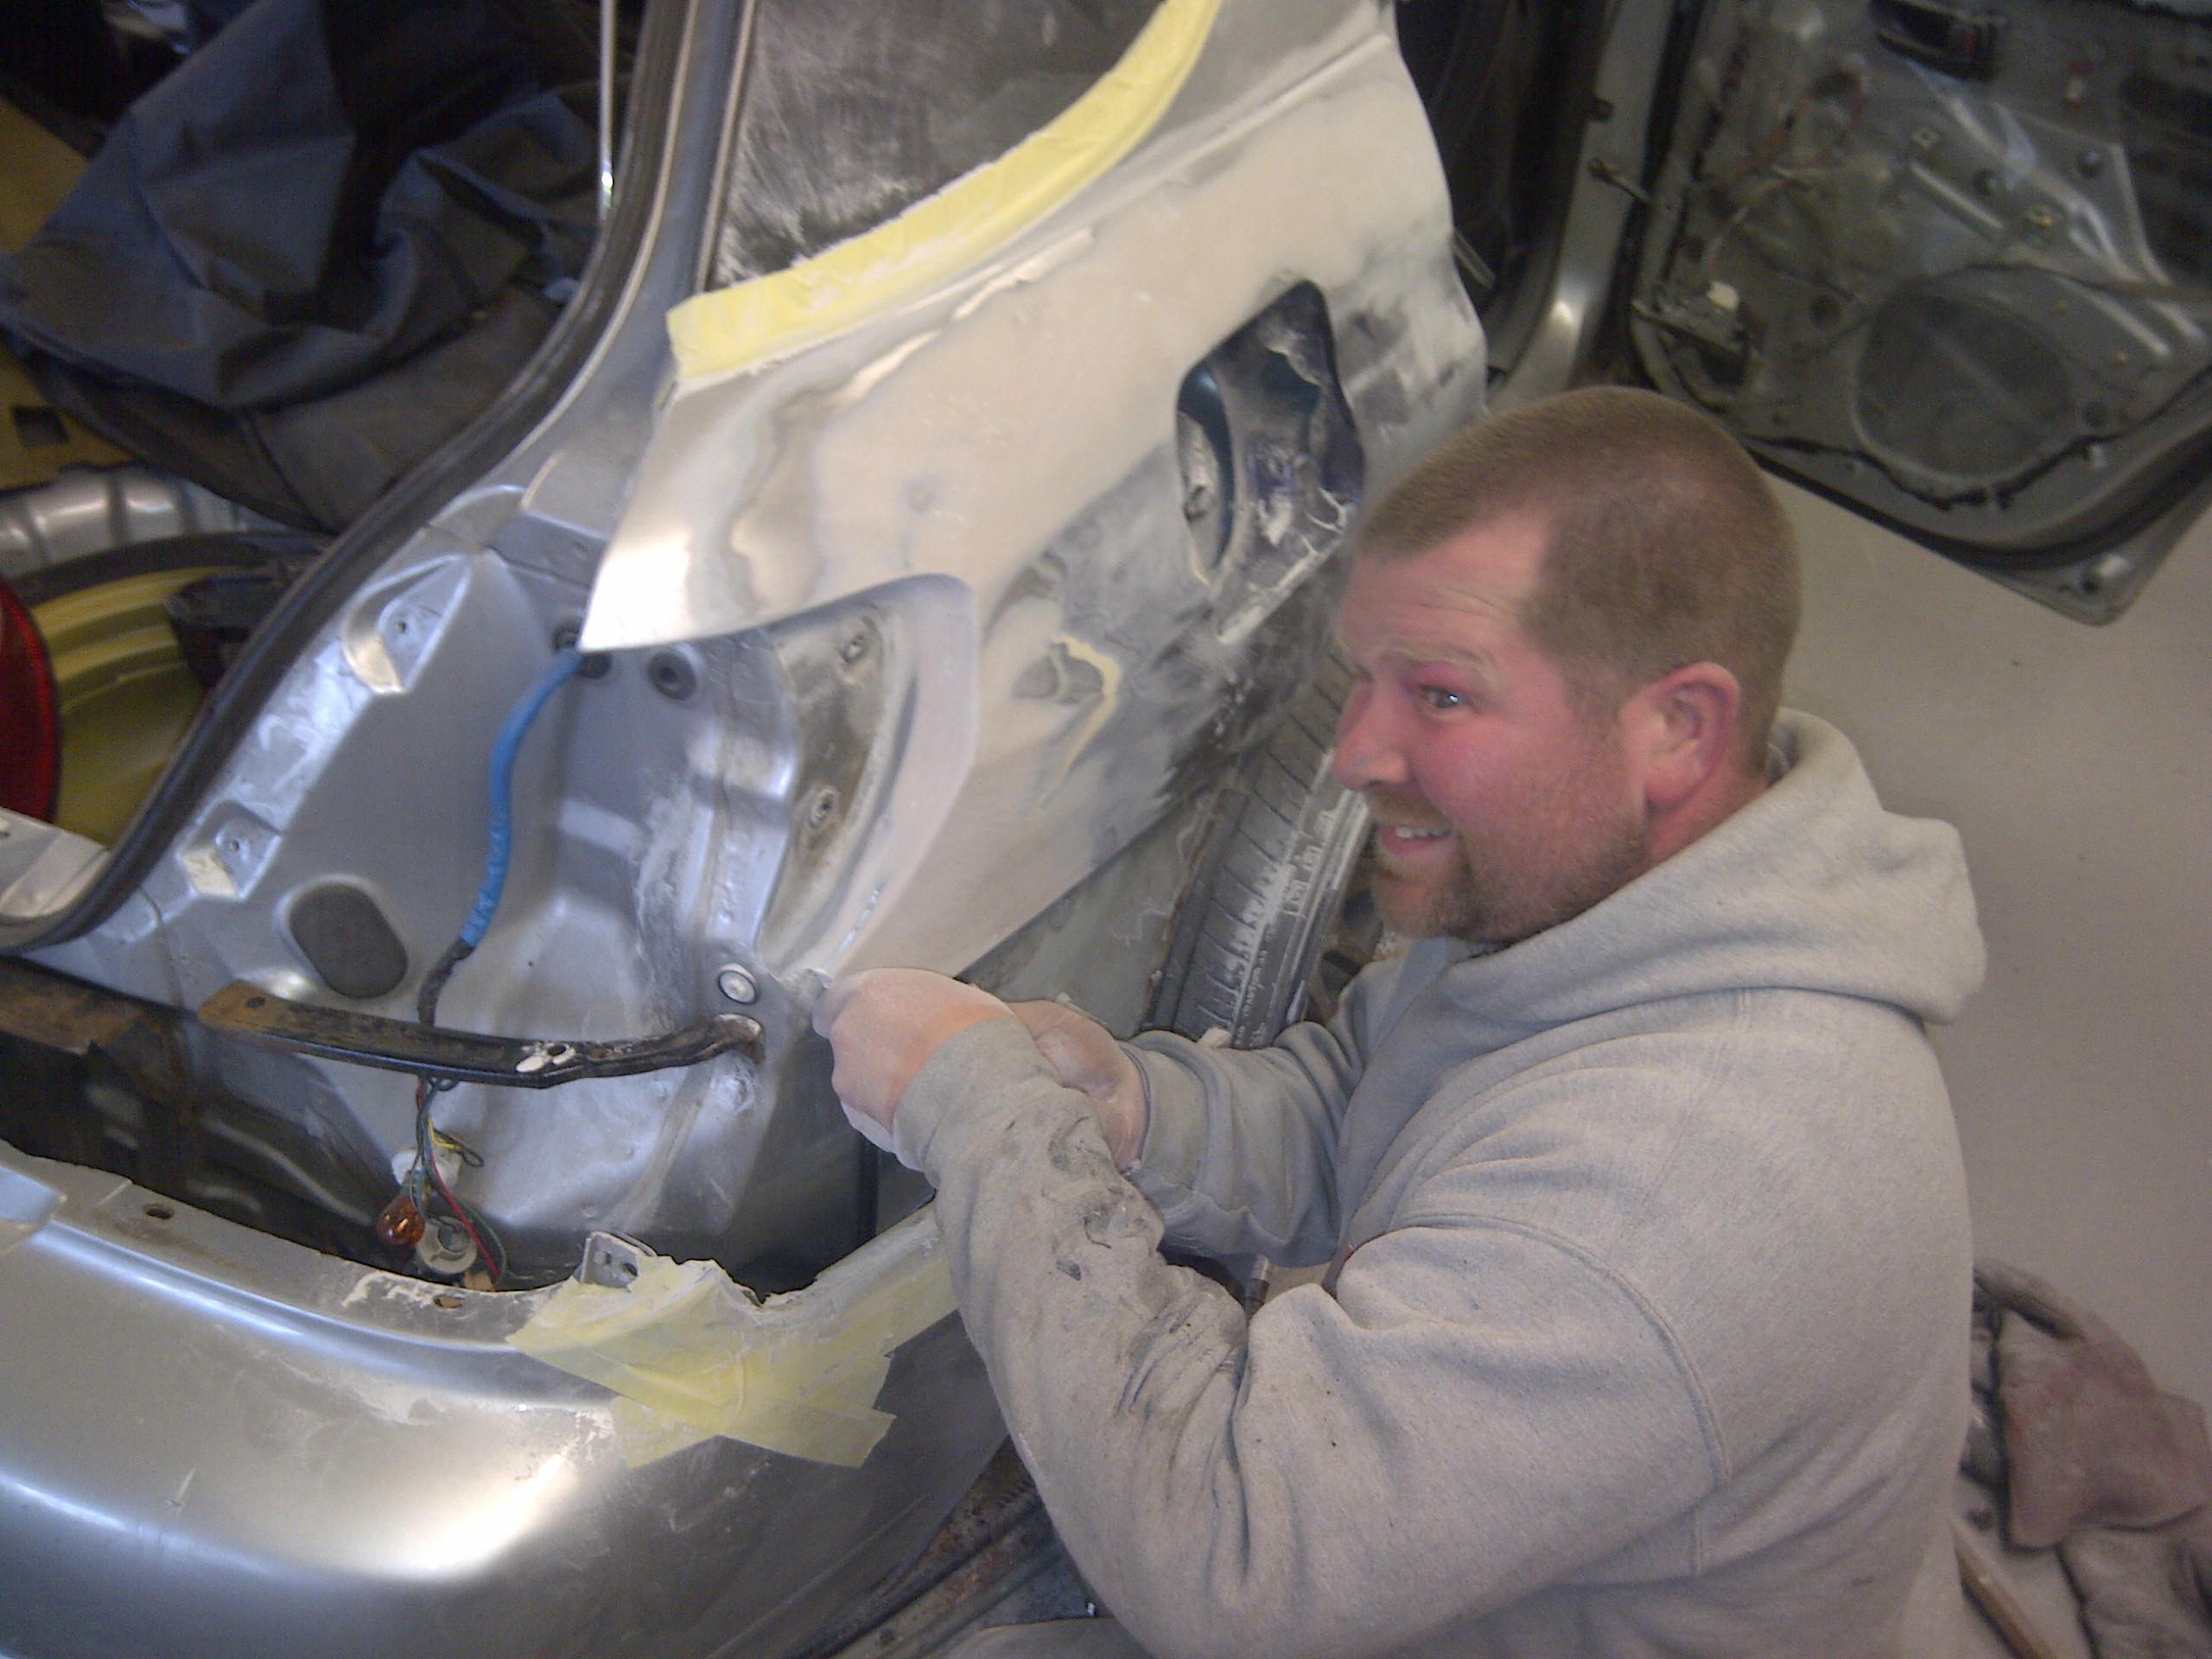
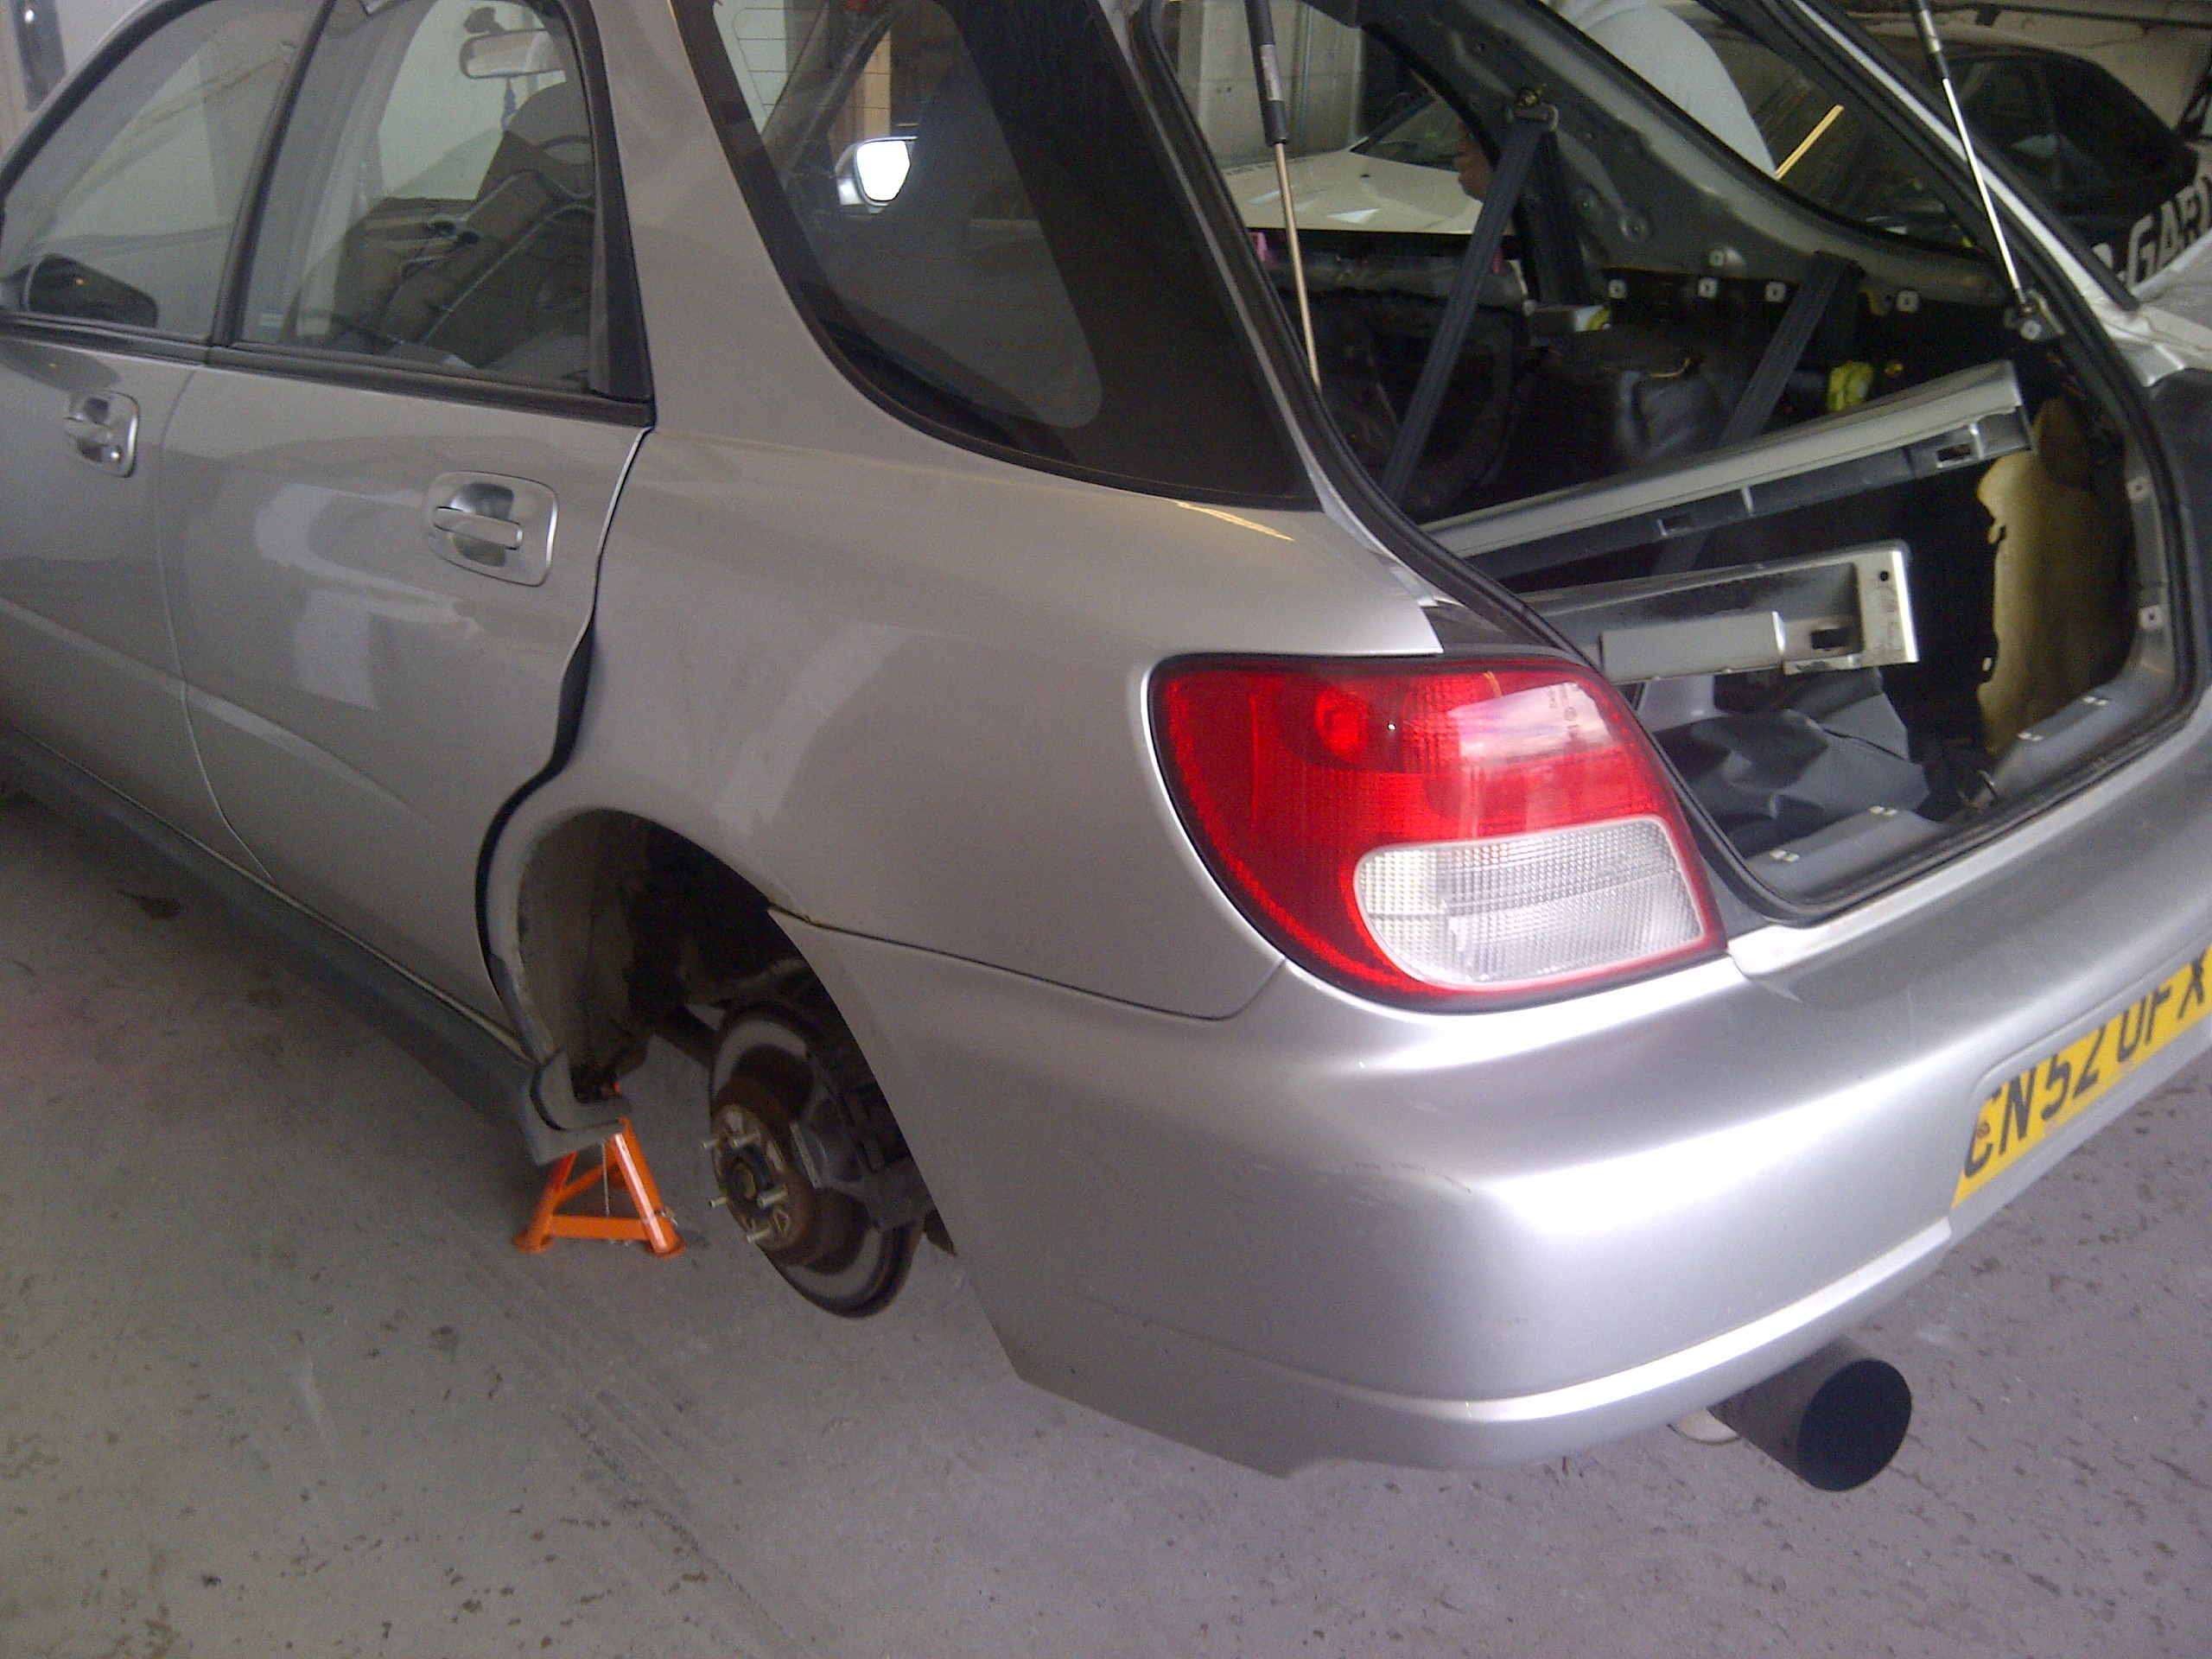
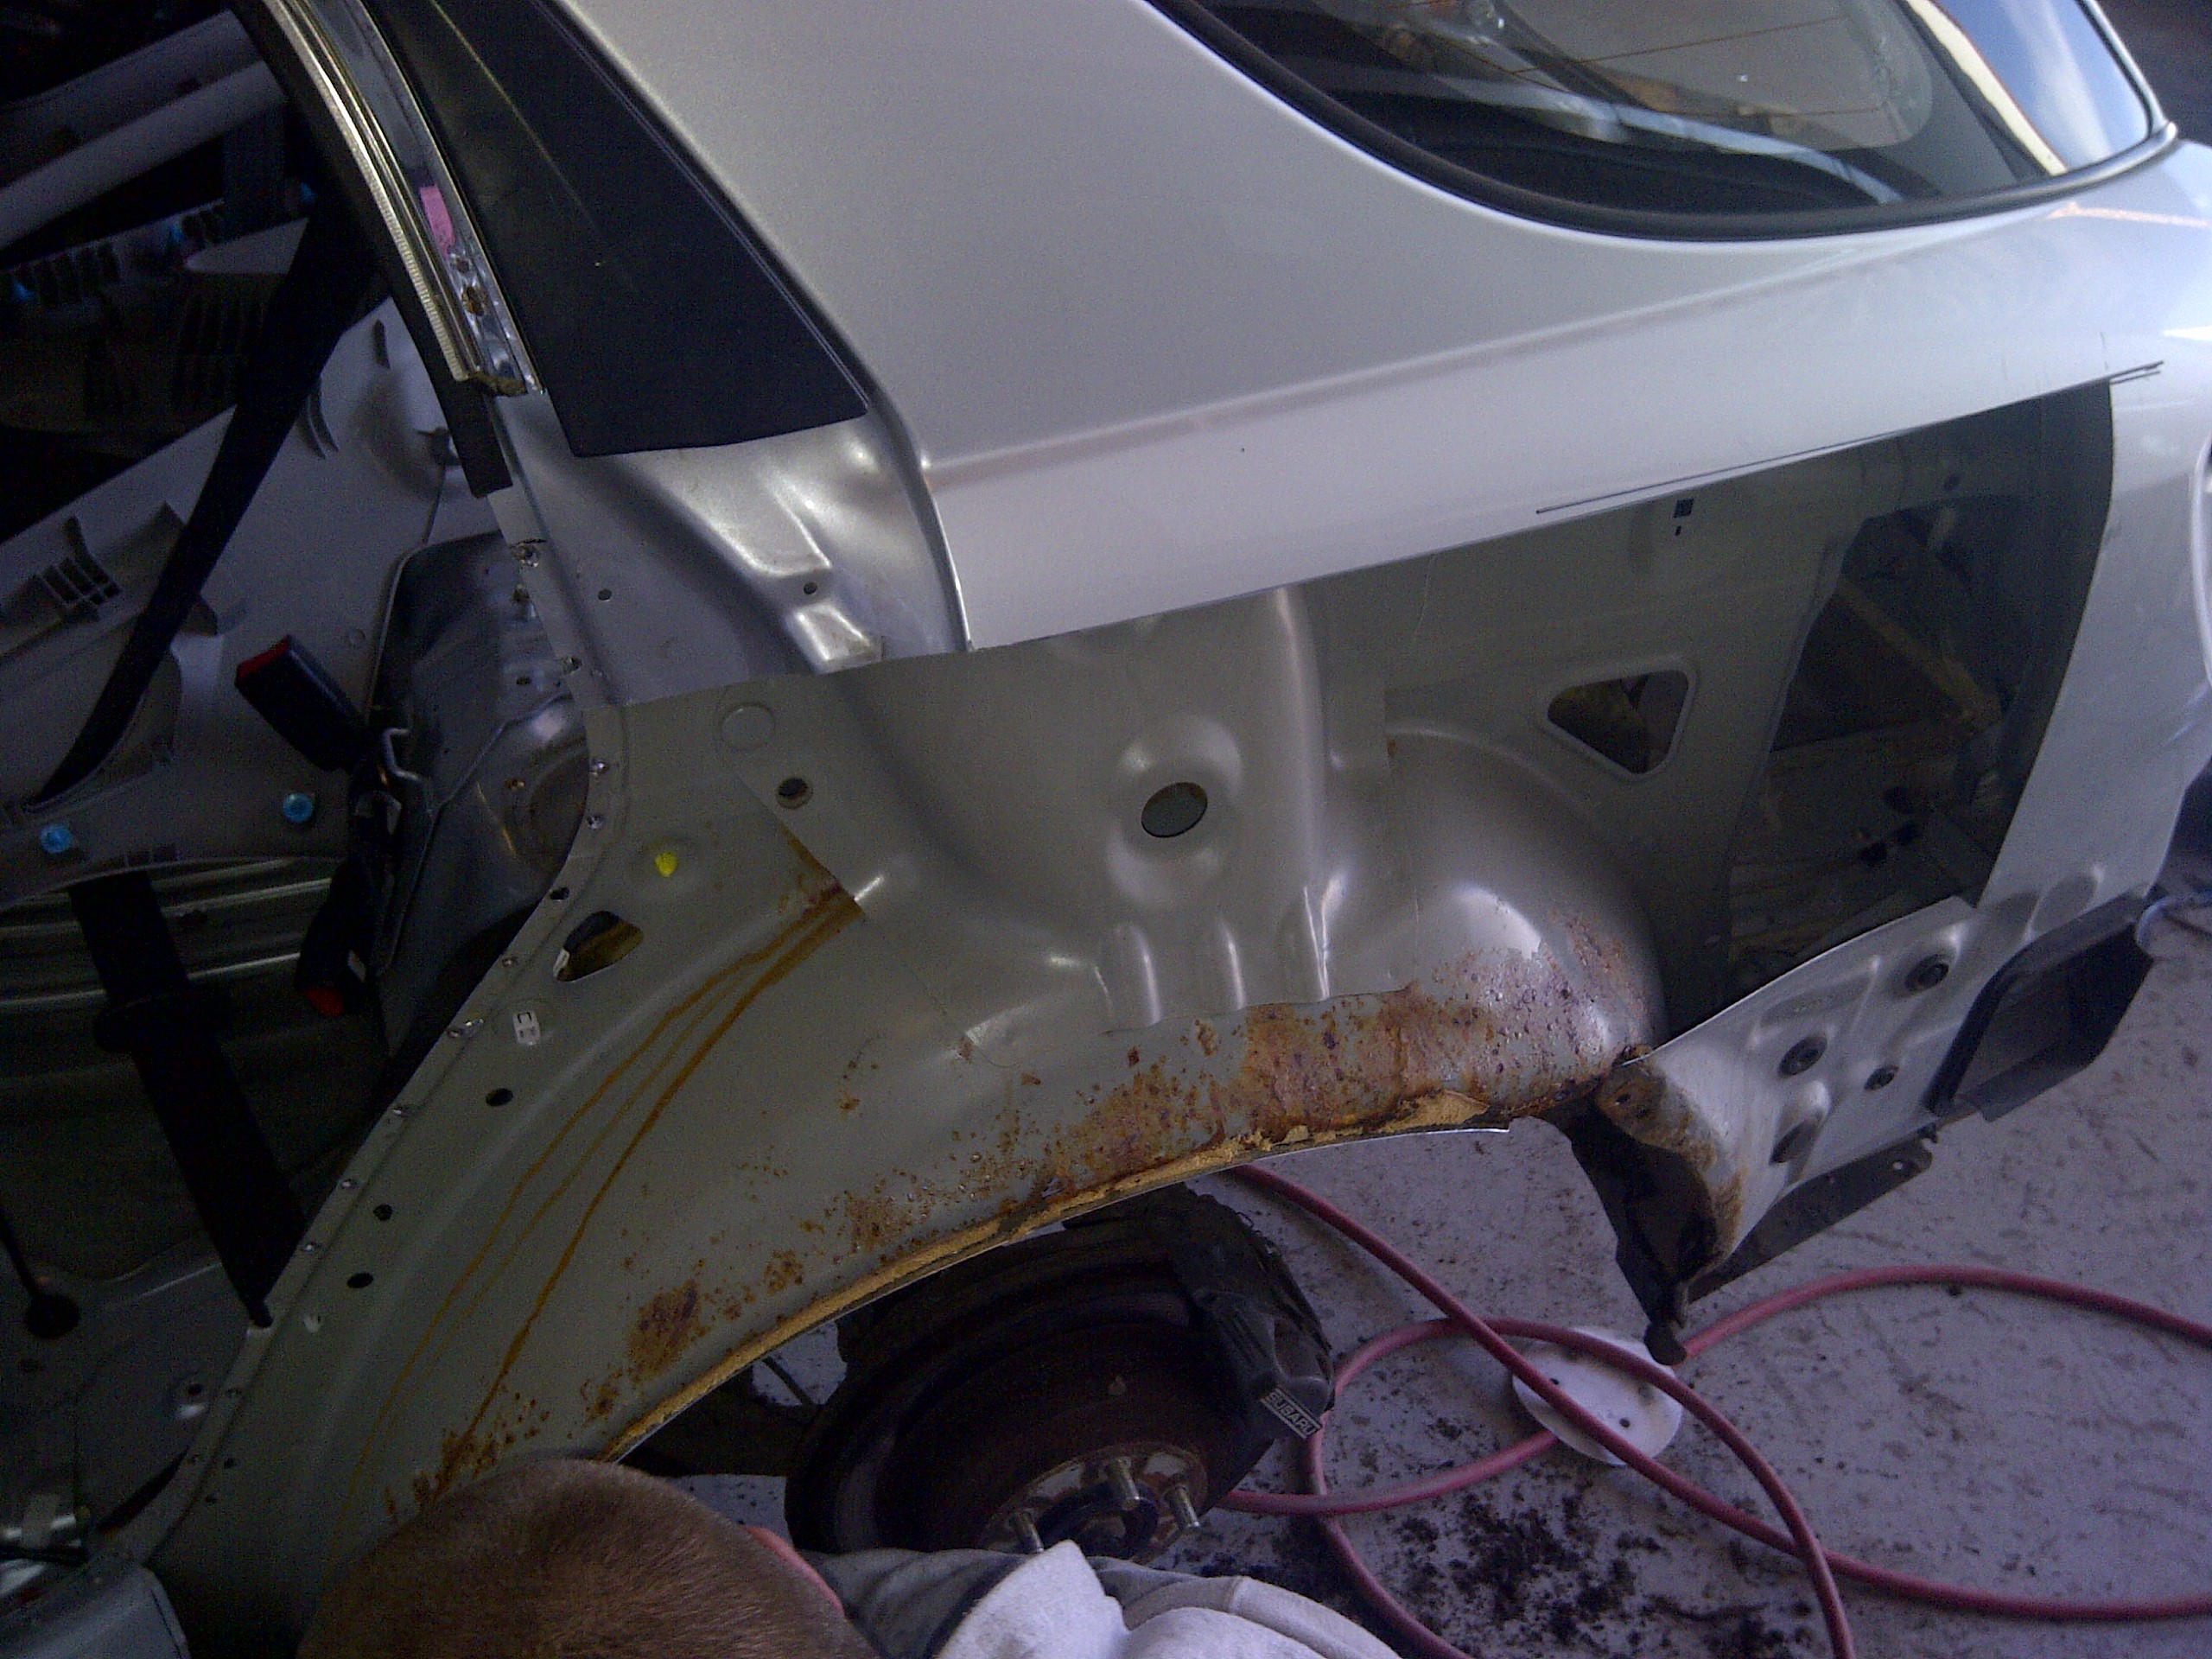
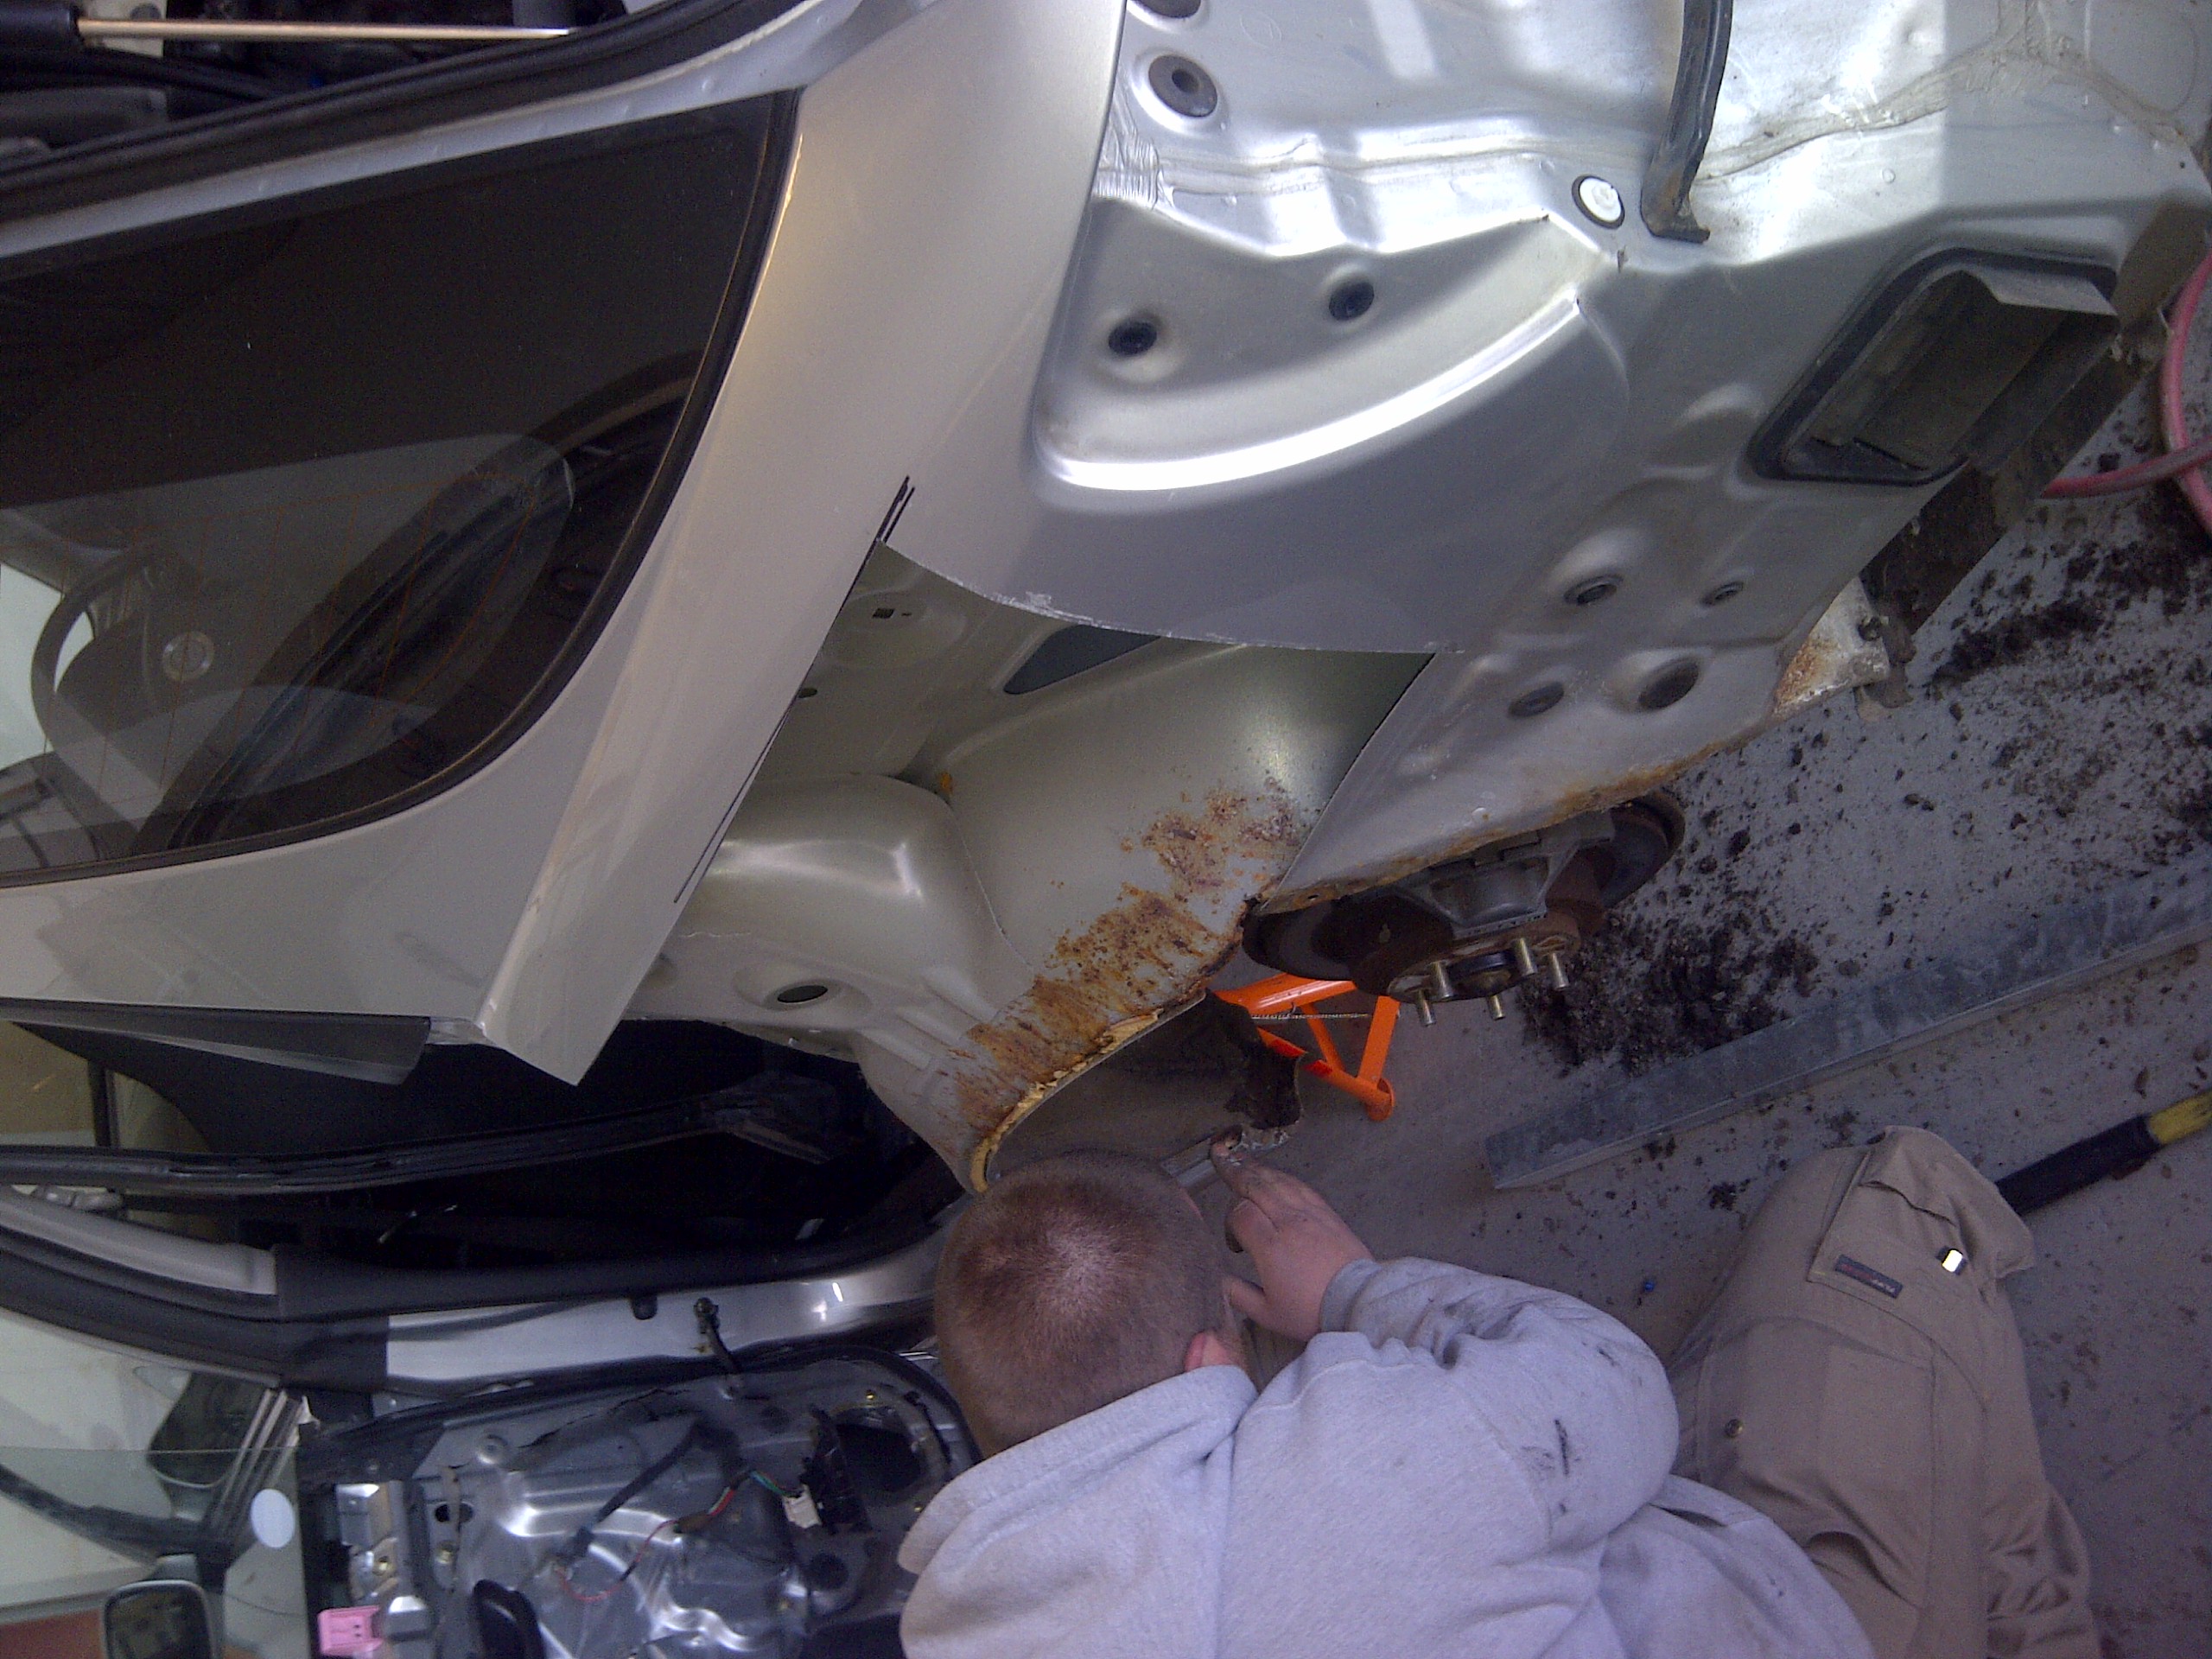
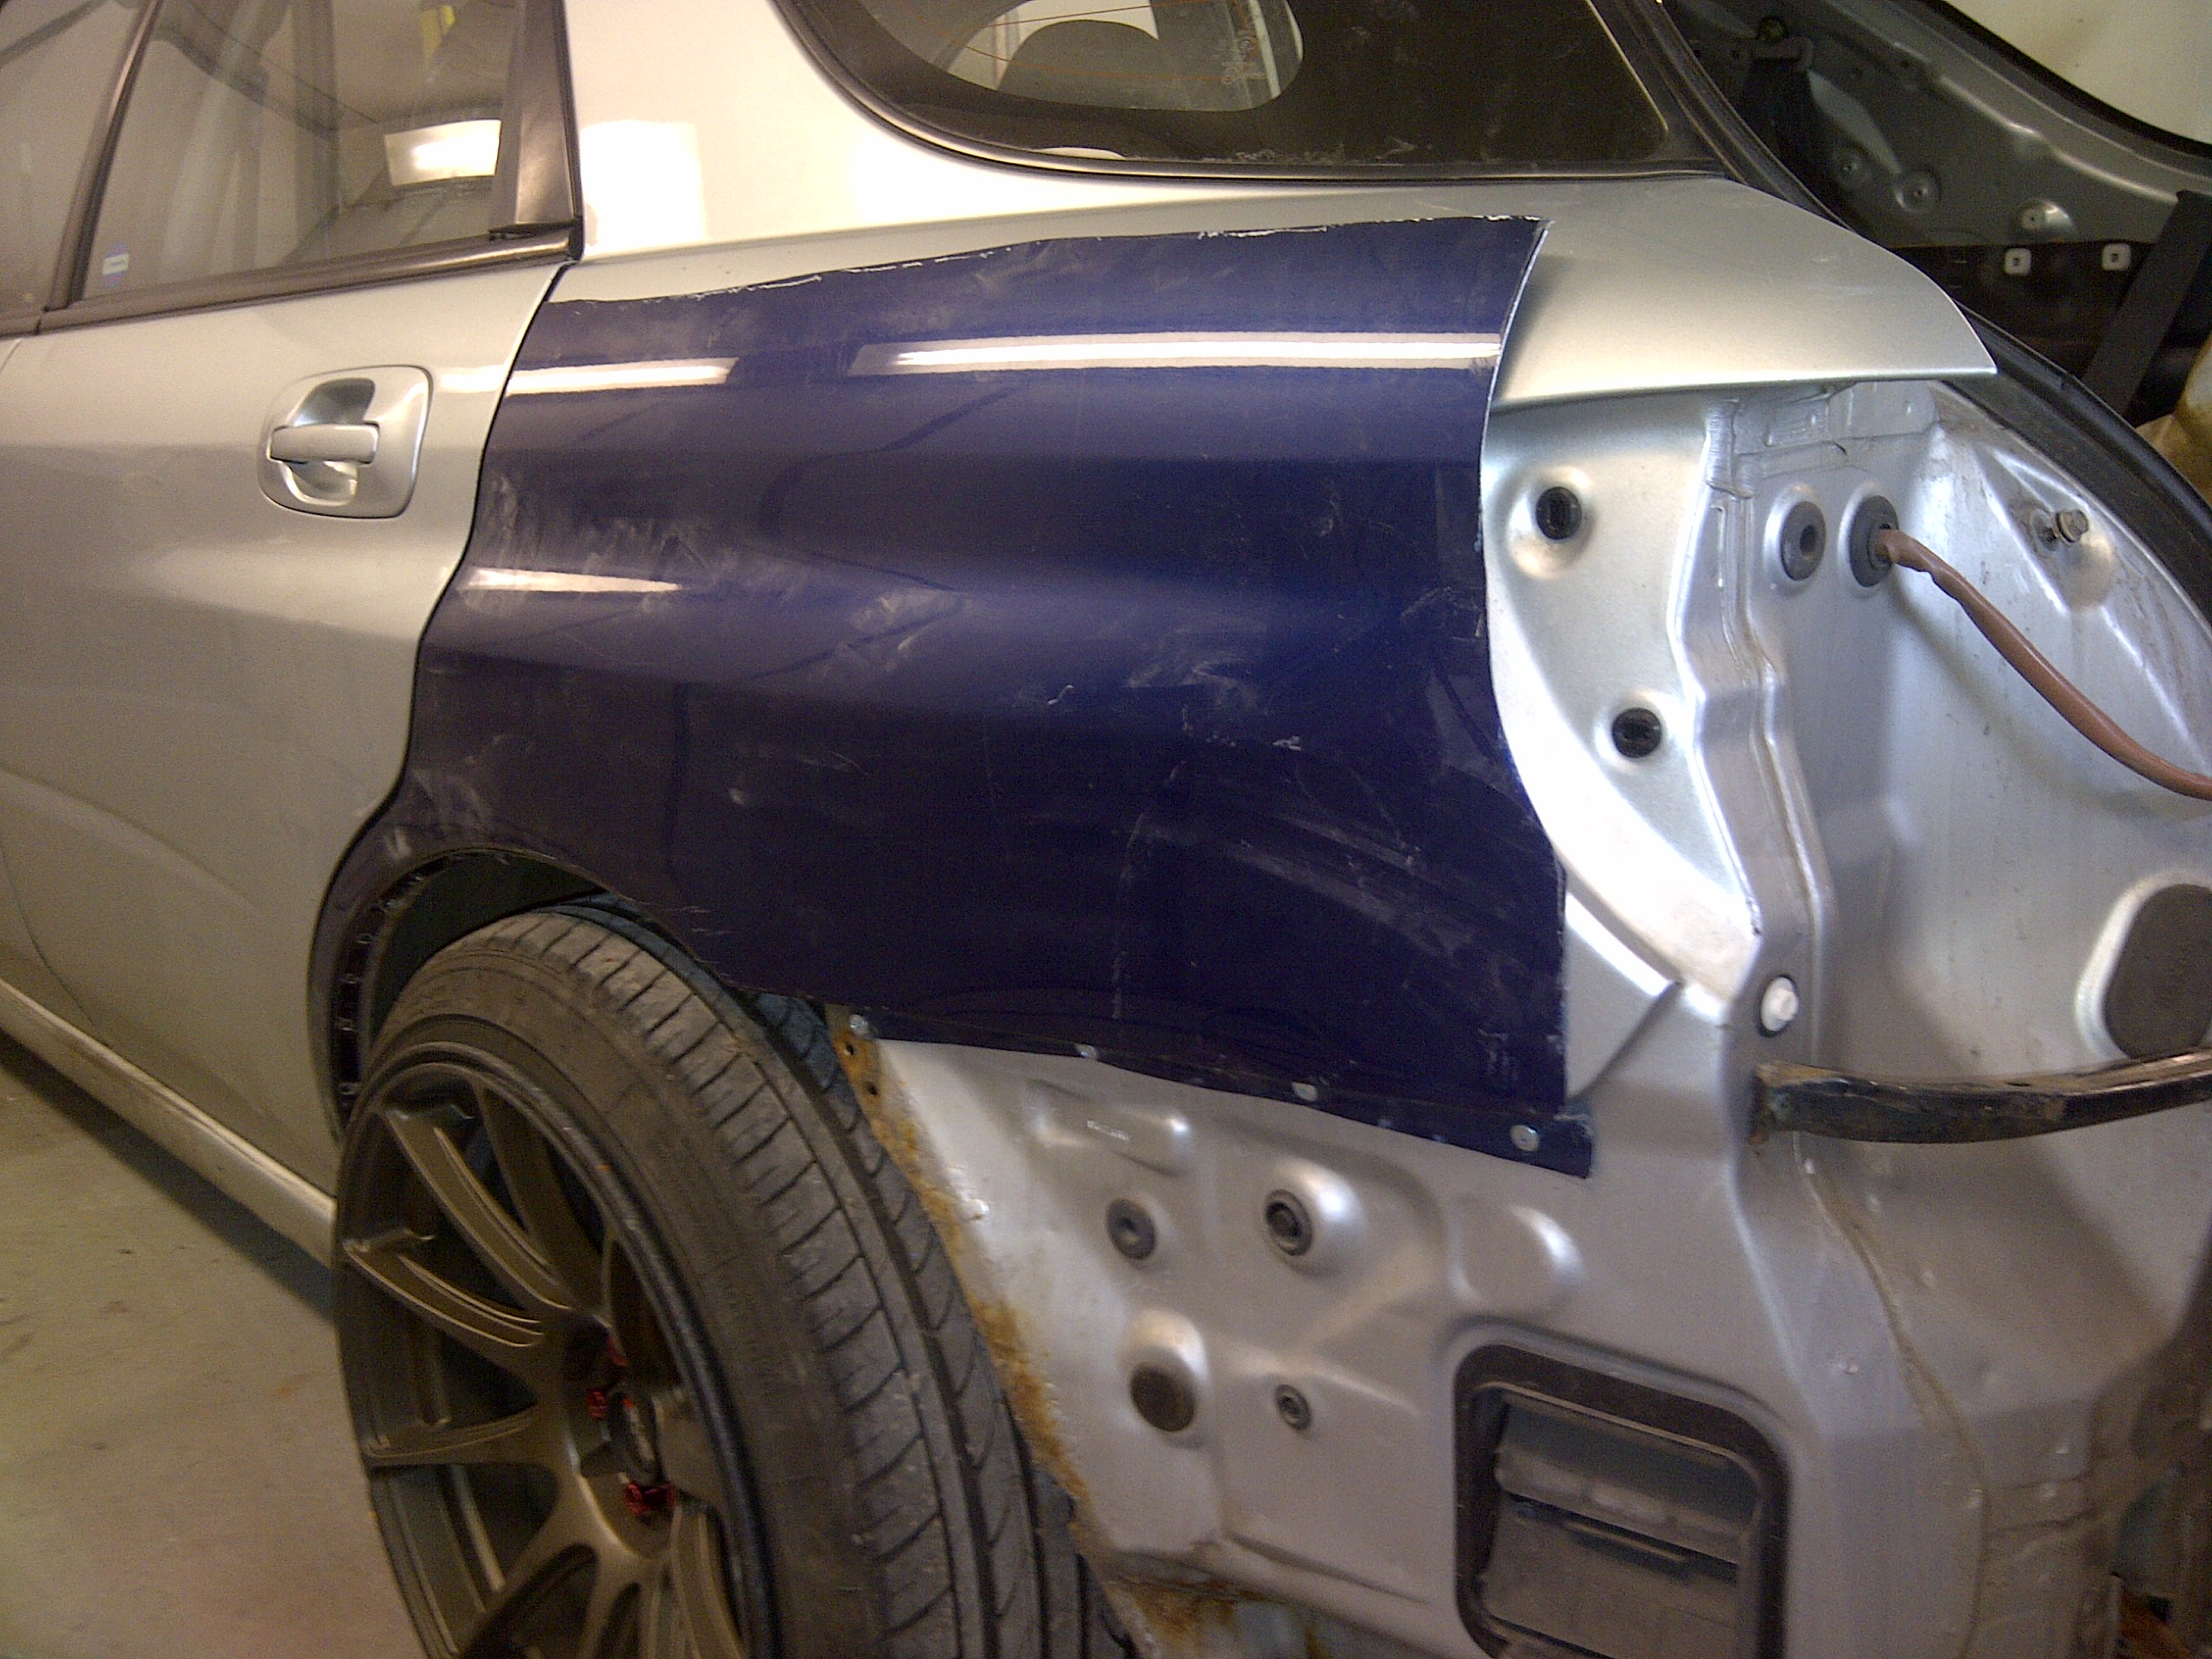
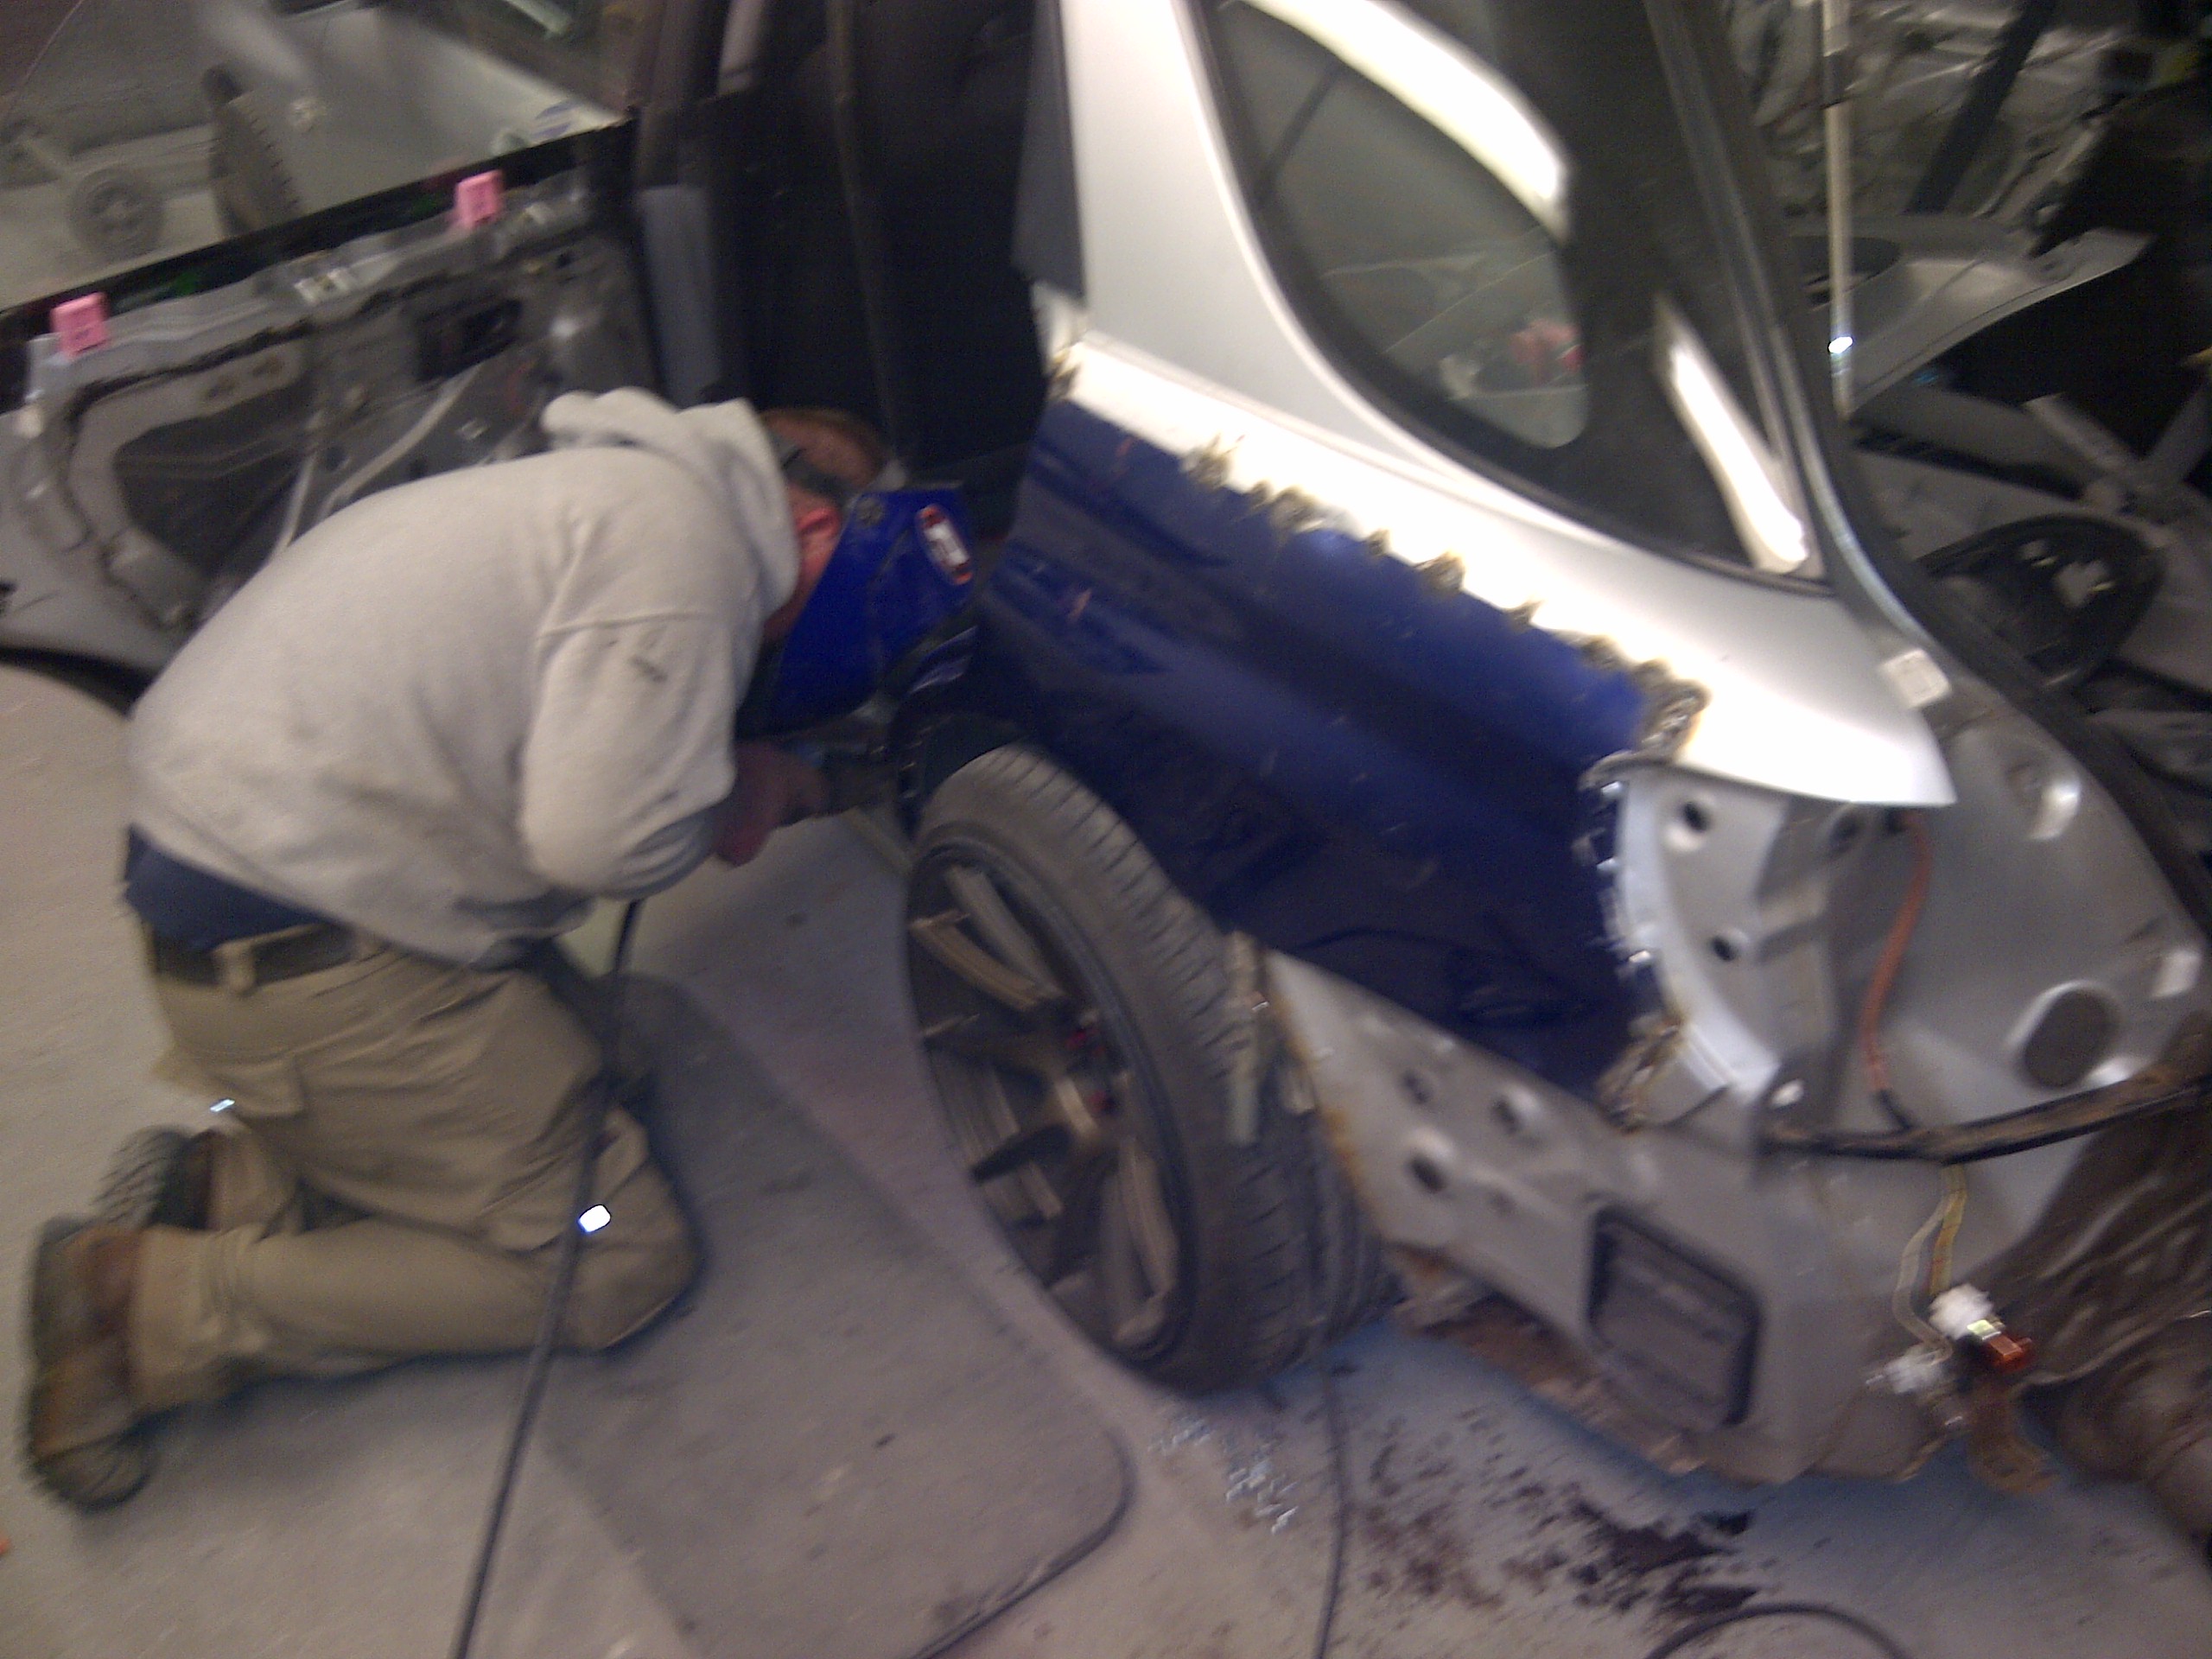
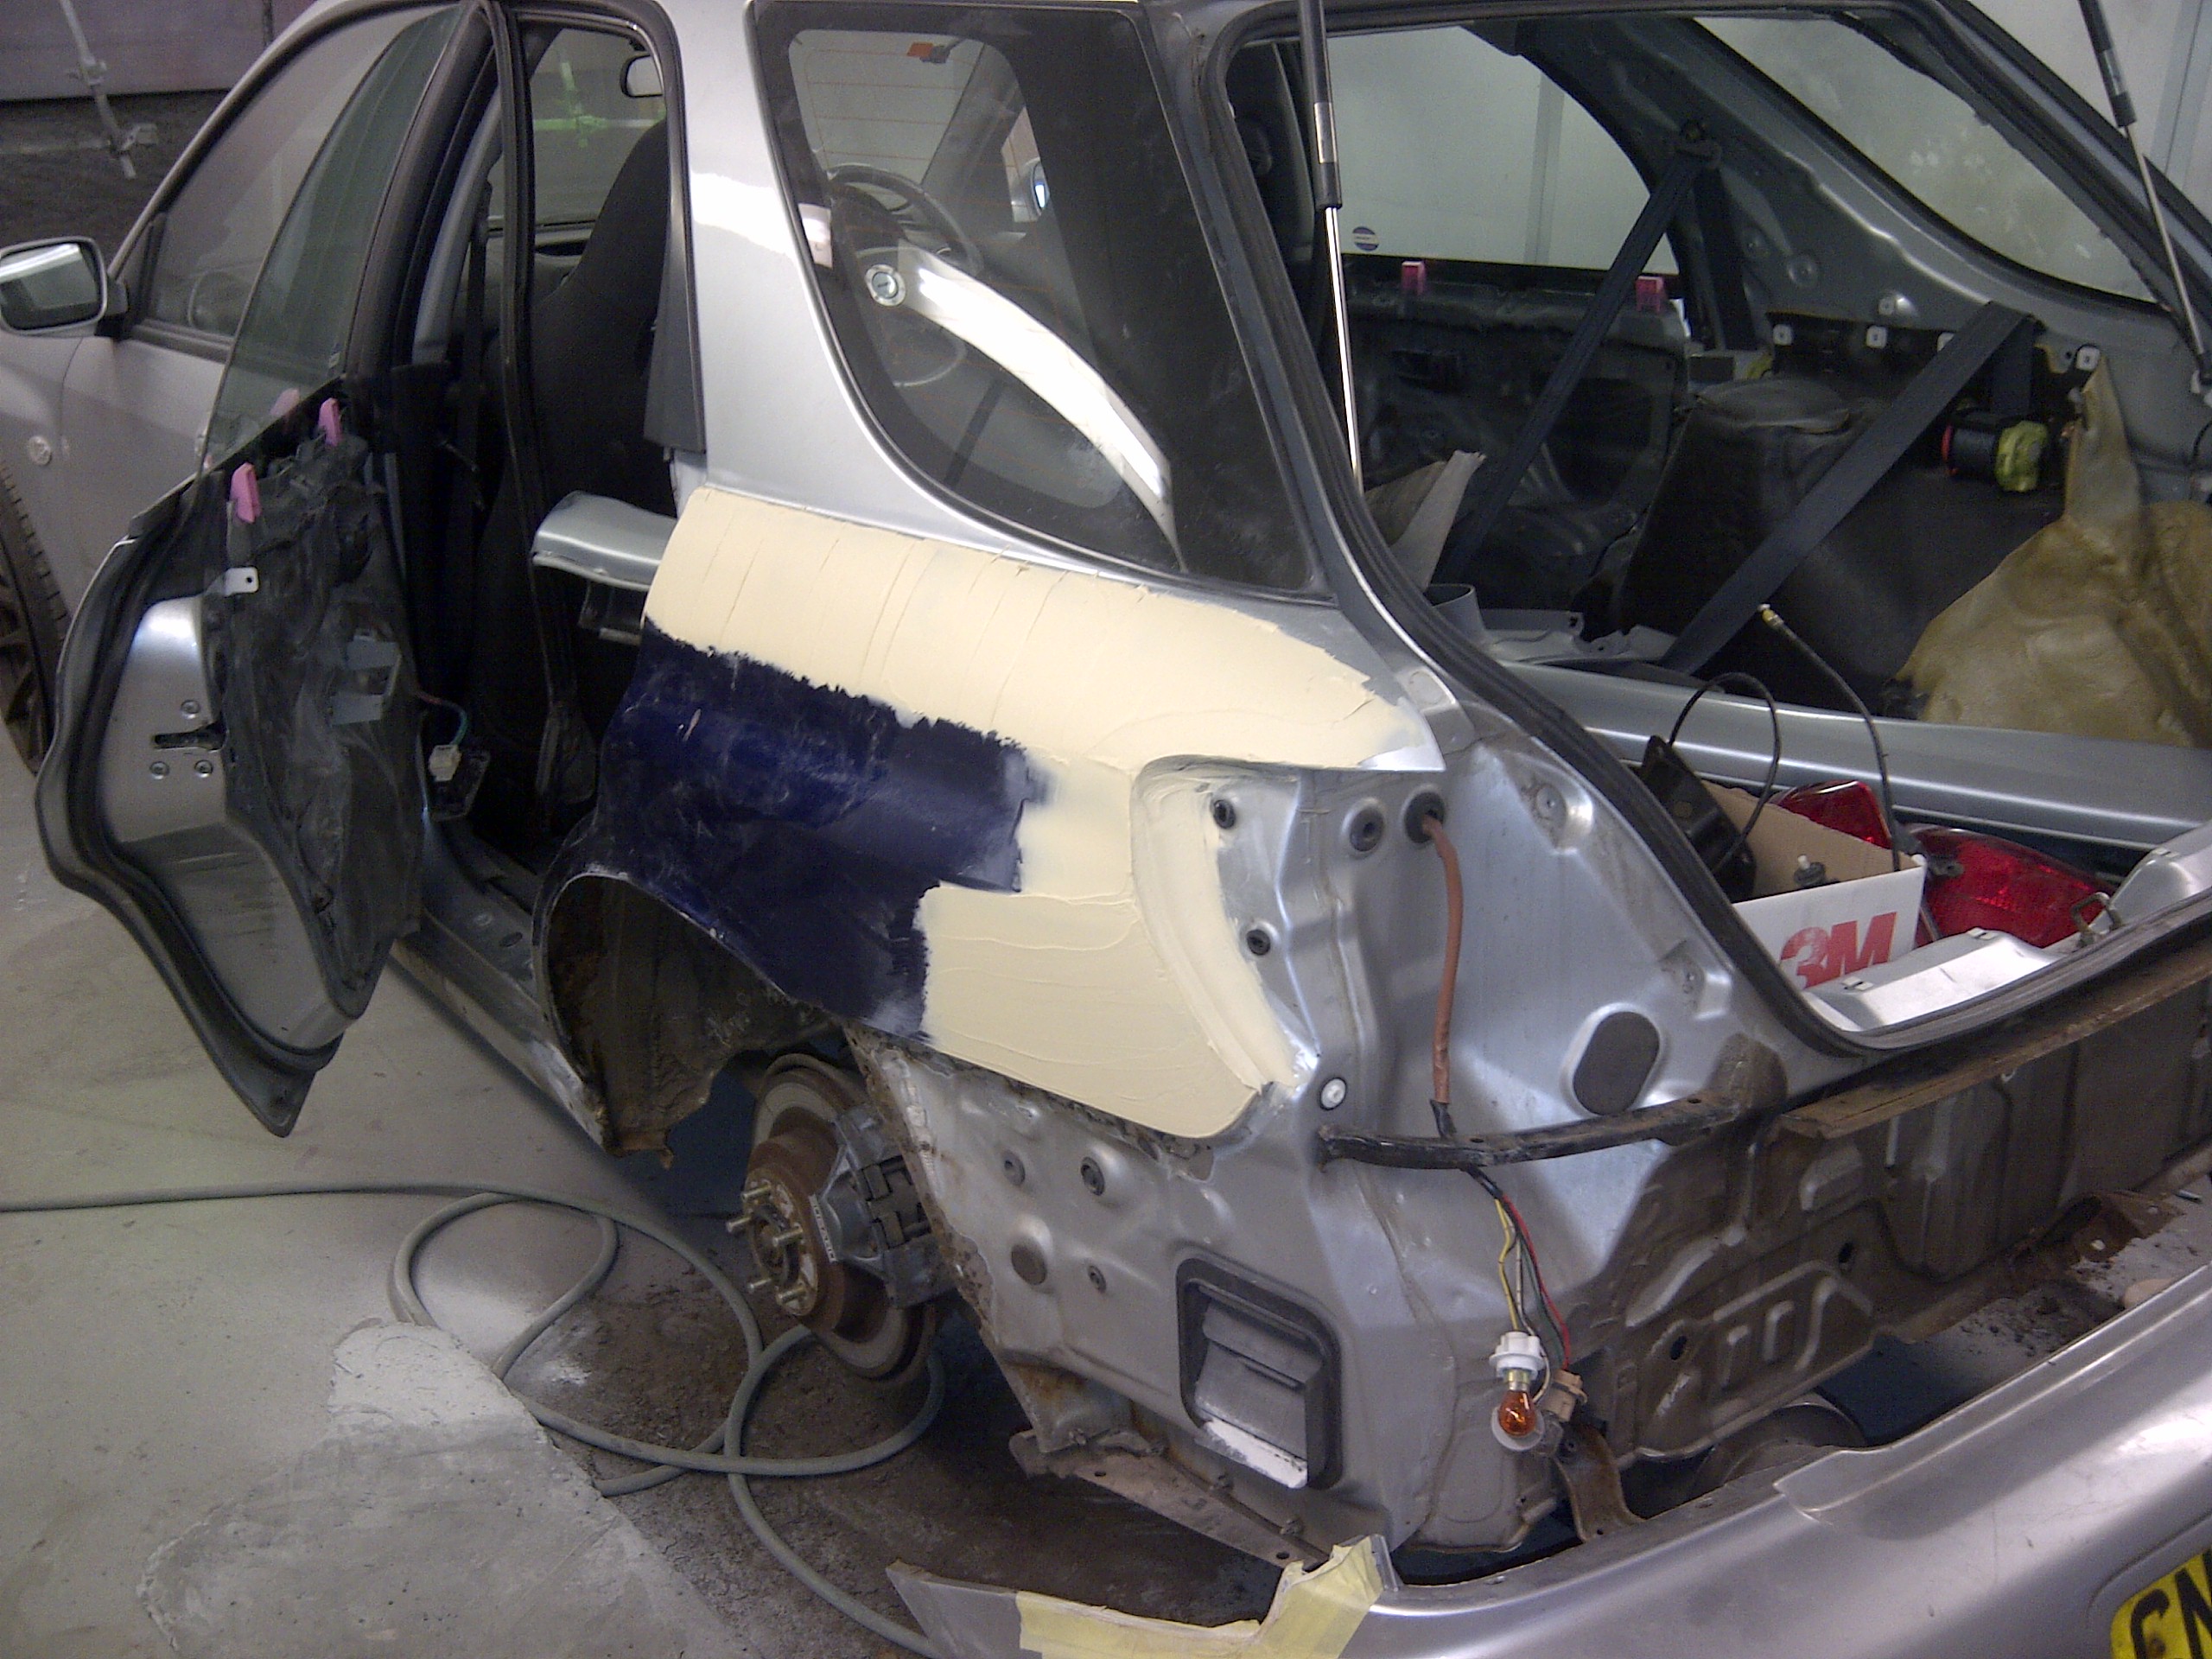
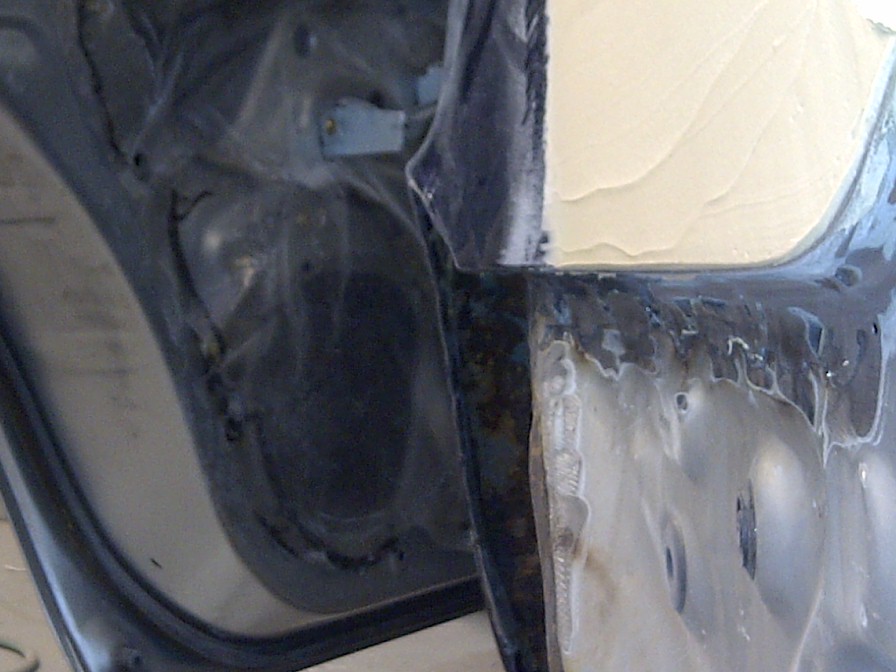
Well my mate James who owns Restomod in Bristol free'd up sometime to attack this for me so I started off drilling the spot welds out and he started with the air axle we weren't sure how things were gunna line up but knew we had to start cutting.
We slid the ar h over and the saloon 1's are longer which turned out to be a good thing as he could than form a step into thr lights like on the saloon's the arch curve was different as well it went longer so the back bumper needed modding also didn't line up perfectly around the buer line so he is building that out to make it all look factory.
I also attacked then with the arch roller to give the wheels a fighting chance of going under the arch when I drop the coilys down. They are a bit wobbly at the min but nothing james can't sort with a small hammer and his skills!!
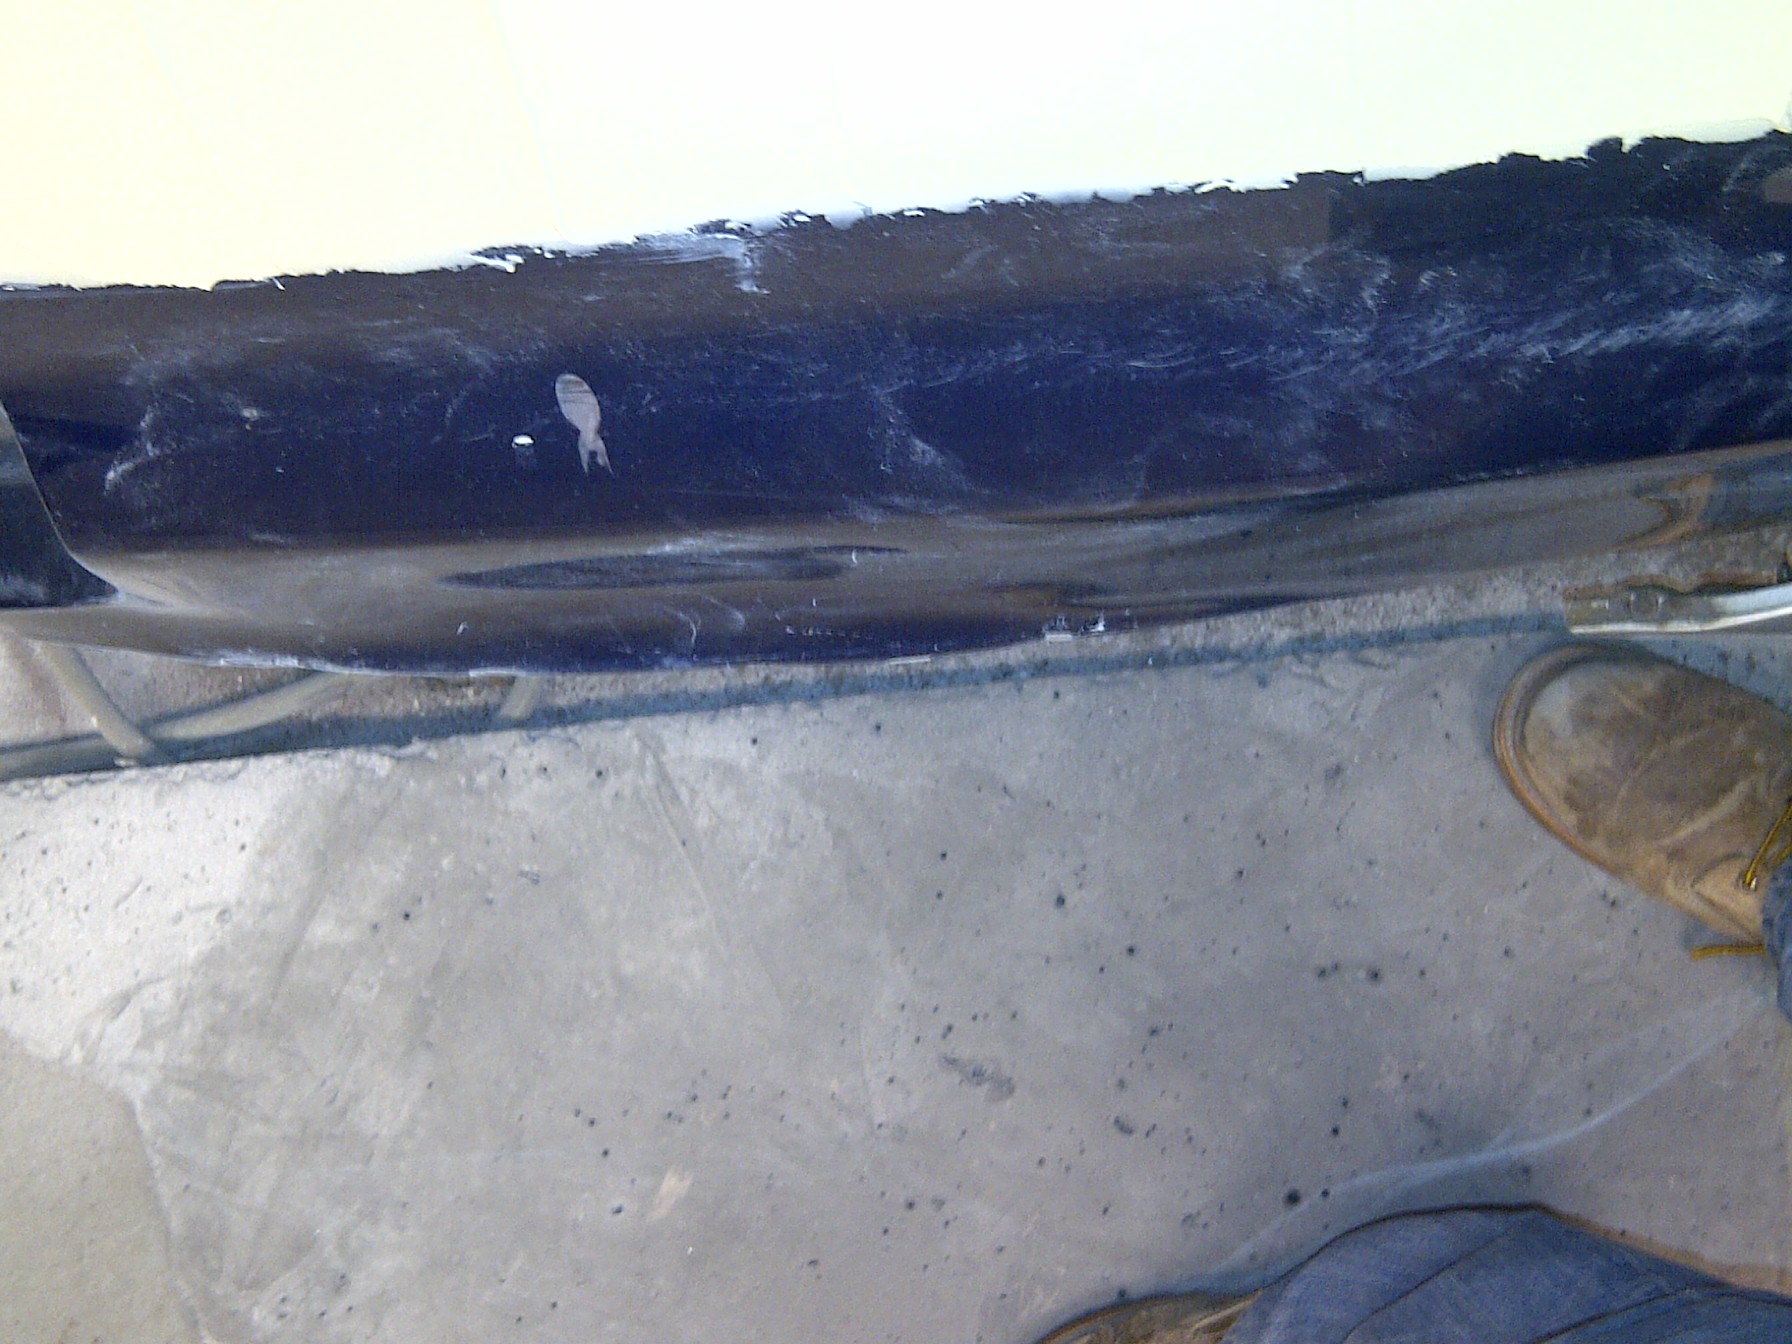
We encountered a lot more rust than we had hoped so couldn't get it all finished so fingers cossed he will have them buttoned up and in primer on Monday but in the mean time here are some pics of where we got to.
Drivers side.


Passenger
We slid the ar h over and the saloon 1's are longer which turned out to be a good thing as he could than form a step into thr lights like on the saloon's the arch curve was different as well it went longer so the back bumper needed modding also didn't line up perfectly around the buer line so he is building that out to make it all look factory.
I also attacked then with the arch roller to give the wheels a fighting chance of going under the arch when I drop the coilys down. They are a bit wobbly at the min but nothing james can't sort with a small hammer and his skills!!
We encountered a lot more rust than we had hoped so couldn't get it all finished so fingers cossed he will have them buttoned up and in primer on Monday but in the mean time here are some pics of where we got to.
Drivers side.
Passenger

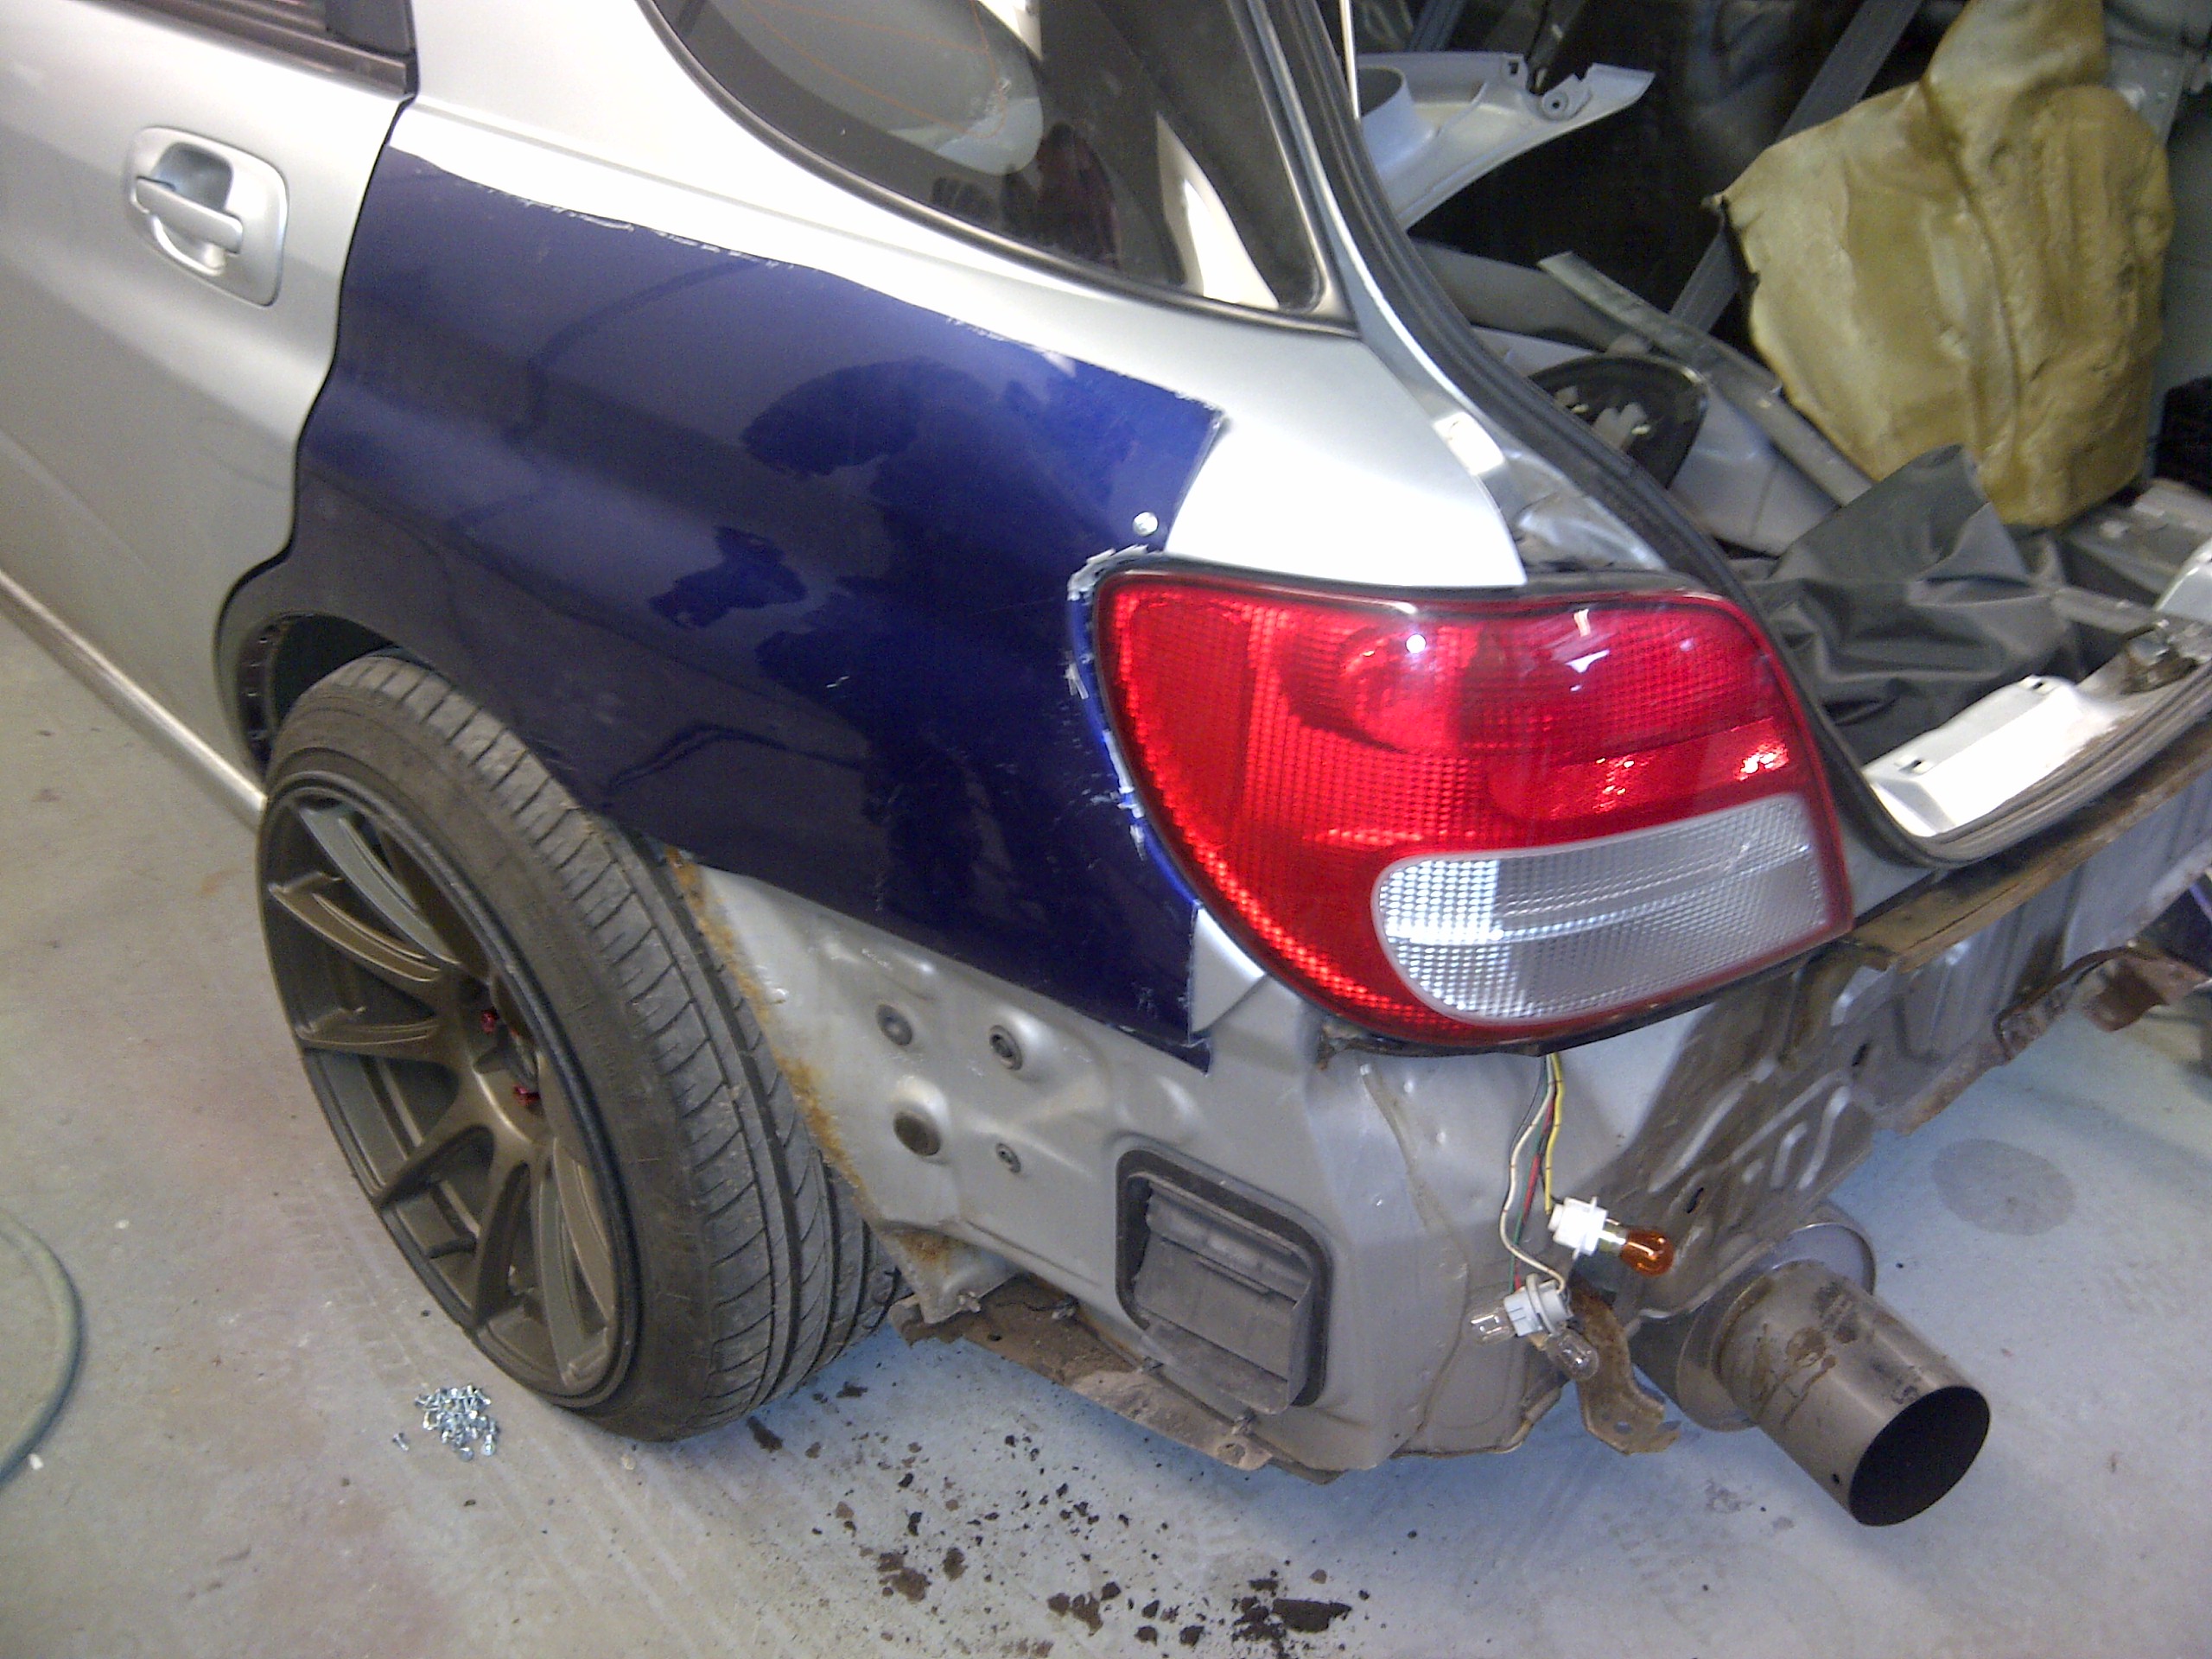
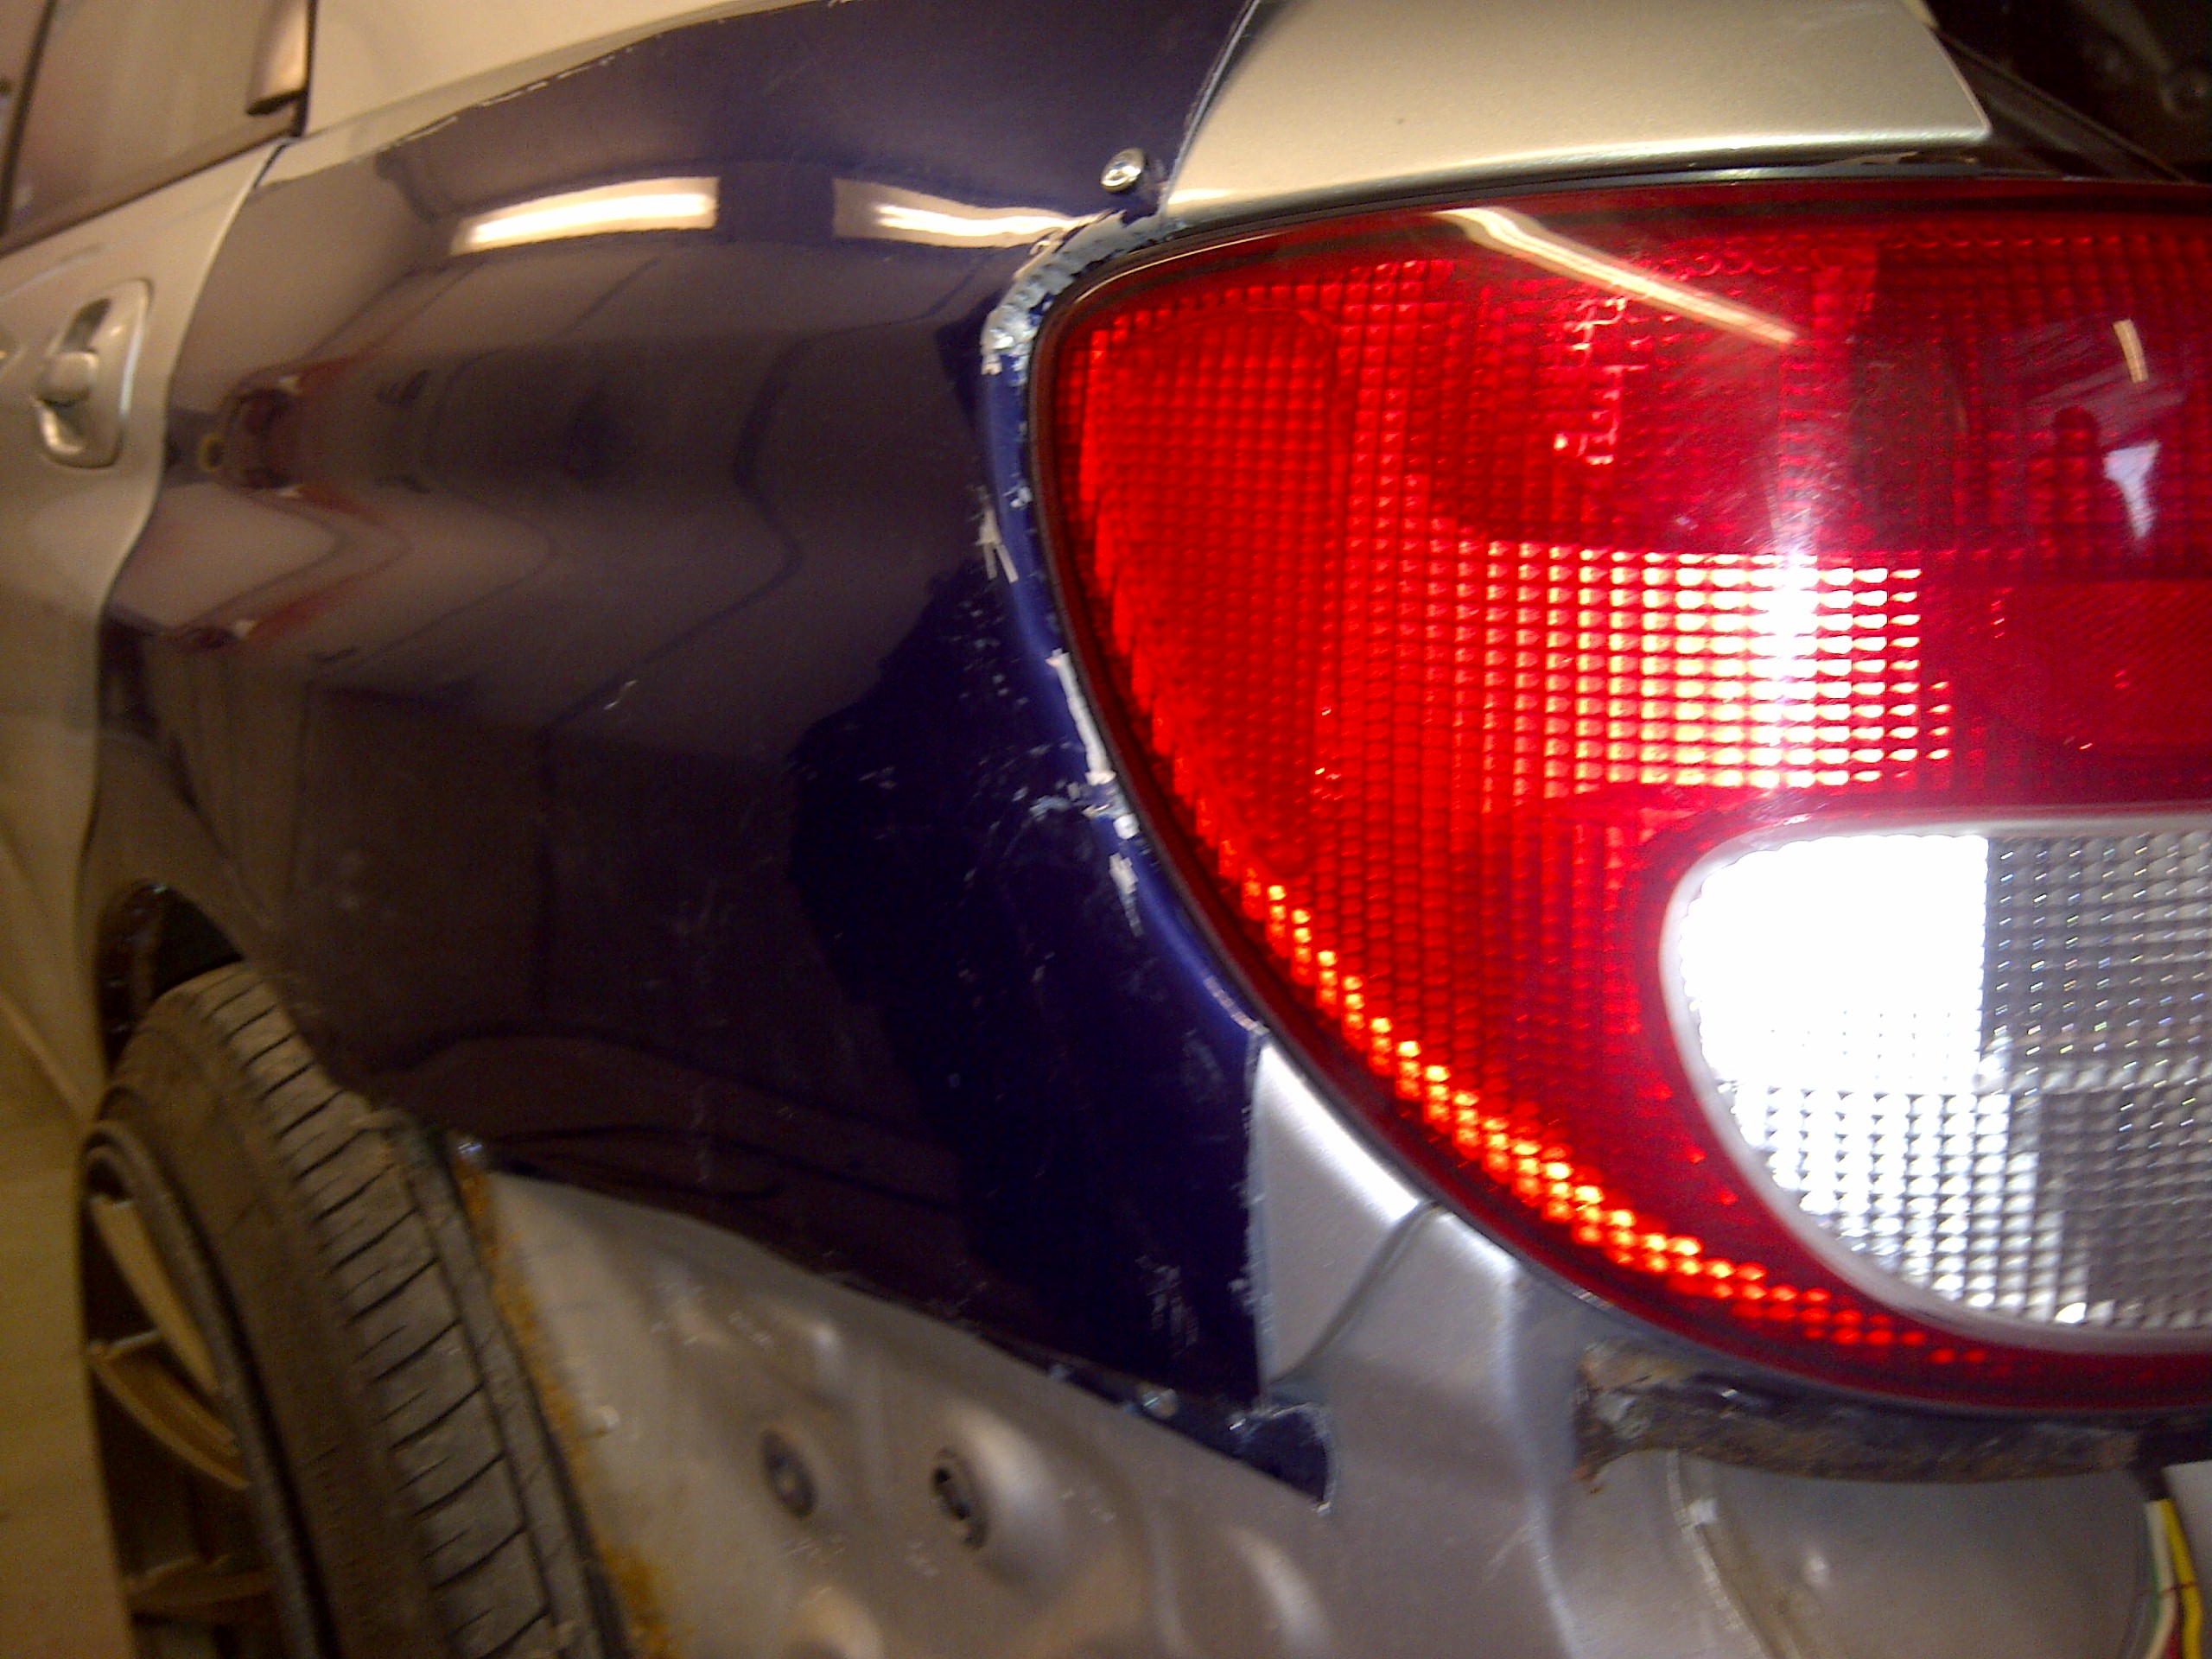
ok so not much happening with the bodywork we have decided to make a back bumper out of a saloon and wagon rear bumpers but they have to be v8 as  vesrion 7's don't match up.
In the mean time I have done a lil more work under the bonnet red red red lol
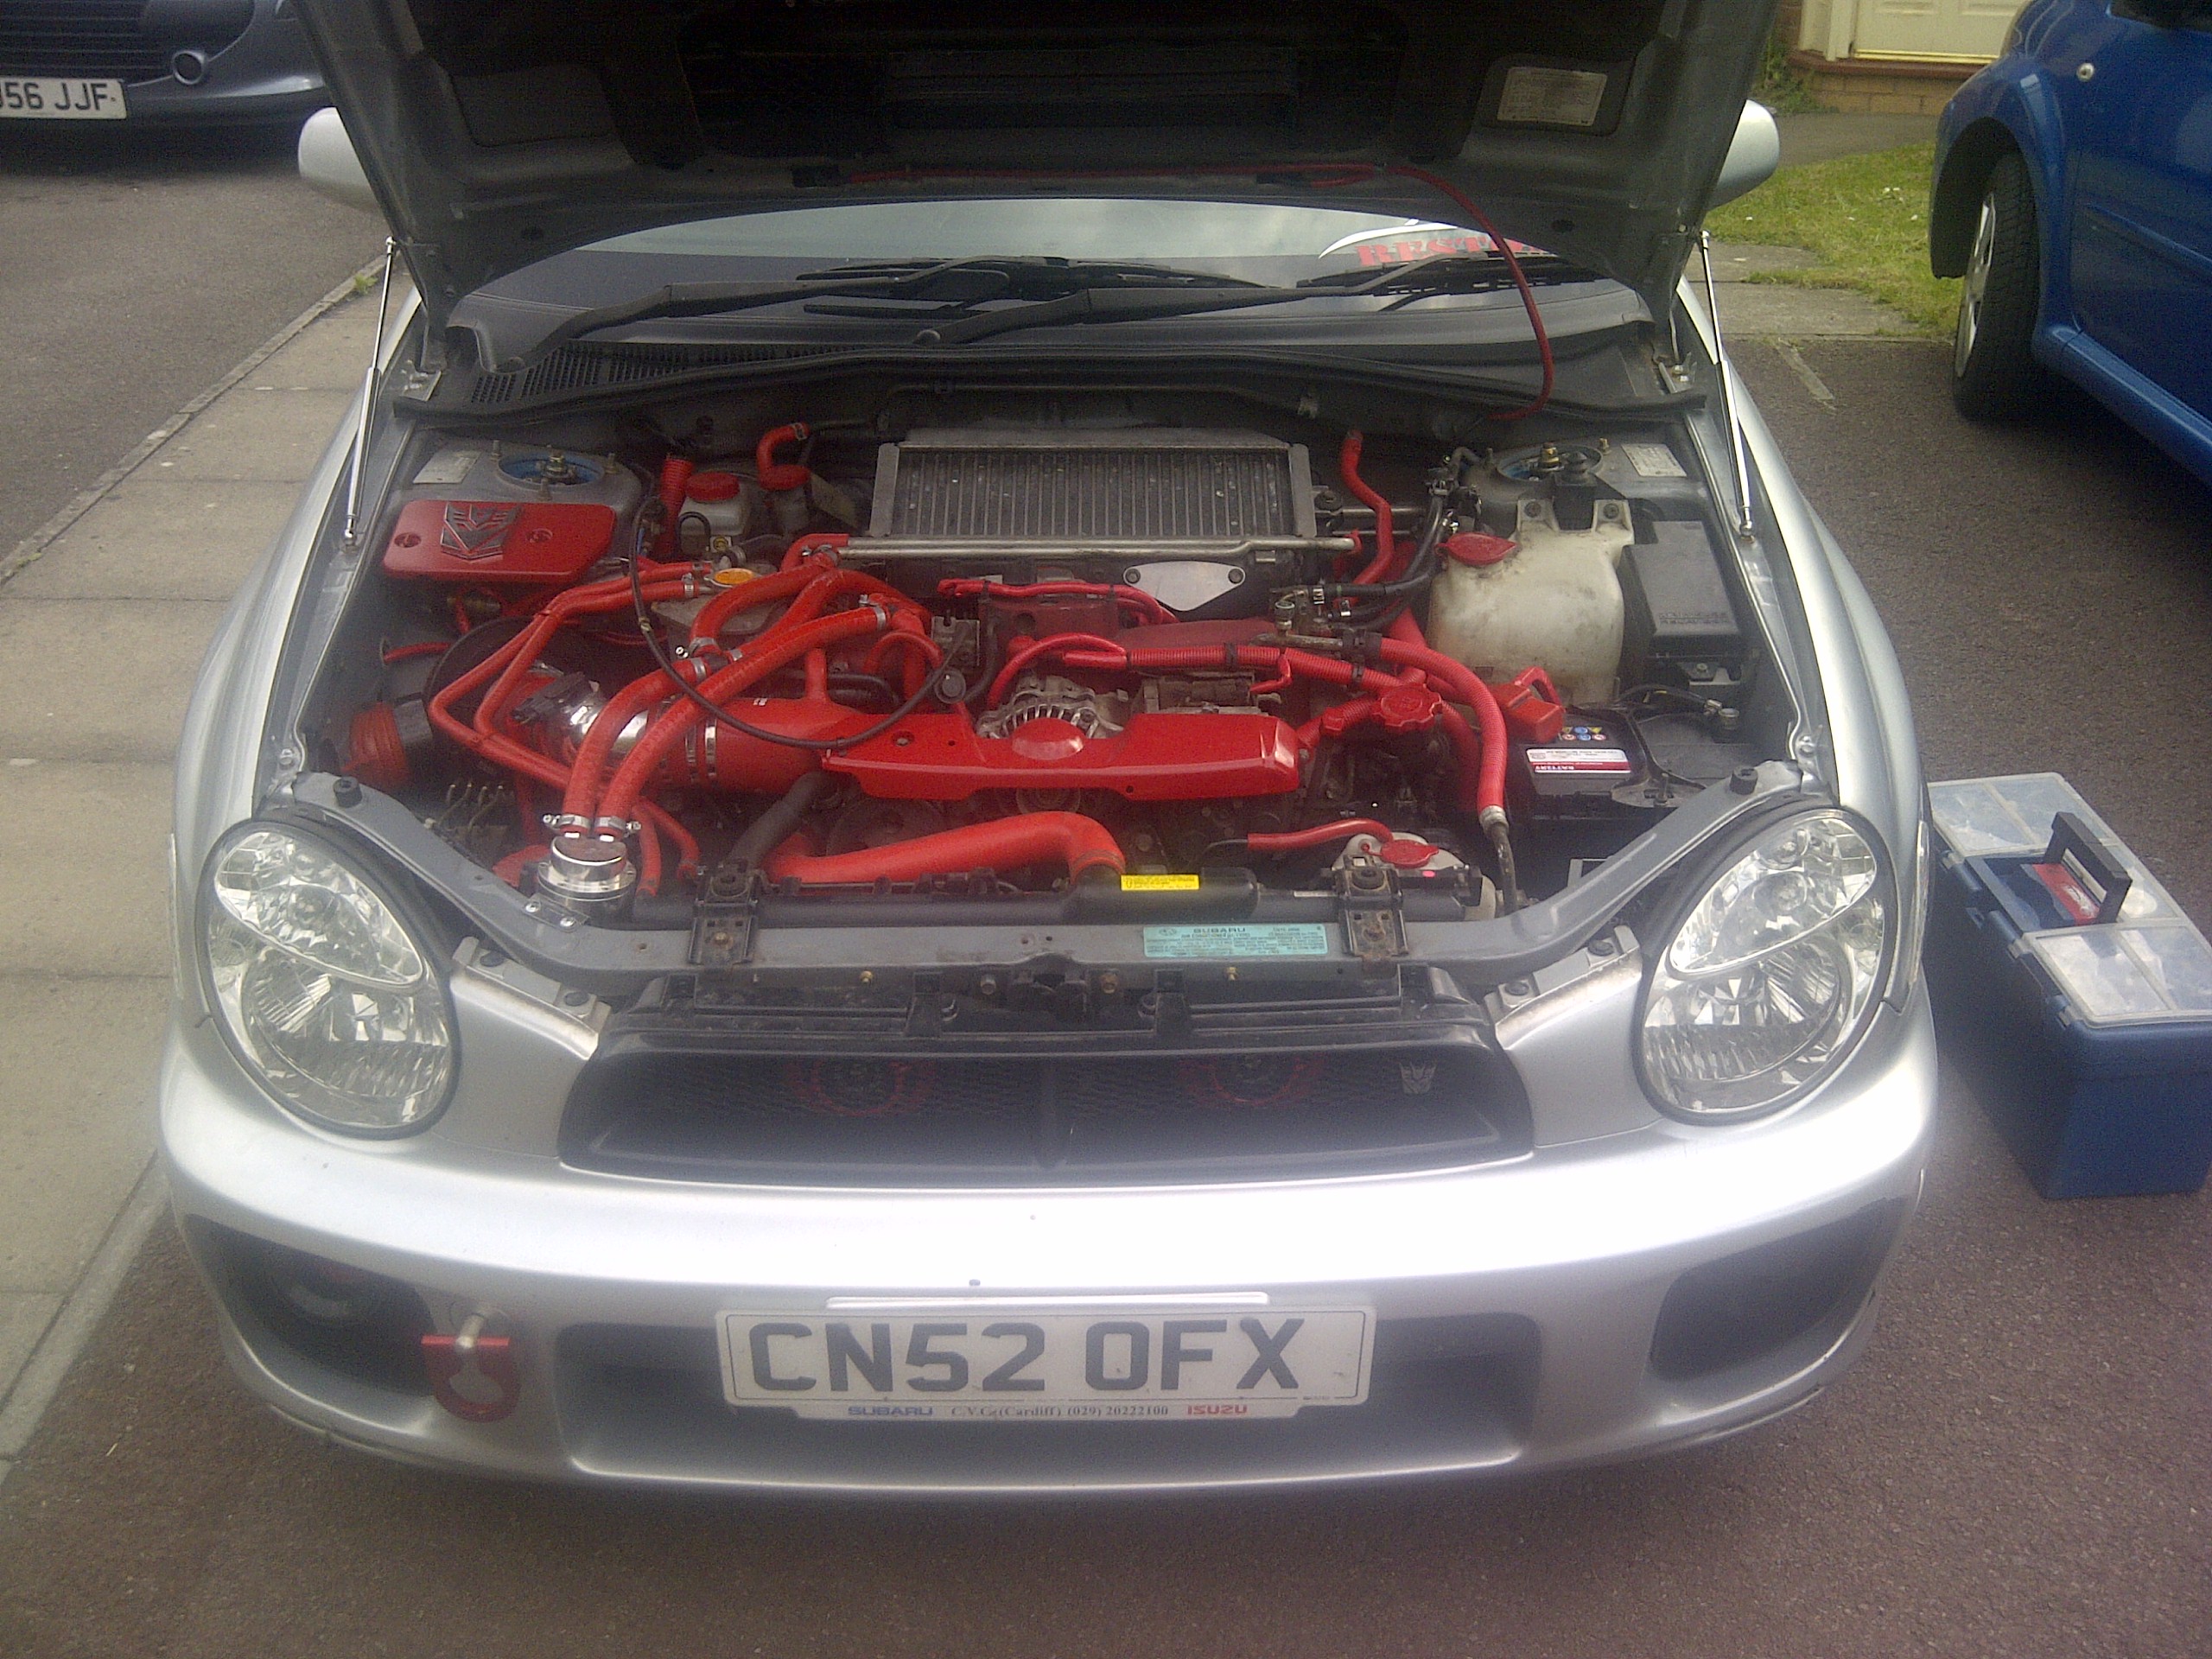
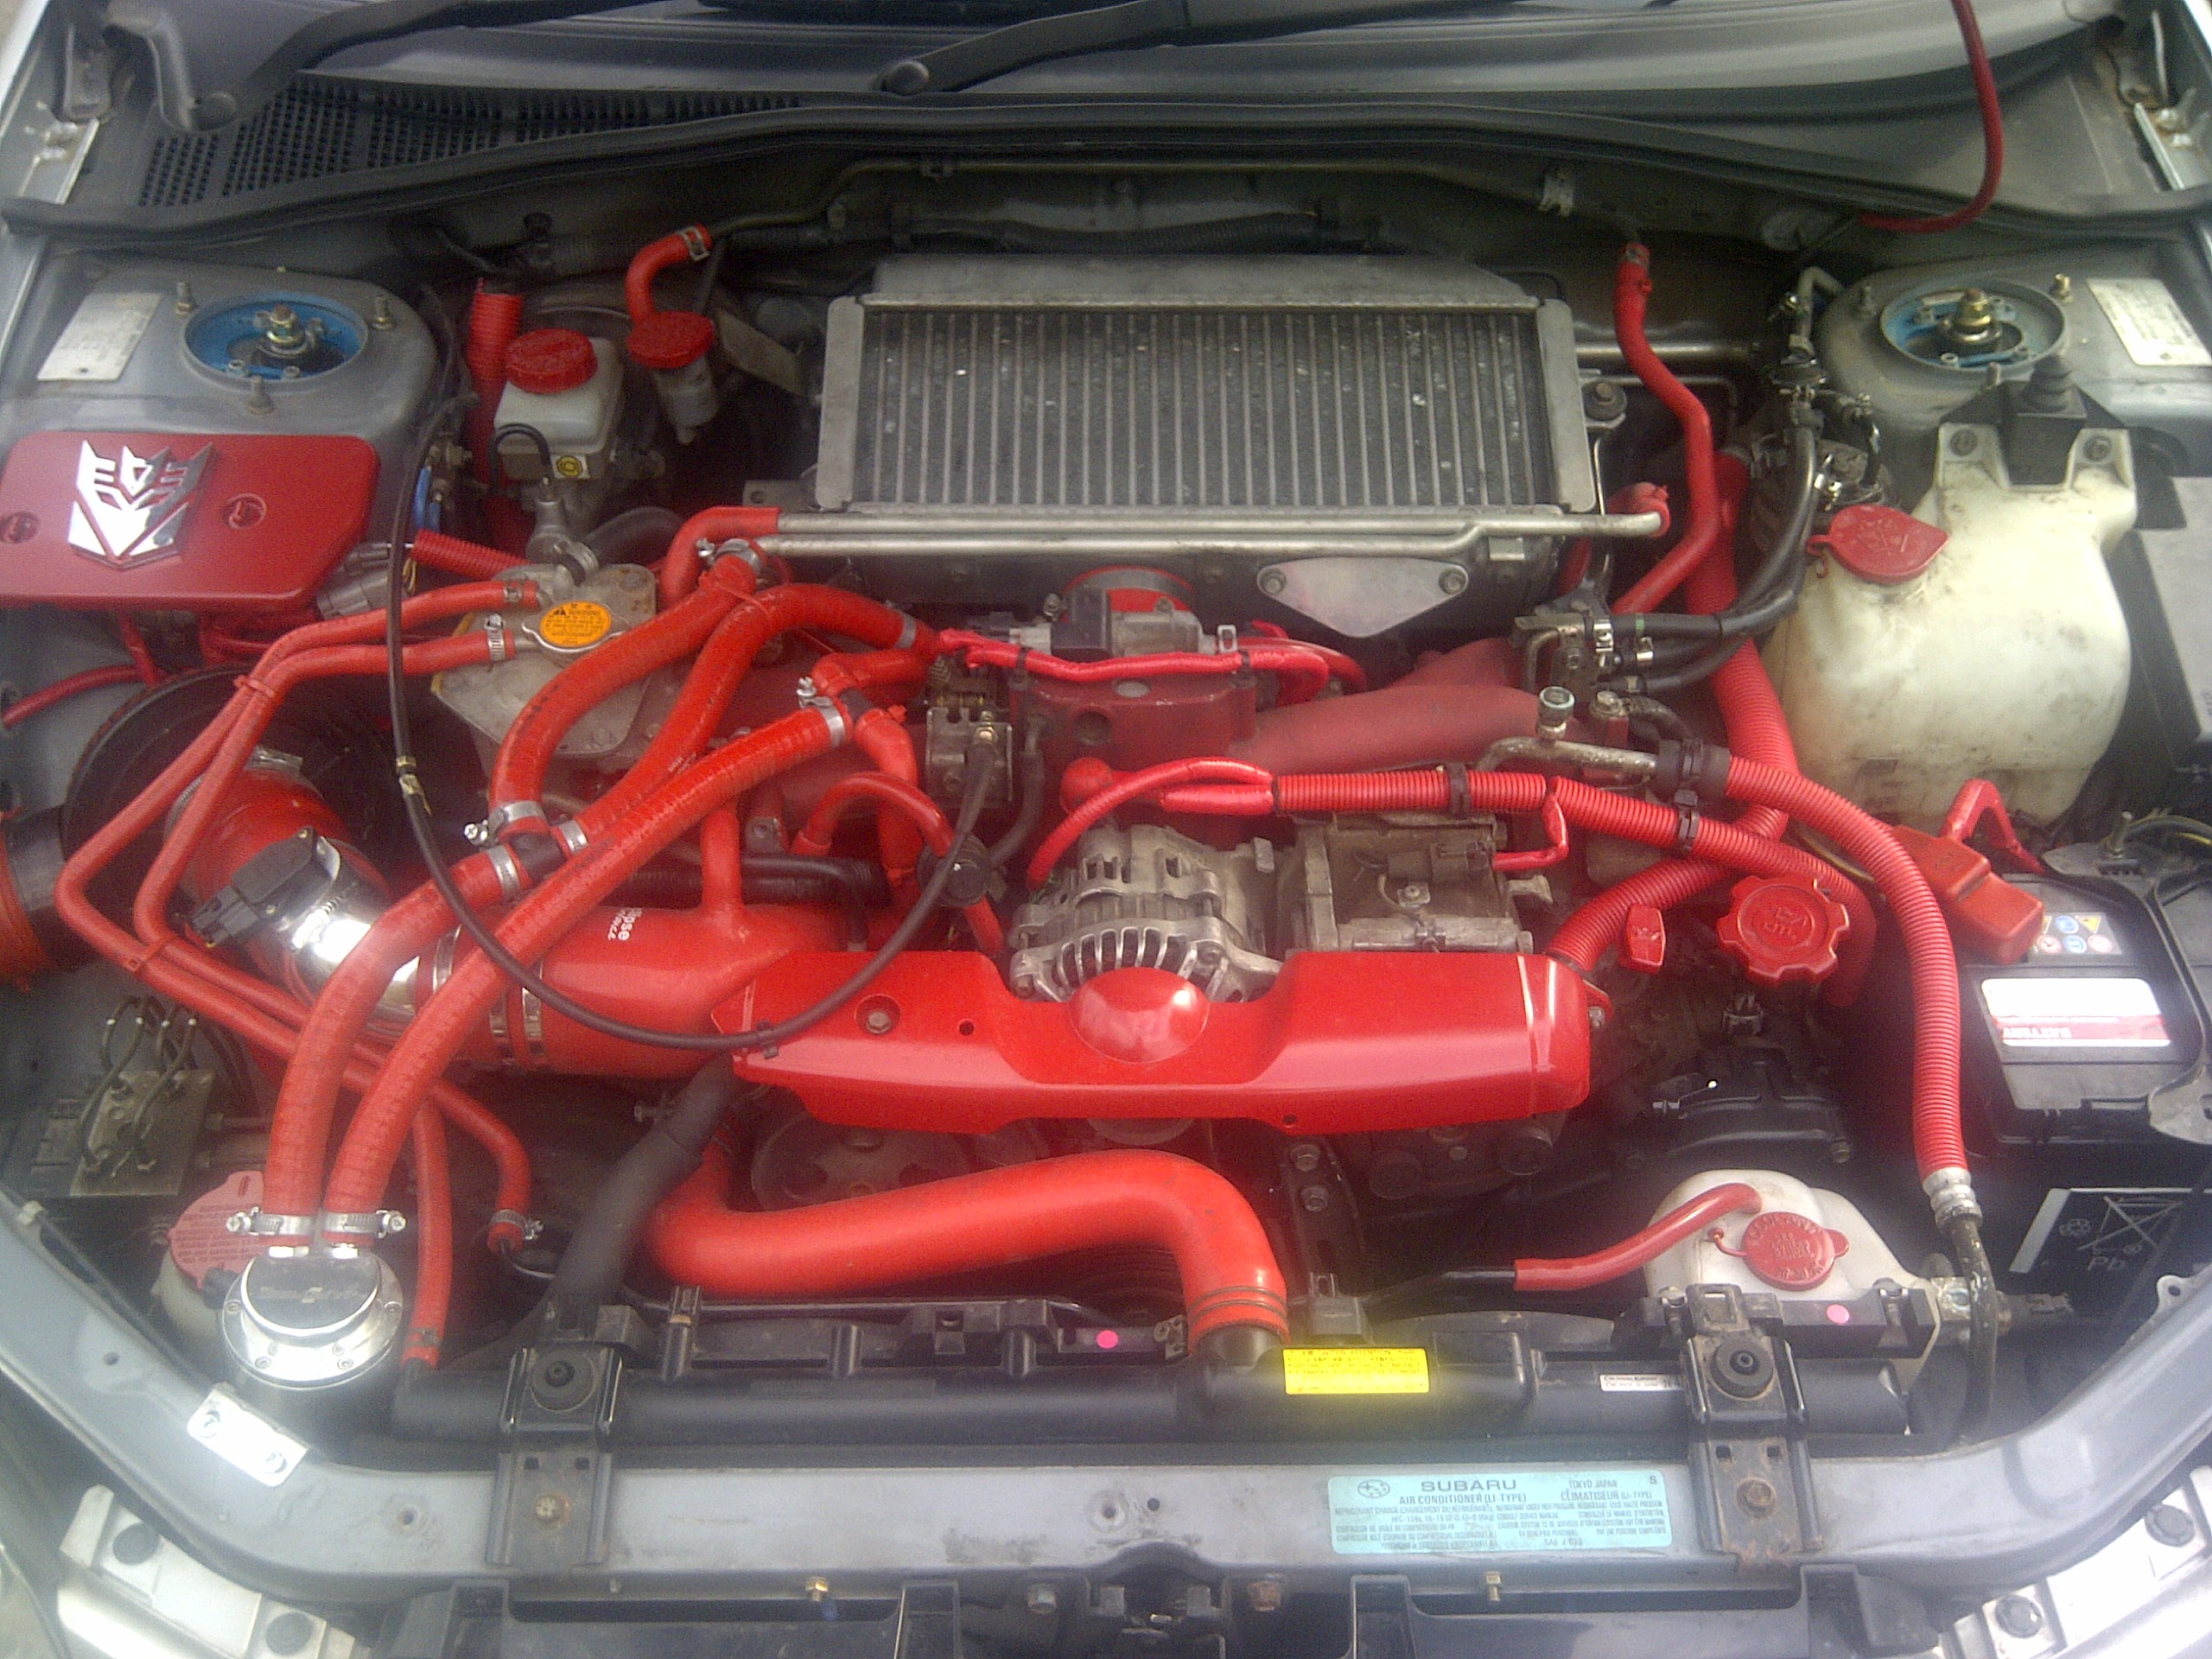
vesrion 7's don't match up. In the mean time I have done a lil more work under the bonnet red red red lol
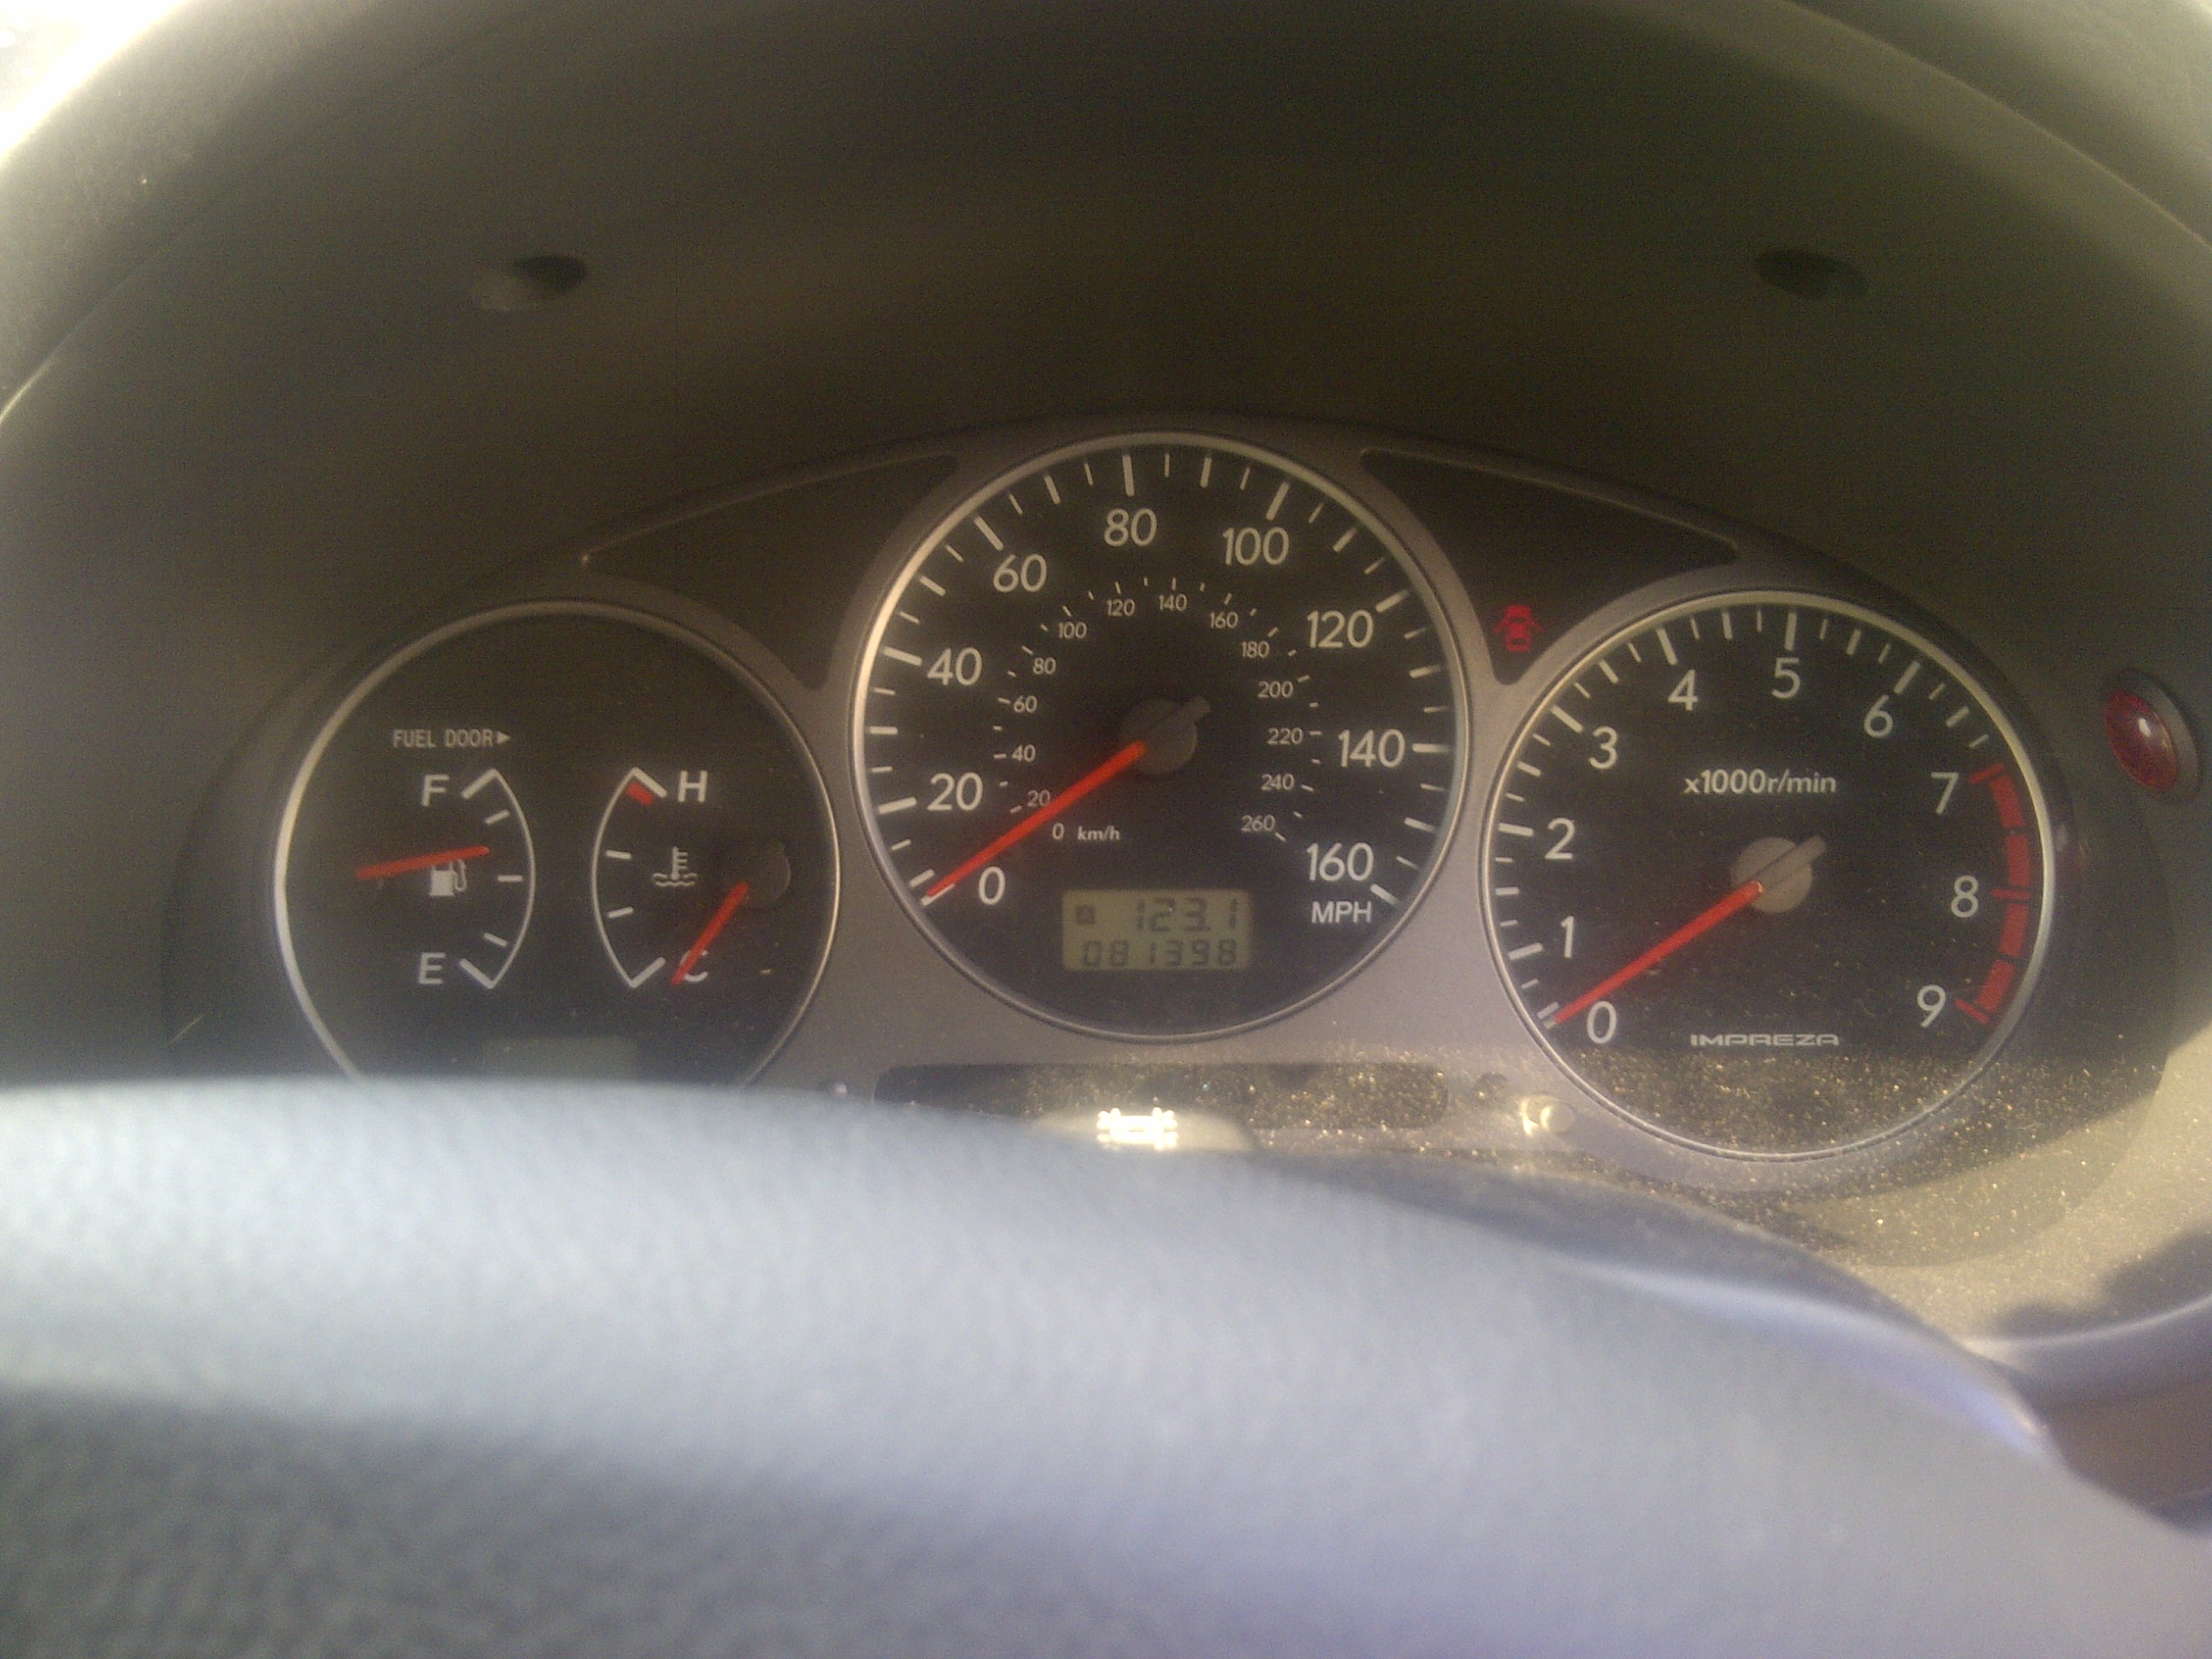
Also did a bit inside the car allnthe switches and dials glow red now and painted the needles red and fitted the warning light for my psi3
Last edited by LewisL; May 27, 2012 at 06:20 PM.
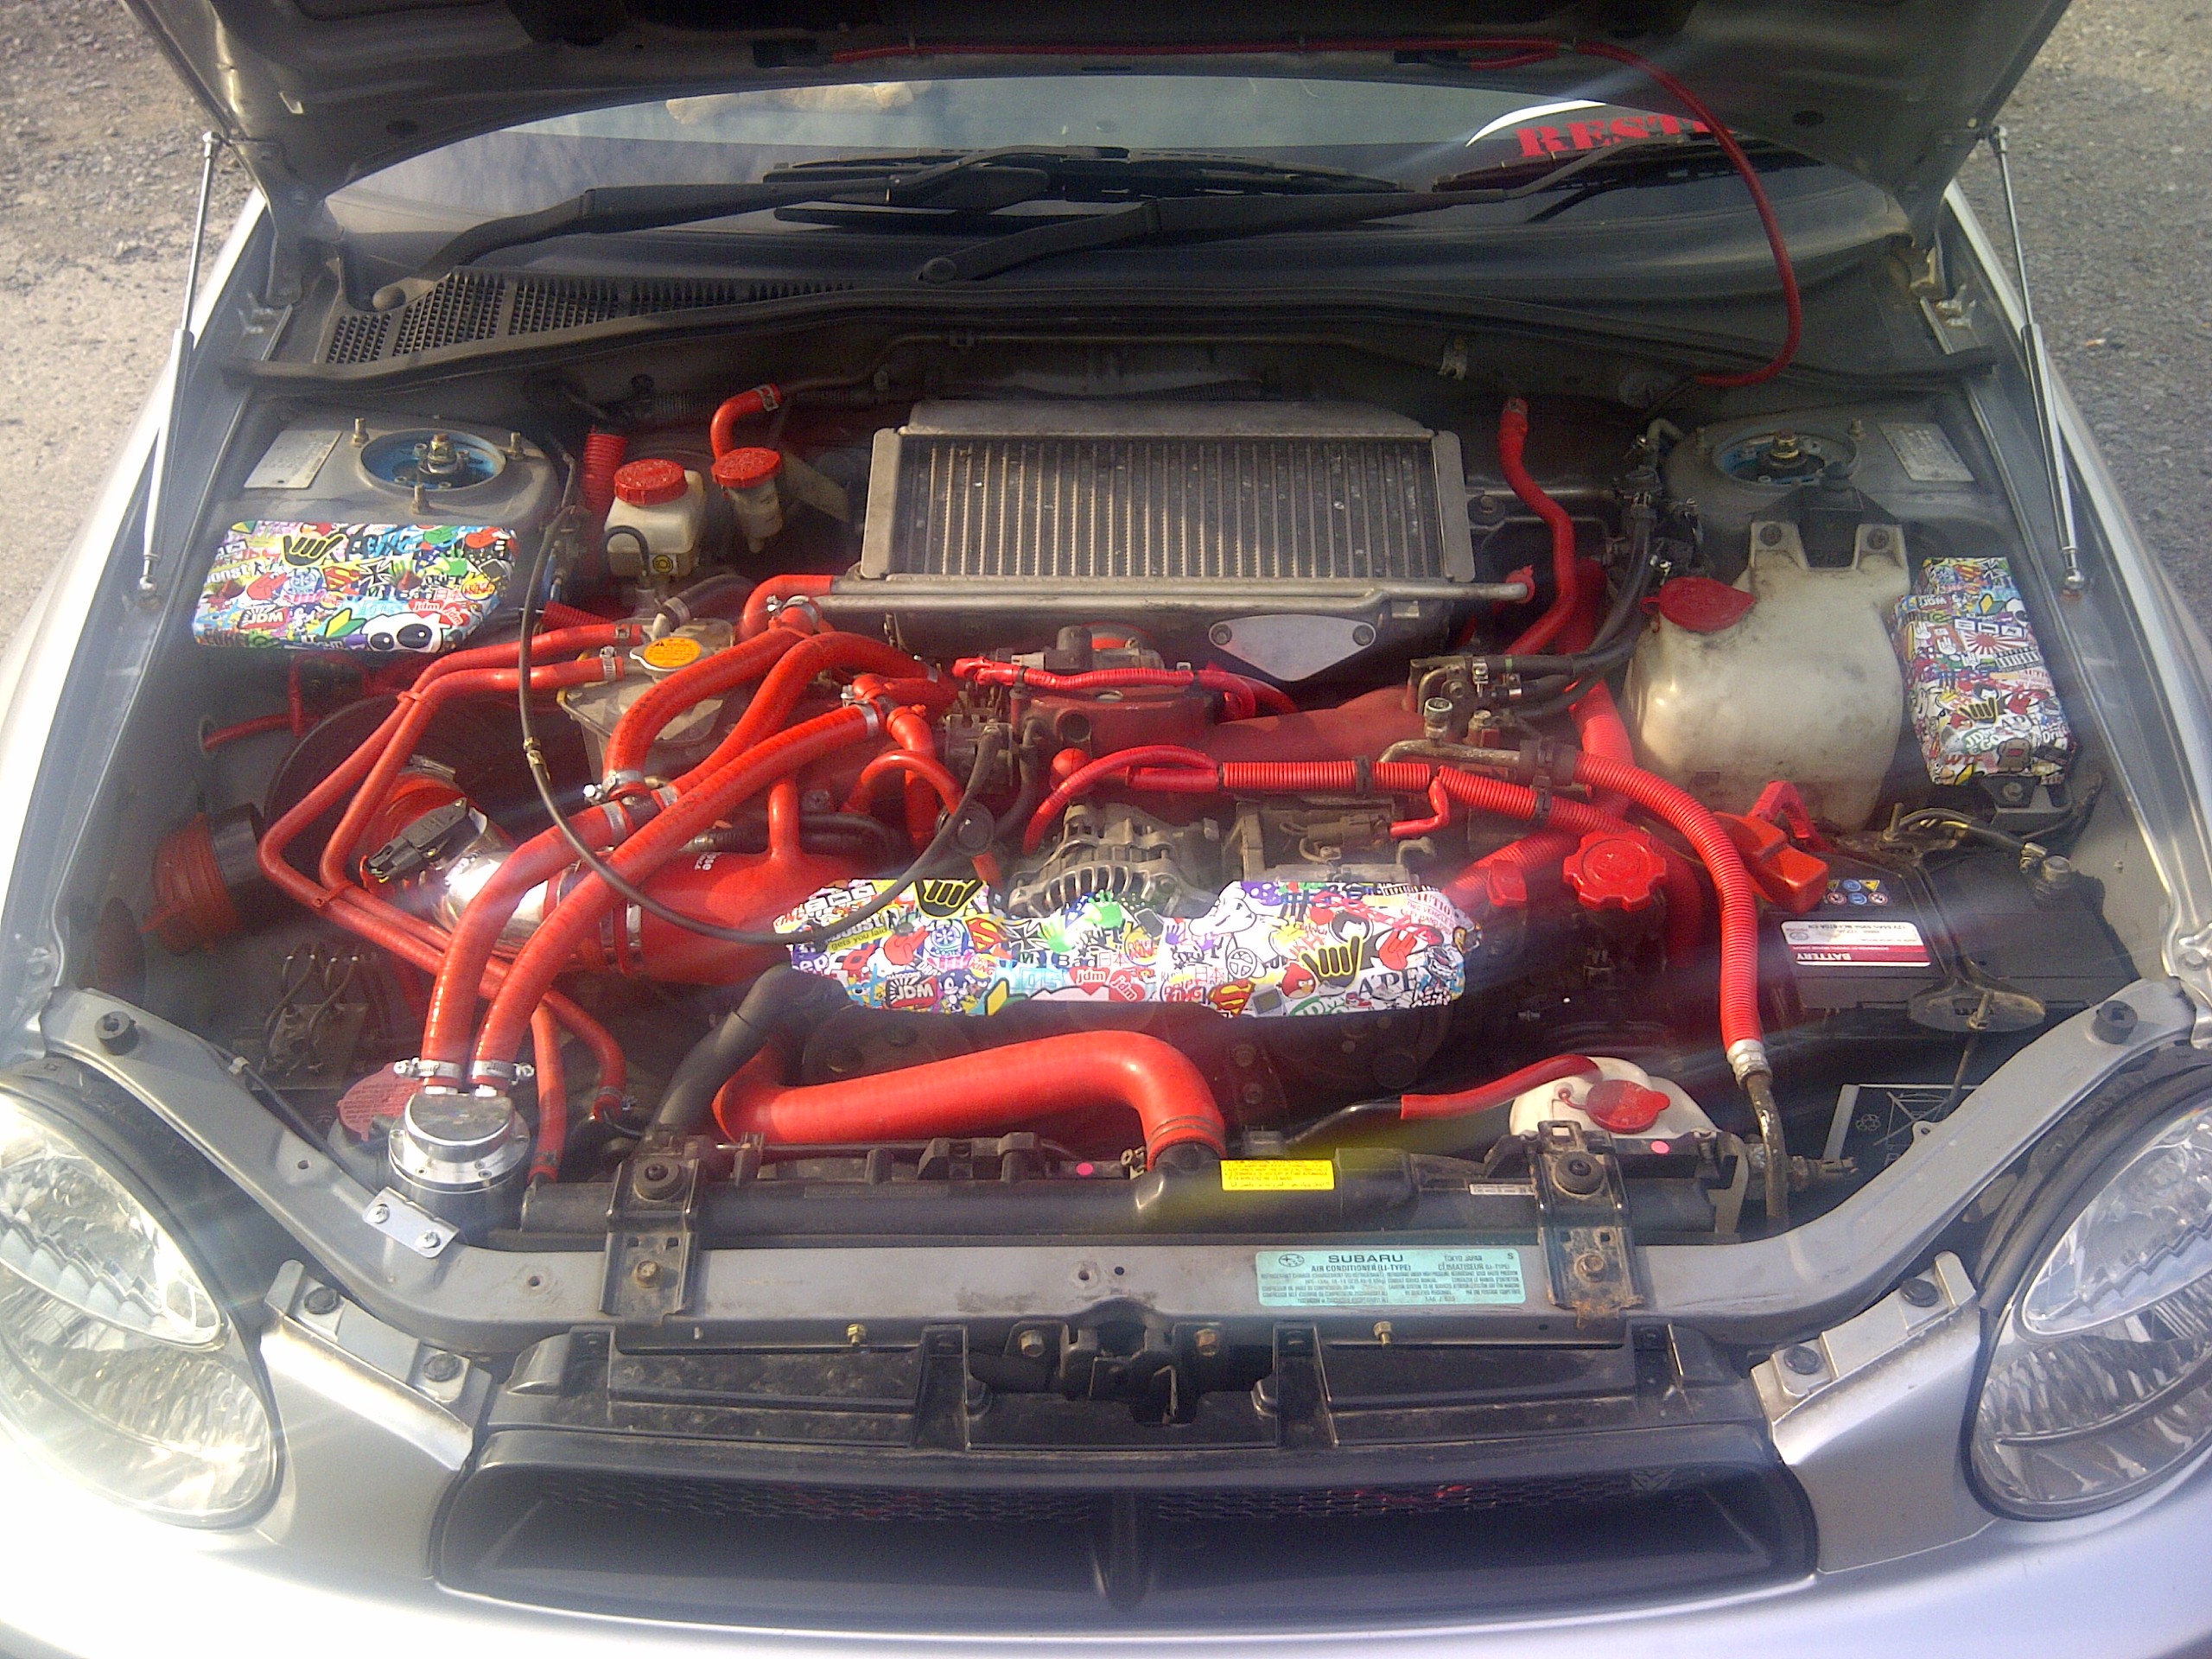
Ok so decided it was too much red so went for this instead and I love it
Started to mock up the new rear bumper we are making out of a blobeye wagon and saloon bumper and seems to give much better clearance and follow the line if the arch better but off to new york in just over 2weeks so she goes into the bodyshop then to get finished off and painted!!! Can't wait
Started to mock up the new rear bumper we are making out of a blobeye wagon and saloon bumper and seems to give much better clearance and follow the line if the arch better but off to new york in just over 2weeks so she goes into the bodyshop then to get finished off and painted!!! Can't wait

Still waiting on my mate to finsih it off
However I fitted the ht autos splitter as I was bird also.removed the tegiwa newage specific tow hook(now for sale) and went about fitting their universal front tow hook I am happy with the job and its fully functional

upload pictures

However I fitted the ht autos splitter as I was bird also.removed the tegiwa newage specific tow hook(now for sale) and went about fitting their universal front tow hook I am happy with the job and its fully functional
upload pictures
Last edited by LewisL; Aug 28, 2012 at 08:56 PM.
Looking great so far. You are basically doing the hardcore version of what I want to do. I will be doing the front arches like you but just having the rear arches rolled.
Do the saloon front wings fit with the original wagon front bumper? Or did it need modifying?
Dan
Do the saloon front wings fit with the original wagon front bumper? Or did it need modifying?
Dan

I fitted a saloon front bumper I don't think the wagon would fit it might with mods but easier to use the saloon 1
Going to make a rear bunper from a v8 saloon and v8 wagon that's the biggest job left to do really before paint
Geeting boot sorted and de-locked and front wing markers removed next weekend along with all the little dents
Going to make a rear bunper from a v8 saloon and v8 wagon that's the biggest job left to do really before paint
Geeting boot sorted and de-locked and front wing markers removed next weekend along with all the little dents