
My Volvo 854 T5-R 591 hp project


Thread Starter
Scooby Newbie
Joined: Oct 2009
Posts: 13
Likes: 0
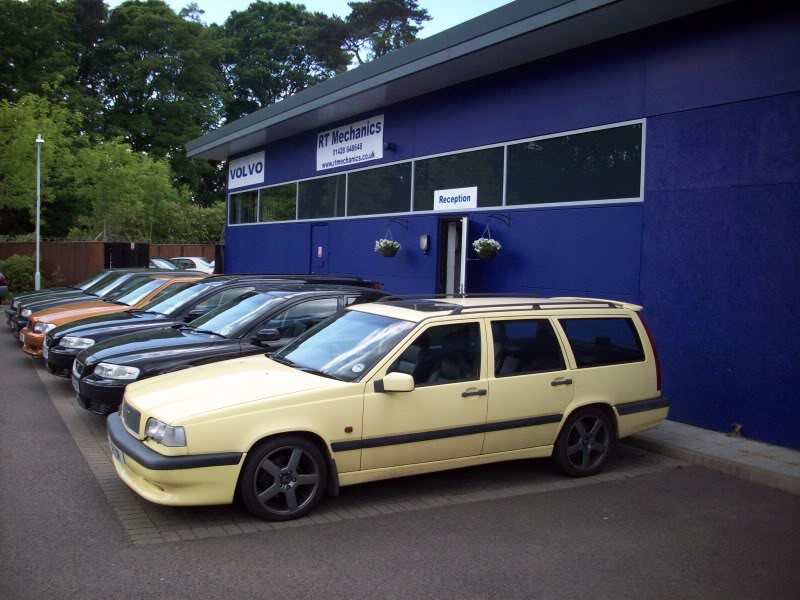
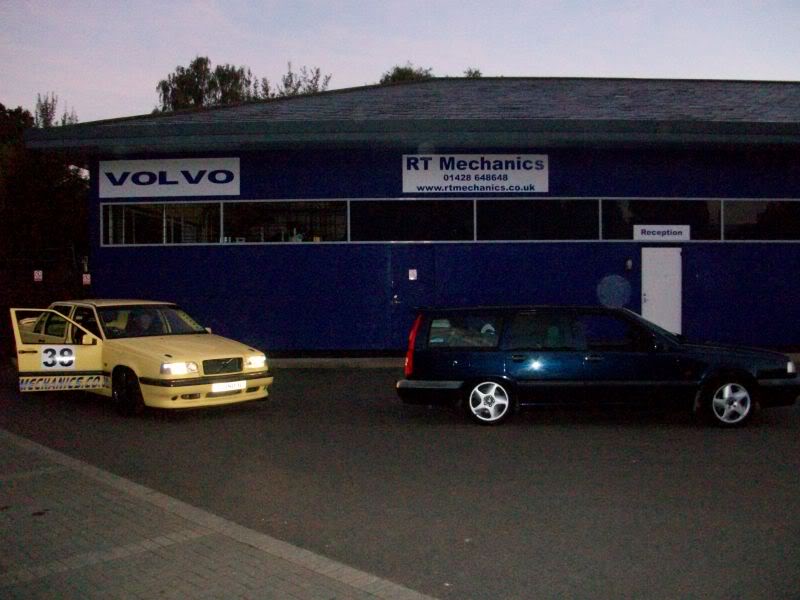
RT Mechanics Ltd Demonstrator Car
THE PERIL - 1995 Volvo 854 T5-R
From a very early age I have always been car mad (of all types, not just Volvo�s!) and have had a big interest in motorsport etc. I followed Volvo during the BTCC years when the 850 series made it�s debut - I thought this was a great thing to show that Volvos are not boring and slow and had planned to make a copy of the white Volvo touring car at some point. Some years later, as RT started to grow, for one weekend a month I worked through a good friend in the Porsche GT 2 Lemans series for a couple of years and then went on to working in the European Le Mans series which took me all over the world with the team working on the cars before having the chance to be a mechanic at Le Mans - the best sports car race in the world which was a real treat for any petrol head - just very very tiring !!!
As RT Mechanics continued to grow and grow I had to give up the racing world and focus more on the normal day to day work. I had been thinking of having a demonstrator car for our company for some years and as we slowly found our way in the small world of Volvo modifications, I thought it would be a good route to take to show the Volvo world what we can do with these much loved cars.
I have never carried out such a big project on a car before so building The Peril has been a great experience for me. Even through the hard times its still been great, and I dread to think how many hours I have spent planning and working on the car over the last three years - all the work has mainly been carried out by me after work or over weekends - the wife has been a great supporter too which helped.
This is the story of our demo car :
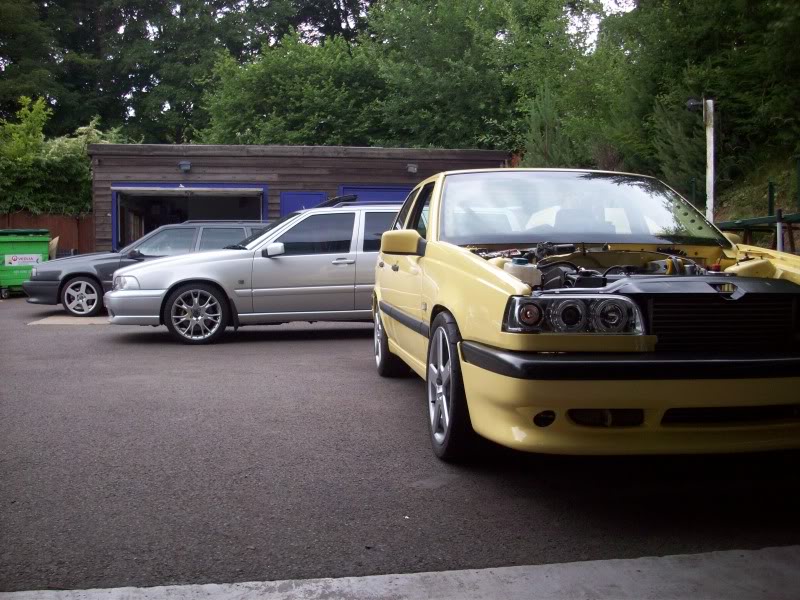
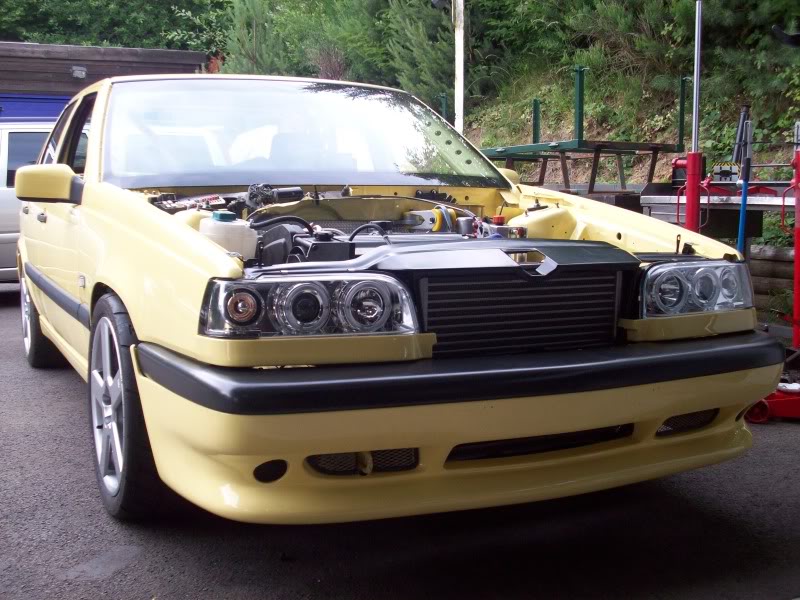
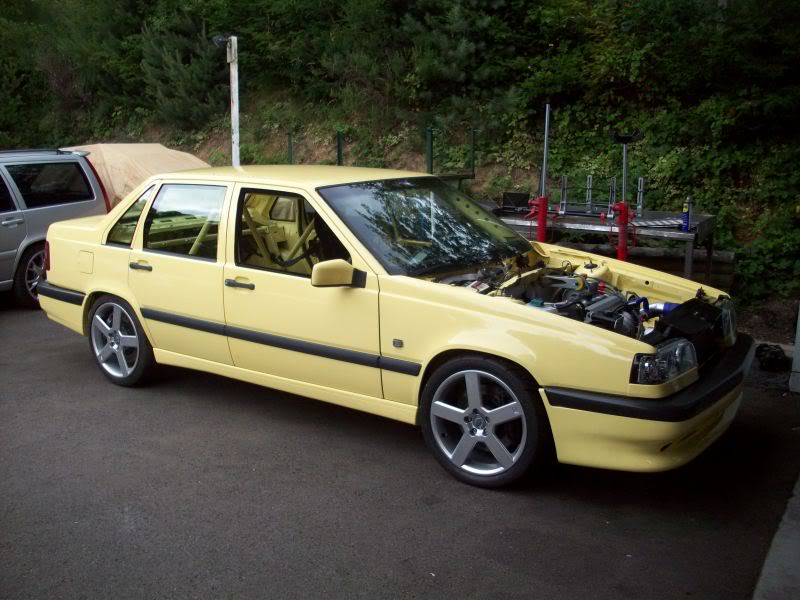
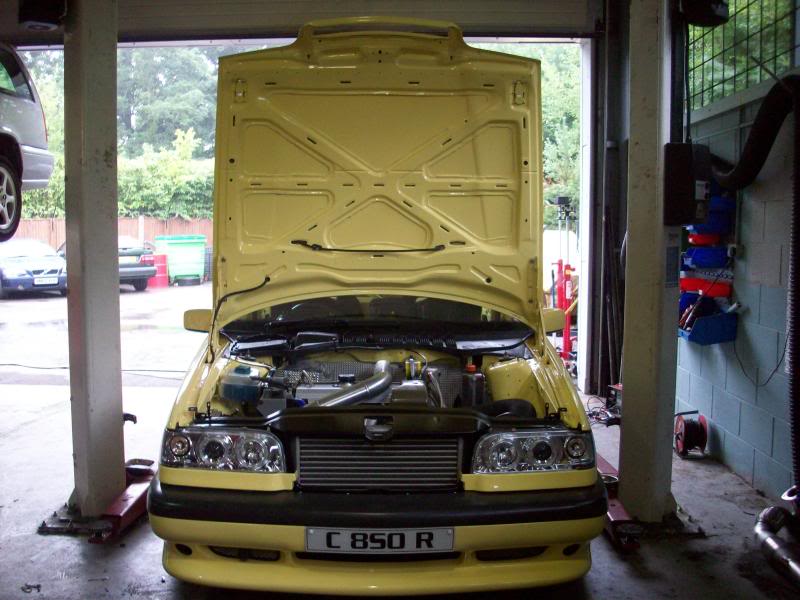
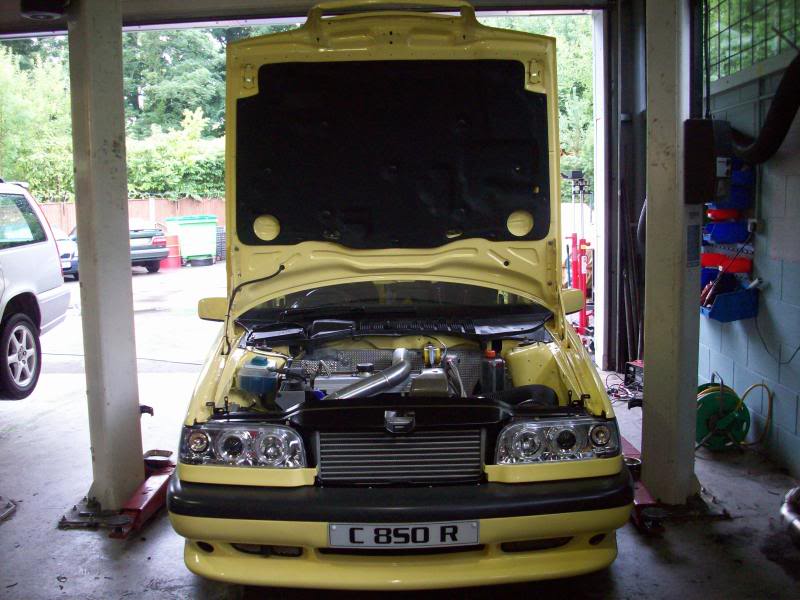
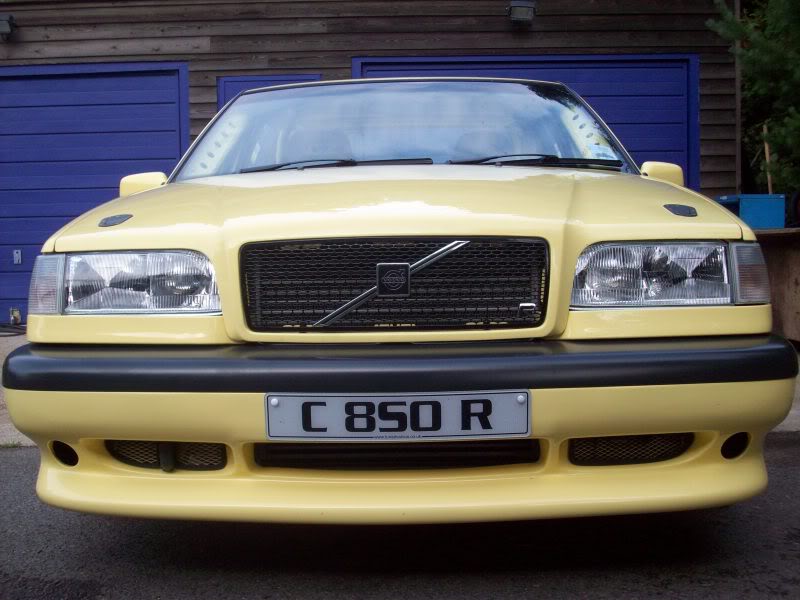
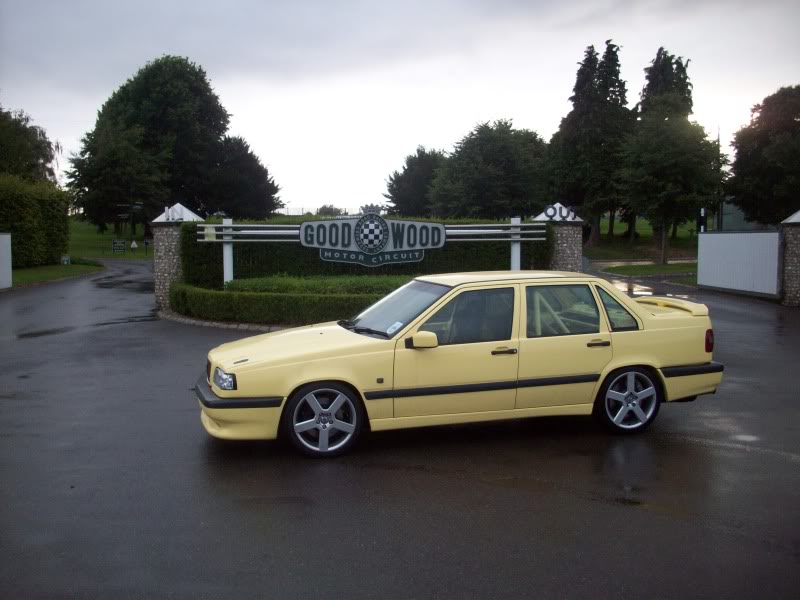
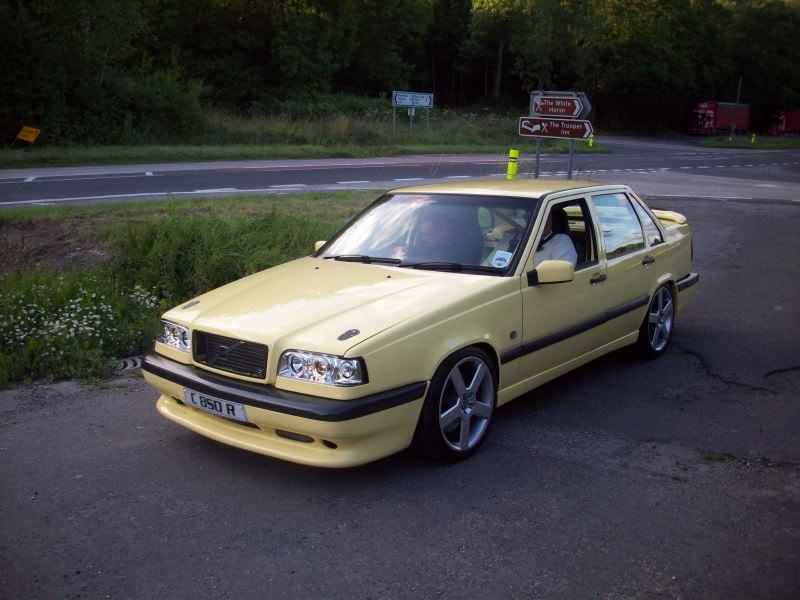
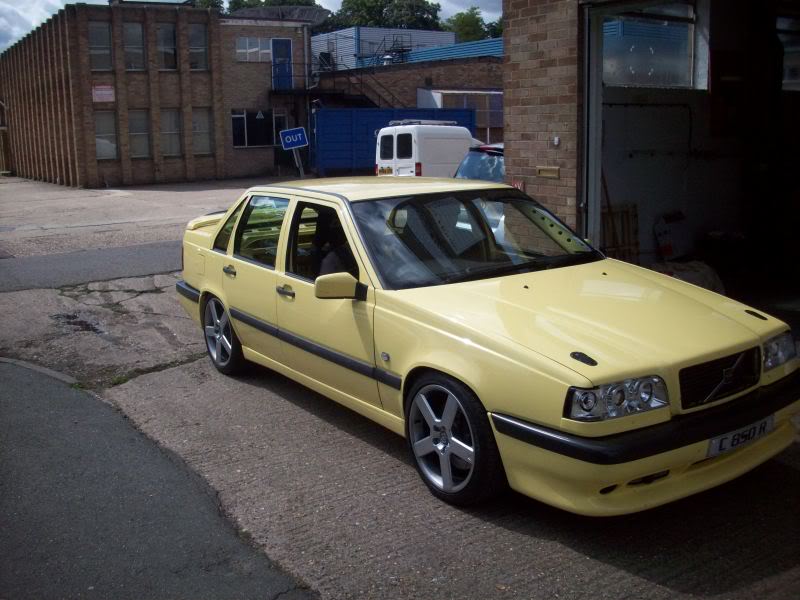
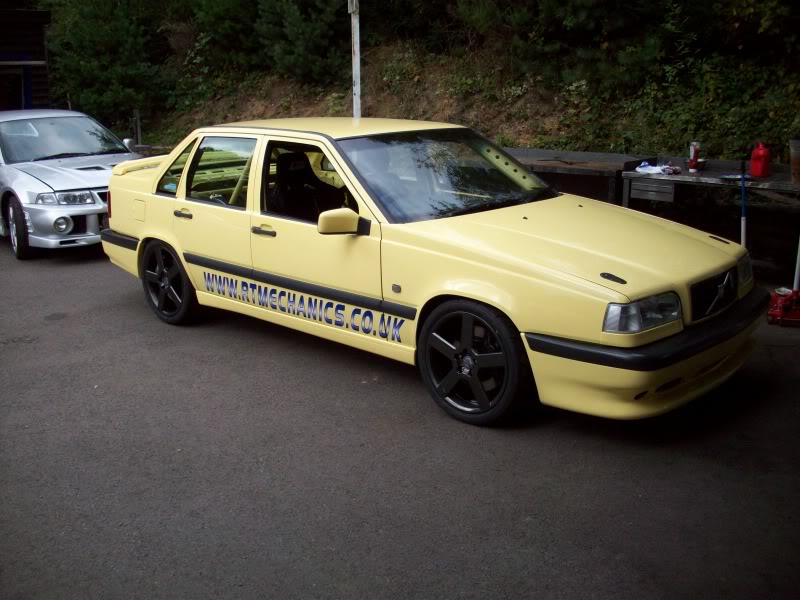
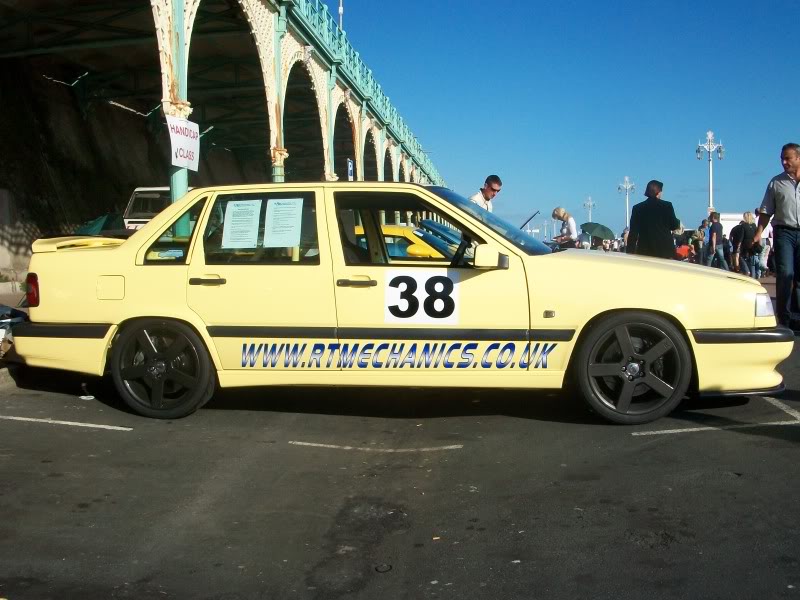
Introducing �The Peril� (Volvo 854 Yellow T5-R)
When I first found the peril it had been well looked after in its life but had the usual items needing attention. Unfortunately the last owner of the car had not been very mechanically minded and had decided to drive for 20 miles with no coolant in !! A new engine and heater matrix/radiator etc was found while I planned my approach on the demonstrator!!
I am not sure the purist�s amongst you will like what I have done to the unsuspecting original T5-R but the project was not designed to make it a show winner for the originality. The demonstrator is designed to show what you can do with a Volvo that is a bit different to the route everyone else takes and also to have some fun along the way.
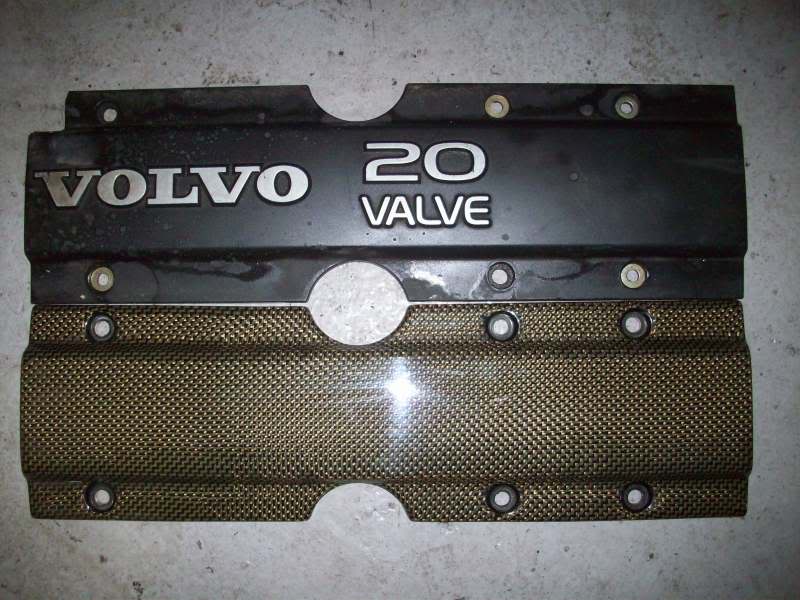
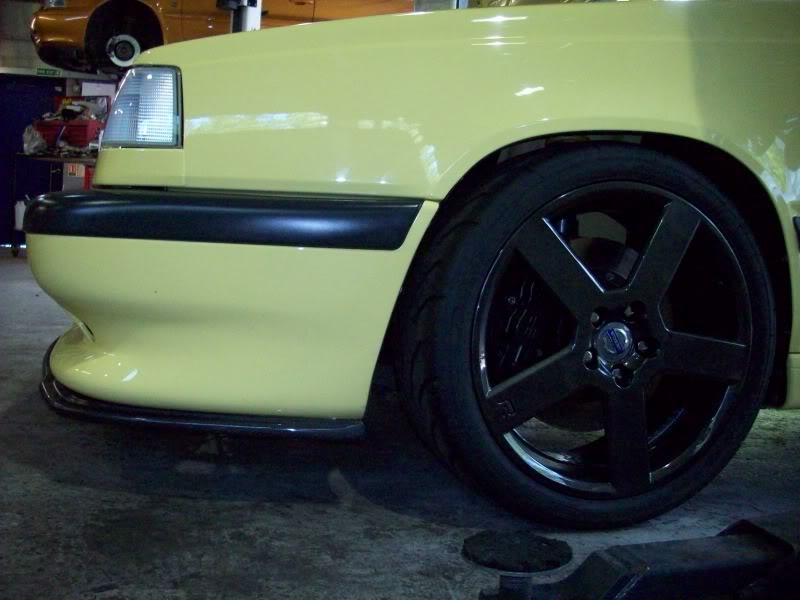
My first task was to look into improving the looks and general set up of the car � I fitted new wheels (I spotted another yellow T5-R saloon on the net that had the Volvo 18 inch Pegasus alloy wheels fitted and I loved the simple design so had to have them thanks to the Nordic car company), and started looking into replacing the terrible brakes and standard suspension - through a bit of research I found by far the best route was a Volvo strut brace and a AP kit for the front and Koni FSD kit with Eibach springs (which was a very new kit at the time) so was just a trial that worked out very well at first. I had also poly bushed the front wishbone arms with Powerflex poly bushes and of course the top engine mount bush. I also brought a few carbon fibre parts - a lower lip spoiler, a number plate surround, throttle body cover and a spark plug cover just to change the look slightly.
I had seen mentioned many times on the American forums that the up-rated anti roll bars were available for the 850 along with adjustable anti roll bar link rods so was very keen to try some before deciding to advise customers if it was a worthwhile modification to do. The kit arrived and I was keen to try them out - I was very surprised at how much better the car handled � it was one of the best kits I�ve brought for the car (apart from the AP brakes!).
The AP Kit gave me the stopping power the 850 should always have had - even on a standard car the brakes are not great so was I very pleased with them. At this stage I also bought a 19 T turbo and was going to use this but as my thoughts grew I decided to go bigger to see how much power I could get from the car to learn what works and what does not.
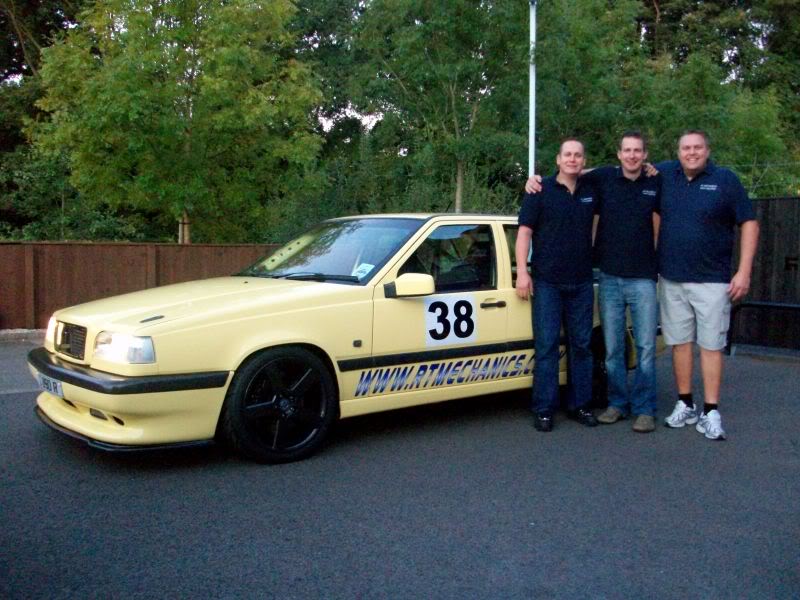
I have made some great friends in the Volvo tuning world, mainly in Sweden. I�ve learnt a lot from their approach to what needs to be done to the engine, ie chassis and brakes etc when developing a high horse-power engine. Most of their tuned Volvo engine�s run at a genuine 500 plus hp, which is a rare number in an 850 especially in the UK !! so thought it would be great to do something special with the Peril. I also wanted to focus on keeping the Peril reliable and strong - I did not want to build an engine that would break every time out and my aim is to make as many shows and events as I can. I have planned to do the Brighton speed trials - I have been going to these shows for years and have always longed to see a Volvo have a go.
My plan has always been to be 100% completely open and honest with the project as it goes along sharing the good times and the bad, and what ever power figures I can make they will be 100 % proven. I�ve always found it strange when you see people spending a small fortune on their cars and don�t have a proper bhp and ftlb torque figure with a graph to prove it! Its very easy to say �my car has *** plus hp� - but would always be great to see it proved!!
Autronic ECU (SM4)/CDI
I have a great friend in the tuning world in the UK who I caught the bug of tuning from and I have learnt a huge amount from him (Mark Shead of MA Developments). Mark has a reputation that is highly regarded as being one of, if not the best in his field of tuning mostly Evo and the Cosworth brand. Five years ago MA Developments became the largest Autronic dealer in the world for their excellent stand alone ECU�s so I thought that with what I had planned in power output this would be great to use to handle the power and have complete control of the ECU and mapping.
I knew the Autronic ECU (SM4) route would not be for everyone, but again if you look at all the high power Volvo�s in Sweden you will see them using the same stand alone type of unit for a very good reason - at this level the standard ECU is not able to handle this kind of power safely enough. You could of course run this system alongside the Volvo ECU and electrics but I did not see the point in still having the bulb failure warning light and cruise control etc. The SM4 has its own self diagnostic system which is extremely helpful in case of a problem � it can be accessed by any PC with the SM4 software. The last thing I wanted to do was risk all the time, money and effort I have put into the car to skimp on the main heart of the car. This also meant I could also do away with the air mass metre which is quite a restriction in terms of air flow and performance.
The SM4 has great features as standard such as traction control, launch control and flat shift - once a sensor is fitted to the clutch pedal you can change gear without lifting from the throttle - all of which would be an extra module to buy in other makes such as Motec � with the SM4, only a switch and a sensor is added to activate it.
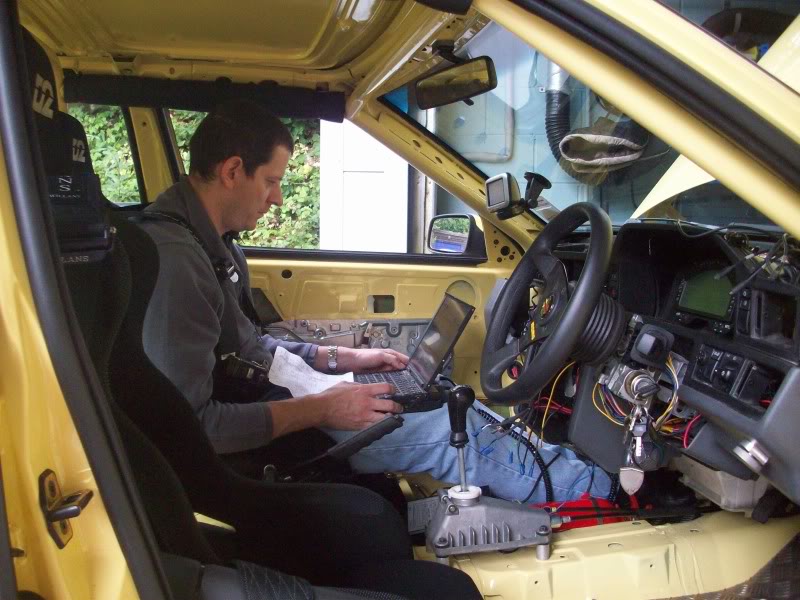
I started to learn how to map the car myself with the aid of Mark Shead (the best Autronic mapper in the world and who has mapped many cars all over the world). I had always wanted to learn about mapping, but of course never wanted to tune / map a customers car before I had properly tested it on our own car. Also at the time, it was and still is a UK first for Autronic SM4 on a 5 cylinder Volvo. All the wiring for the unit was done by myself, again some thing I had never done before so at first I ran the car on the SM4 alongside the Volvo ECU�s (my T5-R was still an auto back then)!!
I read the Autronic manual and started to teach myself about how the system works and what would be needed to make a five cylinder system work. At the same time I wanted to hide as much wiring as possible. I needed to make the system neat and also accessible for if the engine had to come out.
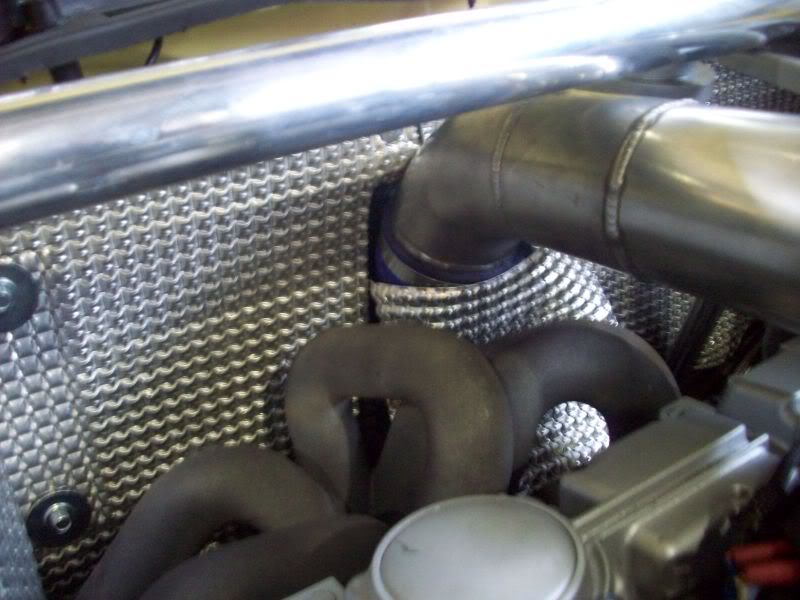
As the Peril was always going to be run at high boost, I did not want to run into problems with a spark blow out, so due to the high boost pressures, I also brought the Autronic 500R CDI unit which removes the need for a distributor cap and HT leads so I could now run an individual coil on each spark plug. I didn�t have to search too hard for the correct coils to use - 960/V90 coils would be just fine.
Change from Automatic to Manual Gearbox
I ran the car for a couple of months like this while I sorted out my wiring loom for the rest of the SM4. I had also decided to make the car a manual at the same time as the power level I had planned would be too much for the autobox so decided it would have to go - I had only seen this done by a friend in the USA. He had a great write up on how carry out the change so a donor car was sourced and the pedal box/centre console/gear cables/flywheel/gearbox and new master cylinder clutch slave was obtained. At this stage I also added a gripper diff which a customer had wanted us to try and then fit one to his car � I was very impressed at how much nicer the car was to drive and control the power. With reducing the torque steer it made the car so much more drivable so I knew this was the diff for me. I brought a new gripper and had the ramp angle made as high as possible. The diff made a few noises on full lock but I could live with that as the benefits of having it far outweighed this.
Getting starter under the Bonnet�
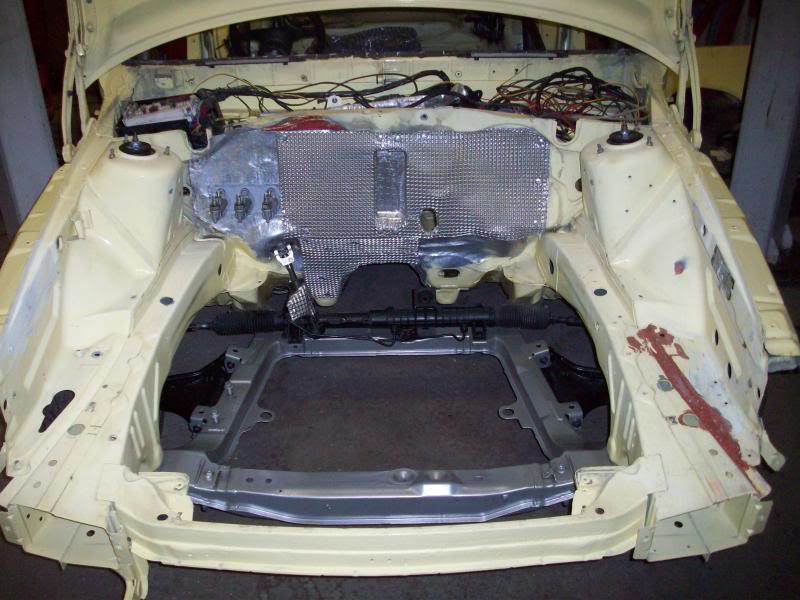
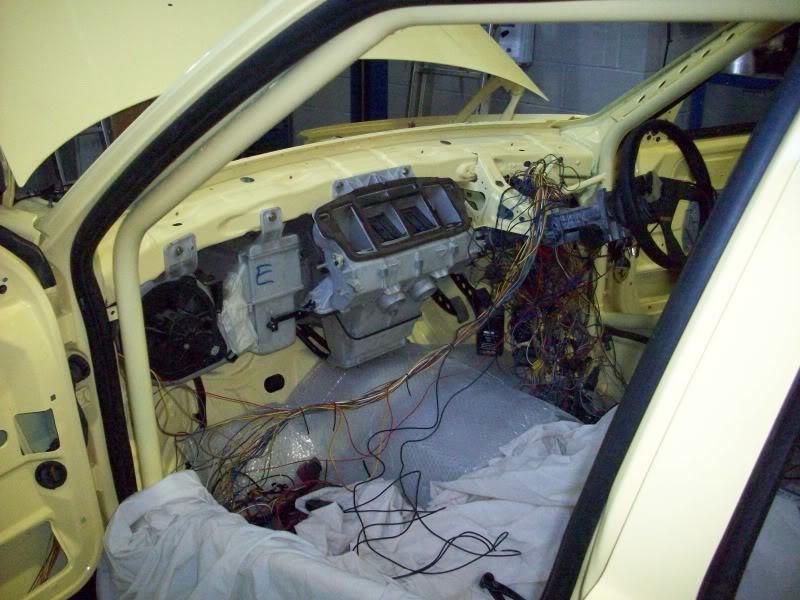
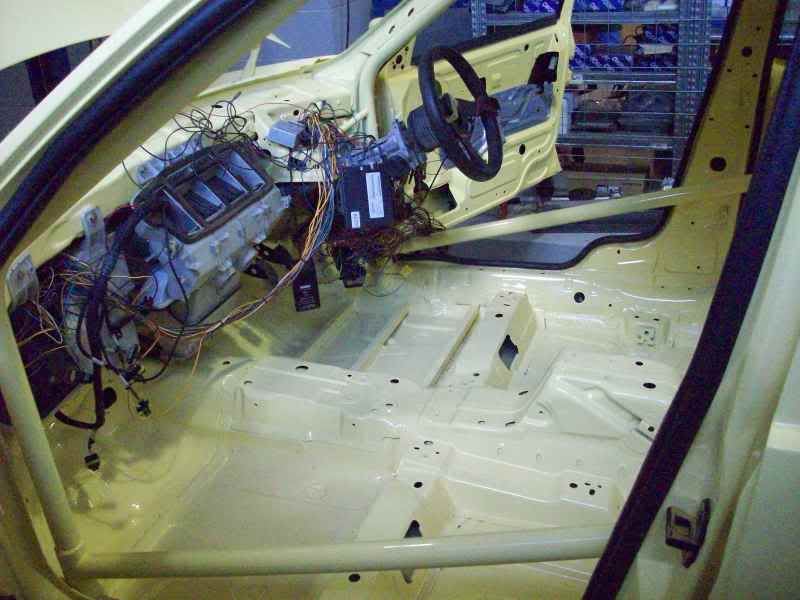
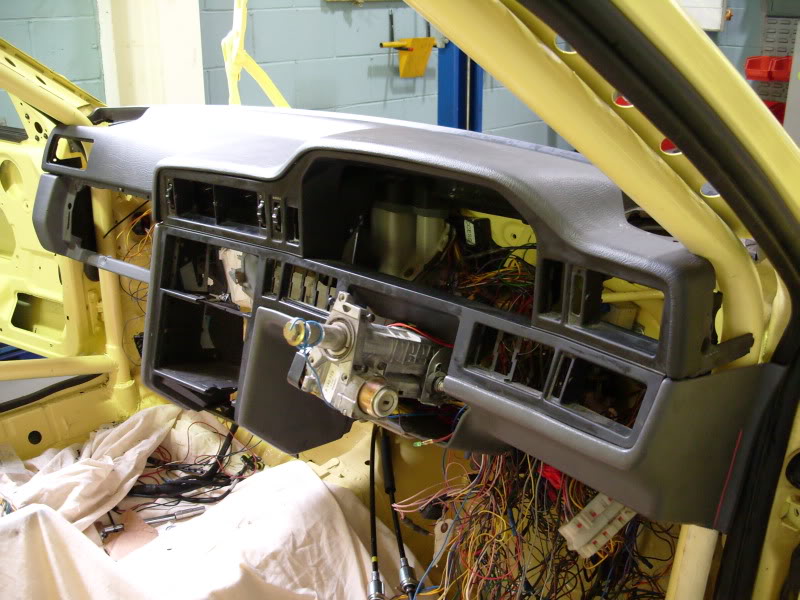
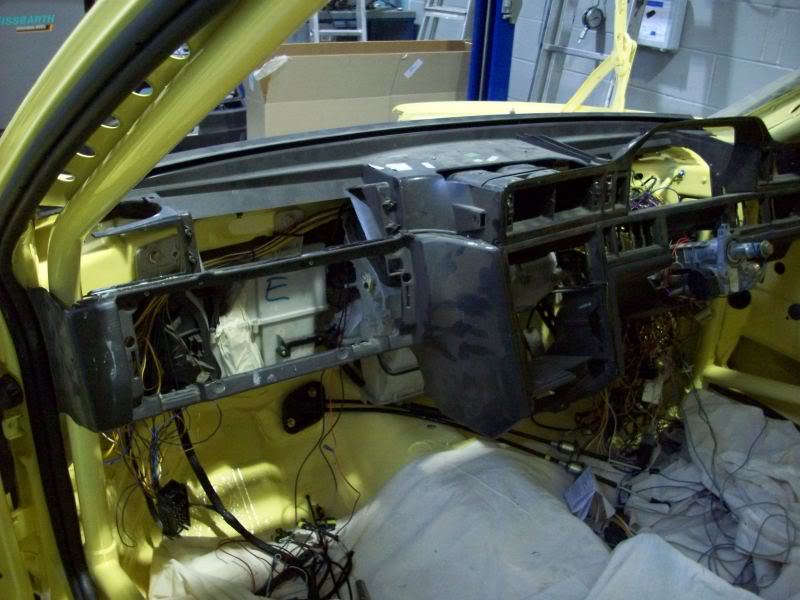
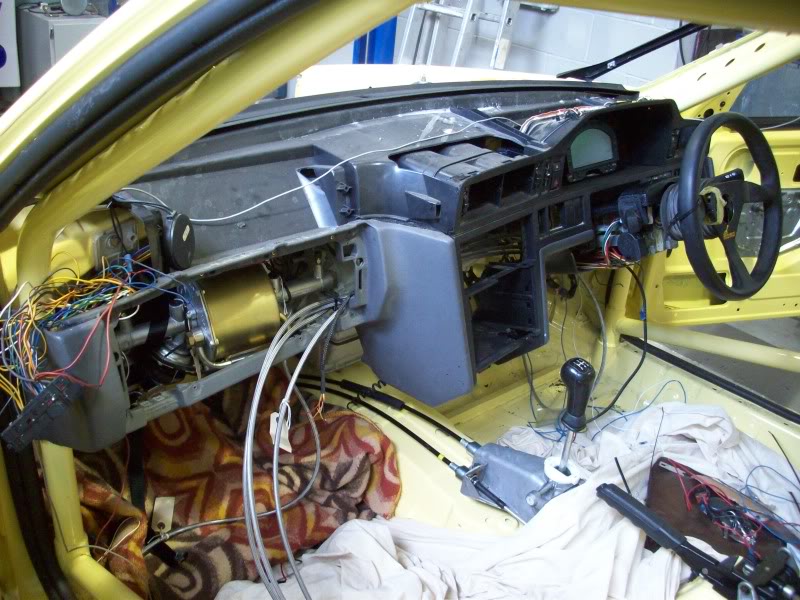
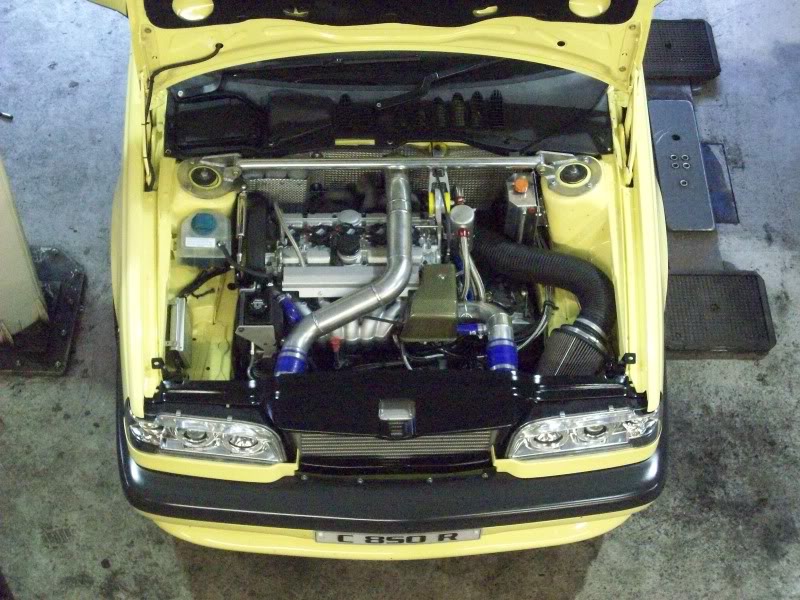
After a few wiring changes the swop was made and I decided to start work on making under the bonnet a lot neater - I removed the standard Volvo wiring and mounted the new ECU inside the car - all associated wiring was hidden as much as possible (I have seen a lot of modified cars over the years with a real mess of wires, pipes and sensors all over the place and wanted to have as much of a fresh and neat look as possible).
I thought it would be an ideal time to strip the engine bay completely and start again including a complete re paint to freshen up the look of all the surrounding areas. I stripped out all of the old Volvo wiring loom and made the changes to the loom for the auto to manual swop etc - at the same time I upgraded all the wiring for the Alternator/battery/and mainly the fuel pump loom. I have seen many people upgrade many items on their cars to make lots of power but no thought is given to the standard wiring which would need to be in top condition. I decided to use a Bosch 044 fuel pump along side the Walbro in tank pump which I had already fitted when I first got the car. I had decided to try a set of RC 750 cc injectors as a trial first of all, so these were brought ready for the engine to be built.
ENGINE
I had been looking into what would be the very best quality engine parts to use. I did not want to risk unknown poor quality parts for the heart of the engine. Generally the Volvo crank seems to be very strong and does not give any problems so I decided a custom crank would not be needed. I then decided to over spec all the other engine internals so future power would not be a problem.
I had conrod�s made to my own design and spec as I wanted to see what difference this would make to the power figures. I also decided to use a very good name for the pistons - they had to have outstanding quality and strength and again it was made to my own design of piston (not that Volvo made a bad job of both components in design but thought it would be nice to try something a bit different) - Time would tell if my new ideas worked.
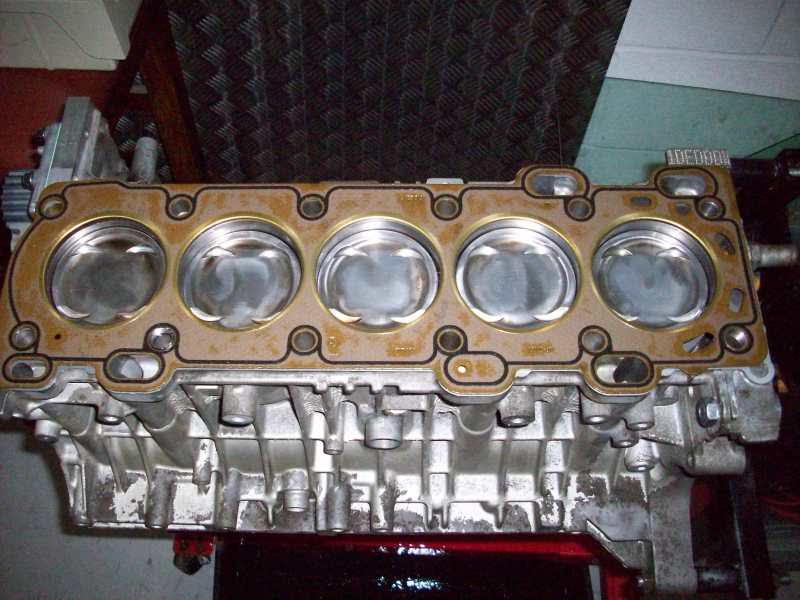
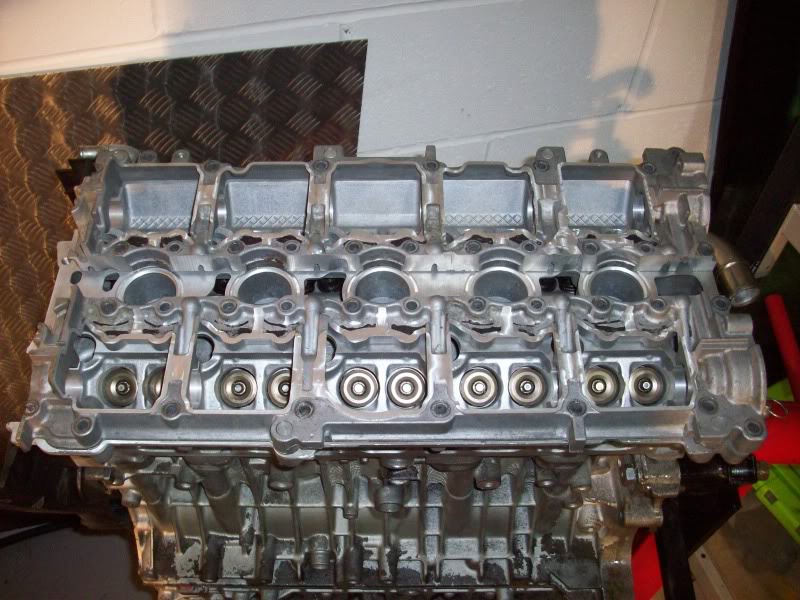
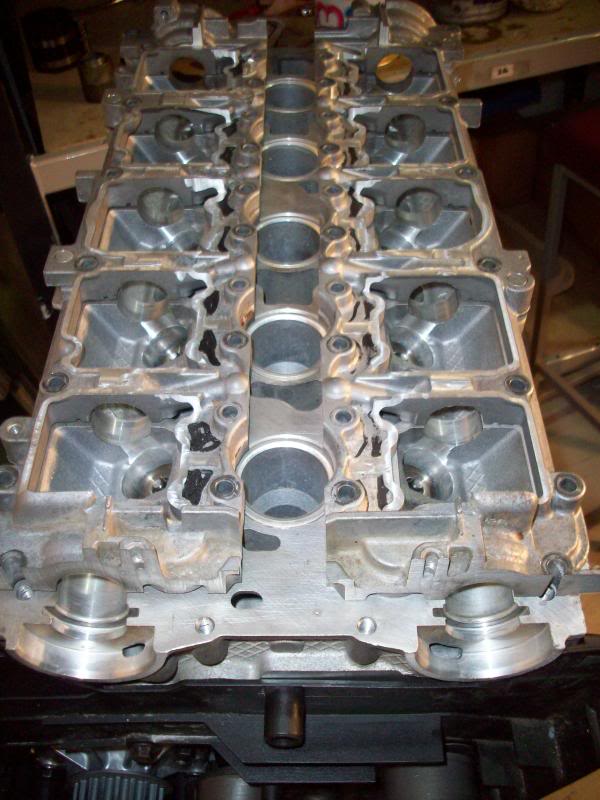
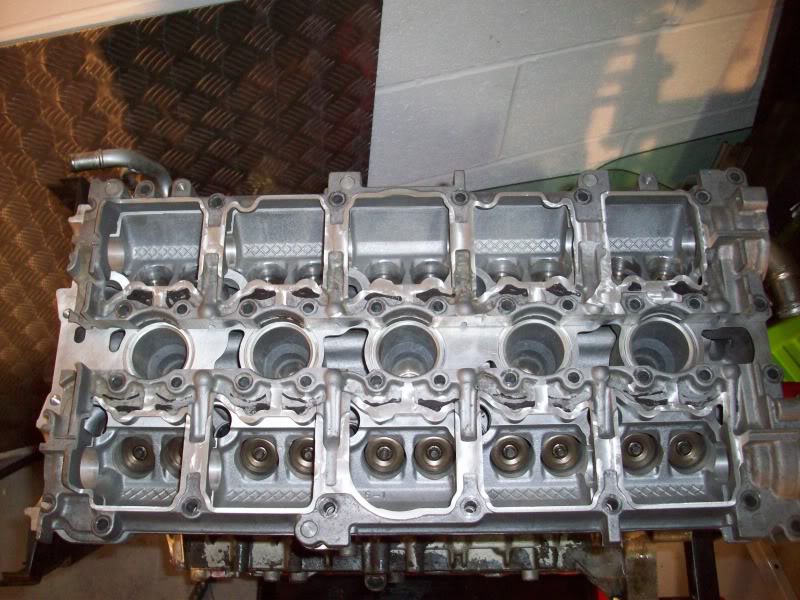
CYLINDER HEAD
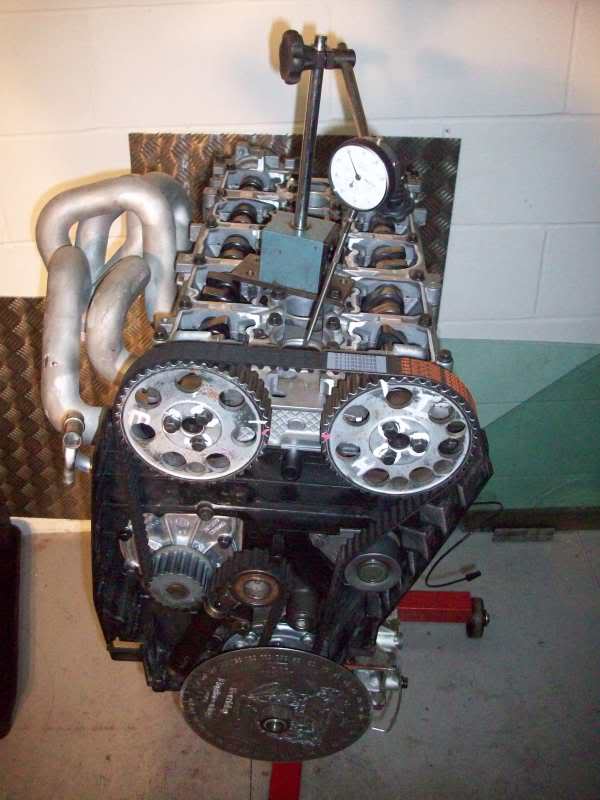
The next step was the head and a brand new one was ordered. I did not want to start with an unknown head so found it cheaper to buy a brand new one and then have the head polished/ported with three angle valve seats cut and the inlet manifold matched as well, I had tried to find a suitable pair of camshafts for the job but found, as usual for the Volvo tuning world there is so little available. I decided to use the standard cams but have them re profiled by piper cams.
Due to never having enough spare time to spend at work I decided to take the whole new engine home and assemble the new build in my small garage - I even had the wife and cats helping !!!
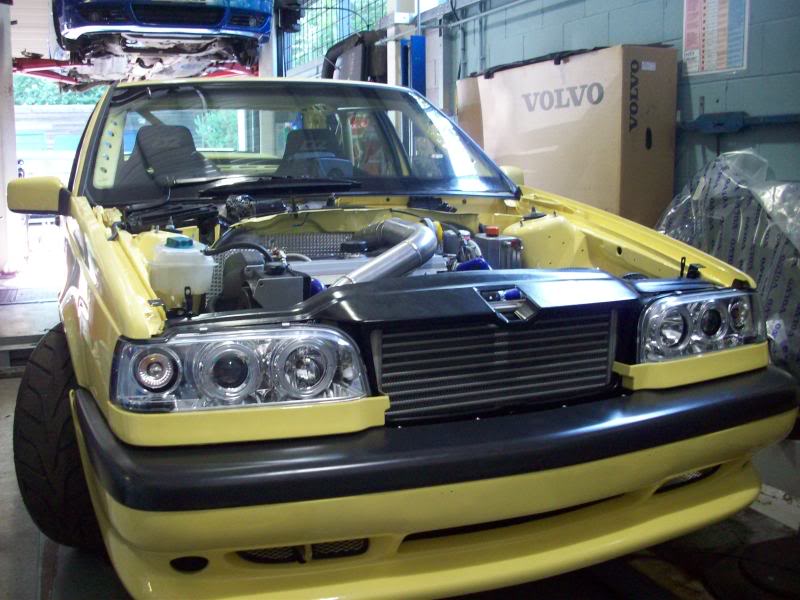
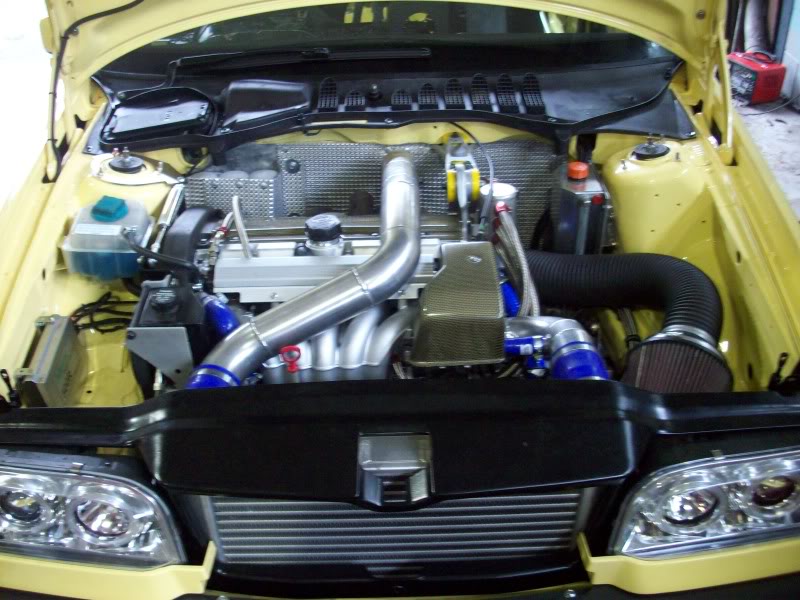
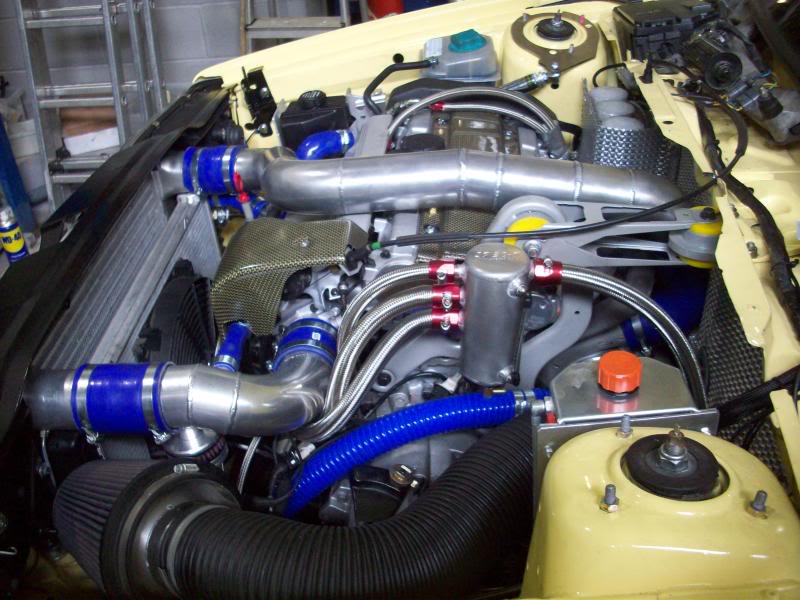
INTERCOOLER
The next stage was to look at what type of design and size intercooler I could run. Again, I decided to go down the custom route - as there were very few intercooler�s that were available, when I asked how they had been tested I was left with a very long silence!!!
So I looked at the space I had and made a sketch of what would fit and then had this made for me. At the same time I removed all traces of the Air con as I knew this was not needed, and once the manifold was made it would not be possible to run with both so was happy to loose it.
After taking measurements for the intercooler it was amazing to see how little metal was across the front of the car so I decided to make this area much stronger with a much thicker material to get the strength back after modifying the front panel. I had also fitted all new boost pipes which took several attempts to get 100% correct !!
TURBO
By this time I had a power figure in mind that I really wanted to get to - 500 bhp which I knew was silly and not for everyone with a fwd Volvo but once this figure was in my mind I had to aim for this figure at least!!
I had seen a few Swedish guys/company�s showing their project cars with 6-800 bhp and I did even hear of an 850 with over 1000 bhp but have never seen proof of it and the fact that most of their cars were built just for a � mile run which is not too hard on the car.
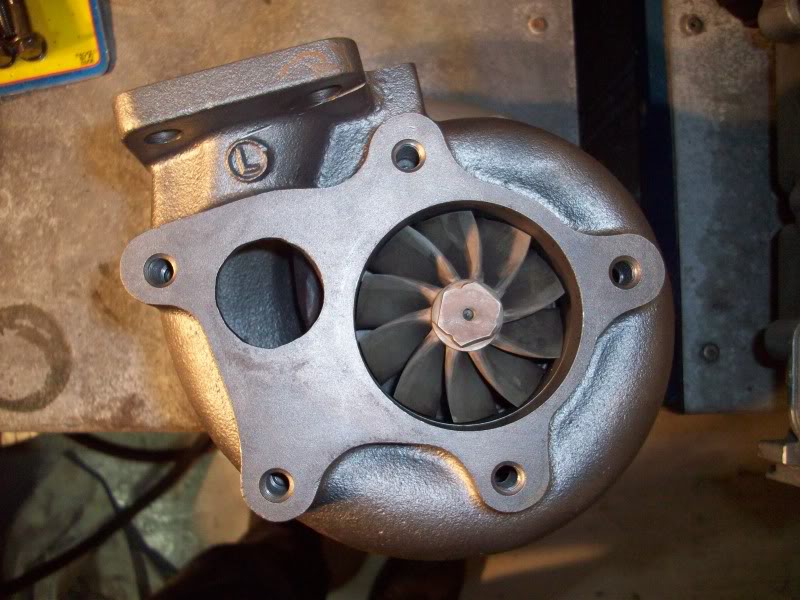
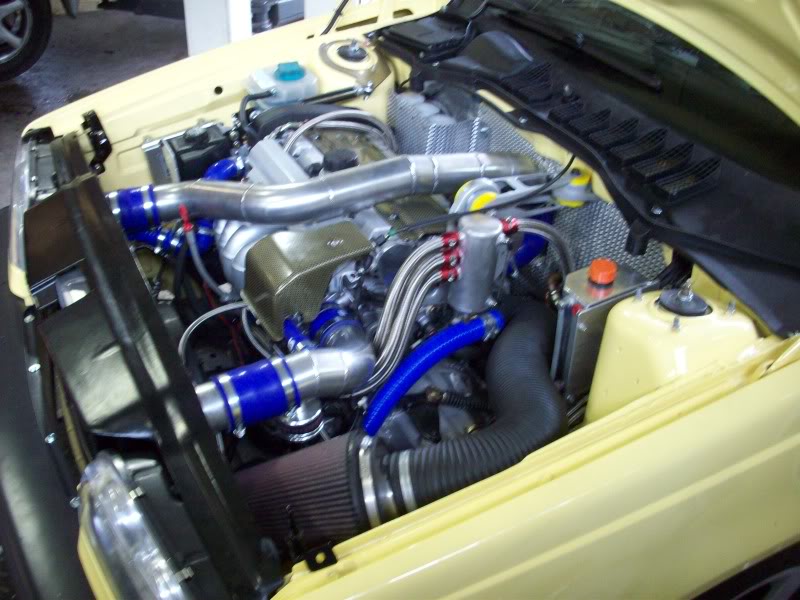
So I knew the engine would make good power, but to get to the figures I wanted, the turbo size had to change. I found a Garrett GT30 turbo and tried to work out how to fit it due to the very tight engine bay.
I had this Turbo sat on the bench at work and realised that I could go for another size up instead so I bought a GT35 with a .82 housing and a ported shroud with a five bolt flange arrangement - this gave me the extra room I needed around the steering column area. This was a 500 plus hp Turbo so was sure I would get the result I wanted.
CLUTCH
I given some thought to what clutch I was going to use in the car as I did not know what the final hp/ftlbs would be. I thought the only route I could take was to use a full paddle clutch - we had used the Helix range of clutch�s before at RT and I had one in my own Evo 6 and was very happy with it but knew the peril would need something a bit more powerful, so a Helix six puck paddle was ordered. Its the one thing when I started this project that I had not wanted to use because I have seen a few friends cars be a real pain to use in traffic and not fun at all but I had no choice, so time would tell!! In reality it was not a worry at all and the car is fine to use in heavy traffic - maybe because of the clutch being hydraulic has made the difference.
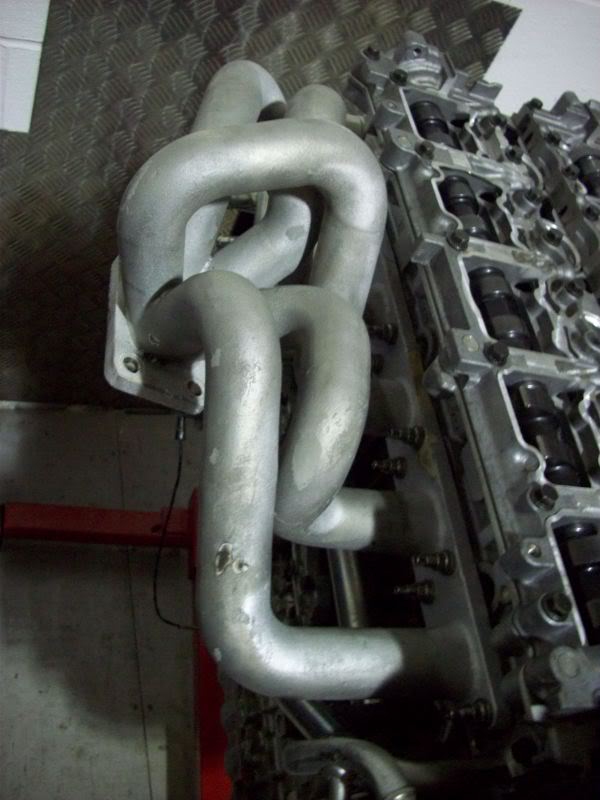
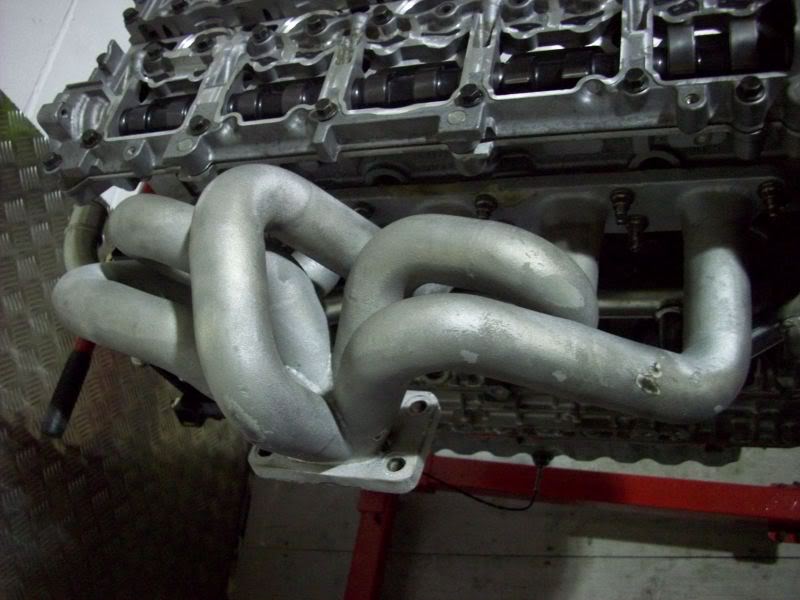
EXHAUST MANIFOLD
I had known from very early on that the standard Volvo exhaust manifold was a very poor design, as you would expect from a mass produced part set up for packaging reasons, and also built for an engine with only 240 bhp max.
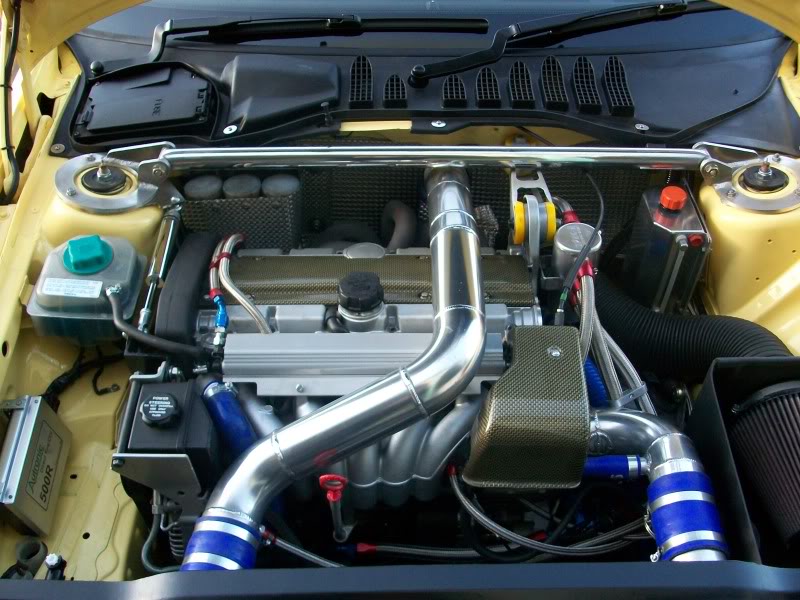
With what I had planned, I knew a custom manifold would have to be made as I knew it was an essential part of my long term plan. I had thought of using the Volvo S60R or V70R phase 2 manifold but still thought it was not right for my project. I wanted to do the job properly and had spent many hours searching the high powered Swedish Volvo tuners sites, and I soon realised they all run with a tubular manifold. So the search for a company to make a proper tubular manifold and a 3.5 inch exhaust system with an external wastegate (Tial 44mm) commenced.
When I found the company that could meet all of my requirements, as well as a high proven record of quality, the Peril was transported to the company as the manifold would have to be made on the car. What had started off as a three week build turned into a very long six months build due to the company having major problems in getting my design 100% spot on (well worth the wait though!)
When the manifold and exhaust was finished the quality was superb and I could not wait to fit it to the car. I still had to get all the correct fittings for the Turbo to fit and also had to have a Turbo drain pipe made for the oil to return to the sump - this was quite a job in the end - we made one good one out of two original Volvo ones as I did not want to risk running silicone hoses etc with such an important item, so it was worth the hassle.
Next, I fitted heat proof material to the whole bulkhead area and removed the standard Volvo tunnel heat shield to make sure the exhaust would fit as high and as neat as possible. I also fitted more heat proof material to the tunnel but moulded it tight to the body.
To finish off the manifold, rather then wrap it with heat wrap (which is hard to do neatly) I wanted to try out a company that until a few years ago would only deal with race teams and not the general motor trade - a company called Zircotec - They were a very professional company to deal with and provided an excellent job for a fair price considering what an expensive and technical process it involved. I decided to have the manifold and the downpipe coated to help reduce the under bonnet temperature and my feet!! When the items arrived in the colour I had chosen I was really pleased with the results they looked superb I just needed to try them with some heat in them!!
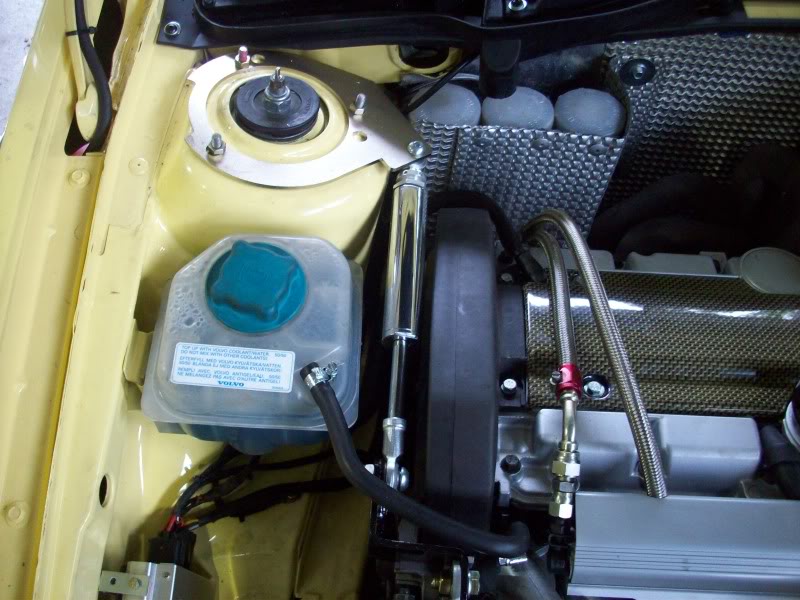
BULKHEAD
I had always thought the brake servo would be a major problem with the type of manifold design I had in my mind. As the Volvo servo is very large I had looked into running a smaller servo instead but this was not going to be possible on a right hand drive car with the manifold I wanted. I had already been doing some research into a new pedal box set up as the bulkhead would need a major re design to strengthen it so we measured out the panel and cut a very large hole in our car. We then added the new panel which was made from a 4 mm steel sheet so this made the bulkhead much stronger to mount a pedal box at the correct angle with my feet and the steering wheel etc.
STRUT BRACE
As the servo was now not needed, I thought the Volvo strut brace should make way for a new design so a local guy was called in and I explained what I wanted to do. He made me a much stronger looking strut brace - just for the appearance of the under bonnet view and nothing more.
STRUT BRACE PIC
MORE BULKHEAD ADJUSTMENTS
We did a trial fit of the bulkhead panel with the manifold and turbo in place and as usual we then had a new problem!! The intake hose to the intercooler was at such an angle I would need more room for the pipe to clear the bulkhead. It would also be too near the manifold so we came up with a new design of panel that would allow more room. This part of the build was the worst part of the whole build as it took up a great amount of time to have it custom made,
REMOVAL OF BRAKE SERVO & ABS SYSTEM
The servo was removed as well as the ABS system which I did not mind as the new pedal box gave a much better feel as to what the brakes are doing. Also, with the brake bias valve fitted I could set up the system as I wanted it. The non servo part of the brake system did take some getting used to, but it just means you have to use your right leg more!! I did look into running a remote servo as well in case I could not adjust to it but so far I am happy with it and the initial tests of the brakes are every bit as good as before so I am happy.
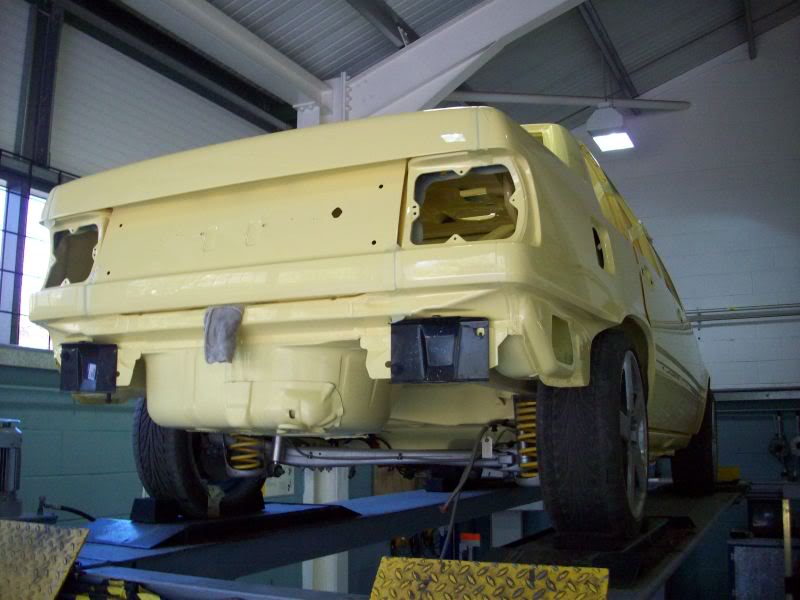
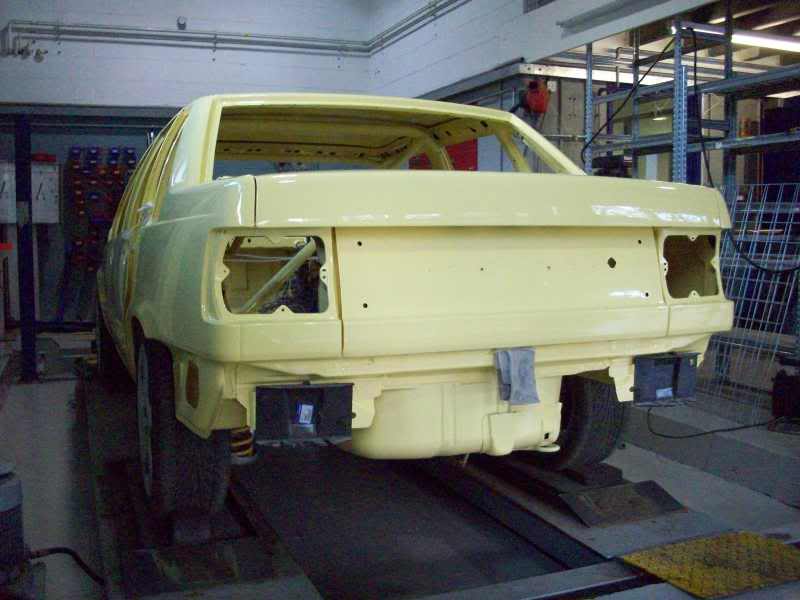
THE UNDERSIDE
As the under bonnet appearance started to change design (many times as I kept changing my mind!!) I wanted to move the battery to the boot area to free up more room and also help with adding a bit more balanced weight to the rear. I soon realised that I could sit the battery in the spare wheel well perfectly and still keep the 18 inch full size spare (needed to fit over the brakes) so decided to run the main power and earth leads underneath the car to give the inside of the car as clean and neat a look as possible. My brother and business partner Andrew came up with the idea of stripping the underside of the car completely and repainting it in body colour underseal - something I had seen a few times at car shows and concour�s events. A plan was made and the colour mixed while I (and the wife!) started to strip the old under seal off. I had no idea how much time this really was going to take - in the end it took aound100 plus hours to strip, clean and re paint the underside and all the other suspension parts. The finished article was better then expected and would really be something different to show future customers and enthusiasts and hopefully spark some imagination to show you don�t need an RS or an Evo etc to go to a car show.
I had seen the Aeroquipt hoses used on many road and race cars before and really liked the look they gave so thought I would use all new hoses and fittings from Aeroquipt where possible. The brake lines were braided with all new banjo fittings, the fuel hoses were the same from front to back - this took some time to do and work out as the Aeroquipt was an all new idea to me and I am not the best with thread sizes etc!
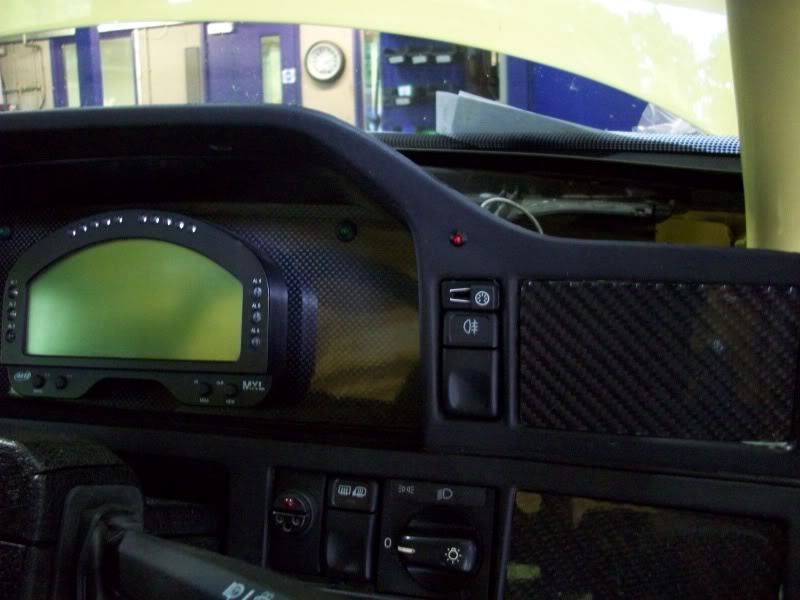
AIM DIGITAL DASH
With the power I wanted to get to I knew I was going to need several gauges inside the car to monitor the engine in various ways, but have always hated the look of lots of gauge pods stuck all over the dash which look a mess in my eyes and you cannot read 5 gauges at the same time and look where you�re going!!!
As luck would have it a trip to the excellent Autosport show was near and I waited to see what I could buy there. I soon found the likes of Stack/Motec etc and their dash�s but none came any where near for the price and standard features the Aim Strada dash had (as sold by Dataspares in the UK). Dataspares also provided all the support and sensors etc for the dash - luckily for me the SM4 was a known product to Aim and wiring the dash in was as easy as wiring two wires to transmit all the information the ecu sees. I could not wait to try out the new dash and had to decide how I wanted the layout, what information I needed to see on the display and which funtion�s I needed a warning light for.
I elected to record and display the water temp/oil temp/exhaust gas temp/oil pressure/boost/air temp/revs/fuel level. The AIM Dash is also a speedo and will store your highest ever reached speed in one very neat unit. I really liked this unit as you can set it to record and show whatever information you need - you can have a warning light for either too high or too low readings as well as being able to set the gear change lights to whatever intervals you wish to change at.
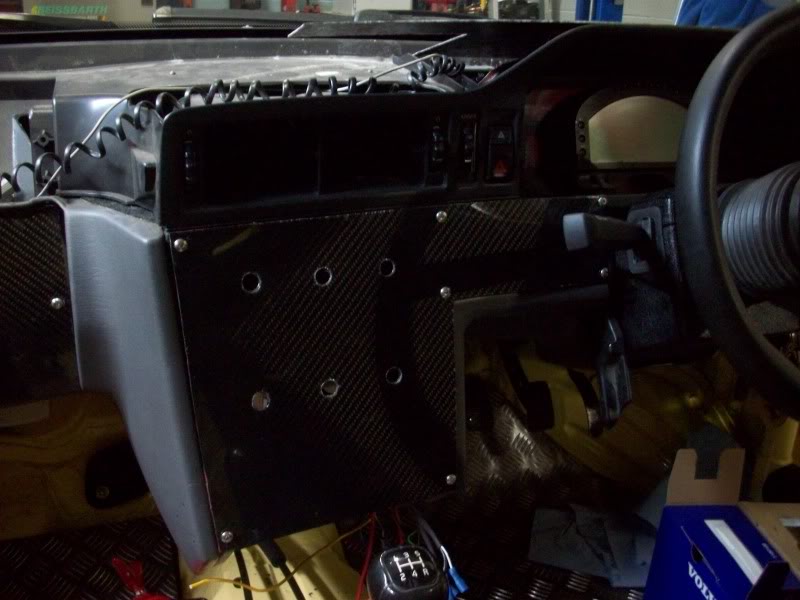
I decided to make a carbon fibre surround for the dash display as I thought this would look neat, so Andrew was again given the job of making a surround which was no five minute job. The finished item looked so good so I decided to use more carbon fibre sheets for other parts as well to cover up various holes in the dash that were no longer needed (glove-box/heater vents etc).
THE FIRST DRIVE
The first drive in the Peril was a very special event and one I had waited two years for with the new engine. I started to learn how to map the engine. I ran the engine in for approx 700 miles then slowly built up the boost levels and rev�s under close tuition from my mapping teacher. We slowly built up from 1 bar up to eventually 2.3 bar peak boost. It was my decision to limit the boost here at this stage as it was all a very unknown limit and did not want to find the engines limits at this early stage! The first proper run in the car was unlike any car I had ever driven before. I had been in a couple of rear wheel drive and 4 wd cars with more power before but never have driven one and especially not a front wheel drive Volvo!! The Peril went just how I had always wanted it to and I was only just at the start of my project so the smile on my face was from ear to ear.
I did very soon after running the car at 2.3 bar find a big problem with the n/s driveshaft CV end joint.
I tried a very healthy standing start launch and after pulling away, I found that the joint had literally twisted and broken. After an inspection I had found that in the cars life the joint had been changed for a copy part so new proper Volvo joints etc were brought and I have had no problems since, which says a lot for the strength of the Volvo product .
HANDLING AND STRENGTHENING OF THE CHASSIS
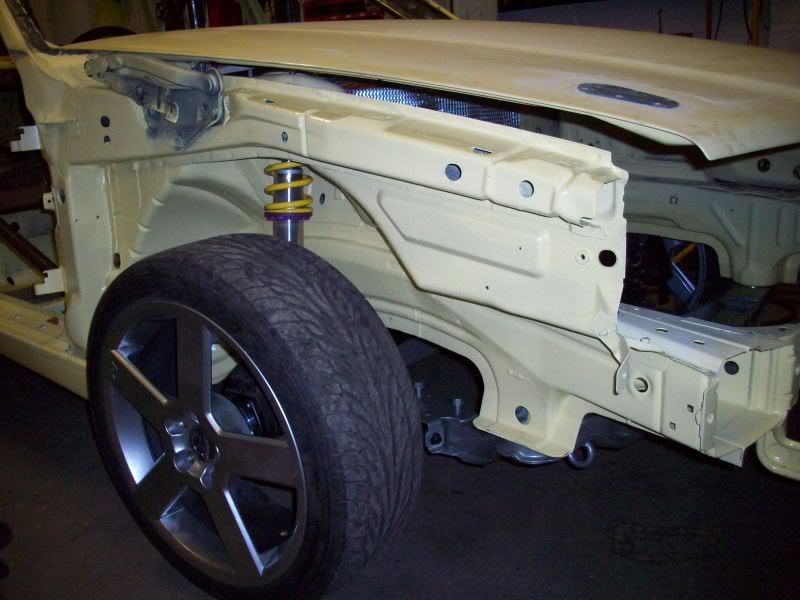
I very soon realised that the Koni FSD suspension was no where near good enough now I had a decent amount of power. Coilovers and some other helpful modifications to the chassis were needed to help control the power I wanted to run, as I was keen to have the handling and general driving of the car as good I could get it so had been looking for a while into what I could do to help strengthen the chassis.
I tried hard to find someone to help with a new design of subframe bush that I thought would help the front of the car feel much more planted. I decided to try using alloy solid mounts. I had recently rebuilt a C70 convertible and while the subframe was out, I found that Volvo had made solid mounts in the subframe. I tried to see if the mounts were available from Volvo but found that unfortunately you could only get them with a new subframe!!
Another idea to help strengthen the chassis was to strengthen the bulkhead/steering column area.When I had the dashboard out to fit the pedal box I was shocked as to how much sideways movement there is in the steering column, so I arranged for extra support to be fitted to strengthen it up. I thought this might help me with the steering feel to reduce the flex - only time would tell if it helped me or not but wanted to try it.
COILOVERS
The Coilover route was the only way I could go which also meant I could have the exact ride height I had always wanted. I spoke to the few (again) companies that actually make coilovers for an 850 and found that KW had a very good name in various forms of motorsport.
When speaking to their engineer�s I told them what I had planned for the Peril and the weight it would be etc. I also explained that the car would be used mainly as a road car but also a few track days and other planned events. They told me about a new range of kit I had not seen advertised before which was thier racing two way adjustable coilover kit. This would give me a much higher field of adjustment, rather than the variant 1-3 kits normally sold. I would also be able to adjust the bump and rebound settings as well as height. The race kits are only made to order so another two long months went by while I ran the engine in and continued mapping lesson�s!!
ROLLING ROAD
My first trip to the Rolling road was a back in May 2008. This was carried out at Motorworx in Marlow - they are a very well known rolling road garage that I had met many years ago when I use to have a Renault 5 Turbo. They use the excellent Dyno Dynamics Rolling Road which are the most accurate and will give consistently reliable results that cannot be adjusted!!! This factor was very important to me as I wanted to know exactly what bhp I was running, and wanted consistent results. Unlike other makes of rolling road it was an ideal location that happened to be just behind Volvo UK�s base, so made it a bit more special to run it there!. The owner of the garage, Danny was quite nervous about running the car as over the years of him testing cars he had never had a fwd car with more than 270 hp on his rollers!!
At first we tried a run on 1.8 bar of boost (478 hp) (447 ftlbs) then slowly upping the boost to a max of 2.3 bar (535 hp) (470.3 ftlb�s torque )
I was over the moon that I had finally got the power I had always wanted and it had made the power very easily so I knew that more was to still to come, but we called it a day. I don�t think my nerves would have taken it much higher into the unknown that day, and we soon realised that water injection was going to be needed as the charge temp was getting to 60 degrees!! I was still extremley pleased with the results as this was just a test at this stage to see what was happening - the final power graph I wanted was still a way off.
CAMS
I went away to change my spec slightly as I knew the cams were very mild, so after a lot of searching I found a company that could make the cams, as I wanted them from blanks which aren�t common to find for a 5 cylinder!!!
I decided on the spec of my own cams and then while waiting the 8 weeks for them to arrive I thought of trying out a test. Over the last few years I have seen lots of people say that running with normally aspirated cams will help the power spread and make more power than normal. I thought this was a good time to try this out to see if it was a fact - I had asked many people that ran the N/A cams if they had done a back to back test and all said no!!! I carried out the test to see what happens with my spec of engine and head etc over the other cams. I actually lost 10 hp so at least I tried to see what would happen over the first set of cams.
Also in the meantime I had bought the excellent Aquamist water injection kit to help with temperature control - not to give me more power at this stage, but due to a technical hitch (my wiring!) it had not worked at all which was a shame.
ANOTHER ROLLING ROAD TEST
Another test I wanted to complete was to try a power run on race fuel (109 GT) which can give you excellent added power very easily. Its not a cheap mod, but what it gave me over the super unleaded fuel was an extra 54 hp so I now had 591 hp and 524 ft-lb�s at the flywheel and this was 501.1 at the wheels. I was again extremely pleased and even the wife let out a scream. The wheel power figure is the one I am most proud of - the higher numbers are nice but the wheel figure and torque�s are my favourite.
We decided to do another run and try out possibly more boost but as the load built up we had a problem - smoke was seen so the run was aborted and the car was driven gently home without a problem. At first it looked like a head gasket problem as the race fuel can be quite nasty to the gaskets and eat away at them. and unfortunately no one makes an uprated one. I soon had the head off and inspected the gasket and found it to be perfect!!
LINERS & OTHER ENGINE CHANGES
I looked at the pistons and they were fine, but the block or the liner was not!!! Liner number 3 had split about a 1 cm down the bore and the split was about 1 mm thick. The block was sent to our chosen machine shop that we use for inspection. The liner was removed from the block to see how Volvo built them into the block - either pressed in or machined in to the block from casting. They found it to be the latter - the standard liners are cast into the block. In 15 years when Volvo launched the all new 850 series and from being an apprentice at Tourist Trophy Volvo in Farnham, I had never had to strip a block down to this degree so it was very interesting to see how Volvo had built the block. From then on, new the research was started into the best route I could take, trying to keep an eye on costs as well!!
After looking at the amount of distortion the block had suffered I was very glad that I had run the car with a proper tubular manifold otherwise this problem could have occurred much earlier on with the amount of heat produced.
On looking at the block we found that there is a small split between the bores which is around half a cm in depth - this doesn�t help the distortion of the bores as it allows them to flex, hence causing the split. We have seen a few 2.5 V70R and Ford Focus ST engines (which have the same engine) that have had this same problem, even with just a standard car. This made me realise that I would need a far stronger liner with a better design, that could withstand the higher heat and pressure.
There are a few companies that make liners for Volvo�s but they only seem to be for the 2.5 litre engine, so I was then limited for my 2.3. I was keen to keep this engine as a 2.3 so in the end I decided again to go down my own route and have the liners designed and made for me and hope that I would not have to look at the block/bores again!!
I had the new cams ready to be installed into the new build and also had some modifications made to the head so I could fit my new cams . I sourced another cam cover which would be machined to see where the camshaft position was - this part of the engine covers and clamps the cams on a T5 engine - to make sure I dialed the new cams in correctly, I needed a test cover.
I had decided by now to run the engine with a different size and make of injectors, so I ordered a set of Siemens 880 cc which I was keen to try over the RC 750�s.
At the last run on the rollers I had seen how far past the limit I had gone with the standard setup of the breather system. I had run both of the breather pipes into a catch tank and found the breather system I had been working on before hand would be needed more than ever. I had a company make me a new system to my own design again using the Aeroquipt hose�s and fittings.
I also decided to run the car with a dump valve for safety reasons as I did not want to risk damage to the turbo, ie blades bending etc. I would only ever recommend that a dump valve is run with the larger types of turbo, as I had found many years ago when I had brought an Escort Cosworth with one fitted and was advised to remove it to improve the throttle response! I did remove it and it was never refitted!
ENGINE MOUNTS
I had been having problems with the engine mounts - not really a surprise as they are working over time for me. I looked at what could be improved and thought it would be a good idea to send a bulkhead mount to Powerflex, a poly bush company to see if they could make me a stronger mount (in yellow of course) and also a new top engine mount (which only seemed to come in purple - they made it for me in yellow!).
I also had the lower gearbox torque mount made for me in poly as well which would help with the rearward movement of the engine under high load. I also had an idea one day while looking under the bonnet of some very high powered Evos �
I noticed that some of them run a engine damper on the offside strut. I thought this would help another problem area I was starting to get with the engine mount under the cambelt. It kept braking even after 100 miles !! I decided to borrow an idea I had seen while at MA Developments - on one of their many high hp Evos, there was an engine damper kit. I thought I may be able to get it to fit the Peril somehow -,if it didn�t work I could always use it on my own Evo 6, so had nothing to loose and bought one.
I got Andrew on the case as he loves making new parts where he can and he soon managed to re shape the small bracket and we thought we would fit to the Pas pump housing:
Early tests showed it had made a massive difference and looked like I had solved the problem
In tests so far it works a real treat so hopefully that�s another problem sorted
Thread Starter
Scooby Newbie
Joined: Oct 2009
Posts: 13
Likes: 0
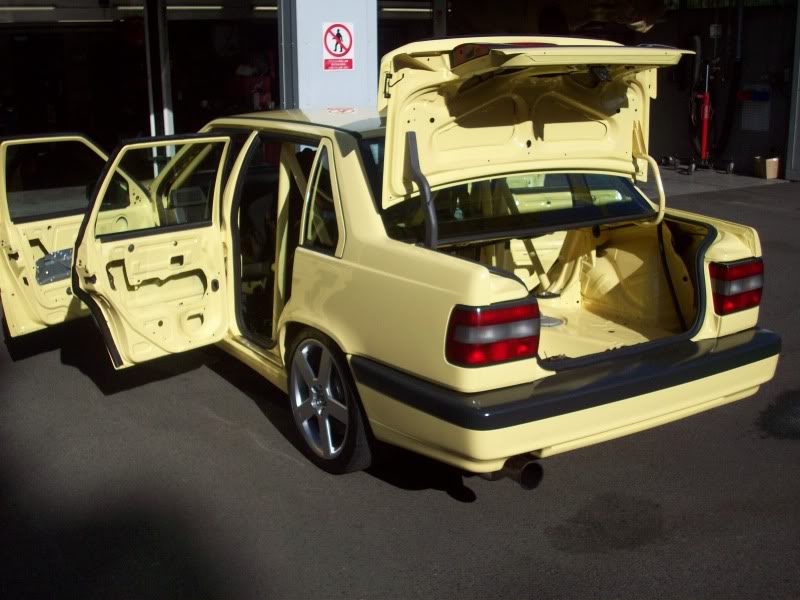
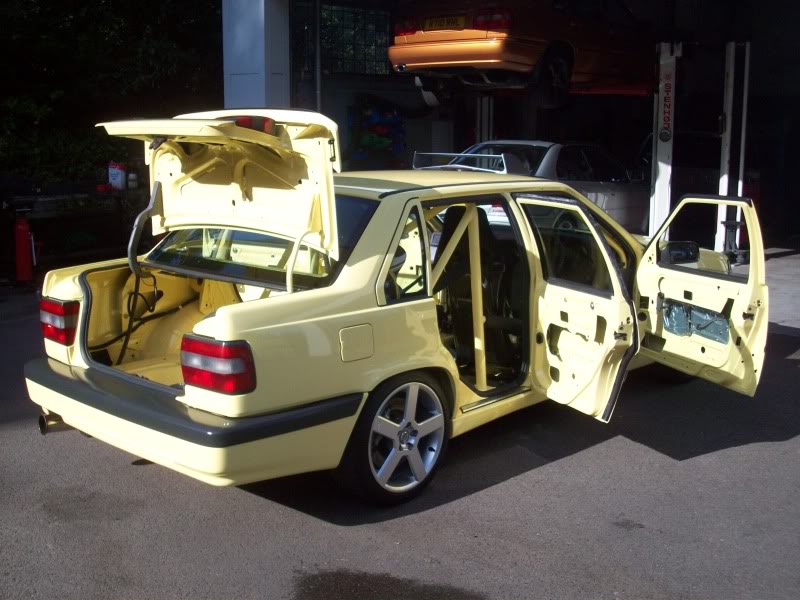
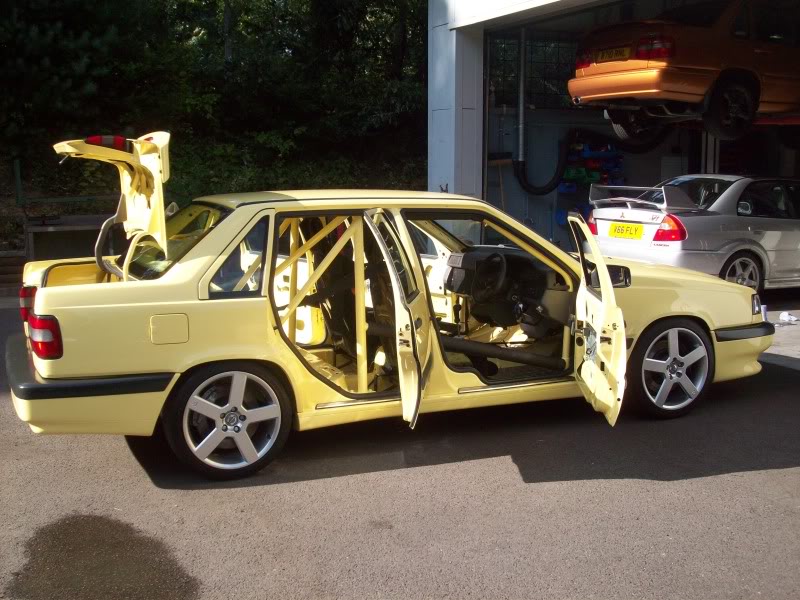
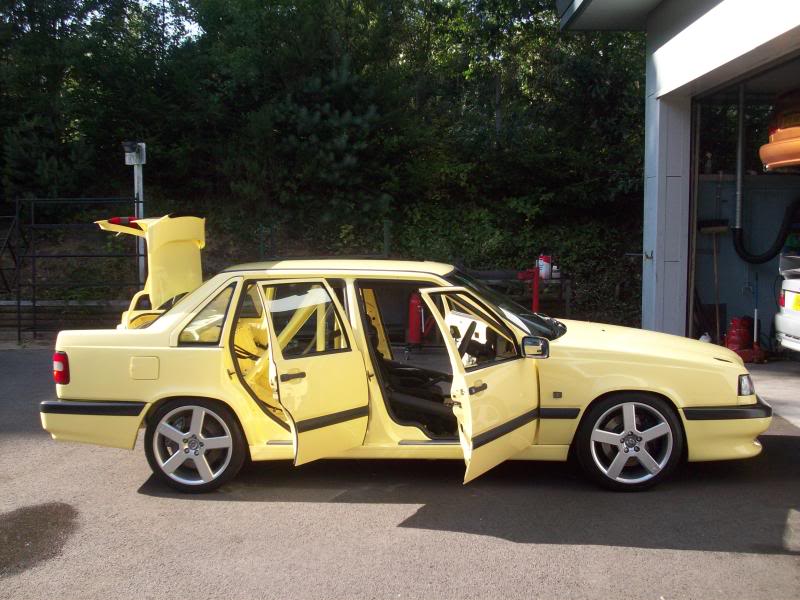
RACING SEATS, HARNESSES, INTERIOR & REAR STRUT BRACE
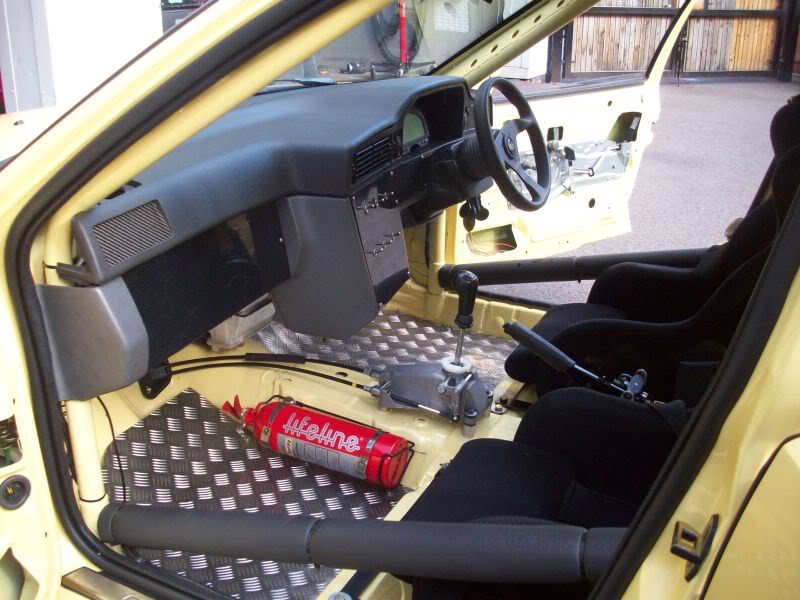
I started to focus my attention on the inside of the car - manly the seats and the seatbelts. I tried out a few different seat designs and had a ride in a friends Mitsubishi Evo 6 who races in the time attack series and was impressed at how well his seats fitted me. They were made by Japanese tuning company called D2. They made a very light and strong seat which is what I needed, so new suitable custom made seat frames were made for the new seats.
I now needed the correct harnesses to finish the job, so again went for a quality make. Willian�s harnesses are very well known and are well proven so I was happy to use them. Its amazing how many people that run harnesses in their cars for track days etc get the angle dangerously wrong with the rear belts!! A suitable anchor was made which would also make a good strut brace to help stiffen the rear of the car nicely. I had wanted to keep the standard carpets and interior at first but soon realised the carpets would have to go with the new seat frames etc and the stripped look slowly grew on me. I started to really think how the stripped look would look at its best so decided to remove any parts I did not need - any brackets and other fixings/roof lining etc had to go along with the sunroof cassette�..
This then gave me another problem - what to do about the sunroof hole?? I was trying to save weight but also wanted to give the car more strength as well�.
THE ROOF
I looked into the costs involved in having a plate made and welded into the roof panel to fill the hole, but by the time the panel had been made and welded into place, the roof filled and re painted, we decided to see if another roof skin would be easier to fit as we could do the work ourselves.
My brother Andrew had already been brave enough to do this work on his own car (an Evo 2) so we decided this would be the way for us so I started to strip and remove all the sealant that was hiding the spot welds on the roof ready to drill them out.
We decided to start to drill out the spot welds of the second hand roof to see how the skin would come apart before we started any drilling on our car!! As we started to strip the metal back I was shocked to see how many layers of metal there are holding just the roof on. You can see why Volvos are such strong cars and are so well made.
We decided to do something a bit different - the risk of not being to remove the original roof skin was too high as it would right off the car in one fal swoop, so we decided to keep the original roof in place for maximum strength and weld/bond the new roof over the original. Andrew must have spent 10-15 hours grinding down the roof to just a skin ready to fit it.
We then prepared the roof ready for the swop over. The paint had to be cleaned off to bare metal as this was the best way for the bonding material to work. We then added the new roof to the car and welded it front and back - this was then left for 48 hours for the bond to make and suitable weight was put on the roof to be sure of a good contact. The hole from the sunroof was then sealed from the inside.
The Peril has many special visitors while all this work is done after hours��
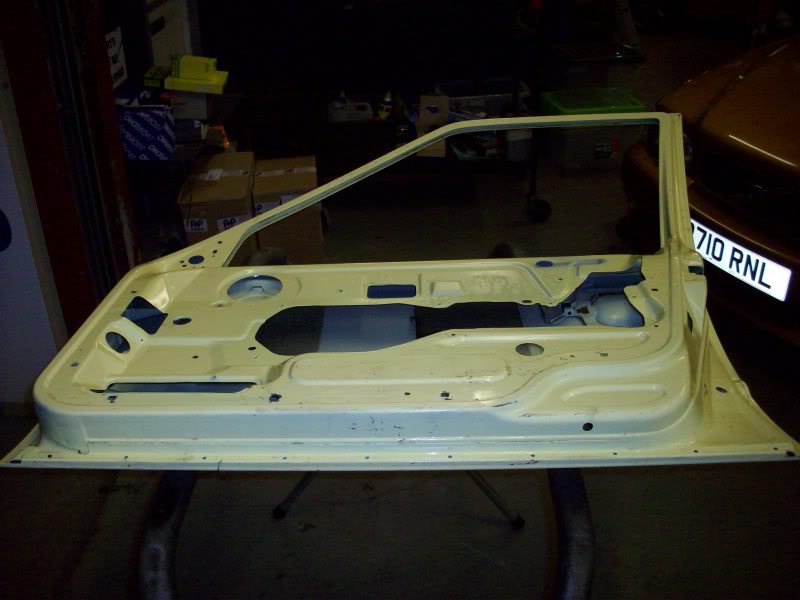
At the same time all other items that were not needed (where possible) were removed and the wiring was hidden as much as possible. I stripped the rear doors of everything other than the door locks and locked the rear windows shut as I would not have any rear passengers to worry about any more.
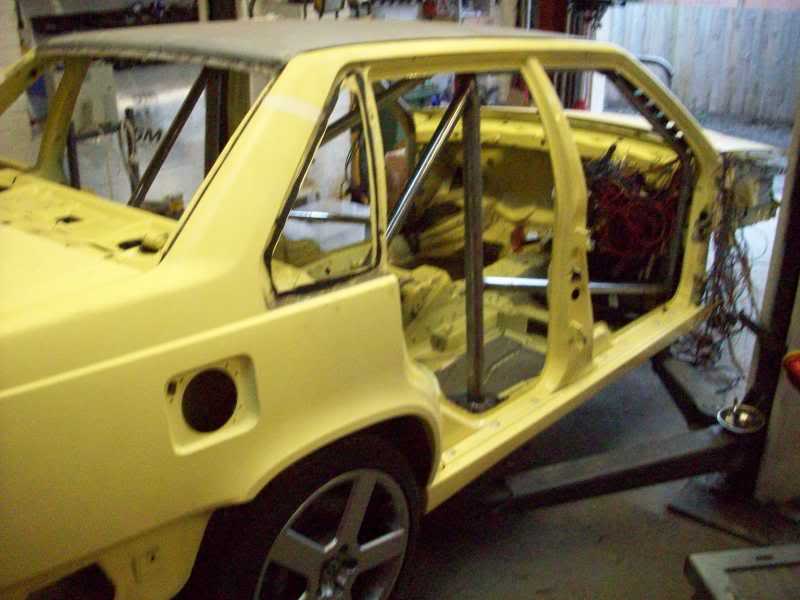
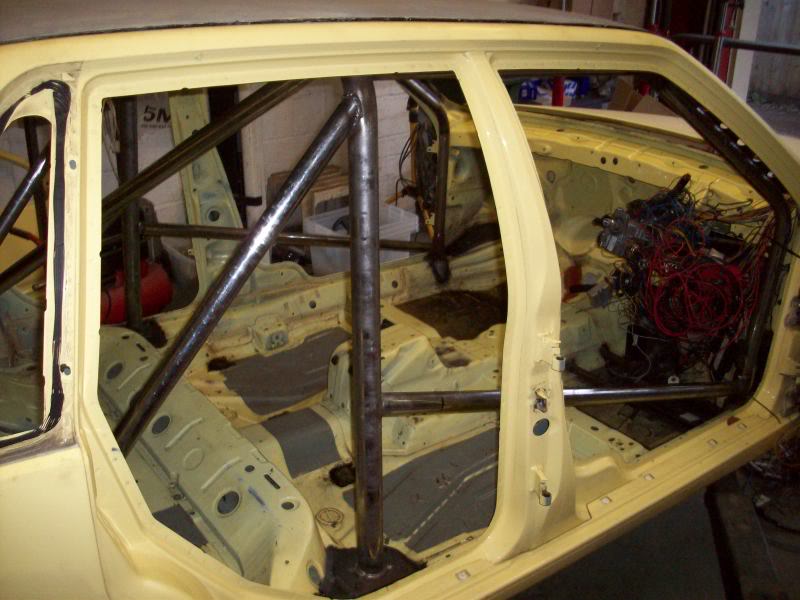
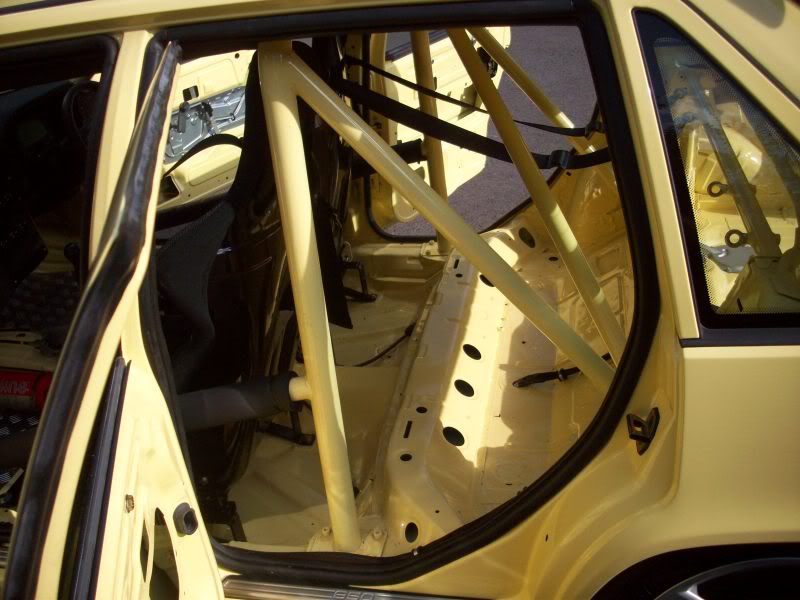
ROLL CAGE
I had been thinking for a while about having a roll cage fitted to make the car as strong and safe inside as possible in case the worst ever happened, as I had planned to do a few top speed runs in the car
The cage would run over the roof line and down behind the dash area with a strengthening bar across the doors and a rear diagonal bar. In the rear support plates had to be made and fixed in the floor behind the front seats and plates for the front bars below the dash area.
I had to make sure that the screen view was not disrupted by the cage, so it had to be fitted as close as possible to the windscreen pillar. I had studied a few other designs of cages - quite a lot of them are in your line of vision when driving on the road - I�m going to be using the car mostly on the road so did not want to block a motorcyclist etc from my view etc.
The cage started off with this :
We made a bar across the top of the windscreen area for extra strength - the material used was CDS 2 (cold drawn steel). We also decided to place strengthening plates down the windscreen pillars. The metal was bought from a local company and we started to measure out the lengths and the bends needed (the roof being the worse with different angles at different points. I bought another dash board as I thought it was time I got rid of the wood effect that is a standard T5-R fitment! I then had to start to cut the dash board around the roll cage where it fitted which took a long time to get it exactly how I wanted it.
RE-WIRING / WIRING LOOM
By this time the final look I wanted to get from inside of the car was in full flow and so I decided to move all the wiring that would be seen down into the left side of the car. A very good friend who is rather handy at looms and has a very high attention to detail made me a new loom and gave me a full wiring diagram in case I ever have a problem, which is a really nice neat touch.
I decided to run one loom of 20 wires down the N/s of the car to keep the inside as neat as possible so the look inside went from this
TO THIS
Its amazing how many very powerful cars are running on a very poor standard of wiring. Many people put lots of extra load on standard wires that are not designed for such things. My great friend spent over 70 hours on the wiring alone - this gives you some idea of how much work has gone into such a thing.
Thread Starter
Scooby Newbie
Joined: Oct 2009
Posts: 13
Likes: 0
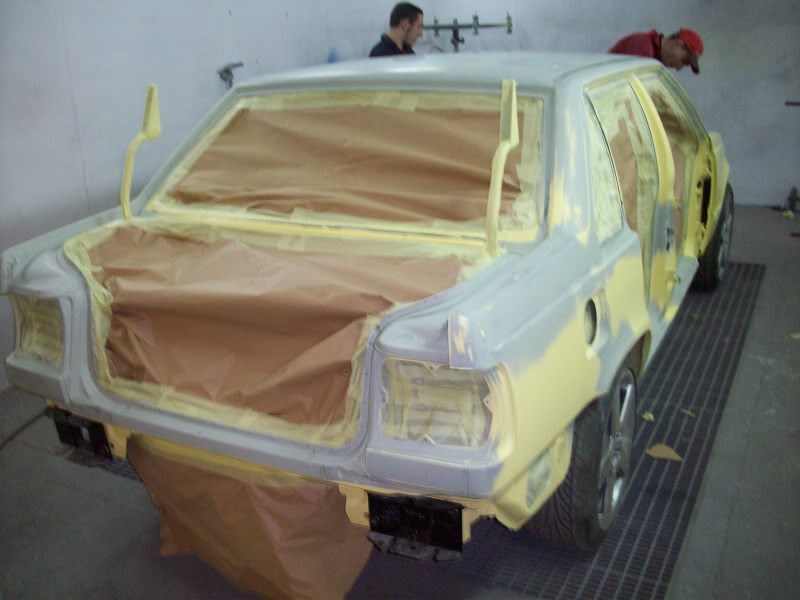
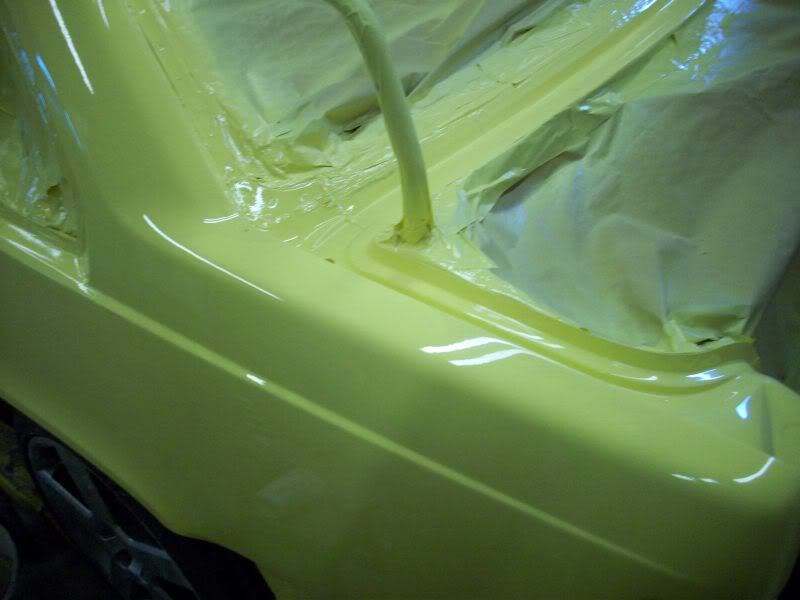
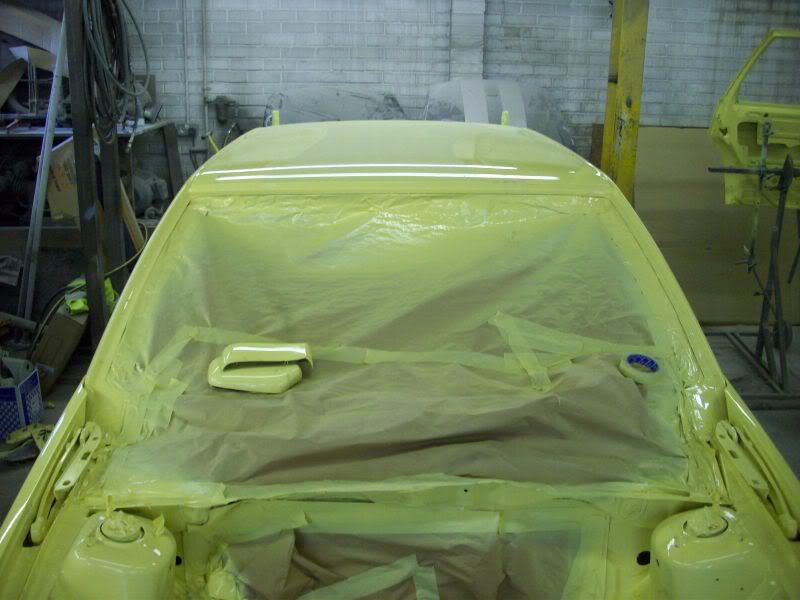
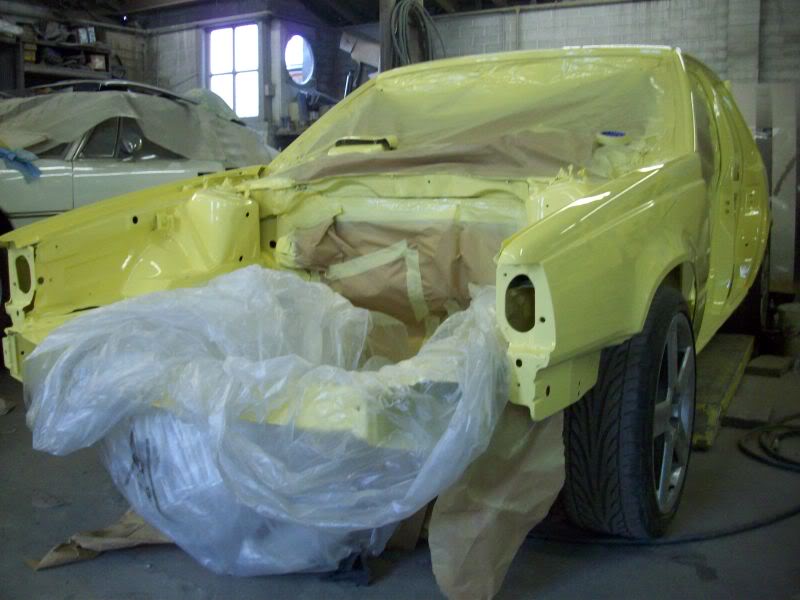
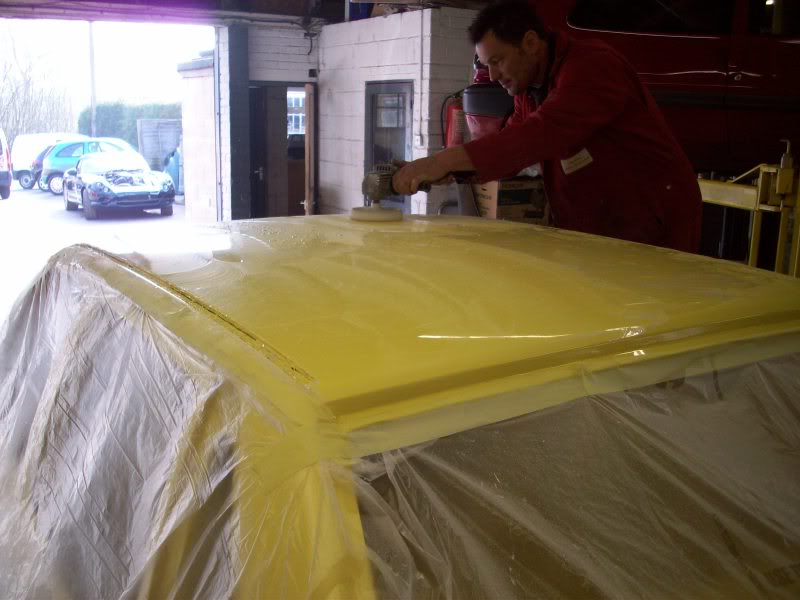
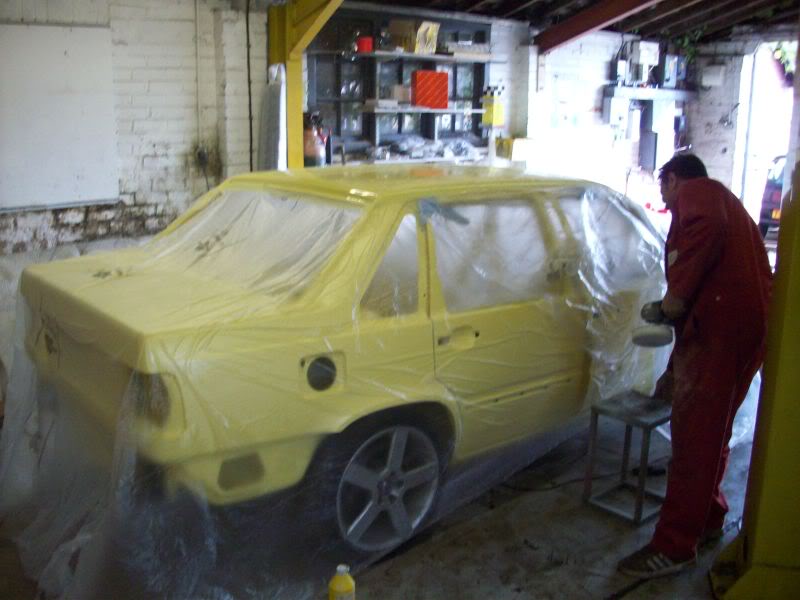
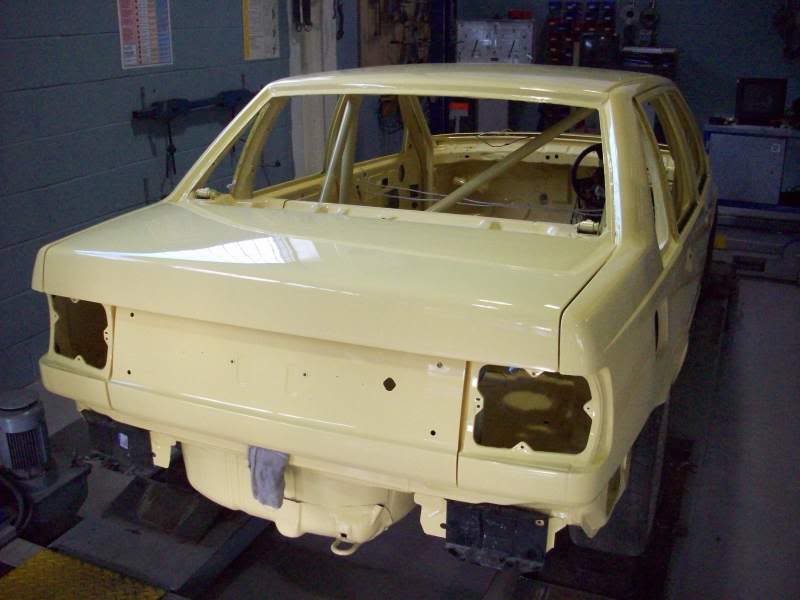
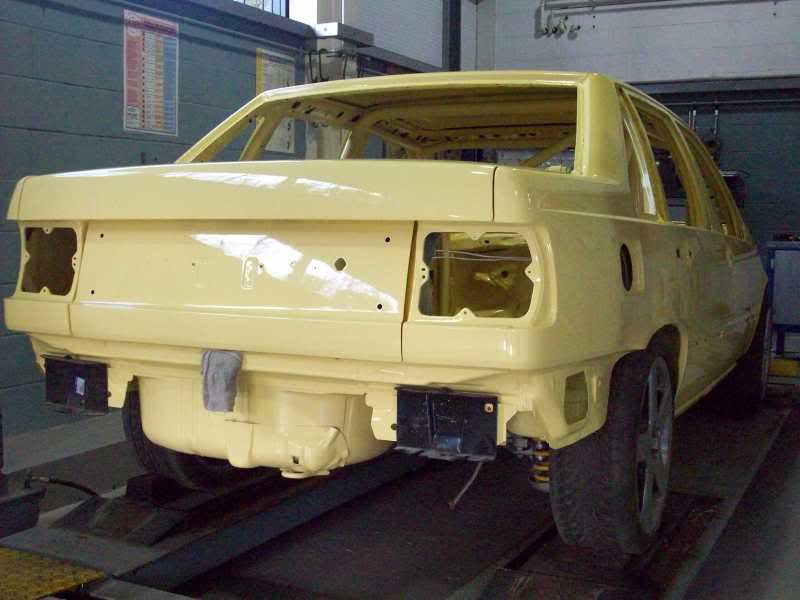
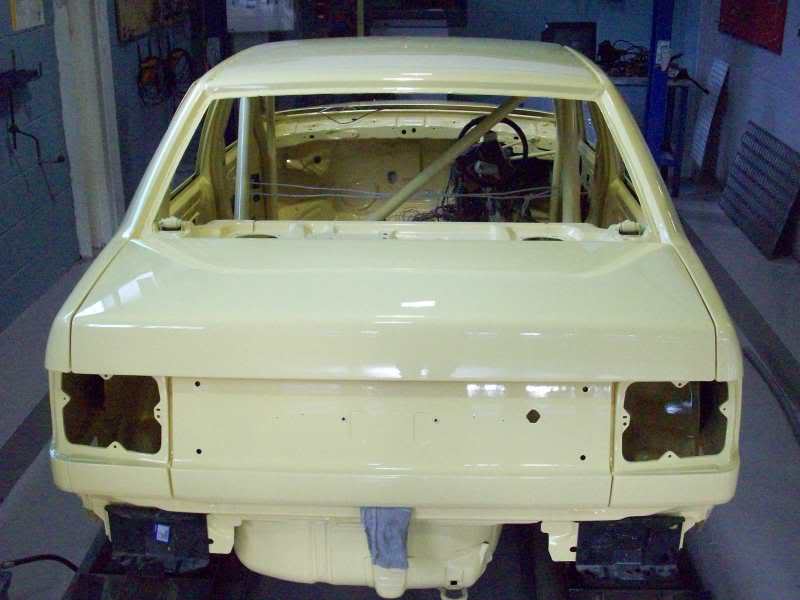
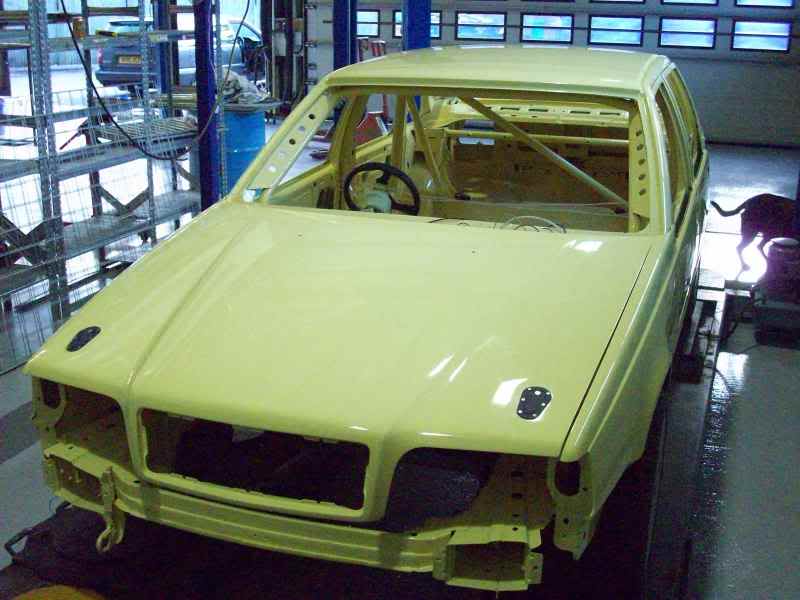
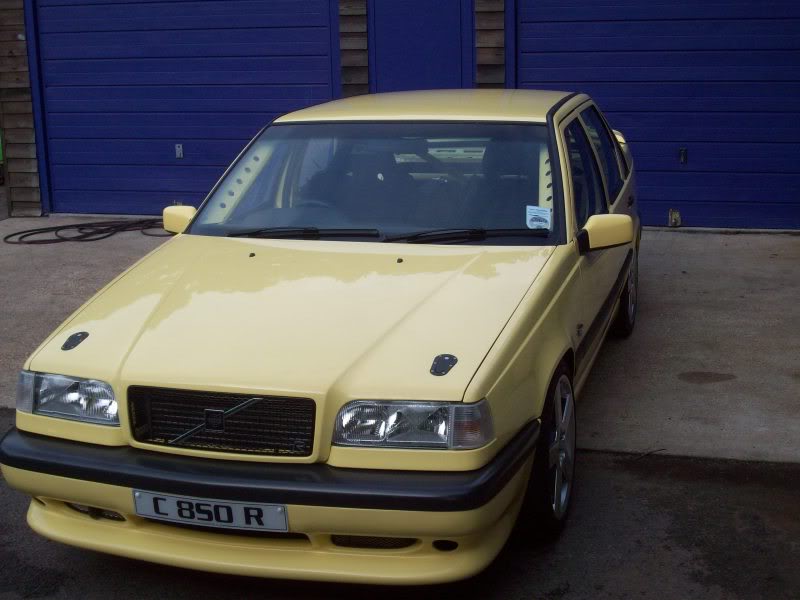
FULL RE-PAINT
As the Peril had had various parts of paintwork done over the years, we decided to completely repaint the whole car - the roof was needing some paint, the interior and cage had to be painted, and I also wanted to change the front wings as I had been a little over enthusiastic with the grinder on the inner lip - I had needed to make as much room for the wheels and tyres as possible - what I should have done is had the arch�s rolled properly (you live and learn!)

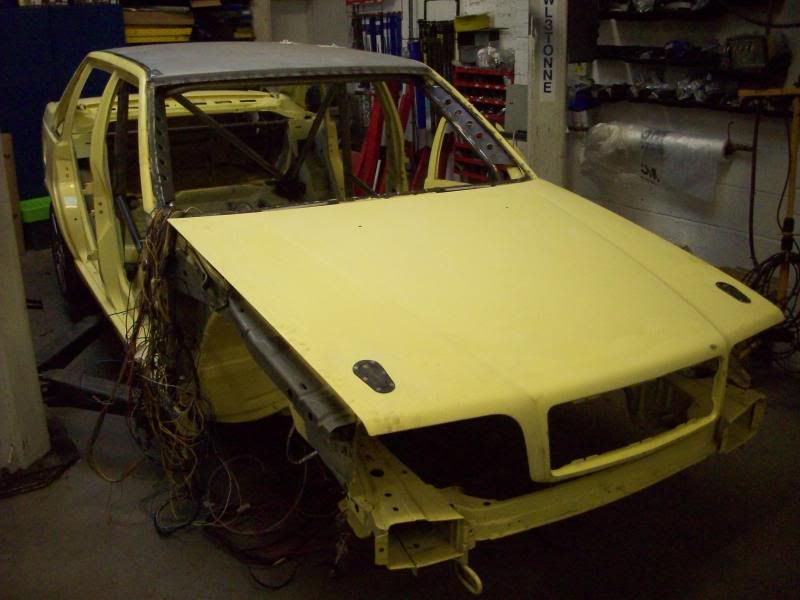
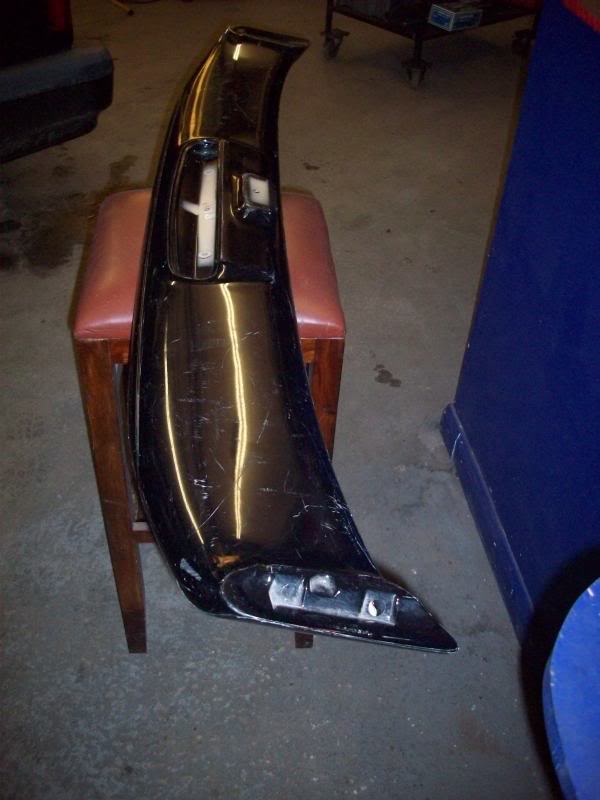
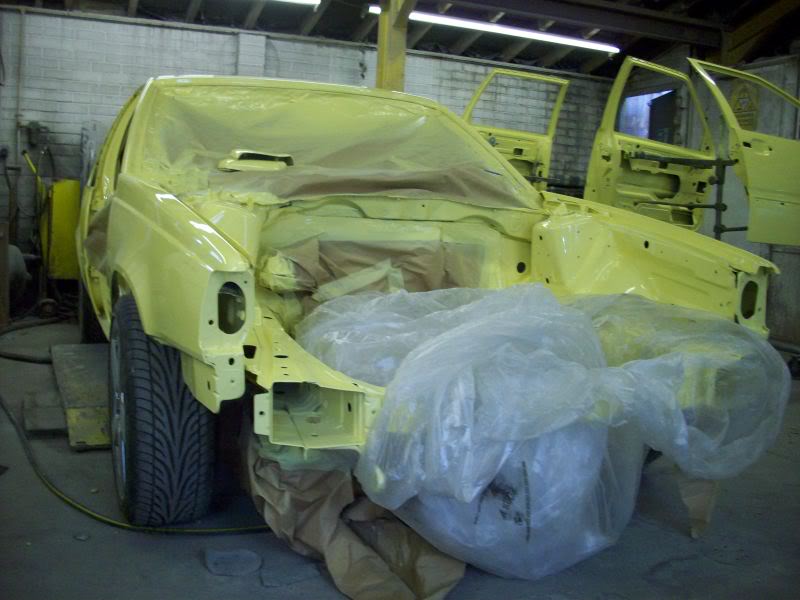
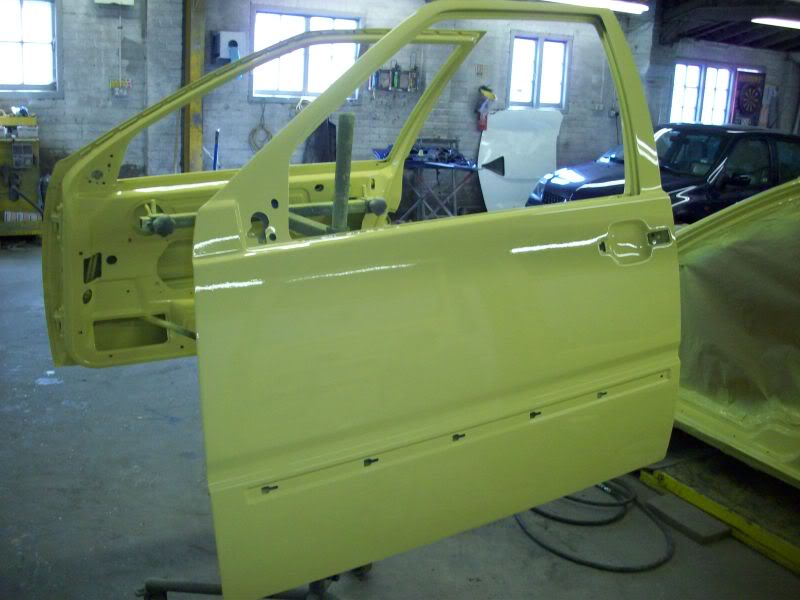
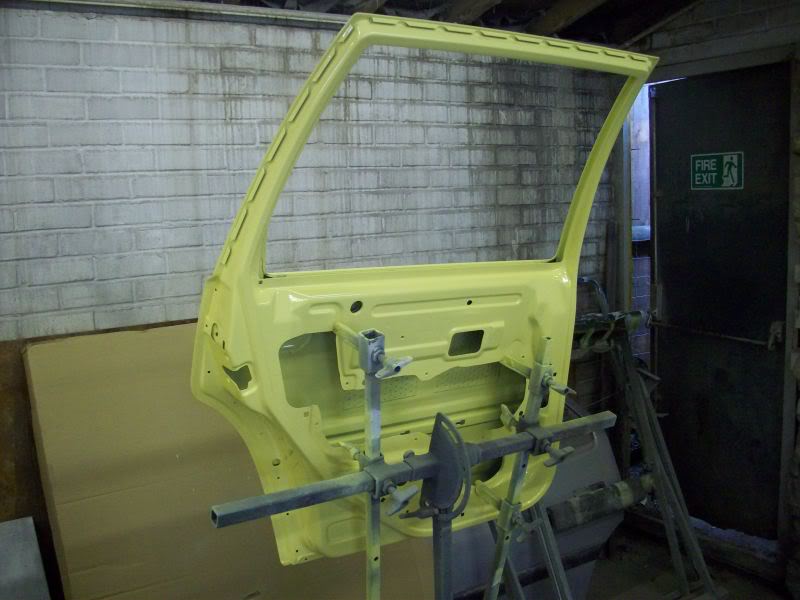
The car was slowly stripped. The doors went to the body shop first to be prepared and the rear spoiler was removed along with any sound deadening.
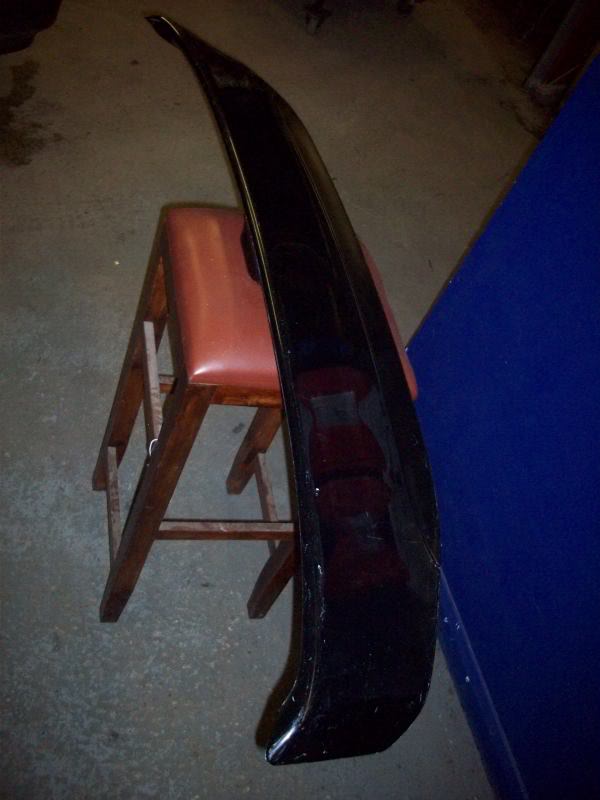
A great customer of ours gave me a very good idea in the middle of all this - he suggested to see if I could get hold of an 850R rear spoiler which has the extra lip on the end, as this may help with the rear of the car at high speed. Even if it didn�t help at high speed, it would be a neat little change to the look of the car and I was lucky to find one and added this to the list of parts to be painted.
The car was delivered to the body shop and left for a few weeks to be prepared and painted
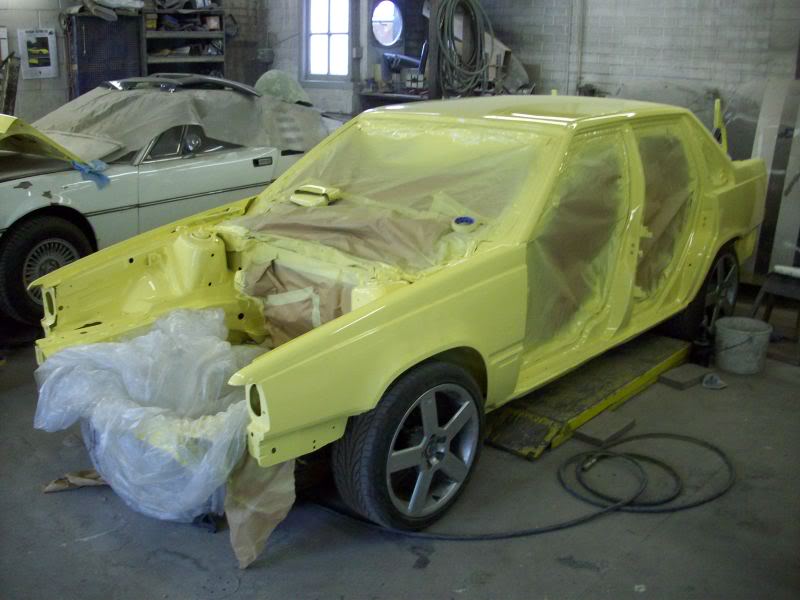
The re paint started off with the inside of the car - all the doors etc were removed and the cage etc was done first
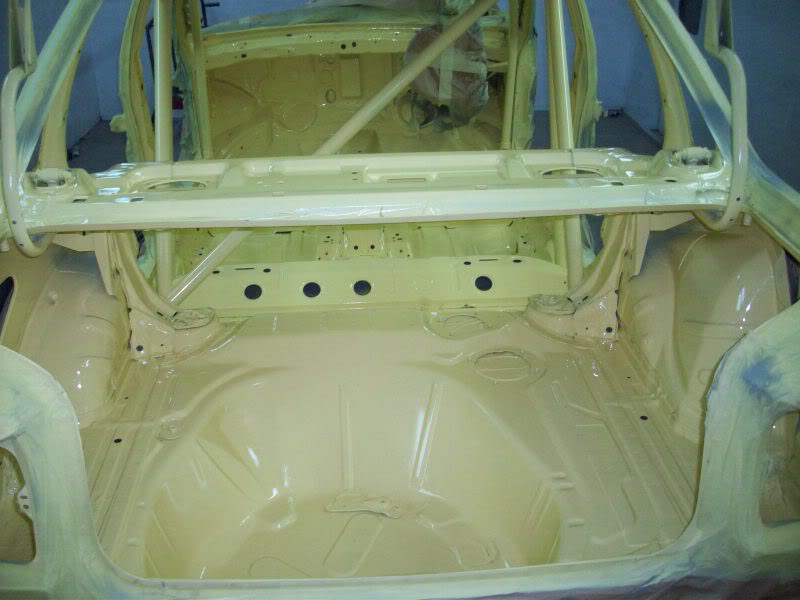

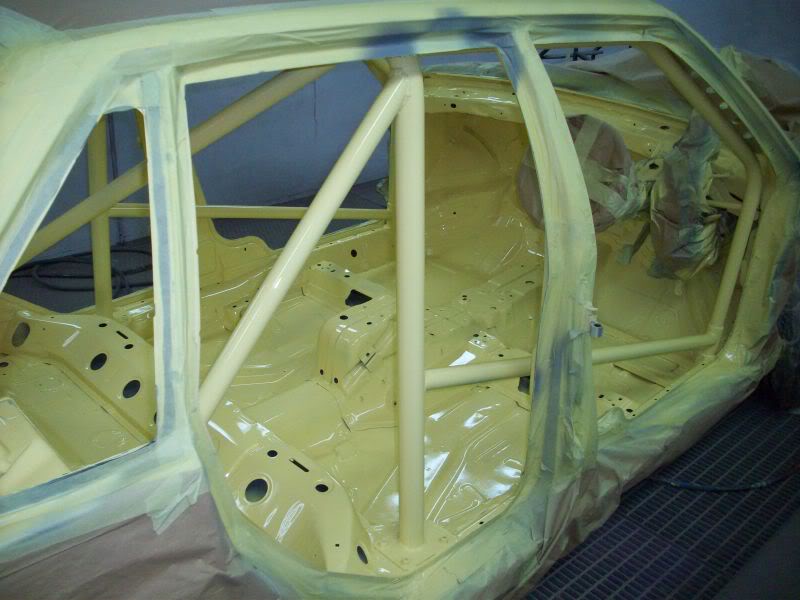
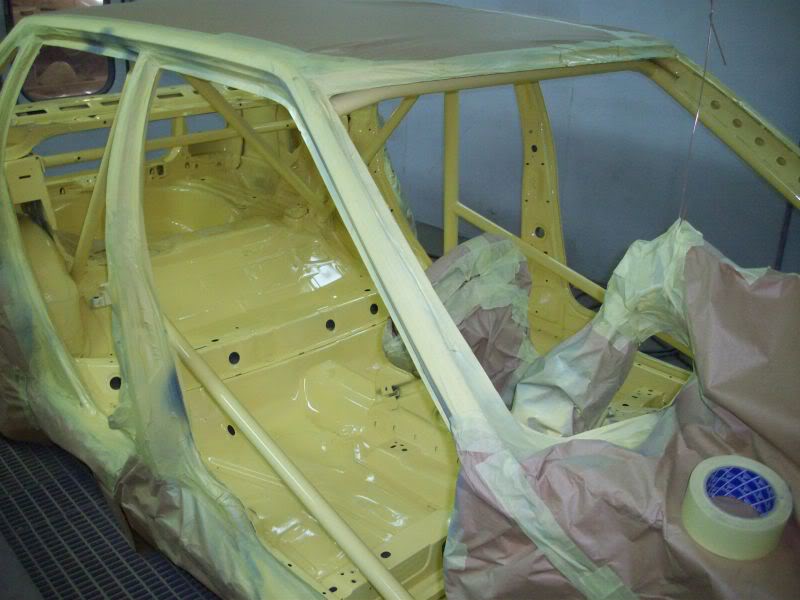
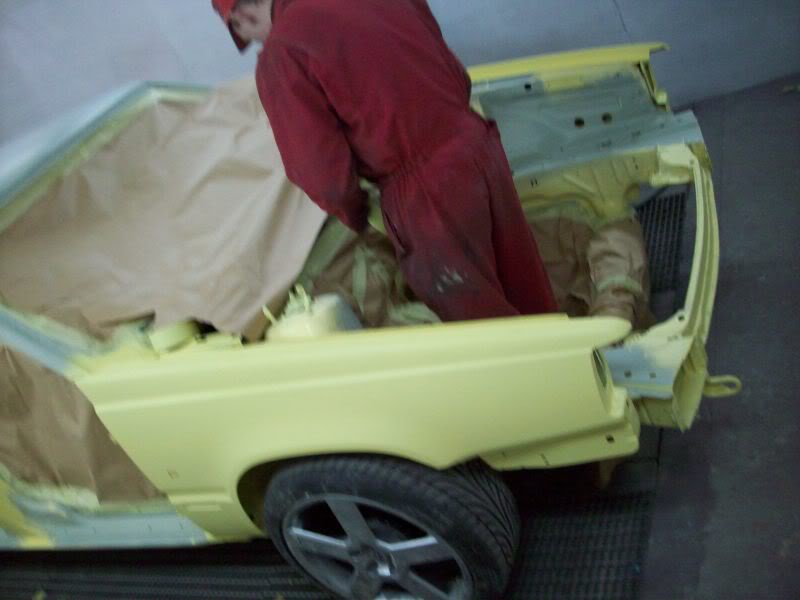
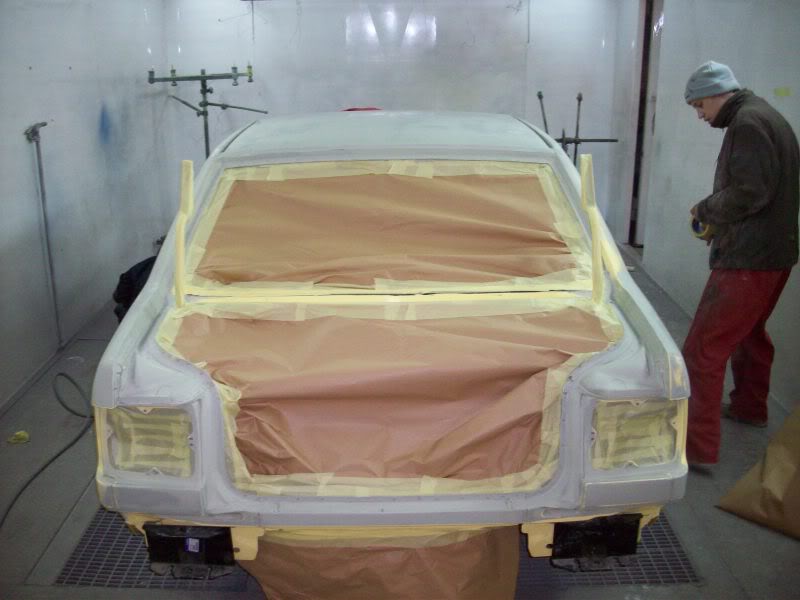
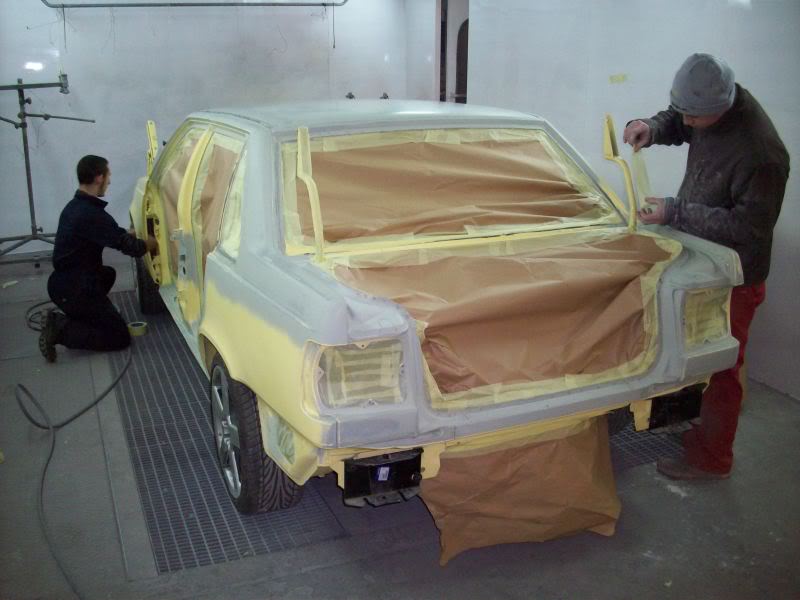
With the inside being finished, it was time to start on the outside

I of course had no stereo, so the antenna mast was not needed
I popped in again after the major paint was done


It was then the turn of the bonnet boot lid and the doors
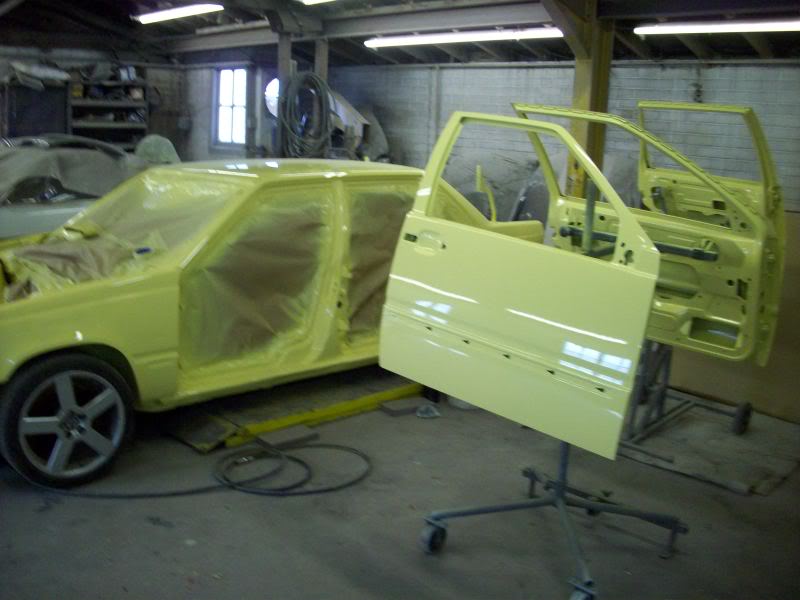
The car was given a full machine polish and the final prep began

At the same time, we had started a relocation to much larger premises for the business:

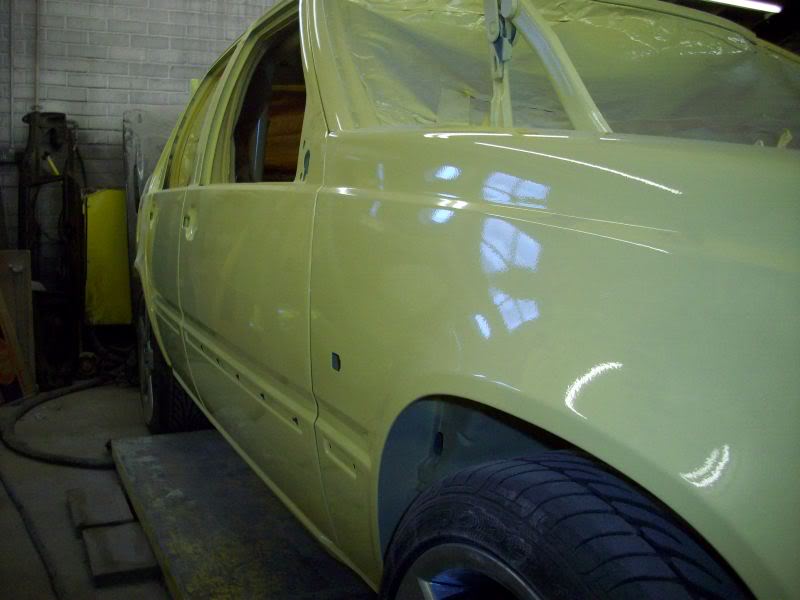
��..so the car took a back seat for several weeks while the move was completed over the long easter weekend. The final stages of the move were completed over the weekend the Peril was delivered to the new unit looking like a new pin. I was over the moon with the job - the car looked better than new. It was great to have the car painted in all the small areas that Volvo never paint - it had several layers of lacquer to make it shine�..
I had been arranging the many, many boxes of Peril parts and now due to the larger building I had my very own engine build area and lots of racking and shelving to store all the Peril parts during the re build. This was a great help and enabled me to sort out the different areas of the car - fuel system, brakes, engine intake etc etc .

I also took over one of the ramps - a four poster, which made the Peril so much easier to work on.
I had at first decided to re build the engine ready to be refitted � I would then concentrate on the rest of the car. I have never had to dial new cams into an engine so this was a new practice for me. A trigger disc was purchased for the crankshaft to measure the true Top Dead Centre (TDC) of the piston - as the new cams are custom made there is no easy setup and as the block was decked and the head given a very light skim, the standard Volvo timing marks were no use to me.
I had a spare cam cover so thought I would use it as a test cover to make sure I could properly dial in the cams. At the machine shop I use they do a few Volvo engines so we decided to share the cover so that they can easily set up the shims on the later heads for solid lifters. They made such a lovely job of the liners they had made for me, I was happy to let them share it.
While the tubular manifold which had been made for me was in storage, I had noticed that the ceramic coating was starting to come off. This was a shock as the manifold had only done 1500 miles since the silver coating so the company I used (Zircotec) were called and they kindly came over to inspect the coating. They where also shocked to see the state of it and kindly offered to strip and re coat the manifold � this was a great relief to deal with such a decent company that are true to their word and just want happy customers.

I decided to have the manifold re done in the charcoal finish this time

I then added the rest of the parts to the engine including the turbo (GT35 with a ported shroud and external wastegate).
The engine was now complete so I slowly but surely started to sort out the wiring inside the car ready for the dash to be refitted - all the time being very careful not to scratch or damage the paint work!
After what seemed a very long time I managed to re-wire the new dash (AIM) and get rid of the wood effect part
I had brought a few sheets of carbon fibre to help tidy up the dash and glovebox area with the four switchs I would need to have the launch control/anti lag/heater fan/traction control I had two spares too in case I wanted to add more items to the car .
Rod also added a low level light for the water injection.
I also started on the engine bay refit adding all the pipes/and wiring looms to the car - they would mostly live inside the chassis legs
As the Peril had had various parts of paintwork done over the years, we decided to completely repaint the whole car - the roof was needing some paint, the interior and cage had to be painted, and I also wanted to change the front wings as I had been a little over enthusiastic with the grinder on the inner lip - I had needed to make as much room for the wheels and tyres as possible - what I should have done is had the arch�s rolled properly (you live and learn!)
The car was slowly stripped. The doors went to the body shop first to be prepared and the rear spoiler was removed along with any sound deadening.
A great customer of ours gave me a very good idea in the middle of all this - he suggested to see if I could get hold of an 850R rear spoiler which has the extra lip on the end, as this may help with the rear of the car at high speed. Even if it didn�t help at high speed, it would be a neat little change to the look of the car and I was lucky to find one and added this to the list of parts to be painted.
The car was delivered to the body shop and left for a few weeks to be prepared and painted
The re paint started off with the inside of the car - all the doors etc were removed and the cage etc was done first
With the inside being finished, it was time to start on the outside
I of course had no stereo, so the antenna mast was not needed
I popped in again after the major paint was done
It was then the turn of the bonnet boot lid and the doors
The car was given a full machine polish and the final prep began
At the same time, we had started a relocation to much larger premises for the business:
��..so the car took a back seat for several weeks while the move was completed over the long easter weekend. The final stages of the move were completed over the weekend the Peril was delivered to the new unit looking like a new pin. I was over the moon with the job - the car looked better than new. It was great to have the car painted in all the small areas that Volvo never paint - it had several layers of lacquer to make it shine�..
I had been arranging the many, many boxes of Peril parts and now due to the larger building I had my very own engine build area and lots of racking and shelving to store all the Peril parts during the re build. This was a great help and enabled me to sort out the different areas of the car - fuel system, brakes, engine intake etc etc .
I also took over one of the ramps - a four poster, which made the Peril so much easier to work on.
I had at first decided to re build the engine ready to be refitted � I would then concentrate on the rest of the car. I have never had to dial new cams into an engine so this was a new practice for me. A trigger disc was purchased for the crankshaft to measure the true Top Dead Centre (TDC) of the piston - as the new cams are custom made there is no easy setup and as the block was decked and the head given a very light skim, the standard Volvo timing marks were no use to me.
I had a spare cam cover so thought I would use it as a test cover to make sure I could properly dial in the cams. At the machine shop I use they do a few Volvo engines so we decided to share the cover so that they can easily set up the shims on the later heads for solid lifters. They made such a lovely job of the liners they had made for me, I was happy to let them share it.
While the tubular manifold which had been made for me was in storage, I had noticed that the ceramic coating was starting to come off. This was a shock as the manifold had only done 1500 miles since the silver coating so the company I used (Zircotec) were called and they kindly came over to inspect the coating. They where also shocked to see the state of it and kindly offered to strip and re coat the manifold � this was a great relief to deal with such a decent company that are true to their word and just want happy customers.
I decided to have the manifold re done in the charcoal finish this time
I then added the rest of the parts to the engine including the turbo (GT35 with a ported shroud and external wastegate).
The engine was now complete so I slowly but surely started to sort out the wiring inside the car ready for the dash to be refitted - all the time being very careful not to scratch or damage the paint work!
After what seemed a very long time I managed to re-wire the new dash (AIM) and get rid of the wood effect part
I had brought a few sheets of carbon fibre to help tidy up the dash and glovebox area with the four switchs I would need to have the launch control/anti lag/heater fan/traction control I had two spares too in case I wanted to add more items to the car .
Rod also added a low level light for the water injection.
I also started on the engine bay refit adding all the pipes/and wiring looms to the car - they would mostly live inside the chassis legs
Thread Starter
Scooby Newbie
Joined: Oct 2009
Posts: 13
Likes: 0
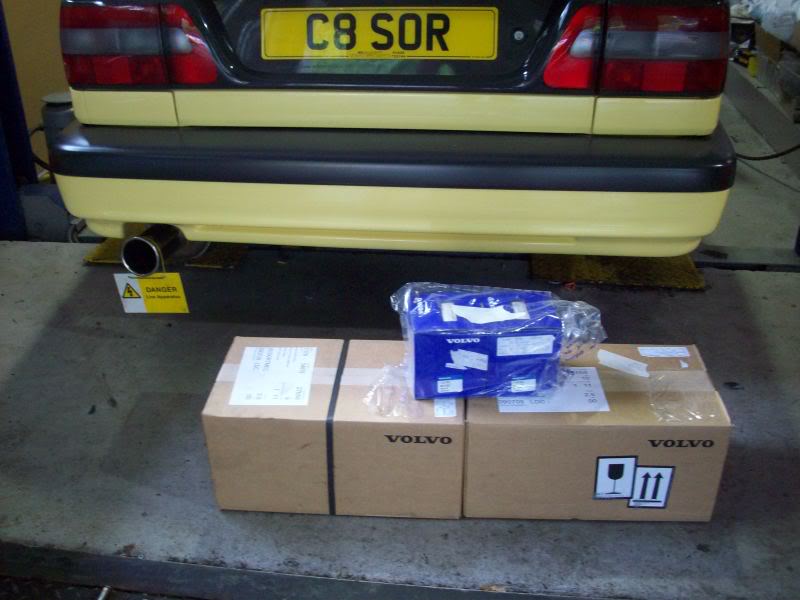
REMOTE BRAKE SERVO
A new part I had to have fitted to the car was a remote brake servo this was something I had started to look into when I first realised I would need a pedal box assembly , as I did wonder how it would be to drive with the car without servo assistance but for a time was happy with the brake feel and found the brakes worked very well all you had to do was press the pedal a bit harder!!
I had pointed out to me a unknown to me a grey area of the mot rules that state if a car leaves the factory with a servo it must have one fitted so I had no choice but fit one I did not want to be running an illegal car so was happy to look into a solution.
I did even check with vosa about the details and found it to be correct there must be hundreds of rally etc cars that don�t run a servo without a problem but wanted to be safe. I then looked into what I needed to do I was not sure if I needed a single servo or a duel servo (I have two master cylinders) so searched long and hard to find a duel servo system this proved very hard and no-one I spoke to in the rally/historic race world knew of such a thing (or the MOT rule !!)
In the end I had a real piece of luck :
I found a company that made just what I needed I quickly ordered one and set about working out where to fit it I had spent much time getting the inside of the car how I wanted it to look so did not want it in view .
The new unit turned up and I set about deciding where to put it I found that it would just fit nicely into the old glove box area so was very pleased to hide it ,I was looking forward to trying out the brakes with the new set up .
MORE FINISHING TOUCHES
As the subframe is now seen so much, I thought I would have several parts and brackets powder coated in silver and a few in black
I also fitted the new alloy sub frame bushes that my local machine shop made for me - I was sure this would make a big difference to the front of the car, as under power you could feel the subframe trying its best to leave the front of the car !!!
I started to add the wishbone arms etc to the subframe ready for the engine and gearbox to be added
I bought new gear control cables and added some brass bushes to the ends to help the gear feel
And poly bushed the lower torque rod
This pic shows the longer bolt I have used for the pick up for the traction control I run on the Sm4
ENGINE GOING BACK IN
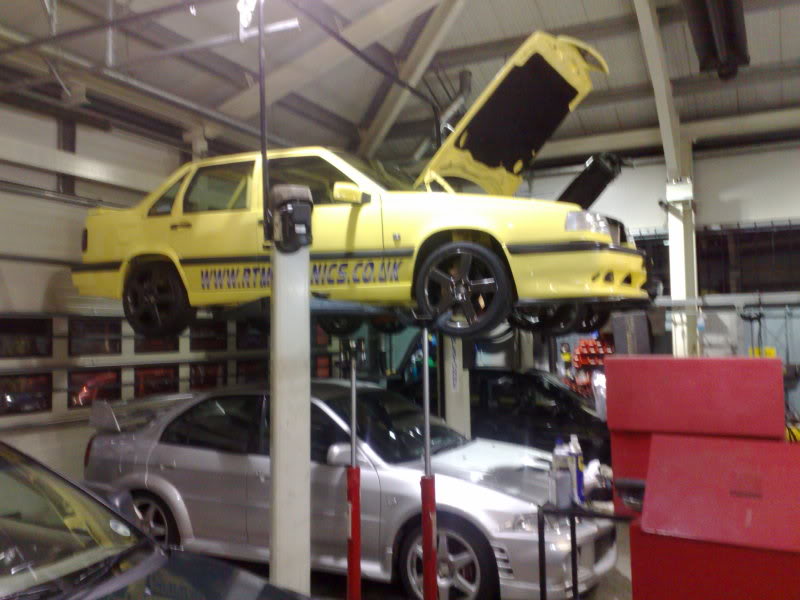
I was now getting ready for the engine and gearbox to go in. I used some very large straps as I did not want an error while lifting the engine onto one of our work trolleys. I first removed the subframe and fitted the steering rack etc to it ready to meet the engine and box
I covered the engine bay sides with cloths just in case of a slip:
In she goes !!!!!!!!!
Andy and the team decided to put a small sign in the shot for a joke
Now that the engine was in place I soon set about connecting all the extra parts back to the car (intercooler/rad hoses etc etc etc )
FITTING RE-PAINTED PARTS
I then added the freshly painted front panel
I also kept busy when I fancied a change of jobs on the car and fitted the fuel tank and the new loom for the fuel pumps/speedo/fuel gauge
I was so pleased with how all the freshly repainted parts looked that I decided to buy all new trims/mouldings, rear glass etc etc etc. This cost a huge amount as Volvo trim items are not the cheapest to buy !!!!
With a bit of help we finally managed to fit the 850R rear spoiler
On went the wiring loom for the engine
The late nights continued for three months - I worked a full day at RT then stayed until late into the night every night as I had to get the car up and running as soon as possible - it started to pay off as it was nearly time to start the car��..
The last time I ran the car, I had one problem - the top rad hose ran so close to the boost hose and the pass return line that it snapped the line clean off the pump, so I had to make a change to stop this from happening again�..
Thread Starter
Scooby Newbie
Joined: Oct 2009
Posts: 13
Likes: 0
TYRES
I managed to borrow an unused Dunlop D01J from a great friend…..
I wanted to see if I could get away with running 235/40/18 but with the ride height I wanted, it was not going to be possible. The last thing I wanted to do was risk damaging the new wings so I needed get 225/40/18. I decided to use the excellent Dunlop D03J’s - I did not want to risk buying cheaper cut slicks like some you see.
THE PERIL IN MOTION AGAIN!
I was soon at the stage where I was ready to drive the Peril around our car park, just to get the wheels moving again under her own steam. This was a great moment for me but I still had lots to do ie, brake lights, reverse lights etc etc etc but it was great to drive again.
HEADLIGHTS & FIRE EXTINGUISHER
After a few comments from customers that had had a chance to see the Peril several times during the re build (they thought the headlights I had bought did not suit the car) I decided to buy new standard lights from Mr Volvo:
I also bought a fire extinguisher to have to hand should the worst ever happen

THE FIRST DRIVE PART 2
It was a very exciting morning one Saturday when it was finally time to drive the car properly again after 9 long months. It was time to start to enjoy the car again and run the engine in for a few hundred miles at half a bar of boost. I wanted to do this as soon as possible so every night that week me and a lucky passenger went out for a good couple of hours each night with a varied course - we even popped into the Goodwood race track as its only down the road from work.
We continued to do more late night runs with no problems at all which was a great relief
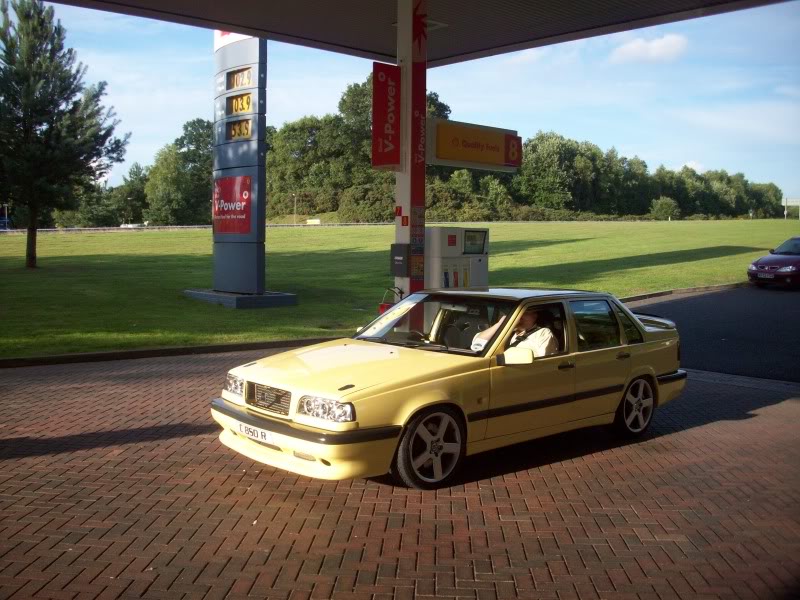
I wondered how many trips I would be making to my favourite shell garage on the A3 at Liphook !!!
RE-MAPPING THE ECU
I travelled over to see Mark Shead my Autronic mapper and teacher who is slowly helping me learn how to map my own car. We started off doing a few runs to start to give the Peril some decent amounts of boost now that the engine was run in after the late night runs with half a bar of boost so out we went :

MAD’s unit was full of all very high hp cars as usual, most put the Peril’s hp in the shade with their power outputs including one very well known Sapphire Cosworth which runs at 2.9 BAR !!! and over 700 hp J
We started off with just the general driveability and throttle response of the car - a few people have asked how much of an animal a fwd Volvo with 535 hp is to drive - well I can honestly say that you can quite happily drive it as a normal car without any dramas in heavy traffic - the car is happy to trundle along with the flow of traffic - even the paddle clutch is not a pain at all - not quite the “un driveable monster” a few ill informed people have said. If you use a good standalone ECU and THE BEST mapper you will have no such problems - of course you need to adapt your driving style but surely that’s common sense with the larger turbo’s. There is a large lever in the middle of the car called a gear stick - you can use it to great effect to help you J
We set the boost up to 2.3 bar as that’s where we got to last time. I was happy to go a bit further this time now that the liner problem was hopefully gone for good so we went up to 2.4 then 2.5 bar. I was happy to stay at this level as the performance at 2.5 bar is quite shocking. The Peril is like not other Volvos I have ever been in or probably will ever be in - I cannot wait to do a few performance tests on the car in the future.
We then set up the water injection and for now set this to cut in at a preset of inlet temp, so the SM4 handles all this side of the WI. When set up the SM4 can even control each WI jet individually - all very clever
LAUNCH CONTROL
While we were out we set up the launch control which works very well. All you do is come to a stop, turn on the switch then hold the throttle flat out - the SM4 takes control and holds the revs at 4.5 k - all you do then is lift the clutch….. easy…
ANTI LAG
Then it was the turn of the anti lag which is just for a bit of fun - no performance gain at all just some fantastic noises – There is nothing quite like a 5 cylinder Volvo popping and banging away J
Once we set up the traction control with a new chip for the SM4, I had to make a few practice starts for a future event…..
MORE FINISHING TOUCHES
I thought it was about time I put a heat shield around the silicon hose that comes from the compressor housing on the turbo as it runs rather close to the exhaust manifold!!!:
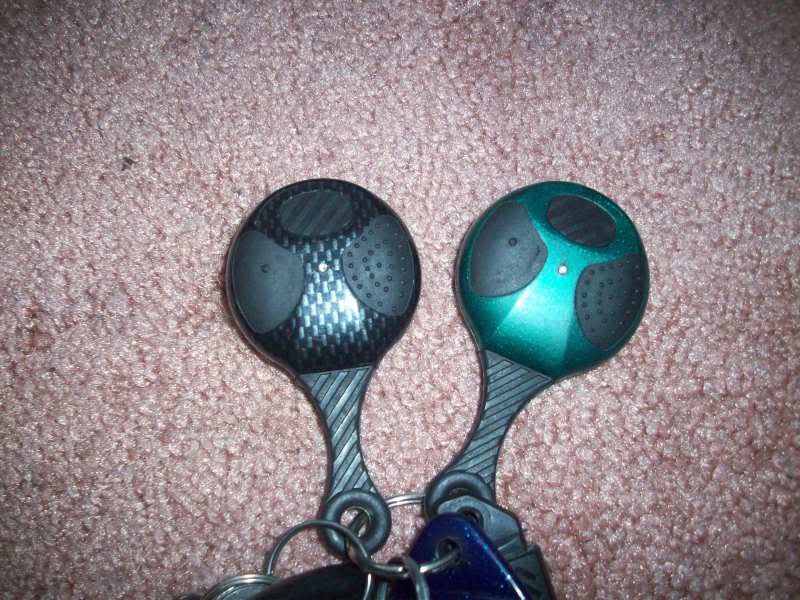
I even managed to get a carbon look remote control for my alarm which matches up with the dash
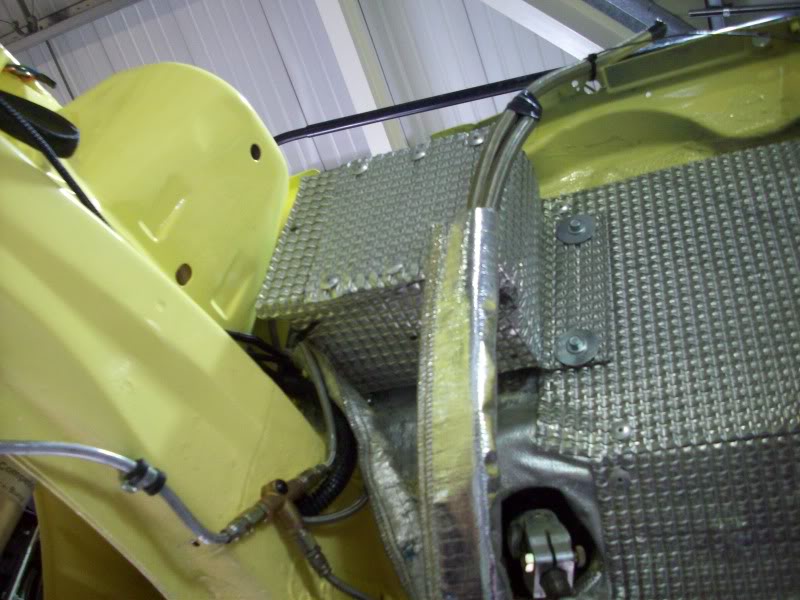
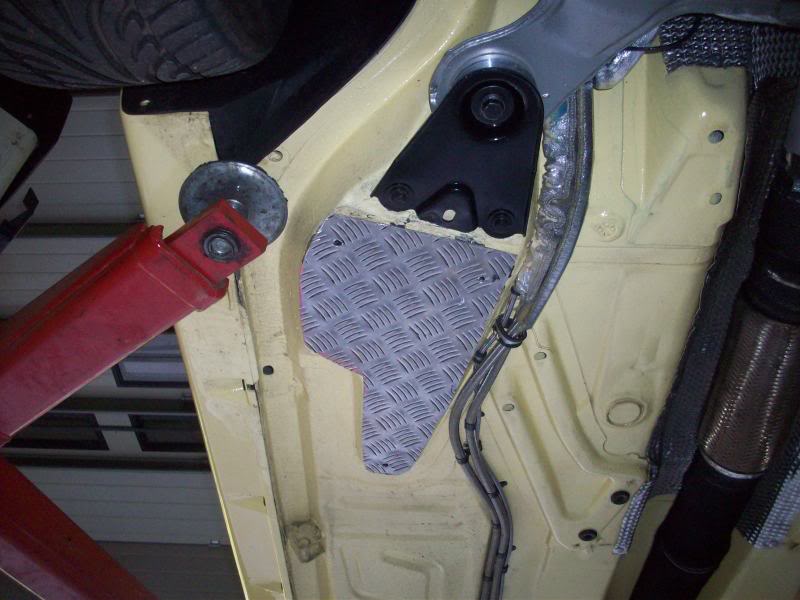
When all of the underside was stripped and repainted I had some extra plating made around the jacking points - this was starting to get marked again so I had bought some checker plate and cut it to shape,,,,,
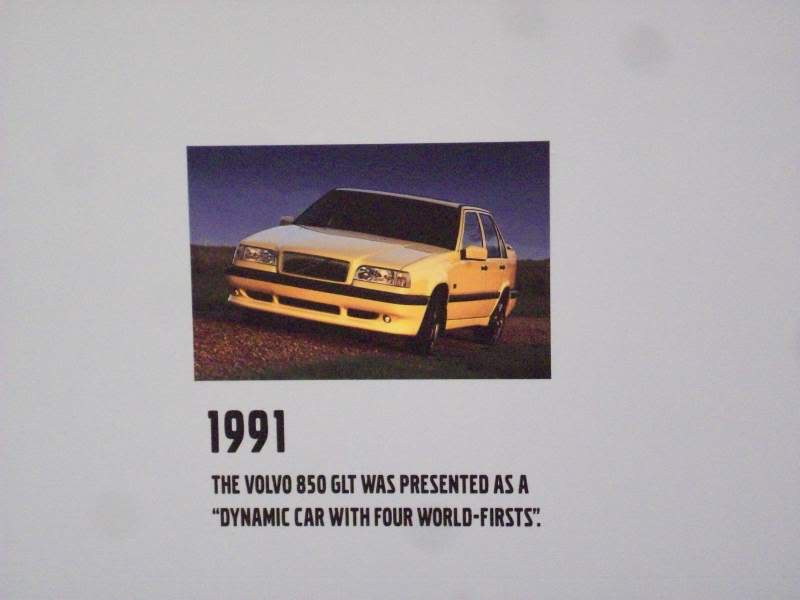
I had a nice surprise when I went down to Beaulieu - in the museum there is a section on Volvo and a picture of a nice young looking Peril J
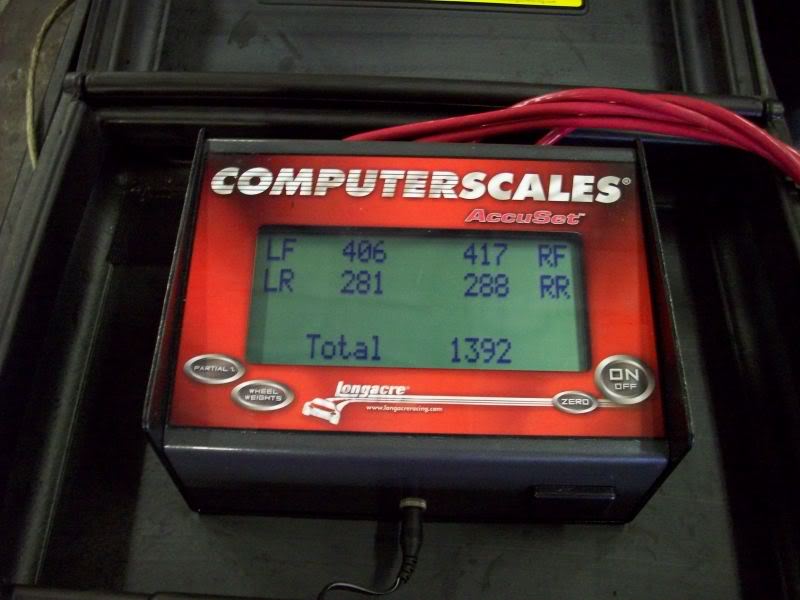
Finally, after many months of wanting to have The Peril weighed I had the chance
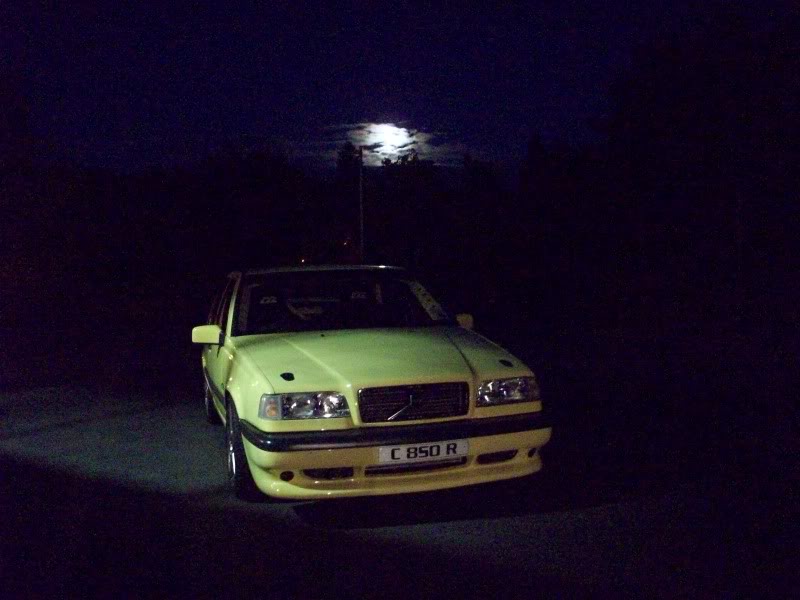
The wife has even started to take a few pics of the Peril
I even managed to get a picture of The Peril on the Top Gear cool wall – it should have been further to the right if you ask me !!!
PREPARING FOR THE THE BRIGHTON SPEED TRIALS
I have had a date in mind to aim for completing the Peril 100% since last September when I made my yearly trip to the Brighton speed trials.
I thought this would be a great event to put the Peril into as I have been going for a few years and have never seen a Volvo enter.
I decided that I would not have time to call it the finished spec as the delays with the custom cams have cost me dear, so would run the car for the Brighton Speed Trails in its current form which is a long way off the final spec.
The Brighton and Hove Motor Club is a great club to be part of as they do several good events each year. I was a member a few years ago when I was doing the Porsche racing. You cannot just enter the speed trials you have to be invited, so many months ago I set about getting my invite. Back in June this year my invite came through and I sent off my details as quickly as I could as I did not want to miss it as the event is always over subscribed.
The pressure was now on to get the car ready as soon as possible so more late nights and weekends helped a lot.
The testing continued - I had decided on a evening run out with a few weeks to go before the Speed trials to a RS Owners club meeting which I used to attend when I had my Escort Cosworth. I have many friends there so thought they might like to see some thing a bit different!!!!!, Me and my great friend Mark (who has been a true friend helping me after hours and weekends for many many months without a complaint!!) set off to Staines Rugby Club for the evening. As we came off the main road down to a round about I slowed in the traffic and went down to first gear. I pulled away and the gearbox made a very strange noise (like I now had straight cut gears!!) I changed to second and the noise was the same !! 3rd 4th and 5th were fine !!
GEAR BOX ISSUES
I had wondered how long the standard gearbox would last even though I have seen many internet guessing games say they are fine for a 5-600 hp car. Maybe I was unlucky, so time would tell. I drove the car home without a problem just a noise in 1st and 2nd still.
I thought the only route I could take was to use a brand new exchange box from Volvo so took a deep breath and ordered one!! The new gearbox was sent to our gearbox company and the gripper diff was swopped over into the new unit, this in its self was not straight forward as the new Volvo gearbox was not without a problem! The gearbox company called me to tell me the roll pins in the lay shaft were not there!!!! If the box had been fitted to the car as it arrived it would not go into gear! This problem was easily sorted but annoying - even brand new parts can be faulty.
The clock was now ticking as the speed trials was only two weeks away so I had very little time to get the engine/box back into the car and run up and tested so the late nights started again.
WHEEL REFURBISHMENT & FRONT SPLITTER
I had always wanted the wheels in anthracite to finish off the look of the car so had this done ready for the speed trials. I also finally added my carbon fibre front splitter which I had been looking forward to adding to the car.
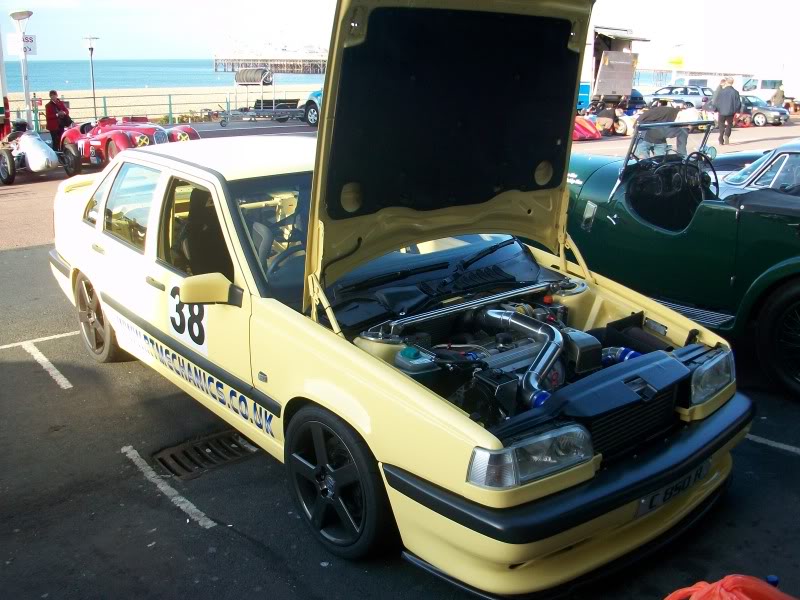
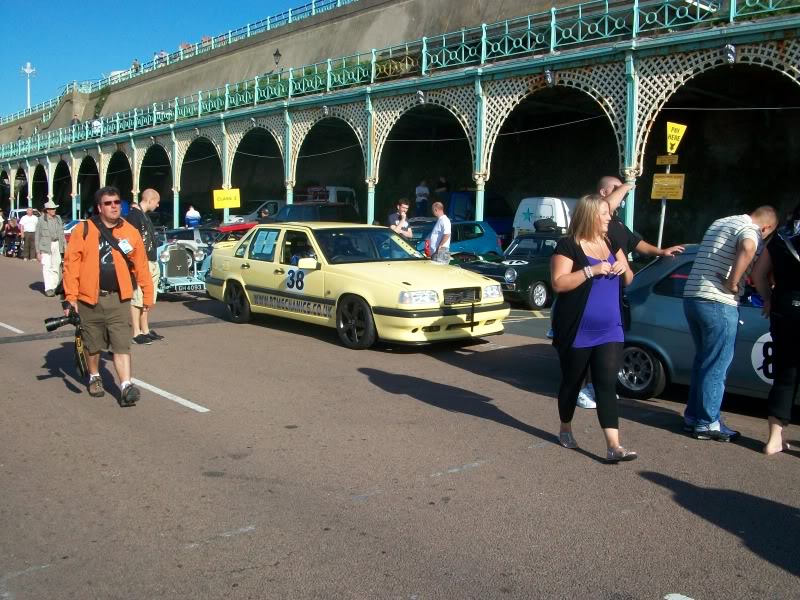
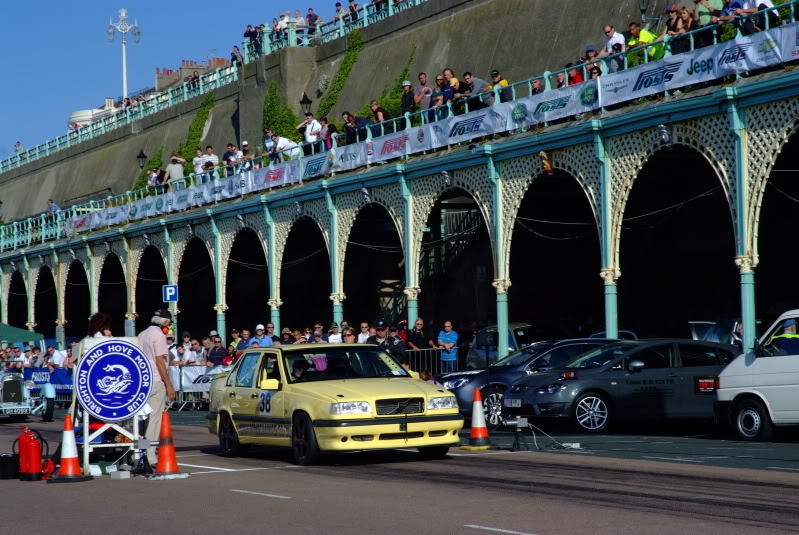
THE BRIGHTON SPEED TRIALS
The days before the speed trials went very quickly and the night before we put the numbers on the car ready for a very early start. I also had a small amount of sign writing done so people would know who the mad guy in the Volvo is. We set off for the speed trials at 6am sharp - thankfully the weather was fine and dry:
We set off for the run down to Brighton and soon arrived and set up camp
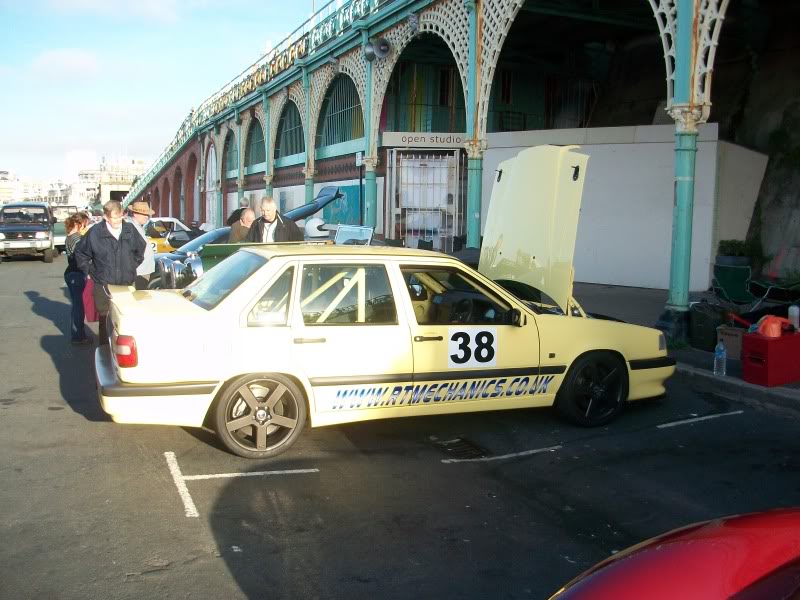
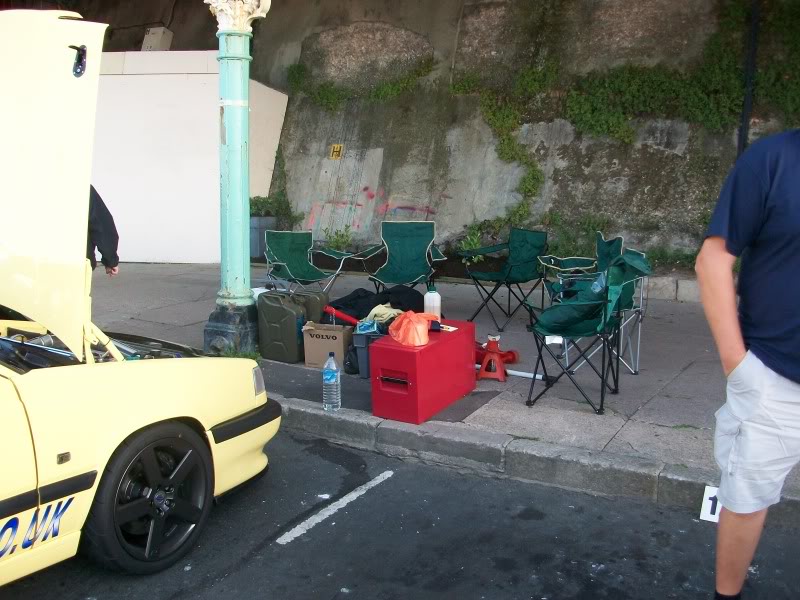
I was very proud to finally make it to the speed trials so with my virgin race suit/gloves and a borrowed crash helmet from a mate I was ready.

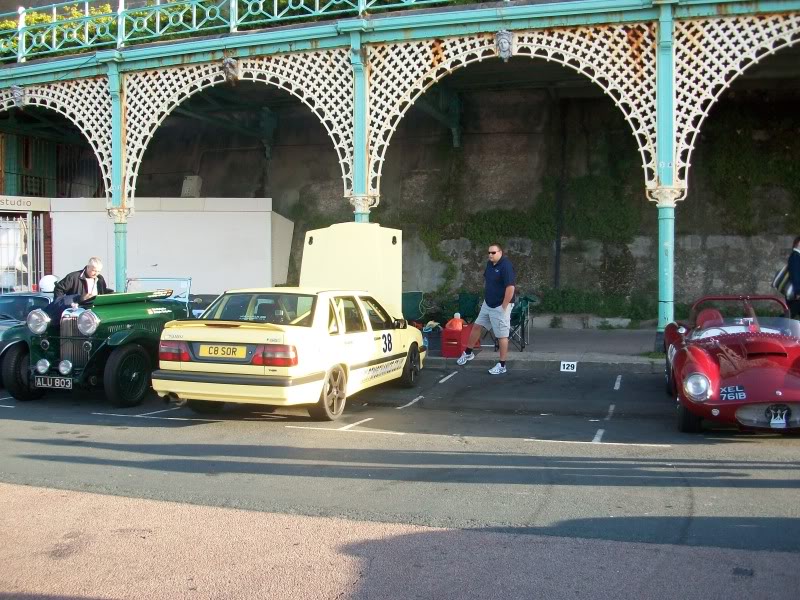
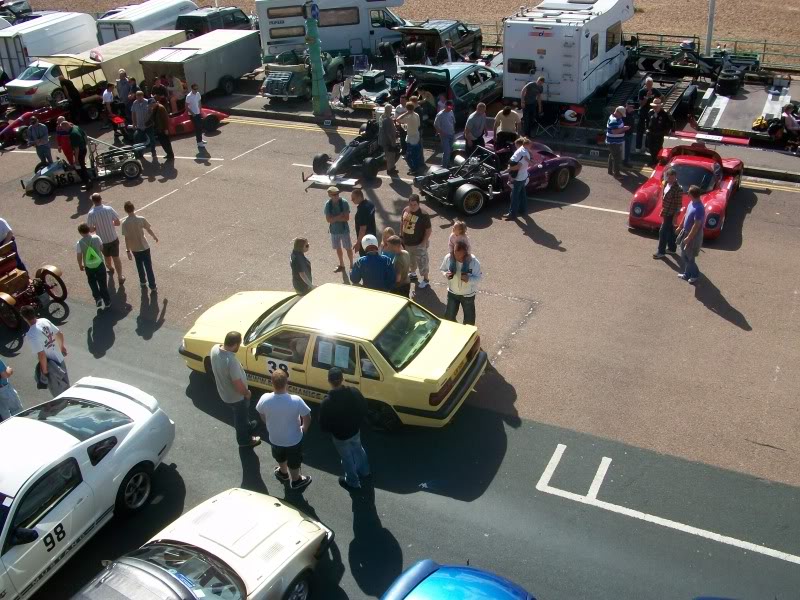
The other cars all started to arrive - such a wide range of cars, just about every year and make you could ask for…. and one very yellow Volvo!
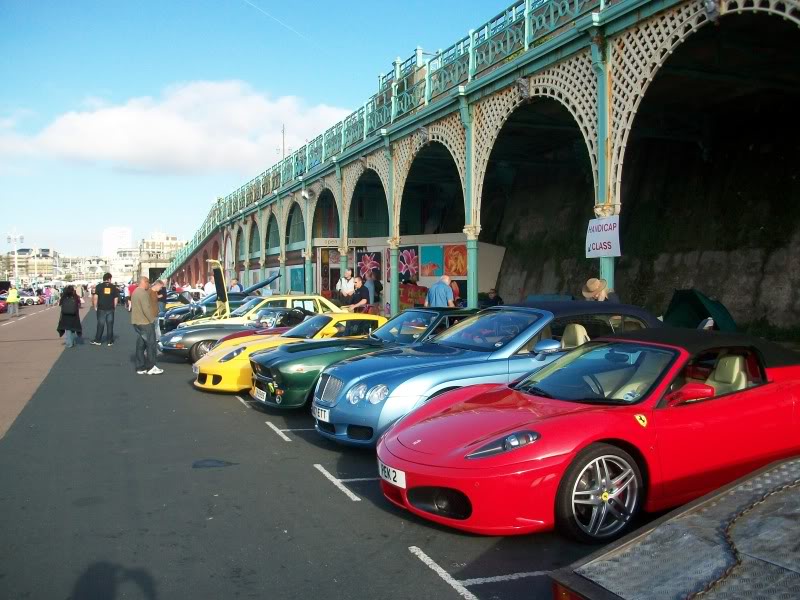
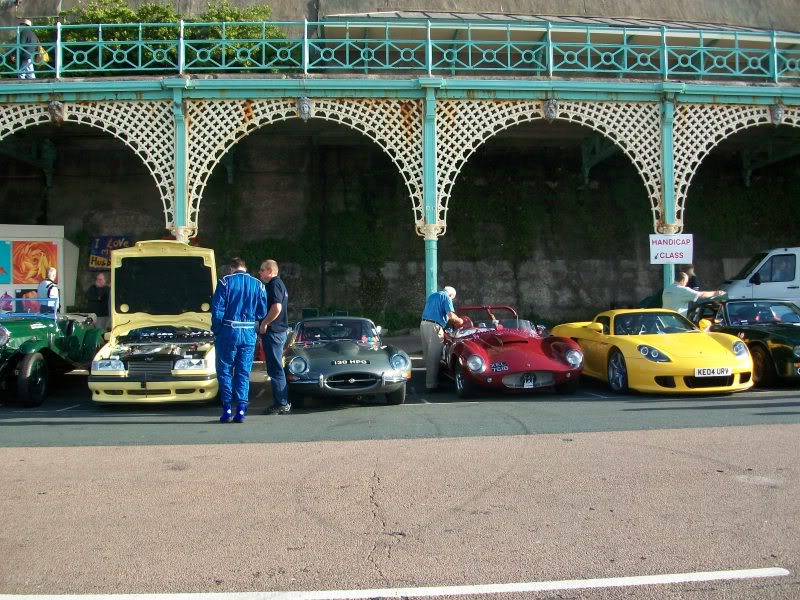
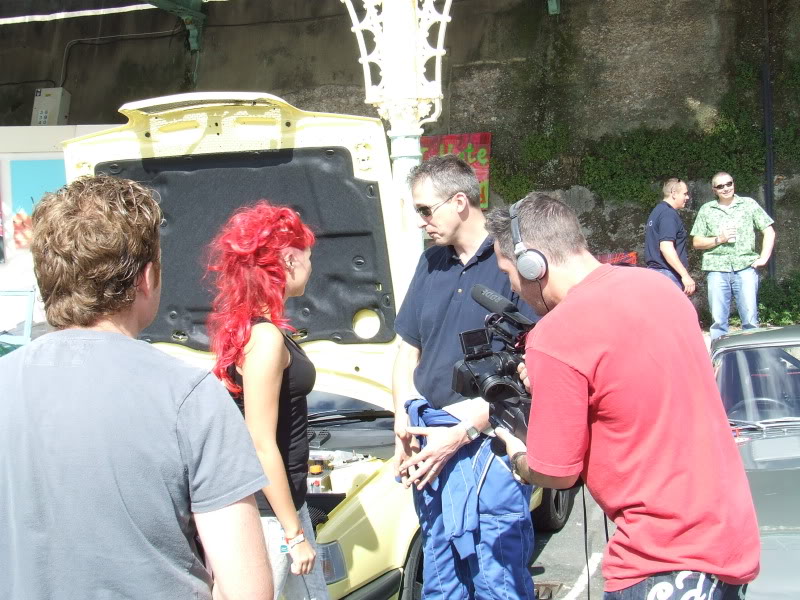
I was very pleased with all the many nice comments made about the car – it drew lots of attention all day long. I even had a very nice lady with very bright hair grab me and ask if I would be happy to do an interview for sky TV!! All very embarrassing and not me at all but I thought why not - the lady was very impressed and said it was her favourite car of the day and she has even booked a ride and another feature of the car :
The time came for my first practice run at about 10 am so I lined up. I thought I would try a run with the launch control on and the anti lag just for the great noise. Due to all the problems with the gearbox and thoughts of the clutch giving out in the days before the event I had no chance to practice at all so I lined up and off I went. The start was terrible and did a 15.8 !! Terrible but it was rather fun though and I put it down to experience, or lack of it in a racing situation under a lot of pressure!
I had not been told how many runs I would be getting but after chatting with my neighbours I found out I would only get one more run so thought I would try with no launch control (which I hadn’t had time to practice with) and just use the car as it was.. So off I went and lined up for the second time. This time the start went a lot better and I was happy with my 13.83 @ 114 mph - still a long way off the best time in the car from looking at other Volvos times but will never be able to beat a good friend in Sweden who runs a 10.64 @ 144 mph !!!!!!!!!!!!!!! Good luck to him with his next goal which is under 10 sec next year!
The day had been fantastic - I was hoping to have some more runs but for the class I was in, that was may limit. I had a great day and met some very nice fellow car lovers. I also had many customers come and support us which was very kind and lots of people came over and said what a nice neat job the car was, especially how under the bonnet looked which meant a lot to me after all the hard work.
I have found lots of pics people took on the day :
So far is my favourite :
At the end of the long day my brother Andy drove the Peril all the way back to RT head quarters - he rather enjoyed his first decent run in the car…!
MORE GEARBOX ISSUES !!!
I spent the next week doing my commute to and from work in the Peril which was great fun to help cheer up the other fellow commuters. Unfortunatley on the way into work the following week disaster struck !!! Coming onto the roundabout on the A3 I slowed for second gear and the gearbox once again made the horrible noise. I could not believe that the brand new box had only lasted 200 miles !!!!!!!
I recorded a small video of the noise if you’re feeling brave :
I luckily had a second hand gearbox which I had bought about three years ago and have popped that into the car for now while we do a full strip of the other box to finally find a cure for the failures …..
This story is up to date so far I will have more to add and hopefully some performance times soon I hope you have enjoyed reading this half as much as i have enjoyed the challenge the project has set me and my great team of supporters and helpers....
I have had lots of help and support from the following people:
All at RT HQ have helped in a big way with the project :
My brother Andrew/Lucy/Derek/Mark S/
The 'Q' my great mate for all the help and long hours
Mark Shead of MA Developments
Rod T wiring etc
Andy (AndysR) and brother James
AP racing Brakes
Spec R alloy
Vehicle wiring products
Earls
Data spares (Dash etc)
Brighton and Hove motor club
Merlin Motorsport
Zircotec
Silicon hoses.com
Turbo Dynamics
And of course my long suffering wife Emma for the help and support with the ups and downs a project like this brings.
If your truly volvo mad enough and want to build such a silly car give us a call 01428 648648 www.rtmechanics.co.uk
Russ
I managed to borrow an unused Dunlop D01J from a great friend…..
I wanted to see if I could get away with running 235/40/18 but with the ride height I wanted, it was not going to be possible. The last thing I wanted to do was risk damaging the new wings so I needed get 225/40/18. I decided to use the excellent Dunlop D03J’s - I did not want to risk buying cheaper cut slicks like some you see.
THE PERIL IN MOTION AGAIN!
I was soon at the stage where I was ready to drive the Peril around our car park, just to get the wheels moving again under her own steam. This was a great moment for me but I still had lots to do ie, brake lights, reverse lights etc etc etc but it was great to drive again.
HEADLIGHTS & FIRE EXTINGUISHER
After a few comments from customers that had had a chance to see the Peril several times during the re build (they thought the headlights I had bought did not suit the car) I decided to buy new standard lights from Mr Volvo:
I also bought a fire extinguisher to have to hand should the worst ever happen
THE FIRST DRIVE PART 2
It was a very exciting morning one Saturday when it was finally time to drive the car properly again after 9 long months. It was time to start to enjoy the car again and run the engine in for a few hundred miles at half a bar of boost. I wanted to do this as soon as possible so every night that week me and a lucky passenger went out for a good couple of hours each night with a varied course - we even popped into the Goodwood race track as its only down the road from work.
We continued to do more late night runs with no problems at all which was a great relief
I wondered how many trips I would be making to my favourite shell garage on the A3 at Liphook !!!
RE-MAPPING THE ECU
I travelled over to see Mark Shead my Autronic mapper and teacher who is slowly helping me learn how to map my own car. We started off doing a few runs to start to give the Peril some decent amounts of boost now that the engine was run in after the late night runs with half a bar of boost so out we went :
MAD’s unit was full of all very high hp cars as usual, most put the Peril’s hp in the shade with their power outputs including one very well known Sapphire Cosworth which runs at 2.9 BAR !!! and over 700 hp J
We started off with just the general driveability and throttle response of the car - a few people have asked how much of an animal a fwd Volvo with 535 hp is to drive - well I can honestly say that you can quite happily drive it as a normal car without any dramas in heavy traffic - the car is happy to trundle along with the flow of traffic - even the paddle clutch is not a pain at all - not quite the “un driveable monster” a few ill informed people have said. If you use a good standalone ECU and THE BEST mapper you will have no such problems - of course you need to adapt your driving style but surely that’s common sense with the larger turbo’s. There is a large lever in the middle of the car called a gear stick - you can use it to great effect to help you J
We set the boost up to 2.3 bar as that’s where we got to last time. I was happy to go a bit further this time now that the liner problem was hopefully gone for good so we went up to 2.4 then 2.5 bar. I was happy to stay at this level as the performance at 2.5 bar is quite shocking. The Peril is like not other Volvos I have ever been in or probably will ever be in - I cannot wait to do a few performance tests on the car in the future.
We then set up the water injection and for now set this to cut in at a preset of inlet temp, so the SM4 handles all this side of the WI. When set up the SM4 can even control each WI jet individually - all very clever
LAUNCH CONTROL
While we were out we set up the launch control which works very well. All you do is come to a stop, turn on the switch then hold the throttle flat out - the SM4 takes control and holds the revs at 4.5 k - all you do then is lift the clutch….. easy…
ANTI LAG
Then it was the turn of the anti lag which is just for a bit of fun - no performance gain at all just some fantastic noises – There is nothing quite like a 5 cylinder Volvo popping and banging away J
Once we set up the traction control with a new chip for the SM4, I had to make a few practice starts for a future event…..
MORE FINISHING TOUCHES
I thought it was about time I put a heat shield around the silicon hose that comes from the compressor housing on the turbo as it runs rather close to the exhaust manifold!!!:
I even managed to get a carbon look remote control for my alarm which matches up with the dash
When all of the underside was stripped and repainted I had some extra plating made around the jacking points - this was starting to get marked again so I had bought some checker plate and cut it to shape,,,,,
I had a nice surprise when I went down to Beaulieu - in the museum there is a section on Volvo and a picture of a nice young looking Peril J
Finally, after many months of wanting to have The Peril weighed I had the chance
The wife has even started to take a few pics of the Peril
I even managed to get a picture of The Peril on the Top Gear cool wall – it should have been further to the right if you ask me !!!
PREPARING FOR THE THE BRIGHTON SPEED TRIALS
I have had a date in mind to aim for completing the Peril 100% since last September when I made my yearly trip to the Brighton speed trials.
I thought this would be a great event to put the Peril into as I have been going for a few years and have never seen a Volvo enter.
I decided that I would not have time to call it the finished spec as the delays with the custom cams have cost me dear, so would run the car for the Brighton Speed Trails in its current form which is a long way off the final spec.
The Brighton and Hove Motor Club is a great club to be part of as they do several good events each year. I was a member a few years ago when I was doing the Porsche racing. You cannot just enter the speed trials you have to be invited, so many months ago I set about getting my invite. Back in June this year my invite came through and I sent off my details as quickly as I could as I did not want to miss it as the event is always over subscribed.
The pressure was now on to get the car ready as soon as possible so more late nights and weekends helped a lot.
The testing continued - I had decided on a evening run out with a few weeks to go before the Speed trials to a RS Owners club meeting which I used to attend when I had my Escort Cosworth. I have many friends there so thought they might like to see some thing a bit different!!!!!, Me and my great friend Mark (who has been a true friend helping me after hours and weekends for many many months without a complaint!!) set off to Staines Rugby Club for the evening. As we came off the main road down to a round about I slowed in the traffic and went down to first gear. I pulled away and the gearbox made a very strange noise (like I now had straight cut gears!!) I changed to second and the noise was the same !! 3rd 4th and 5th were fine !!
GEAR BOX ISSUES
I had wondered how long the standard gearbox would last even though I have seen many internet guessing games say they are fine for a 5-600 hp car. Maybe I was unlucky, so time would tell. I drove the car home without a problem just a noise in 1st and 2nd still.
I thought the only route I could take was to use a brand new exchange box from Volvo so took a deep breath and ordered one!! The new gearbox was sent to our gearbox company and the gripper diff was swopped over into the new unit, this in its self was not straight forward as the new Volvo gearbox was not without a problem! The gearbox company called me to tell me the roll pins in the lay shaft were not there!!!! If the box had been fitted to the car as it arrived it would not go into gear! This problem was easily sorted but annoying - even brand new parts can be faulty.
The clock was now ticking as the speed trials was only two weeks away so I had very little time to get the engine/box back into the car and run up and tested so the late nights started again.
WHEEL REFURBISHMENT & FRONT SPLITTER
I had always wanted the wheels in anthracite to finish off the look of the car so had this done ready for the speed trials. I also finally added my carbon fibre front splitter which I had been looking forward to adding to the car.
THE BRIGHTON SPEED TRIALS
The days before the speed trials went very quickly and the night before we put the numbers on the car ready for a very early start. I also had a small amount of sign writing done so people would know who the mad guy in the Volvo is. We set off for the speed trials at 6am sharp - thankfully the weather was fine and dry:
We set off for the run down to Brighton and soon arrived and set up camp
I was very proud to finally make it to the speed trials so with my virgin race suit/gloves and a borrowed crash helmet from a mate I was ready.
The other cars all started to arrive - such a wide range of cars, just about every year and make you could ask for…. and one very yellow Volvo!
I was very pleased with all the many nice comments made about the car – it drew lots of attention all day long. I even had a very nice lady with very bright hair grab me and ask if I would be happy to do an interview for sky TV!! All very embarrassing and not me at all but I thought why not - the lady was very impressed and said it was her favourite car of the day and she has even booked a ride and another feature of the car :
The time came for my first practice run at about 10 am so I lined up. I thought I would try a run with the launch control on and the anti lag just for the great noise. Due to all the problems with the gearbox and thoughts of the clutch giving out in the days before the event I had no chance to practice at all so I lined up and off I went. The start was terrible and did a 15.8 !! Terrible but it was rather fun though and I put it down to experience, or lack of it in a racing situation under a lot of pressure!
I had not been told how many runs I would be getting but after chatting with my neighbours I found out I would only get one more run so thought I would try with no launch control (which I hadn’t had time to practice with) and just use the car as it was.. So off I went and lined up for the second time. This time the start went a lot better and I was happy with my 13.83 @ 114 mph - still a long way off the best time in the car from looking at other Volvos times but will never be able to beat a good friend in Sweden who runs a 10.64 @ 144 mph !!!!!!!!!!!!!!! Good luck to him with his next goal which is under 10 sec next year!
The day had been fantastic - I was hoping to have some more runs but for the class I was in, that was may limit. I had a great day and met some very nice fellow car lovers. I also had many customers come and support us which was very kind and lots of people came over and said what a nice neat job the car was, especially how under the bonnet looked which meant a lot to me after all the hard work.
I have found lots of pics people took on the day :
So far is my favourite :
At the end of the long day my brother Andy drove the Peril all the way back to RT head quarters - he rather enjoyed his first decent run in the car…!
MORE GEARBOX ISSUES !!!
I spent the next week doing my commute to and from work in the Peril which was great fun to help cheer up the other fellow commuters. Unfortunatley on the way into work the following week disaster struck !!! Coming onto the roundabout on the A3 I slowed for second gear and the gearbox once again made the horrible noise. I could not believe that the brand new box had only lasted 200 miles !!!!!!!
I recorded a small video of the noise if you’re feeling brave :
I luckily had a second hand gearbox which I had bought about three years ago and have popped that into the car for now while we do a full strip of the other box to finally find a cure for the failures …..
This story is up to date so far I will have more to add and hopefully some performance times soon I hope you have enjoyed reading this half as much as i have enjoyed the challenge the project has set me and my great team of supporters and helpers....
I have had lots of help and support from the following people:
All at RT HQ have helped in a big way with the project :
My brother Andrew/Lucy/Derek/Mark S/
The 'Q' my great mate for all the help and long hours
Mark Shead of MA Developments
Rod T wiring etc
Andy (AndysR) and brother James
AP racing Brakes
Spec R alloy
Vehicle wiring products
Earls
Data spares (Dash etc)
Brighton and Hove motor club
Merlin Motorsport
Zircotec
Silicon hoses.com
Turbo Dynamics
And of course my long suffering wife Emma for the help and support with the ups and downs a project like this brings.
If your truly volvo mad enough and want to build such a silly car give us a call 01428 648648 www.rtmechanics.co.uk
Russ
Last edited by Volvoman; Oct 30, 2009 at 07:39 AM.

Trending Topics


Scooby Regular
Joined: Aug 2000
Posts: 80,907
Likes: 0
From: God's promised land
That's dedication if ever i've seen it!!
There's a canary yellow 850 just a few roads away from me. I've never "understood" the colour, but you can't help looking!! Hope all that work was worth it!
There's a canary yellow 850 just a few roads away from me. I've never "understood" the colour, but you can't help looking!! Hope all that work was worth it!


Thread Starter
Scooby Newbie
Joined: Oct 2009
Posts: 13
Likes: 0
Thanks Volvos can be fun


Thread Starter
Scooby Newbie
Joined: Oct 2009
Posts: 13
Likes: 0

Thread Starter
Scooby Newbie
Joined: Oct 2009
Posts: 13
Likes: 0


Thread Starter
Scooby Newbie
Joined: Oct 2009
Posts: 13
Likes: 0

Thanks
Your dead right it would go straight in
Thread Starter
Scooby Newbie
Joined: Oct 2009
Posts: 13
Likes: 0
Hi all just thought i would add one of my videos from the speed trials from last October i have not been able to convert them until now so thought i would finally add some noise here :
You will here the anti lag start @ 1 min 42 once i cross the finish line (centre switch on the dash) no aid at all to me other then the noise just to please the watching crowd hope you enjoy them and it gives you some idea how the car sounds this is the second run of the two I had on the day a 13.83 @114 mph not the fastest time in the world but I was happy I never went to win the event just take part I will be doing more � mile runs soon as the gearbox parts are complete .
Enjoy :
Russ

Scooby Regular
Joined: Oct 2009
Posts: 194
Likes: 0
Hi russ, not sure if you remember me from a while back. Its tempo who used to own a t5r. Was emailing you a fair bit. Decided to go for a p1 in the end.
Have to say your car is amazing!!! Still think the 5cylinder sound is the only competition the scooby has. Still regret not keeping mine.
Tempo
Have to say your car is amazing!!! Still think the 5cylinder sound is the only competition the scooby has. Still regret not keeping mine.
Tempo