When you click on links to various merchants on this site and make a purchase, this can result in this site earning a commission. Affiliate programs and affiliations include, but are not limited to, the eBay Partner Network.
Here's a little thread on a certain member's car i am lucky enough to rip to pieces and cut to shred's. Never thought id actually be working on a scoob for a living. Work as Estimator/Interior's and detailing at Kintore auto-body nowadays.
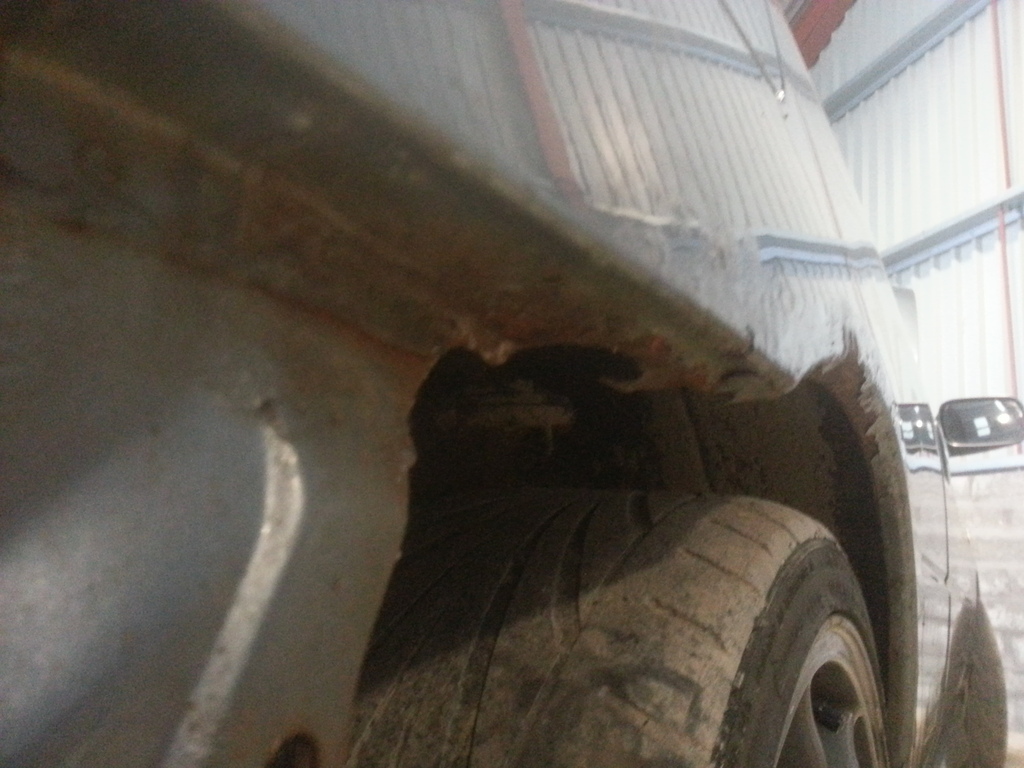
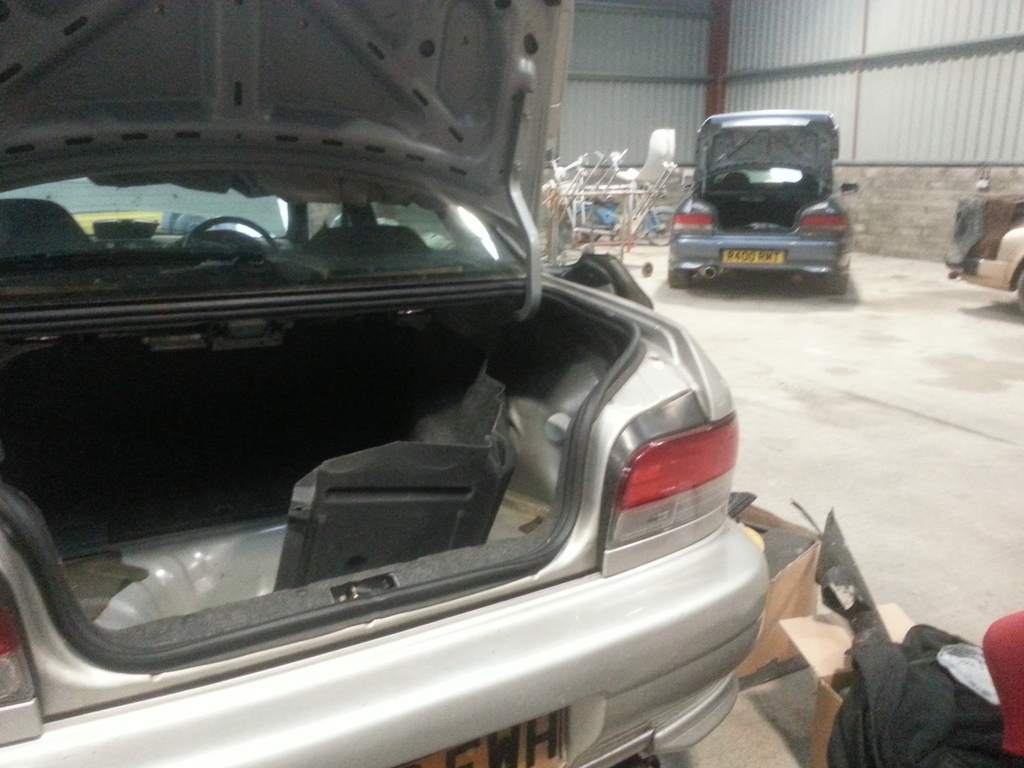
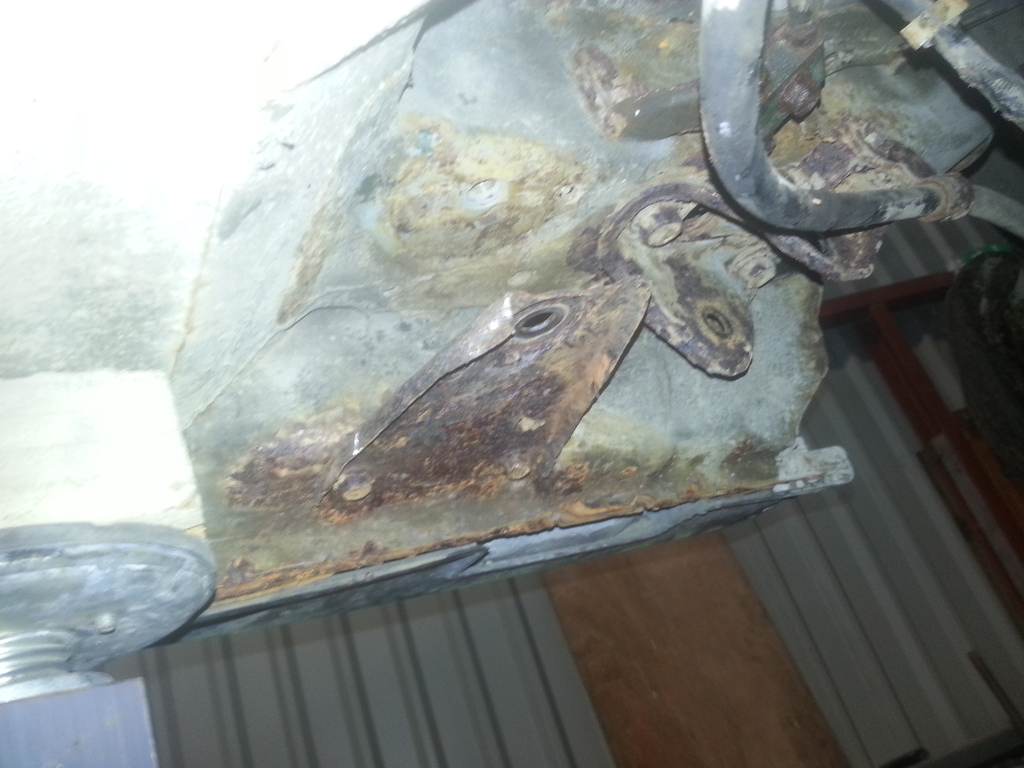
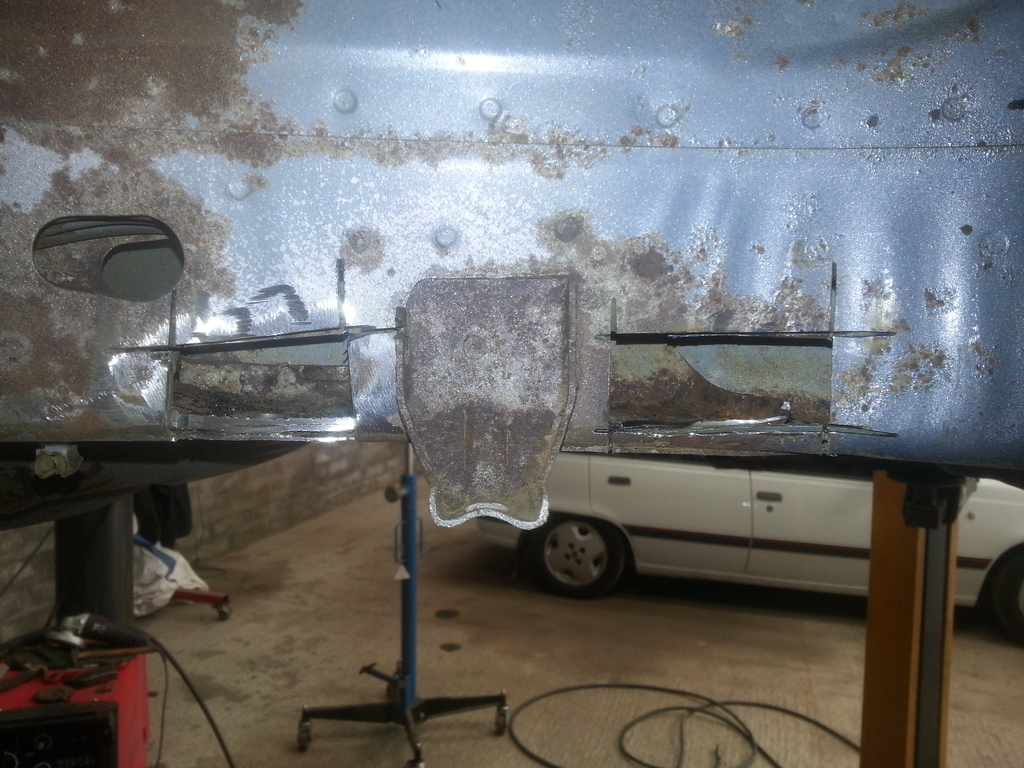
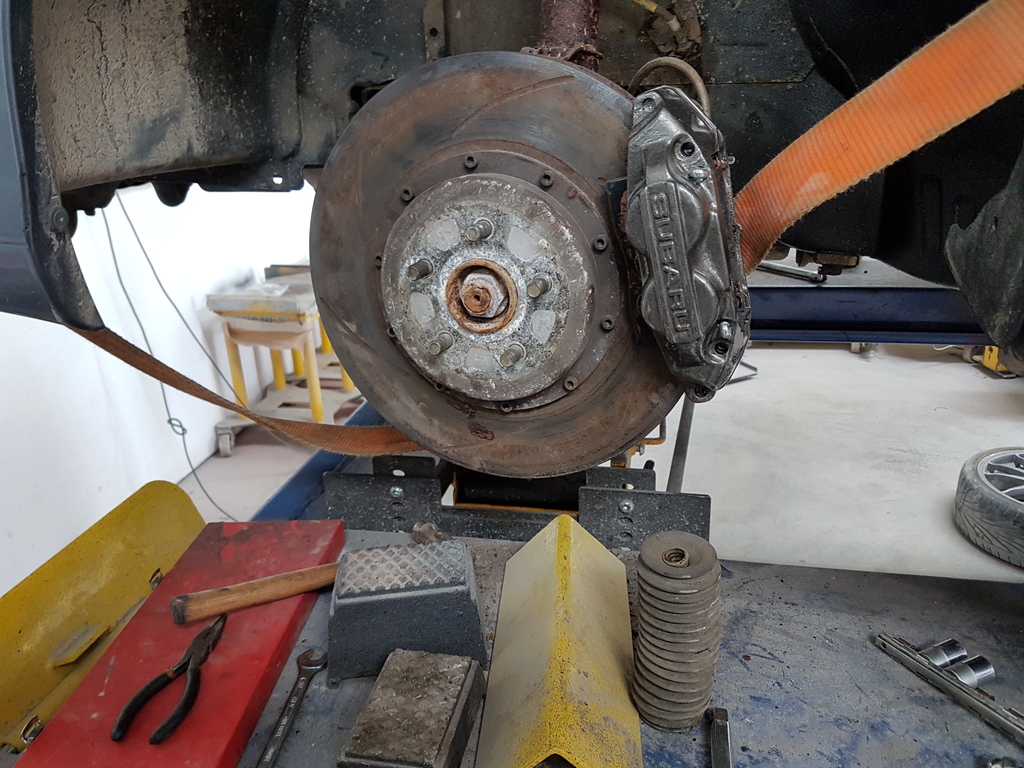
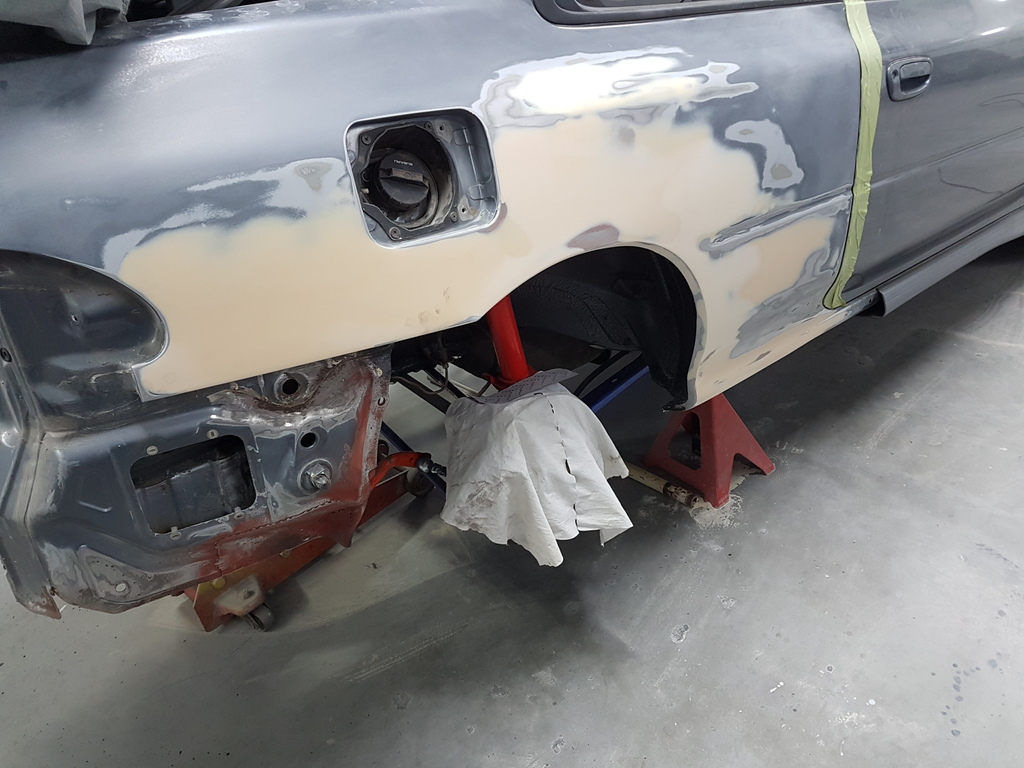
This one is in for Rear Arches cut out welded repaired, old sub-frame and suspension removed, fuel tank off. Strip everything from gearbox back. Shot-blast everything. Weld and put new metal in where needed. OH and a rather interesting
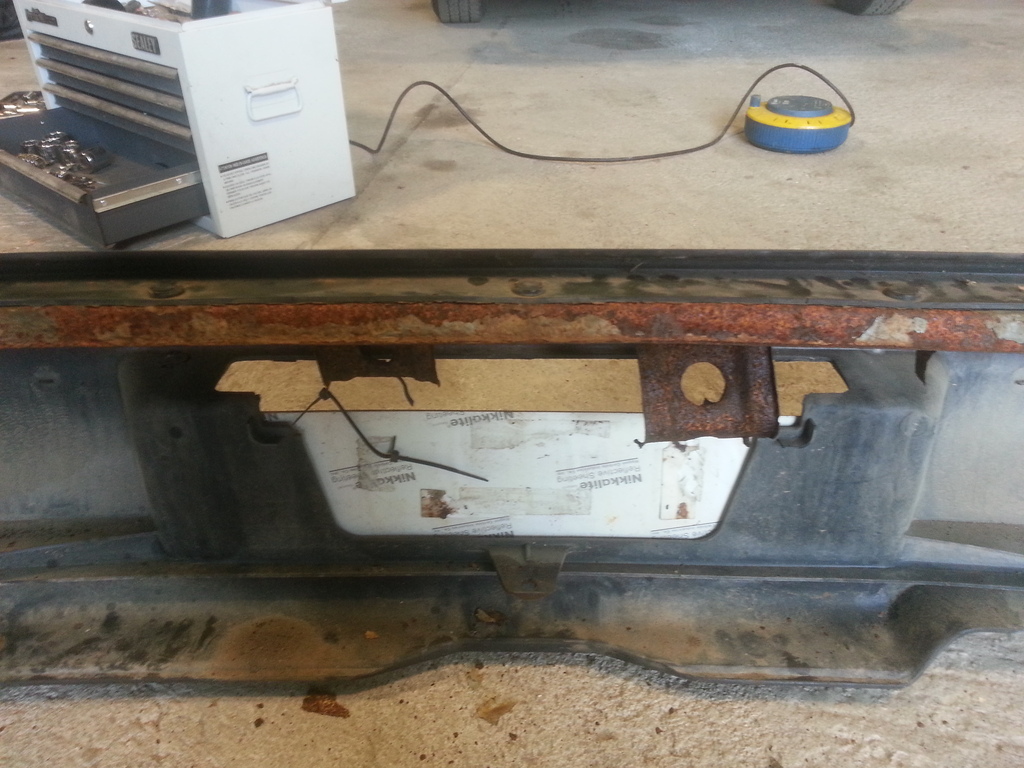
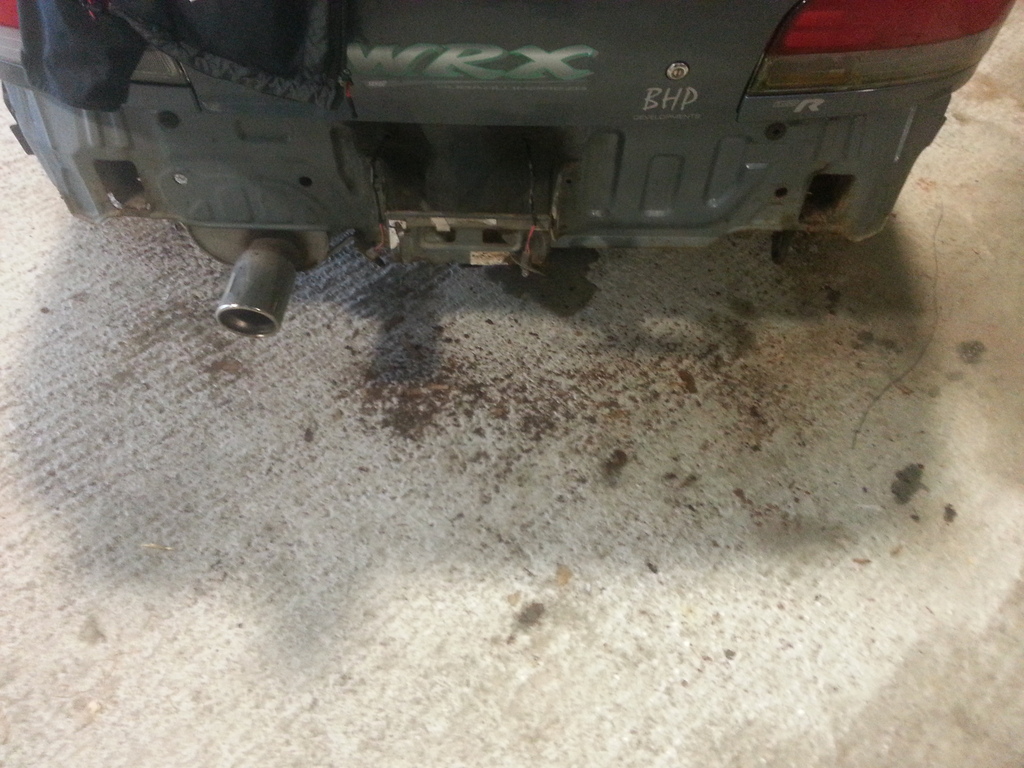
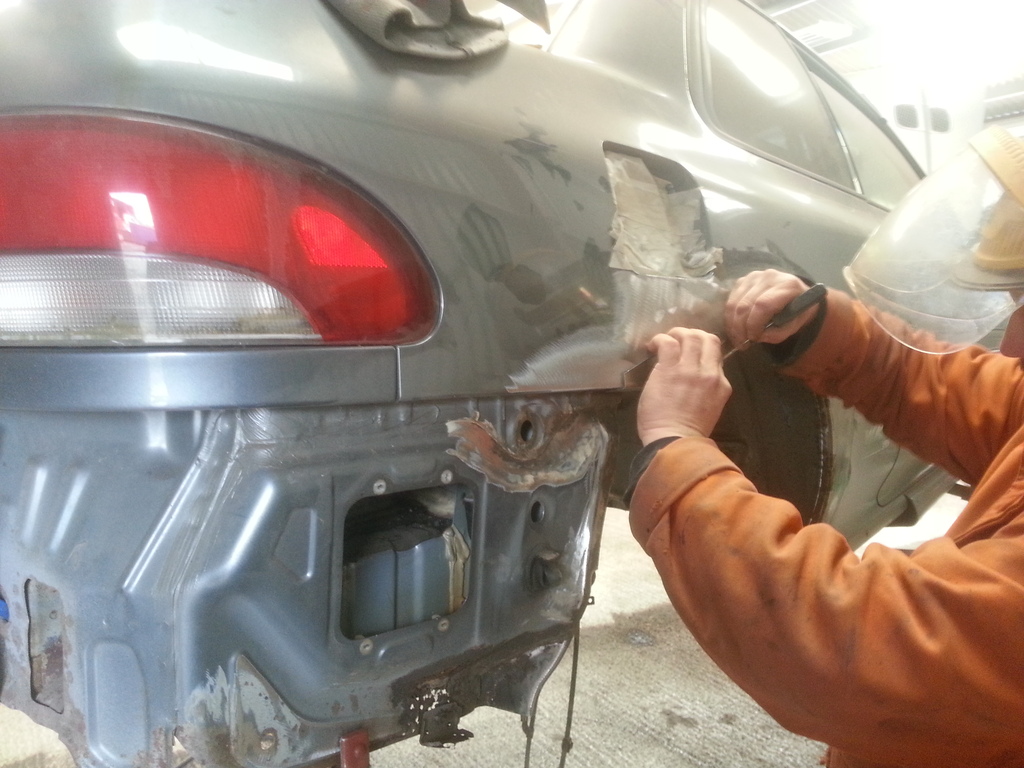
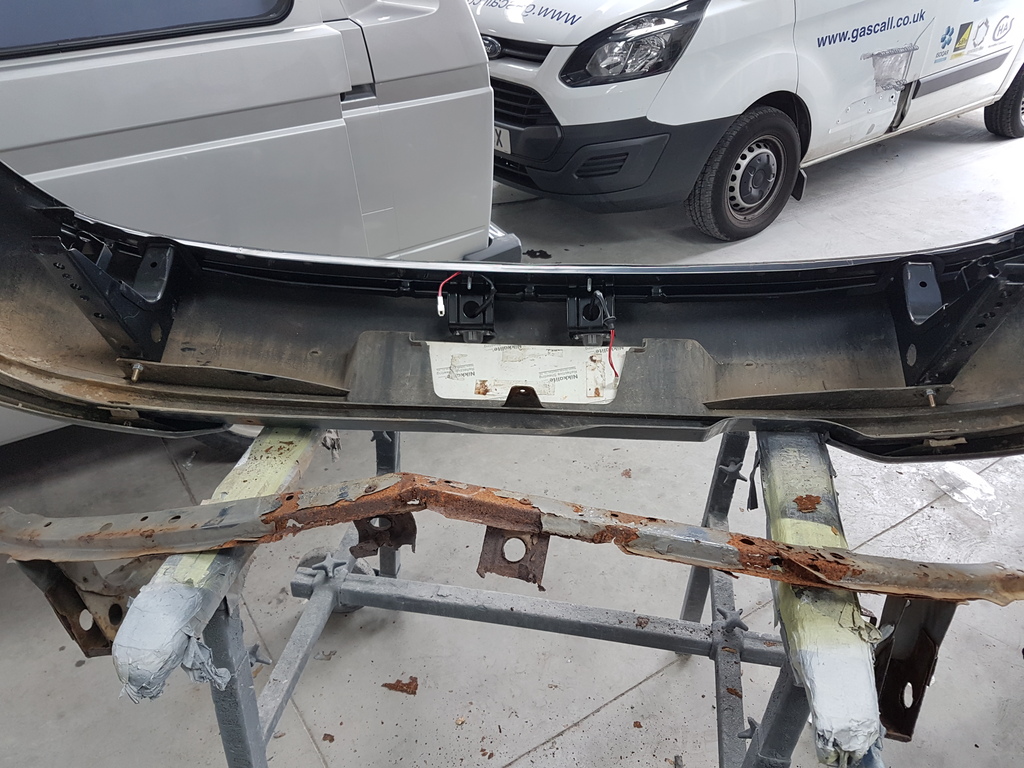
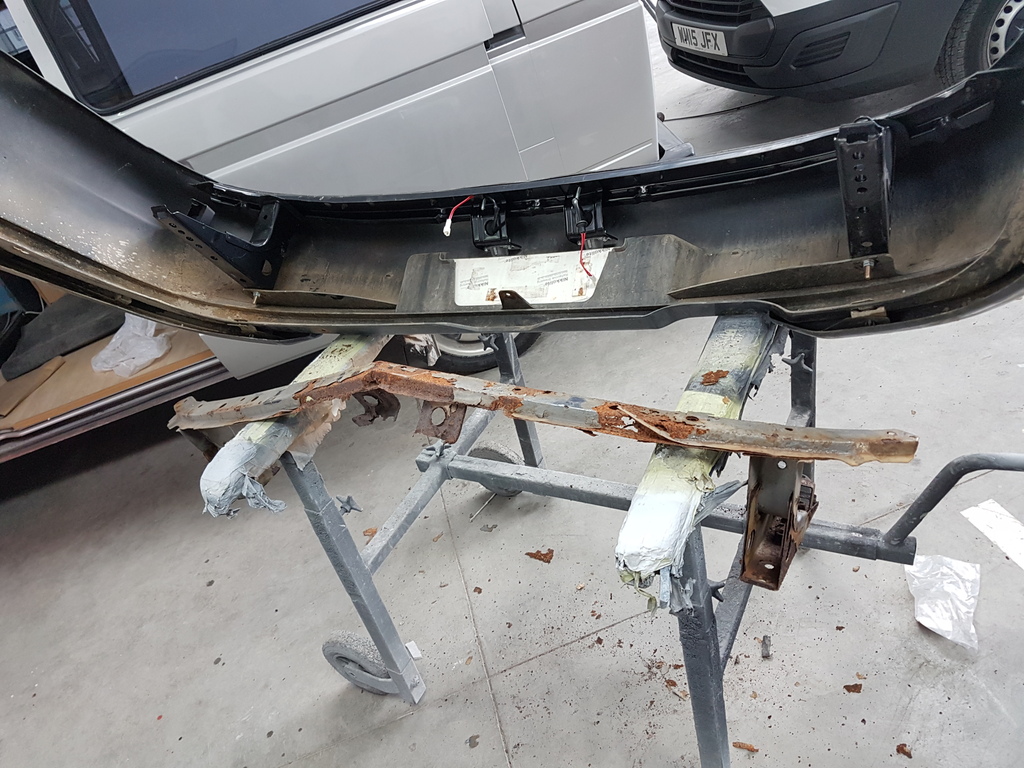
First of all was to remove the rear bumper to see the extent of the damage to the arches and rear bumper bar.
2* (Plastic) Screws at top of bumper were it joins the arch, 1 each side
4* screws joining the bumper to the lower arch, 2 each side. These are quite often knackered or loose.
2* plastic trim clips on underside of bumper, 1 each side
6* bolt's securing bumper bar to chassis, these can be accessed underneath, these also secure the rear towing eye ( Drivers side ) and rear exhaust mount ( passenger side ) these bolt's are usually rusty and stiff. Apply a bit of heat before hand to help loosen them off.
Remove rear bumper plate light's. this car's were cable tied, but usually its just a couple of screws
1* 10mm bolt underneath at the center of the bumper. going up towards the rear bumper bar.
Also if rear fog light add on is there, remove before hand. As there tensile strength isn't the best :shrug:
Rear bumper should now slide out complete with bumper bar.take it steady and make sure the front edges of the bumper clear the arch's when removing.
Should end up something like this:
As seen rear bumper bar has seen better day's, on the lookout for a replacement.
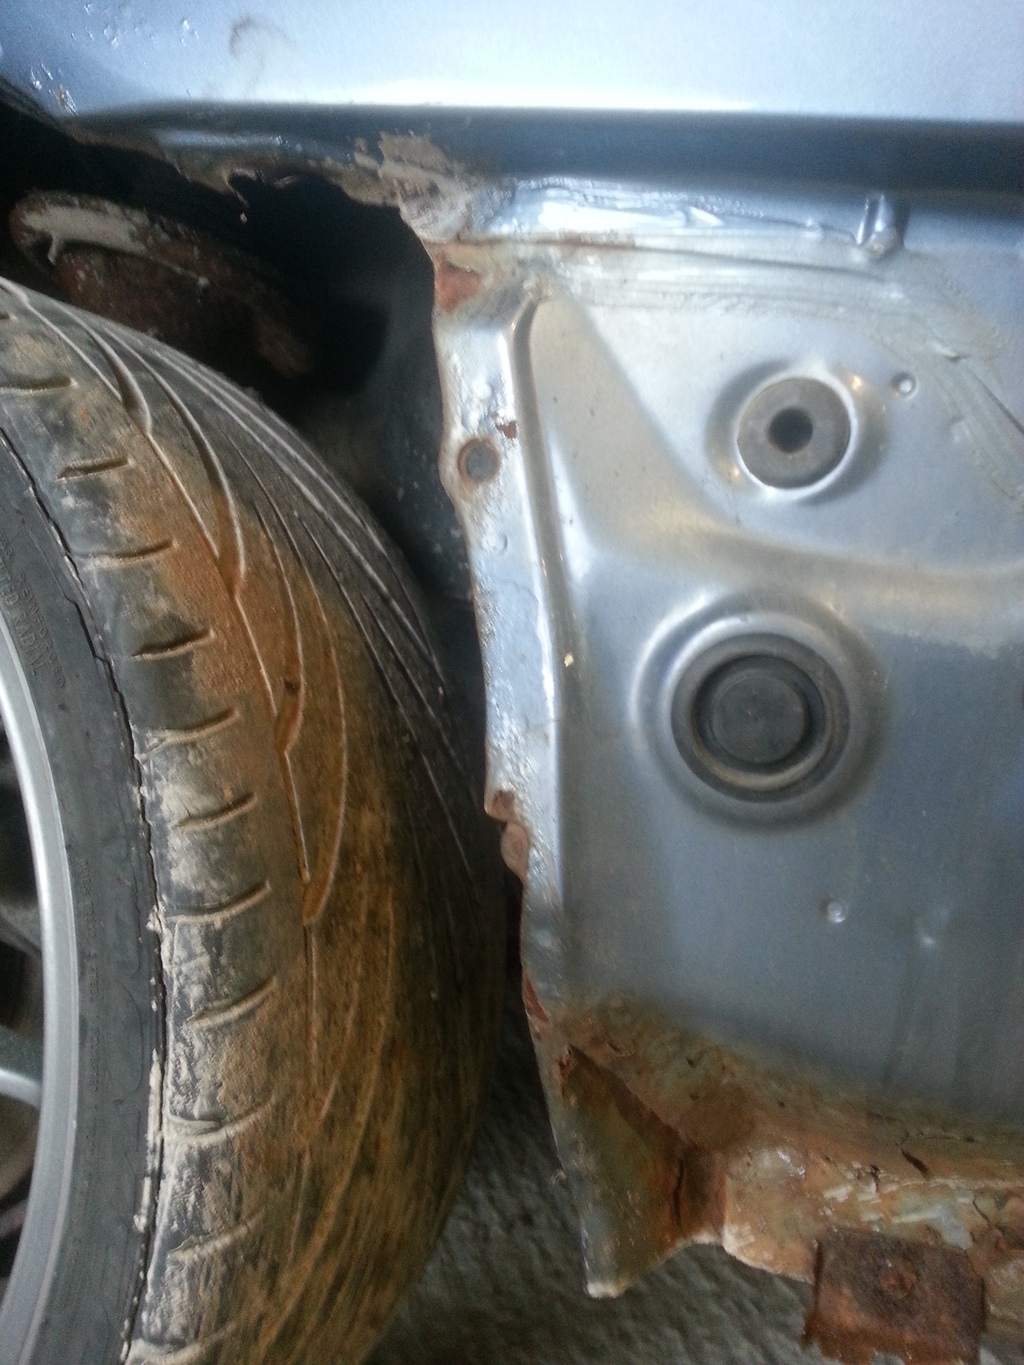
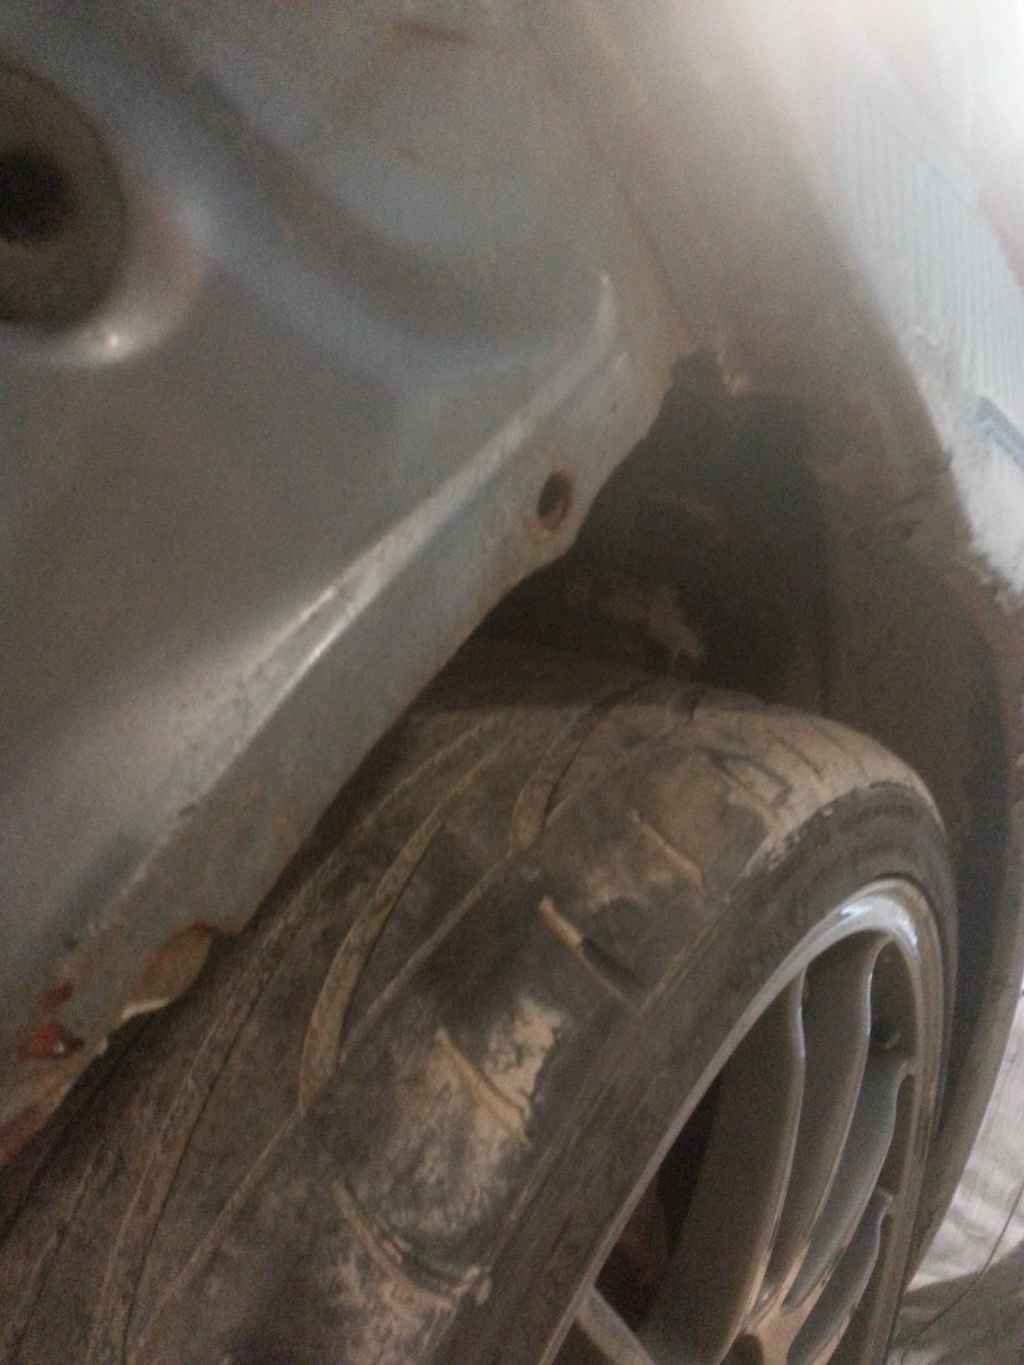
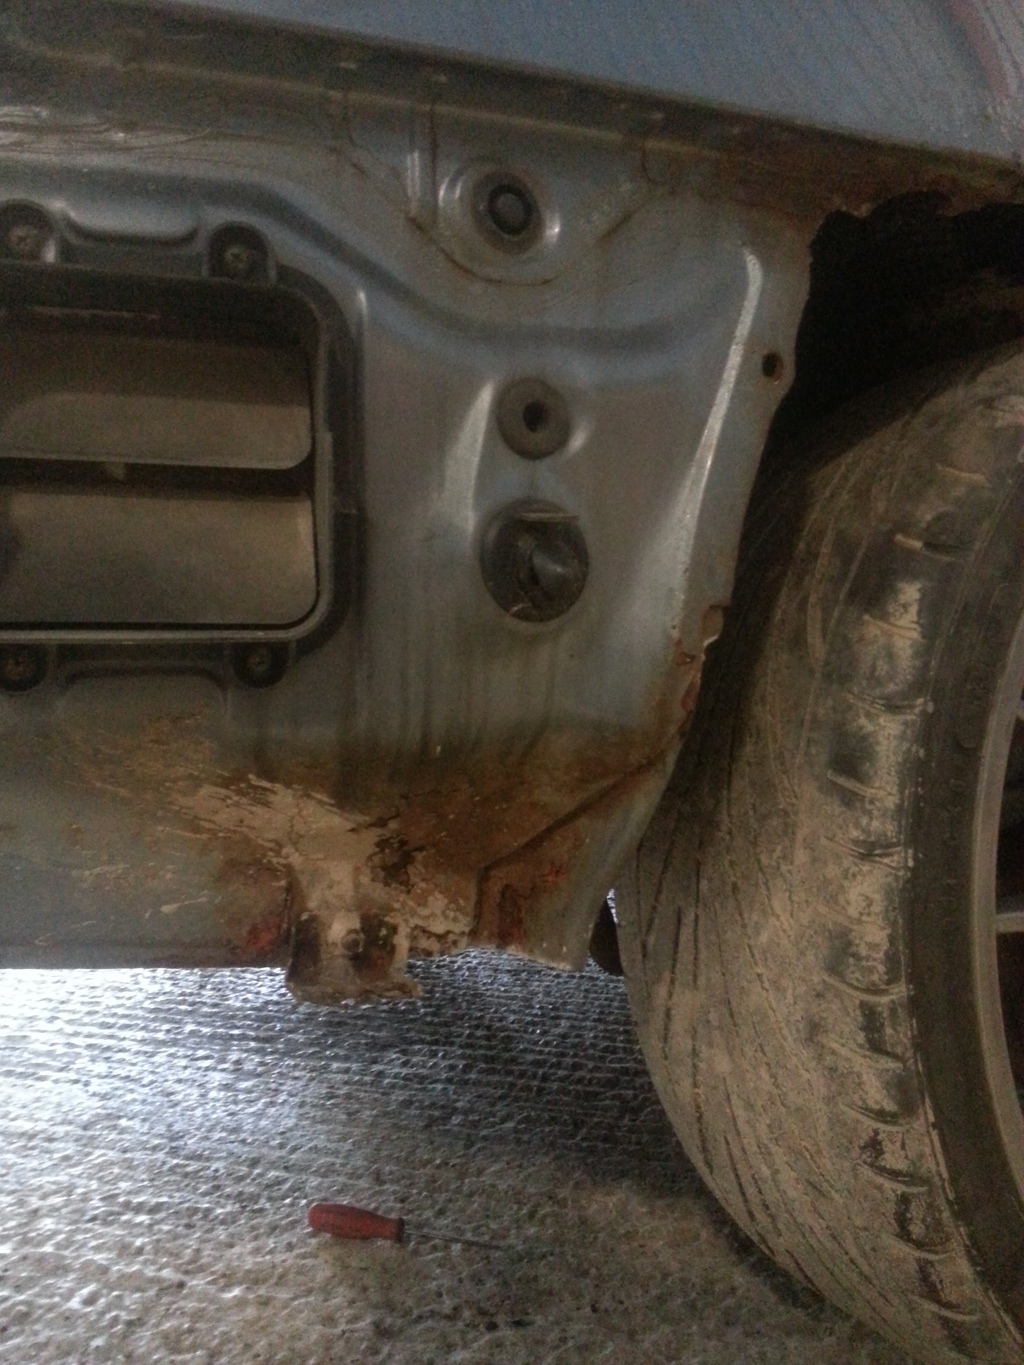
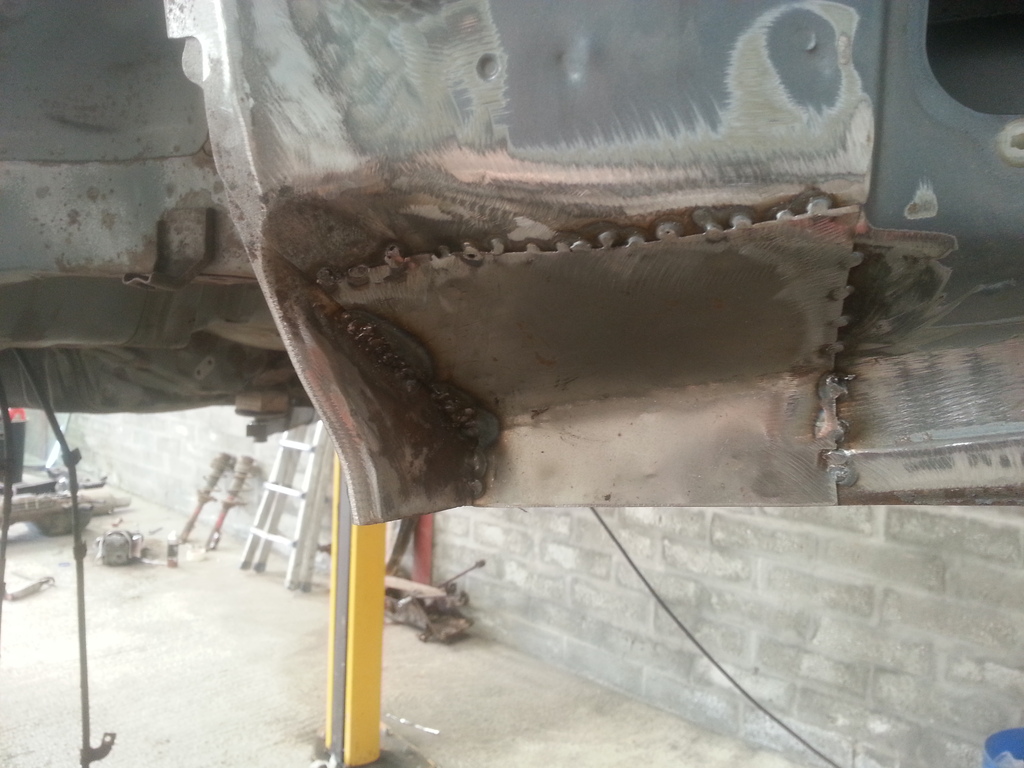
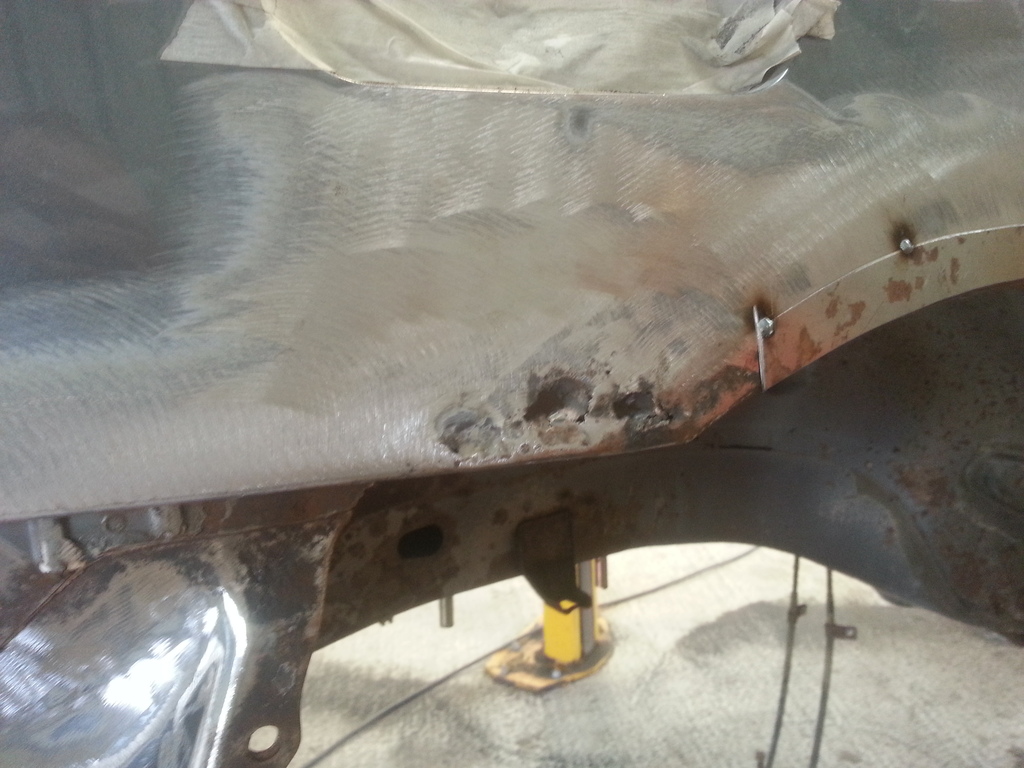
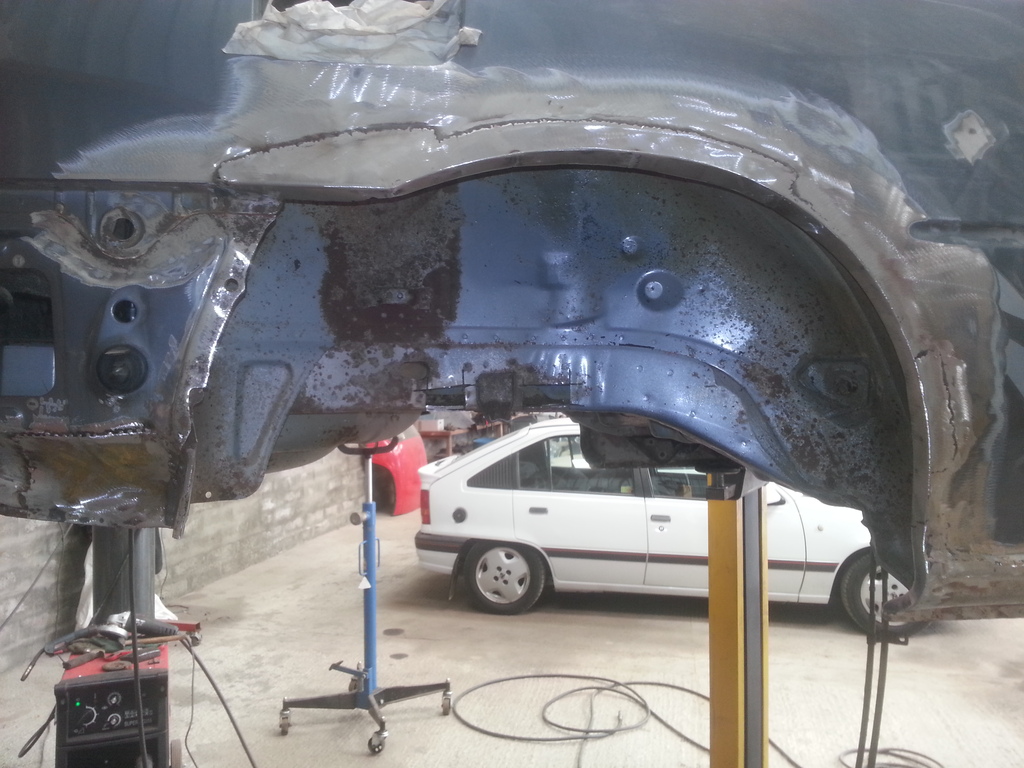
And this is what it's hidden!!:
Passenger Side:
Drivers Side:
Unfortunately the rear section of the sill's have also completely pooped there pant's, however easily welded, cavity sealed and made better than new
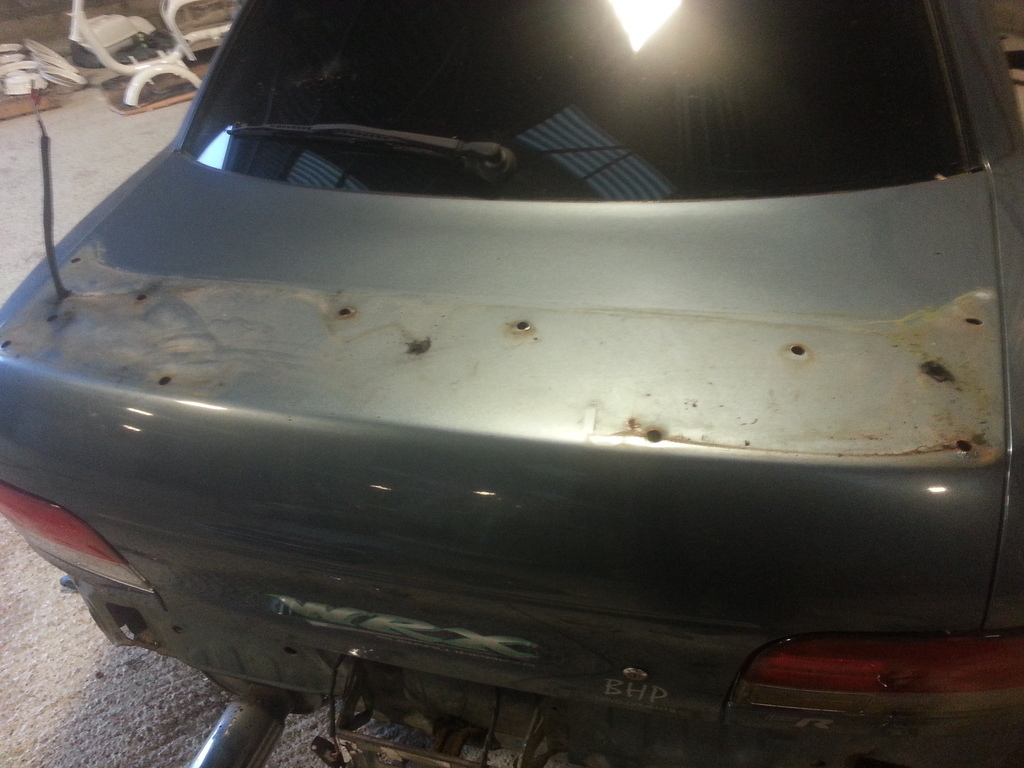
Next on was to remove the rear spoiler. With this being a aftermarket spoiler the original bolt holes were not used. However upon removal could quite clearly see why there was a pond in spare wheel well. Original holes has a little bit of silicone to stop them leaking, however was completely useless. The bolt's have also managed to warp the boot slightly. Will be putting new stud's in the spoiler.welding/fiberglass the unused holes. 12 holes in the boot altogether.
Managed to get a lot more done today, however i forgot to take photo's so will do today's and tomorrow' update in a ones.
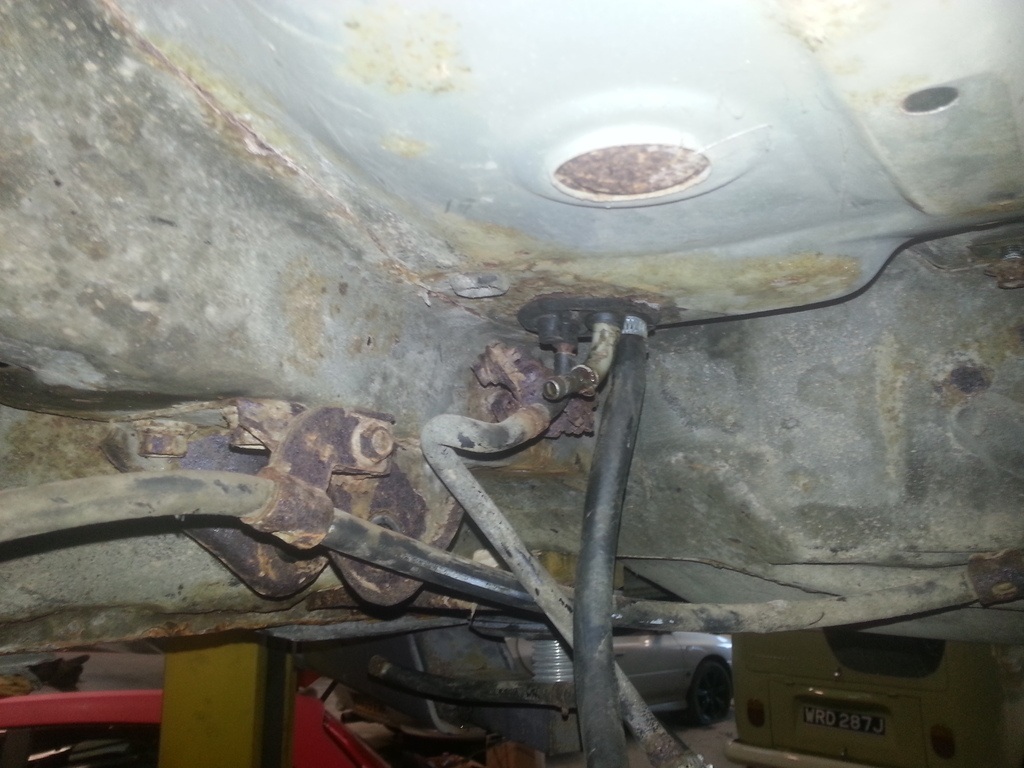
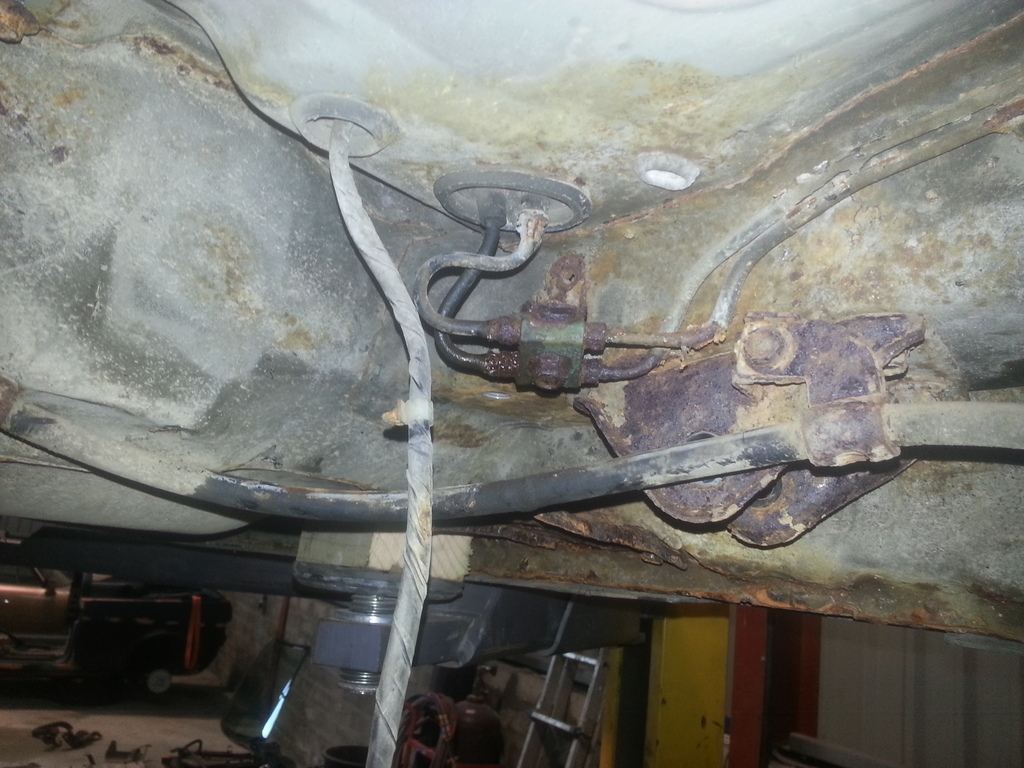
Tomorrow subframe/diff will be off the car ( all loosened off today ) Also will be making these pesky rear fuel lines that are leaking everywhere slightly different.
Plan is to remove fuel pump assembly
Cut off original fuel lines at the top off the pump assembly. Braise on AN6 fitting's in there place.
remove the fuel lines were they join the chassis underneath the rear seat.
Probable rebuild the lines from the fuel tank and secure them straight under chassis fitting's welded on and secured.
There fore it be fully teflon braided lines fitted from the tank to the underneath of the chassis. Need to figure out the legalities for MOT's etc and safety. and how to route them. Will be doing a drawing mock up start of next week.
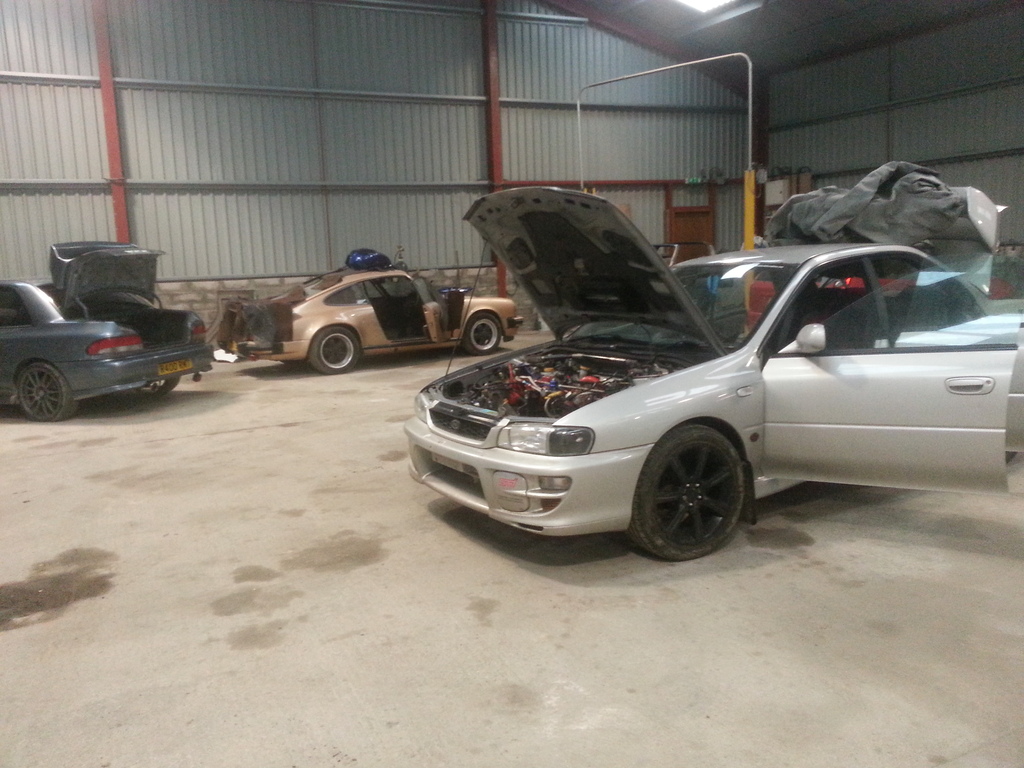
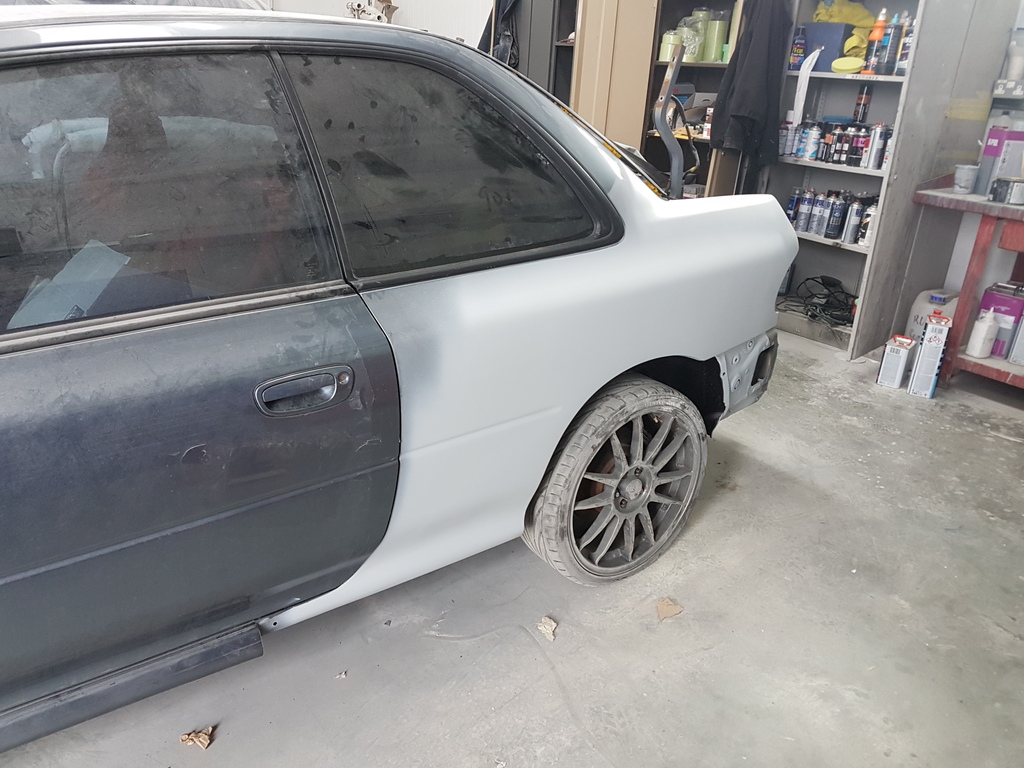
Also got my car in the workshop for similar work to be done after Marks is finished. Also you can see the Porsche 911 SC that i just finished a full interior removal, clean and rebuild back together, car was unfortunately flooded in Port Elphinstone a few month's ago. Was quite a big job but it's as good as new now
Well i think it's time for bed, Update to follow over the next few day's.
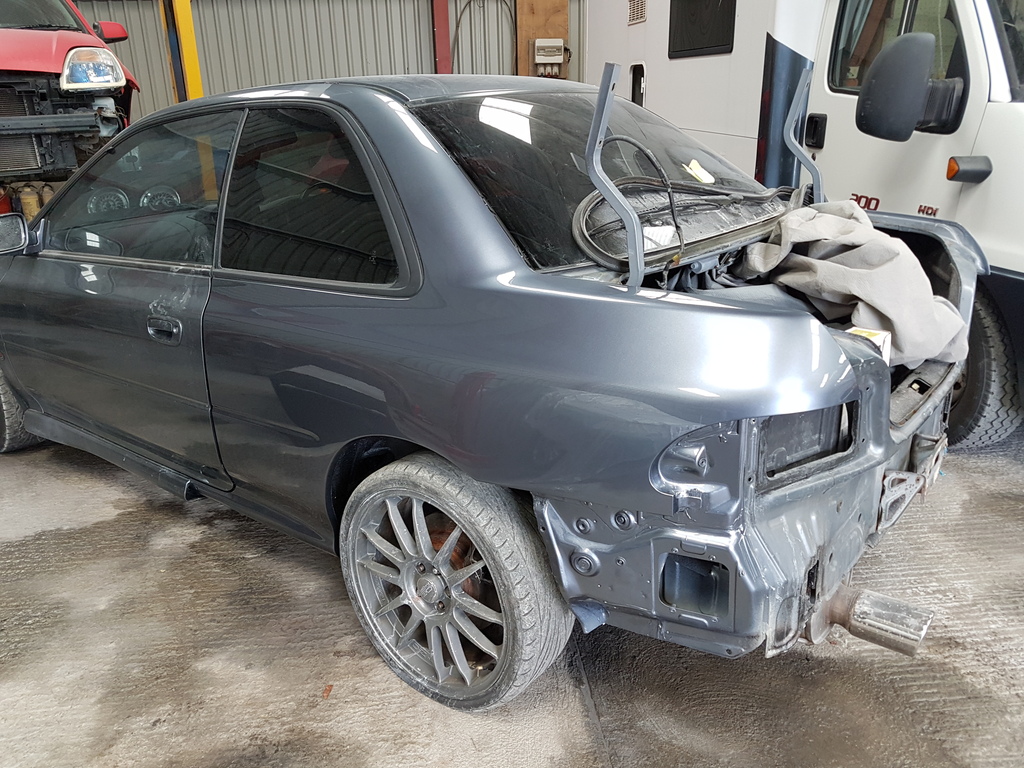
The tires are just to roll it on, a car trailer was used to move it. It has been sitting for 6 years and now finally getting some tlc . Looking forward to seeing the progress.
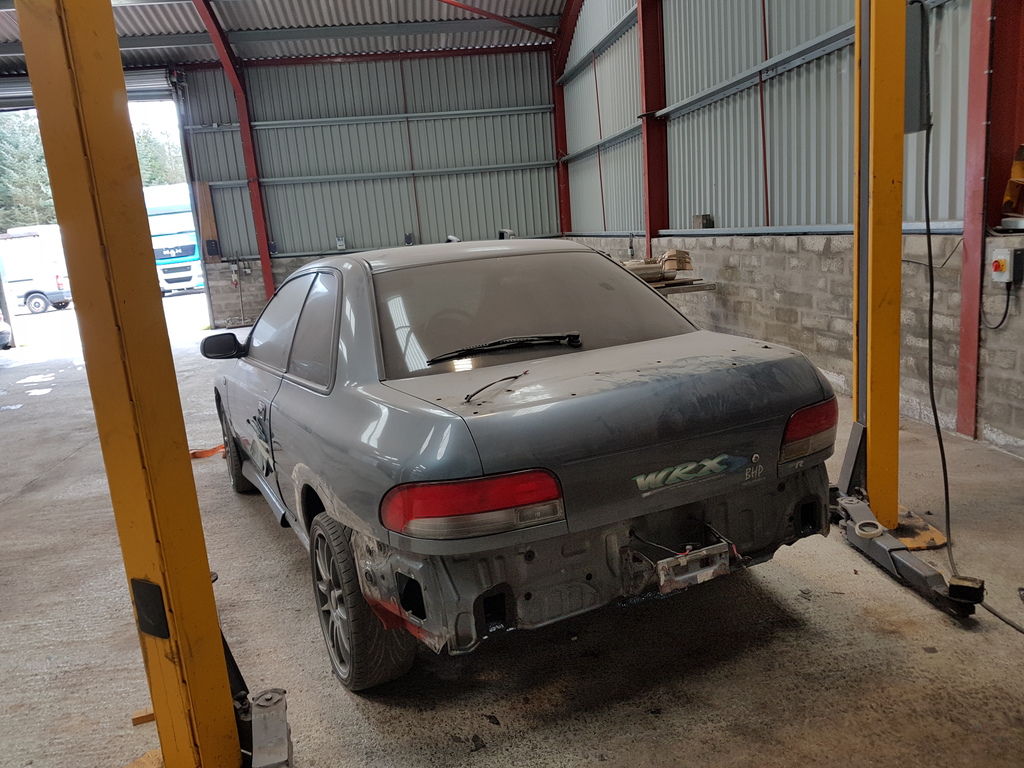
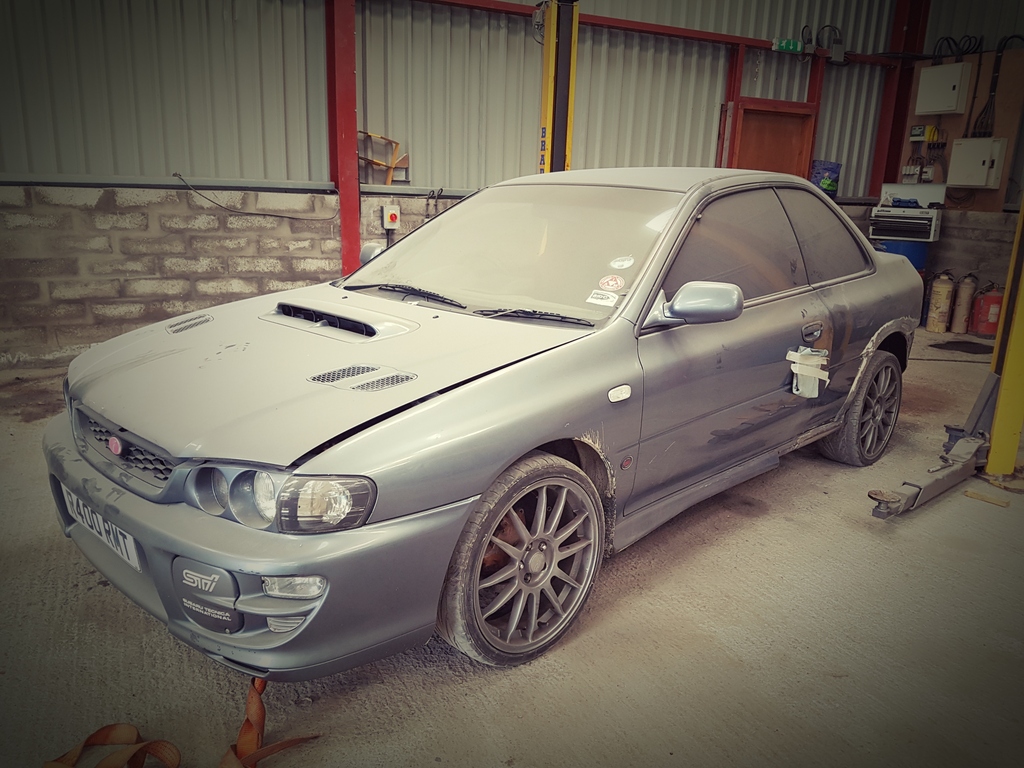
Well finally managed to crack on with Marks Type R
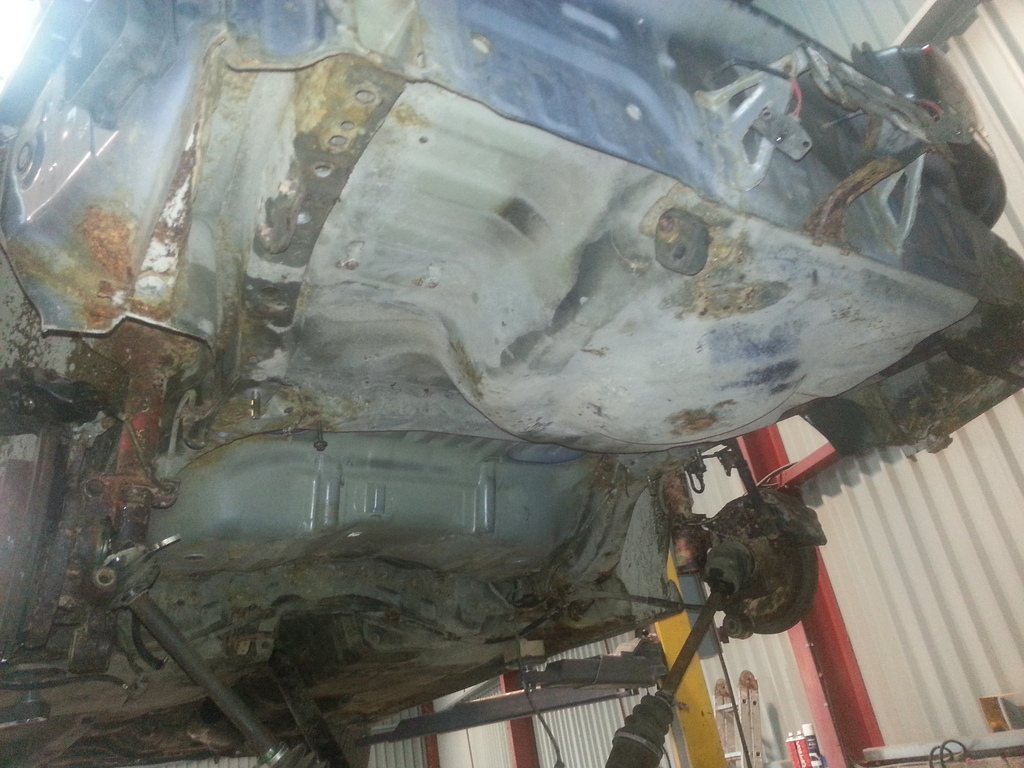
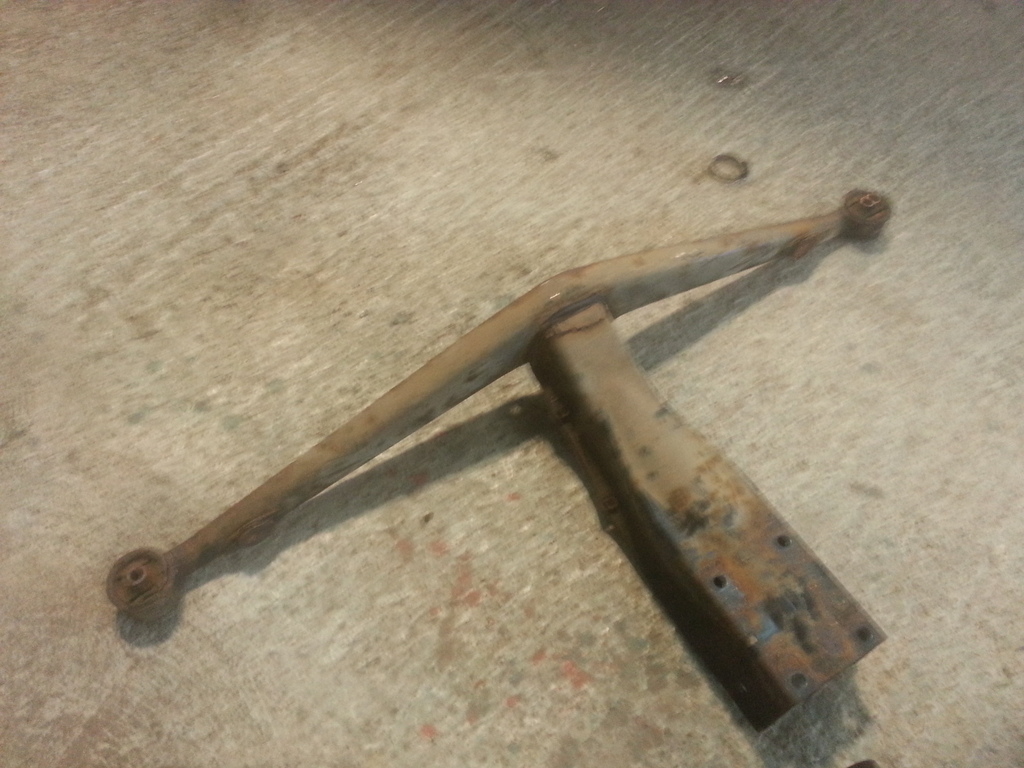
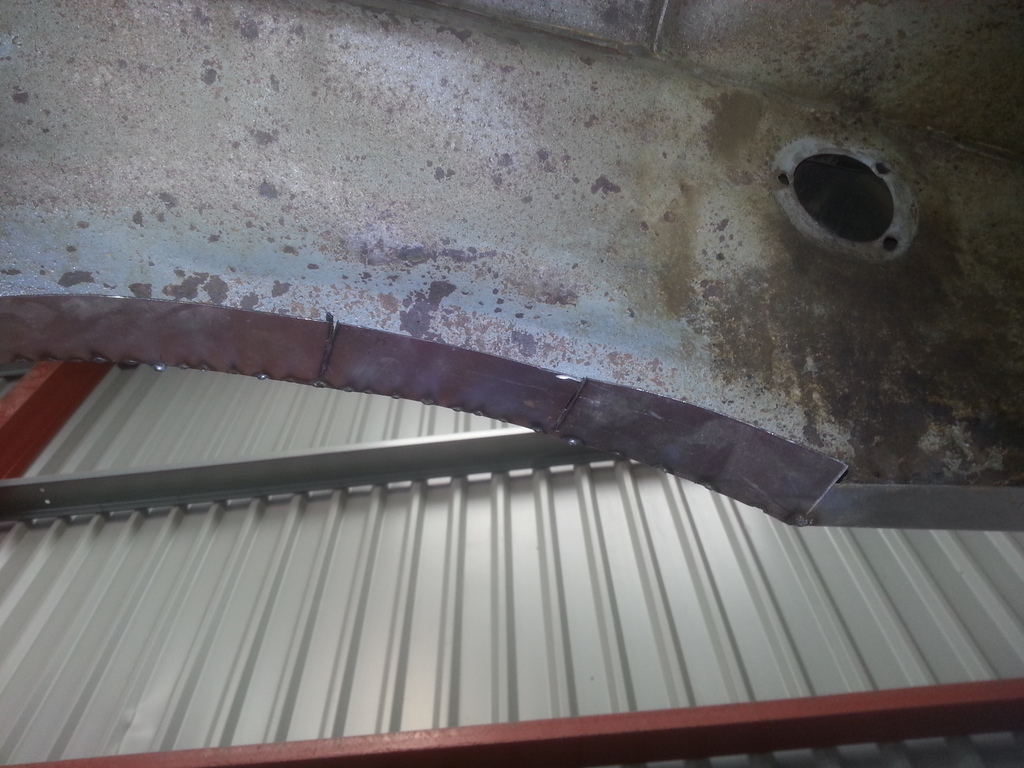
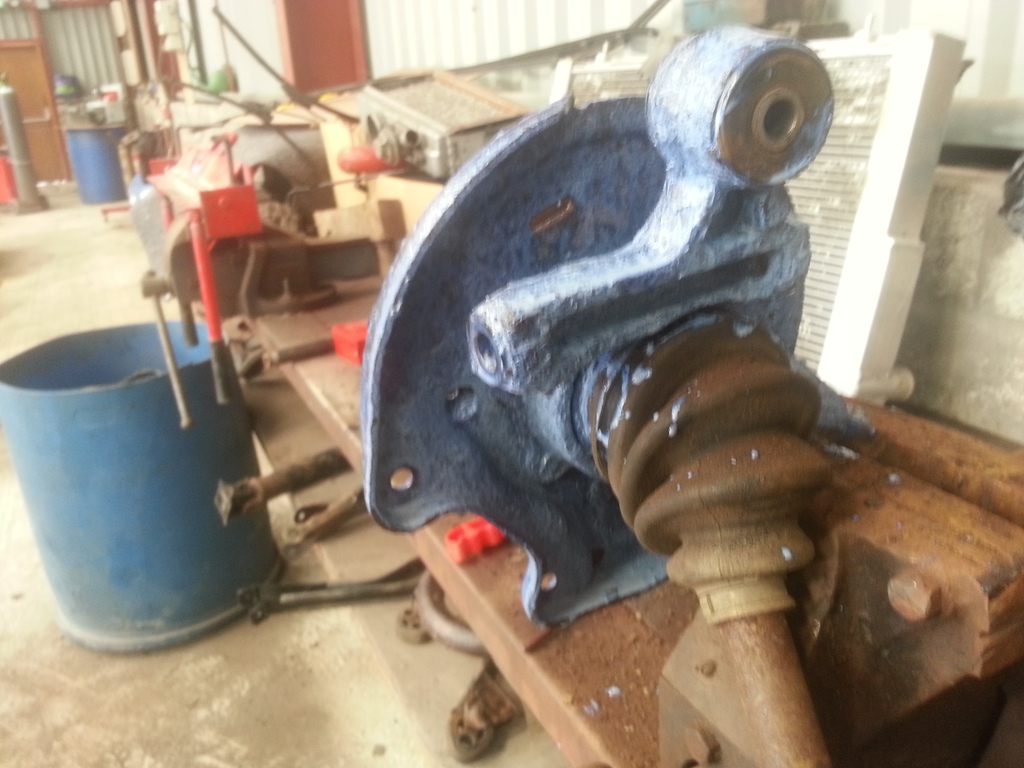
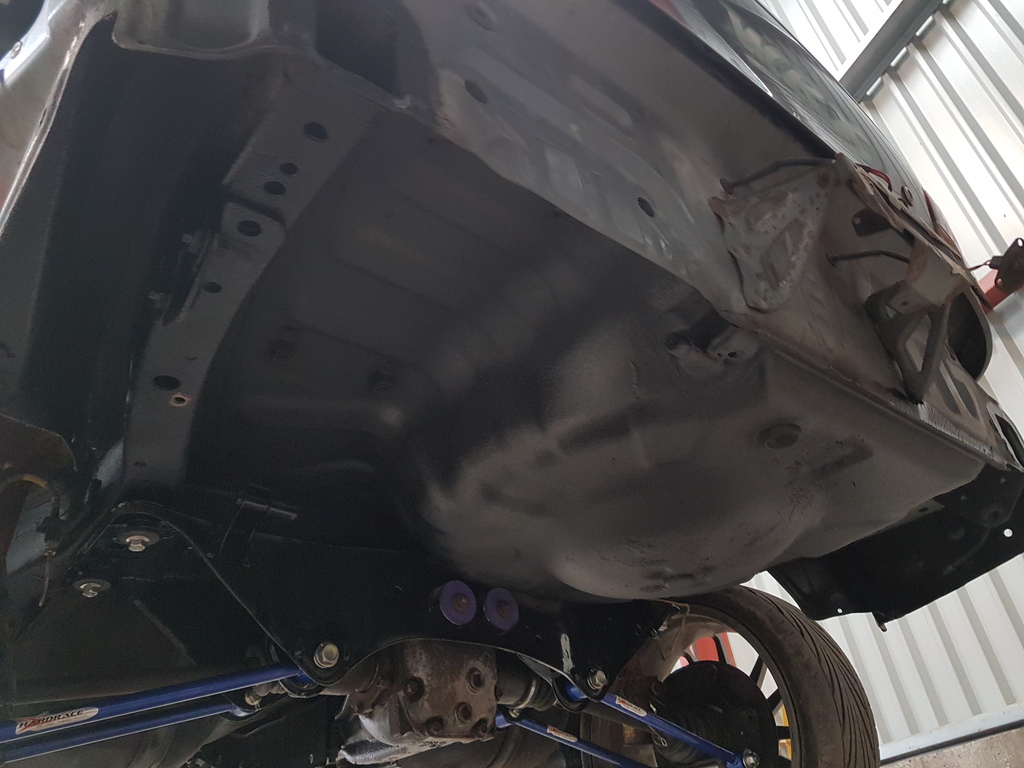
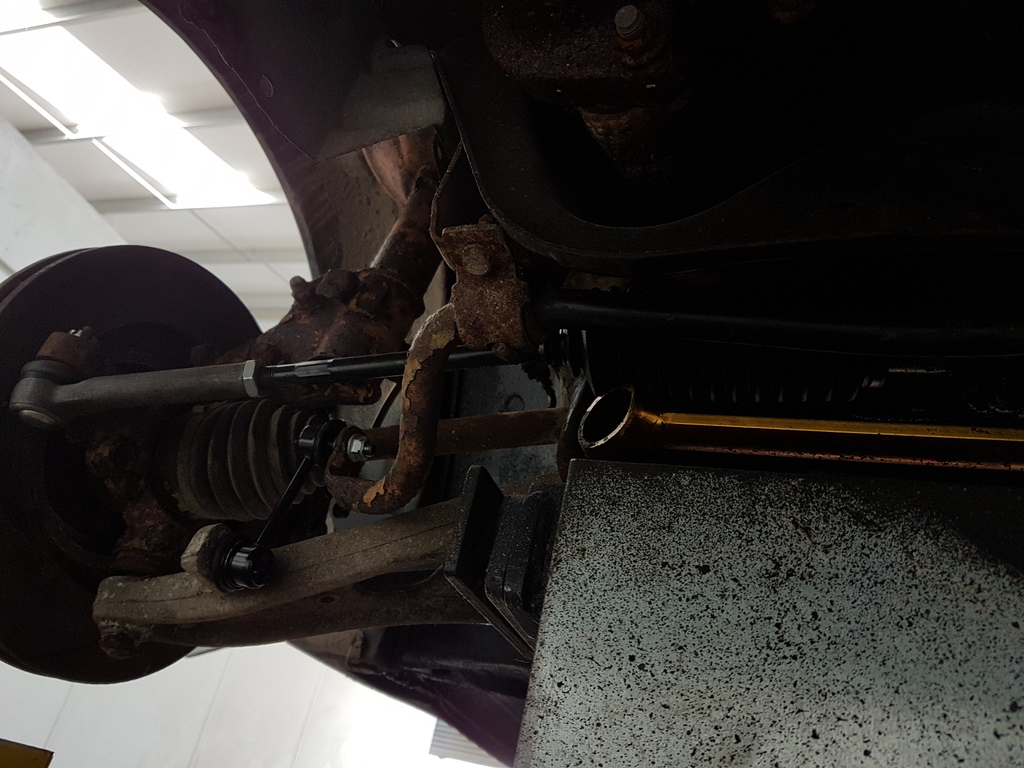
Removed the rear Sub-frame eventually. Loosened of the rear diff bolt's (17 mm), removed diff securing bolts to diff cradle ( 14 mm at the side and 17 mm underneath),4 bolt's for prop-shaft (12 mm). Also removed the drive shafts from the diff as was easier at the time. unbolted the 2 securing bolts for the t piece cradle at the sill's. Before removing the sub-frame, take the time to undo the lateral arms and caliper bolt's etc, makes it easier as there a pain to remove when off the car.
After the rear anti roll bar mount's were a right pain and decided the snap, the rear sub-frame bolts decided to follow suit. only 1 gave up without a fight. the other 3 decided to snap the castle nuts were the join the inner chassis. Bugger. However it's okay as will be welding in new metal with stainless nut's. Also while the metal is cut out give's better access to get inside the chassis legs and wax and underseal every crevice.
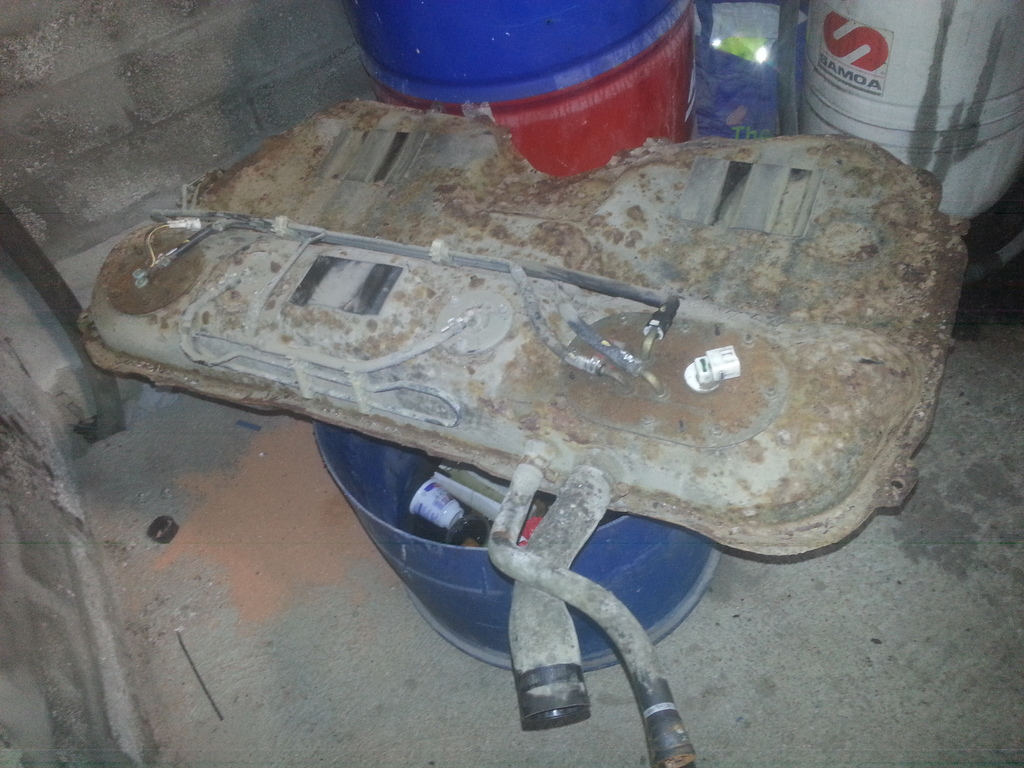
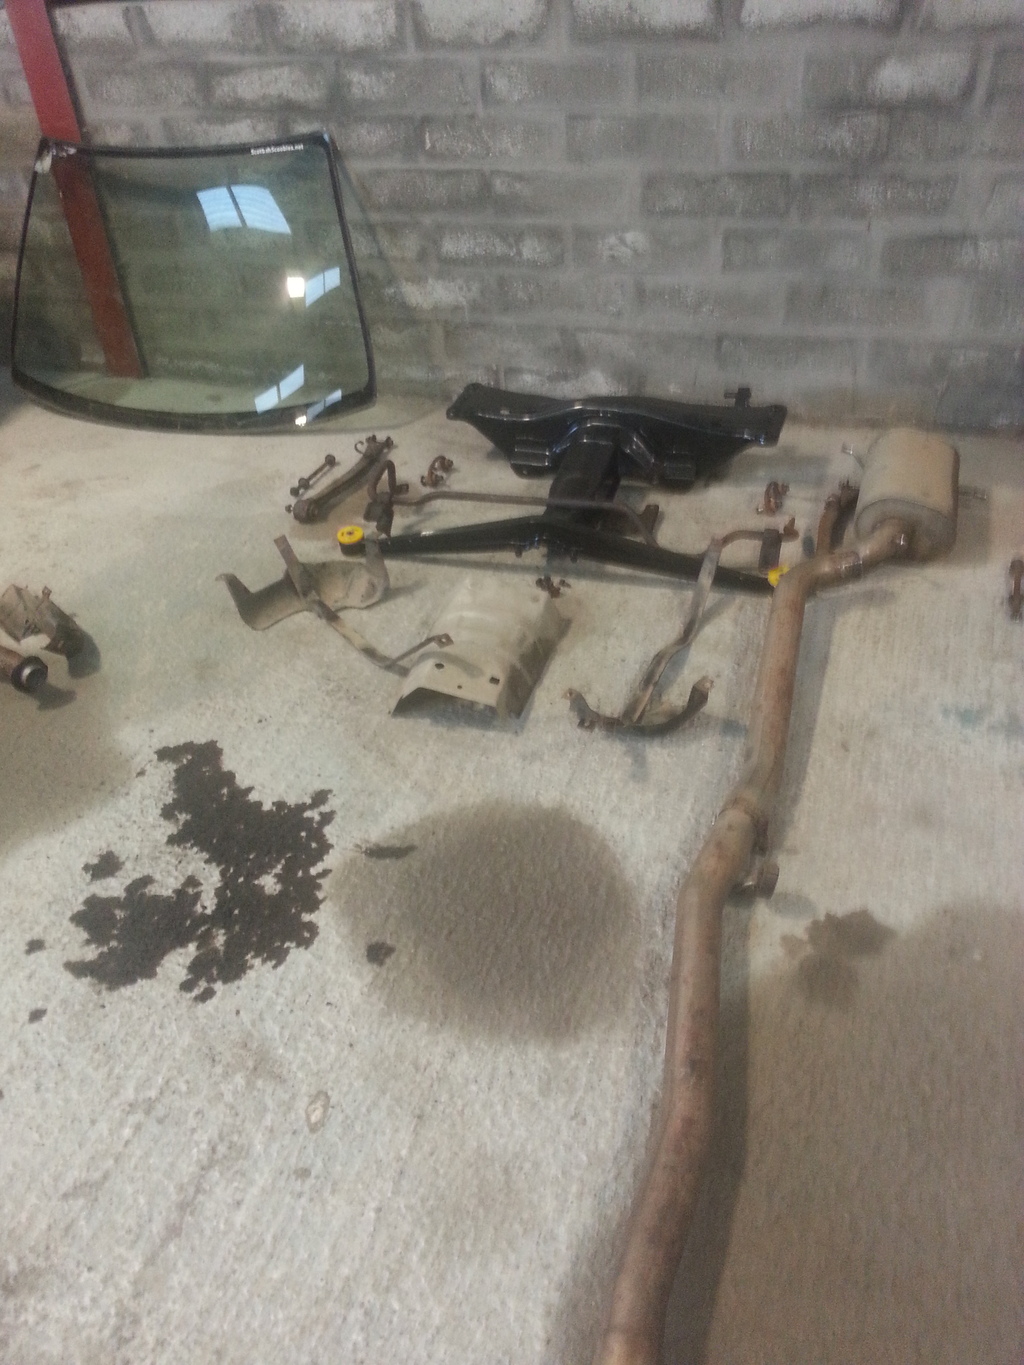
Next up was the fuel tank removal. Quite easy to be honest. 2 securing straps (rust prone and need replacing) (12 mm if i remember correctly). there's also some trim clip's that secure the protective plastic cover at the top, pop out really easily. Lower the fuel tank slowly ( make sure the fuel pump wiring is disconnected before hand, there's 2 plug's above the tank, one on the fuel pump housing and one on the other side). Also make sure the 3 fuel lines are disconnected as well. And to label witch is witch for future reference.
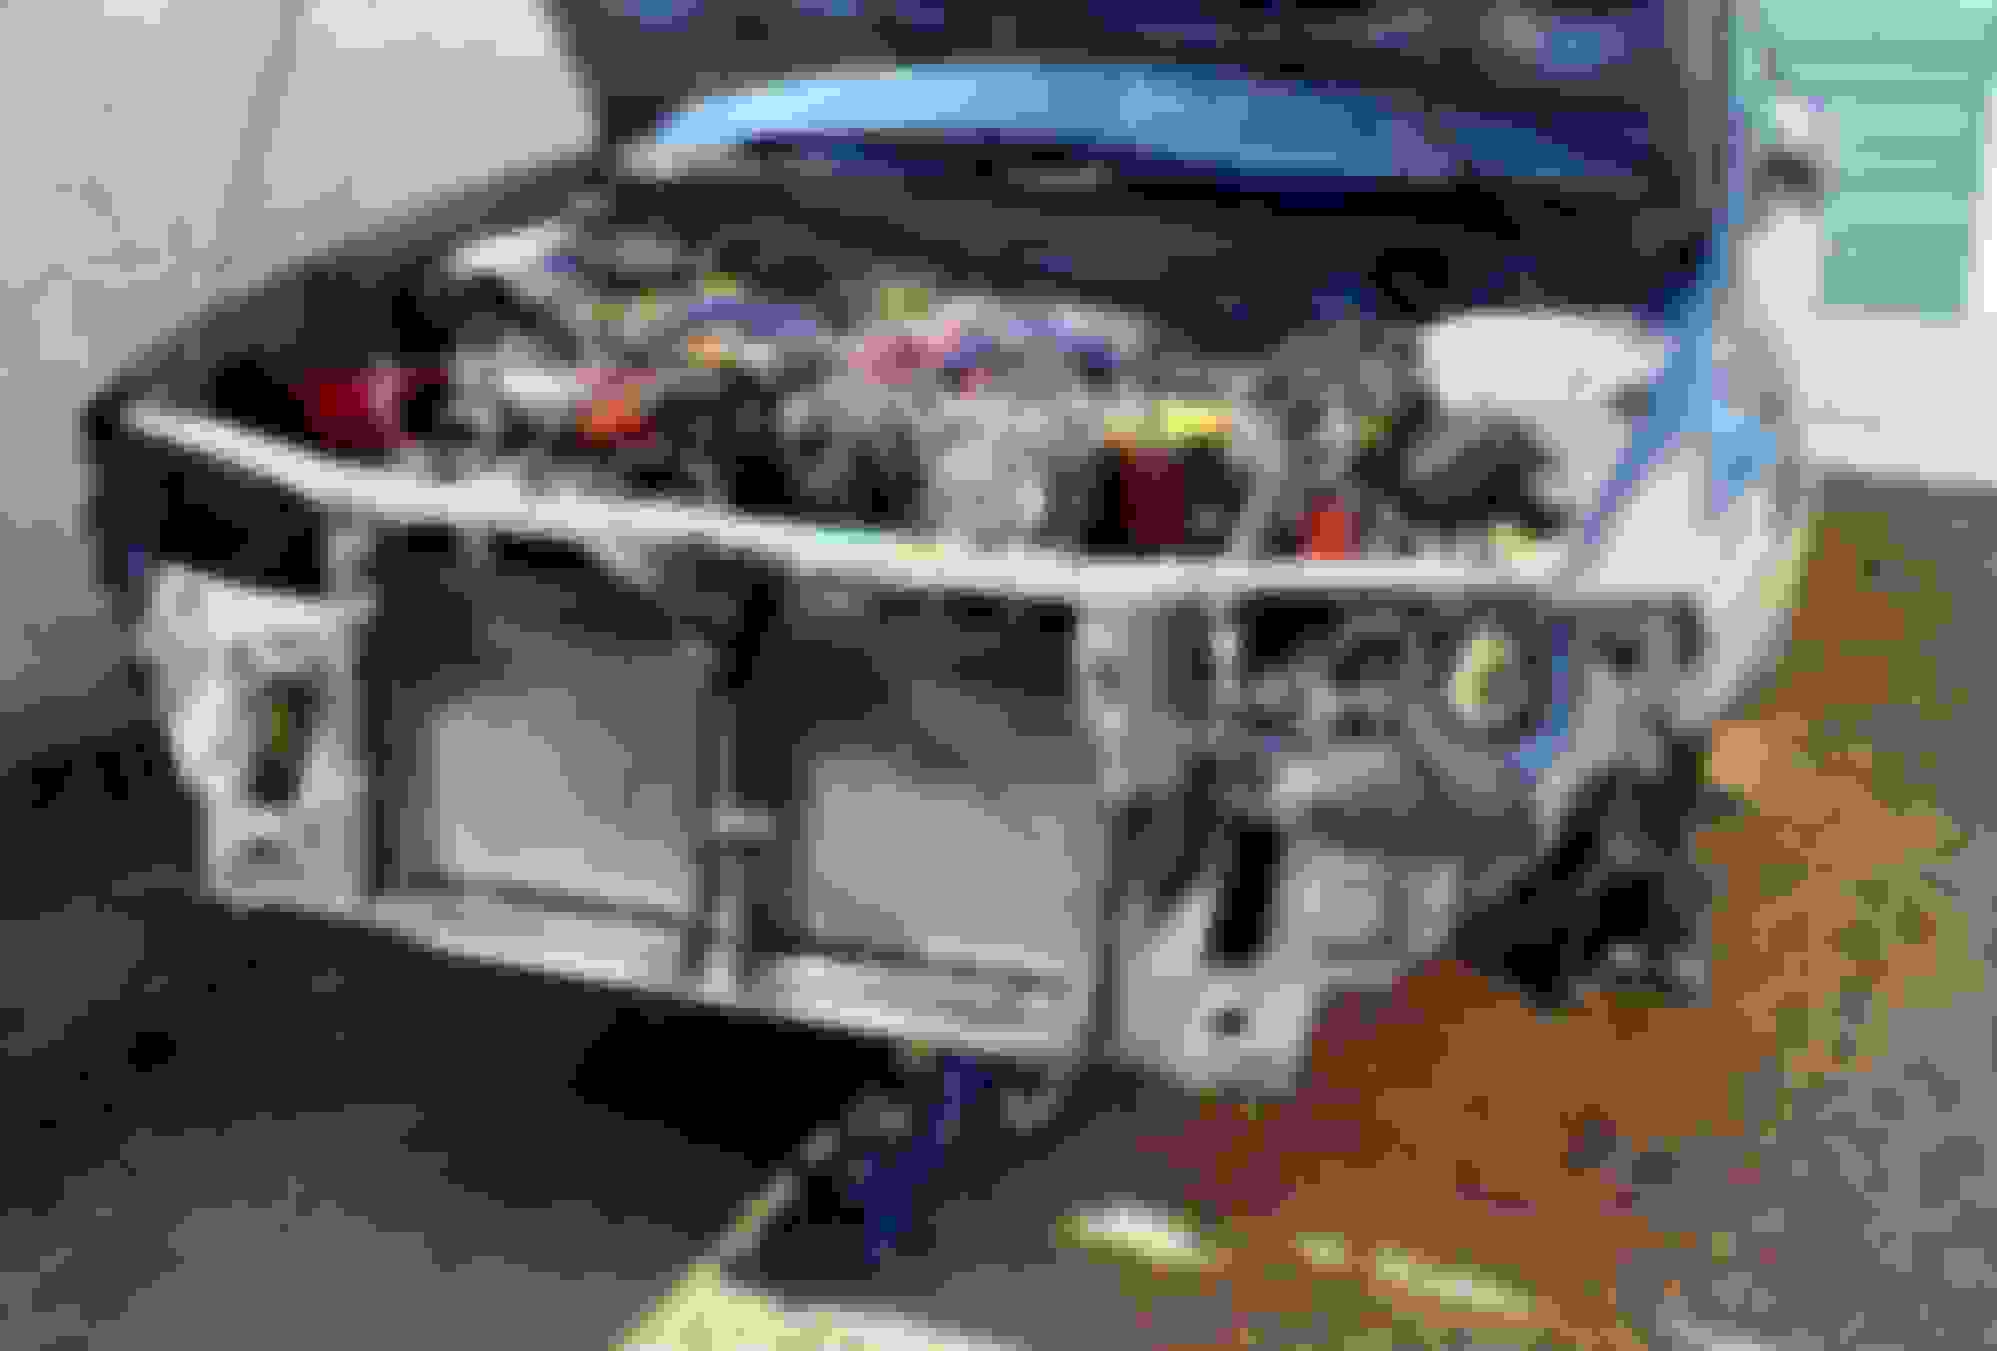
once that's all off your left with some thing like this:
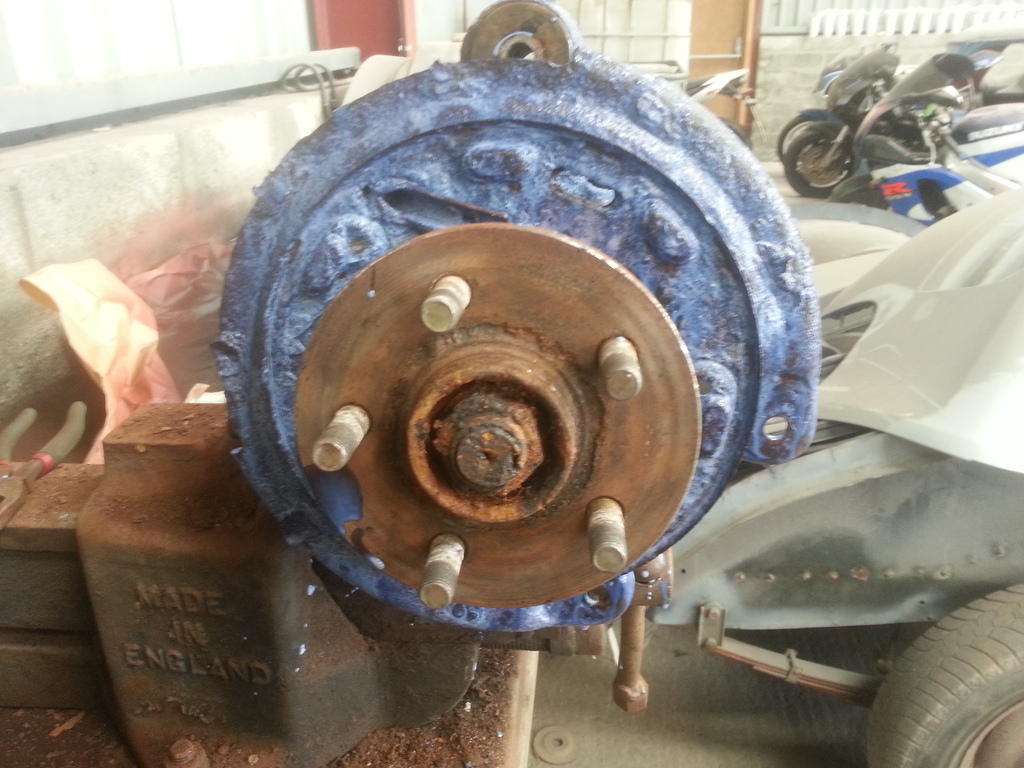
The rear struts are coming off tomorrow once i can get the discs off, couldnt remember witch way to adjust the handbrake shoes to remove the disc ( Up or down ), the drive shafts were secured and not hanging straight after the photo's. Will be removing them from the hub's and clean and paint with new boot's on while all apart.
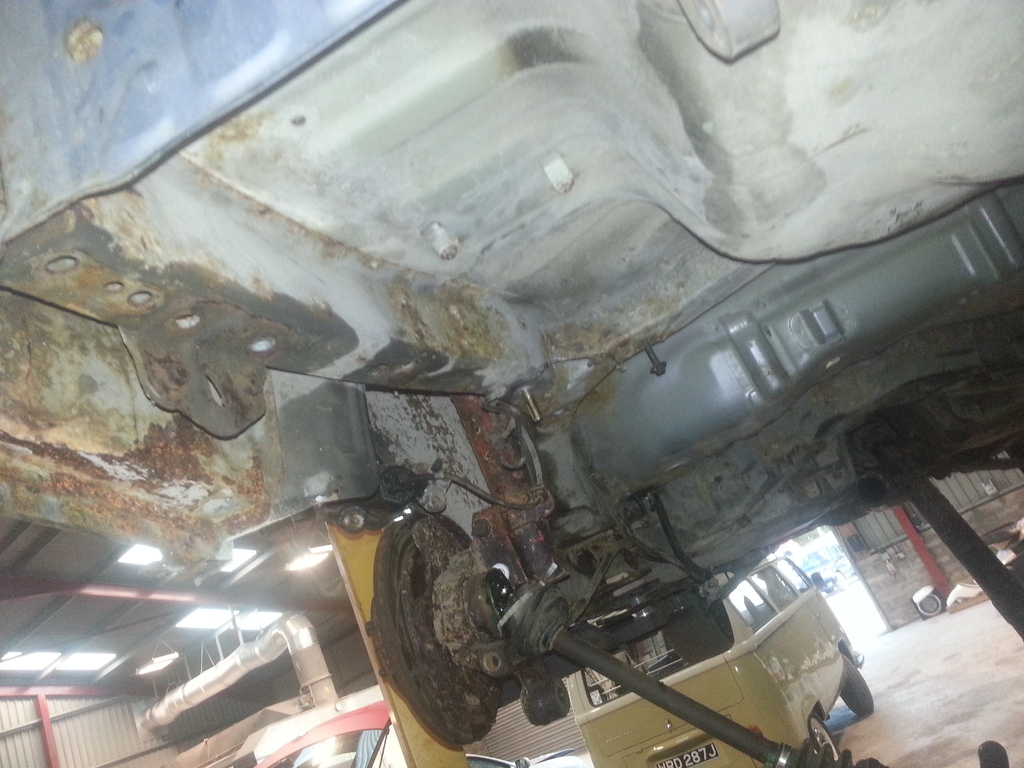
The fuel tank is showing a lot of rust on top, so on the lookout for a replacement ( one in the pipeline i think ). Also the rear brake lines are totally shot. Will be getting new ones in after its blasted/welded/undersealed//por15'd
But overall it's not to bad, the rear sills have certainly seen better day's, The T piece cradle mount's were they secure to the sill are totally gone. but glad it's all in the process of getting sorted
Rear t Piece cradle was completely shot, can be nearly bent in half!!. the rear sub-frame has also seen much better days. Metal is extremely thin in some area's. The new powdercoated one's will last for the next 16 years atleast
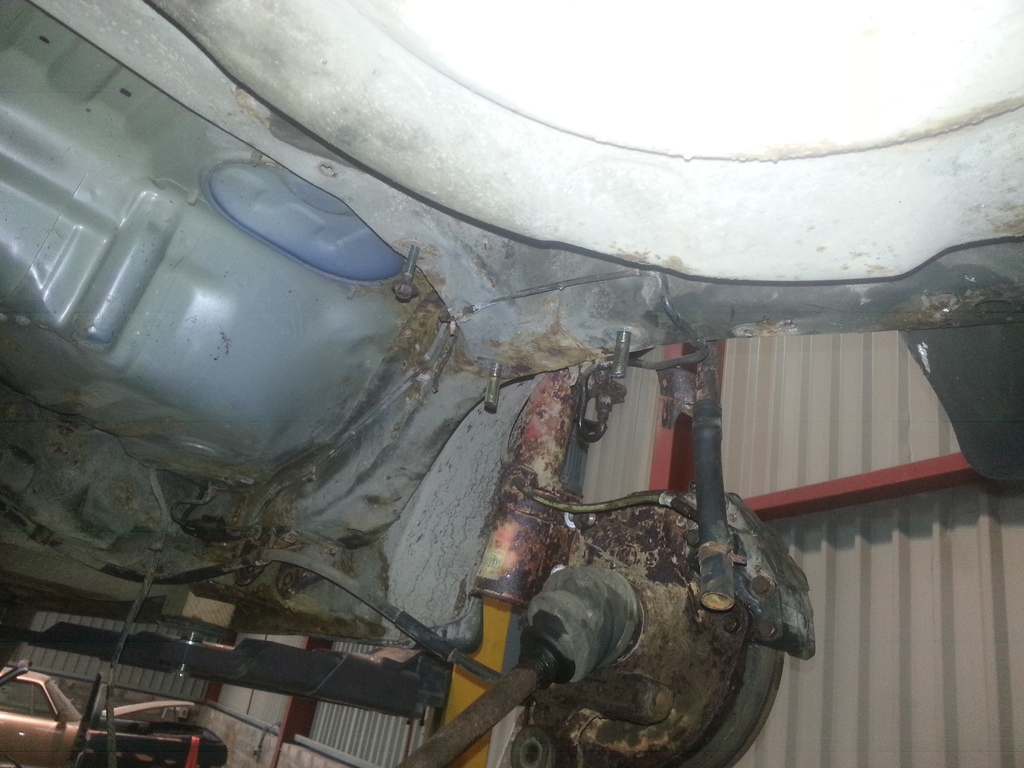
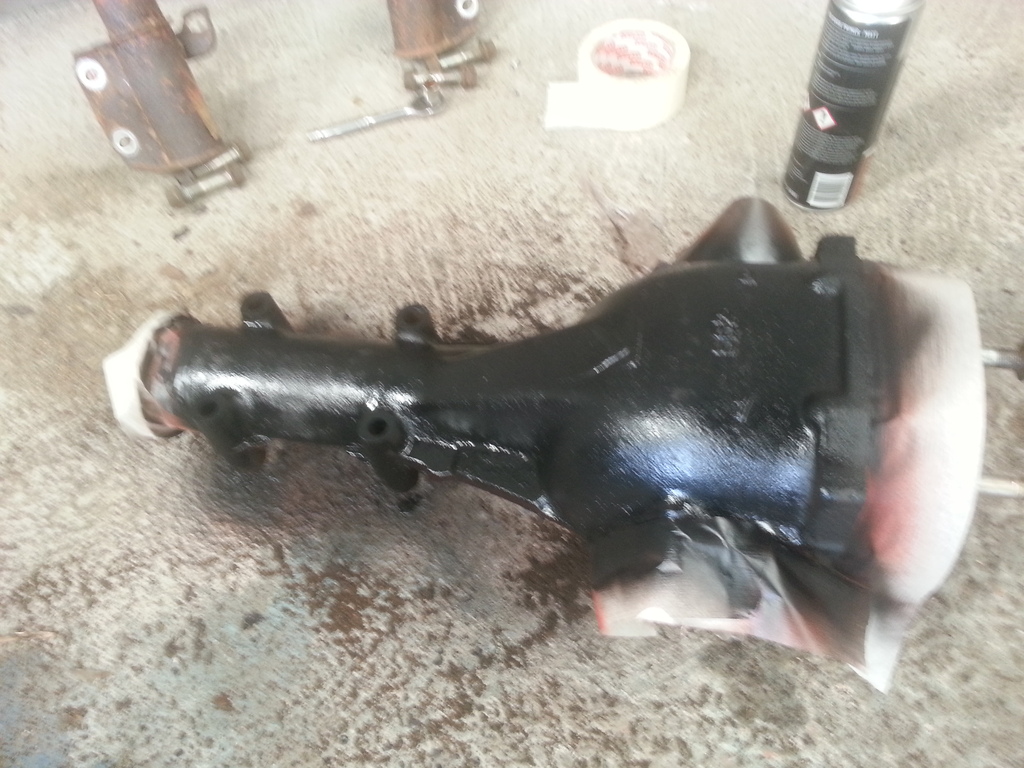
Hopefully get it shot-blasted tomorrow and let the welder work his magic, while he's doing that ill be refurbishing the diff with lick of paint. Hub's removed ready for a refurb, drive shafts, rear calipers. And can make a proper start on the Fuel line rework
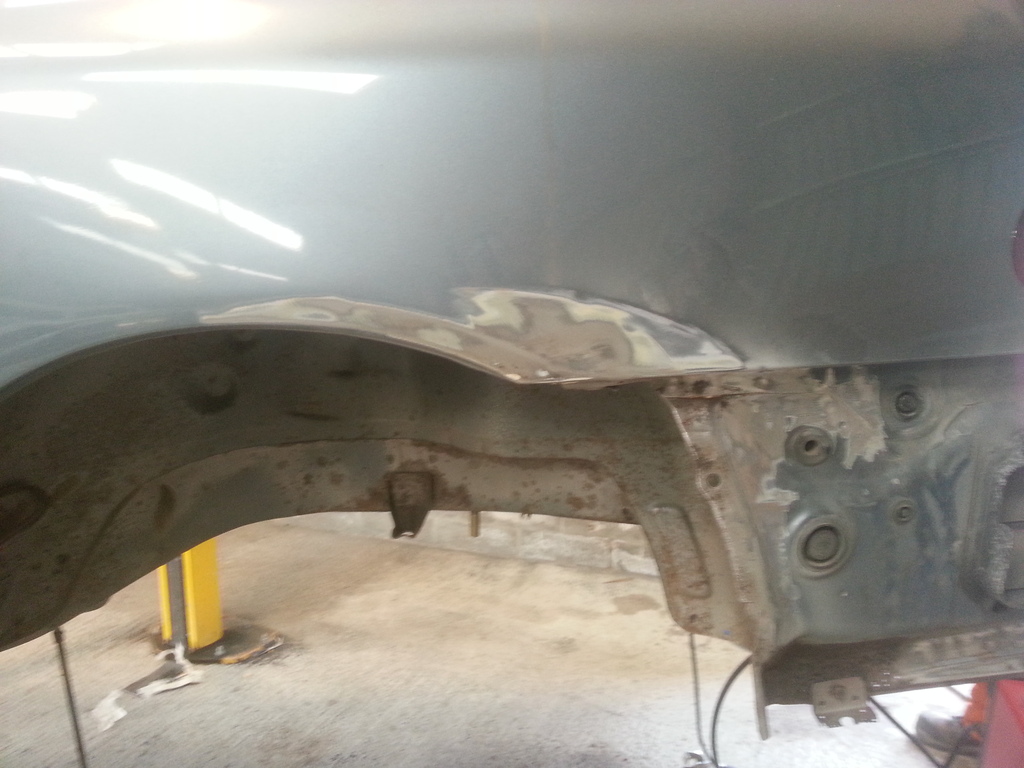
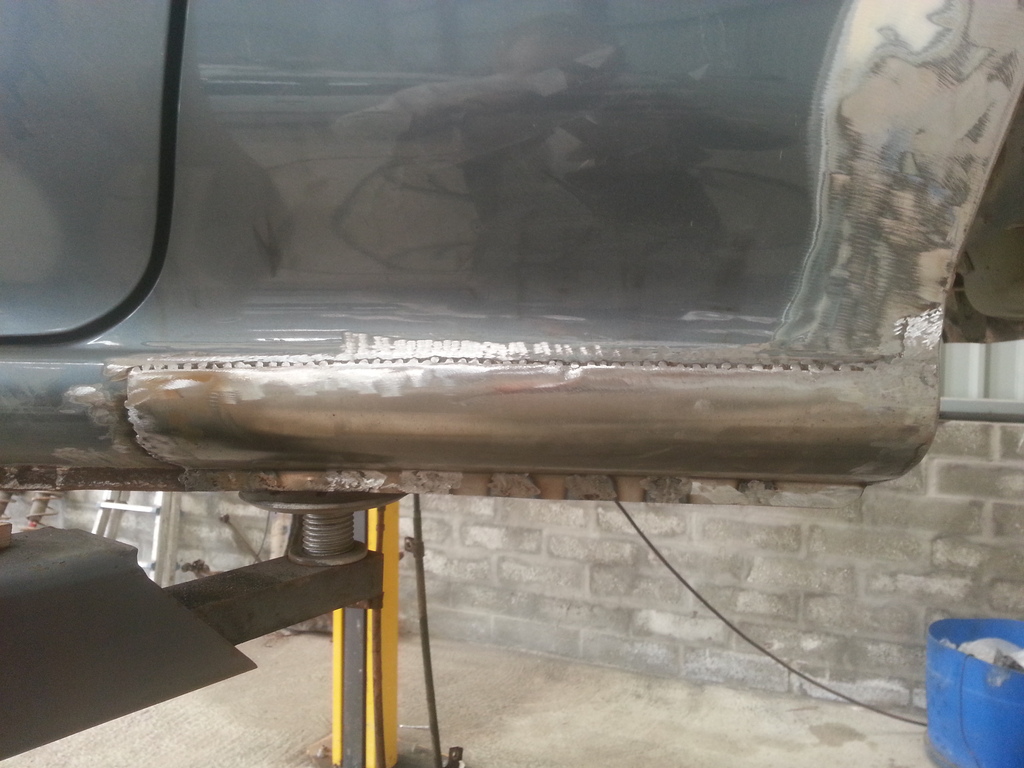
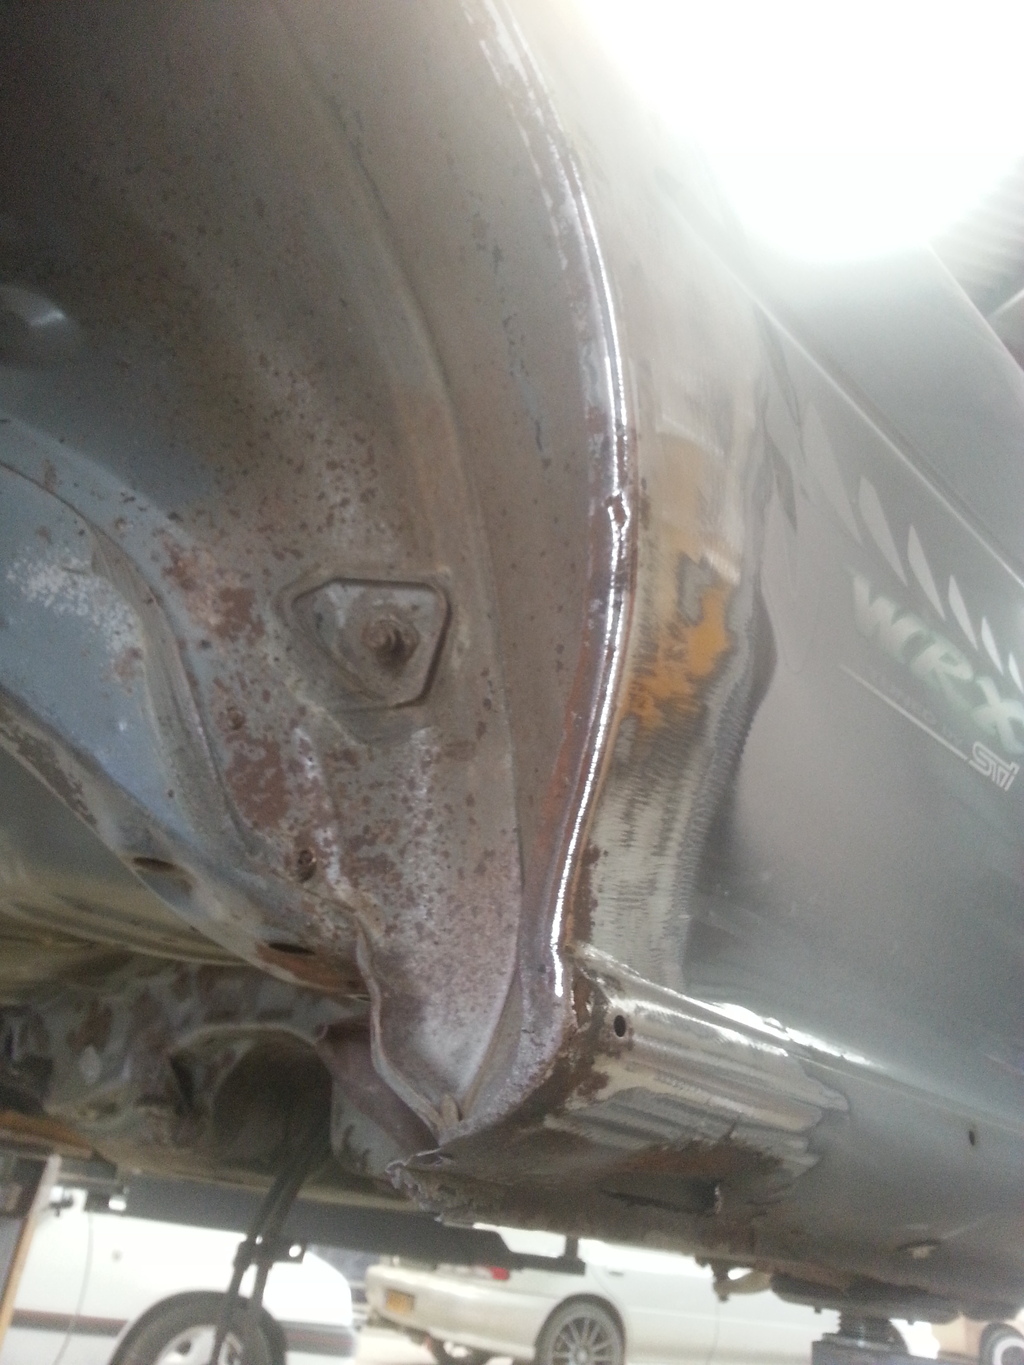
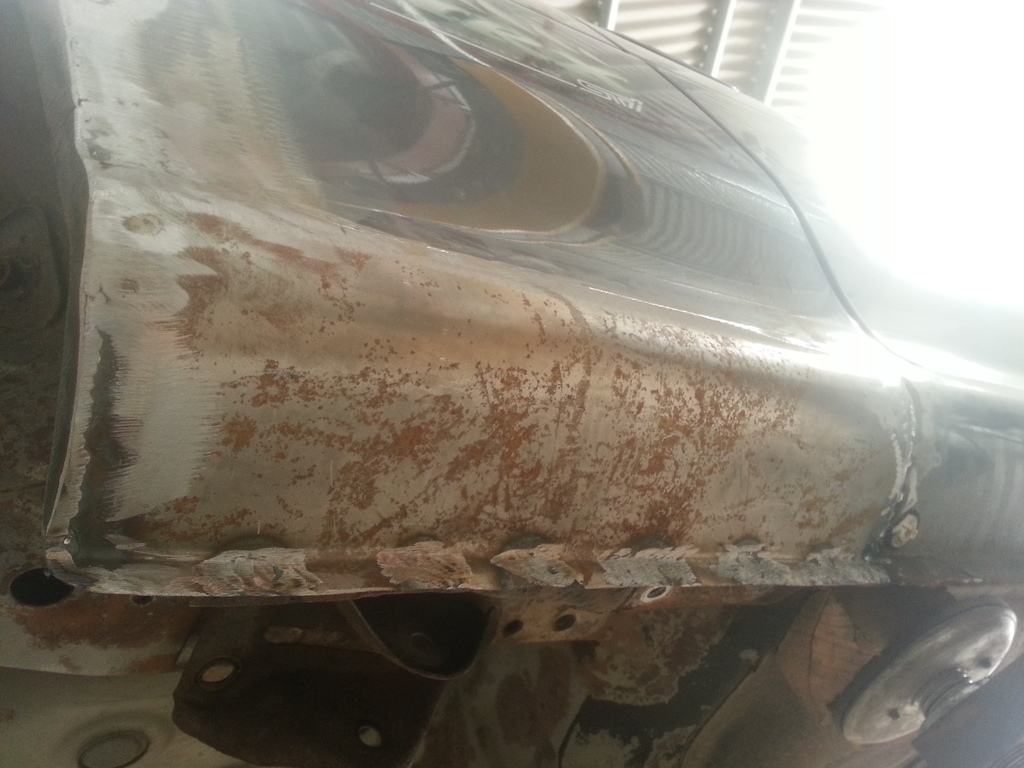
Well the cutting and welding has started over last 2 days. First off the passenger arch got ground back, few tiny holes that we welded a new plate into. overall the passenger side is in really good condition, only bad part is were the arch joins the sill,
As can be seen in the photo's the arche's have been done before, quite a few little dent's and marks on the passenger side, possible why the passenger side was looking better to start with.
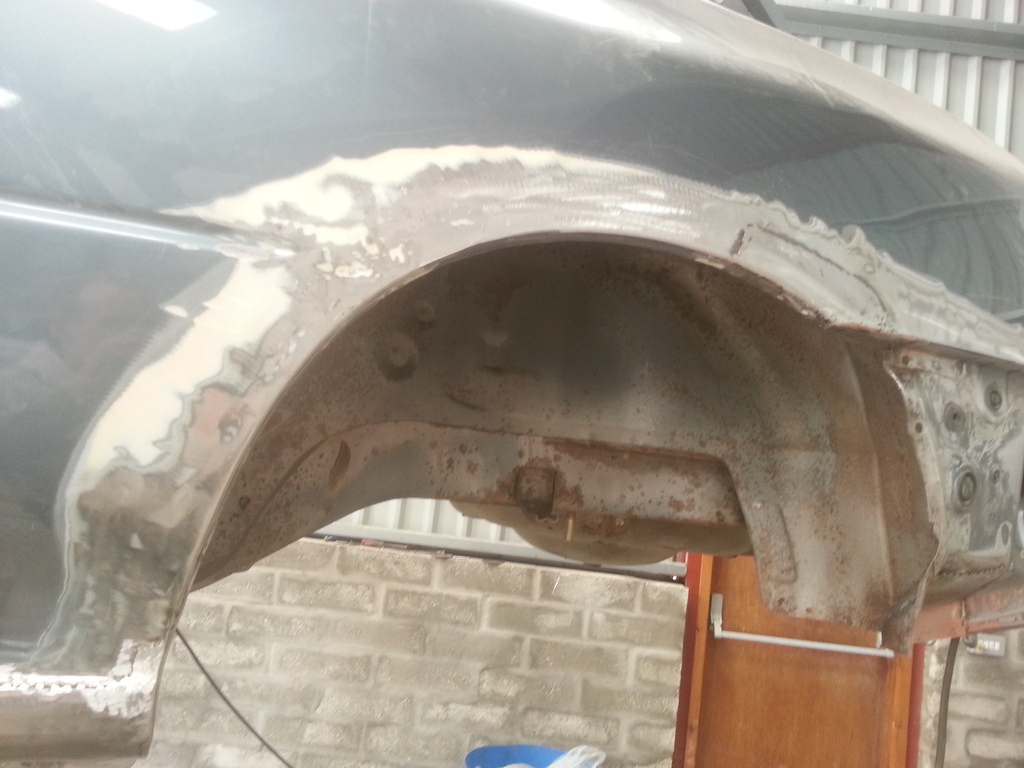
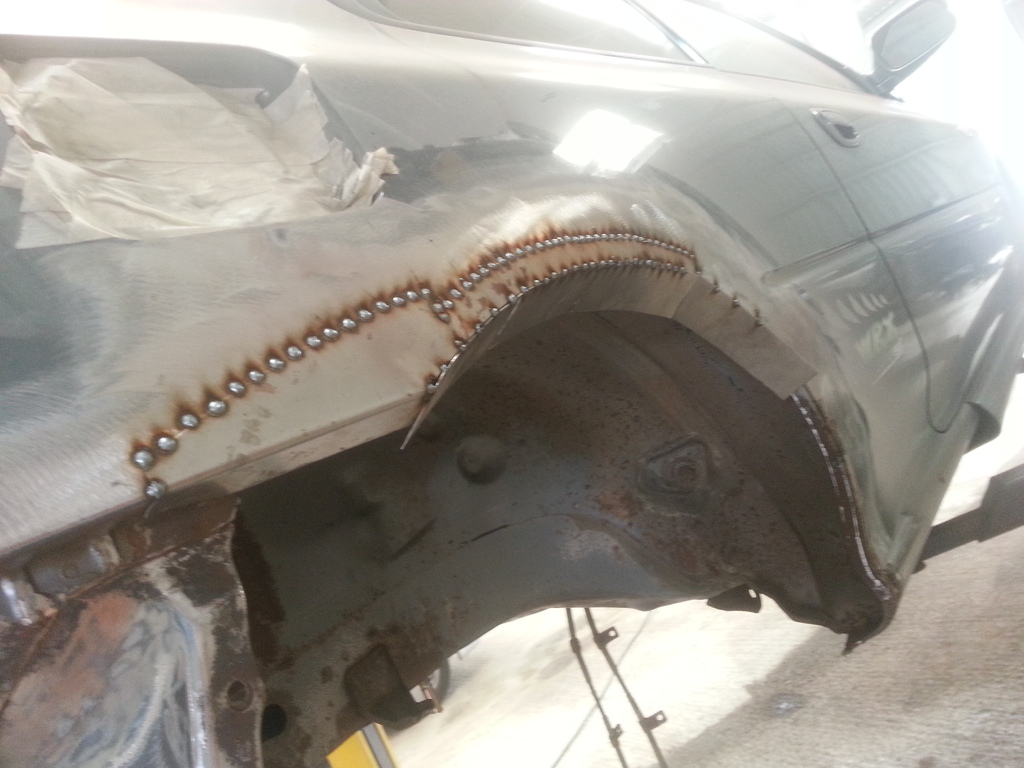
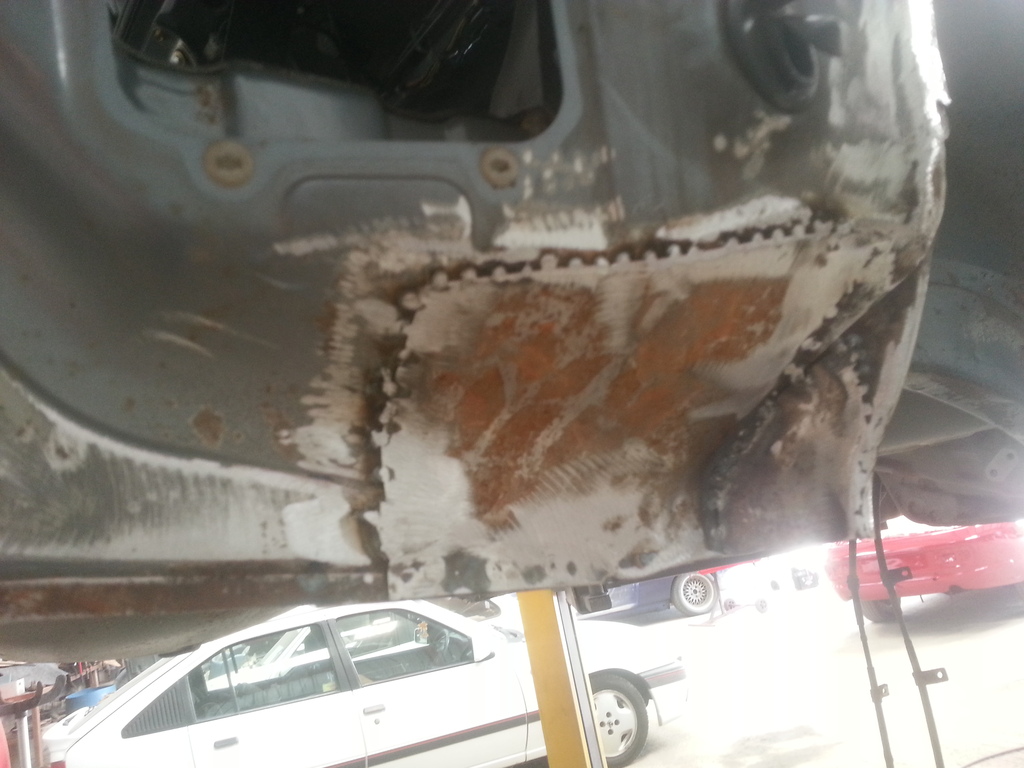
Drivers side required a lot more cutting and welding.
Then it was onto rectifying the snapped subframe bolt's. decided to enter from the side, remove the nut clean up and weld it back in. with the extra hole managed to get better access to cavity wax the inner chassis leg further down. unfortunately didnt manage to get photos of the inner arch weld's.tomorrow plan on doing the inner skin of the sill to were it join's the new outer skin
Obviously more work to do the sill's and arches with tidying it up and making sure the inner and outer section's join solidly and no chance of gaps. couple of day's then it should hopefully be ready for seam sealing and under-sealing.
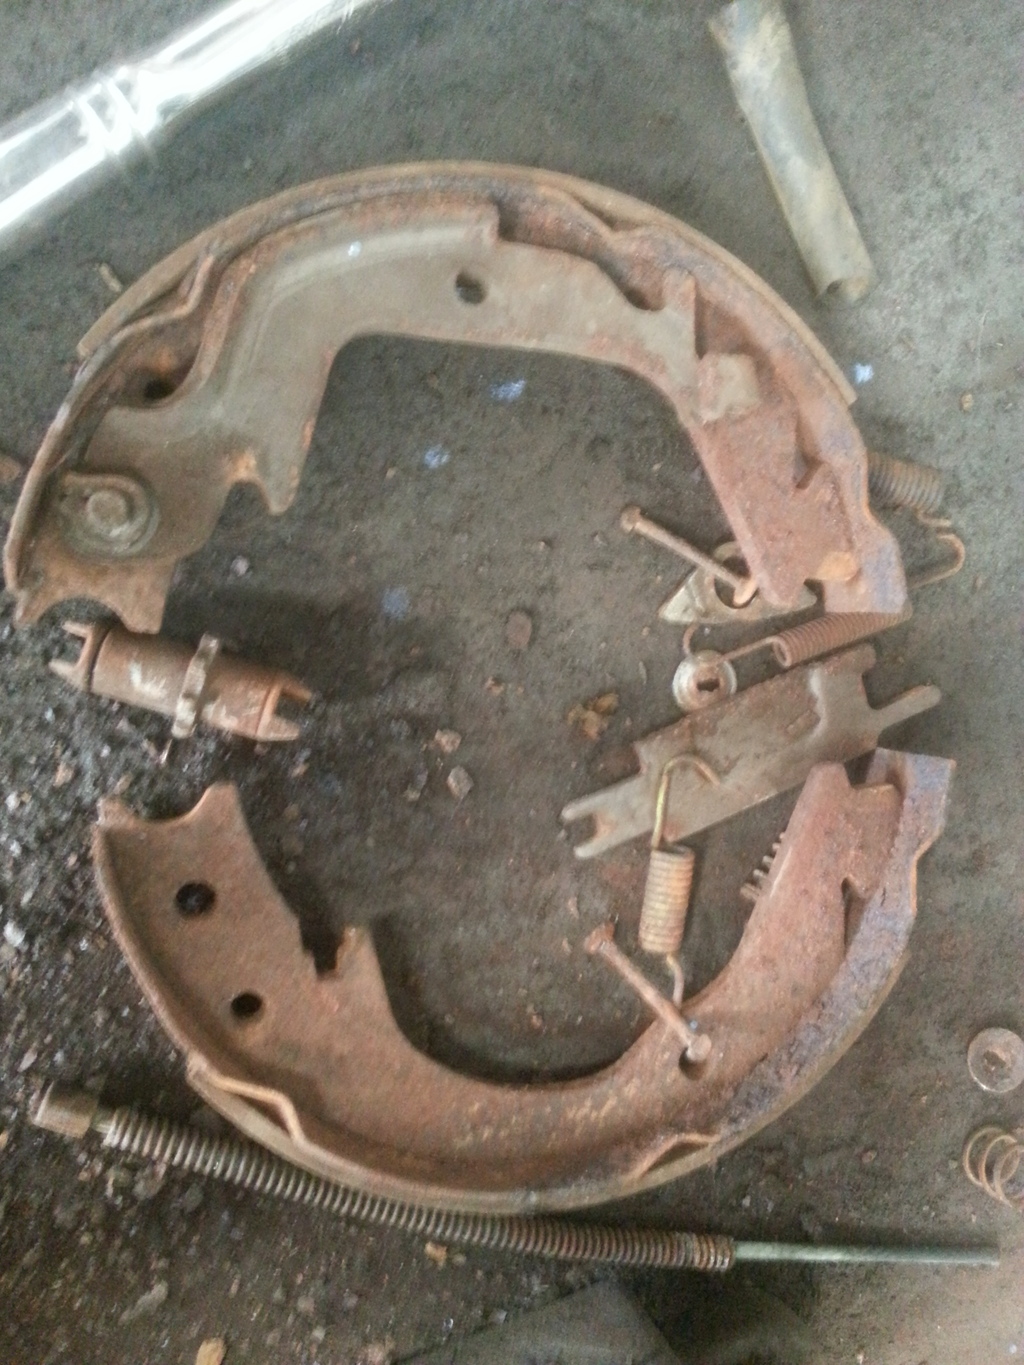
Stayed a bit later tonight to sort the rear handbrake shoes and surface's up, overall this hub isn't to bad, needed a small bit of blasting and rust remedying. clean up tomorrow and ready for new handbrake fitting kit, Driveshaft out tomorrow, clean, degrease, paint the shaft's and refit with new boot's Also managed to wire wheel up, rust remedy and prime and paint the rear diff, fuel tank straps,filler neck, rear droplink's, diff support bracket,
Apologies for the lack of updates. Laptop is broken,also getting used to the new phone.
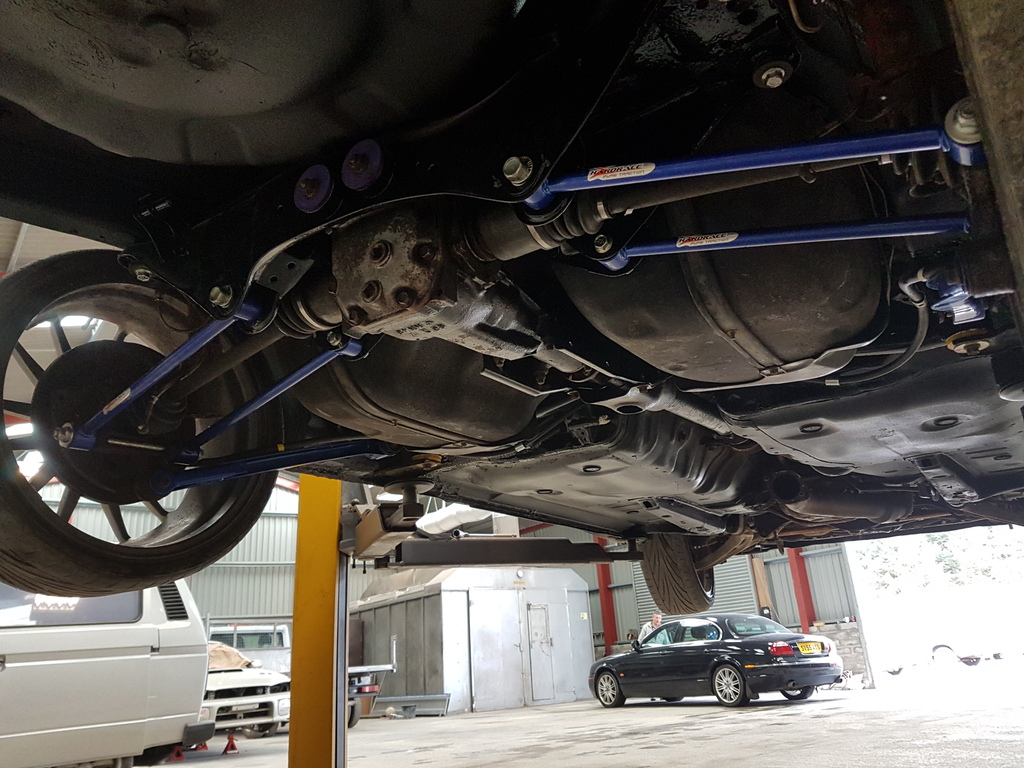
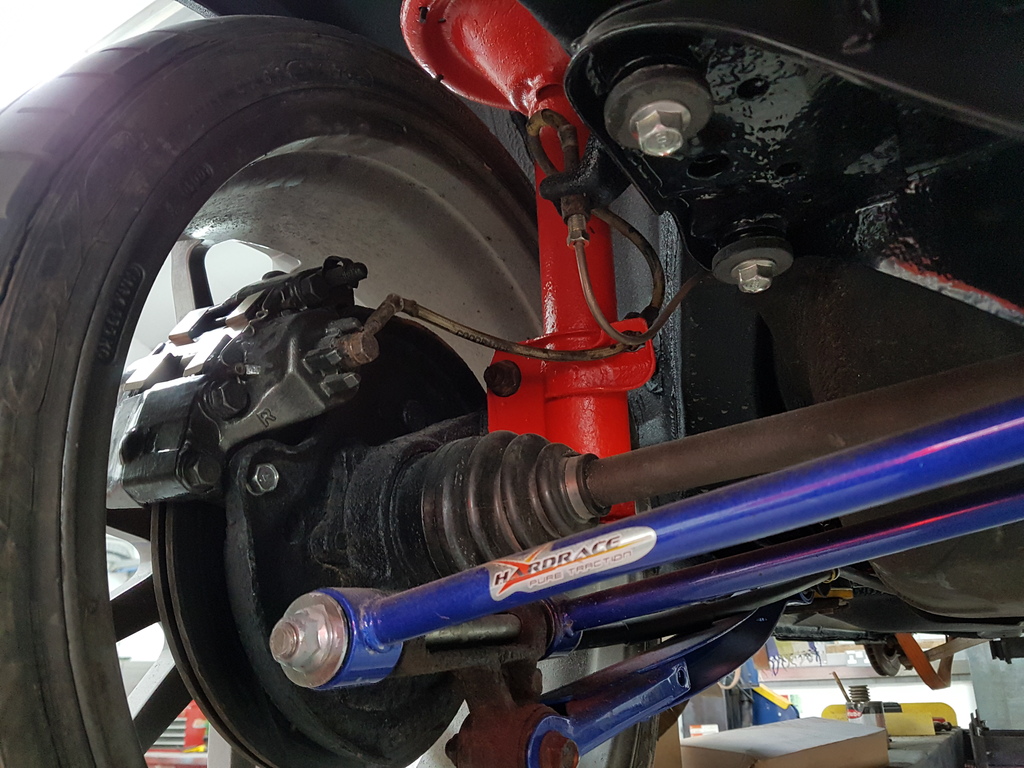
Thankfully the hard race stuff all arrived okay 2nd time round.looks brilliant and should hopefully be a great upgrade over standard.
After getting the rear subframe and diff all fitted up. The new lateral arms all fitted up a treat. Certainly a straight swap over standard items. With Mark ordering up all new bolts for the underneath it to certainly goes together easily.
Next up is the bodywork prep. Started on the rear spoiler repair. With it being a aftermarket item there was several more studs than original. 9 holes need repaired in the boot. Will get photos of the spoiler later this week.
What sort of price does this work cost? Just got mine back from mot today and looks like it needs this sort of restoration. Hopefully won't have to scrap it.
Well managed to really crack on with this after a quite busy period meaning i could only get 20-30 mins at a time per day
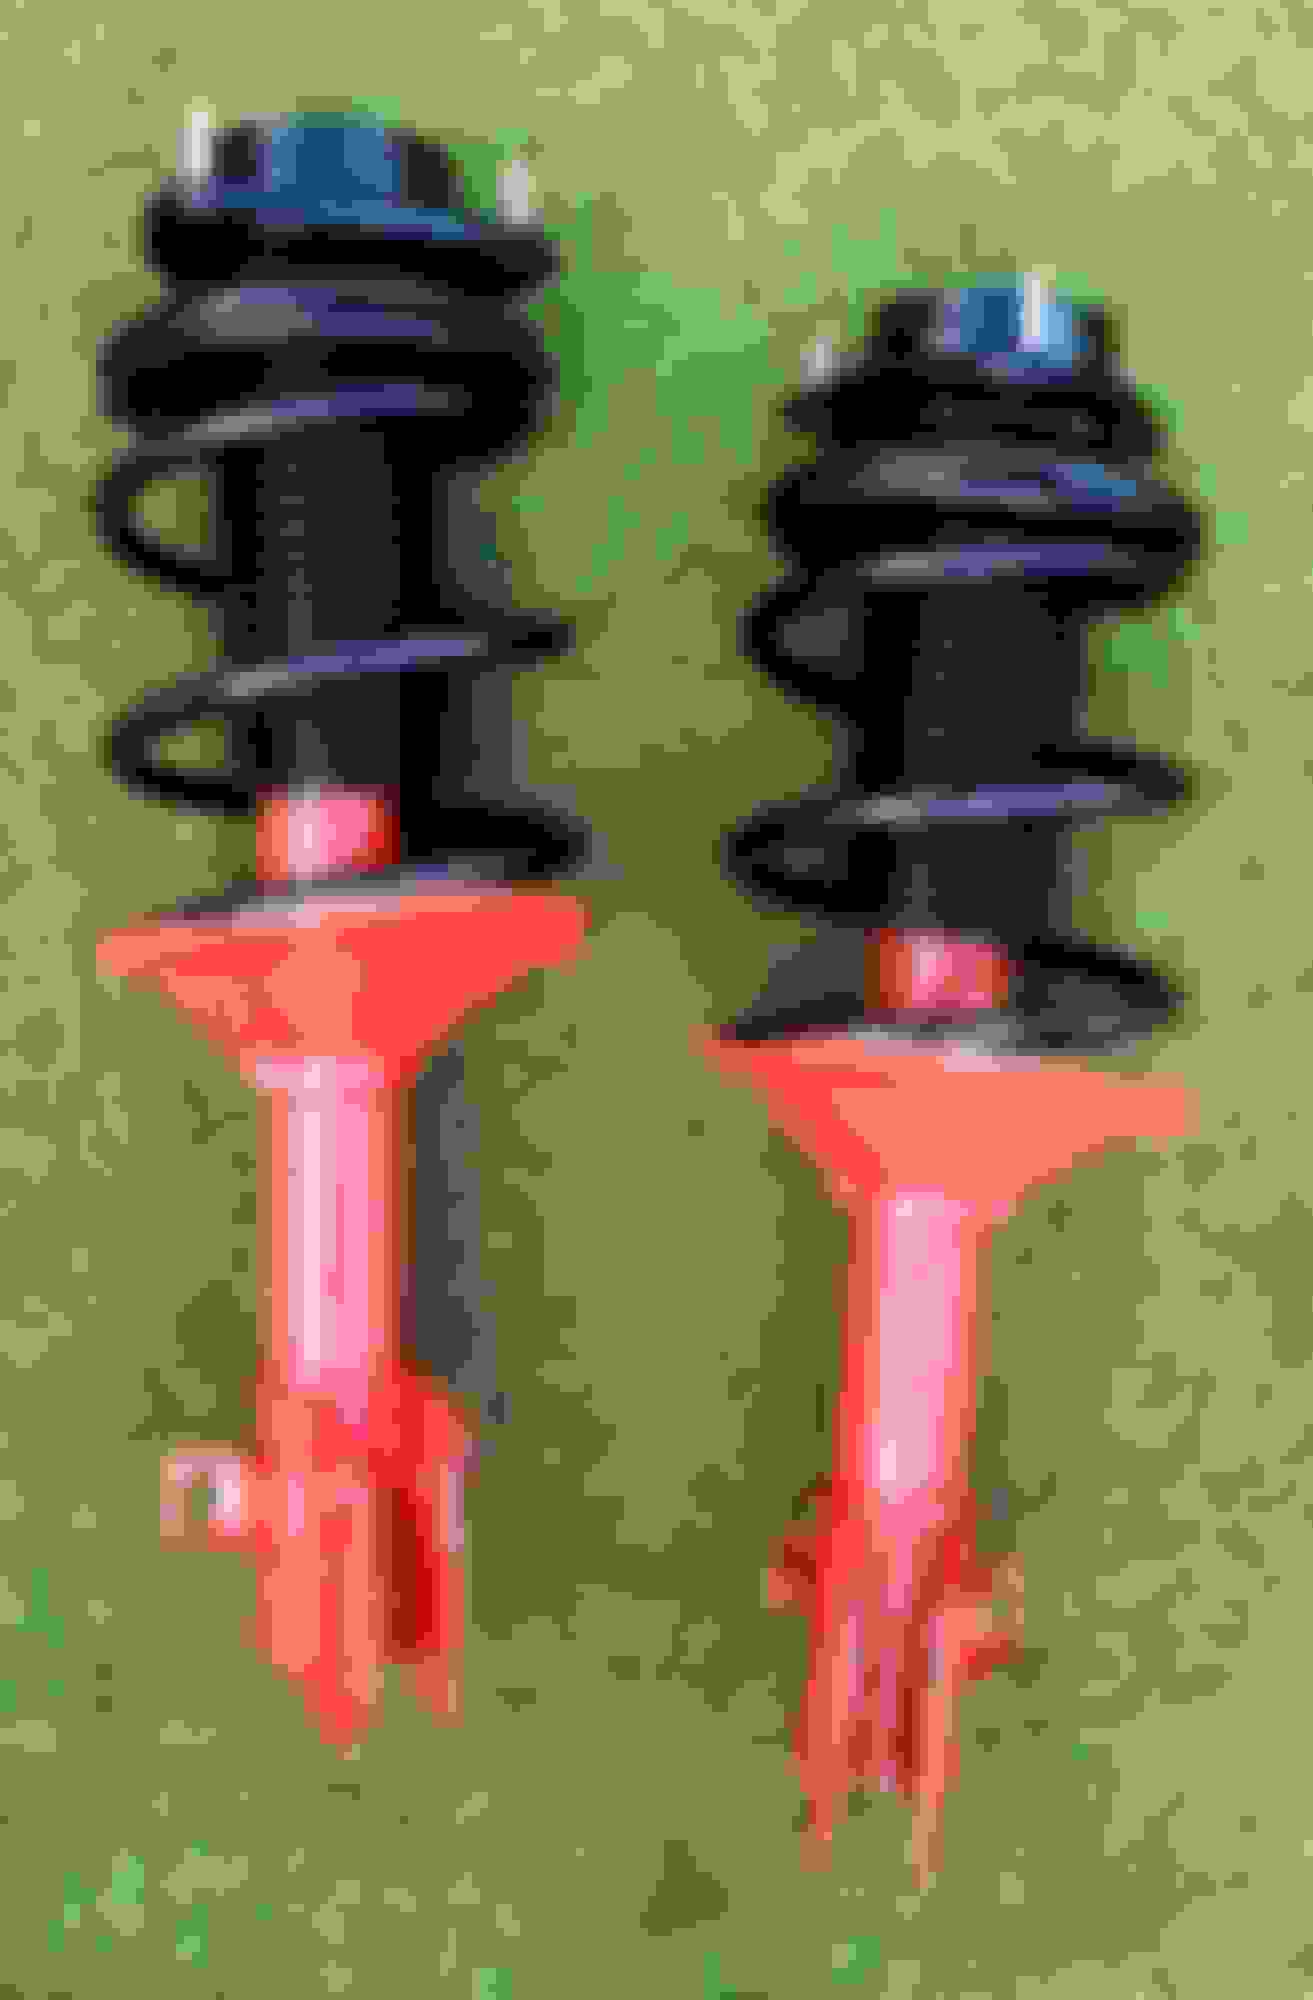
Shot-blasted and stripped the rear struts and spring's. etch primed followed by some high build primer, paint and lacquer and all rebuilt up. The spring's were in pretty good nick considering the surface corrosion. Forgot to get a before photo of them however im sure we all know what they look like after a few years sitting around.
Mark dropped of his rebuilt front and rear calipers!! bloody good job i must say, paint look's really good, new stainless pistons, seals,retaining pins bolts. Top job Mark. Ill let you do my rear 2 pot's due to my severe lack of patience!!!
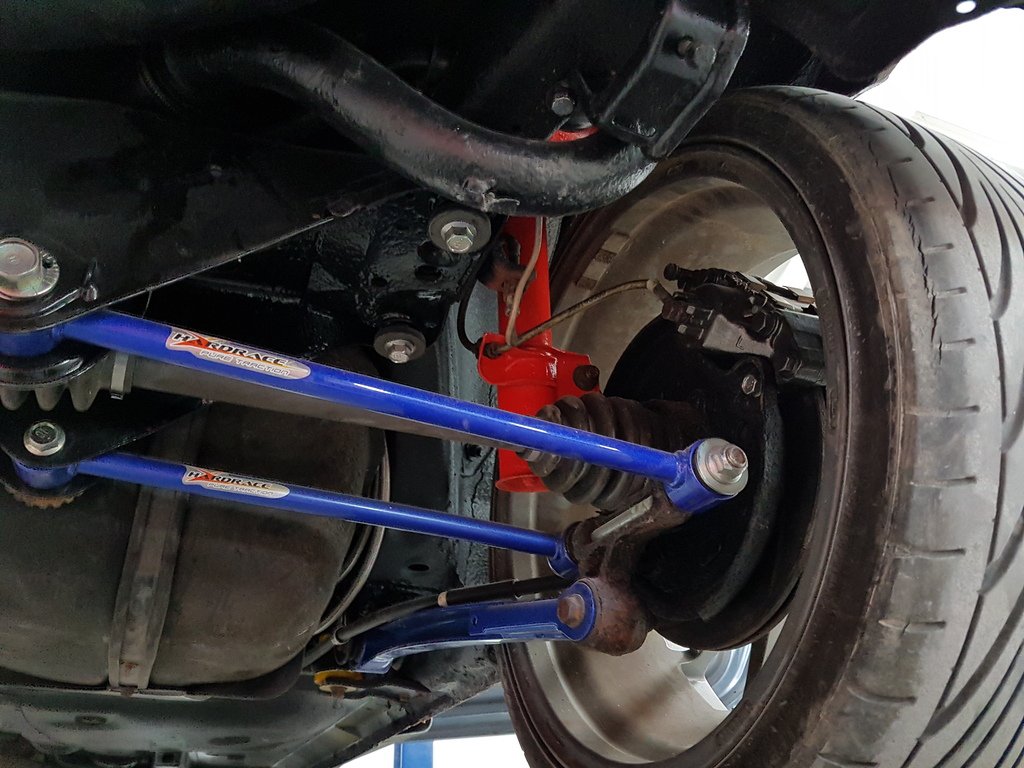
White line rear ARB painted a rather frightening orange, better than rust i suppose, Goes nicely against the blue hardrace lateral arms
2nd coat of stonechip over the POR 15 rust preventative paint front to rear.
Managed also sneakily to fit up the new front inner tie rods and end's, old ones were certainly past it!! also new droplink's that put up quite a fight until the 3" Grinder said hello!!
(Russell: there's a leak coming from the driver's side steering rack,i couldn't pin point exactly were however it seems to be coming from were it bolts to the subframe if that makes sense)
Then were on to the fuel lines, ill post exactly what i ordered for doing the conversion at the end of the thread. but cost's around �120 quid for hose,fitting's etc. Away back out to secure them in place then crack on with the lovely job of cutting my finger's to ribbon's fitting on the stealth black torques fitting's!!!
Mark's ordered pretty much the ICP catalogue of new bolt's,fitting's etc for the complete rear end, makes such a difference to the car with proper OEM quality bolt's. certainly recommend it for anyone doing similar.
Tonight i should hopefully have a little blurb on the fuel line fitting and routing etc!! (Hint: dont need to drop the tank as i thought it needed)
Pics as promised Mark:
Front passenger brake caliper: will clean up the face!!
Passenger side rear strut after tidy up:
Drivers side front tie rod and drop link:
Passenger Side front tie rod and drop link:
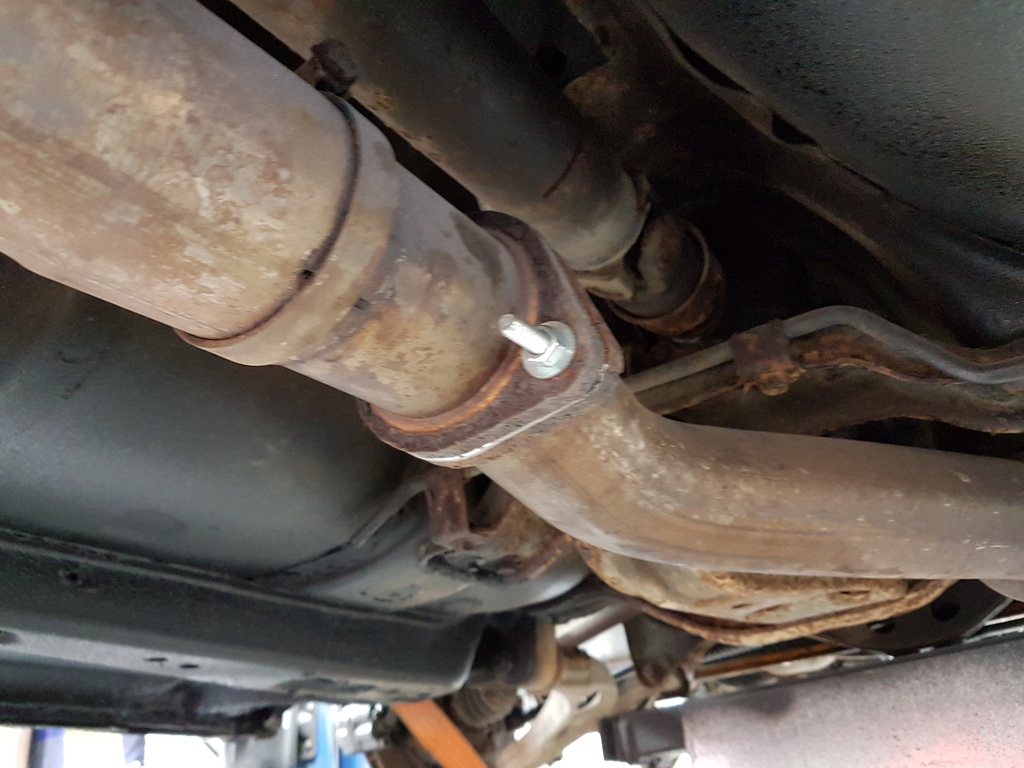
3" exhaust gasket and new stainless bolt's:
Passenger side rear end: ( will be cleaned, dust and crap everywhere )
Having a few issues to get this started. Teflon fuel lines all fitted up. pressure at the regulator. Wont start. car turn's over and just doesnt seem to want to fire
Cam + crank sensor's okay
fuel in tank
fuel getting to filter okay
original fuel pump assembly used even with the new-age tank
original level sensor from "passenger side" of the tank used
no check engine light's or anything obvious as to why it wont start.
was a small leak from the return pipe fitting on the pump assembly, sorted that and no different. Any one able to shed any light?
she runs, theres spark and fuel. but idles very lumpy with throttle held open, soon as throttles shut it cut's out. fuel pressure reading a constant 50 psi on tickover then dropping once off. did splutter into life for a few second's then back to running lumpy.
Bit of a update here, apologies for the delay in updates.
new rear bumper bar fitted up:
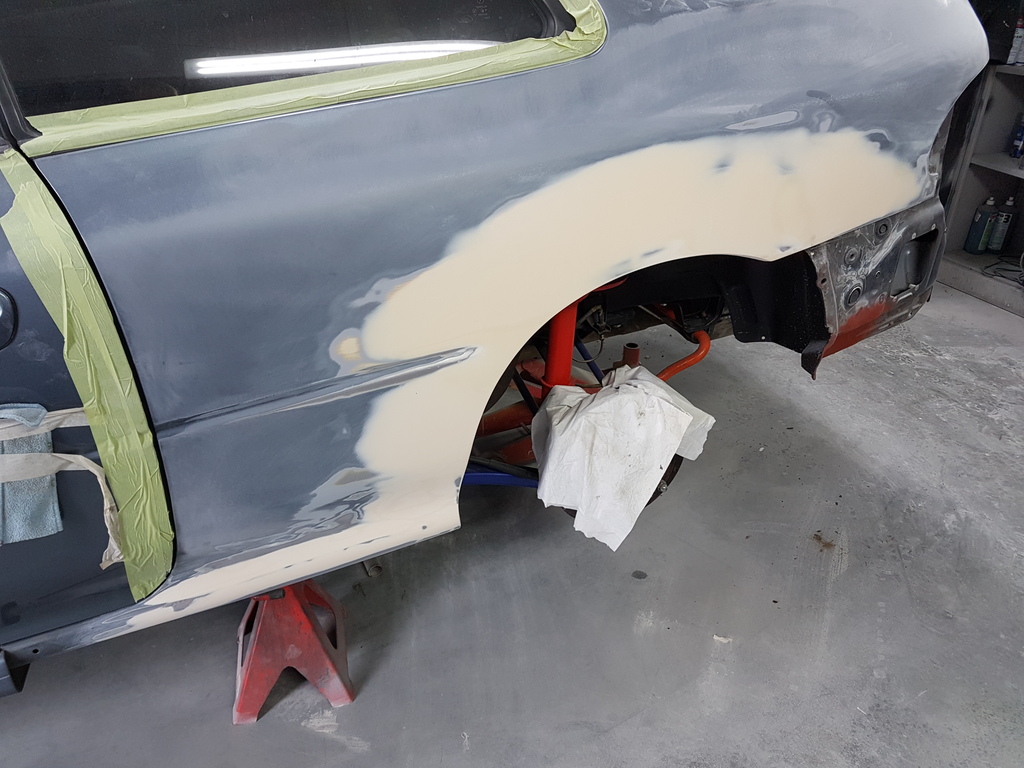
Rear arches all painted,
Looks brilliant now it's finally painted, rear bumper needs a bit of fettling as it seems to be sitting a little inwards, job to sort before final fit up and polishing
Struts re built, arches stripped for stone chip and underseal. Bumper bar off for replacement. Nearly time for engine out and paint. Rebuilt. Arches ready for final prep before stone chip and underseal. Getting ready for paint once stripped. Nearly ready to remove.