
Haykeye STi Door Cards into Blobeye WRX - a How To Guide....


Thread Starter
Scooby Regular
Joined: May 2007
Posts: 156
Likes: 0
From: Aberdeenshire
I recently said that I was going to be putting an interior from a Hawkeye STi into a Blobeye WRX and was asked if I could write up a �how to� as another member was interested in doing the same.
Sorry if it gets a bit long winded, but it�s not a quick thing to do!!
First up I started with the drivers side as I felt this would be the most challenging, and a good enough place as any to begin.
Firstly, you need to remove the old door card � there are a few threads already covering this but a quick explanation is as follows:
Remove the black triangle behind the wing mirror and the interior door handle surround.
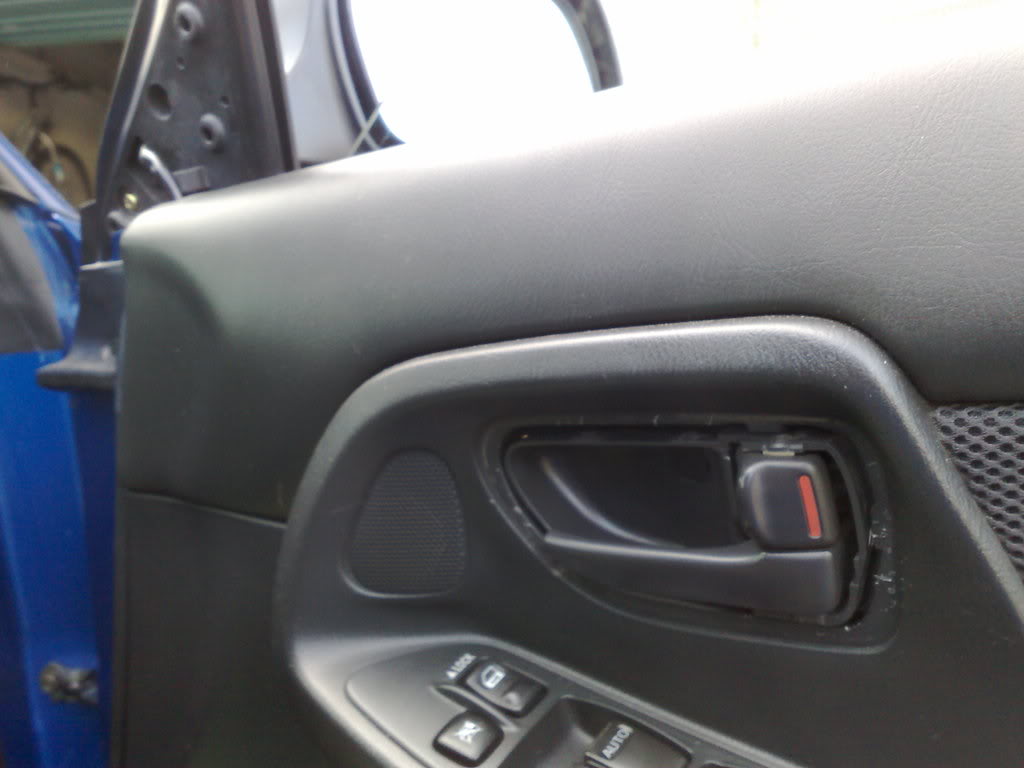
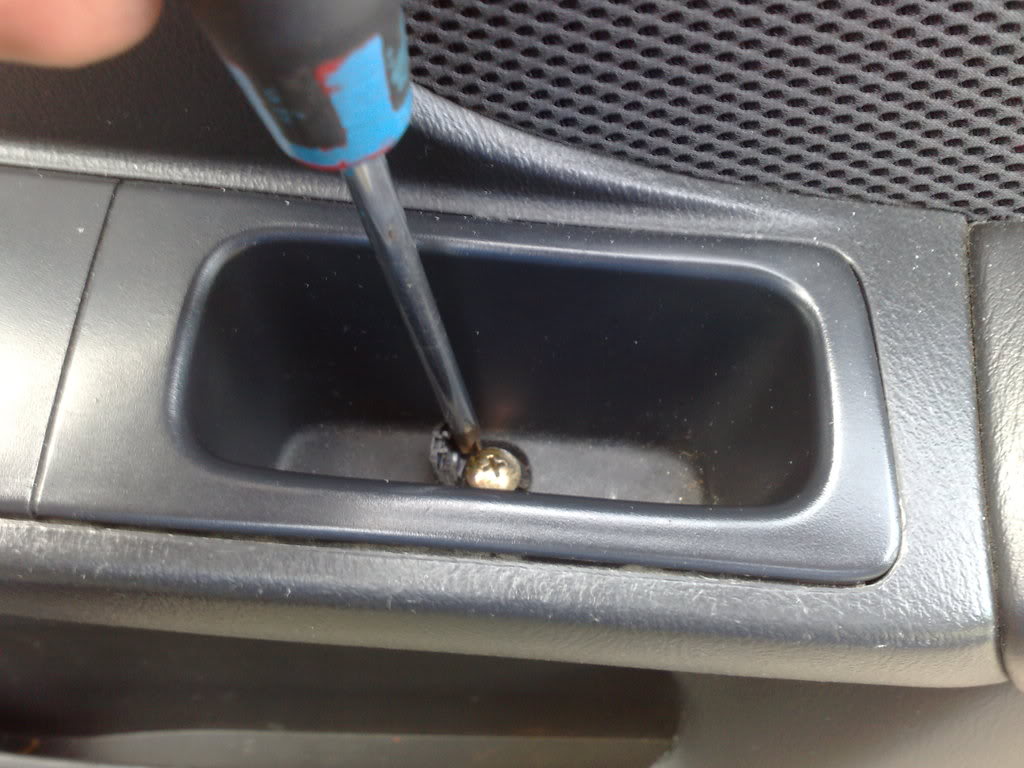
Next up there is a screw hidden under a cover in the door pull which needs to be undone and removed.
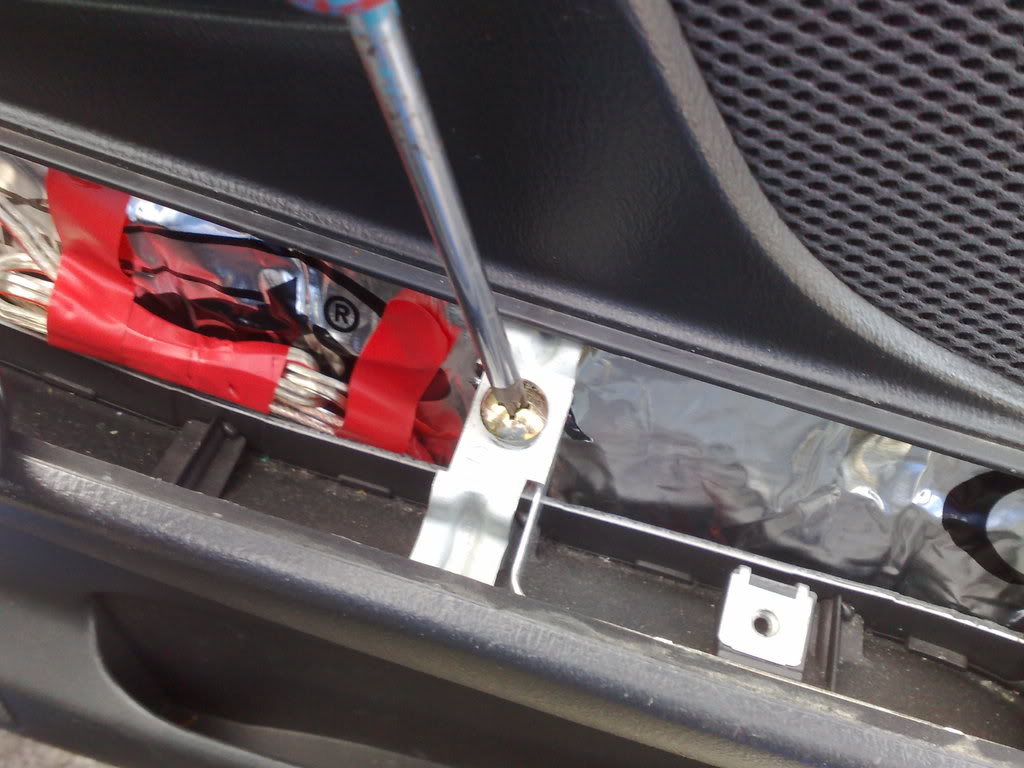
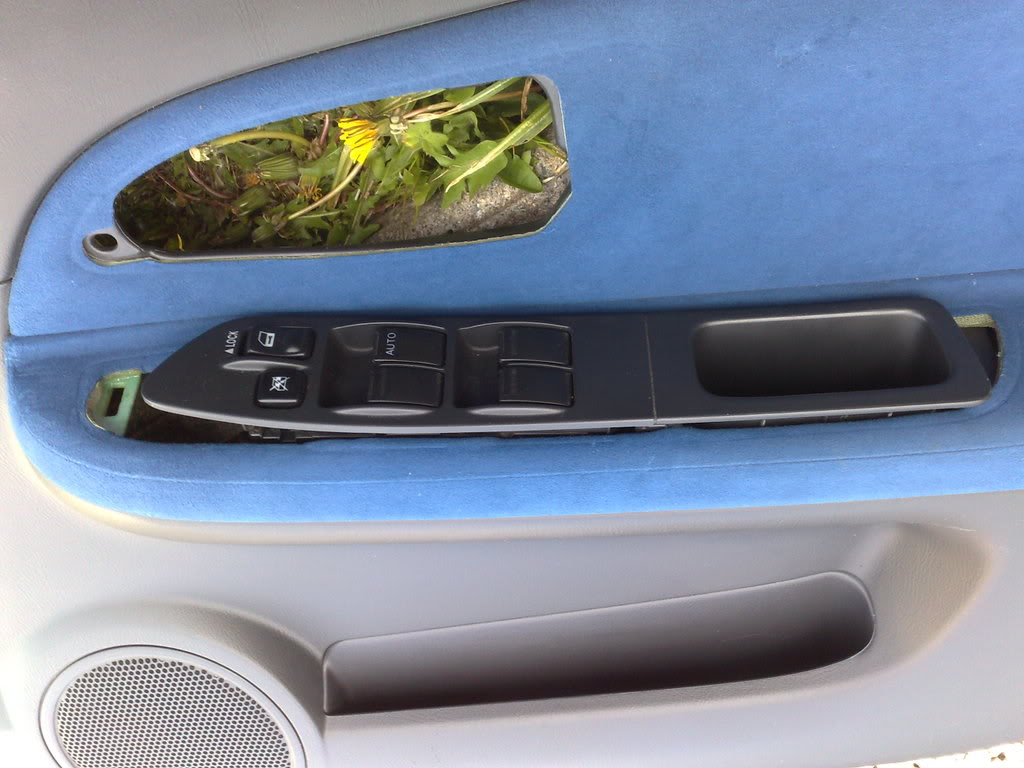
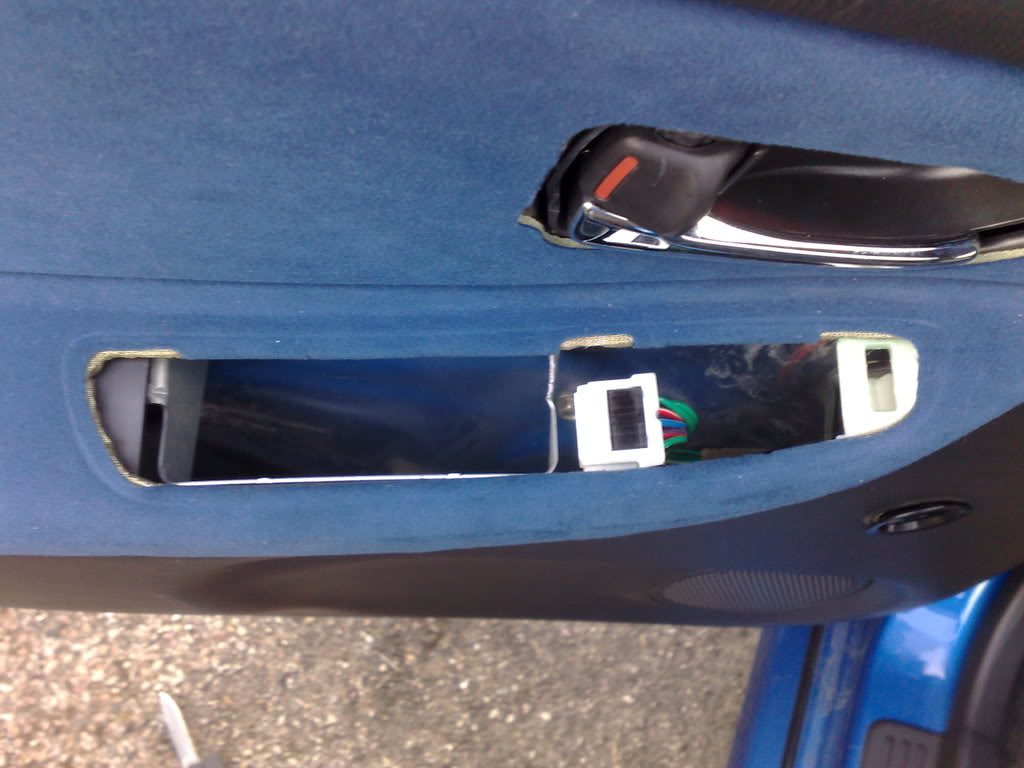
Once this is done you can remove the electric window switches � lift up the unit from the rear and slide it out from the front and then remove the wiring harness from the switch block.

With this out the way the final screw securing the door card to the door can be removed.
Finally the door card simply pulls off as it is only left on with poppers.
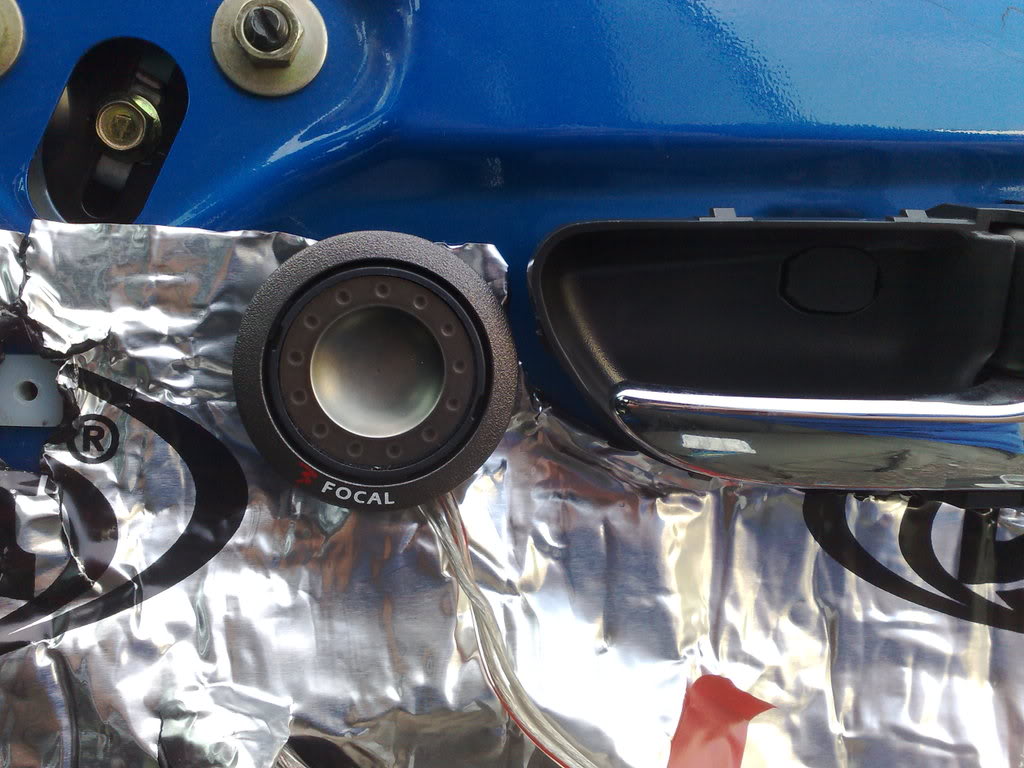
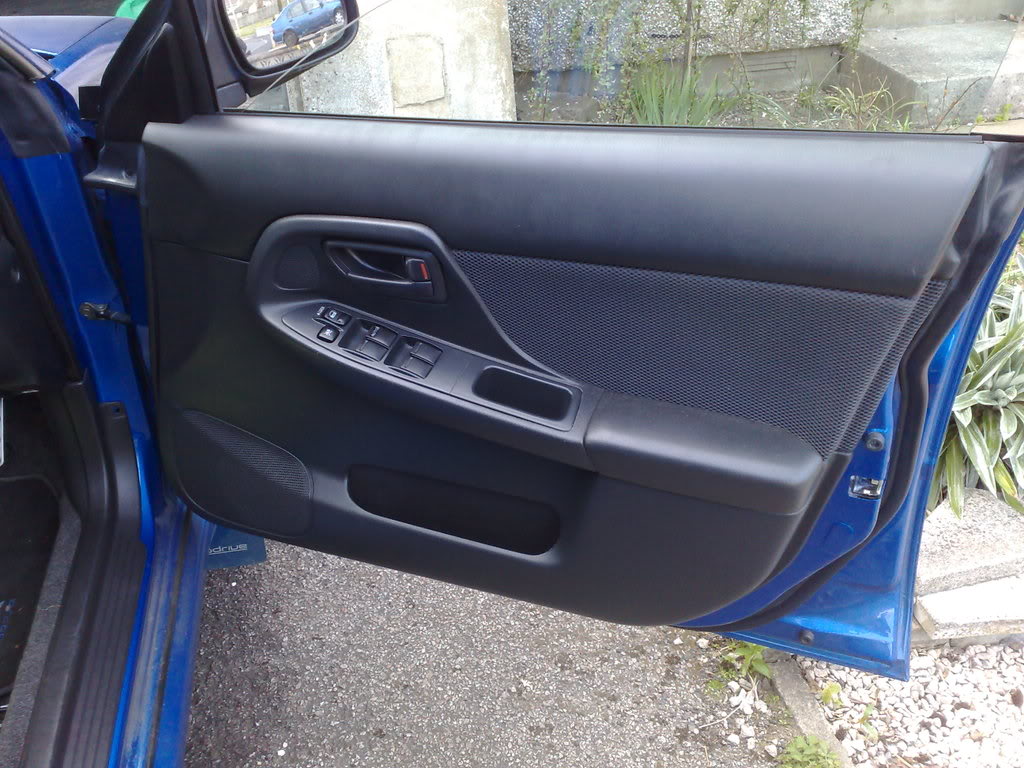
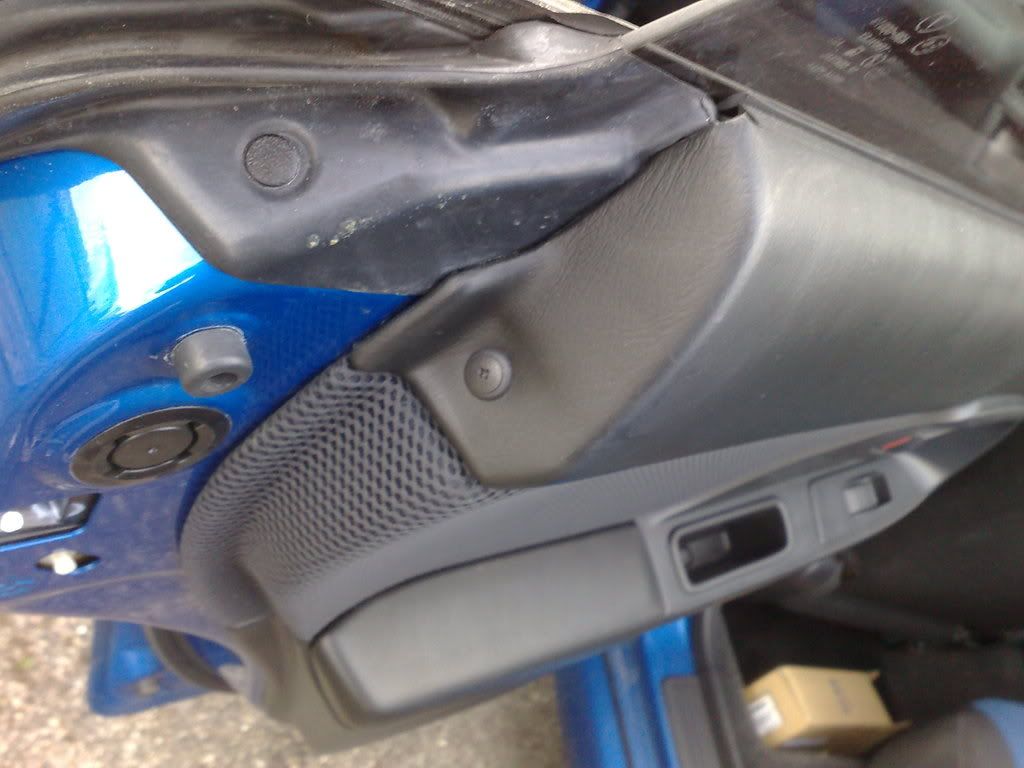
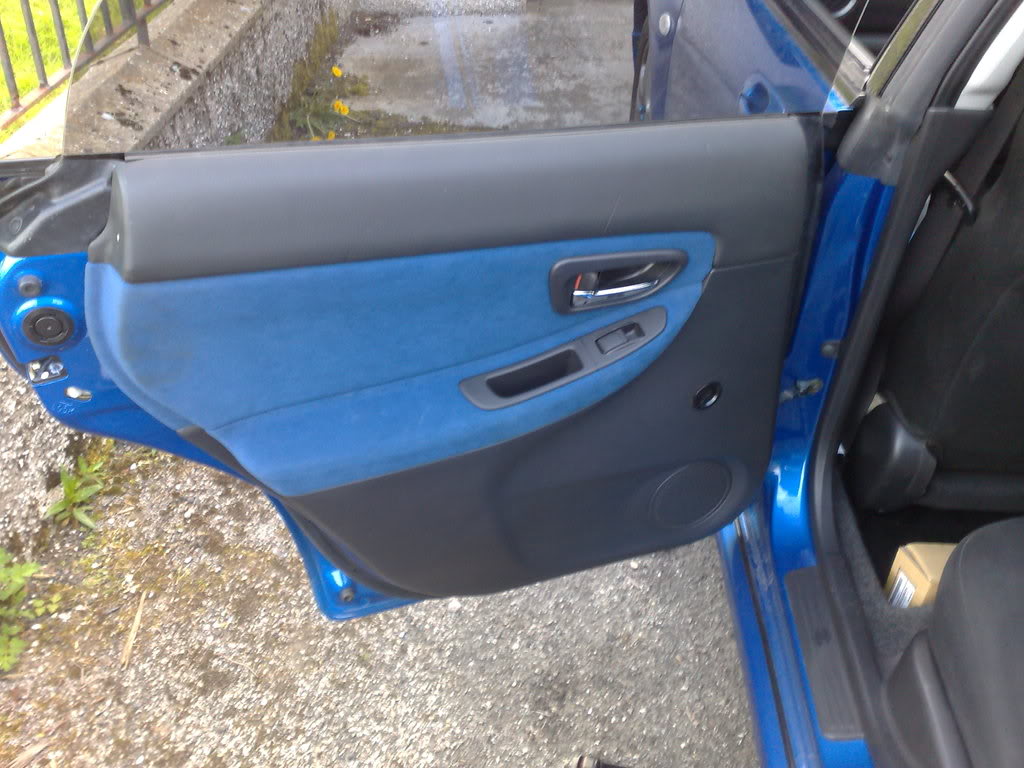
You may have noticed by looking at the two interiors that in the Blobeye the tweeter is angled towards the occupants, whereas in the Hawkeye the tweeter sits flush and is located closer to the interior handle. The pic below shows the tweeter mounted on the original blobeye bracket which needs to be removed and the tweeter repositioned.
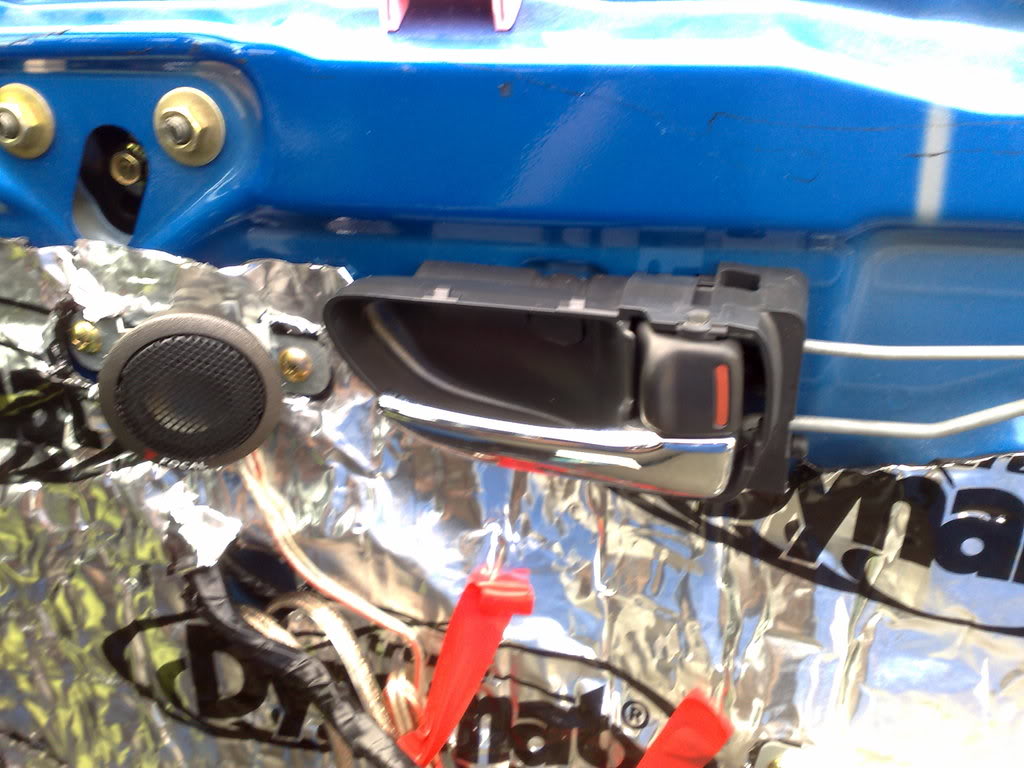
The observant will have also noticed that I have swapped out the door handles for some chrome STi ones � this is simple enough and involves removing the screw behind the cover, sliding the handle towards the back of the car and then removing the 2 door control links � 1 for door opening and one controlling the lock.
To mount the tweeter I simply used some double sided sticky pads and to get the location right I got one of the new Hawkeye door surrounds, held the tweeter behind the mesh in the surround and offered up the surround to the door handle before pressing the tweeter down into it�s new location.
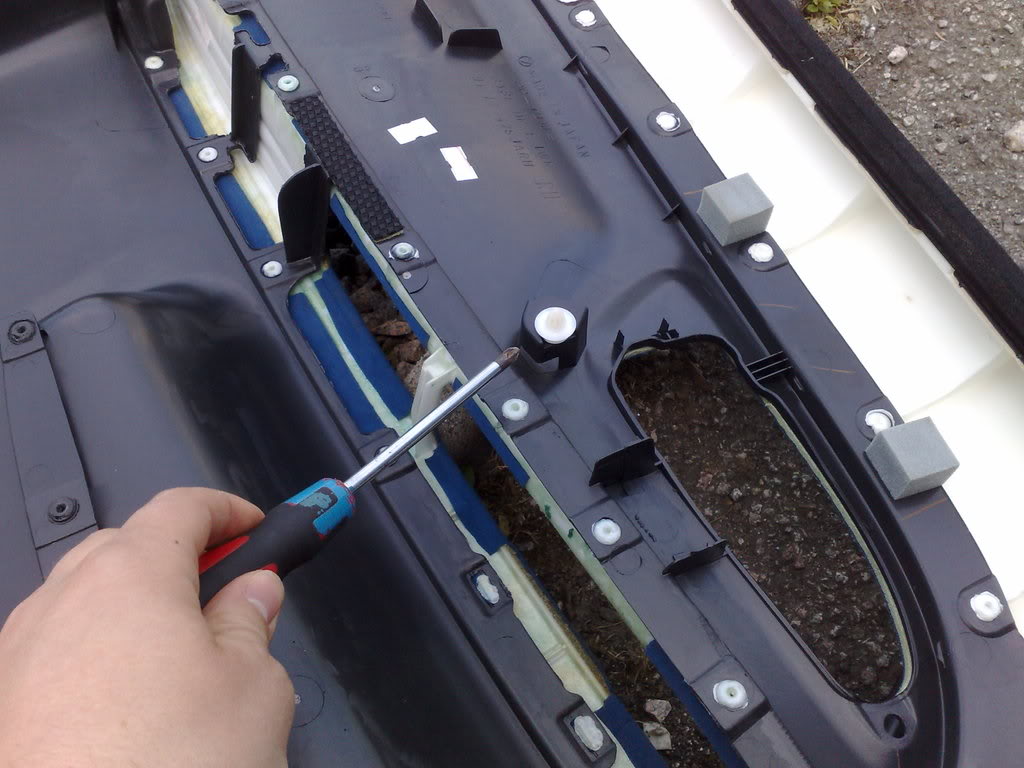
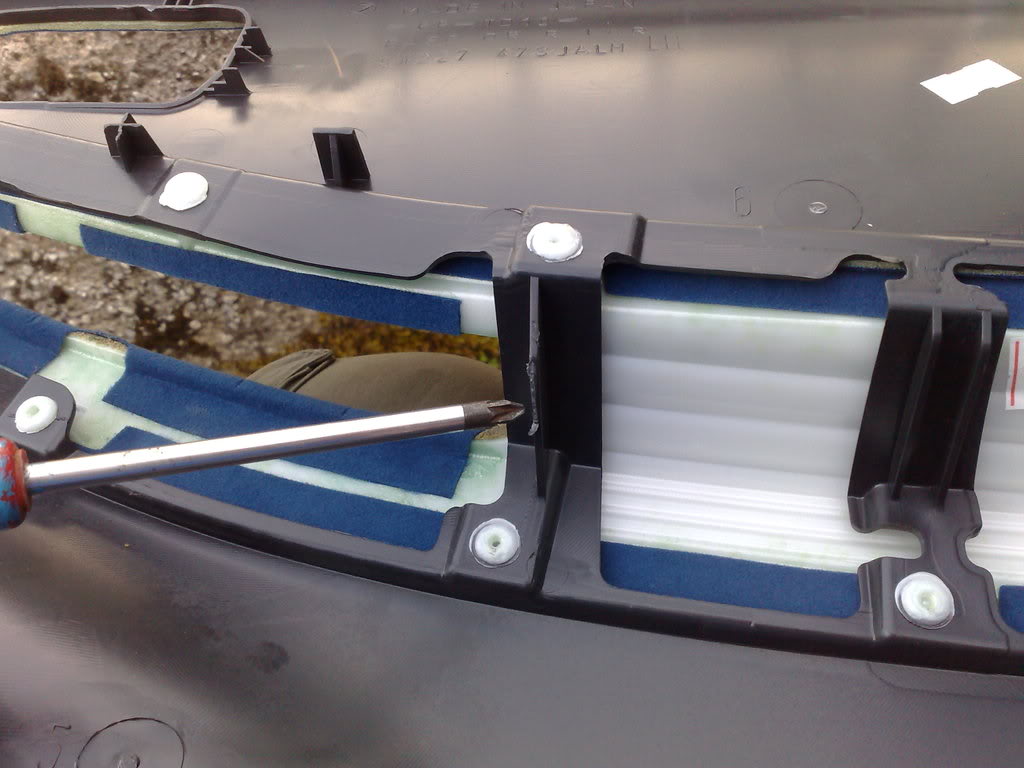
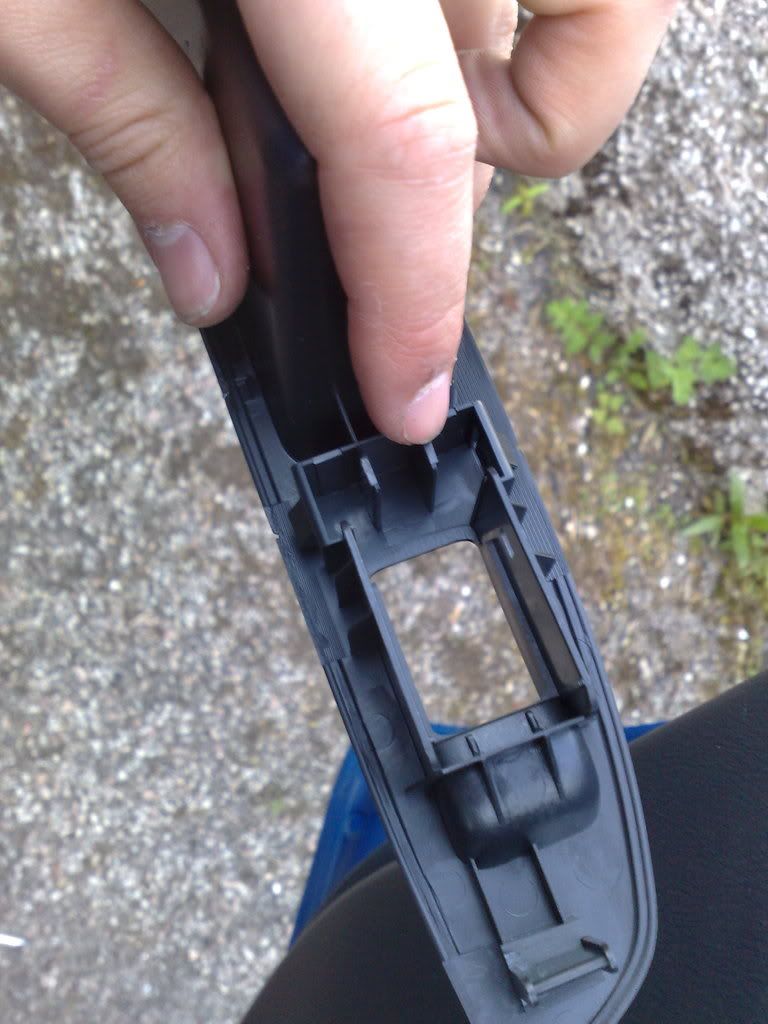
Before progressing on with the door card I checked the back of the new one with the old to compare the mounting locations of all the plastic poppers used to keep the door card in place. As a result I found that one of them, shown below, had to be removed as there was no corresponding hole in the door � or if there was it was underneath the Dynamat!
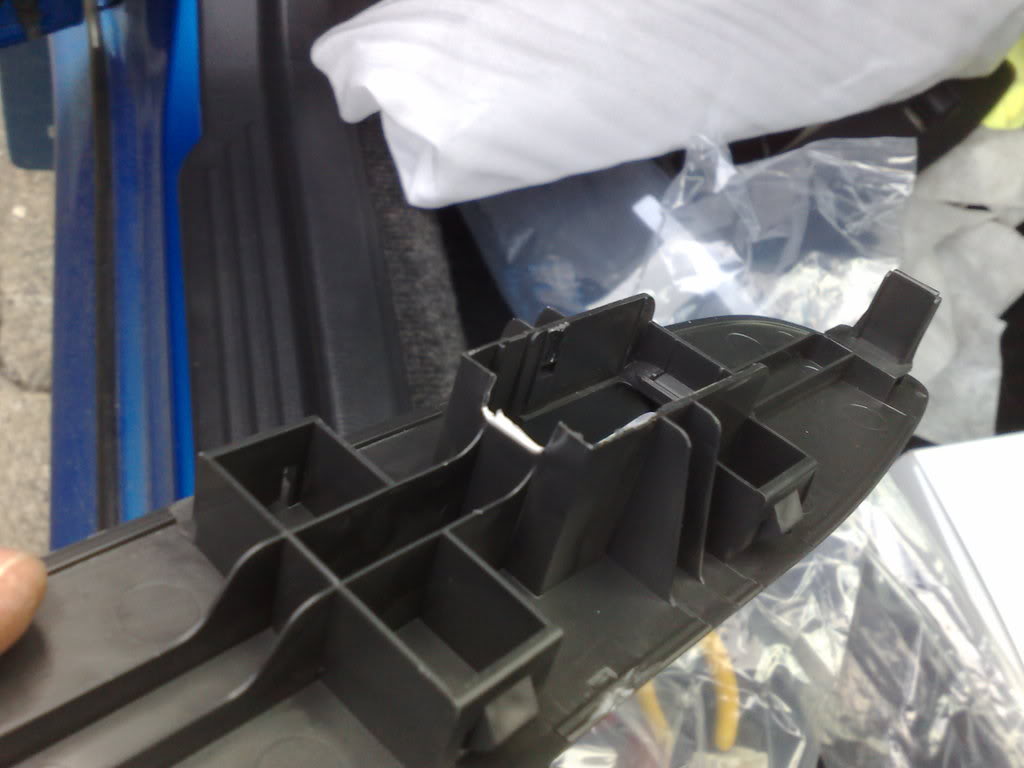
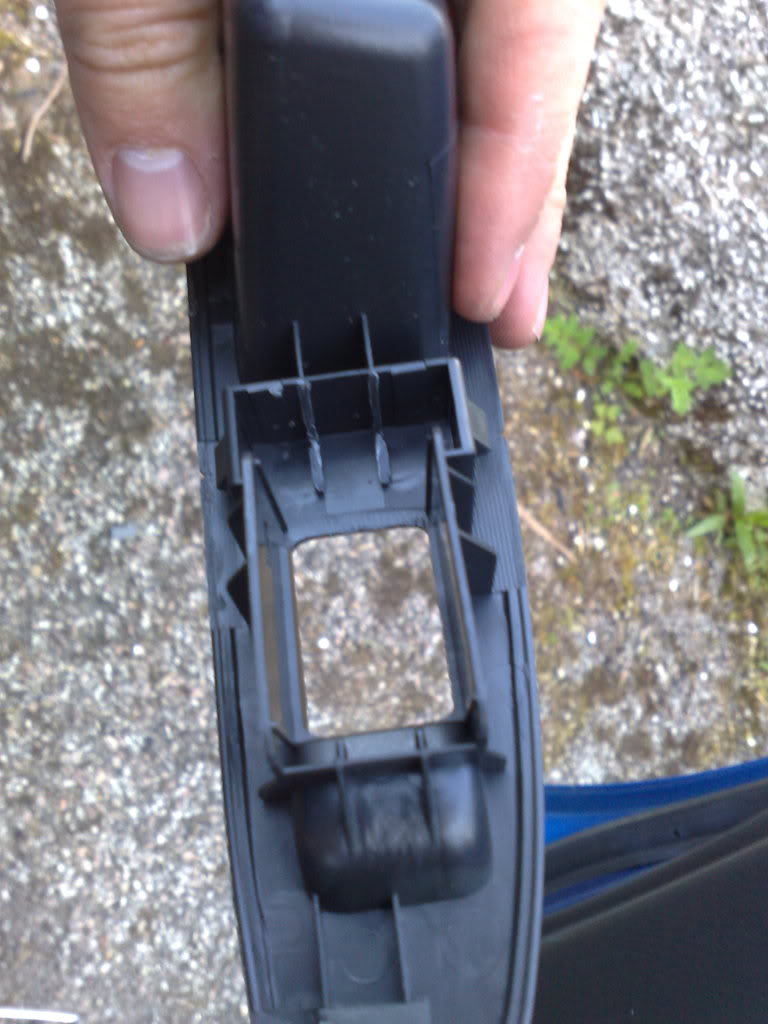
Onto trial fitting the door card. The metal door pull/handle that connects to the door itself need some modification to enable the new card to fit on. The furthest back tab needs to be bend down, and I also ended up trimming some of the black plastic rib on the card that sits here.
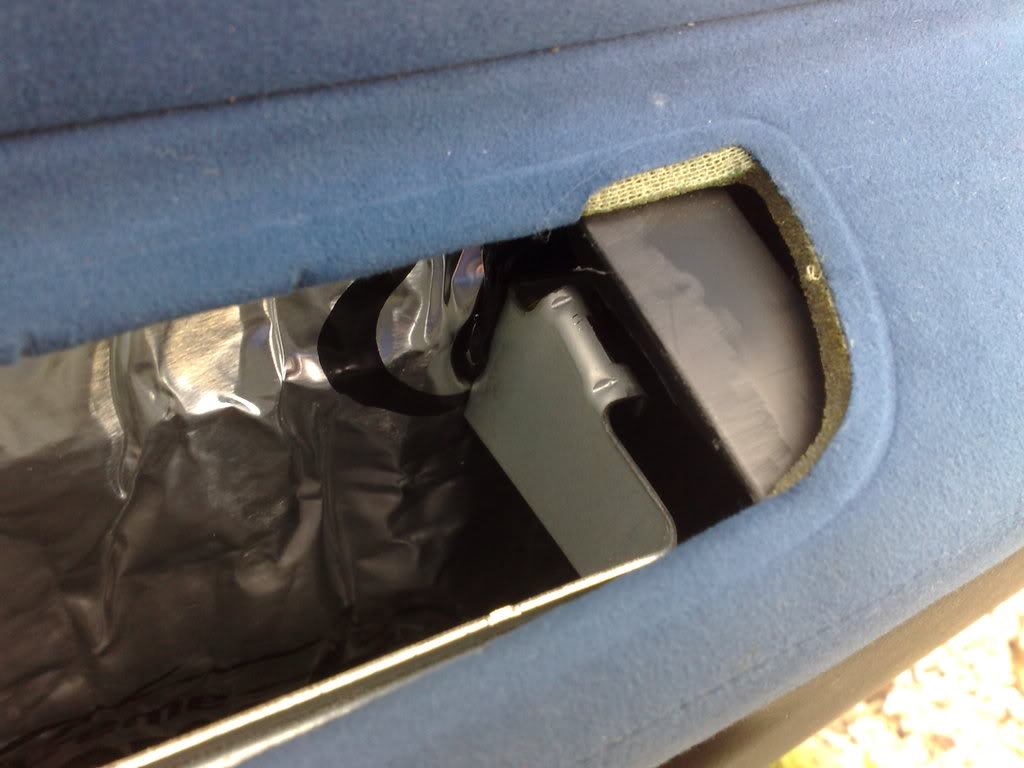
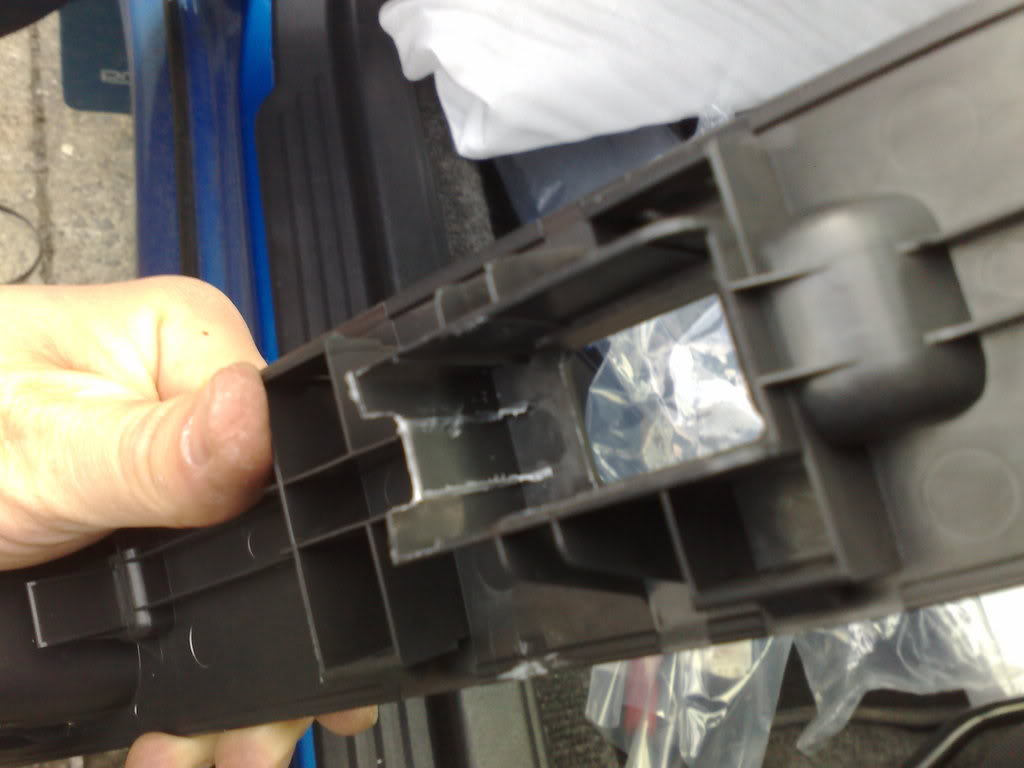
Also you can see below that the metal tab which originally held on the blobeye door card fouls the bracket for the hawkeye switch panel � solution was to remove this tab completely from the handle which then allowed the switch panel to locate correctly.
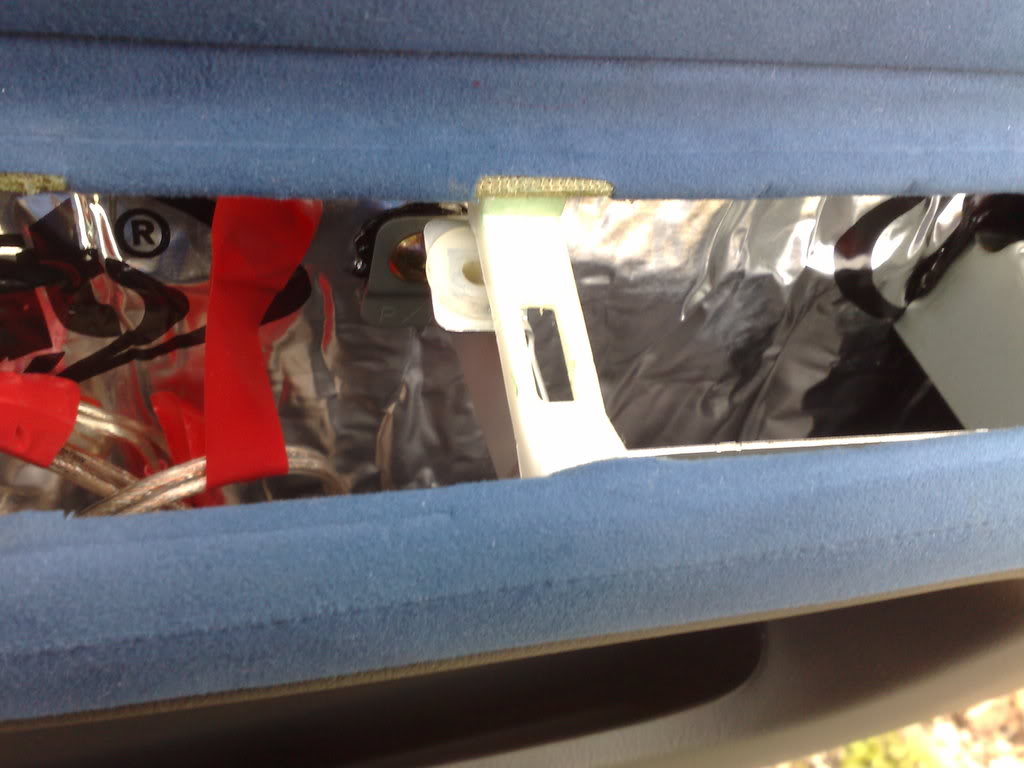
Some trimming of the plastic from underneath this white piece was also required to enable it to clear the metal �handle� sufficiently, but this was just a case of running a Stanley knife down it to remove a few mm.
The door card is now held on by only the plastic poppers, but I feel that this is more than enough and the additional screw that was used before won�t be missed.
As many have found before, the Hawkeye trims panels are longer than the Blob and Bugeye panels.
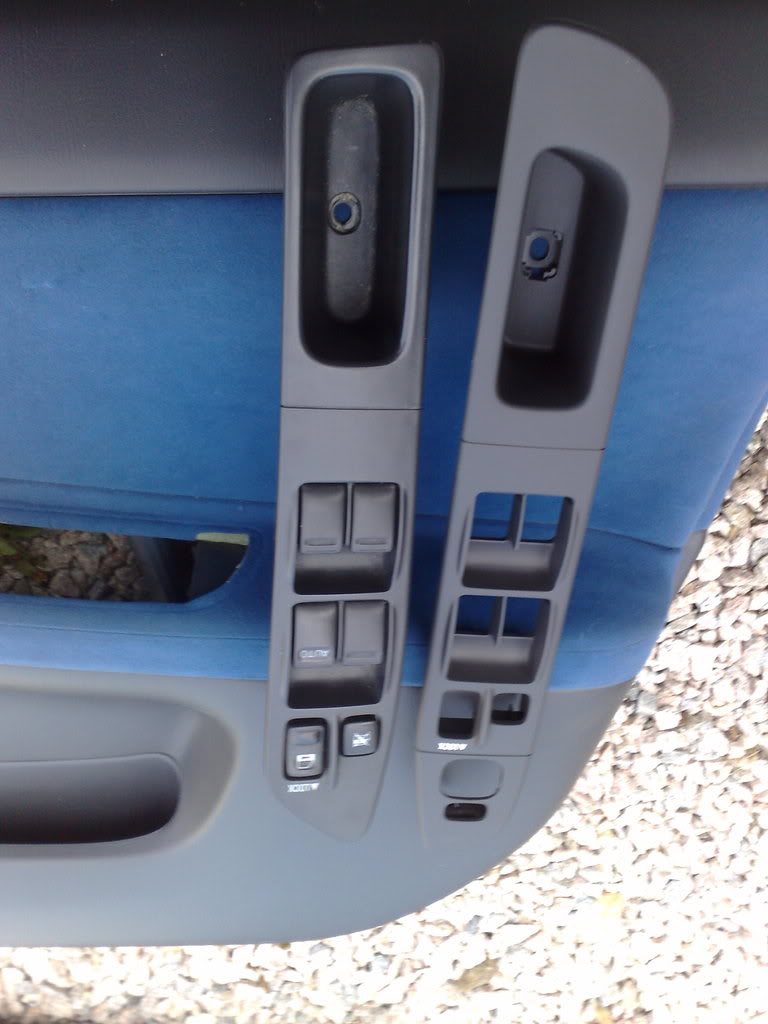
Only solution to this is to get new panels. I got mine from the dealers and will post up the part numbers and list price for each item I required in this install.
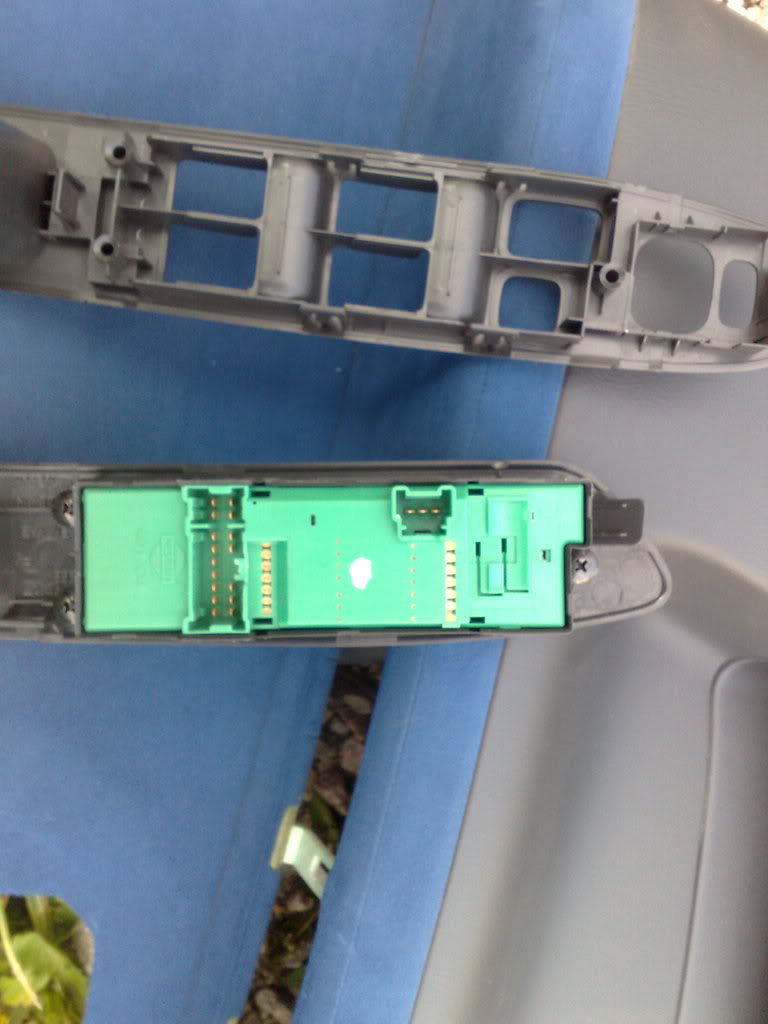
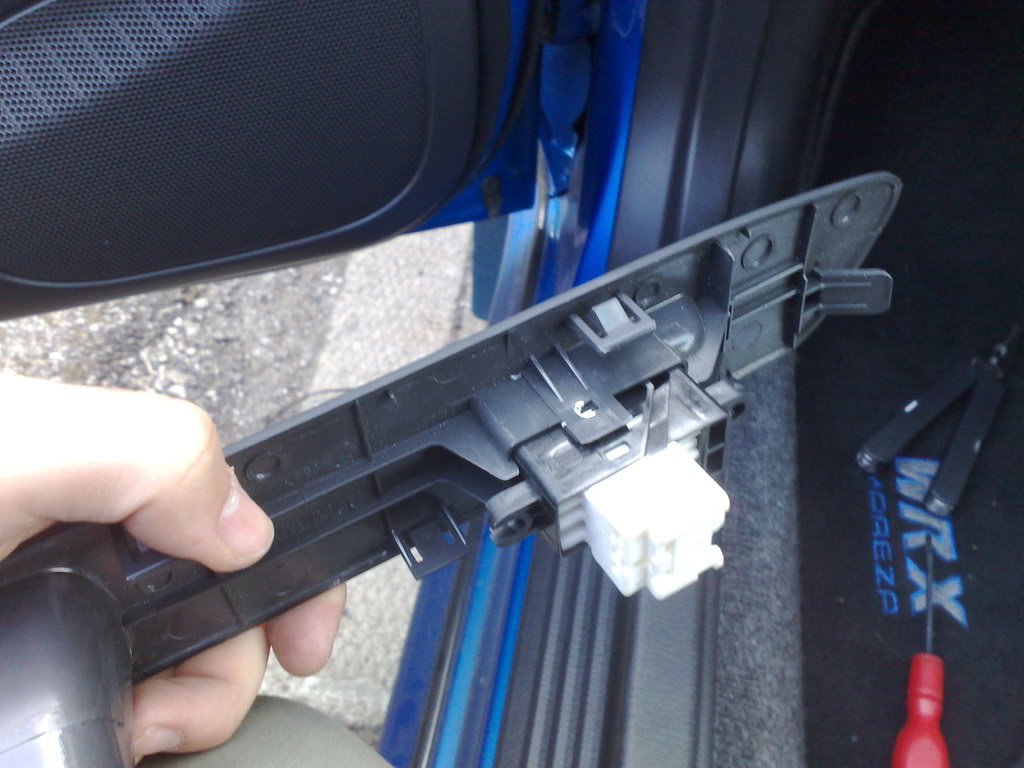
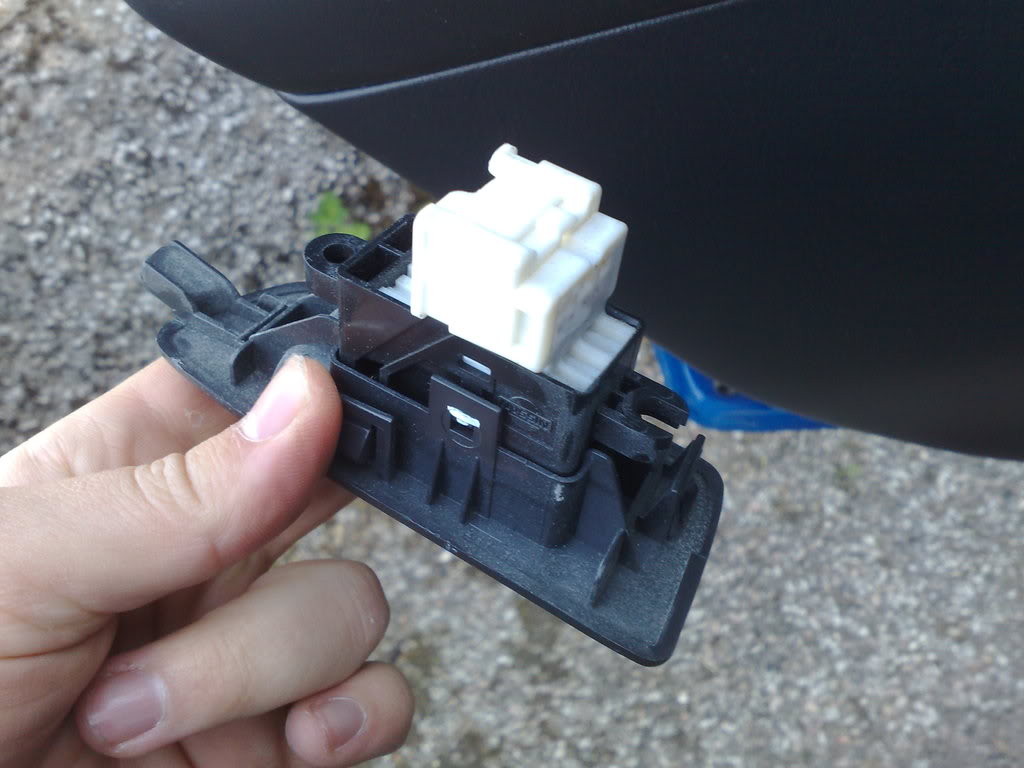
Handily all the electric switched from the Blobeye swap directly over to the new Hawkeye panels, there are 3 screws on the rear which once undone allow the unit to come off of the trim.
One point however is that in the Haweye the electric wing mirror control switch is also located here instead of in the centre console. At the moment I have simply blanked this off using a piece of black plastic I had lying about, but in the future I plan to do the whole centre console swap so will wire up a control switch when I get round to that one.
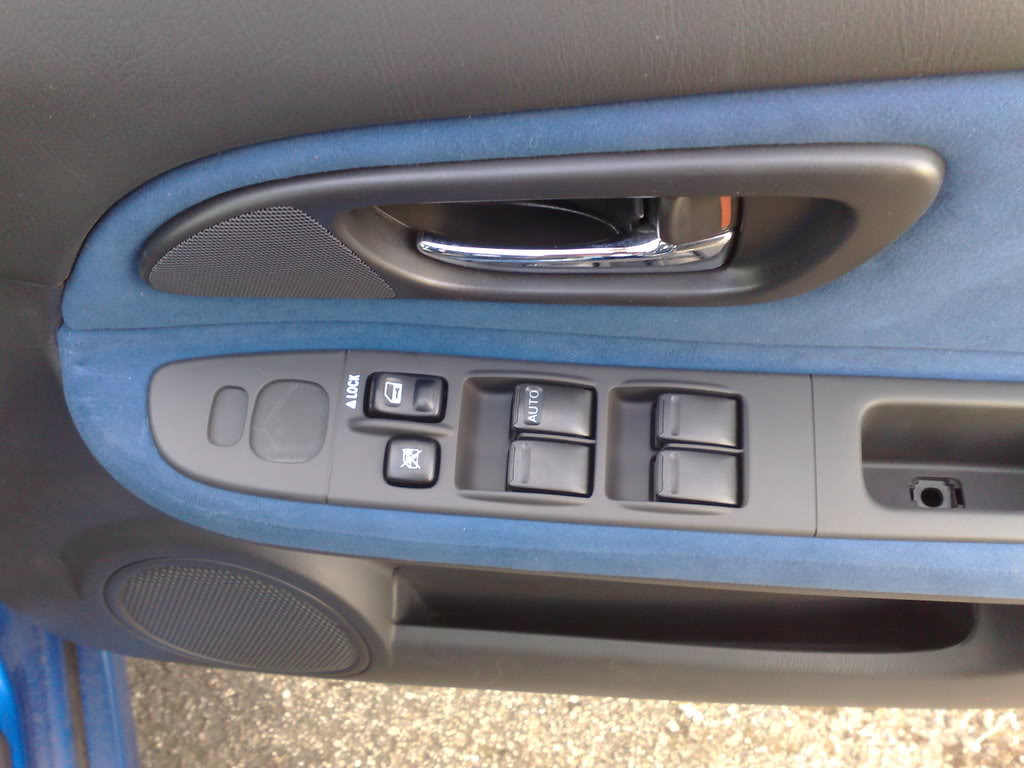
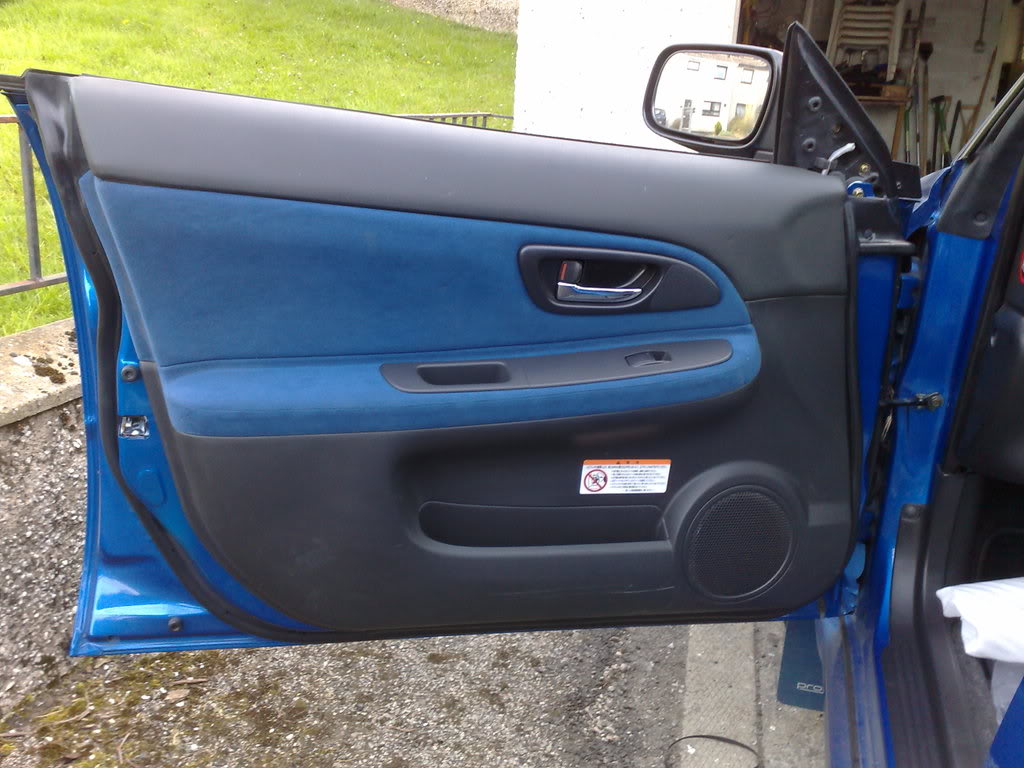
Once this trim is in you now have a completed drivers door card swap, changing from this:
To this:
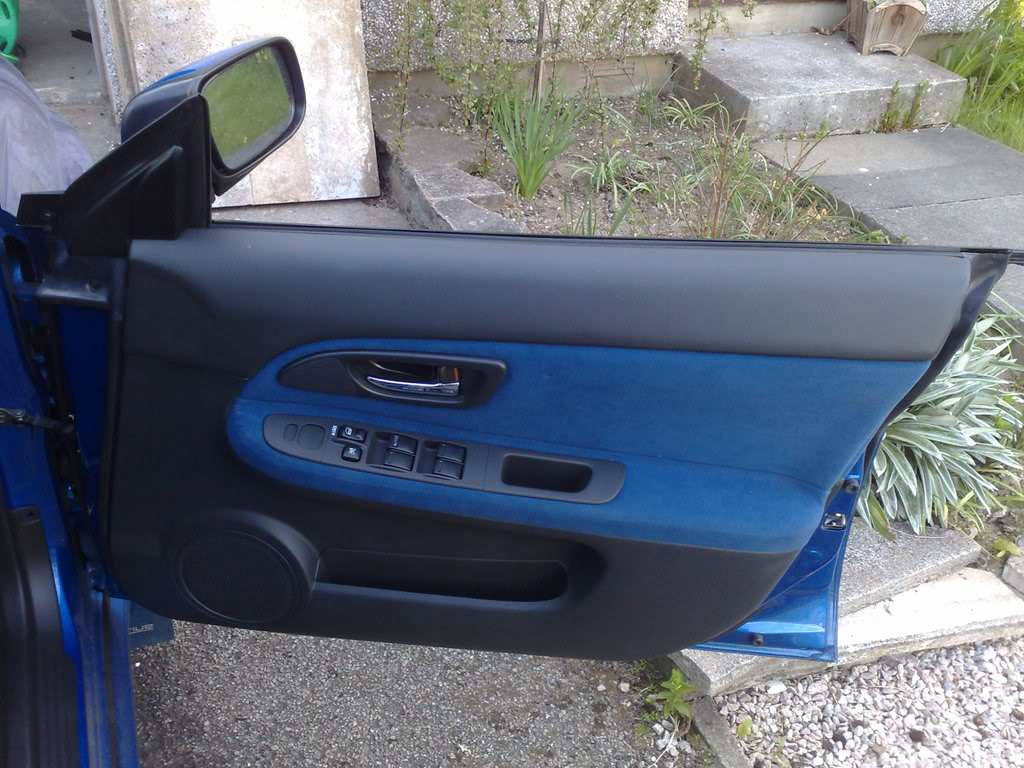
Mmmmmmm, Niiice!
Passenger side door � Removal exactly the same as drivers, only things I will mention is the electric window trims.
Once you remove the Blobeye trim you will see that on this side (and the rears) the switch is merely clipped into place.
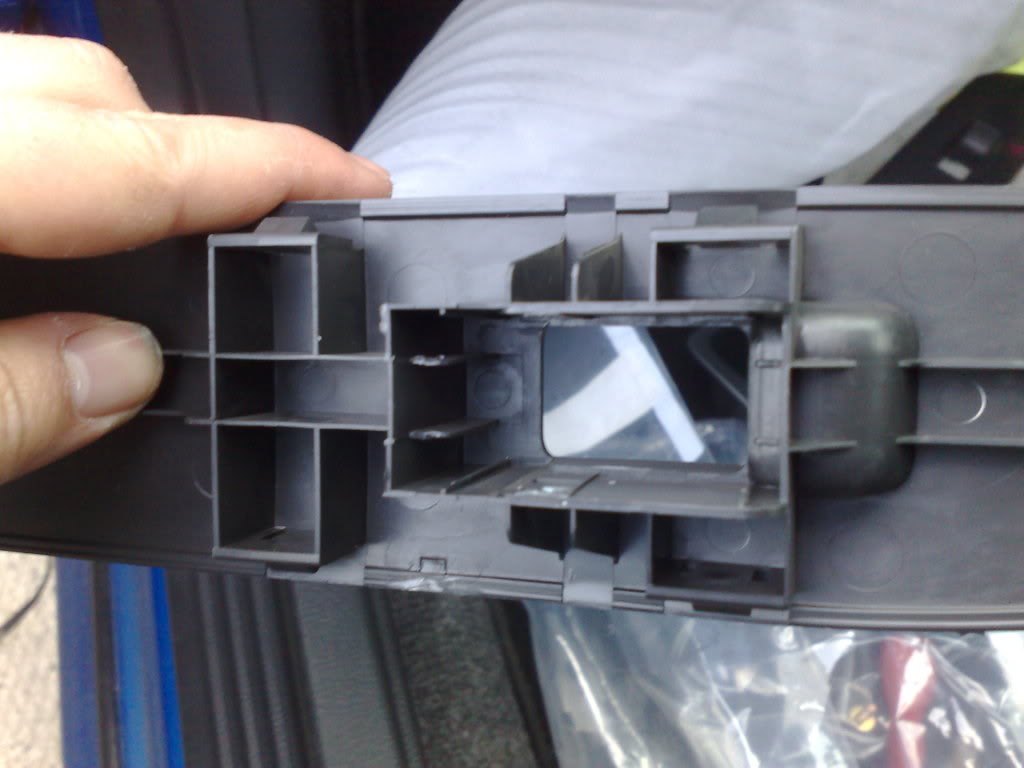
Remove by levering the sides with a small screwdriver or similar and switch will come out. Trying to fit into new panel highlighted that the older switch must be of a slightly different design, easily solved however by small modification of the Hawkeye trim panel. Here we see the new panel and the bits that are causing problems are the two vertical fins on the inside of the rectangular housing.
These pics show the mods needed � you need to remove a small section from the rear of the rectangle and the two fins themselves:
Small section-
Fins removed-
Here you can now see that the electric window control switch now fits perfectly within the new trim panel:

The same mods were needed to the metal door �handle� (bend one clip and remove other) to fit the door card, but once all of it�s on the door now looks like this:
Rear Doors � both the same so will only go through this once! Once again there is a screw in the door pull but this time there is an additional one at the end of the door card itself as shown below:
Remove both of these, along with the door handle surround and you can then just pull off the original door card. Once again the windo switch is just clipped in so removal is quite easy.
The rear card will need a small piece of the plastic ribbing removed to allow it to clear the metal �handle� again, and this is detailed below:
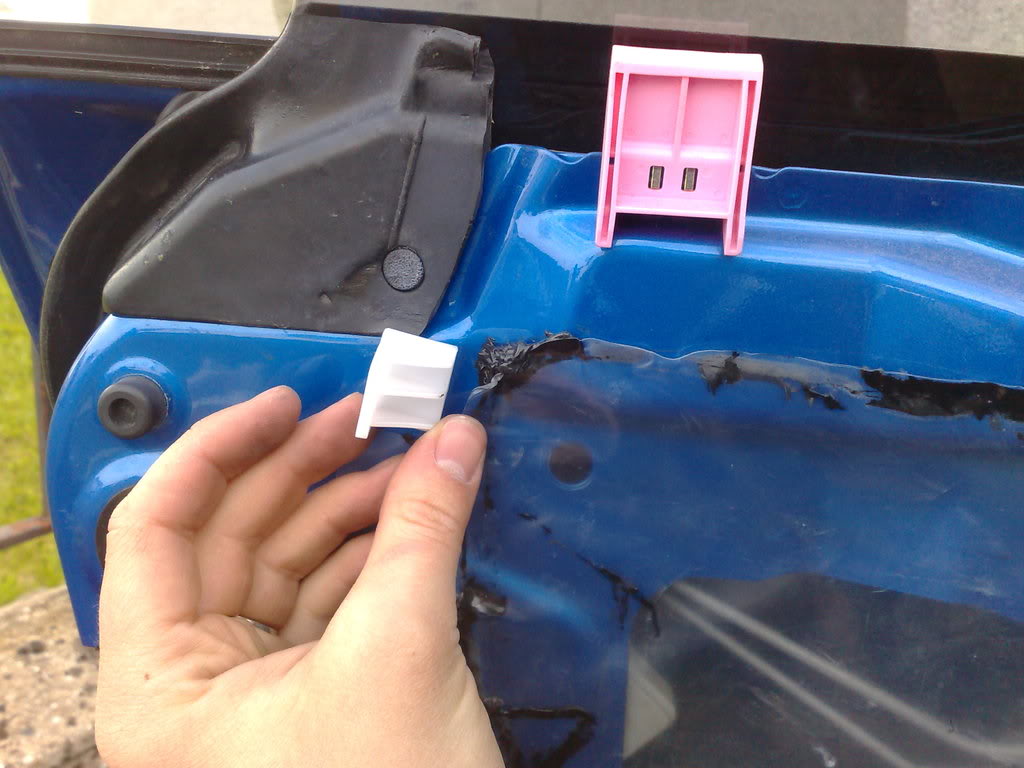
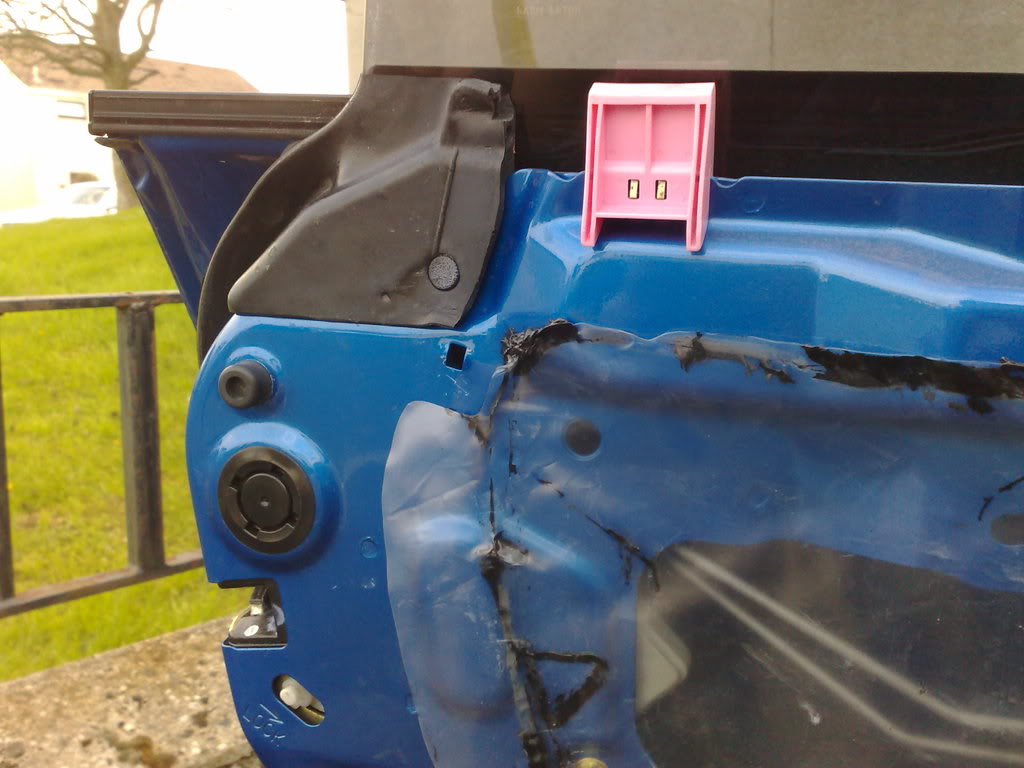
The panel screw in the end of the door card unfortunately doesn�t line up with the blobeye one, so this white piece of plastic needs to be removed as the Hawkeye door card will not fit with this still in place.
Again the hawkeye trim panels need a small mod to enable the switch to fit correctly � the two ribs shown below need to be removed.
Before:
After:
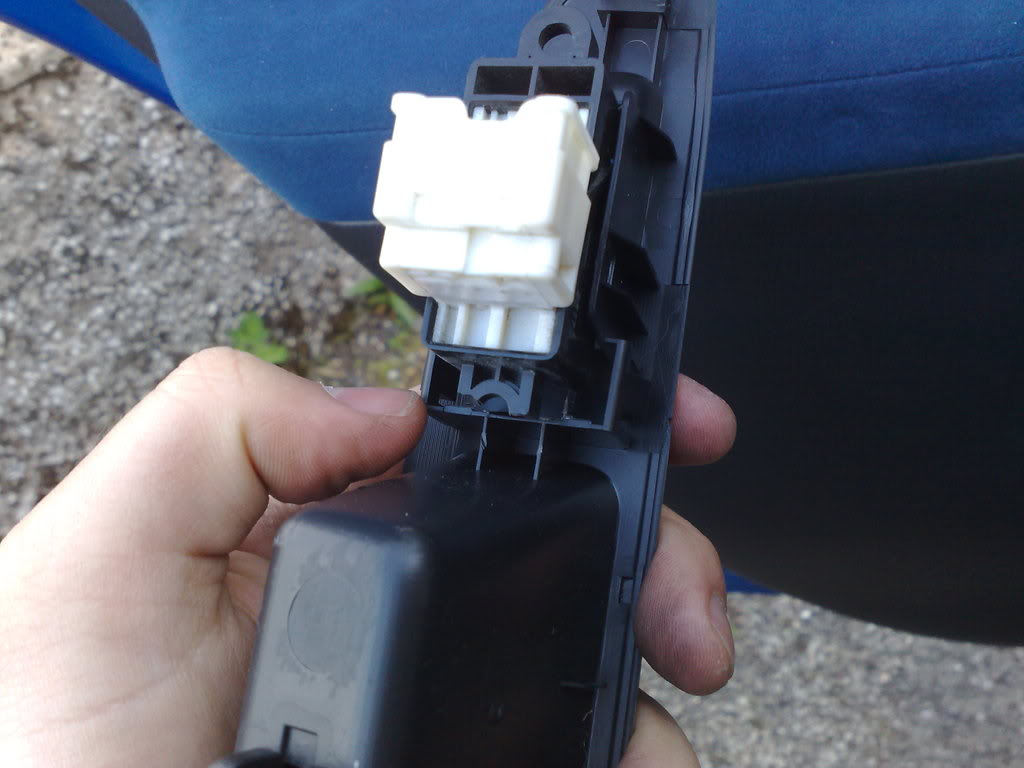
Trial fitting of the trim now highlighted that the switch was catching on the metal �handle� that you can see in the pic below:
Removal of the plastic mounting bits on the switch itself allowed it to pass back down and clear the handle, providing a snug fit.
Finished article now looks like this:
Hopefully this all makes sense and isn�t too much waffle! Any question then post them up and I�ll try to help! Oh, part numbers, right � the parts I got were:
61052FE020OE � Cover Remote Dr RH - �8.28
61052FE030OE � Cover Remote Dr LH - �8.48
61052FE040OE � Cover Remote Dr LH - �5.82
61052FE050OE � Cover Remote Dr LH - �5.82
94266FE200OE � Panel Pwr Wdo Sw - �9.13
94266FE240OE � Panel-Power Window Swi� - �9.54
94266FE270OE � Panel-Power Window Swi� - �5.86
94266FE280OE � Panel-Power Window Swi� - �5.86
I still need to get the small screw covers for inside the door pulls as there is just a hole at the minute, will get them some time and update this post when I do!
Sorry if it gets a bit long winded, but it�s not a quick thing to do!!
First up I started with the drivers side as I felt this would be the most challenging, and a good enough place as any to begin.
Firstly, you need to remove the old door card � there are a few threads already covering this but a quick explanation is as follows:
Remove the black triangle behind the wing mirror and the interior door handle surround.
Next up there is a screw hidden under a cover in the door pull which needs to be undone and removed.
Once this is done you can remove the electric window switches � lift up the unit from the rear and slide it out from the front and then remove the wiring harness from the switch block.
With this out the way the final screw securing the door card to the door can be removed.
Finally the door card simply pulls off as it is only left on with poppers.
You may have noticed by looking at the two interiors that in the Blobeye the tweeter is angled towards the occupants, whereas in the Hawkeye the tweeter sits flush and is located closer to the interior handle. The pic below shows the tweeter mounted on the original blobeye bracket which needs to be removed and the tweeter repositioned.
The observant will have also noticed that I have swapped out the door handles for some chrome STi ones � this is simple enough and involves removing the screw behind the cover, sliding the handle towards the back of the car and then removing the 2 door control links � 1 for door opening and one controlling the lock.
To mount the tweeter I simply used some double sided sticky pads and to get the location right I got one of the new Hawkeye door surrounds, held the tweeter behind the mesh in the surround and offered up the surround to the door handle before pressing the tweeter down into it�s new location.
Before progressing on with the door card I checked the back of the new one with the old to compare the mounting locations of all the plastic poppers used to keep the door card in place. As a result I found that one of them, shown below, had to be removed as there was no corresponding hole in the door � or if there was it was underneath the Dynamat!
Onto trial fitting the door card. The metal door pull/handle that connects to the door itself need some modification to enable the new card to fit on. The furthest back tab needs to be bend down, and I also ended up trimming some of the black plastic rib on the card that sits here.
Also you can see below that the metal tab which originally held on the blobeye door card fouls the bracket for the hawkeye switch panel � solution was to remove this tab completely from the handle which then allowed the switch panel to locate correctly.
Some trimming of the plastic from underneath this white piece was also required to enable it to clear the metal �handle� sufficiently, but this was just a case of running a Stanley knife down it to remove a few mm.
The door card is now held on by only the plastic poppers, but I feel that this is more than enough and the additional screw that was used before won�t be missed.
As many have found before, the Hawkeye trims panels are longer than the Blob and Bugeye panels.
Only solution to this is to get new panels. I got mine from the dealers and will post up the part numbers and list price for each item I required in this install.
Handily all the electric switched from the Blobeye swap directly over to the new Hawkeye panels, there are 3 screws on the rear which once undone allow the unit to come off of the trim.
One point however is that in the Haweye the electric wing mirror control switch is also located here instead of in the centre console. At the moment I have simply blanked this off using a piece of black plastic I had lying about, but in the future I plan to do the whole centre console swap so will wire up a control switch when I get round to that one.
Once this trim is in you now have a completed drivers door card swap, changing from this:
To this:
Mmmmmmm, Niiice!
Passenger side door � Removal exactly the same as drivers, only things I will mention is the electric window trims.
Once you remove the Blobeye trim you will see that on this side (and the rears) the switch is merely clipped into place.
Remove by levering the sides with a small screwdriver or similar and switch will come out. Trying to fit into new panel highlighted that the older switch must be of a slightly different design, easily solved however by small modification of the Hawkeye trim panel. Here we see the new panel and the bits that are causing problems are the two vertical fins on the inside of the rectangular housing.
These pics show the mods needed � you need to remove a small section from the rear of the rectangle and the two fins themselves:
Small section-
Fins removed-
Here you can now see that the electric window control switch now fits perfectly within the new trim panel:
The same mods were needed to the metal door �handle� (bend one clip and remove other) to fit the door card, but once all of it�s on the door now looks like this:
Rear Doors � both the same so will only go through this once! Once again there is a screw in the door pull but this time there is an additional one at the end of the door card itself as shown below:
Remove both of these, along with the door handle surround and you can then just pull off the original door card. Once again the windo switch is just clipped in so removal is quite easy.
The rear card will need a small piece of the plastic ribbing removed to allow it to clear the metal �handle� again, and this is detailed below:
The panel screw in the end of the door card unfortunately doesn�t line up with the blobeye one, so this white piece of plastic needs to be removed as the Hawkeye door card will not fit with this still in place.
Again the hawkeye trim panels need a small mod to enable the switch to fit correctly � the two ribs shown below need to be removed.
Before:
After:
Trial fitting of the trim now highlighted that the switch was catching on the metal �handle� that you can see in the pic below:
Removal of the plastic mounting bits on the switch itself allowed it to pass back down and clear the handle, providing a snug fit.
Finished article now looks like this:
Hopefully this all makes sense and isn�t too much waffle! Any question then post them up and I�ll try to help! Oh, part numbers, right � the parts I got were:
61052FE020OE � Cover Remote Dr RH - �8.28
61052FE030OE � Cover Remote Dr LH - �8.48
61052FE040OE � Cover Remote Dr LH - �5.82
61052FE050OE � Cover Remote Dr LH - �5.82
94266FE200OE � Panel Pwr Wdo Sw - �9.13
94266FE240OE � Panel-Power Window Swi� - �9.54
94266FE270OE � Panel-Power Window Swi� - �5.86
94266FE280OE � Panel-Power Window Swi� - �5.86
I still need to get the small screw covers for inside the door pulls as there is just a hole at the minute, will get them some time and update this post when I do!


Just out of interest, where did you source the doorcards from?
I changed the centre console in my 01WRX to an 06 console last year and need the 06> door cards to finish the job (Well, to locate the electric mirror switch in the door panel to tidy things up!)
Thanks in advance
Nick
I changed the centre console in my 01WRX to an 06 console last year and need the 06> door cards to finish the job (Well, to locate the electric mirror switch in the door panel to tidy things up!)
Thanks in advance
Nick
Thread Starter
Scooby Regular
Joined: May 2007
Posts: 156
Likes: 0
From: Aberdeenshire
Just out of interest, where did you source the doorcards from?
I changed the centre console in my 01WRX to an 06 console last year and need the 06> door cards to finish the job (Well, to locate the electric mirror switch in the door panel to tidy things up!)
Thanks in advance
Nick
I changed the centre console in my 01WRX to an 06 console last year and need the 06> door cards to finish the job (Well, to locate the electric mirror switch in the door panel to tidy things up!)
Thanks in advance
Nick
 (hence the hole in the rear cards for the window winders!!)
Might be worth checking out the likes of japperformanceparts (?think that's them?) and other breakers, as well as keeping those eyes peeled on ebay.

I like this, would like to do this to mine, but with 2005 WRX door trims so I retain the standard trim but get better door cards, I tried japperformance parts, I got a set of chrome handles for �25, but as they only break sti's they cannot help with the doorcards, anyone have an idea where I might locate some 05 WRX door cards with the cloth on the handles as the ones fitted above
Darren
Darren
Trending Topics
Thought I'd bring this thread out of retirement as I've fitted hawkeye door cards to my bugeye (Already have the centre console installed so the next job is to re-locate the electric mirror wires to the drivers door)
A few things to add to the excellent write-up:
1. No cutting required on the door cards. I simply sourced a full set of hawkeye metal brackets that fix to the doors. Everything then bolts up fine. These were purchased from a Jap Performance Parts.
2. I used double sided padded tape and duck tape to reposition my tweeters but again, I reckon a set of hawkeye tweeter brackets from a breakers would do perfectly!
Does anybody have a wiring diagram for the elec mirror switch from a hawkeye or has done this conversion already?
Cheers
Nick

The mirror switch wiring is a little tricky, I obtained a mirror switch with door loom and extended wires from door to existing loom plug location under centre console then got some small spade connectors and pushed them in the plug, easy to know which to put where if you study wiring diagrams from both 04 and 06 cars, can't remember the wiring now as was a long time ago when I did it
The mirror switch wiring is a little tricky, I obtained a mirror switch with door loom and extended wires from door to existing loom plug location under centre console then got some small spade connectors and pushed them in the plug, easy to know which to put where if you study wiring diagrams from both 04 and 06 cars, can't remember the wiring now as was a long time ago when I did it
Cheers

Thread
Thread Starter
Forum
Replies
Last Post
Mattybr5@MB Developments
Full Cars Breaking For Spares
34
Nov 7, 2024 04:10 PM
Rocco13
ScoobyNet General
8
Sep 13, 2015 08:11 PM
Scooby-Doo 2
Wheels And Tyres For Sale
1
Sep 9, 2015 06:51 PM