
STi8 Seats - Anyone managed to lower them (in a Classic)

Are STi 7 seats any different ??
Fitted a Set of STi 8 seats and their too high for me.
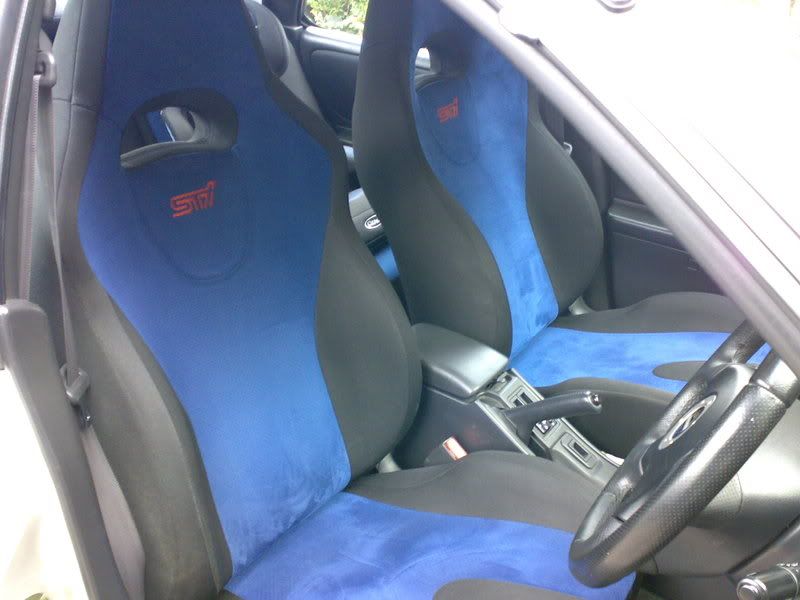
Fitted a Set of STi 8 seats and their too high for me.
Last edited by Scott.T; Apr 17, 2008 at 08:28 AM.
I have just popped into Corbeau (seemed silly not to as I live in the same town) and had a look at their seat runners, in order to try an lower the seat position. Result being I think I can knock something up (or at least get a friend too).
Will be knocking up some Ally prototypes and will get re-manufactured in steel...will keep you posted (as I can see a market for these, especially in the USA).
Will be knocking up some Ally prototypes and will get re-manufactured in steel...will keep you posted (as I can see a market for these, especially in the USA).


Scooby Regular
Joined: Mar 2006
Posts: 88
Likes: 0
ive looked in to lowering my sti 8 seats fitted to my classic so will be watching this with intrest
what i did find tho is mounts on the new seats where bolts go thru to chassis these are 10mm higher than classic ones if u able to remover reweld these i think u could be on to something
keep us posted ill be happy to test and do what i can to help make a lower subframe
what i did find tho is mounts on the new seats where bolts go thru to chassis these are 10mm higher than classic ones if u able to remover reweld these i think u could be on to something
keep us posted ill be happy to test and do what i can to help make a lower subframe


will be making some new feet from Ally Angle and Box section, then reproducing in steel.
Will also probably get them powder coated too.
These will mount to the existin seat rails using M8 fastenings rather then a rivet & spot weld.
I figure 8-off M8's will be fine as Sparco recomend at least 4-off M8's for their seat fixings.
Lifted from my post on my local forum
Story so far, I will improve the images at later date as a bit blurred (phone camera and poor light)
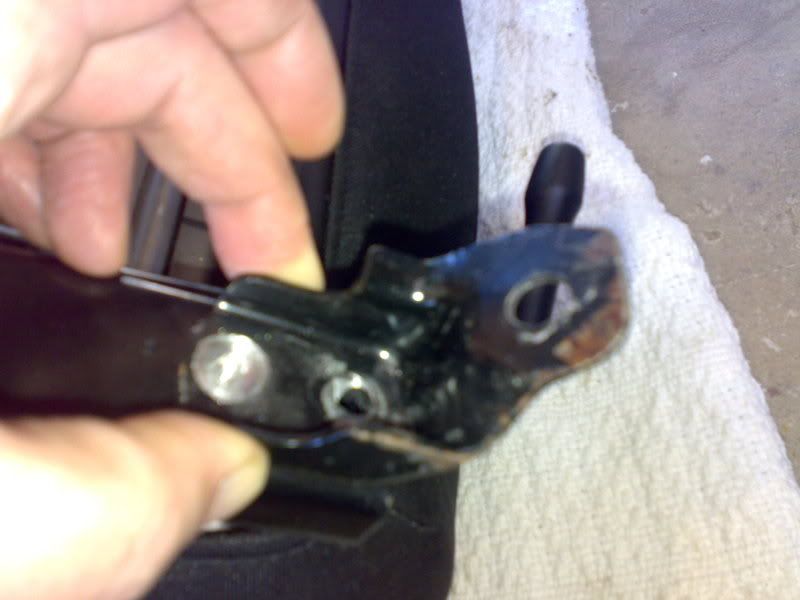
Right... am beyond the point of no return as have removed all the feet/brackets from the drivers side seat.
The Front Left & Right and the Rear Floor Mount can be removed by drilling the heads off the rivets and punching out the old rivet.
Each of them also has a small spot weld that can also be drilled slightly.
With a small tap with a hammer the feet then fall off.
Front Right foot with Rivet and spot weld Drilled
Front Right foot removed

Front Left foot removed
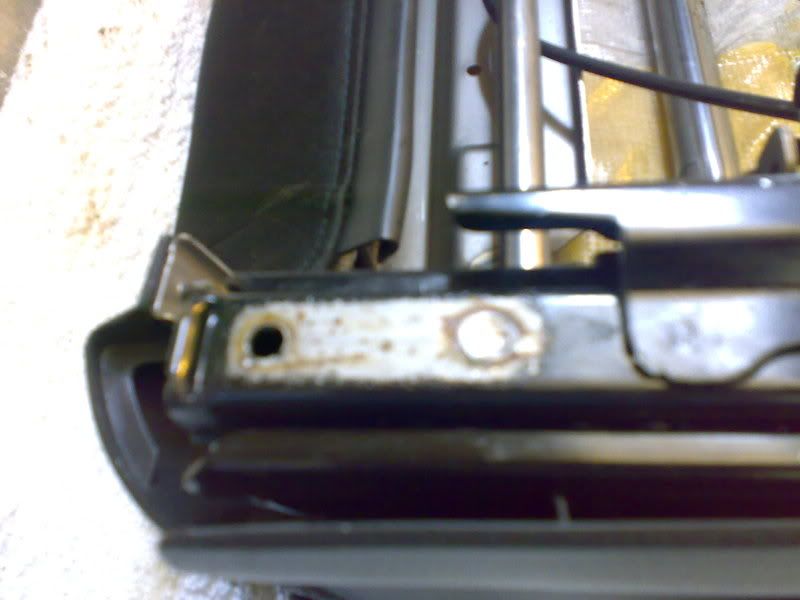
Rear Left foot removed
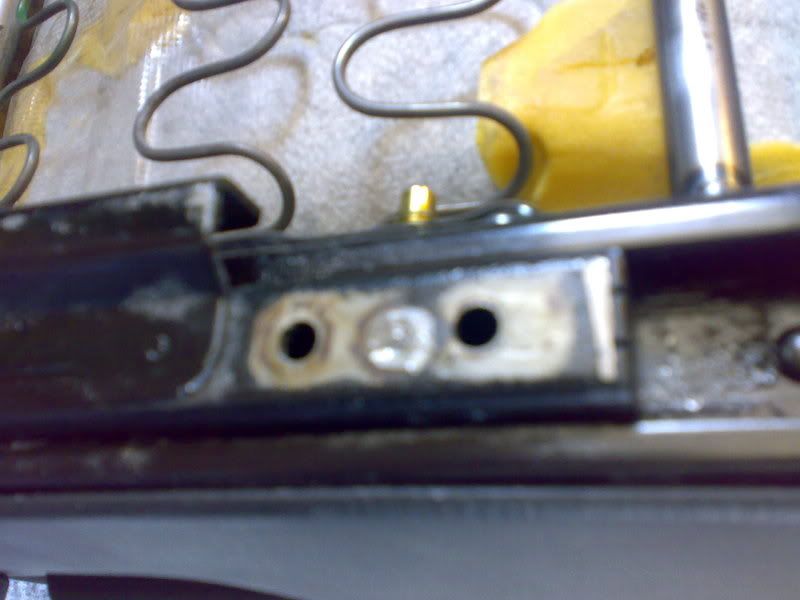
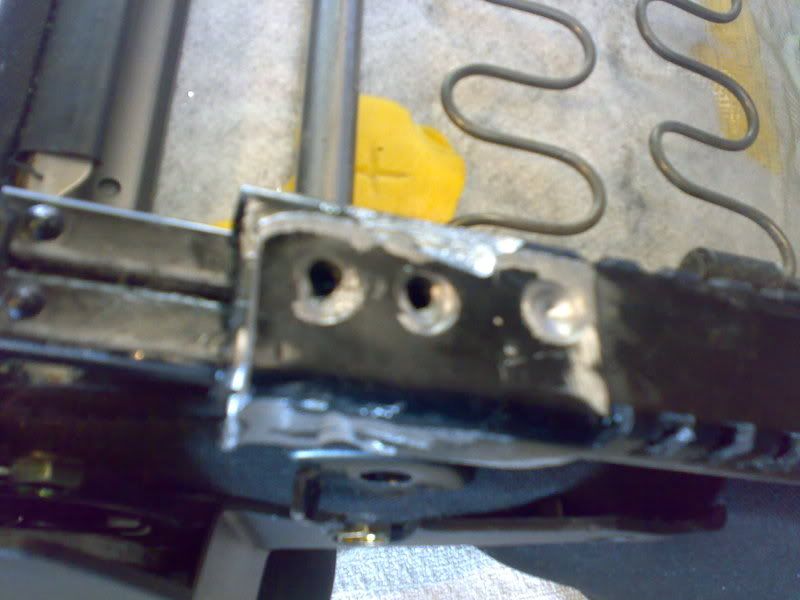
The rear mount that fits to the transmission tunnel was a bit more difficult, and as sods law goes, it's always the last one that's a bitch.
I started to remove as per the others i.e drill rivets and spot weld. Only to find that this one has additional welds.
Initially I tried to grind these off, but then realised I could just cut the bracket in 2 places with a hacksaw. This would remove the bulk of the bracket, leaving just a small part on the runner. This can remain as will be cover by the new fixings later.
I will also tidy the grindings and repaint at some point before final re-assembly.
Rear Tunnel Mount removed
The other seat will have this removed a bit neater..LOL
Drivers & Passenger Height Difference
These images show the difference in mounting height between the Drivrs and Passenger Side seats, the drivers side being the lower one.
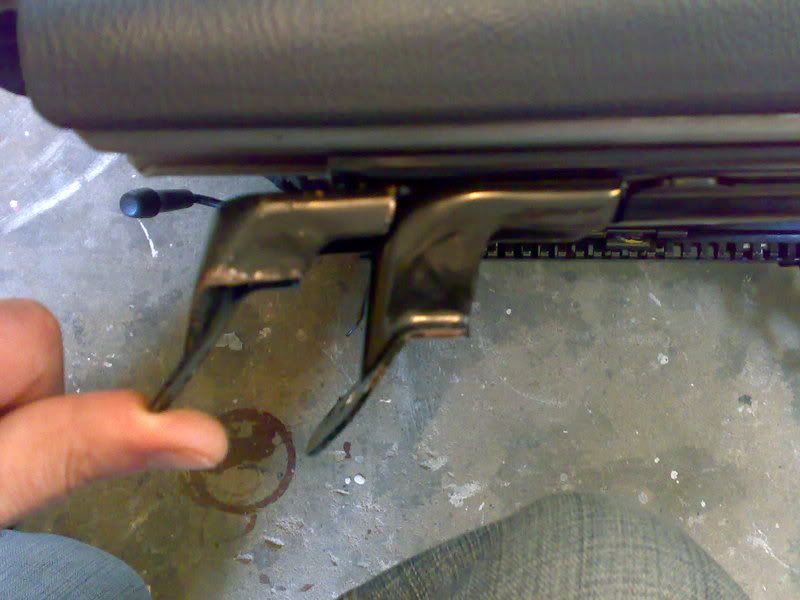
What should be noted at this point, despite the differences seen in these images, the lower mounting is still taller then the Standard Classic mount.
I will post an image comparing Classic Drivers side Mount and Newage Drivers side Mount at a later stage.
Story so far, I will improve the images at later date as a bit blurred (phone camera and poor light)
Right... am beyond the point of no return as have removed all the feet/brackets from the drivers side seat.
The Front Left & Right and the Rear Floor Mount can be removed by drilling the heads off the rivets and punching out the old rivet.
Each of them also has a small spot weld that can also be drilled slightly.
With a small tap with a hammer the feet then fall off.
Front Right foot with Rivet and spot weld Drilled
Front Right foot removed
Front Left foot removed
Rear Left foot removed
The rear mount that fits to the transmission tunnel was a bit more difficult, and as sods law goes, it's always the last one that's a bitch.
I started to remove as per the others i.e drill rivets and spot weld. Only to find that this one has additional welds.
Initially I tried to grind these off, but then realised I could just cut the bracket in 2 places with a hacksaw. This would remove the bulk of the bracket, leaving just a small part on the runner. This can remain as will be cover by the new fixings later.
I will also tidy the grindings and repaint at some point before final re-assembly.
Rear Tunnel Mount removed
The other seat will have this removed a bit neater..LOL
Drivers & Passenger Height Difference
These images show the difference in mounting height between the Drivrs and Passenger Side seats, the drivers side being the lower one.
What should be noted at this point, despite the differences seen in these images, the lower mounting is still taller then the Standard Classic mount.
I will post an image comparing Classic Drivers side Mount and Newage Drivers side Mount at a later stage.
Trending Topics
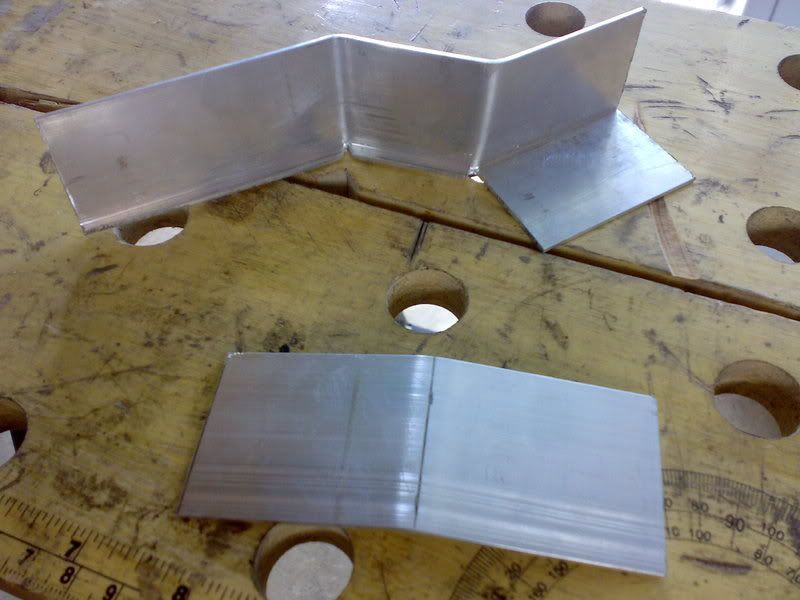
Prototype Mountings, in Ally
Knocked up out of a bit of Ally Angle.
For the 2 front feet I used the 90 Degree of the Angle on one side and then bent another 90 Angle, to effectivley give the 'footprint' as per the standard bracket.
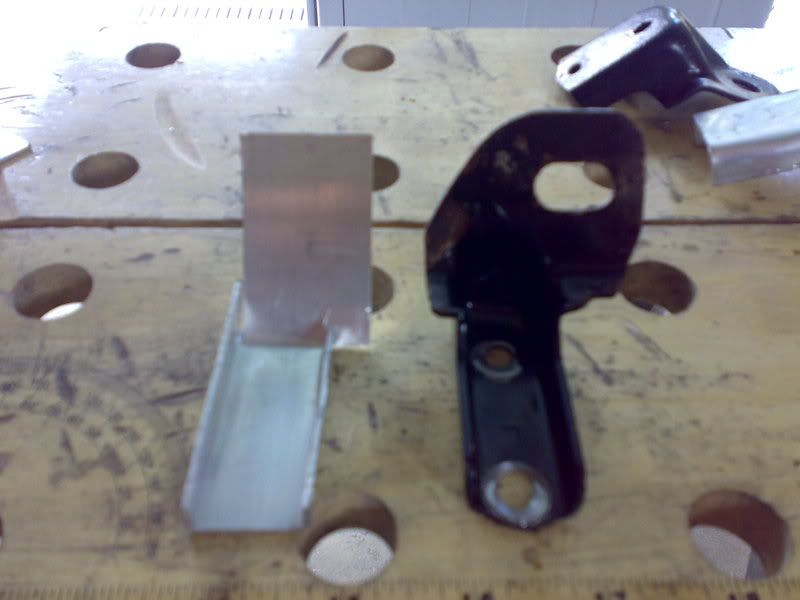
This was cut to give the Bracket 10mm of lift from the vehicle floor mount.
The standard Classic Mounting height at the front is 15mm
The standard Newage Drivers-side Mounting height at the front is 20mm
The standard Newage Passenger-side Mounting height at the front is 35mm
Therefore I will be dropping the front of the seat down 5mm lower then the standard Classic mount on both drivers and passenger side. This is 10mm lower then the Newage Drivers side and a massive 30mm lower for the Passenger side.
I may mess with these figures a little later as I want to get the seat base 'front' to sit higher then the seat base 'back', therefore re-creating the front to back pitch I have the classic seat set to in order to provide better leg support.


Tunnel Mount
This image shows the seat mount to the transmission tunnel.
The 90 Degree angle mounts to the bottom of the rail with a bolt going through the other end of the bracket to secure to the transmission tunnel.
With this, the height of the seat will be determined by the position of the hole
The other bracket shown above is the last and easiest mount. This is the rear outside mount, which on a Classic is very nearly on the floor. A simple bend and some packing will be used to set the height on this side.
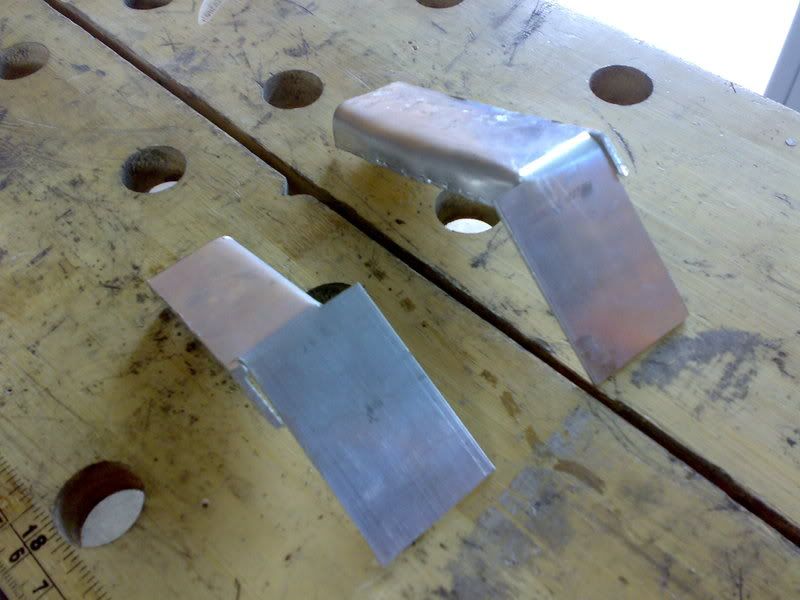
All of the above will now be re-produced in steel with some modification.
We will use the thickest possible that can be bent.
Where joints meet these will also be welded, but this will be left until after the next fit.
Finally they will all be tidied and powder coated
Knocked up out of a bit of Ally Angle.
For the 2 front feet I used the 90 Degree of the Angle on one side and then bent another 90 Angle, to effectivley give the 'footprint' as per the standard bracket.
This was cut to give the Bracket 10mm of lift from the vehicle floor mount.
The standard Classic Mounting height at the front is 15mm
The standard Newage Drivers-side Mounting height at the front is 20mm
The standard Newage Passenger-side Mounting height at the front is 35mm
Therefore I will be dropping the front of the seat down 5mm lower then the standard Classic mount on both drivers and passenger side. This is 10mm lower then the Newage Drivers side and a massive 30mm lower for the Passenger side.
I may mess with these figures a little later as I want to get the seat base 'front' to sit higher then the seat base 'back', therefore re-creating the front to back pitch I have the classic seat set to in order to provide better leg support.
Tunnel Mount
This image shows the seat mount to the transmission tunnel.
The 90 Degree angle mounts to the bottom of the rail with a bolt going through the other end of the bracket to secure to the transmission tunnel.
With this, the height of the seat will be determined by the position of the hole
The other bracket shown above is the last and easiest mount. This is the rear outside mount, which on a Classic is very nearly on the floor. A simple bend and some packing will be used to set the height on this side.
All of the above will now be re-produced in steel with some modification.
We will use the thickest possible that can be bent.
Where joints meet these will also be welded, but this will be left until after the next fit.
Finally they will all be tidied and powder coated
How to gain another inch
Seat Firmness/Bounce Fix
Images Courtesy of NASIOC
Here's the easy fix, that corrects the firmness of the seat.
Time to implement 5-10 mins
Turn the seat over and you will see that the springs are hard up against the seat base/foam.
Give em' a tug and get them about 1-1.5" away from the base.


You can do the same with the back rest.
Although you don't need to pull the cover right off, just un-hook the bottom edge and get ya' arm up inside.

If I now sit in the 're-worked' driver seat then swap the the 'un-touched' passenger seat you can really feel the difference
I may slide a bit of foam into the gap to take up the slack, but at the moment when I sit in the seat the springs do make contact, so they are still doing the job, although at different tensions.
Seat Firmness/Bounce Fix
Images Courtesy of NASIOC
Here's the easy fix, that corrects the firmness of the seat.
Time to implement 5-10 mins
Turn the seat over and you will see that the springs are hard up against the seat base/foam.
Give em' a tug and get them about 1-1.5" away from the base.
You can do the same with the back rest.
Although you don't need to pull the cover right off, just un-hook the bottom edge and get ya' arm up inside.
If I now sit in the 're-worked' driver seat then swap the the 'un-touched' passenger seat you can really feel the difference
I may slide a bit of foam into the gap to take up the slack, but at the moment when I sit in the seat the springs do make contact, so they are still doing the job, although at different tensions.
It all depends on the guy that is fabbing the real items, but I will be asking him.
Having taken a few more measurements today, for some it may not be worth modding the front feet of the drivers side as there is only 5mm difference between the Classic height and the NewAge height (I aim to come down another 5mm, so 10mm in total).
The Passenger side front feet are worth doing as they are quite a bit higher.
However the rear mount seems to be where most of the height comes from, and compares as :
25mm Classic Drivers Side
40mm Newage Drivers Side
So 15mm higher then the Classic
30mm Classic Passenger Side
55mm Newage Passenger Side
So 25mm higher then a Classic
It doesn't sound alot, but that compared with the firmer seat really makes a difference, expecialy when your 6ft3
Scooby Regular
Joined: Mar 2006
Posts: 88
Likes: 0
yeah its a lot and even tho im not the tallest of people really bugs me when driving in new seats i liek to fell im sitting in the car rather than on it my dad complains all the time when in passenger seat LOL i didnt relise was much diffrance between passenger and driver seat
hope all goes well keep me posted on a set of these id really like get a set just finish of my interior :0
hope all goes well keep me posted on a set of these id really like get a set just finish of my interior :0
It certainly made the seat fell more like my classic seat, as you started to feel part of it rather then sat on it.
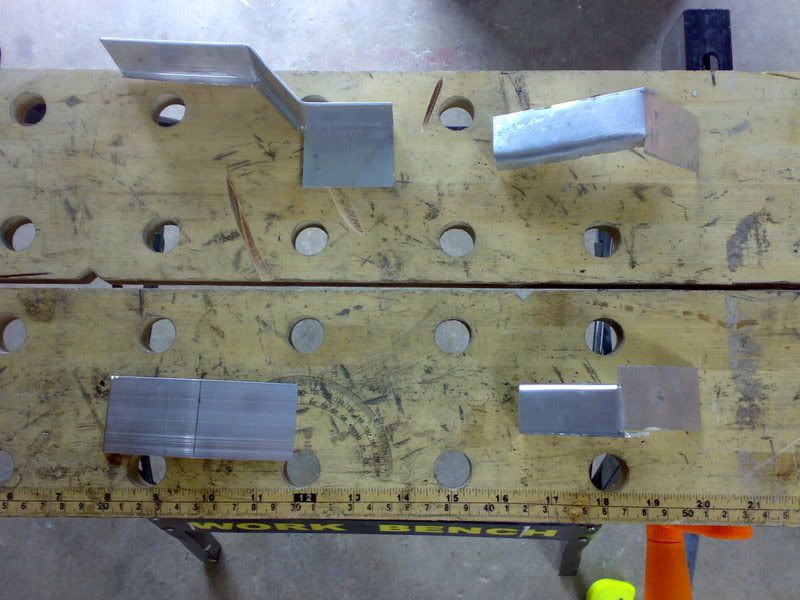
Change of plan slightly.
Took the brackets to the guy that was going to fab them and took along an original front foot as a comparison.
At the end of a bit of head scratching we decided the best approach would be to cut the standard feet, take some material out and then reweld. Filling the origional Bracket to Rail holes thus allowing fresh newly positioned ones to be drilled/aligned.
We aim to modify as so :
Front Outside Foot, down to 10mm height
Front Inside Foot, down to 5mm height (the classic inside foot is lower then the outside)
Rear Outside Foot, down to 15mm height
Rear inside bracket, weld on another piece of angle (to replace bit cut off to remove), then add additional holes to allow bracket to be repositioned.
This should get the seat as low as physically possible and allow for additional packing/spacing at the front to try and bring the front edge up to provide leg support (which the classic seat does better then the newage).
Whilst sitting in a Newage a car on Saturday I realised why the problem is more pronounced in the Classic. The newags Dash and Doors are quite a bit higher then the Classic.
Last edited by Scott.T; Apr 21, 2008 at 09:46 PM.
sorry guys not sat in a classic with newage seats but you say they are higher which i can imagine but why do you all not like the extra hieght? is it uncomfortable? out of place? what makes it soo bad? steering wheel out of place? etc etc
also i am 6ft 1 so i guess that is me with the same complaints as you if i chose to fit them.
as for bending the seat springs, i have to say brave move as it could of gone wrong but does it make a big difference? is it more user friendly? could you not just bend it more so you sink further?
steve
also i am 6ft 1 so i guess that is me with the same complaints as you if i chose to fit them.
as for bending the seat springs, i have to say brave move as it could of gone wrong but does it make a big difference? is it more user friendly? could you not just bend it more so you sink further?
steve
Being 6ft3 I have the classic seat base wound right down at the back, putting my bum as close to the floor as possible. And the seat base front right up, giving support to my legs. The Newage seat only has a single base height adjustment rather then a front/back pitch.
this gives a seating position similar to a good Recaro, although no-where near as good.
On the Newage seats I found I was looking under the top of the winderscreen, and the armrest was out of reach. And also felt like I was going to slide off the seat when slowing/braking.
With regard to spring stretching. This is a proven method used in the USA, to make the seats more 'Sit In', rather then Sit On'.
This will give you an extra inch, so some may find just stretching the springs is enough.
The Passenger side is even worse and is a bit like a high chair.....thats what my wife calls it at the moment.
However, the problem isn't only with the NewAge seats in a Classic, as alot of NewAge drivers also complain about the seat height.

Managed to lower the drivers side with cut down/welded OE brackets.
Seat now sits preety much at the same height as the classic seat.
However, STi 8 interior is now on ebay as I am finding the Classic seats more comfortable, softer and more hugging then the Sti 8 seats.
The STi 8 seats look great, but for me (with a recurring back problem) the STi 8 seats are not suitable.
Will now investiaget STi5/6 Interior, Interior re-trim or a set of Recaro's
Last edited by Scott.T; May 6, 2008 at 01:27 PM.

No, not gone **** up.
The Newage Brackets can be cut down aand welded, which is what I have done.
I just find overall that the Classic seat is more comfortable.
when I take the STI seats back out I will photo and post on here the modded brackets.
The Newage Brackets can be cut down aand welded, which is what I have done.
I just find overall that the Classic seat is more comfortable.
when I take the STI seats back out I will photo and post on here the modded brackets.
Sorry Guy's
Seats sold before I got a chance to take pics of brackets.
It;s quite obviouse when you look at a Newage bracket though. Just cut out the excess material and re-weld.
If you have a look under the passenger side you will see that the seat is almost up on stilts. Just cut out the vertical section of the foot and re-weld.
This image shows :
'on left' drivers side newage foot
'on right' passenger side newage foot
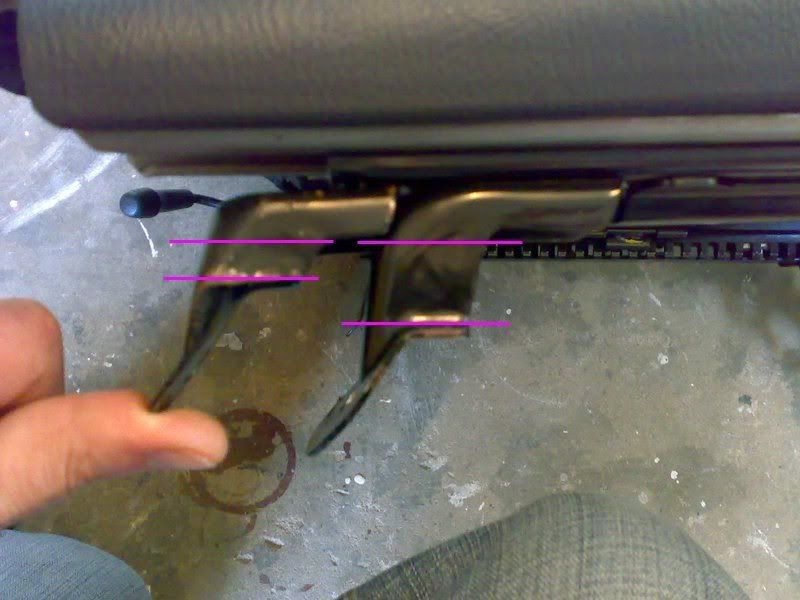
As a guide cut out material between the lines and re-weld.
I found that the Classic was 5mm smaller on the inside foot, compared to the outside.
So you may want to double check that on the Newage
Seats sold before I got a chance to take pics of brackets.
It;s quite obviouse when you look at a Newage bracket though. Just cut out the excess material and re-weld.
If you have a look under the passenger side you will see that the seat is almost up on stilts. Just cut out the vertical section of the foot and re-weld.
This image shows :
'on left' drivers side newage foot
'on right' passenger side newage foot
As a guide cut out material between the lines and re-weld.
I found that the Classic was 5mm smaller on the inside foot, compared to the outside.
So you may want to double check that on the Newage


I'm 6'3" with a long body. My head was slightly touching the roof when sat in the car and banging on the roof going over the bumps. I needed to compromise driving position by slackening the rake one position.
I reckon 23mm came out of the rear brackets, but the difference in head room is substantial. I now have to jack the seat up some for optimal position. All the way down is too low
Great modification to get a relaxed & comfortable driving position


I reckon 23mm came out of the rear brackets, but the difference in head room is substantial. I now have to jack the seat up some for optimal position. All the way down is too low
Great modification to get a relaxed & comfortable driving position

Really interesting. does anyone know a metal work welders in Middlesex that would be able to do this? Unfortunately I don't have a welding setup at home............ Can't think why not! 

Scooby Newbie
Joined: Nov 2011
Posts: 2
Likes: 0
From: Lima,Peru
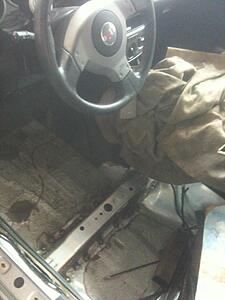
Well so far swapped the bases from a USDM sti but it still seats a bit high for my taste. After doing some research on several forums found out that a lot of people complain aboput this. However trimming the bases, which only lowers it for about an inch, wont solve it for me.
So I took the car to guy that prepares rally cars and told me that he had done this sort of work before and that it consists on taking off the carpet and cutting and rewelding the arches in which the seat bases are bolted on. It made sense to me and when you put back the carpet it will look as stock.
This is how it looks at the moment.
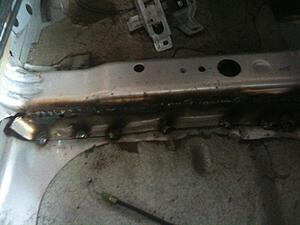
Will post more pics on monday when the job is done.
Hope it helps!
So I took the car to guy that prepares rally cars and told me that he had done this sort of work before and that it consists on taking off the carpet and cutting and rewelding the arches in which the seat bases are bolted on. It made sense to me and when you put back the carpet it will look as stock.
This is how it looks at the moment.
Will post more pics on monday when the job is done.
Hope it helps!
Well so far swapped the bases from a USDM sti but it still seats a bit high for my taste. After doing some research on several forums found out that a lot of people complain aboput this. However trimming the bases, which only lowers it for about an inch, wont solve it for me.
So I took the car to guy that prepares rally cars and told me that he had done this sort of work before and that it consists on taking off the carpet and cutting and rewelding the arches in which the seat bases are bolted on. It made sense to me and when you put back the carpet it will look as stock.
This is how it looks at the moment.


Will post more pics on monday when the job is done.
Hope it helps!
So I took the car to guy that prepares rally cars and told me that he had done this sort of work before and that it consists on taking off the carpet and cutting and rewelding the arches in which the seat bases are bolted on. It made sense to me and when you put back the carpet it will look as stock.
This is how it looks at the moment.
Will post more pics on monday when the job is done.
Hope it helps!

Thread
Thread Starter
Forum
Replies
Last Post