

Newage WRX TMIC onto classic (mod)


Thread Starter
Scooby Regular
iTrader: (46)
Joined: Nov 2005
Posts: 5,381
Likes: 0
From: Probably polishing it.Lol
A couple of pics also.
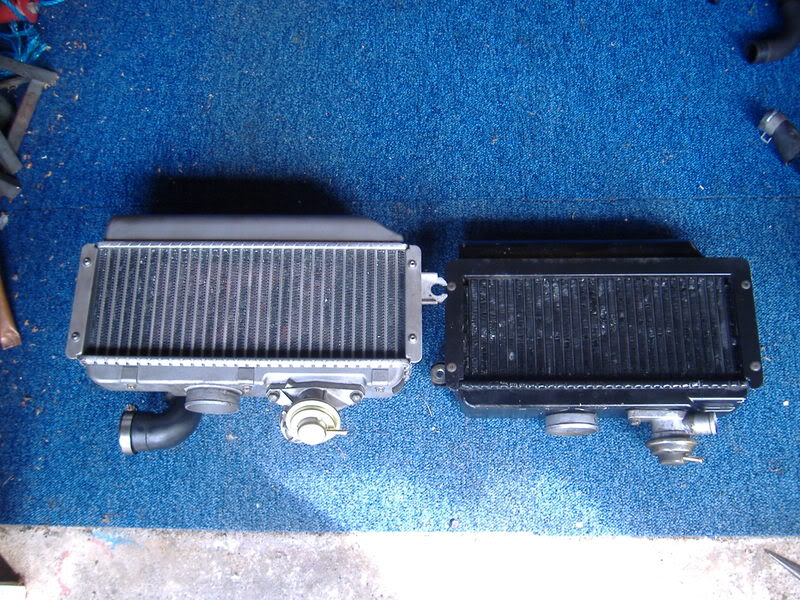
With my o/e tmic looking tired and tatty with loads of bent fins I decided to source a newage WRX tmic knowing it was slightly larger thus allowing cooler charge temps.
COST
Newage TMIC - �20 inc dumpvalve (Ebay)
Newage dumpvalve hose - �5.50 (Grade A Subaru)
Flat alluminium bar (about 80mm x 20mm) to act as bridging plate - �0.00
You will also need a slightly larger jubilee clip for d/v hose and a m8 nut/bolt for new bracket.
Comparison sizes
Step 1.
Remove intercooler and swap i/c hose assy to the new i/c, unless you have a Samco /Prodrive one.
Step2.
Remove o/e d/v hose
Step 3.
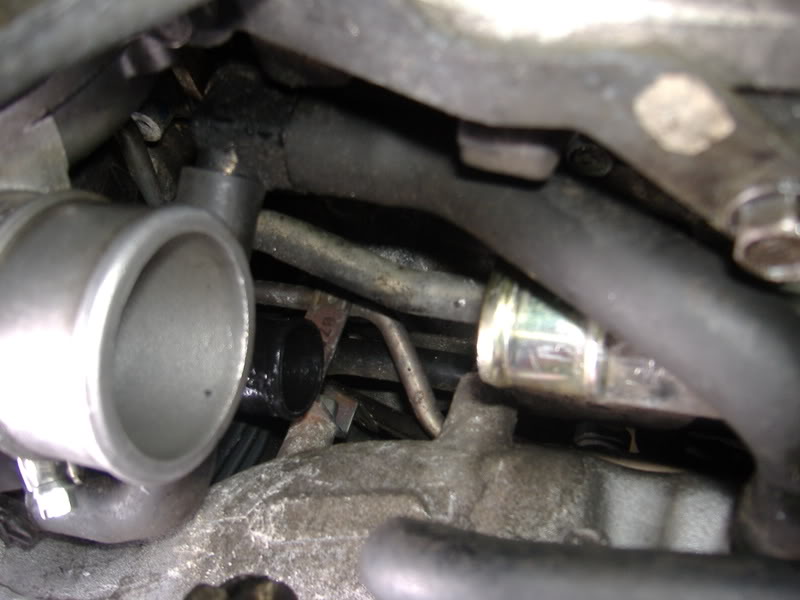
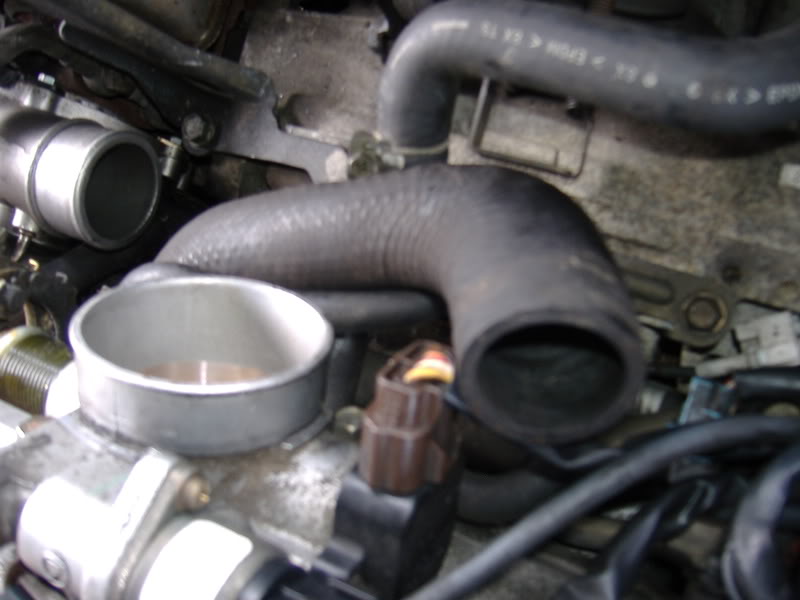
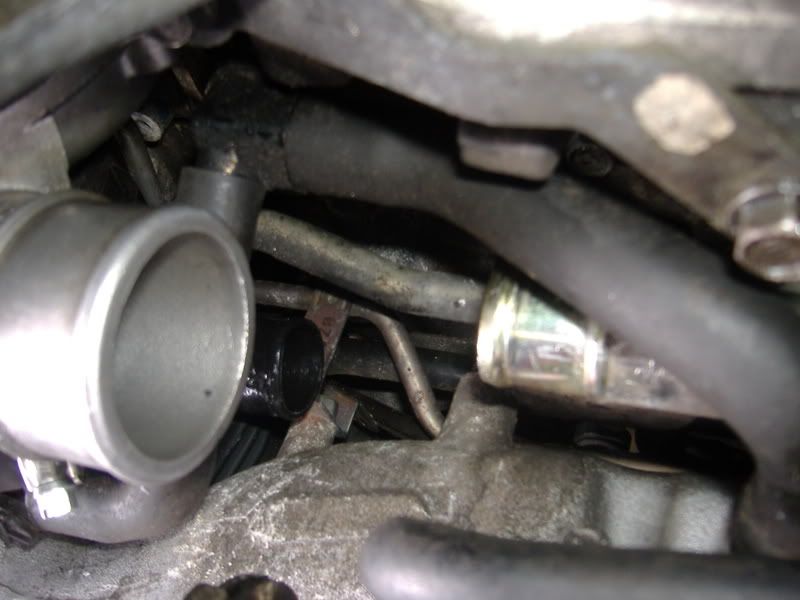
Remove small rubber hose between induction piping and o/e d/v alloy tubing.
In an ideal world, this alloy tube should be removed, but looking at how it is fixed, there are some brackets fixed to the inlet manifold, so I left the pipe in place. It doesn't cause any issues)
You can see the induction pipe d/v return (Black plastic tube behind turbo) and the alluminium return hose (shiney tube) The rubber hose between them is the one that is removed.
Step 4.
Fit newage d/v hose to the Black plastic hose shown above leaving the end ready to accept the new d/v. I secured the hose with a jubilee clip rather than the akward circular clip.
Step 5.
Remove r/h/s i/c bracket (it needs to be bent to fit the new i/c and one of the holes elongating)
Step 6.
Place newage i\c into position. You will notice that the l/h/s bracket falls about 50mm short of the i/c bracket. You will need to construct a small bridging plate from a flat bar and drill a 10mm hole at either ends .Then fix the l/h/s of the i/c using the bracket.

Step 7.
Place r\h bracket into position and note how it requires bending to make it fit, then place it on the floor and tap away. Elongate hole to allow it to be fitted to the engine.
Step 8.
Fit r/h bracket to the i/c and engine.
Step 9.
Ensure d/v hose connected and check all connections and tighten all jubilee clips.
This may not be the most popular mod as most go for the STI i/c, but the WRX intercooler is noticeably larger and the mod was very good value for money imo.
Next will be the newage undertray and Samco i/c hose (classic).

With my o/e tmic looking tired and tatty with loads of bent fins I decided to source a newage WRX tmic knowing it was slightly larger thus allowing cooler charge temps.
COST
Newage TMIC - �20 inc dumpvalve (Ebay)
Newage dumpvalve hose - �5.50 (Grade A Subaru)
Flat alluminium bar (about 80mm x 20mm) to act as bridging plate - �0.00
You will also need a slightly larger jubilee clip for d/v hose and a m8 nut/bolt for new bracket.
Comparison sizes

Step 1.
Remove intercooler and swap i/c hose assy to the new i/c, unless you have a Samco /Prodrive one.
Step2.
Remove o/e d/v hose
Step 3.
Remove small rubber hose between induction piping and o/e d/v alloy tubing.
In an ideal world, this alloy tube should be removed, but looking at how it is fixed, there are some brackets fixed to the inlet manifold, so I left the pipe in place. It doesn't cause any issues)
You can see the induction pipe d/v return (Black plastic tube behind turbo) and the alluminium return hose (shiney tube) The rubber hose between them is the one that is removed.
Step 4.
Fit newage d/v hose to the Black plastic hose shown above leaving the end ready to accept the new d/v. I secured the hose with a jubilee clip rather than the akward circular clip.

Step 5.
Remove r/h/s i/c bracket (it needs to be bent to fit the new i/c and one of the holes elongating)
Step 6.
Place newage i\c into position. You will notice that the l/h/s bracket falls about 50mm short of the i/c bracket. You will need to construct a small bridging plate from a flat bar and drill a 10mm hole at either ends .Then fix the l/h/s of the i/c using the bracket.

Step 7.
Place r\h bracket into position and note how it requires bending to make it fit, then place it on the floor and tap away. Elongate hole to allow it to be fitted to the engine.
Step 8.
Fit r/h bracket to the i/c and engine.
Step 9.
Ensure d/v hose connected and check all connections and tighten all jubilee clips.
This may not be the most popular mod as most go for the STI i/c, but the WRX intercooler is noticeably larger and the mod was very good value for money imo.
Next will be the newage undertray and Samco i/c hose (classic).

Last edited by bob r; Jun 25, 2008 at 10:45 AM.


Thread Starter
Scooby Regular
iTrader: (46)
Joined: Nov 2005
Posts: 5,381
Likes: 0
From: Probably polishing it.Lol


Thread Starter
Scooby Regular
iTrader: (46)
Joined: Nov 2005
Posts: 5,381
Likes: 0
From: Probably polishing it.Lol

Thread Starter
Scooby Regular
iTrader: (46)
Joined: Nov 2005
Posts: 5,381
Likes: 0
From: Probably polishing it.Lol
Also the addition of the newage undertray would be vital as the one you mention would also be slanted.
Trending Topics


18 June 1815 - Waterloo
iTrader: (31)
Joined: Dec 2004
Posts: 19,156
Likes: 15
From: To the valley men!
I seem to have a different pipe fitting on my STi V5 DV. The large DV hose seems to curve back under the manifold near the Coil Packs in a "C" shape?
Does the STi need a different hose?
Does the STi need a different hose?
Scooby Regular
Joined: Nov 2009
Posts: 415
Likes: 0
From: plymouth
just done this on my 97 uk classic.intercooler fits lovely but had to cut elbow for d/v off of original i/c and have it welded onto new i/c as there is a great big valve and pipe on the inlet manifold where the d/v and pipe should go.bit of a fiddle but worth it as only cost me �65 all in.


Thread
Thread Starter
Forum
Replies
Last Post