
Polished Bliss vs RR Vogue (over 30 hours of machining!)


Again, posted on behalf of Clark, done a couple of weeks ago...
---
It seems like i'm saying this more and more nowadays, but this really was a gruelling detail and a major test of patience (and perhaps sanity?!)
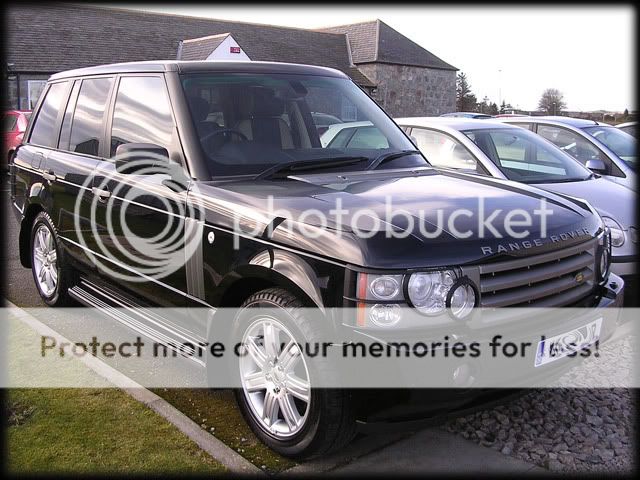
The car in question was a black Range Rover, which arrived on Sunday afternoon while i was doing the White Evo FQ. My camera batteries were charging on Monday morning so this prevented me from taking any wash pics etc so here's a few pics i took on Sunday of the defects in the sun:


Whilst it looked good from a distance, the car was covered in RIDS and little "nicks" in the paint which were typical signs of regular automatic car wash visits
As i said, no wash pics so i'll just list the process for that stage:
- Pre-rinse at high pressure and hot water (50 degrees)
- Engine and shuts soaked with Megs Superdegreaser and pressure washed
- Wheels cleaned with Megs WB (4:1) x2
- Arches cleaned and scrubbed with Megs Superdegreaser and a brush
- Washed with 2BM & Megs Shampoo Plus
- Autosmart Tardis on lower halfs and wheels
- Rinsed
- Clayed with Megs Aggressive Detailing Clay
- Dried with Waffle Weave and Leaf Blower
Total Wash Time: 6 hours.
Polish:
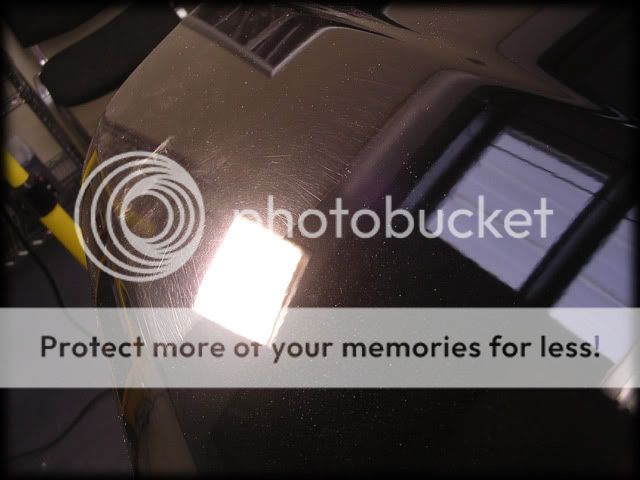
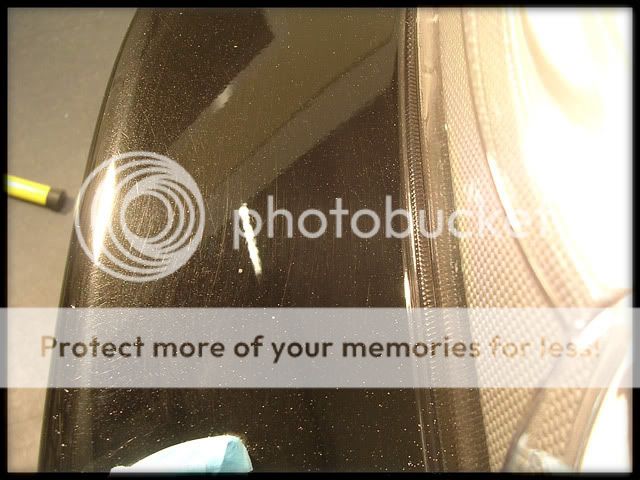
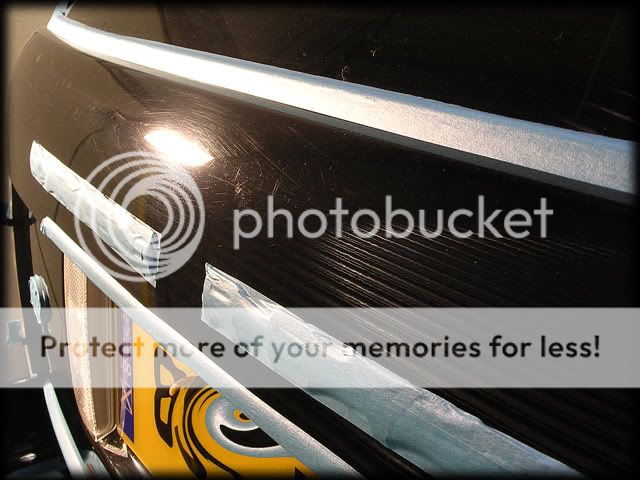
Defects under the Halogens, a nice helping of RIDS,scuffs and nicks all round!:

Paint readings were taken next and this is what the gauge read on the first panel (bonnet):
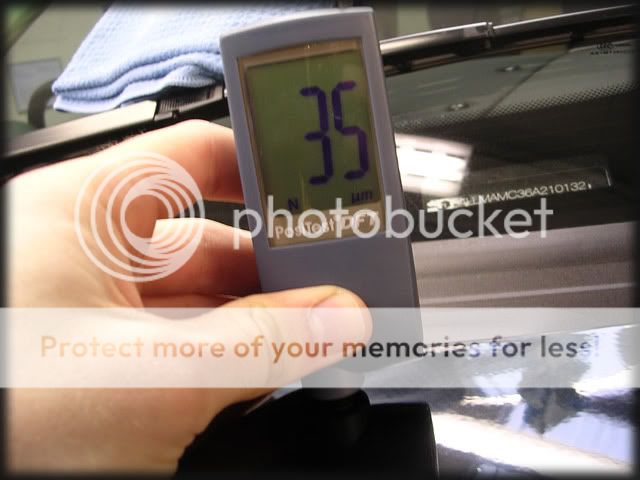
Obviously i knew this wasnt right otherwise there would be a big cloudy patch where there would be no clear coat so i got out the other metals gauge and tested it against the calibration shims:
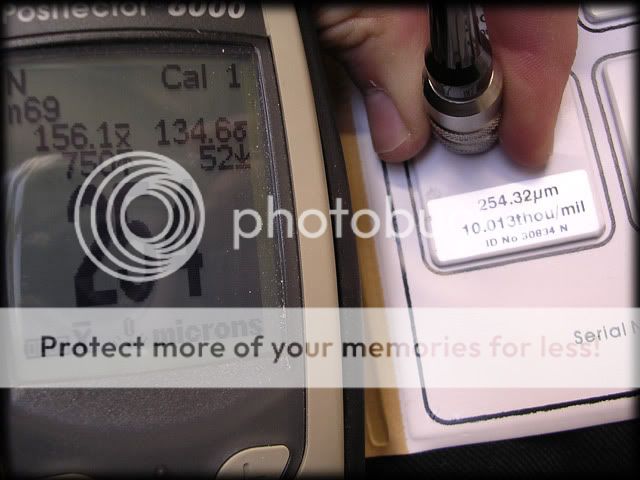
Spot on
The other gauge was re-set and checked later on and all seemed fine with it again but i continued with the other one for the time being, this was a reminder that i should be checking the gauges before every detail and not just now and again so a slap on the wrists for me! Obviously it had told me that there was less paint than there actually was but it could have landed me in trouble if it had been the other way round!
The car was showing readings from 80-120-ish microns all round with no signs of re-spray work, so all was good on that front
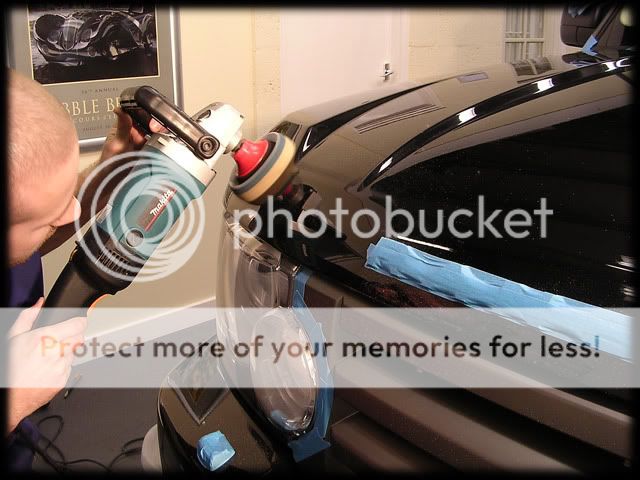
It was then taped up ready for polishing:

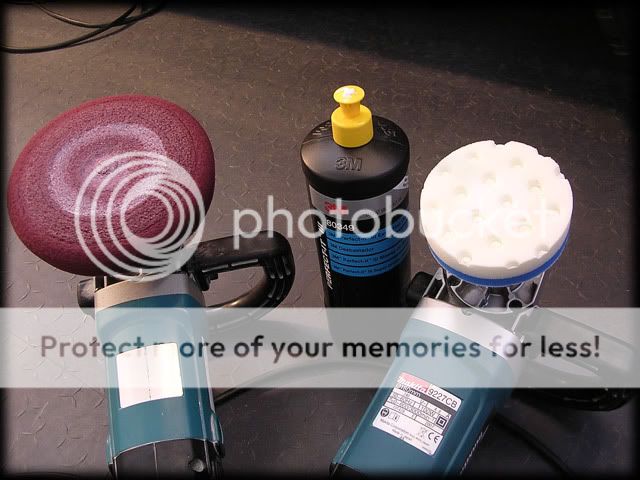
I played about with a few pad and polish combinations, but Range Rover paint is another one of those "fussy" kinds when it comes to certain polishes (certainly in my experiences anyways) so i eventually settled on 3M's range for this car after the others failed to work properly (even Megs #83 dusted more than normal), using a Megs Cutting Pad on one rotary and a Lake Country CCS 4" Polishing pad on the other:
I was using a new backing plate for the 4" pads that Rich wanted me to try:

This one is better than most others as it offers more clearance between the edge of the plate and the pad, as you can see below compared to a standard sized one:

This makes it alot easier to control as i found the rotary was very twitchy with the larger one.
Using some Ultrafina to help prime the pad along with the Fine Cut Compound, this was how my test section looked after 2 hits:
The paint on this one wasnt hard but it wasnt soft either - kind of in the middle and it took a bit of effort at times to remove all the defects with some areas needing a couple of hits @1800rpm's, but as you can see the correction was pretty much perfect
I worked my way round the car using the 2 machines, the 4" pad being used for the smaller areas...
...And also the bumpers, but for these i used 3M Fast Cut Plus asi find it cuts very well without having to cause too much heat, which is always a good thing on plastics!
Top of bumper before:

After:

Before:
After:

Another correction shot on the lower half of the front bumper:

7pm - I called it a day as i prepared myself for a long 2 days to folllow!
Tuesday - Day 2
Correction resumed, and i had it planned out in my head that i wanted the whole car corrected by the end of the day - ready for final polishing on the Wednesday.
Lower half before:

After:

50/50 on the door:
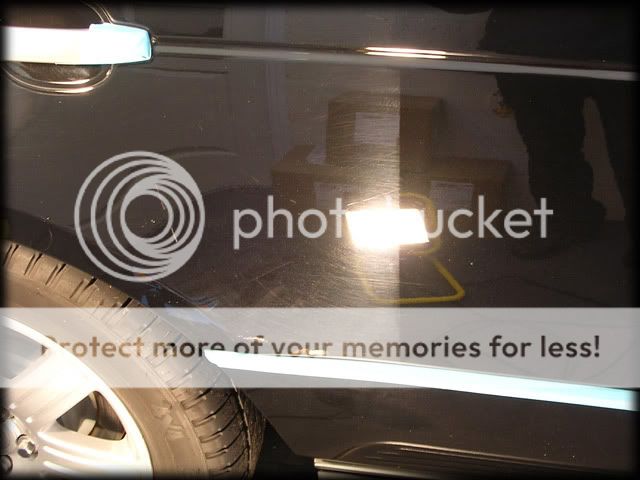

Funny how you sometimes dont realise just how bad a car is untill you do a half and half shot
Door on the other side before:

After - however some of the deeper nicks remained (Passenger side was worse than drivers side for some reason):

I hit this section again with Fast Cut Plus for a bit more bite:


Much better
Rear end before:
After:

Tail light before (plastic guards were removed to gain access to front and rear lights):

After:

I finally finished the correction work at around 10pm and headed home. I actually find the drive home (around 40 mins) the most tiring part of my day!
Wednesday - Day 3
Final Polishing began, for this i used Menzerna PO85RD, but strangely i had to be really careful with my finishing as close inspection on the first few panels revealed very light buffer trails - even on a finishing pad. A bit strange as the paint wasnt really soft enough to prevent the abrasives from fully breaking down but with a bit of patience and thorough working of the polish it was fine.
Again i used the 4" pad for the smaller areas:

Super sharp finish

From here on i havent got many more pics during the rest of the detail as a there were a few distractions during the course of the afternoon and this held me up a bit, so i just wanted to get cracking as these Range Rovers aint small!
Half way through the refining stage i noticed some "pig tailing" on some areas of a couple of doors and a wing, how this happened i dont know - it could have been a piece of grit caught in a pad or even a hard piece of polish. Either way it looked awful and for the next couple of hours i swore (alot!),sweated and generally stressed like mad as i went back over these areas with the Megs G220 and Menz 3.02 before refining the finish again with the rotary. What should have been a straight forward second machine stage was turning out to be pure frustration as i could see the likelyhood of another very late night increasing by the minute!
I FINALLY finished all the polishing at 10pm and with the football now on the radio i finally managed to chill out a bit and just got used to the fact that i was going to be a sleepy boy on Friday, as i still had to wax the car plus do the interior/wheels/tyres/arches etc etc!
However, this is where Mr Polished Bliss (Rich) came in handy as he was still at work too, having spent the last few hours unpacking all the Megs and Blackfire products that had arrived during the day, and luckily he had finished by the back of 10 too, so while i applied the LSP/other exterior details and did the Engine Bay, Rich did the interior,wheels,tyres and arches.
Still no picture taking going on at this point so i'll list the process again:
Engine Bay:
- 303 Aerospace Protectant
Interior:
- Hoovered
- APC wipe down
- Poorboys Natural Look Dressing
- Zym�l Treat for the Leather
- Jeffs Werkstatt Prime Strong on door shuts
- Megs Glass Cleaner Concentrate on the glass
Arches - Megs All Season Dressing
Wheels - PB Wheel Sealant
Tyres - Blackfire Long Lasting Tyre Gel
LSP - Zym�l Vintage
It was now approaching 2am(!!!) by the time we had finished, and as the owner wasnt picking the car up till 10 or 11 the next morning we left the wipe down untill then (i know i know, pair of slackers! )
)
So, onto this morning (Thursday) and after a wipe down with Zym�l Field Glaze, this was the results of 30 odd hours of machine polishing and 39 hours in total, every panel as near flawless as possible in the time available! Enjoy


The owner was delighted with the end results, as were we! That long, seemingly never ending correction stage is always worth it when you see the final results
As always, thanks for looking!
Clark
---
It seems like i'm saying this more and more nowadays, but this really was a gruelling detail and a major test of patience (and perhaps sanity?!)
The car in question was a black Range Rover, which arrived on Sunday afternoon while i was doing the White Evo FQ. My camera batteries were charging on Monday morning so this prevented me from taking any wash pics etc so here's a few pics i took on Sunday of the defects in the sun:
Whilst it looked good from a distance, the car was covered in RIDS and little "nicks" in the paint which were typical signs of regular automatic car wash visits
As i said, no wash pics so i'll just list the process for that stage:
- Pre-rinse at high pressure and hot water (50 degrees)
- Engine and shuts soaked with Megs Superdegreaser and pressure washed
- Wheels cleaned with Megs WB (4:1) x2
- Arches cleaned and scrubbed with Megs Superdegreaser and a brush
- Washed with 2BM & Megs Shampoo Plus
- Autosmart Tardis on lower halfs and wheels
- Rinsed
- Clayed with Megs Aggressive Detailing Clay
- Dried with Waffle Weave and Leaf Blower
Total Wash Time: 6 hours.
Polish:
Defects under the Halogens, a nice helping of RIDS,scuffs and nicks all round!:
Paint readings were taken next and this is what the gauge read on the first panel (bonnet):
Obviously i knew this wasnt right otherwise there would be a big cloudy patch where there would be no clear coat so i got out the other metals gauge and tested it against the calibration shims:
Spot on
The other gauge was re-set and checked later on and all seemed fine with it again but i continued with the other one for the time being, this was a reminder that i should be checking the gauges before every detail and not just now and again so a slap on the wrists for me! Obviously it had told me that there was less paint than there actually was but it could have landed me in trouble if it had been the other way round!
The car was showing readings from 80-120-ish microns all round with no signs of re-spray work, so all was good on that front
It was then taped up ready for polishing:
I played about with a few pad and polish combinations, but Range Rover paint is another one of those "fussy" kinds when it comes to certain polishes (certainly in my experiences anyways) so i eventually settled on 3M's range for this car after the others failed to work properly (even Megs #83 dusted more than normal), using a Megs Cutting Pad on one rotary and a Lake Country CCS 4" Polishing pad on the other:
I was using a new backing plate for the 4" pads that Rich wanted me to try:
This one is better than most others as it offers more clearance between the edge of the plate and the pad, as you can see below compared to a standard sized one:
This makes it alot easier to control as i found the rotary was very twitchy with the larger one.
Using some Ultrafina to help prime the pad along with the Fine Cut Compound, this was how my test section looked after 2 hits:
The paint on this one wasnt hard but it wasnt soft either - kind of in the middle and it took a bit of effort at times to remove all the defects with some areas needing a couple of hits @1800rpm's, but as you can see the correction was pretty much perfect
I worked my way round the car using the 2 machines, the 4" pad being used for the smaller areas...
...And also the bumpers, but for these i used 3M Fast Cut Plus asi find it cuts very well without having to cause too much heat, which is always a good thing on plastics!
Top of bumper before:
After:
Before:
After:
Another correction shot on the lower half of the front bumper:
7pm - I called it a day as i prepared myself for a long 2 days to folllow!
Tuesday - Day 2
Correction resumed, and i had it planned out in my head that i wanted the whole car corrected by the end of the day - ready for final polishing on the Wednesday.
Lower half before:
After:
50/50 on the door:
Funny how you sometimes dont realise just how bad a car is untill you do a half and half shot
Door on the other side before:
After - however some of the deeper nicks remained (Passenger side was worse than drivers side for some reason):
I hit this section again with Fast Cut Plus for a bit more bite:
Much better
Rear end before:
After:
Tail light before (plastic guards were removed to gain access to front and rear lights):
After:
I finally finished the correction work at around 10pm and headed home. I actually find the drive home (around 40 mins) the most tiring part of my day!
Wednesday - Day 3
Final Polishing began, for this i used Menzerna PO85RD, but strangely i had to be really careful with my finishing as close inspection on the first few panels revealed very light buffer trails - even on a finishing pad. A bit strange as the paint wasnt really soft enough to prevent the abrasives from fully breaking down but with a bit of patience and thorough working of the polish it was fine.
Again i used the 4" pad for the smaller areas:
Super sharp finish
From here on i havent got many more pics during the rest of the detail as a there were a few distractions during the course of the afternoon and this held me up a bit, so i just wanted to get cracking as these Range Rovers aint small!
Half way through the refining stage i noticed some "pig tailing" on some areas of a couple of doors and a wing, how this happened i dont know - it could have been a piece of grit caught in a pad or even a hard piece of polish. Either way it looked awful and for the next couple of hours i swore (alot!),sweated and generally stressed like mad as i went back over these areas with the Megs G220 and Menz 3.02 before refining the finish again with the rotary. What should have been a straight forward second machine stage was turning out to be pure frustration as i could see the likelyhood of another very late night increasing by the minute!
I FINALLY finished all the polishing at 10pm and with the football now on the radio i finally managed to chill out a bit and just got used to the fact that i was going to be a sleepy boy on Friday, as i still had to wax the car plus do the interior/wheels/tyres/arches etc etc!
However, this is where Mr Polished Bliss (Rich) came in handy as he was still at work too, having spent the last few hours unpacking all the Megs and Blackfire products that had arrived during the day, and luckily he had finished by the back of 10 too, so while i applied the LSP/other exterior details and did the Engine Bay, Rich did the interior,wheels,tyres and arches.
Still no picture taking going on at this point so i'll list the process again:
Engine Bay:
- 303 Aerospace Protectant
Interior:
- Hoovered
- APC wipe down
- Poorboys Natural Look Dressing
- Zym�l Treat for the Leather
- Jeffs Werkstatt Prime Strong on door shuts
- Megs Glass Cleaner Concentrate on the glass
Arches - Megs All Season Dressing
Wheels - PB Wheel Sealant
Tyres - Blackfire Long Lasting Tyre Gel
LSP - Zym�l Vintage
It was now approaching 2am(!!!) by the time we had finished, and as the owner wasnt picking the car up till 10 or 11 the next morning we left the wipe down untill then (i know i know, pair of slackers!
)So, onto this morning (Thursday) and after a wipe down with Zym�l Field Glaze, this was the results of 30 odd hours of machine polishing and 39 hours in total, every panel as near flawless as possible in the time available! Enjoy
The owner was delighted with the end results, as were we! That long, seemingly never ending correction stage is always worth it when you see the final results
As always, thanks for looking!
Clark

"I finally finished the correction work at around 10pm and headed home. I actually find the drive home (around 40 mins) the most tiring part of my day!"
you need to get a more interesting car then mate, a scooby maybe
Absolutely stunning mate, its crazy how such expensive cars get into this state�. Crazy level of correction tho time well spent
Thanks for spending the time to give us the write up very interesting read�.
you need to get a more interesting car then mate, a scooby maybe
Absolutely stunning mate, its crazy how such expensive cars get into this state�. Crazy level of correction tho time well spent
Thanks for spending the time to give us the write up very interesting read�.
Lol, due to the amount of miles piled on each week Clark runs back and forth in a Mondeo, so not as exciting as his Cupra R weekend toy! That said, he's actually looking hard for a mint WR1 just now, so by the summer he should be caning the backroads in style!

 Great reading, though.
 Scooby Regular
Joined: Mar 2006
Posts: 548
Likes: 0
From: Wiltshire
Always amazing to see the PB work and this one is no different Truly amazing results from a lot of hard work
PS. Got any Megs 220's yet ? I'm itching to have a go at my paintwork, although not before I have practised on mother in laws Fiesta
PS. Got any Megs 220's yet ? I'm itching to have a go at my paintwork, although not before I have practised on mother in laws Fiesta
Trending Topics


Thread
Thread Starter
Forum
Replies
Last Post