
Show us your Gauges


Scooby Regular

Joined: Aug 2003
Posts: 350
Likes: 0

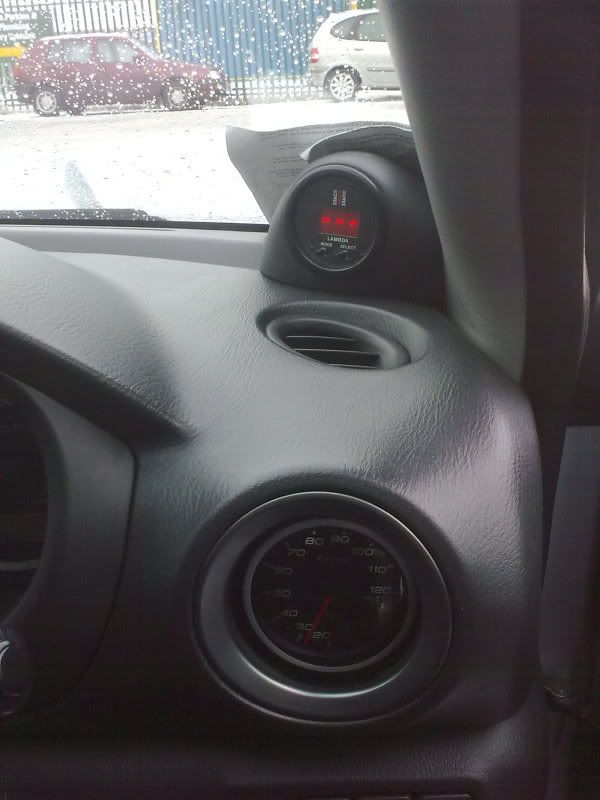


I've done mine in an arc around the fuel pressure gauge.
It's not easy, some nice soldering
DO use plenty of cable, it's best tucked up rather than fiddling trying to get it to fit if it's too short I wrapped all mine in non-sticky loom tape to make a nice job.
Oh, and when removing the LEDs from the board, CLIP the legs, one long, one short, for identification afterwards, and the legs left sticking out of the board are easier to solder to than trying to get wires back through the board. I used small shrink fit tubing as an insulator.
It's not easy, some nice soldering
DO use plenty of cable, it's best tucked up rather than fiddling trying to get it to fit if it's too short
I wrapped all mine in non-sticky loom tape to make a nice job.Oh, and when removing the LEDs from the board, CLIP the legs, one long, one short, for identification afterwards, and the legs left sticking out of the board are easier to solder to than trying to get wires back through the board. I used small shrink fit tubing as an insulator.

Scooby Regular
Joined: Mar 2005
Posts: 964
Likes: 0
It's a Kakumei and I got it from, dare I say it, Flat4Online  . Comes with 52mm or 60mm holes. Probably easily available from elsewhere, but in Flat4's defence it came promptly, as has everything I've ordered from them. Maybe I've just been lucky.
. Comes with 52mm or 60mm holes. Probably easily available from elsewhere, but in Flat4's defence it came promptly, as has everything I've ordered from them. Maybe I've just been lucky.

Scooby Newbie
Joined: Feb 2010
Posts: 2
Likes: 0
From: Kent
Hi guys anyone know where to run the green wire from my 2 in 1 boost and rev counter gauge I have done the boost one but dont know where to connect the green wire from the rev counter instructions say it needs to be connected to the negative wire from the coil. I have been told this is traceable from the ECU but there are loads of wires any one know which one it is??

Scooby Regular
Joined: Oct 2008
Posts: 86
Likes: 0
From: Out there
KAKUMEI 96-00 IMPREZA GC8 100% CARBON GAUGE POD (52mm) : eBay Motors (item 270055956018 end time Feb-28-10 09:17:07 PST)
I really want it, my fiber pod has already few scratches on it

Scooby Regular
Joined: Aug 2003
Posts: 350
Likes: 0
I've done mine in an arc around the fuel pressure gauge.
It's not easy, some nice soldering
DO use plenty of cable, it's best tucked up rather than fiddling trying to get it to fit if it's too short I wrapped all mine in non-sticky loom tape to make a nice job.
Oh, and when removing the LEDs from the board, CLIP the legs, one long, one short, for identification afterwards, and the legs left sticking out of the board are easier to solder to than trying to get wires back through the board. I used small shrink fit tubing as an insulator.
It's not easy, some nice soldering
DO use plenty of cable, it's best tucked up rather than fiddling trying to get it to fit if it's too short
I wrapped all mine in non-sticky loom tape to make a nice job.Oh, and when removing the LEDs from the board, CLIP the legs, one long, one short, for identification afterwards, and the legs left sticking out of the board are easier to solder to than trying to get wires back through the board. I used small shrink fit tubing as an insulator.


Scooby Regular
Joined: Jul 2005
Posts: 150
Likes: 0


Scooby Regular
Joined: Mar 2001
Posts: 777
Likes: 0

Just ordered another gauge for Fuel Pressure yesterday so had to make space for an extra gauge on the dash last night.... Quite happy but pics will have to wait until the dash is back in 


Scooby Regular
Joined: Sep 2007
Posts: 55
Likes: 0
From: South Yorkshire
Anyone recommend a good quality A pillar gauge for 2 prosport gauges. I see most seem to favour 3 gauges in centre pod but I really like the A pillar pods but there dont seem to be much choice over them??