
Impreza HTS (Norwegian build STi V8 with Cosworth engine)

Crawford Performance USA have spent a lot of time looking closely at why the EJ257 block is prone to cylinder liners cracking on high power builds by developing their own TA car. In which time they have managed to destroy many blocks by pressure spiking due to losing control of the combustion event resulting in cylinder liners flexing and cracks occuring. By changing the piston dish capacity and design they have managed to run there TA car safely at over 700 bhp on a standard EJ25 block and have developed a new piston designed to enable a better burn rate which along with the correct mapping has proven to be reliable. Also tuners have used Cosworth long blocks such as Power Station & Zen Performance and run over 700 bhp so the standard EJ25 block can run big bhp but can't cope with pressure spiking as well as the CDB can.
Last edited by bluerigster; Nov 16, 2009 at 09:44 PM.

Thread Starter
Scooby Regular
Joined: Sep 2006
Posts: 56
Likes: 0
From: Modum, Norway
Engine is back in the car, I've been a litle busy with with work the last weeks so things doesn't goes as fast as I want.
Here's some spare parts ready if some replacement should be needed after some icetrack racing:
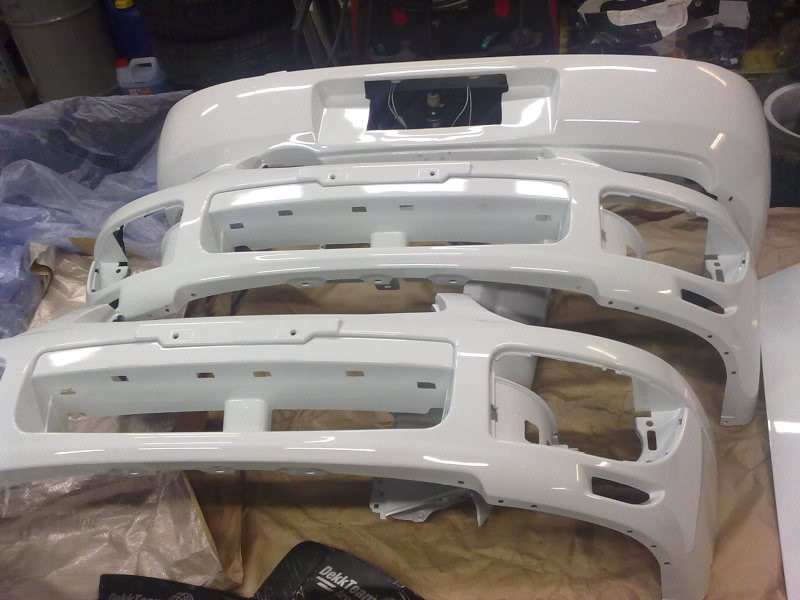
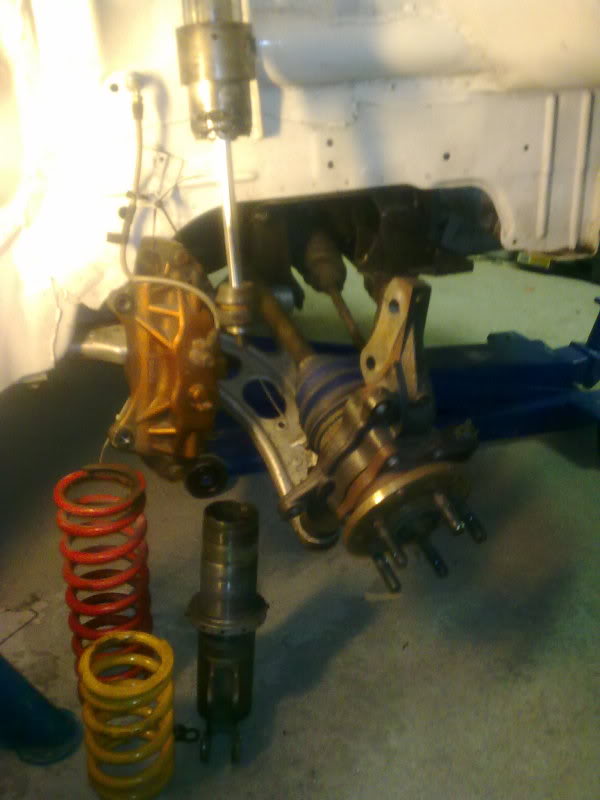
Changing of springs and brakes to suit the iceracing and the 16" rims
Now I just have to get an wheelaligment and some hours on the dyno to break in the engine and then I will be ready for the Ice driving season starting the 2. of January. :ritz:
Here's some spare parts ready if some replacement should be needed after some icetrack racing:
Changing of springs and brakes to suit the iceracing and the 16" rims
Now I just have to get an wheelaligment and some hours on the dyno to break in the engine and then I will be ready for the Ice driving season starting the 2. of January. :ritz:
Thread Starter
Scooby Regular
Joined: Sep 2006
Posts: 56
Likes: 0
From: Modum, Norway

I don't know the exactly cost for the spec I'm running today, but I've bought parts for about 150.000� the last three years that have been used/tested on this car.
I'll quess at the current configuration it has parts for about 100.000� + labour if you dont do the work by yourself.
Thread Starter
Scooby Regular
Joined: Sep 2006
Posts: 56
Likes: 0
From: Modum, Norway
Finnaly I've got time to open the PPG gearbox I bought a few months ago, I just wanted to see what it looked like on the inside before I put it into my car.
It was in very good shape so I will trow it in the car tomorrow, and hopefully do some testing on the ice soon.
JDM Spec-C gearset (with broken 4. gear, I blew this last summer)
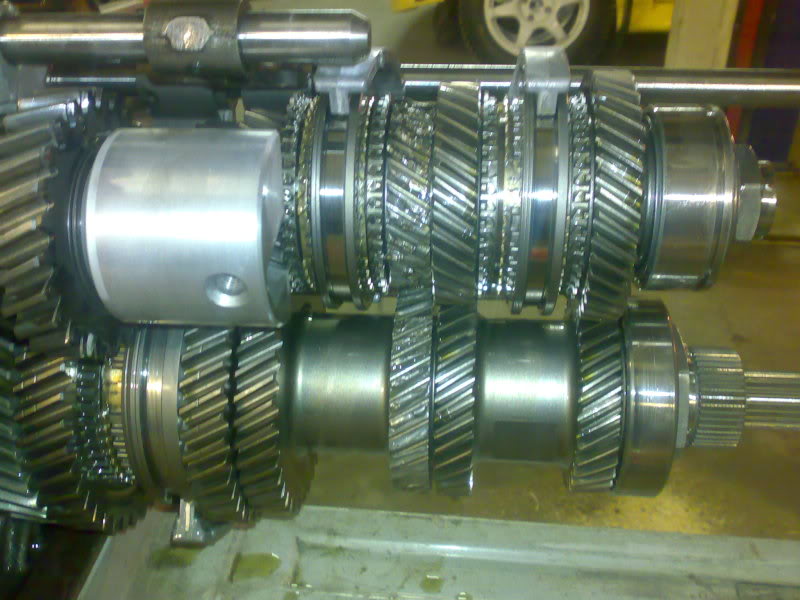
6 speed PPG dog:

Hopefully this will be a little stronger than the original one. . .
It was in very good shape so I will trow it in the car tomorrow, and hopefully do some testing on the ice soon.
JDM Spec-C gearset (with broken 4. gear, I blew this last summer)
6 speed PPG dog:
Hopefully this will be a little stronger than the original one. . .


Thread Starter
Scooby Regular
Joined: Sep 2006
Posts: 56
Likes: 0
From: Modum, Norway
I broke it in a competiton, didn't do anything special I was in fourth around a corner and just floored it out on the straight and the theets was just ripped of. . .
So I think it's a combination of the power I got and the grip in the Michelin slick tires I'm driving on became to much in the end.
This gearset had about 3000 km on track before it broke.

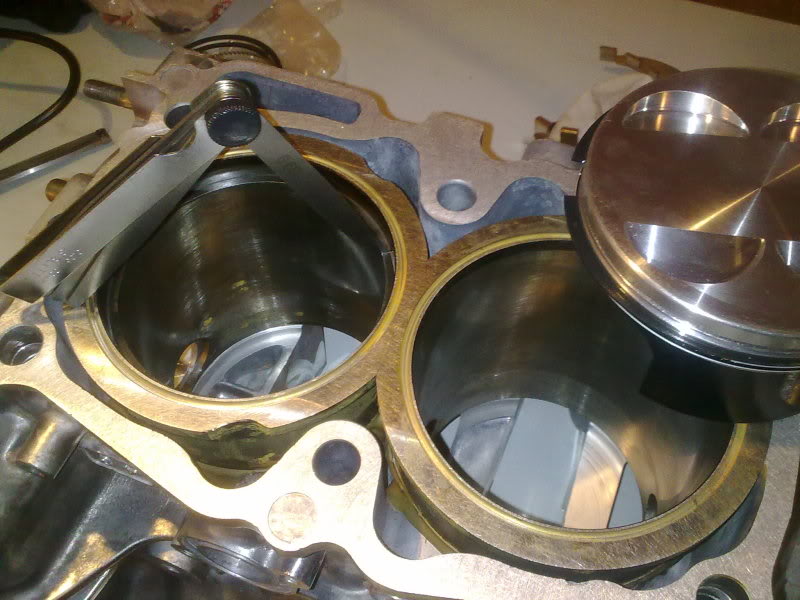
Crawford Performance USA have spent a lot of time looking closely at why the EJ257 block is prone to cylinder liners cracking on high power builds by developing their own TA car. In which time they have managed to destroy many blocks by pressure spiking due to losing control of the combustion event resulting in cylinder liners flexing and cracks occuring. By changing the piston dish capacity and design they have managed to run there TA car safely at over 700 bhp on a standard EJ25 block and have developed a new piston designed to enable a better burn rate which along with the correct mapping has proven to be reliable. Also tuners have used Cosworth long blocks such as Power Station & Zen Performance and run over 700 bhp so the standard EJ25 block can run big bhp but can't cope with pressure spiking as well as the CDB can.
The Zen Block was strengthened with inserts around the bores. I've just had the exact same done to my block.


Thread Starter
Scooby Regular
Joined: Sep 2006
Posts: 56
Likes: 0
From: Modum, Norway
A litle update:
I'm starting to prepare the car for the racing season and I got some new parts from Celtic motorsport today.
New pistons made to my spec by JE.
(higher comp and a few other details changed)
Will not run with a traditional headgasket anymore, so thats the main reason why I change pistons.
This is my way to try and solve the problem with blown headgaskets.
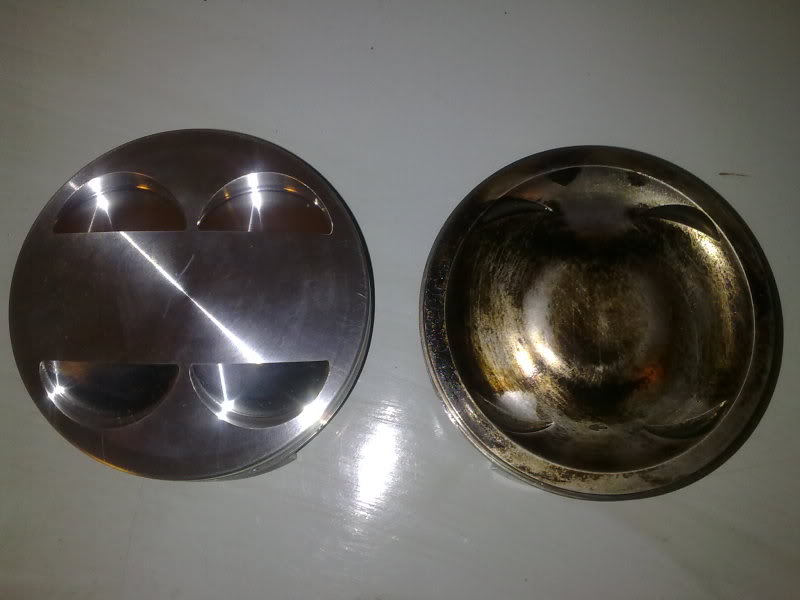
The new JE piston and a Cosworth piston to compare:
New rear arms made by Ikeya to remove all the nylon/rubber bushings.

I'm starting to prepare the car for the racing season and I got some new parts from Celtic motorsport today.
New pistons made to my spec by JE.
(higher comp and a few other details changed)
Will not run with a traditional headgasket anymore, so thats the main reason why I change pistons.
This is my way to try and solve the problem with blown headgaskets.
The new JE piston and a Cosworth piston to compare:
New rear arms made by Ikeya to remove all the nylon/rubber bushings.

Thread Starter
Scooby Regular
Joined: Sep 2006
Posts: 56
Likes: 0
From: Modum, Norway
Here is the start of my new engine build, I will try to build without normal head gasket and use Wills Rings instead. Hopefully this will last longer than my previus headgaskets.... ")
I also had JE to make some new pistons for me in my own spec:
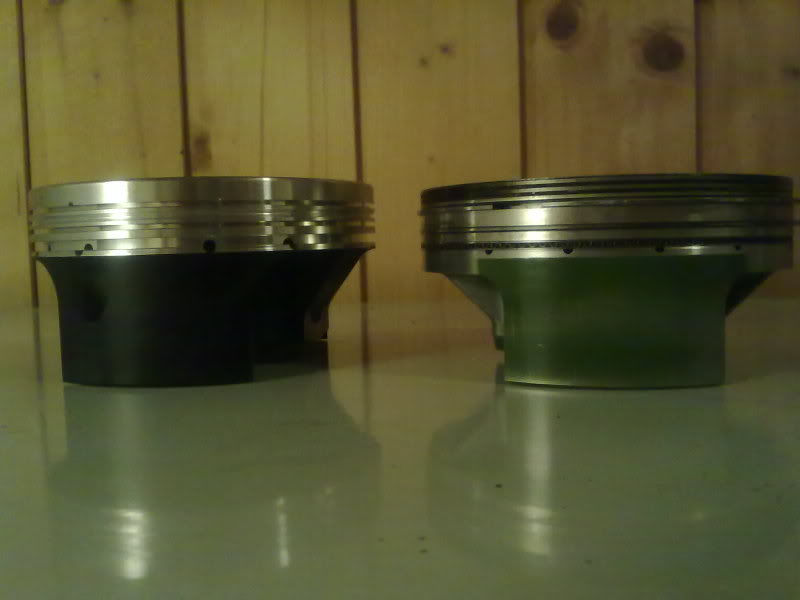
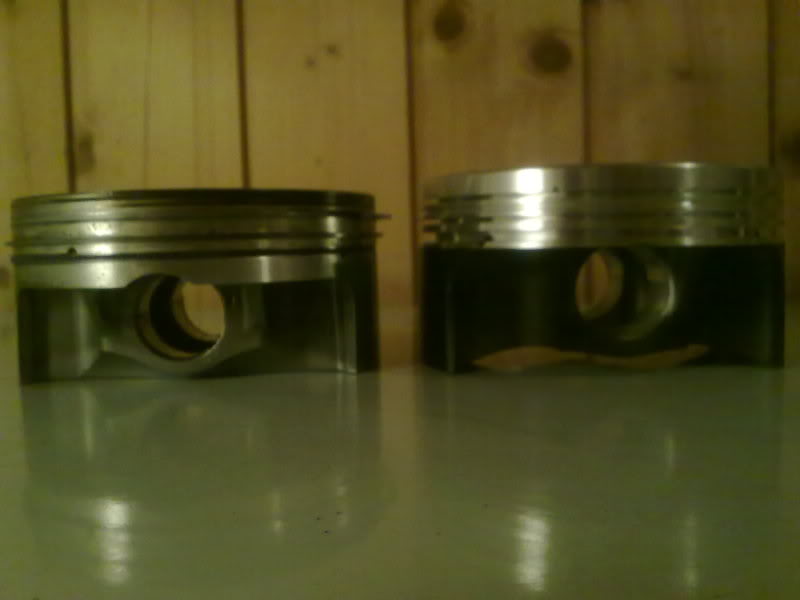
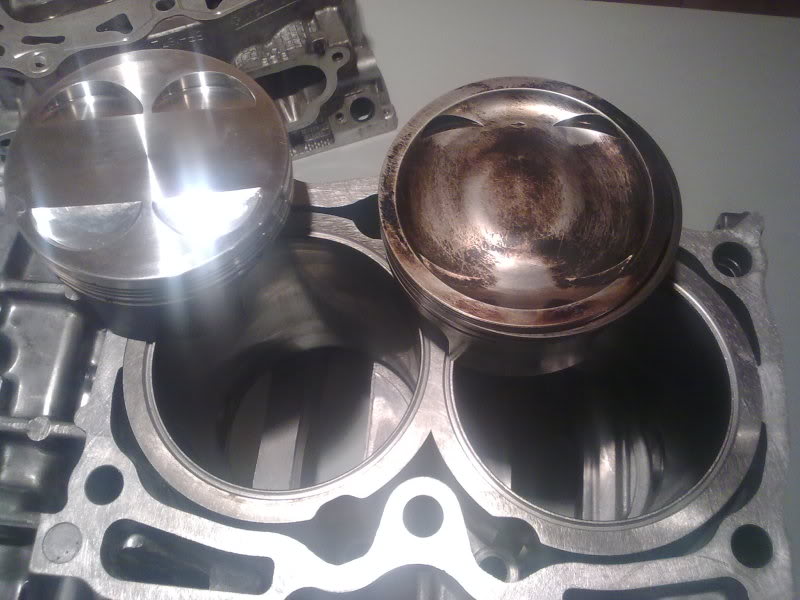
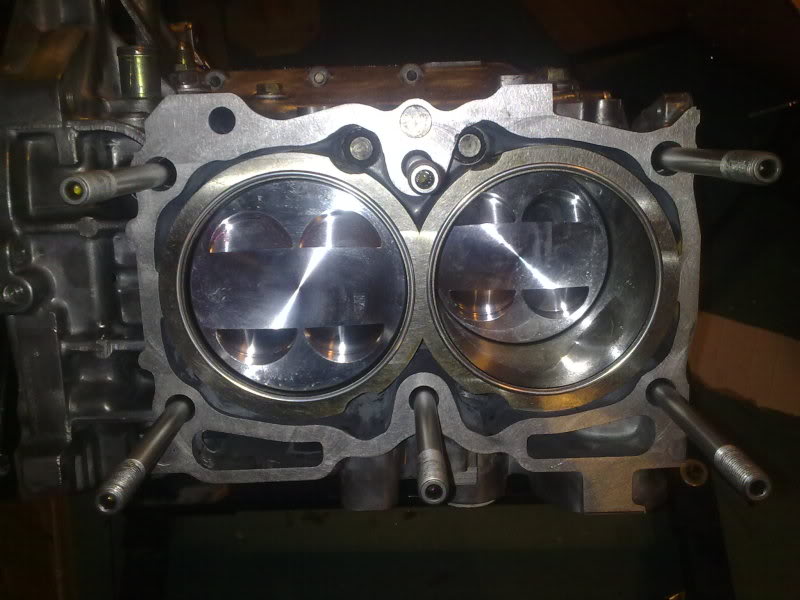
Block with sleeves and tread for the Wills Rings and new JE piston beside the Cosworth pistons I used to run:
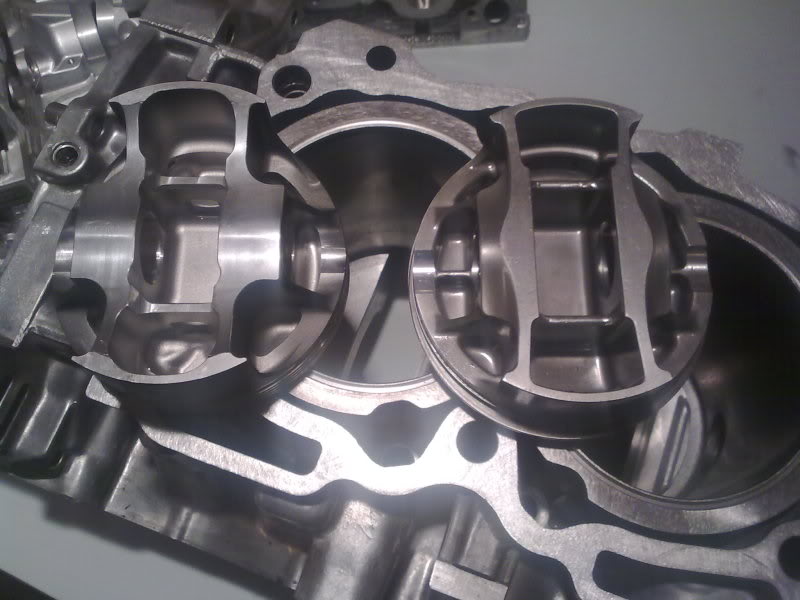
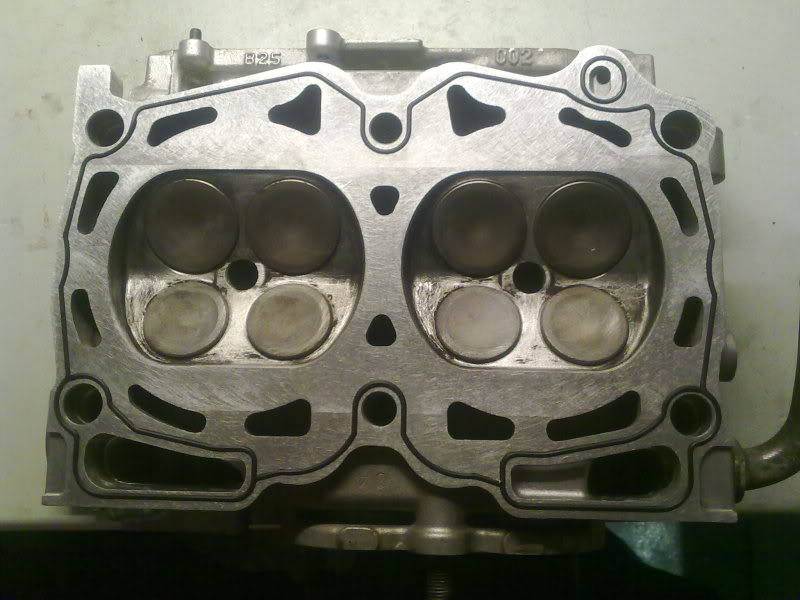
Cosworth heads with O-ring treads. It went some time to make the program for this tread, we had to use 157 refrence points before we where sure to have it right.
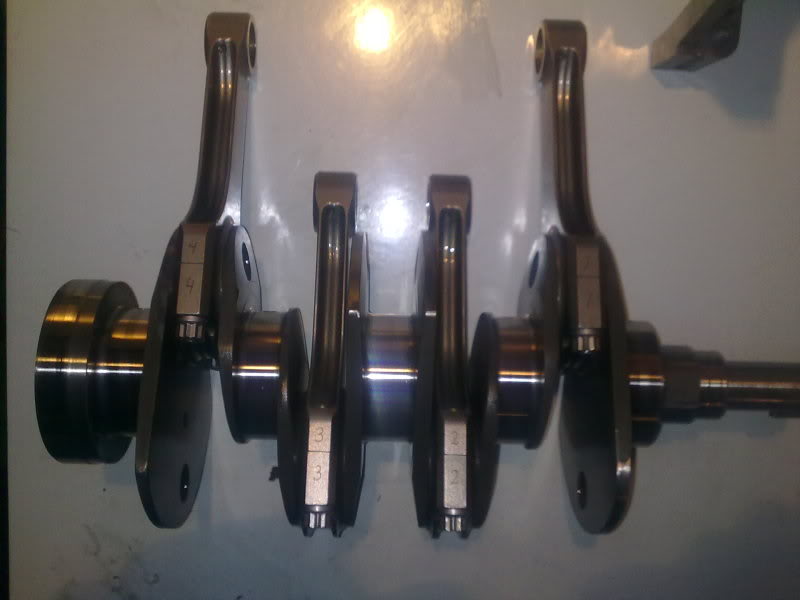
Coswort billet crank and rods ready for some new challenges:
Now I just hope I get the Wills Rings and O-rings tomorrow so I can start to assemble it again...
I also had JE to make some new pistons for me in my own spec:
Block with sleeves and tread for the Wills Rings and new JE piston beside the Cosworth pistons I used to run:
Cosworth heads with O-ring treads. It went some time to make the program for this tread, we had to use 157 refrence points before we where sure to have it right.
Coswort billet crank and rods ready for some new challenges:
Now I just hope I get the Wills Rings and O-rings tomorrow so I can start to assemble it again...
Thread Starter
Scooby Regular
Joined: Sep 2006
Posts: 56
Likes: 0
From: Modum, Norway
Finally I got some time to proced with my engine build...
Checking the correct gap on the piston rings:
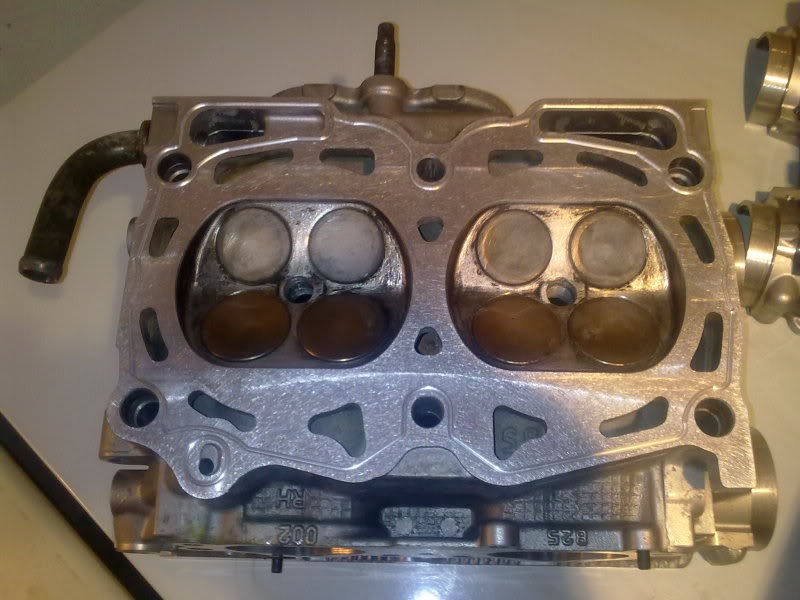
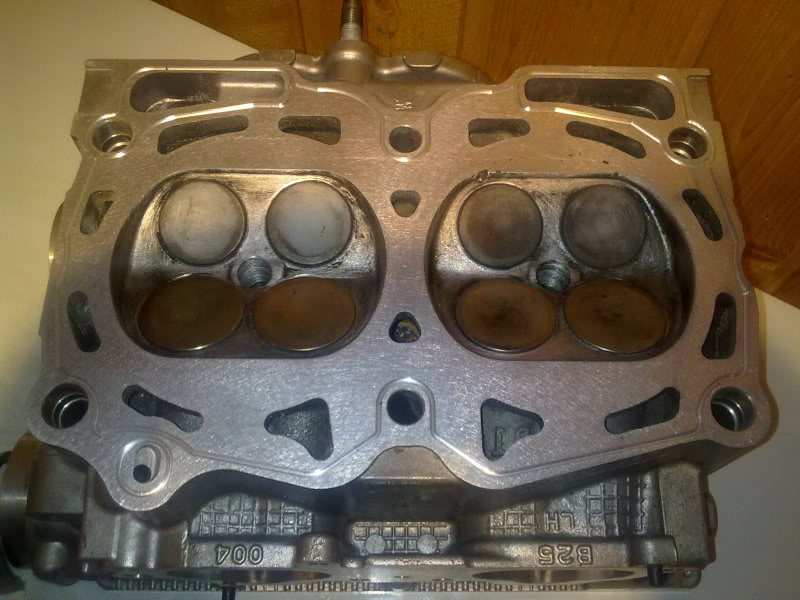
Head with the O - ring in place:
And the short block ready with the wills rings to mount the heads:
Hopefully I got the time to complete the engine and put it back in the car this week...
Checking the correct gap on the piston rings:
Head with the O - ring in place:
And the short block ready with the wills rings to mount the heads:
Hopefully I got the time to complete the engine and put it back in the car this week...
Thread Starter
Scooby Regular
Joined: Sep 2006
Posts: 56
Likes: 0
From: Modum, Norway
Yes it has been some progress and some setbacks...
The engine came togheter and performed well on the dyno:
(My car had 225hp on this dyno when it was stock STi):
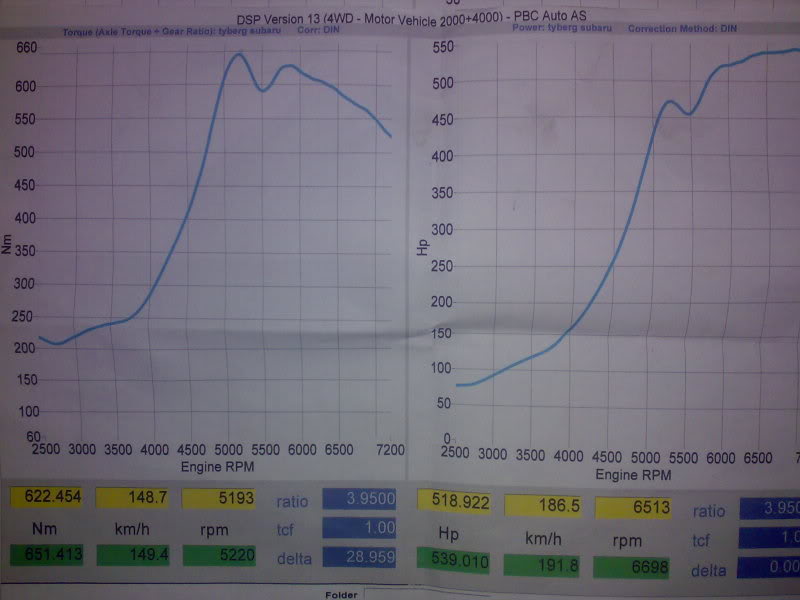
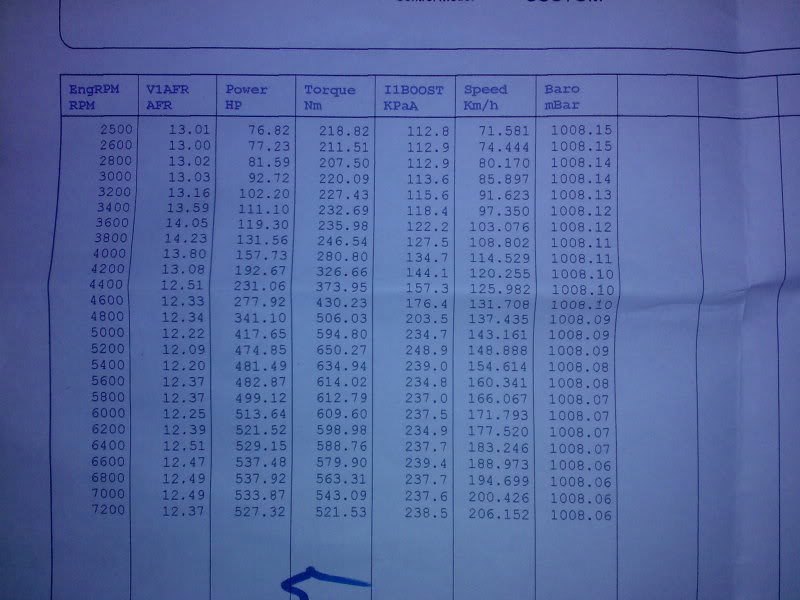
650nm = 481 Lbft and 240 kPaA = 20,5 psi boost
Here I tried to run with a 1.06 hotside on the turbo, but I think the response is a litle bad so I will change back to .84 house.
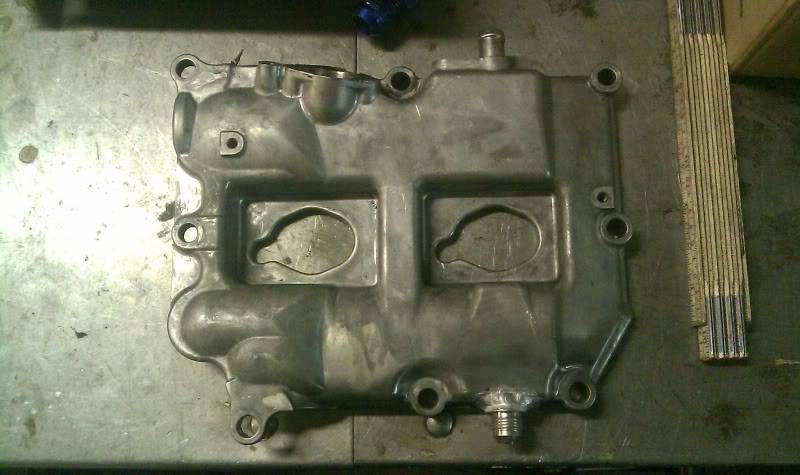
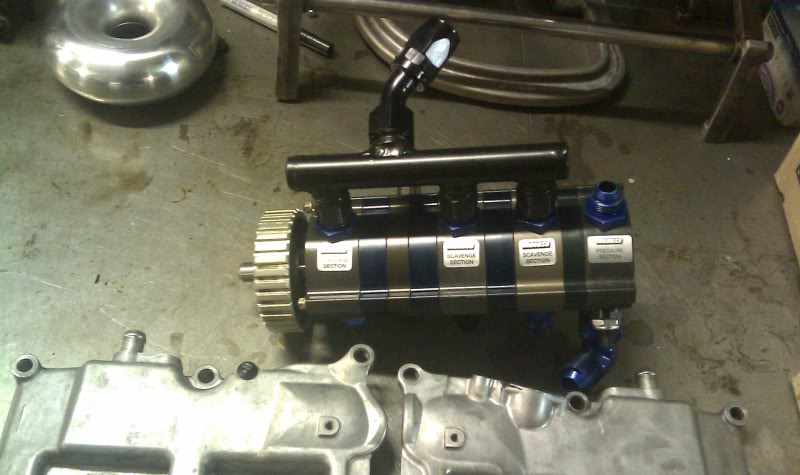
In this race/testing I discovered that I had to do some changes in the drysump system becouse the engine was filled with oil on the track, the scavenge on TRP kit isn't good enough for a track with turn's and high G force, so I have started to do some modifications to (hopefully) sort this out before this season.
Modification of valve covers:
New drysump pump with one more scavenge port than it was on the pump I got from TRG:
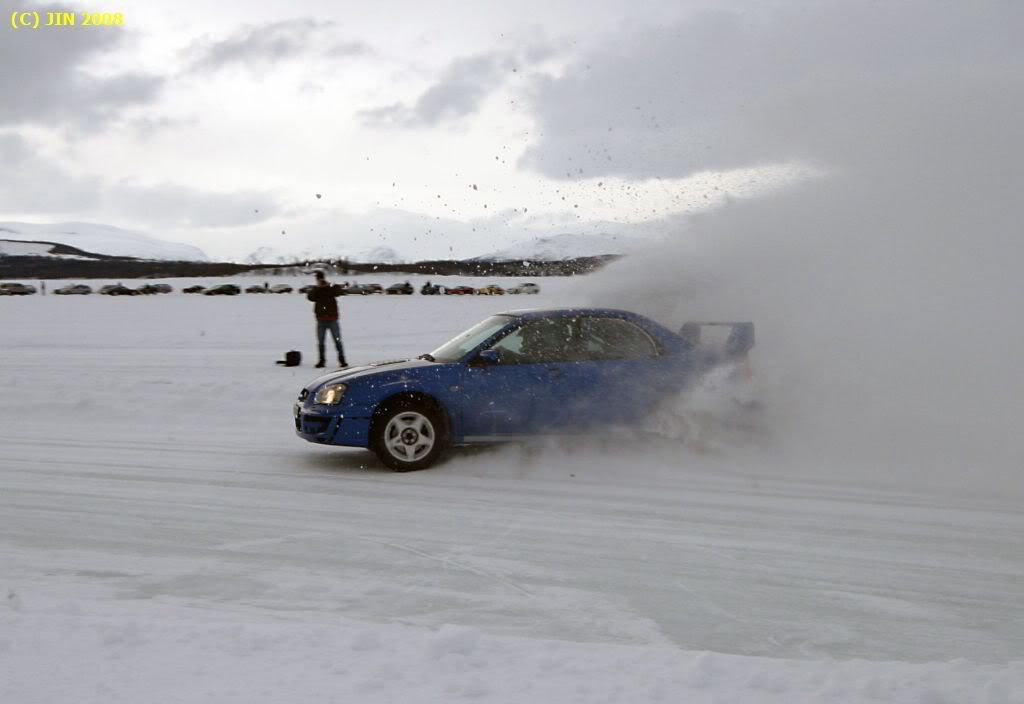
Here's a link to a video from the racingserie I'm competing in here in Norway.
(This was the first race last year, and I'm only running with 15 psi boost here and wrong front fender, so the car understeer a lot more than it normaly does)
http://www.youtube.com/watch?v=27Thn5TqfdY
The engine came togheter and performed well on the dyno:
(My car had 225hp on this dyno when it was stock STi):
650nm = 481 Lbft and 240 kPaA = 20,5 psi boost
Here I tried to run with a 1.06 hotside on the turbo, but I think the response is a litle bad so I will change back to .84 house.
In this race/testing I discovered that I had to do some changes in the drysump system becouse the engine was filled with oil on the track, the scavenge on TRP kit isn't good enough for a track with turn's and high G force, so I have started to do some modifications to (hopefully) sort this out before this season.
Modification of valve covers:
New drysump pump with one more scavenge port than it was on the pump I got from TRG:
Here's a link to a video from the racingserie I'm competing in here in Norway.
(This was the first race last year, and I'm only running with 15 psi boost here and wrong front fender, so the car understeer a lot more than it normaly does)
http://www.youtube.com/watch?v=27Thn5TqfdY
Thread Starter
Scooby Regular
Joined: Sep 2006
Posts: 56
Likes: 0
From: Modum, Norway
Then I've spent some time in the garage again
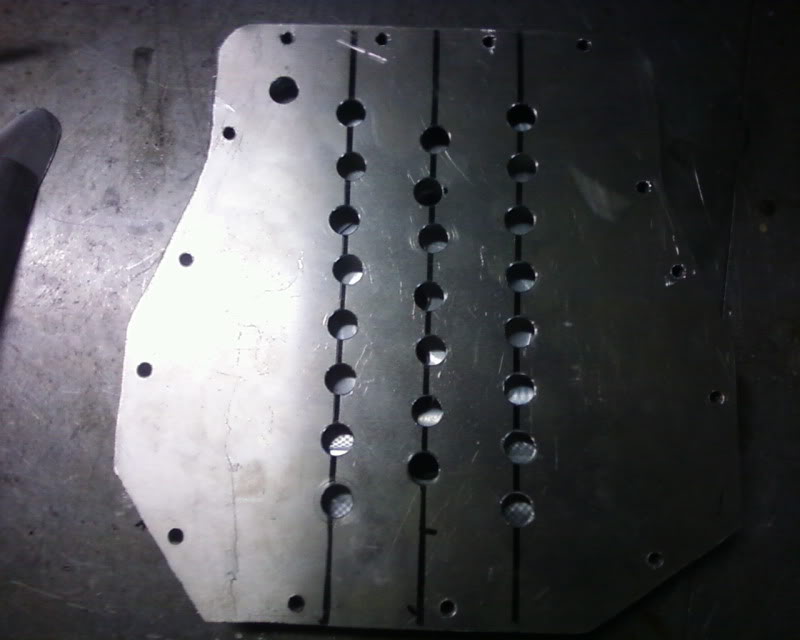
Made some parts that should help the pump collect oil from the oilpan:
(I forgot to take a picture after it was welded togheter, but it will come)
Drilled some ekstra holes in the oilpan to help the new "suction" camber to collect the oil:
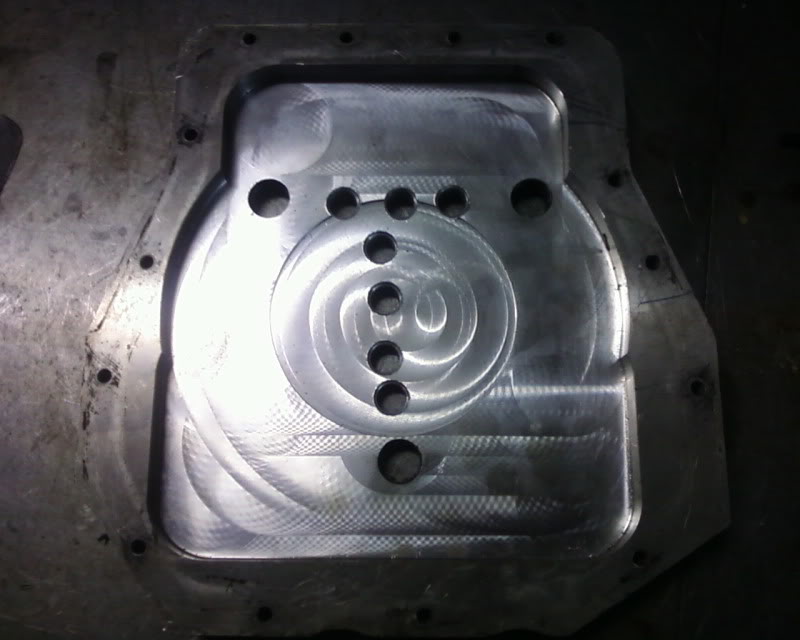
Here was it only the two biggest holes in the rear that collected oil when the kit was in Rigoli spec.:
I made a "baffle plate" that I will mount between the block and oilpan to prevent the oil flushing around in the engine when I'm on the track:
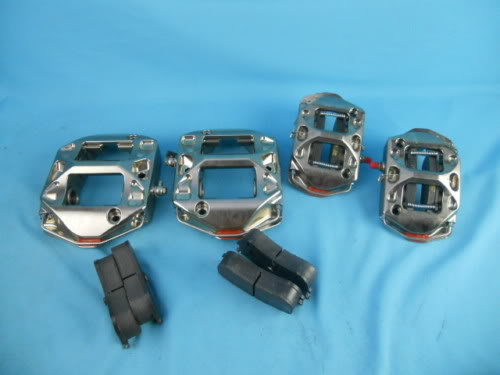
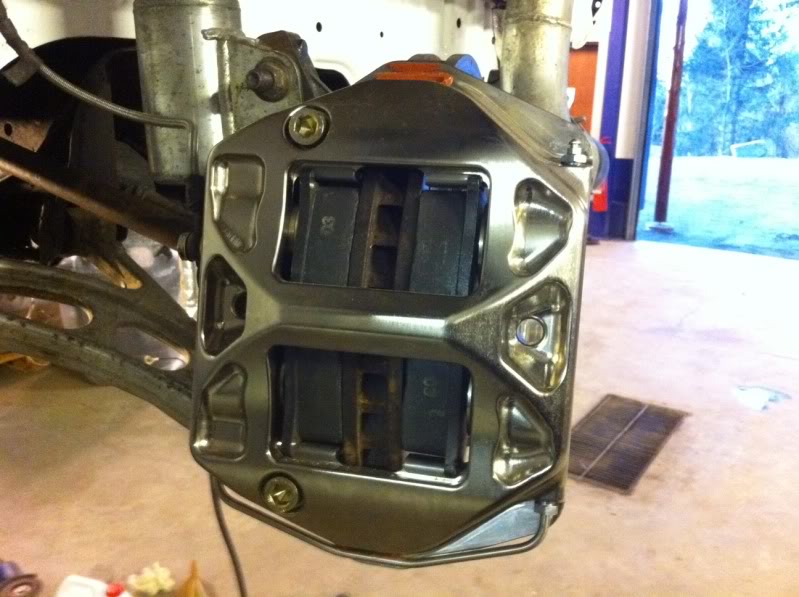
I've also bought some new brake calipers that are mor suited to racing and the heat we are seeing there.
This are Performance Friction calipers in front it is ZR22 and rear ZR24:
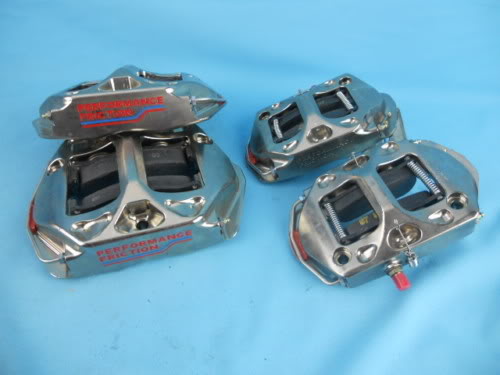
Front calipers:
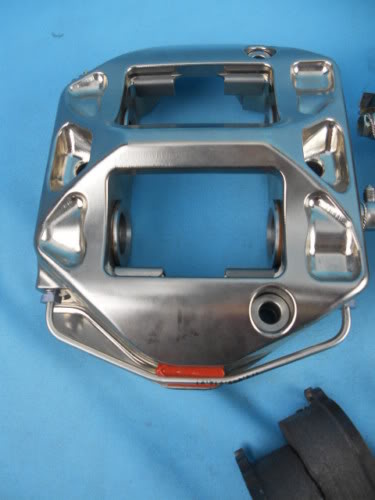
Rear calipers:
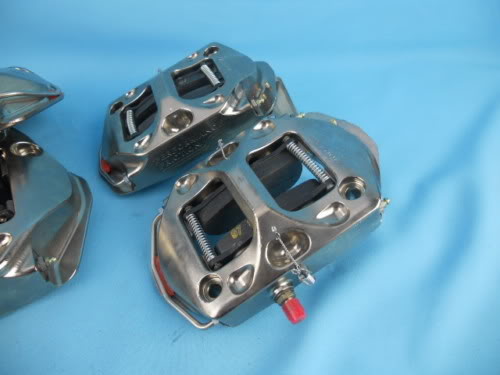
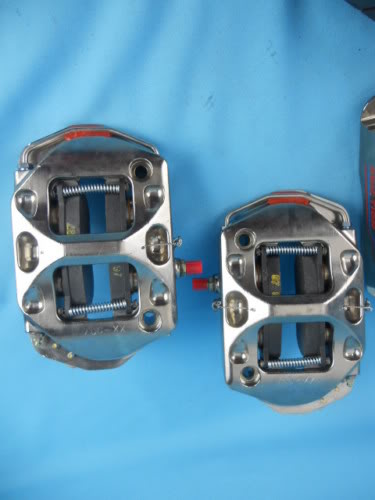
Now I just have to draw a nice bracket so it will be possible to mount them on the car...
If anyone have thougts about this or things I should do differntly please let me know.
Made some parts that should help the pump collect oil from the oilpan:
(I forgot to take a picture after it was welded togheter, but it will come)
Drilled some ekstra holes in the oilpan to help the new "suction" camber to collect the oil:
Here was it only the two biggest holes in the rear that collected oil when the kit was in Rigoli spec.:
I made a "baffle plate" that I will mount between the block and oilpan to prevent the oil flushing around in the engine when I'm on the track:
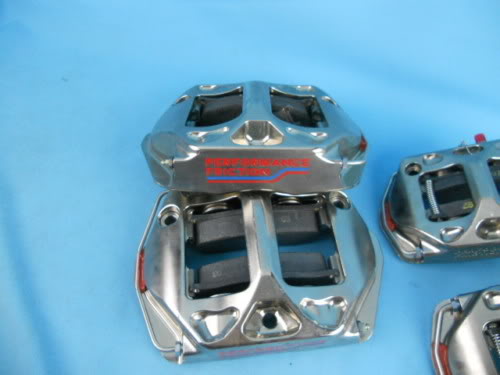
I've also bought some new brake calipers that are mor suited to racing and the heat we are seeing there.
This are Performance Friction calipers in front it is ZR22 and rear ZR24:
Front calipers:
Rear calipers:
Now I just have to draw a nice bracket so it will be possible to mount them on the car...
If anyone have thougts about this or things I should do differntly please let me know.

Thread Starter
Scooby Regular
Joined: Sep 2006
Posts: 56
Likes: 0
From: Modum, Norway
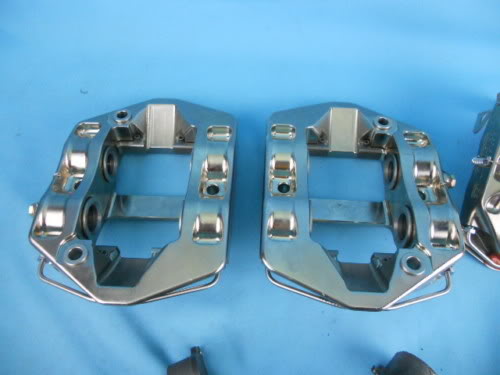
Here's some crappy picture's comparing the Performance Friction calipers to my stock well used an toasted Brembo's:
Now I just have to make some brackets so I can get them on the car.
Oilpan ready with modifications:
Diffrent pieces are dropping in the mail everyday, so I think I have to start to but some of it togheter so I can be ready for the first test weekend in Sweden in mid April.
Thread Starter
Scooby Regular
Joined: Sep 2006
Posts: 56
Likes: 0
From: Modum, Norway
Time for a litle update again. 
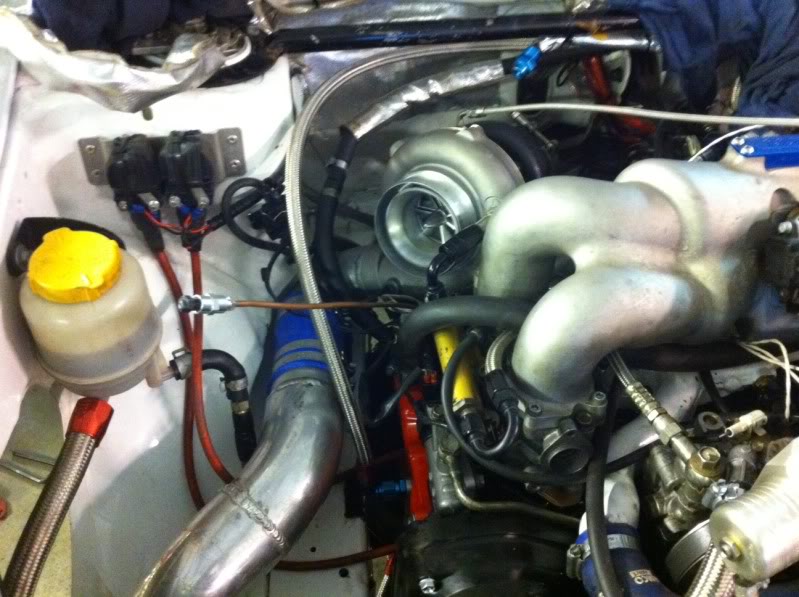
Engine in car with new turbo:
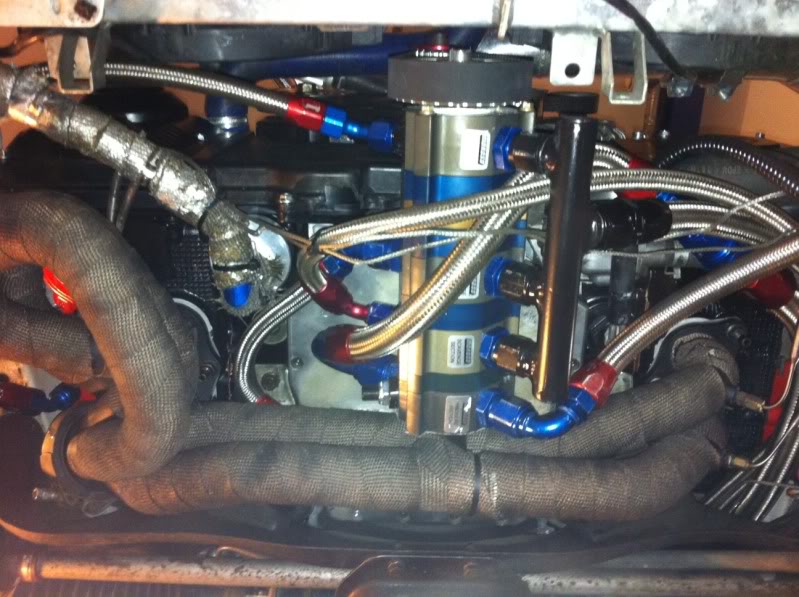
New drysump setup:
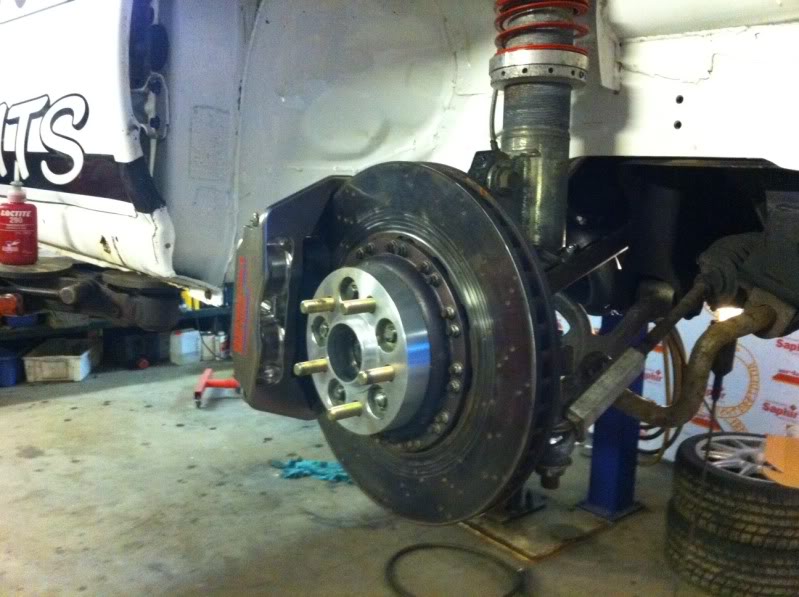
New brakes front end:

and rear:
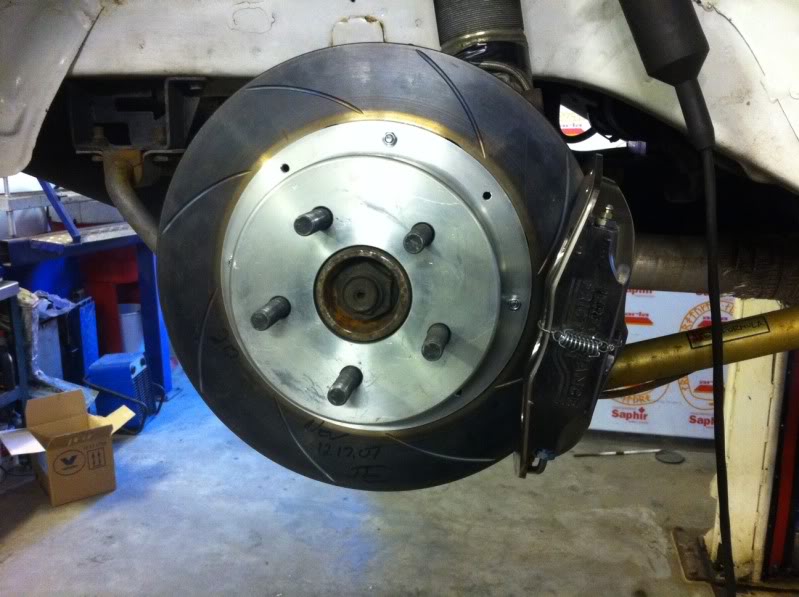
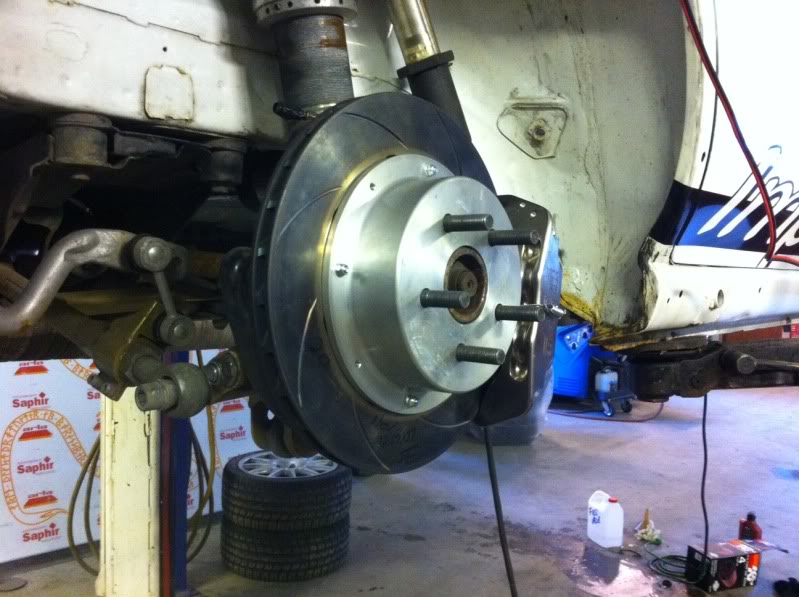
On these change from stock brakes rear to new Performance friction/AP racing i saved 10 lbs each side.
Engine is started and runing fine, I just have to bleed the brakes tomorrow and then I'm ready for the dyno on monday
Engine in car with new turbo:
New drysump setup:
New brakes front end:
and rear:
On these change from stock brakes rear to new Performance friction/AP racing i saved 10 lbs each side.
Engine is started and runing fine, I just have to bleed the brakes tomorrow and then I'm ready for the dyno on monday
Thread Starter
Scooby Regular
Joined: Sep 2006
Posts: 56
Likes: 0
From: Modum, Norway
Thread Starter
Scooby Regular
Joined: Sep 2006
Posts: 56
Likes: 0
From: Modum, Norway

Scooby Regular
Joined: May 2002
Posts: 6,316
Likes: 2
From: home
It may not be a problem on short sprint type stuff, but I think that running Lambda 0.84/85 on any fuel with that sort of boost is pushing it, I've run about 0.8 and 81 for race use on E85. I know you need to run reasonably lean for fuel economy, but I do think that you issues with reliability may be eased by running a little richer.
Thread Starter
Scooby Regular
Joined: Sep 2006
Posts: 56
Likes: 0
From: Modum, Norway
It may not be a problem on short sprint type stuff, but I think that running Lambda 0.84/85 on any fuel with that sort of boost is pushing it, I've run about 0.8 and 81 for race use on E85. I know you need to run reasonably lean for fuel economy, but I do think that you issues with reliability may be eased by running a little richer.

I had a friend of mine driving it on the track last weekend and here's some videos from this session:
Practicing on wet track:
http://www.youtube.com/watch?v=Rx6GXK_ZKaA
Timed practice/qualifying. We decided to turn up the power for this session but unfortunatly it blew a headgasket so he only run the half session. But he got 7. best time (of 21 cars)
http://www.youtube.com/watch?v=TWtNo4A9wSs
Start of the race. We turned the power down again, but he only got a few laps before the water was mising again...
http://www.youtube.com/watch?v=e0atoKCNzls
From a car behind in the field:
http://www.youtube.com/watch?v=rIzPoLDbnVw
I will change my Cosworth H11 11mm headstuds to RCM 14mm before next race and hopefully this will solve the problems with lifting of the heads.

