
wagon fettle


Thread Starter


Joined: Nov 2003
Posts: 13,356
Likes: 58
From: in the woods...........555 Wagon Sqn
picked up most of my of rest of my suspension parts from Mocom yesterday, only waiting for the alloy arm adapters and a replacment bolt.
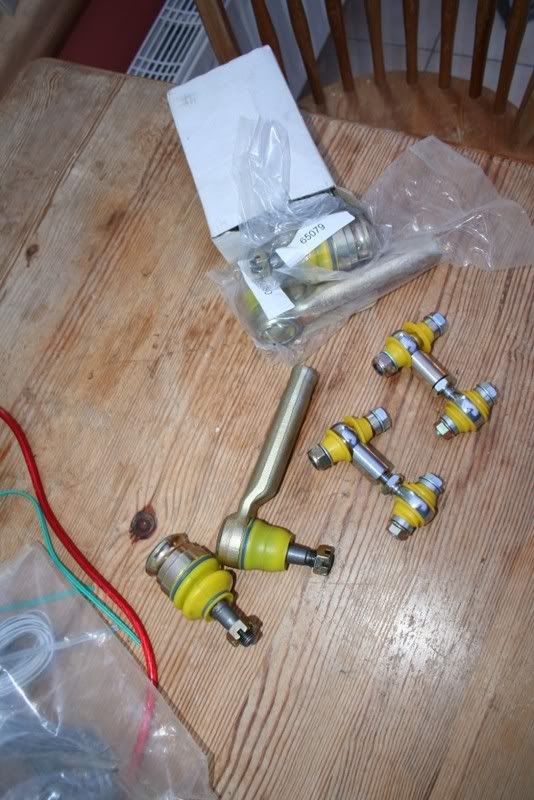
Superflex have sent me a replacement bush free of charge too
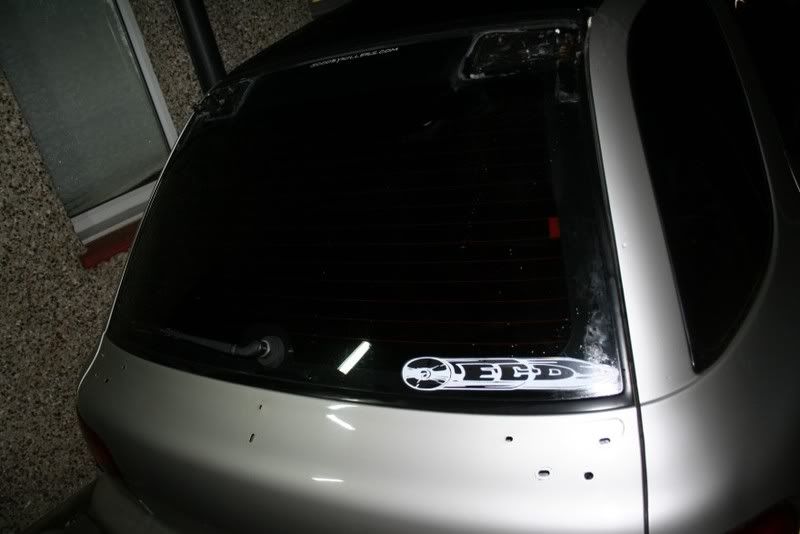
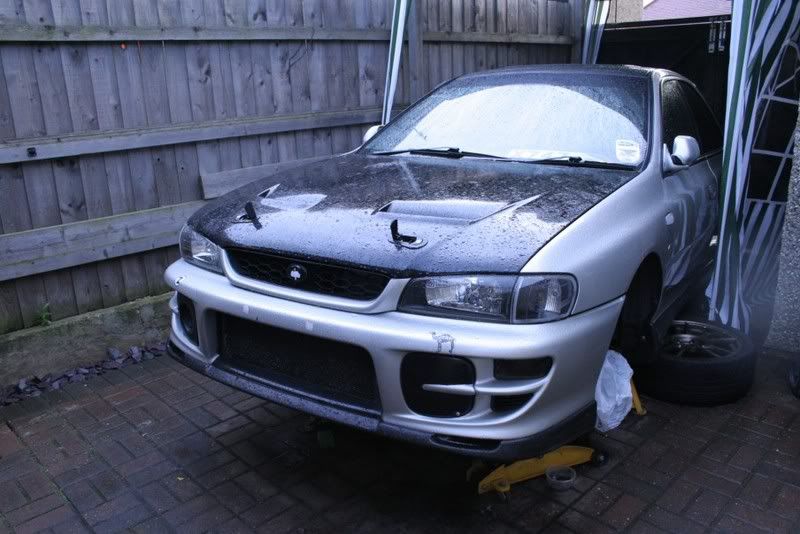
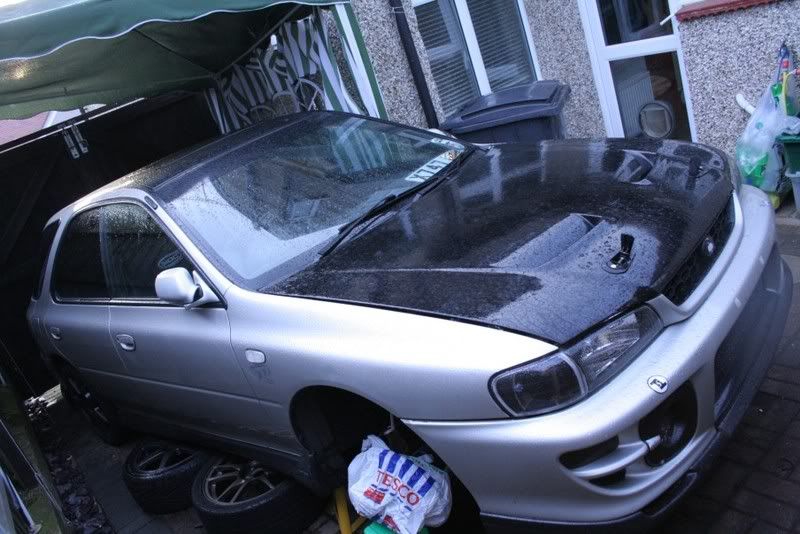
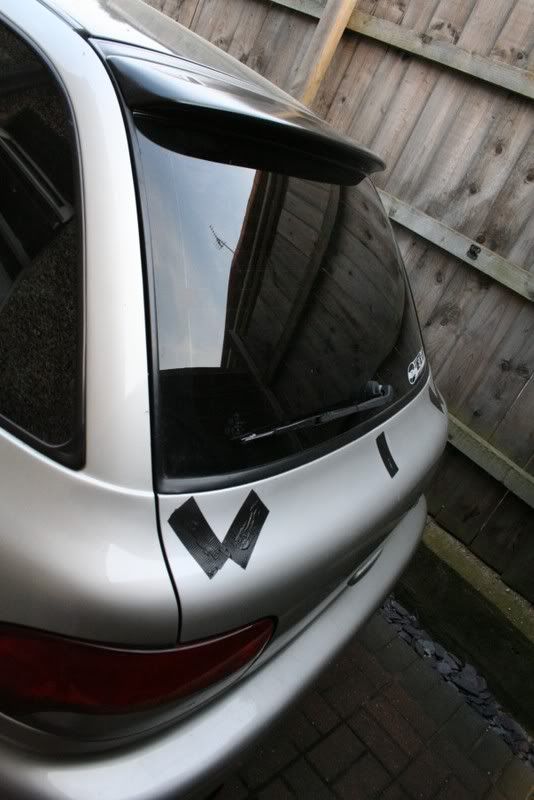
took both the wings off last night, totally changes its appearance
saves almost 6kgs too
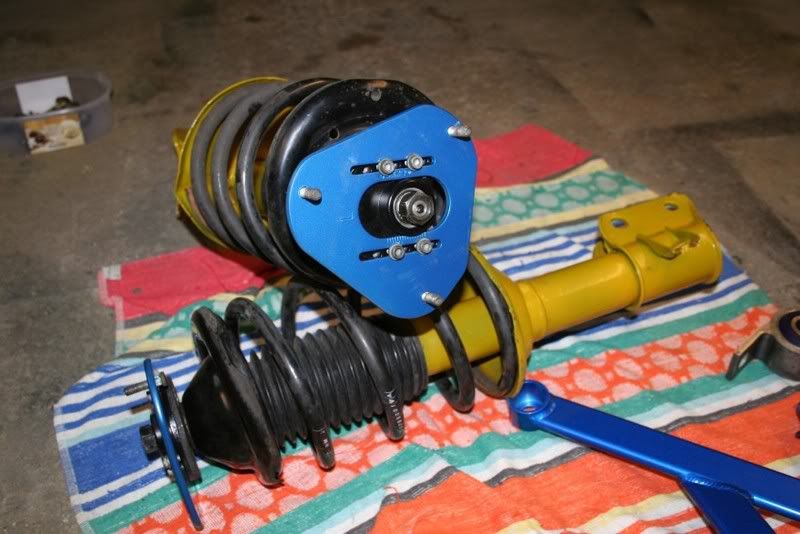
put my front shocks together too
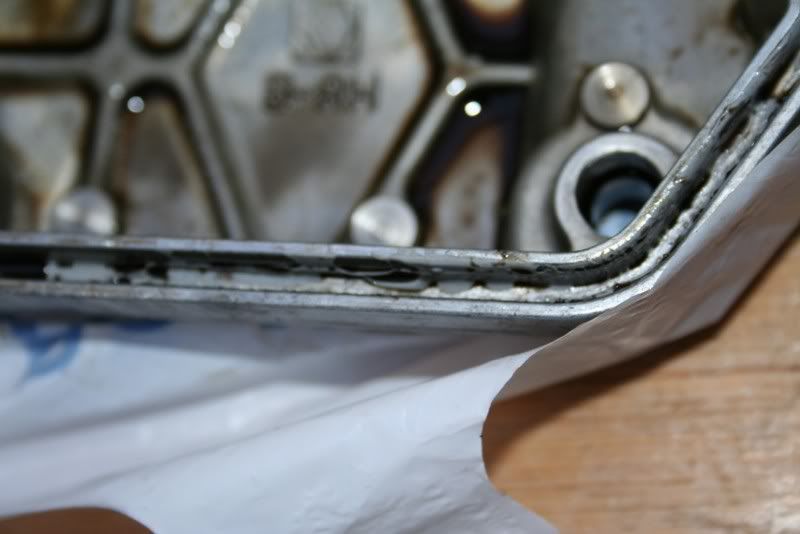
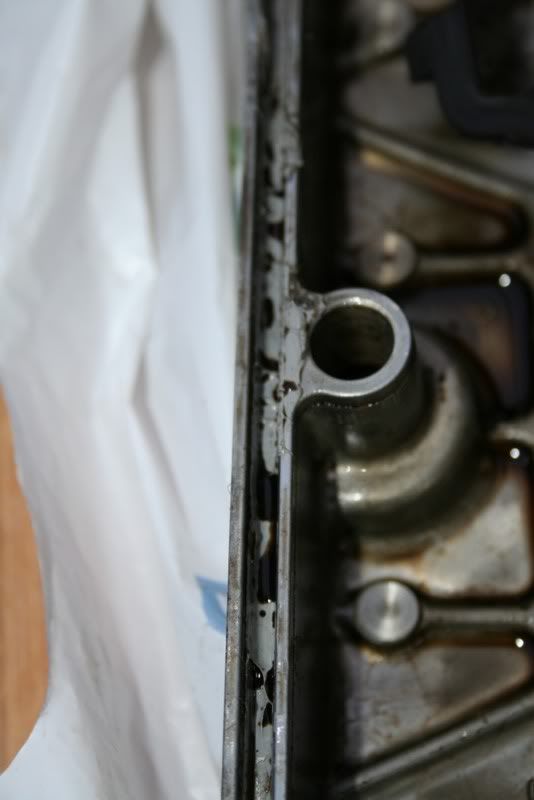
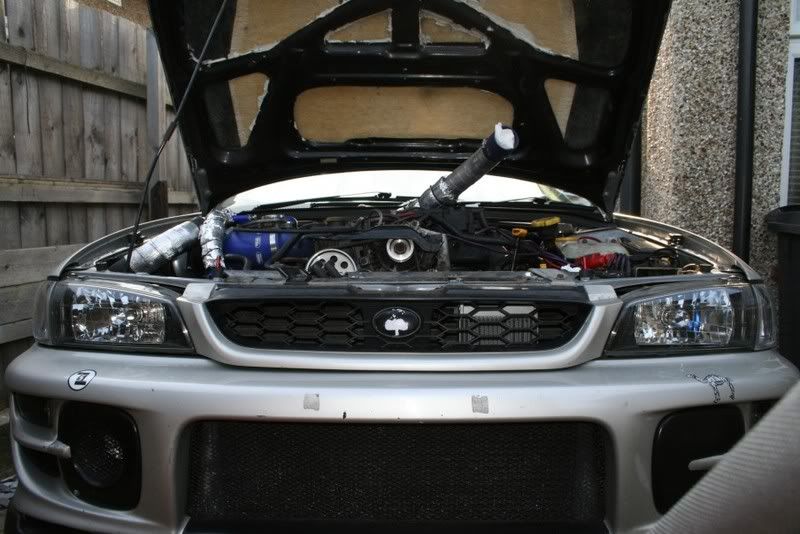
but mostly so far this weekend I have been avoiding putting the rocker cover on! I've spent hours cleaning all the sealer from both the cover and head, I really don't want to have to do it again
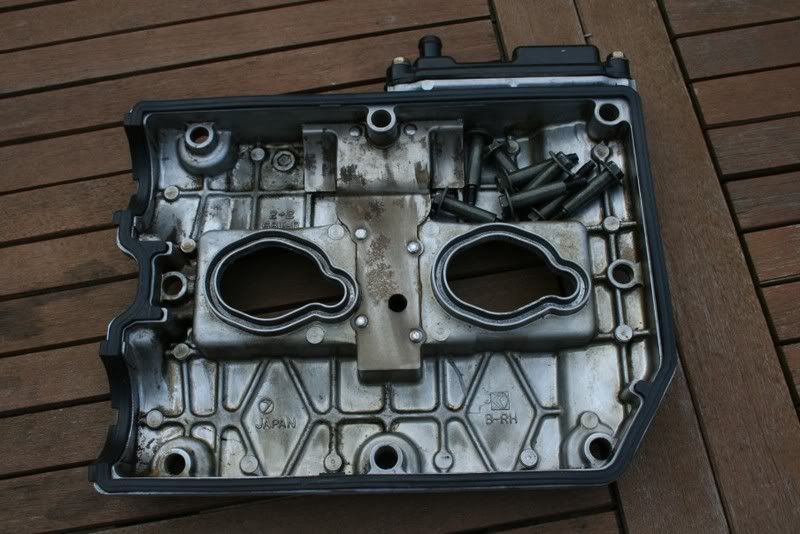
its all cleaned up and ready to go...
Superflex have sent me a replacement bush free of charge too
took both the wings off last night, totally changes its appearance
saves almost 6kgs too
put my front shocks together too
but mostly so far this weekend I have been avoiding putting the rocker cover on! I've spent hours cleaning all the sealer from both the cover and head, I really don't want to have to do it again
its all cleaned up and ready to go...

Thread Starter
Joined: Nov 2003
Posts: 13,356
Likes: 58
From: in the woods...........555 Wagon Sqn
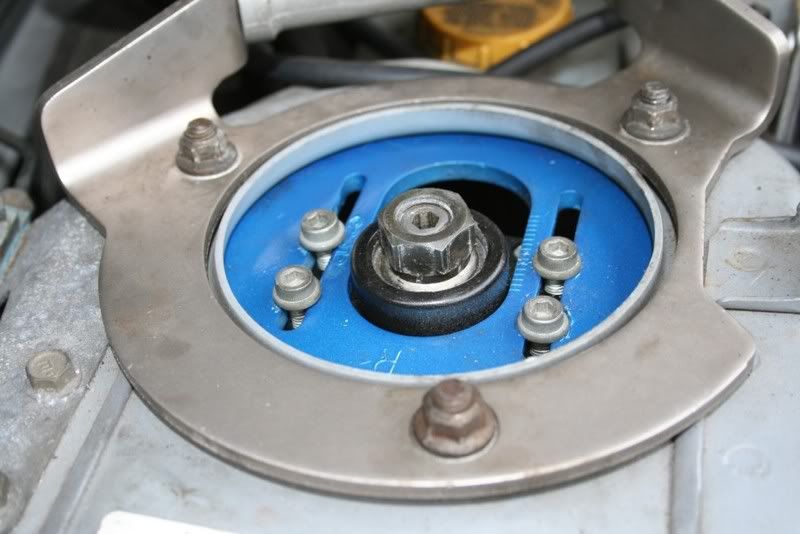
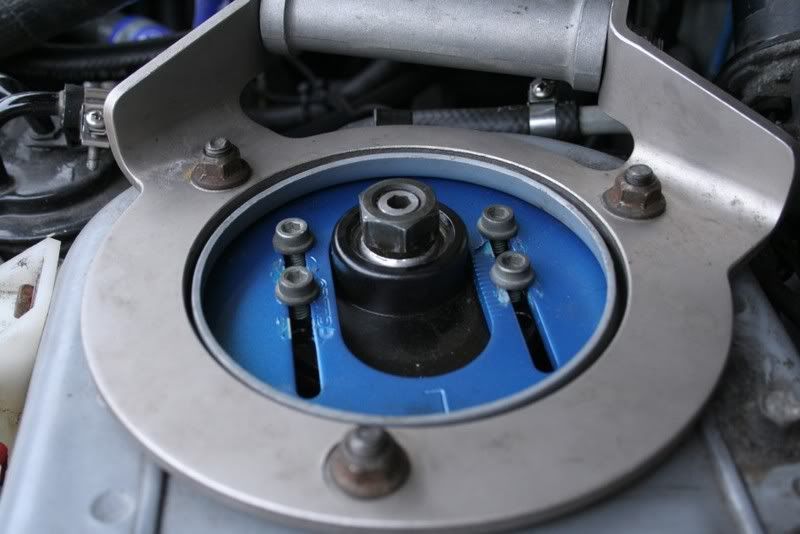
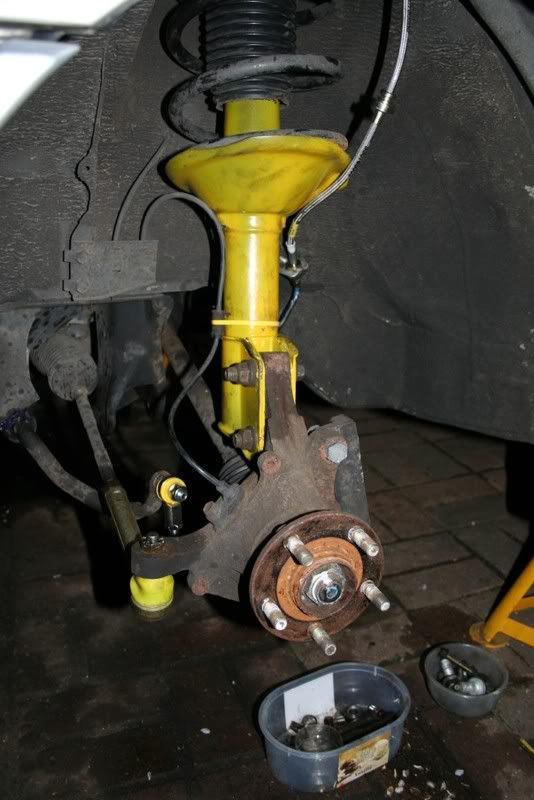
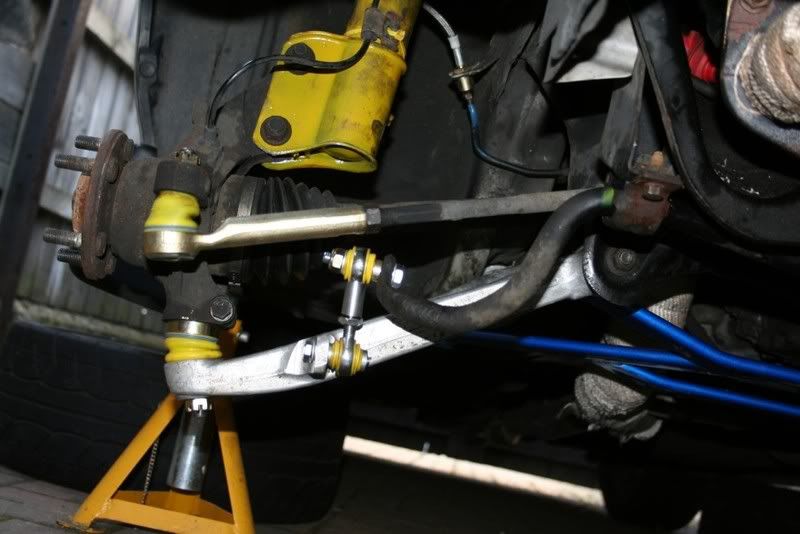
made a little progress this afternoon; got the struts on and front braided lines fitted...
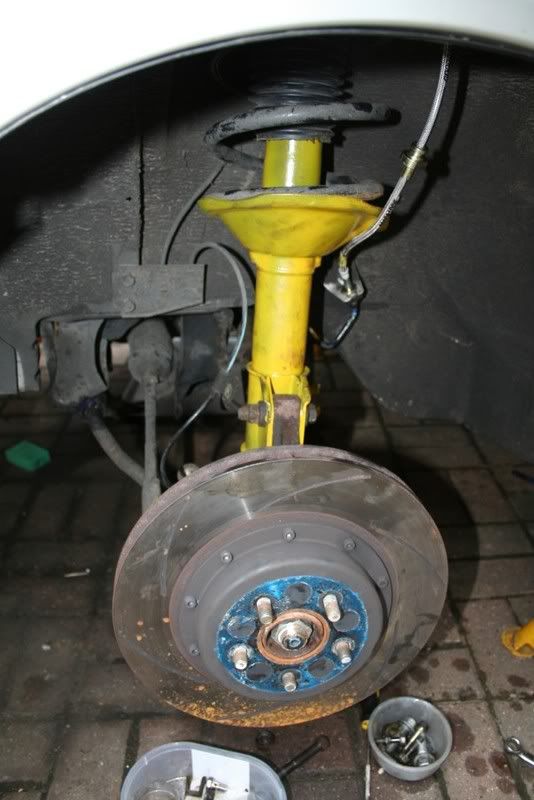

top mounts need a bit of adjustment though
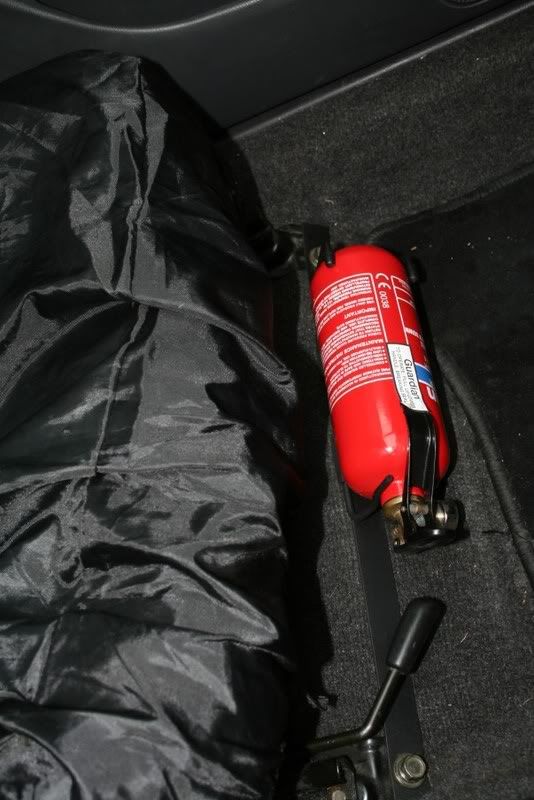
I got a little distracted and knocked up an fire extinguisher bracket and for less than �20 ended up with this
top mounts need a bit of adjustment though
I got a little distracted and knocked up an fire extinguisher bracket and for less than �20 ended up with this
Last edited by trails; May 4, 2008 at 06:49 PM.
Thread Starter
Joined: Nov 2003
Posts: 13,356
Likes: 58
From: in the woods...........555 Wagon Sqn
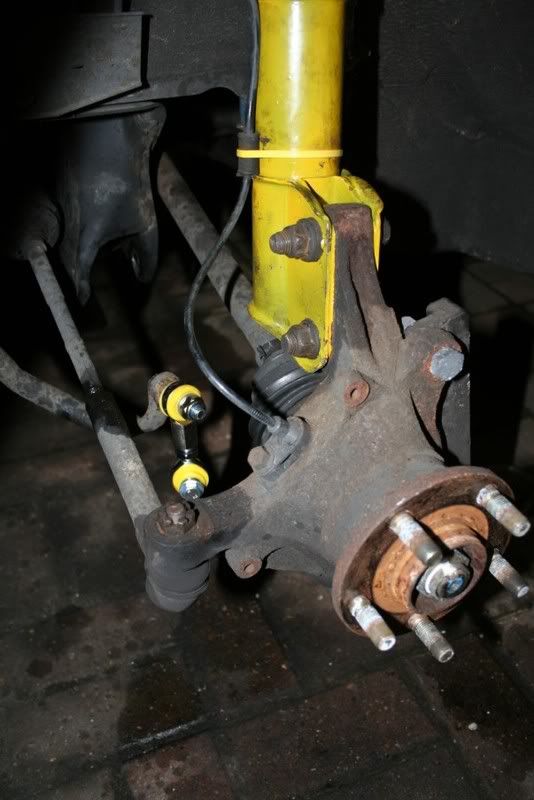
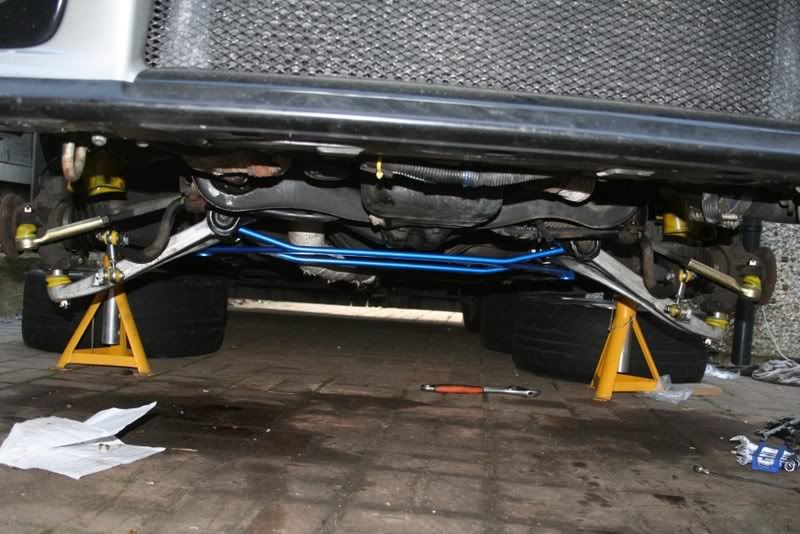
last update for today, attached the drop link replacements and unfastened the lower control arm...stuck hard though so I'll be applying WD liberally tonight and hopefully they will come off easily tomorrow 
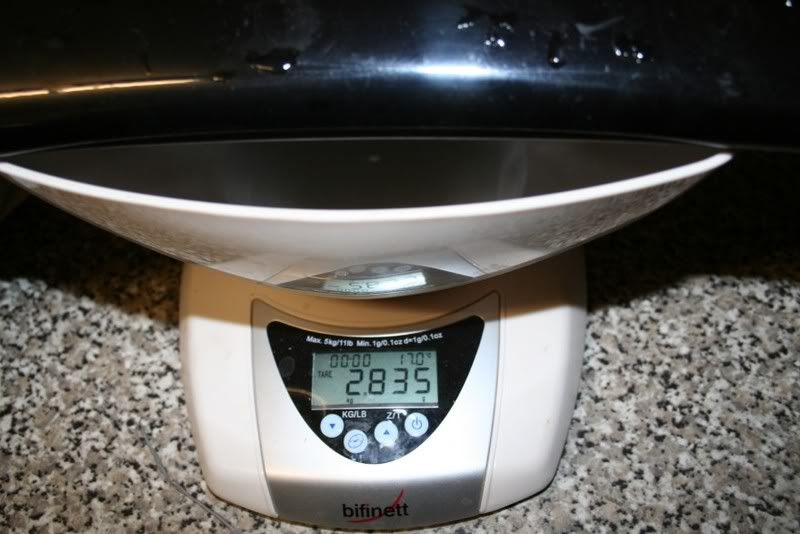
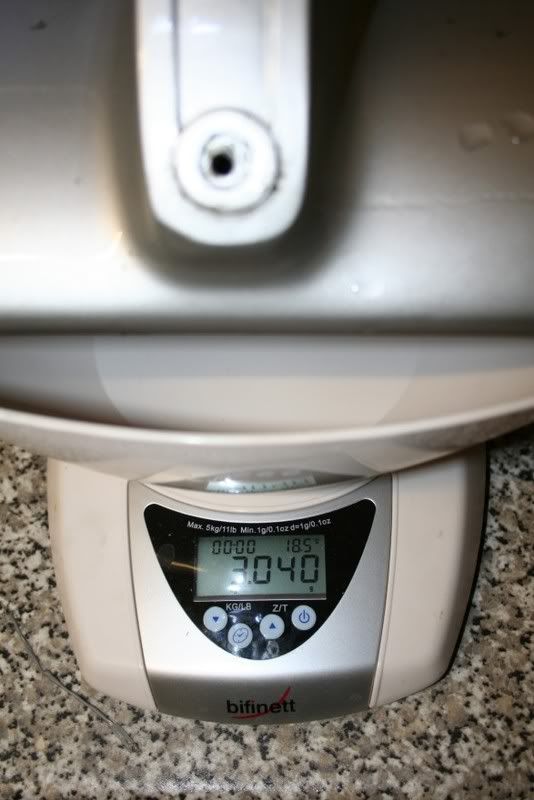
Thought I'd find out the weight difference between the wishbones...
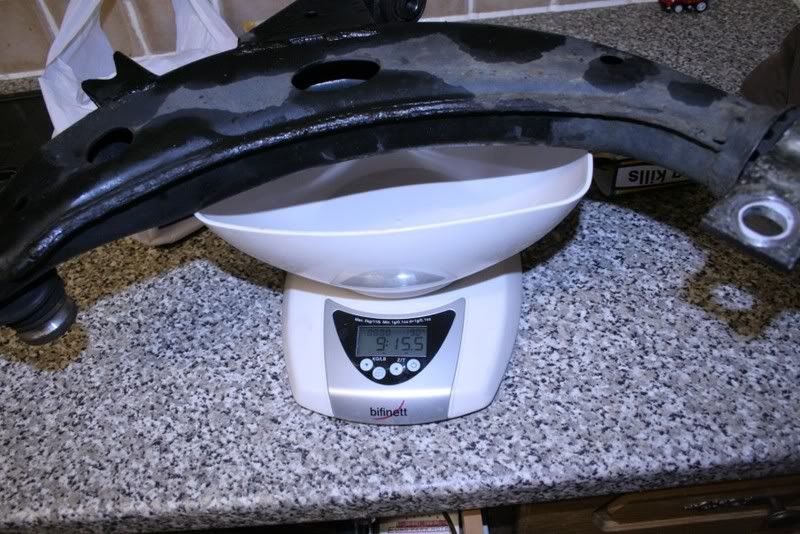
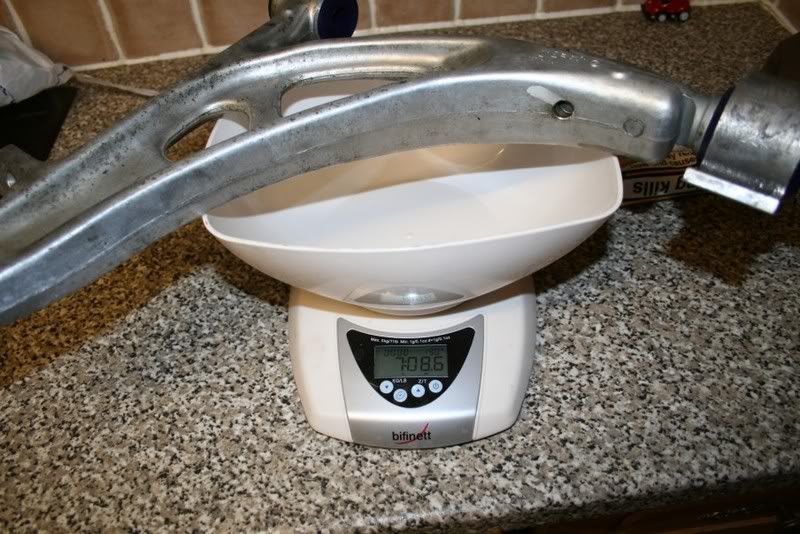
Just over 2kg's a side can't be bad
Thought I'd find out the weight difference between the wishbones...
Just over 2kg's a side can't be bad
Thread Starter
Joined: Nov 2003
Posts: 13,356
Likes: 58
From: in the woods...........555 Wagon Sqn
with the aid of a couple of scaffold poles and a Scott to hold them in place they came off easily 
Hopefully the last few bits will arrive very soon, then I can finish putting it back together. I sprayed my OEM rear wing and once its gone off I'll lacquer it...pleased with the results so far.
Hopefully the last few bits will arrive very soon, then I can finish putting it back together. I sprayed my OEM rear wing and once its gone off I'll lacquer it...pleased with the results so far.

Thread Starter
Joined: Nov 2003
Posts: 13,356
Likes: 58
From: in the woods...........555 Wagon Sqn
Thread Starter
Joined: Nov 2003
Posts: 13,356
Likes: 58
From: in the woods...........555 Wagon Sqn
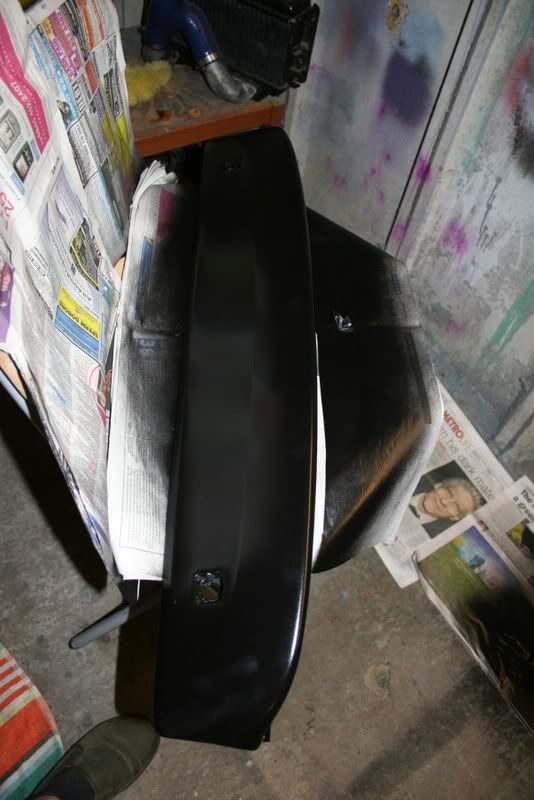
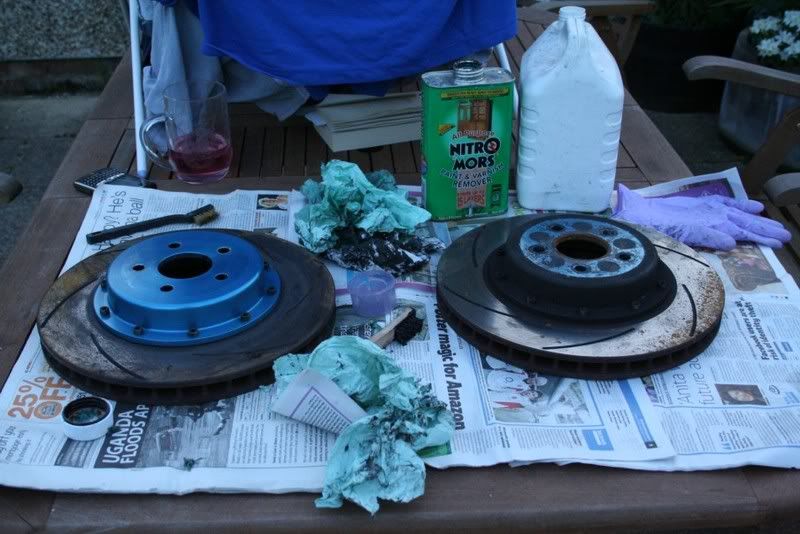
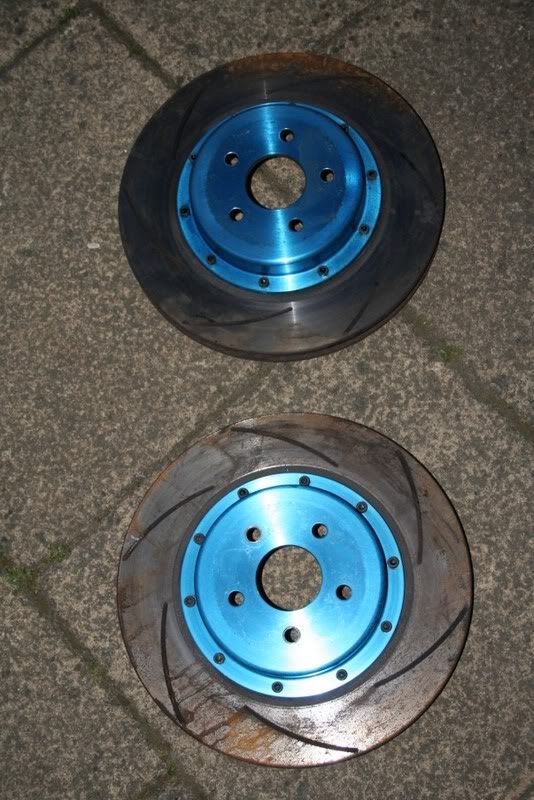
rubbed down the wing and lacquered it...looks OK but I won't know until tomorrow how its going to look. As I seem to have amassed quite a lot of shiny blue stuff I thought I'd strip my bells and see if I can deal with the bling. We shall see how long it they stay blue 
got tomorrow off, I have to get it running tomorrow because its booked into Mocom for a geometry set up on Saturday morning
got tomorrow off, I have to get it running tomorrow because its booked into Mocom for a geometry set up on Saturday morning

Thread Starter
Joined: Nov 2003
Posts: 13,356
Likes: 58
From: in the woods...........555 Wagon Sqn
Thread Starter
Joined: Nov 2003
Posts: 13,356
Likes: 58
From: in the woods...........555 Wagon Sqn
 so this evening all i have to do it put the brakes back on bleed them, put the wheels on and then stick the rocker cover gasket on
be good to say hello in person
fitted my repainted wing, not the best quality but acceptable for WIP
Last edited by trails; May 9, 2008 at 08:22 PM.
Thread Starter
Joined: Nov 2003
Posts: 13,356
Likes: 58
From: in the woods...........555 Wagon Sqn

Thread Starter
Joined: Nov 2003
Posts: 13,356
Likes: 58
From: in the woods...........555 Wagon Sqn
Thread Starter
Joined: Nov 2003
Posts: 13,356
Likes: 58
From: in the woods...........555 Wagon Sqn
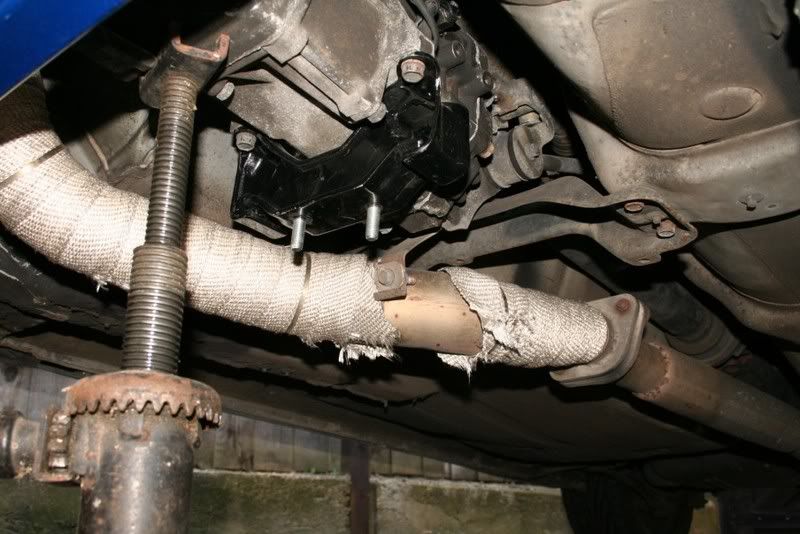
replaced my engine mounts today, had to jack the engine up quite a way...looked like a hot rod
I ended up re-using the OEM mounts plates as they were identical to the Group N mounts but had had heat shields welded in place.
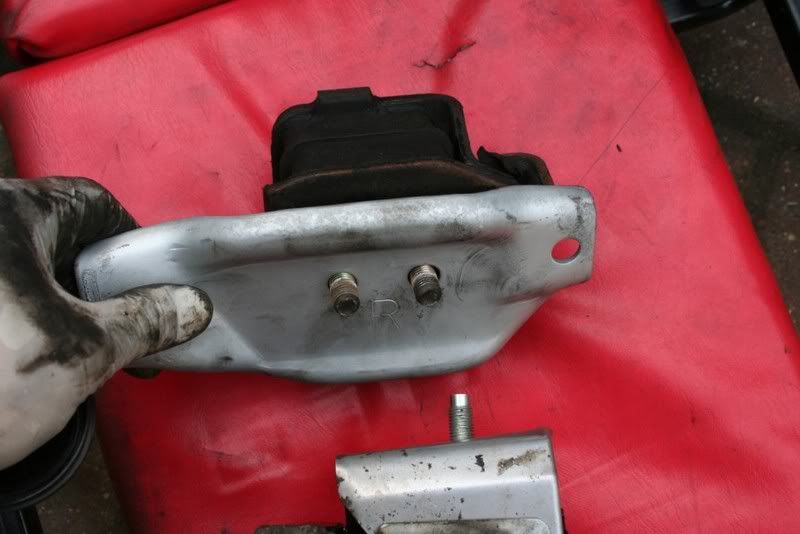
Pretty straight forward job except one fixing...it was an absolute bugger to get at

still all the hardship is forgotten now they are in...all I need do now is find out why my struts sounds like its try to escape from the turrets.
I ended up re-using the OEM mounts plates as they were identical to the Group N mounts but had had heat shields welded in place.
Pretty straight forward job except one fixing...it was an absolute bugger to get at
still all the hardship is forgotten now they are in...all I need do now is find out why my struts sounds like its try to escape from the turrets.
Last edited by trails; May 14, 2008 at 07:48 PM.

Thread Starter
Joined: Nov 2003
Posts: 13,356
Likes: 58
From: in the woods...........555 Wagon Sqn
Thread Starter
Joined: Nov 2003
Posts: 13,356
Likes: 58
From: in the woods...........555 Wagon Sqn
so all finished with the engine mounts now, which means everything is back together! I only have two things left to do before I can drive it again
1. Let Mocom sort the Geometry out.
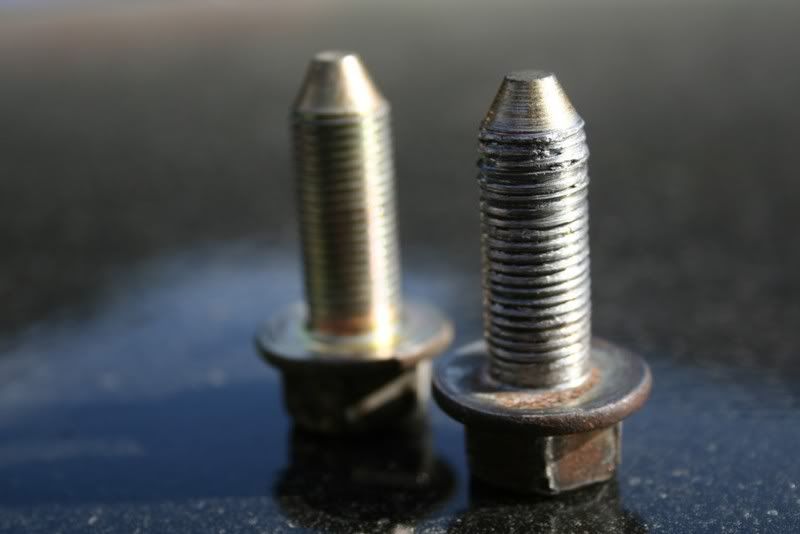
2. Let Mocom sort out a little issue I created by being lazy and using an impact gun to fix the last gearbox cross member fixing. It should look like this;
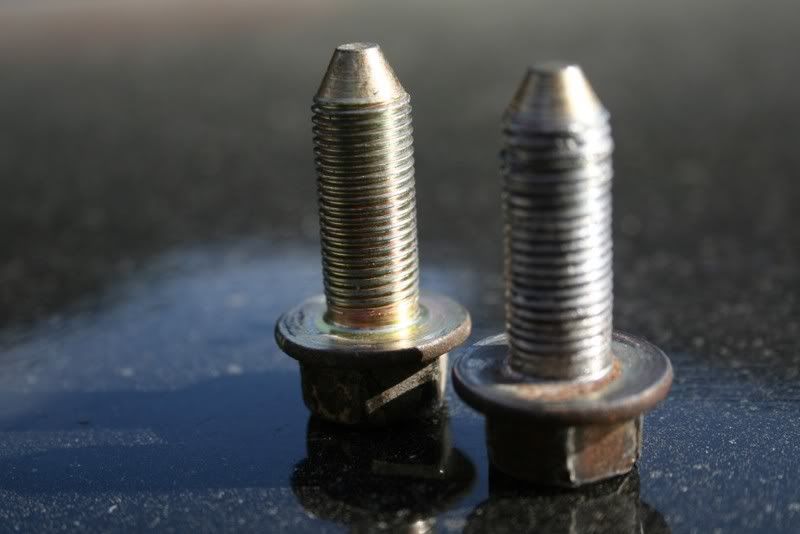
but now after my fettling") it looks like this
it looks like this 
I'd like to apologise to Zak and Luke in advance for being a ham fisted **** wit and thank them for coming to pick it up and trailering it back to their premises to un-Ian it With a bit of luck and a tail wind I might even be able to drive it at the weekend
1. Let Mocom sort the Geometry out.
2. Let Mocom sort out a little issue I created by being lazy and using an impact gun to fix the last gearbox cross member fixing. It should look like this;
but now after my fettling
it looks like this I'd like to apologise to Zak and Luke in advance for being a ham fisted **** wit and thank them for coming to pick it up and trailering it back to their premises to un-Ian it
With a bit of luck and a tail wind I might even be able to drive it at the weekend
Thread Starter
Joined: Nov 2003
Posts: 13,356
Likes: 58
From: in the woods...........555 Wagon Sqn
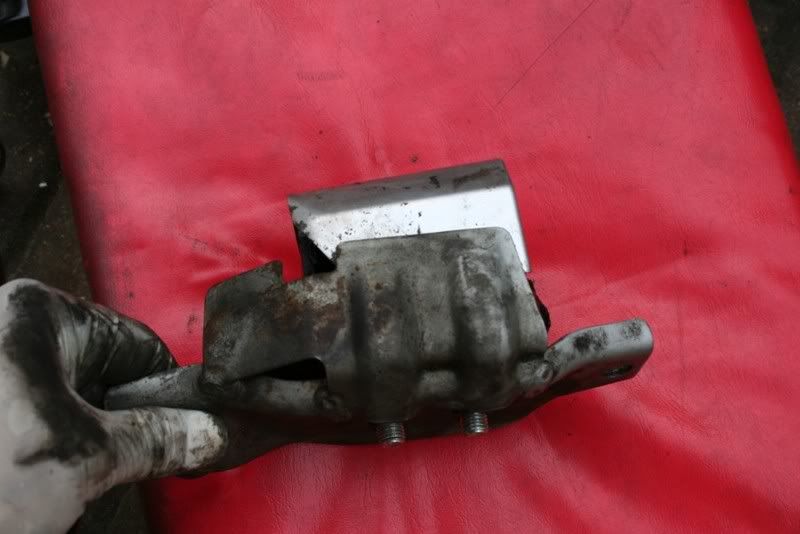
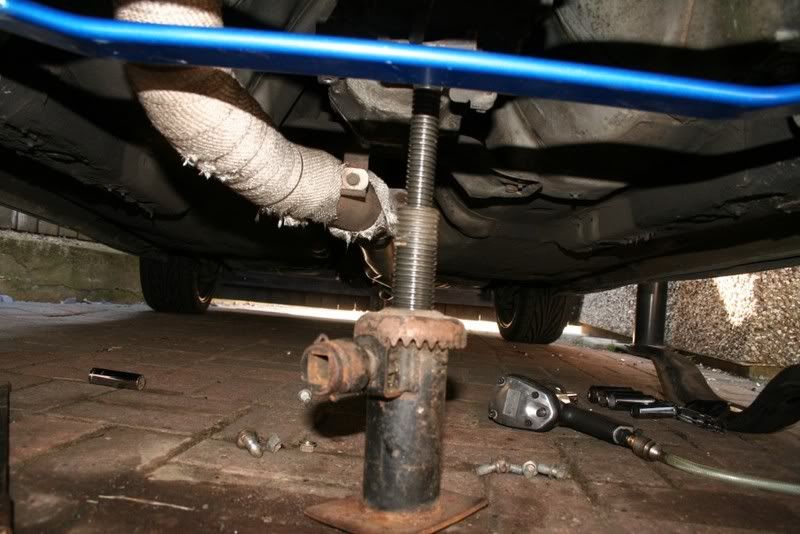
doh, forgot to post the pics of the gearbox mount it was a tight sqeeze
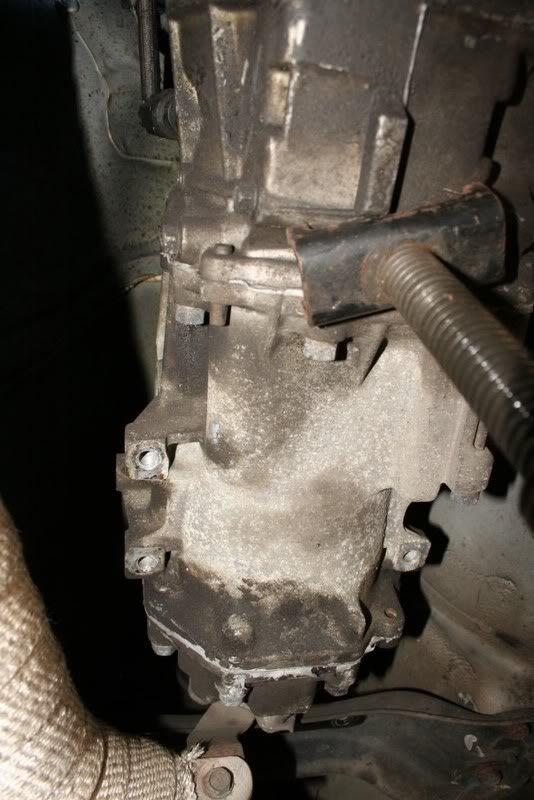
with the supporting members removed you can see the mounting points that the mount is fixed to the gearbox housing.
new one in place.
everything back together. I can turn the computer off now

it was a tight sqeeze with the supporting members removed you can see the mounting points that the mount is fixed to the gearbox housing.
new one in place.
everything back together. I can turn the computer off now

