
Prodrive Grp.N. chassis street build


Thread Starter
Scooby Regular
Joined: Dec 2002
Posts: 458
Likes: 0
Well,
It has been a while when i last did an update.
Been working more on the car than doing computing.
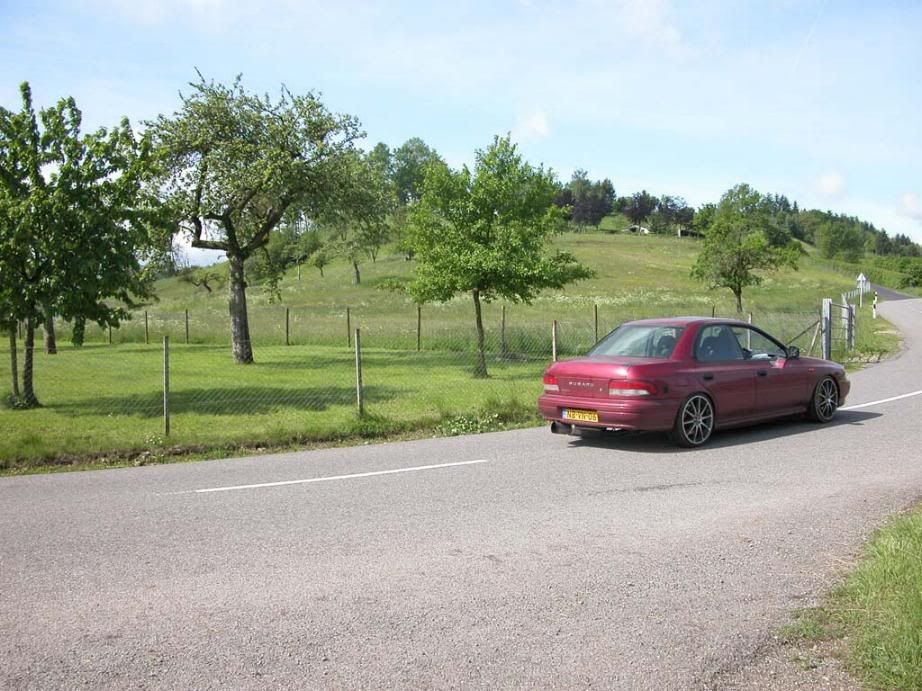
It is on the road now, just came back from Luxemburg and it performed above expectations.
Last Teusday it got Dutch MOT on it, and began running the in.
Meanwhile i fitted a 2002 Spec-C 6 speed with DCCD and external oil cooler, this is the only version which has this feature, just like the 45/55 divide between front and rear instead of 35/65.
Together with the box i changed the complete rear suspension (again), this time the STI5 was replaced with the 2004 Forester STI version.
Complete wiith Brembo's and aluminum suspensions bars.
Of course the usual STI rear diff, propshafts and drive shafts were replaced too.
Before fitting that i replaced the GL tank with the USDM STI which was on the car i have the loom from.
I changed this because it had more capacity and the connector would be plug and play after that.
I removed all the american invirement addons which gave me a nice check engine light all the time, ohh well. .
.
After much woork i got the 2005 WRX dash in too, it needs some finishing but the nasty part is over.
Now i'm going to drive for a bit first .
.
I will finish the report later when i have time to make it.
In between here are some pics of the car is now.


greets
It has been a while when i last did an update.
Been working more on the car than doing computing.
It is on the road now, just came back from Luxemburg and it performed above expectations.
Last Teusday it got Dutch MOT on it, and began running the in.
Meanwhile i fitted a 2002 Spec-C 6 speed with DCCD and external oil cooler, this is the only version which has this feature, just like the 45/55 divide between front and rear instead of 35/65.
Together with the box i changed the complete rear suspension (again), this time the STI5 was replaced with the 2004 Forester STI version.
Complete wiith Brembo's and aluminum suspensions bars.
Of course the usual STI rear diff, propshafts and drive shafts were replaced too.
Before fitting that i replaced the GL tank with the USDM STI which was on the car i have the loom from.
I changed this because it had more capacity and the connector would be plug and play after that.
I removed all the american invirement addons which gave me a nice check engine light all the time, ohh well.
.After much woork i got the 2005 WRX dash in too, it needs some finishing but the nasty part is over.
Now i'm going to drive for a bit first
.I will finish the report later when i have time to make it.
In between here are some pics of the car is now.
greets

Scooby Regular
Joined: Nov 2003
Posts: 1,053
Likes: 0
From: A.K.A RAIDEN, Watford & Tidworth. V7 STI Type RA Spec C, V2 STI,97JDM WRX, Daytona 675R
Looking good matey, I should pop down to the Netherlands and have a look some time. I'm always passing through on my way back to UK.
Keep up the good work, I'm liking the newage dash
Aston
Keep up the good work, I'm liking the newage dash
Aston
Awesome project Dinges - well impressed.
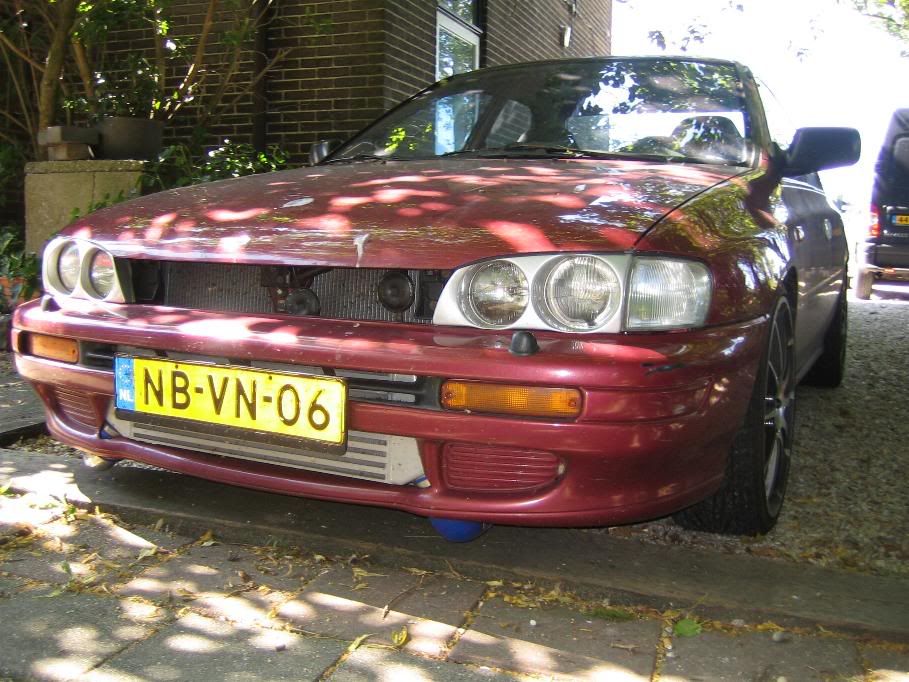
Looking at the old Scooby in the car park you'd be thinking 'what on earth are those huge pipes doing under the front end'
Keep posting mate - fantastic job.
Mick
Looking at the old Scooby in the car park you'd be thinking 'what on earth are those huge pipes doing under the front end'
Keep posting mate - fantastic job.
Mick


Scooby Regular
Joined: Jul 2003
Posts: 7,181
Likes: 0
From: Surviving as a soldier of fortune on the Los Angeles underground...
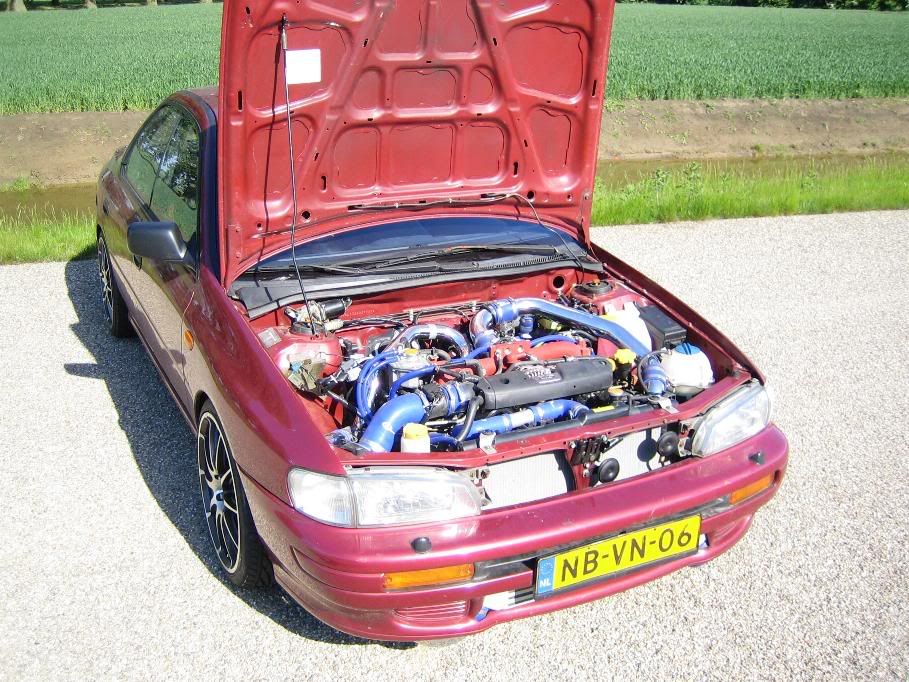
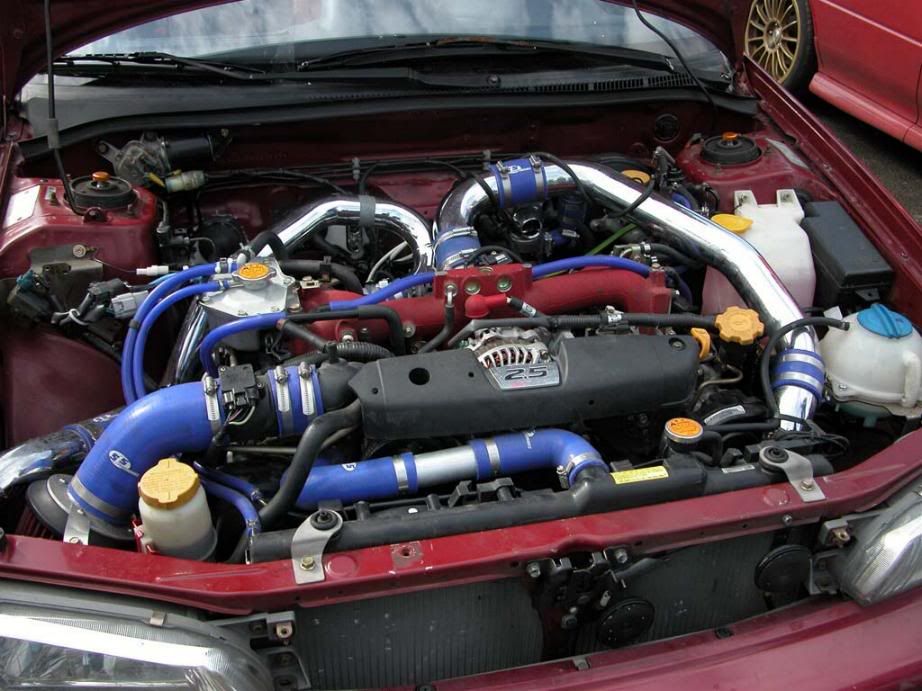
Good work - for looking a little on the rough side I bet it suprises quite a few people when you pop the bonnet!
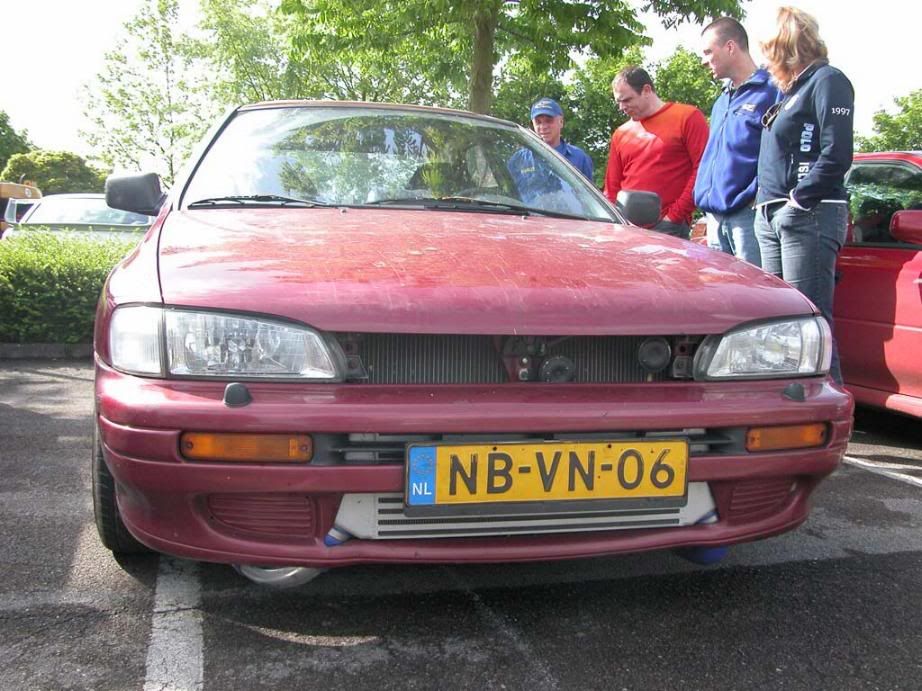
Have you thought about fitting a late classic front bumper to allow more air to the FMIC?
I'm also tempted to get my STI allloys resprayed silver now they look great.
Great write up BTW.
Have you thought about fitting a late classic front bumper to allow more air to the FMIC?
I'm also tempted to get my STI allloys resprayed silver now
they look great.Great write up BTW.


Thread Starter
Scooby Regular
Joined: Dec 2002
Posts: 458
Likes: 0
Thanks guys,
Reactions like this make a project like worth while!
I get quite alot of reaction, more than i expected, maybe it's not as stealthy as i thought it was hehehe.
Yeah the contrast between the exterior and enginebay is pretty big, so when they see the blingbling under the its always good for a smile.
I will when i'm giong to paint the car, in one of the first post i have a picture of my frontbumper i think?
Hehehe, i don't like gold, and they look pretty good in silver .
Reactions like this make a project like worth while!
Originally Posted by Mick
Looking at the old Scooby in the car park you'd be thinking 'what on earth are those huge pipes doing under the front end'
Originally Posted by messiah
Good work - for looking a little on the rough side I bet it suprises quite a few people when you pop the bonnet!
Yeah the contrast between the exterior and enginebay is pretty big, so when they see the blingbling under the its always good for a smile
.
Originally Posted by messiah
Have you thought about fitting a late classic front bumper to allow more air to the FMIC?
Originally Posted by messiah
I'm also tempted to get my STI allloys resprayed silver now they look great.
they look great..
Thread Starter
Scooby Regular
Joined: Dec 2002
Posts: 458
Likes: 0
Small update.
After getting it on the road i had a bit of a hobbydip, and now it's hot to do anything on the car.
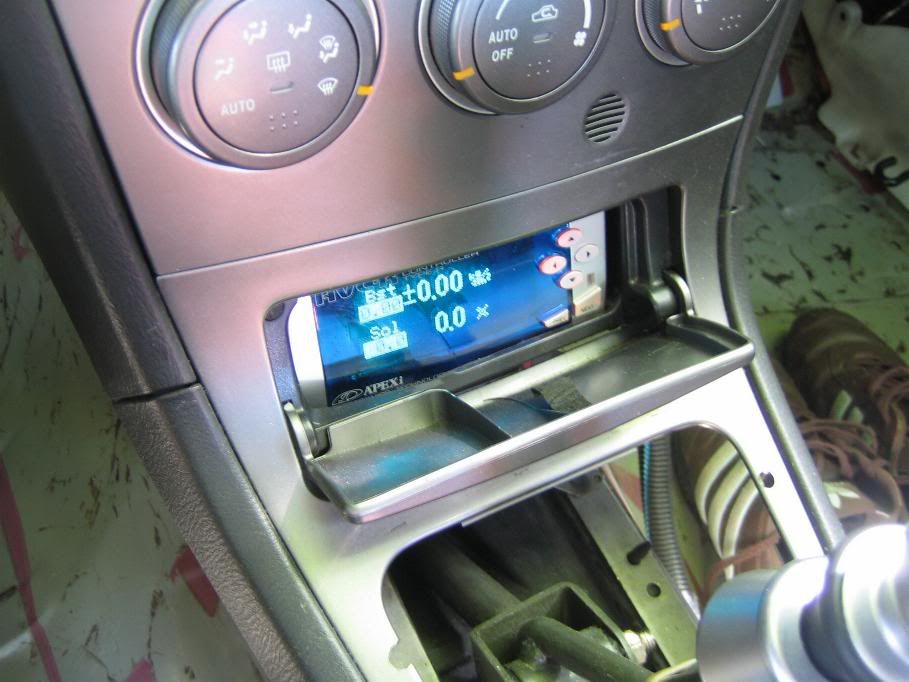
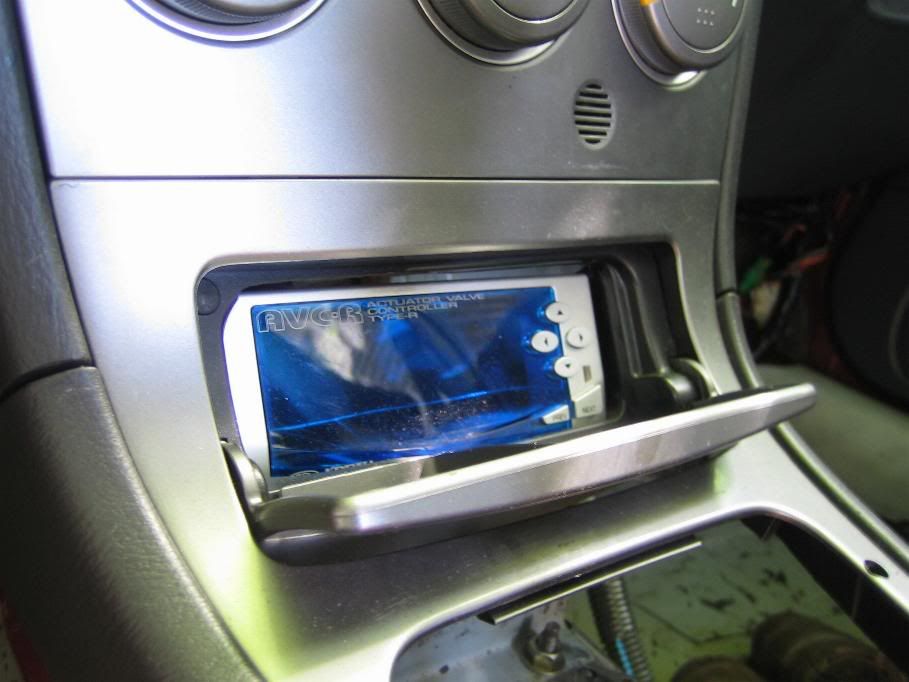
So not much news besides that i put the AVC-R in the car.
I'm not a smoker so i found a nice spot for it.
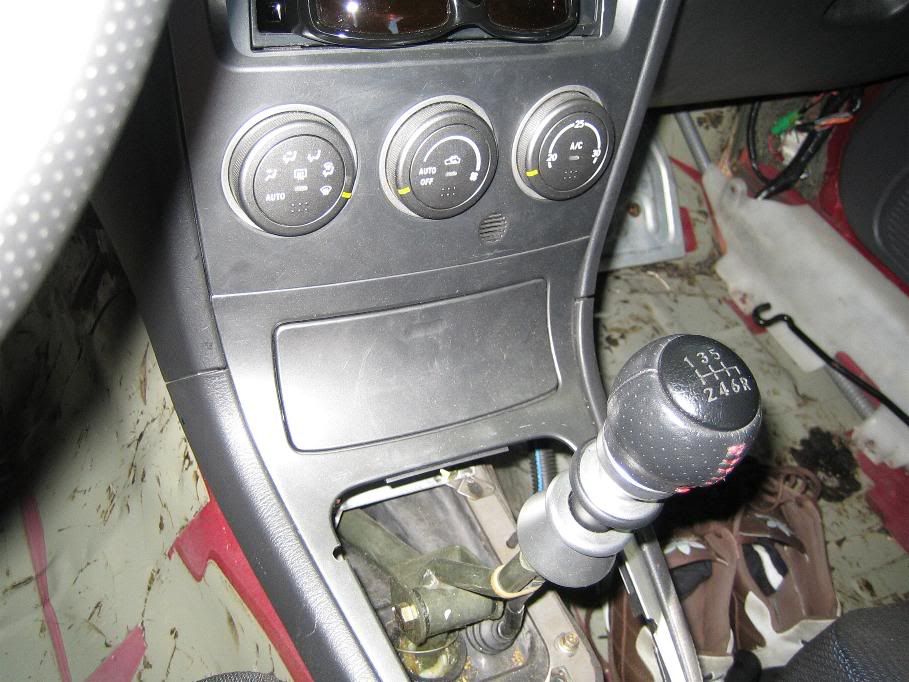
Next in line are the Sparco Evo's.
greets.
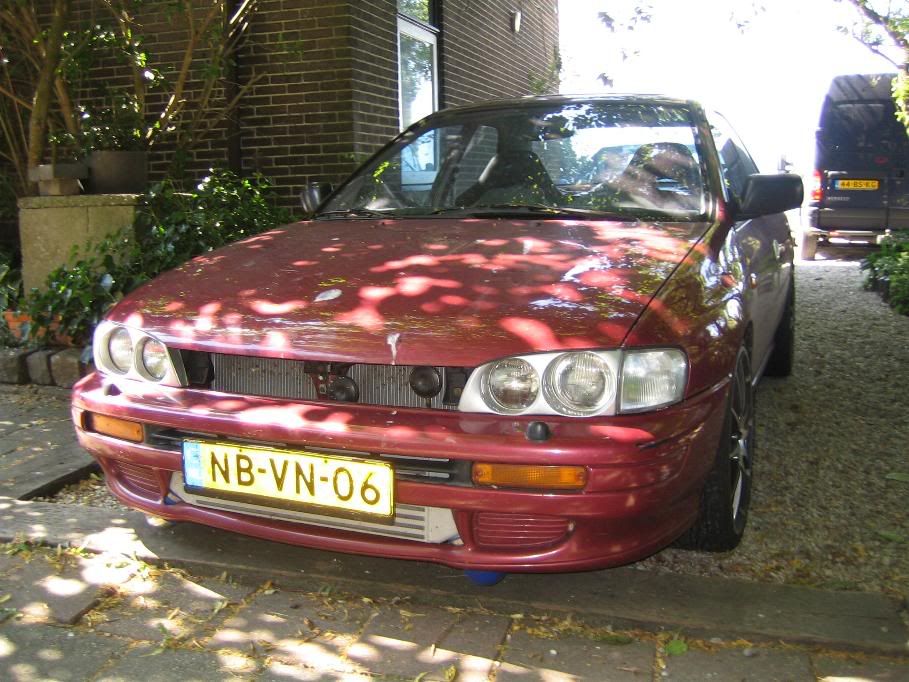
Oh ok, just of few snaps of the car with morrettes on it, i took them this afternoon.
After getting it on the road i had a bit of a hobbydip, and now it's hot to do anything on the car.
So not much news besides that i put the AVC-R in the car.
I'm not a smoker so i found a nice spot for it
.Next in line are the Sparco Evo's.
greets.
Oh ok, just of few snaps of the car with morrettes on it, i took them this afternoon.
Thread Starter
Scooby Regular
Joined: Dec 2002
Posts: 458
Likes: 0
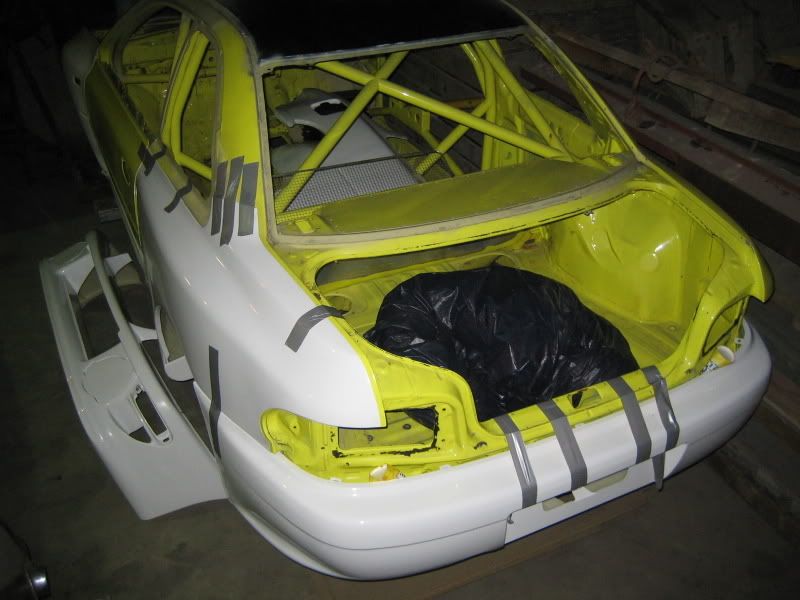
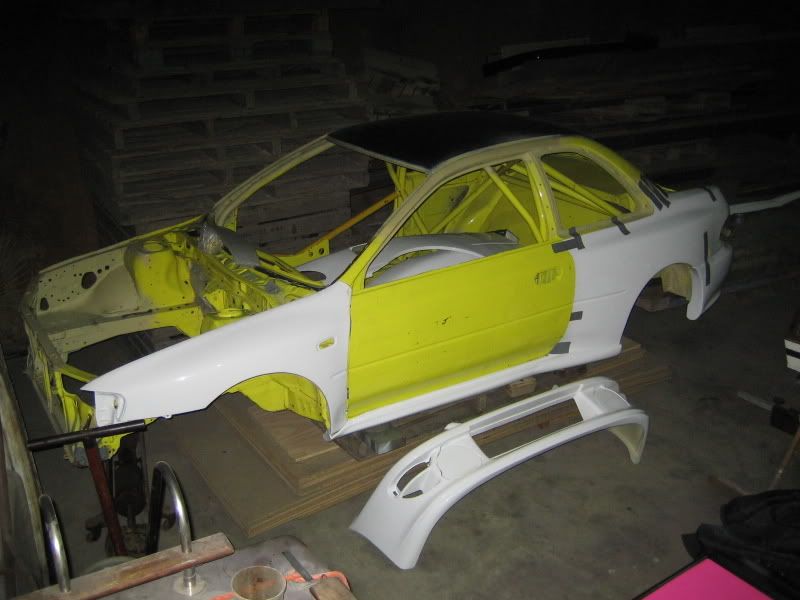
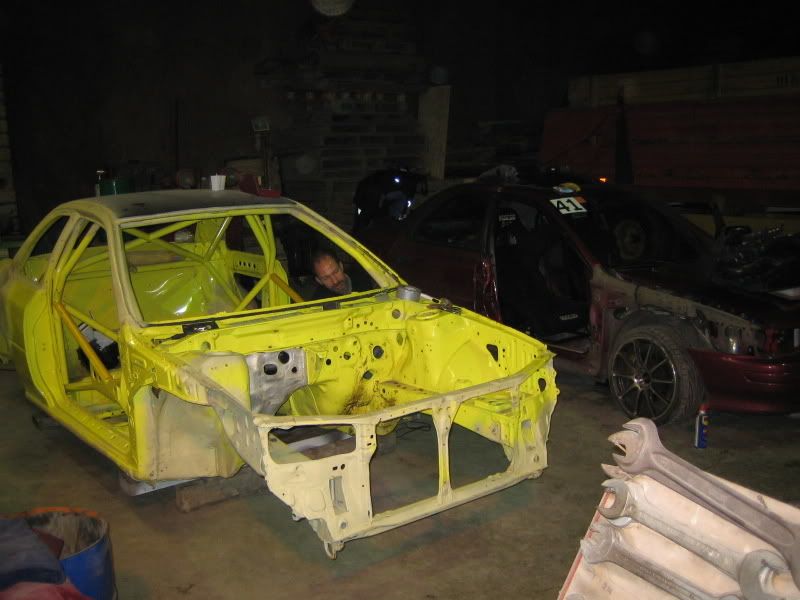
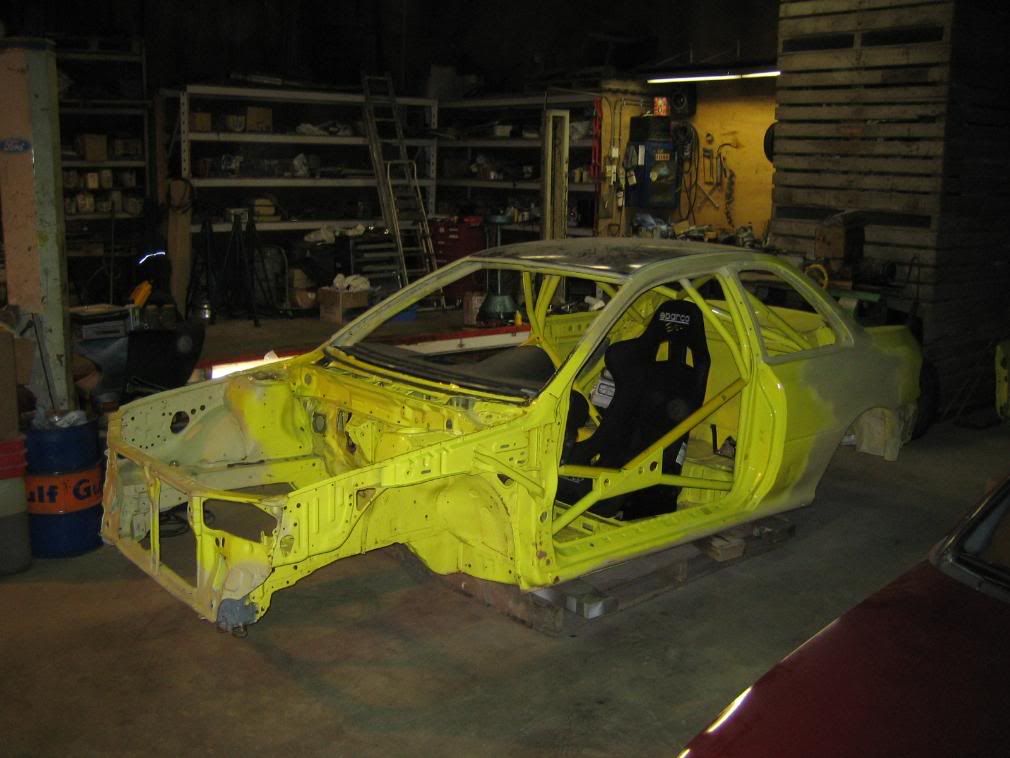
Well, let me dig up an old thread here.
After driving my GL for 1.5 years I got an offer I couldn't refuse!
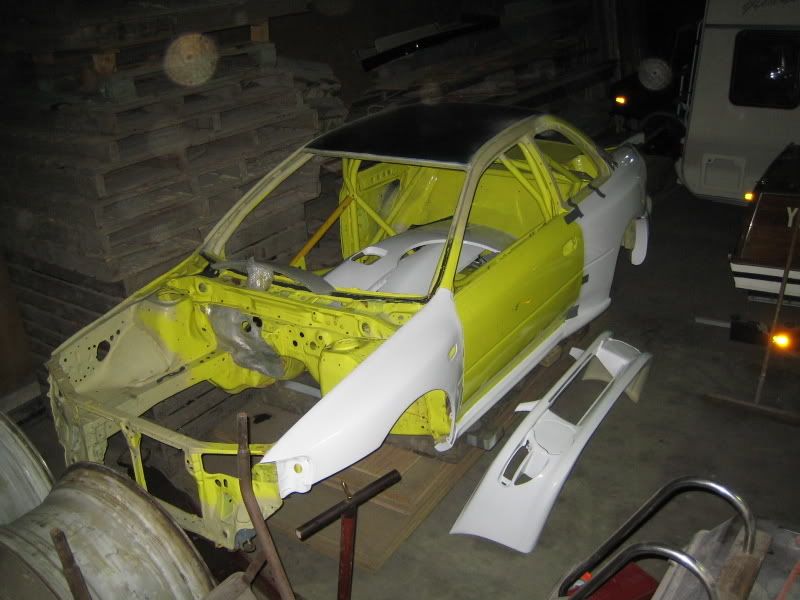
I was offered a genuine Group-N chassis that someone reserved for himself to build up but had to sell because he had bought a real WRC S5 instead.
So I took it off his hands.
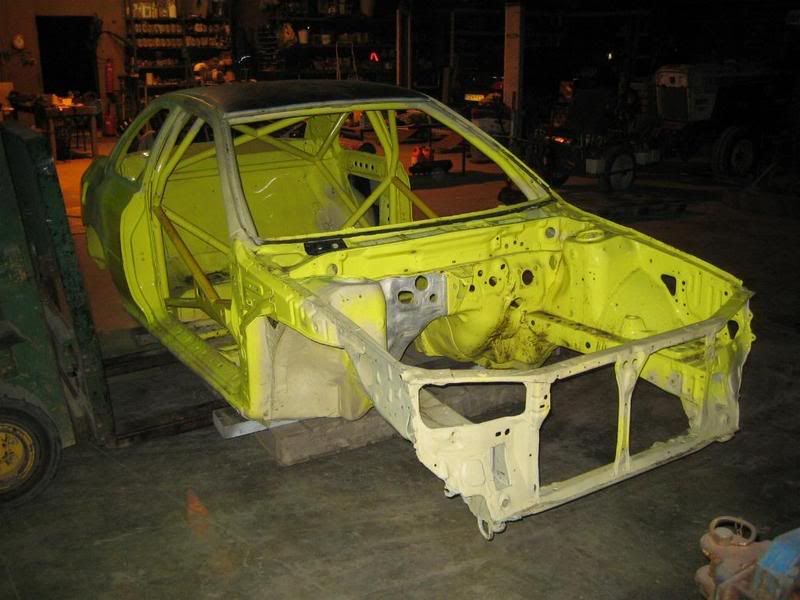
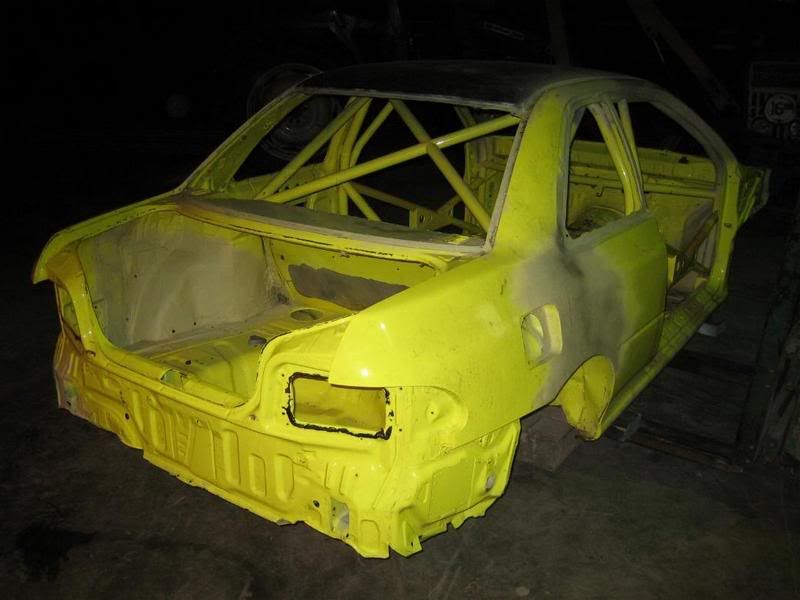
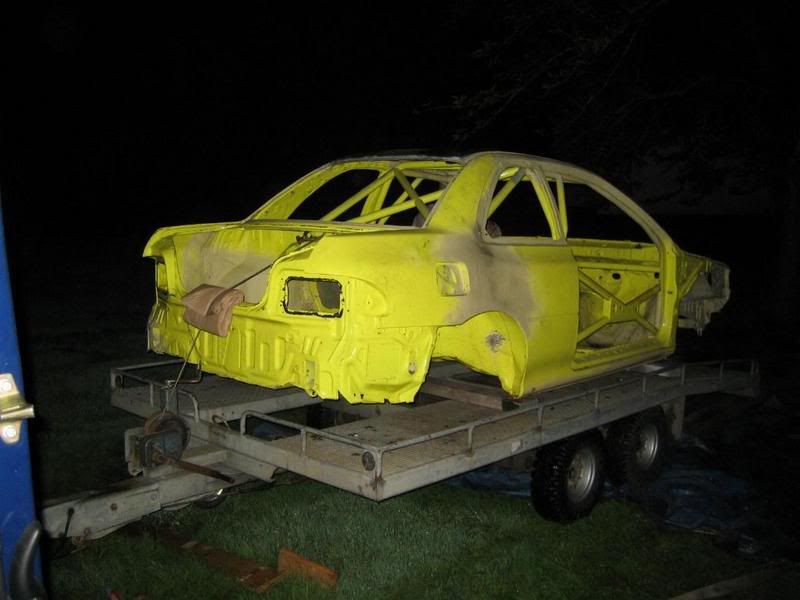

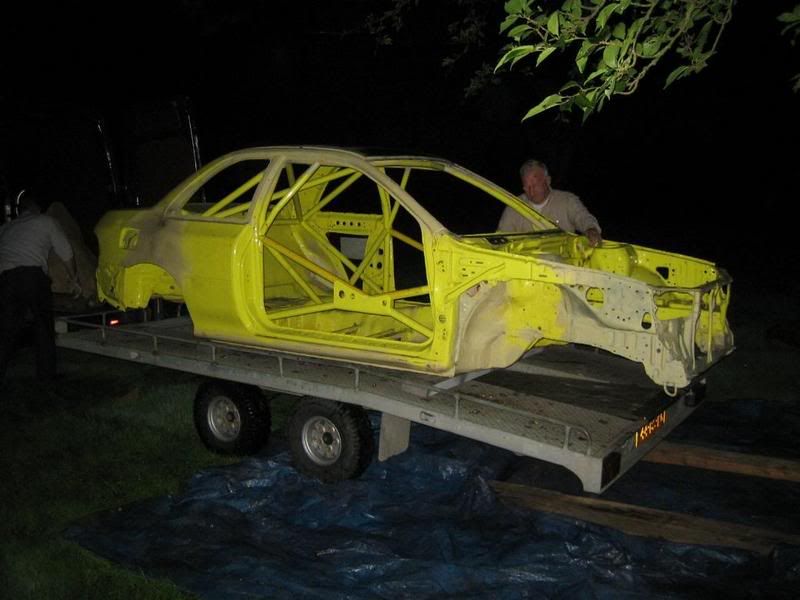
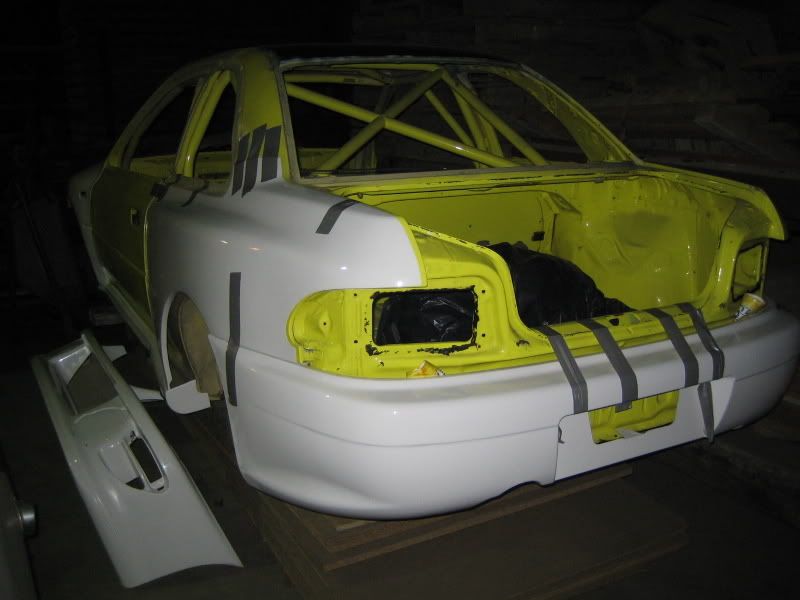
It's a genuine Prodrive bodyshell, LHD, seam welded, full cage.
Everything from the GL will be put into this chassis so i will have litlle free time left this year .
I have n o history on this shell, but I know it comes from the UK, if anyone has any info on in PLEASE let me know.
It has a tag on the cage saying: S2 PRO 97
So it's probably from 1997.
After driving my GL for 1.5 years I got an offer I couldn't refuse!
I was offered a genuine Group-N chassis that someone reserved for himself to build up but had to sell because he had bought a real WRC S5 instead.
So I took it off his hands.
It's a genuine Prodrive bodyshell, LHD, seam welded, full cage.
Everything from the GL will be put into this chassis so i will have litlle free time left this year
.I have n o history on this shell, but I know it comes from the UK, if anyone has any info on in PLEASE let me know.
It has a tag on the cage saying: S2 PRO 97
So it's probably from 1997.
Thread Starter
Scooby Regular
Joined: Dec 2002
Posts: 458
Likes: 0
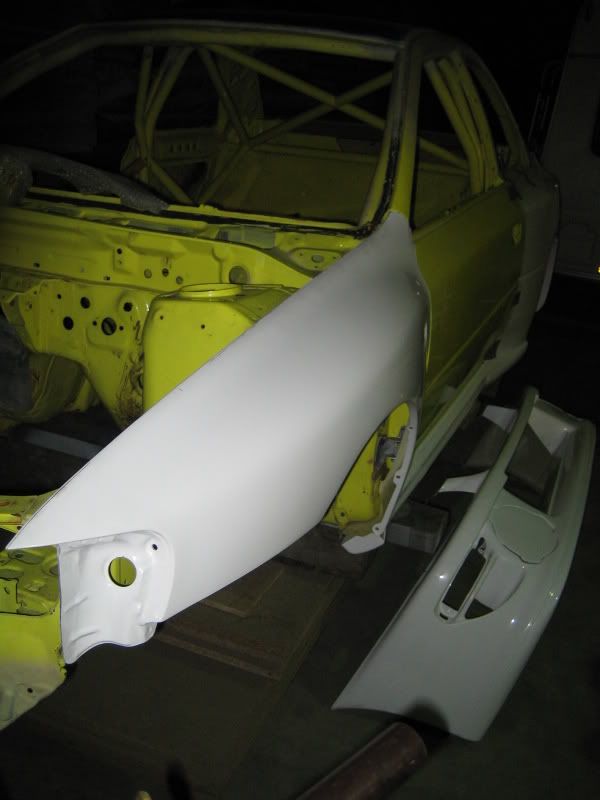
I got new goodies for it also.
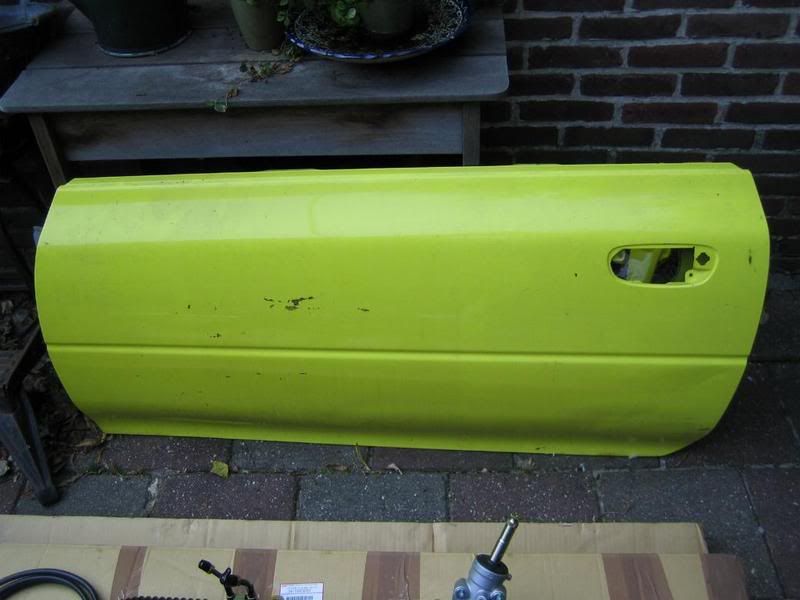
First up half the doors arrived!
Small dents but they wil be dealt with in a later stage.
The windows and mechanisms are still in the UK.
But what i'm really proud of is this:
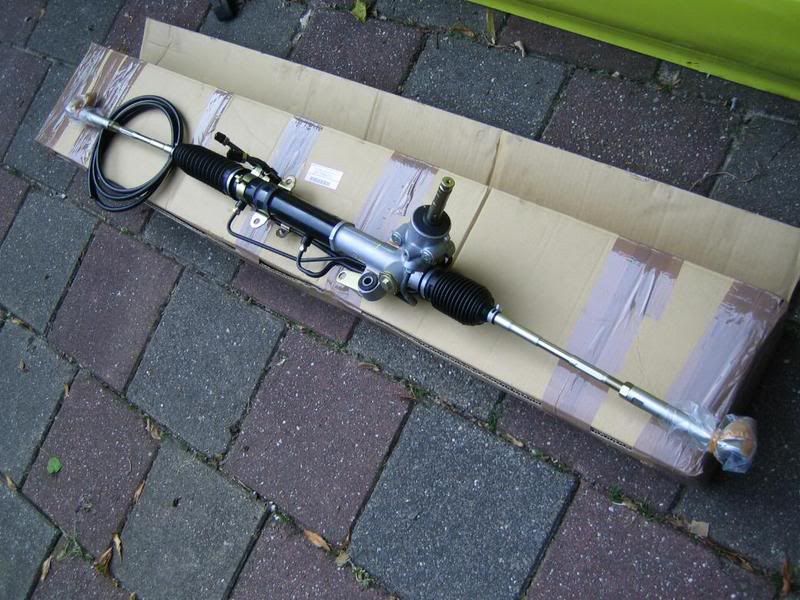
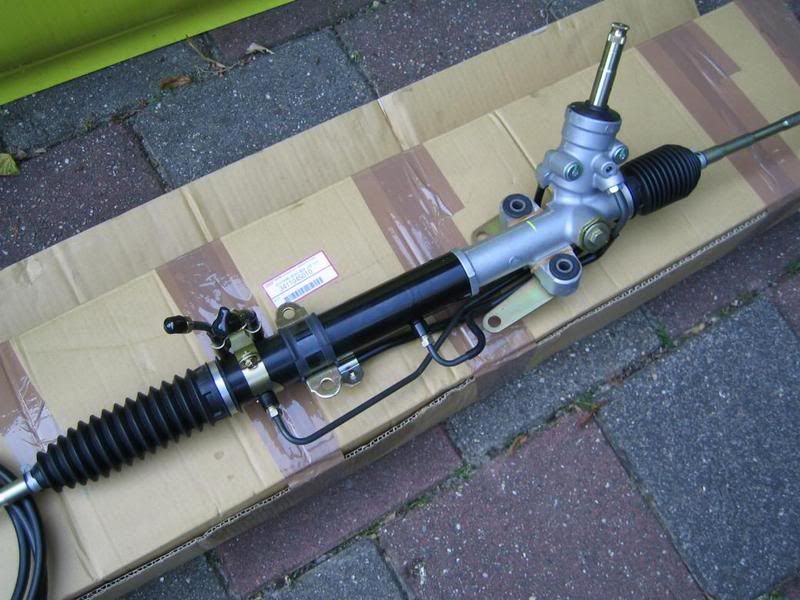
A genuine Prodrive quick rack group-n steering rack.
It's 13:1 or 2 turns lock to lock.
Very expensive but i had some luck by having the right connections.
This will definatly improve the driving experience!
First up half the doors arrived!
Small dents but they wil be dealt with in a later stage.
The windows and mechanisms are still in the UK.
But what i'm really proud of is this:
A genuine Prodrive quick rack group-n steering rack.
It's 13:1 or 2 turns lock to lock.
Very expensive but i had some luck by having the right connections.
This will definatly improve the driving experience!
Last edited by Aram; Dec 26, 2007 at 04:48 PM. Reason: Bad writing.
Thread Starter
Scooby Regular
Joined: Dec 2002
Posts: 458
Likes: 0
Did the first small step on the chassis.
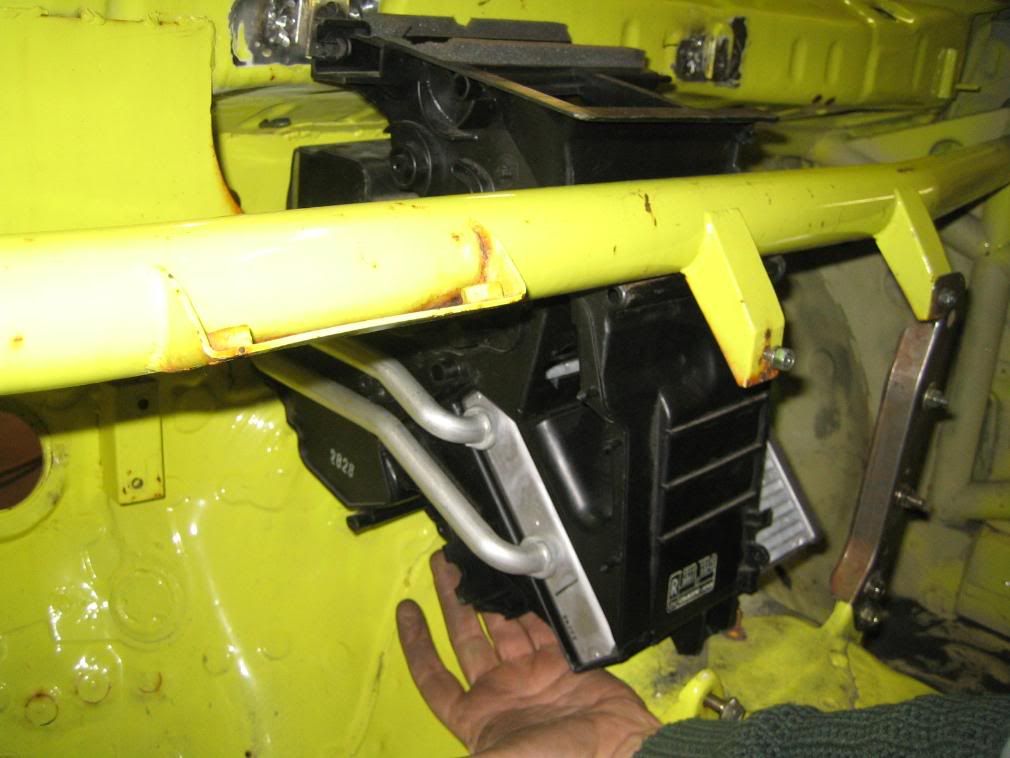
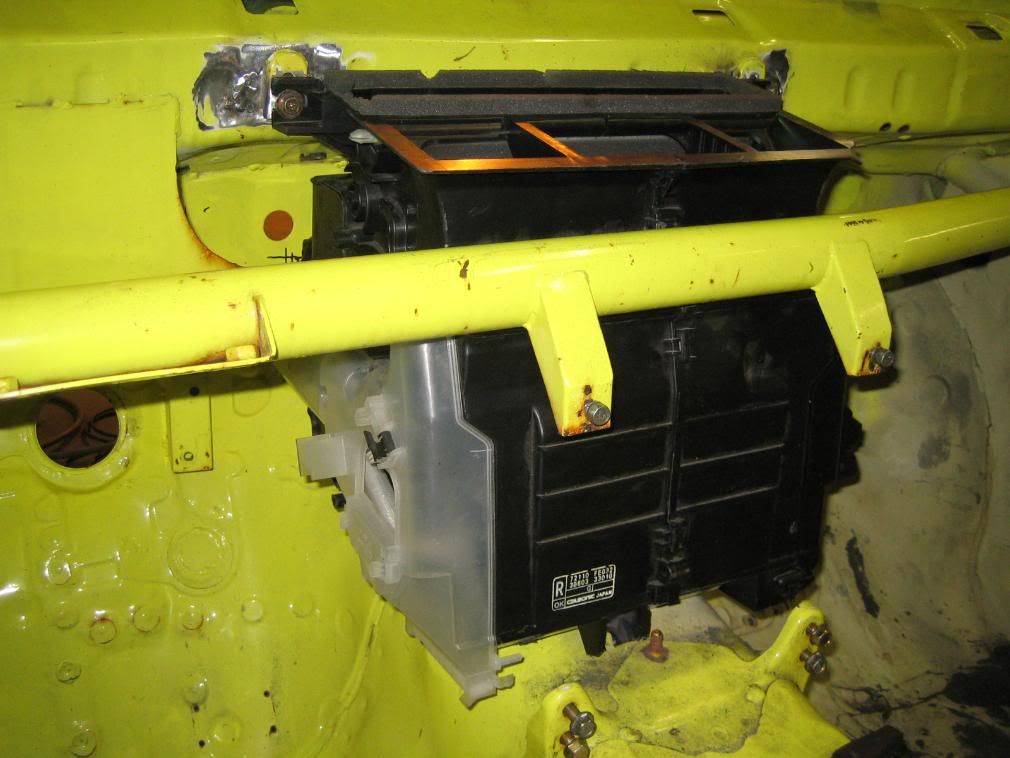
I'll begin with the dash, and the first thing to begin with is the heater unit.
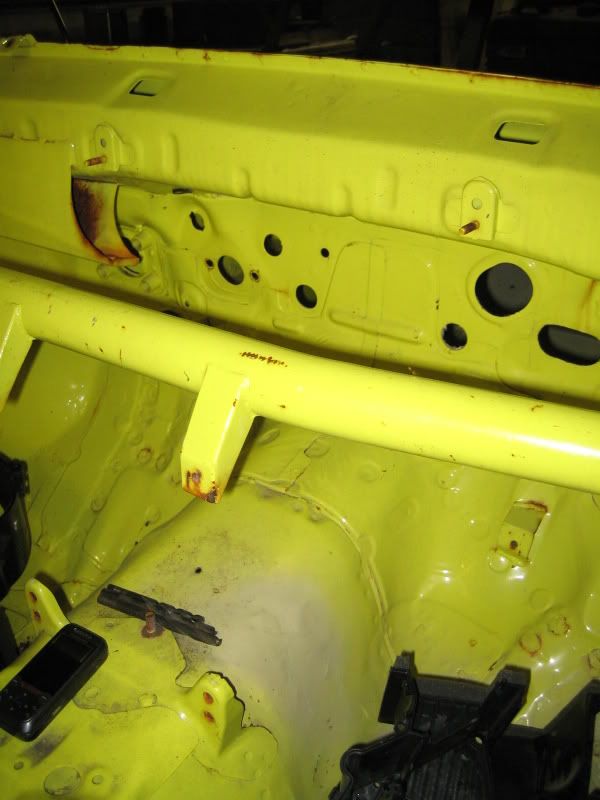
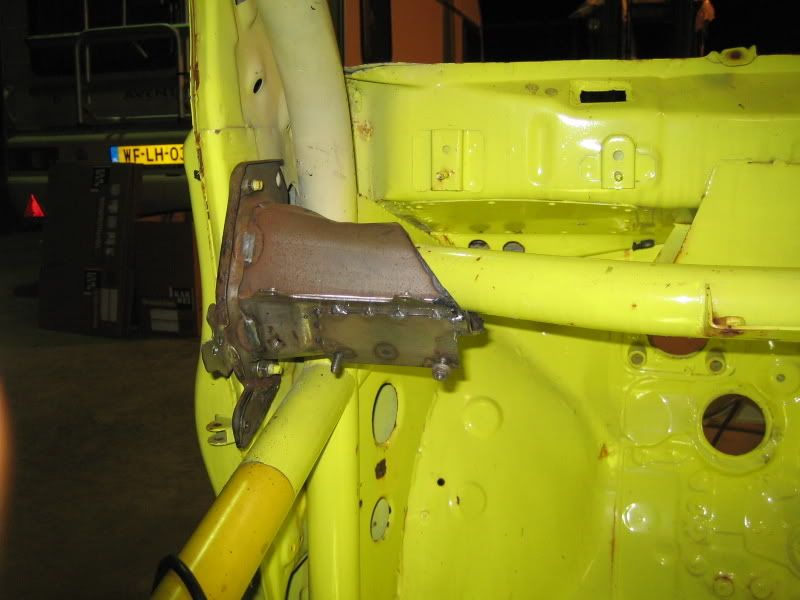
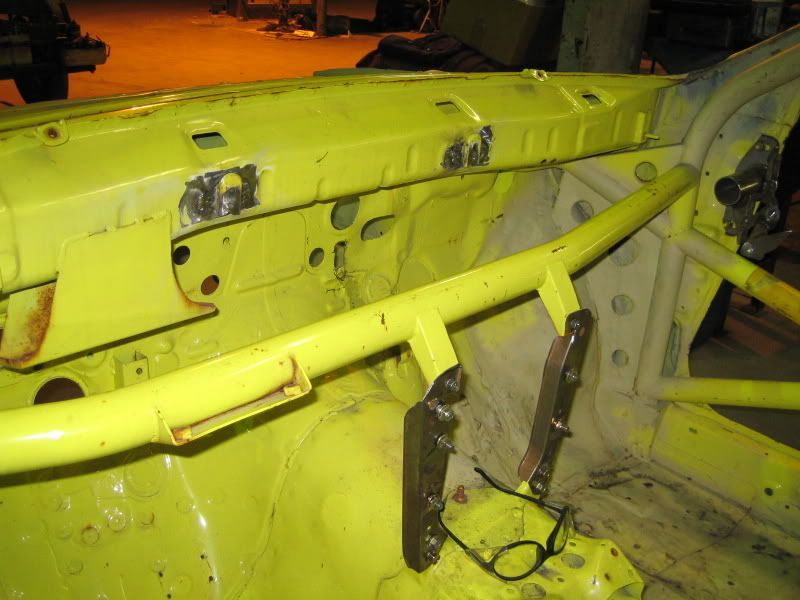
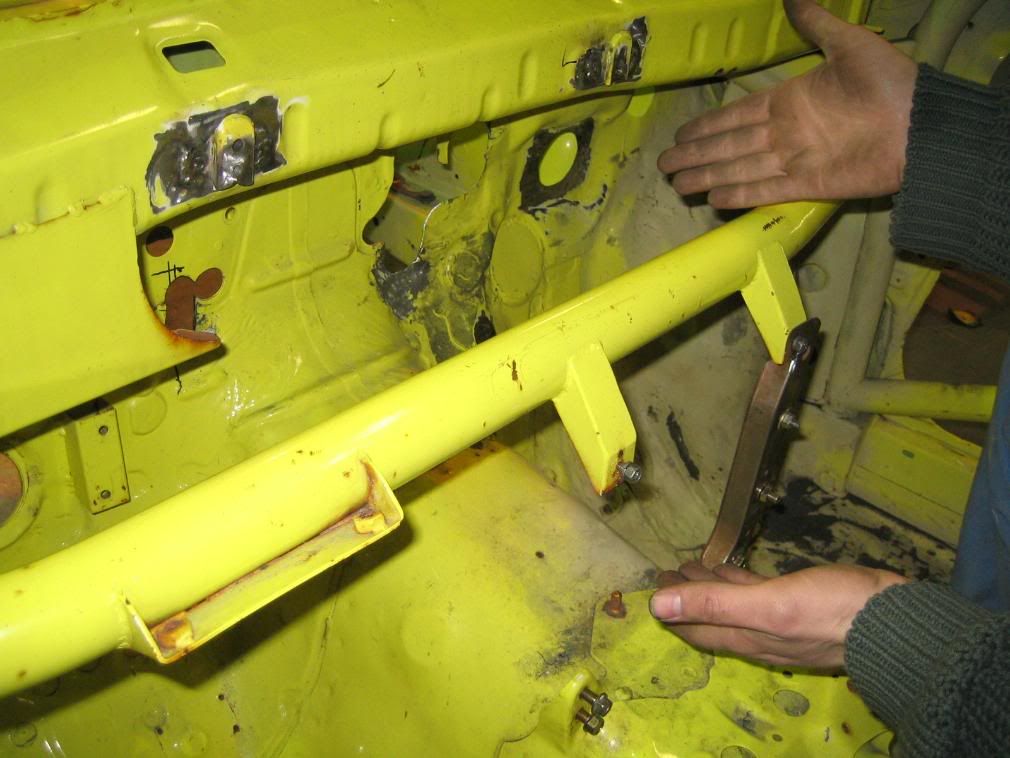
First problem, there is a beam from the cage that runs through the dash.
That wouldn't be a prob as it runs there on a standard car also, but only then it's removeable.
Now there is no way to mount the unit behind the beam in one piece.
The beam:
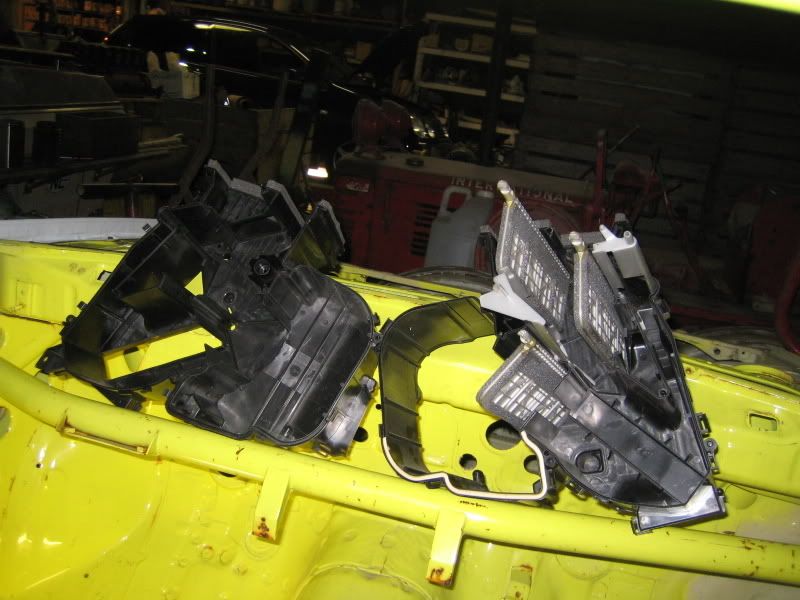
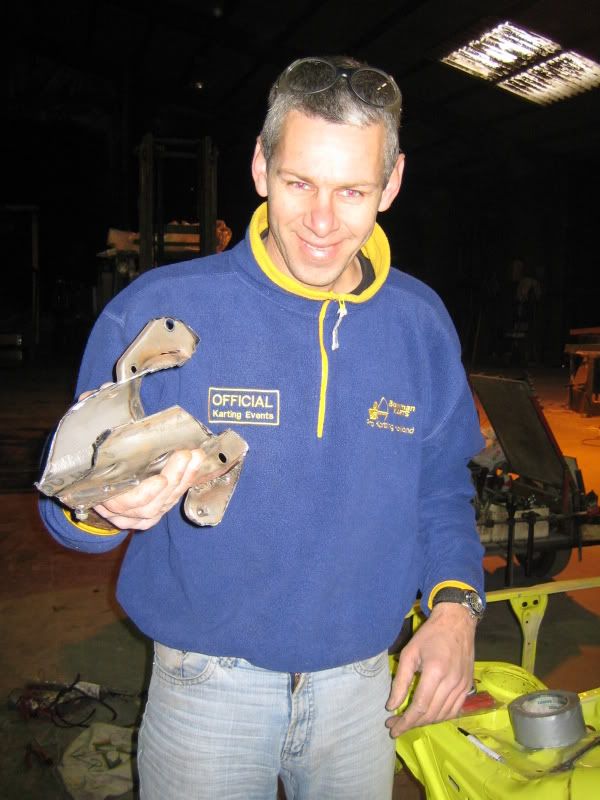
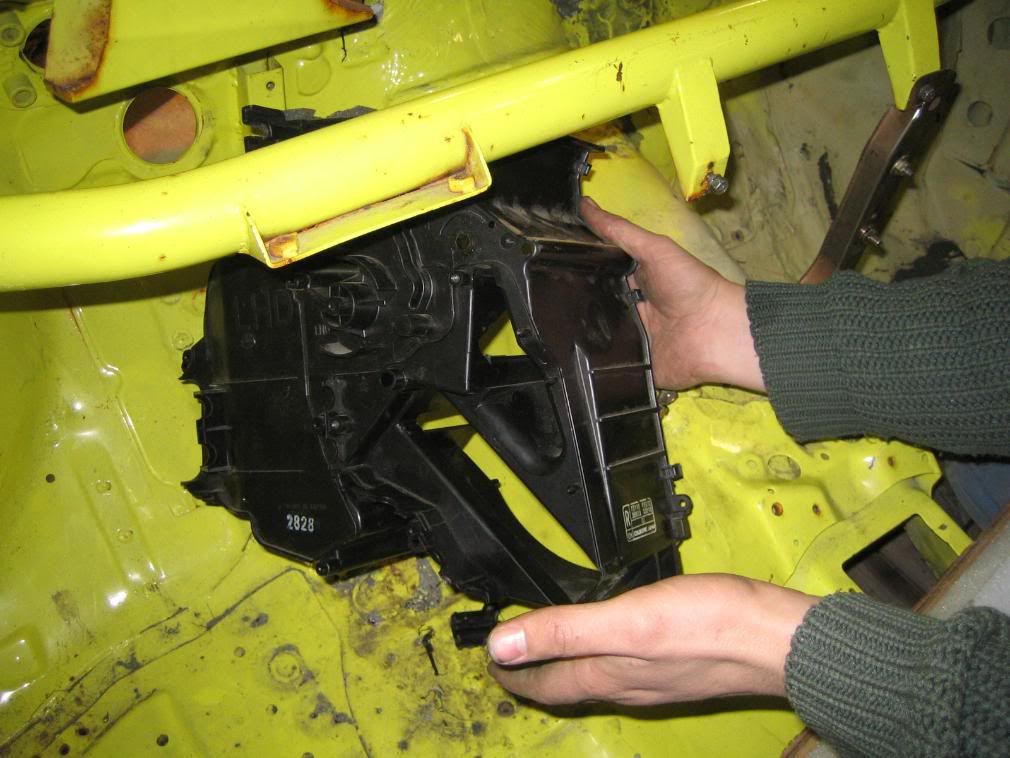
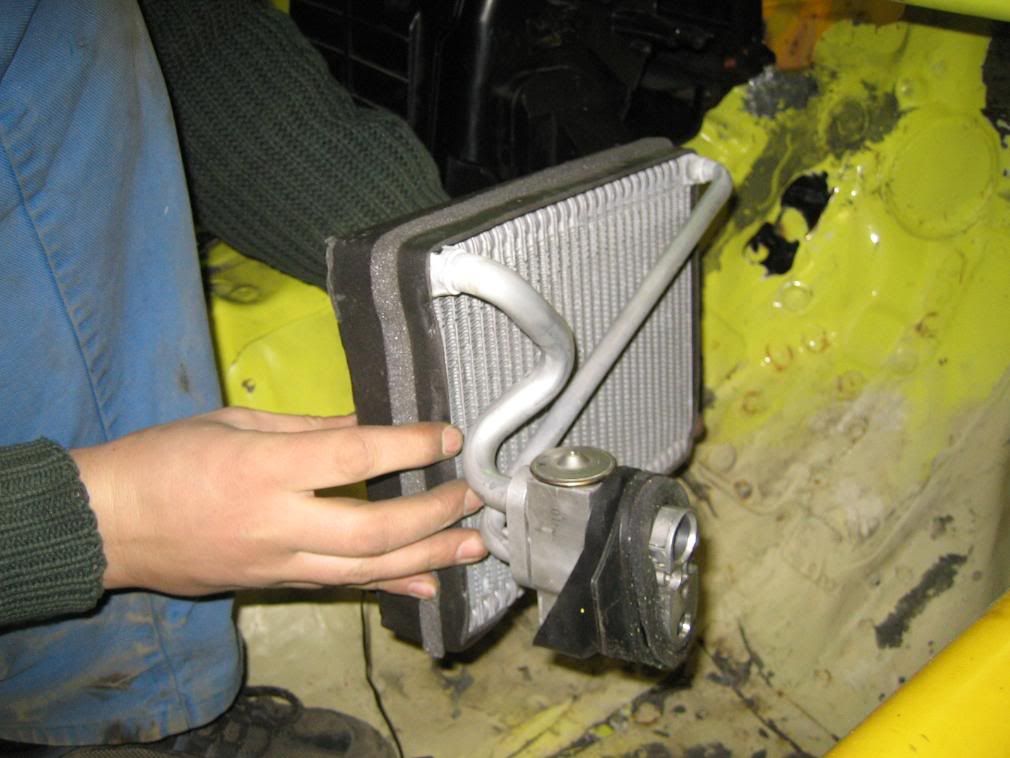
I've got a heater unit to use as a dummy, the one that I'm going to use is still in the other car.
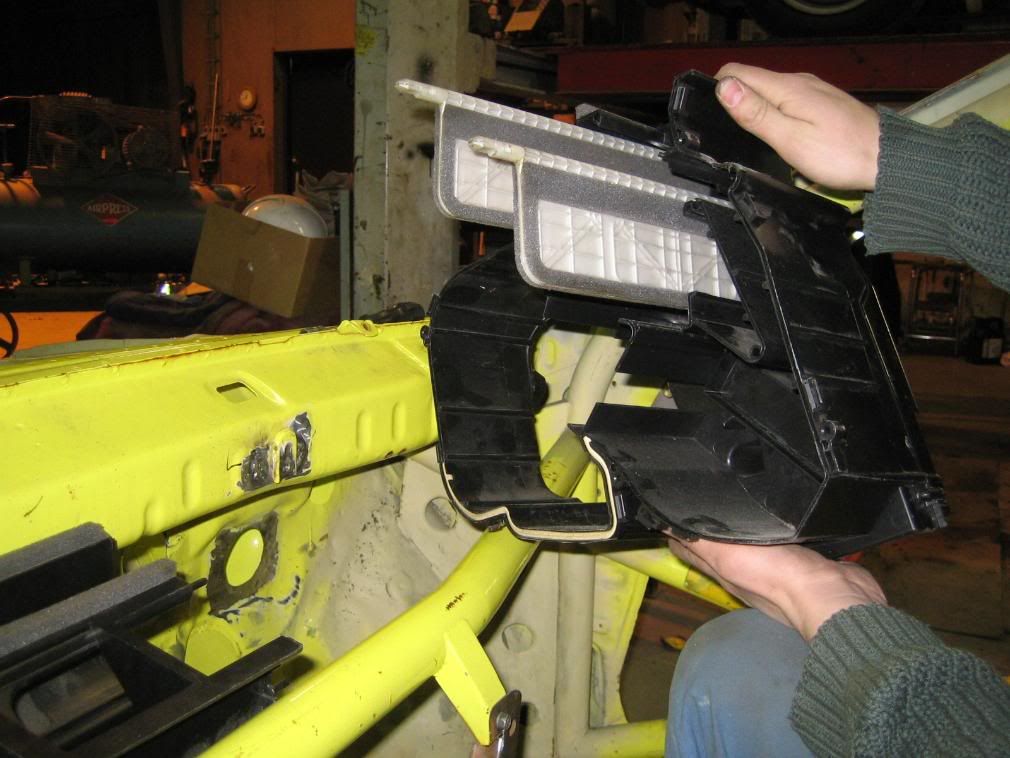
I had to separate this unit because it would not fit in one piece behind the beam.
2 mounting points were also removed, which is no problem as these would not be useable anyway.
The 2 unit parts:
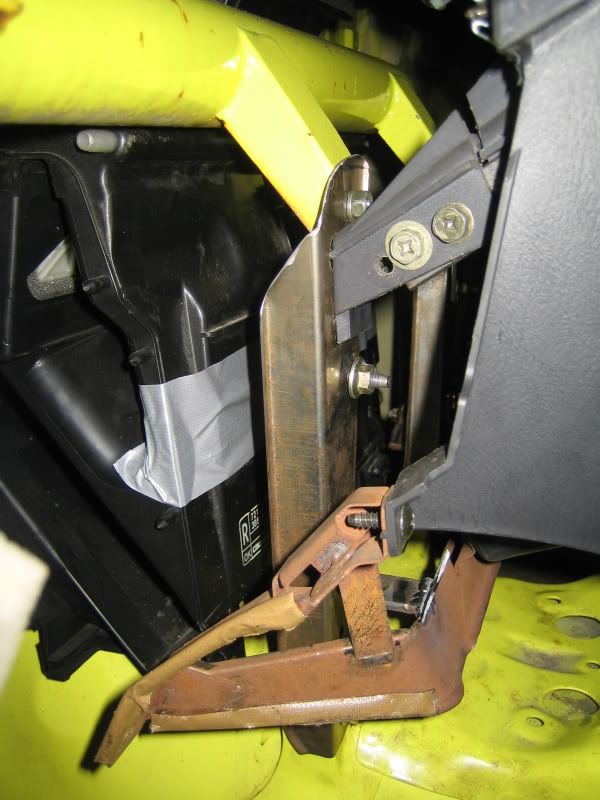
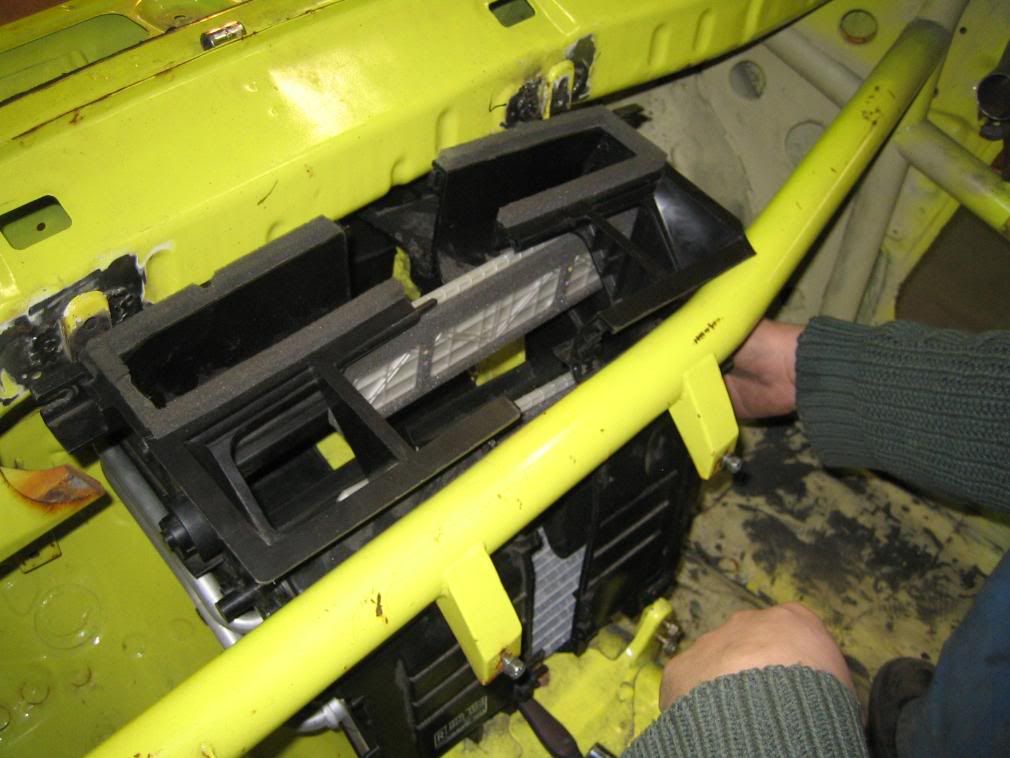
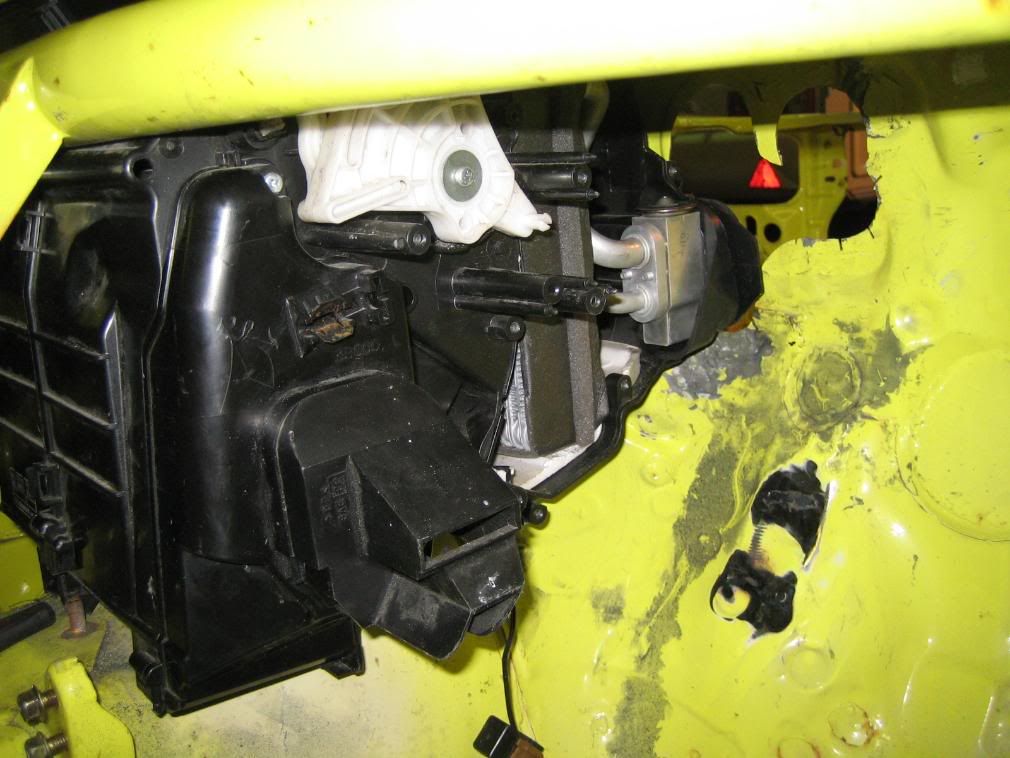
One part fitted:
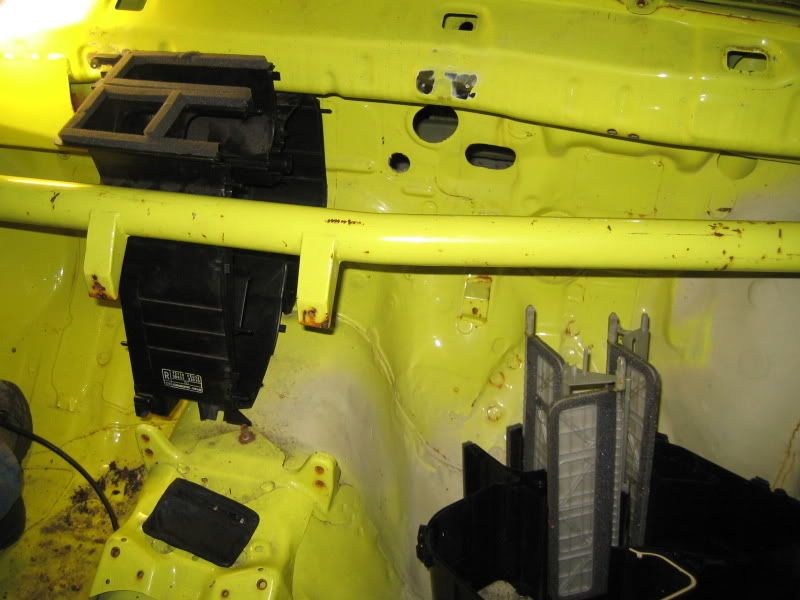
Et viola, a heater unit in place:
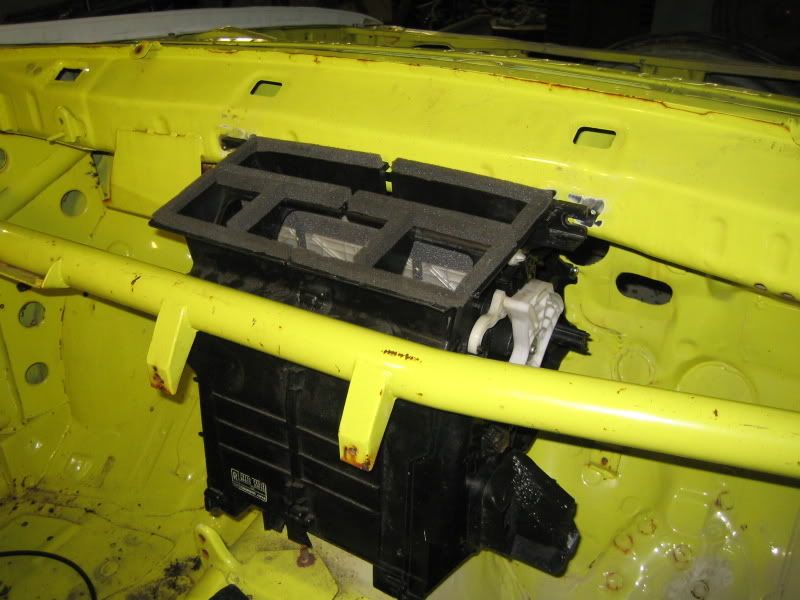
I'm not sure if I will leave it like this, I'll contact my friend in the rally team if cutting out the beam brings down the strength, if it's not significant I will cut it out and use the original.
I'll begin with the dash, and the first thing to begin with is the heater unit.
First problem, there is a beam from the cage that runs through the dash.
That wouldn't be a prob as it runs there on a standard car also, but only then it's removeable.
Now there is no way to mount the unit behind the beam in one piece.
The beam:
I've got a heater unit to use as a dummy, the one that I'm going to use is still in the other car.
I had to separate this unit because it would not fit in one piece behind the beam.
2 mounting points were also removed, which is no problem as these would not be useable anyway.
The 2 unit parts:
One part fitted:
Et viola, a heater unit in place:
I'm not sure if I will leave it like this, I'll contact my friend in the rally team if cutting out the beam brings down the strength, if it's not significant I will cut it out and use the original.
Thread Starter
Scooby Regular
Joined: Dec 2002
Posts: 458
Likes: 0
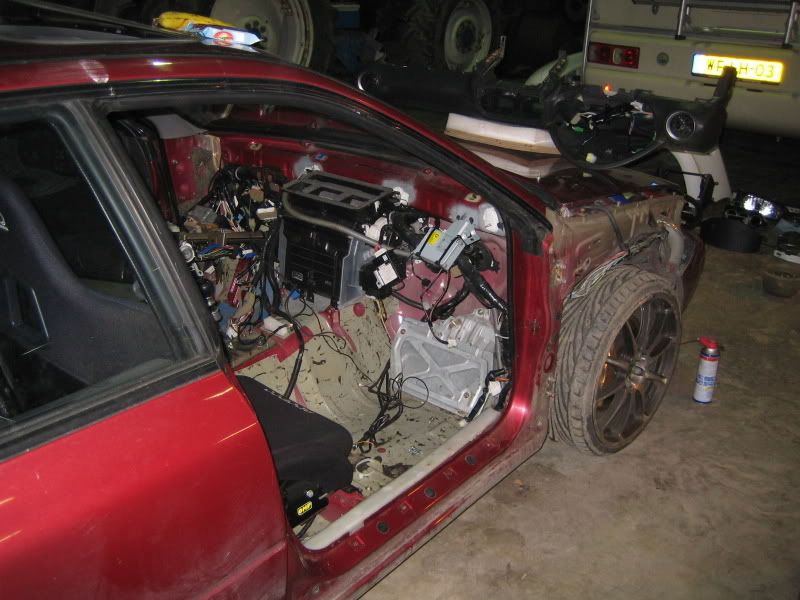
So, the first day of the new project has ended.
This morning my friends Alex and Dick were at my door.
So we started right away with tearing out the dashbord, the last hour of my GL had begun...*snif*
Pics:
Dash out of the GL:
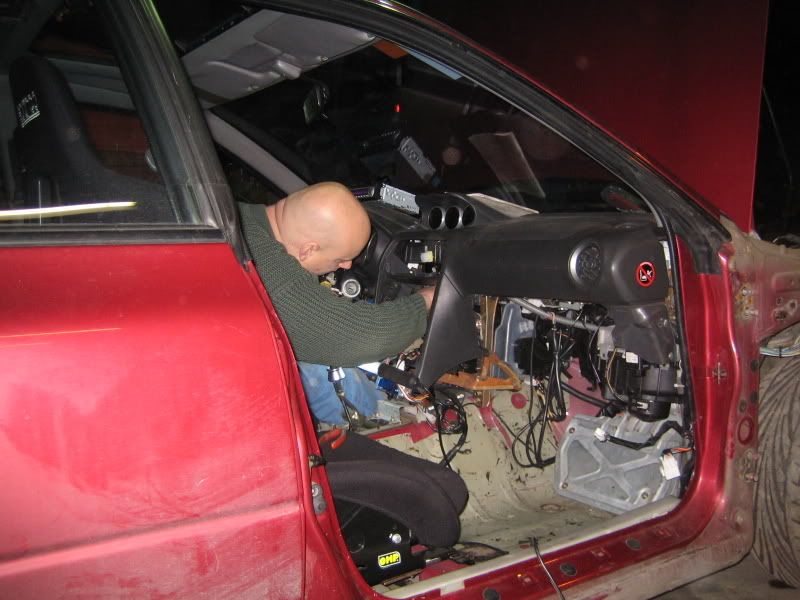
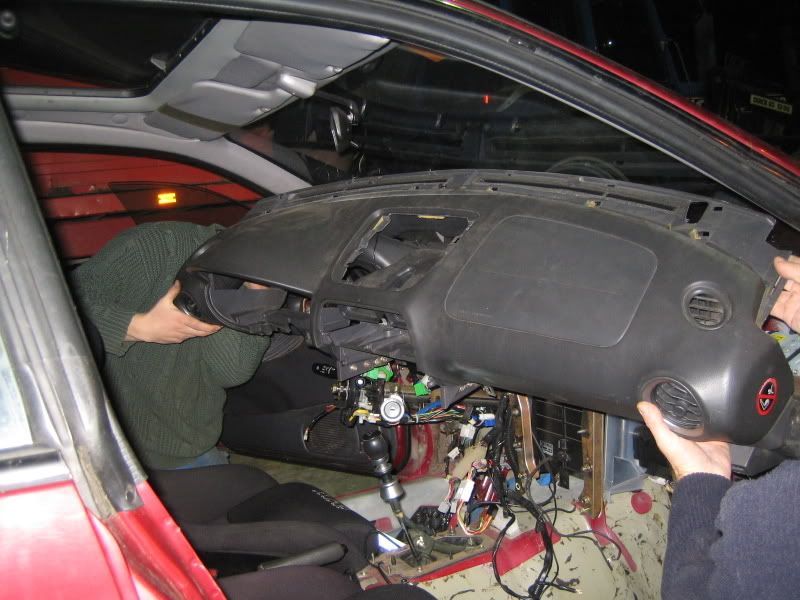
Dick doing his thing:
Ehh....
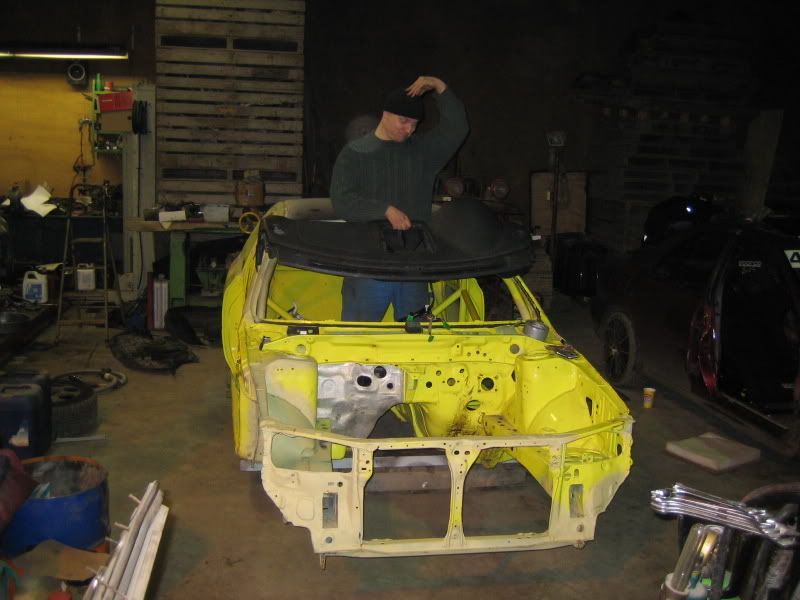
R.I.P. GL 24-12-2007
Dick happy:
Alex is a bit confused:
This morning my friends Alex and Dick were at my door.
So we started right away with tearing out the dashbord, the last hour of my GL had begun...*snif*
Pics:
Dash out of the GL:
Dick doing his thing:
Ehh....
R.I.P. GL 24-12-2007
Dick happy:
Alex is a bit confused:
Thread Starter
Scooby Regular
Joined: Dec 2002
Posts: 458
Likes: 0
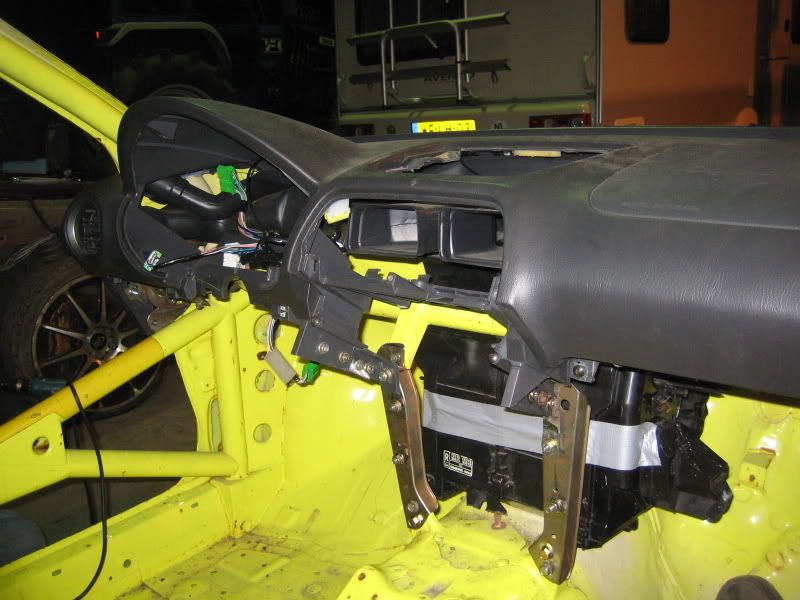
Fortunatly we could use the brackets we made for the GL, we spent alot of time fabricating those.
But the dash was a bit crooked when it was in the GL and this time around I wanted it perfect, so a bit of modification was required.
It's not finished of course but I couldn't resist putting in the centre console, also to see if it was in straight:
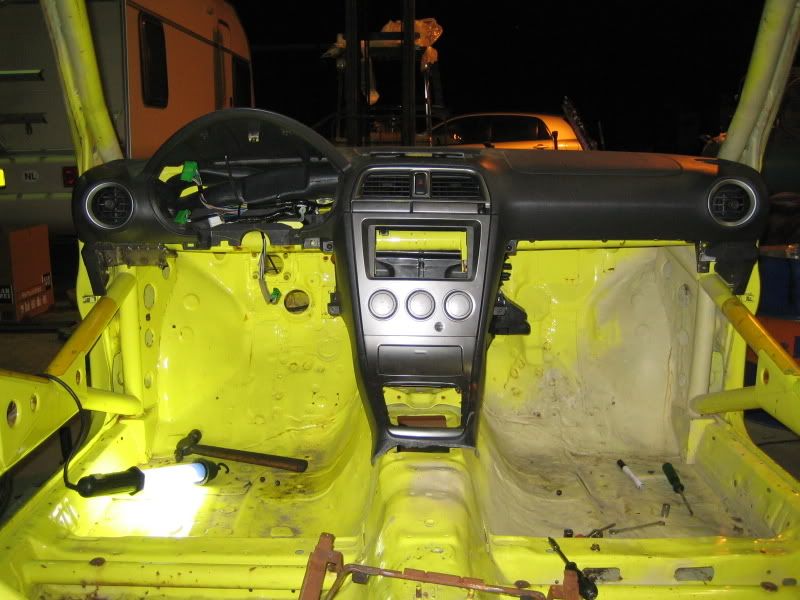

Thursday we continue, hopefully we can get as much done as today.
But the dash was a bit crooked when it was in the GL and this time around I wanted it perfect, so a bit of modification was required.
It's not finished of course but I couldn't resist putting in the centre console, also to see if it was in straight:
Thursday we continue, hopefully we can get as much done as today.
I was pointed in this direction earlier it may be of interest to you also for some reference......
ECS Performance
ECS Performance
Thread Starter
Scooby Regular
Joined: Dec 2002
Posts: 458
Likes: 0
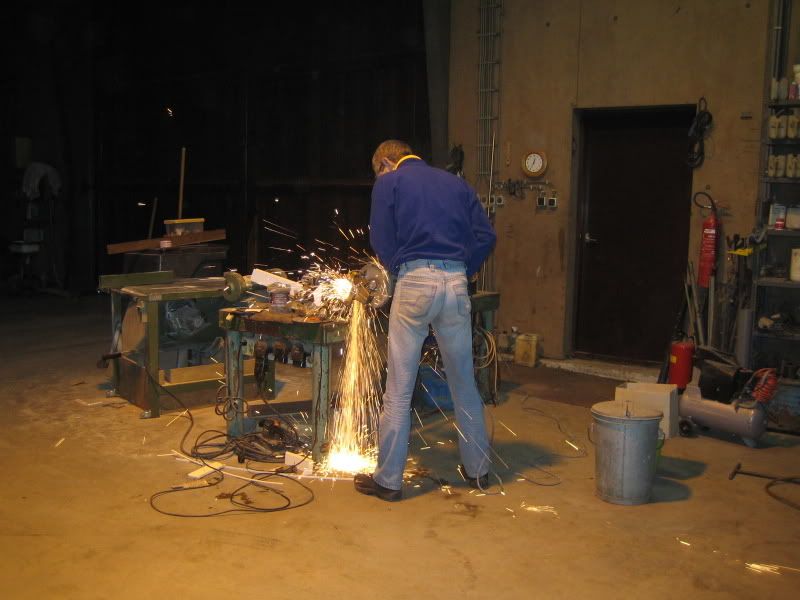
Done a bit today.
Monday we already fixed the dashboard console for the looks. Today we fixed it up.

After that it was the heaters turn. I have to measure the whole thing out, so it fits perfectly to the tubes inside the top of the dashboard.
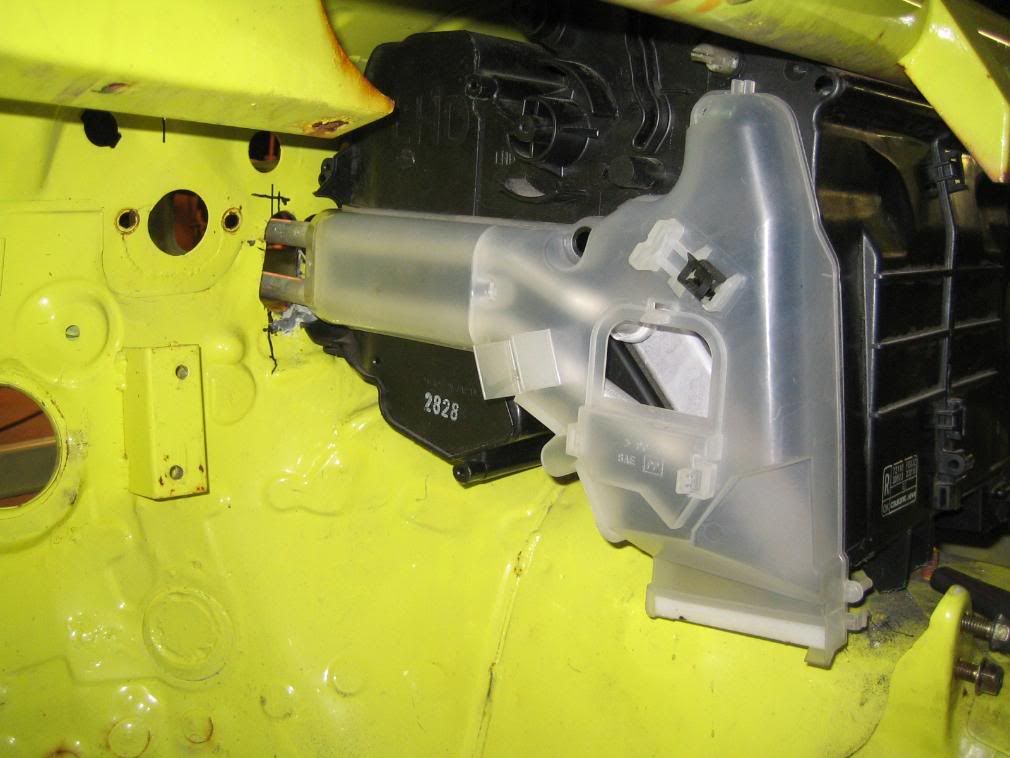
Back together solid as a rock:
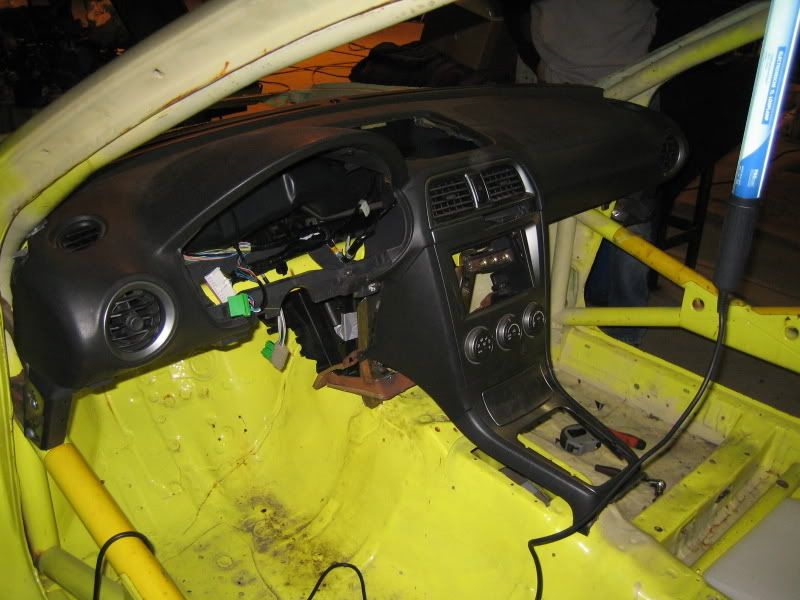
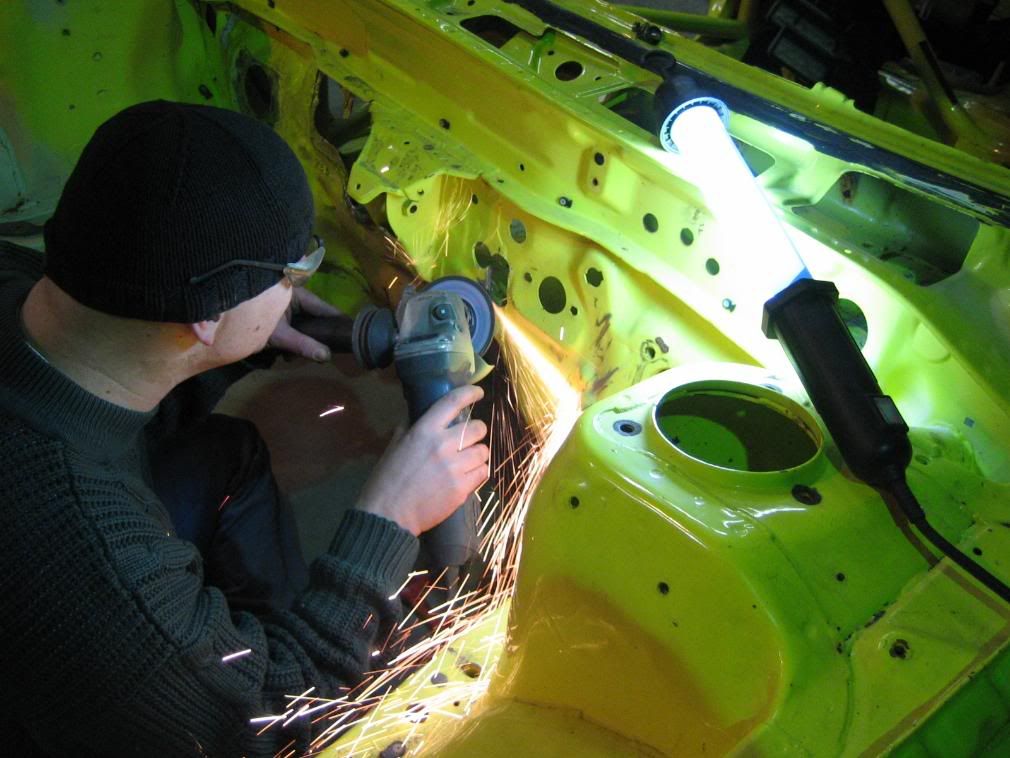
Then it was time to rearrange the firewall, I have to cut holes for the airco, heater and engine loom. Halfway the hole the saw went dull, so I have to pick up new ones tommorow:
Monday we already fixed the dashboard console for the looks. Today we fixed it up.
After that it was the heaters turn. I have to measure the whole thing out, so it fits perfectly to the tubes inside the top of the dashboard.
Back together solid as a rock:
Then it was time to rearrange the firewall, I have to cut holes for the airco, heater and engine loom. Halfway the hole the saw went dull, so I have to pick up new ones tommorow:

Thread Starter
Scooby Regular
Joined: Dec 2002
Posts: 458
Likes: 0
Got me some new saws today, much better.
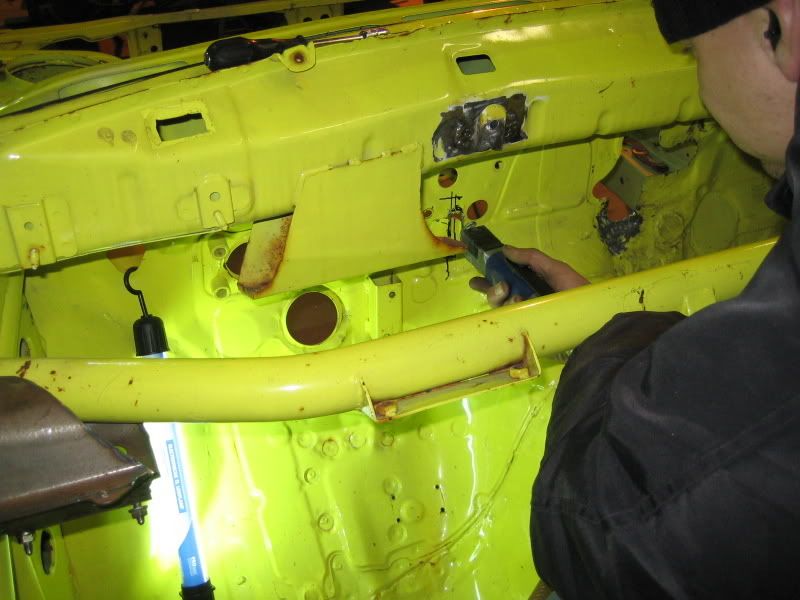
I have to cut a few holes in the firewall, one for the airco, one for the heater itself and 2 more for engine looms.
The new-age models have different connection terminals for the airco and heater so I have to adjust everything.
I knew this was going to come because I had the same problems with the build-up of my other project, that's why I started with the dash on this project, good to have it out of my way.
It might look simple to cut a few holes in the firewall and it is, but there are other problems.
There have been made all kinds of foldings (not sure if this is the correct word for it) pressed into the metal of the firewall, this is for strength and against resonation.
The airco terminal has to be tight to the firewall to prevent leakages so I have to make it flat.
But when they press the folds into the metal it stretches it a litlle also, so when you try hammer it flat there is some material left, which has to go somewhere.
So when you hit the firewall in one place it bounces back somewhere else.
To cure this I have made cuts into all the stressed places, this relaxes the metal.
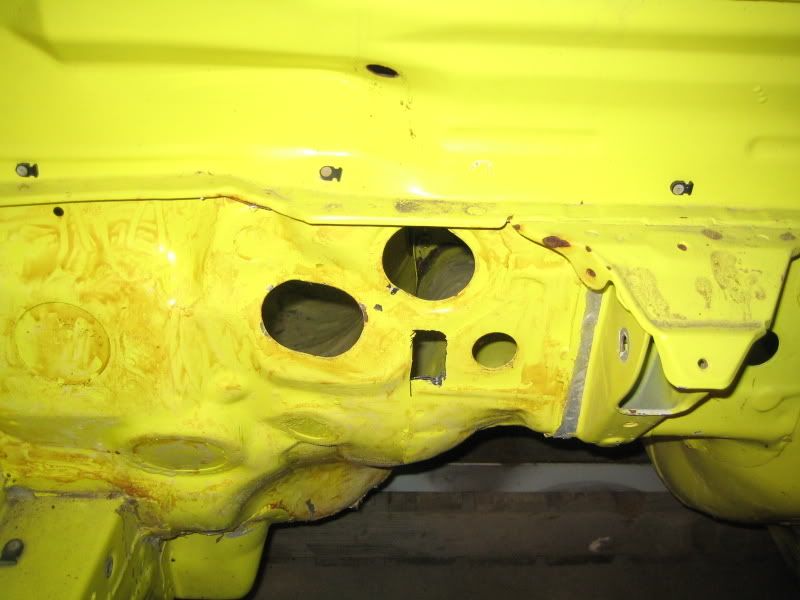
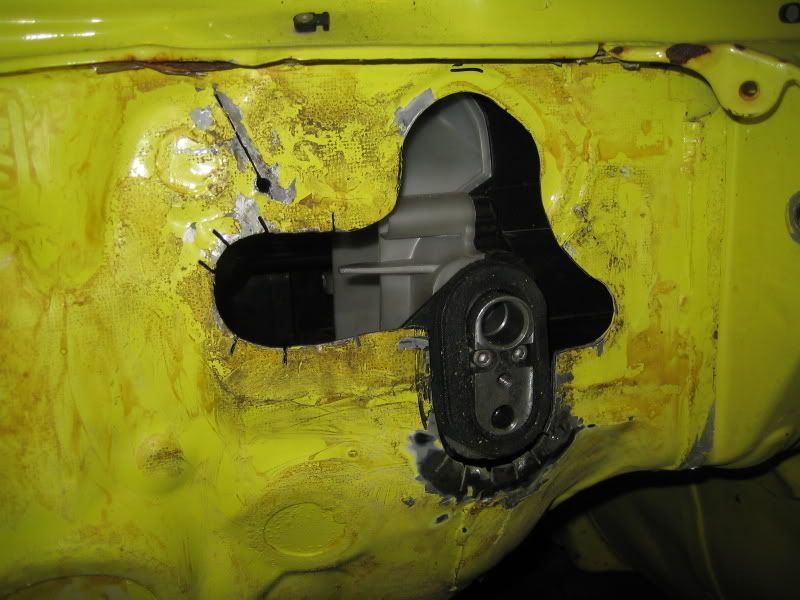
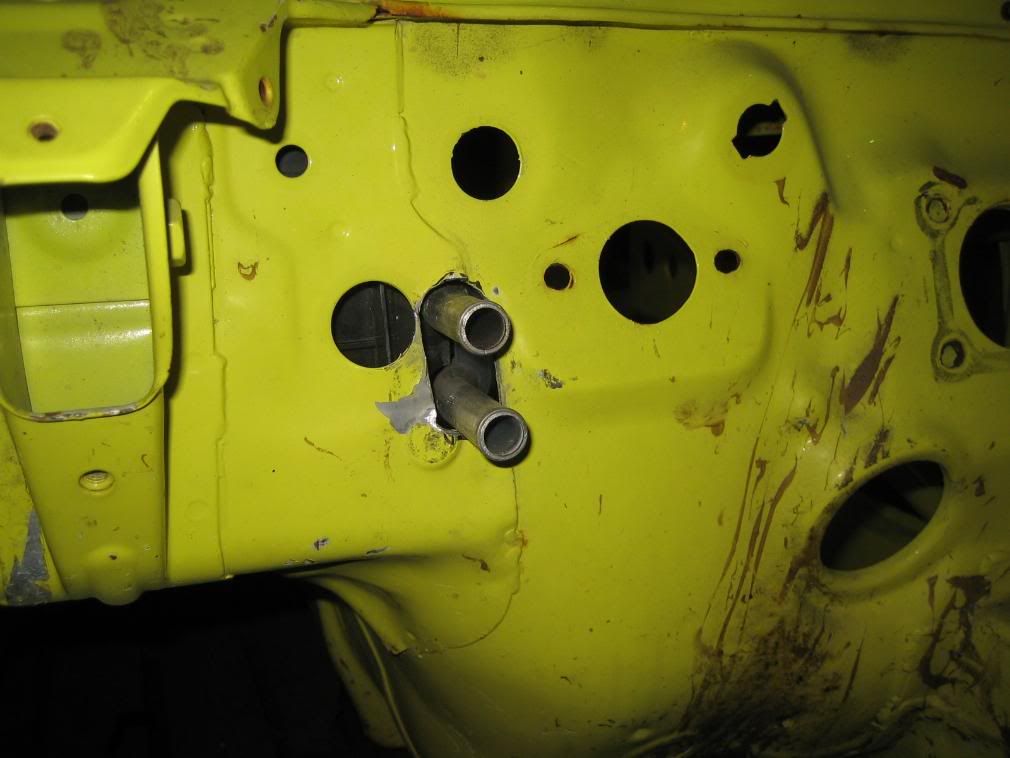
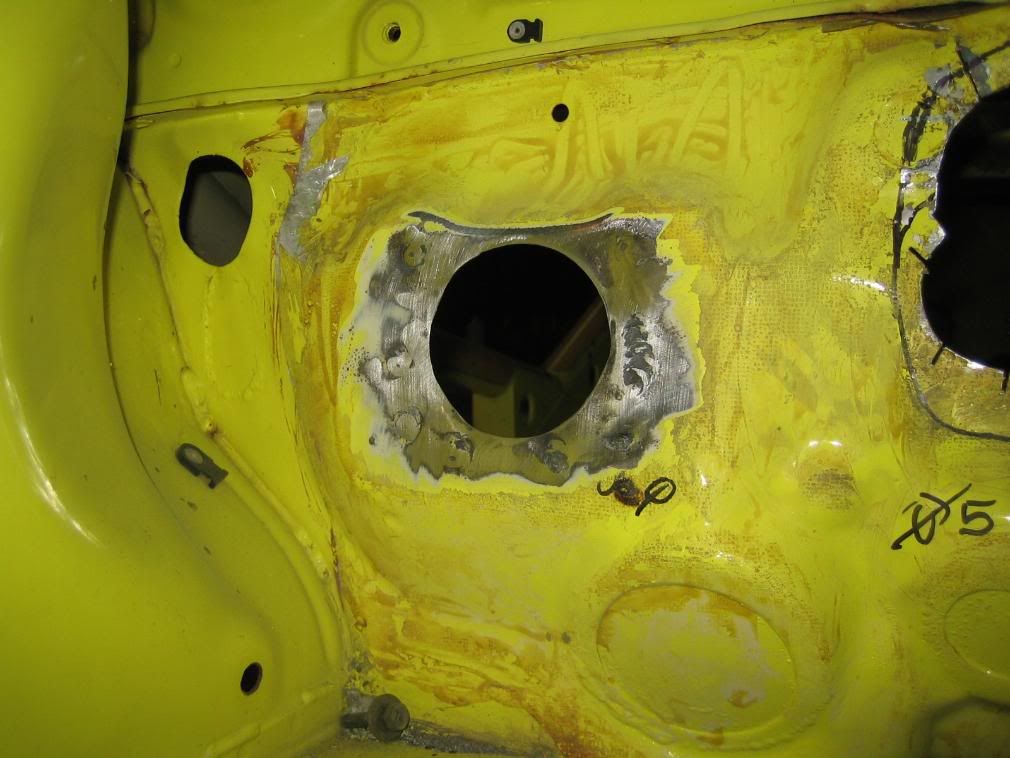
So I had made a nice fitting hole:
I had already fixed the heaterunit, into which the airco unit is built, so the position of the connection terminal was final, I had to make the firewall fit around it.
The firewall had to be repositioned back and forth a bit to get it to fit the connection terminal, but due to the stresses the hole I first cut didn't come out right.
So I had to make it bigger:
I have to cut a few holes in the firewall, one for the airco, one for the heater itself and 2 more for engine looms.
The new-age models have different connection terminals for the airco and heater so I have to adjust everything.
I knew this was going to come because I had the same problems with the build-up of my other project, that's why I started with the dash on this project, good to have it out of my way.
It might look simple to cut a few holes in the firewall and it is, but there are other problems.
There have been made all kinds of foldings (not sure if this is the correct word for it) pressed into the metal of the firewall, this is for strength and against resonation.
The airco terminal has to be tight to the firewall to prevent leakages so I have to make it flat.
But when they press the folds into the metal it stretches it a litlle also, so when you try hammer it flat there is some material left, which has to go somewhere.
So when you hit the firewall in one place it bounces back somewhere else.
To cure this I have made cuts into all the stressed places, this relaxes the metal.
So I had made a nice fitting hole:
I had already fixed the heaterunit, into which the airco unit is built, so the position of the connection terminal was final, I had to make the firewall fit around it.
The firewall had to be repositioned back and forth a bit to get it to fit the connection terminal, but due to the stresses the hole I first cut didn't come out right.
So I had to make it bigger:
Thread Starter
Scooby Regular
Joined: Dec 2002
Posts: 458
Likes: 0
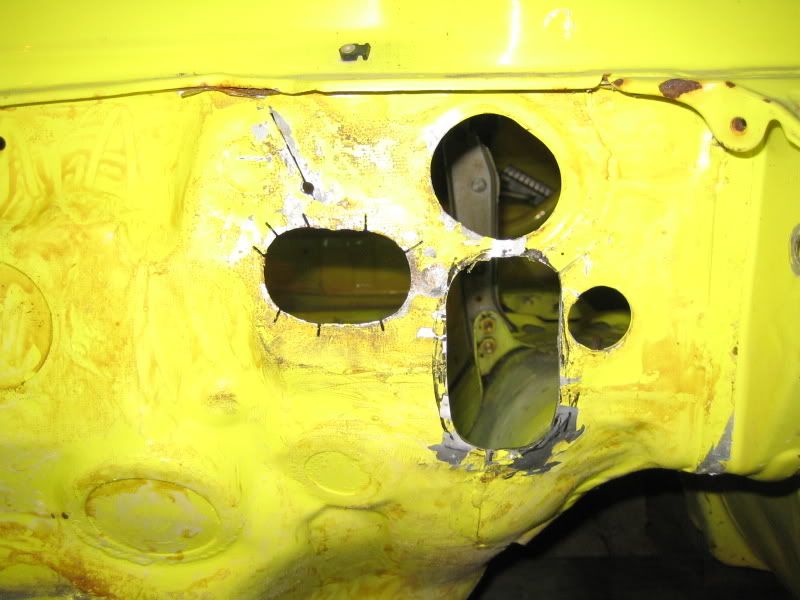
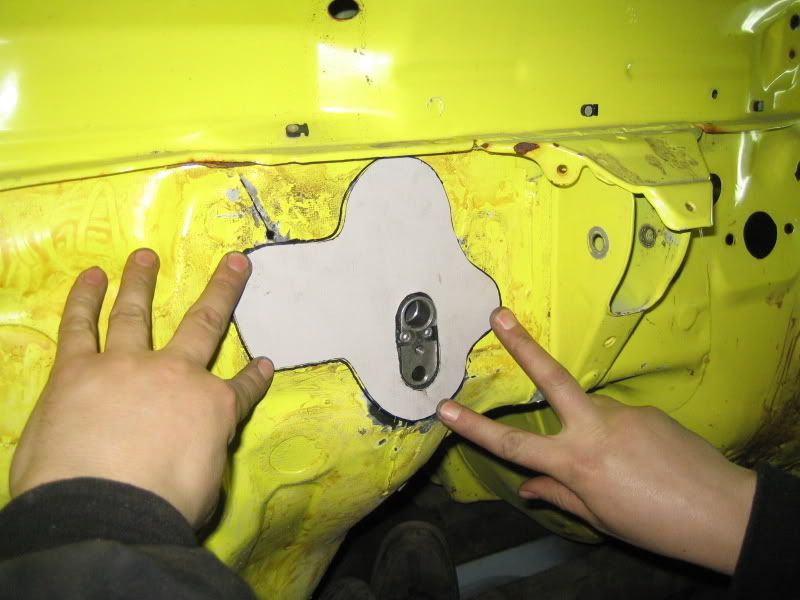
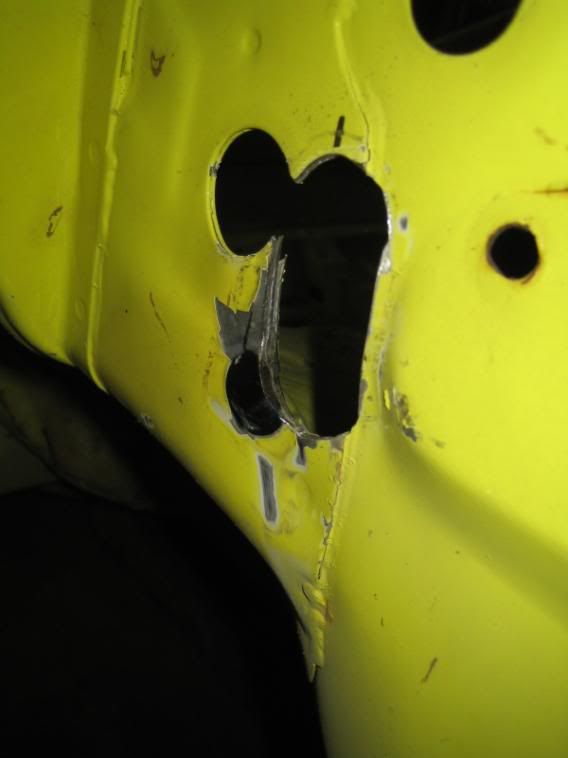
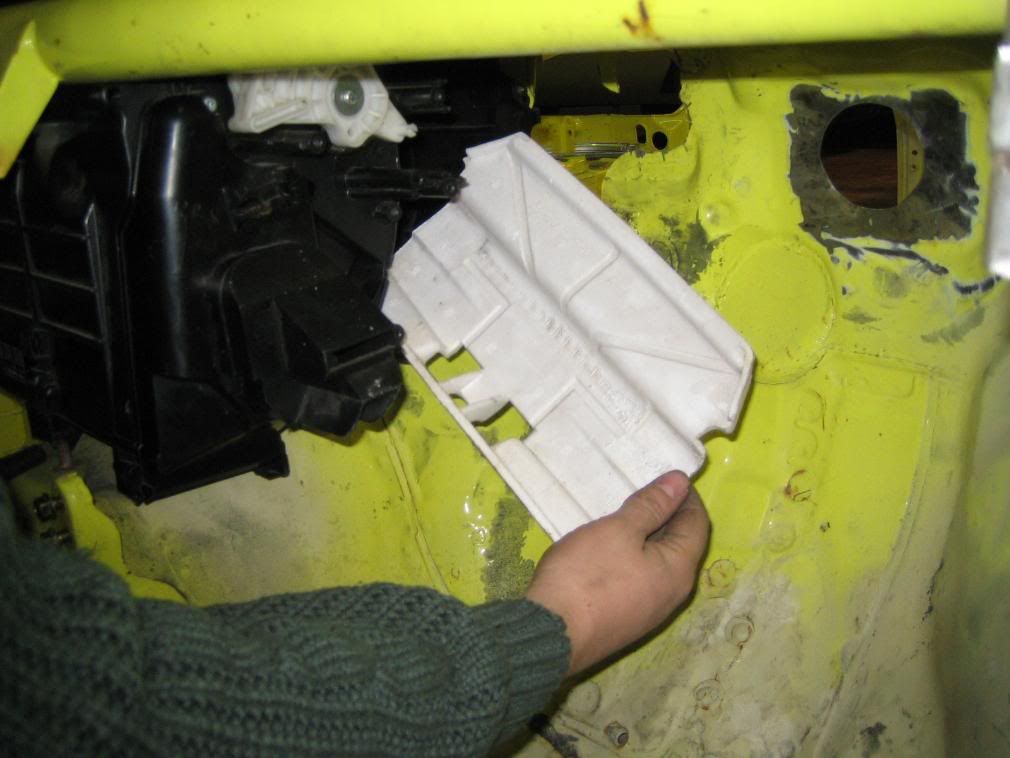
I increased the hole a bit more because I decided that the coverplate was going to be bigger and incorperate one of the engineloom holes too:
I used some packing foil as blueprint:
Which I used for cutting it out in cardboard:
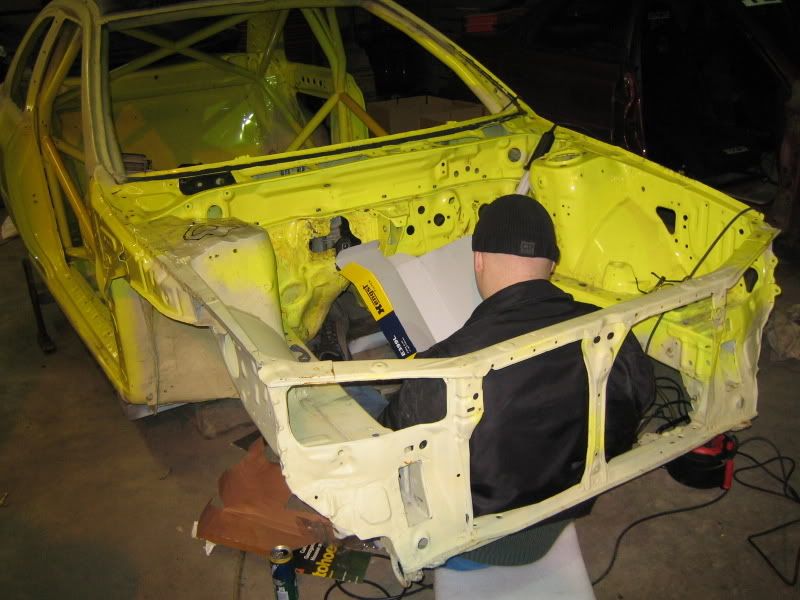
Et viola:
After that I started cutting holes for the heater connections:
Then the day was over.
I used some packing foil as blueprint:
Which I used for cutting it out in cardboard:
Et viola:
After that I started cutting holes for the heater connections:
Then the day was over.


Thread Starter
Scooby Regular
Joined: Dec 2002
Posts: 458
Likes: 0
Nope, it's not going to stay yellow.
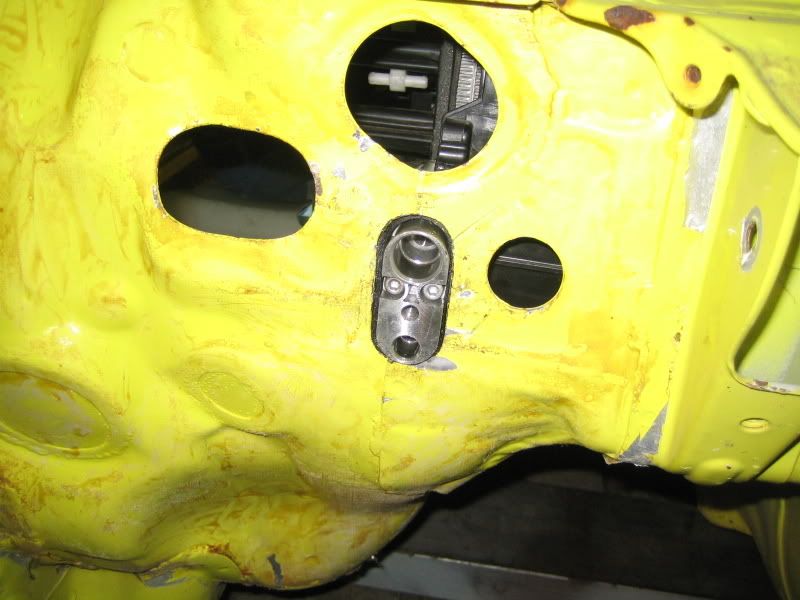
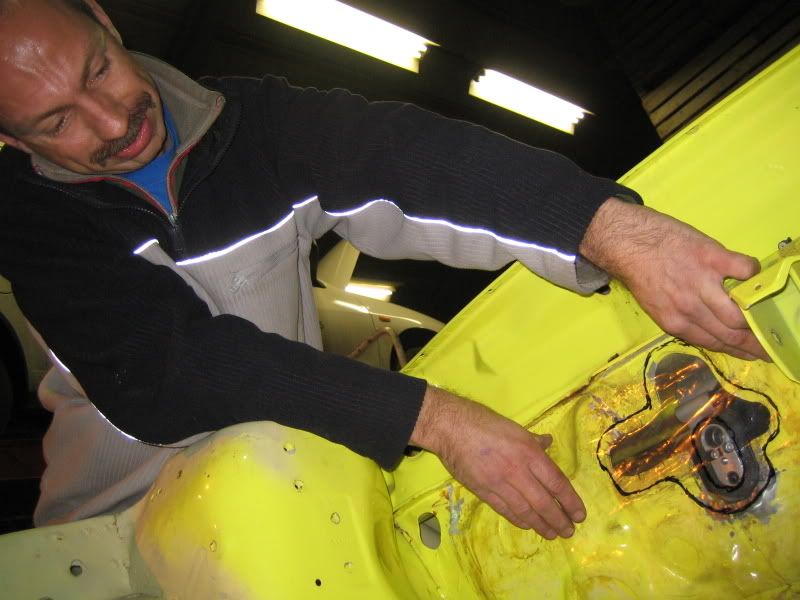
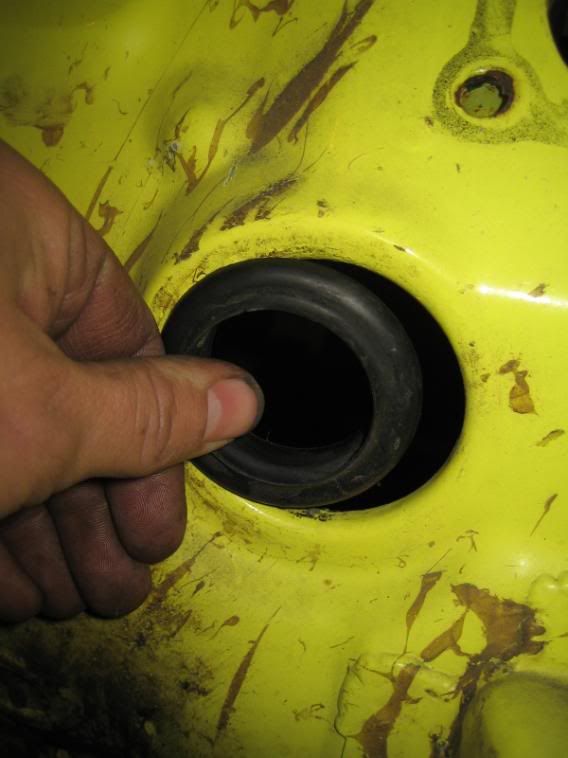
Today I went further on the heater connections.
After making a start yesterday I increased the hole a bit further for positioning and finished it off to fit the rubber:
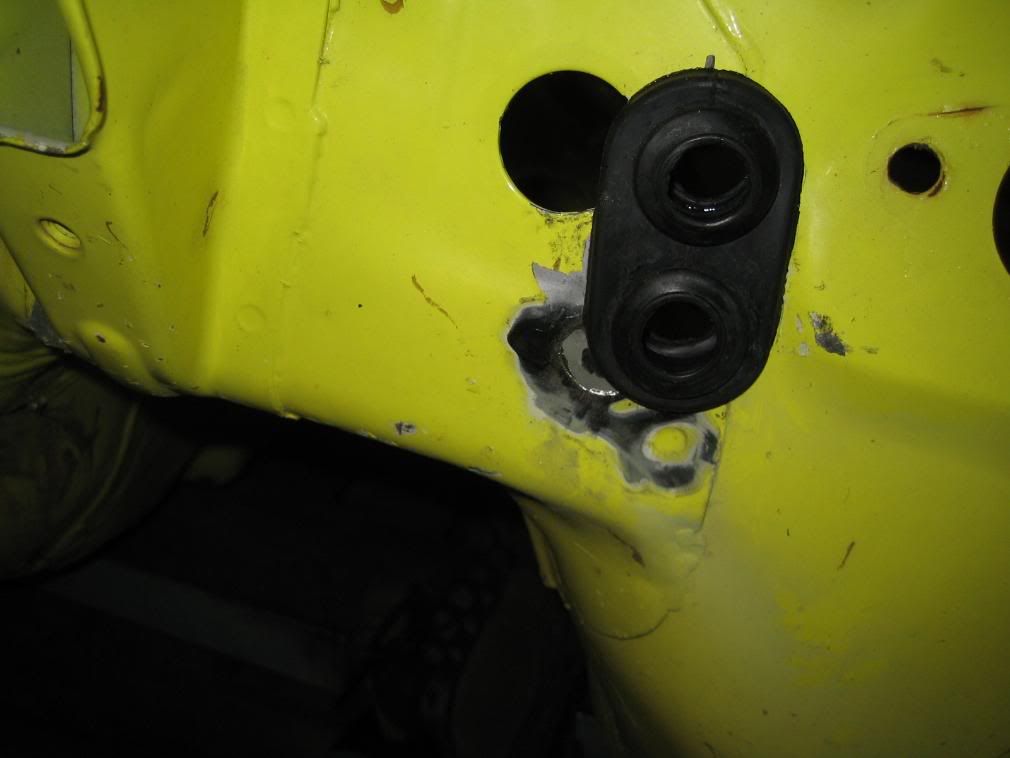
The finishing touch:
The loom holes were up next:

Today I went further on the heater connections.
After making a start yesterday I increased the hole a bit further for positioning and finished it off to fit the rubber:
The finishing touch:
The loom holes were up next:
Thread Starter
Scooby Regular
Joined: Dec 2002
Posts: 458
Likes: 0
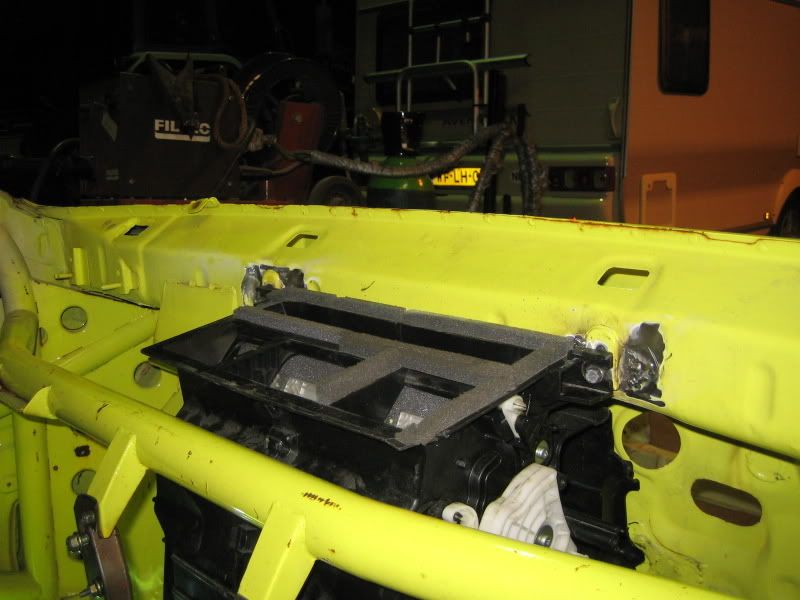
To give some background info, we had to do this predure about 30 times.
Building in the heater unit:
Empty!
Left side, this has to be wiggled between the cage and firewall and then be moved to the right for the heater element to fit:
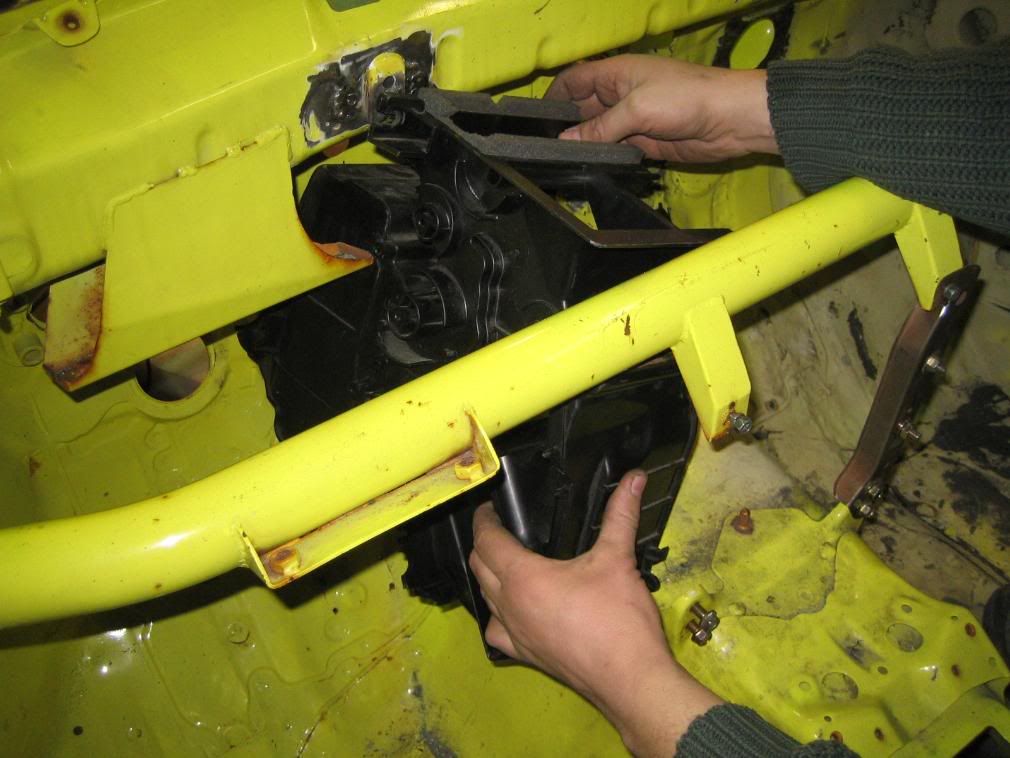
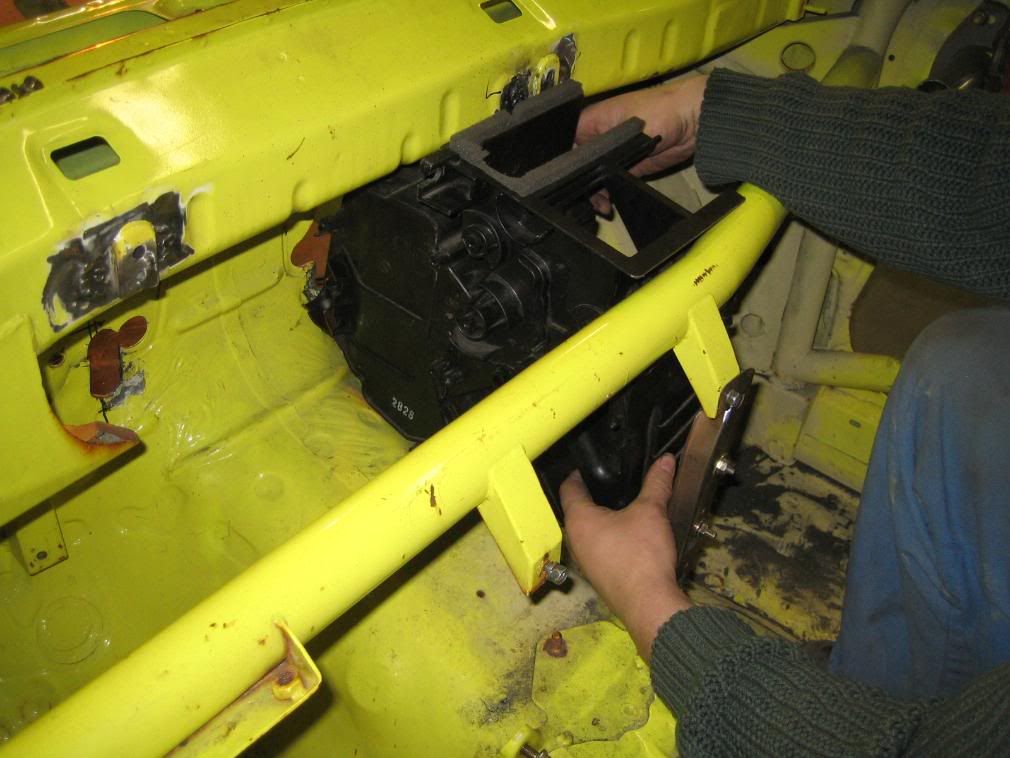
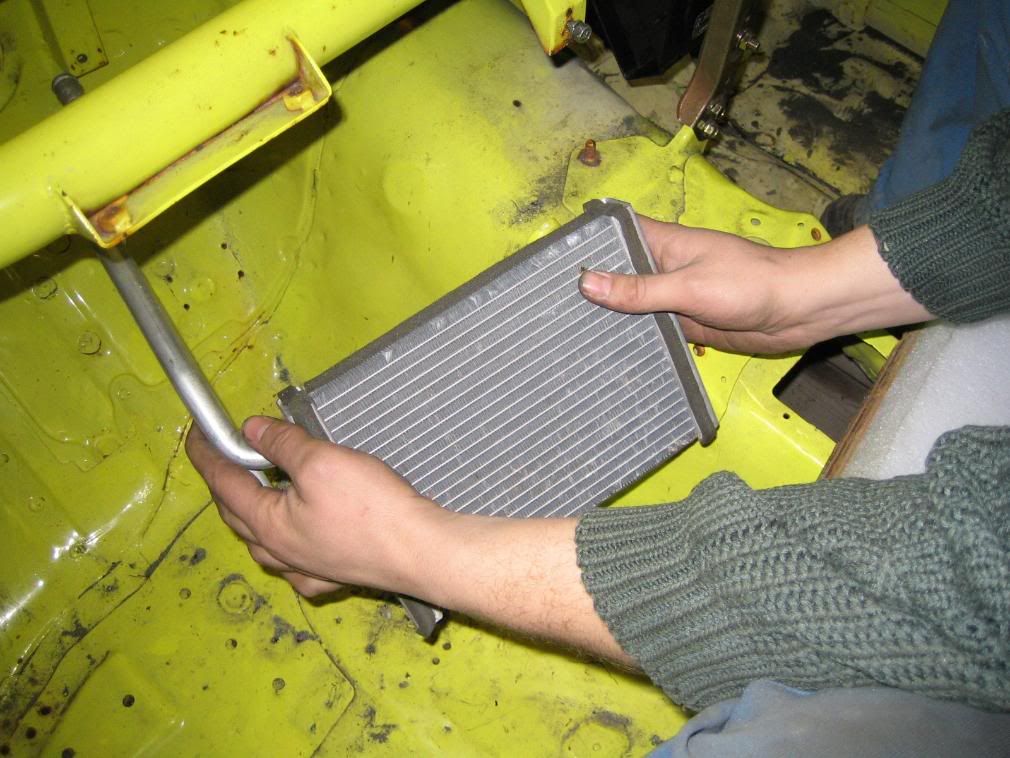
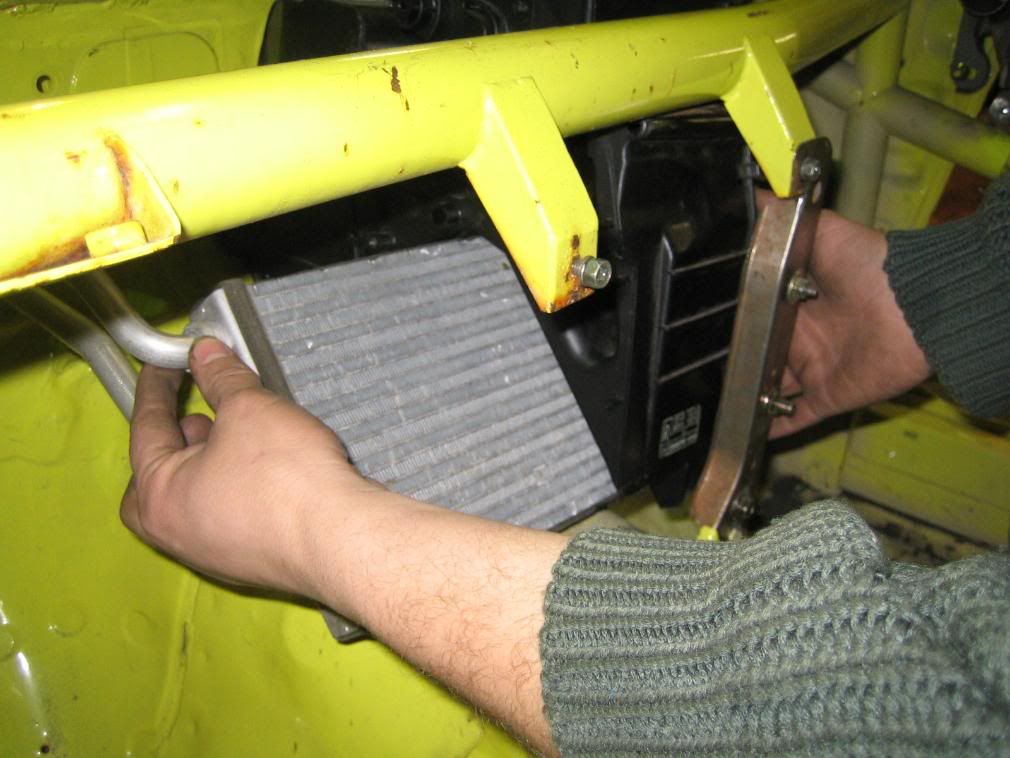
Heater element, the pipes have to go through the hole first, then the left half can be pushed over it:
Building in the heater unit:
Empty!
Left side, this has to be wiggled between the cage and firewall and then be moved to the right for the heater element to fit:
Heater element, the pipes have to go through the hole first, then the left half can be pushed over it:

Thread Starter
Scooby Regular
Joined: Dec 2002
Posts: 458
Likes: 0
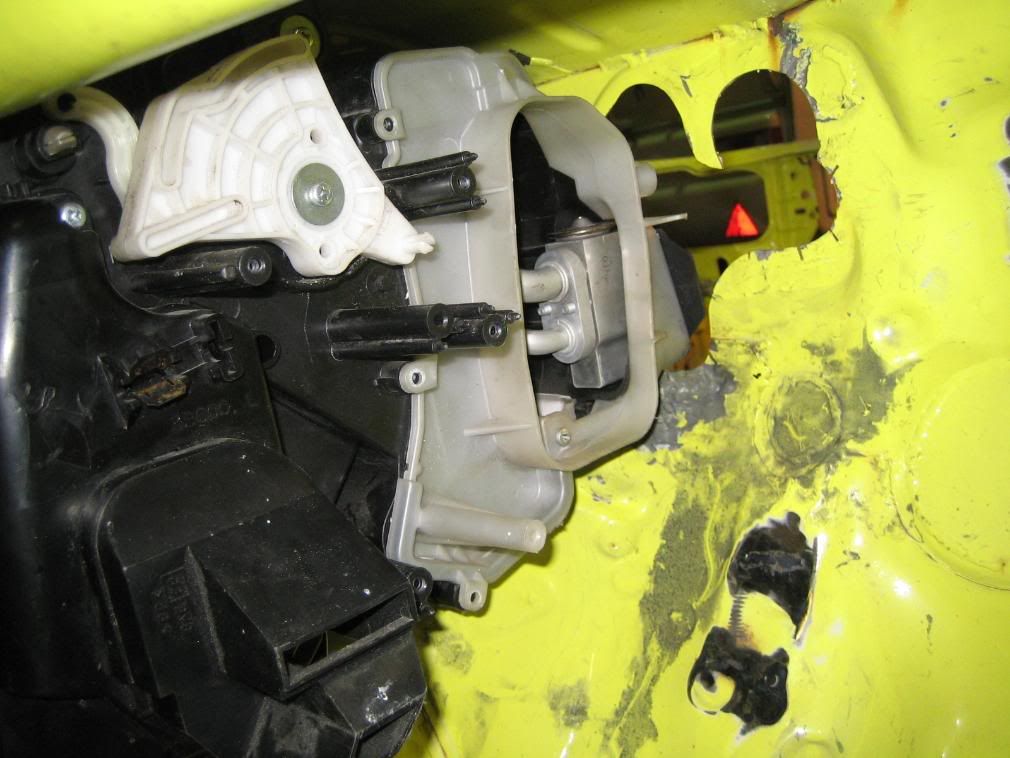
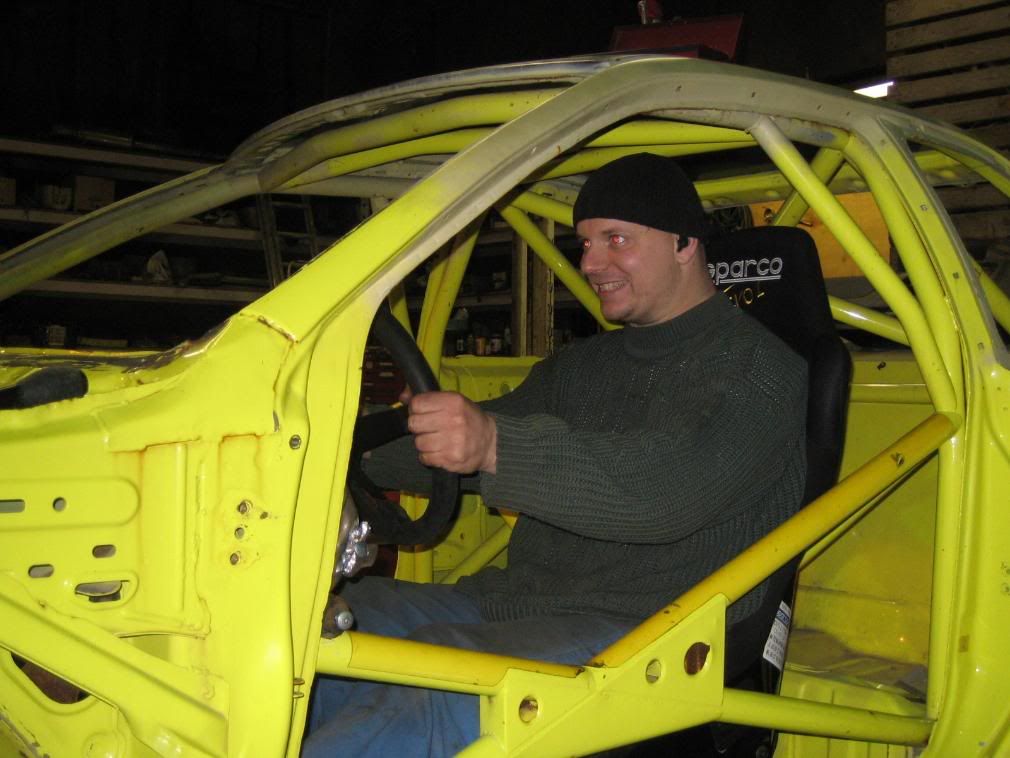
Et viola!!
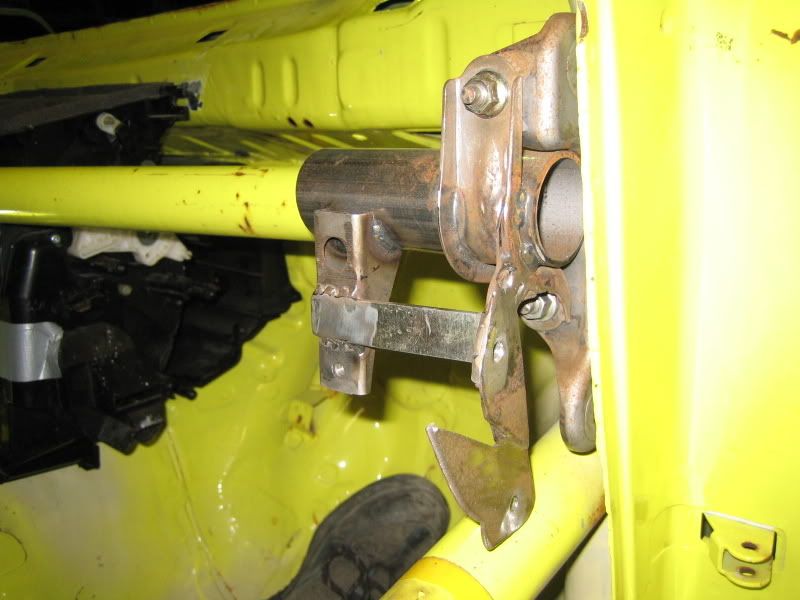
The next step is the steering column, it's fixation points do not match the ones in the chassis.
So we had to put in the chair and dashboard for alignment fitting.
With the GL we needed a day to make the chairframe fitting.
In this chassis the guys atProdrive have welded in some tubes for fixation.
I could fit the chair in just sitting on his side supports,so no frames were needed!!

Thread Starter
Scooby Regular
Joined: Dec 2002
Posts: 458
Likes: 0
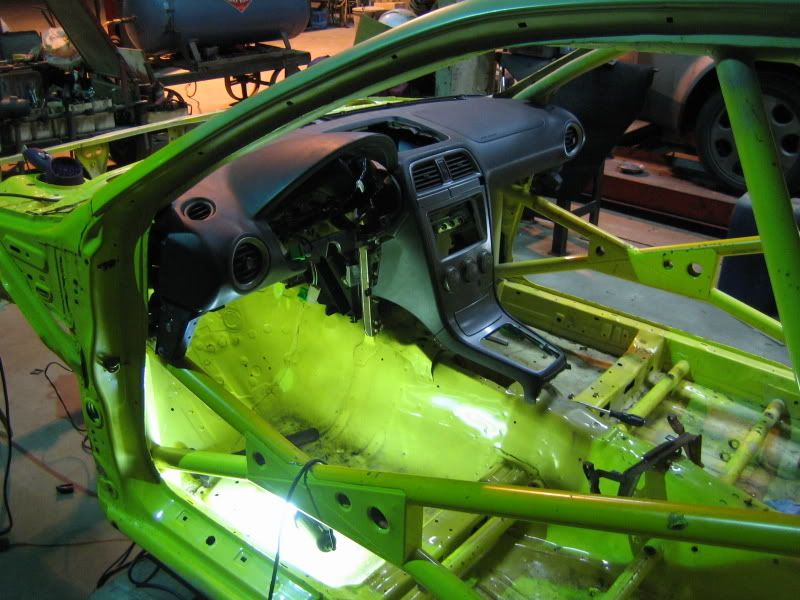
Dasboard:
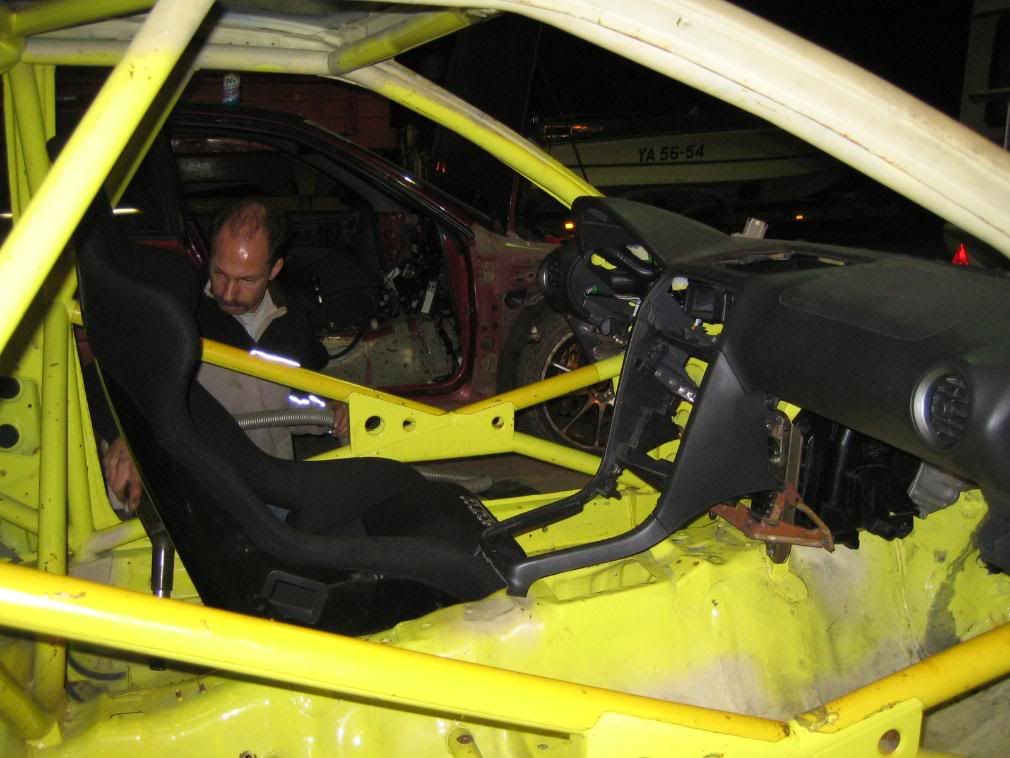
Chair had to be test fitted of course:
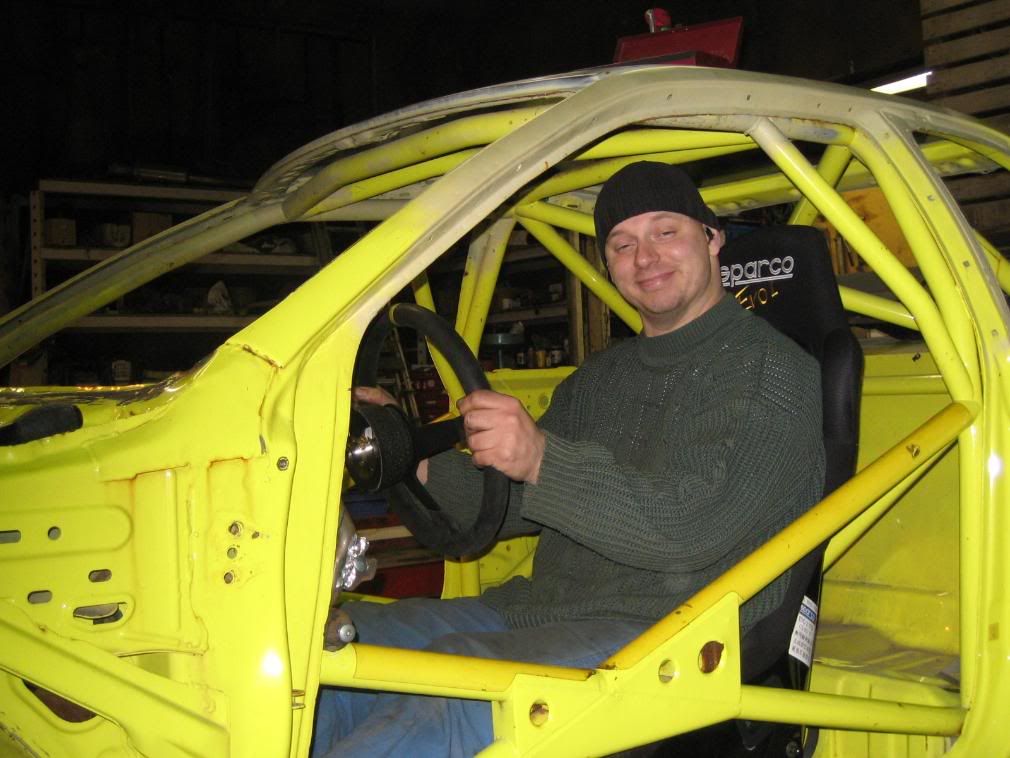
The steer sits perfect in line!:
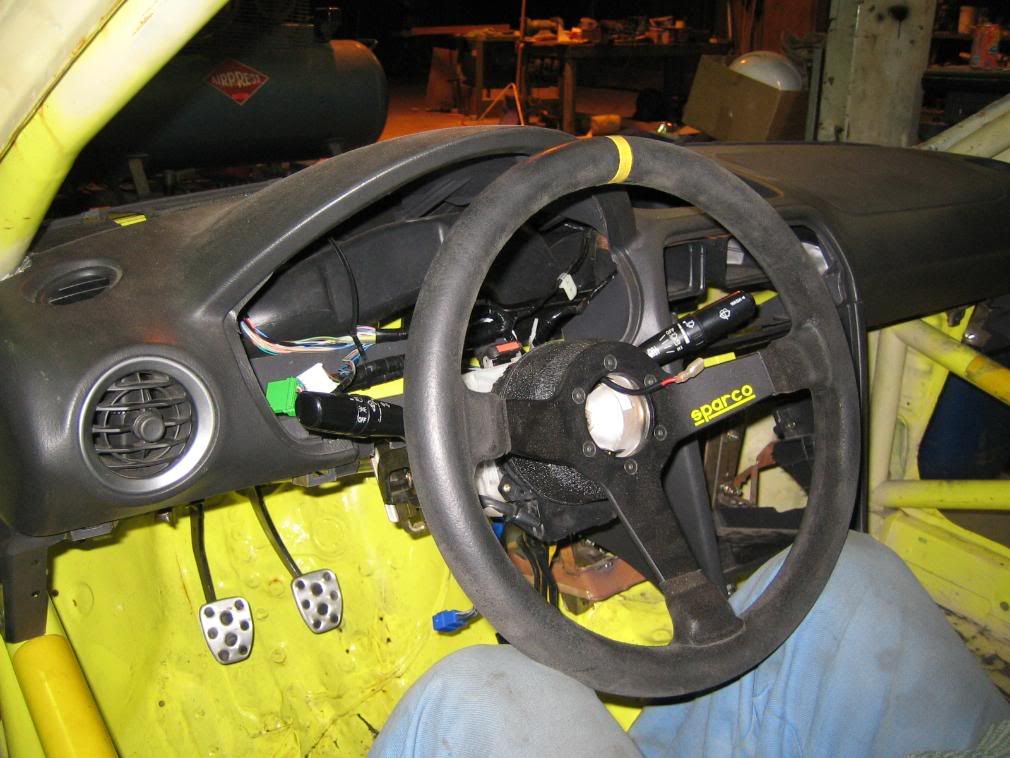
Unfortunatly the hole in the firewall is to big for this collumn,this has to be adressed too:
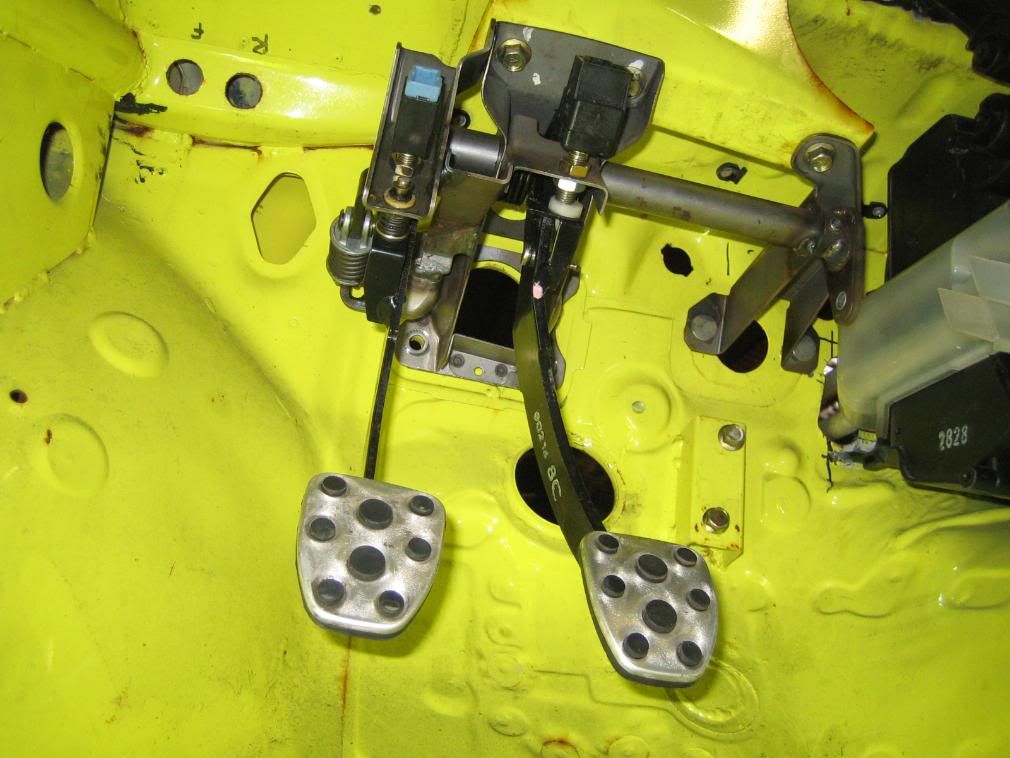
We also removed some pedals from the old car and put them in the new chassis:
This was it for this year, more next year!
Chair had to be test fitted of course:
The steer sits perfect in line!:
Unfortunatly the hole in the firewall is to big for this collumn,this has to be adressed too:
We also removed some pedals from the old car and put them in the new chassis:
This was it for this year, more next year!