Prodrive Grp.N. chassis street build


 28 August 2008, 01:21 PM
#155
Scooby Regular
Join Date: Feb 2006
Location: Going further than the station and back !!! ZZZZZZZZZzzzzzzzzzzzz
Posts: 11,097
Likes: 0
Received 0 Likes
on
0 Posts
Dinges, what can i say??
Not only have you taken the time to work on this scoob, but also the detailed write-up as well.
Very commendable !!
keep up the good work !
Dazza
Not only have you taken the time to work on this scoob, but also the detailed write-up as well.
Very commendable !!
keep up the good work !
Dazza
28 August 2008, 02:08 PM
#156
Scooby Regular
Thread Starter

Join Date: Dec 2002
Posts: 458
Likes: 0
Received 0 Likes
on
0 Posts
The write up is 2 way, it's a sort of dairy for me and it my be a nice read for whoever is interested.
I show what my idea's are, so others might copy them or someone can say, hey! your doin it wrong, try this!
BTW, if I want to change my nick, who do I adres?
I show what my idea's are, so others might copy them or someone can say, hey! your doin it wrong, try this!
BTW, if I want to change my nick, who do I adres?
14 September 2008, 09:36 PM
#157
Scooby Regular
Thread Starter
Join Date: Dec 2002
Posts: 458
Likes: 0
Received 0 Likes
on
0 Posts
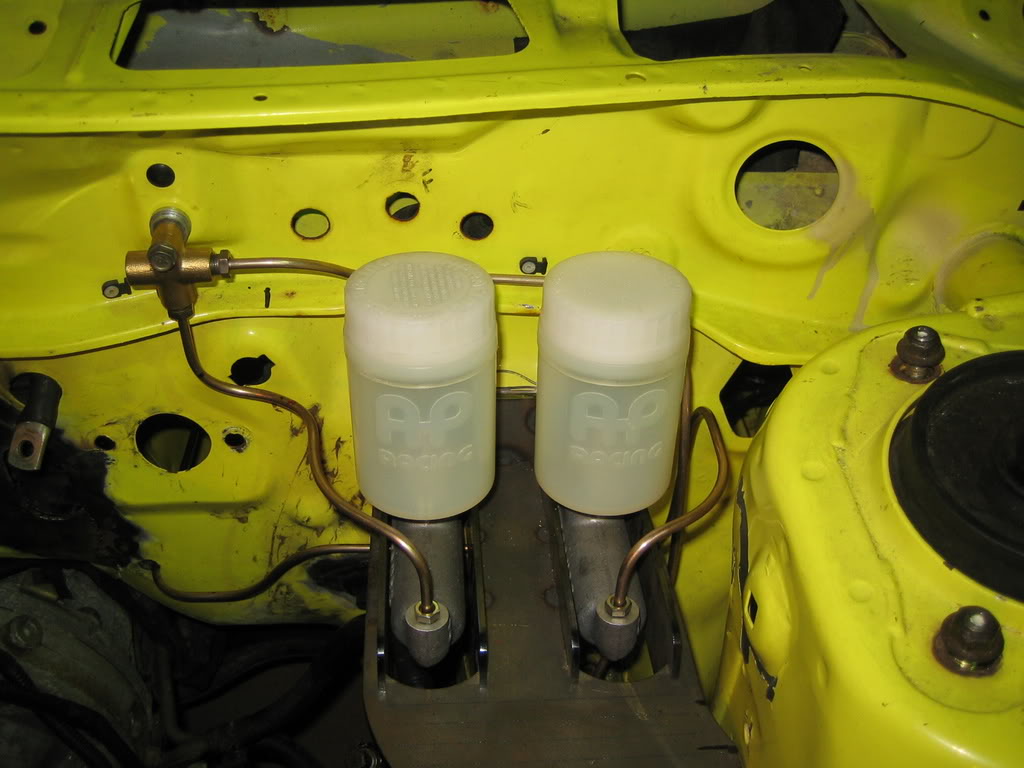
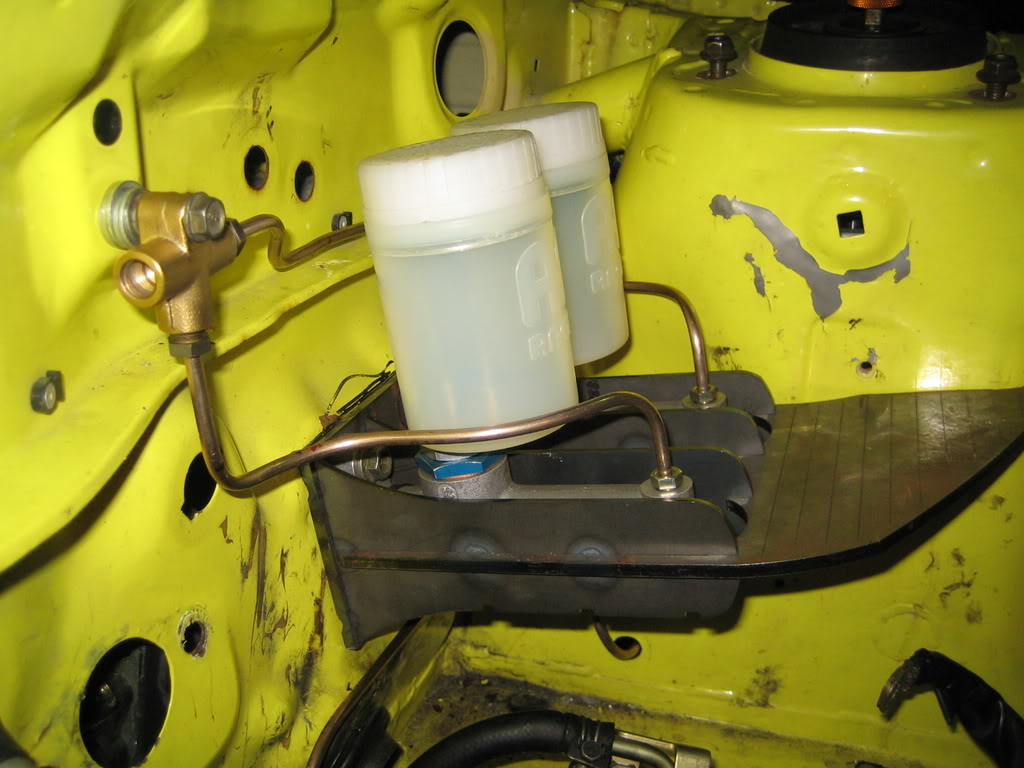
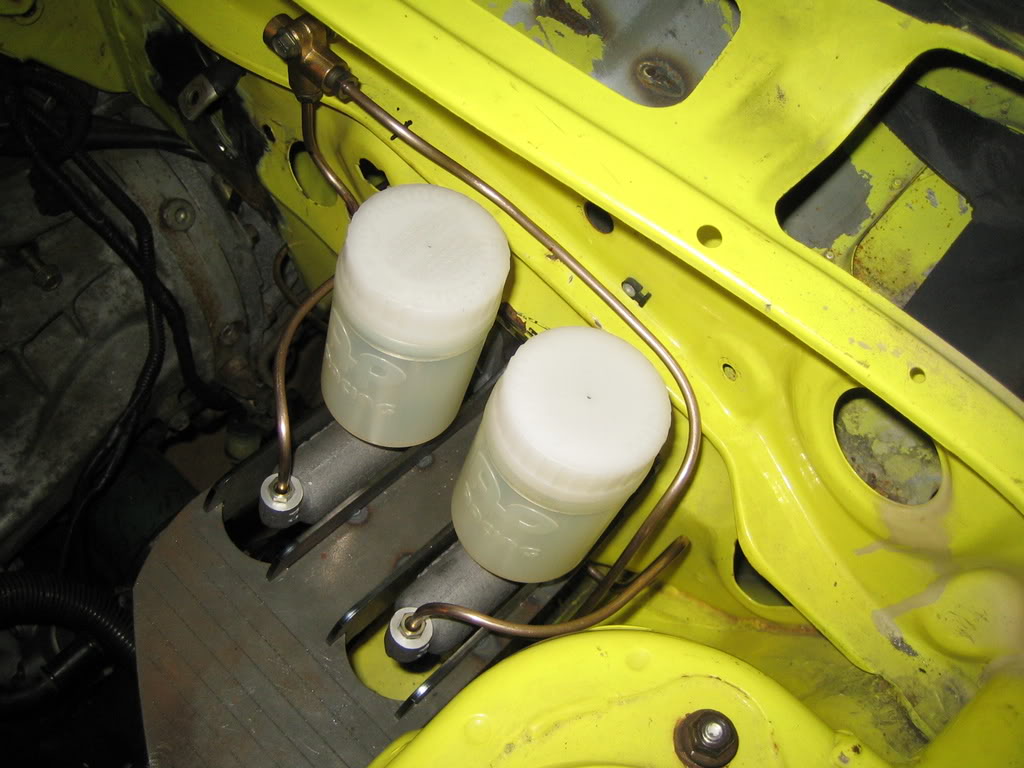
Small update,
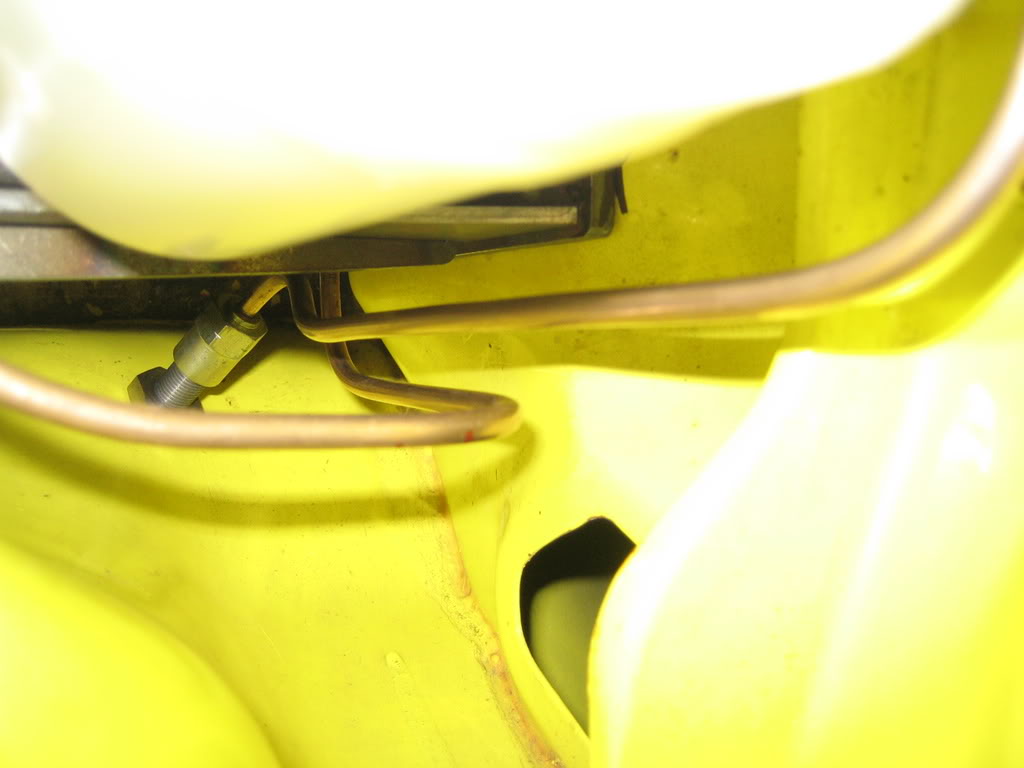
Did another small piece of brakeline, the part to the left front wheel:
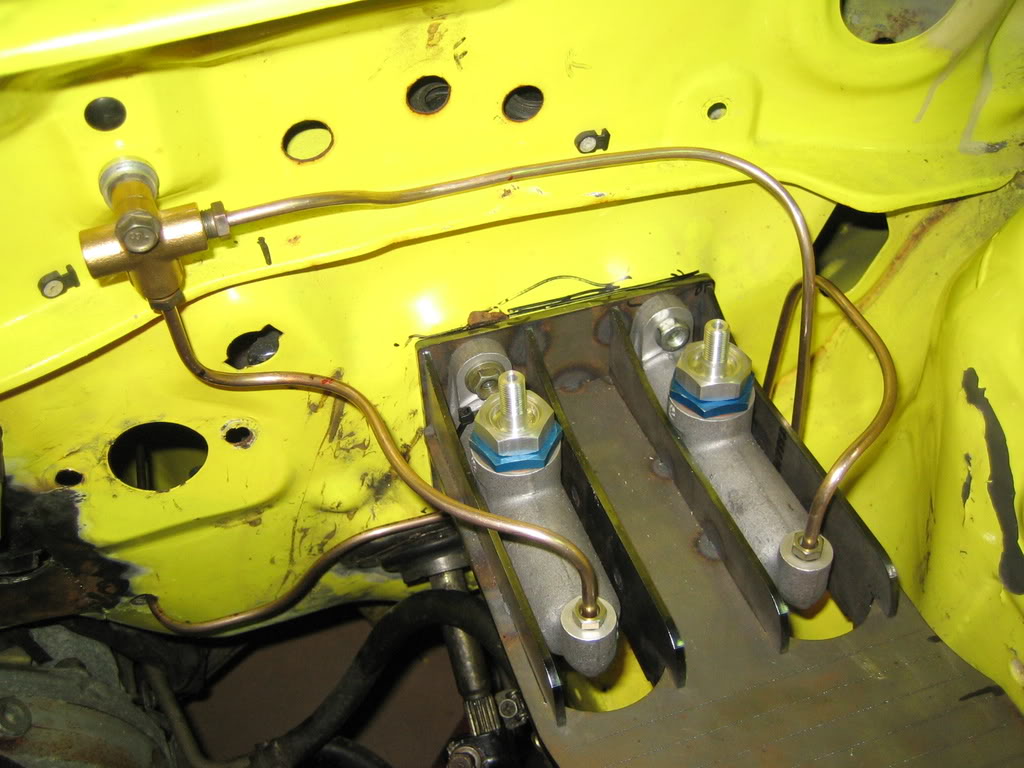
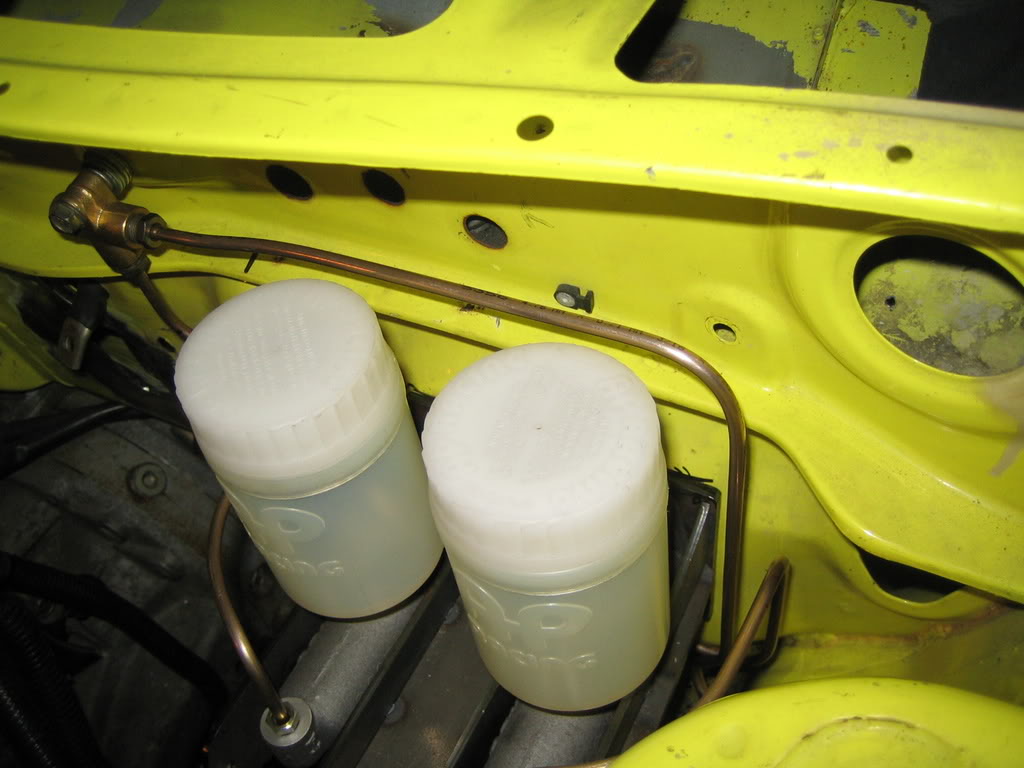
AP-racing fluid reservoirs have arrived, my dummy worked pretty good I must say!:
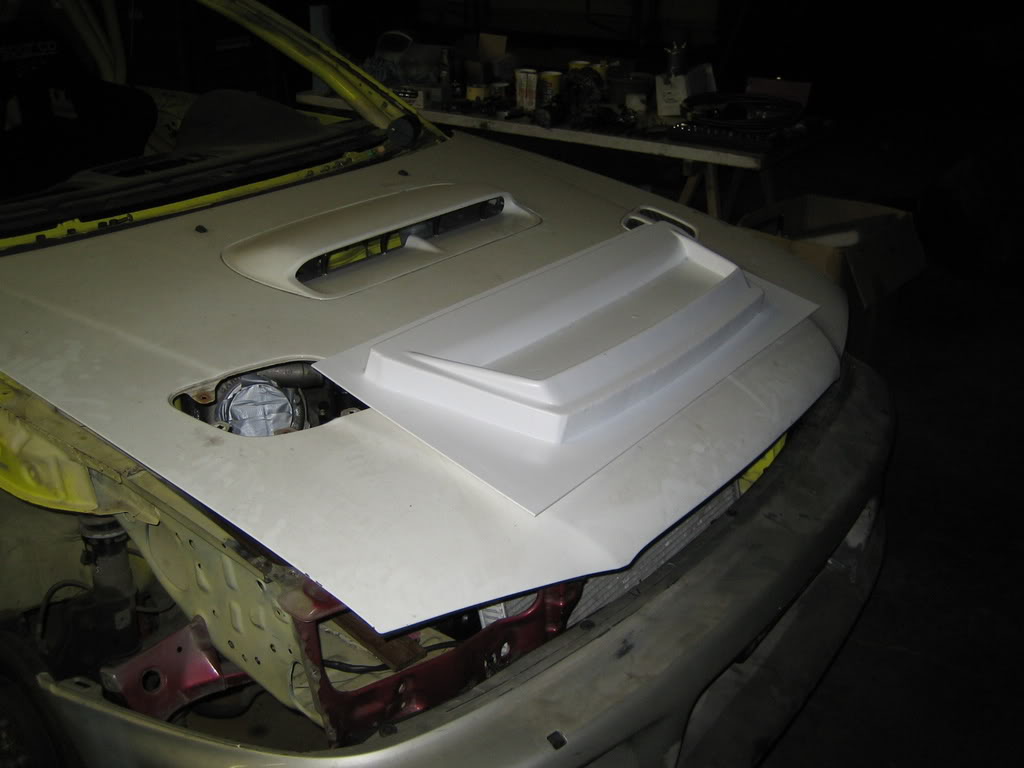
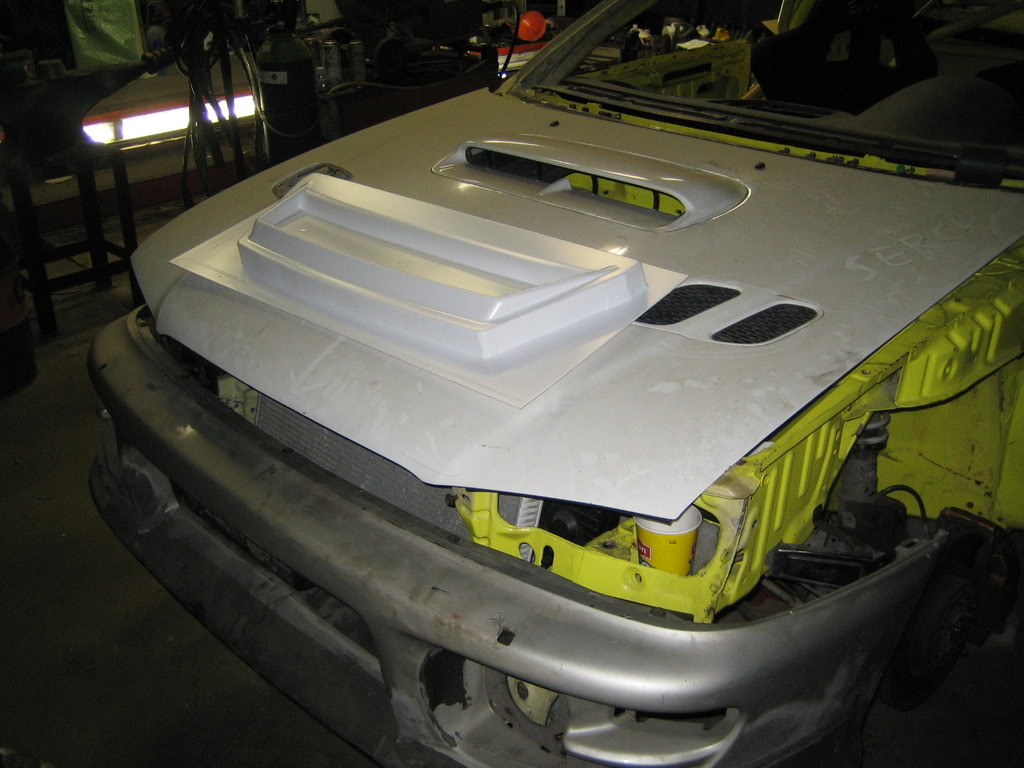
An air exit for the bonnet, WRC replica.
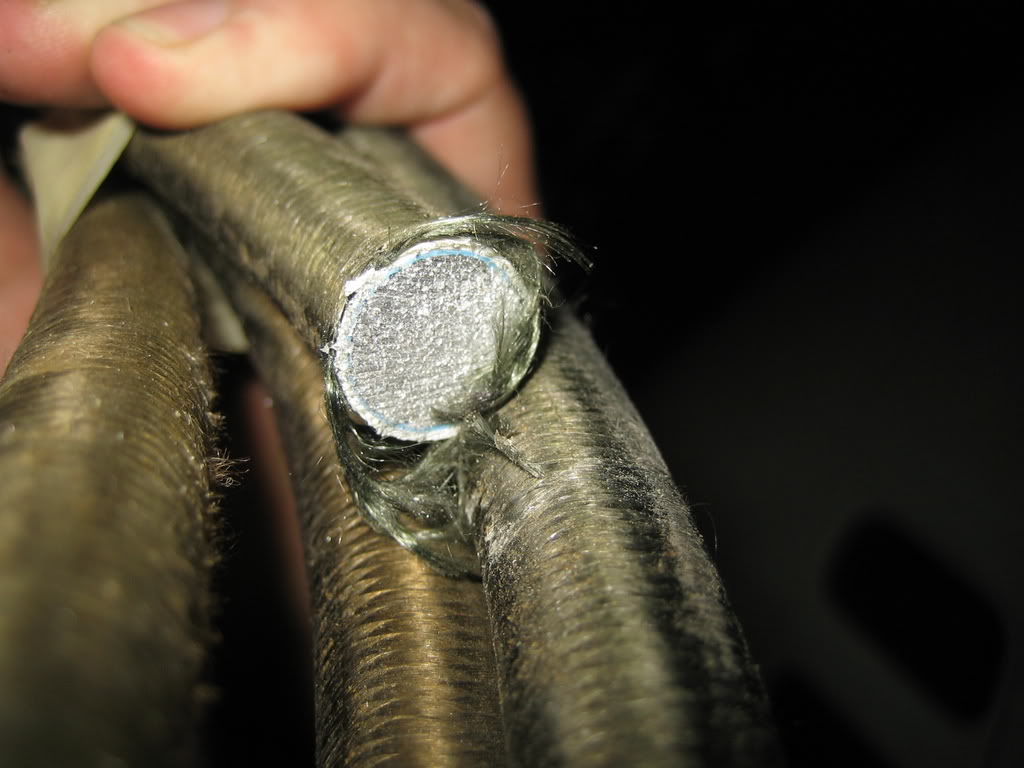
This is something else that crossed my path, a new cable for the battery.
It's aluminum with a silver coating, used in proffesional racing apparently.
A bit bizarre, it's fingersize but weigh's nearly nothing:
Did another small piece of brakeline, the part to the left front wheel:
AP-racing fluid reservoirs have arrived, my dummy worked pretty good I must say!:
An air exit for the bonnet, WRC replica.
This is something else that crossed my path, a new cable for the battery.
It's aluminum with a silver coating, used in proffesional racing apparently.
A bit bizarre, it's fingersize but weigh's nearly nothing:
 10 October 2008, 06:04 PM
#161
Scooby Regular
Thread Starter
Join Date: Dec 2002
Posts: 458
Likes: 0
Received 0 Likes
on
0 Posts
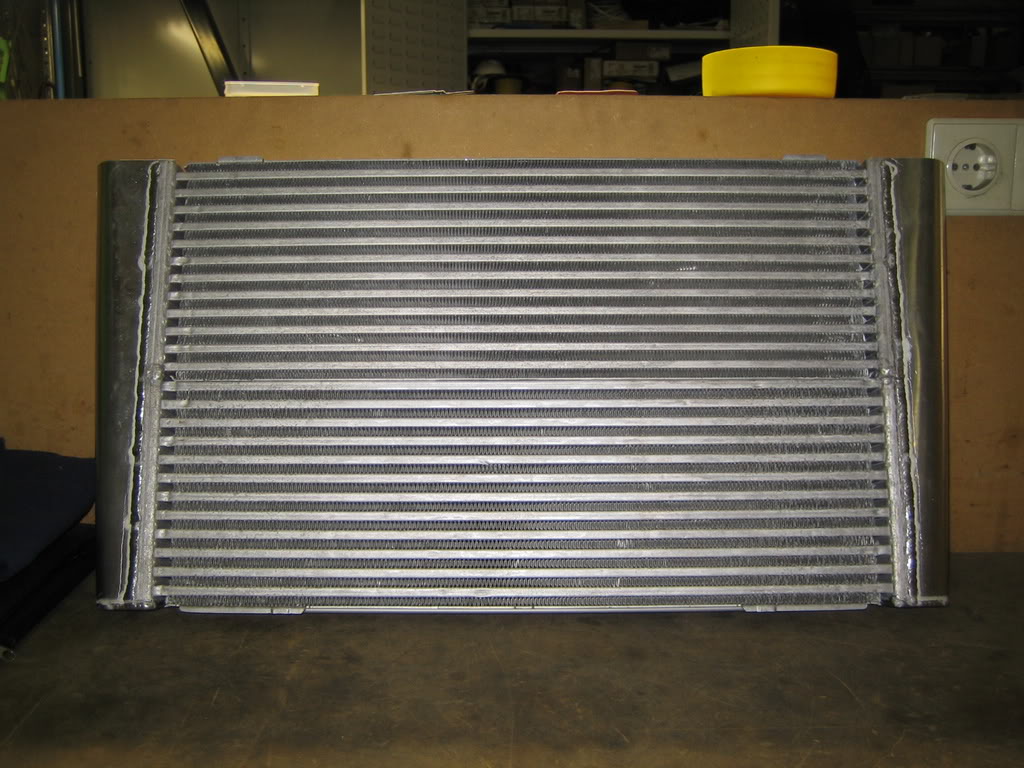
FMIC time!
This job was sidelined for a bit but today I got some inspiration again.
The endtank attachments had to be worked.
There was a difference in width between the cores, so after contemplating a bit it was decided to change them altogether and make them as small as possible.
So a tool was made and used:


The IC needed to be heated up so the material would get softer and more workable.
Fire up the ovens:

Unfortunatly it cooled down rather quick, so I used a torch later.
Mutilated a plier:


First flattening occured:


After that my new tool came into action:

Viola, the result and difference:


Next week I'll rework the radiator the same way.
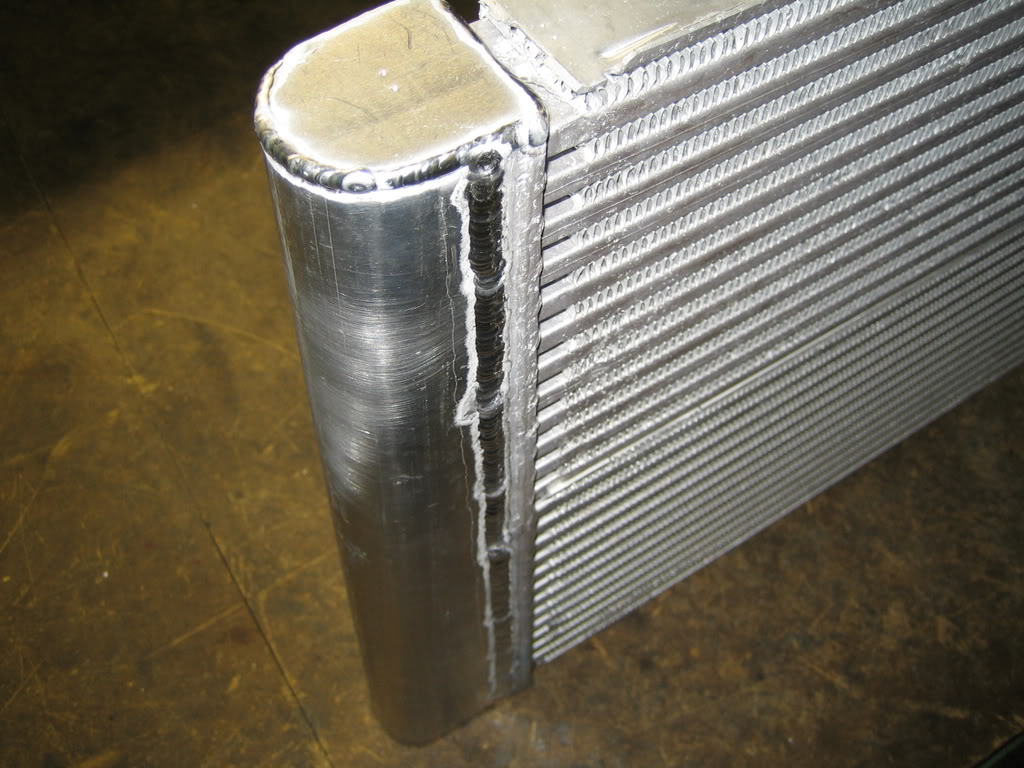
Now the 2 cores have to be welded together which is pretty risky, if that fails all this work has been done for nothing!
Received some parts today, alloy tube and connectors:

Next week more parts should follow, so more updates then.
This job was sidelined for a bit but today I got some inspiration again.
The endtank attachments had to be worked.
There was a difference in width between the cores, so after contemplating a bit it was decided to change them altogether and make them as small as possible.
So a tool was made and used:
The IC needed to be heated up so the material would get softer and more workable.
Fire up the ovens:
Unfortunatly it cooled down rather quick, so I used a torch later.
Mutilated a plier:
First flattening occured
:After that my new tool came into action:
Viola, the result and difference:
Next week I'll rework the radiator the same way.
Now the 2 cores have to be welded together which is pretty risky, if that fails all this work has been done for nothing!
Received some parts today, alloy tube and connectors:
Next week more parts should follow, so more updates then.
16 October 2008, 09:25 PM
#163
Scooby Regular
Thread Starter
Join Date: Dec 2002
Posts: 458
Likes: 0
Received 0 Likes
on
0 Posts
Me too m8. 
Picked up the collector tank today, I already had one but this one has the pump inside it.
This is to cool down the pump, like it does in the original tank.


Fuel line nipples:

SS brakeline nipples:

Picked up the collector tank today, I already had one but this one has the pump inside it.
This is to cool down the pump, like it does in the original tank.
Fuel line nipples:
SS brakeline nipples:


 17 October 2008, 07:38 PM
#165
Scooby Regular
Thread Starter
Join Date: Dec 2002
Posts: 458
Likes: 0
Received 0 Likes
on
0 Posts
One side finished!:


Did some minor mods to the feul surge tank, now a pic of it put together:

Mike had finished the endtanks for the FMIC, now it can be welded up!!


Did some minor mods to the feul surge tank, now a pic of it put together:
Mike had finished the endtanks for the FMIC, now it can be welded up!!
10 November 2008, 08:02 PM
#167
Scooby Regular
Thread Starter
Join Date: Dec 2002
Posts: 458
Likes: 0
Received 0 Likes
on
0 Posts
Thanks!
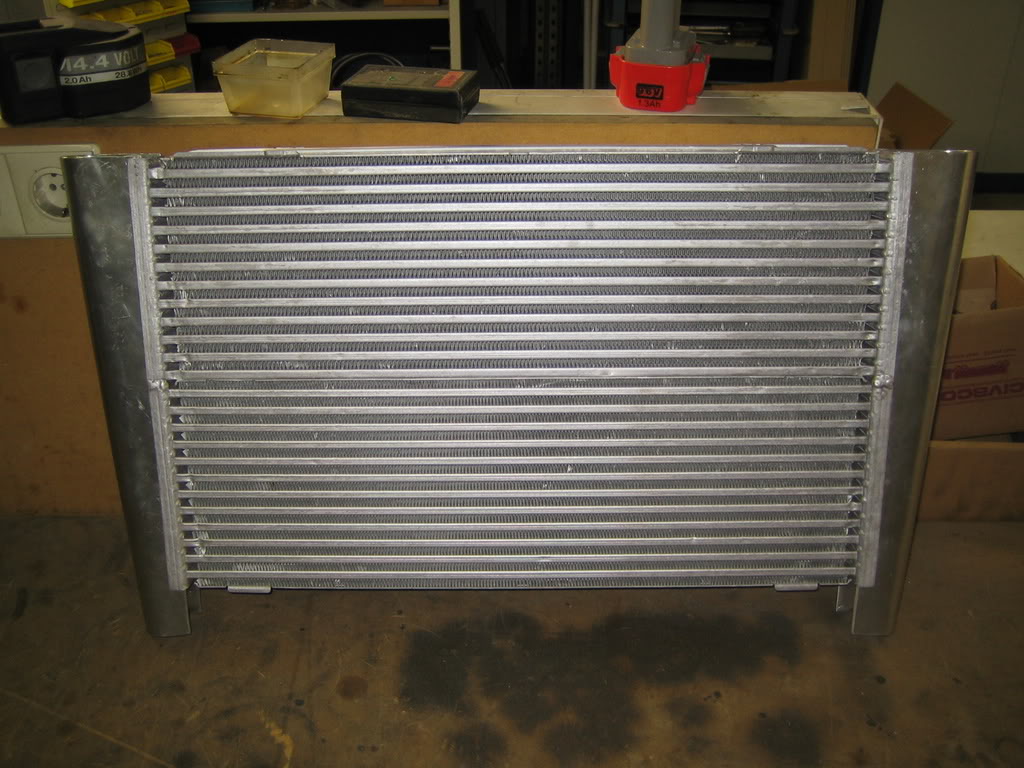
The 2 IC cores are welded together, but I found out today it was leaking, so we will adress that later:
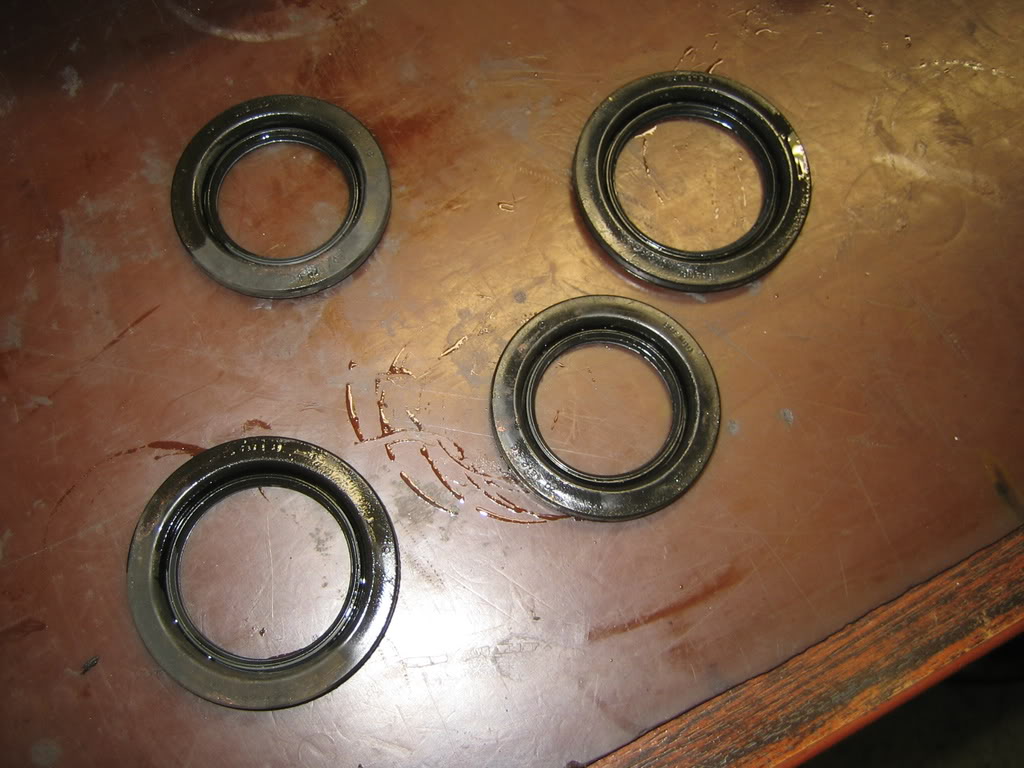
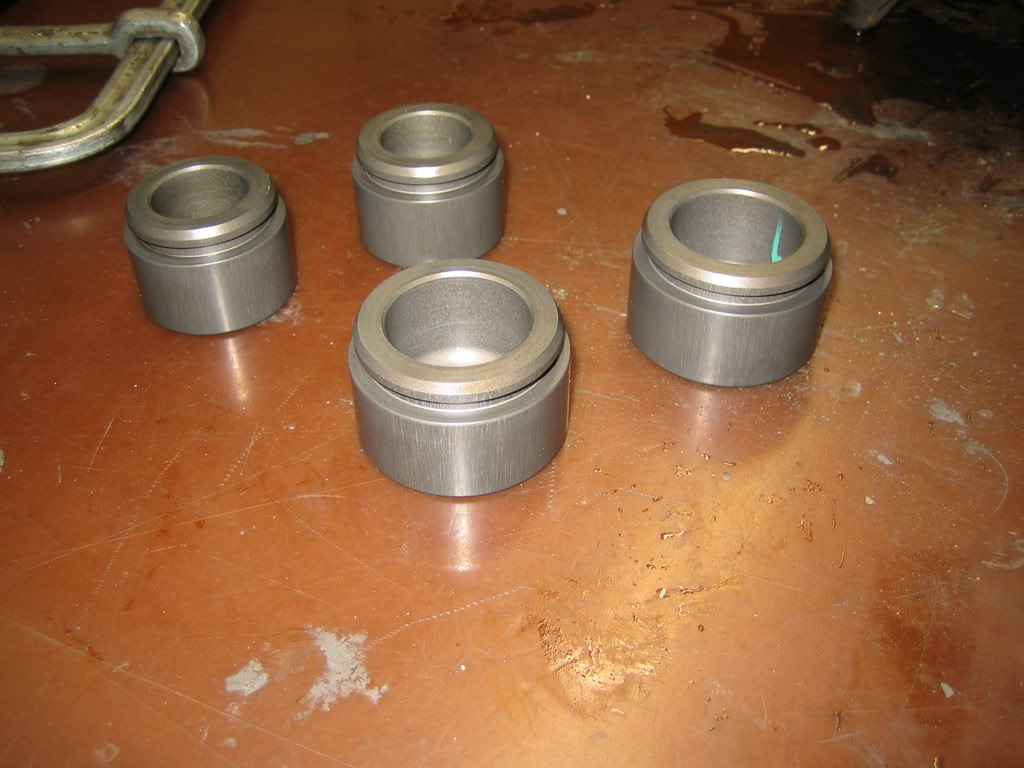
Dismantled the first brakecaliper for painting.
Empty:
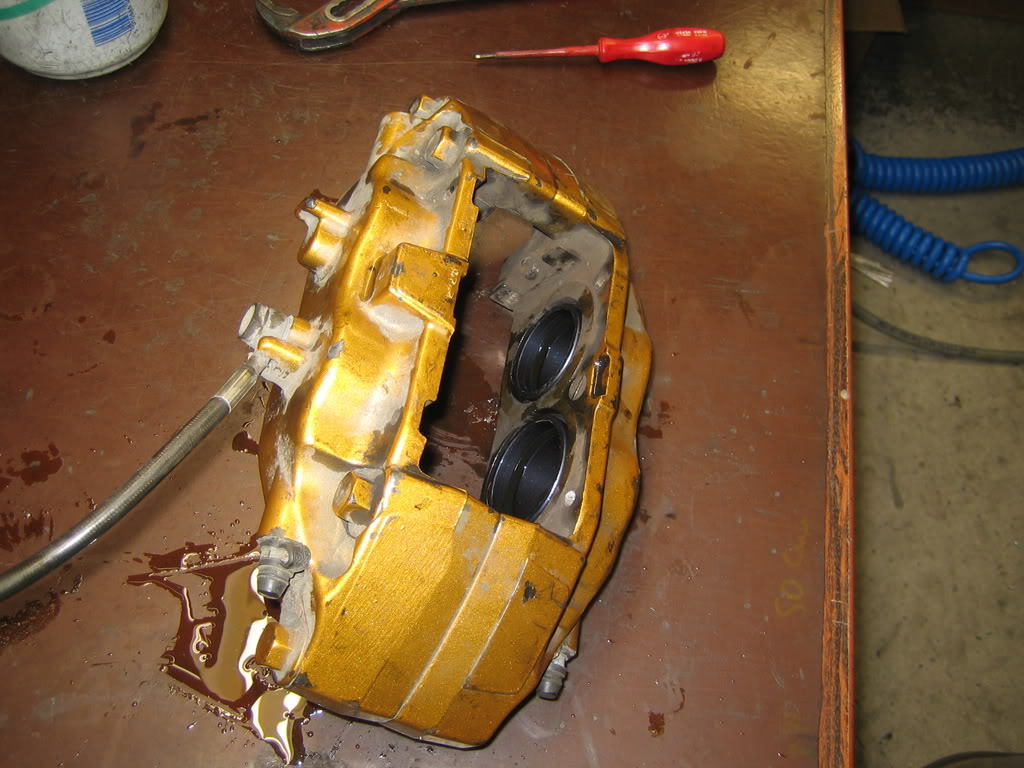
Dust seals:
Pistons:
The 2 IC cores are welded together, but I found out today it was leaking, so we will adress that later:
Dismantled the first brakecaliper for painting.
Empty:
Dust seals:
Pistons:
10 November 2008, 08:03 PM
#168
Scooby Regular
Thread Starter
Join Date: Dec 2002
Posts: 458
Likes: 0
Received 0 Likes
on
0 Posts
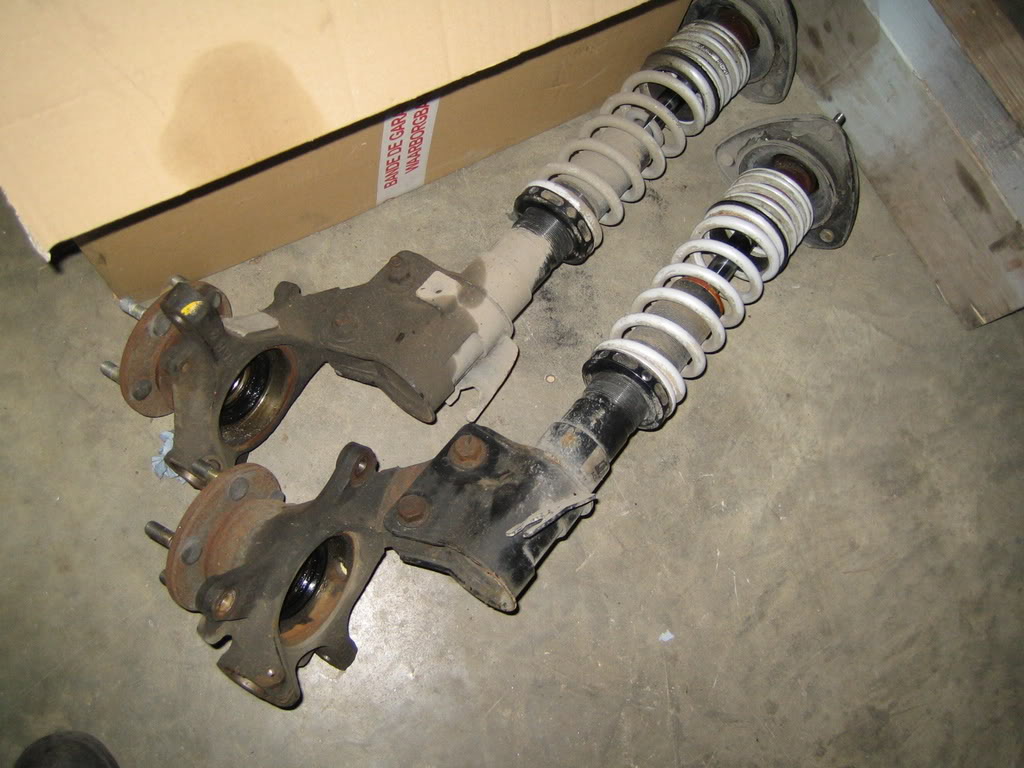
I got the 2006 hubs now, with PCD 114.3.
It should have larger bearings on the front ones, which is always nice.
Unfortunatly the front struts won't fit anymore:
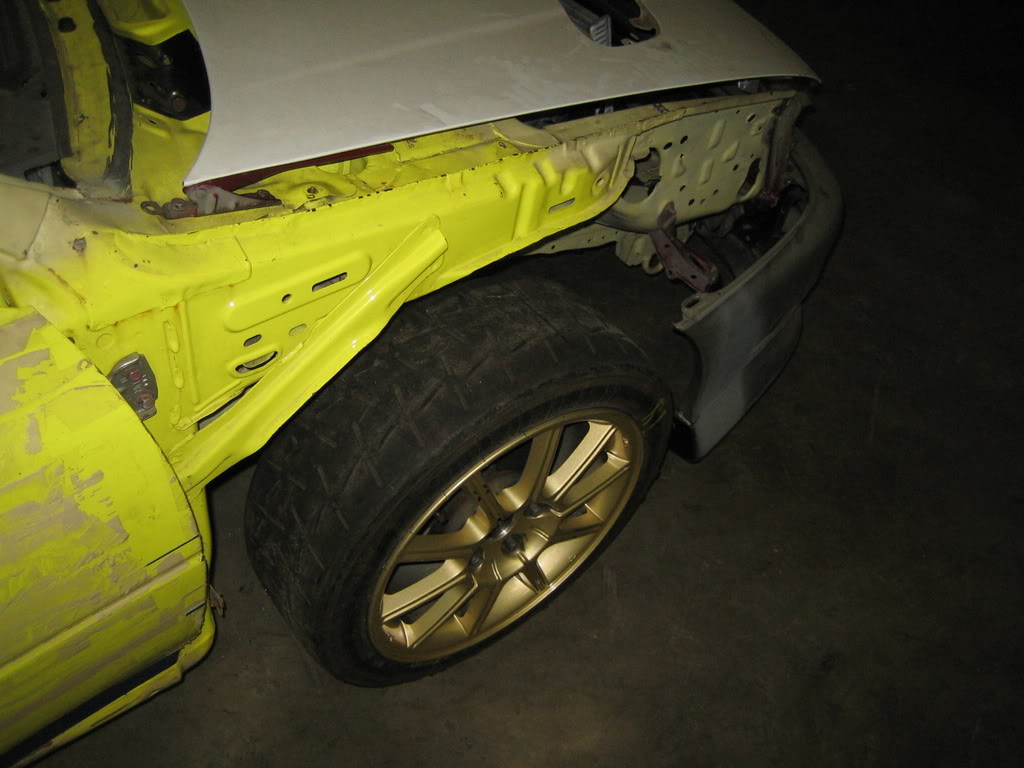
After the wintertyres the car now has semi-slicks without having moved an inch:
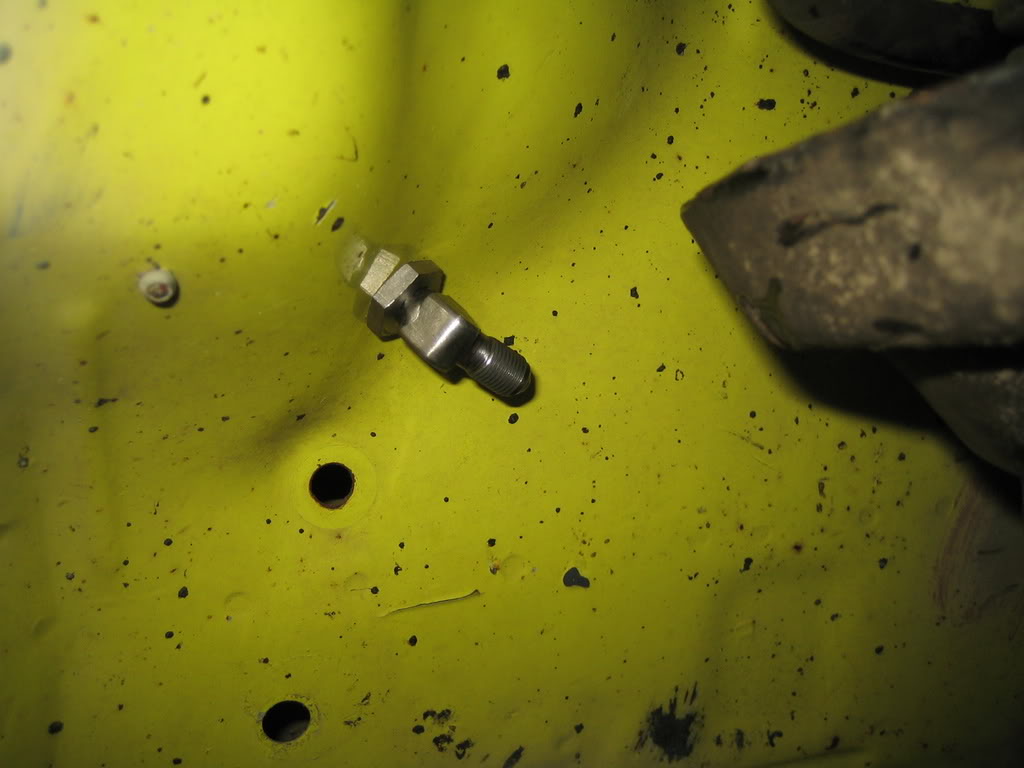
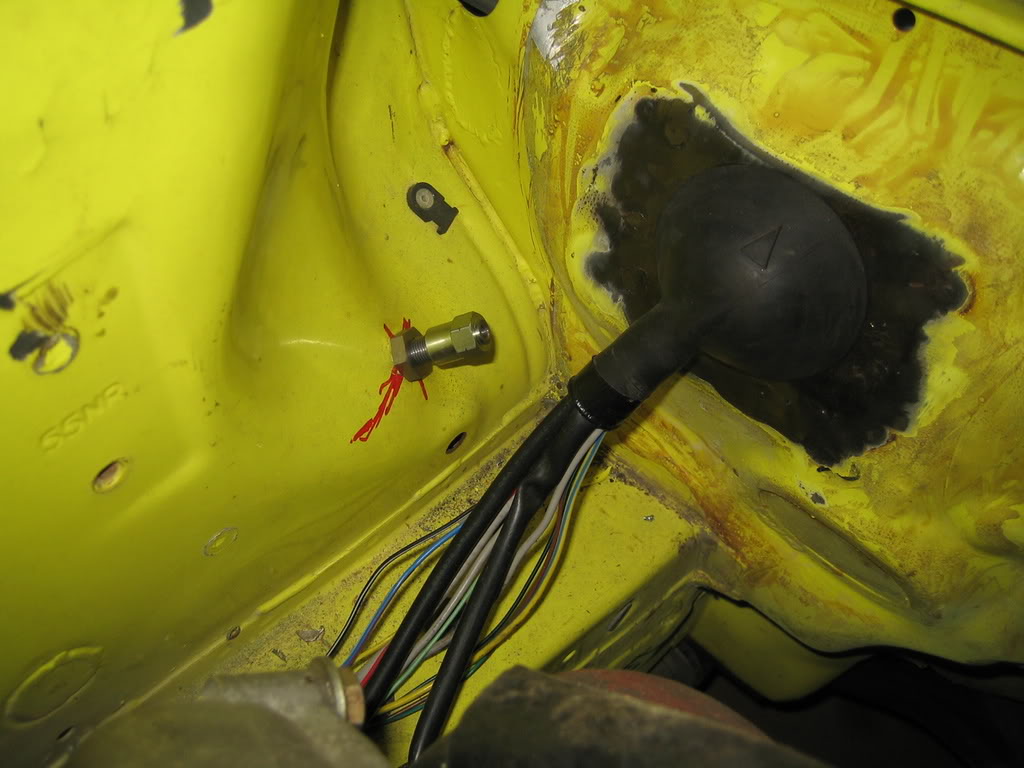
When changing the hubs I also put in the rightside brakeline adaptor in:
It should have larger bearings on the front ones, which is always nice.
Unfortunatly the front struts won't fit anymore:
After the wintertyres the car now has semi-slicks without having moved an inch:
When changing the hubs I also put in the rightside brakeline adaptor in:
 10 November 2008, 10:50 PM
#171


Fantastic build coming together 
I can see now why you have not painted the shell as yet... so much bespoke modding needed you would ruin it, still when you have it to a stage where you can strip and paint them assemble immediatly it should make a massive difference
I can see now why you have not painted the shell as yet... so much bespoke modding needed you would ruin it, still when you have it to a stage where you can strip and paint them assemble immediatly it should make a massive difference
12 November 2008, 04:50 PM
#172
Scooby Regular
Thread Starter
Join Date: Dec 2002
Posts: 458
Likes: 0
Received 0 Likes
on
0 Posts
Thanks m8!
There is still alot more bodywork to be done, much more than I have done sofar actually.
I can't wait to have the first layer of primer on it but at this point it looks far far away.
There is still alot more bodywork to be done, much more than I have done sofar actually.
I can't wait to have the first layer of primer on it but at this point it looks far far away.
12 November 2008, 04:51 PM
#173
Scooby Regular
Thread Starter
Join Date: Dec 2002
Posts: 458
Likes: 0
Received 0 Likes
on
0 Posts
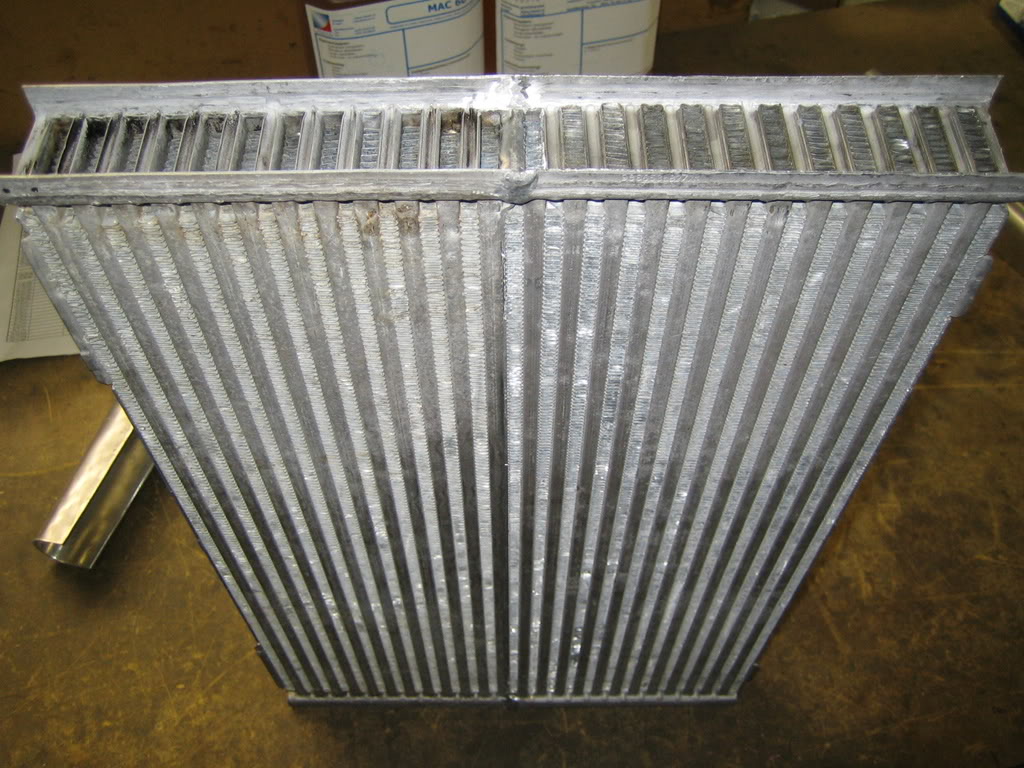
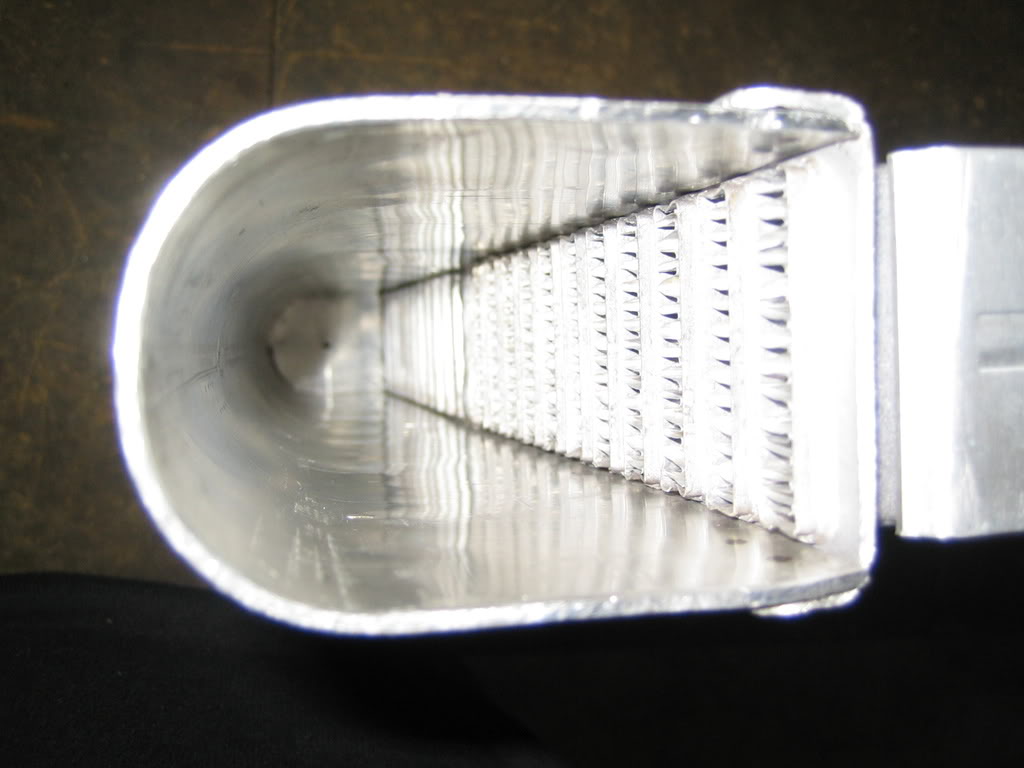
Today I had the IC core cleaned.
I wanted all the dirt n' grime out of it before welding up the endtanks.
So first it went into a degreasing bath and after that it had a few dips in an acidbath.
Took some pics from the acid bath, the fumes were not long life improving, I lost a few years today I think.
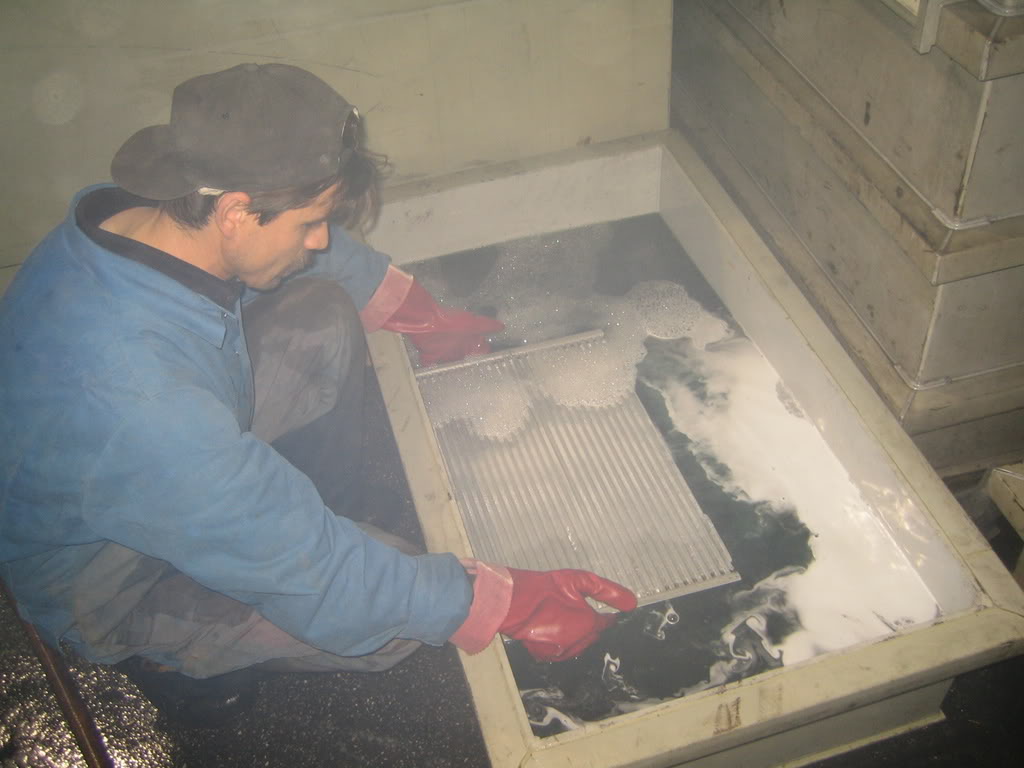
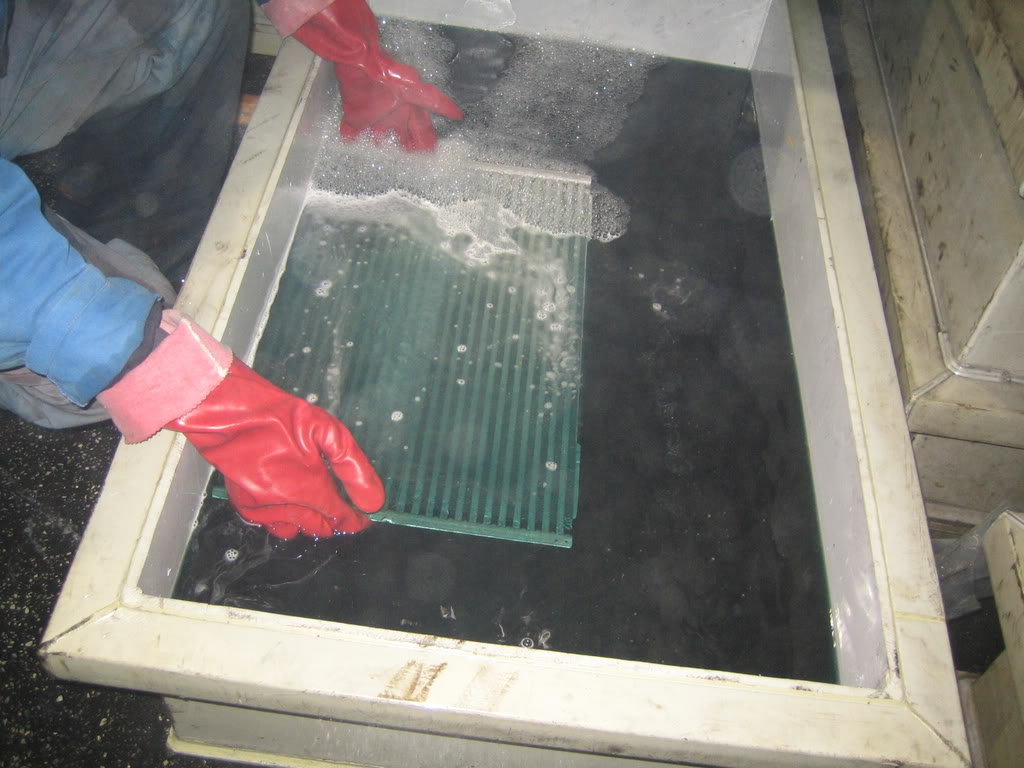
The brownish fumes came off the aluminum, you can see a bit in the second picture also.
When they put it on the box from out of the acid, there were big clouds of the stuff coming of the core, like it was vaporising.........which it probably was too.
They said it would be gone in 10 minutes....
Anyway, I think all of the dirt is out now.
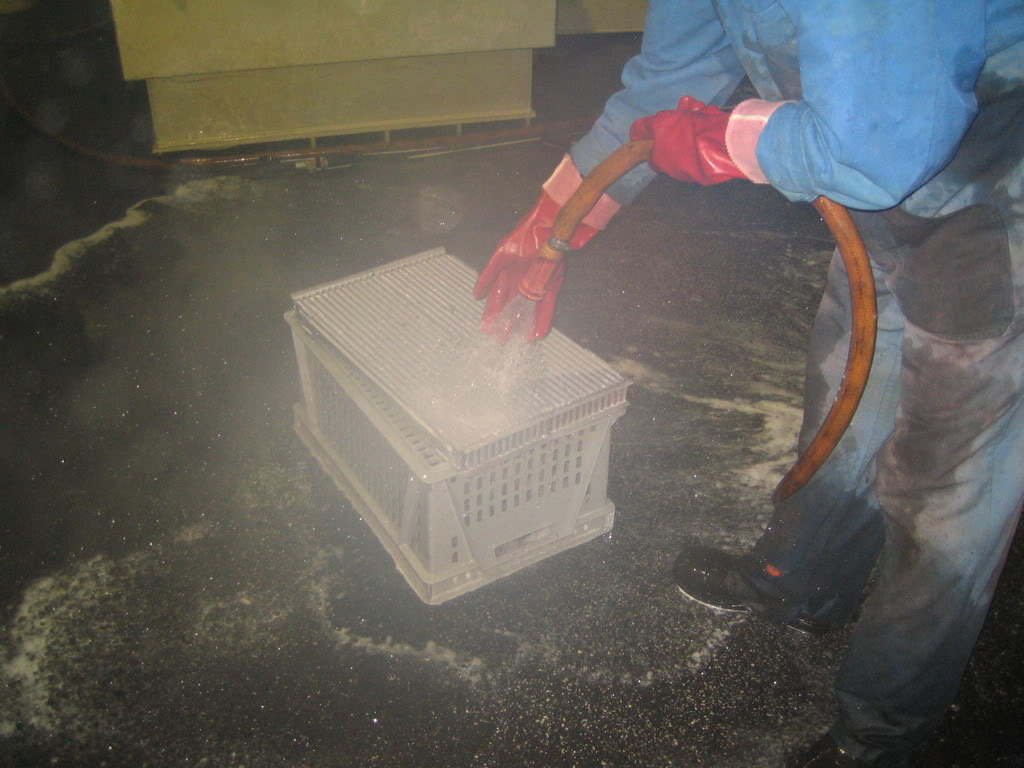
Now it looks like new!
I'll pick it up tommorow and maybe we can weld the endtanks on as well!
I wanted all the dirt n' grime out of it before welding up the endtanks.
So first it went into a degreasing bath and after that it had a few dips in an acidbath.
Took some pics from the acid bath, the fumes were not long life improving, I lost a few years today I think.
The brownish fumes came off the aluminum, you can see a bit in the second picture also.
When they put it on the box from out of the acid, there were big clouds of the stuff coming of the core, like it was vaporising.........which it probably was too.
They said it would be gone in 10 minutes....
Anyway, I think all of the dirt is out now.
Now it looks like new!
I'll pick it up tommorow and maybe we can weld the endtanks on as well!
14 November 2008, 07:56 PM
#174
Scooby Regular
Thread Starter
Join Date: Dec 2002
Posts: 458
Likes: 0
Received 0 Likes
on
0 Posts
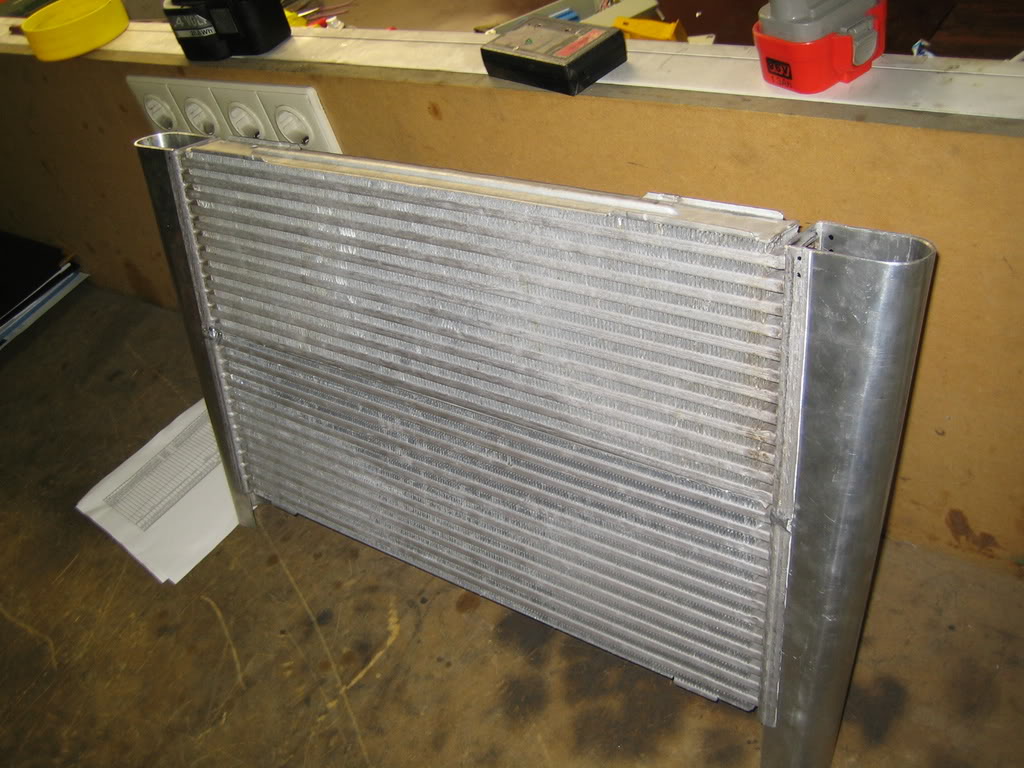
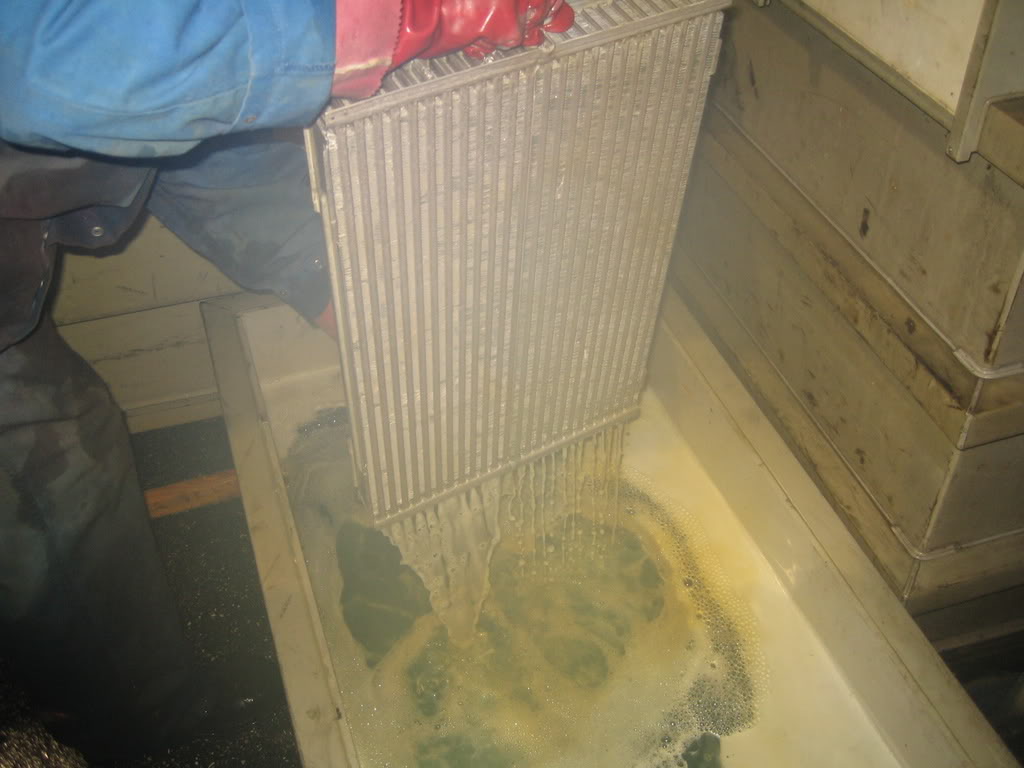
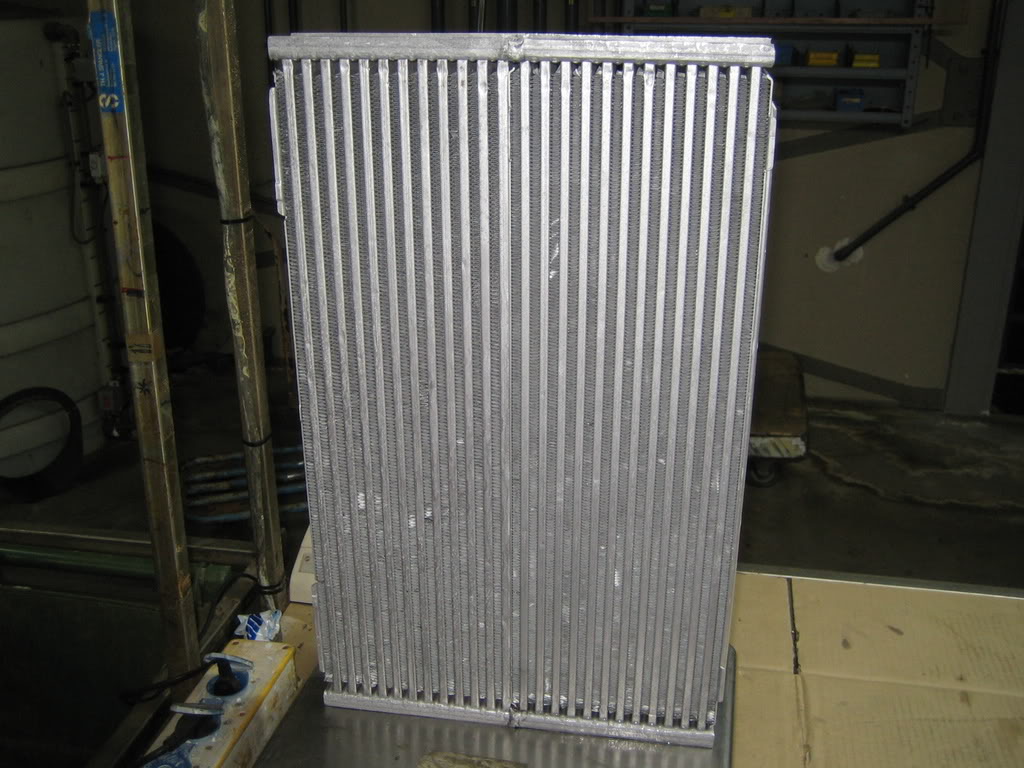
Picked up the cleaned core yesterday, looks nice and clean now.
Before:
After:
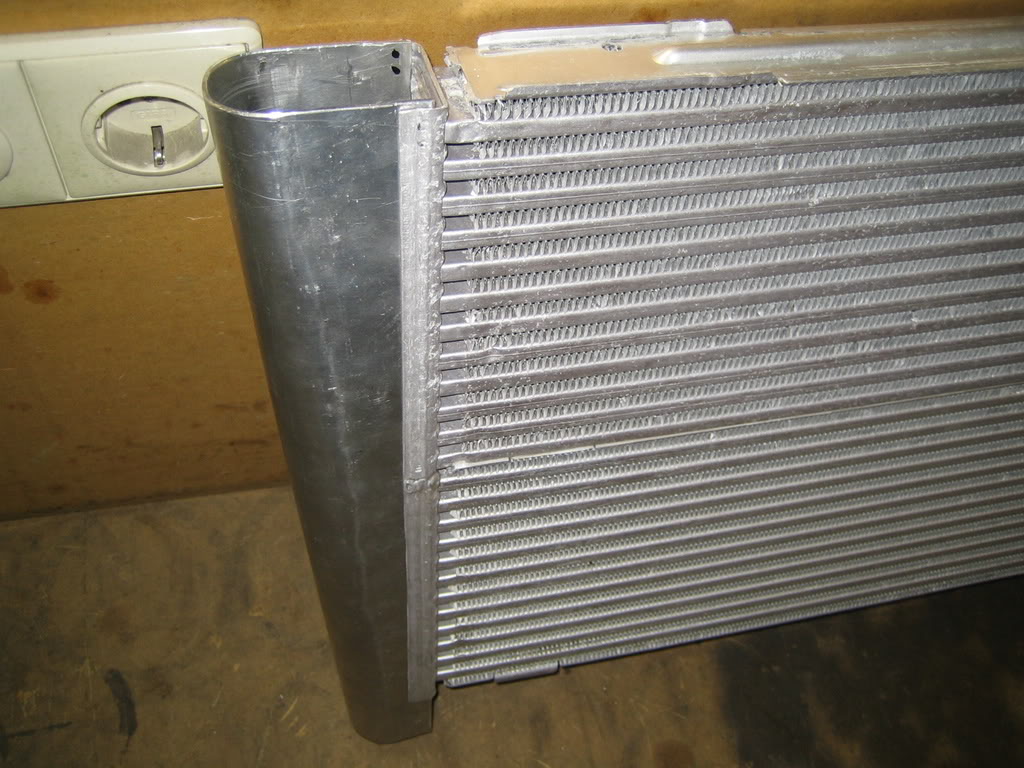
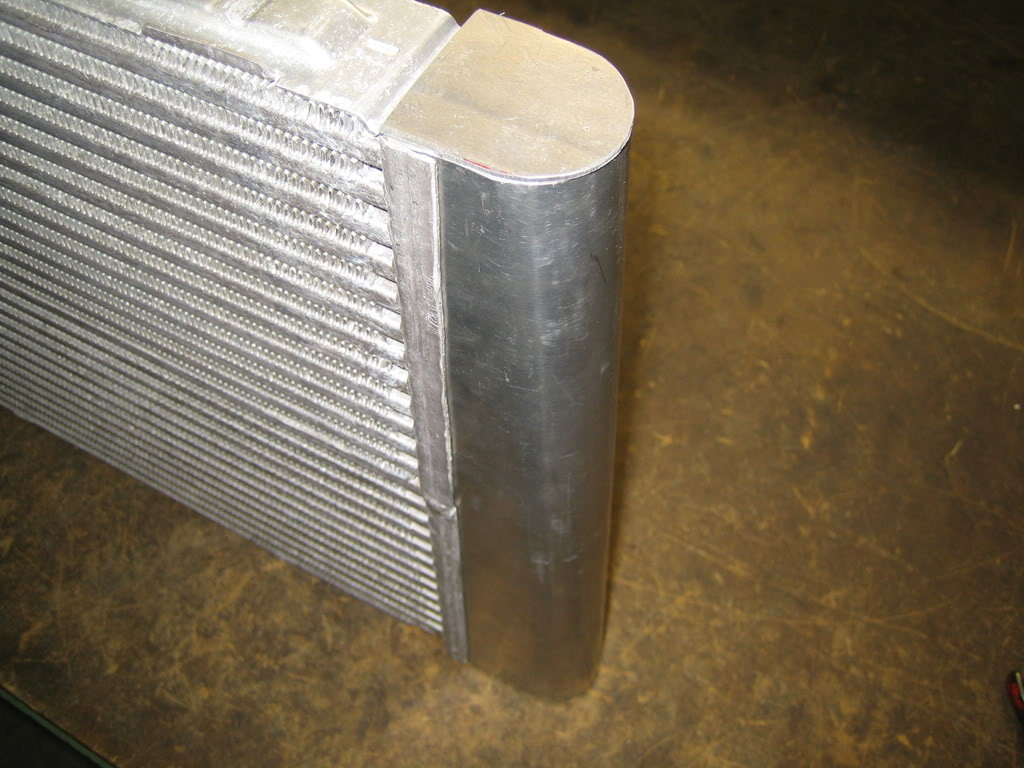
So today the tanks had to be welded on so I started with cutting them to the correct length.
From the leftover pieces I created the bottom plates:

Before:
After:
So today the tanks had to be welded on so I started with cutting them to the correct length.
From the leftover pieces I created the bottom plates:
14 November 2008, 07:57 PM
#175
Scooby Regular
Thread Starter
Join Date: Dec 2002
Posts: 458
Likes: 0
Received 0 Likes
on
0 Posts
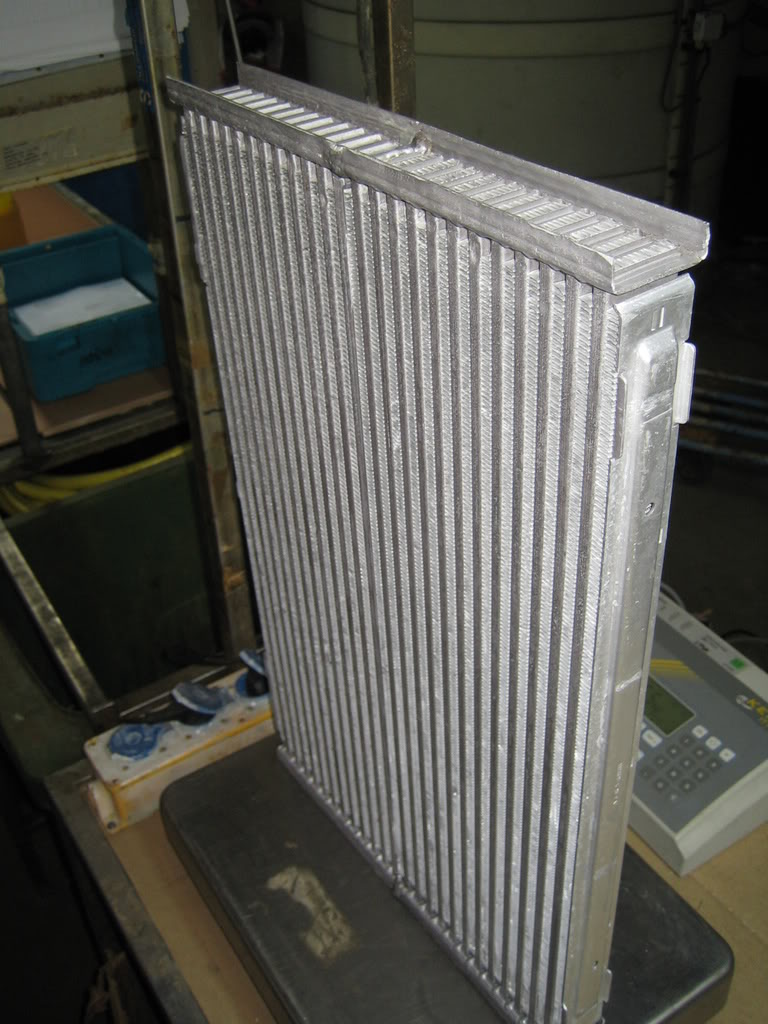
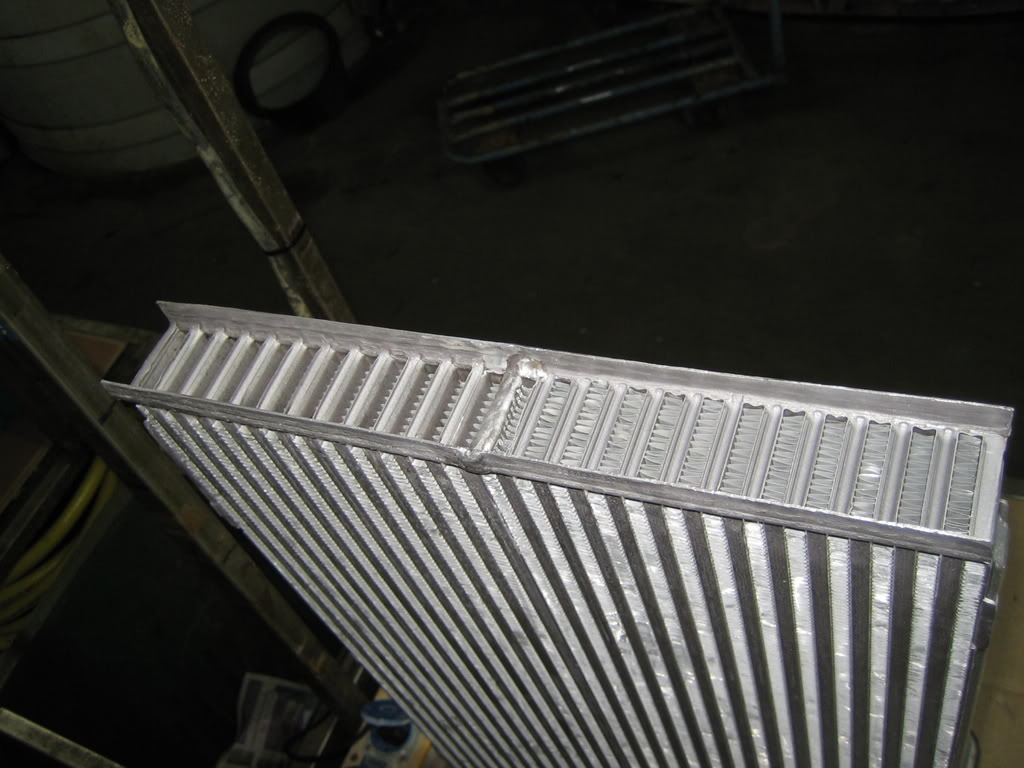
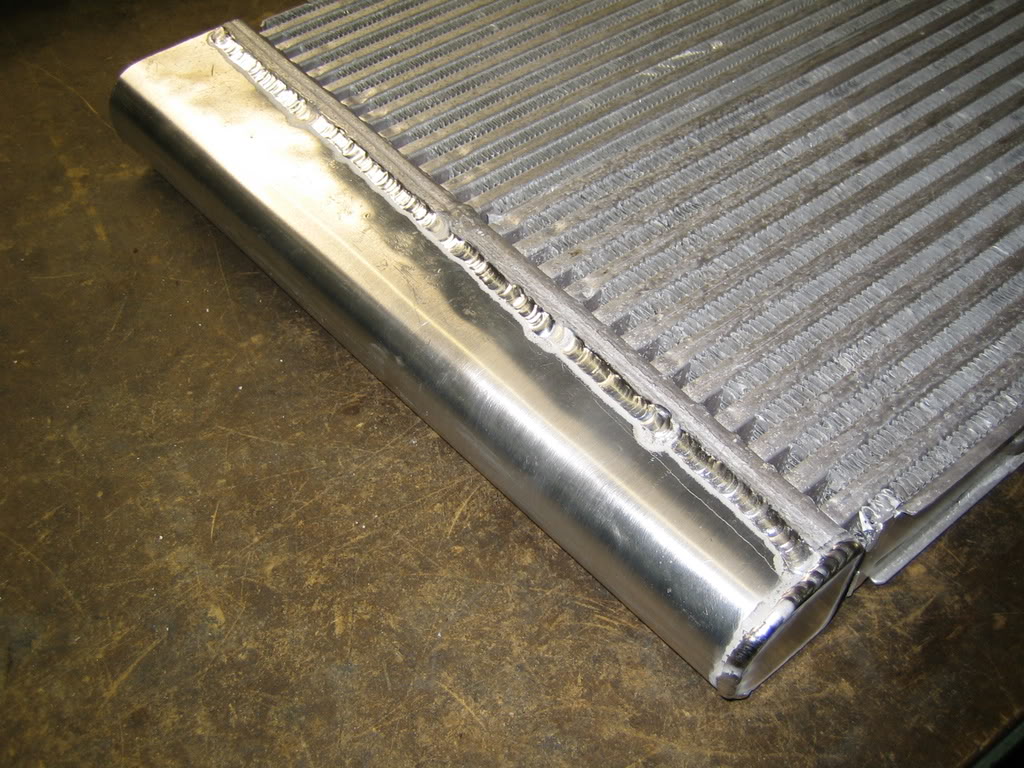
The welds will be treated afterwards but I leave them like this untill eveything is welded on and it is tested.
I must say I'm pretty pleased with it, and I really, really, really hope it doesn't leak.......
Inside:
Also done a bit of brakeline again, I got new adaptors for theinner fender and I wasn't satisfied with the last version so I made a new one again.
Now I'm happy:
Started with a dummy for the right side, looking good sofar:
18 November 2008, 08:49 PM
#178
Scooby Regular
Thread Starter
Join Date: Dec 2002
Posts: 458
Likes: 0
Received 0 Likes
on
0 Posts
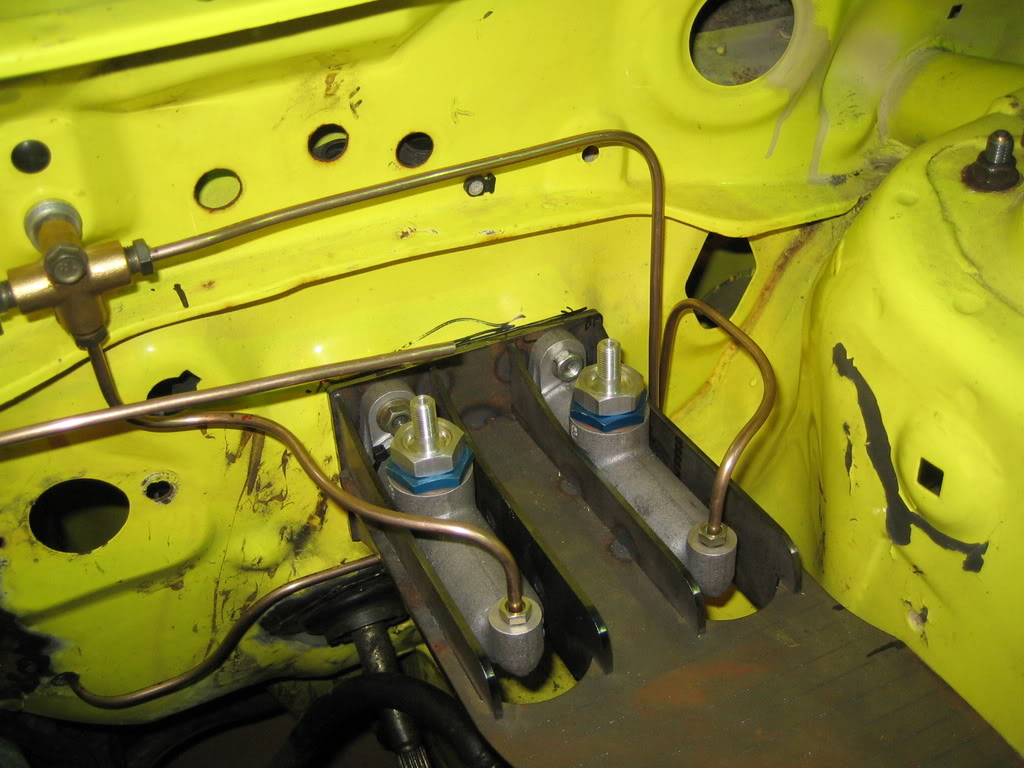
The brake lines on the front are done!
Fabricated the last part today, tomorrow we start with the rear:

On a USDM tank there is some kind of enviremental system, I don't need that.
So my friend Alex lasered some nice aluminum plates.
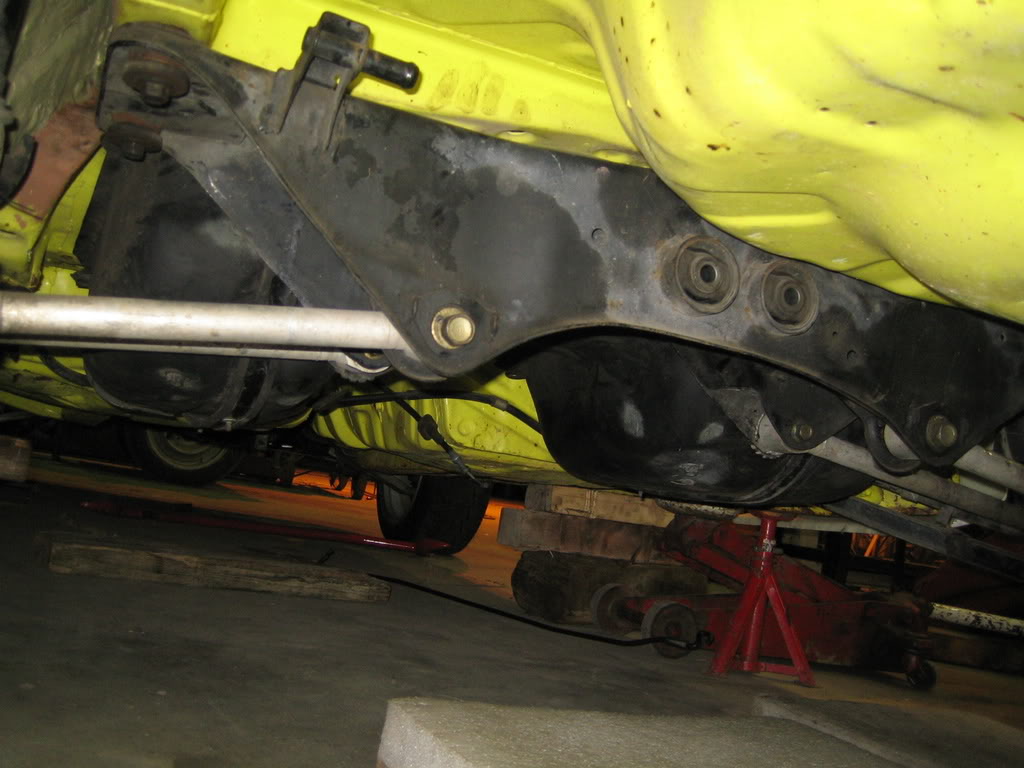
They will be anodized in a later stage, but because I need the tank under the car for the next step I tried them on.
Before:
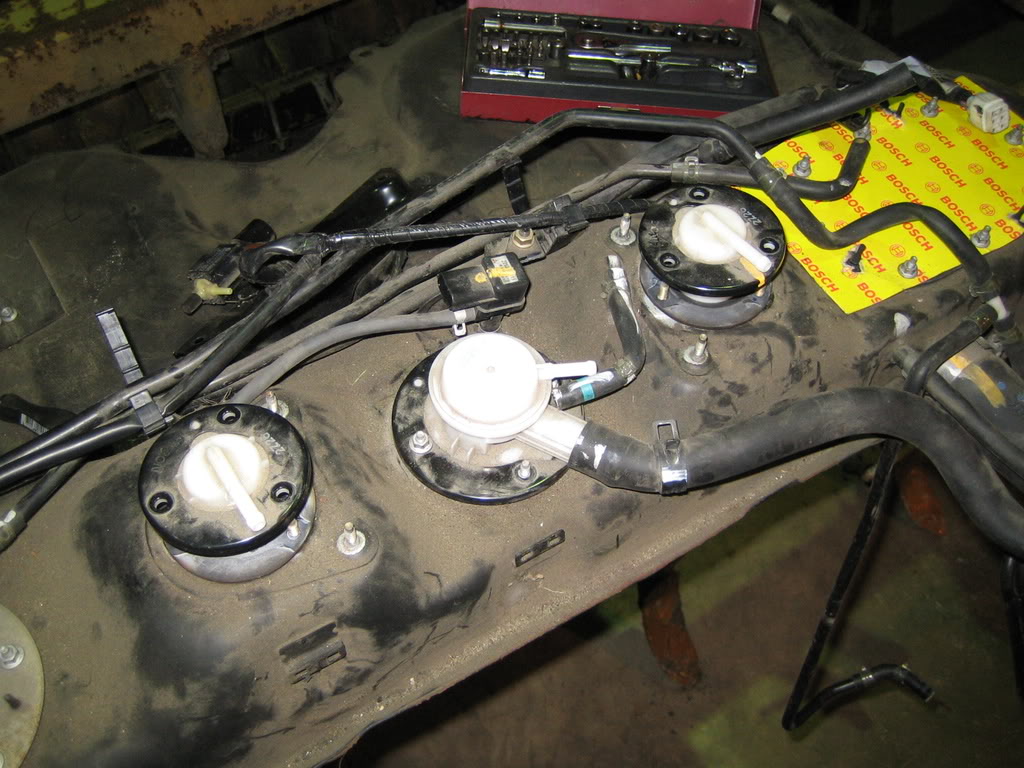
After:
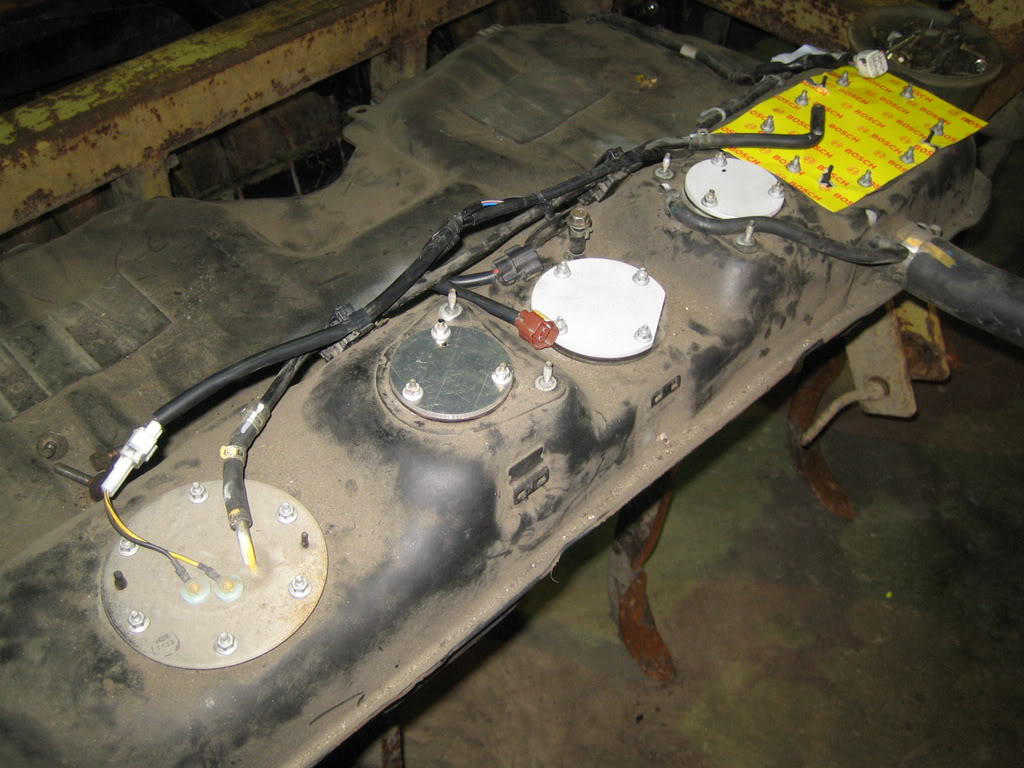
And while we were at it:
Tomorrow more!
Fabricated the last part today, tomorrow we start with the rear:
On a USDM tank there is some kind of enviremental system, I don't need that.
So my friend Alex lasered some nice aluminum plates.
They will be anodized in a later stage, but because I need the tank under the car for the next step I tried them on.
Before:
After:
And while we were at it:
Tomorrow more!
 19 November 2008, 11:03 PM
#180
Scooby Regular
Thread Starter
Join Date: Dec 2002
Posts: 458
Likes: 0
Received 0 Likes
on
0 Posts
Well, here is some more!
We have done another small step today, again my good friend Alex dropped by to give mental guidance.
But I had already done some preparations at work.
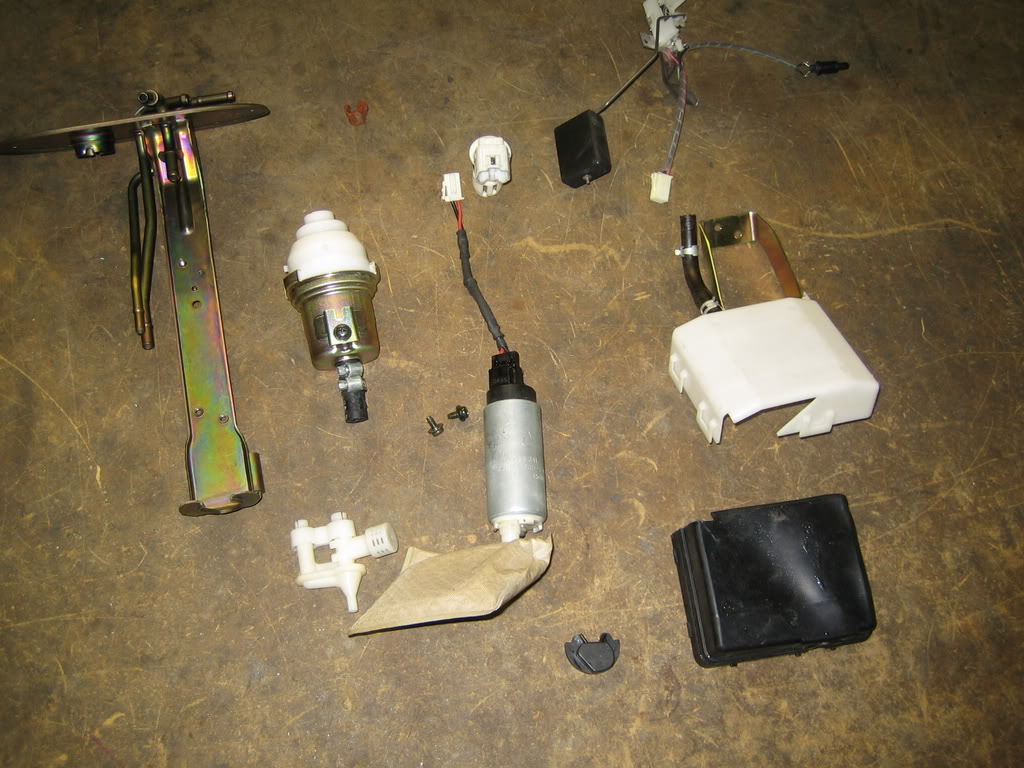
First I stripped the feulpump assembly, I'm going to weld parts on it so it has be clean.
Before:
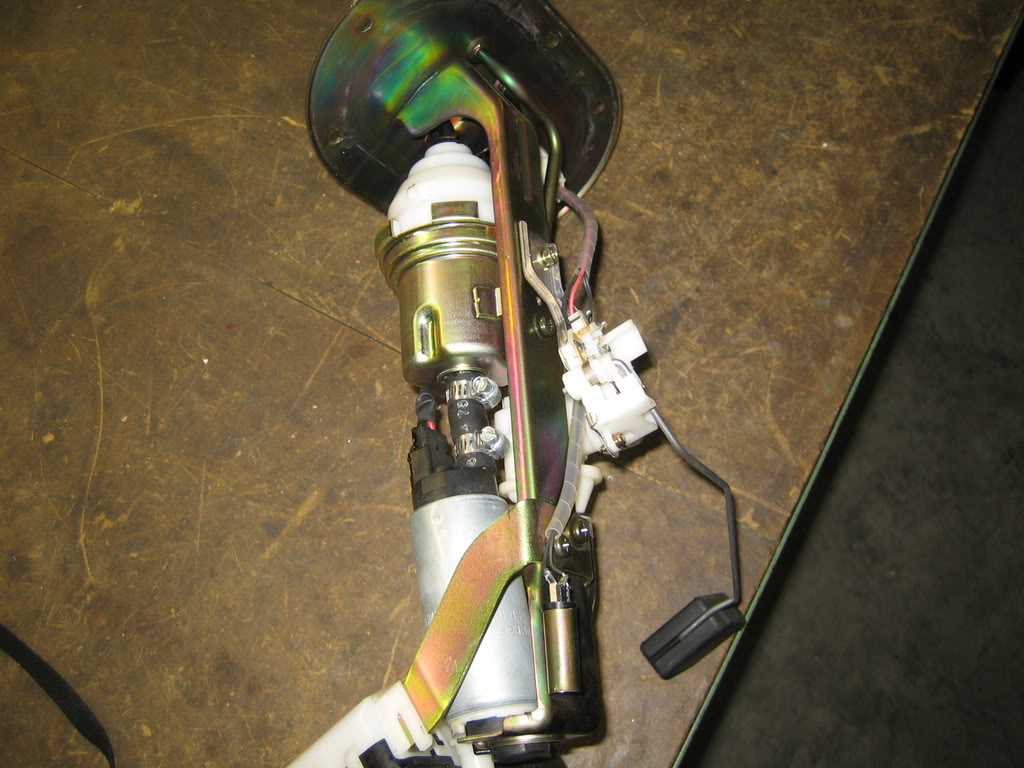
After:
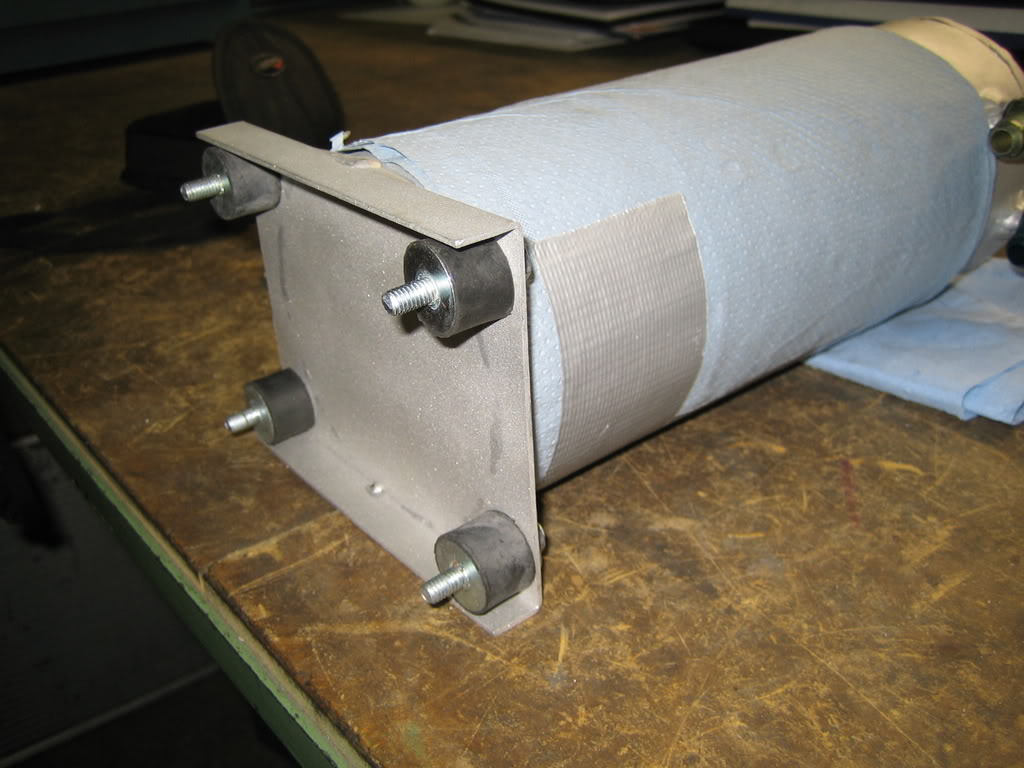
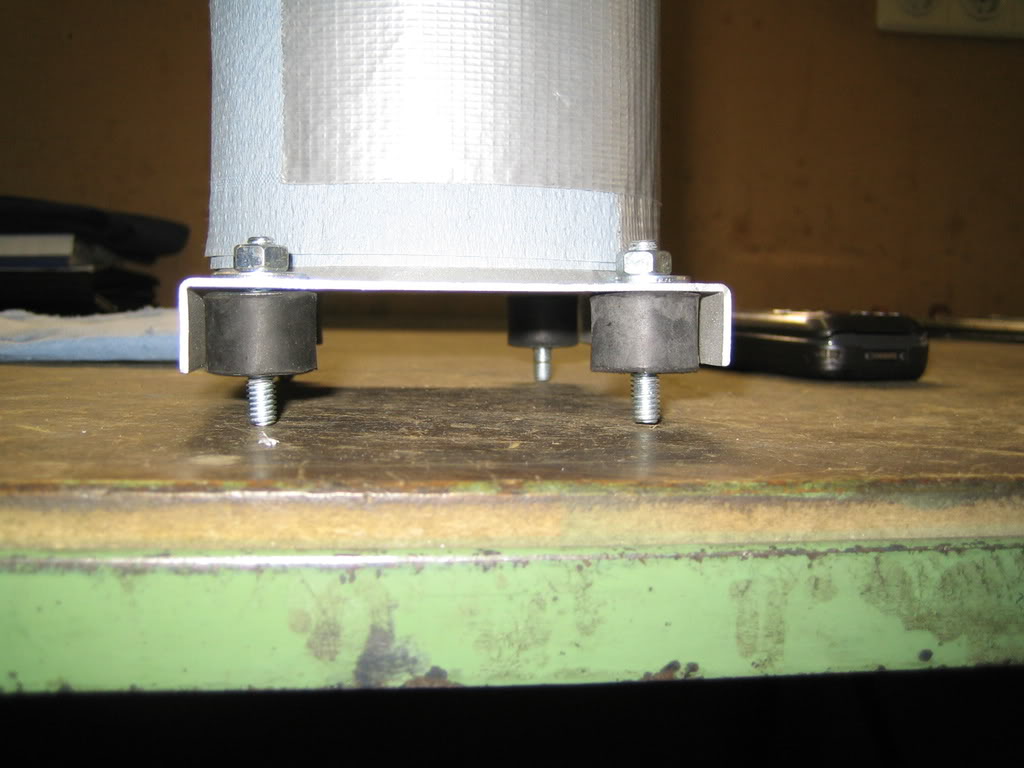
The other thing I did was put the dampers on the surgetank:
We have done another small step today, again my good friend Alex dropped by to give mental guidance.
But I had already done some preparations at work.
First I stripped the feulpump assembly, I'm going to weld parts on it so it has be clean.
Before:
After:
The other thing I did was put the dampers on the surgetank: