Prodrive Grp.N. chassis street build
 18 January 2008, 08:44 PM
#61
Scooby Regular
Thread Starter

Join Date: Dec 2002
Posts: 458
Likes: 0
Received 0 Likes
on
0 Posts
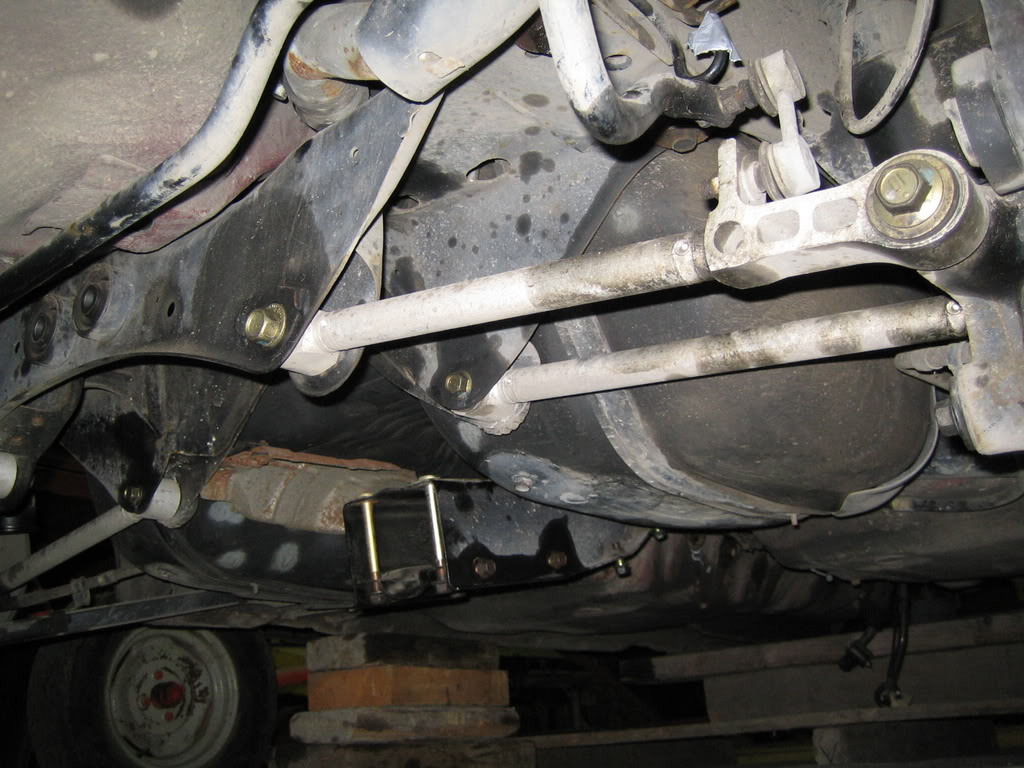
Teusday I fitted the gearbox subframe and the rear of the front wishbones.
I thought the thread was rusted so brought some tools to repair but it turned out that the threads were good enough to use after sitting outside for quite some time.
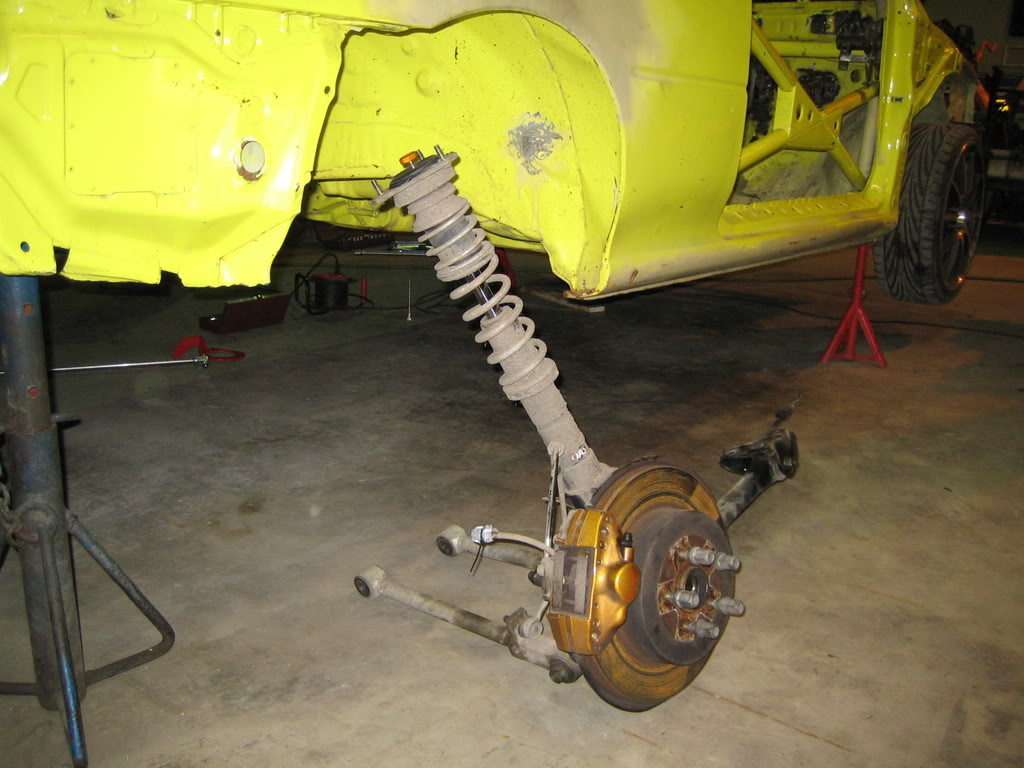
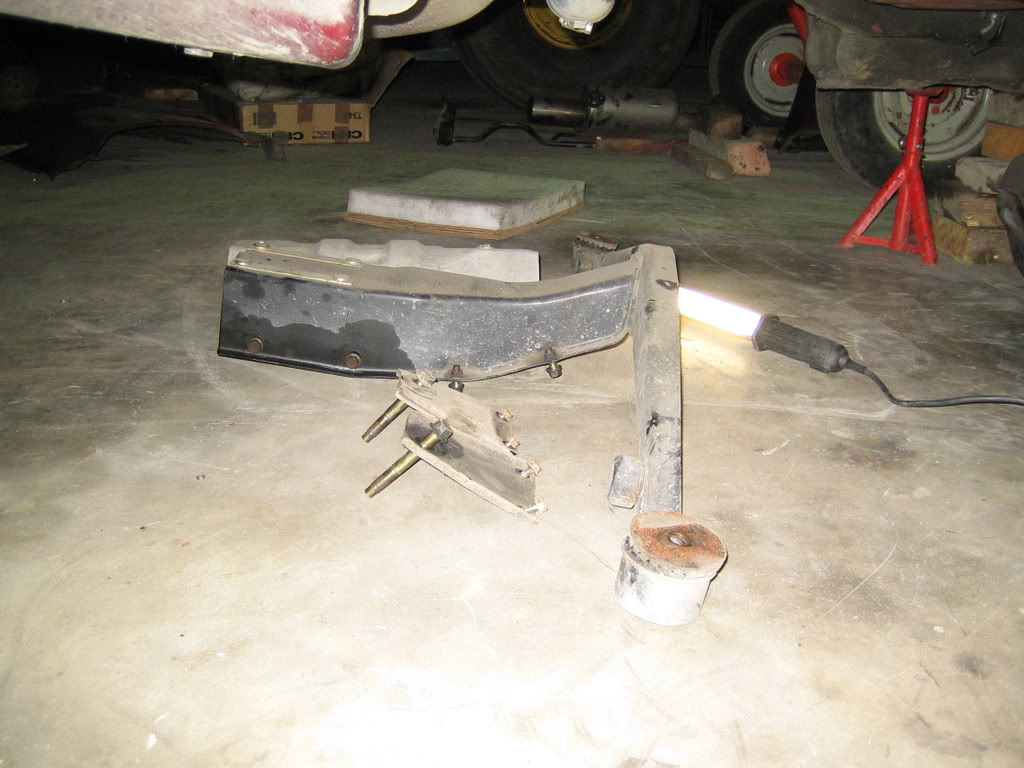
I also removed the rear diff and axels:
Yesterday we did alot more thankfully. 8)
We changed the whole rear suspension.
Remove from the donor:
First of 3 parts:
View on the front:

I thought the thread was rusted so brought some tools to repair but it turned out that the threads were good enough to use after sitting outside for quite some time.
I also removed the rear diff and axels:
Yesterday we did alot more thankfully. 8)
We changed the whole rear suspension.
Remove from the donor:
First of 3 parts:
View on the front:
 18 January 2008, 08:46 PM
#63
Scooby Regular
Thread Starter
Join Date: Dec 2002
Posts: 458
Likes: 0
Received 0 Likes
on
0 Posts
Later that evening 2 friends dropped by, Bjorn and Tim.
Tim can weld plastic and my dashbord has quite some welding to be done to.
Working together:
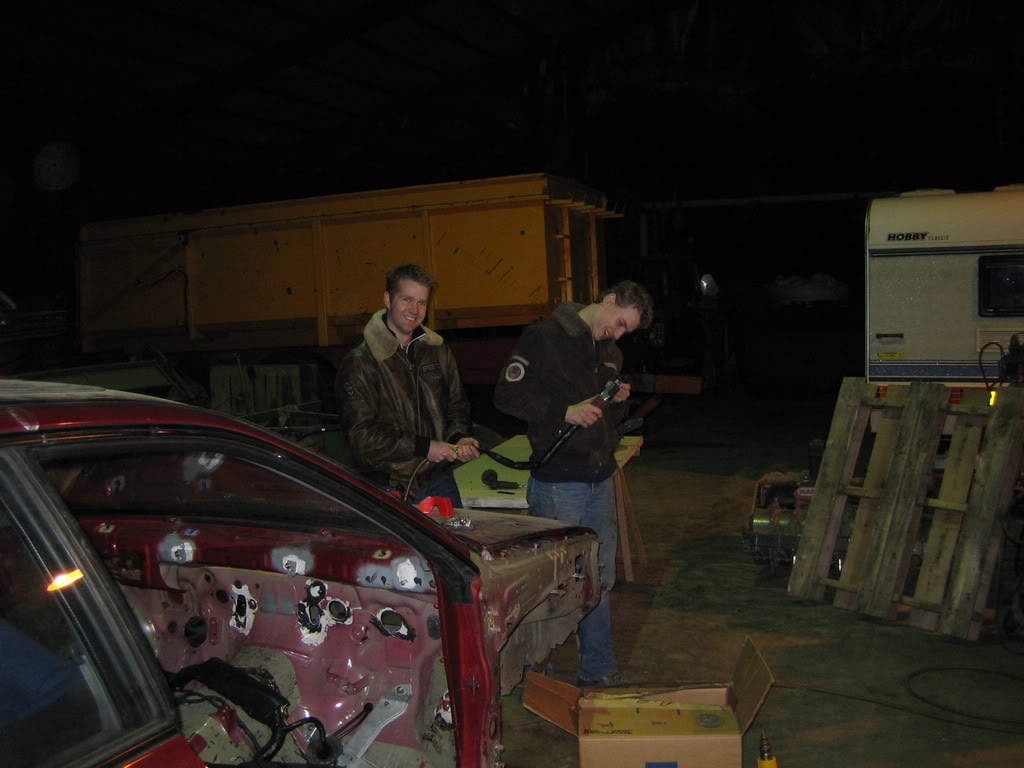
Fitting and measuring:
More next time!
Tim can weld plastic and my dashbord has quite some welding to be done to.
Working together:
Fitting and measuring:
More next time!
19 January 2008, 07:12 PM
#64
Scooby Regular

Join Date: Jan 2008
Location: Switzerland / Germany
Posts: 108
Likes: 0
Received 0 Likes
on
0 Posts
simply an incredible project!!
Impressive!! will be happy to take a close look on the project
You come from Netherlands? where you will drive this car? it's only a track car? as a lot of people from NL come on the ring... if you will be one day on the ring with this car let me know, will be happy to take a look :P
Impressive!! will be happy to take a close look on the project
You come from Netherlands? where you will drive this car? it's only a track car? as a lot of people from NL come on the ring... if you will be one day on the ring with this car let me know, will be happy to take a look :P
22 January 2008, 09:46 PM
#66
Scooby Regular
Thread Starter
Join Date: Dec 2002
Posts: 458
Likes: 0
Received 0 Likes
on
0 Posts
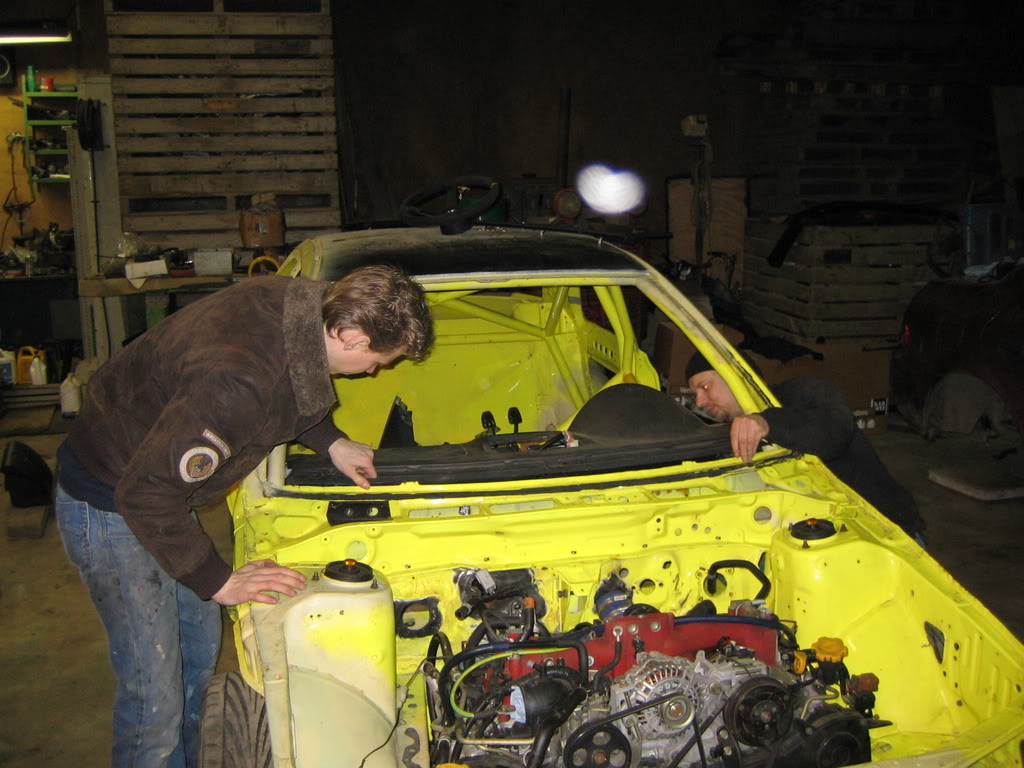
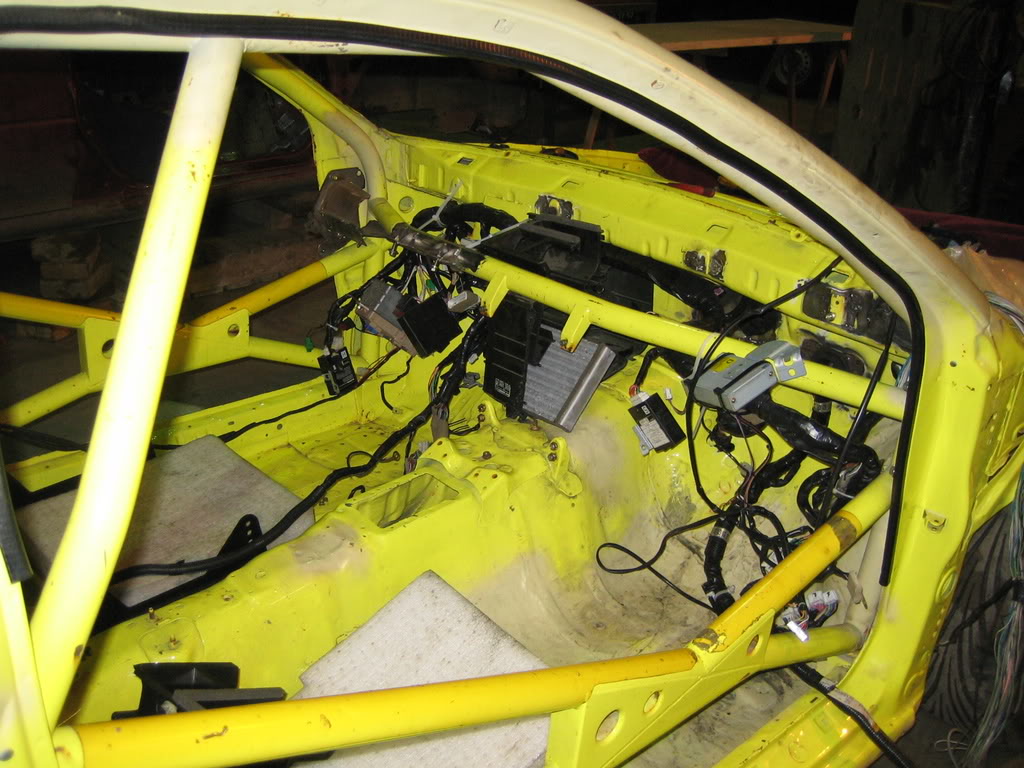
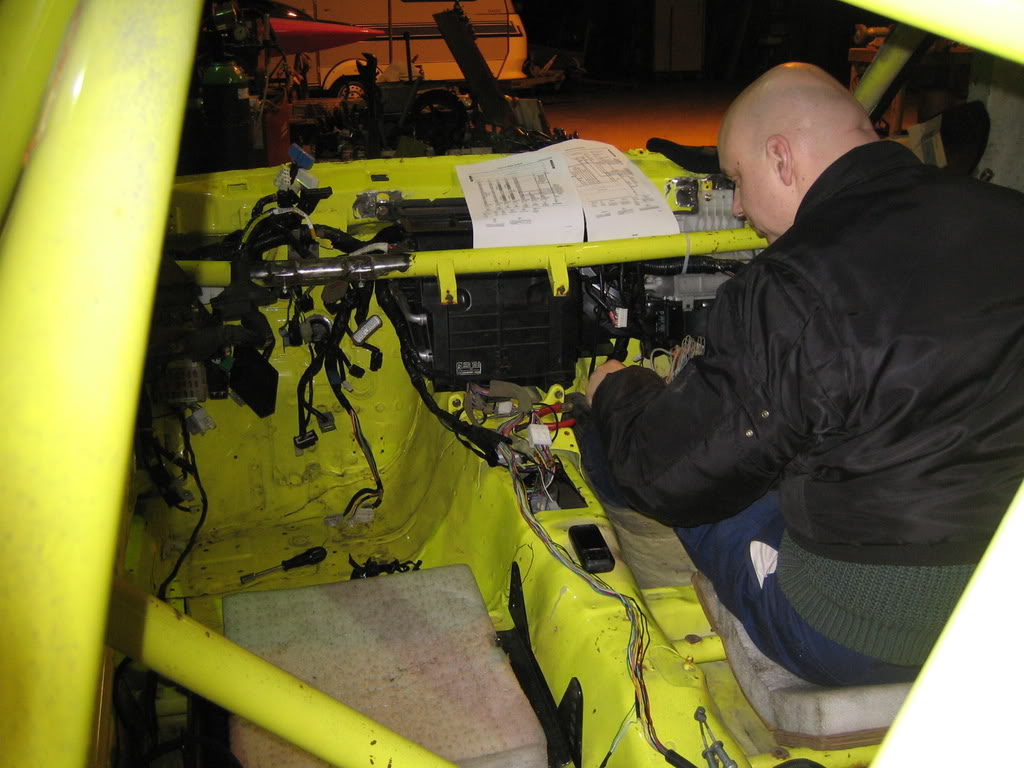
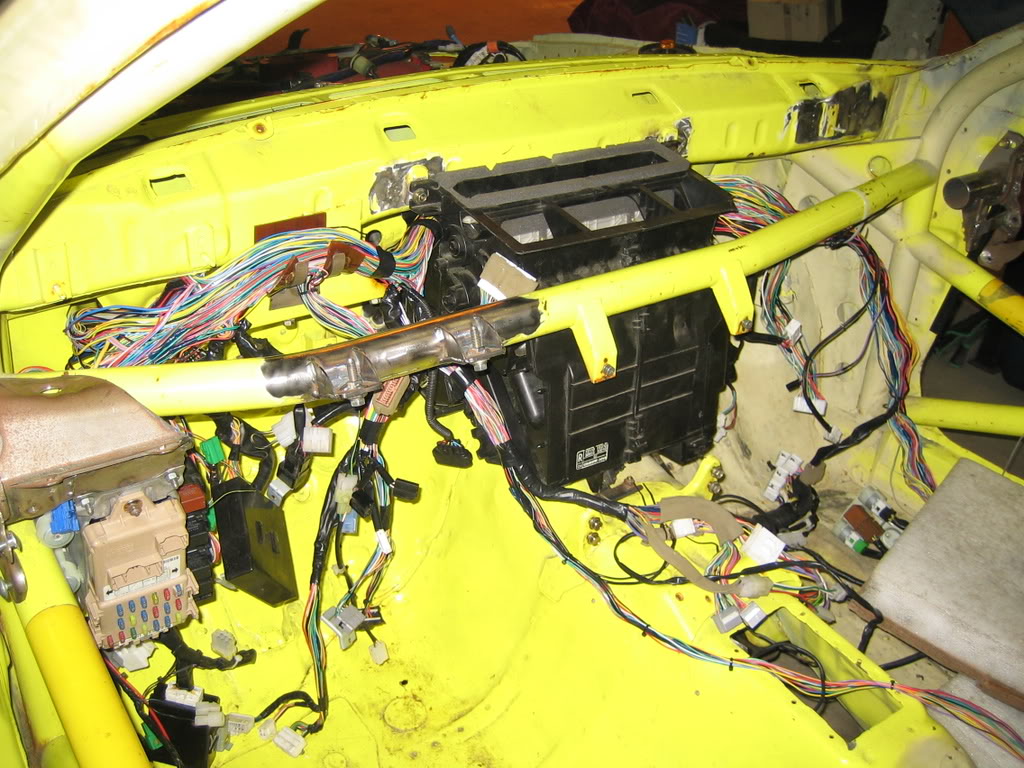
Today I tried the dash loom in.
I had some doubts on wether it would fit or not, mainly the heater could give some problems.
GL very empty:
The big question, will the heater fit with the loom inside?
Well, part 1 is in:
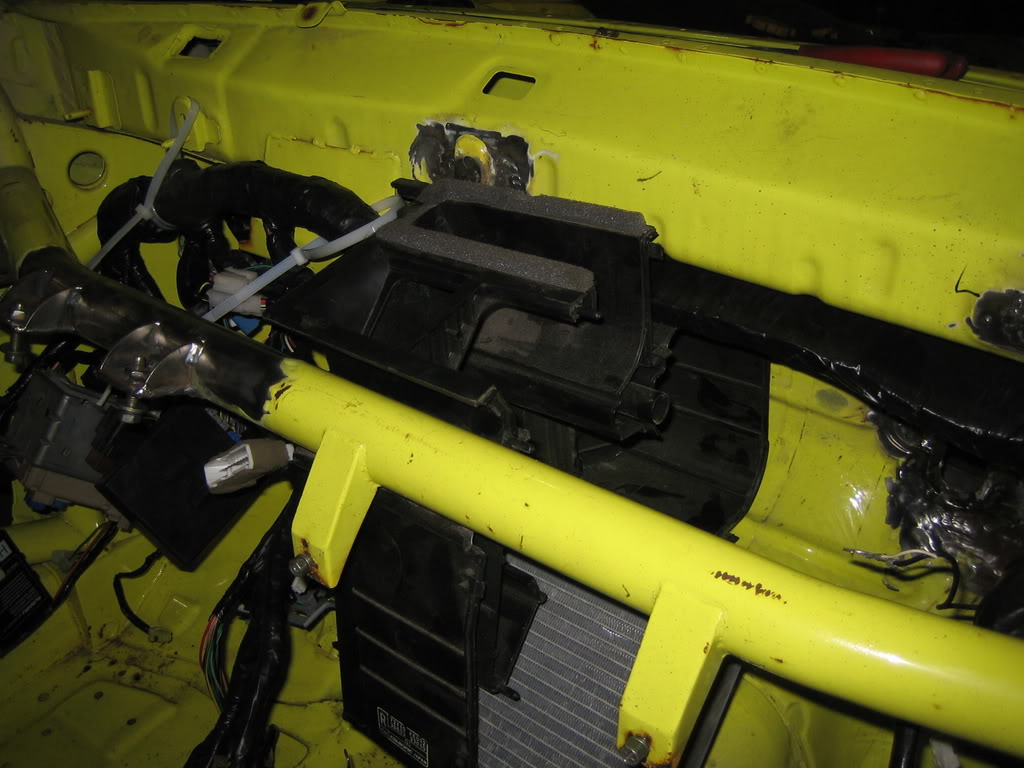
Part 2 is in:
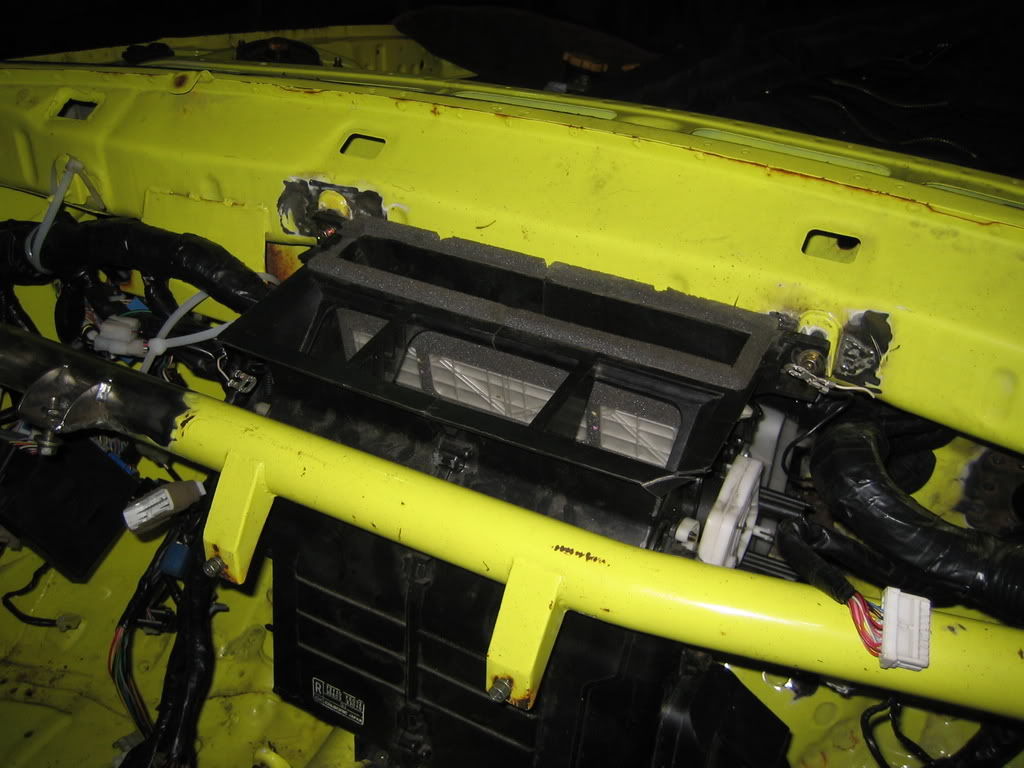
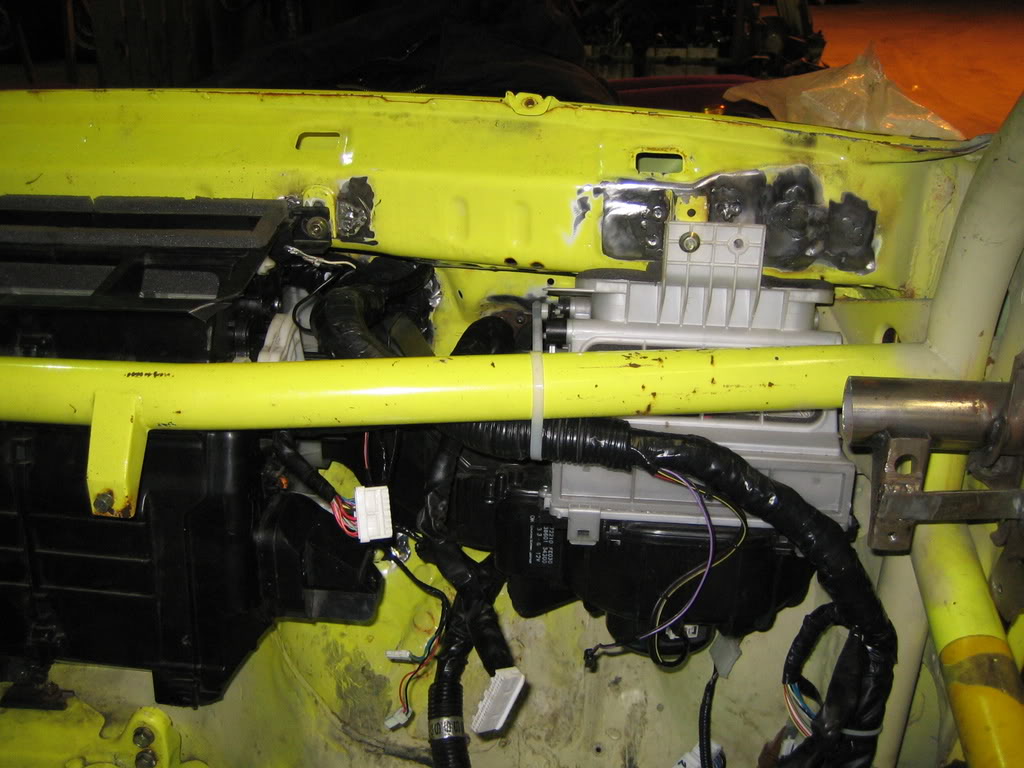
En waddayaknow, the blower fits also!!:
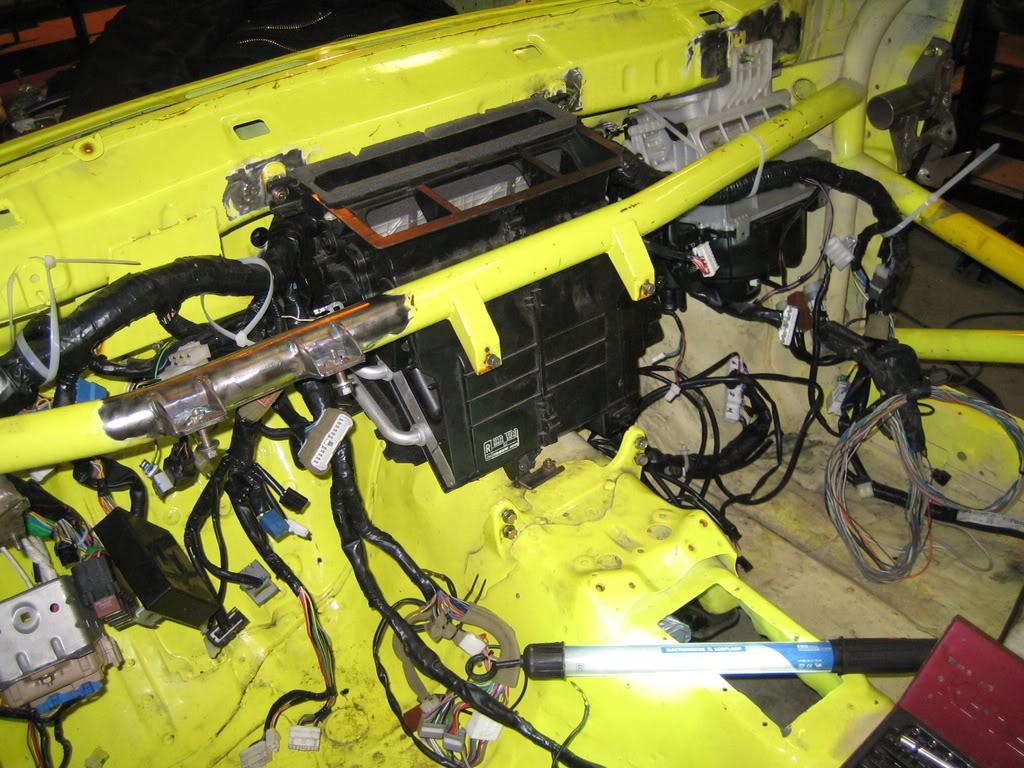
Now I'm going to look if I can cut some more wire from the loom, that will save some weight and make it a bit easier to fix.
I had some doubts on wether it would fit or not, mainly the heater could give some problems.
GL very empty:
The big question, will the heater fit with the loom inside?
Well, part 1 is in:
Part 2 is in:
En waddayaknow, the blower fits also!!:
Now I'm going to look if I can cut some more wire from the loom, that will save some weight and make it a bit easier to fix.
24 January 2008, 06:49 PM
#67
Scooby Regular
Join Date: Jan 2008
Location: Switzerland / Germany
Posts: 108
Likes: 0
Received 0 Likes
on
0 Posts
 so want to see this project finished already !!
very cool project!
i will start soon my '08 project too but unfortunately will be not a scooby this year
 27 January 2008, 05:51 PM
#68
Scooby Regular
Thread Starter
Join Date: Dec 2002
Posts: 458
Likes: 0
Received 0 Likes
on
0 Posts
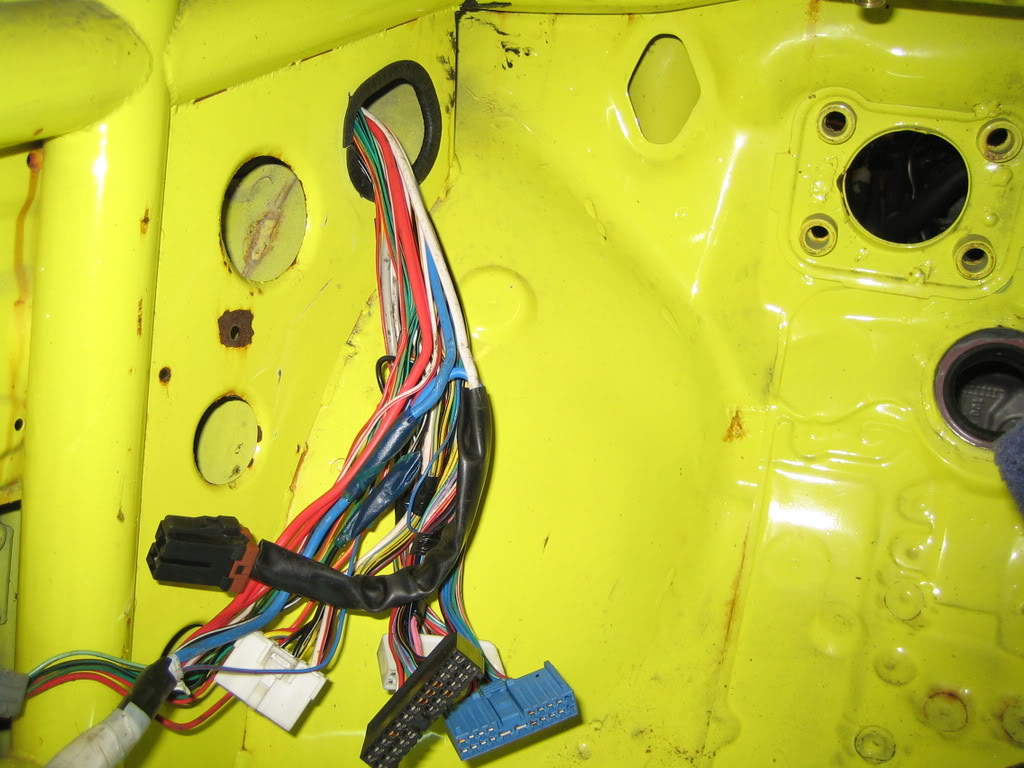
This week I addressed the loom.
There are 2 main looms, one under the dash and one running from the dash to the engine on the left hand side of the enginebay under the fender.
On the right side of the engine bay there is a loom also, this one consist of 96% ABS wiring, only 2 wires are for the blinkers.
Because of the cage and therefore even less space available between the heater and chassis I wanted to get rid of the ABS wiring, as I won't be using it anyway.
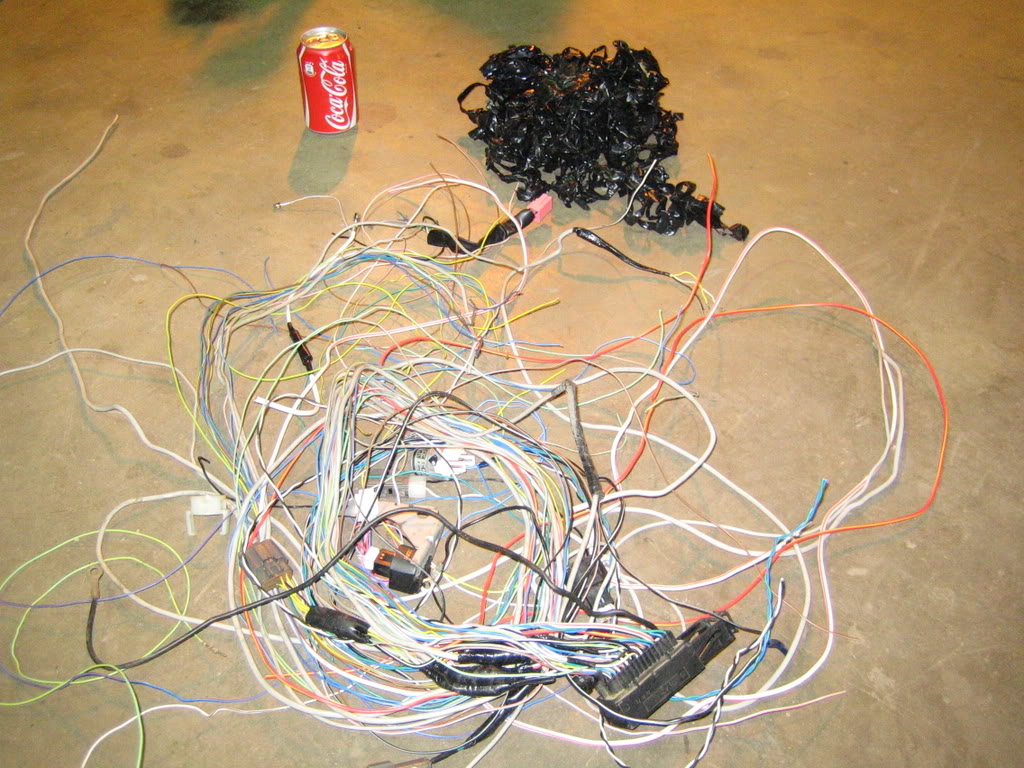
So I spent this week cutting the loom and researching the wiring diagrams.
Today I finished cutting and this coming week I will install the cable as is and reroute it so it fits nicely and without stres.
Then I will tiewrap it in place and tape it shut, resulting in a loom that won't scrape anywhere and is fits stressless between all the components.
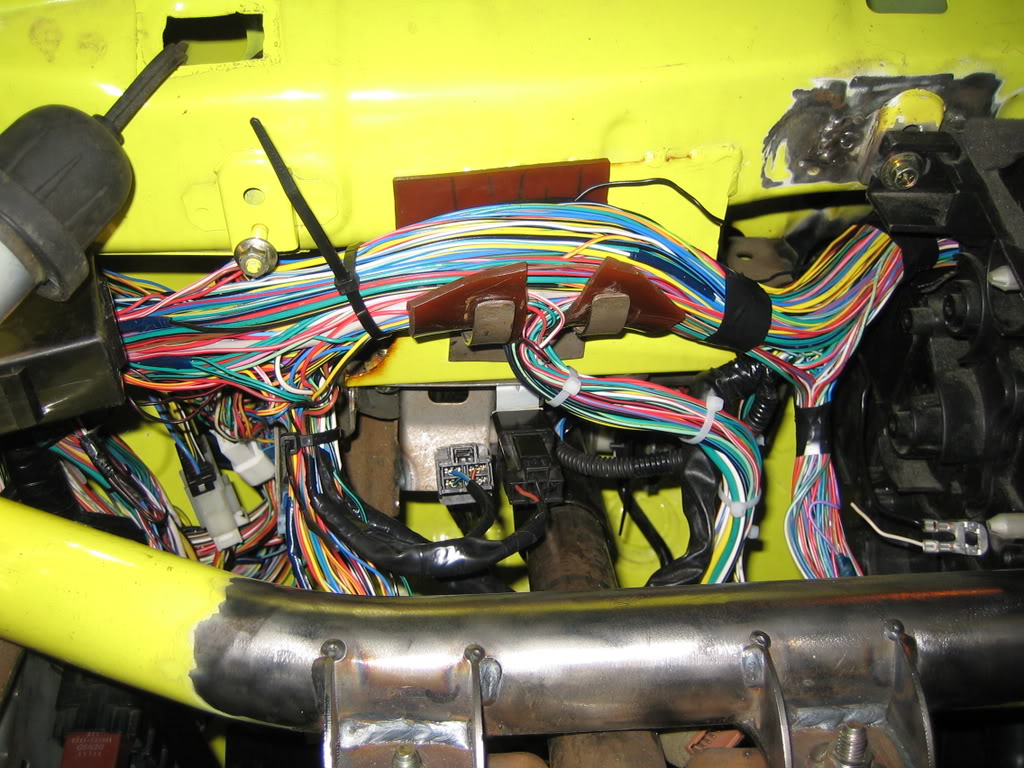
Starting with diagrams in reach :
Chaos to everyone who doesn't where everything goes, so that's everyone but my I guess
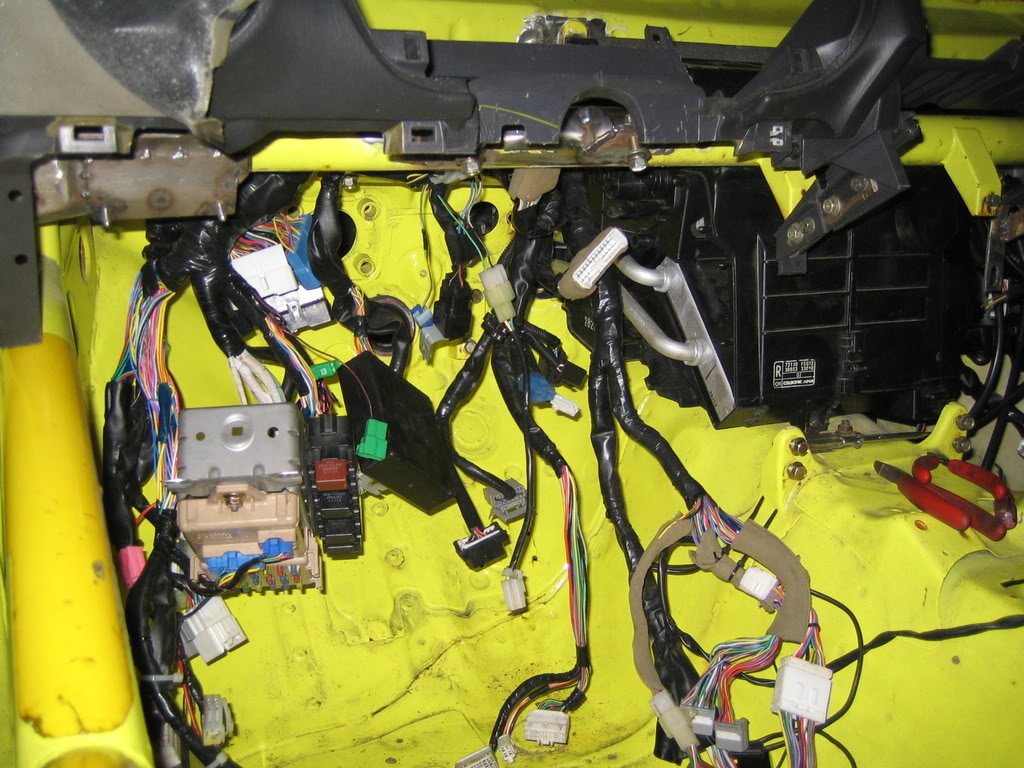
ABS wiring:

This is how the put together wiring t the factory, no welding, cold fusion rules :
There are 2 main looms, one under the dash and one running from the dash to the engine on the left hand side of the enginebay under the fender.
On the right side of the engine bay there is a loom also, this one consist of 96% ABS wiring, only 2 wires are for the blinkers.
Because of the cage and therefore even less space available between the heater and chassis I wanted to get rid of the ABS wiring, as I won't be using it anyway.
So I spent this week cutting the loom and researching the wiring diagrams.
Today I finished cutting and this coming week I will install the cable as is and reroute it so it fits nicely and without stres.
Then I will tiewrap it in place and tape it shut, resulting in a loom that won't scrape anywhere and is fits stressless between all the components.
Starting with diagrams in reach :
Chaos to everyone who doesn't where everything goes, so that's everyone but my I guess
ABS wiring:
This is how the put together wiring t the factory, no welding, cold fusion rules :
27 January 2008, 05:53 PM
#70
Scooby Regular
Thread Starter
Join Date: Dec 2002
Posts: 458
Likes: 0
Received 0 Likes
on
0 Posts
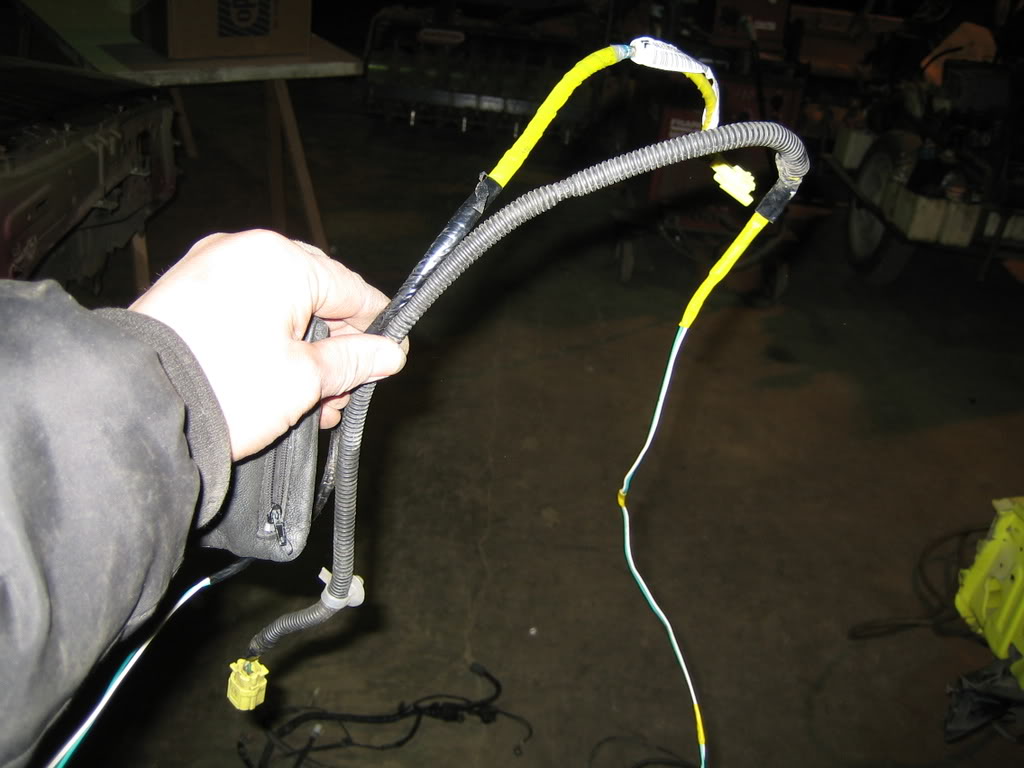
The result:
Tim, a friend of mine, was working on the dashboard:
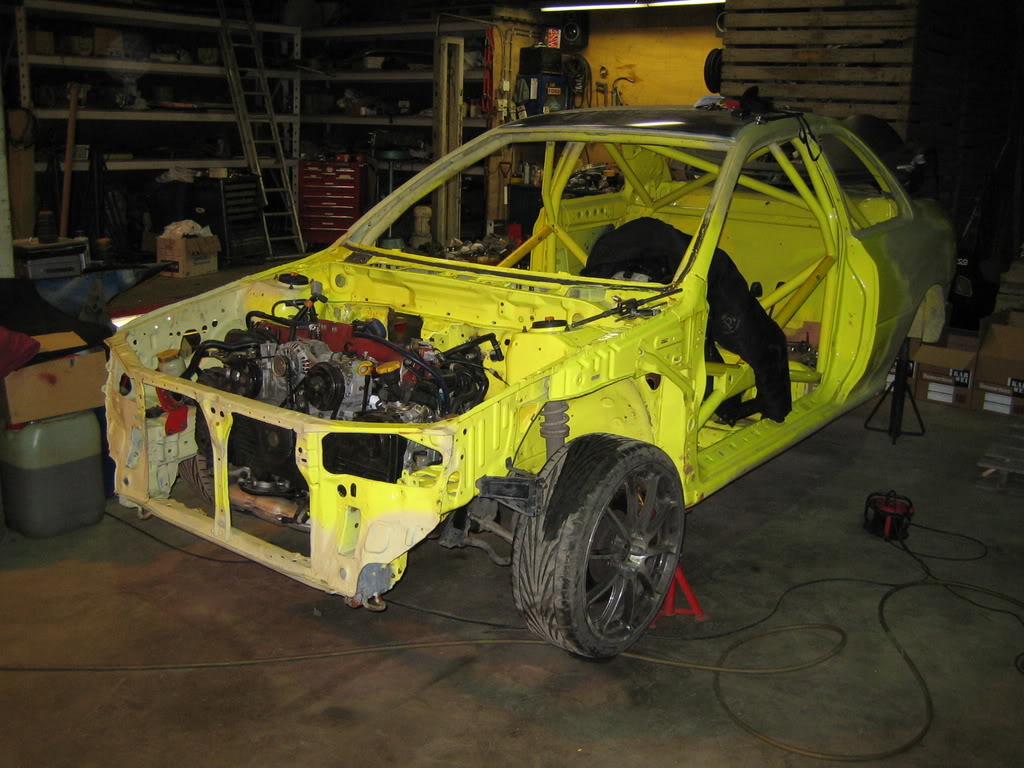
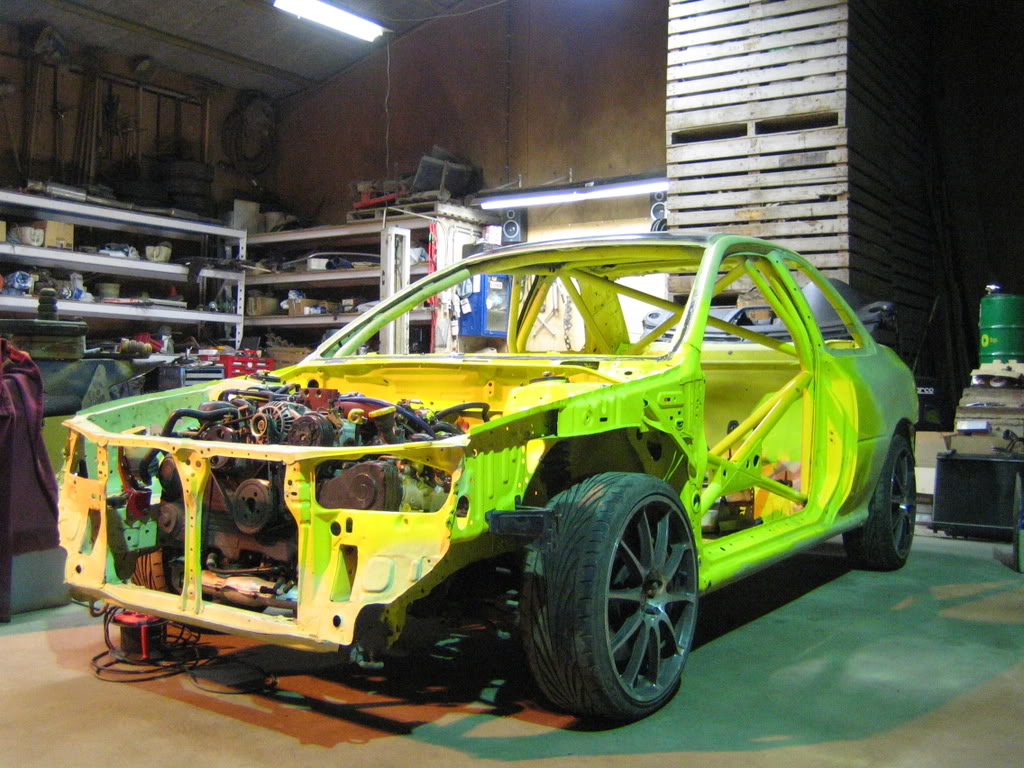
Random pic of the car:
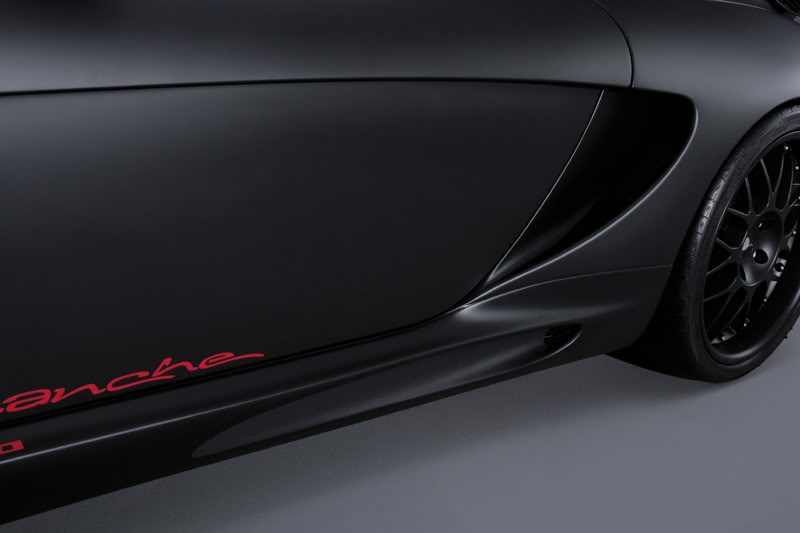
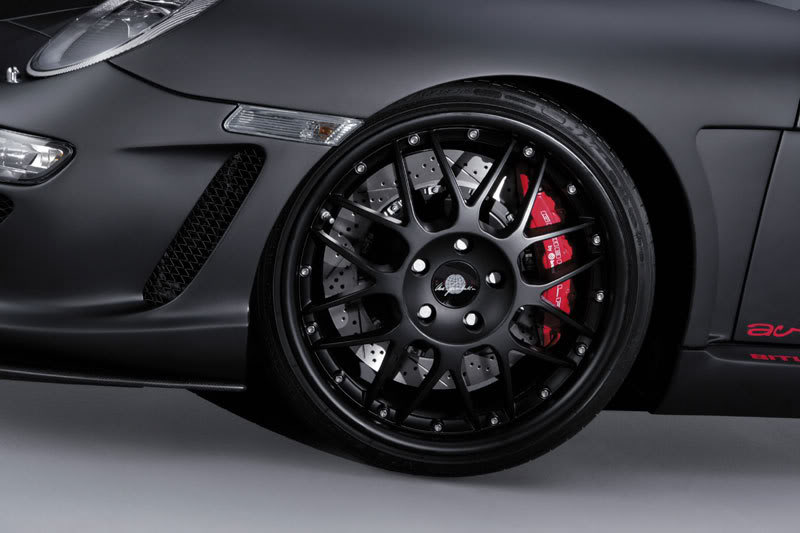
This is the color combo I was thinking of, maybe a bit lighter shade of grey though:

Tim, a friend of mine, was working on the dashboard:
Random pic of the car:
This is the color combo I was thinking of, maybe a bit lighter shade of grey though:
 Amazing job you're doing!
27 January 2008, 07:50 PM
Amazing job you're doing!
27 January 2008, 07:50 PM
#72


That's dedication for you  wiring is a massive job to undertake you need lots of patience that's for certain, a mate of mine is building an Ultima you should see his garage floor at the moment
How about fitting possibly one single plug/socket for all engine releted wires then in the future when you need to take the engine out it becomes a much easier task, my friends using an aircraft type screw in socket in his build.
BMW do a very nice dark metalic gunmetal grey it may be worth a look at makes life easier if you can get something off the shelf.
wiring is a massive job to undertake you need lots of patience that's for certain, a mate of mine is building an Ultima you should see his garage floor at the moment How about fitting possibly one single plug/socket for all engine releted wires then in the future when you need to take the engine out it becomes a much easier task, my friends using an aircraft type screw in socket in his build.
BMW do a very nice dark metalic gunmetal grey it may be worth a look at
makes life easier if you can get something off the shelf.
29 January 2008, 11:27 PM
#73
Scooby Regular
Thread Starter
Join Date: Dec 2002
Posts: 458
Likes: 0
Received 0 Likes
on
0 Posts
@SSS,
Ultima's are great cars!
I'm not planning on doing much on the car after it's done, so the engine should be staying in for a longtime, I'll keep that part of the loom in tact I think.
I have a painter who can make any color, so it will be custom, like the rest of the car.
Ultima's are great cars!
I'm not planning on doing much on the car after it's done, so the engine should be staying in for a longtime, I'll keep that part of the loom in tact I think.
I have a painter who can make any color, so it will be custom, like the rest of the car.
29 January 2008, 11:27 PM
#74
Scooby Regular
Thread Starter
Join Date: Dec 2002
Posts: 458
Likes: 0
Received 0 Likes
on
0 Posts
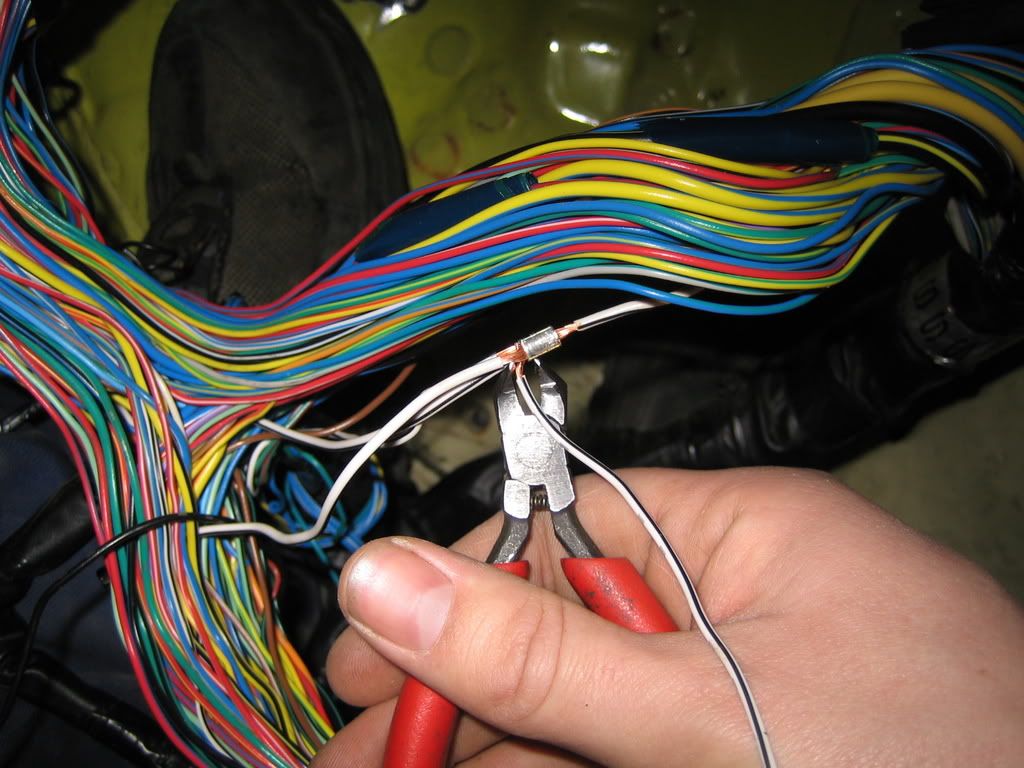
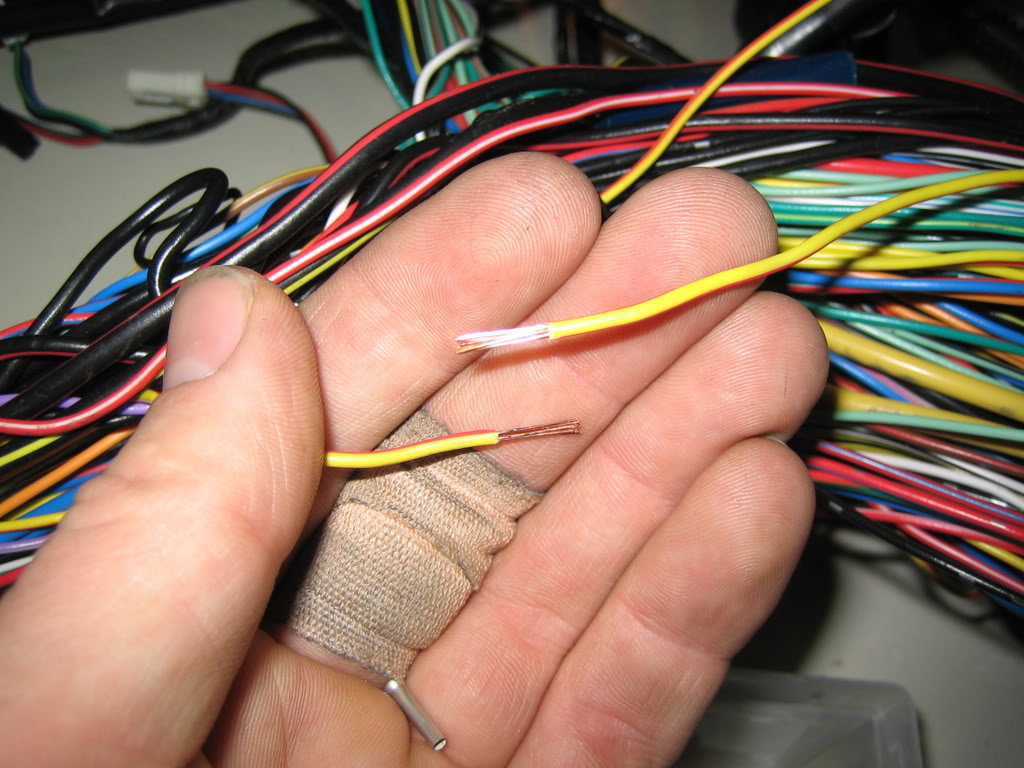
While removing tape from the loom I accidently had cut of a wire that I had to repair.
I figured why not take pics of the proces?
So I did.
Strip the 2 wire ends:
Take a wire-end shell (most likely not the correct word for this item, if anyone knows please say it ) and remove the plastic end of it:
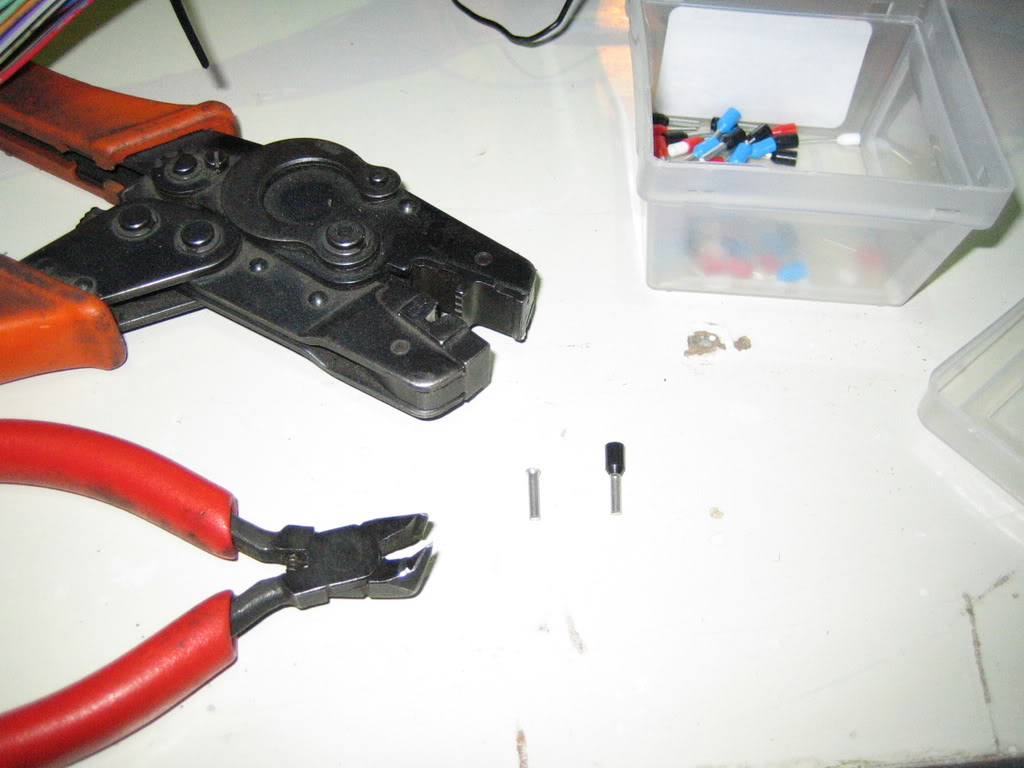
Put the 2 wire ends in at either side of the shell:
Use the special tool:
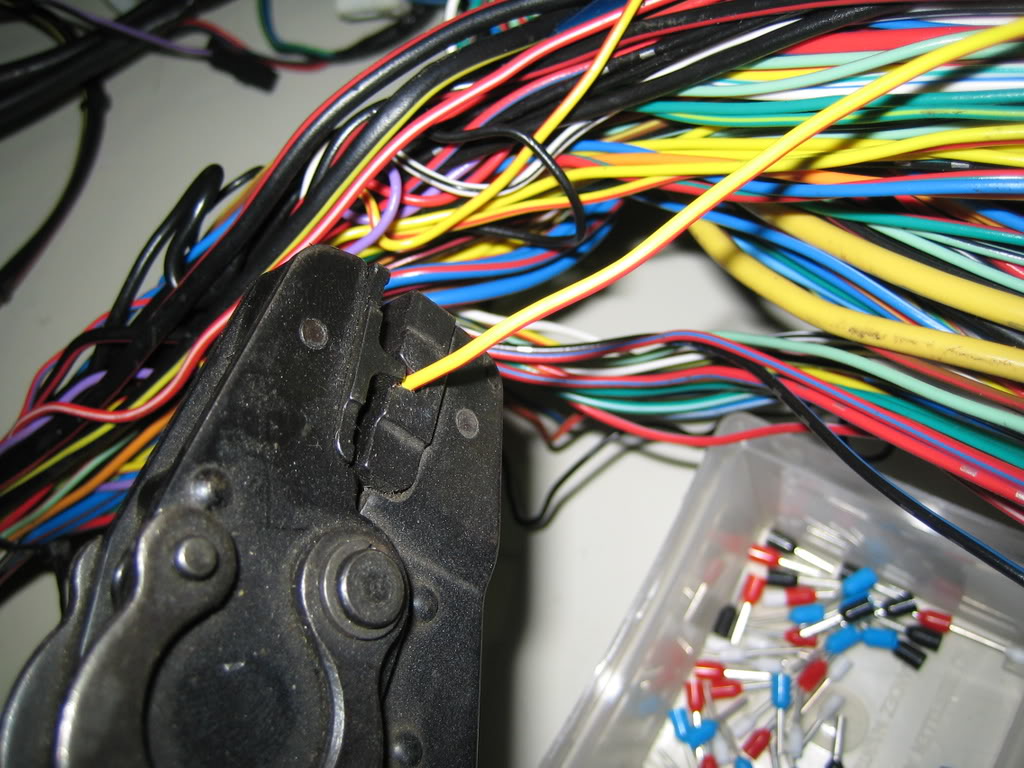
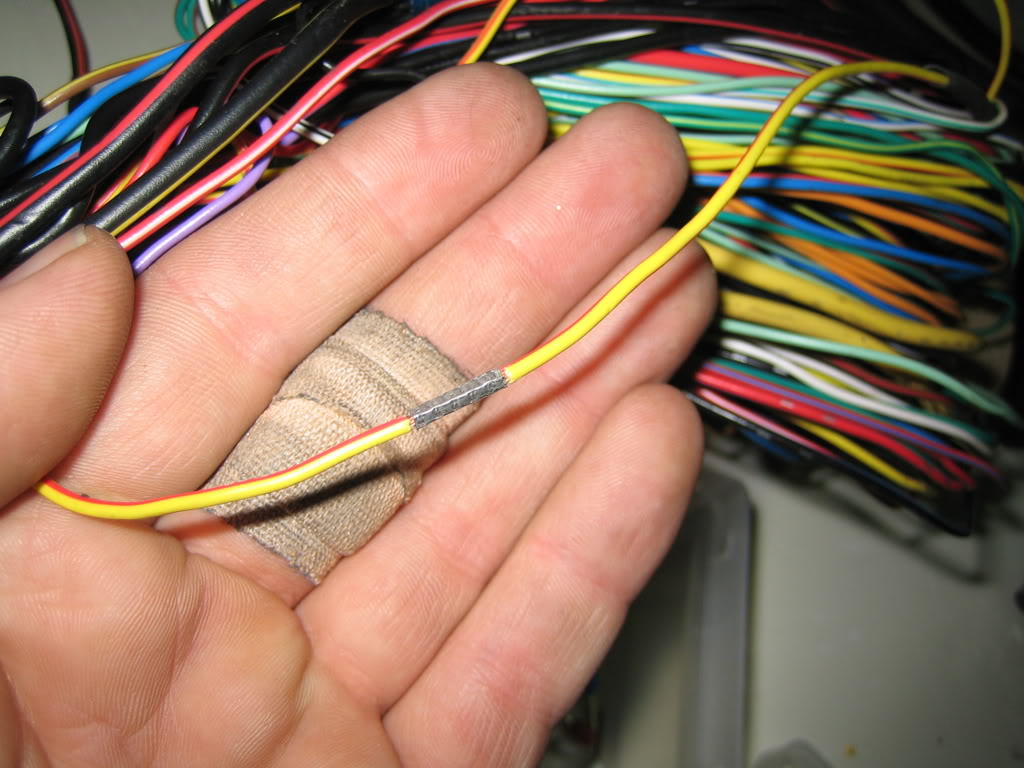
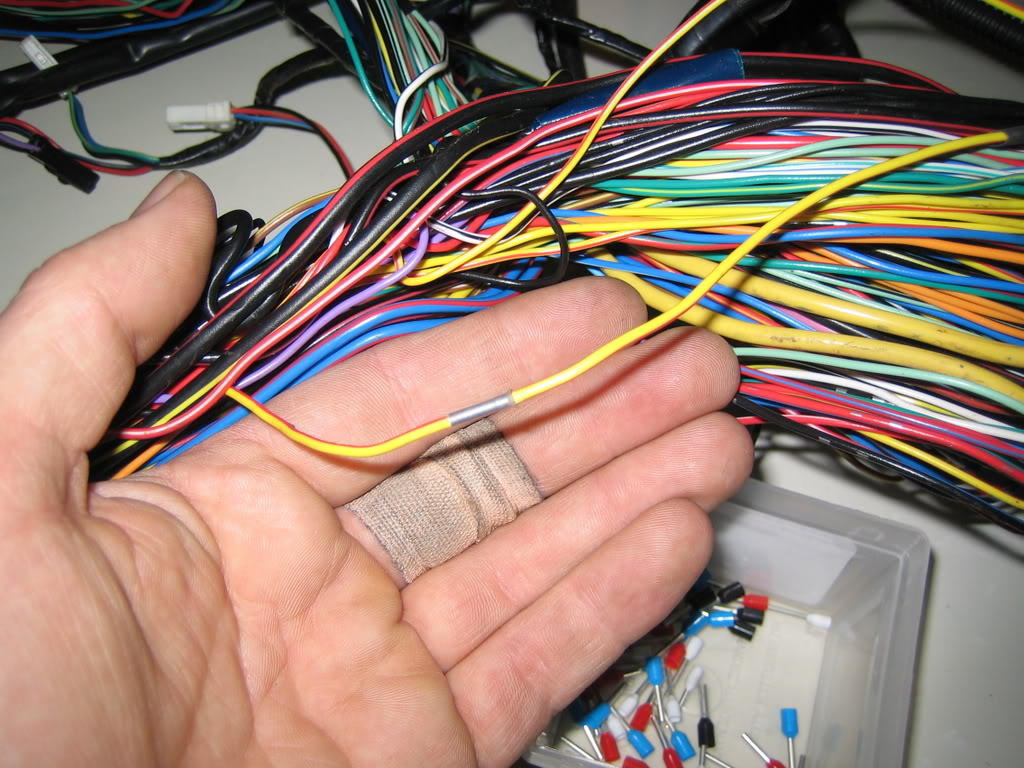
And finish it off with some isolation:
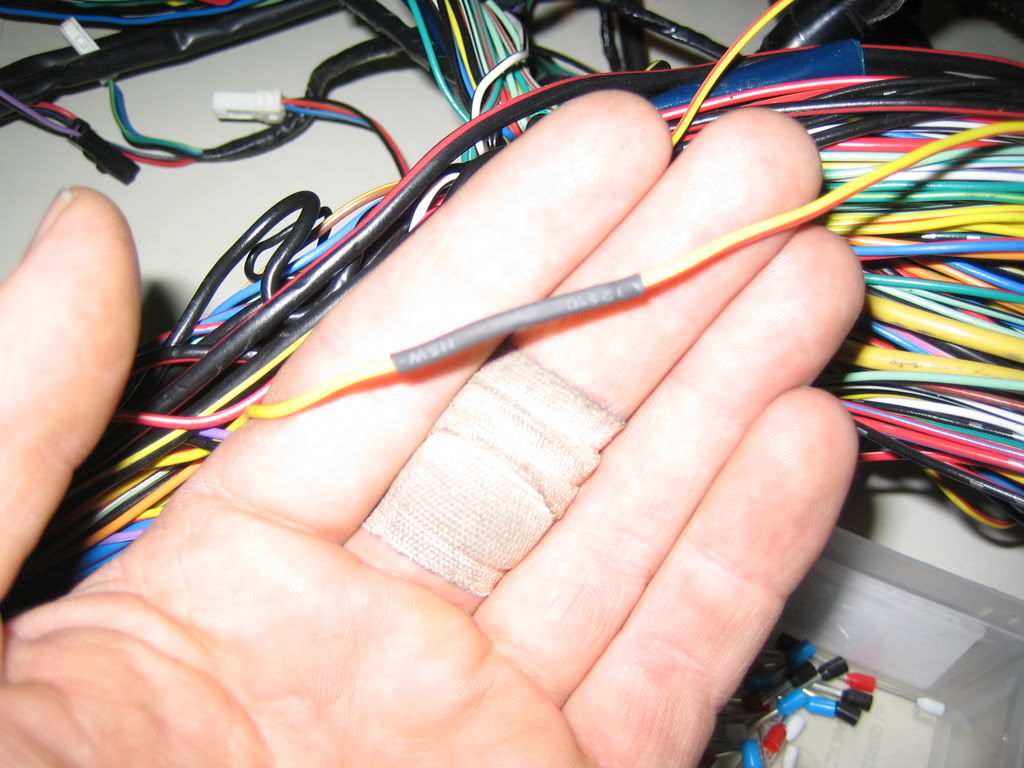
Simple really.
I figured why not take pics of the proces?
So I did.
Strip the 2 wire ends:
Take a wire-end shell (most likely not the correct word for this item, if anyone knows please say it
) and remove the plastic end of it:Put the 2 wire ends in at either side of the shell:
Use the special tool:
And finish it off with some isolation:
Simple really.
29 January 2008, 11:28 PM
#75
Scooby Regular
Thread Starter
Join Date: Dec 2002
Posts: 458
Likes: 0
Received 0 Likes
on
0 Posts
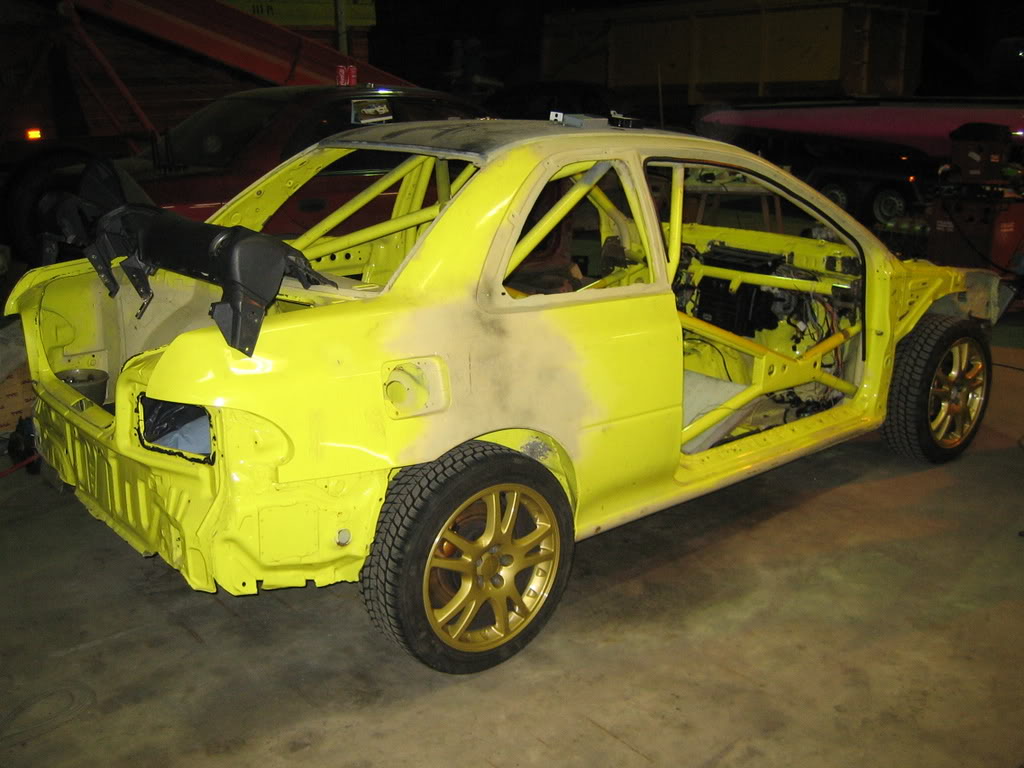
The car is on some STI wheels now, the Rota's are going back for repairs and won't return, time for some different wheels:
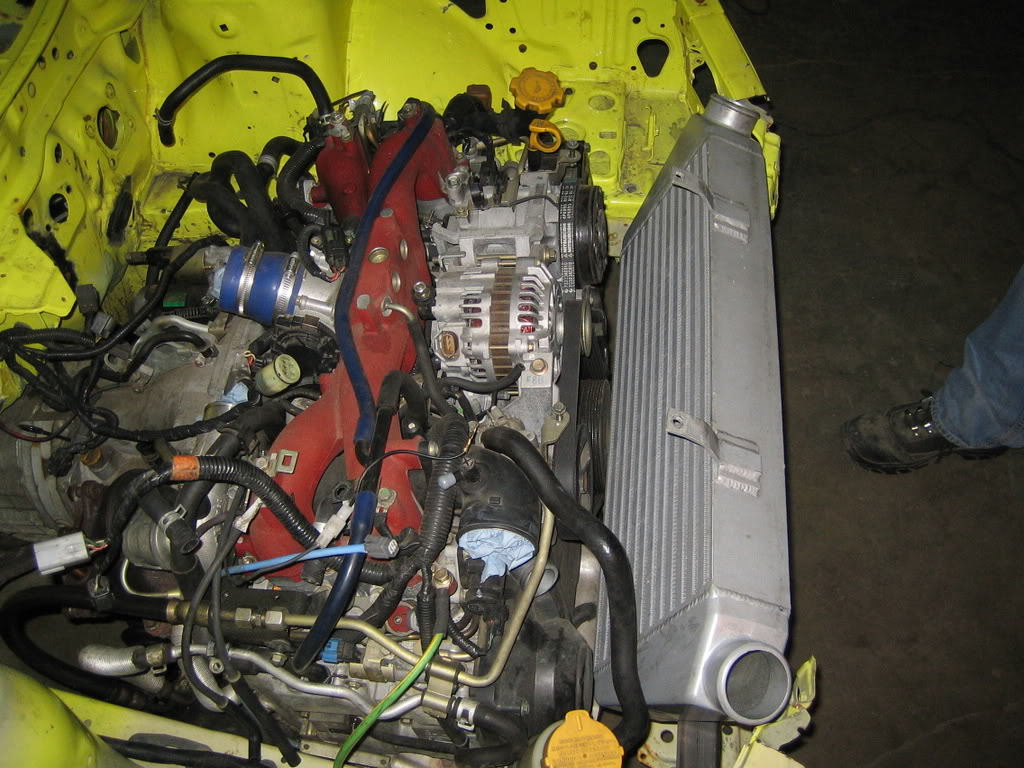
A friend of mine dropped by and we started on the FMIC set-up.
So we started of by cutting stuff away.
I must say, this going to be very nice indeed:
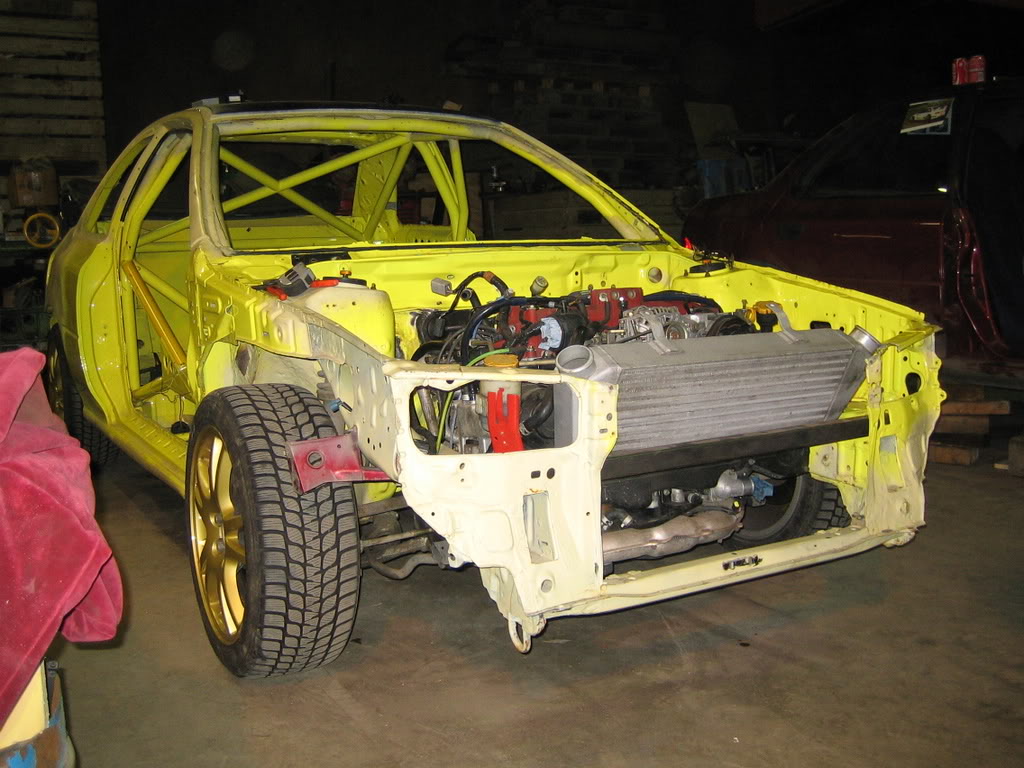
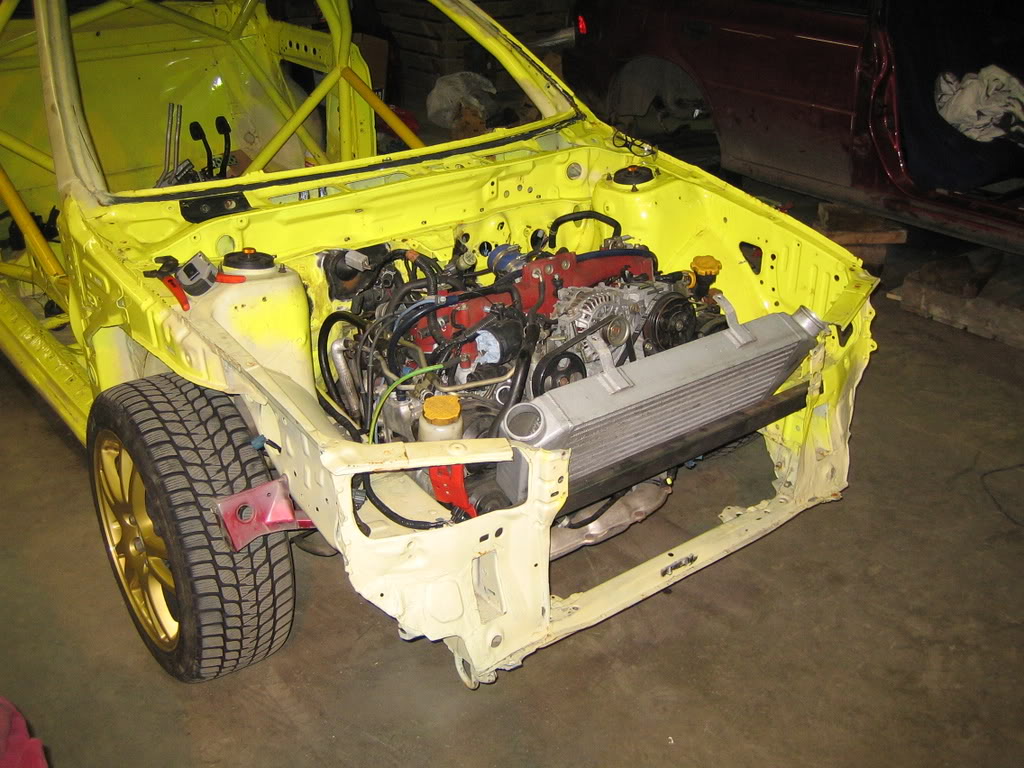
The loom is in the car again, ready to be tie-wrapped in place:
A friend of mine dropped by and we started on the FMIC set-up.
So we started of by cutting stuff away
.I must say, this going to be very nice indeed:
The loom is in the car again, ready to be tie-wrapped in place:
03 February 2008, 06:08 PM
#76
Scooby Regular
Thread Starter
Join Date: Dec 2002
Posts: 458
Likes: 0
Received 0 Likes
on
0 Posts
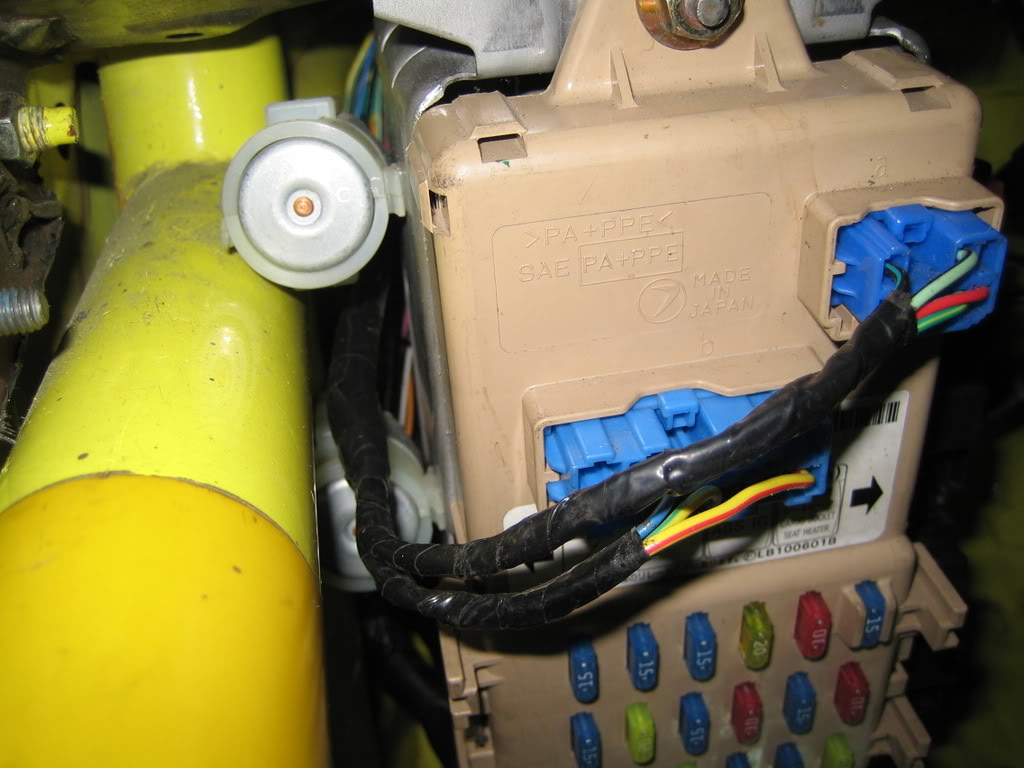
Small update:
The loom isn't finished yet, but I had some progress this week.
First up was the fusebox, I had the old fixation points from the previous car but one of the round relais on the side was in the way of the cage.
When removing the ABS wiring from the loom one of those relais was gone so now it did fit.
Here it sits after retaping the wires again:
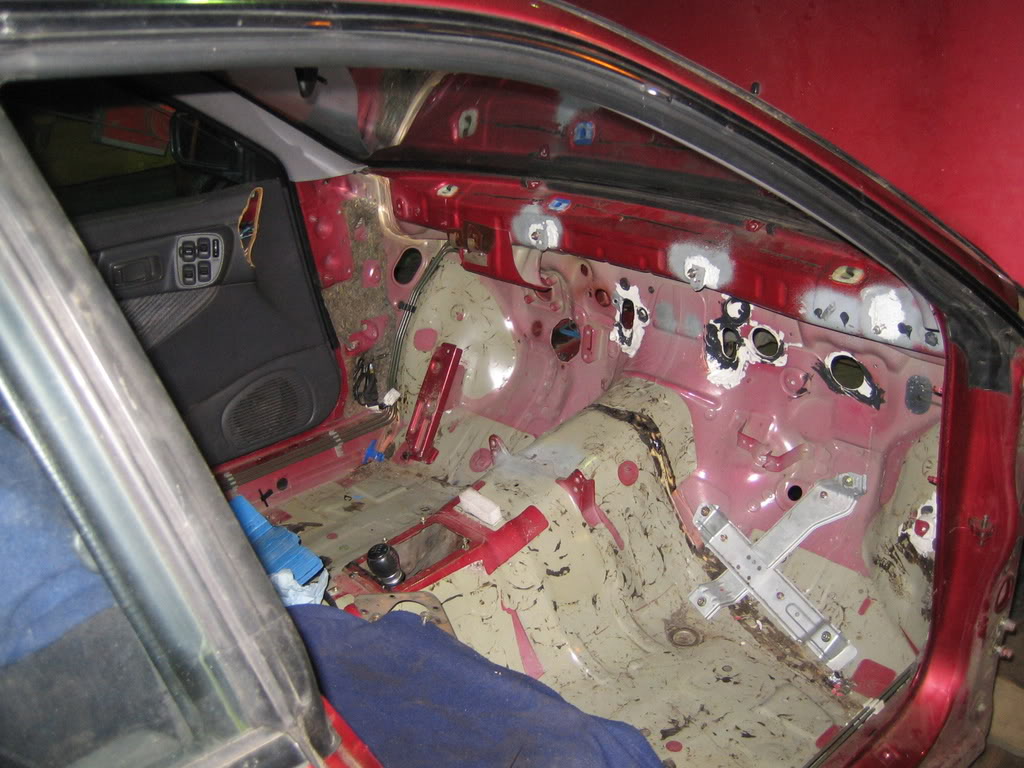
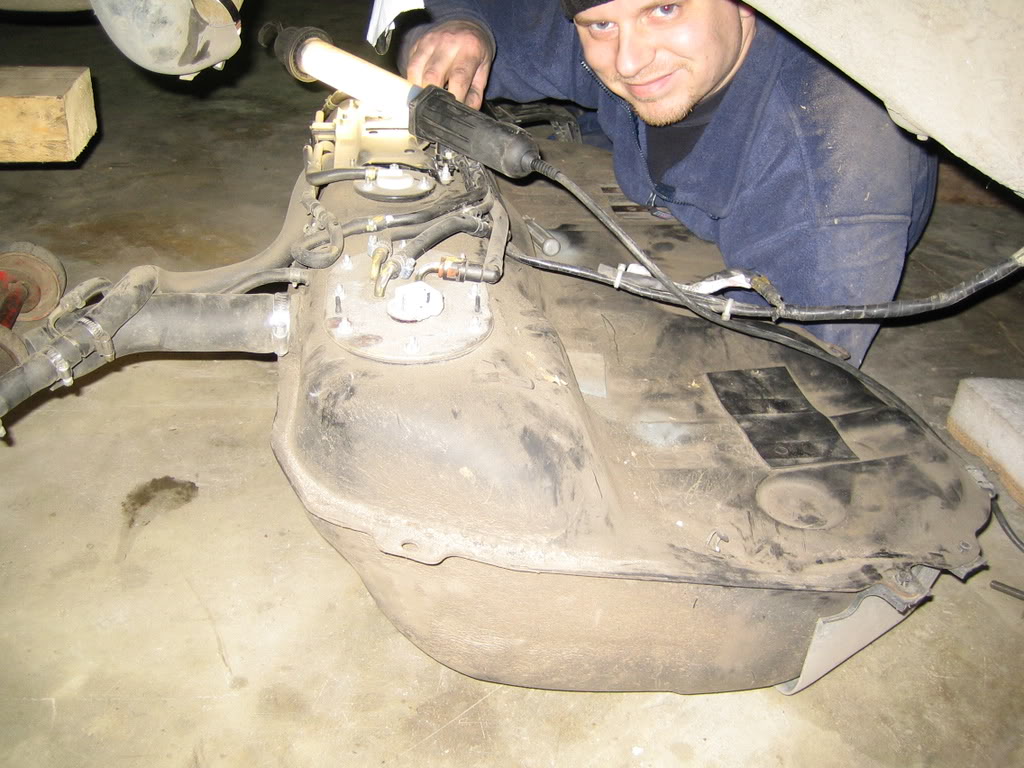
Meanwhile the tank and some other stuff was removed from the old car, it's getting very empty now:
Then the engine loom had to find it's way into the cabin, but there was a cage in it's way now.
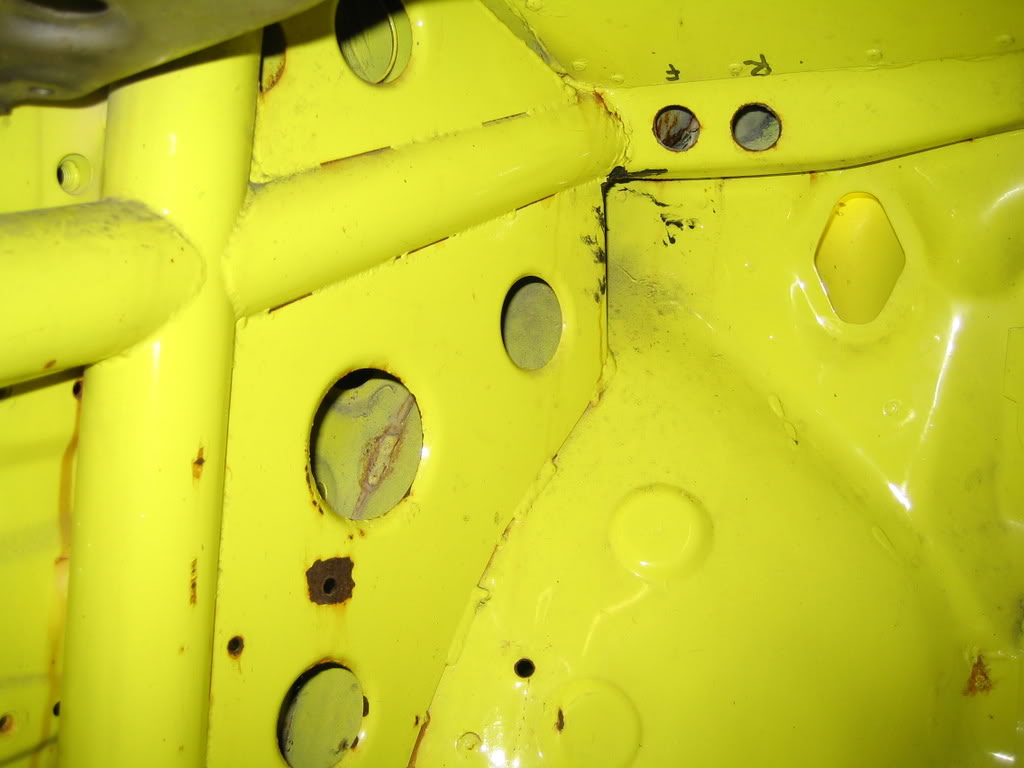
So I had to open up one of the holes:
As it was:
After some cutting:
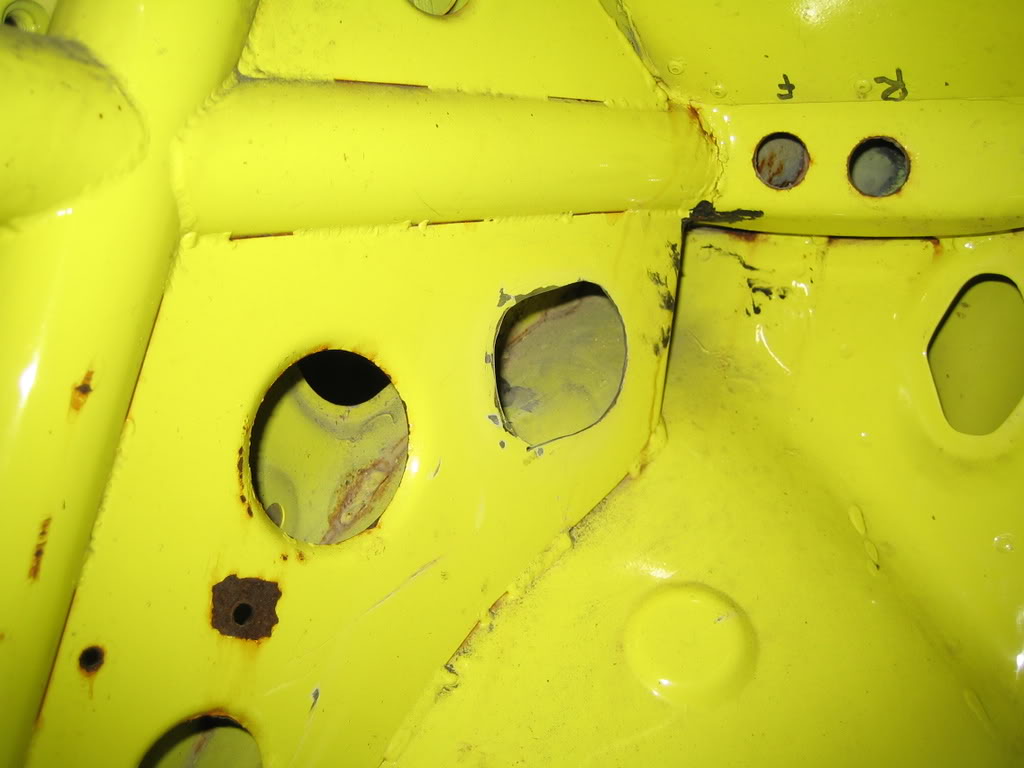
And viola, enter ye, enter ye....:
The loom isn't finished yet, but I had some progress this week.
First up was the fusebox, I had the old fixation points from the previous car but one of the round relais on the side was in the way of the cage.
When removing the ABS wiring from the loom one of those relais was gone so now it did fit.
Here it sits after retaping the wires again:
Meanwhile the tank and some other stuff was removed from the old car, it's getting very empty now:
Then the engine loom had to find it's way into the cabin, but there was a cage in it's way now.
So I had to open up one of the holes:
As it was:
After some cutting:
And viola, enter ye, enter ye....:
03 February 2008, 06:09 PM
#77
Scooby Regular
Thread Starter
Join Date: Dec 2002
Posts: 458
Likes: 0
Received 0 Likes
on
0 Posts
I found some airbag cables in the loom while removing ABS so of course it was exit --->:
First steps in the retaping of the loom, some small wires:
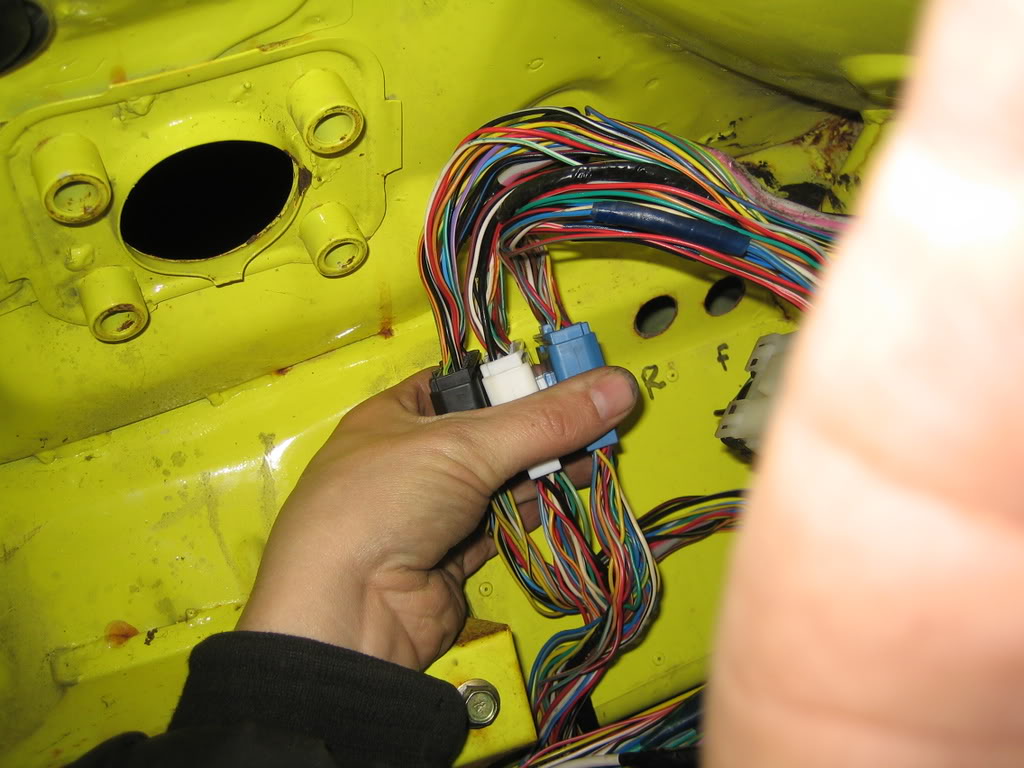
3 major connectors needed a fixed place somewhere, in the other car they were hanging loose, I didn't like that so it had to be fixed in this car.
This is the best place for them but nothing to fix them to:
So we made a rather large bracket for them, after a afternoon of measuring grinding and welding this came out:
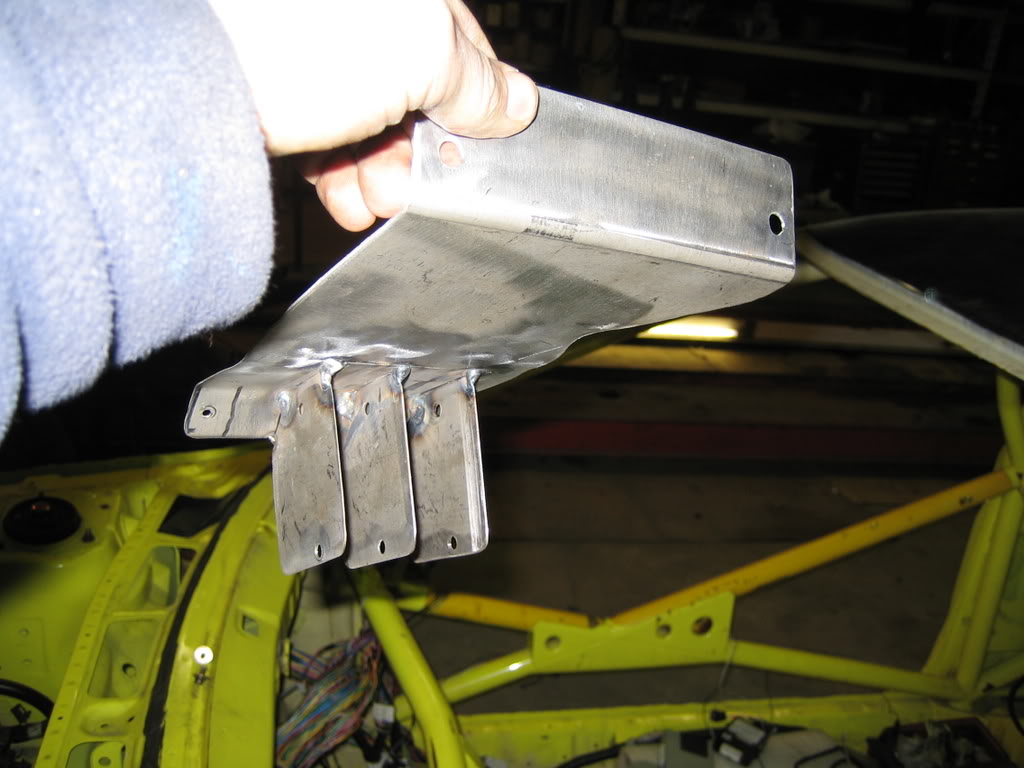
And this is how it is in the car:
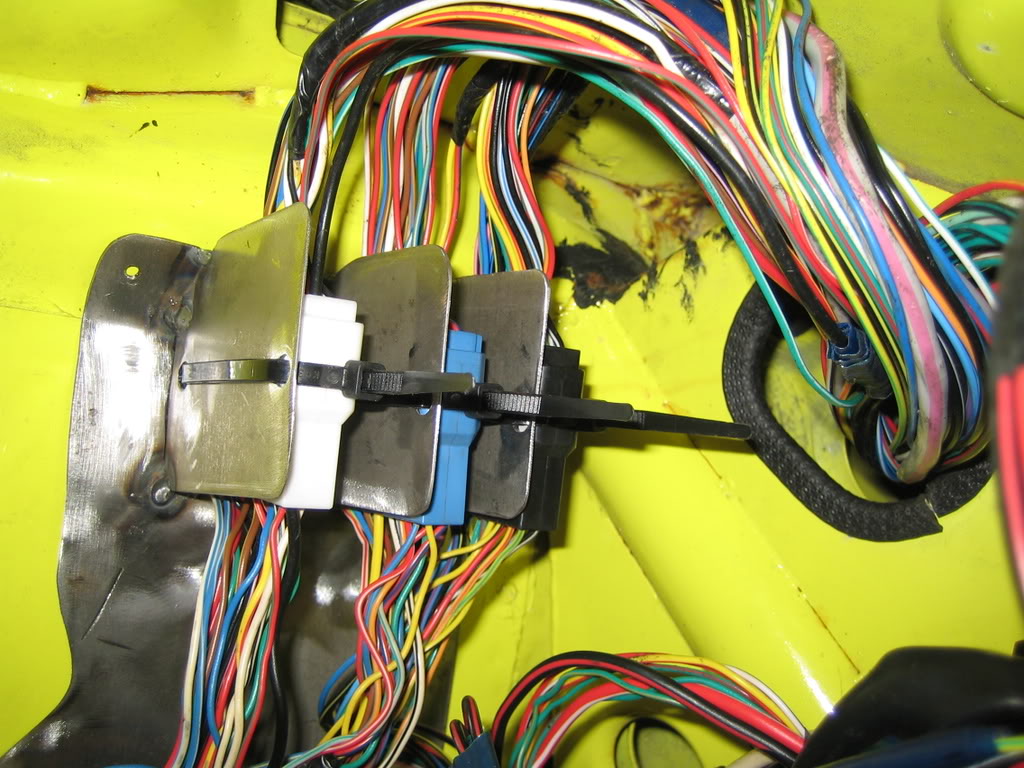
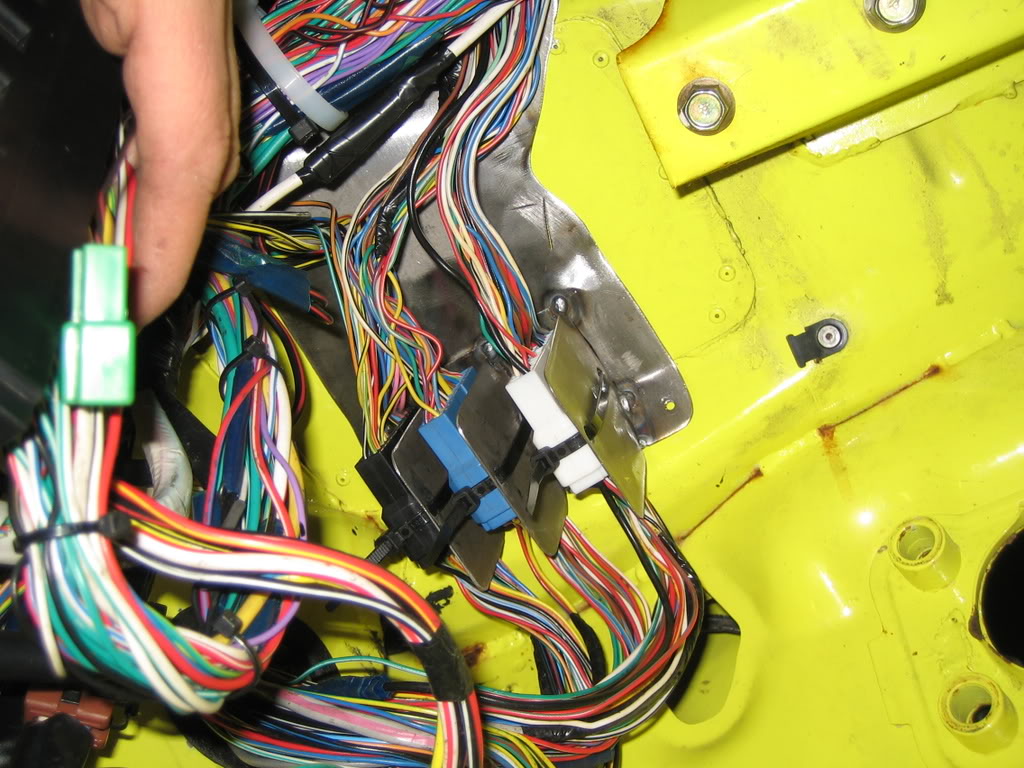
I'm pretty happy with the resluts actually.
The loom is nearing completion now, and not a minute to soon, I'm getting fed up with it.
First steps in the retaping of the loom, some small wires:
3 major connectors needed a fixed place somewhere, in the other car they were hanging loose, I didn't like that so it had to be fixed in this car.
This is the best place for them but nothing to fix them to:
So we made a rather large bracket for them, after a afternoon of measuring grinding and welding this came out:
And this is how it is in the car:
I'm pretty happy with the resluts actually.
The loom is nearing completion now, and not a minute to soon, I'm getting fed up with it.
 17 February 2008, 05:59 PM
#79
Scooby Regular
Thread Starter
Join Date: Dec 2002
Posts: 458
Likes: 0
Received 0 Likes
on
0 Posts
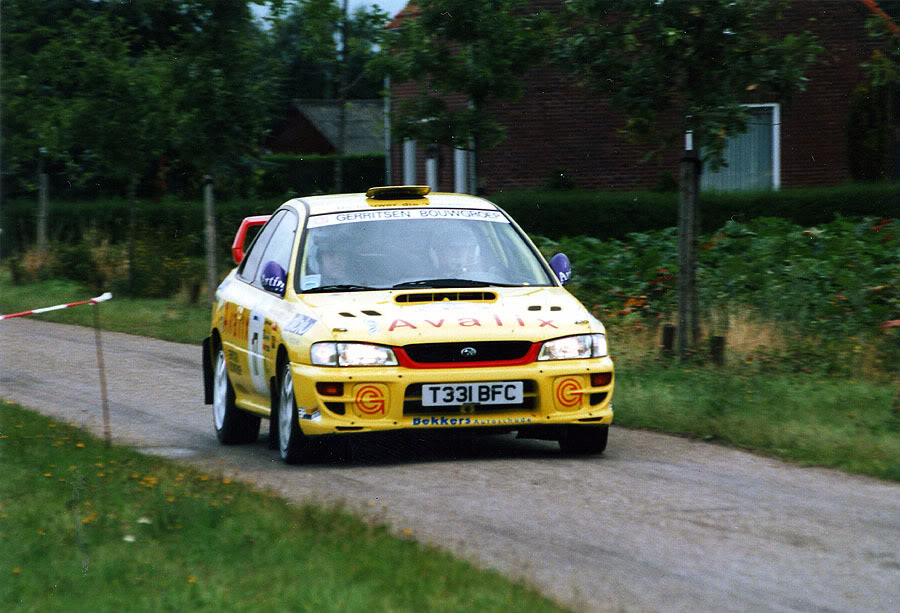
It's been a while since my last update, and with good reason, I didn't feel like it, in the last few postst you will see why.
I found out the history of my chassis, which is not as good as I was told.
It seems that the small damage in front and rear was actually more something like a megacrash.
It has been rolled etc. in 2000 somewhere.
I now know the whole route it has been on since 2000 untill it came in my possesion, which is nice to know, although the guy has not been very honest about it as it seems.
Ohh well....
I have found 2 pictures of the car when it was still in anger on the stages in europe:
17 February 2008, 06:02 PM
#80
Scooby Regular
Thread Starter
Join Date: Dec 2002
Posts: 458
Likes: 0
Received 0 Likes
on
0 Posts
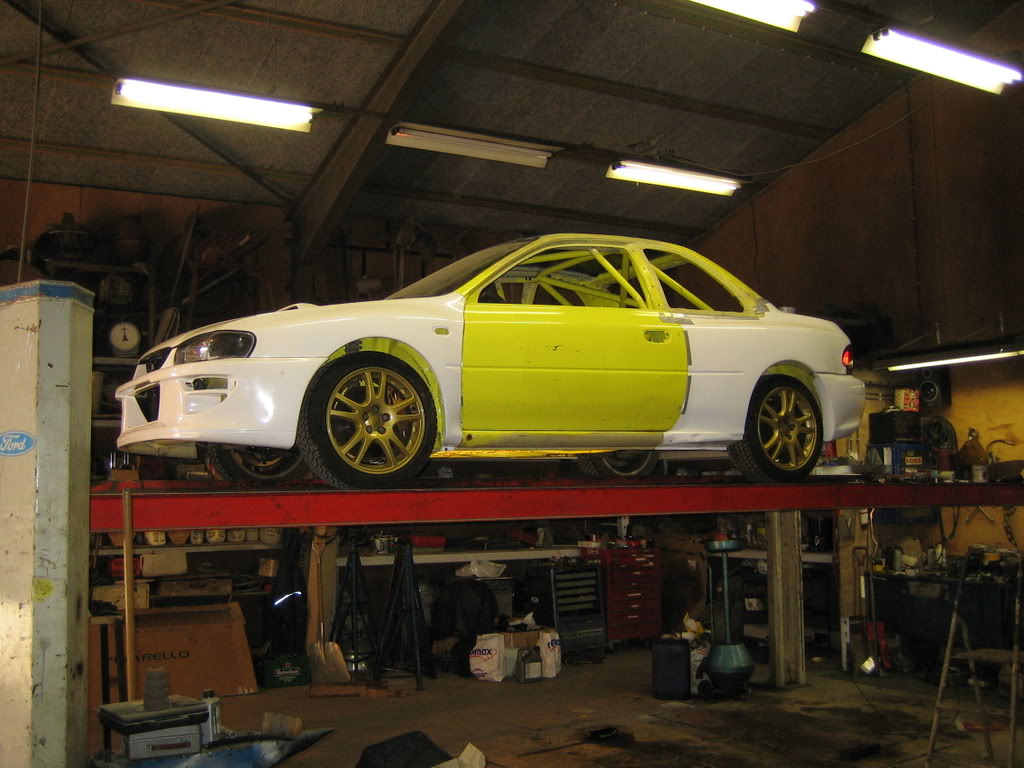
A friend of mine who owns his own wheel shop was going to drop by with some stuff to determine the offset that is best for my new wide fenders, the official S5 WRC car uses +12 which I think is best for mine aswel.
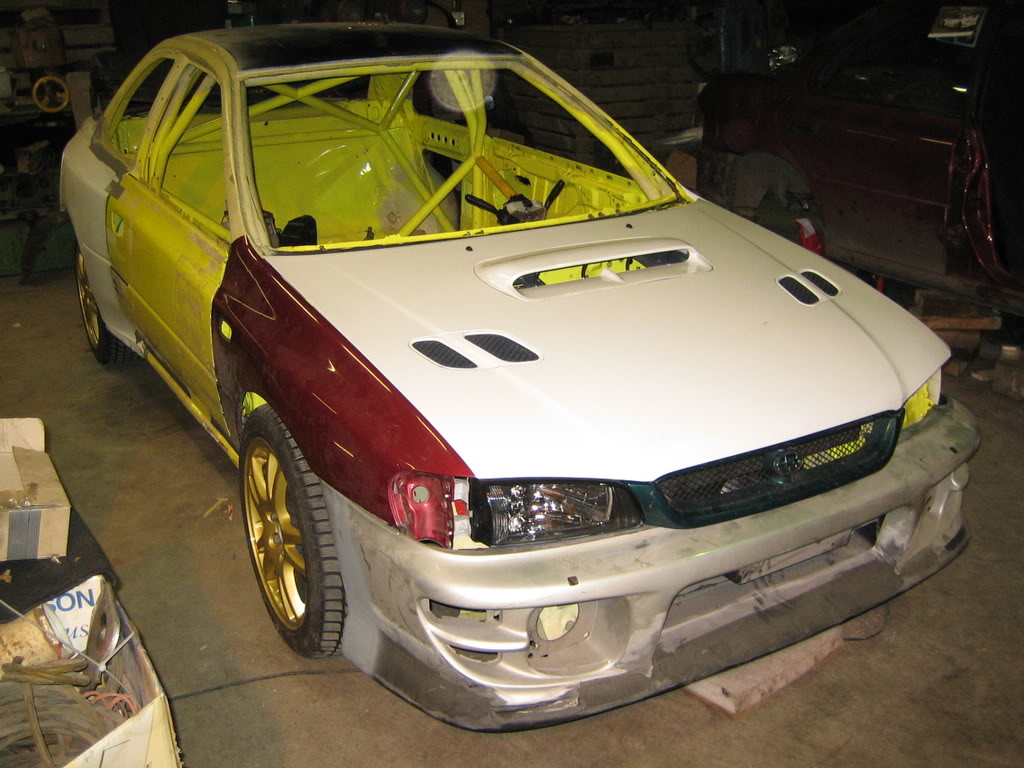
So I wanted to mount all fenders, lights and bumpers to see the end result, a 15 minute job normaly, it took me 2 weeks....
To cut thing short, the right front inner wing is 5mm to short, the last 2 holes on top of the fender are not in line, the ones near the headlights I mean.
And the 2 innerwings are 10mm to close to each other, which means the hood won't close etc.
I know this by cross measurig the chassis with my old red chassis.
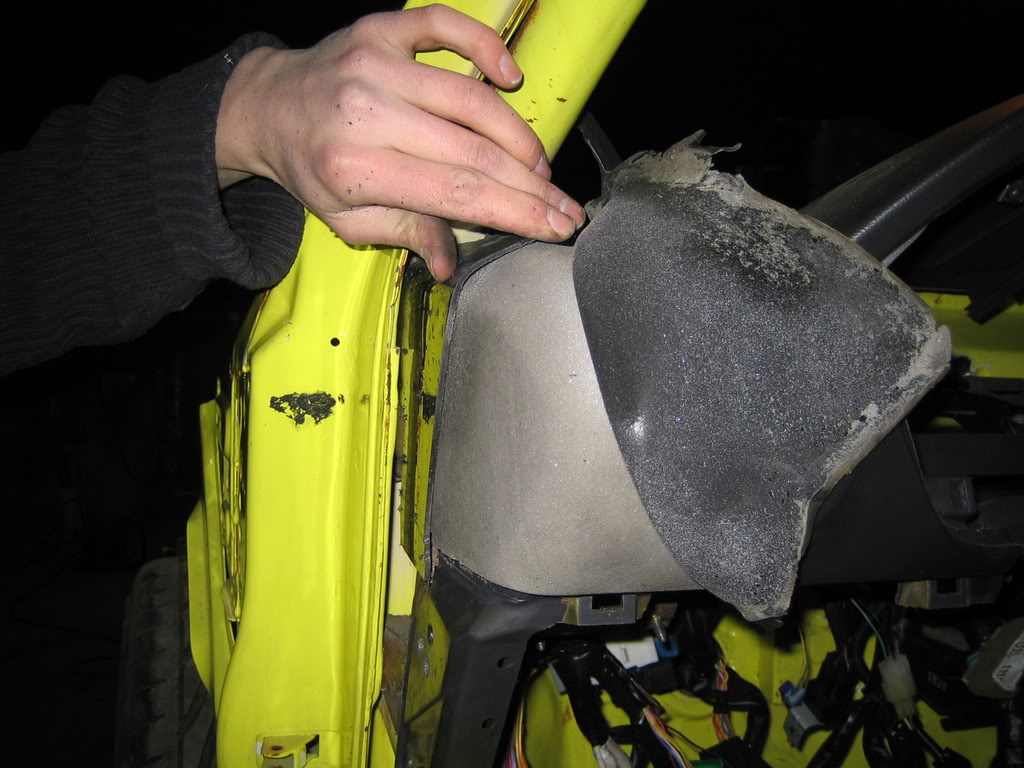
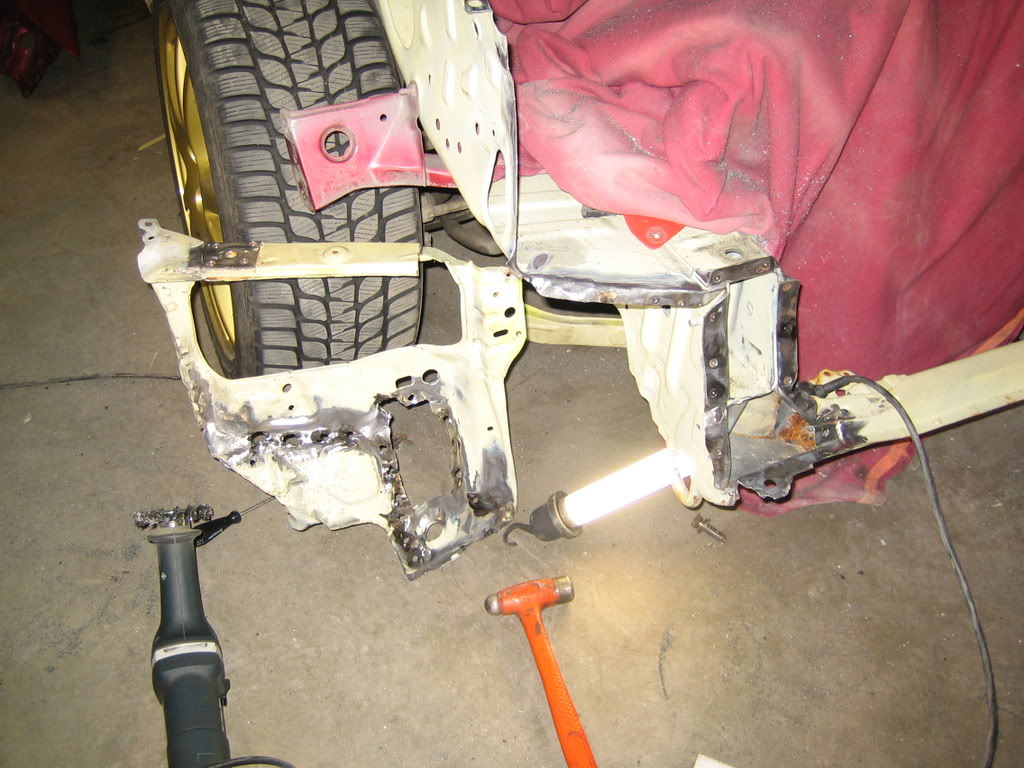
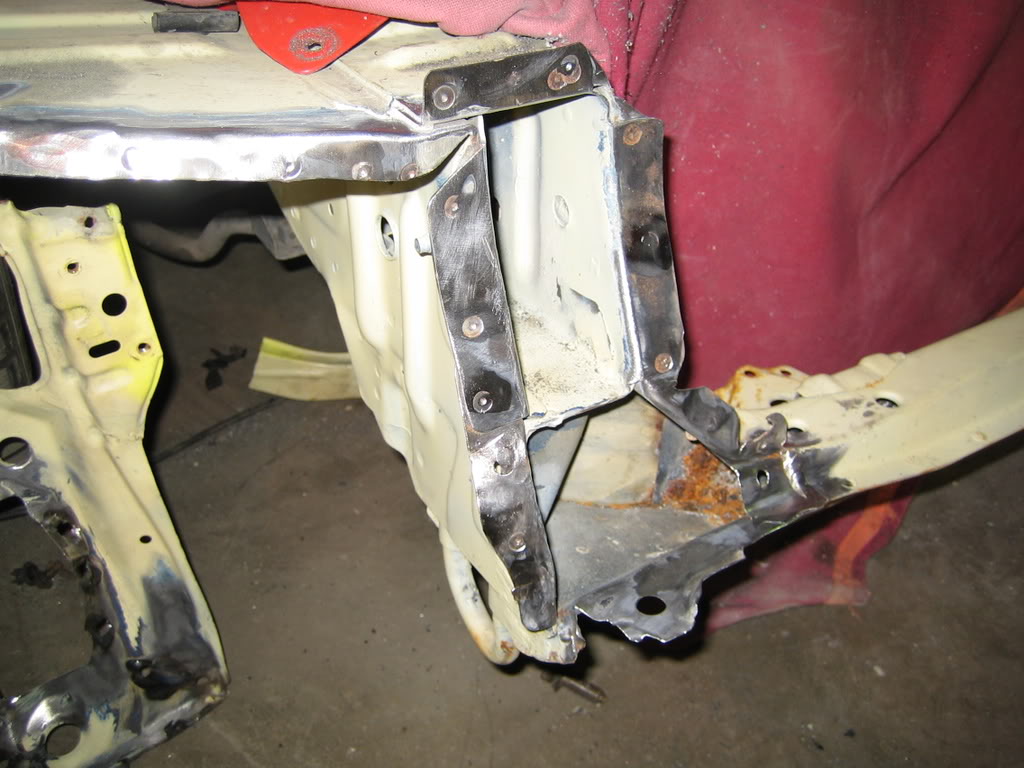
So I decided to do some panelwork on my car, which is a first for me.
The headlight panel was to high and to far back so that was going to be replaced, solving 2 problems.
First the panel was welded a bit to high on the inner wing and I could weld the panel 5mm forward so the fender would fit.
The 10mm shortage in the width I'd solve by makes sleeveholes for the fenders, moving them outwards, noone would see it afterwards.
Here I fixed the panels and headlight, the fender is not attached to the innerwing here:
Let's do it:
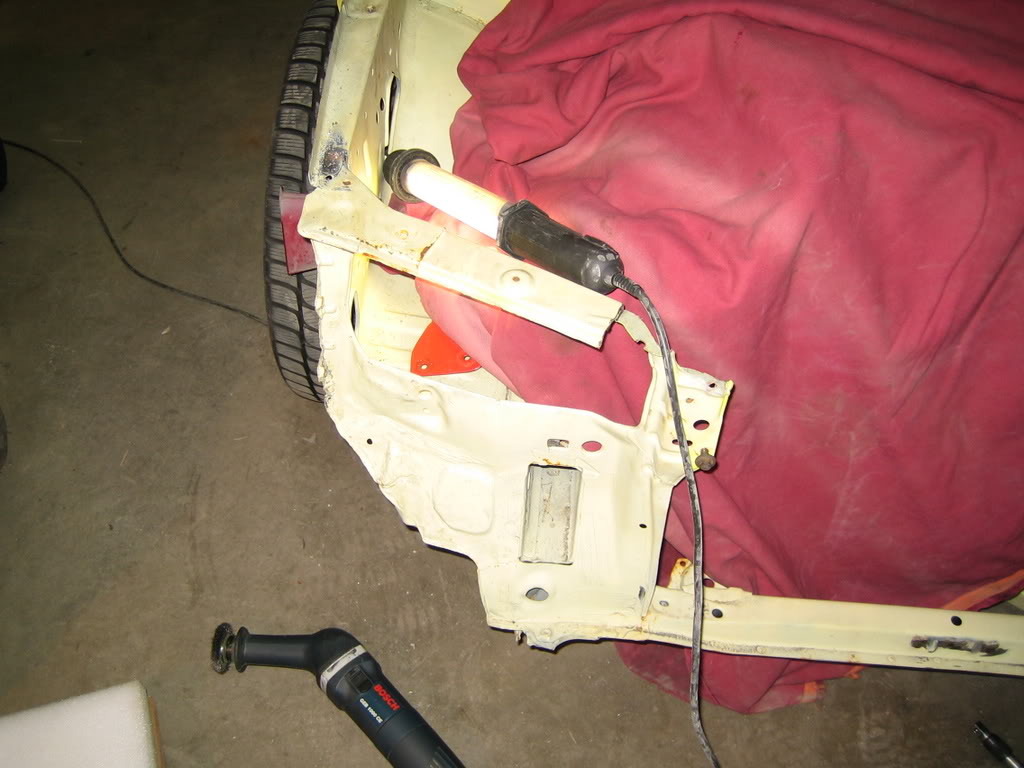
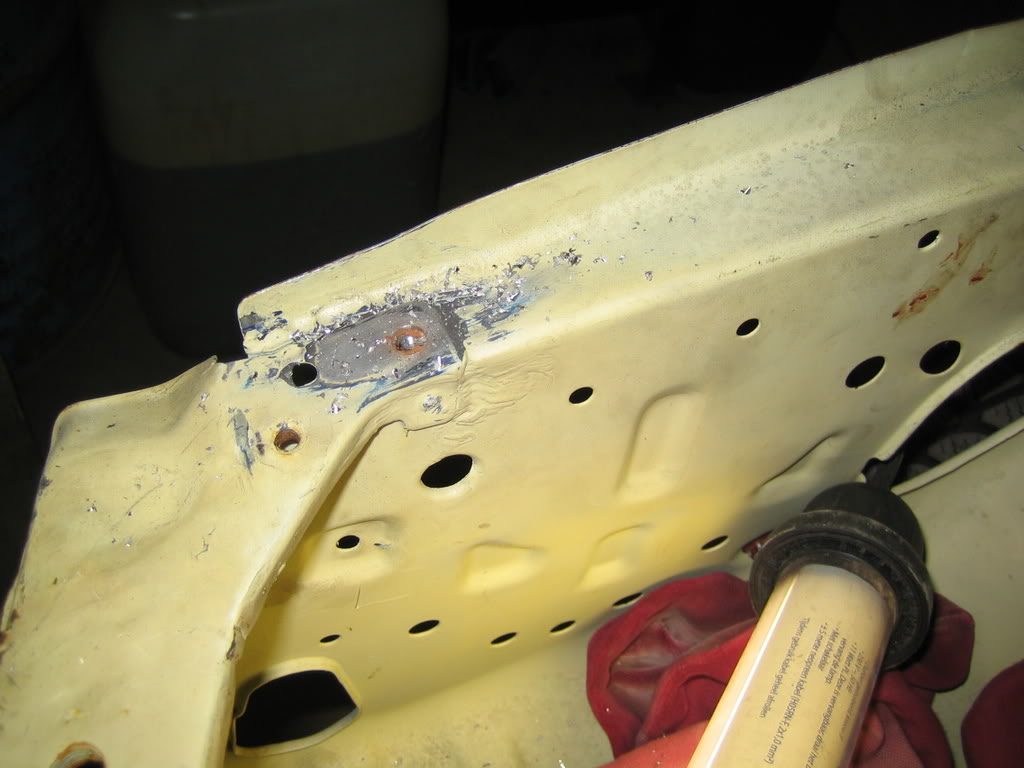
Drilling the welds:
Face off:
So I wanted to mount all fenders, lights and bumpers to see the end result, a 15 minute job normaly, it took me 2 weeks....
To cut thing short, the right front inner wing is 5mm to short, the last 2 holes on top of the fender are not in line, the ones near the headlights I mean.
And the 2 innerwings are 10mm to close to each other, which means the hood won't close etc.
I know this by cross measurig the chassis with my old red chassis.
So I decided to do some panelwork on my car, which is a first for me.
The headlight panel was to high and to far back so that was going to be replaced, solving 2 problems.
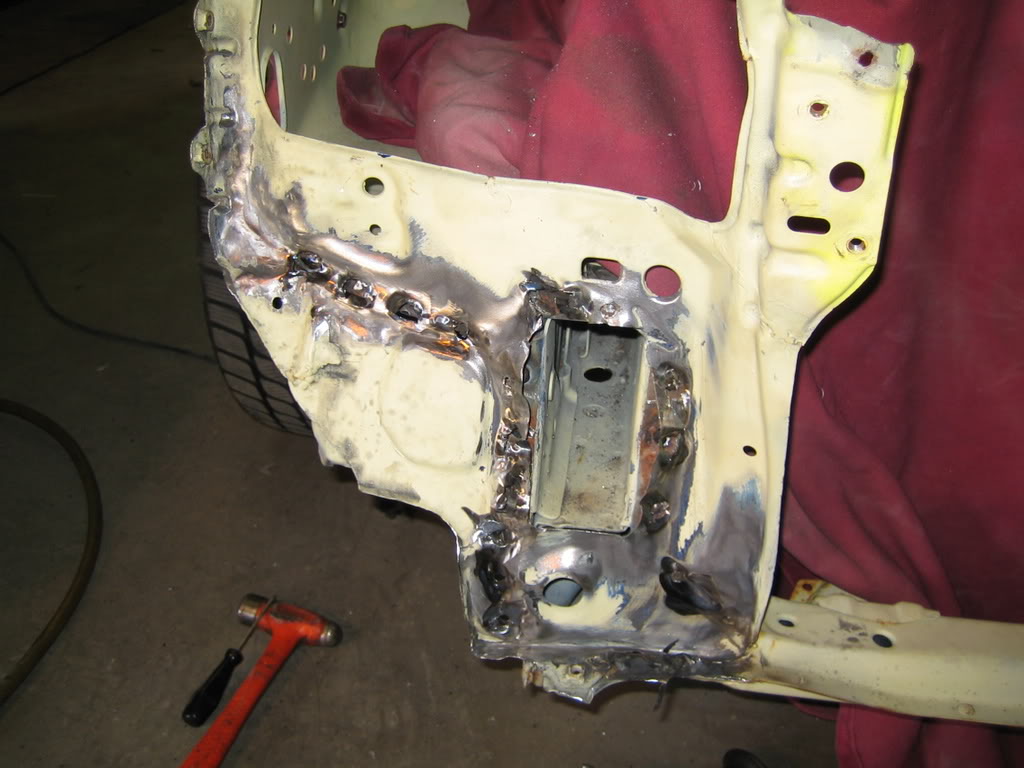
First the panel was welded a bit to high on the inner wing and I could weld the panel 5mm forward so the fender would fit.
The 10mm shortage in the width I'd solve by makes sleeveholes for the fenders, moving them outwards, noone would see it afterwards.
Here I fixed the panels and headlight, the fender is not attached to the innerwing here:
Let's do it:
Drilling the welds:
Face off:
17 February 2008, 06:15 PM
#85
Scooby Regular
Thread Starter
Join Date: Dec 2002
Posts: 458
Likes: 0
Received 0 Likes
on
0 Posts
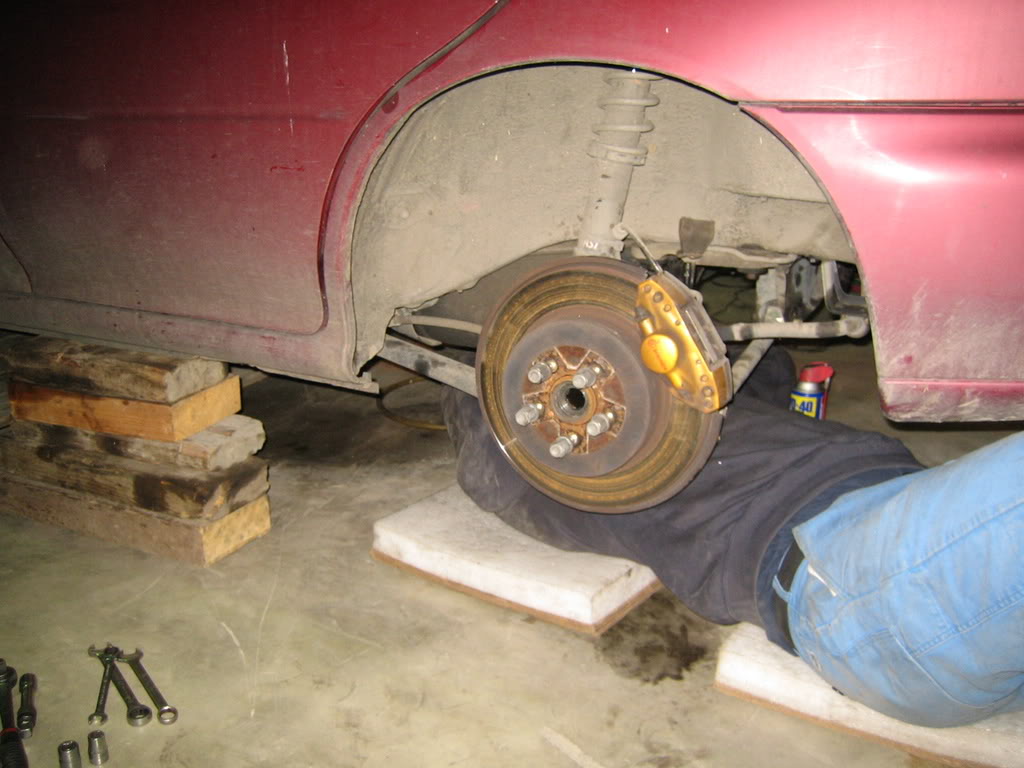
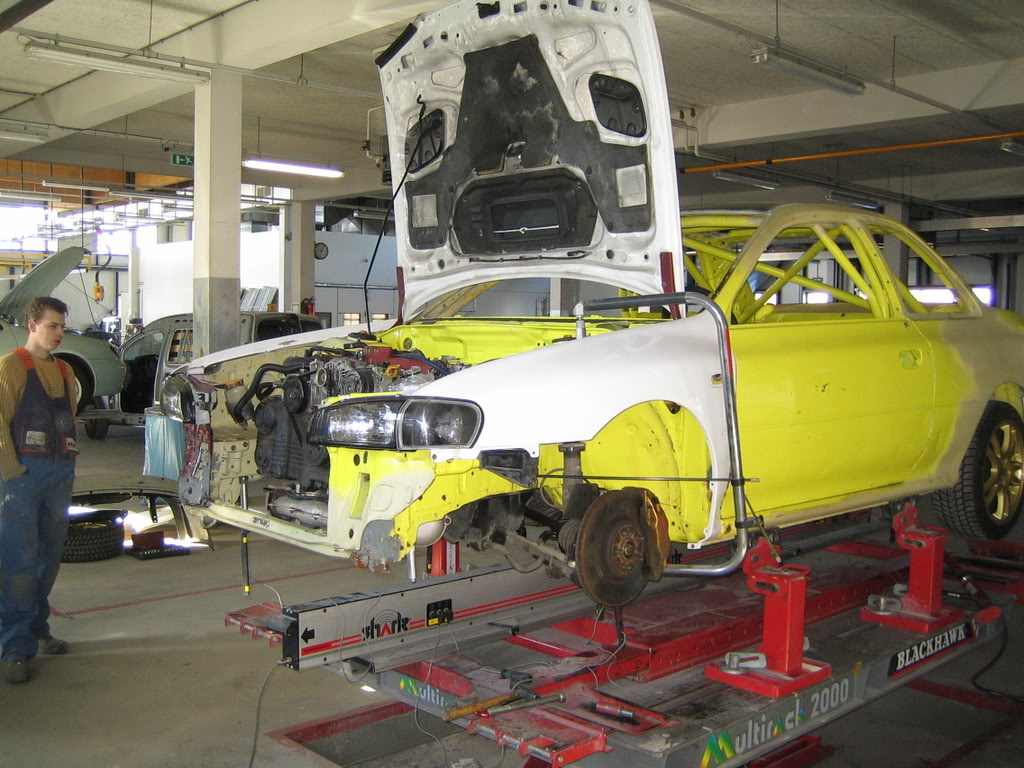
Then I noticed that my right front wheel was leaning too far back.
Err....??... so I pushed it onto the carlift.
Spend an afternoon measuring the whole bottom of the car and found a few things which did not make me happy, my enthusiasm was fading even more after it already had been dampened by finding out the not so glorious past of the car.
Measured everything and compared it with my red chassis which never had any damage.
I found that cross measured eveything was ok, max 2mm from front to rear, but the width was wrong.
It turned out that the whole front of the car was 10mm too narrow.
Aaarggggggggggggghhh....
Car on the carlift, front wheel on the other side was to far back:
I was afraid the right chassisbeam was leaning in 10mm which would f**k up my suspension geometry so I feared it would have to end up on the straightening bench for the 3rd time.
I spoke to the guy who had repaired the chassis and he told me he had used the original templates when restoring it, so at least the suspesion points were 100% correct, well it turned out not to be so.
Then when I had bought it I had it checked again to make really sure it was ok, and again they said it was ok, but again, not!.
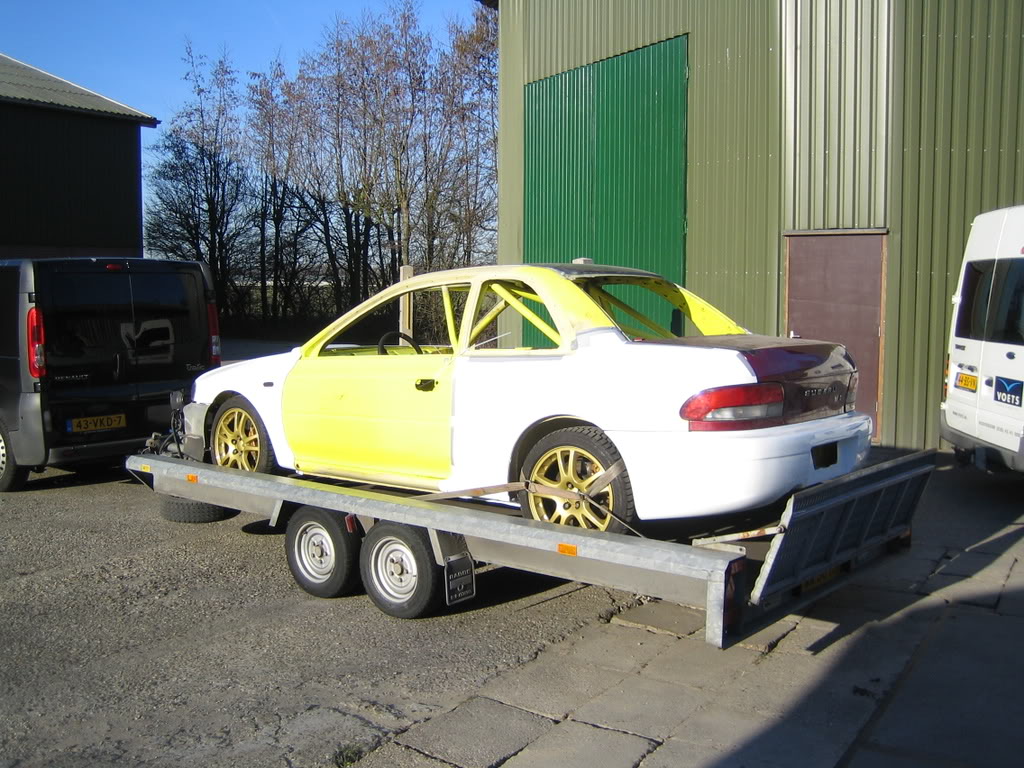
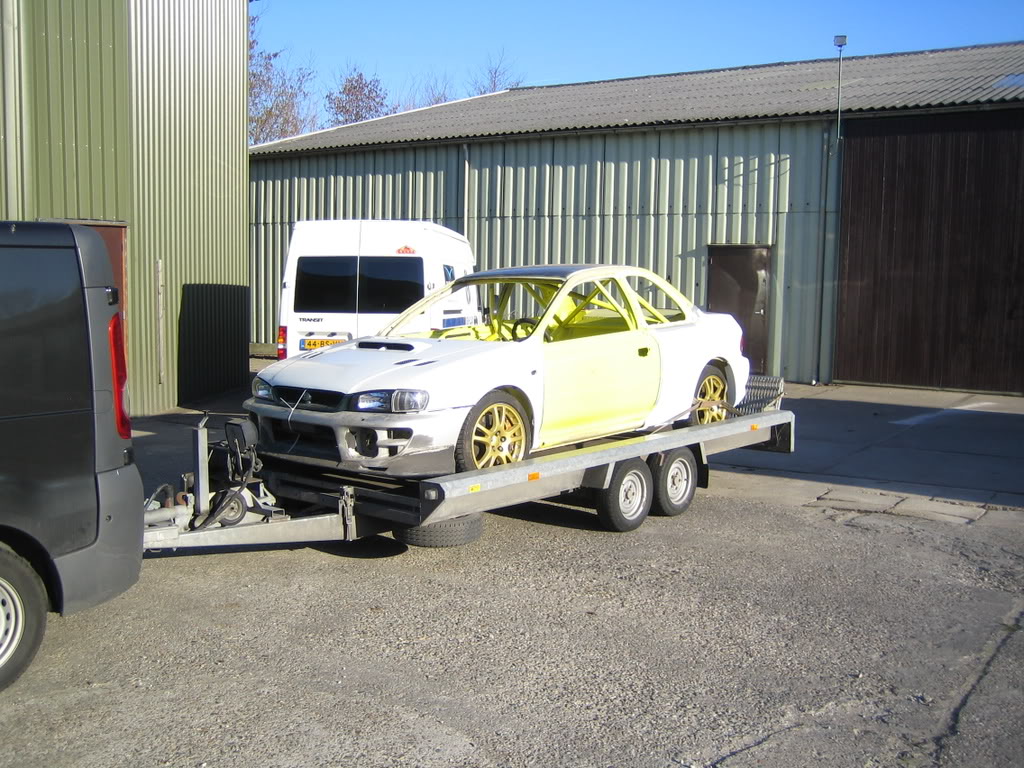
Luckily a friend of mine works in a repair shop where they have lasertool to measure everything which I could use.
So yesterday it went to the garage once again:
Err....??... so I pushed it onto the carlift.
Spend an afternoon measuring the whole bottom of the car and found a few things which did not make me happy, my enthusiasm was fading even more after it already had been dampened by finding out the not so glorious past of the car.
Measured everything and compared it with my red chassis which never had any damage.
I found that cross measured eveything was ok, max 2mm from front to rear, but the width was wrong.
It turned out that the whole front of the car was 10mm too narrow.
Aaarggggggggggggghhh....
Car on the carlift, front wheel on the other side was to far back:
I was afraid the right chassisbeam was leaning in 10mm which would f**k up my suspension geometry so I feared it would have to end up on the straightening bench for the 3rd time.
I spoke to the guy who had repaired the chassis and he told me he had used the original templates when restoring it, so at least the suspesion points were 100% correct, well it turned out not to be so.
Then when I had bought it I had it checked again to make really sure it was ok, and again they said it was ok, but again, not!.
Luckily a friend of mine works in a repair shop where they have lasertool to measure everything which I could use.
So yesterday it went to the garage once again:
17 February 2008, 06:16 PM
#86
Scooby Regular
Thread Starter
Join Date: Dec 2002
Posts: 458
Likes: 0
Received 0 Likes
on
0 Posts
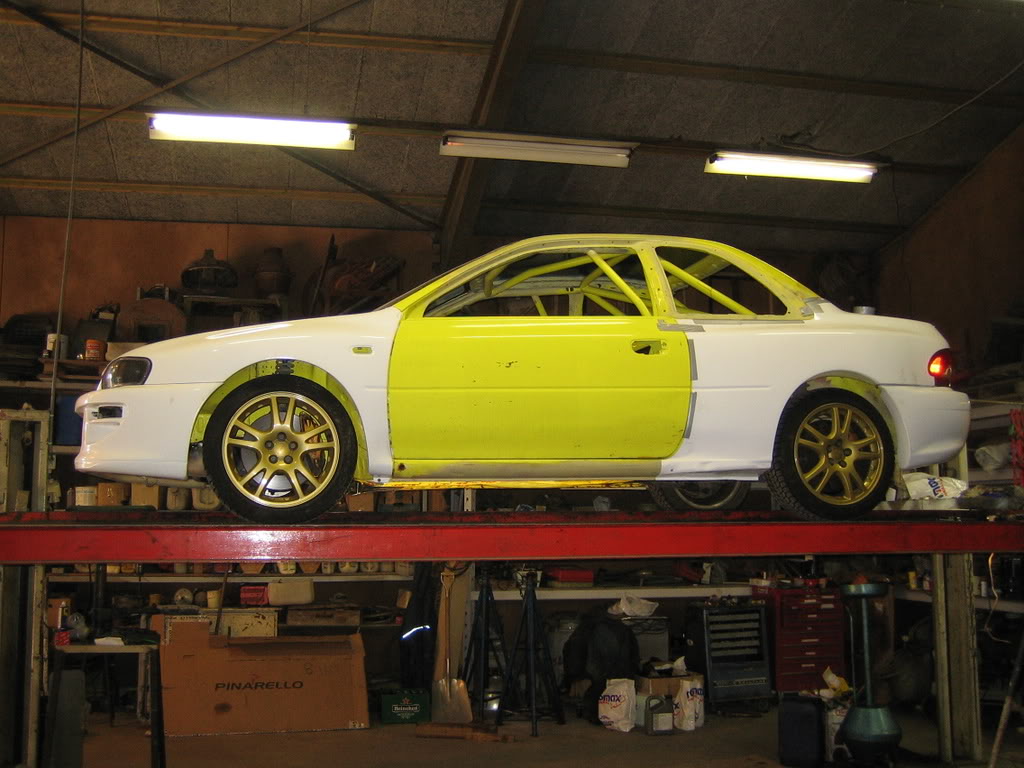
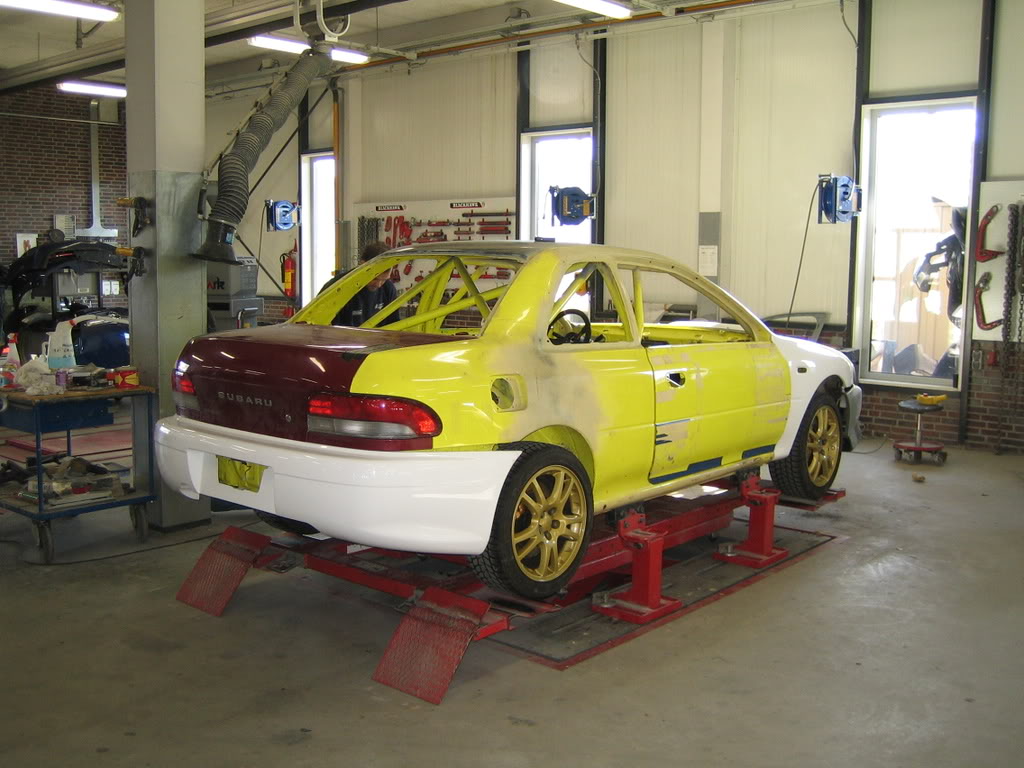
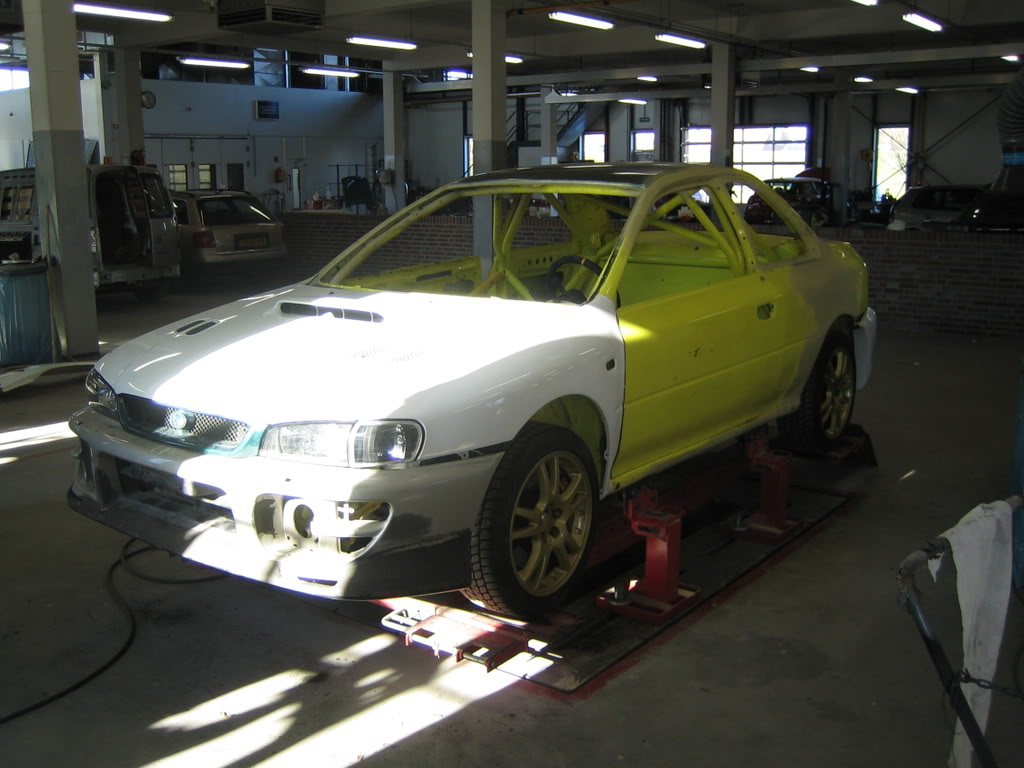
It would only be measured but the guy doing the measuring was very helpfull and soon he was using his 10ton press on the car.
It turned out the front was 3mm to narrow on both sides and the rear 2mm on both sides, so I had a gap of 6 and 4mm.
After using his press the figures wre 0 and 0, it was square and straight as could be!!
So the car had the color of a banana but not the shape thank god.
The only thing we could not fix was the 5mm shortness which was actually far more than only the front inner wing.
It goes bak through the whole leg, so the rear mounting points of the front right suspension arm is 5mm back also.
Luckily Mr. Subaru has made some sleeve holes in the subframe and mounting points so that 5mm gap should be overcome quite easily making the suspesion 100% ok!
The 10mm narrower inner wings we left as they were the sleeve holes in the fenders fix it well enough, pushing them apart would only tear things up.
After a lousy 2 weeks I can now work again with full confidence on my Chiquita!
Car on the straightening bench:
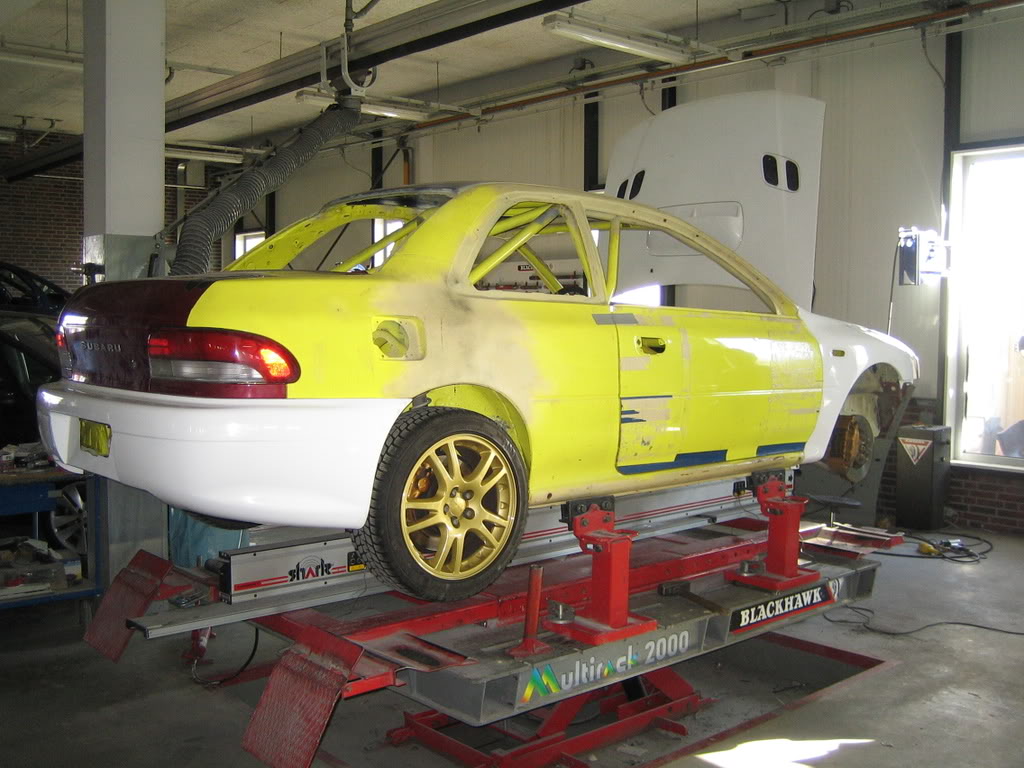
Next installments hopefull sooner than last time.
It turned out the front was 3mm to narrow on both sides and the rear 2mm on both sides, so I had a gap of 6 and 4mm.
After using his press the figures wre 0 and 0, it was square and straight as could be!!
So the car had the color of a banana but not the shape thank god.
The only thing we could not fix was the 5mm shortness which was actually far more than only the front inner wing.
It goes bak through the whole leg, so the rear mounting points of the front right suspension arm is 5mm back also.
Luckily Mr. Subaru has made some sleeve holes in the subframe and mounting points so that 5mm gap should be overcome quite easily making the suspesion 100% ok!
The 10mm narrower inner wings we left as they were the sleeve holes in the fenders fix it well enough, pushing them apart would only tear things up.
After a lousy 2 weeks I can now work again with full confidence on my Chiquita!
Car on the straightening bench:
Next installments hopefull sooner than last time.