When you click on links to various merchants on this site and make a purchase, this can result in this site earning a commission. Affiliate programs and affiliations include, but are not limited to, the eBay Partner Network.
The panels are bowed slightly in 3 places, I've covered the main scrape up with touch up for now as it was to the metal, only advantage I have is my cousin is a paint & bodywork specialist so he is going to sort it for me for a decent price, but its not gonna get done for a while.
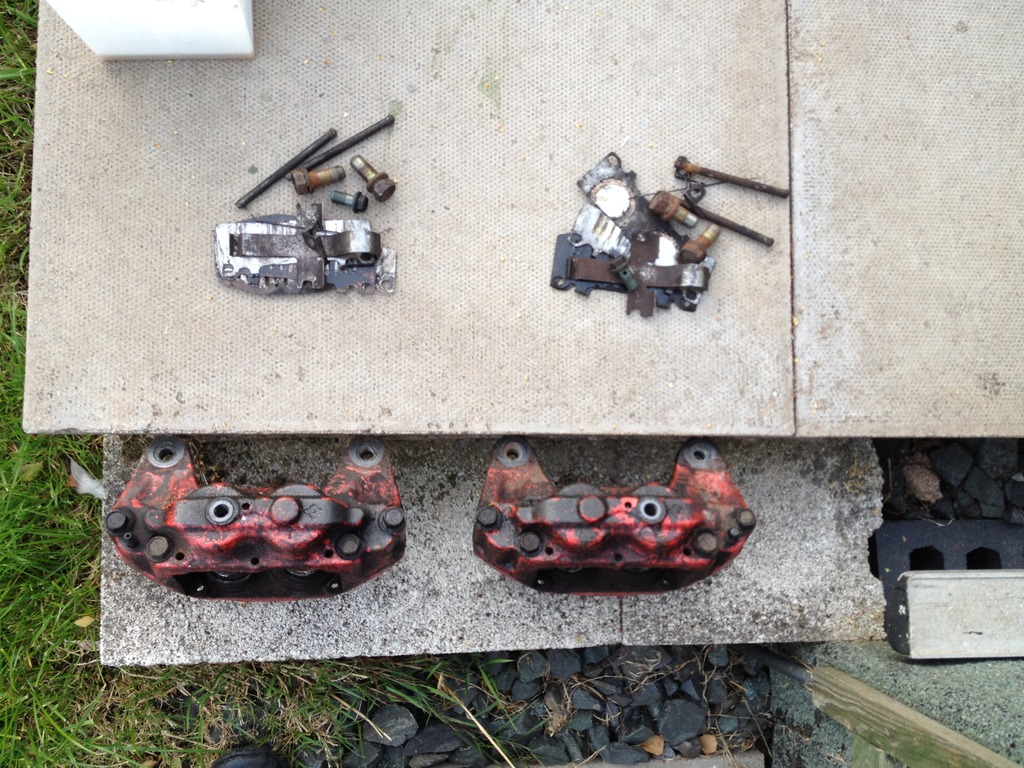
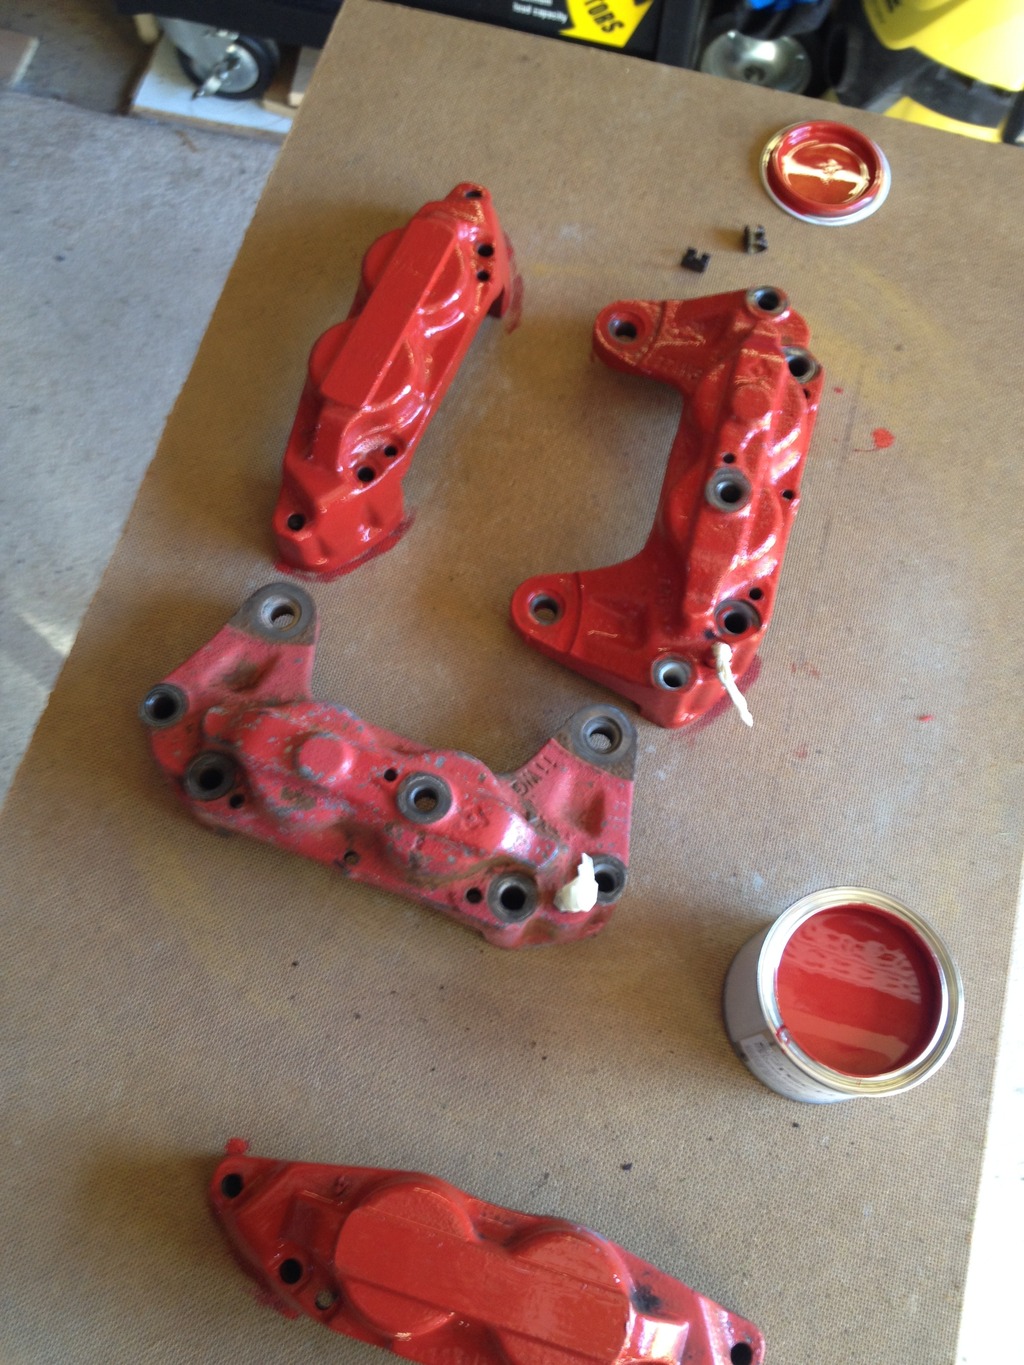
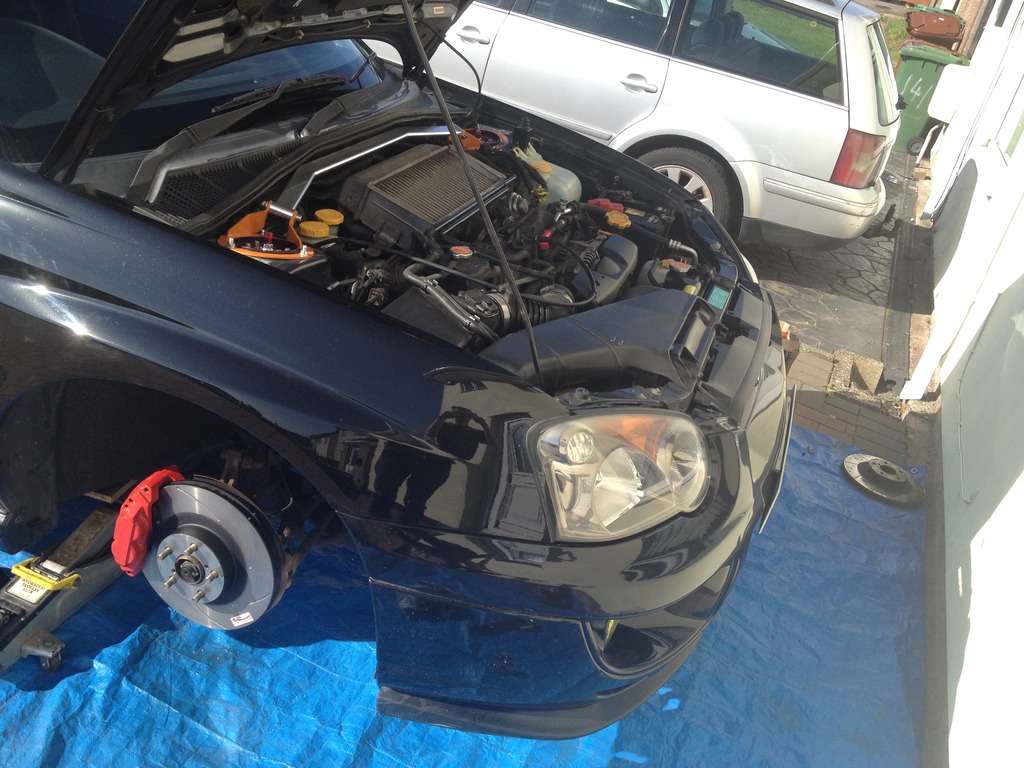
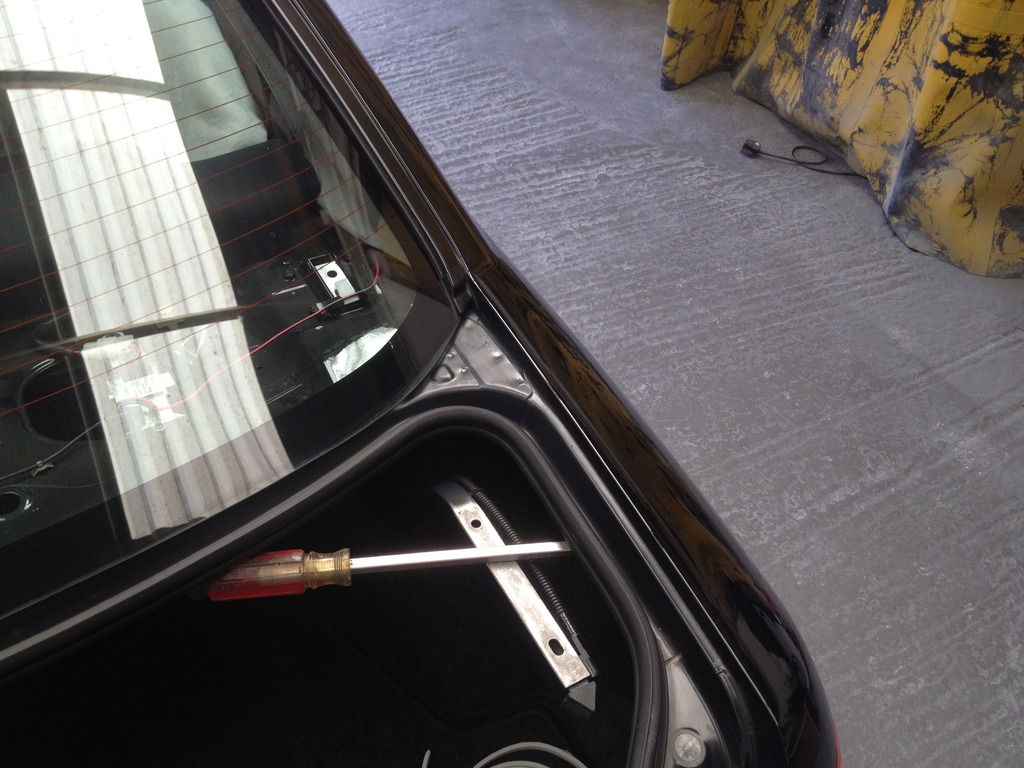
So I spent all this weekend doing a full refurb on my calipers, I noticed that my passenger side front had a seized piston, after freeing it I figured I may as well sort it out properly so I ordered a rebuild kit and new discs and pads from Godspeed. Turns out that both calipers had a seized piston once I stripped them down.
First thing was to get all the old pistons and seals stripped
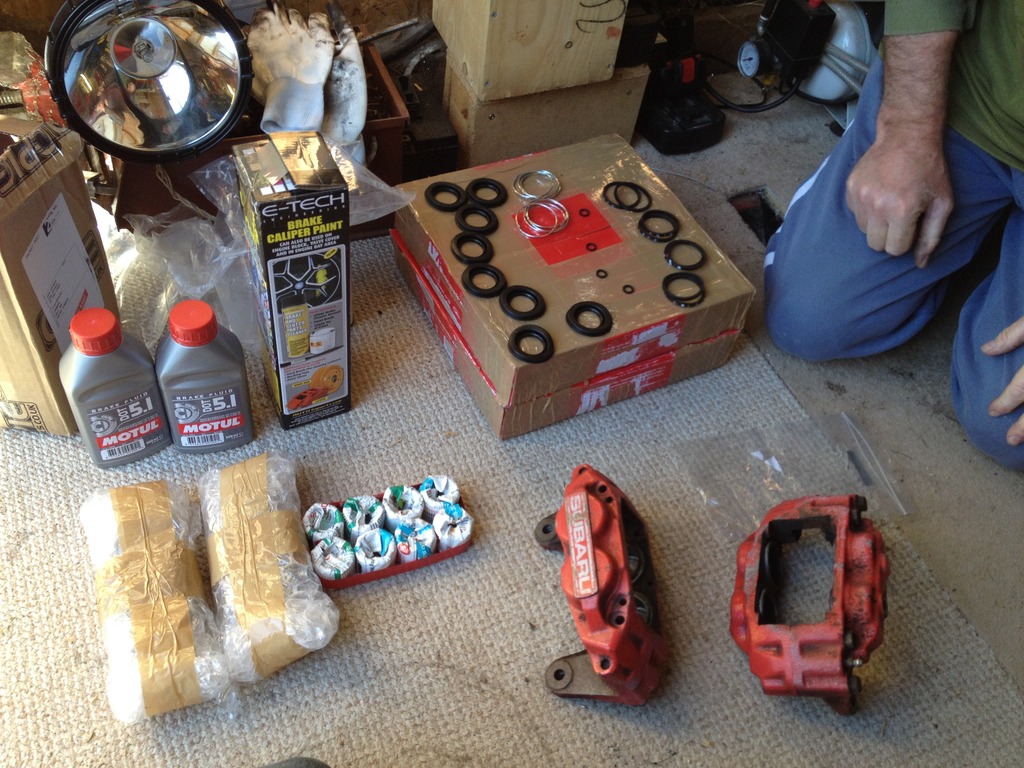
New parts all waiting to go on
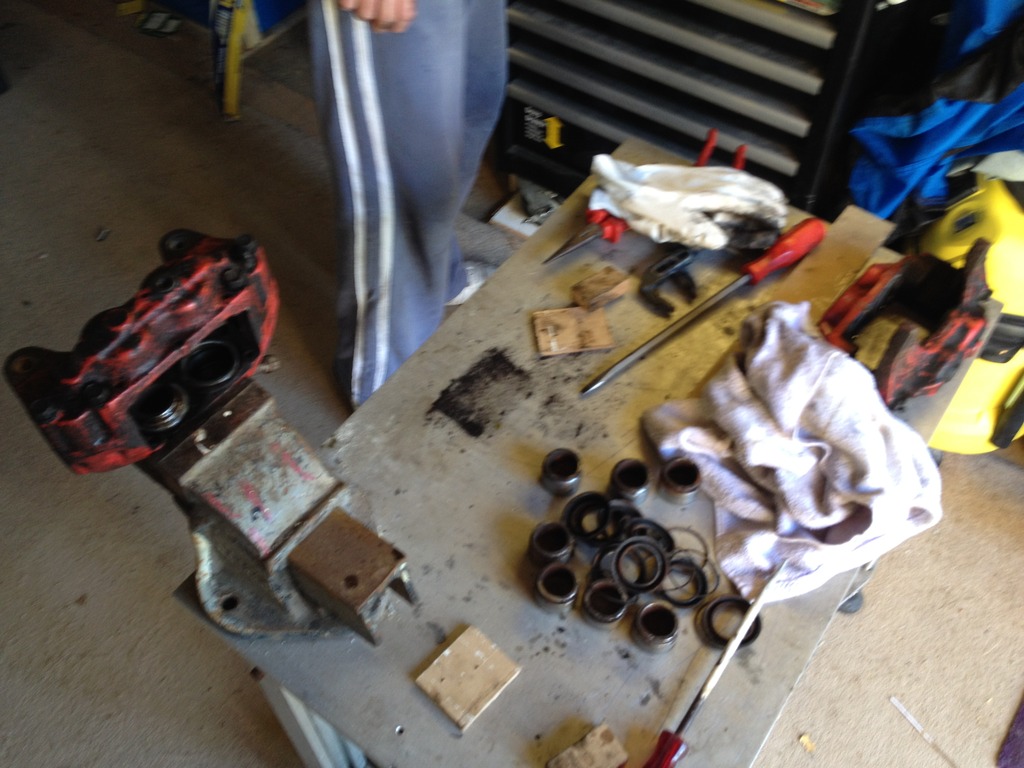
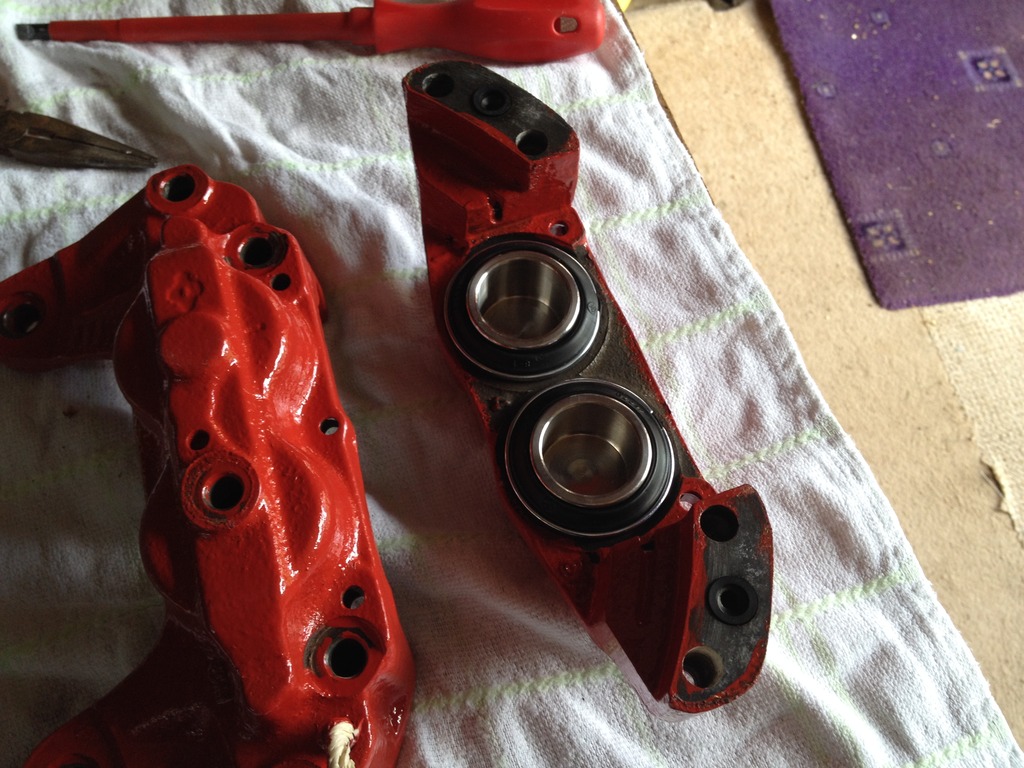
Then split the calipers and gave them a good clean up, amazing how much crap you pull off them when you start..
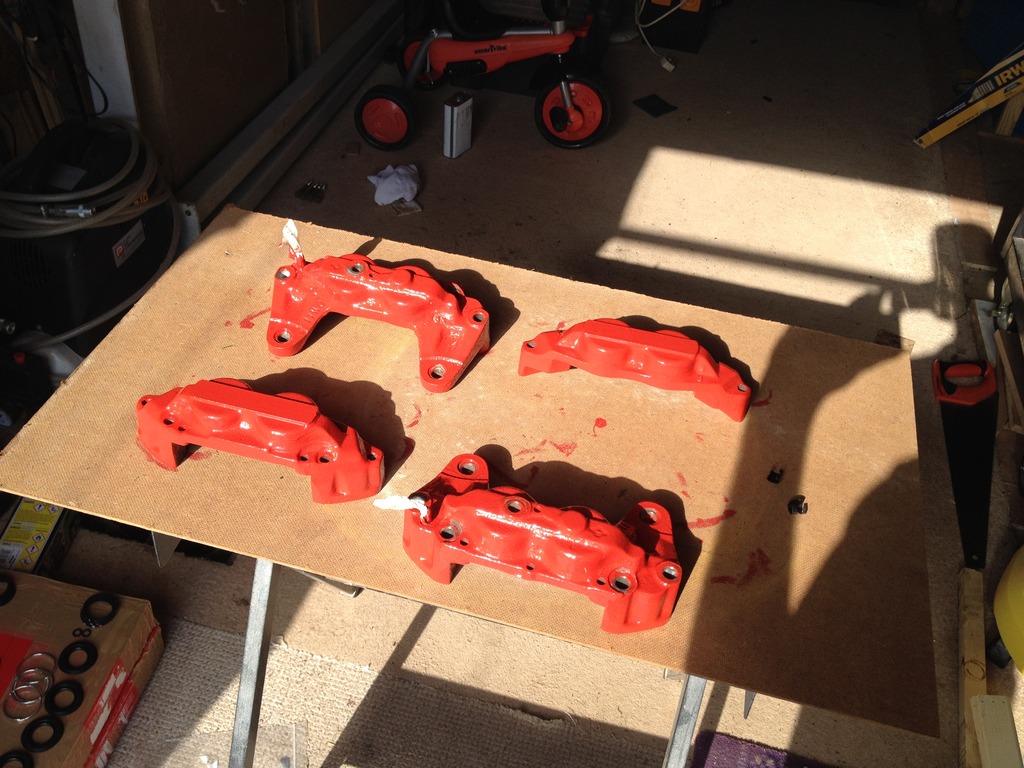
First coat of paint
All painted and ready for the new pistons and seals to go in
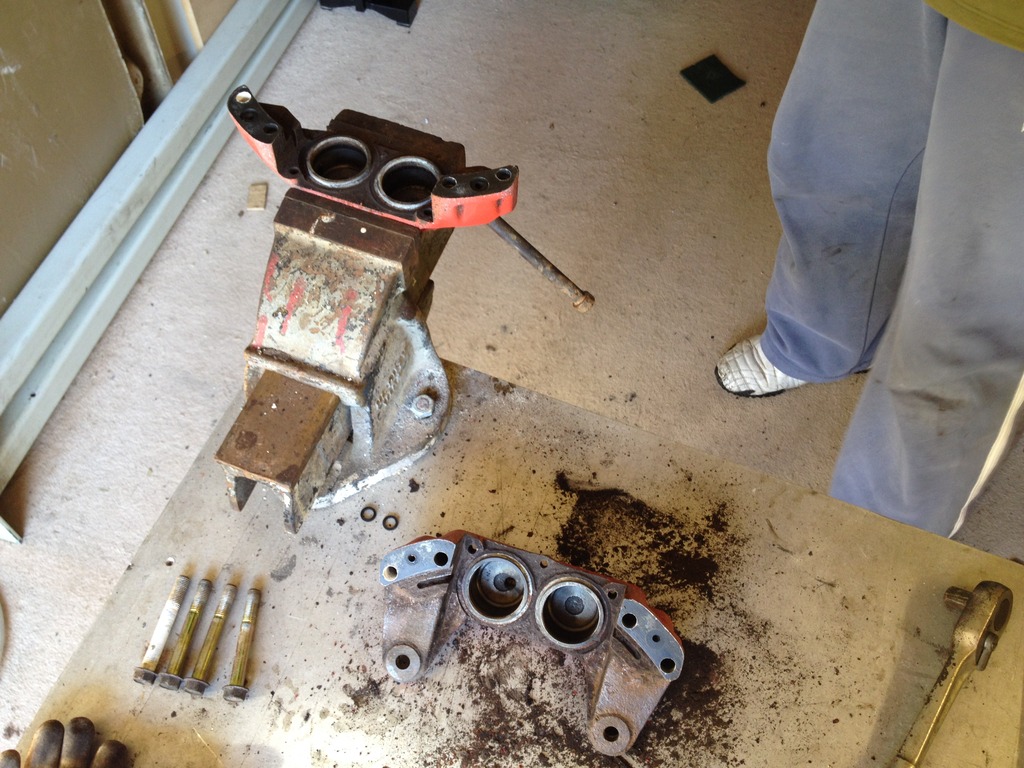
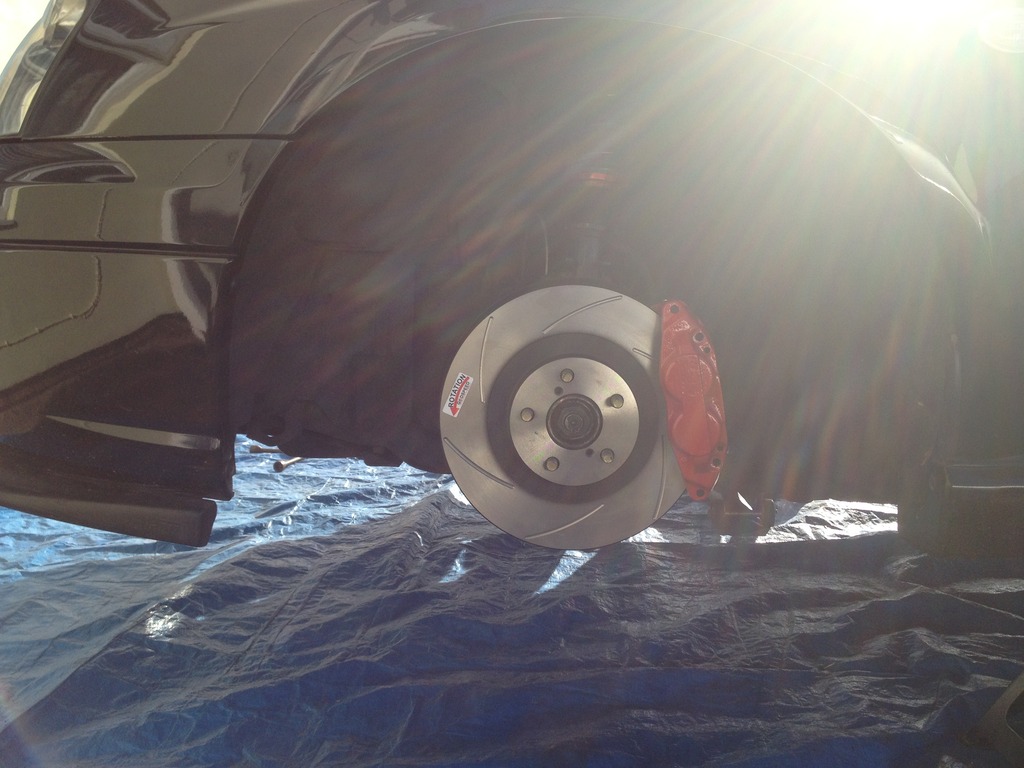
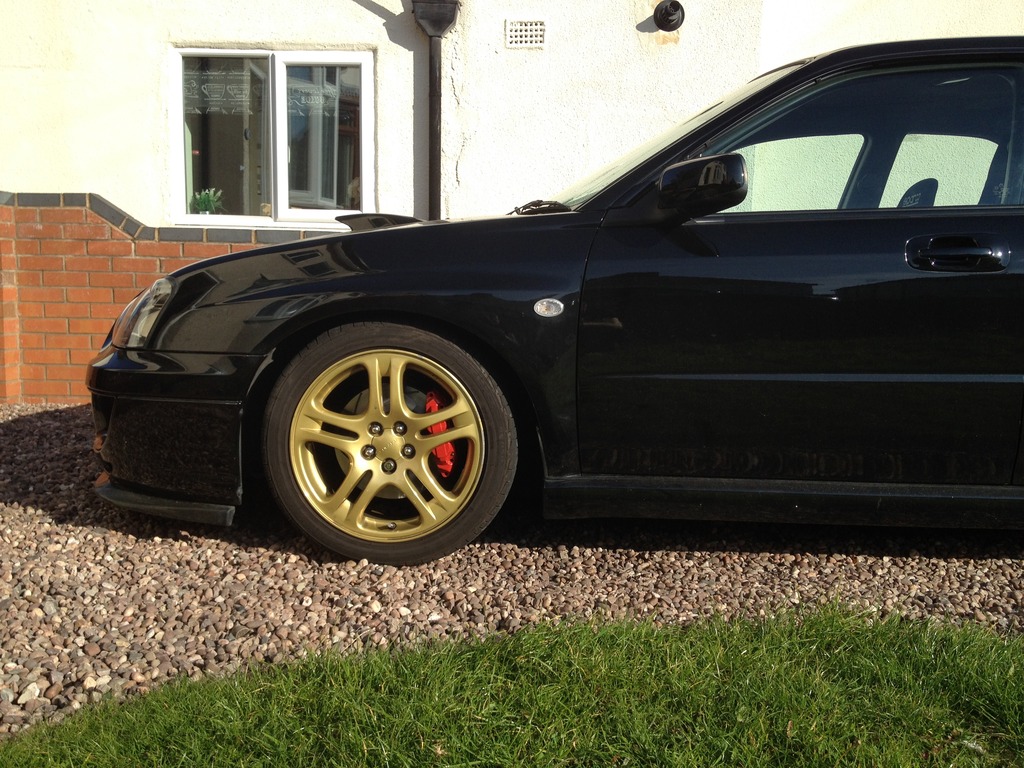
Then got everything back together on the car
Full fluid bleed replaced with Motul dot 5.1
And all done
Just waiting for some replacement decals for the calipers now and bedding the brakes in.
Wow I didn't realise it had been this long since I updated this.. anyhow I got married just over a week ago so now I have freed up some money to spend on the motor
She's going in for a full service at Pole Position on Monday. And I have also picked up a new boot lid, super rare, factory fitted with the A line spoiler, so no welded boot holes here
So this is in for a full strip down and respray whilst I go on my honeymoon, ready to fit when I come back, can't wait.
Whilst I have been waiting for my boot lid to be finished I have spent the time tidying up the engine bay, so the rad brackets and battery tie down were taken off, cleaned up and resprayed, and some general cleaning in the bay, but thats not finished yet..
However today was the day I got my phone call to say the boot was ready to get put on, so with lots of excitement I headed over to get started.
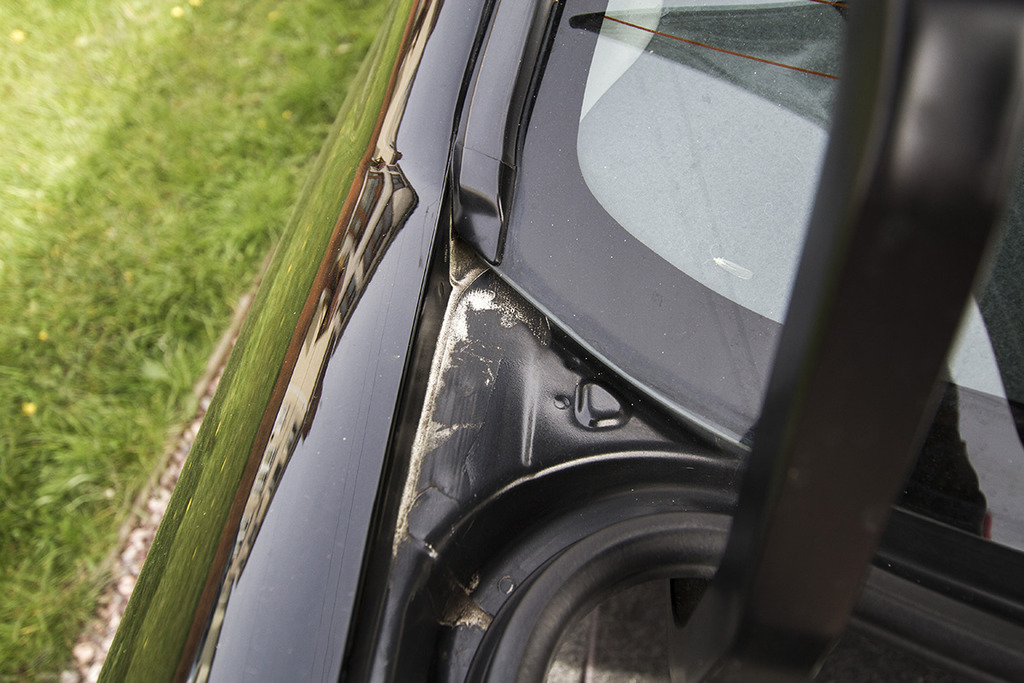
When I first got there we started taking my boot lid off ready to change the bootlock over, and whilst it was off I asked about the horrible white marks I had between the boots rubber seal, it was on both sides and basically the paint had worn off inside
He told me it was no problem to sort whilst we were there with the boot off, so after masking off the areas, a quick rub down and 2 light coats saw it looking all better
Then we carried on getting the boot in place to start the polishing stages before attaching the A line spoiler, badge and boot lock.
so to cut the rest of the story short, I had also bought a replacement front splitter as I broke the last one, and this time bought some rear spats to tie in with the lip spoiler, so glad I did�.
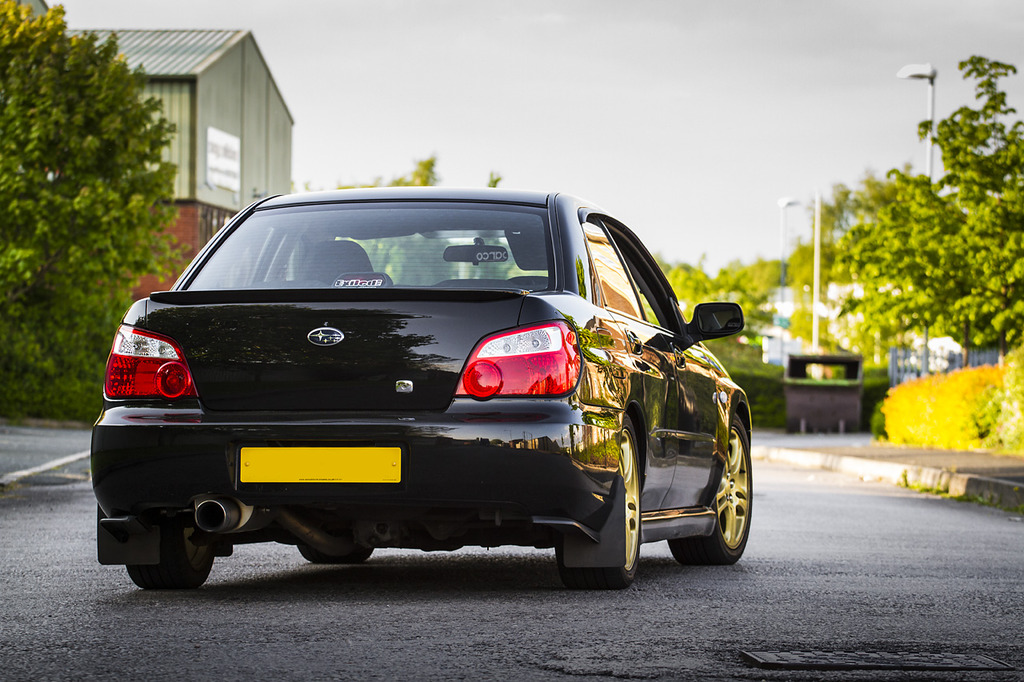
Really nice car, and I'm not just saying that as I've got a black blob! What products do you use to get a shine like that?
Thanks bud, I tend to use a good majority of Auto Finesse products, but have recently started trying out a few other brands from some detailing sites as well. If you want more details about my cleaning methods etc just throw me a PM
Originally Posted by SirFozzalot
Lovely looking scoob with some nice subtle and sensible mods.
Subtle and sensible is the approach I'm going with, so I'm glad to hear that
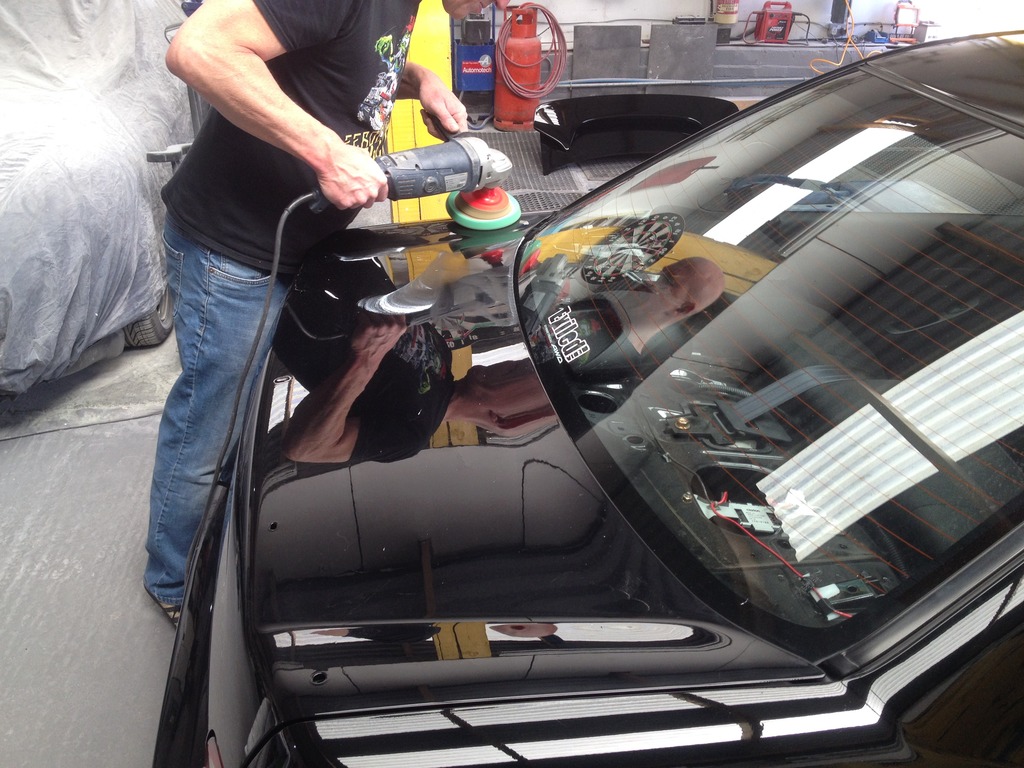
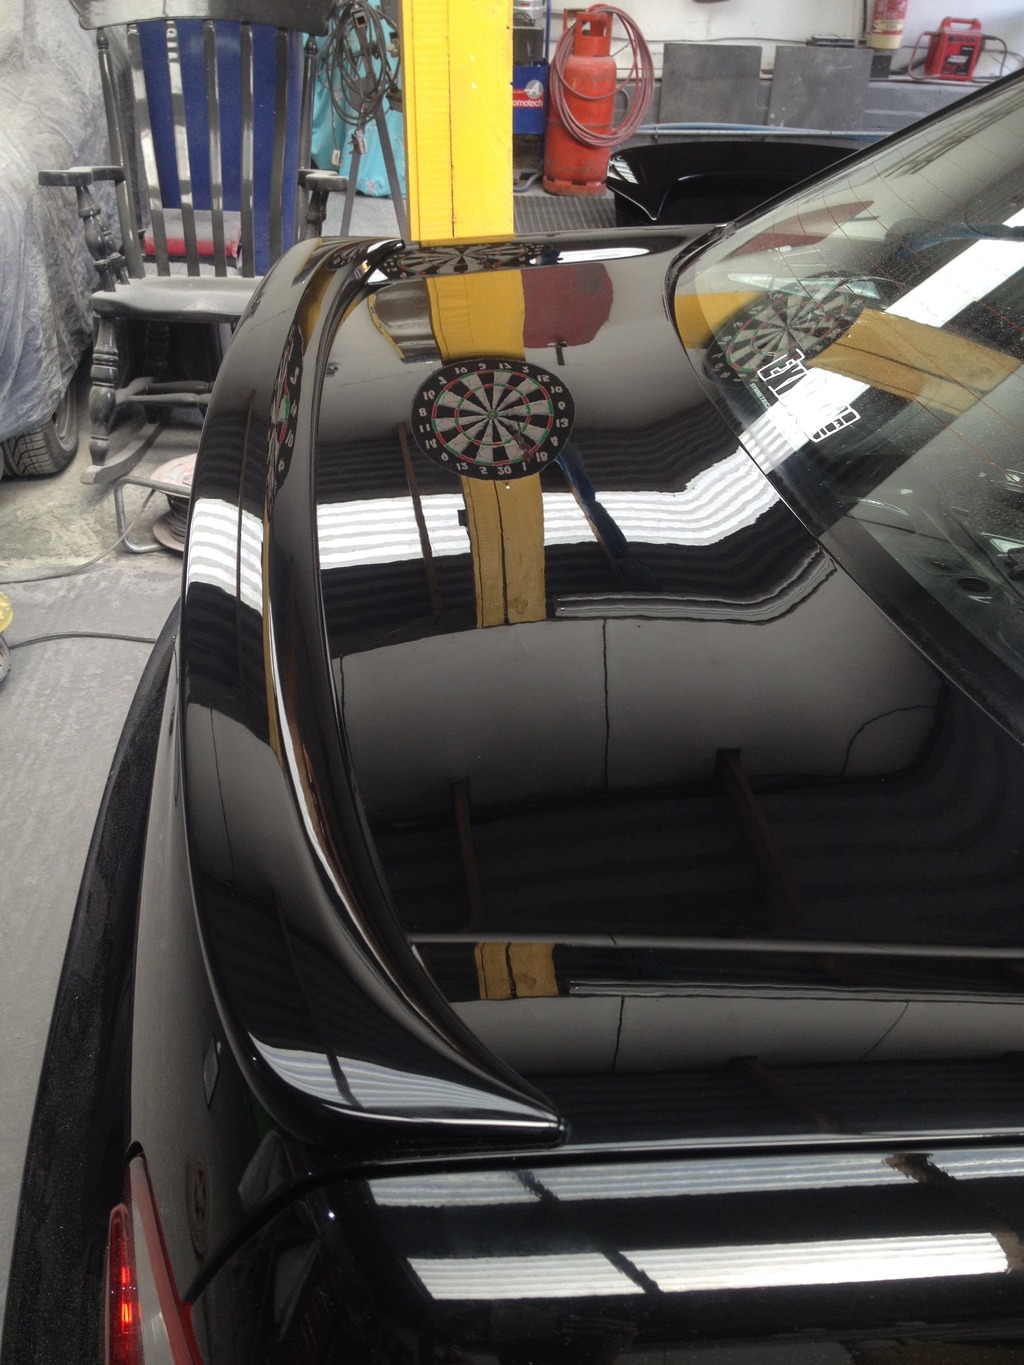
Its gone back in for a refining polish on the boot and roof today and picking it up tomorrow. Still lots of bodywork issues to sort out over time though
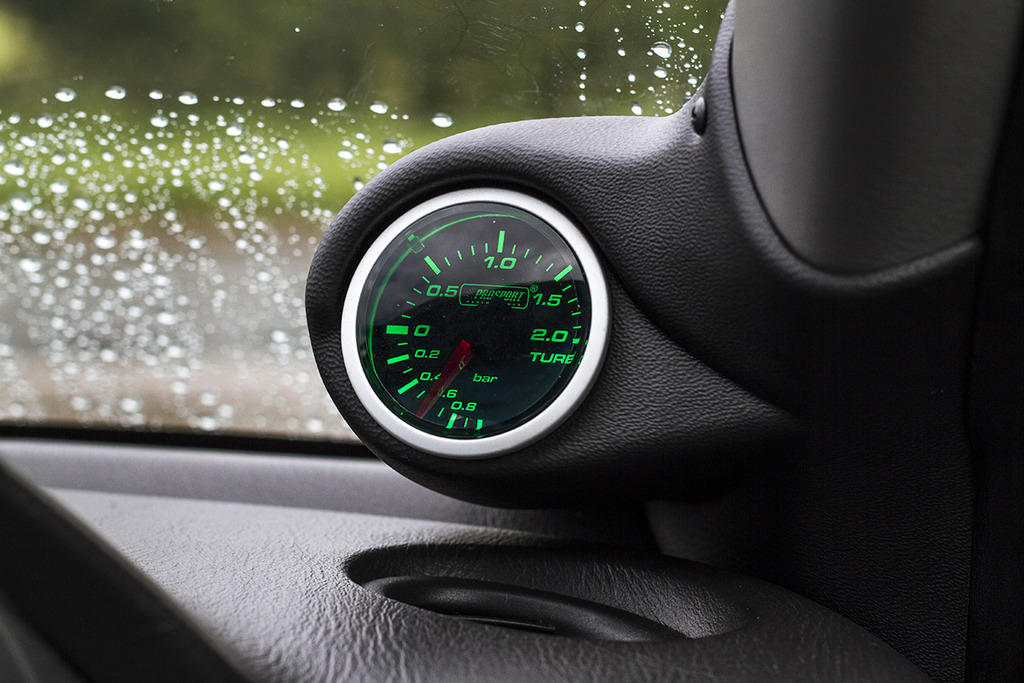
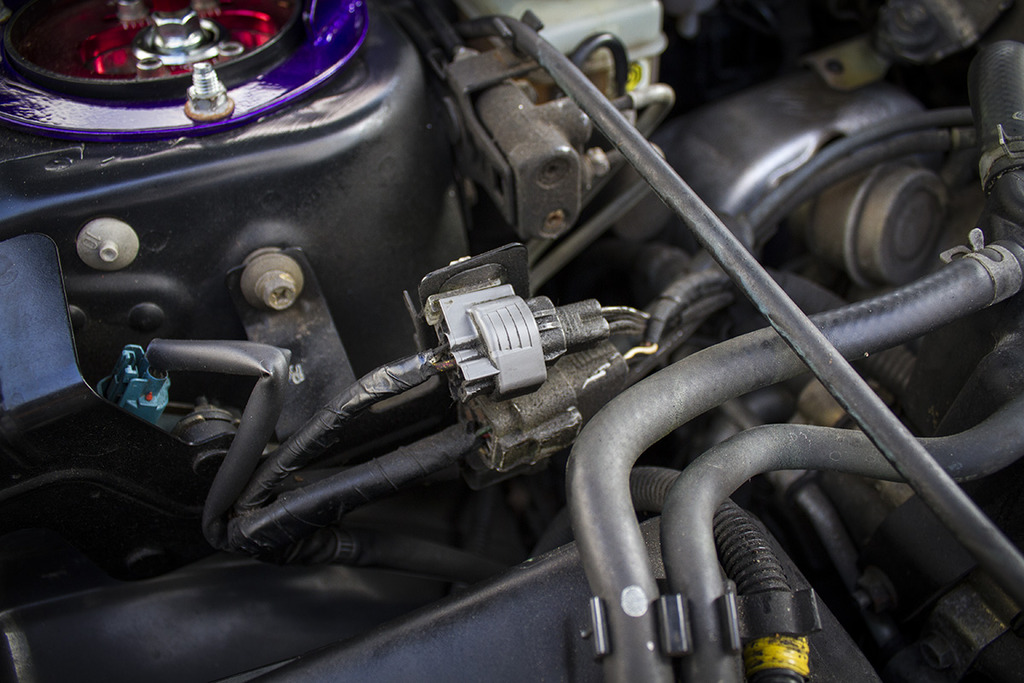
My latest purchase has been a Prosport boost gauge and scoobyworld pillar pod. Only just got round to fitting it at the weekend, so now I can keep an eye on the health of the engine and the turbo ready for future mods
The car has also flew through its MOT
I've also sent off my strut brace brackets to be powder coated so should be collecting those in a couple of days., if I like the results I'll be getting some more bits done too as part of my engine bay cleanup.
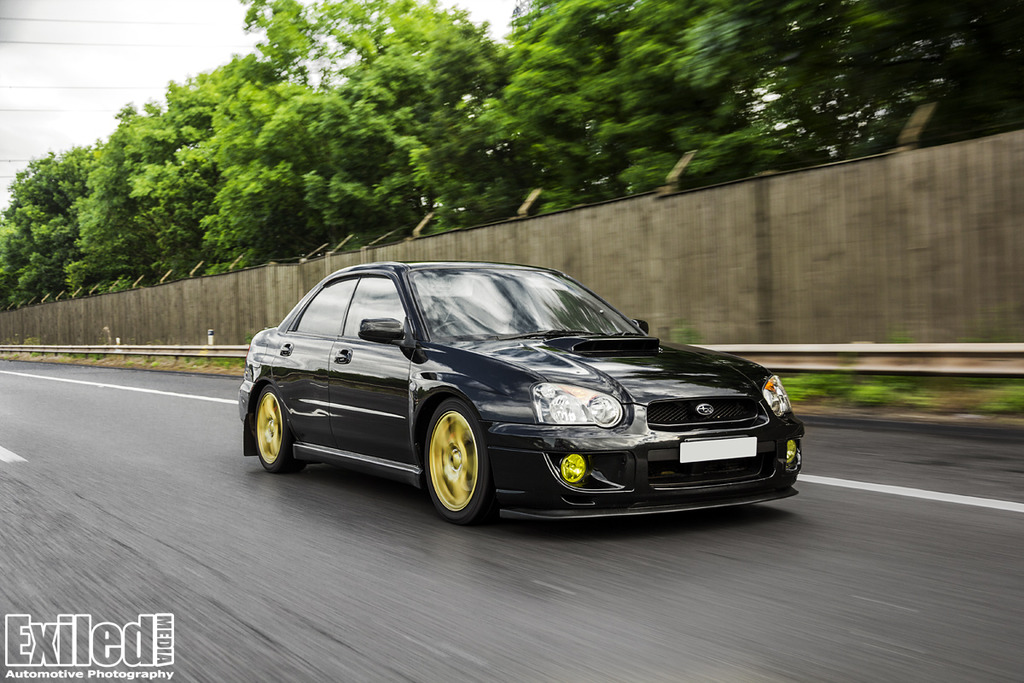
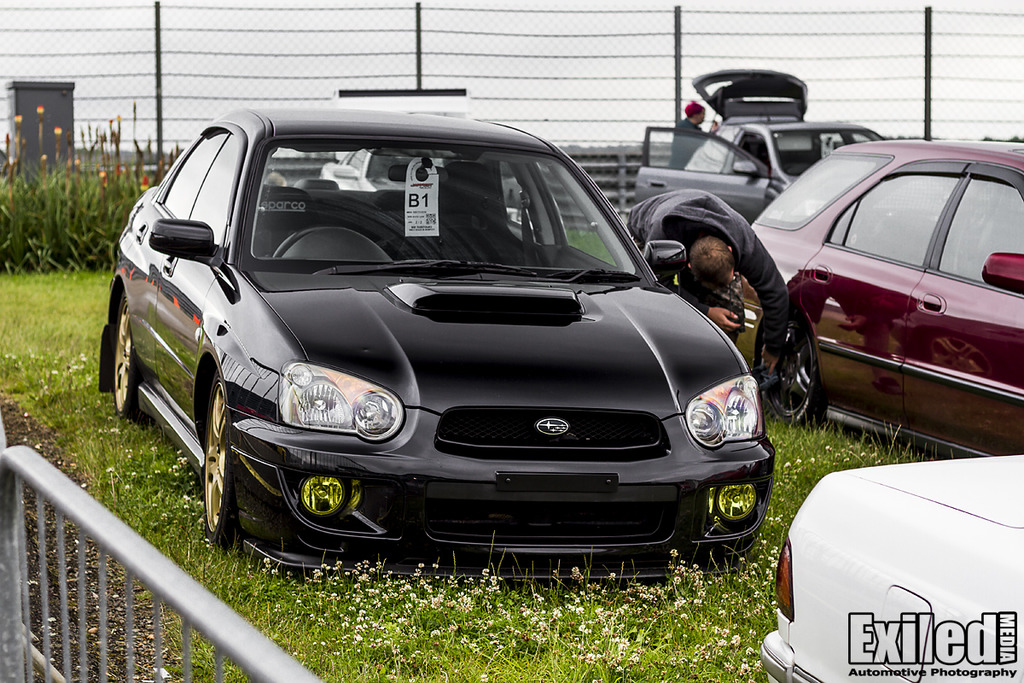
And got myself a nice new roller shot from on the way to Japfest Rock the other week.
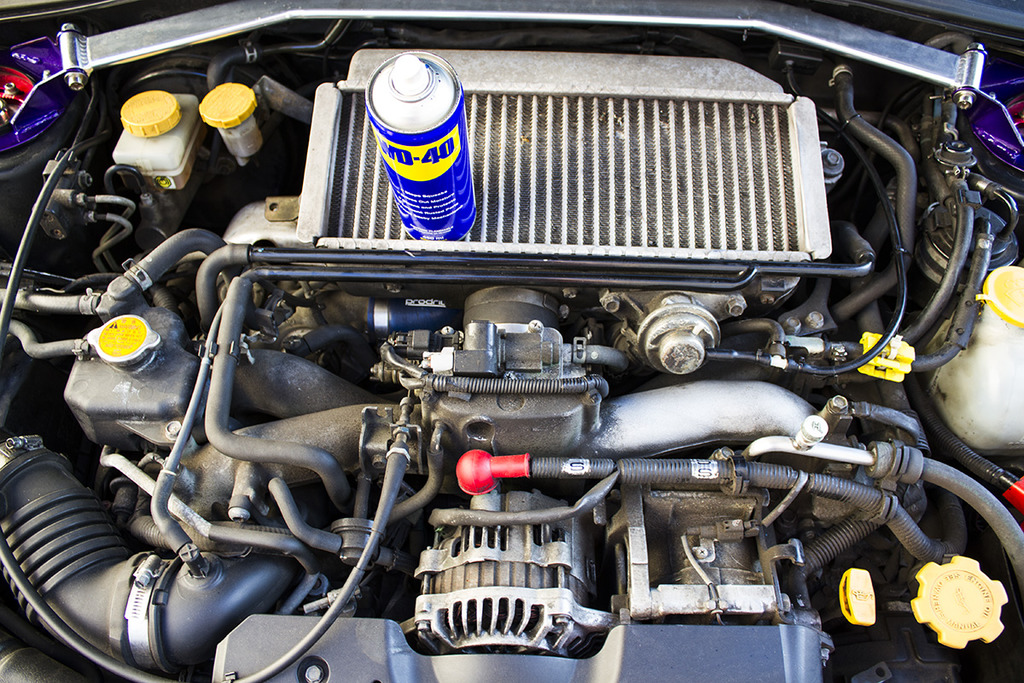
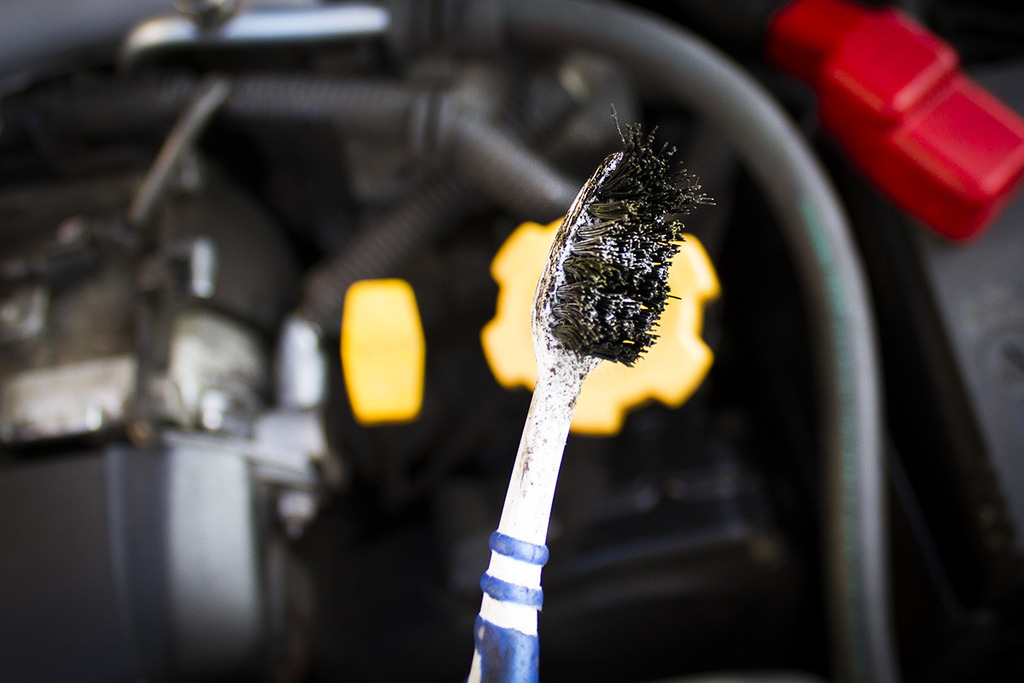
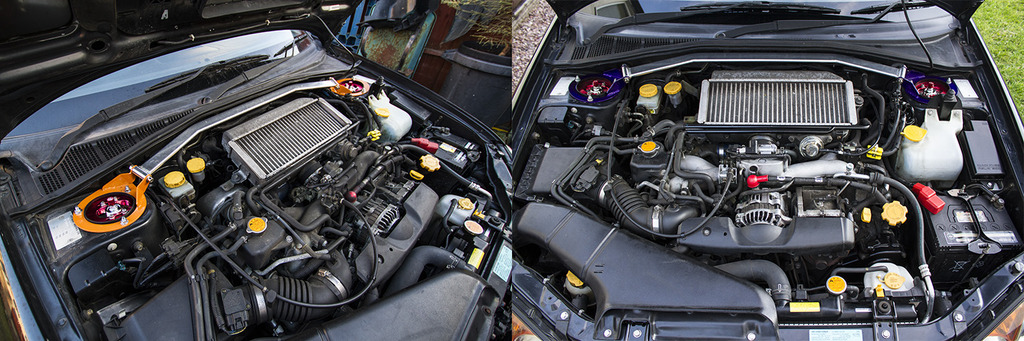
Well I have now had my strut brackets back from the powdercoaters, and I absolutely love the colour they have come out so will definitely be going for that theme. I figured it was time to really get the engine bay looking better so I did my first stage of attack yesterday evening.
Weapon of choice was good old WD-40. You can see which side I had already attacked on this pic, came up much better than I expected. A few in progress shots to show the difference.
And the most useful tool for this task was an old tooth brush to get at all the nooks and crannies:loll:
Looking much better here
So I still need to clean up all the plastics and give them a dressing, and next thing to look at is some replacement hoses as some of them are looking a little old and faded now.
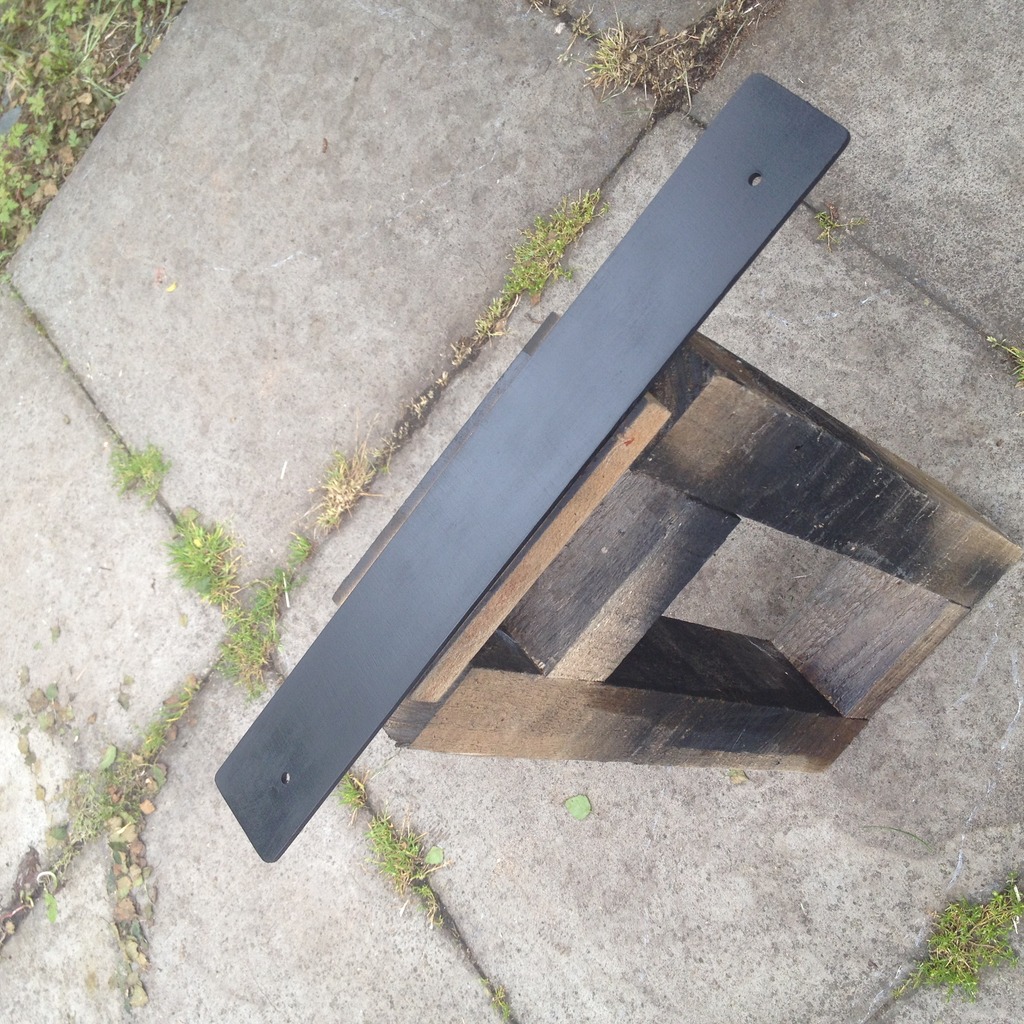
I've seen a lot of licence plate blanking plates that you can buy, but with all of them in the region of �50+ I think that is absolutely RIDICULOUS for what they are... so I made my own, out of an old licence plate
Cut it to fit the exact size of the lip where the plate sticks out on the bumper, couple of coats of matt black paint and voila.. Looks pretty darn good for about �3.
This was just after one coat but you get the idea.
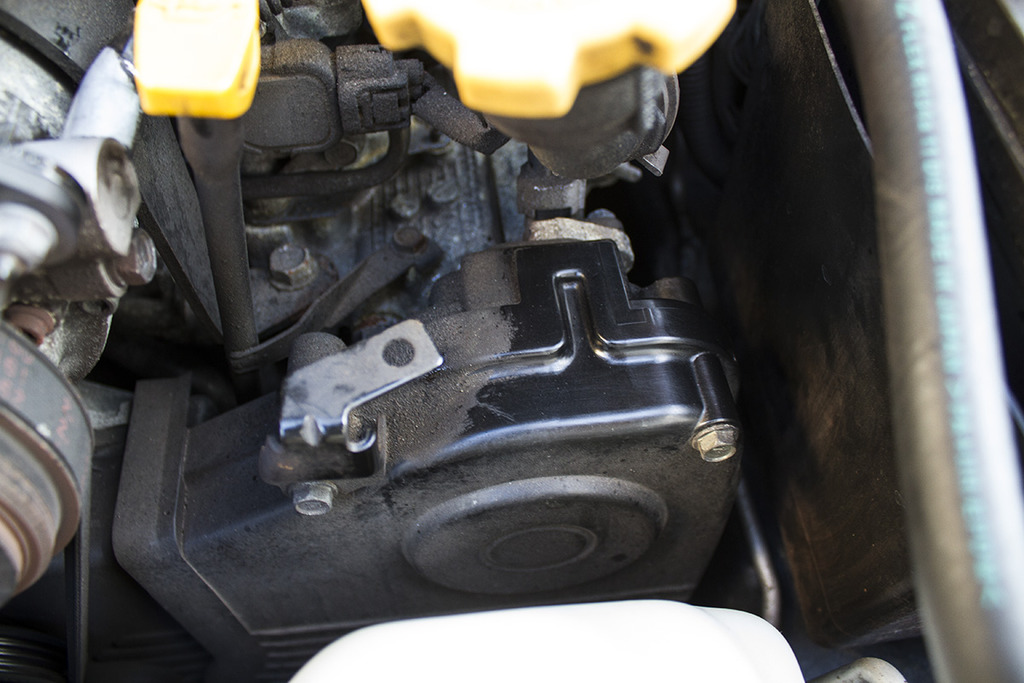
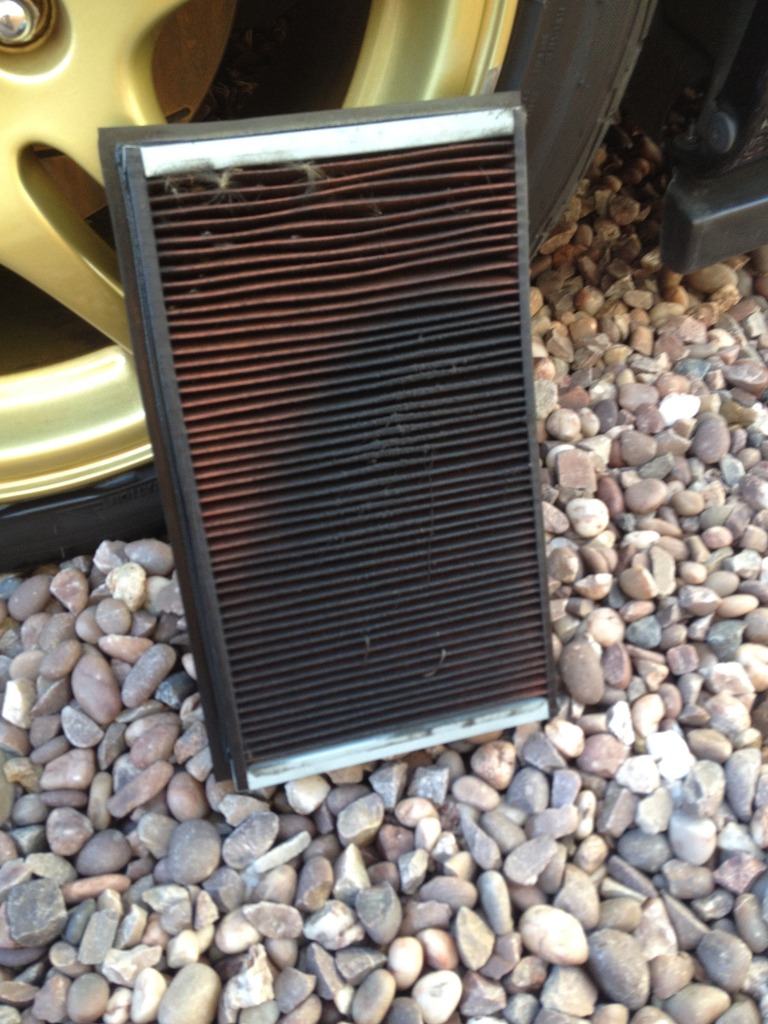
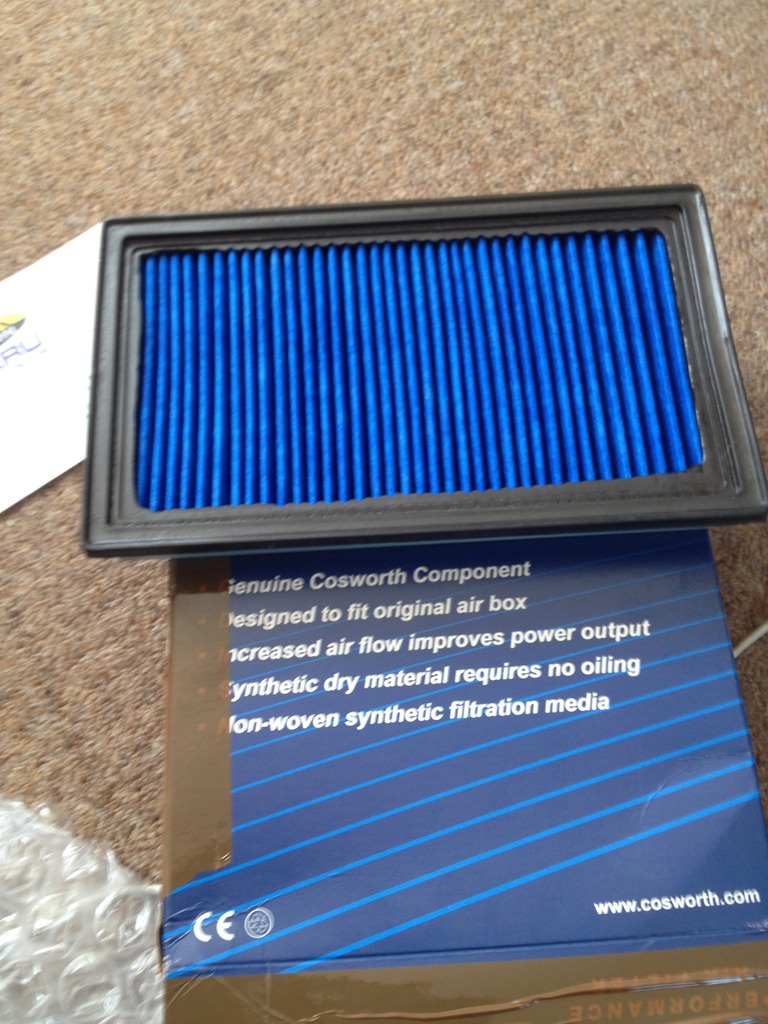
In the past couple of months I have also had to replace the alternator belt due to my aircon tensioner breaking and cutting it in half, and after checking the air filter I was quite shocked just how dirty it has got so have now replaced that with a cosworth one.
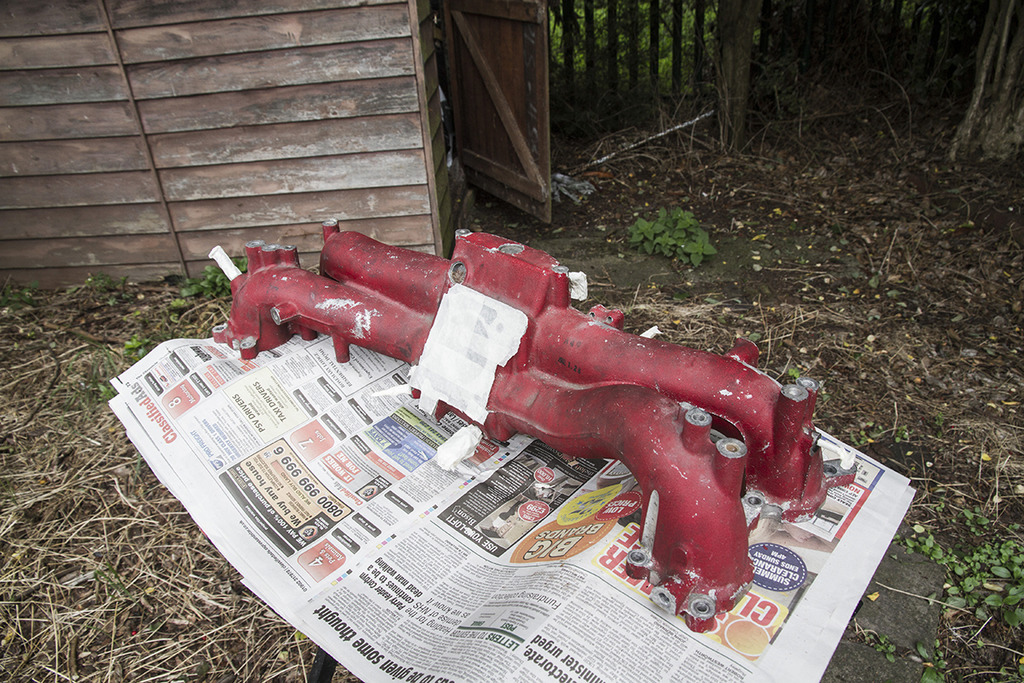
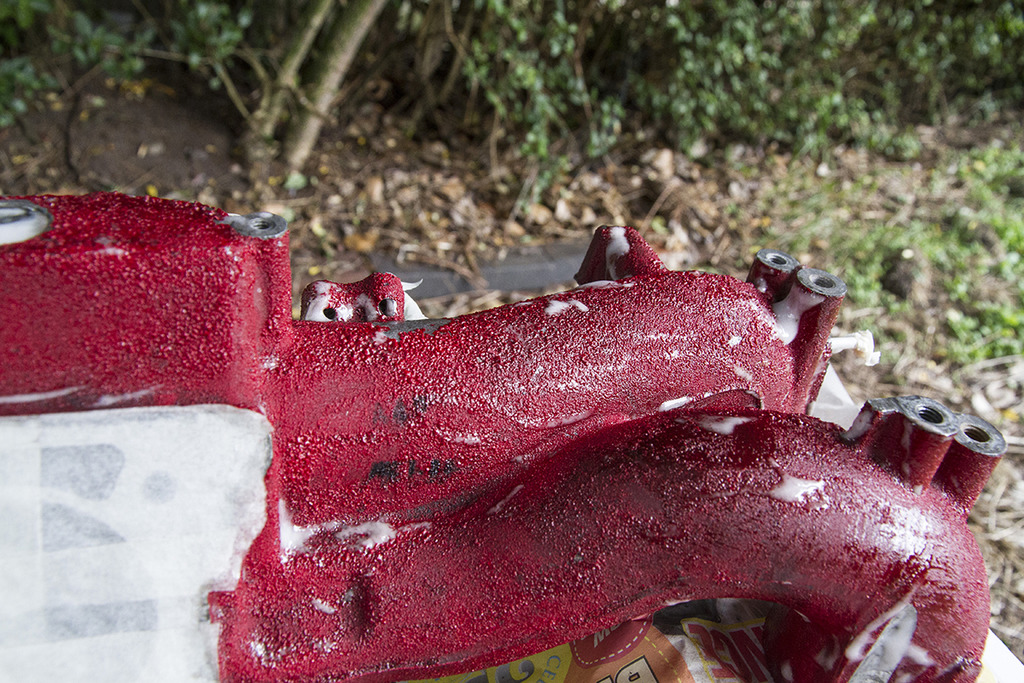
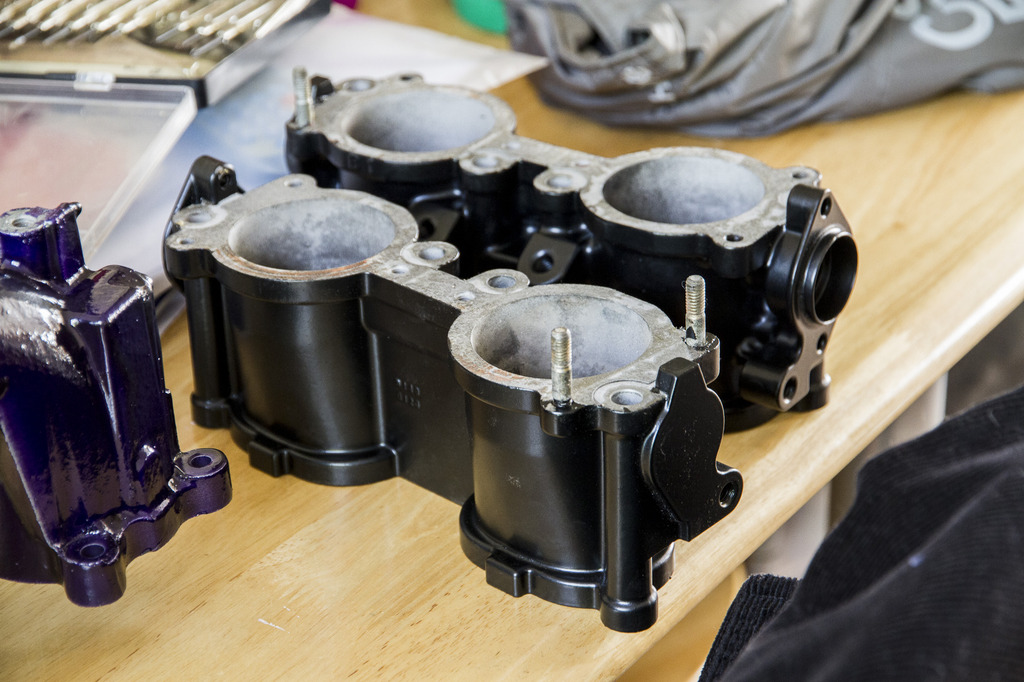
And finally I have recently bought an Sti inlet manifold and pink injectors, I am going to be refurbing the manifold why it is off the car which also gives me the time to acquire the other parts I need.
I'm also trying to decide what brakes to go for to upgrade, not sure whether to just go for Brembos or go even better, so if anyone knows of any good deals or recommendations be sure to let me know.
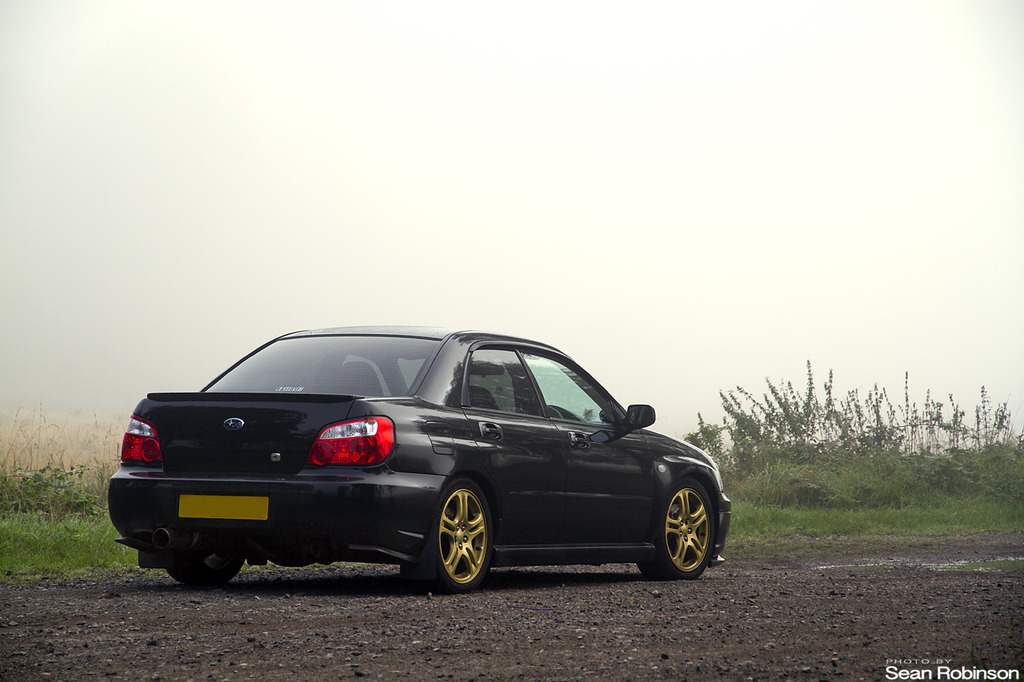
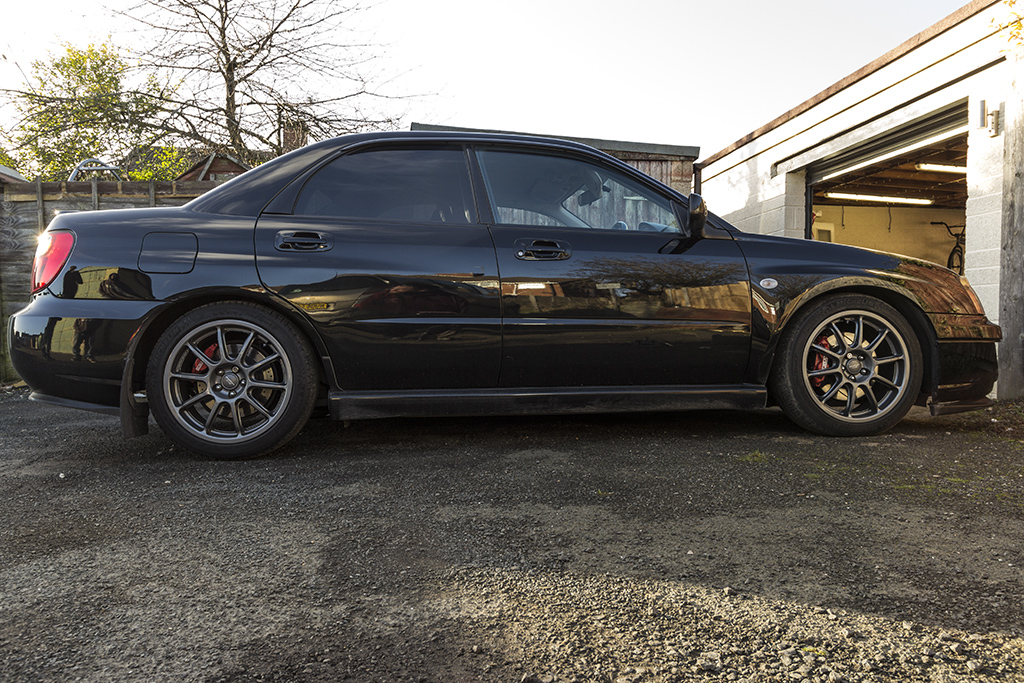
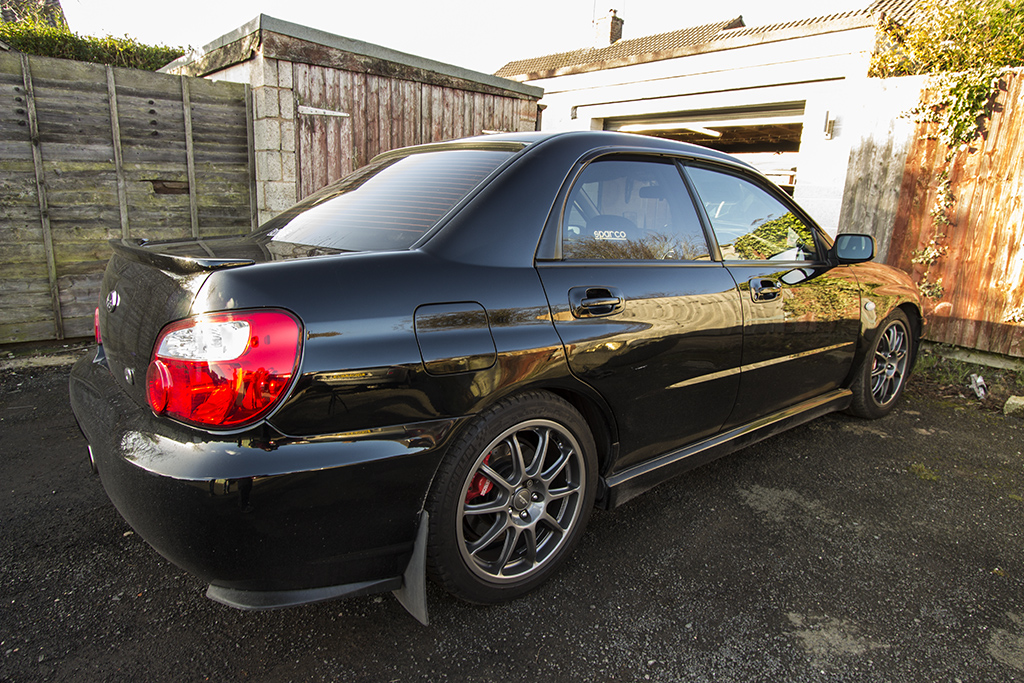
I got my windows tinted on Monday, something I've been meaning to get done for ages just not got round to it until now... Exterior is coming together nicely now, and I have also just received my rear window lip spoiler, just got to decide if I'm gonna get it painted or leave it as it is.
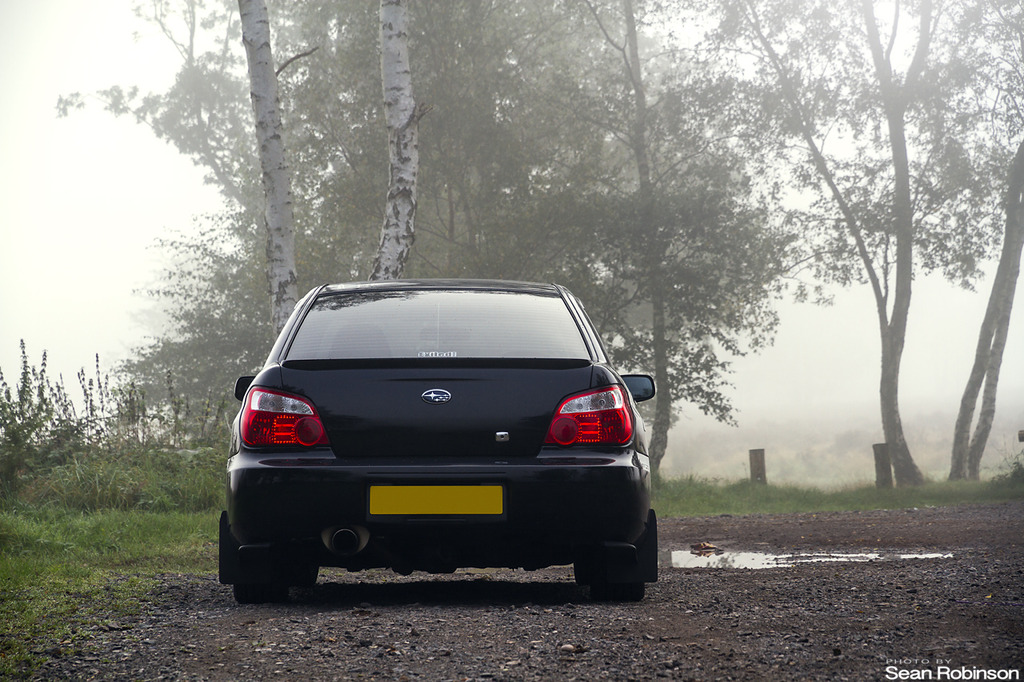
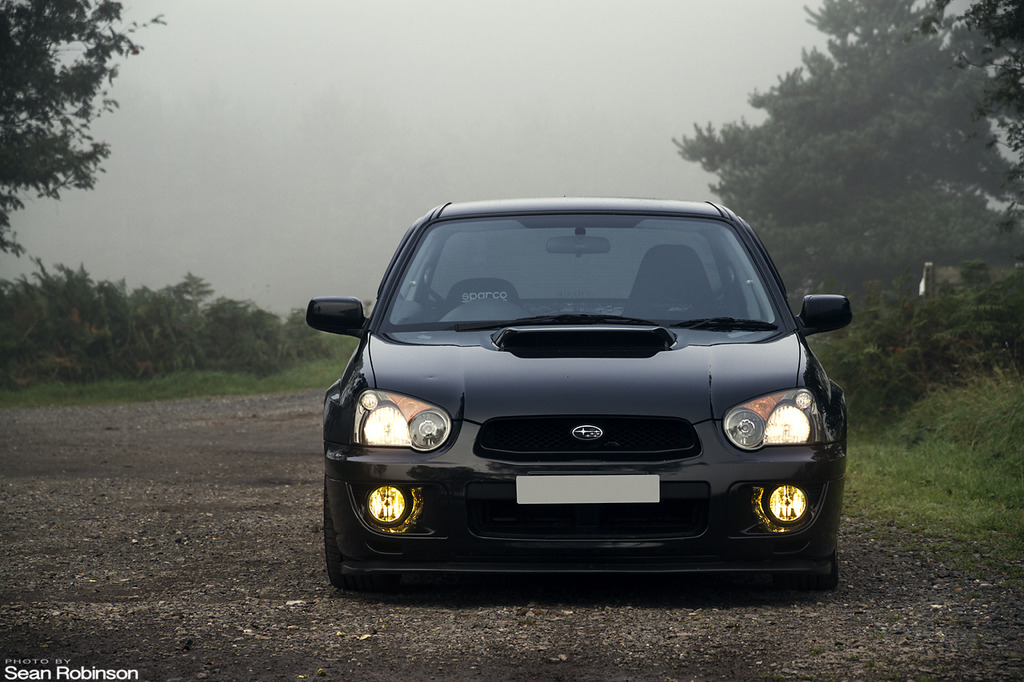
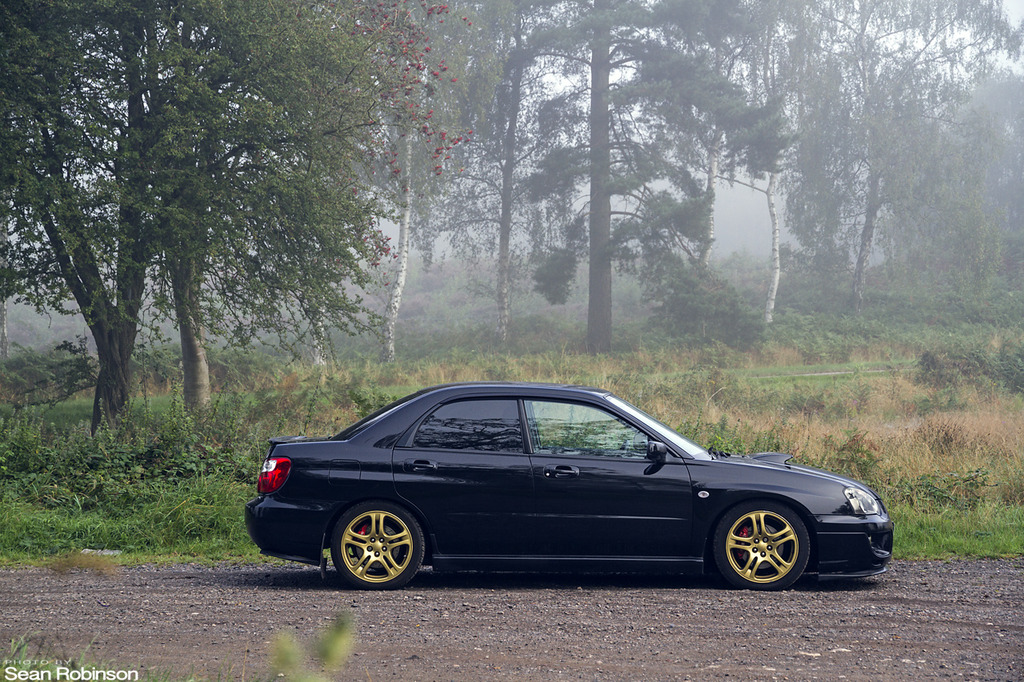
Managed to grab a few shots this morning in the epic fog, cars filthy though..
I forgot my blanking plate as I rushed out for to make sure I got shots in the fog
Looks really smart.
How did you get on with brakes? Did you decide what to go for?
Not yet bud, ideally I need some bigger brakes that will fit under the stock wheels as I can't afford to buy both brakes and wheels atm, so still trying to weigh up all the options.
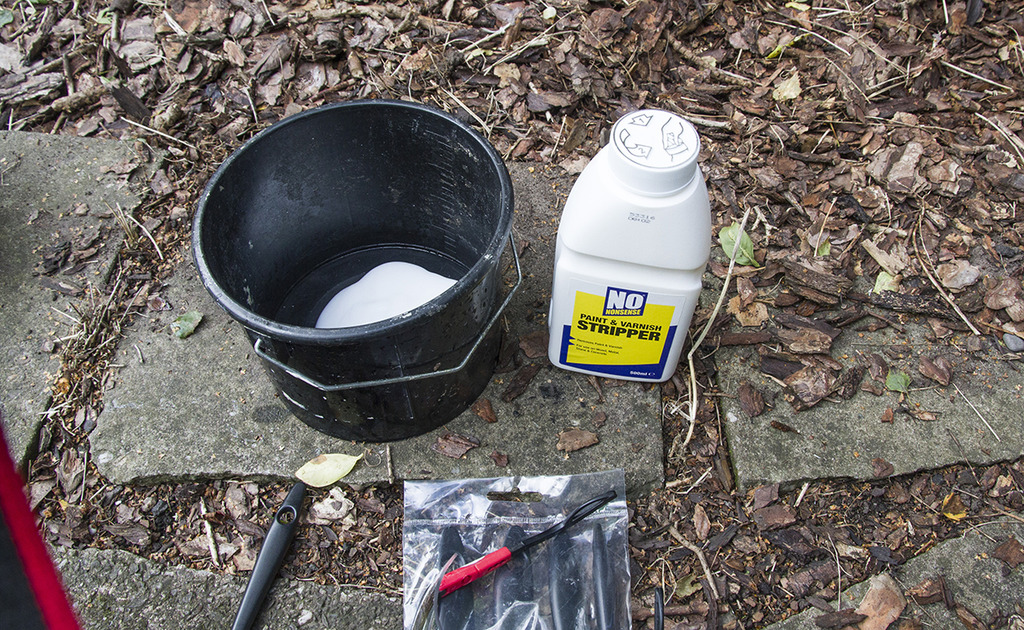
I made a start stripping down the manifold yesterday before having to head to work.
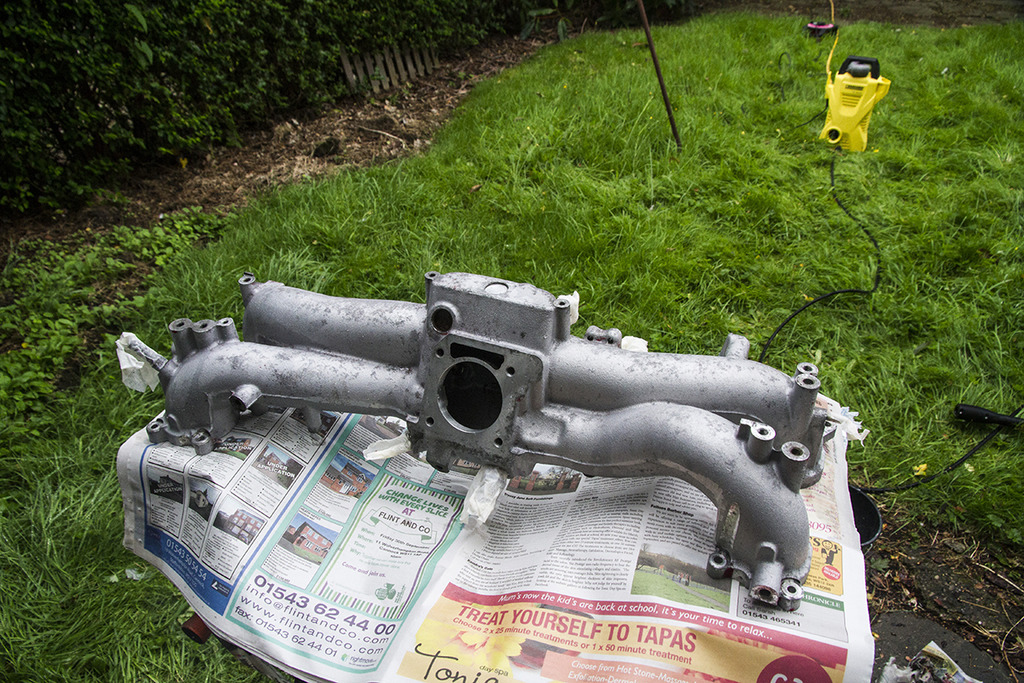
So everything is now apart, next part is to clean up all the fuel rails and the injectors and then make a decision on what I'm gonna do with the manifold, at the moment I'm unsure on either getting it powdercoated or just doing a high temp paint job. Also need to source some new gaskets. I also plan to replace all the bolts with some stainless steel ones to avoid corrosion in the future.
Other makes are available. They're designed to help lower intake temperatures by separating the intake from the block.
It's not something I had considered to be honest, I'll look into it, but I'm not sure the extra outlay for this and two sets of gaskets is gonna benefit me enough for what I do/will use the car for.
It's been a while again since I updated this, so here goes.
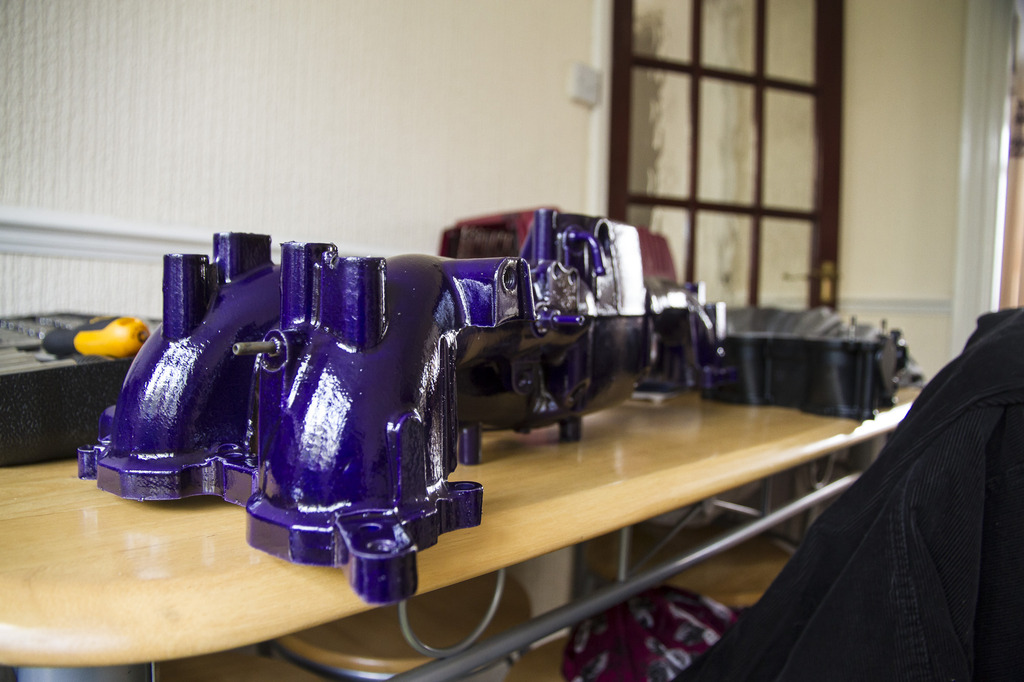
The manifold came back from the powder coaters along with the TGV deletes, really happy with how these have come out, so the bay will start to take the theme I'm after soon.
The fuel rails have been sent to be acid dipped and re-coated in the factory colour, so once they return its just a case of putting it all back together.
I have also since bought a new daily driver, I have always hated taking this to work because I never know what I'm gonna come back to so its nice to be able to leave the scoob safe at home and just use it for fun now..
And as a treat for my 30th this year, the wife has said that she wants for us to go to the Nurburgring, which I absolutely can't wait. Now this also means getting a lot of stuff done to the car before hand..
So after driving a friends car with the uprated rear ARB and droplinks I went out yesterday and bought some SuperPro ones, which are getting fitted next week.
Brakes wise I think I am going to go with D2 6 pots on 330mm discs, another friend has them on his evo and he swears by them, and having been in the car I know why..
In a random outing I also tried some OZ prodrive wheels off my mates car to see how they looked, I quite like them but I'm not 100% yet, maybe just because of the colour.
 31 August 2015, 10:22 AM