The Four and the Rotary


 15 February 2015, 08:56 AM
#153
Scooby Regular
Thread Starter

Think I ended up getting the second lot from aluminium warehouse online. You can get it from Earl's through Think Automotive but it's far more expensive than buying it in lengths. I'll see if I can find the invoice at the shop Monday.
15 February 2015, 01:09 PM
#156
 17 February 2015, 11:12 PM
#158
Scooby Regular
Thread Starter
Think mine was 1.2mm. So closer to an swg18.
Very frustrating day today. Or morning should I say. I have a leak from the main rear oil seal. No idea how that has happened. New one ordered from RCM tomorrow incase the one in there is damaged. Suspected oil seal because it only leaks when your cranking.
One other fault also that has stopped play if the lack of injectors fire fuel into the bores. Used a node light to make sure they are getting a trigger signal and they are indeed. I need to check the voltage and amperage to make sure its all strong/high enough to hold the injectors open. Also resistance test across the injectors to make sure that they are not knackered. I'd be surprised if all four injectors have gone down because none of the bores are wet at all so the fault appears to be affecting all four. Fuel pressure is good but I may throw another FPR in there just to eliminate that as a problem.
Will do some tests on Thursday morning.

 24 February 2015, 09:14 PM
#160
Scooby Regular
Thread Starter
Well............
Got the old girl running.
BUT its never as simple as that is it. After ordering the new seal and a couple of other bits off of RCM I got around to getting the beast running. As I wasn't 100% where to start looking given the injectors had a pulse signal. SO I pulled them out and ran them through the injector cleaner. Remade some of the earthing points on the chassis and engine. Re checked earths on the ECU and AEM unit along with power supplies. Changed the battery for a new larger item. Refitted it all and pressed the button. She tried so hard to fire it was agitating. So. Swapped the plugs from 8's to 6's. And turn the fuel pressure down on the FPR. Pressed the button again and she fired up a treat
Happy days.
Having had the car the fired it was time to replace the oil seal. Personally I find it quicker to pull the motor than drop the gearbox. Undo the bolts unplug the wiring harness and bosch, out. Anyway before that, oil out. Aweful lot of debris. Turns out the crank ate the rear thrust bearing. Long story short when the 2.1 engine let go the crank went off to a specialist to be analysed, checked and all that. It came back with the ok to be reused in the new build. Cranking the motor over and running it proved other wise.
Absolutely everything has been scrutinised at the end of which a new EJ257 crank/big end and main bearings has been ordered from RCM and should be with me in the next couple of days so I can rebuild the old girl again. Hopefully this time to a more positive out come.
On we go.....
Last edited by seventune; 14 August 2015 at 12:42 AM.


 27 February 2015, 05:03 PM
#163
Scooby Regular
Thread Starter
I knew really that I should have replaced the crank when it went together before for piece of mind. But could not afford it at the time. Still, done now. Hopefully get the bottom end together tonight / tomorrow morning.
Not having time to do it today I got the Aerocatchs in instead.
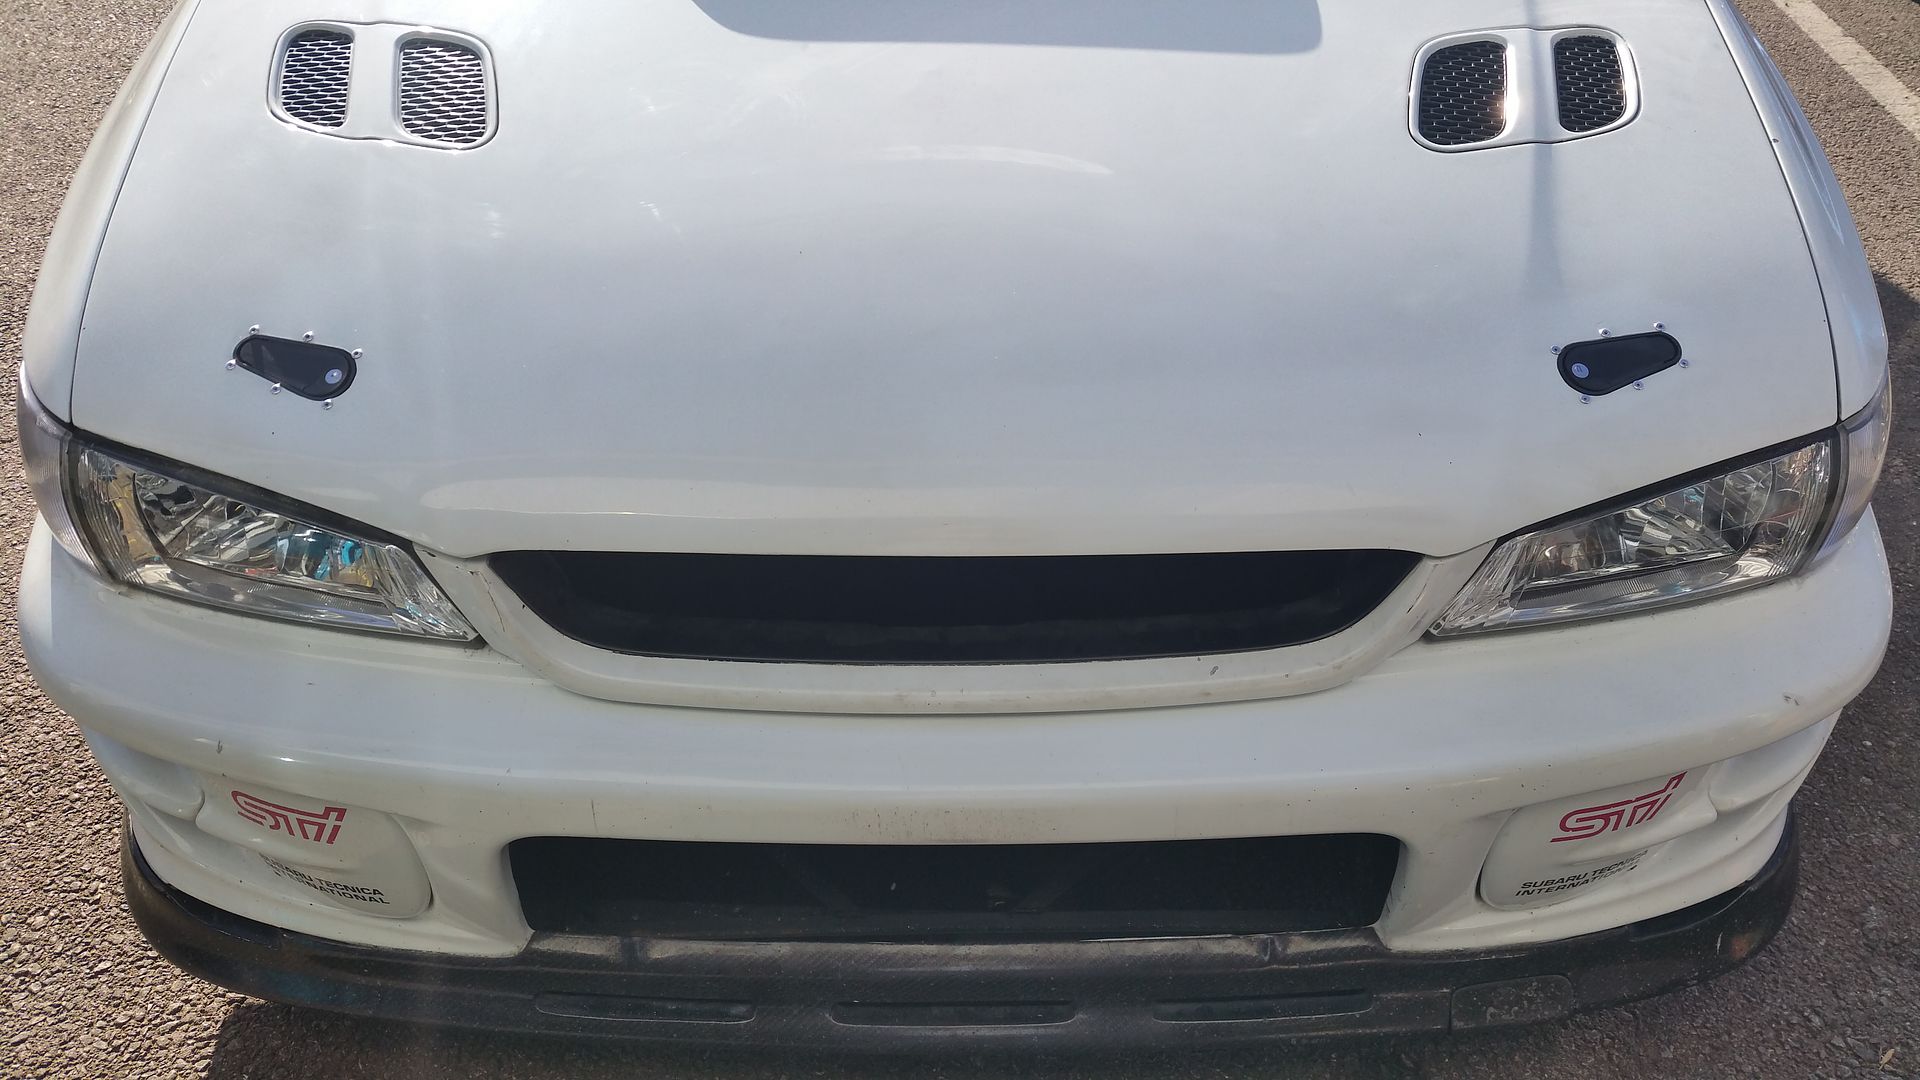
Not having time to do it today I got the Aerocatchs in instead.

Last edited by seventune; 14 August 2015 at 12:45 AM.
28 February 2015, 06:34 PM
#164
Scooby Regular
Thread Starter
Well bottom end back together. Pressing on to get the engine back in and running by the weekend.
I want my scoob back on the road.
I want my scoob back on the road.

Last edited by seventune; 14 August 2015 at 12:46 AM.
 20 March 2015, 10:14 PM
#166
Scooby Regular
Thread Starter
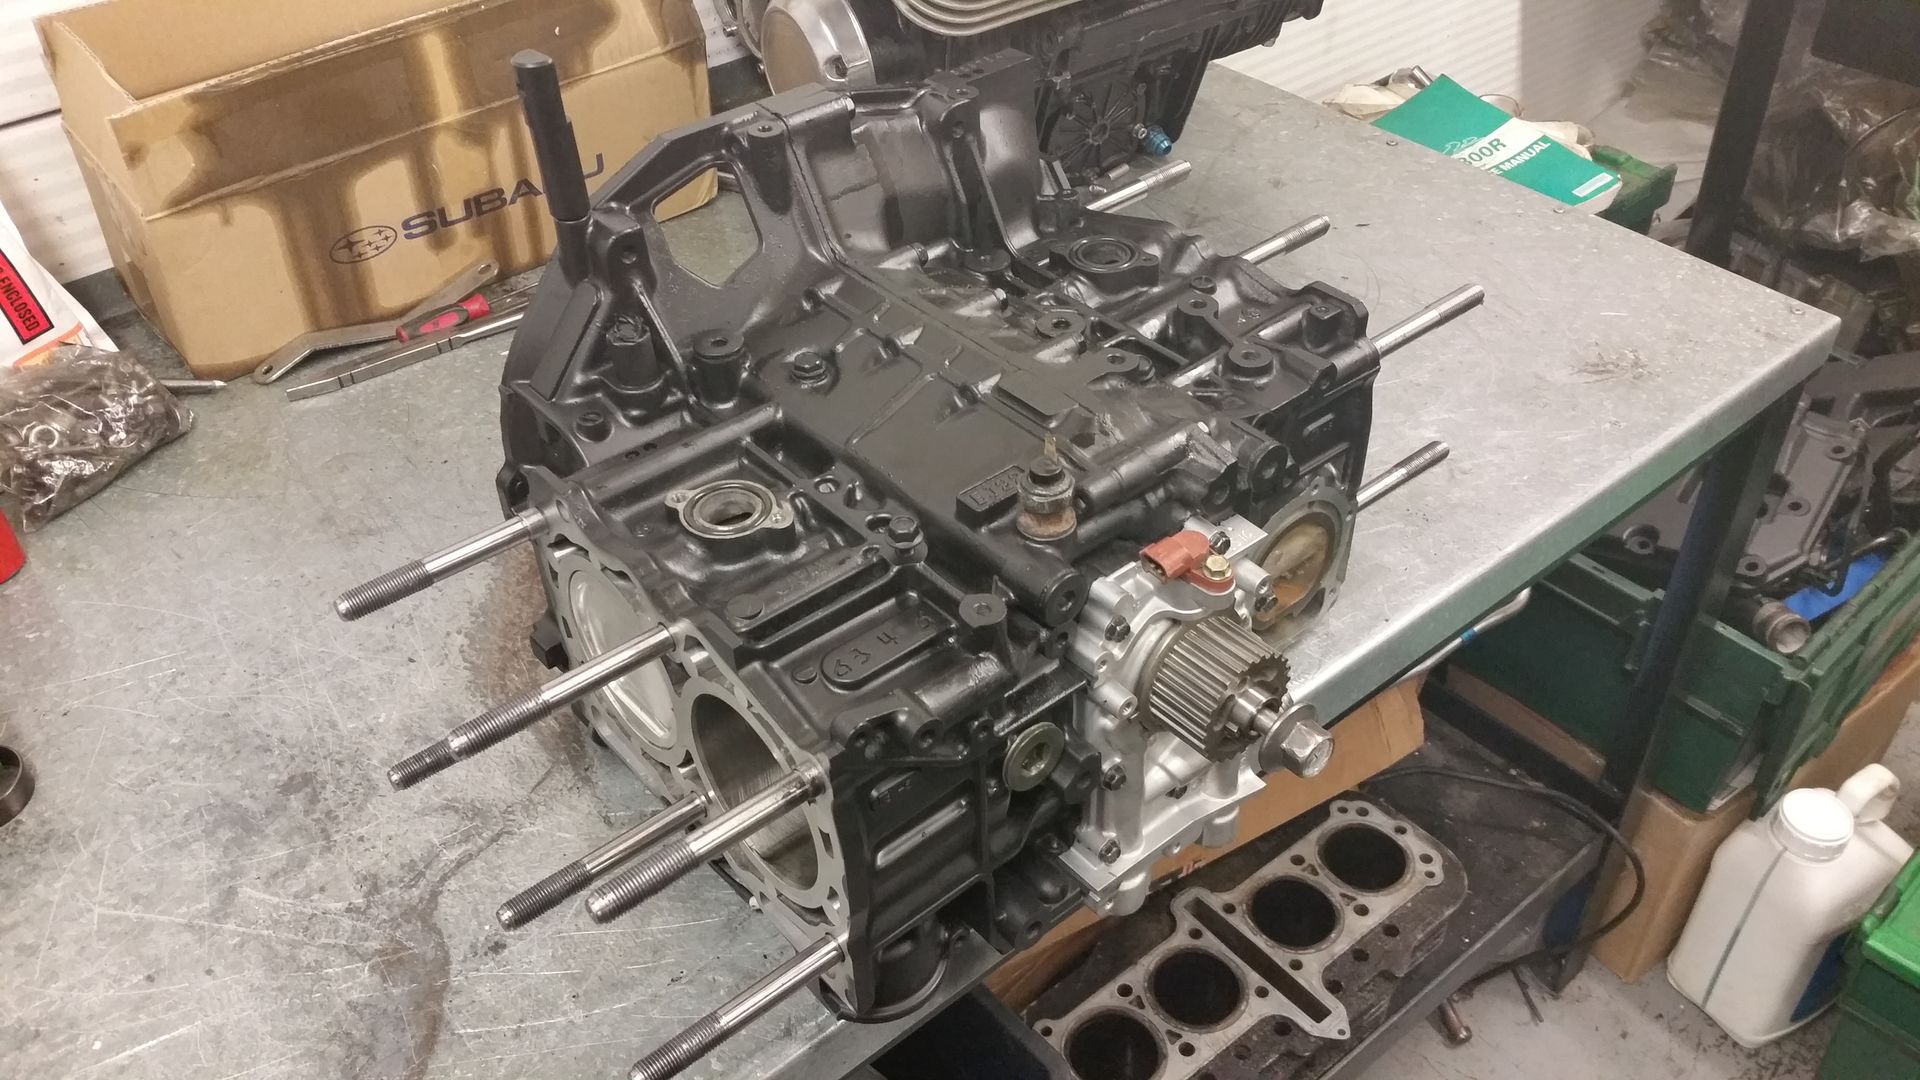
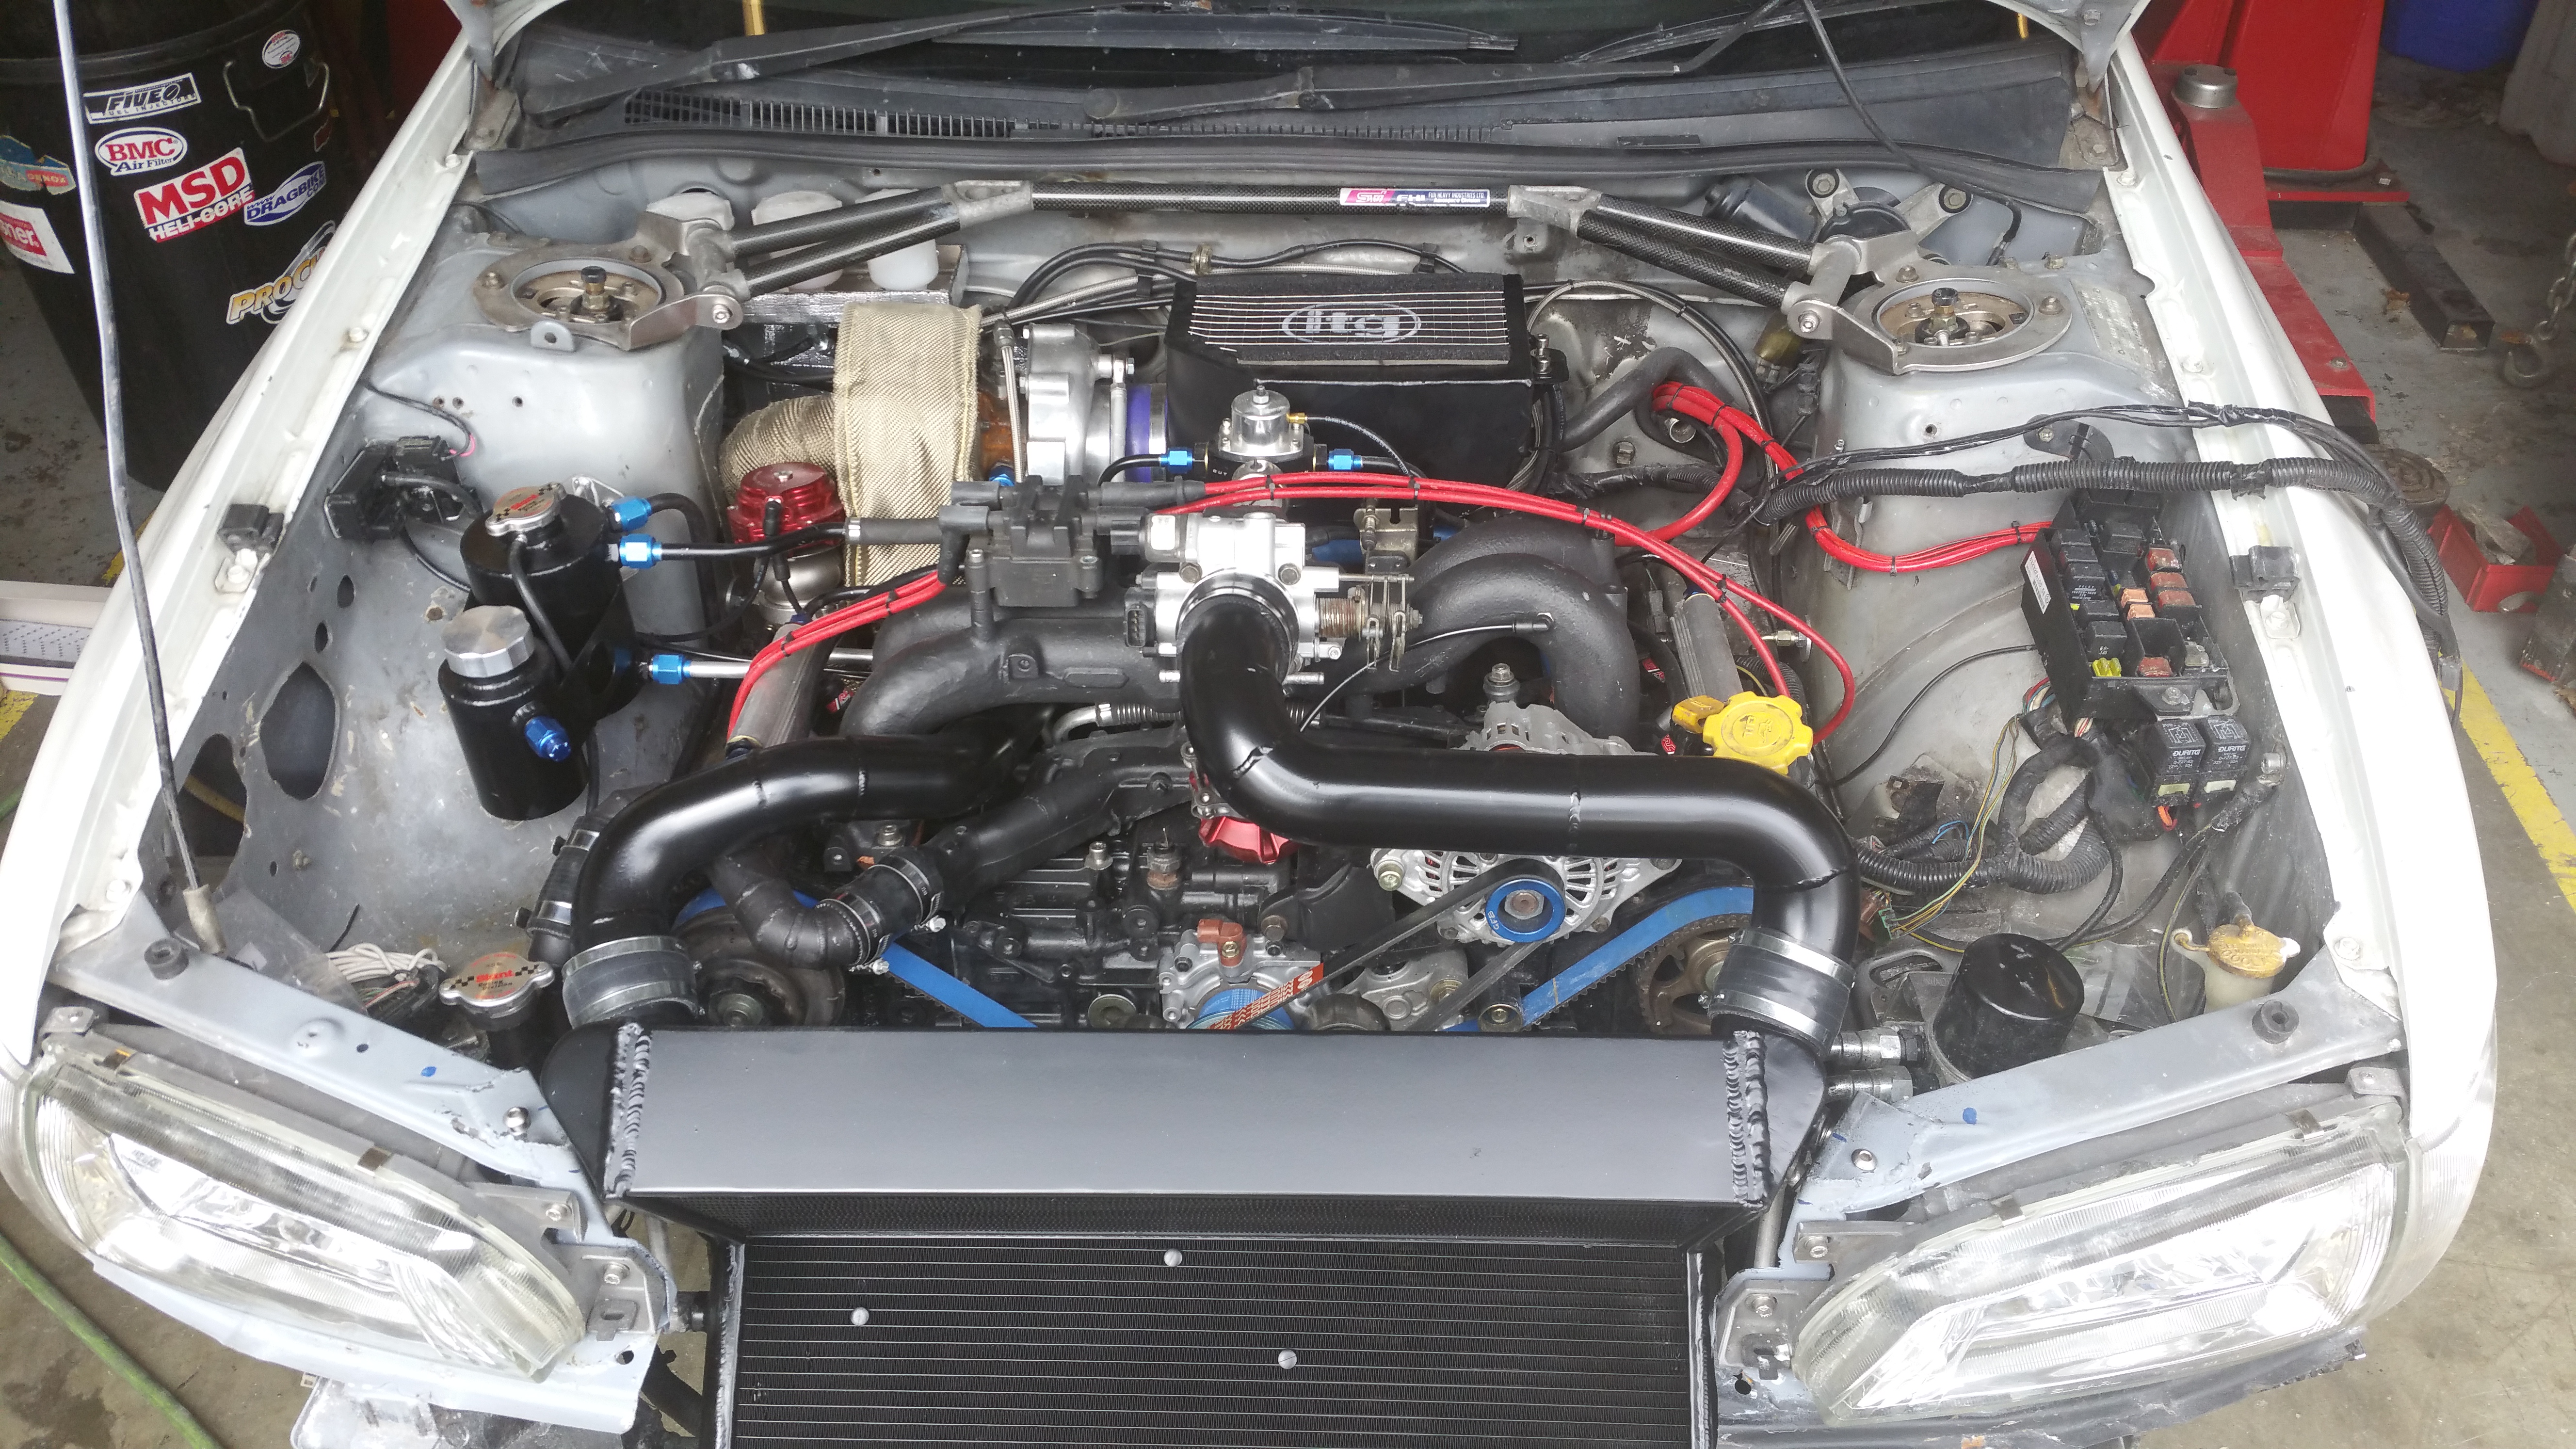
Well the motor is now 100% built and ready to go back in. I have been even more scrupulous with checking and re checking everything to avoid the crank issue happening again. There was no obvious cause for the crank mashing the rear face of the thrust bearings.
First big thing to change was the piston to head clearance. With the new crank the piston where 20 thou higher than previously. At lowest tilt they where .013" above deck and on full tilt at their highest .031". With the 1.5mm ( .059") head gasket there was no real room to allow for rod stretch. In the turbo bike we allow .040" rod stretch so I took some meet off the top of the pistons to gain the extra clearance.
Crank then the new nitrated crank got clearance, re clearance and clearanced again on both main and big ends.
End float was checked I don't know how many times which I just right ;D
There was one other concern that I had come across before. This invovled the hydraulic clutch bearing. I've seen it before where the spacer behind the bearing has been too thick and when the engine is installed the sits butt up against the clutch cover. Not only not having and air gap as it should but actually being forced up into the clutch cover and also taking up the end float in the crank and mashing thrust bearings. That also being a concern the heights where check over again and on both the engine and gearbox side and was all fine as I had hoped with the required 2.4mm air gap.
With every thing checked it ready to go back in. Plan is for Monday.
Last edited by seventune; 14 August 2015 at 12:47 AM.
20 April 2015, 09:29 AM
#168
Scooby Regular
Thread Starter
Thanks dude,
There are a couple of issues to report but it's a bit long winded on the phone so i will do that bit later on the lap top but in the mean time.....
There is a bit of adjusting to do but the vent is just sitting in there at the moment.
There are a couple of issues to report but it's a bit long winded on the phone so i will do that bit later on the lap top but in the mean time.....

There is a bit of adjusting to do but the vent is just sitting in there at the moment.
Last edited by seventune; 02 June 2015 at 11:59 PM.
03 May 2015, 09:15 AM
#169
Scooby Regular
Thread Starter
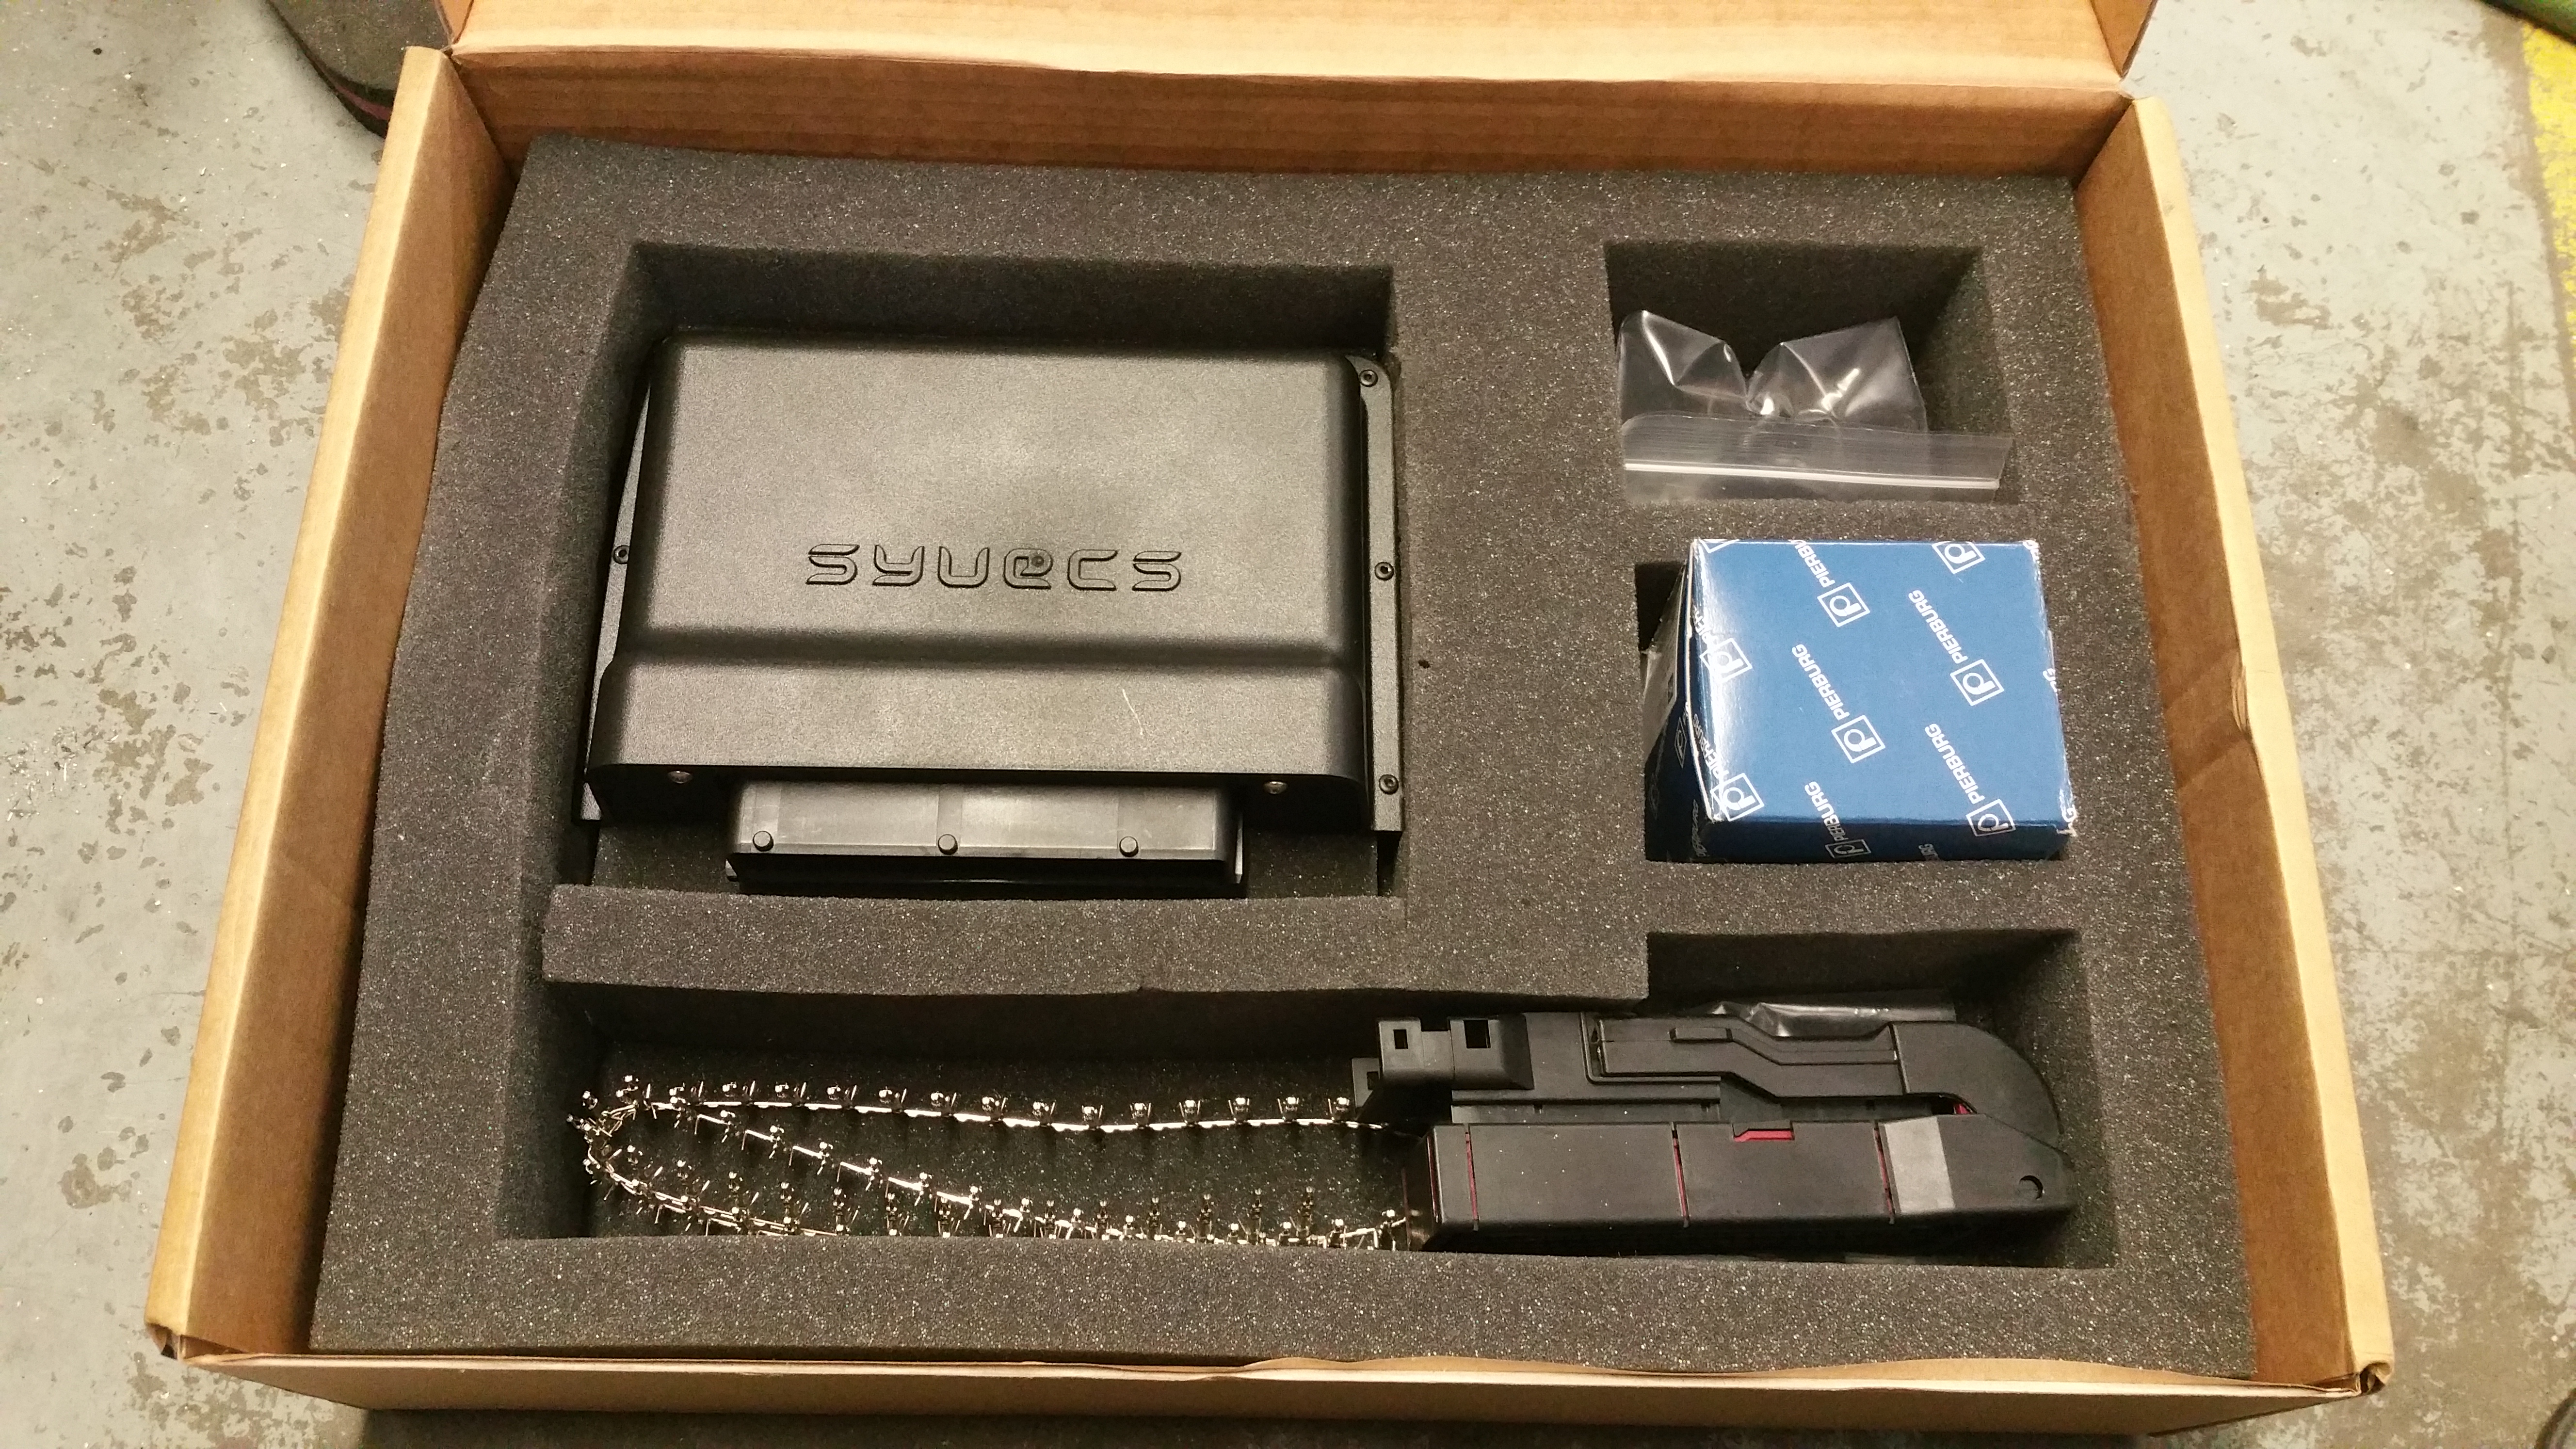
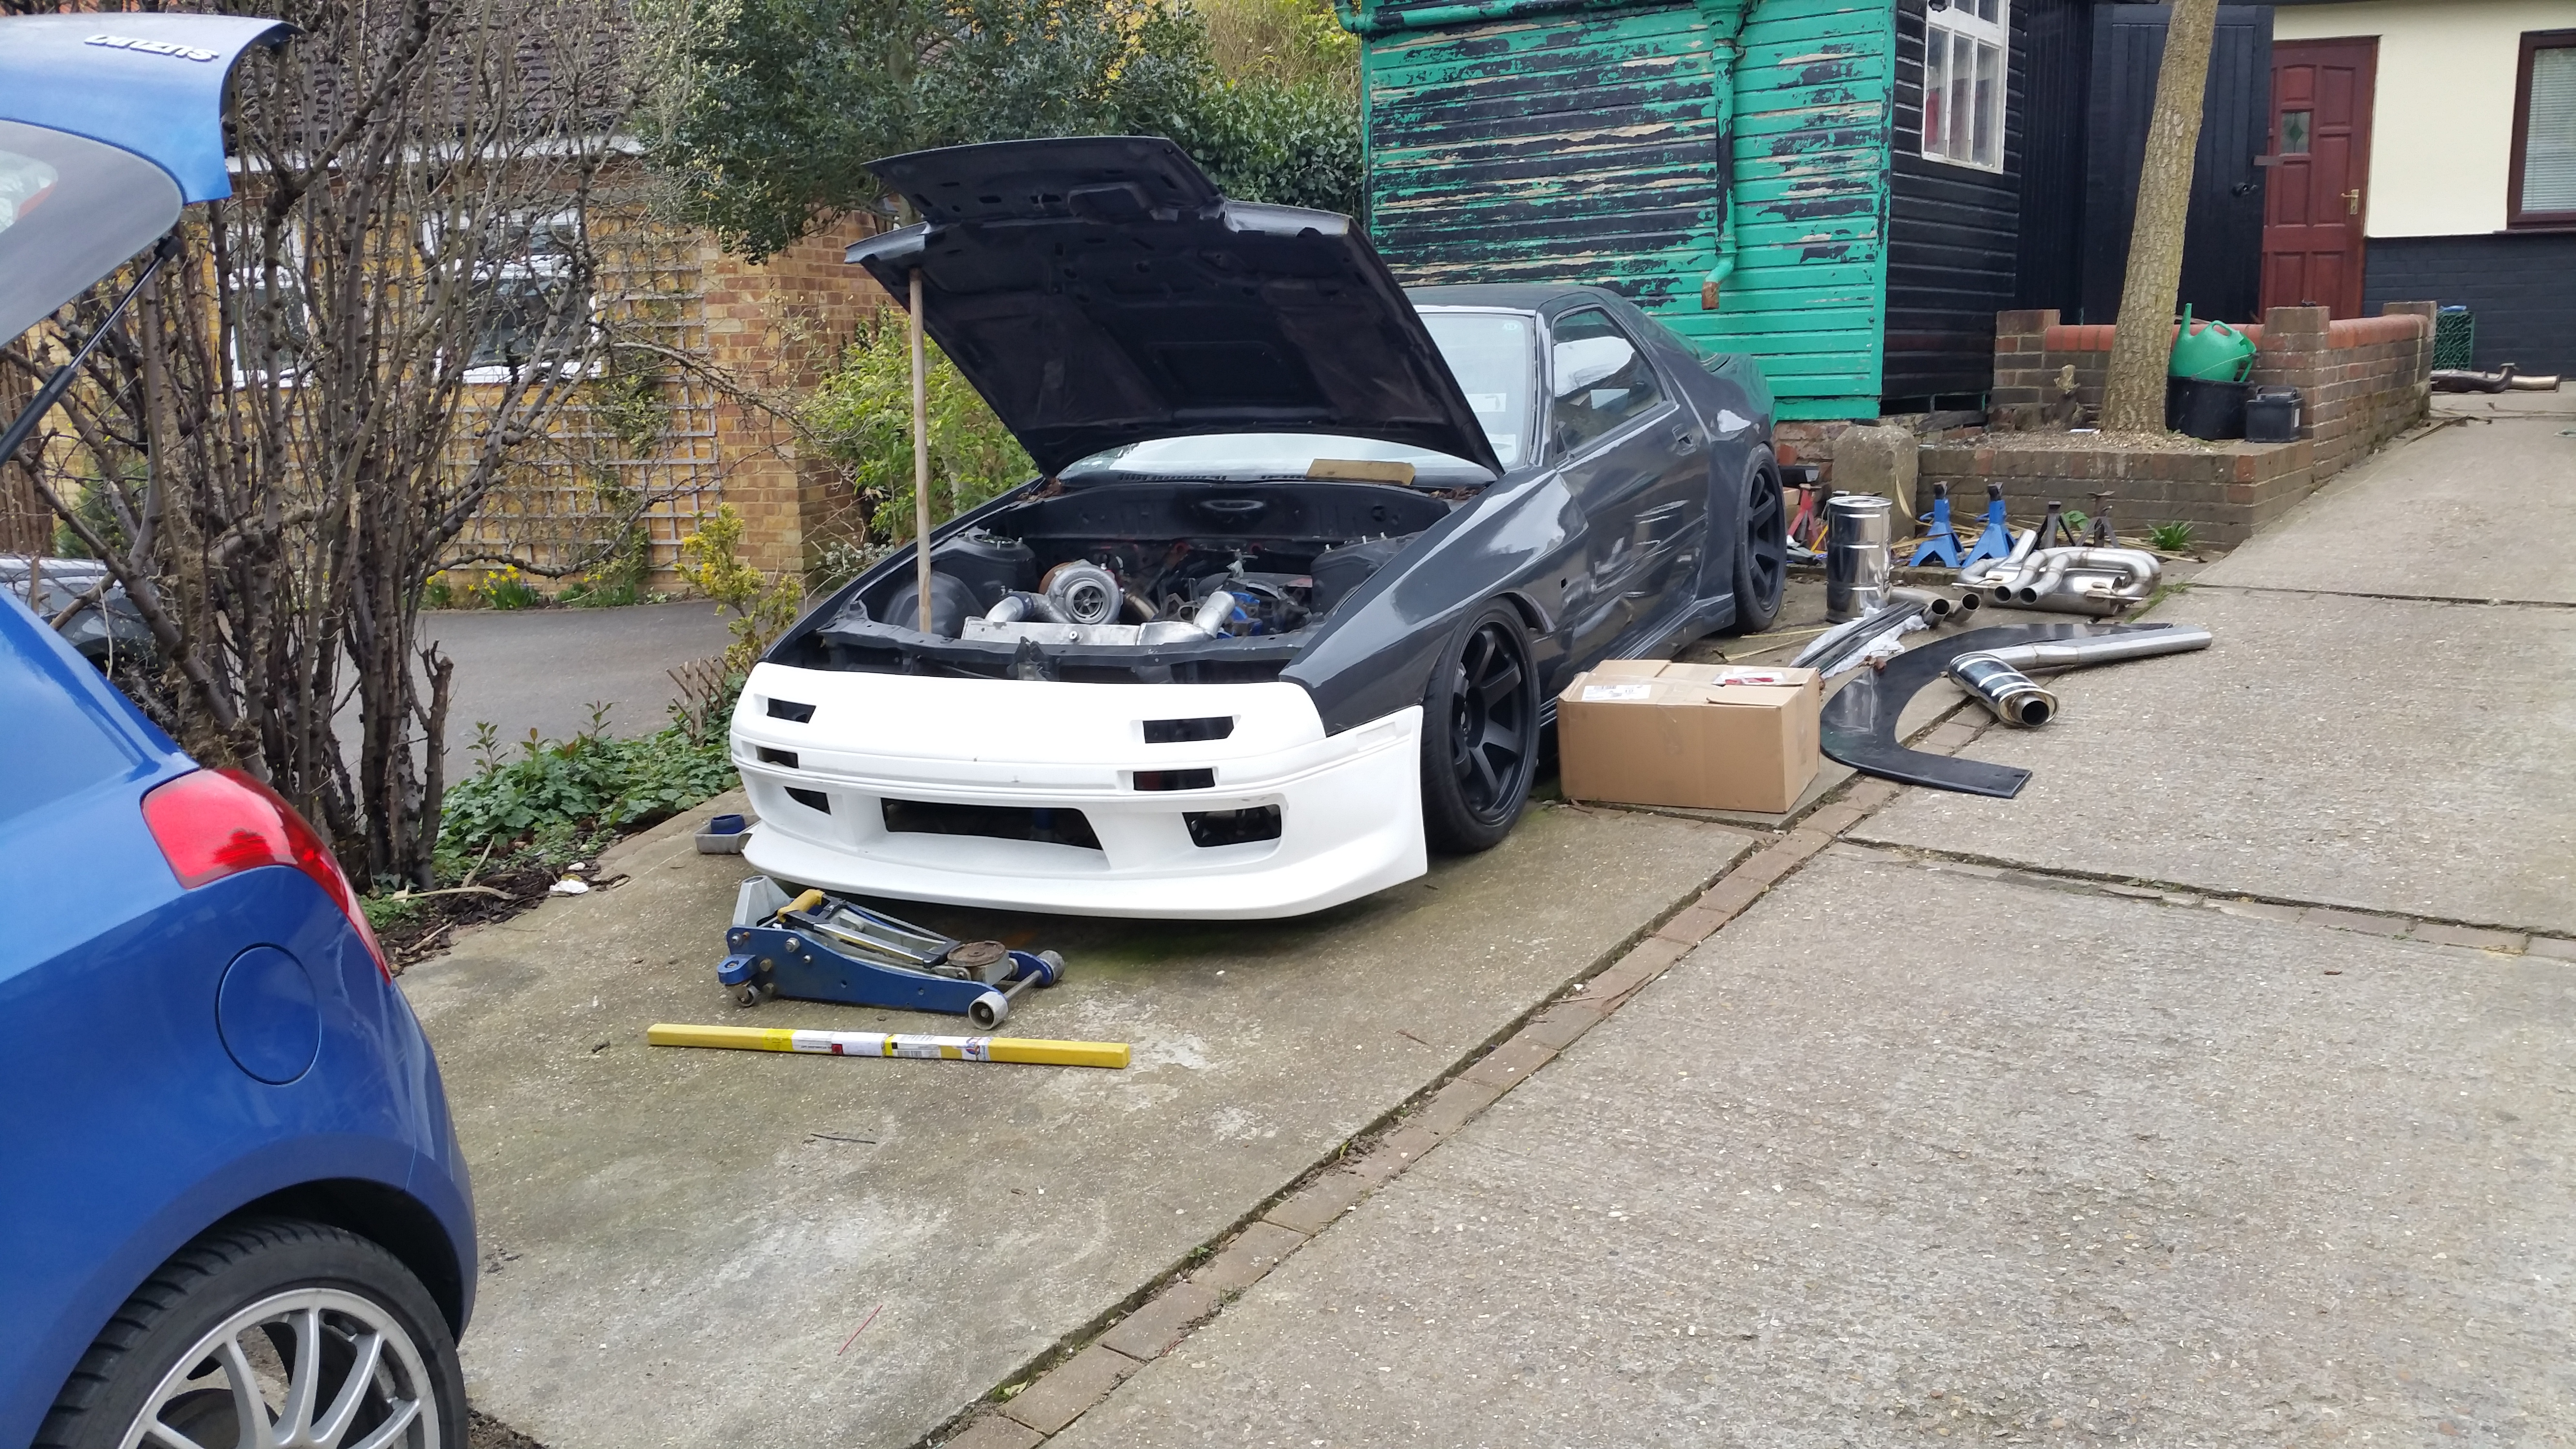
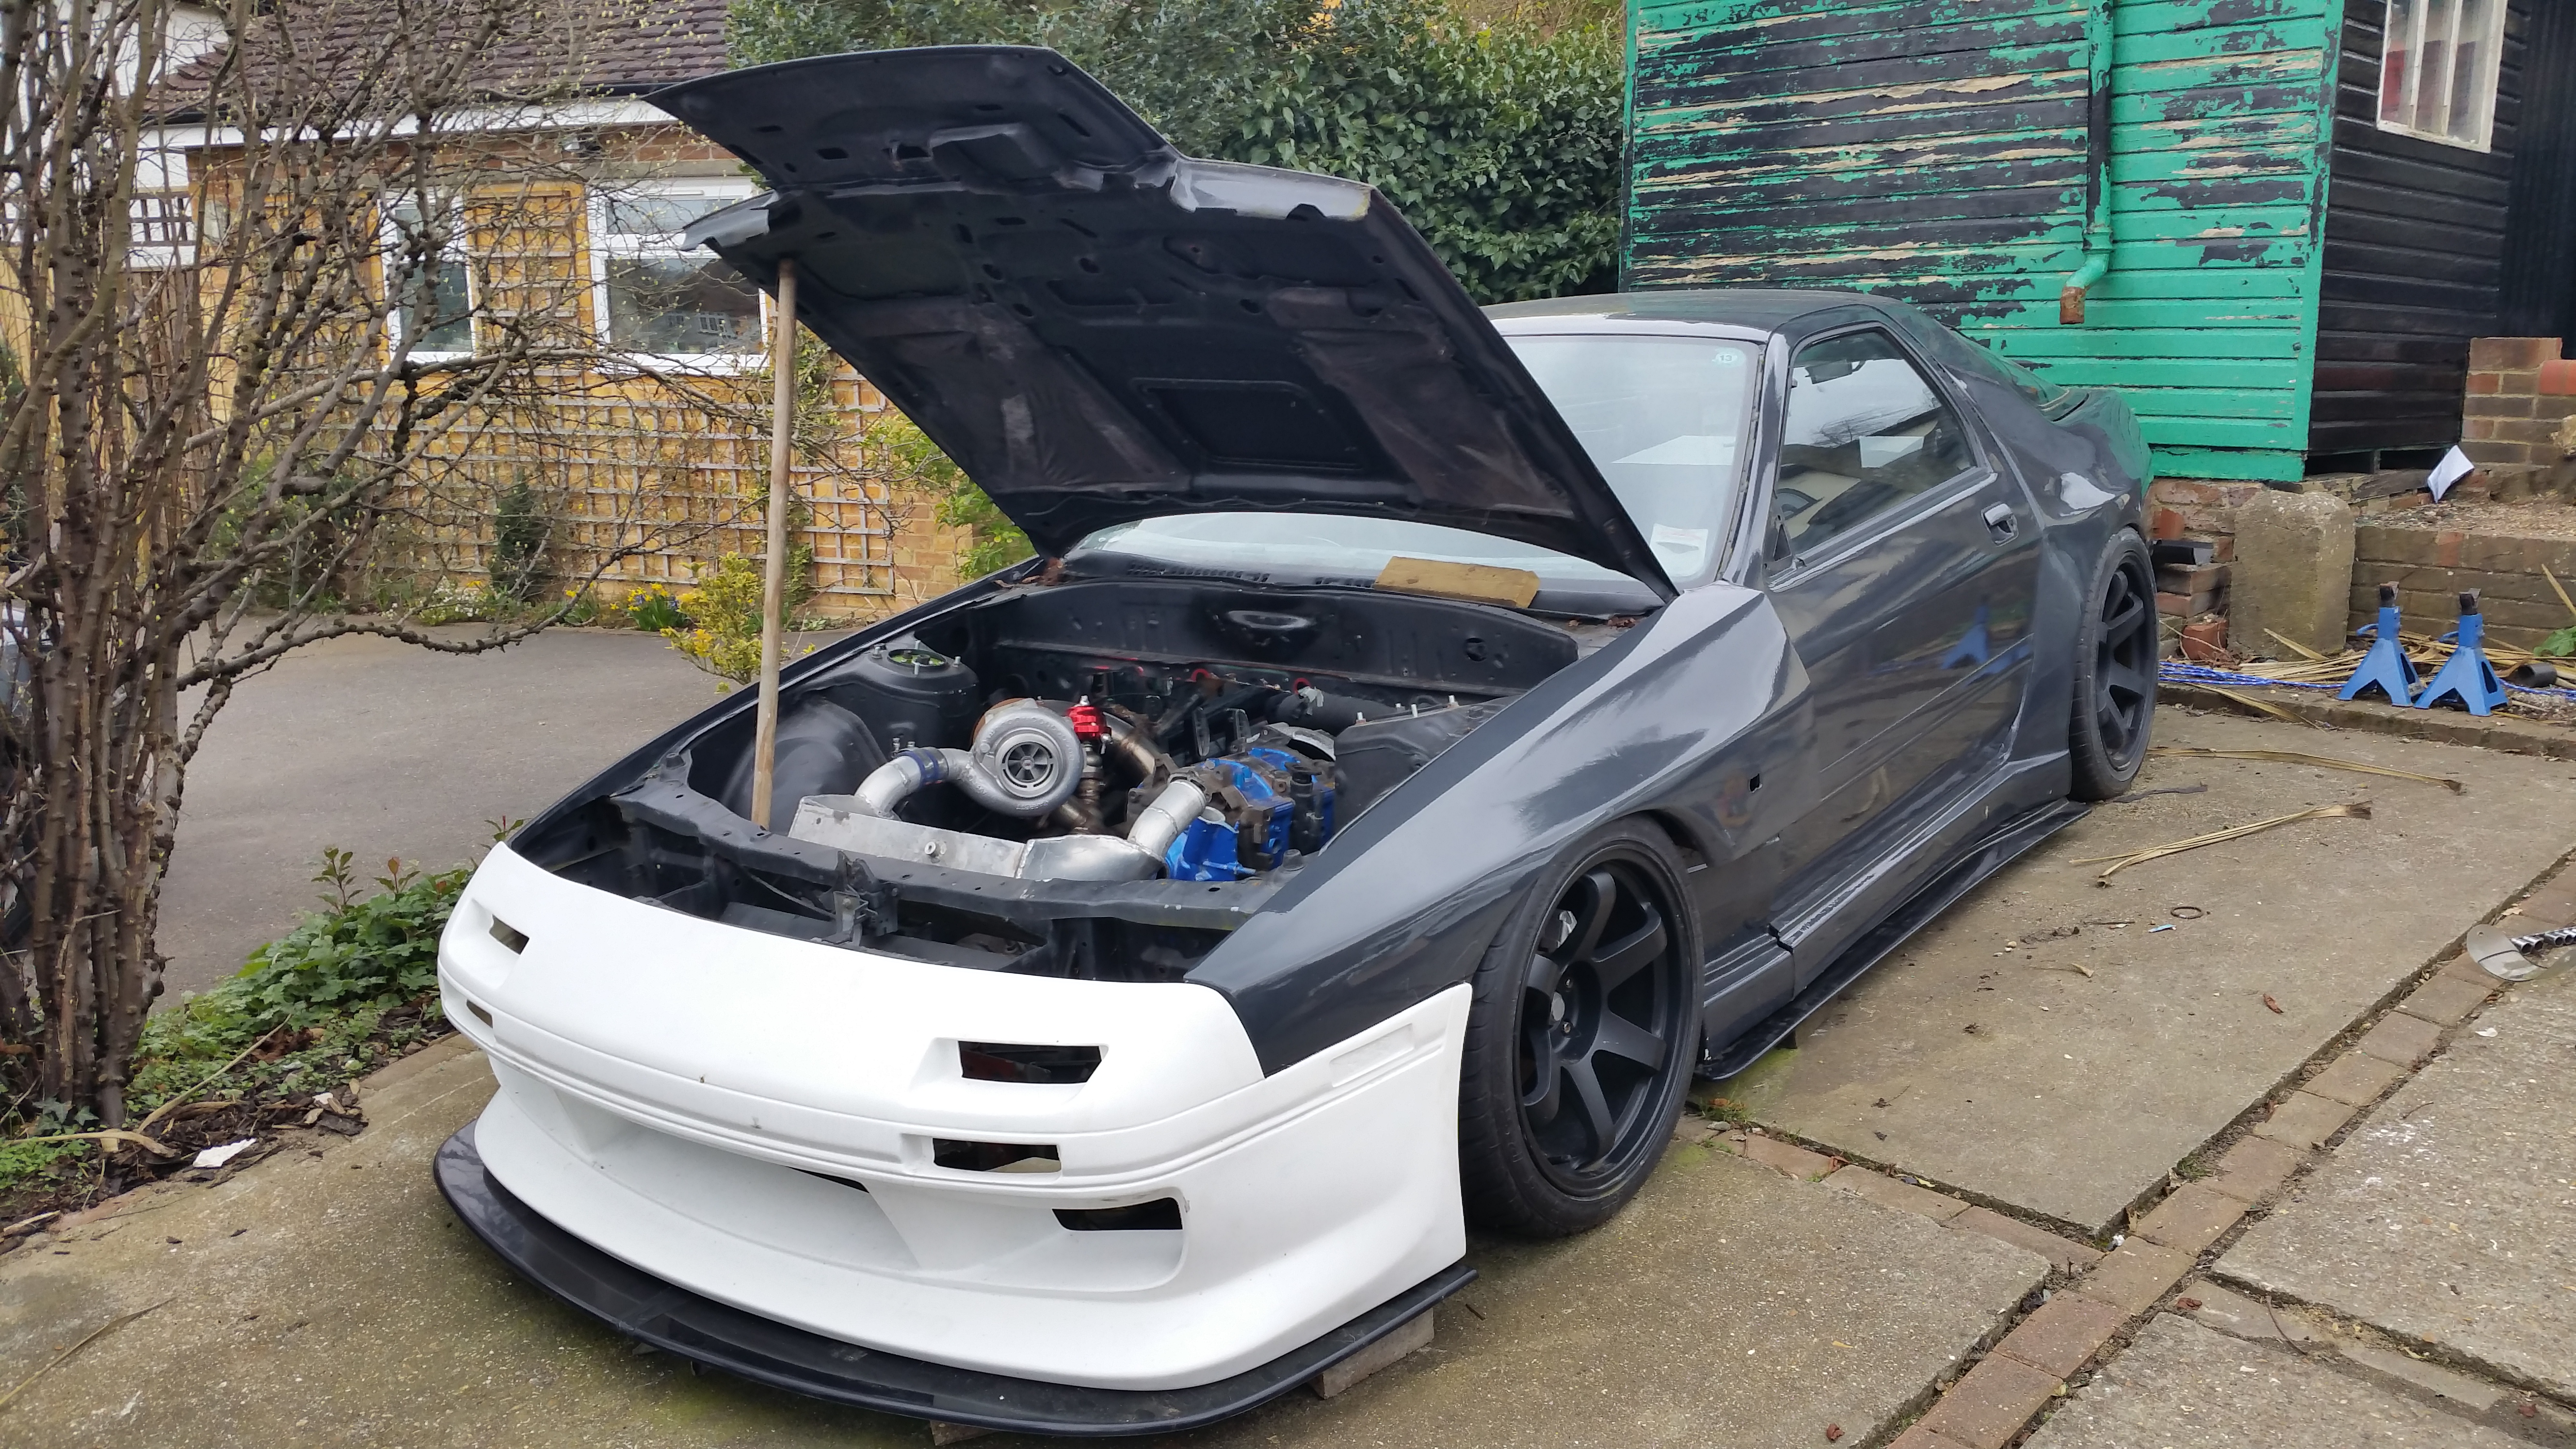
So then. Electrical gremlins are a real pig. But ever cloud has a silver lining. As you know the car is fitted it an AlcaTek ECU. I have been trying to get them to talk to me about making some changes to the ecu for absolutely months. Eventually I decided to not have any changes made to the ecu and just buy a proper one buy in the mean time just get it mapped for the current mods. Anyway reinstalling the loom and engine this time has unearthed an underlying electrical issue. It's started with sensor ground wires carrying 8volt live feeds. Which I traced back into the loom then the ecu. Once that was sorted other singles appeared to be incorrect. The loom that had seen far better days before I had even got into looking for the faults. After finding bare wires, doggy taped up and crimped connections I was time to start fresh. Given the lack of contact and lack of support from AlcaTek I decided that if I was building a new loom it wouldn't be for that ecu. So I bought this instead
Nice Syvecs S6
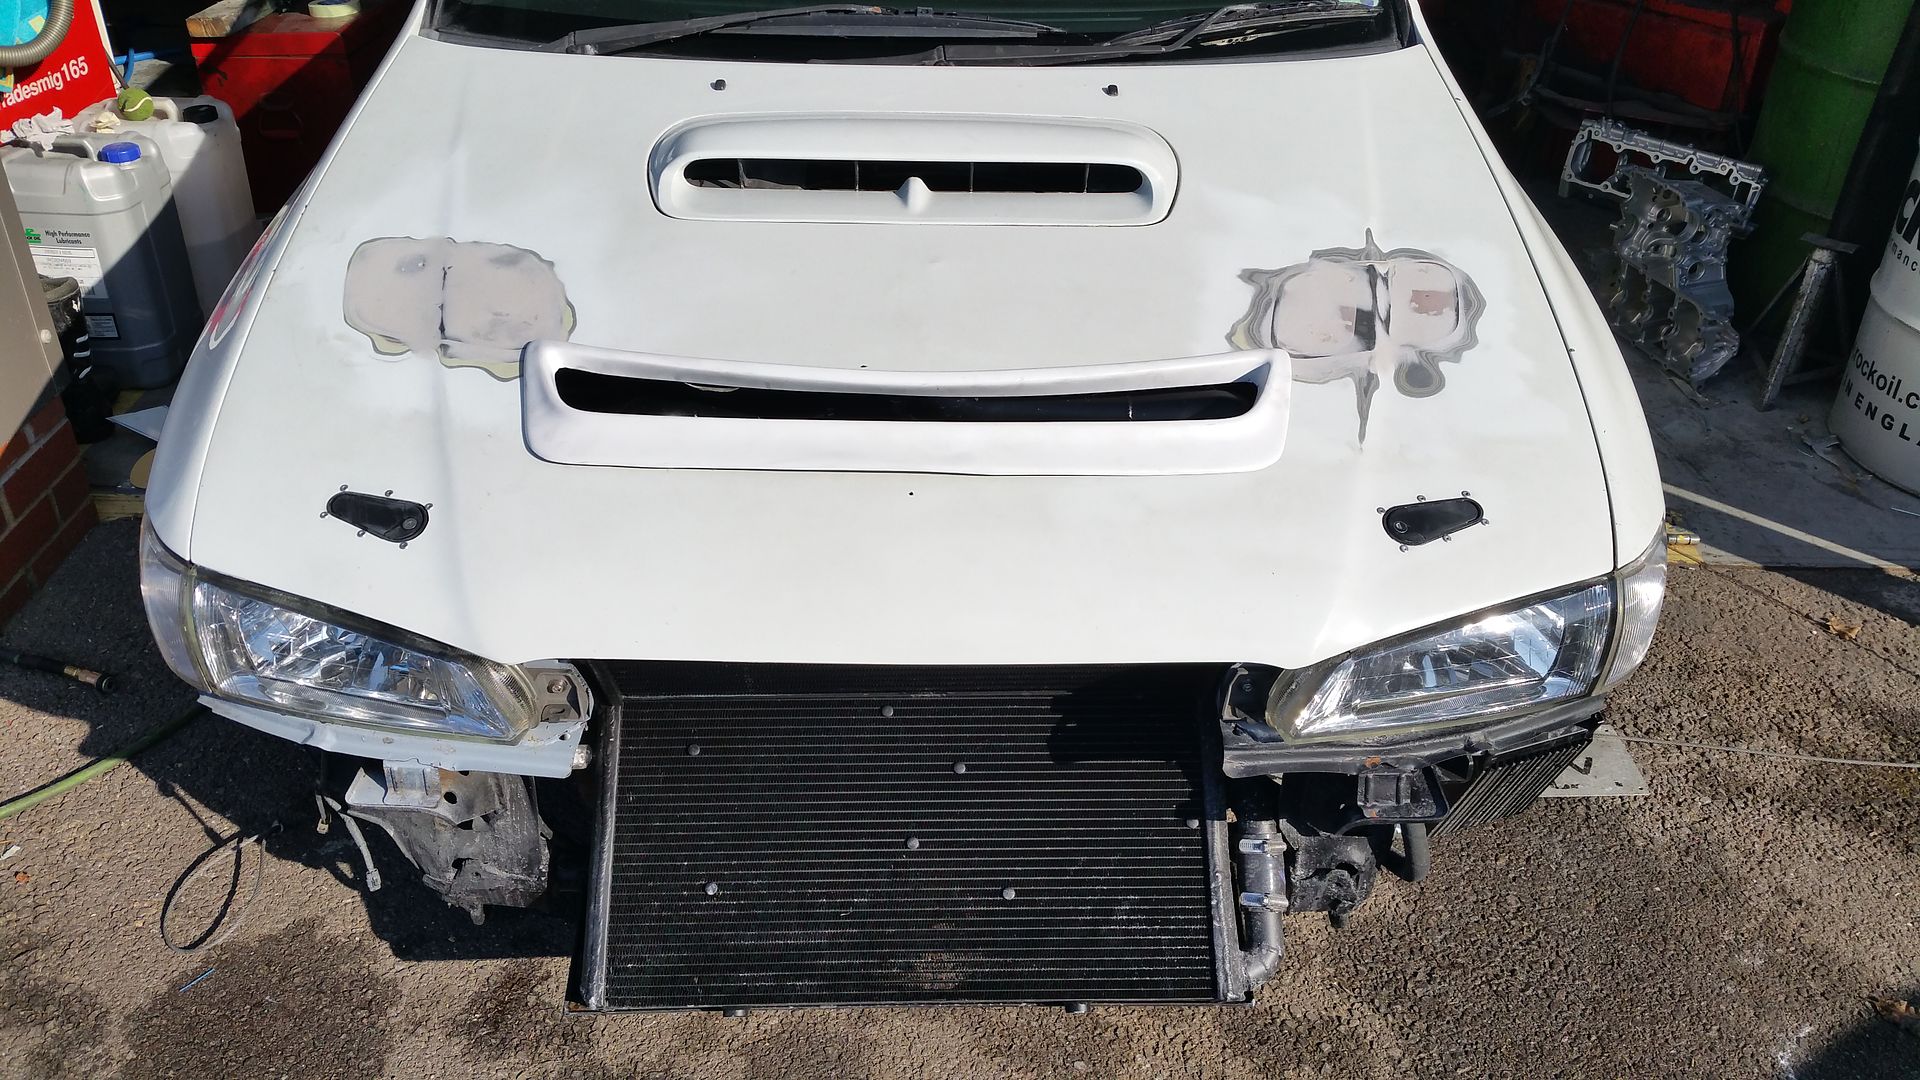
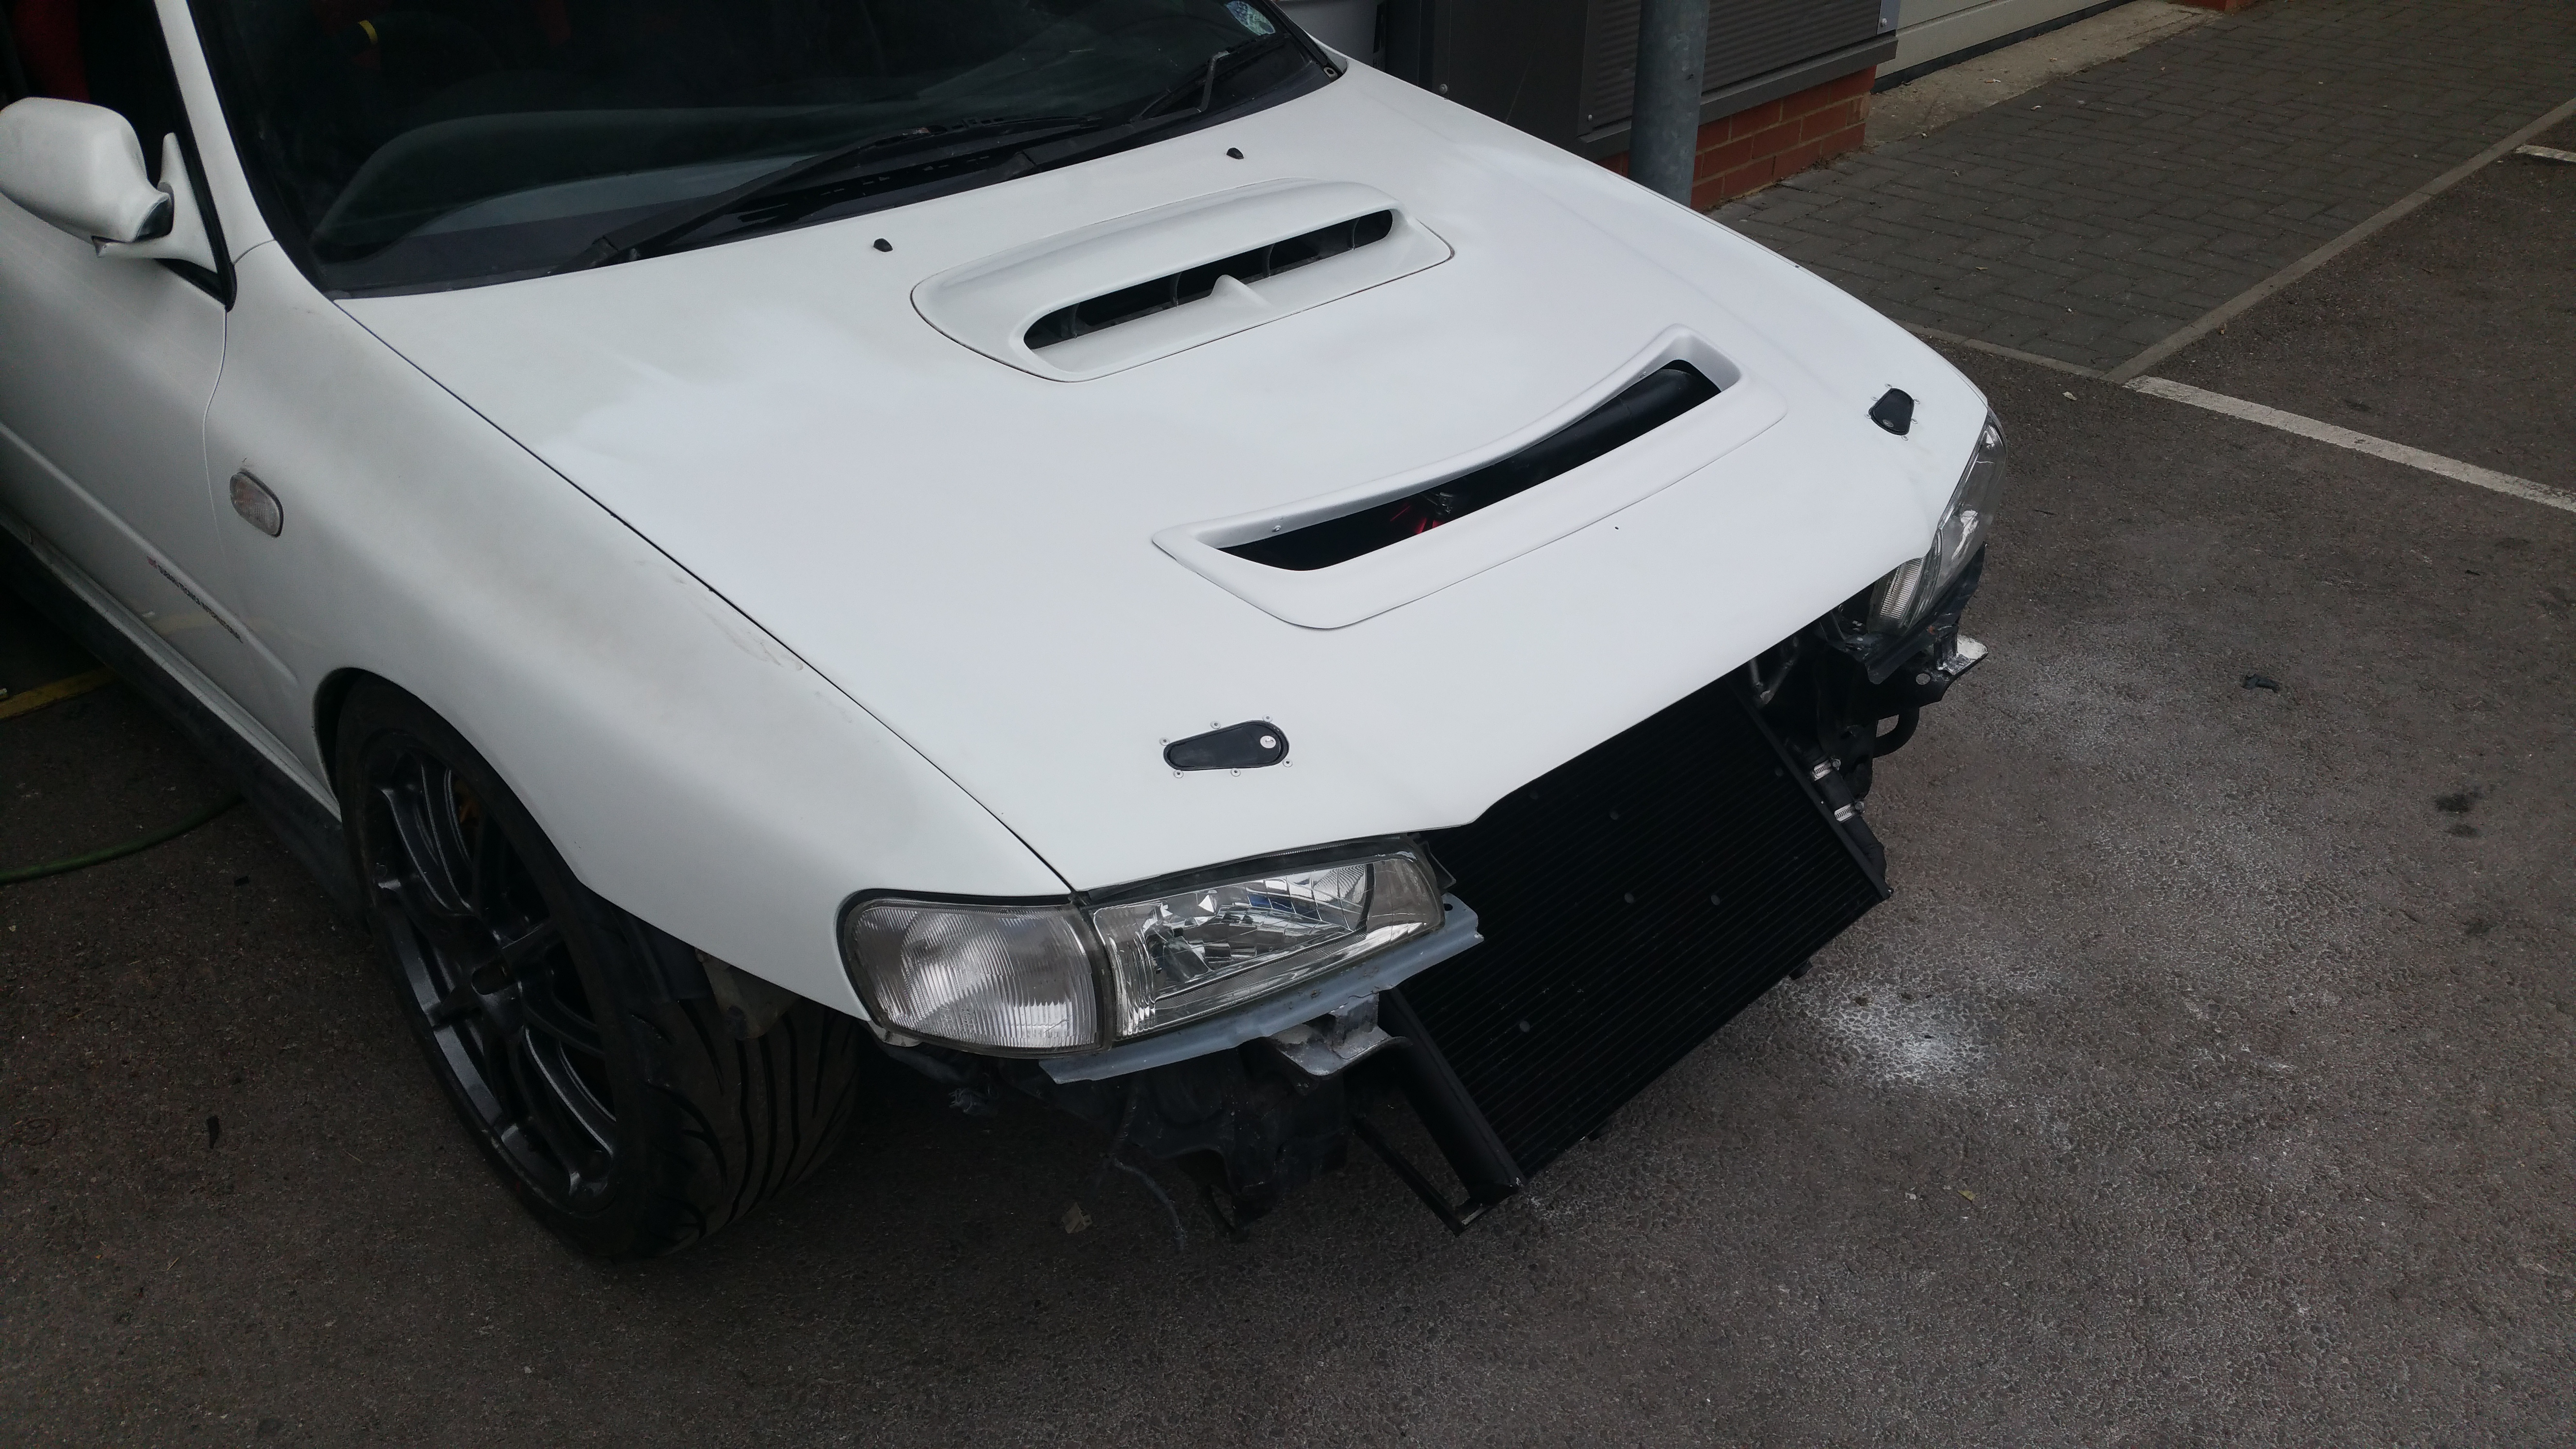
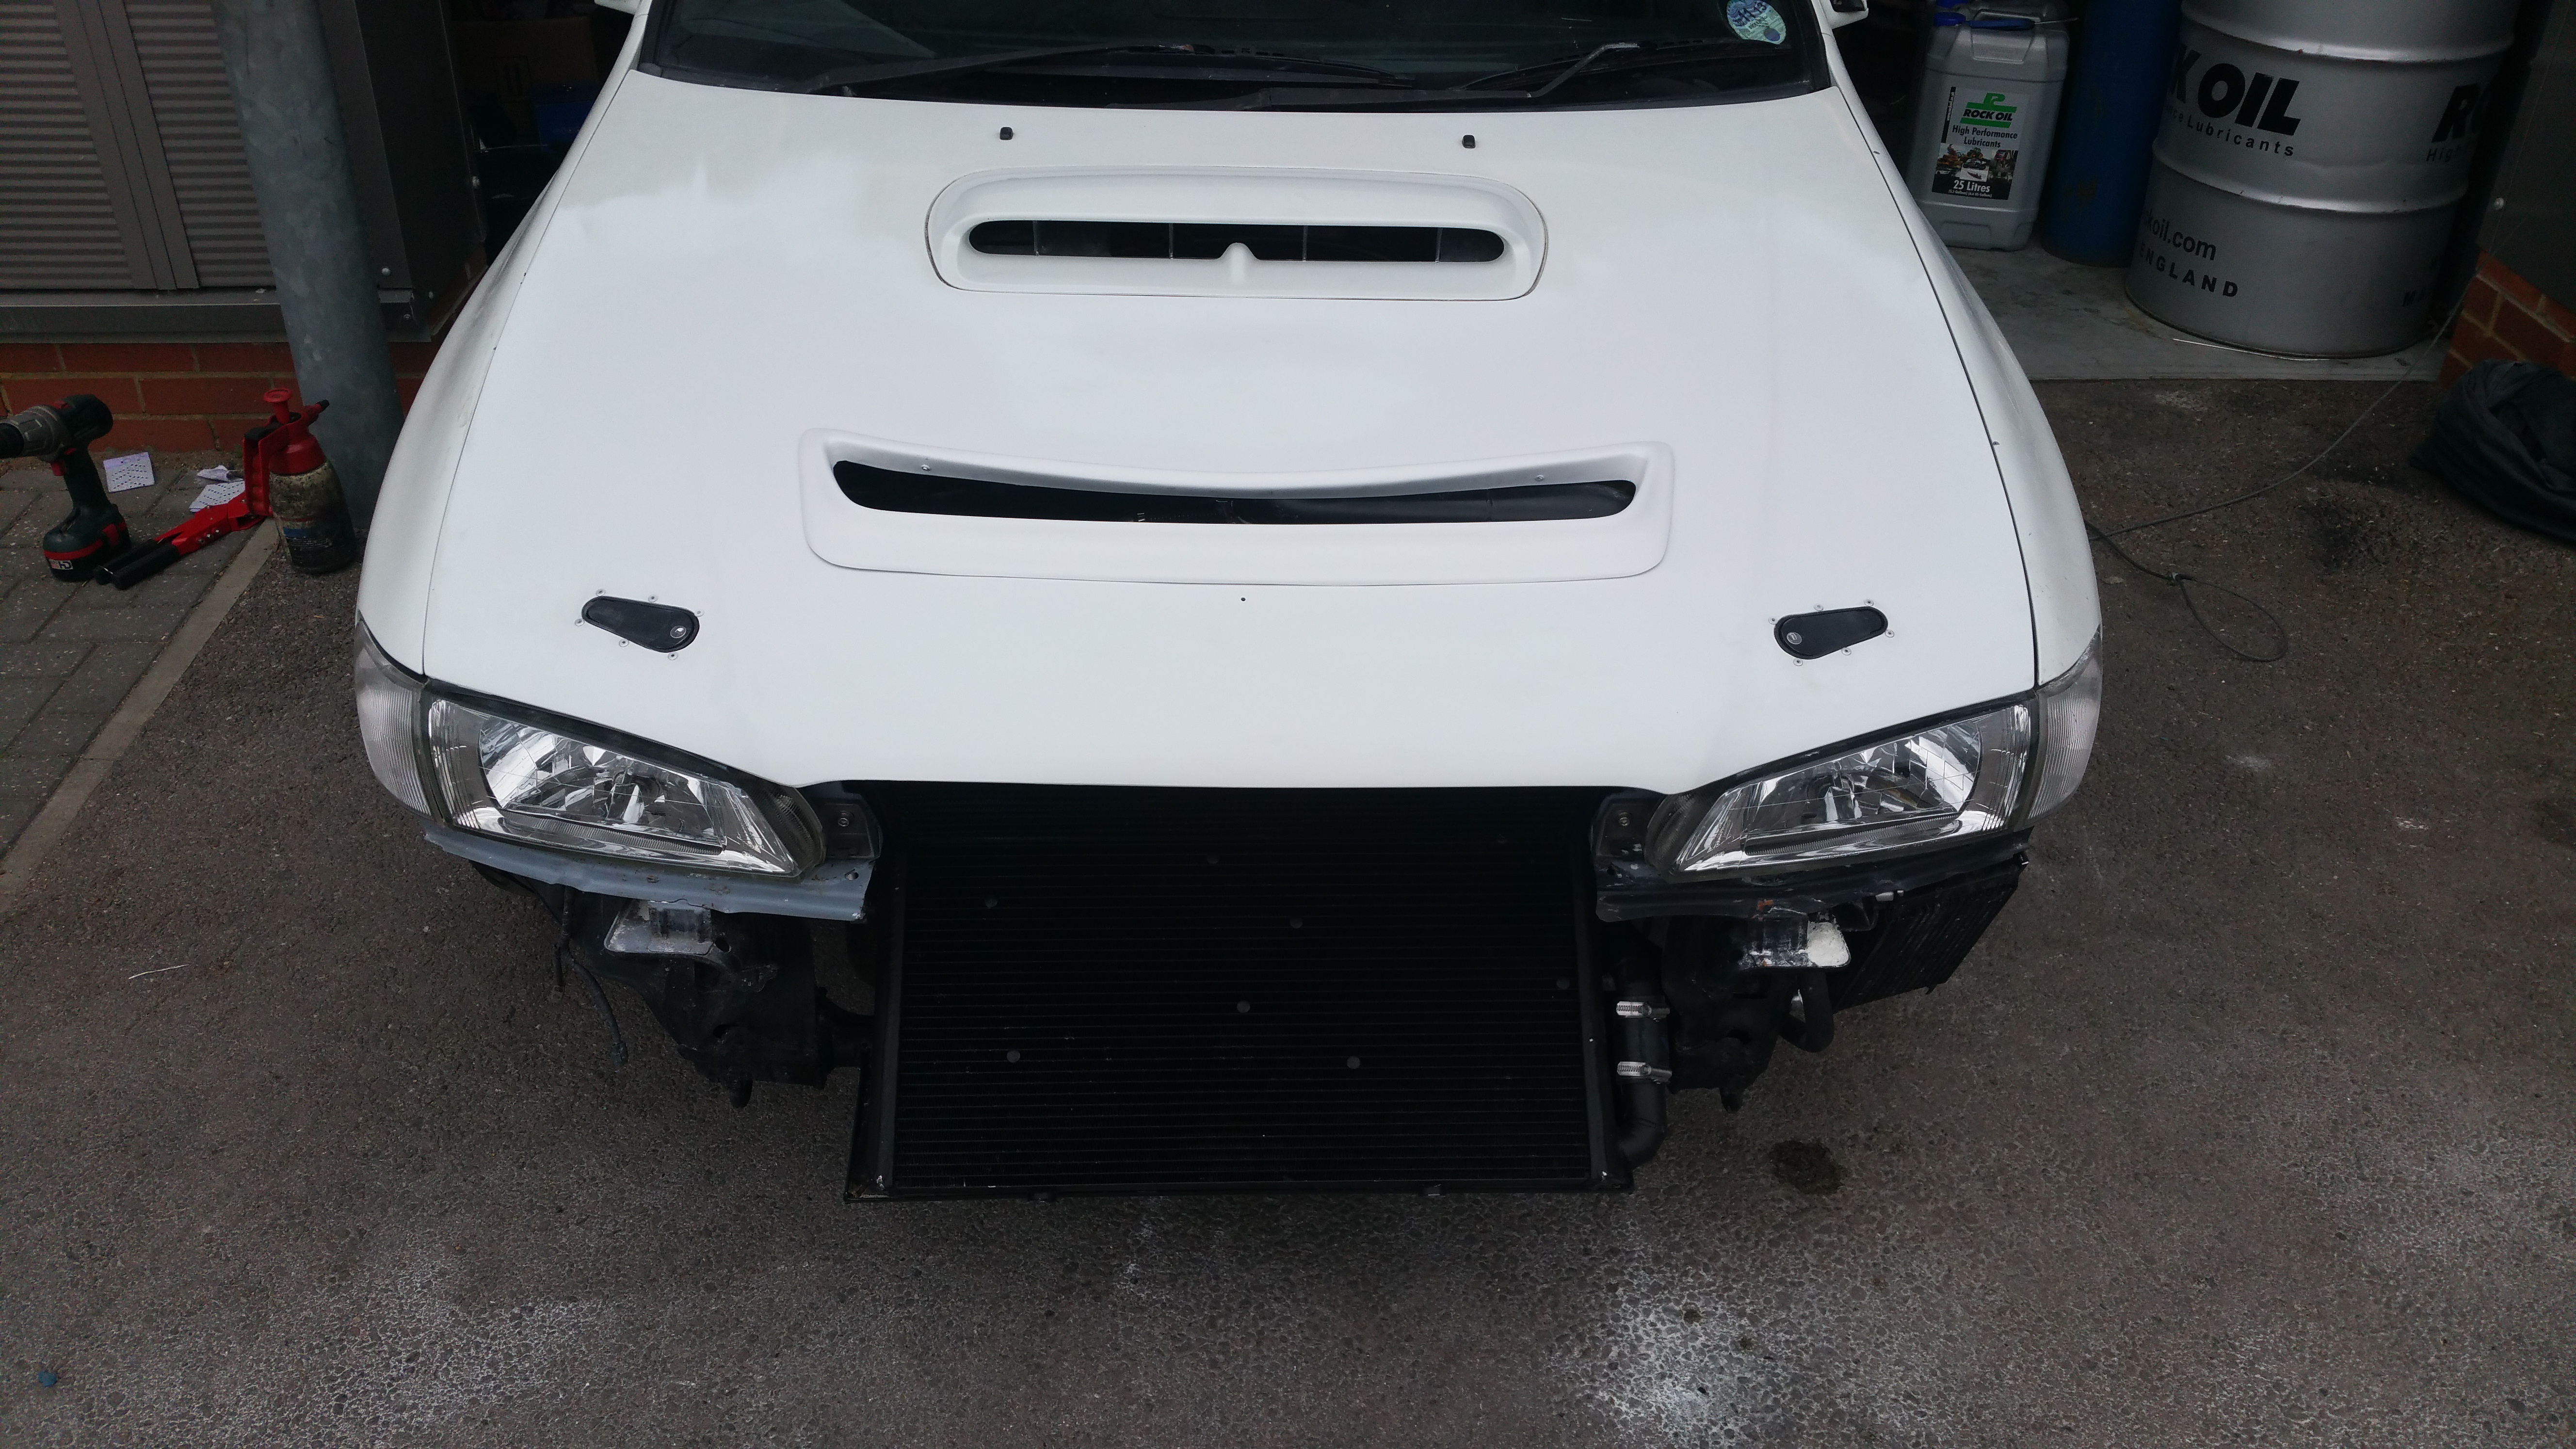
Few other little bits got done whilst I was waiting for the Syvecs. Bonnet is now finished and ready for paint
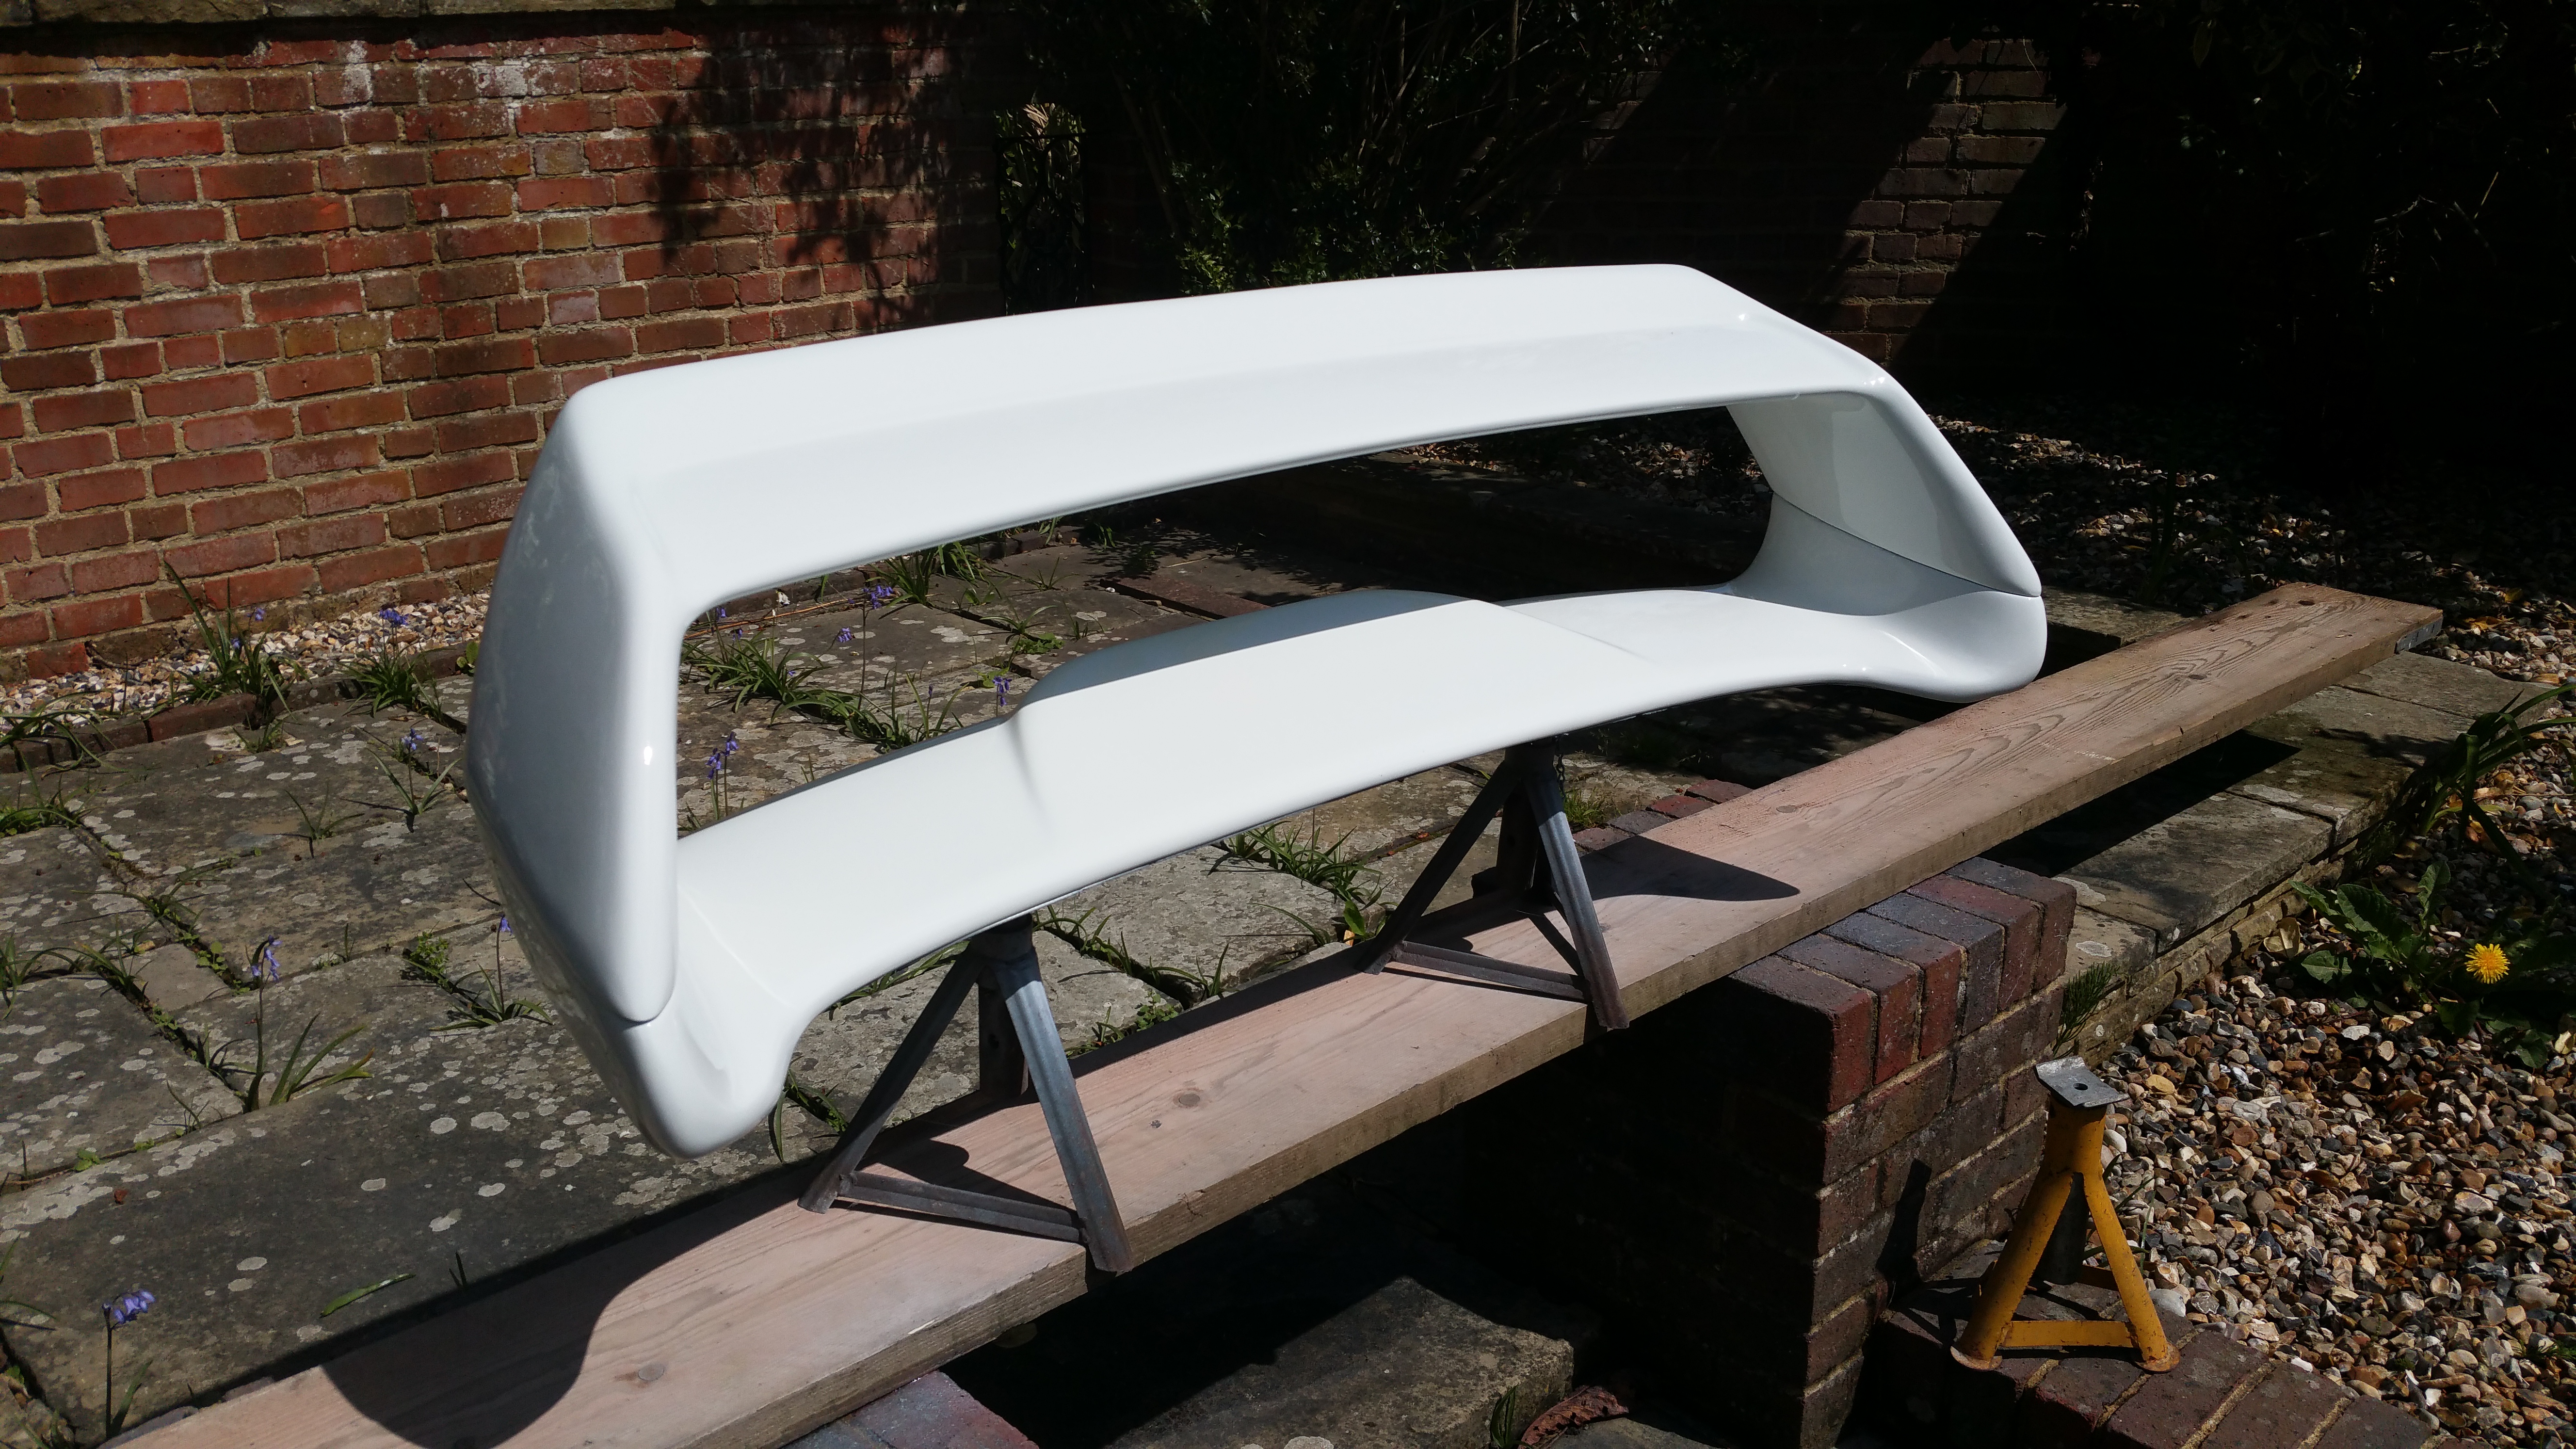
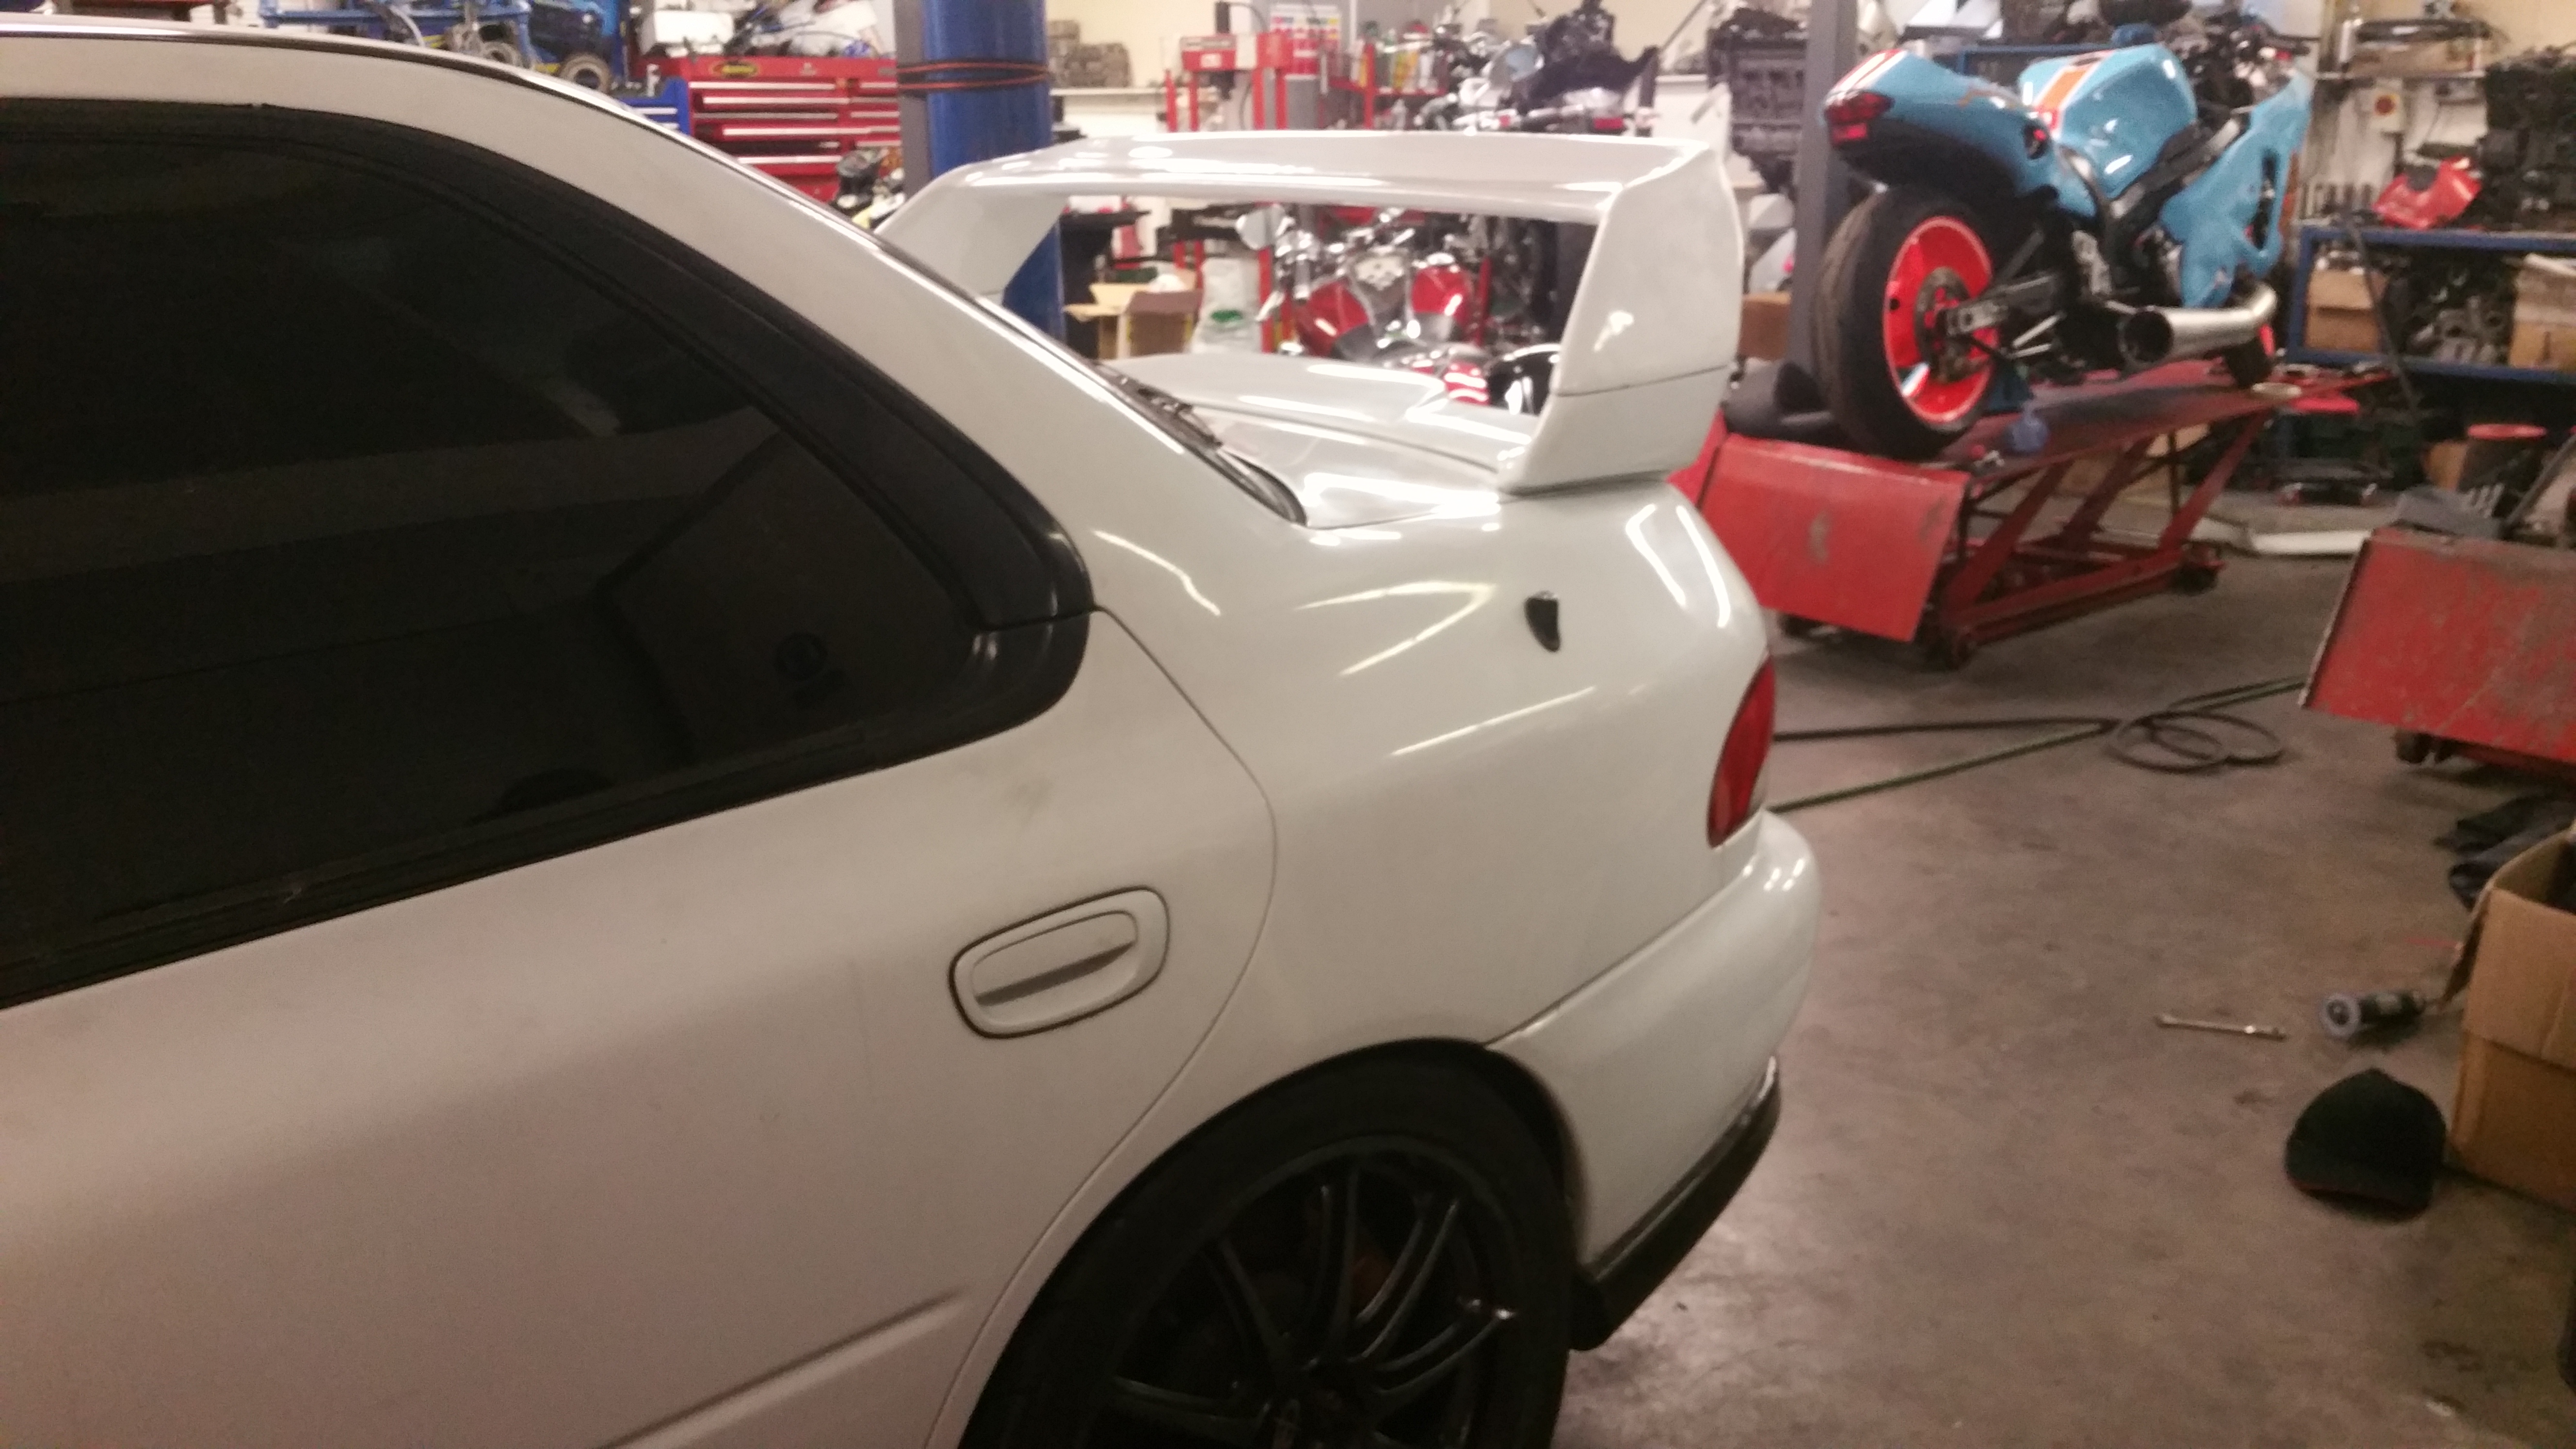
Finally got around to painting and fitting the STI 6 spoiler. I was hoping to paint the front bumper today but the weather is looking a bit bad.
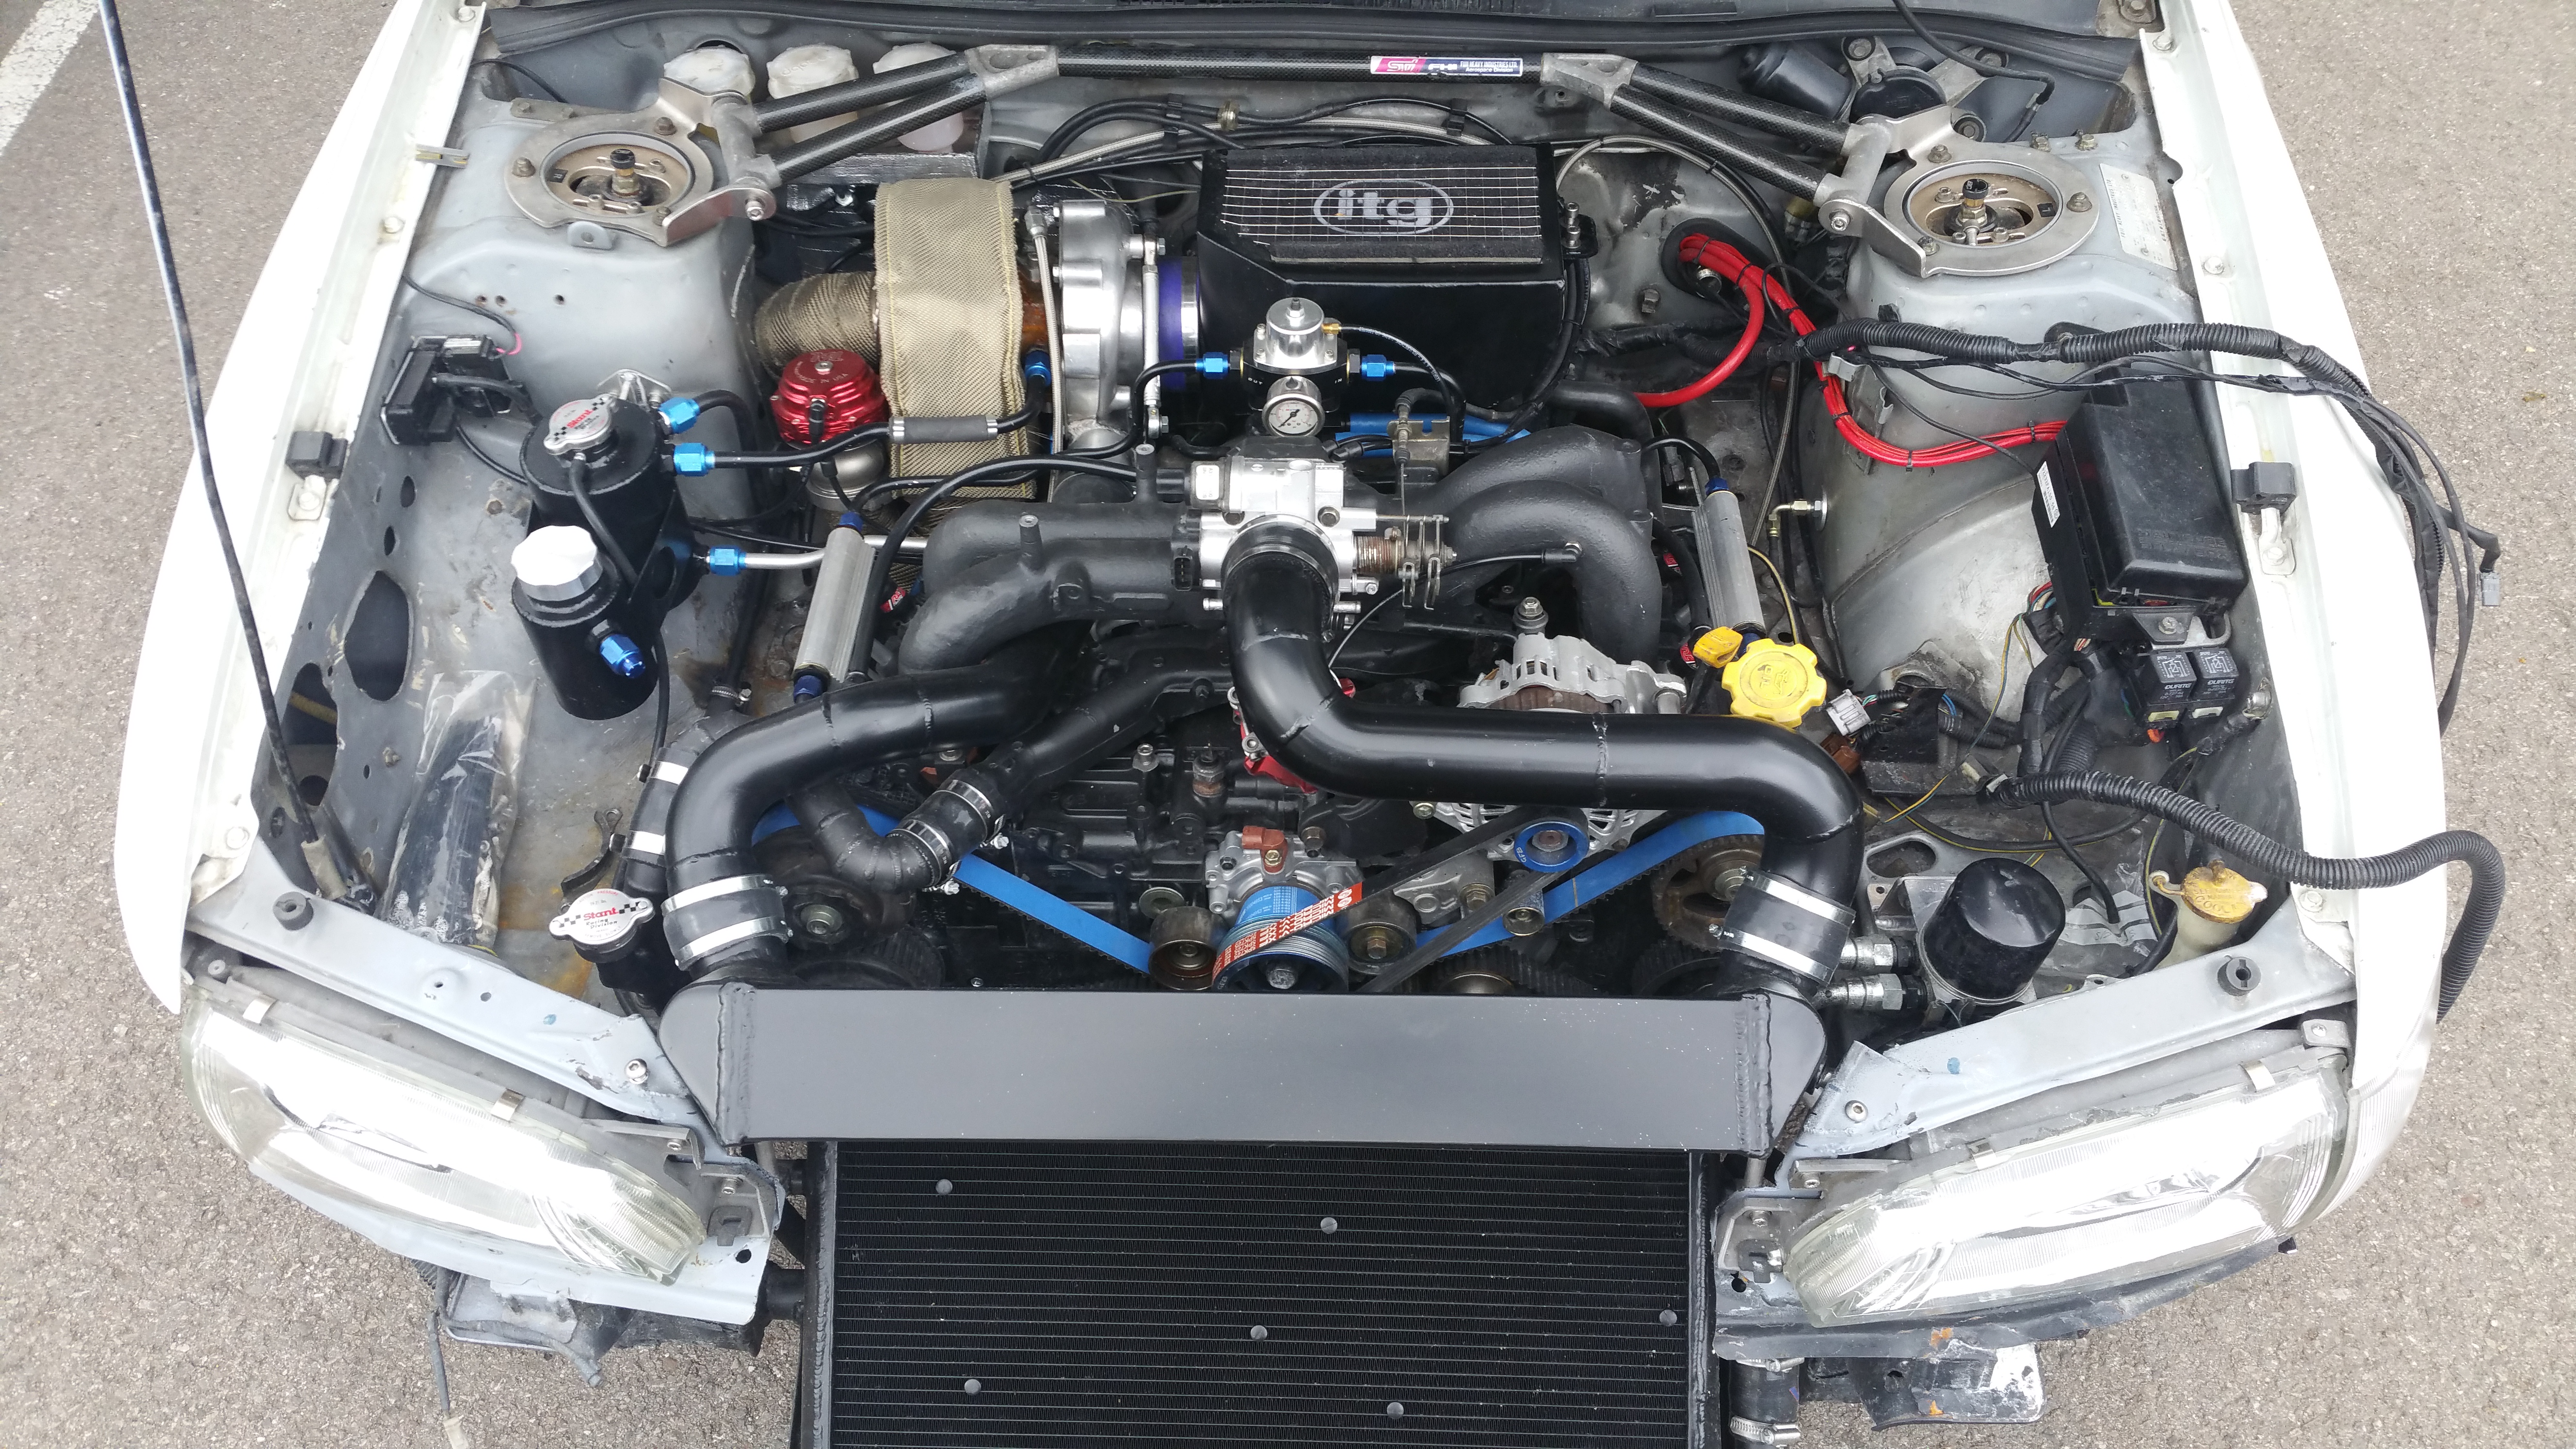
Also got all the water system back in the bay and thought I'd treat the turbo to a cozy blanket
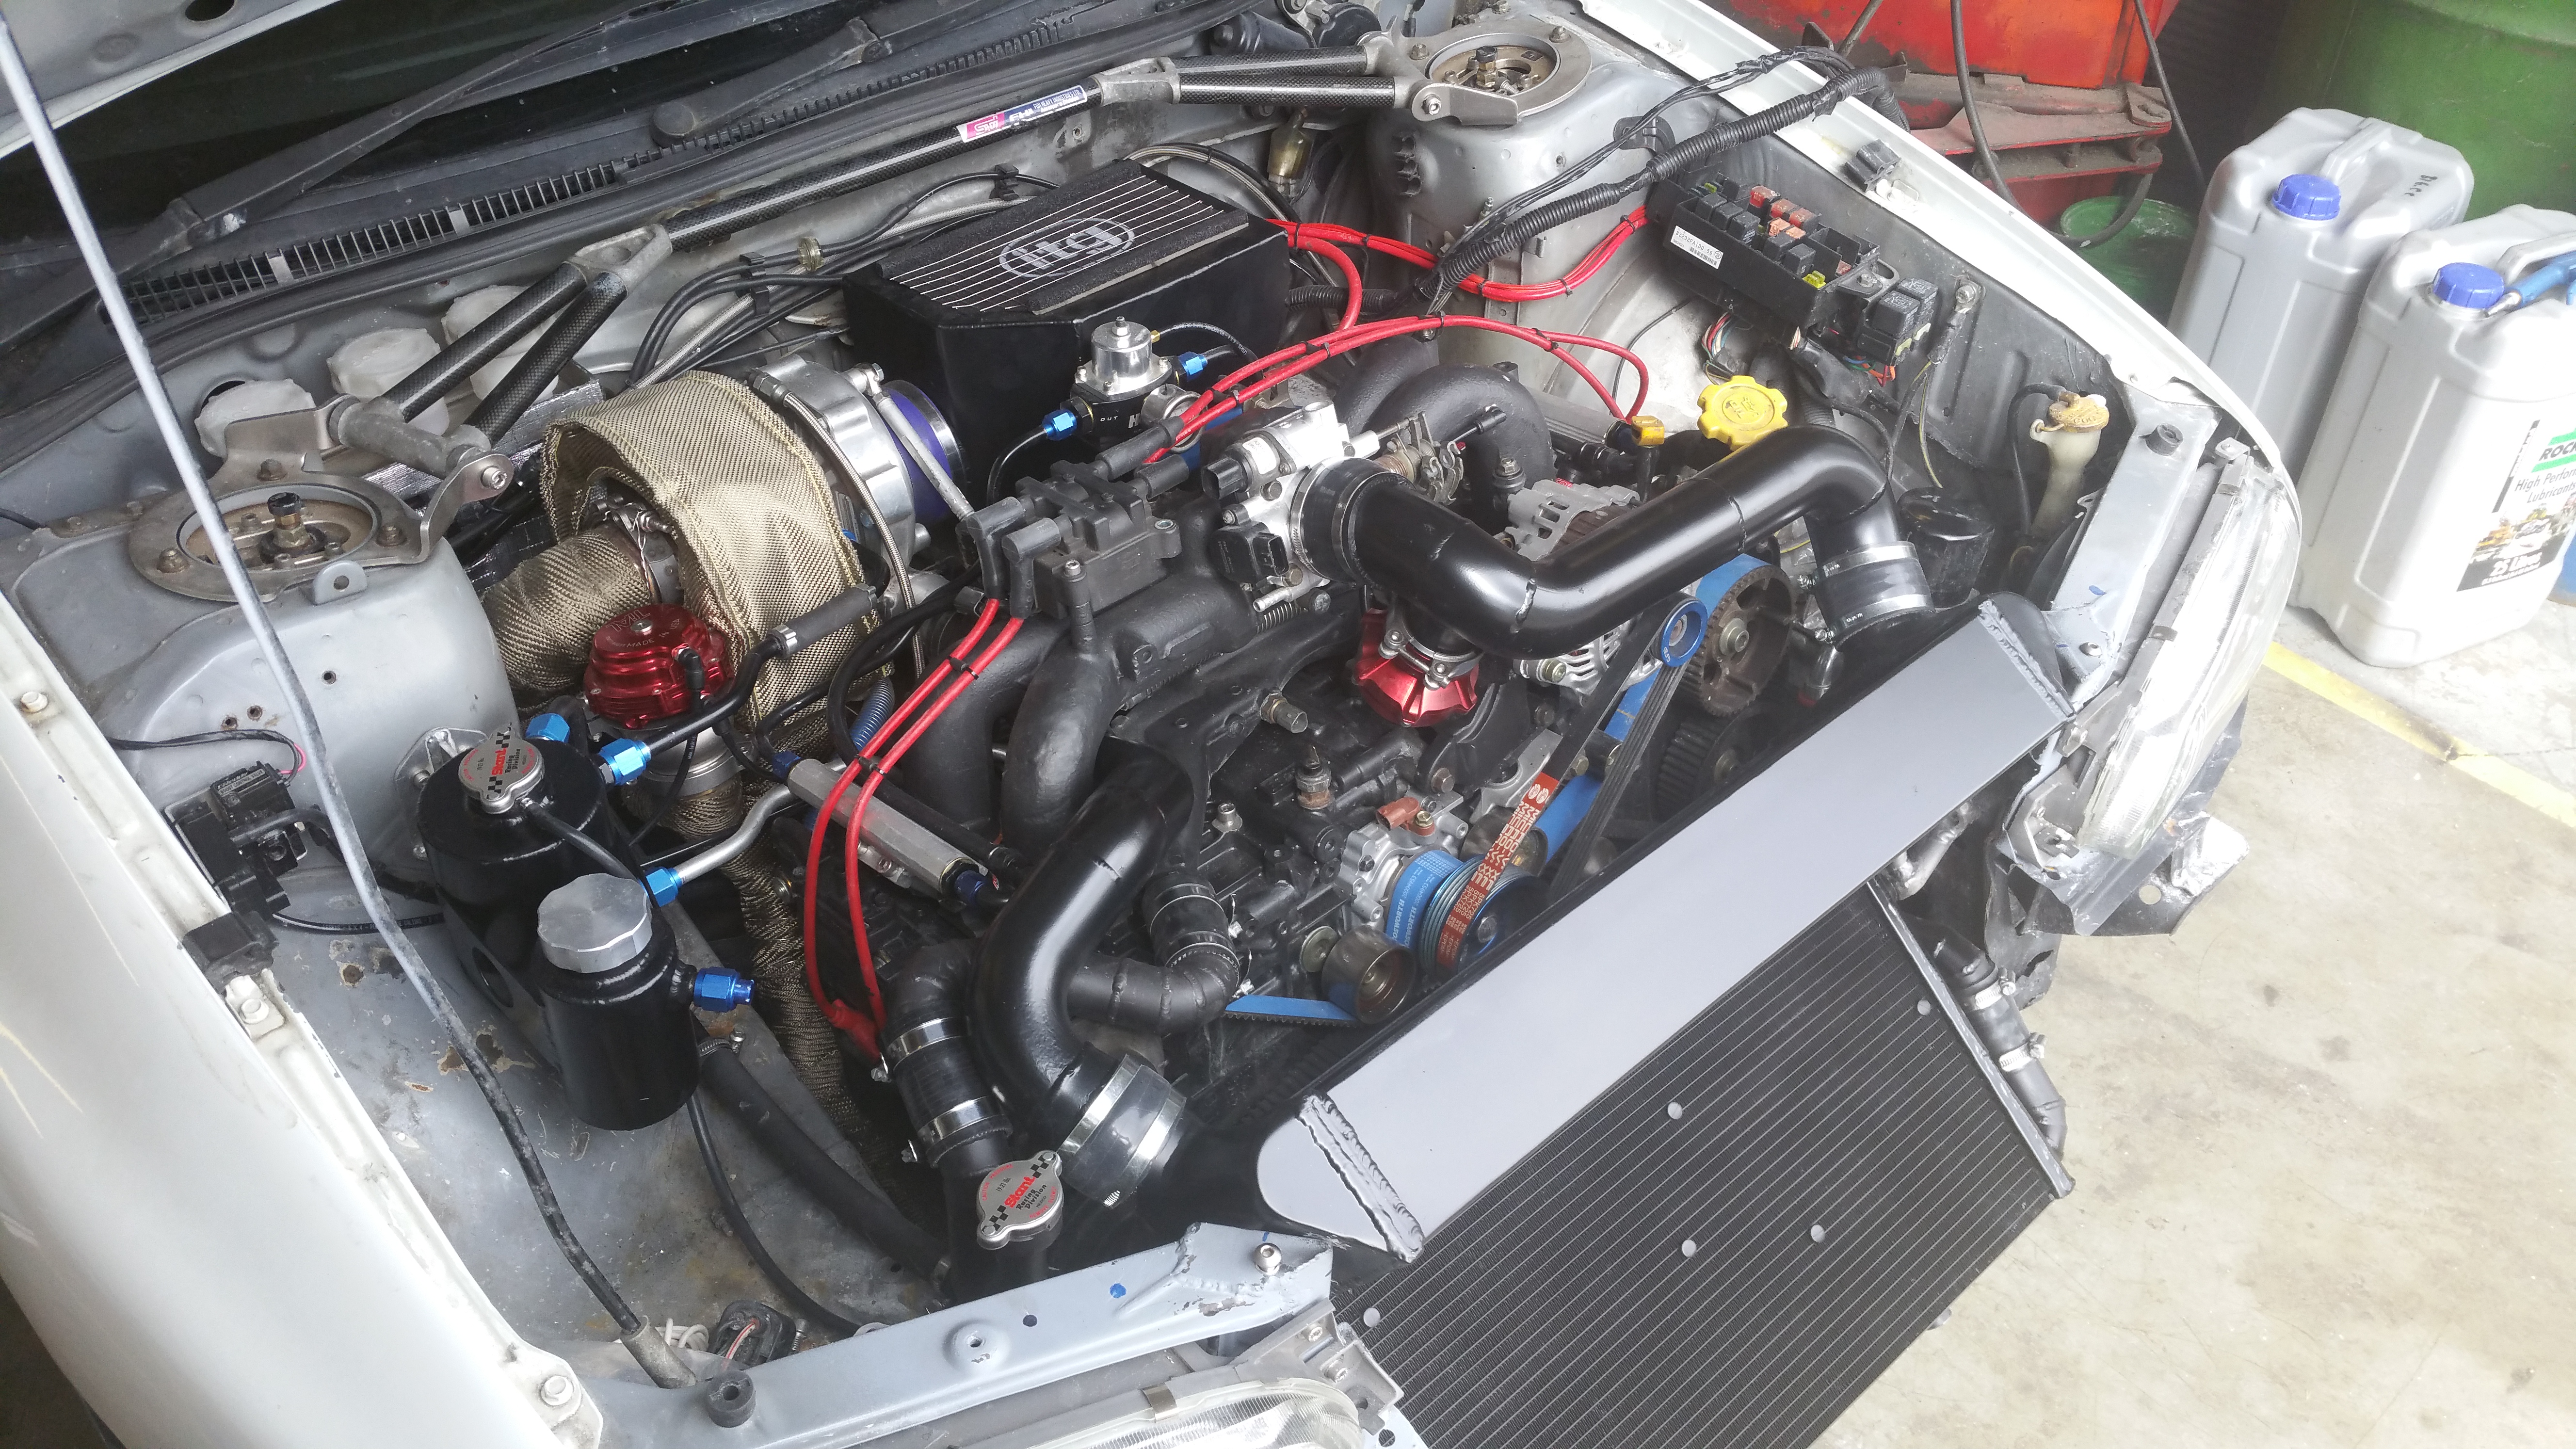
All the bits for the loom are ordered. Hopefully all be with me next week and I can look towards actually driving the old girl
Nice Syvecs S6

Few other little bits got done whilst I was waiting for the Syvecs. Bonnet is now finished and ready for paint


Finally got around to painting and fitting the STI 6 spoiler. I was hoping to paint the front bumper today but the weather is looking a bit bad.


Also got all the water system back in the bay and thought I'd treat the turbo to a cozy blanket


All the bits for the loom are ordered. Hopefully all be with me next week and I can look towards actually driving the old girl
Last edited by seventune; 14 August 2015 at 12:48 AM.
 11 May 2015, 06:46 AM
#172
Scooby Regular
Thread Starter
Not much progress with the FC. But a little.
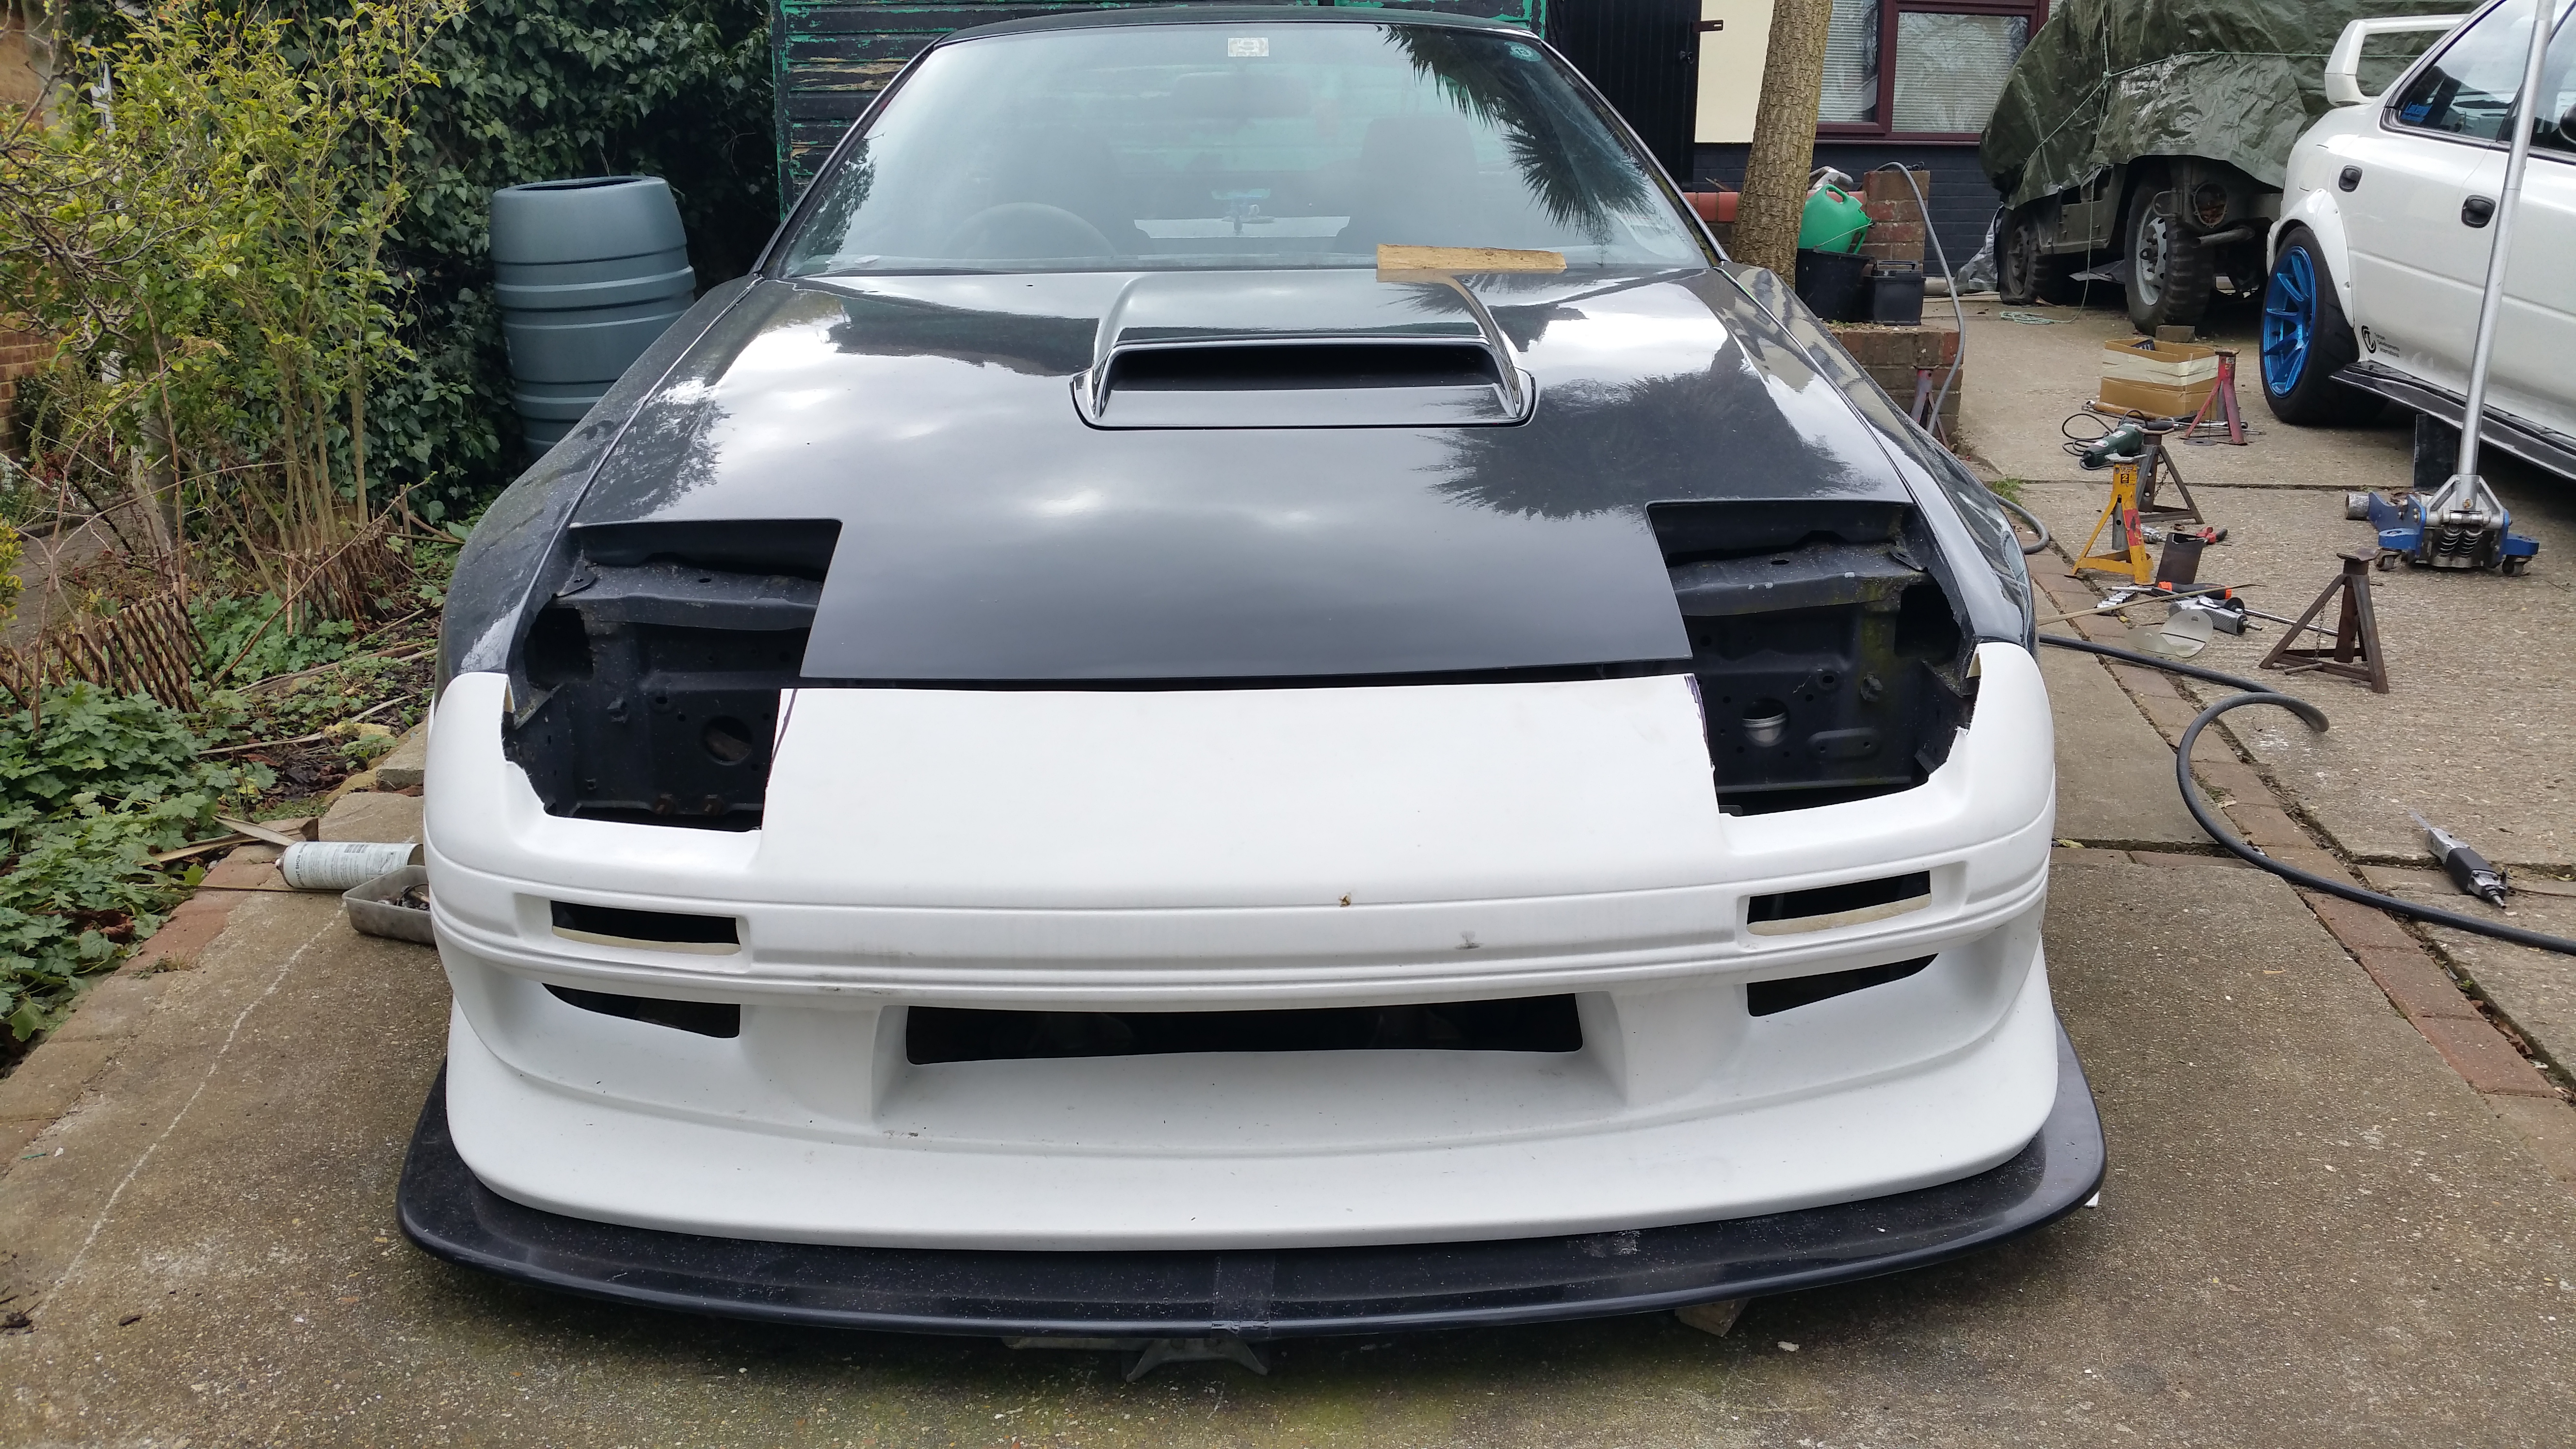
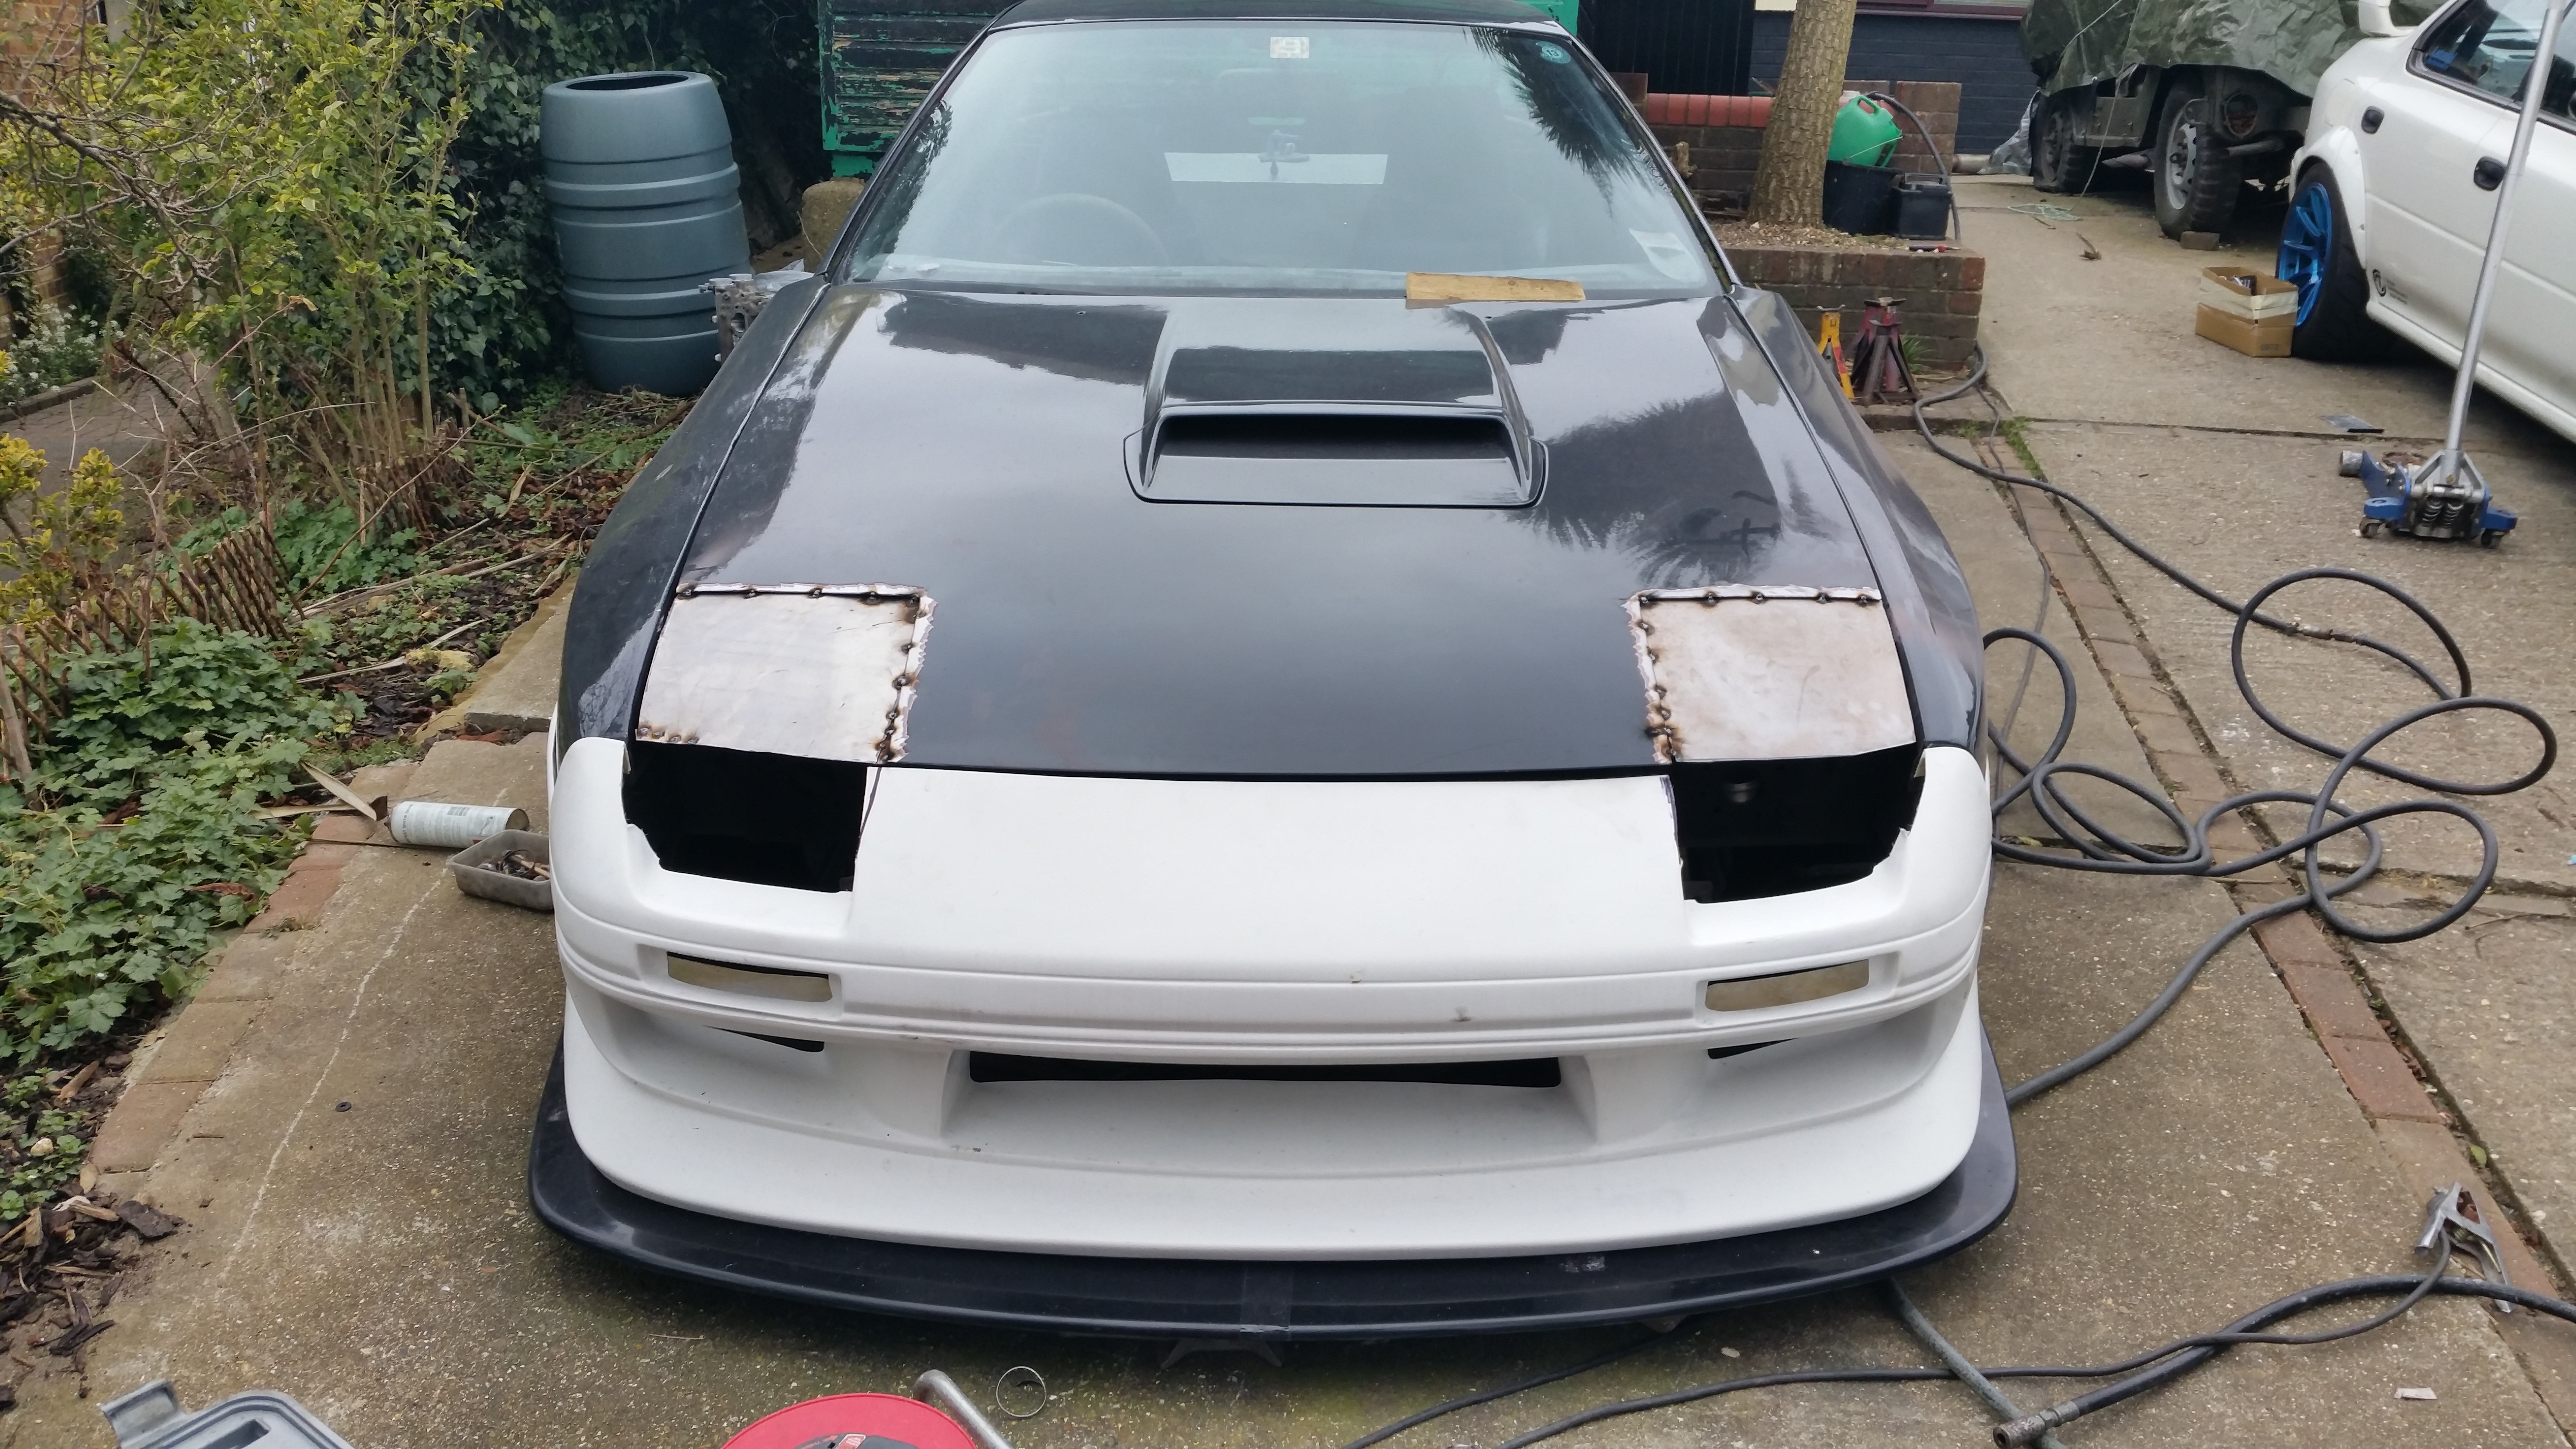
New front bumper turned up a while back with a splitter that needed a little modding
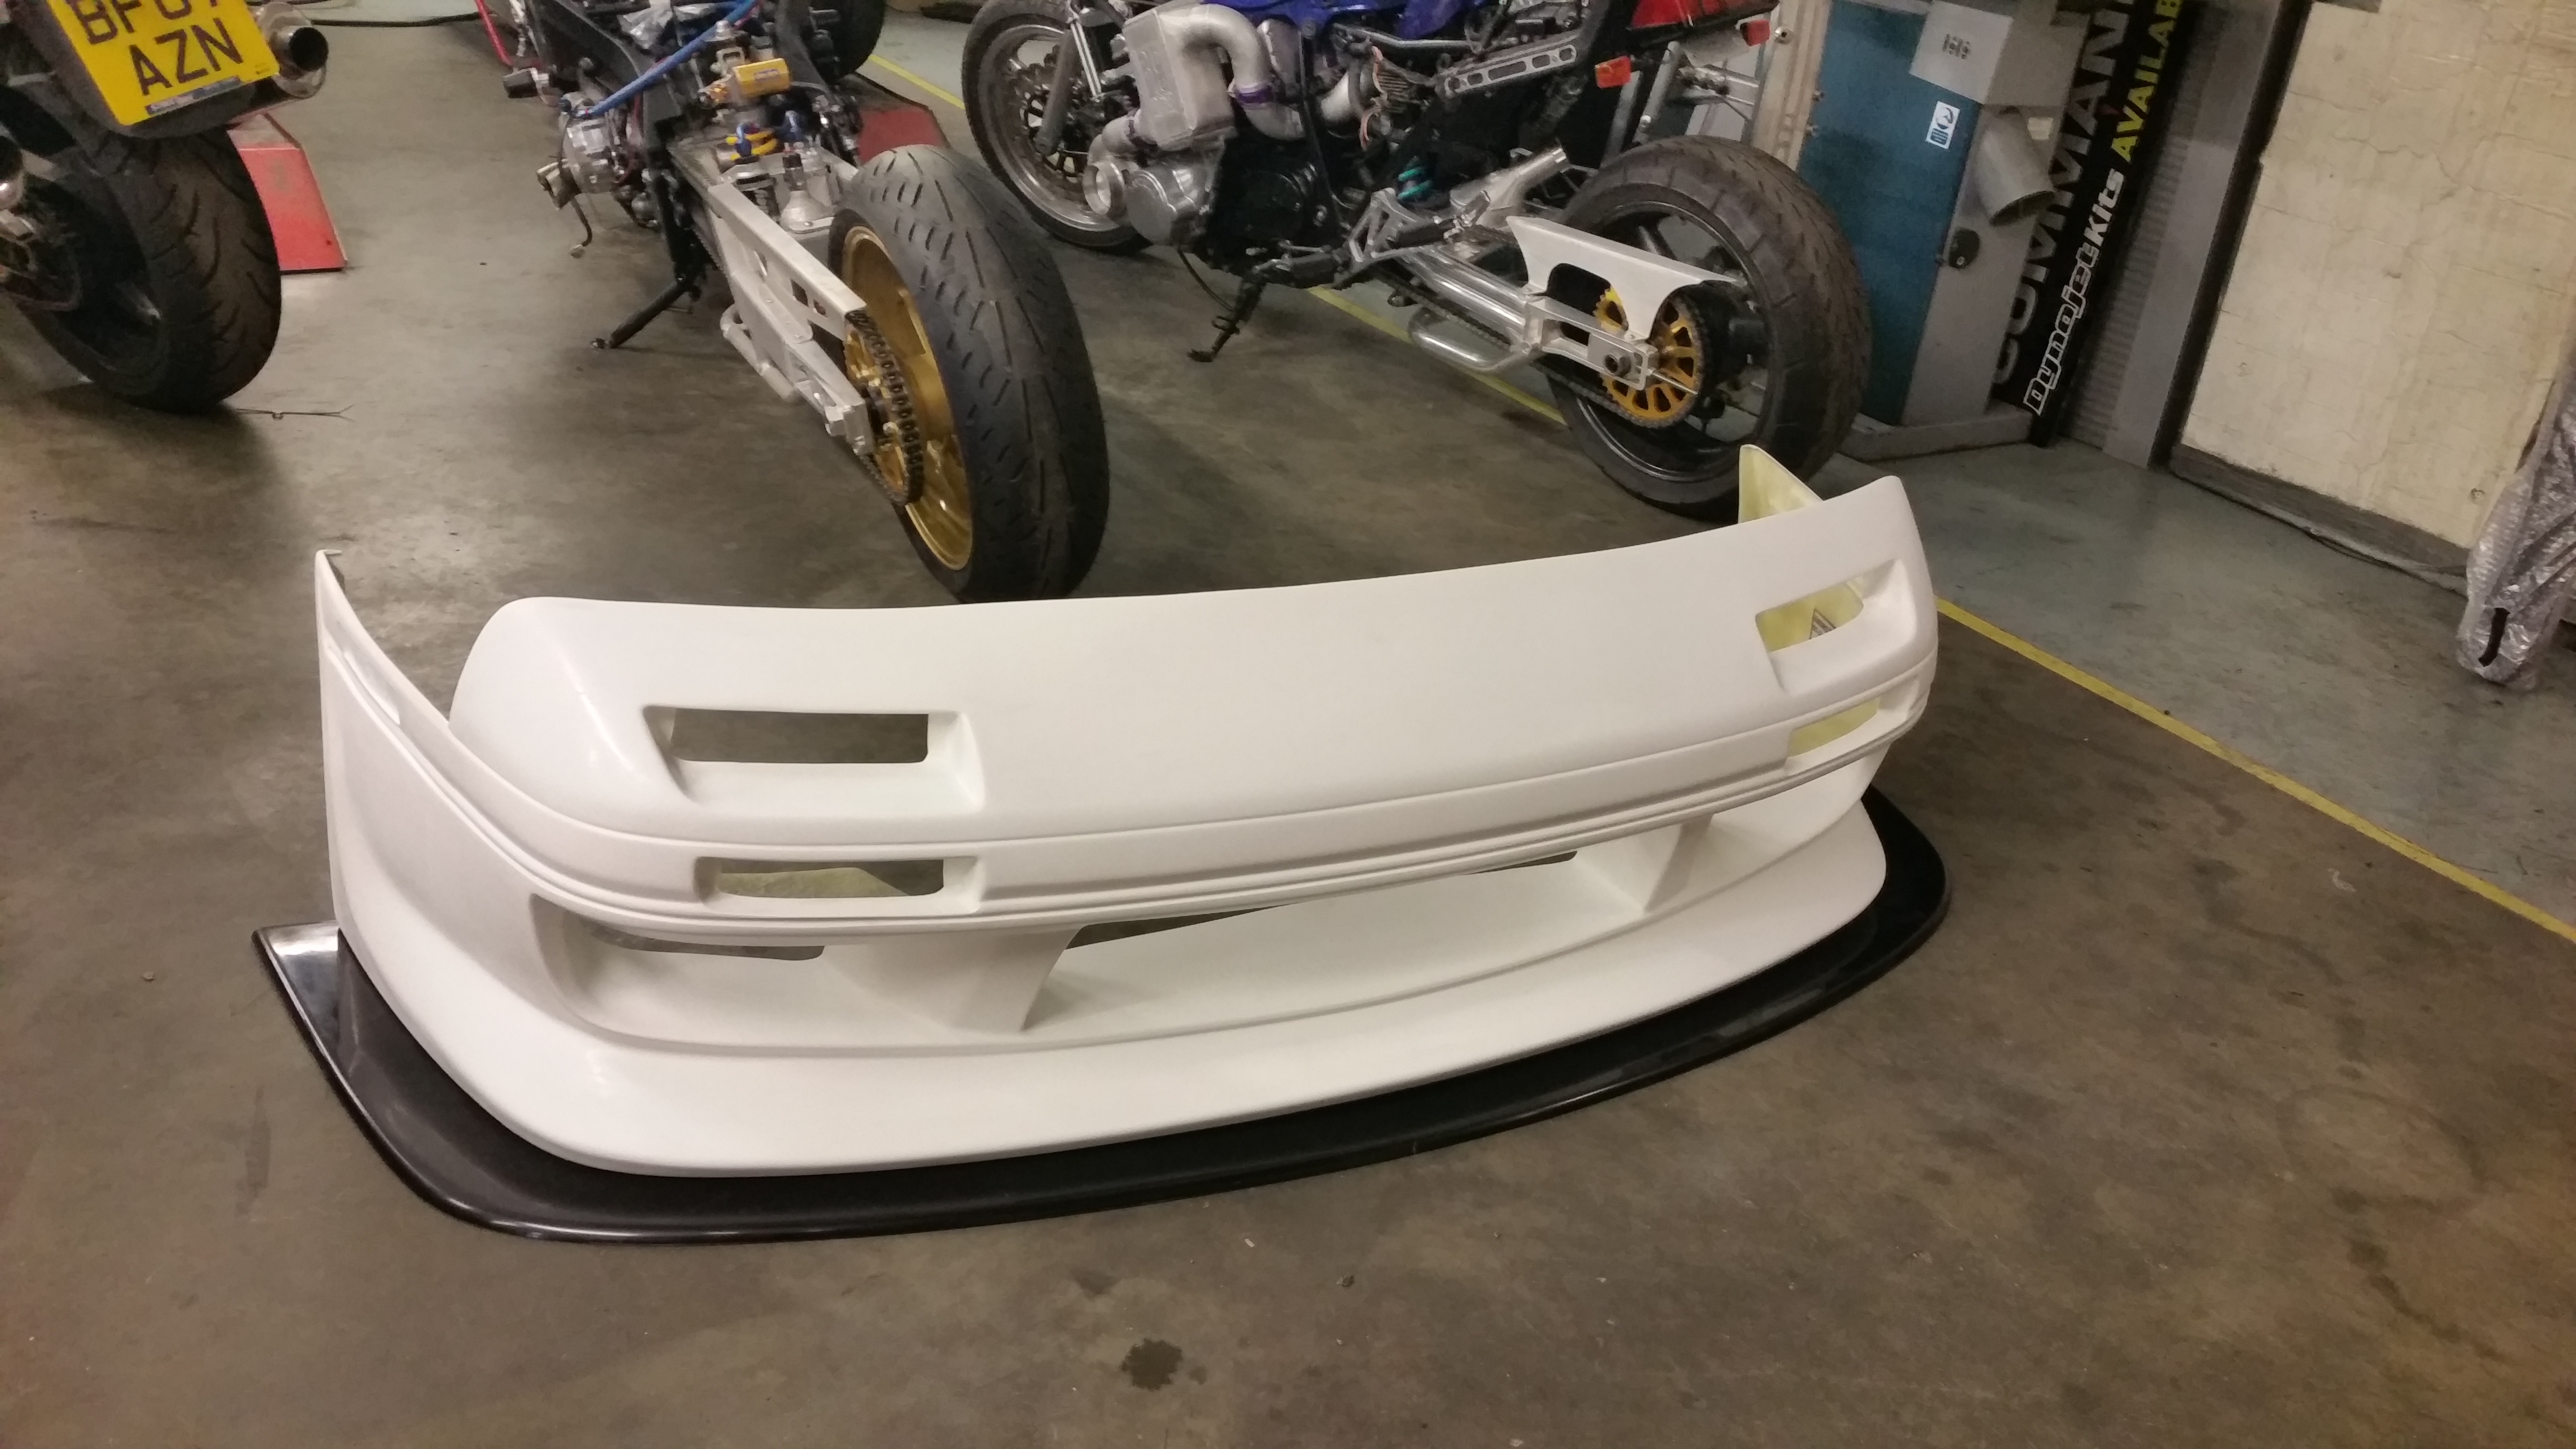
Test fit
offered up the splitter and extensions to make sure that it was all going to work. Result they did. Since they had been fitted properly.
I have had long term plans to get rid of the pop ups for aero reasons so. Trimmed the bumper to fit fixed lights and started the mods on bonnet.
So not much very much concentrating on the Impreza. Will be nice to get that running to I can get on with the FC.
New front bumper turned up a while back with a splitter that needed a little modding

Test fit


offered up the splitter and extensions to make sure that it was all going to work. Result they did. Since they had been fitted properly.

I have had long term plans to get rid of the pop ups for aero reasons so. Trimmed the bumper to fit fixed lights and started the mods on bonnet.


So not much very much concentrating on the Impreza. Will be nice to get that running to I can get on with the FC.
15 May 2015, 07:56 PM
#175
Scooby Regular
Thread Starter
Thanks Guys,
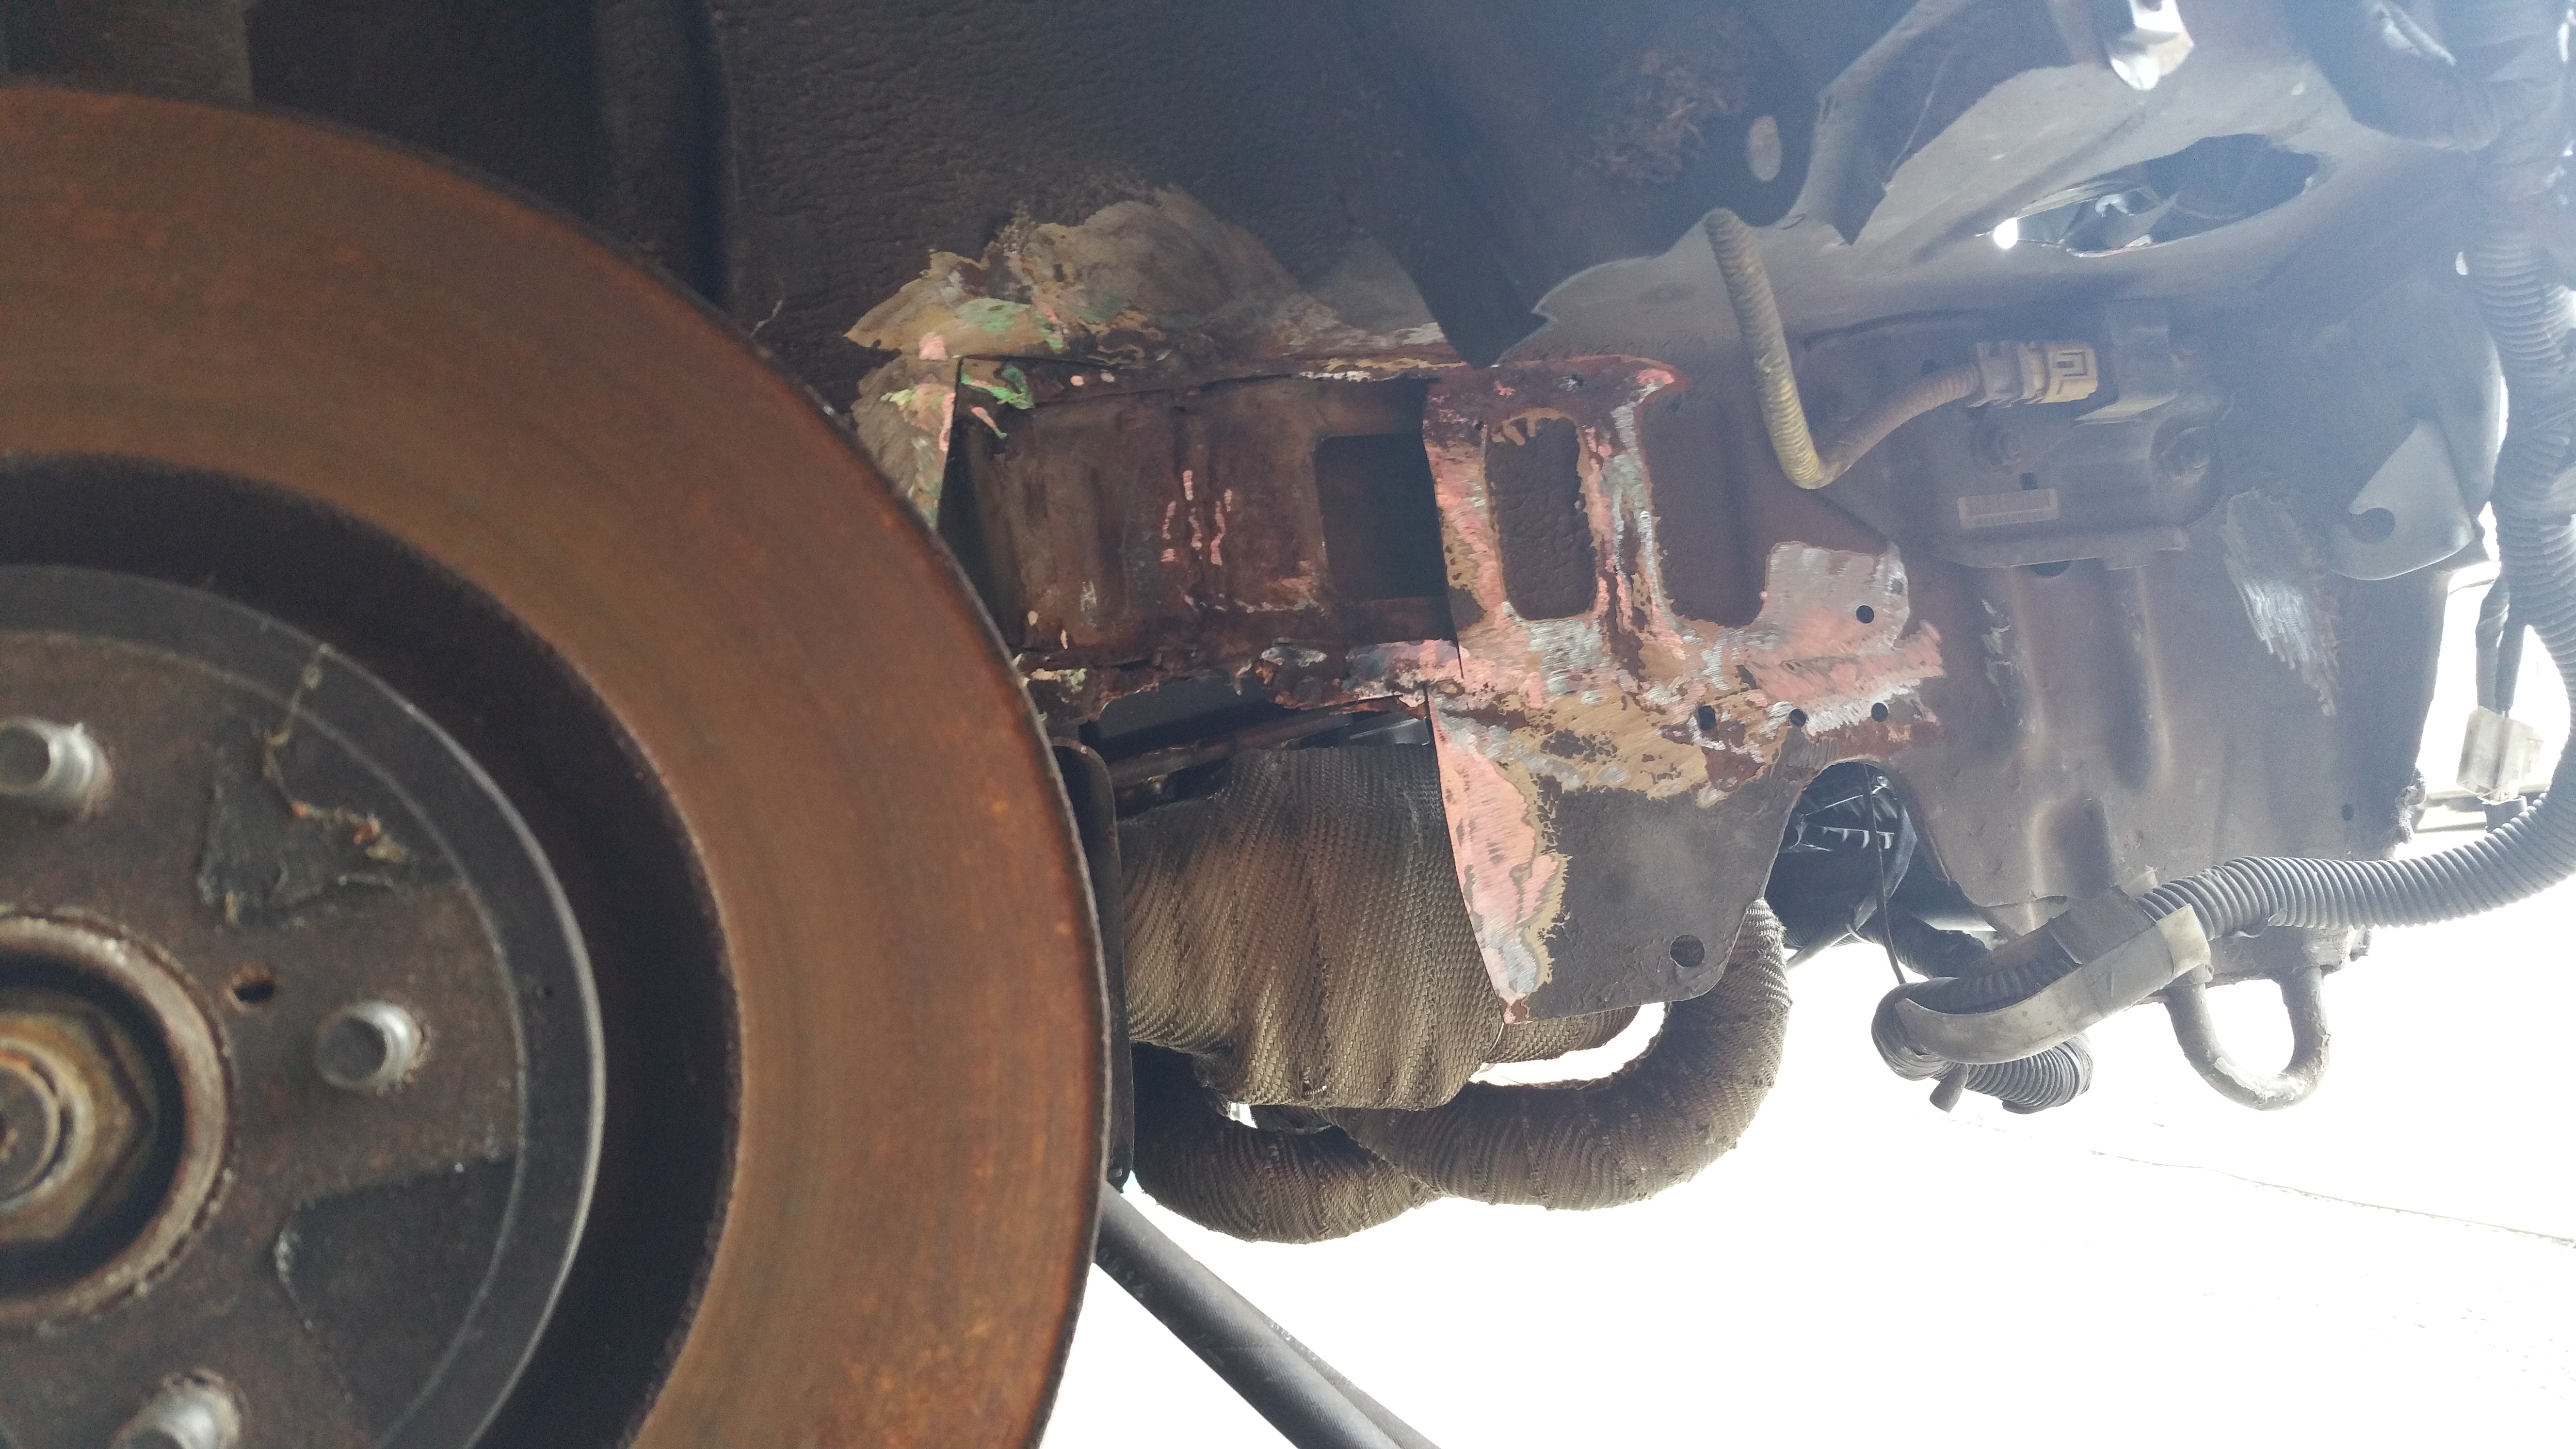
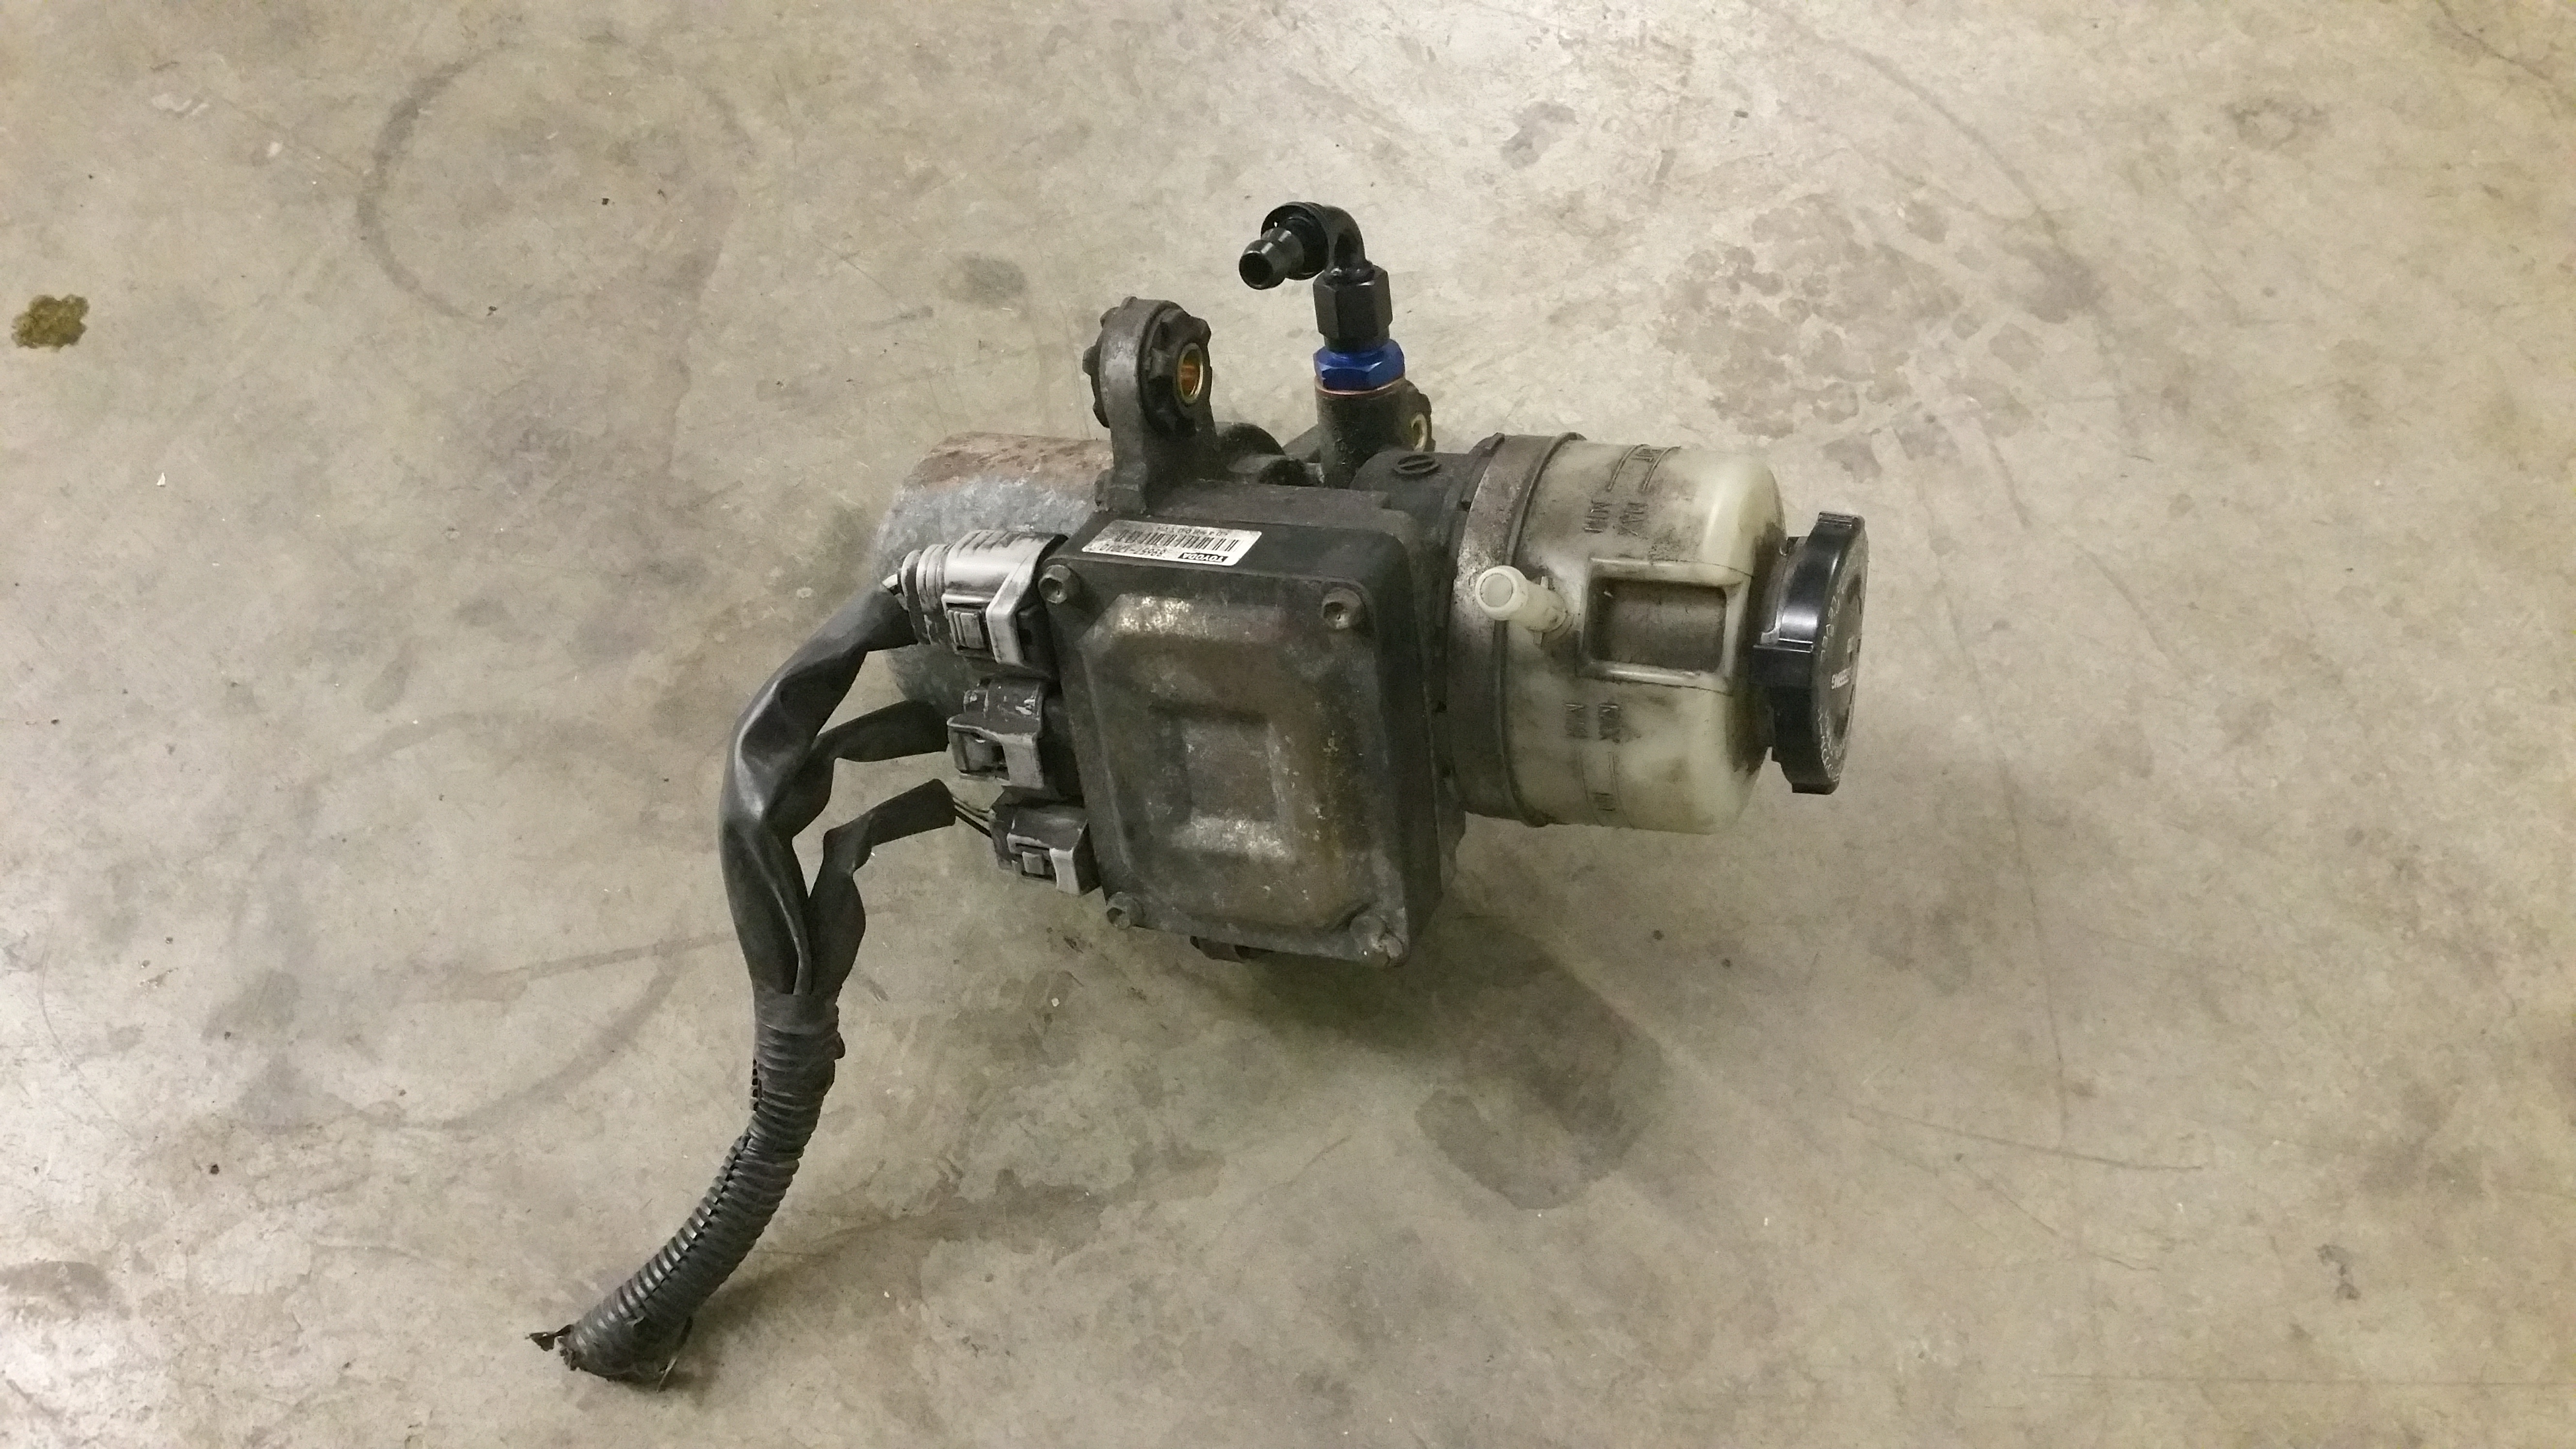
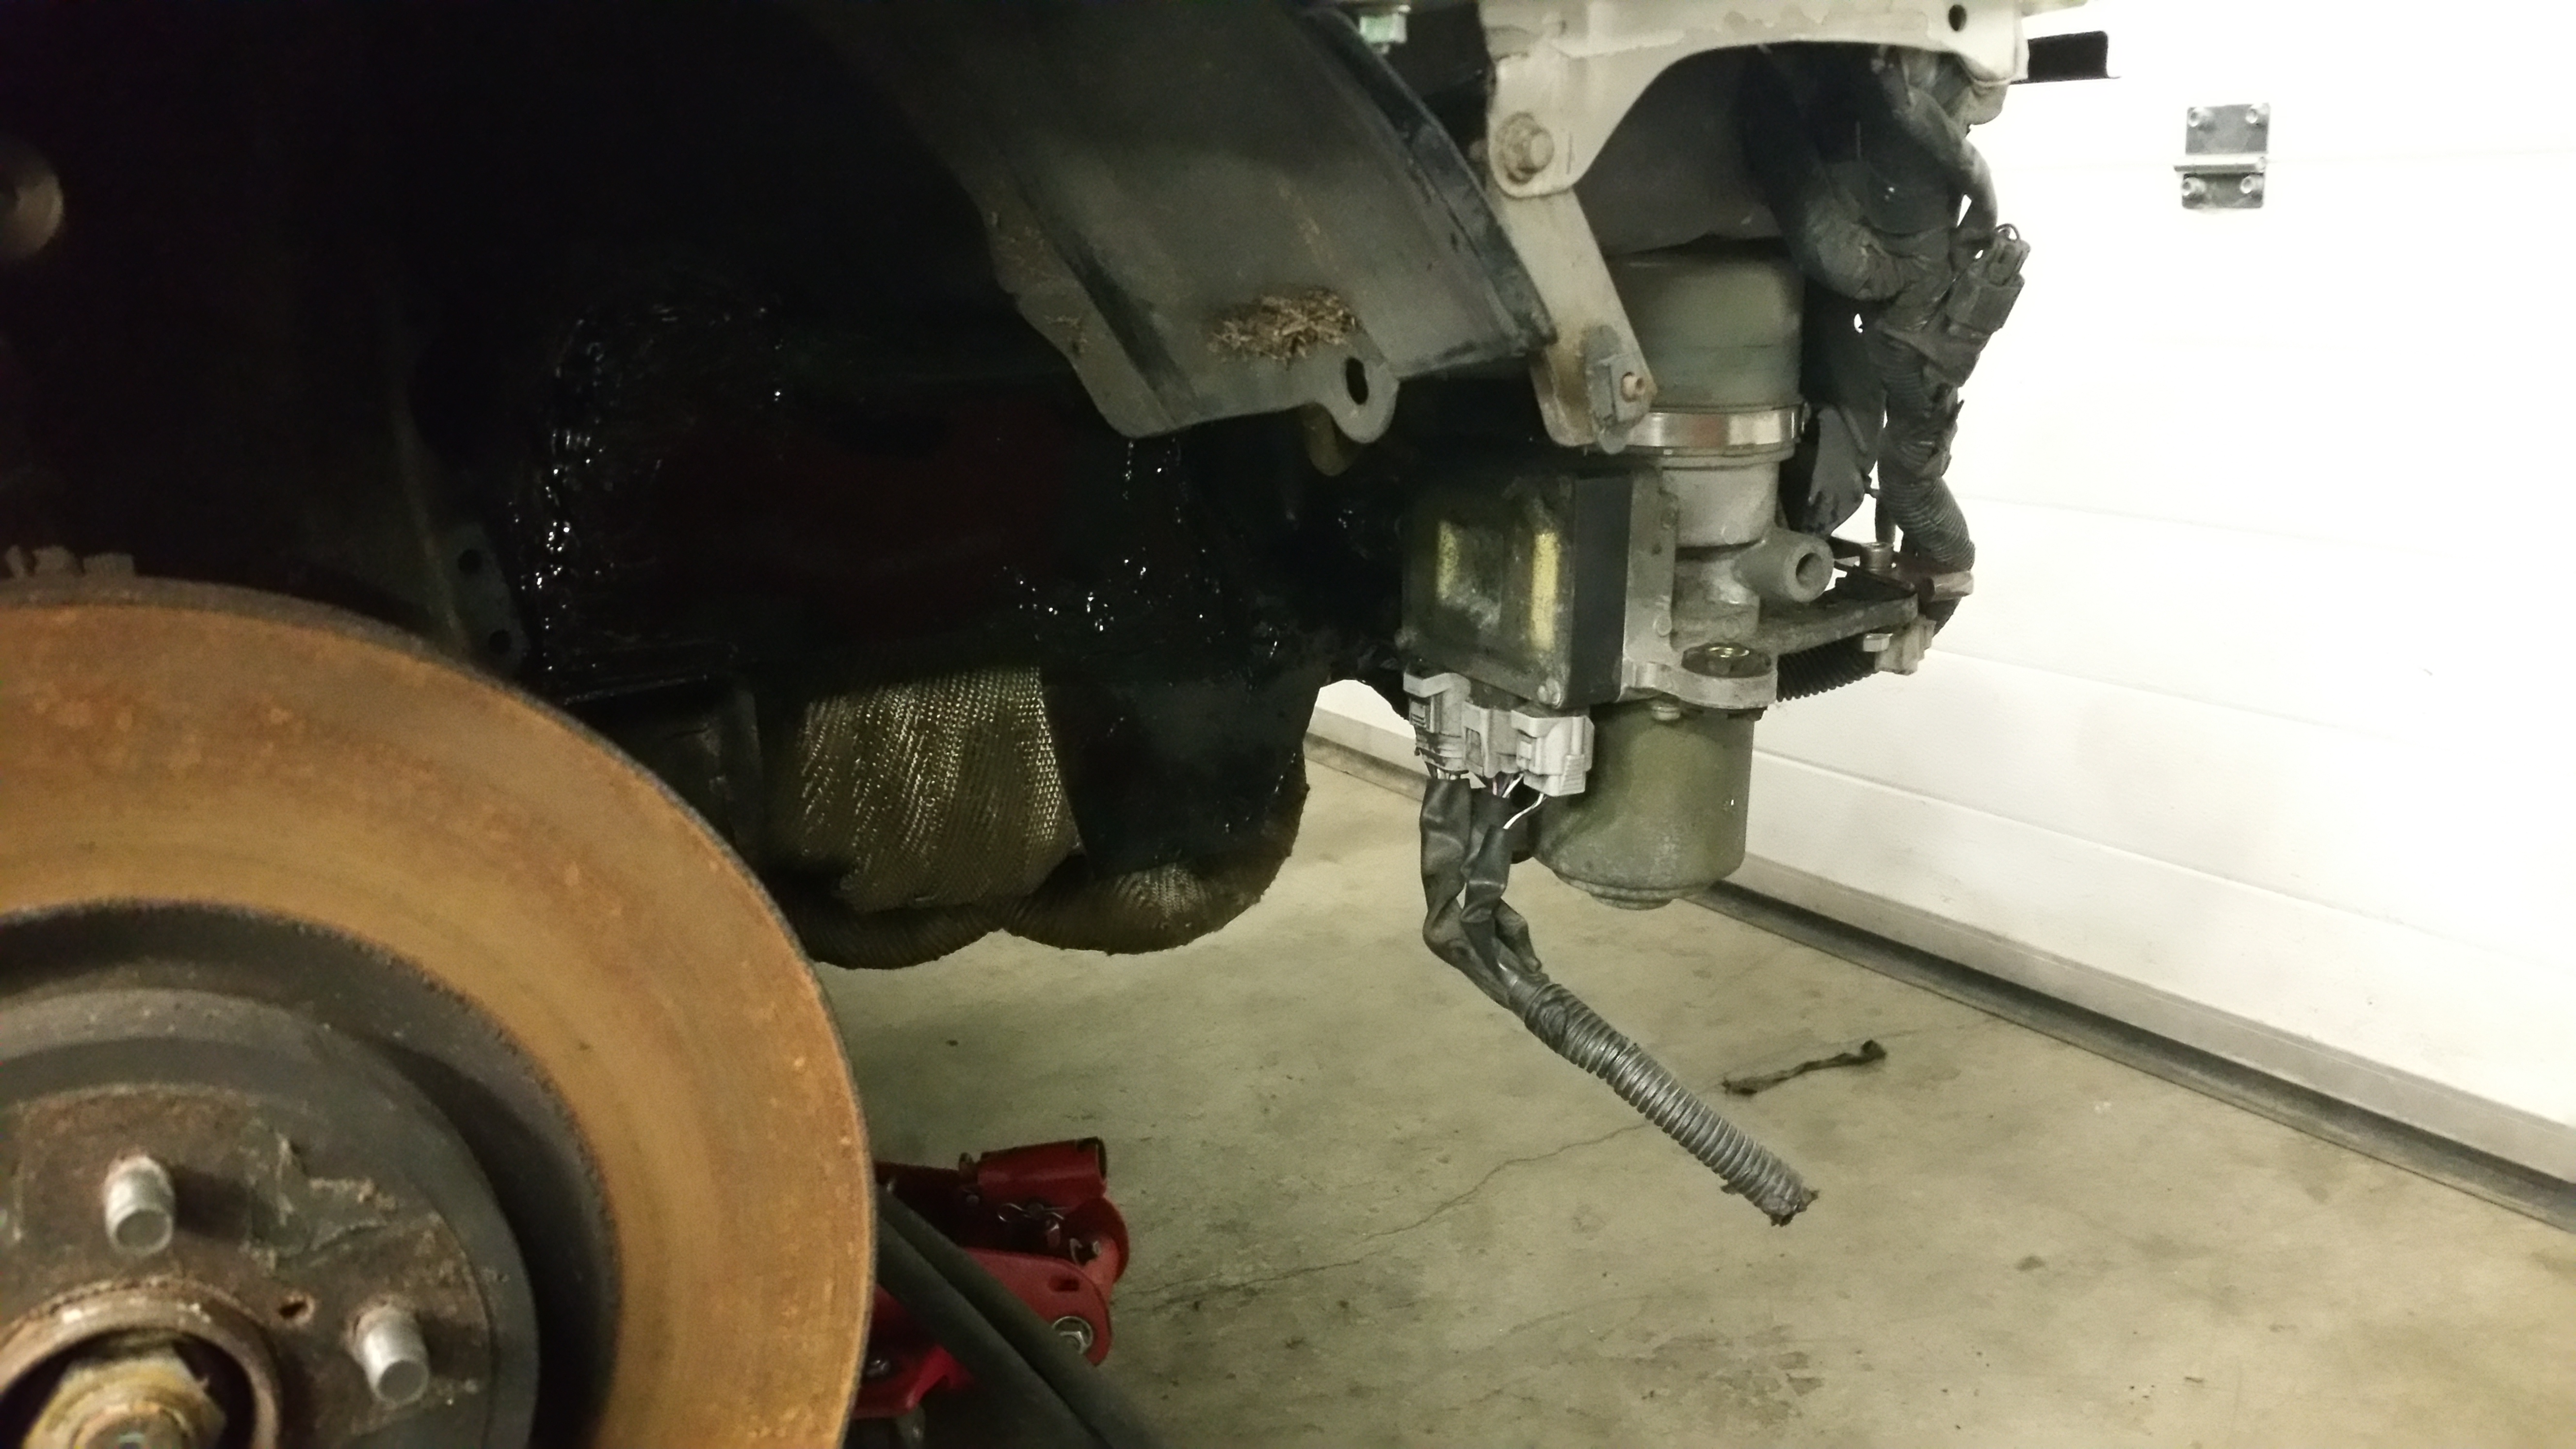
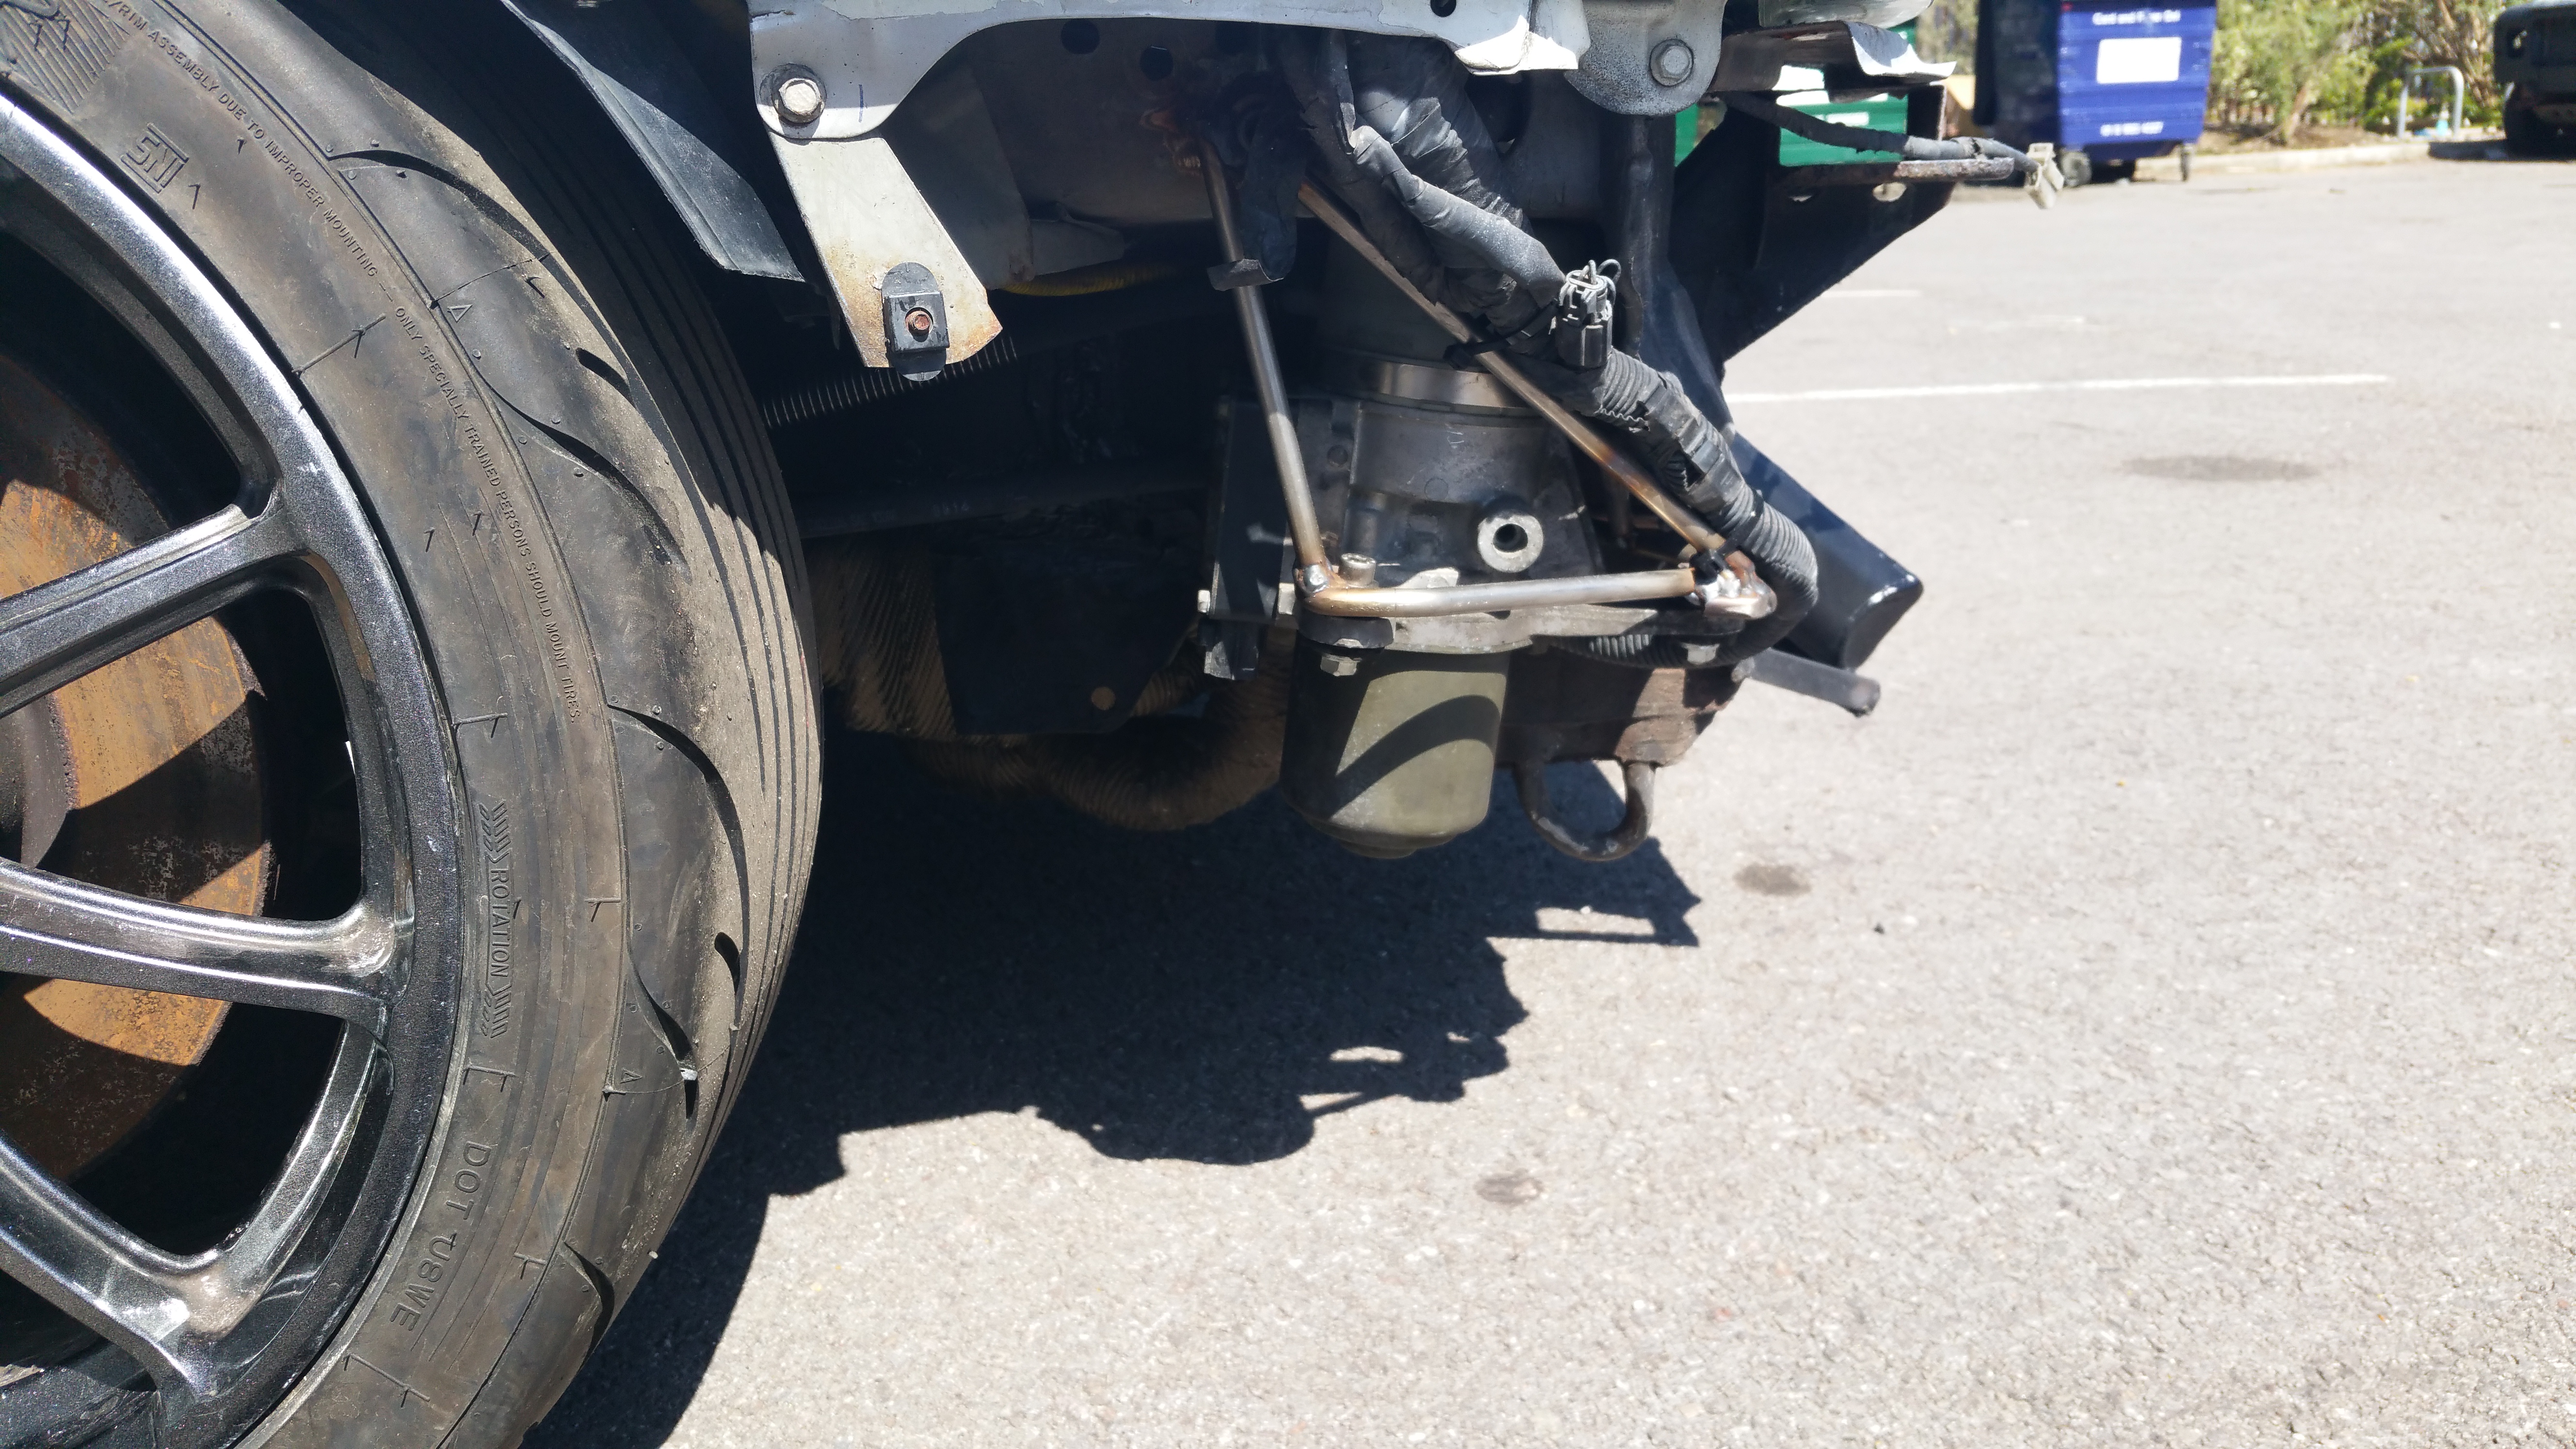
Started getting the power steering in. Buried it in behind the front bumper on the drivers side. Its an electric MR2 pump. Will be interested to see how it works. I also found some grot under there so sorted that out too while I was there. need to add to the bracket and some extra support as its a heavy pump.
Grot:
Pump:
Grot fixed and pump in place (but not finished)
Started getting the power steering in. Buried it in behind the front bumper on the drivers side. Its an electric MR2 pump. Will be interested to see how it works. I also found some grot under there so sorted that out too while I was there. need to add to the bracket and some extra support as its a heavy pump.
Grot:

Pump:

Grot fixed and pump in place (but not finished)

Last edited by seventune; 14 August 2015 at 12:49 AM.
17 May 2015, 06:30 AM
#176
Scooby Regular
Thread Starter
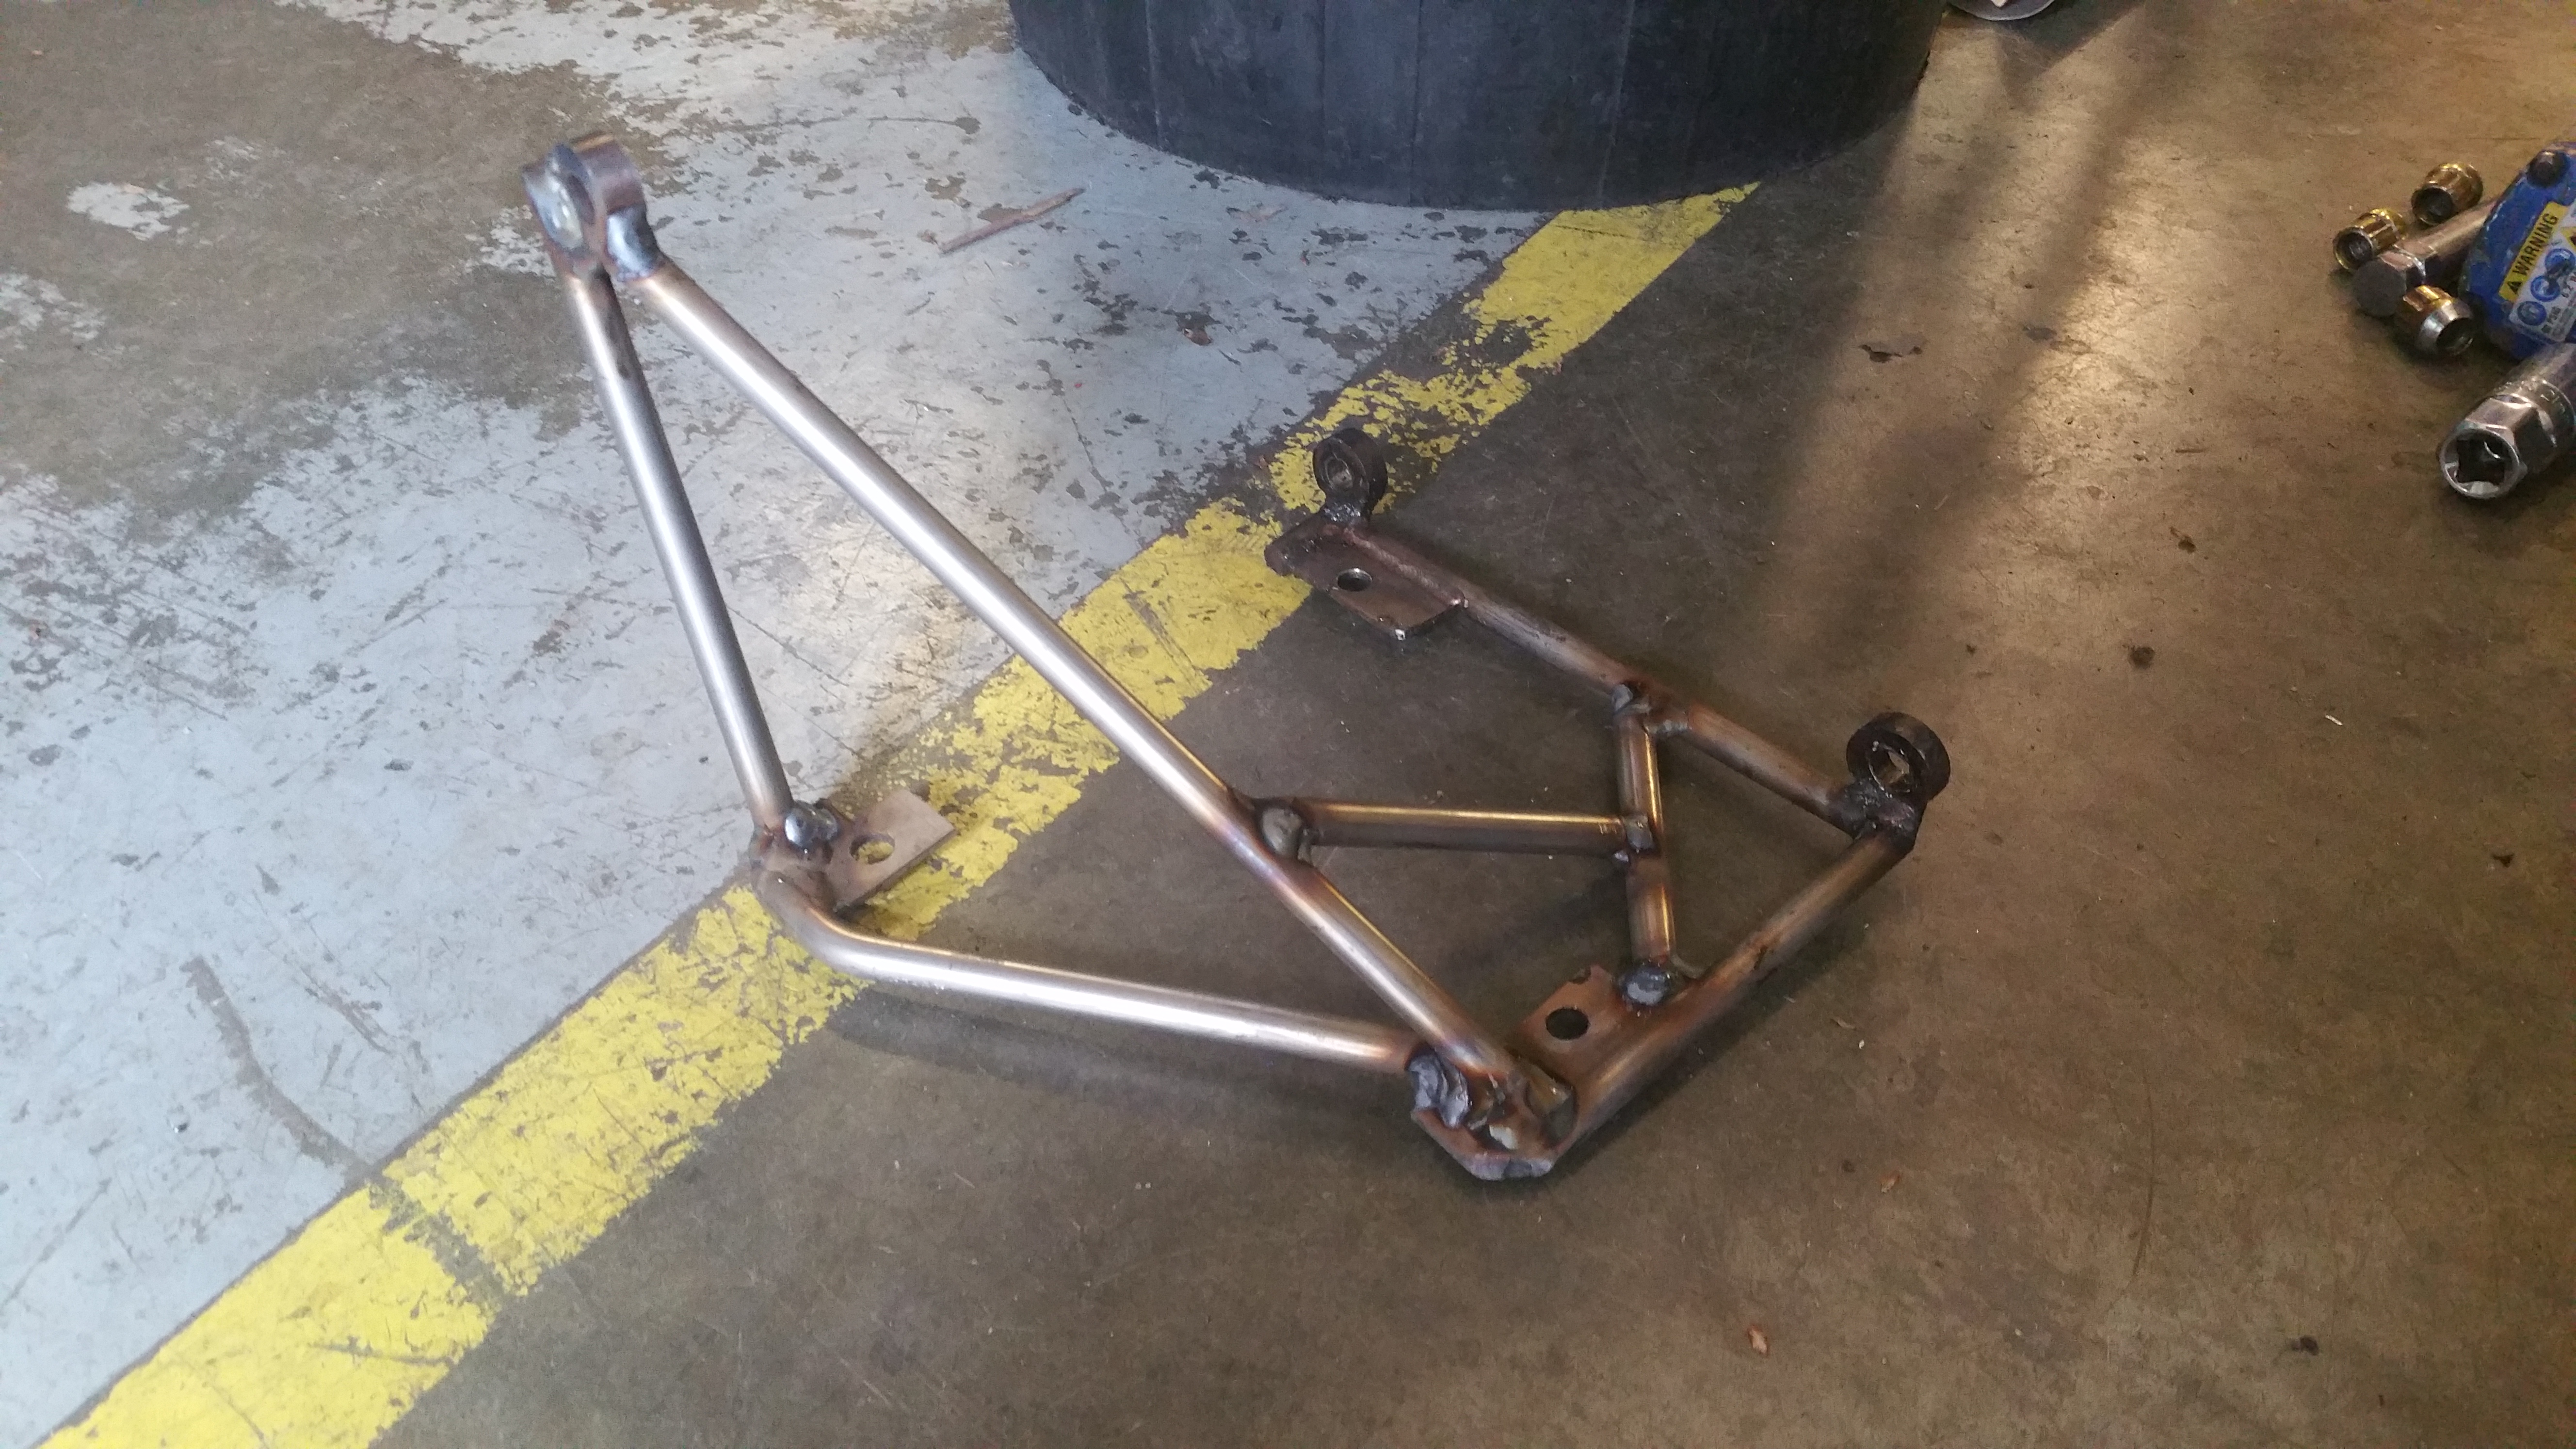
So added some extra support to the power steering brace. It's now all ready for wiring. As it's sitting up in behind the front bumper I just mig'd it up a bit brashly. Does the job.
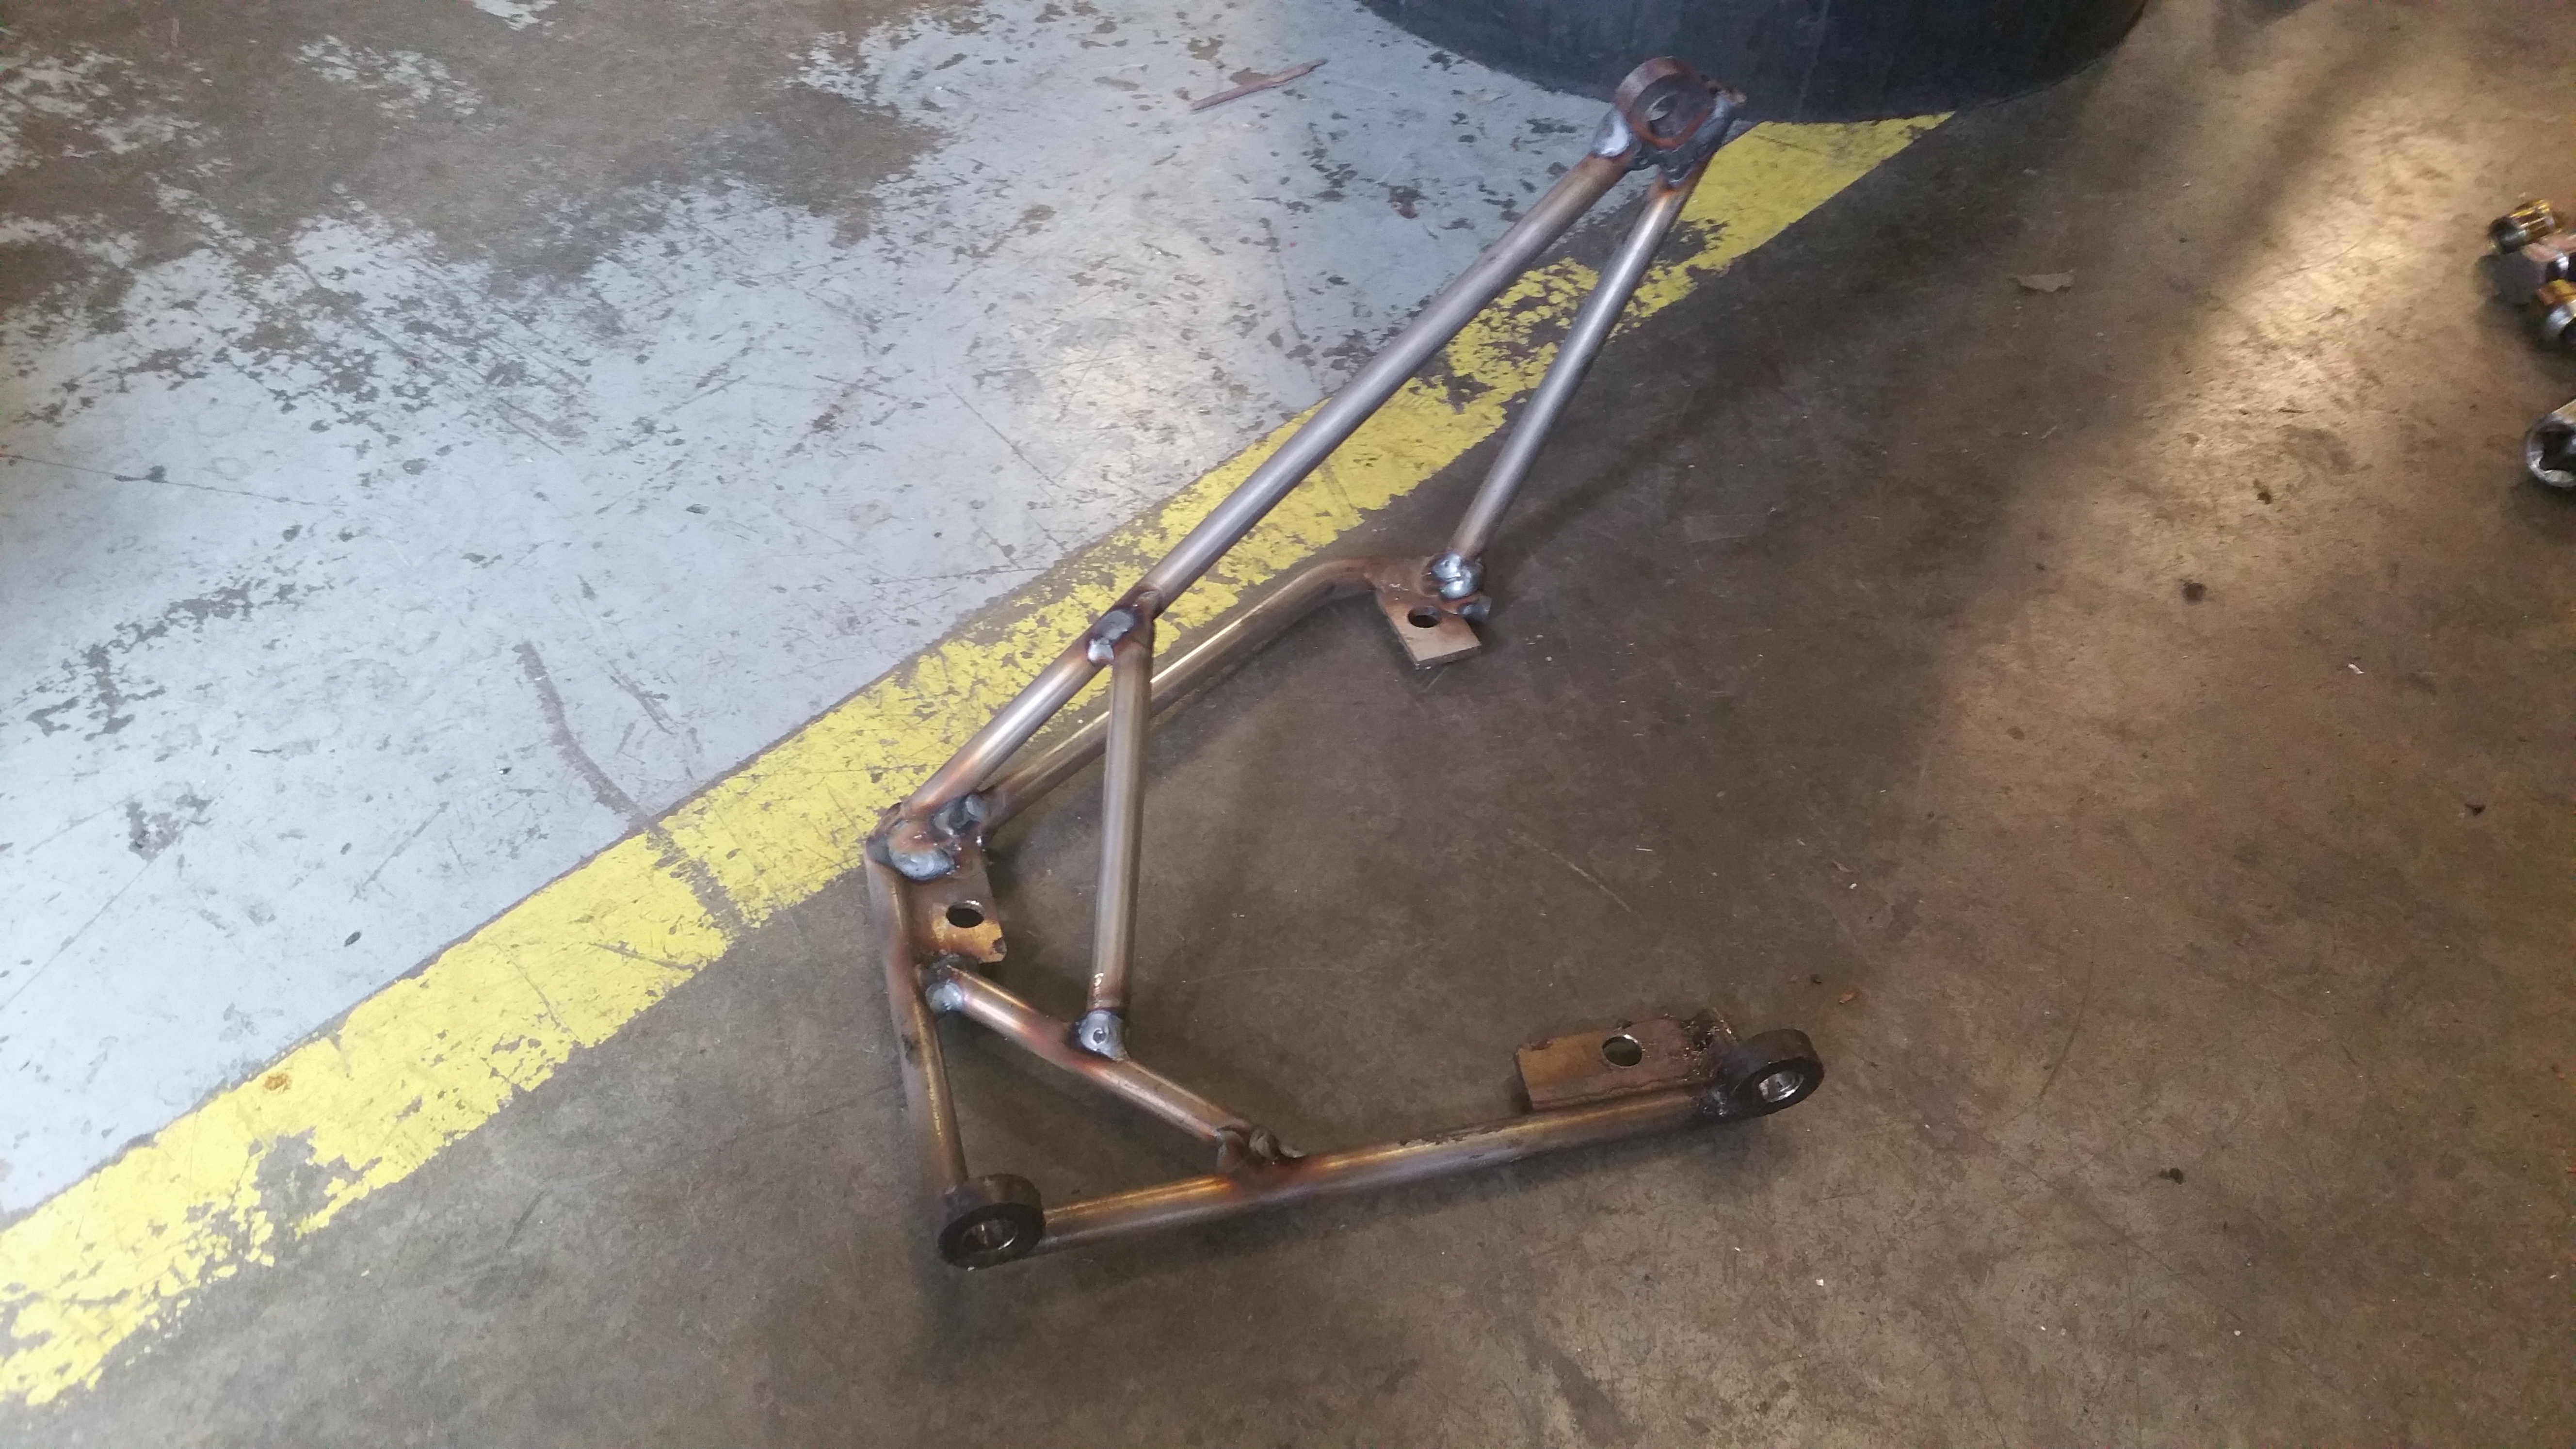
So that ended up down here like this
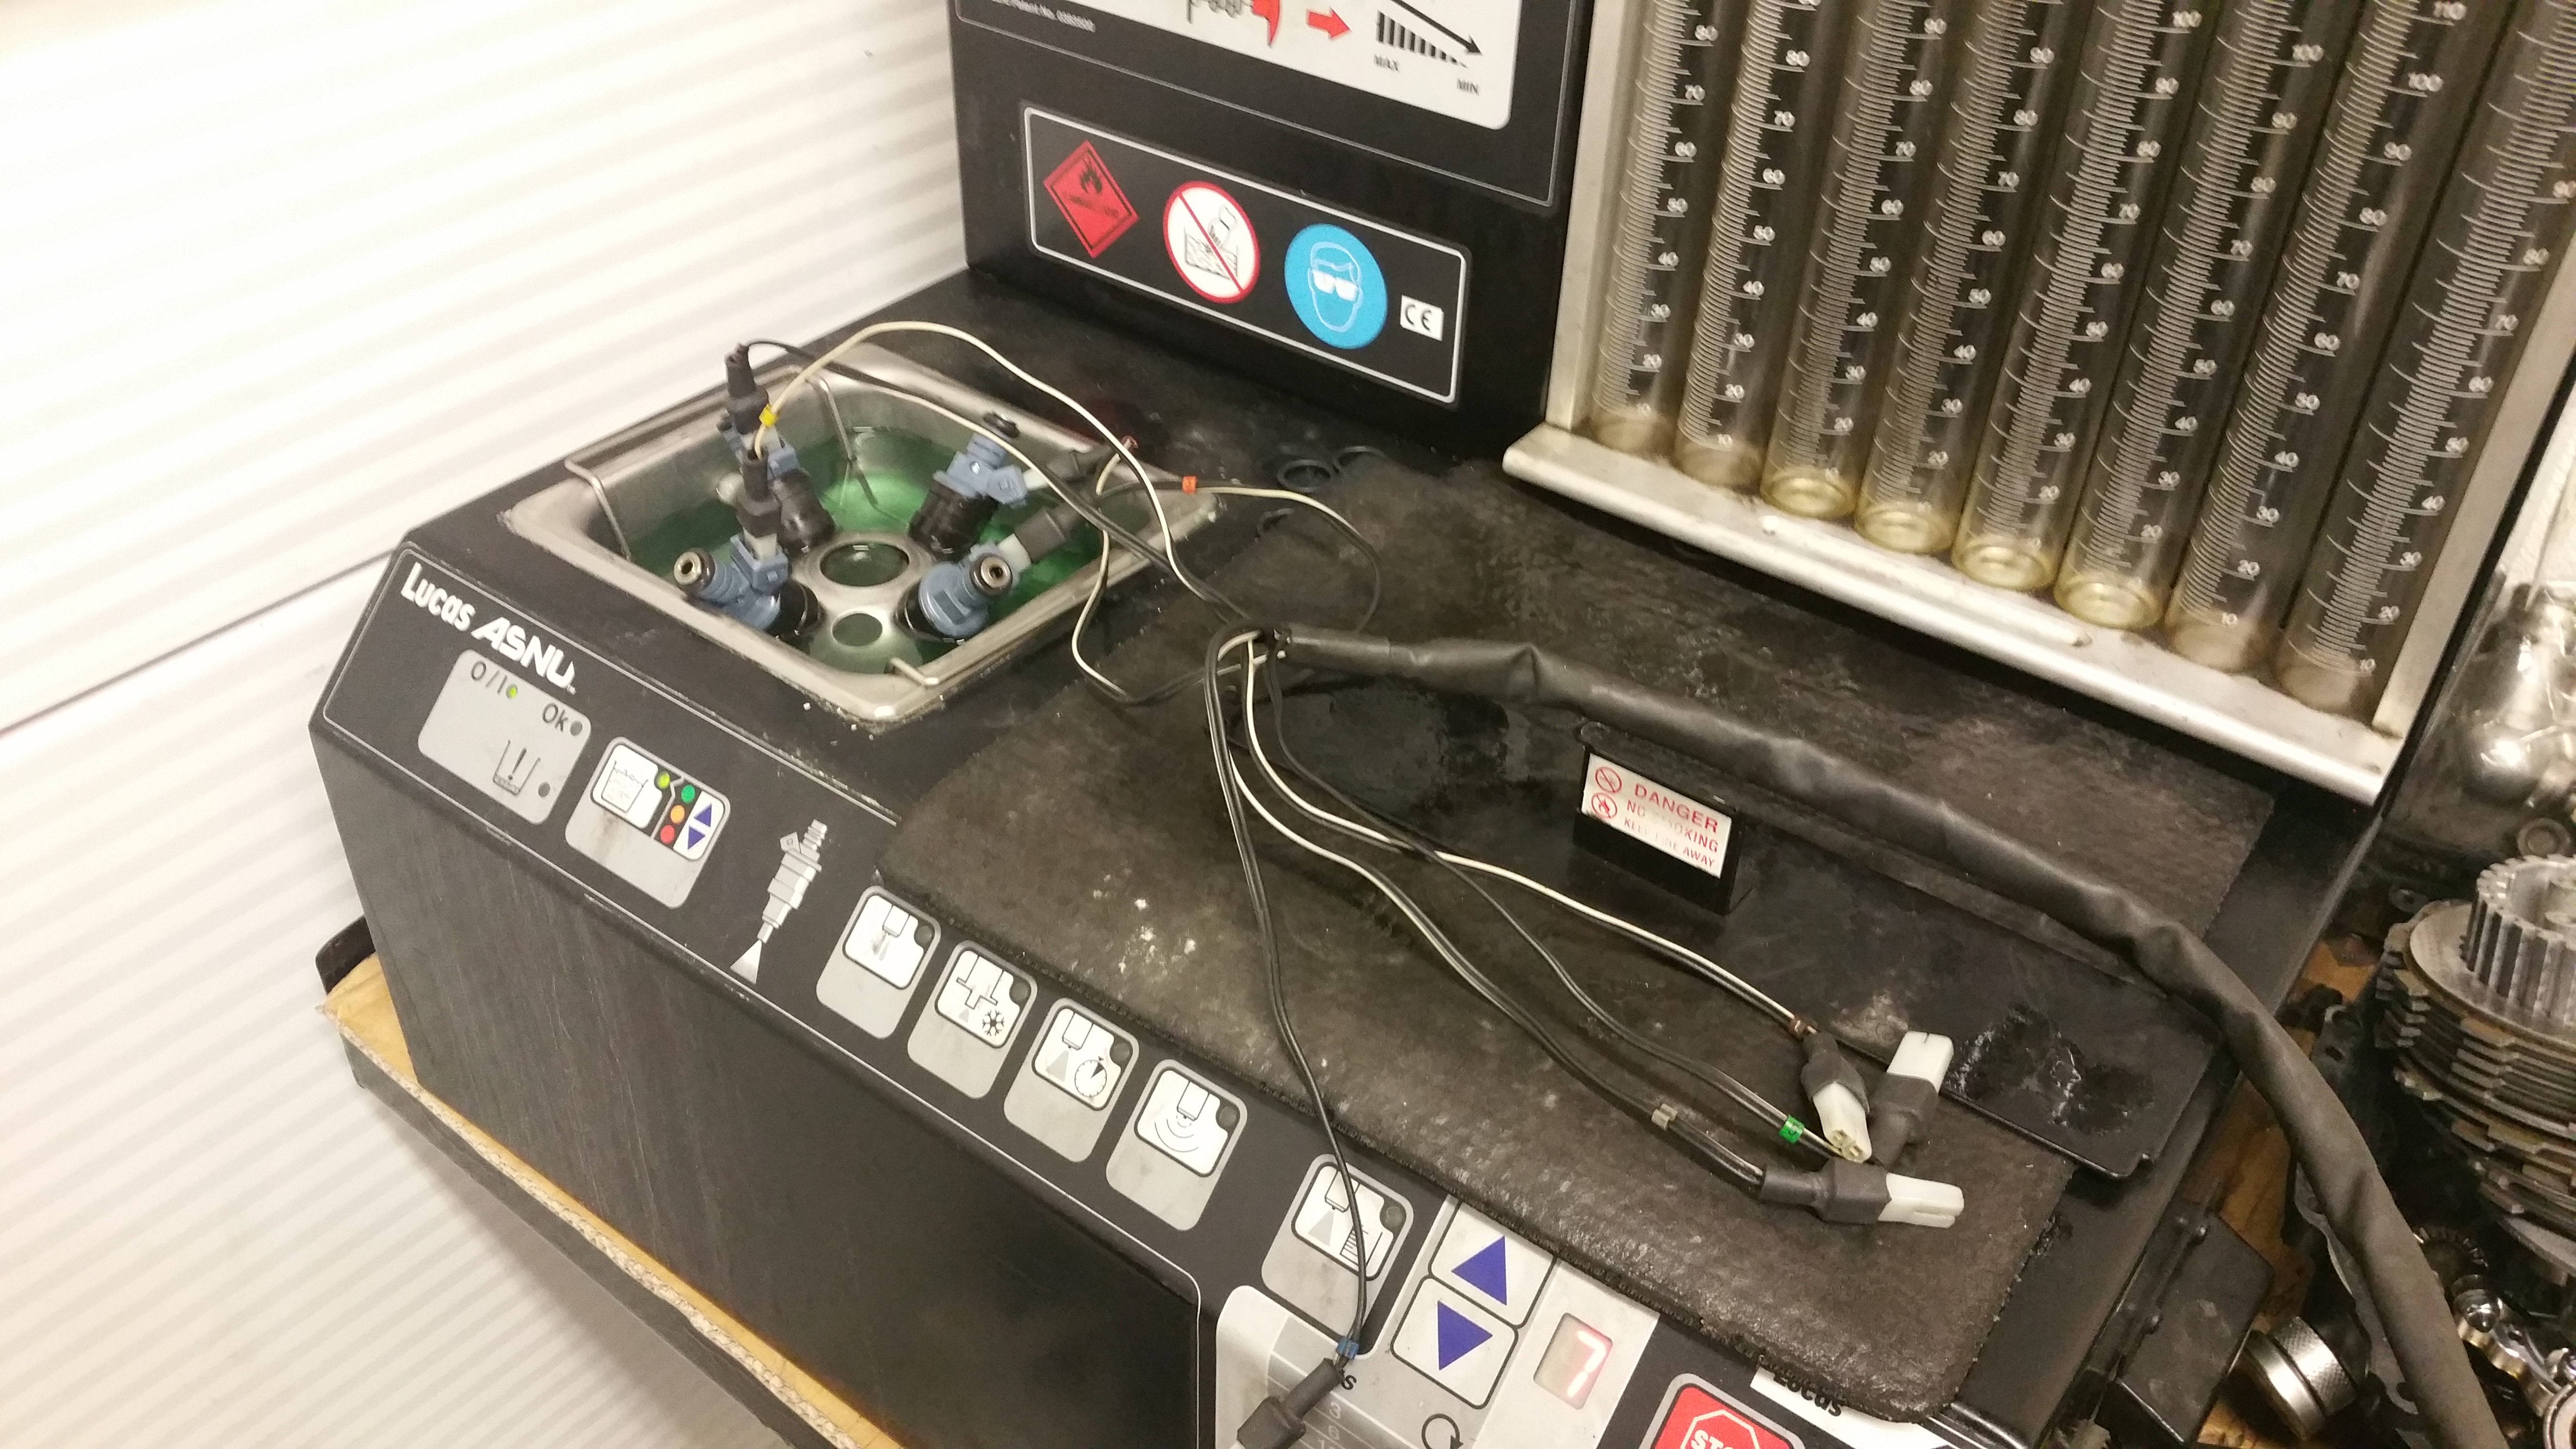
Now slight chance on the fueling front. I was going to run 8 injectors long term (still might) but in order to get a few more functions out of the Syvecs I have changed the 750cc RC injectors for some bigger Bosch units that I have 'borrowed' from the RX7 build. Just given how long I've had them I bought a refurb pack and gave the a bath
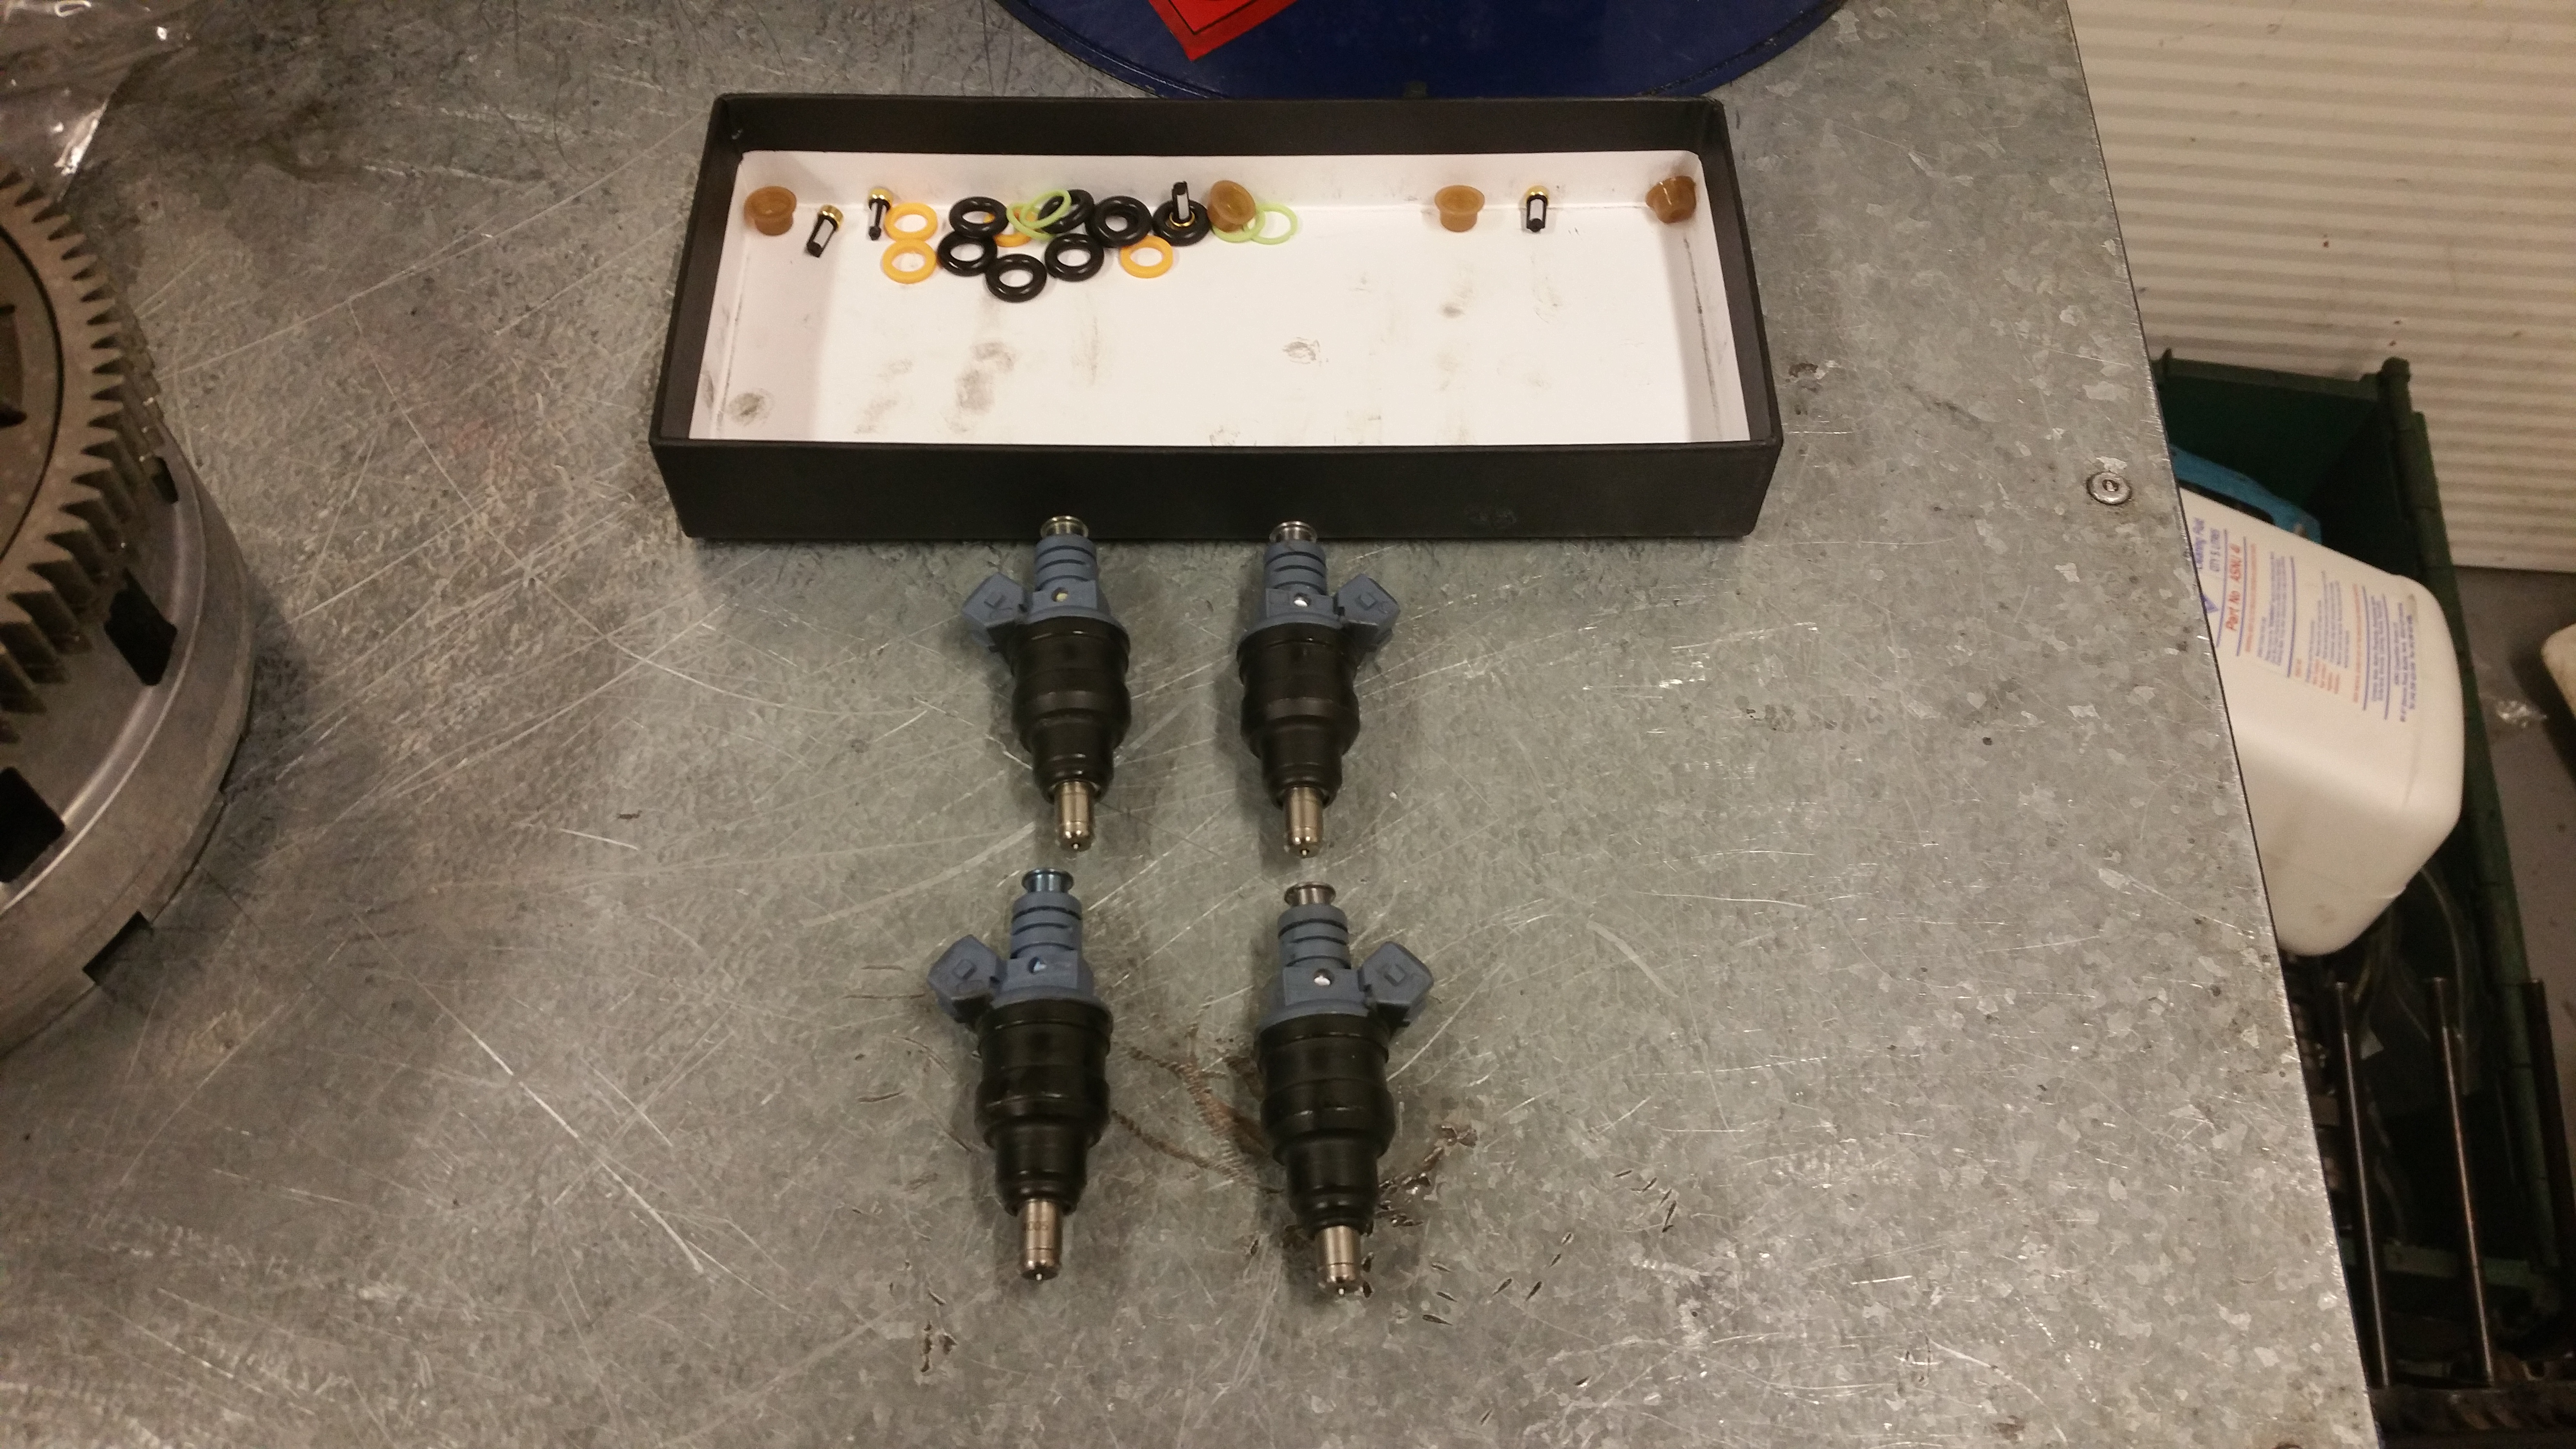
Mid cleaning
So onto the next job.....


So that ended up down here like this

Now slight chance on the fueling front. I was going to run 8 injectors long term (still might) but in order to get a few more functions out of the Syvecs I have changed the 750cc RC injectors for some bigger Bosch units that I have 'borrowed' from the RX7 build. Just given how long I've had them I bought a refurb pack and gave the a bath

Mid cleaning

So onto the next job.....
Last edited by seventune; 14 August 2015 at 12:51 AM.
27 May 2015, 09:18 PM
#177
Scooby Regular
Thread Starter
Couple of trivial bits on the go while I'm sorting out the wiring loom plugs and pins etc...
First thing was to get a set of late model individual coils. Hopefully this should help with the performance and if nothing else makes for a nicer tidy engine bay in loosing the mid mounted coil pack and bright red HT leads!
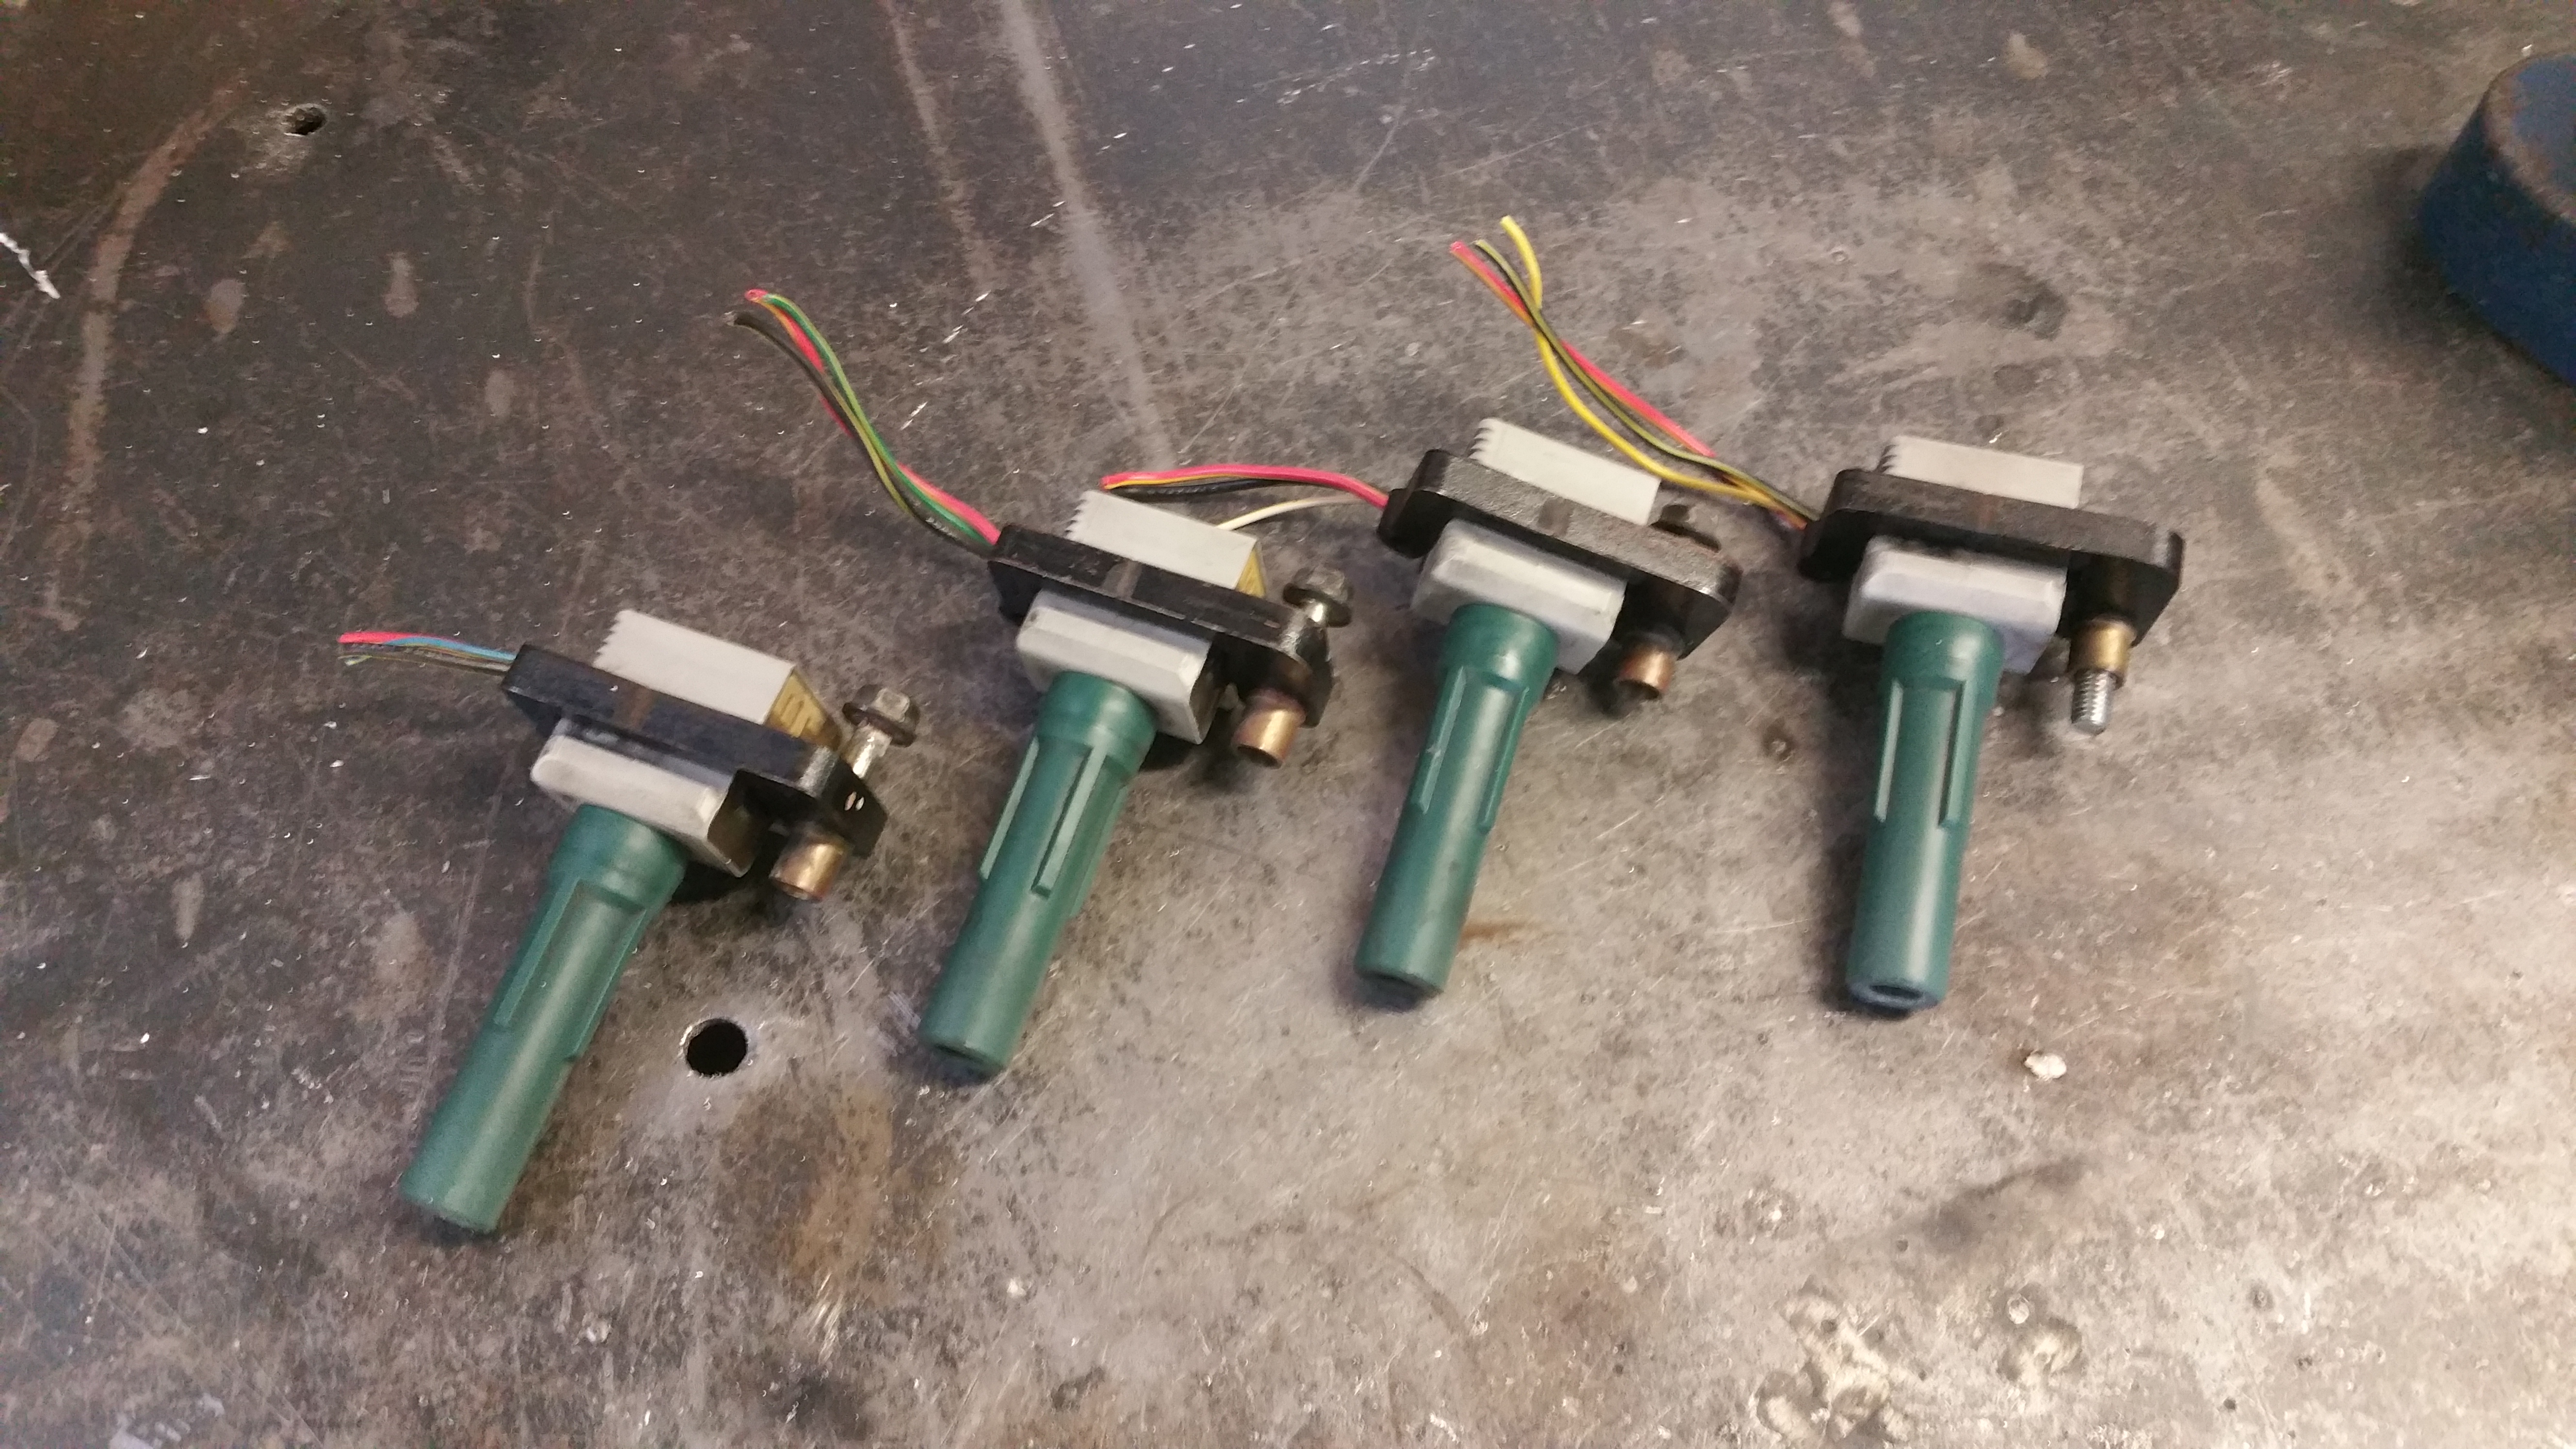
net result without the coil in there.... much neater
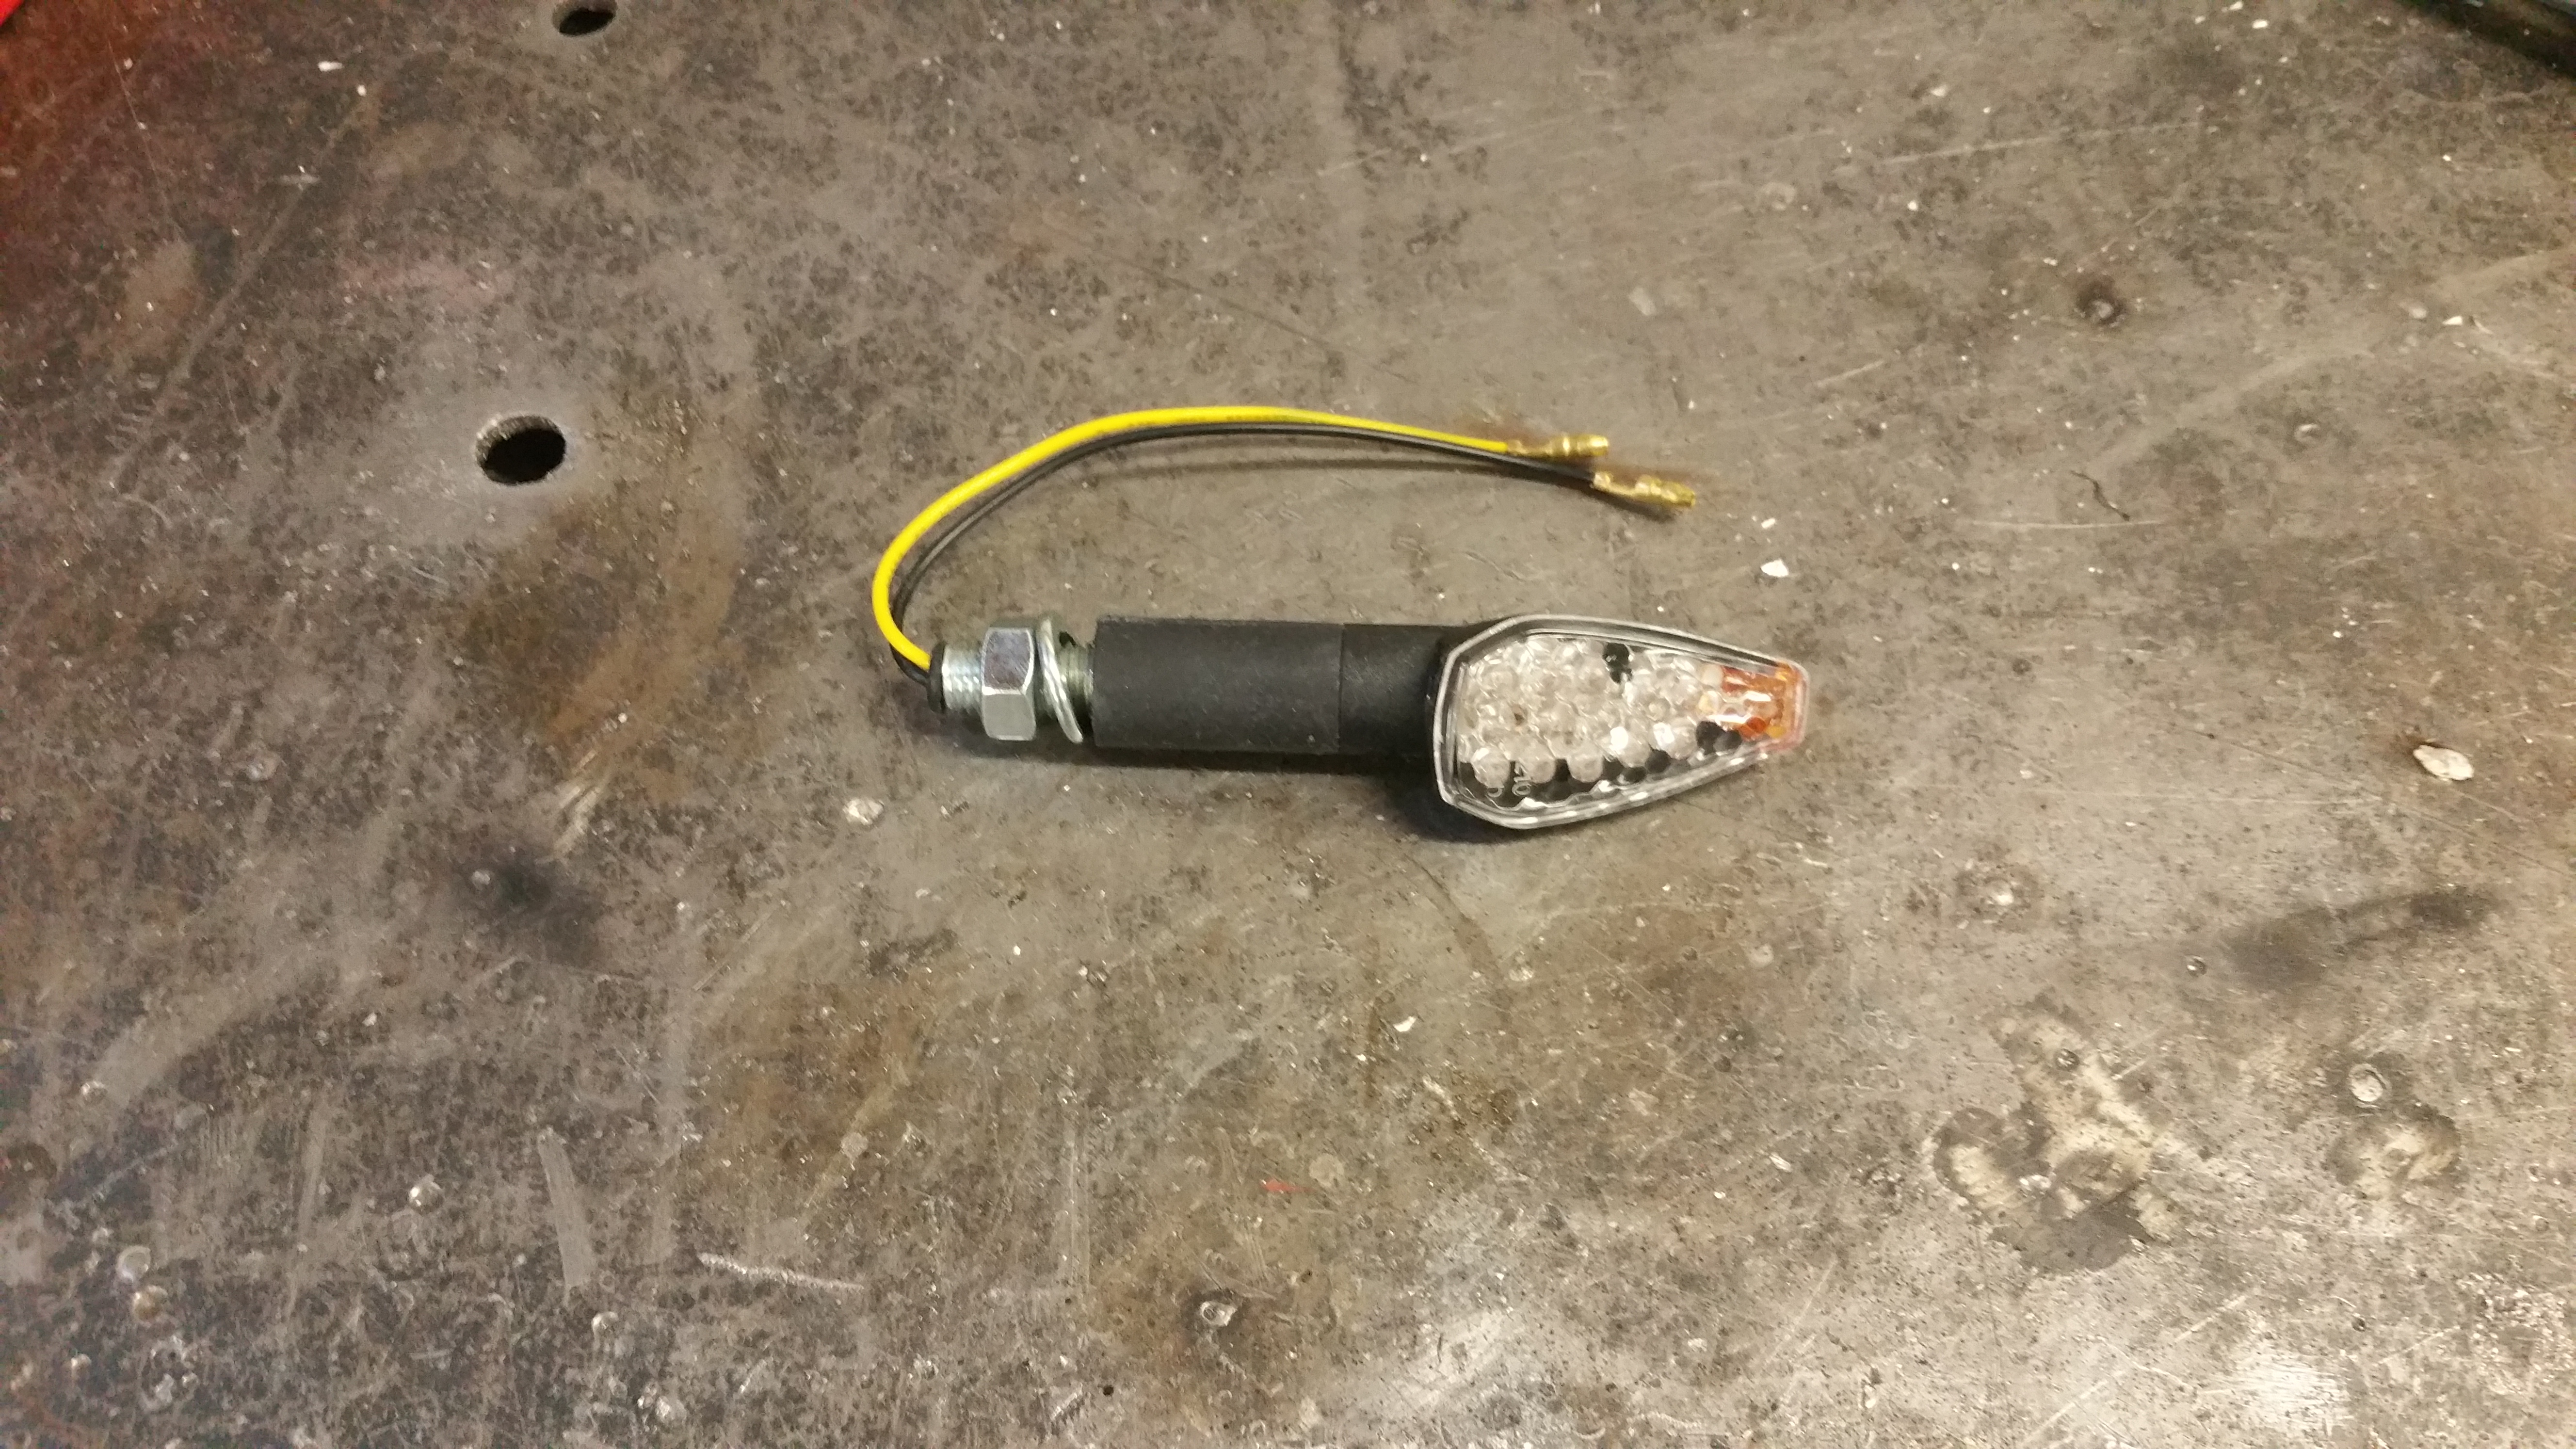
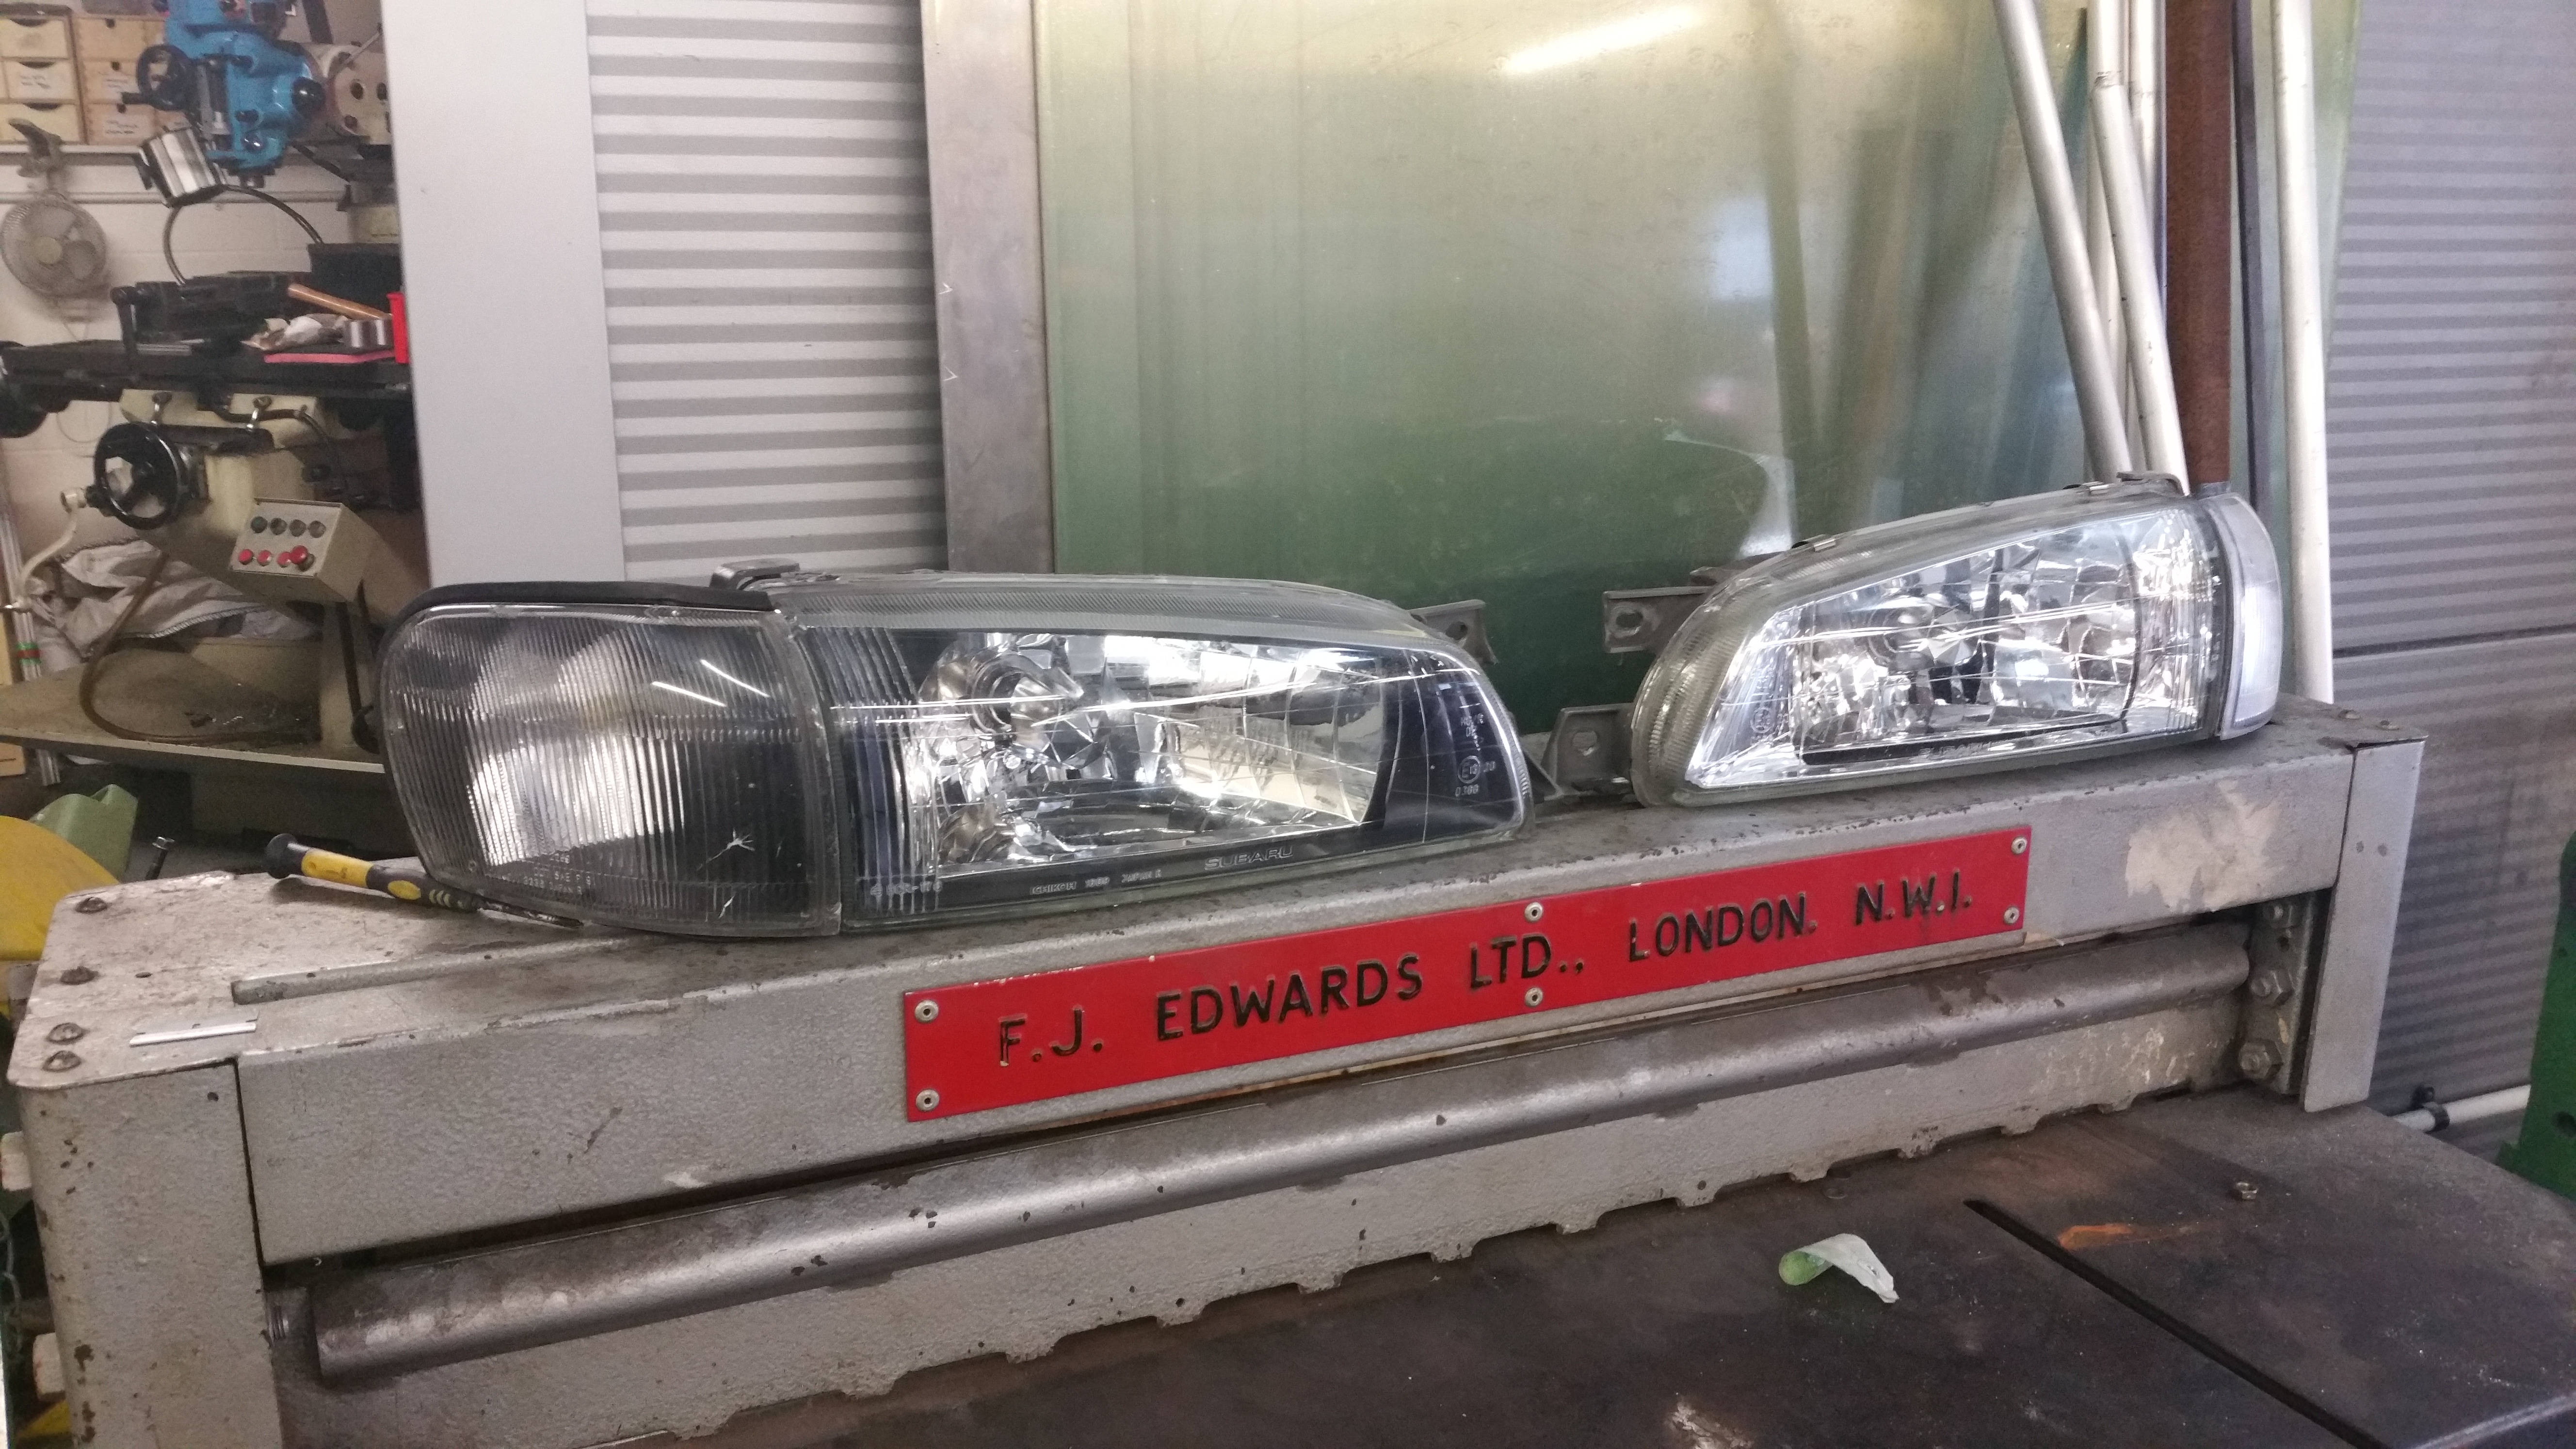
The other thing I have been poking around at is the lights. I have seen a couple of the version 5/6 cars with modded blacked headlights. I think it look very cool so I have set about doing mine. There was another small issue to tackle too. As I have the oil cooler one side of the front bumper and the power steeing pump the other I have removed the indicators and little black plastic infill from the bumper. My decision was to move LED indicators into the side light housing whilst blacking them. I used a set of LED bike indicators.
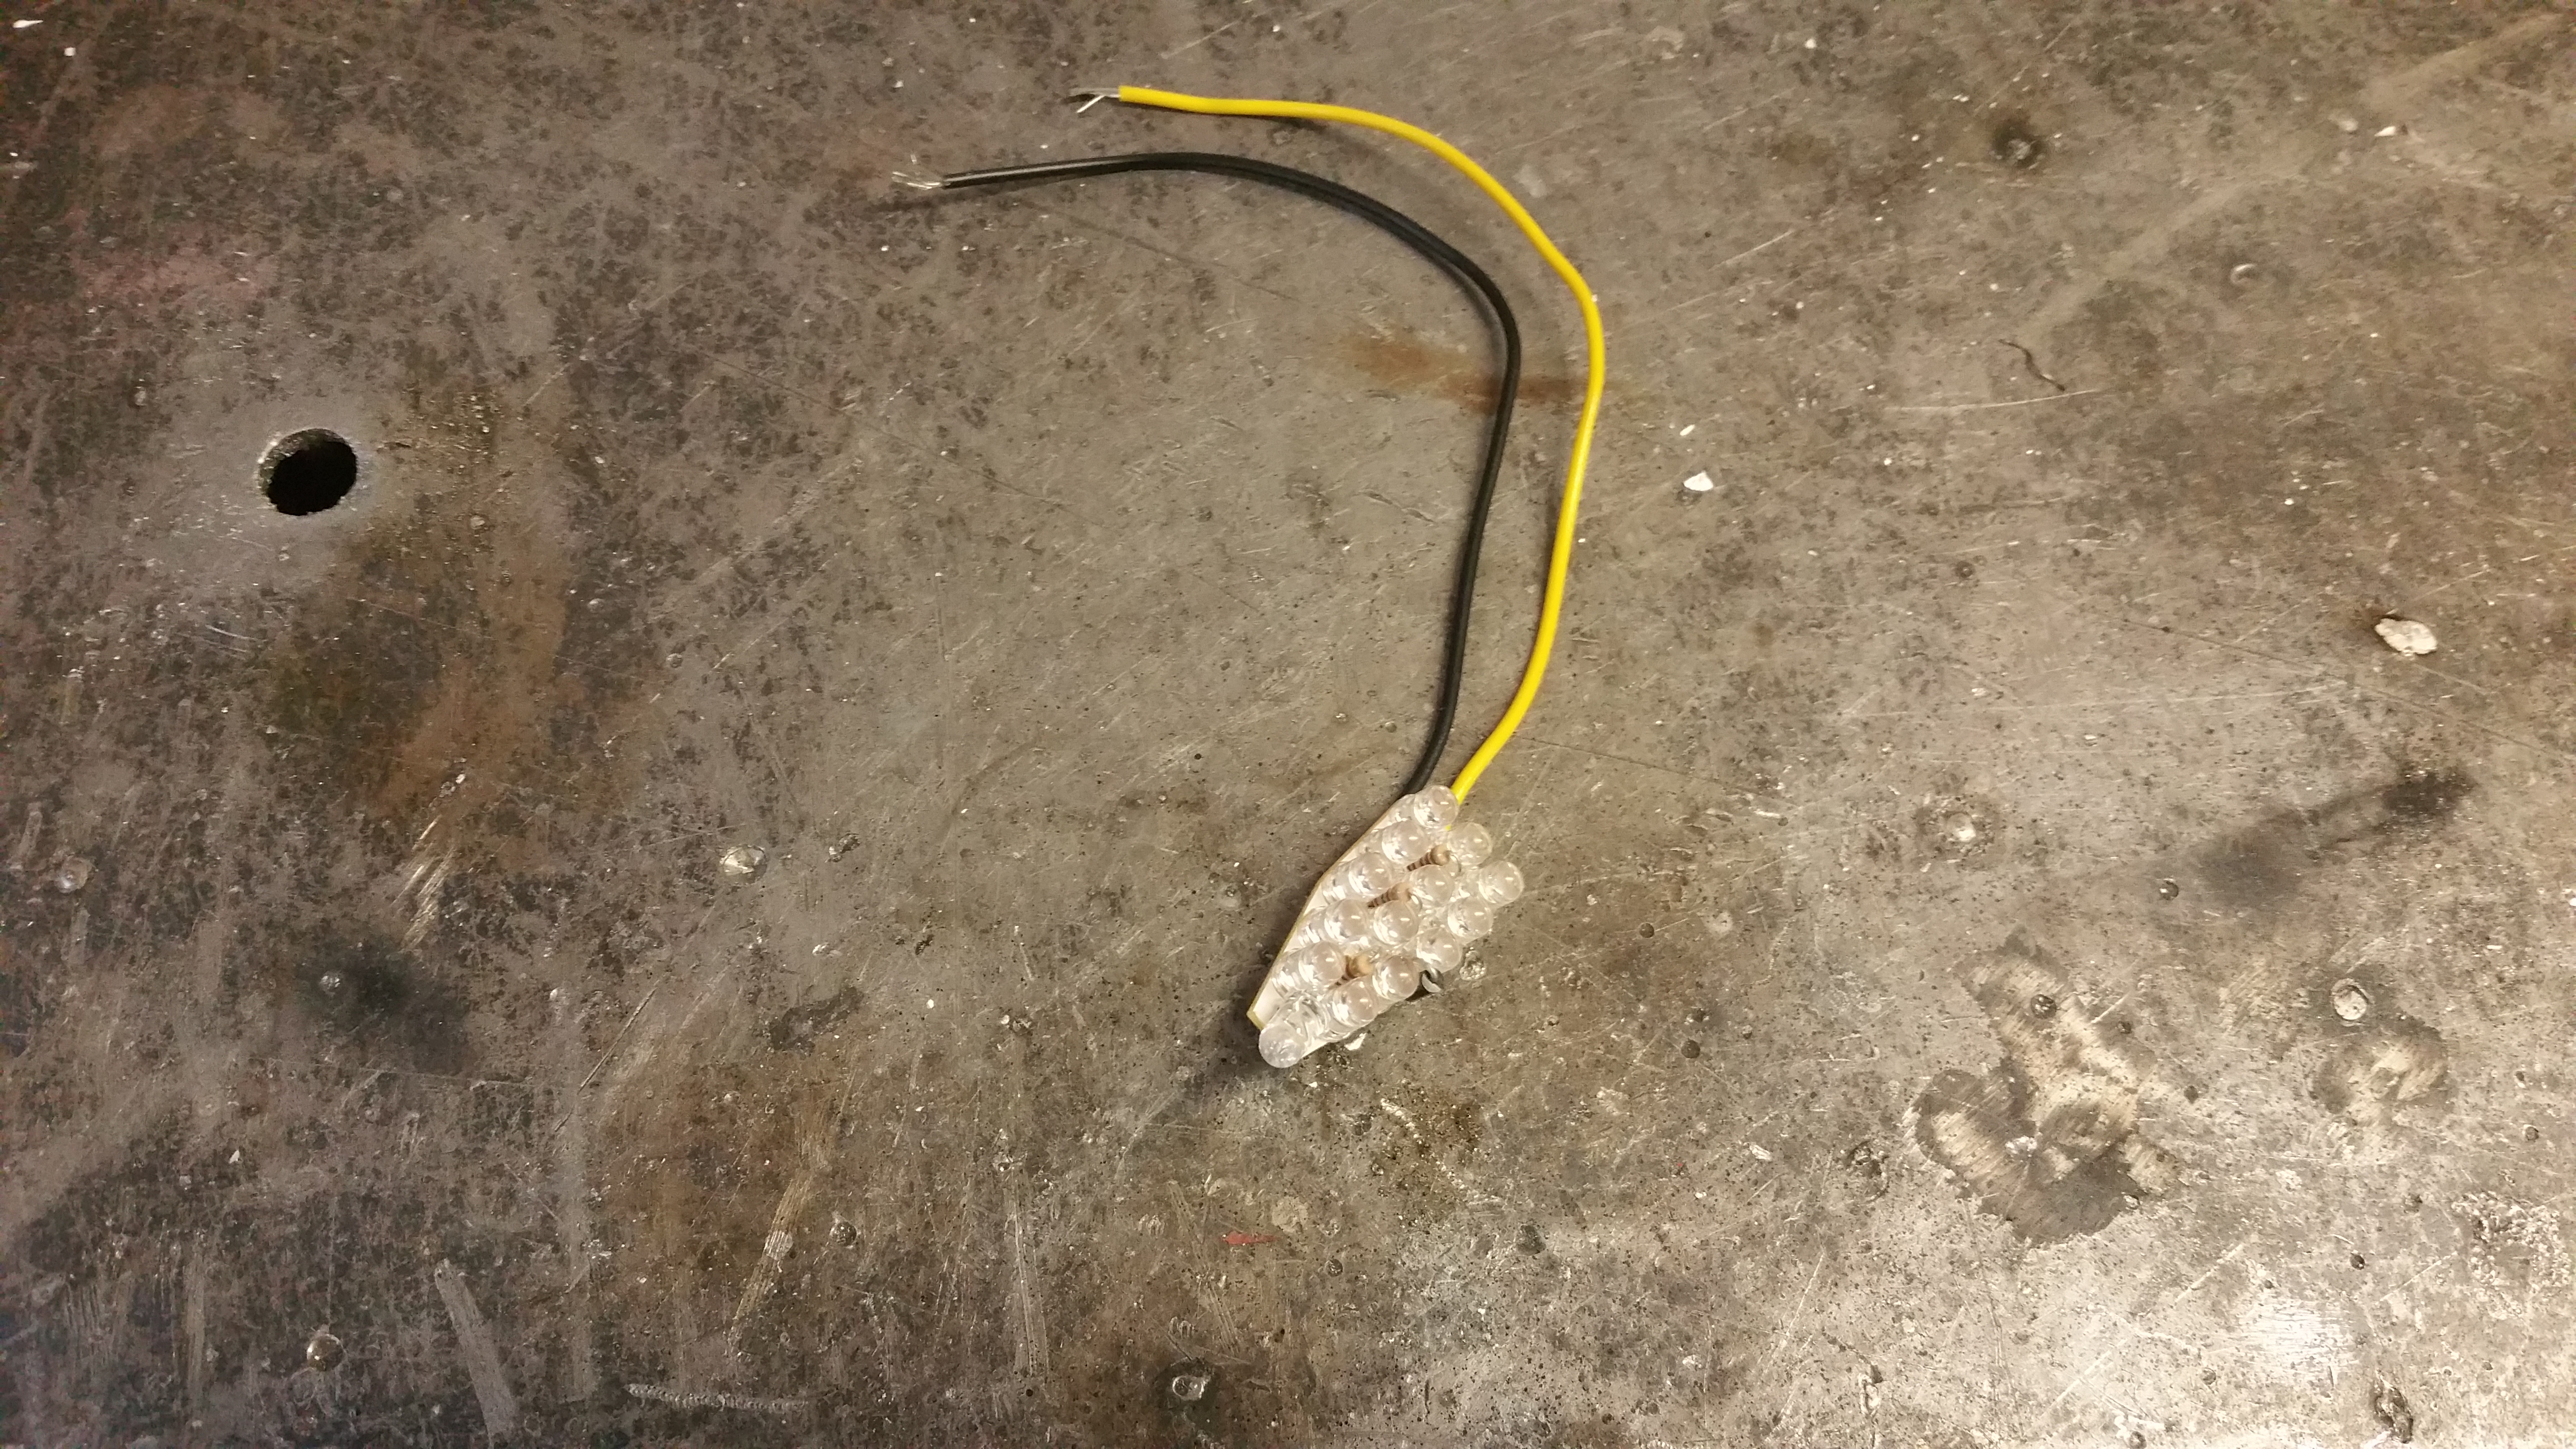
Started with these:
Then did this:
Threw them in here:
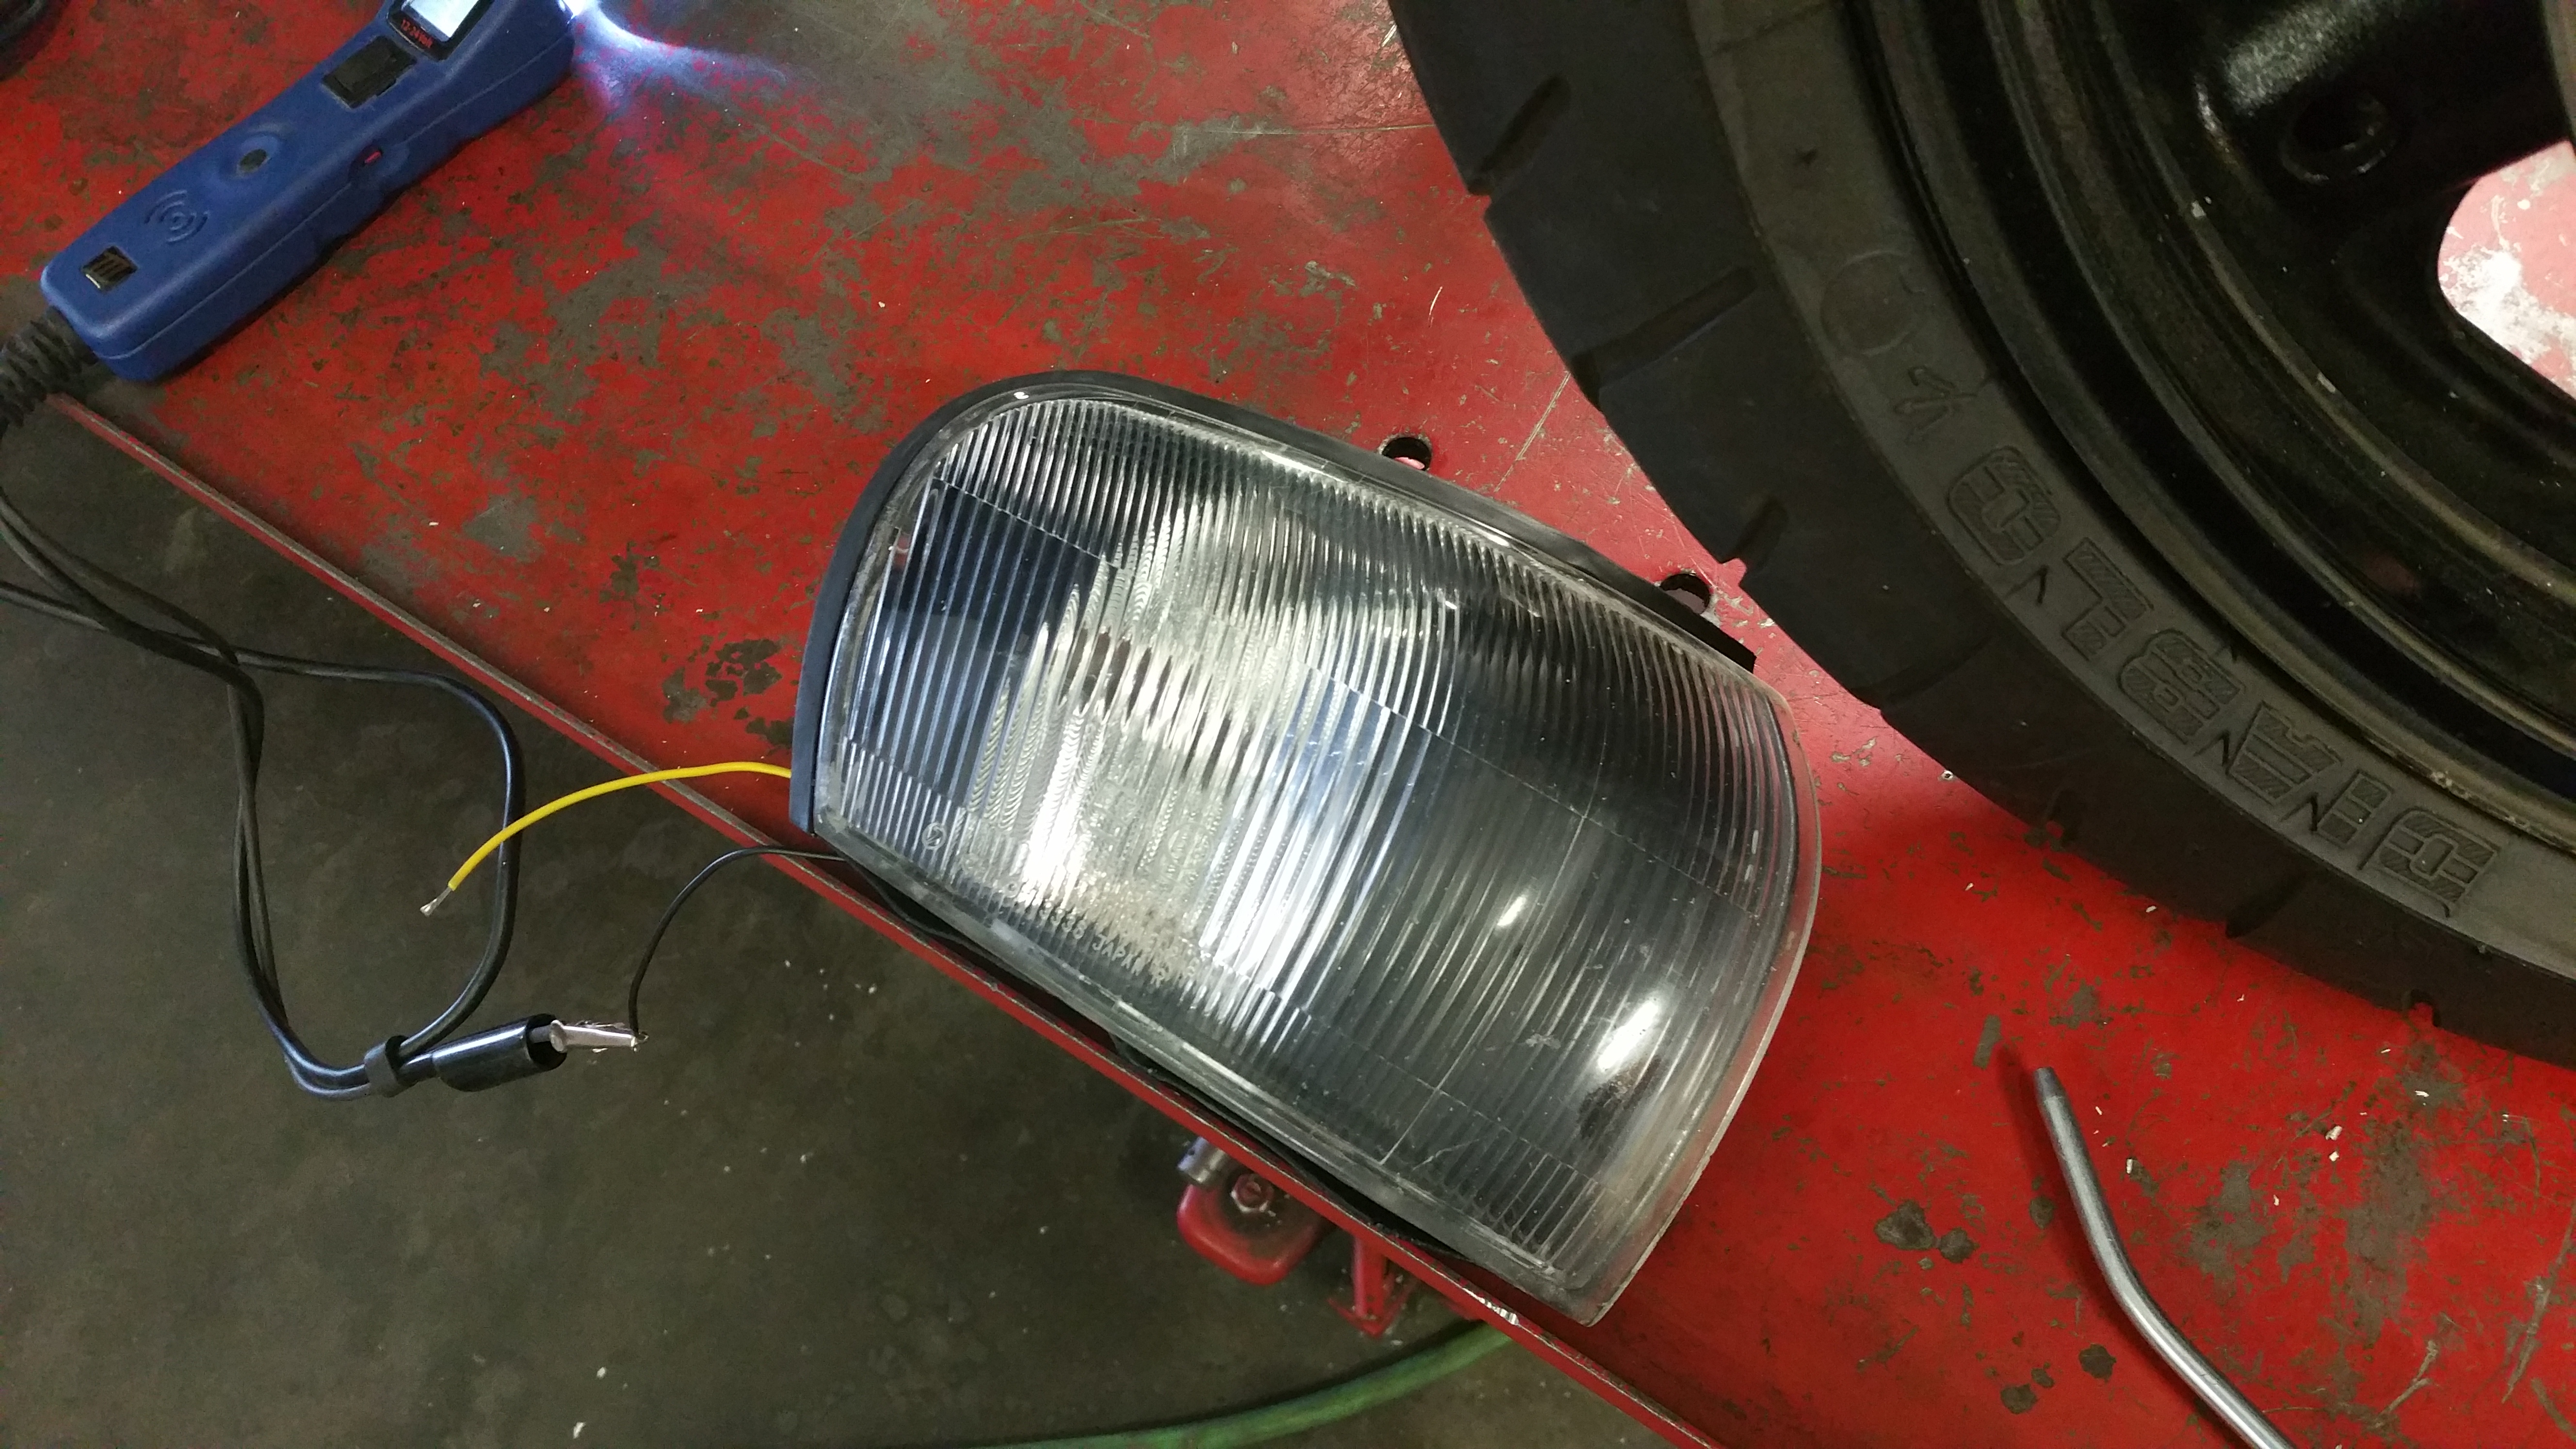
And wayhay:
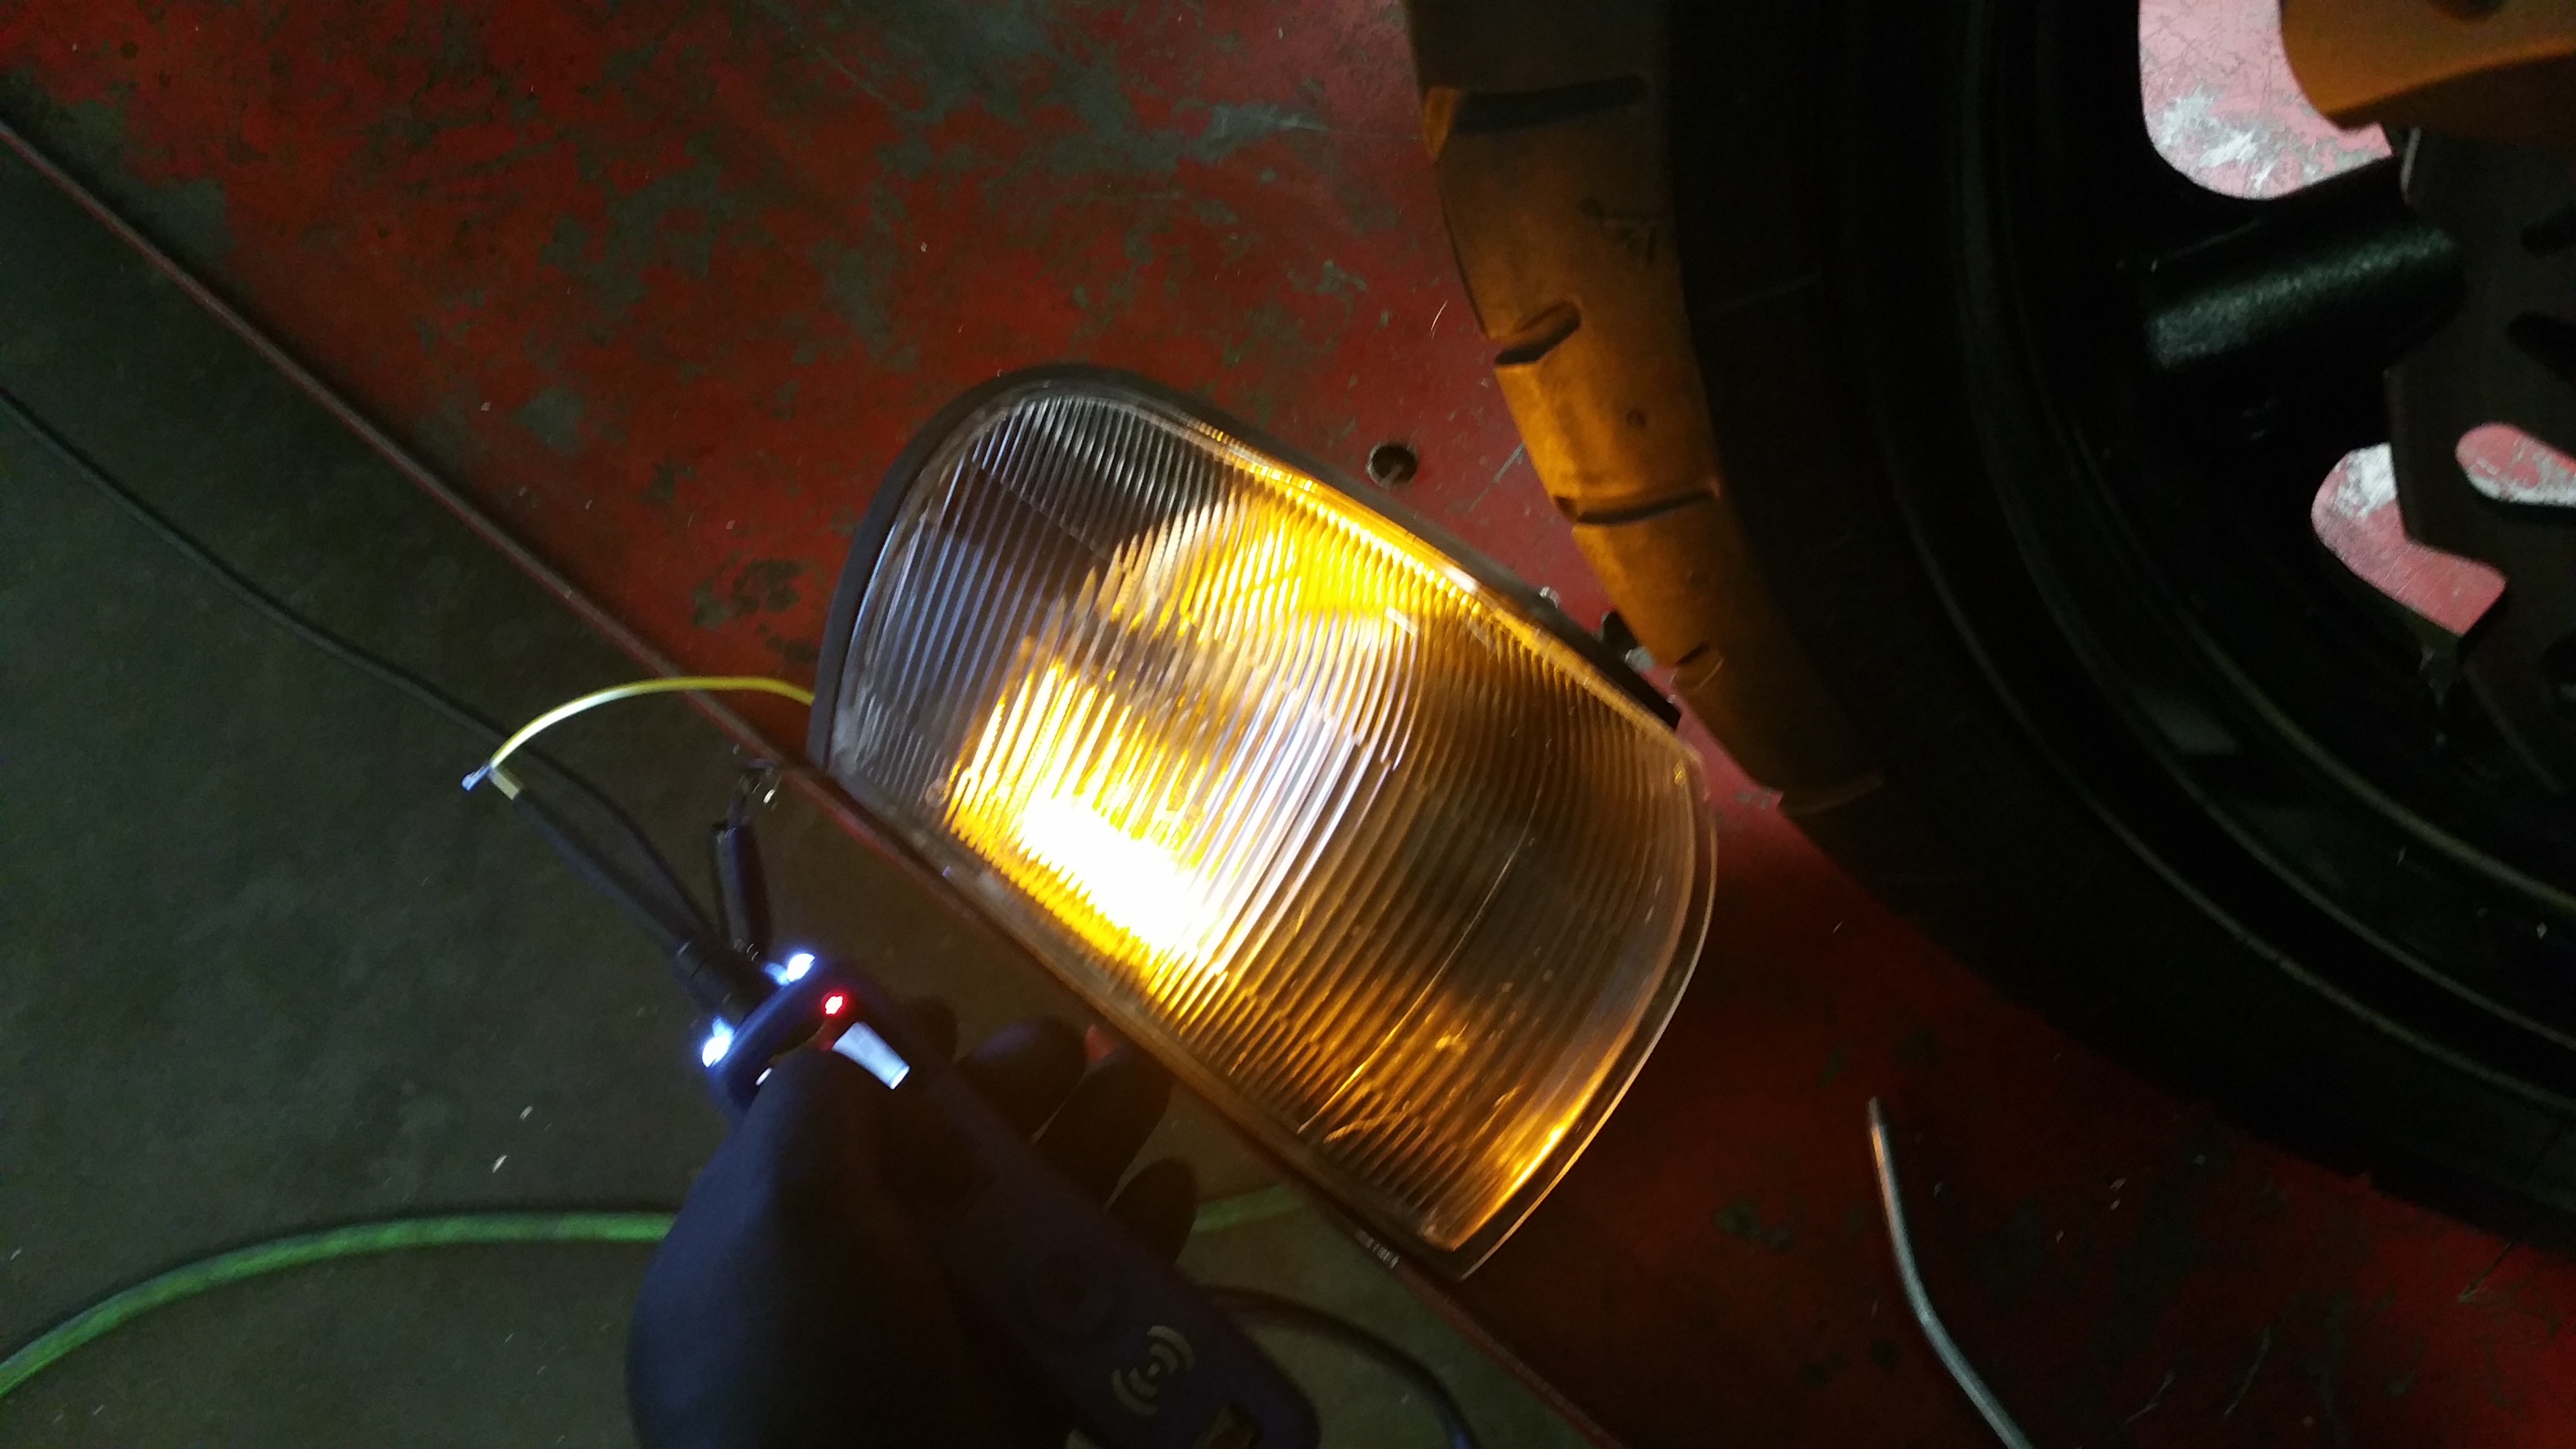
So with the indicstors and side lights in the one housing I can set about ducting the cooler and pump
Oh and here is a painted pair next to the pair I'll be doing in the morning
First thing was to get a set of late model individual coils. Hopefully this should help with the performance and if nothing else makes for a nicer tidy engine bay in loosing the mid mounted coil pack and bright red HT leads!

net result without the coil in there.... much neater

The other thing I have been poking around at is the lights. I have seen a couple of the version 5/6 cars with modded blacked headlights. I think it look very cool so I have set about doing mine. There was another small issue to tackle too. As I have the oil cooler one side of the front bumper and the power steeing pump the other I have removed the indicators and little black plastic infill from the bumper. My decision was to move LED indicators into the side light housing whilst blacking them. I used a set of LED bike indicators.
Started with these:

Then did this:

Threw them in here:

And wayhay:

So with the indicstors and side lights in the one housing I can set about ducting the cooler and pump
Oh and here is a painted pair next to the pair I'll be doing in the morning

Last edited by seventune; 14 August 2015 at 12:51 AM.
28 May 2015, 03:04 PM
#178
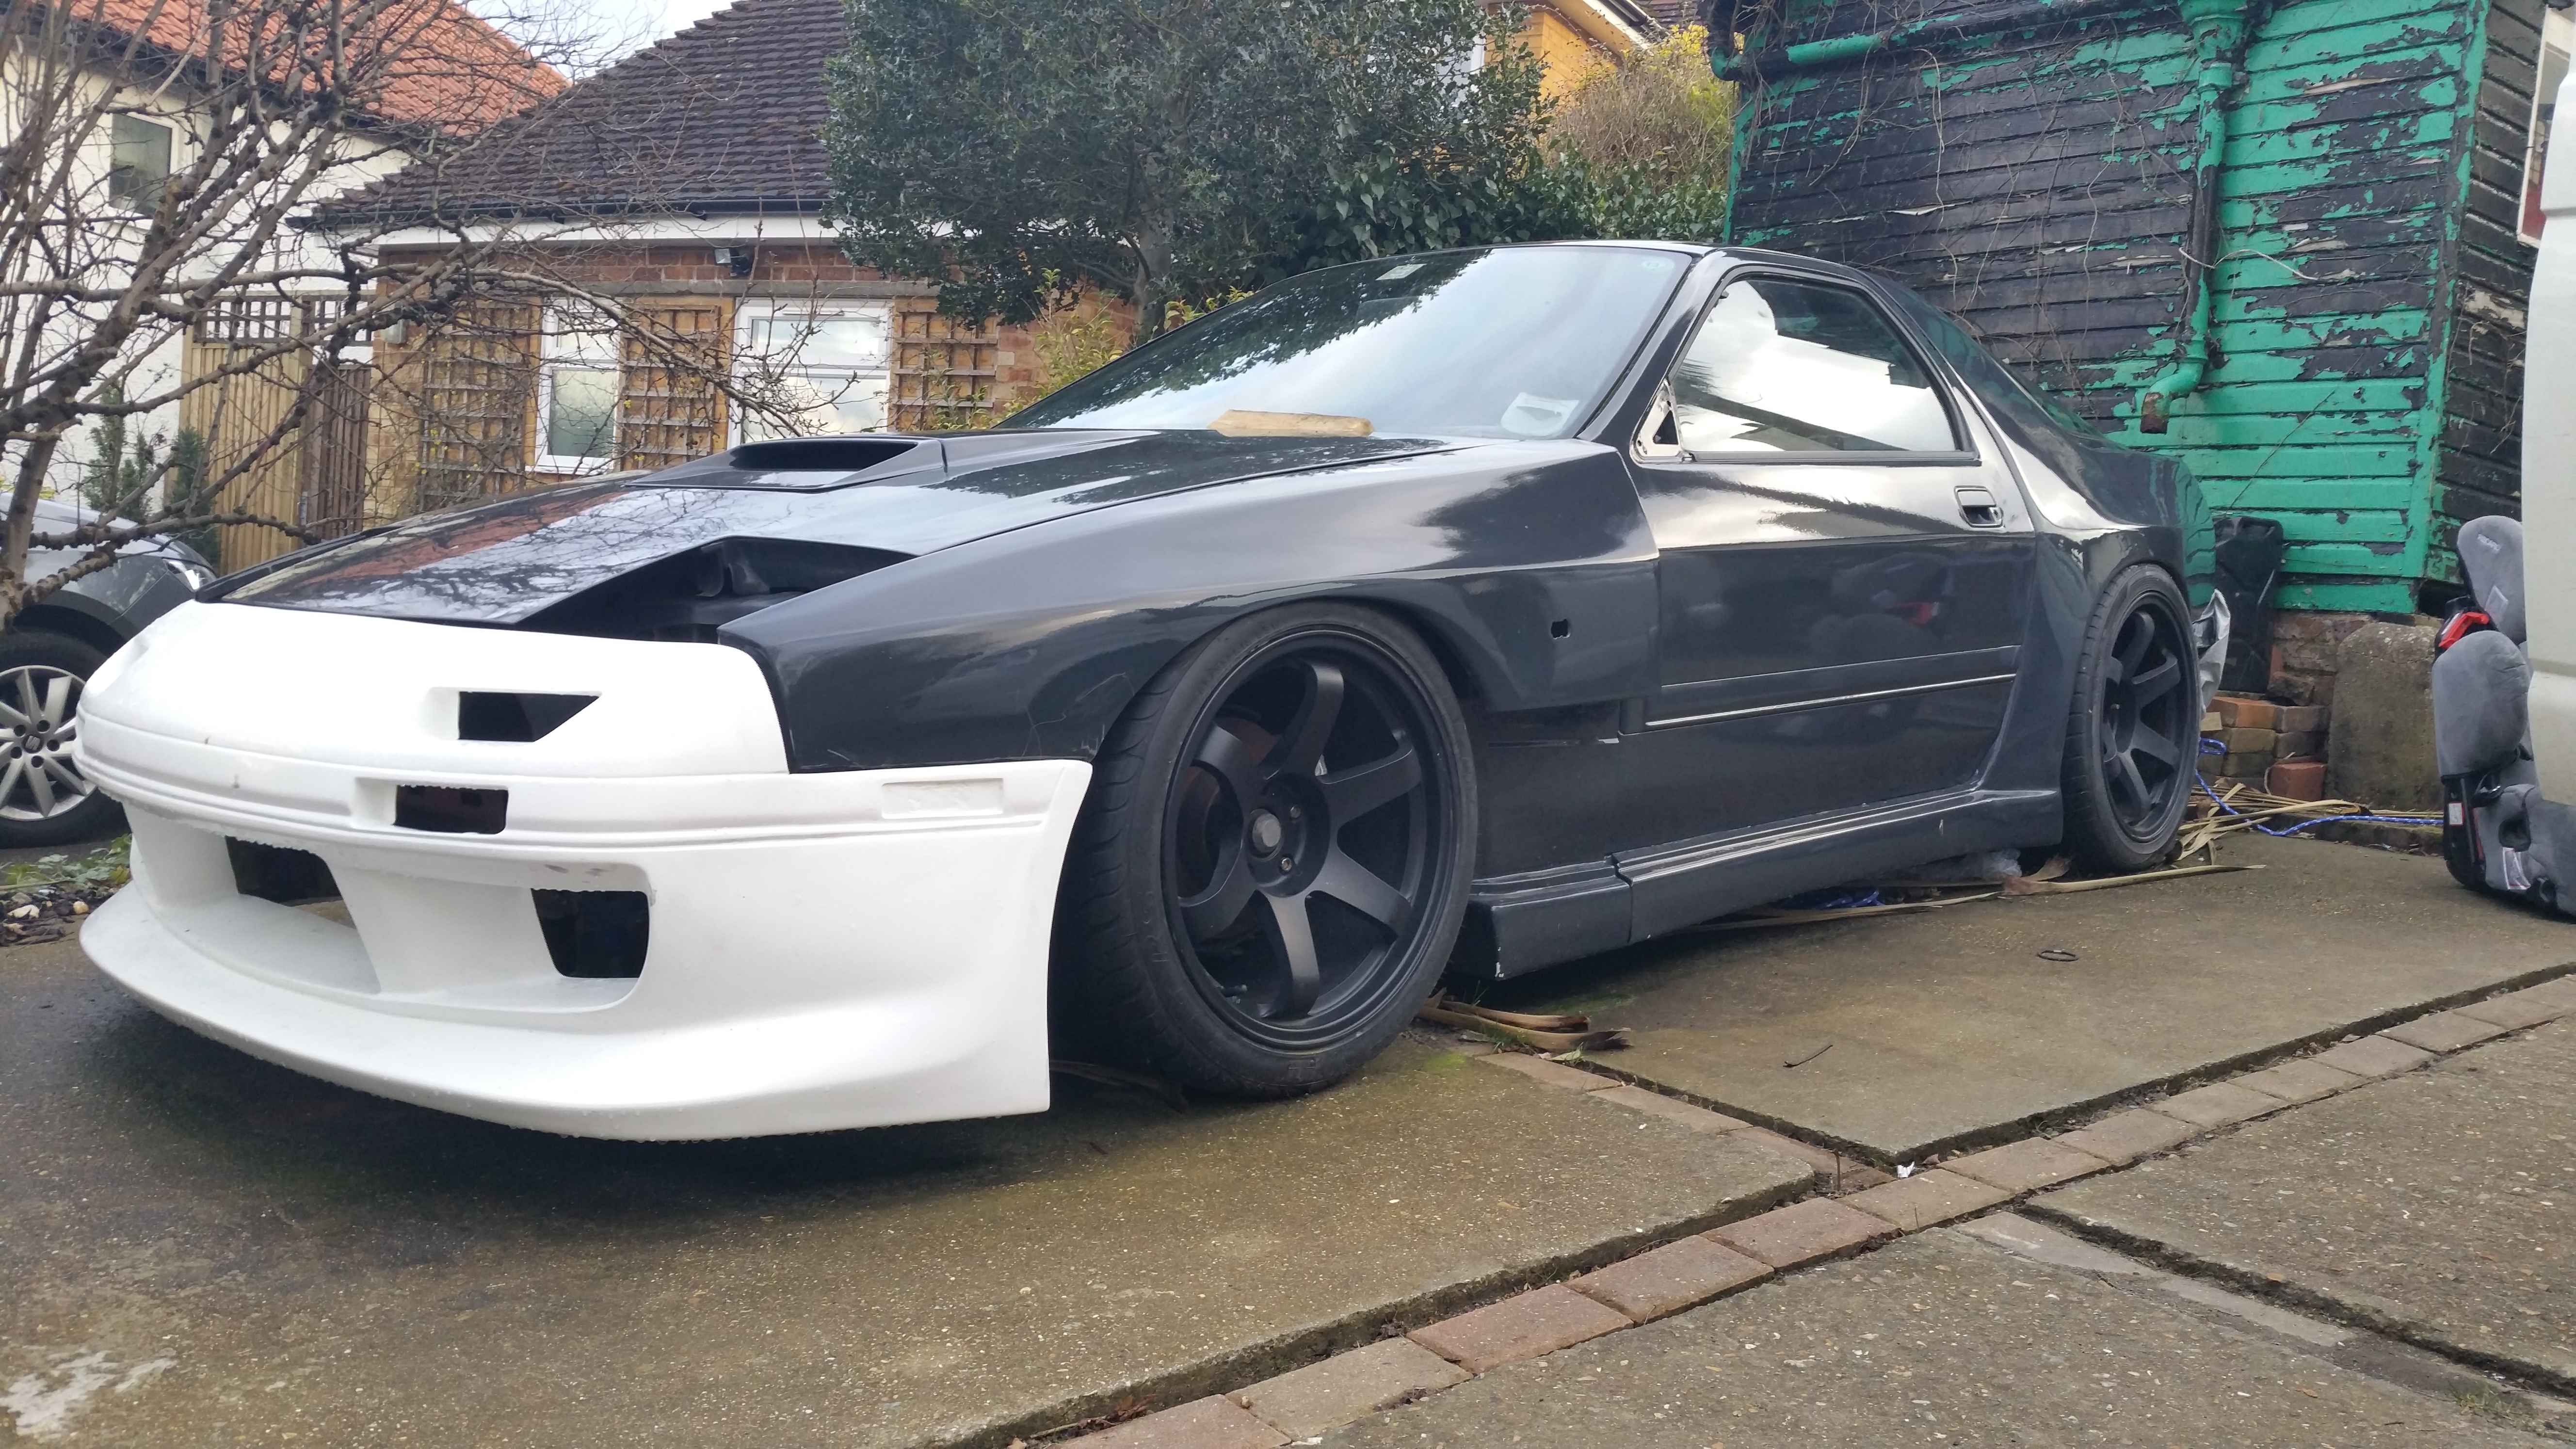
Absolutely incredible builds. I was following your Rx7 build over on DW, but had no idea you were on here too with an Impreza 
The turbo setup and orientation is awesome. Great work mate. Makes me wish I had more of a fabrication brain and welding skills to match.
The turbo setup and orientation is awesome. Great work mate. Makes me wish I had more of a fabrication brain and welding skills to match.
 28 May 2015, 07:18 PM
#180
Scooby Regular
Thread Starter
Cheers dude. To be fair the 7 isn't really doing much at the moment. Need the scoob finished first. Then I'll get back on the other one. Too much to do and not enough time!