Bugeye Tarmac Rally Build
 23 December 2012, 12:12 PM
#1
Scooby Regular
Thread Starter

Join Date: Oct 2012
Location: Chester
Posts: 86
Likes: 0
Received 0 Likes
on
0 Posts
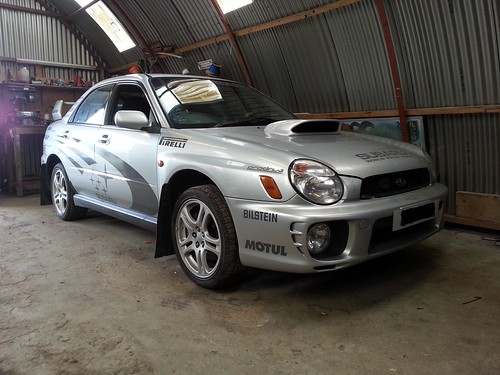
Back in October I purchased a 2003 Bugeye WRX Impreza to convert to rally use.
This is my story so far:
The car before any work
Dodgy installed weld-in rollcage:
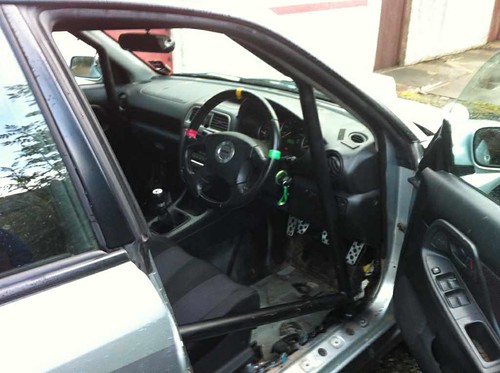
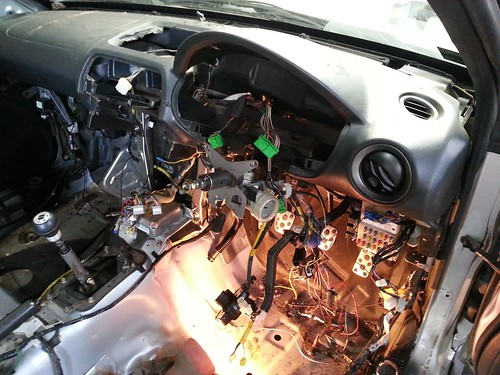
Let the strip down begin. There was a mass of none standard wiring behind the dash. Each step of the removal got more and more interesting!


Turns out these last two pictures were a laser jammer ... naughty boy
There was also a mass of audio related wires on the passenger side with a PA amplifier ... how weird.
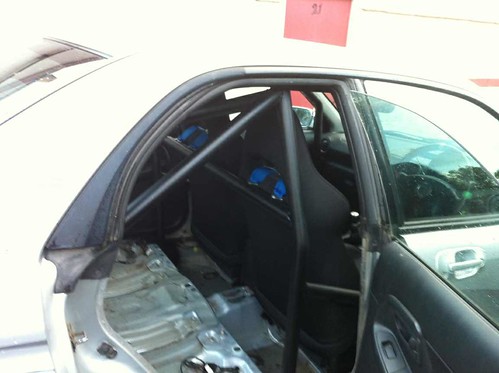
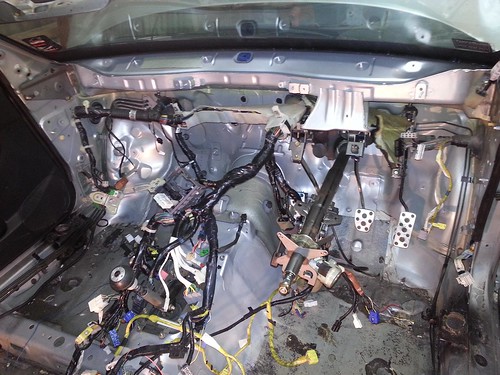
Seats, rollcage and sound deadening removed:
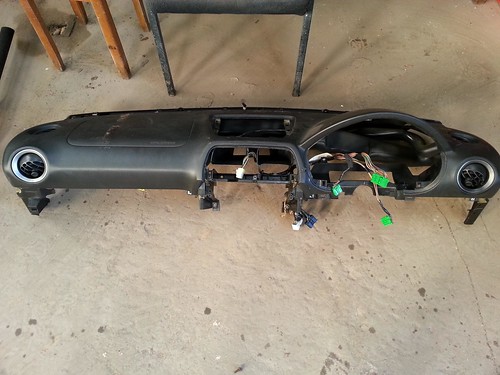
Start to remove dash:


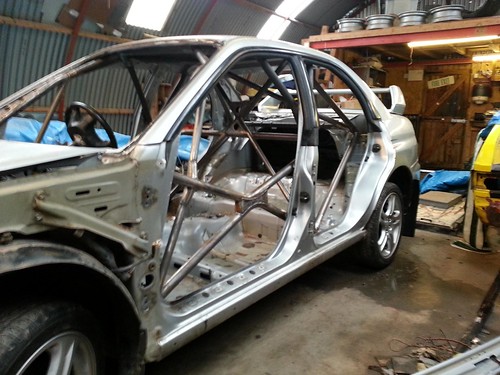
That's the easy bit over. A nice treat in a few days though ... the weld in Custom Cages Step 3 International rollcage should be complete

This is my story so far:
The car before any work
Dodgy installed weld-in rollcage:
Let the strip down begin. There was a mass of none standard wiring behind the dash. Each step of the removal got more and more interesting!
Turns out these last two pictures were a laser jammer ... naughty boy
There was also a mass of audio related wires on the passenger side with a PA amplifier ... how weird.
Seats, rollcage and sound deadening removed:
Start to remove dash:
That's the easy bit over. A nice treat in a few days though ... the weld in Custom Cages Step 3 International rollcage should be complete
 23 December 2012, 01:08 PM
#2
Scooby Regular
Thread Starter
Join Date: Oct 2012
Location: Chester
Posts: 86
Likes: 0
Received 0 Likes
on
0 Posts
A bit more for my 2013 plans for this car:
355mm AP 6 pot front brakes
330mm AP 4 pot rear brakes
18" wheels
Custom Cages Step 3 Rollcage
Sparco Pro2000 seats
TRS 6 point harnesses
Heated front windscreen
Bias brake peddlebox
Lifeline Fire Marshal Electric 4.0 Ltr Aluminium plumbed in extinguisher
Boot mounted fuel cell
Straight cut dog box
Proflex suspension and adjustable anti roll bar upgrades
ECU with ALS and launch control
With regard to the engine. I want a slight modification for 2013 so I can concentrate on the above so I will be looking to get up to approx. 300bhp with simple mods such as ecu, injectors and turbo.
I can concentrate on building something with good low down torque for 2014 ... something that will compensate for the loss due to running the required turbo restrictors.
25 December 2012, 02:45 PM
#3
Scooby Regular
Thread Starter
Join Date: Oct 2012
Location: Chester
Posts: 86
Likes: 0
Received 0 Likes
on
0 Posts
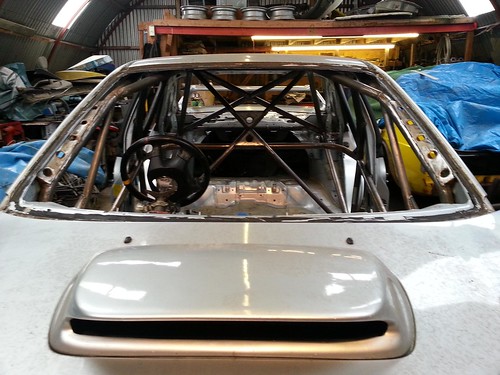
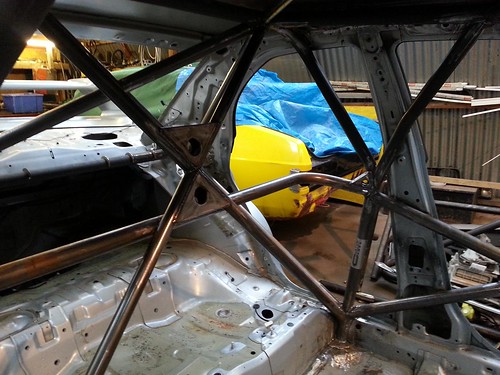
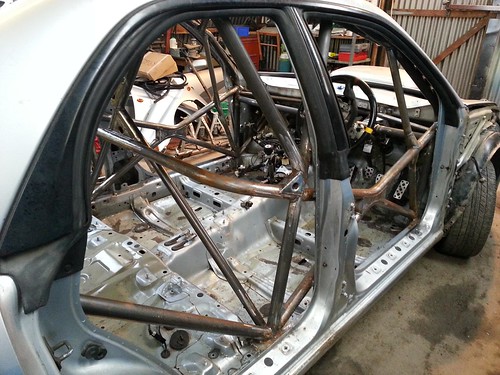
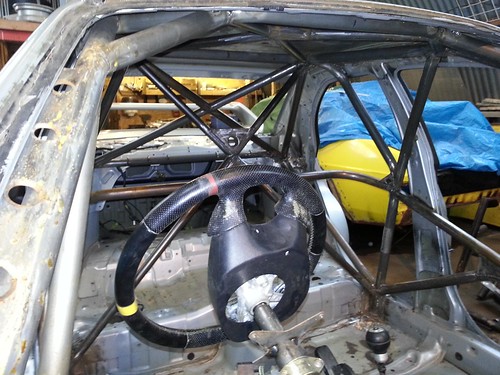
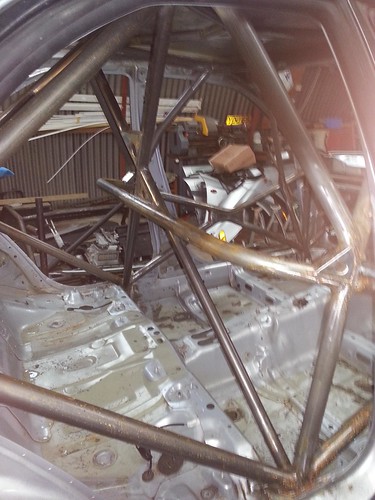
Next stage almost complete now, just brackets for hydraulic handbrake, seat mounts and some cleaning before a lick of paint.


Trending Topics
25 December 2012, 09:20 PM
#9
Scooby Regular
Thread Starter
Join Date: Oct 2012
Location: Chester
Posts: 86
Likes: 0
Received 0 Likes
on
0 Posts
Thanks for the responses so far.
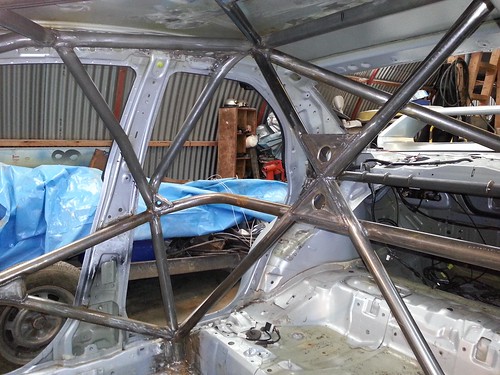
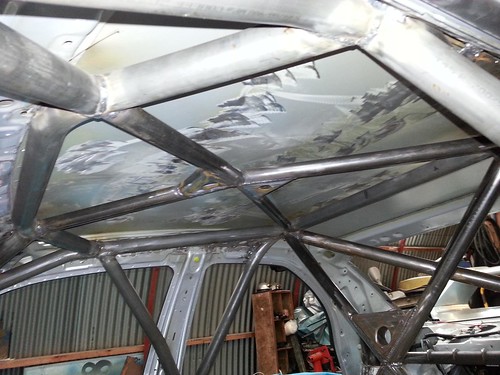
Cage is about �1300 + vat. Looking at about 40 hours for the fitting.
It's T45 steel and not CDS therefore very thin and very strong. This has allowed CC to construct the kit with smaller diameter tubing for lightness.
As the tube diameter is smaller then the regs stated by the FIA, CC issue a ROPS certificate upon completion of test sample which you send to CC along with 6 photos of the cage. This certificate makes the cage legal for FIA and MSA competition use.
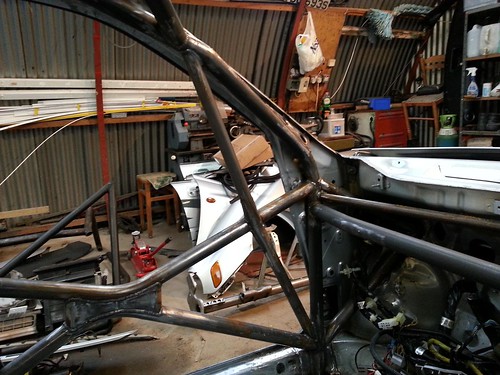
When you get the kit its very daunting as you are just presented with a mass of tubes.
Cage is about �1300 + vat. Looking at about 40 hours for the fitting.
It's T45 steel and not CDS therefore very thin and very strong. This has allowed CC to construct the kit with smaller diameter tubing for lightness.
As the tube diameter is smaller then the regs stated by the FIA, CC issue a ROPS certificate upon completion of test sample which you send to CC along with 6 photos of the cage. This certificate makes the cage legal for FIA and MSA competition use.
When you get the kit its very daunting as you are just presented with a mass of tubes.
26 December 2012, 07:46 AM
#10
Scooby Senior
iTrader: (51)
Join Date: Nov 2005
Location: Wherever I park my car, that's my home
Posts: 20,491
Likes: 0
Received 2 Likes
on
2 Posts
Great project and amazing work done on that jigsaw puzzle of a cage. Wiring can be a nightmare at the best of times.
Looking forward to seeing this come together
Looking forward to seeing this come together
 19 February 2013, 09:14 PM
#12
Scooby Regular
Thread Starter
Join Date: Oct 2012
Location: Chester
Posts: 86
Likes: 0
Received 0 Likes
on
0 Posts
February update as promised.
Unfortunately not the update I was planning to give, as if you remember the plan was to get it back together and get out on the stages asap ... then lay it up over next winter for the extra work.
Mulling it over in the workshop I decided to wise up and go with my brain not my heart ... so the teardown continues.
Anyway:
Strip around engine. The aim was to drop it with all the running gear.
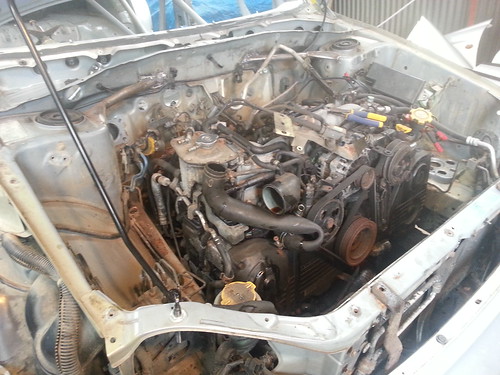
Easier than I expected
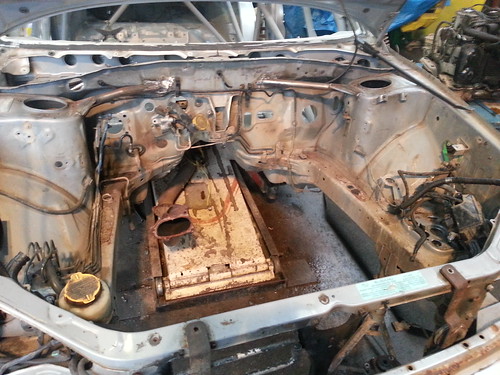
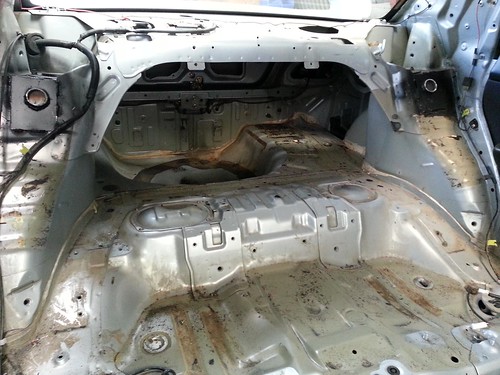
Nasty bit of rust on front panel, surface only and will be gone with the colour change.

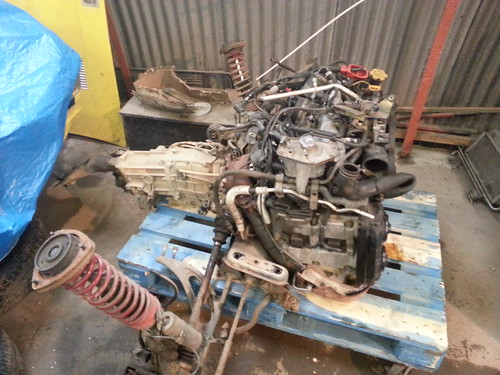
Wheels an all

Patented scooby engine trolly
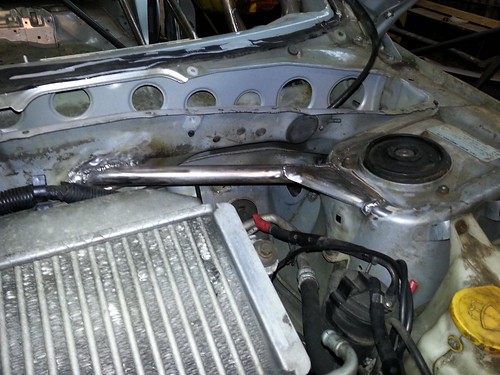
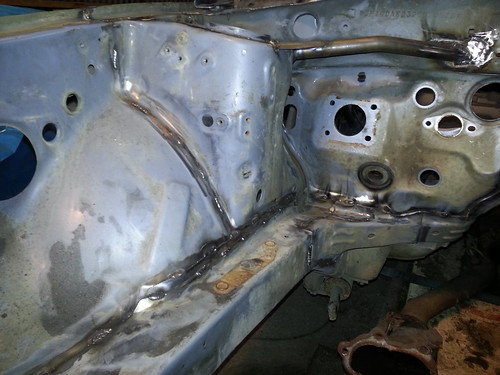
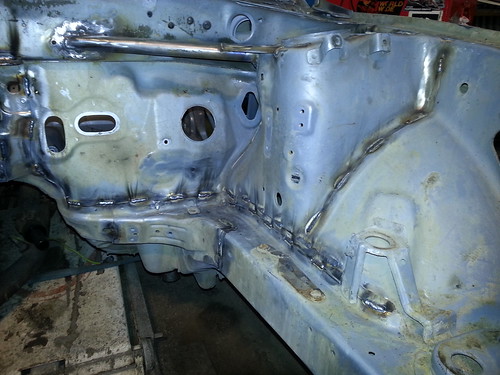
Seam welding commences, bay more or less finished


Not much progress I'm afraid, an attack of sciatica and 2 weekends on a Vivaro with a starting problem put stop to that.
I'm expecting March for it to see new paint and some competition gear bolting on.
Nige
Unfortunately not the update I was planning to give, as if you remember the plan was to get it back together and get out on the stages asap ... then lay it up over next winter for the extra work.
Mulling it over in the workshop I decided to wise up and go with my brain not my heart ... so the teardown continues.
Anyway:
Strip around engine. The aim was to drop it with all the running gear.
Easier than I expected
Nasty bit of rust on front panel, surface only and will be gone with the colour change.
Wheels an all
Patented scooby engine trolly
Seam welding commences, bay more or less finished
Not much progress I'm afraid, an attack of sciatica and 2 weekends on a Vivaro with a starting problem put stop to that.
I'm expecting March for it to see new paint and some competition gear bolting on.
Nige
23 April 2013, 02:31 PM
#13
Scooby Regular
Thread Starter
Join Date: Oct 2012
Location: Chester
Posts: 86
Likes: 0
Received 0 Likes
on
0 Posts
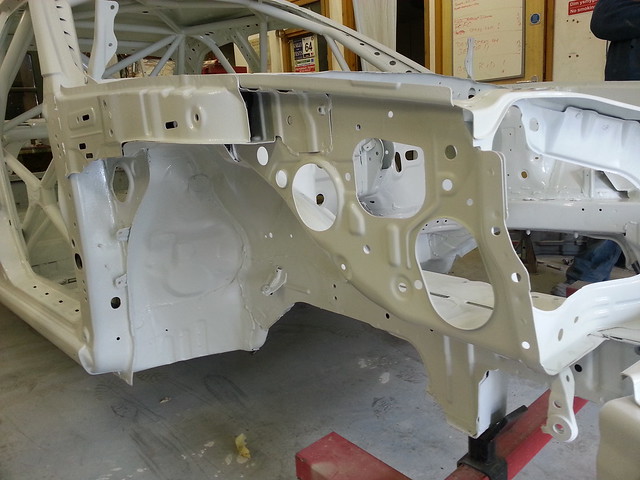
Latest update.
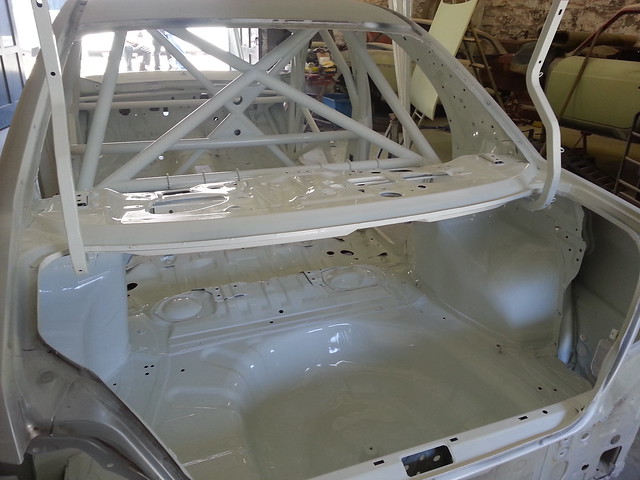
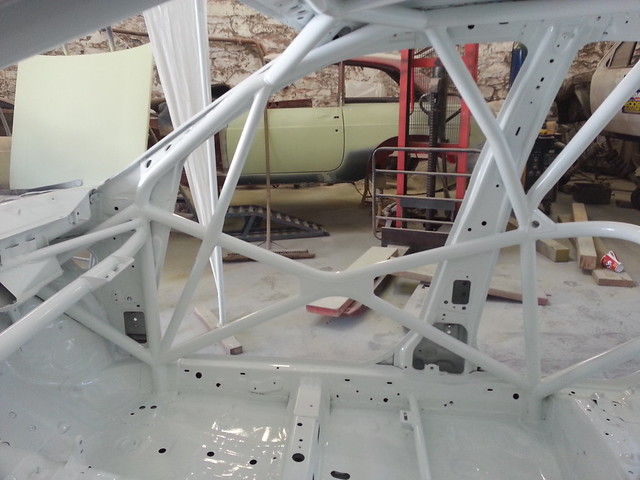
All the seam welding now finished ... hindered by the amount of seam sealer on these shells ... there is a LOT. Also, barckets for seats strengthened and new mounts for rears of seats installed.
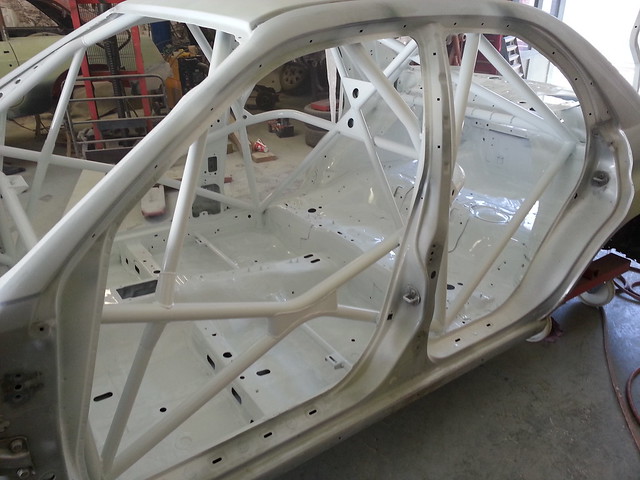
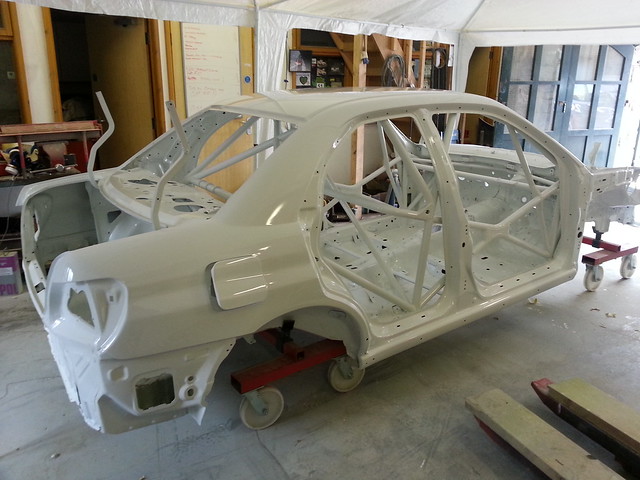
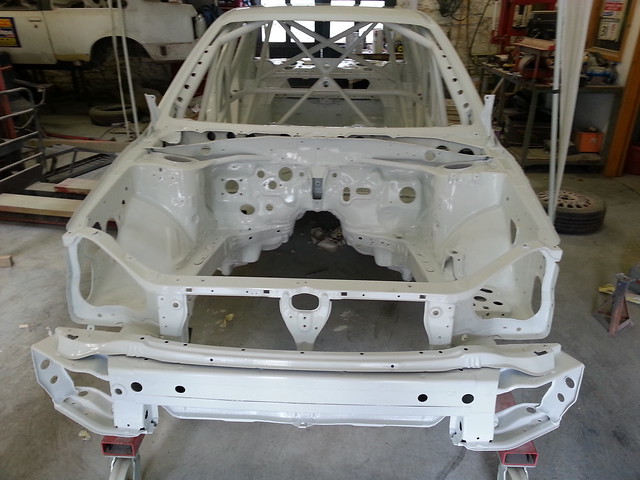
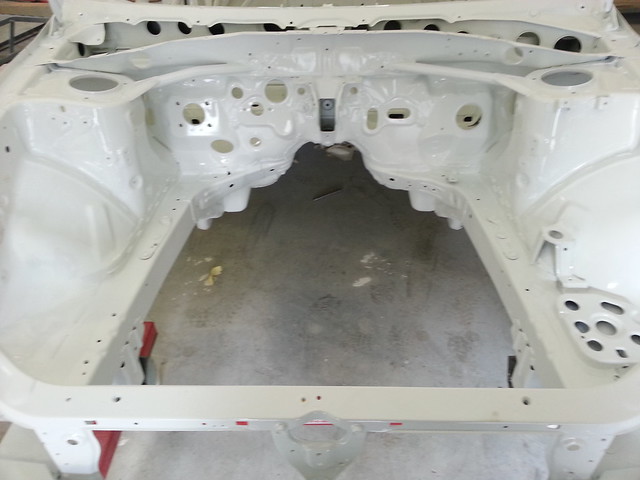
Stage one of painting complete (cockpit). Engine bay, underneath and main shell exterior in progress as we speak.
Paint by PRC @ Felin Fawr
Nige


All the seam welding now finished ... hindered by the amount of seam sealer on these shells ... there is a LOT. Also, barckets for seats strengthened and new mounts for rears of seats installed.
Stage one of painting complete (cockpit). Engine bay, underneath and main shell exterior in progress as we speak.
Paint by PRC @ Felin Fawr
Nige
23 April 2013, 09:47 PM
#16
Scooby Newbie

Join Date: Apr 2013
Location: N Wales
Posts: 2
Likes: 0
Received 0 Likes
on
0 Posts
Hi Thanks a lot for the compliments lads,I am a qualified paint sprayer based up here in North Wales working out of an industrial unit at Felin Fawr works in Bethesda North Wales.
More pics will be available soon By RallyWrx !
Oh and the grumpy old git in the last pic is ME
Want a quote just remember the Name PENRHYN RALLY CENTRE message me if you want a quote
Dave
More pics will be available soon By RallyWrx !
Oh and the grumpy old git in the last pic is ME
Want a quote just remember the Name PENRHYN RALLY CENTRE message me if you want a quote
Dave
Last edited by Penrhyn Rally Centre; 23 April 2013 at 09:48 PM.
 27 April 2013, 11:59 PM
#19
Scooby Regular
Thread Starter
Join Date: Oct 2012
Location: Chester
Posts: 86
Likes: 0
Received 0 Likes
on
0 Posts
 07 May 2013, 12:18 AM
#22
Scooby Regular
Thread Starter
Join Date: Oct 2012
Location: Chester
Posts: 86
Likes: 0
Received 0 Likes
on
0 Posts
Thanks for the comments. A bit more work this weekend.
Dash, first fitting after mods and before it goes for flocking.
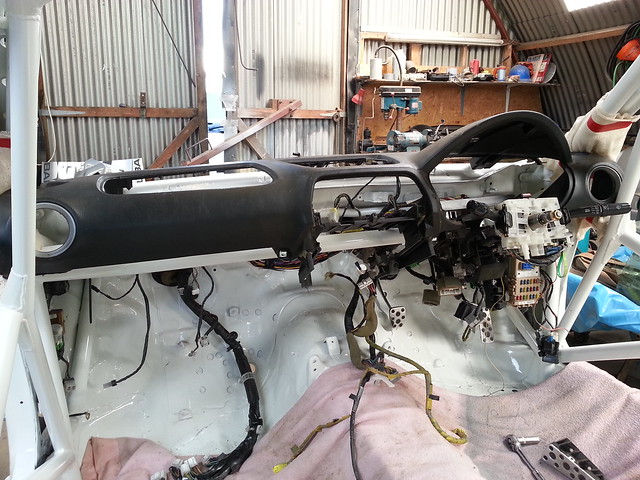
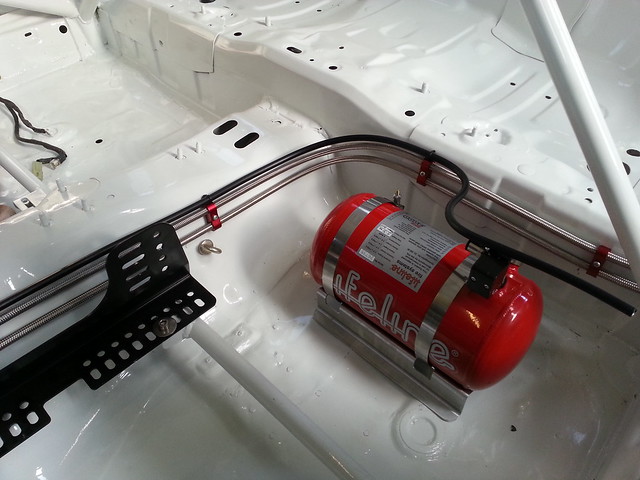
Plumbed in extinguisher line and fuel lines


Concentrate on securing the loom behind the dash and removing the safety loom(airbags etc) from the main loom before finally fitting the dash.
Dash, first fitting after mods and before it goes for flocking.
Plumbed in extinguisher line and fuel lines
Concentrate on securing the loom behind the dash and removing the safety loom(airbags etc) from the main loom before finally fitting the dash.
Last edited by RallyWRX; 07 May 2013 at 12:25 AM.
07 May 2013, 06:40 AM
#23
Scooby Senior
iTrader: (51)
Join Date: Nov 2005
Location: Wherever I park my car, that's my home
Posts: 20,491
Likes: 0
Received 2 Likes
on
2 Posts
Looking good, I have looked at the loom to but decided to leave mine as the car isn't stripped like yours - you should be able to get a lot of excess wiring out, not just the airbag stuff
06 June 2013, 05:43 PM
#24
Scooby Regular
iTrader: (2)

Join Date: Mar 2012
Location: somerset
Posts: 598
Likes: 0
Received 0 Likes
on
0 Posts
Wow, looks proper job
There's loads of uneccessary wiring within the loom its crazy!
MSA recommend running fuel lines outside passenger compartment (14.1.2 in blue book) no idea if a scrutineer would pull you up on it though..... But as you're at this stage (similar to where I'm at but a damn sight more effort and money gone into it!) I figured why not air on the side of caution. I had a quick look and think I can run the lines through the box sections running down the length of the chassis...
Keep up the good work!
06 June 2013, 07:14 PM
#25
Scooby Regular
Thread Starter
Join Date: Oct 2012
Location: Chester
Posts: 86
Likes: 0
Received 0 Likes
on
0 Posts
Wow, looks proper job
There's loads of uneccessary wiring within the loom its crazy!
MSA recommend running fuel lines outside passenger compartment (14.1.2 in blue book) no idea if a scrutineer would pull you up on it though..... But as you're at this stage (similar to where I'm at but a damn sight more effort and money gone into it!) I figured why not air on the side of caution. I had a quick look and think I can run the lines through the box sections running down the length of the chassis...
Keep up the good work!
There's loads of uneccessary wiring within the loom its crazy!
MSA recommend running fuel lines outside passenger compartment (14.1.2 in blue book) no idea if a scrutineer would pull you up on it though..... But as you're at this stage (similar to where I'm at but a damn sight more effort and money gone into it!) I figured why not air on the side of caution. I had a quick look and think I can run the lines through the box sections running down the length of the chassis...
Keep up the good work!
 with the update the past month or so but I have been busy with it.
 - A lot of the rusty running gear (cross members, brackets etc.) are in the powder coaters which I will get back this weekend.
- In-situ adjustable lateral arms for rear being researched, trying to find some with spherical bearings but all the UK companies seem to only flog them bushed.
- 356mm brakes arrived last week courtesy of a decent Scoobynet member.
- 330mm rear brakes ordered.
- Doors, bonnet etc. with the painters.
- Dash back from flokers (Proflock, Holywell) and a trial fit done ... not usually a fan but this is very nice.
Tom, you'll be fine with the lines in the car, they just need protecting.
Used to run 8mm copper on the Escort through the cockpit with some clear flexi hose to stop it getting knocked.
The pipe in the Scooby is Teflon with steel braid as per FIA approval.
Fuel Systems
5.13.1. Have any fuel lines passing through the driver/passenger compartment protected and, if nonmetallic, to be internally or externally metal braided hydraulic pressure hose or fuel lines complying with FIA specifications.
5.13.2. They may only be joined by screwed sealing joints or vehicle manufacturers approved joint.
Nige
06 June 2013, 07:28 PM
#26
Scooby Regular
Thread Starter
Join Date: Oct 2012
Location: Chester
Posts: 86
Likes: 0
Received 0 Likes
on
0 Posts
No too bad really and it really is a shock how much lighter it is with just that... whether it starts again is another thing

Nige
 07 June 2013, 07:54 AM
#28
Scooby Regular
iTrader: (2)
Join Date: Mar 2012
Location: somerset
Posts: 598
Likes: 0
Received 0 Likes
on
0 Posts
Best not to rush these things! Post some pics up, would be good to see a few more things you've done!
Adjustable arms can be made relatively easily with just a pillar drill, drills and clockwise and anticlickwise taps if you can't find any 'off the shelf'
Good news on the fuel lines. That bloody book contradicts itself in a few places! And the scrutineers 'have their say' too! I'm going to look and see how easy and well protected they can be outside the cockpit before I make a decision, but thanks for the info
Sounds like 75% of the loom has gone have you gone for manual windows? What are you doing to demist the screen?
The doors are stupid heavy, have you done much with them?
Tom
Adjustable arms can be made relatively easily with just a pillar drill, drills and clockwise and anticlickwise taps if you can't find any 'off the shelf'
Good news on the fuel lines. That bloody book contradicts itself in a few places! And the scrutineers 'have their say' too! I'm going to look and see how easy and well protected they can be outside the cockpit before I make a decision, but thanks for the info
Sounds like 75% of the loom has gone
have you gone for manual windows? What are you doing to demist the screen?The doors are stupid heavy, have you done much with them?
Tom
07 June 2013, 08:27 AM
#29
Scooby Regular
Thread Starter
Join Date: Oct 2012
Location: Chester
Posts: 86
Likes: 0
Received 0 Likes
on
0 Posts
Best not to rush these things! Post some pics up, would be good to see a few more things you've done!
Adjustable arms can be made relatively easily with just a pillar drill, drills and clockwise and anticlickwise taps if you can't find any 'off the shelf'
Good news on the fuel lines. That bloody book contradicts itself in a few places! And the scrutineers 'have their say' too! I'm going to look and see how easy and well protected they can be outside the cockpit before I make a decision, but thanks for the info
Sounds like 75% of the loom has gone have you gone for manual windows? What are you doing to demist the screen?
The doors are stupid heavy, have you done much with them?
Tom
Adjustable arms can be made relatively easily with just a pillar drill, drills and clockwise and anticlickwise taps if you can't find any 'off the shelf'
Good news on the fuel lines. That bloody book contradicts itself in a few places! And the scrutineers 'have their say' too! I'm going to look and see how easy and well protected they can be outside the cockpit before I make a decision, but thanks for the info
Sounds like 75% of the loom has gone
have you gone for manual windows? What are you doing to demist the screen?The doors are stupid heavy, have you done much with them?
Tom
Front windscreen is electrically heated.
I'm also fitting a roof vent to bring some fresh air into the car on the move.
Nige