When you click on links to various merchants on this site and make a purchase, this can result in this site earning a commission. Affiliate programs and affiliations include, but are not limited to, the eBay Partner Network.
I wanted to share the restoration of my STI 2005 with the community.
First to Introduce myself, I am a nearly 33yo french dude working as a motorsport engineer in UK (I let you imagine the abuse I get...)
In 2017 it was really time for me to get a proper car (Wont tell you what was my daily drive so far but my colleagues pushed me to add a mattress and a roll of duct tape in the back... just to complete the look).
Compared to France, great cars are so cheap here in UK. So when I realized I could afford a nice Porsche for <15kGBP, I thought I knew what to get.
But one day a colleague showed me what else I could get for that price: a Subaru Impreza... WOW... I did not think about it. In France they are very rare, but anytime I had seen one I felt attracted. It always remind me about Colin Mcrae, and the playstation games I spent hours on.
By the way, the french Highway Police has been using WRXs from 2006 to 2011.
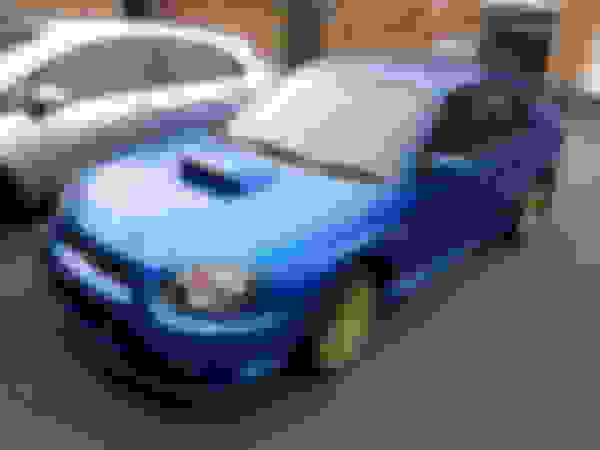
So after learning about the different models, my preference was going for a BlobEye. I hesitated a bit about the Color, but at the end: "An Impreza has to be Blue" I would say. It does not prevent me to appreciate ones in black or white but Blue is a classic.
So here is the one.
Almost Standard, 2005, Wide Track, DCCD, Prodrive Perf Pack. 75K Miles at sell time.
When I went to see it I had a quick look underneath and noticed some rust on suspension part but arch wheels were fine.
My test drive was a bit short but this is my fault. I said the guy I was a bit nervous to drive a 305hp car RH drive for the first time in a city center so he took it out, we swapped and I came back to the garage with it.
Few days later when I picked it up, on the way back home I noticed the steering wheel had to be few deg left to keep it drive straight...
Also the rear axle felt loose... I had zero confidence to push. In fact I would still be quicker we the other car than this one...
I took it for tracking and there I understood a bit what was going on...
I had some Toe Out on the rear....
So those guys tried to fix the rear toe, but they did not manage to correct it, and actually they even made it slightly worst...?
One guy explained me the bushings were probably too worn to make the adjustment effective...
When they went to correct the front toe, nuts were too rusty to crack them loose. No adjustment possible.
From there I knew I was going to have quite a lot of work on the car. I actually have descent skills and experience for that but all my tools are in France.
So I inspected the car and tried the best I could to list all that needed a replacement. The work would be done during Christmas holidays and with no other car available it was crucial to have everything I needed before to start.
Indeed the bushings were foocked!
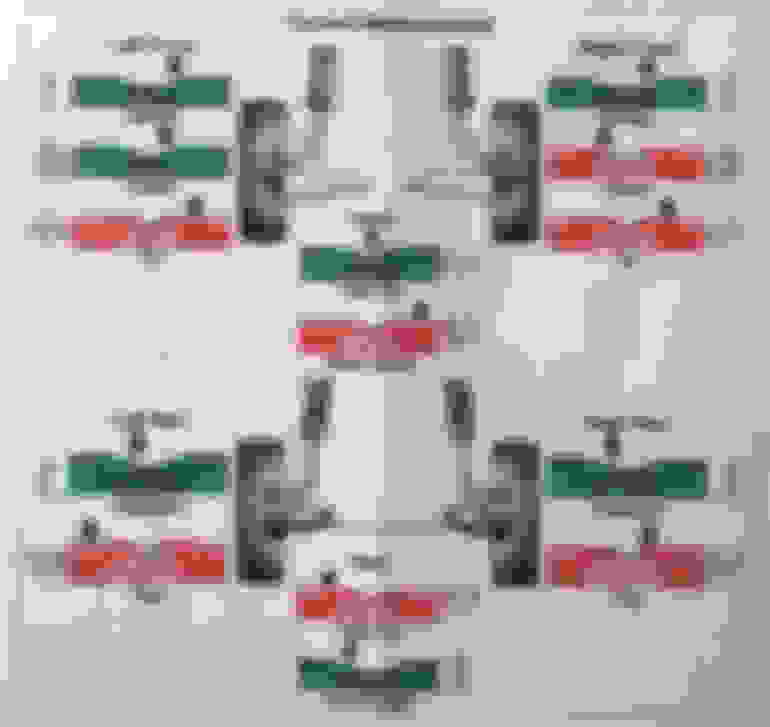
Have a look here:
I started by measuring the Toe variation on the Rear Left wheel: about 4mm!!
Then taking parts off, terrible surface rust on them...
All this goes off easily with a small hammer...
Here is another example with the canister bracket
I removed tons of this!
This is like 2mm thick. Hopefully I did not remove 2mm of metal from parts. Its just that the rust expands.
CV joints
Rear Hub...
Rear Bumper brackets were foocked.
One day I shut the boot and a chunk of rust came off the car.... Pretty sure it was coming from there.
Hopefully the body is absolutely fine here.
Rear Subframe.
For info, mine does not have bushings to connect to the chassis. Apparently they started to do it around 2005.
Same things, a lot of the rust goes off with a hammer...
Then I sandblasted some parts myself. This operation is quite messy...
But the result is nice!
Then Hammerite paint
The one on the right is as coming out of the dish washer after being sand blasted. This made it rust again but actually as the Hammerite paint I was using was "Direct to rust" so adhesion was much better this way.
Looking good now!
Same for CV joints and drive shafts.
New boots and fresh grease!
After so much efforts, it is nice to see this:
About the rear diff, I had the common Whining sound (not much). I was worried the bearing was going off.
I did read somewhere that the Whining sound was coming from a too big backlash.
I measured about 0.33mm, tolerance is between 0.10 and 0.20.
After just cleaning and reassembling with correct torque on bolts I had about 0.15mm.
Whining sound is still there in 5th, 6th gear but I stopped worrying...
For the bushings I wanted to use PowerFlex.
When I get them I was a bit worried about the play between the insert and the bolts.
But actually Subaru bushings have the same play.
Then I realized the clamping force was made to block it anyway. Torque on the bolt that connect side links to upright is 140N.m, which equals to several tons of clamping force!
I fixed it with some welding and some Holts Gun Gum
After that, I also had to treat the chassis, which is much less affected.
It looks bad like this but rust is very thin here.
Treating rust by working underneath the car is a pain!
Here I used this. It puts I thing rubbery layer which look nice.
The only pic I have to show the result is here. I only put 1 layer. Should put much more.
One can goes quite far... I bought six for a very good price on ebay.
Note that I removed the plastic covers there. They are like bucket for stones, water and ****. What do you think?
Be careful when using a metallic brush on a drill...
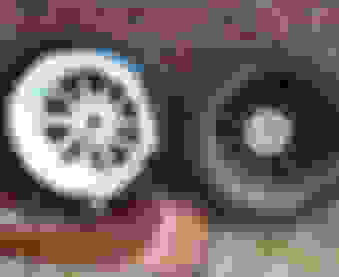
This is not recommended but I used oven cleaner inside my rims. Did not work enough... maybe this one was not that strong.
And finally reset rear toe using the TrackAce of a colleague. Thanks Paul
Before
After
I had my Front and Rear ARB sand blasted and powder coated by a pro. 50gbp, no bill (Cash is king )
Notice that here I am really forcing on it, you can see the tyre moving on the rim.
I did not remeasure the rim displacement but for sure it is much less.
Driving is much better now. And the wheel does not have to be steered as much as before to make the car go straight. I would says the rear fixed the front by 75%
Later I will go to a tracking shop to get all Adjusted.
What you see above took me like 10hrs/day for 14days.
I still have a lot to do:
- Do basically the same for the front, replacing steering rods, treat front subframe and UCradle...
- Rebuild calipers, brake lines.
- Replace all fluids, Power Steering, Brake fluid, Gearbox oil, Coolant...
- Clean Engine bay
- ...
This will happen for my next holidays in France.
I will update the thread then.
What do you guys think?
Do you think I bought too quickly? Should I have stay away from it because of the rust?
Engine seems healthy, will go on a Dyno later to check it.
Gears are a bit difficult to downshift when its cold. Fresh oil may fix that.
Finally an update on my restoration project one year after... Only work on it last summer.
My goal was to do the front subframe as I previously did the rear one.
So for info I managed to drop both the U Cradle (Easy) and the engine/suspension subframe without dropping the engine.
Just had a jack holding the engine up for the time of the subframe swap.
I had a few struggles...
This bolt linkage broke on one end. I ended up welding an old spanner on it to take it off..
CV joints would not come out without this home made tool/technic...
Old subframe Vs 2nd hand one sand blasted and powder coated
There was perforating rust on the side where the exhaust goes by... Heat accelerate rust.
Same thing for the U Cradle
Also replaced inside and outside steering joints
Did the alignment with fishing string and a ruler.... went fine. Don't have pictures of this part unfortunately.
Looking much better now, even the MOT guy said it.... ^^
Replaced lower ball joints, was probably not needed but I bought them by anticipation so...
The upright is awful... Really need to refurb them later.
Regarding the struts, I didn't have the manual with the torque specs with me so I went for 200Nm by head...
It think the real torque is like 175Nm I quickly noticed I was overshooting as it went soft...
Was really not expecting this for a 25Nm overshoot... I suspect those bolt from ICP were not great...
I did a few other fancy jobs:
I changed the cabin filter, very much needed as you can see
My Front Left head light was fading, I did the right one with a 3M kit fitting on a drill earlier, but for the left one I got lazy and only put wax which works...but not for long.
I was annoyed with the few double sided tape from balancing weight left there by tyre guys not doing their job properly...
Notice the inside of my wheels are not very nice... I think the have been refurbished, probably not to the highest standard...
I have been told about this drill stuff which works really well. It's like an eraser.
Hop! gone!
Replaced spark plugs. Gaps were still fine but don't know how old the were...
Pressure washed under the bonnet after applying an engine degreaser from GUNK (GUNK).
This degreaser worked really well. It has quite a strong diesel smell...
Finshed with a trim renovator.
Nice!
And for the fun I did a record of the good Subaru rumble which I can give a link to if you insist...????
I did not work on it last winter because I purchased a 2 posts lift!
Can't wait to work on that!
Any update on this restoration? Good read and excellent work by the man
Thanks for your appreciation!
Yes mate, I am about to make some work on the car in the next 3 weeks.
But first I am finishing the installation of something that should make you all very jealous: My 2 post lift here with my daily, a Swift Sport !
I need to get rid of the net that is supposed to keep the birds off my roof, in fact it's full of bird poo, it's a giant diper... Will install some fake owl and stuff.... finger crossed.
I want to install some lighting and power sockets and then I'll replace:
All wheel bearings
Some brake lines
Brake calipers
maybe the rear subframe.
I also need to replace the fuel level sensors
I have a scrubbing noise when reversing while steering left....
a good polish and waxing!
Plenty of things to do, not sure all will be done...
Nice workshop. It's got room to work properly. To quote a well known phrase "Space, the final frontier".
I suggest you consider painting it. White walls make it a lot lighter. Painted floors stay clean and are easier to keep that way.
very nice restoration.
I had to do the same work on mine which had also suffered the ravages of rust. it's nice to see cars saved!
Et au passage �a fait plaisir de voir d'autre fran�ais ici 😉
Cool! Did you make a post about it?
A french Sub? You live in France?
Originally Posted by John 37
Nice workshop. It's got room to work properly. To quote a well known phrase "Space, the final frontier".
I suggest you consider painting it. White walls make it a lot lighter. Painted floors stay clean and are easier to keep that way.
Good idea, I never considered painting the walls, but they would need to be refurbished too, before.
The Grange's floor is asphalt/tarmac but where the lift is it's concrete which I painted, I need to paint the workshop too.
I would like to decorate the walls with some stuffs like posters of "Days of thunder" (very inspirational to my current life ) and "Christine" if you know that one? It's the story of a nerd who fall in love with a Plymouth Fury 1957 which he restore, but the car is possessed by hell. It's an old school horror movie... but what I like is to identify myself with the nerd obsessed by his car...
I will add a working bench in front of the lift like inside the workshop.
Painting and ciment is not ideal below 5degc those jobs will be for next year when the temp comes back.
 13 January 2018, 09:14 PM

 )
)


 Pretty sure it was coming from there.


 )
)