New/Old Familiar Wagon
 30 November 2017, 03:39 PM
#31

So the JDM HID headlights arrived from Germany this morning and they are mint. Very pleased with them. Also super quick delivery and well packaged. One needs a very minor buff over an inch square area but otherwise they look brand new.
However, they don't have the levelling motors attached....but the manual adjusters work freely....so I won't have to worry about custom wiring for the EUDM to JDM level switch/motors (which to be honest, I probably wasn't going to bother with anyway. I don't tow, so I've never encountered a circumstance where I have wanted to adjust the headlight level anyway).
They come with D2R bulbs but I haven't figured out how to remove thing yet. I've unclipped the spring but they aren't moving freely. Will leave them for now.
My loom from the States has arrived in London, so I'm just awaiting it to clear customs before I can fit them.
 30 November 2017, 05:13 PM
#32
Figured out how to remove the bulbs!
What I have discovered though is that for my Bugeye HIDs, I was able to get Osram Xenarc Nightbreaker Unlimited D2S bulbs. However, they only do Xenarc Original in D2R flavour. So I won't be able to compare Projector to Reflector headlights and I doubt the Blob's will as good.
They came with good Philips Vision 4300K bulbs, so I think I'll try those first. Not much options to upgrade whilst keeping a sensible colour. I may try Philips X-treme vision 4800k if I'm not happy with the standard bulbs. Otherwise the other limited options are 5000k and upwards.
20 December 2017, 12:39 PM
#33
Bit of an update. My wiring loom from Lightwerkz arrived quickly and didn't attract any fees from Customs. However, I didn't realise that the bulbs in my current headlights were 9005 holder and not H4 (as per my Bug). The Lightwerkz loom comes with H4 connection (basically a pair of spade terminals to plug into the H4 socket to get power). Now I could have simply chopped the 9005 plug off the car loom and wired it all up. But that would have been messy, especially if I wanted to install the stock lights back.
So I've sourced a 9005 female plug (the same connection as on the HB3 main bulbs) to wire onto the Lightwerkz loom, so it will be plug'n'play and won't require any cutting of the car loom. I couldn't actually find a female 9005 connector that would ship quickly. So in the end I bought a generic HID wiring loom for �8, which included a single 9005 female connector....
I managed to swap the adjustment motors from my current headlights to the new JDM ones. Predictably one of the 3 screws had rusted solid. In the end I cut it off at the base with a Dremel. The exact same screw had rusted on both headlights. It does make me wonder what all the talk of converting the 6 pin JDM motor to the 4 pin UK look is all about? All you have to do is swap the motors across. Presumable people have been selling their UK lights including the motors and being left with just the JDM ones? Had I known it was a simple case of swapping the motors, I would have done this with my Bugeye conversion - looking at the old headlights and motors though, I think they maybe too far gone with regards to rust. Maybe a job for spring...
Finally, there seems to be confusion over what bulbs fit in Blobeye UK/JDM headlight. Every website I have looked on has quoted 581 (bayonet) for the indicator. When in fact it is 582 (capless blade). The only other explanation is that 581 IS for UK and 582 is for JDM and the current headlights are JDM non-HID, not UK.....seems unlikely, although the headlights have definitely been removed before as two of the plastic mounting grommets are missing.
Hopefully will have them wired and installed today, weather permitting.
Last edited by TECHNOPUG; 20 December 2017 at 12:40 PM.
20 December 2017, 04:36 PM
#34
Success!
However, the dipped beam doesn't stay on with the high beam....when installed my Bug HIDs, I had to earth the ballasts in order to keep the dipped HIDs on. With the different style Blob ballasts, there is nowhere to attach an earth to them. Although from a brief test, it appears that the switch from dipped to high is instaneous (certainly no noticeable gap or drop in light).
Maybe this is how they are supposed to work, being more advanced than the old Bugeye set up?
22 December 2017, 09:13 AM
#35
Scooby Regular
It does make me wonder what all the talk of converting the 6 pin JDM motor to the 4 pin UK look is all about?
Finally, there seems to be confusion over what bulbs fit in Blobeye UK/JDM headlight. Every website I have looked on has quoted 581 (bayonet) for the indicator. When in fact it is 582 (capless blade). The only other explanation is that 581 IS for UK and 582 is for JDM and the current headlights are JDM non-HID, not UK.....seems unlikely, although the headlights have definitely been removed before as two of the plastic mounting grommets are missing.
Hopefully will have them wired and installed today, weather permitting.
UK WRX bugeyes have a 3 pin levelling motor connector MY02 STi bugeye came with a 6 pin connector.
UK blobeyes all have a 6 pin motor connector.................

UK Blobeyes come with capless indicator bulbs (84920FE010)

Don't always believe website info as most are based on US model info. (Although in this case even the US cars had capless bulbs) Bugeye have bayonet type bulb.
However, the dipped beam doesn't stay on with the high beam....when installed my Bug HIDs, I had to earth the ballasts in order to keep the dipped HIDs on. With the different style Blob ballasts, there is nowhere to attach an earth to them. Although from a brief test, it appears that the switch from dipped to high is instaneous (certainly no noticeable gap or drop in light).
Maybe this is how they are supposed to work, being more advanced than the old Bugeye set up?
Maybe this is how they are supposed to work, being more advanced than the old Bugeye set up?
My03-05 Headlight wiring - a separate relay and fuse supplies power to both dip and main beam for each side.
Turning the lighting switch to position II (with ignition on) puts the Headlight relay coil feed (MB8) to earth which activates both headlight relays applying power to the system.

My06/07 the same setup with HID but has an additional feed and relay in the system.

 22 December 2017, 10:47 AM
#36
Thanks for the post Don. The LW loom takes the power feed from the OS high beam for both ballasts. This the same as the Bugeye loom I have. I wonder whether if I wired the ballasts directly to the low beam connector on either side, it would resolve the issues? Although I don't really want to chop up the stock loom. I may have to just live with it as there is no perceptible drop in light when switching between low & high beam.
22 December 2017, 11:45 AM
#38
Scooby Regular
Would have probably been better off with the OEM HID loom they do which taps into the low beam wiring.........................

Have you checked your PM's ?
Have you checked your PM's ?
Last edited by Don Clark; 22 December 2017 at 11:47 AM.
22 December 2017, 11:55 AM
#39
Scooby Regular
Just to confirm, JDM HID and UK non HID headlights use the same High/main beam bulbs -

22 December 2017, 01:04 PM
#40
Never mind, it has confirmed that I just need to wire to the low beam rather than the high for the power. I'll have to see if I can find a low beam headlight plug to wire onto the loom, so I don't need to chop the one in the car.
Yes, PM received thanks.
03 January 2018, 04:57 PM
#42

With reference to the image above, the red lead from the high beam plug goes to a single white wire to the relay (to engage the relay/to send 12v to the ballasts). The red AND black wires also go to the high beam HB3 bulb, so that they still work.
I cut the low beam plug off my old lights and wired the red lead to the white relay lead on the loom, having first removed the high beam connector and redundant HB3 plugged that was spliced on. On the basis that when the low beams are on, they will send a signal to the relay via the red/white wire.
That didn't work.
Had a quick chat with Lightwerkz and we discussed whether the unattached black lead from the low beam plug needed to be earthed. So connected that to the earth lead on the loom.
Still nothing.
Except that now both high beams come on when low beam selected but the OS one turns off when you select high beam......
Any ideas? In the upper image above there is a tap for both the red and black low beam but I don't know whether the black lead goes to earth or to the relay (or whether the relay is different on that loom).
Current options are to put the loom back to how I had it powered off the high beam (with no low & high beam function). Try swapping red/black wires round. Wire black lead to own earth (rather than the loom). Or buy the correct loom from LW.
Last edited by TECHNOPUG; 03 January 2018 at 05:06 PM.
03 January 2018, 05:18 PM
#43
Scooby Regular
It all depends on the relay used and how it is wired
03 January 2018, 05:31 PM
#44
Yes I think that the relays must be different. The red wire from the high beam is definitely feeding the relay in the originally configured loom, hence why I assumed that simply feeding the relay with the low beam red wire would also work. Clearly I'm not an auto-electrician 
 03 January 2018, 05:53 PM
#46
It's my own fault for ordering the wrong loom. Well, really it's Lightwerkz's fault for not having the correct loom listed in the "Subaru" section of their website, leading me to ordering the wrong one....
On the plus side, I can remove both headlights in under 8 mins now
On the plus side, I can remove both headlights in under 8 mins now
03 January 2018, 05:59 PM
#47
It's my own fault for ordering the wrong loom. Well, really it's Lightwerkz's fault for not having the correct loom listed in the "Subaru" section of their website, leading me to ordering the wrong one....
On the plus side, I can remove both headlights in under 8 mins now
On the plus side, I can remove both headlights in under 8 mins now
04 January 2018, 09:51 AM
#48
Scooby Regular
You need to work out what goes where and how the relay is wired (and what type it is) in the lightwerks loom
This is roughly how I see it working..................

This is roughly how I see it working..................
04 January 2018, 02:56 PM
#49
That's with a P type relay. I have an F type which has a 5th connection 87A.
https://www.tme.eu/gb/Document/cbb87...LDN_SERIES.pdf
https://www.tme.eu/gb/Document/cbb87...LDN_SERIES.pdf
Last edited by TECHNOPUG; 04 January 2018 at 02:57 PM.
04 January 2018, 03:12 PM
#51
Stripped all the wired back to see what goes where. The current loom has pin 86 on the relay going to battery earth (it's spliced into the 2 ballasts earths). So I'll try connecting that to the negative lead on the low beam feed as per your diagram and see if that works.
04 January 2018, 03:40 PM
#52
Scooby Regular
Stripped all the wired back to see what goes where. The current loom has pin 86 on the relay going to battery earth (it's spliced into the 2 ballasts earths). So I'll try connecting that to the negative lead on the low beam feed as per your diagram and see if that works.
The coil supply 85/86 can usually be fed either way around
05 January 2018, 01:18 PM
#54
Scooby Regular
Not having a newage to hand  when original headlights fitted, did the low beams stay on with the high beams??
when original headlights fitted, did the low beams stay on with the high beams??
05 January 2018, 02:53 PM
#56
Scooby Regular
What happens if you attach one of your old low beam bulbs to the now vacant low beam socket??
07 January 2018, 05:21 PM
#58
Success.
The N/S headlamp fuse needed replacing.
Night and day (pun intended) over the UK non-HID lights. You can actually drive properly at night without backing off every time another car comes the other way. Definitely worth doing if you can find them at a nice price, as I was fortunate to do.
I haven't been able to do a comparison with my Bug Projector lens yet but (I suspect they will be better - at least with regards to beam cut off)
they have more powerful D2S bulbs which aren't available in D2R flavour required for the Blob anyway.
It is plug and play if you get the right loom....
 For future, if anyone does similar, I reckon you could easily make the loom for �20. I have found lots of place that sell the plugs for the ballasts, which are the only specific connectors you need. Only in the States to be fair, but they were just $7.50 each. The rest is just a basic relay, fuse holder and some wires. You'll then need to either cut the end of your car side loom with the low beam or source a h/l side low beam plug (I did the latter).
I had replaced all the bulbs on the new h/l and used LEDs for the sidelights and indicators. The voltage is obviously a lot lower now and that is causing the indicators to blink fast as if one was blown. Is there a way around this - a different LED specific relay perhaps?
One of these I presume?
https://www.autobulbsdirect.co.uk/led-flasher-unit.html
07 January 2018, 06:31 PM
#59
Scooby Regular
Glad you fixed it.
Hazard and flasher relay is 3 pin similar to these...........


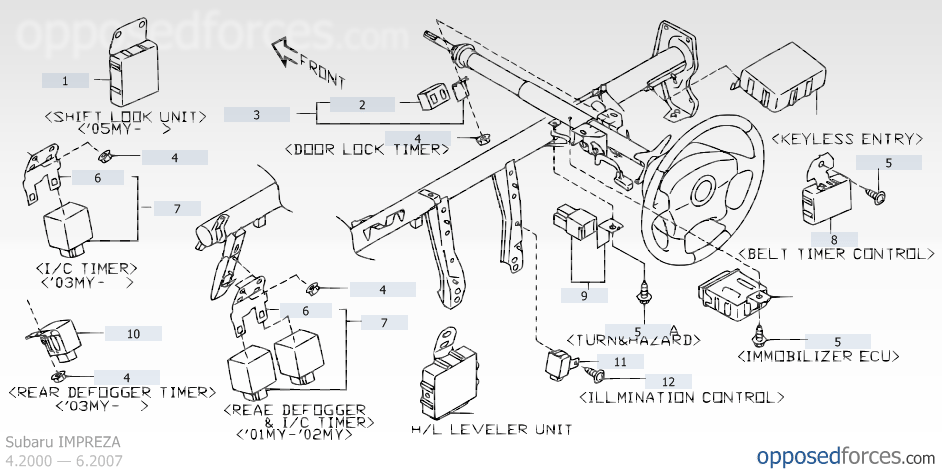
Screws near to the steering column mounting bracket (item 9 below)
Hazard and flasher relay is 3 pin similar to these...........
Screws near to the steering column mounting bracket (item 9 below)