
Buggy


We decided to use a Subaru Type RA as a donor car for a buggy this time. Keeping the engine in the front, and most importantly the 4WD system.
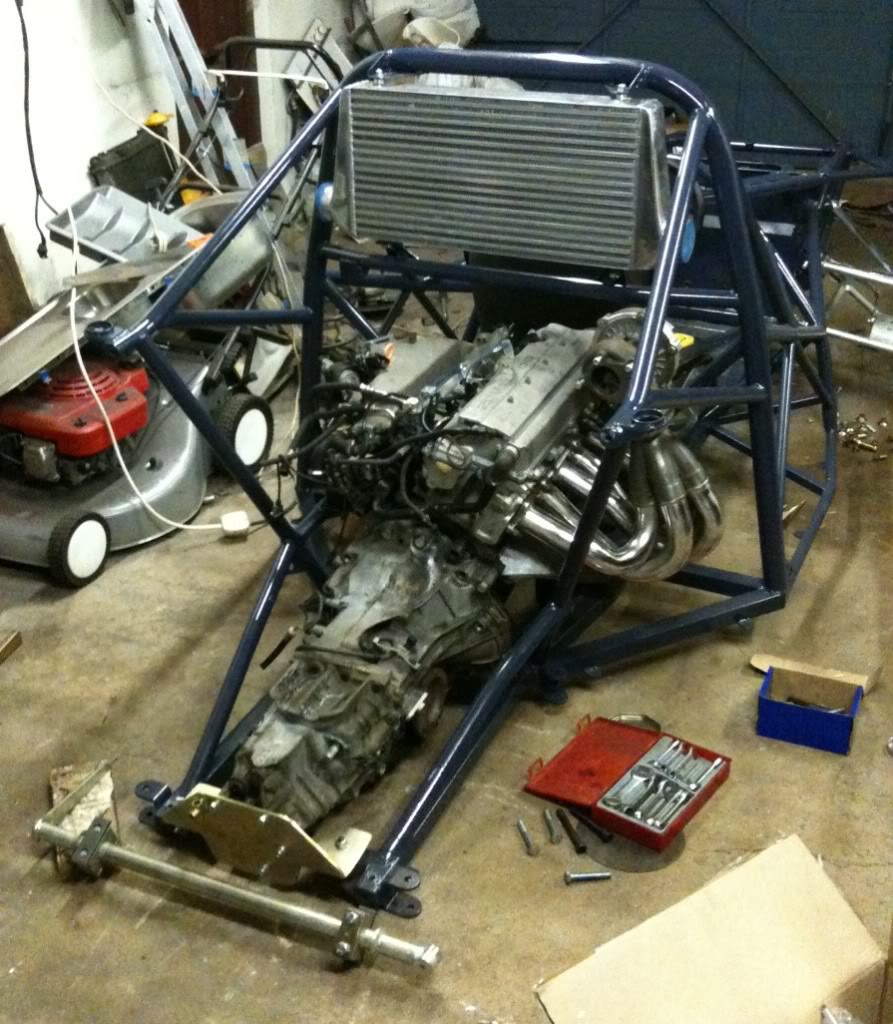
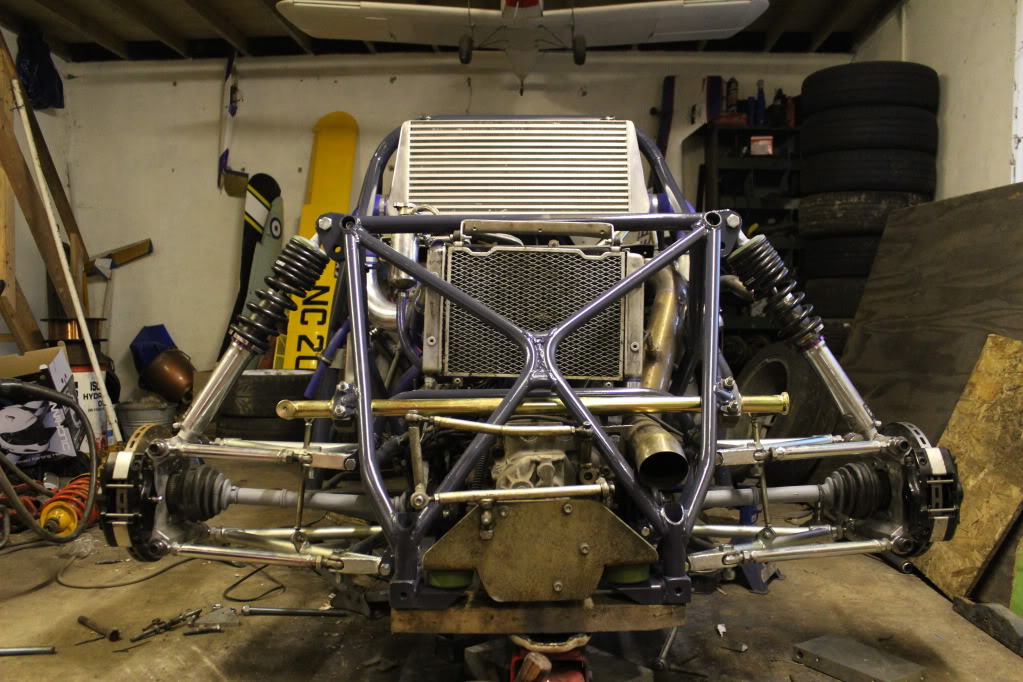
Here's the progress so far. The front isn't finished yet, but you can see how the rest is shaping up.
The radiator, battery and fuel tank are in the rear, and it is hoped that with two occupants the buggy will be well balanced.
A front mount intercooler would add weight and length to the front, two side mounts would be better, but it was decided to use a large top mount instead. This brings the weight inboard, shortens the pipework and gives the buggy more of a feature around this area of the body.
A front LSD has been bought, to help with the traction.
The standard engine develops 260ps, it has a Z5 ECU, 4 branch and will have an unrestricted exhaust. The weight is hoped to finish at less than 700Kg, giving ~370 bhp/tonne.
Last edited by Stefen1; Aug 23, 2018 at 07:59 PM.


Scooby Regular
Joined: Jul 2009
Posts: 669
Likes: 0
would it not be easier using the existing floor of the subaru and build round it just a question as im curious as why u went spaceframe and just cut out the meatl around it and replace with the tubing could this be made road legal
Trending Topics


Wow, there's a lot in interest in this! Thanks for the comments.
Yes, the scoop will be integrated into the upward slope of the bonnet, we'll try a few ideas when we get that length.
Use the existing floor panel - This is a good idea if it were to be put into another shell, but if you look carefully at the overhead picture of the drivetrain on the pallets you'll see one of the driveshafts has been set aside. This has the effect of reducing the wheelbase by ~2ft so would require the floor panel to be chopped and welded. Besides, we think it looks much better all tubular frame!
The frame is made up as we go along. Compare the first picture with the top roll frame in place with the one before it. Look at the front - the black pipe has been chopped off and replaced with red pipe. Sometimes a rework is needed to make it look the part. One step back, two steps forward.

take my hat off to you ... that is top engineering and built from scratch.
that buggy is gonna rip your face off when it goes
what kind of time scale has this taken? and what s the tubular frame made from?
you ve gotta put a vid up when this is running
... that is top engineering and built from scratch.that buggy is gonna rip your face off when it goes
what kind of time scale has this taken? and what s the tubular frame made from?
you ve gotta put a vid up when this is running

A few more progress pics from last weekend.
This has taken about 12 full days so far (spread over a couple of months).
The black pipe is either 42, 33 or 26mm steel pipe with 3mm wall. The red pipe is 42mm or 33mm heating pipe which is a softer steel and easy to bend.
This has taken about 12 full days so far (spread over a couple of months).
The black pipe is either 42, 33 or 26mm steel pipe with 3mm wall. The red pipe is 42mm or 33mm heating pipe which is a softer steel and easy to bend.
Last edited by Stefen1; Aug 23, 2018 at 08:03 PM.


Scooby Regular
Joined: Nov 2012
Posts: 362
Likes: 1
From: Durham
Stuff like this amazes me, there are some very skilled people out there - very impressive work! The engine and drive train laid out looks like some sad dead animal 
Whats its intended use? When I read 'buggy' I was expecting a Baja type thing but it looks too low for off-road use.
Whats its intended use? When I read 'buggy' I was expecting a Baja type thing but it looks too low for off-road use.
Thanks for all the great comments. I'll give a text update here as I've no new photos just yet.
We will be panelling the spaces in most of the frame, with some lightweight material, such as aluminium, plastic or similar. Need to get the brackets cut and weld them on.
With regard to road use - IIRC the IVA manual is ~300 pages long so it's probably a long enough road to bring it that far. We thought about it with the other (Audi) buggy, but the freedom to design and build without any restriction is refreshing.
The 4WD will really help the traction, so although due to the ground clearance it can't go over rough terrain, it should do well on a gravel/paved or tar surface. It's almost more of an engineering exercise than anything else. We know from the Audi buggy that 10 mins driving is quite enough, it's really quite intense.
Progress - The engine has been taken out of the frame and it has been welded, took 2 days! So reassembly is required and a bit of mounting various bits and pieces needs to be done.
The Audi buggy in the background. She has a 2.2L 5 cylinder turbo engine, out of an Audi S6. Mid engined, rear wheel drive. It's chipped and runs at 1.5 Bar. Here are a few photos:
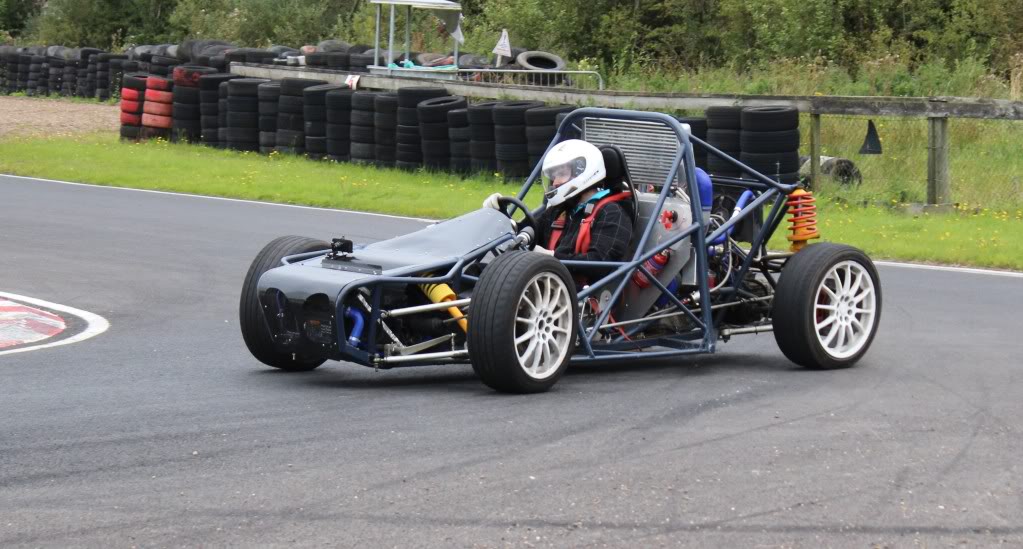
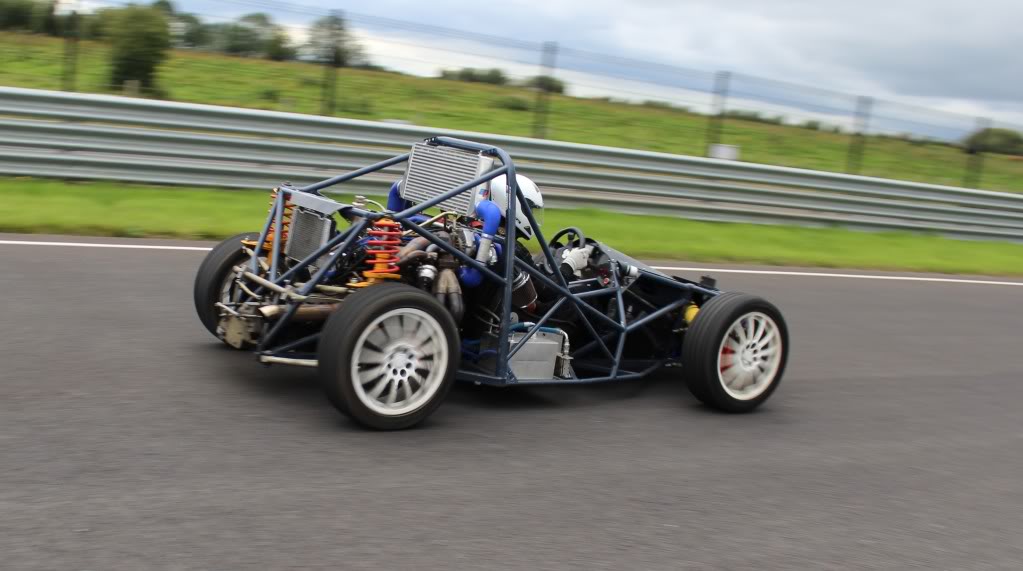
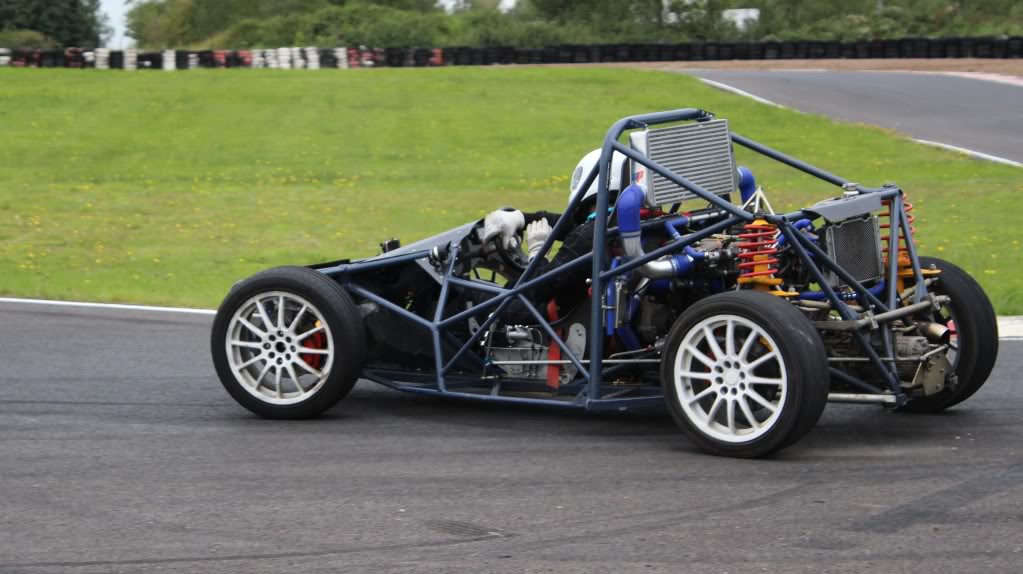
Since those photos were taken, she's had a new doubled wishbone setup :
The Subaru buggy is quite a different article, front engined, two seats, 4WD. We thought initially the engine would hang out too far, but having chosen the Subaru over an inline four, it seems to work in well with the rest of her.
Initially, I was going to use a 2.7TT out of a S4 and build a mid engined one, but the engine is heavy and underpowered, you'd need to be getting the RS4 to be any good, which is expensive. Also with a RWD she tends to spin, so I was temped by the light, short 4WD Subaru setup. Loads of them about and plenty of parts and upgrades available. It makes sense.
We will be panelling the spaces in most of the frame, with some lightweight material, such as aluminium, plastic or similar. Need to get the brackets cut and weld them on.
With regard to road use - IIRC the IVA manual is ~300 pages long so it's probably a long enough road to bring it that far. We thought about it with the other (Audi) buggy, but the freedom to design and build without any restriction is refreshing.
The 4WD will really help the traction, so although due to the ground clearance it can't go over rough terrain, it should do well on a gravel/paved or tar surface. It's almost more of an engineering exercise than anything else. We know from the Audi buggy that 10 mins driving is quite enough, it's really quite intense.
Progress - The engine has been taken out of the frame and it has been welded, took 2 days! So reassembly is required and a bit of mounting various bits and pieces needs to be done.
The Audi buggy in the background. She has a 2.2L 5 cylinder turbo engine, out of an Audi S6. Mid engined, rear wheel drive. It's chipped and runs at 1.5 Bar. Here are a few photos:
Since those photos were taken, she's had a new doubled wishbone setup :
The Subaru buggy is quite a different article, front engined, two seats, 4WD. We thought initially the engine would hang out too far, but having chosen the Subaru over an inline four, it seems to work in well with the rest of her.
Initially, I was going to use a 2.7TT out of a S4 and build a mid engined one, but the engine is heavy and underpowered, you'd need to be getting the RS4 to be any good, which is expensive. Also with a RWD she tends to spin, so I was temped by the light, short 4WD Subaru setup. Loads of them about and plenty of parts and upgrades available. It makes sense.


Last edited by Stefen1; Aug 23, 2018 at 08:02 PM.
