Colin's '00 Bugeye WRX

 08 December 2016, 01:41 PM
#32
Scooby Regular
Thread Starter
Join Date: May 2016
Location: South Germany
Posts: 91
Likes: 0
Received 0 Likes
on
0 Posts


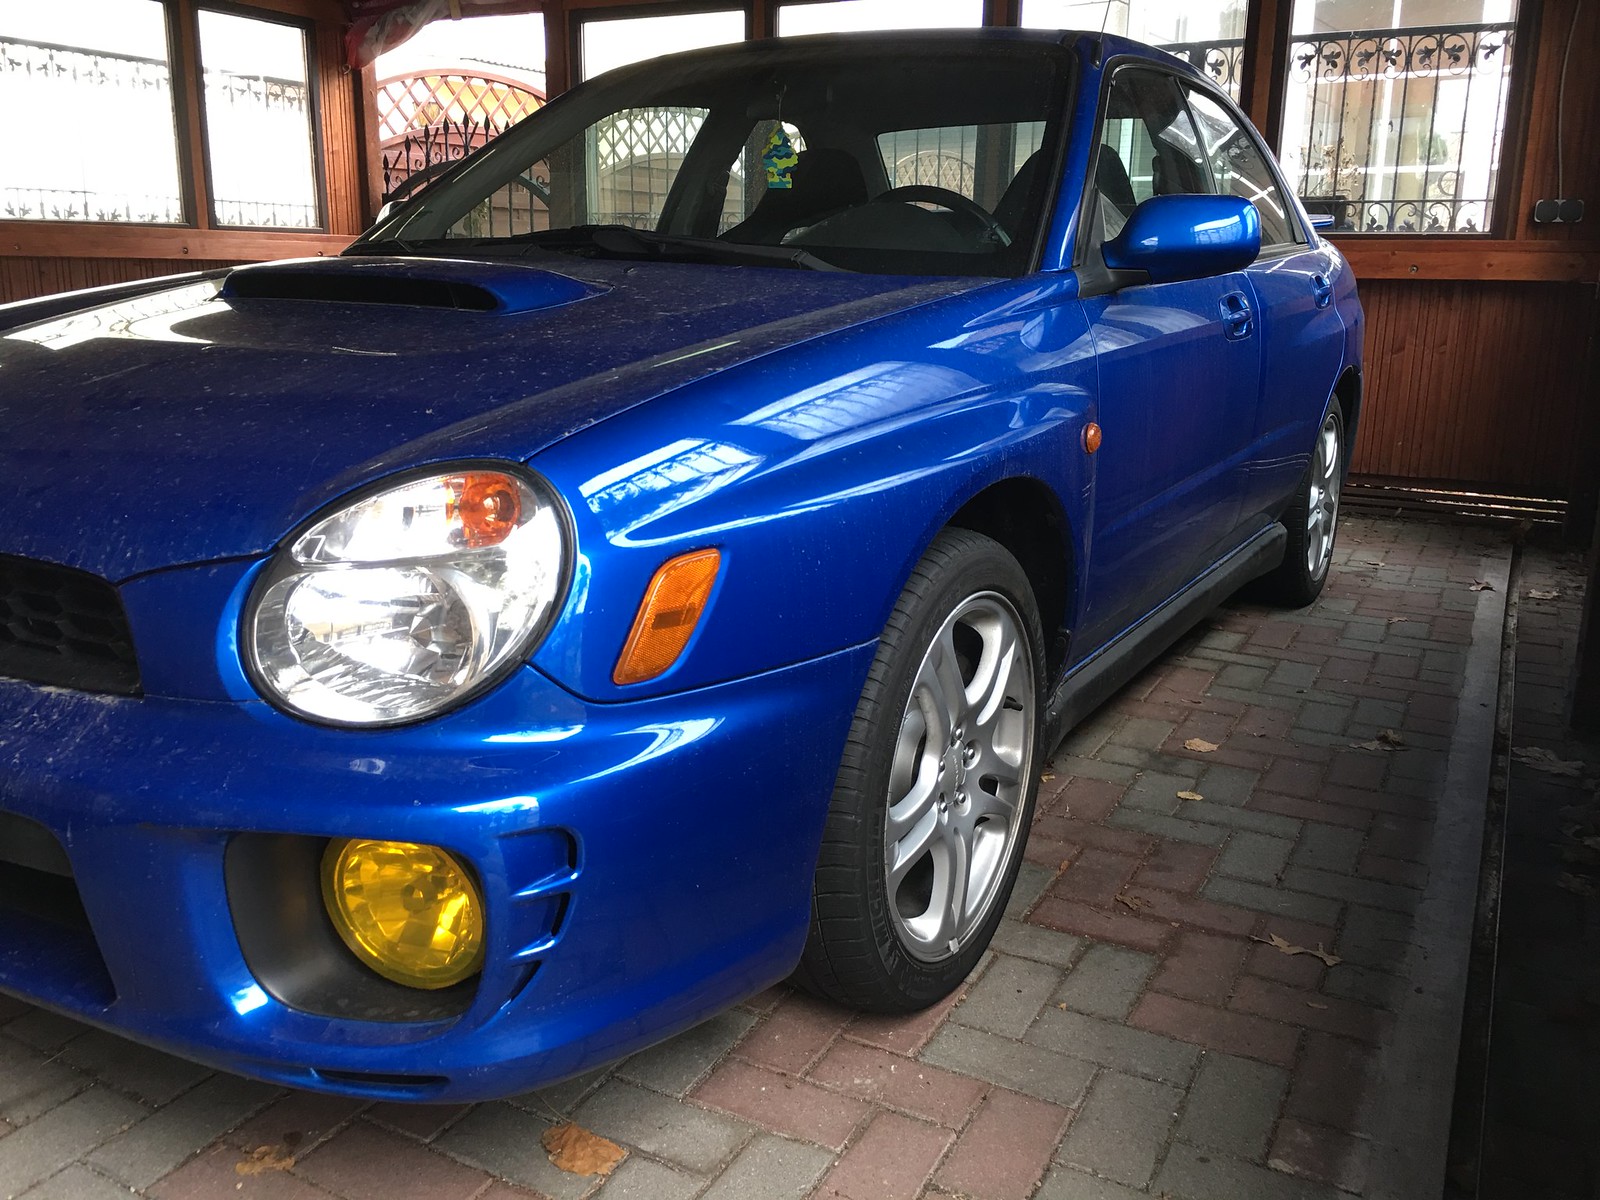
Me too, altough I'm quite sad...
But here are some pictures of the new one (didn't take rhem of course as I don't own the car yet)
Guess the thread about the new car will be about how I'll get this car into my dream Impreza.
11 December 2016, 06:20 AM
#34

That looks like a good example. So, have you got any plans? Are you going to swap the good bits from the old car (wheels, brakes etc) to the new one?
the new one looks like it's got an aftermarket turbo intake pipe, has it been Modded or remapped?
the new one looks like it's got an aftermarket turbo intake pipe, has it been Modded or remapped?
Last edited by Cambs_Stuart; 11 December 2016 at 06:22 AM.
14 December 2016, 02:15 PM
#35
Scooby Regular
Thread Starter
Join Date: May 2016
Location: South Germany
Posts: 91
Likes: 0
Received 0 Likes
on
0 Posts
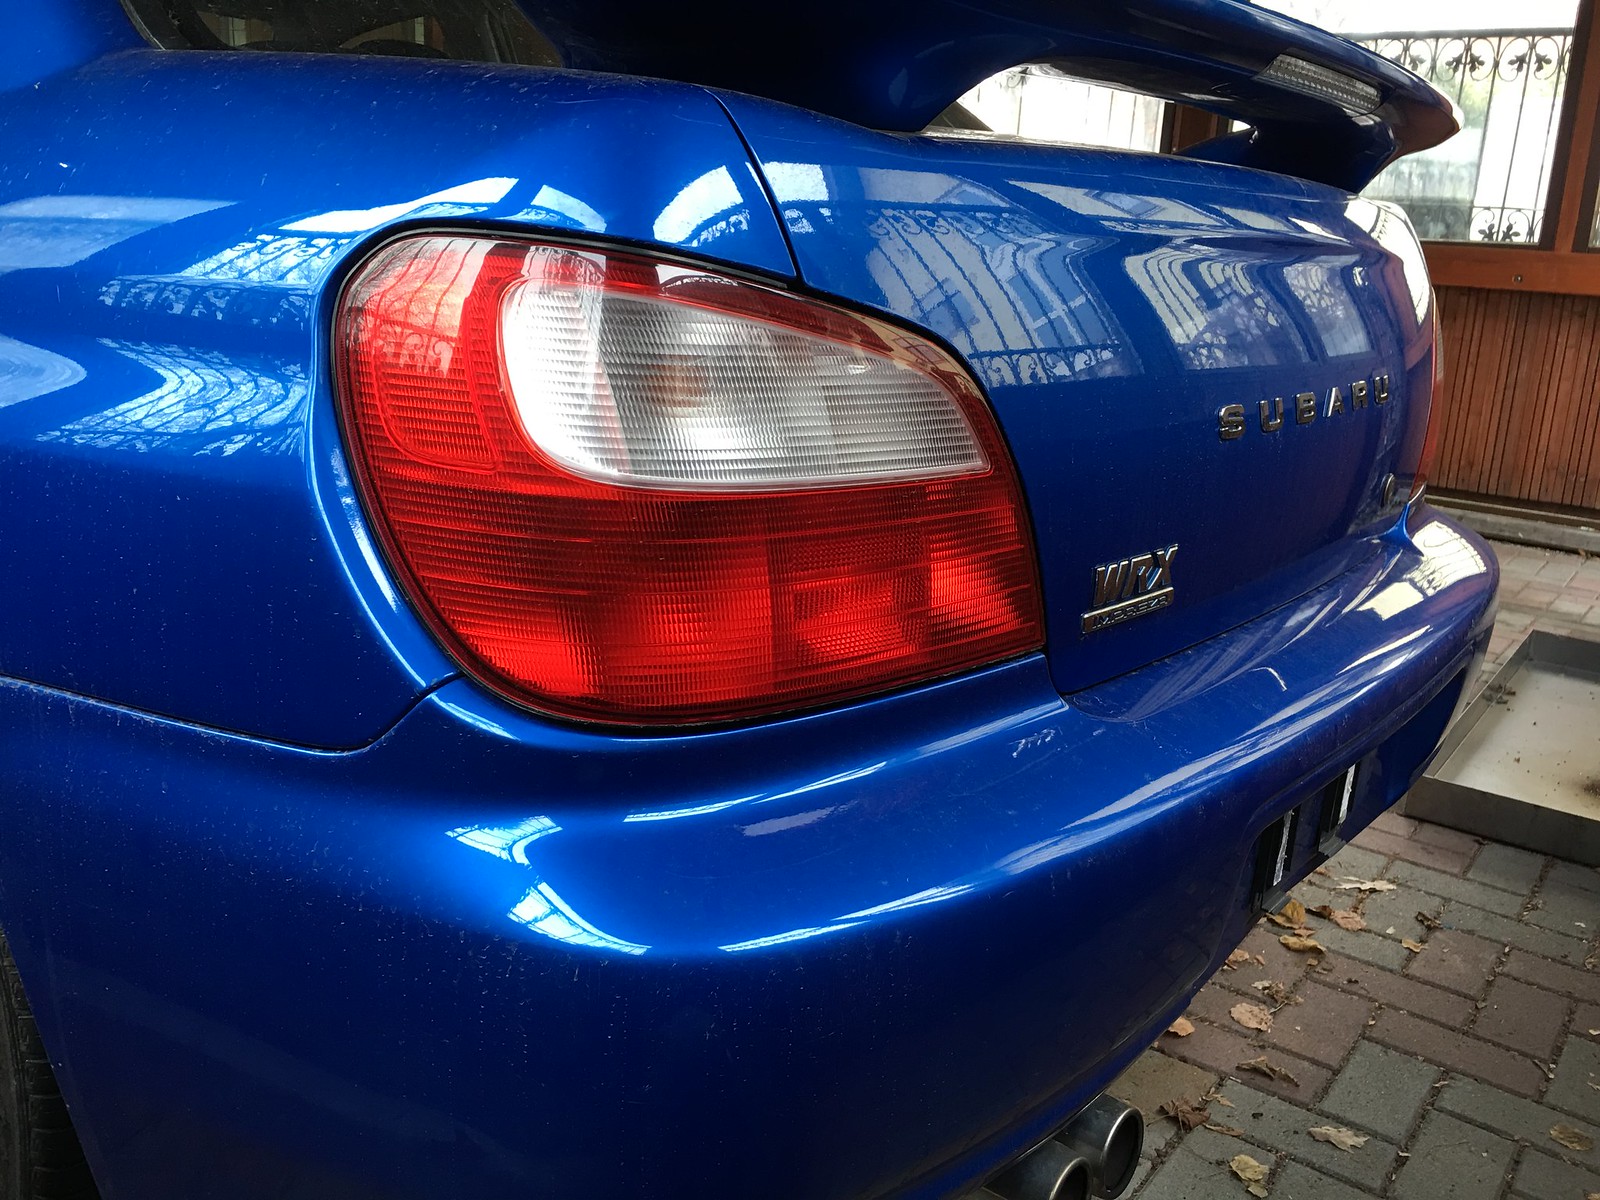
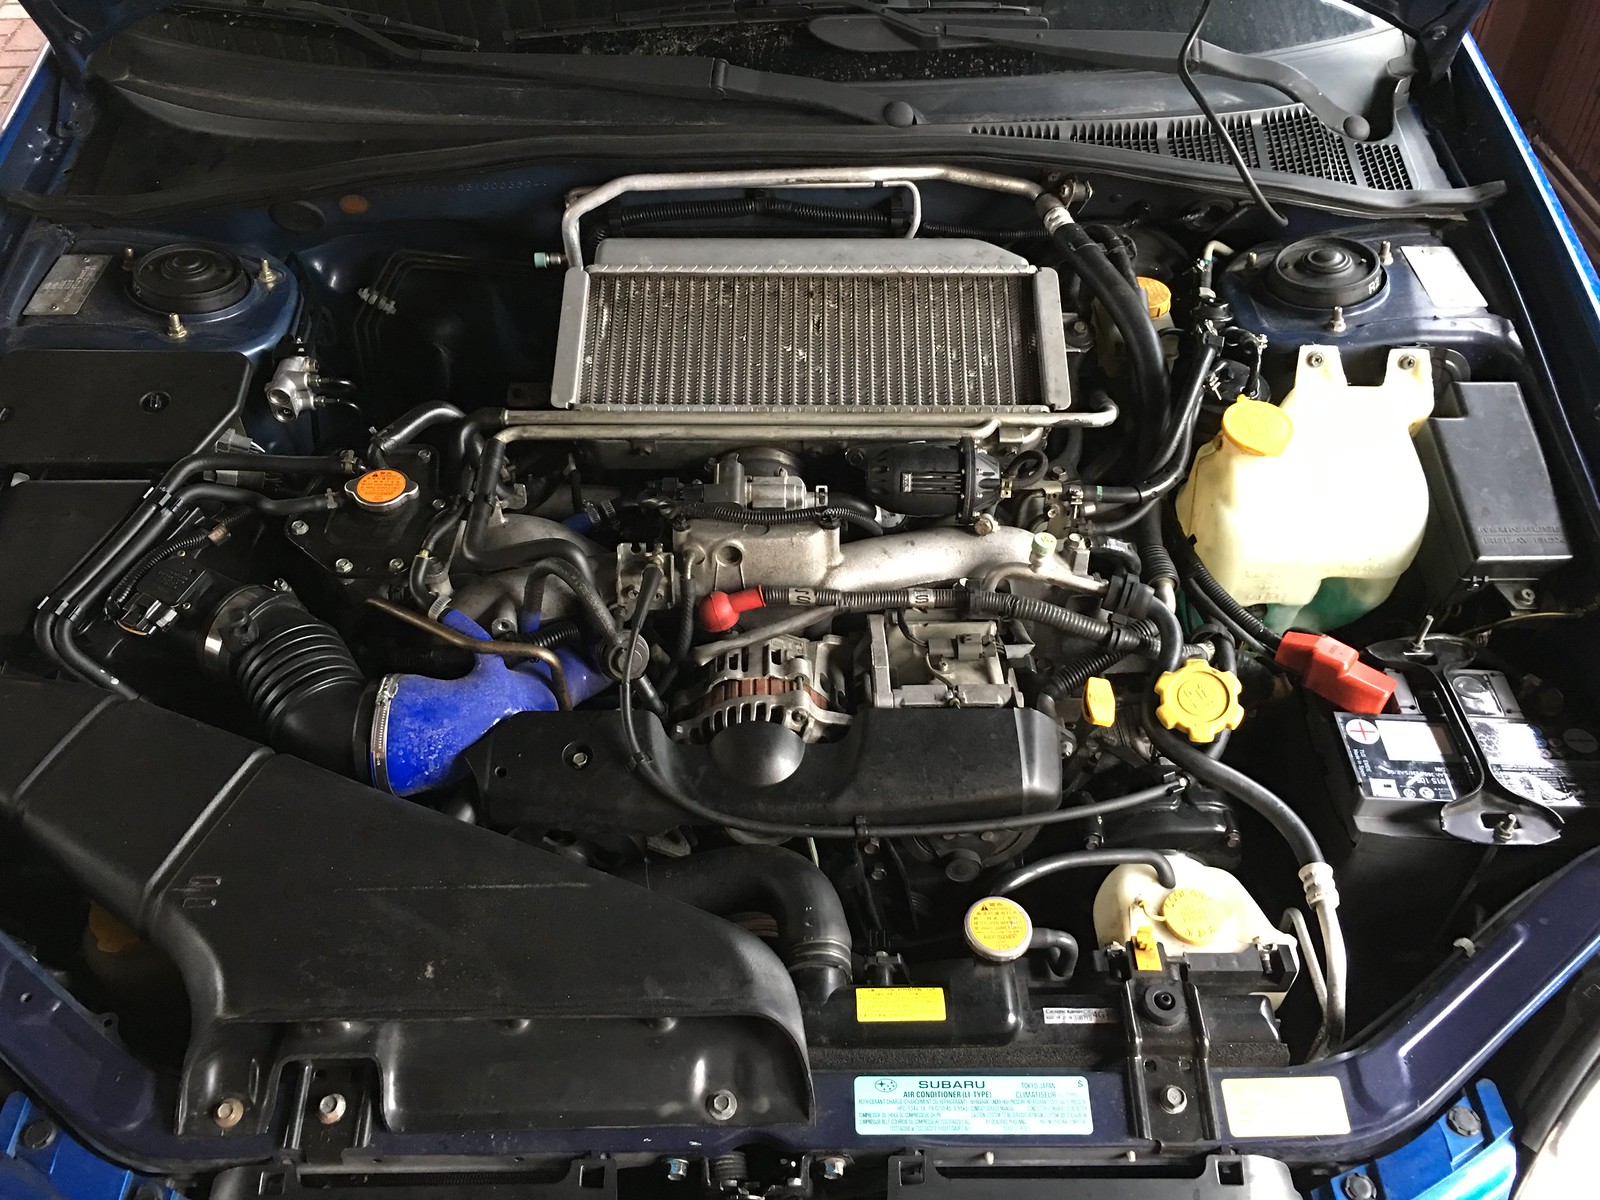
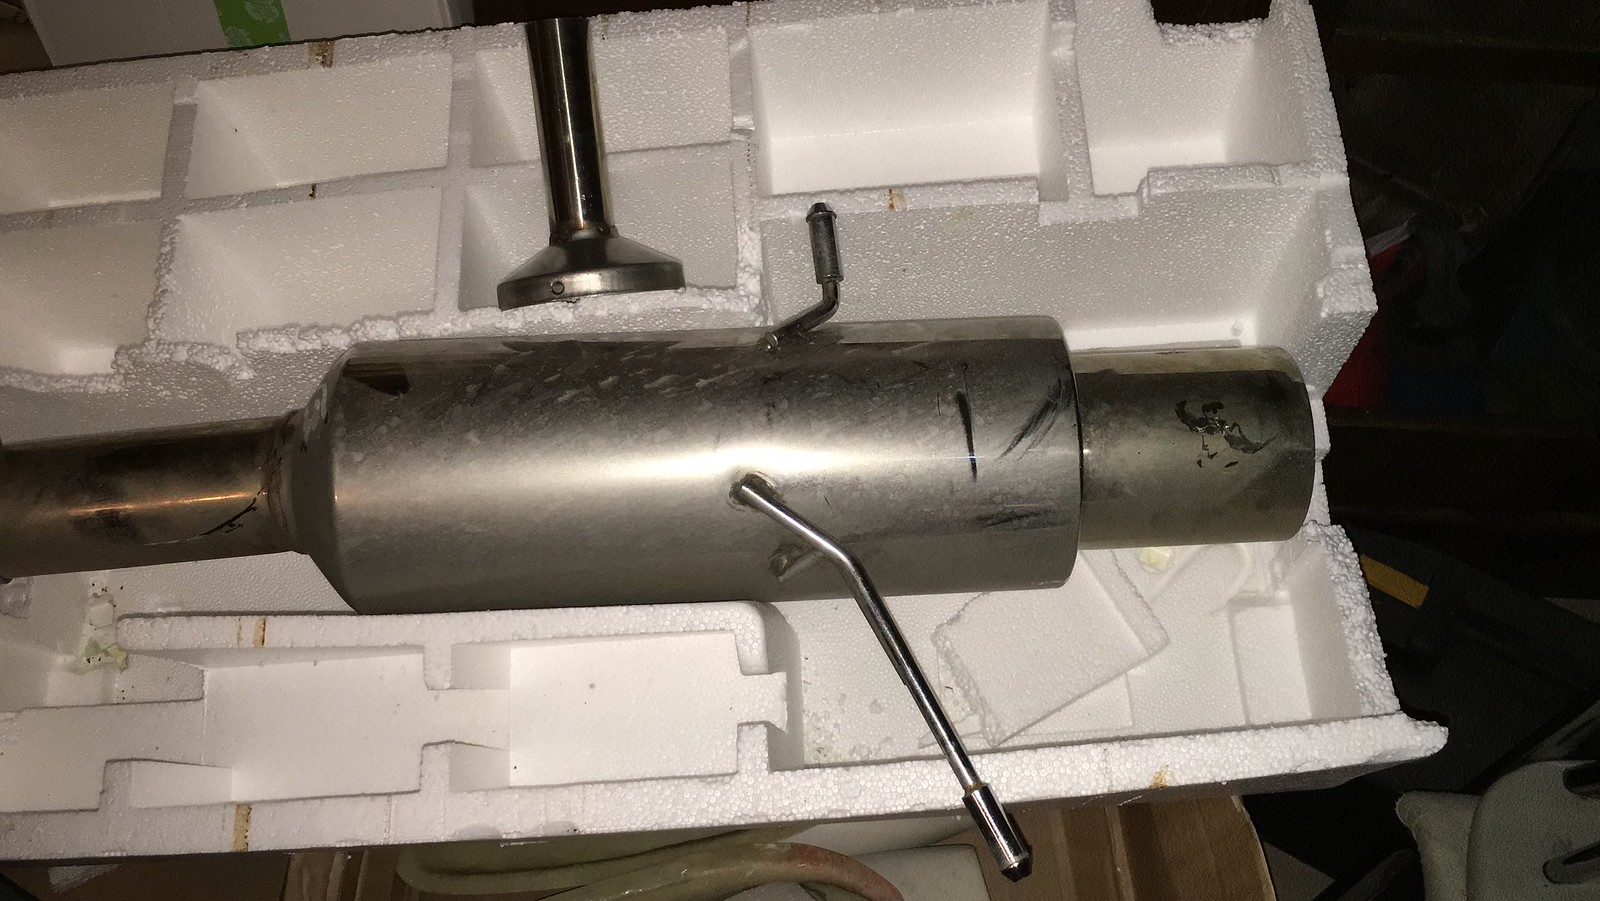
Hey Stuart, car will be picked up later (just passed my driving test today, got my license). The old car is sold completely. The only remains are the floormats and mudflaps. The new one is completely stock as it is, we only got a Double DIN Kenwood Radio and Big in Japan catless 3" with it. The exhaust system is not fitted yet. If you mean the blue silicone pipe, uhm not really as mod but the stock one was getting a bit cracked so the owner decided to use one made from blue silicone as it is more heat resistant. The iron panel (heatshield) from the turbo is not mounted even tough the standard exhaust is fitted, but the BIJP exhaust doesn't fit with that turbo heatshield and the previous owner decided to not fit it again with the standard exhaust.
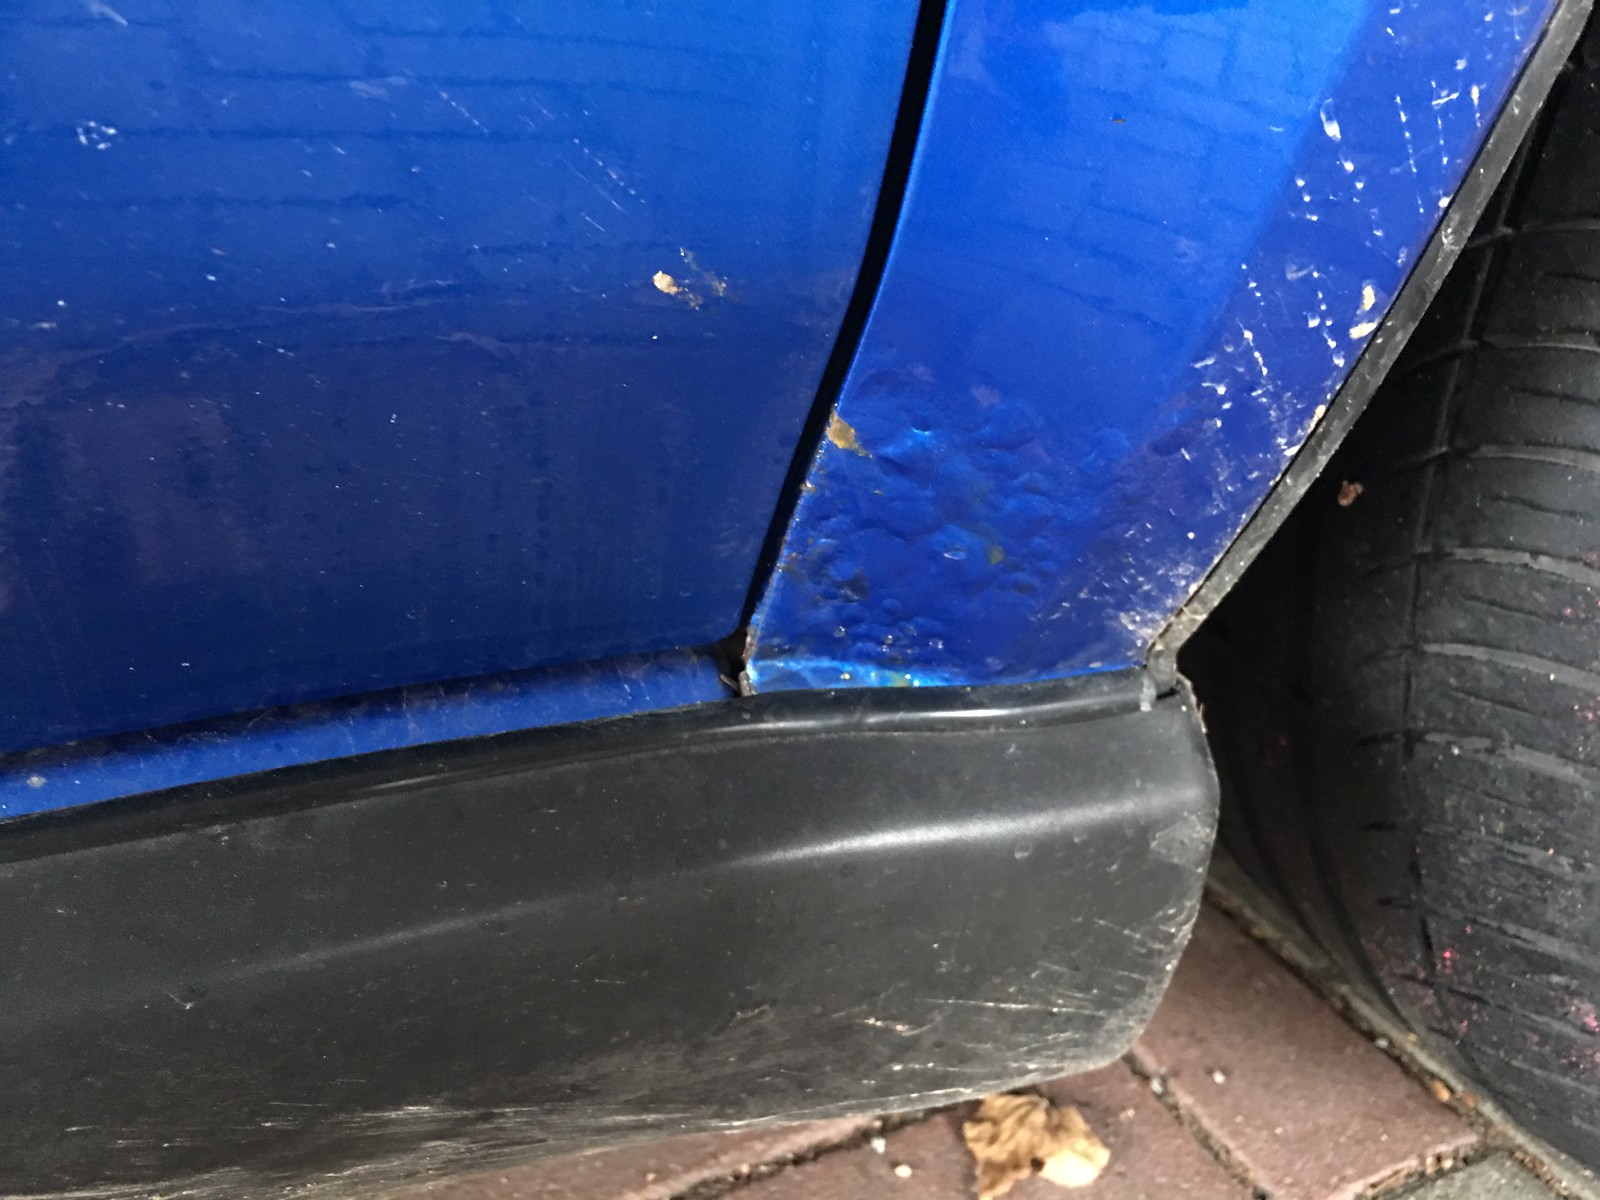
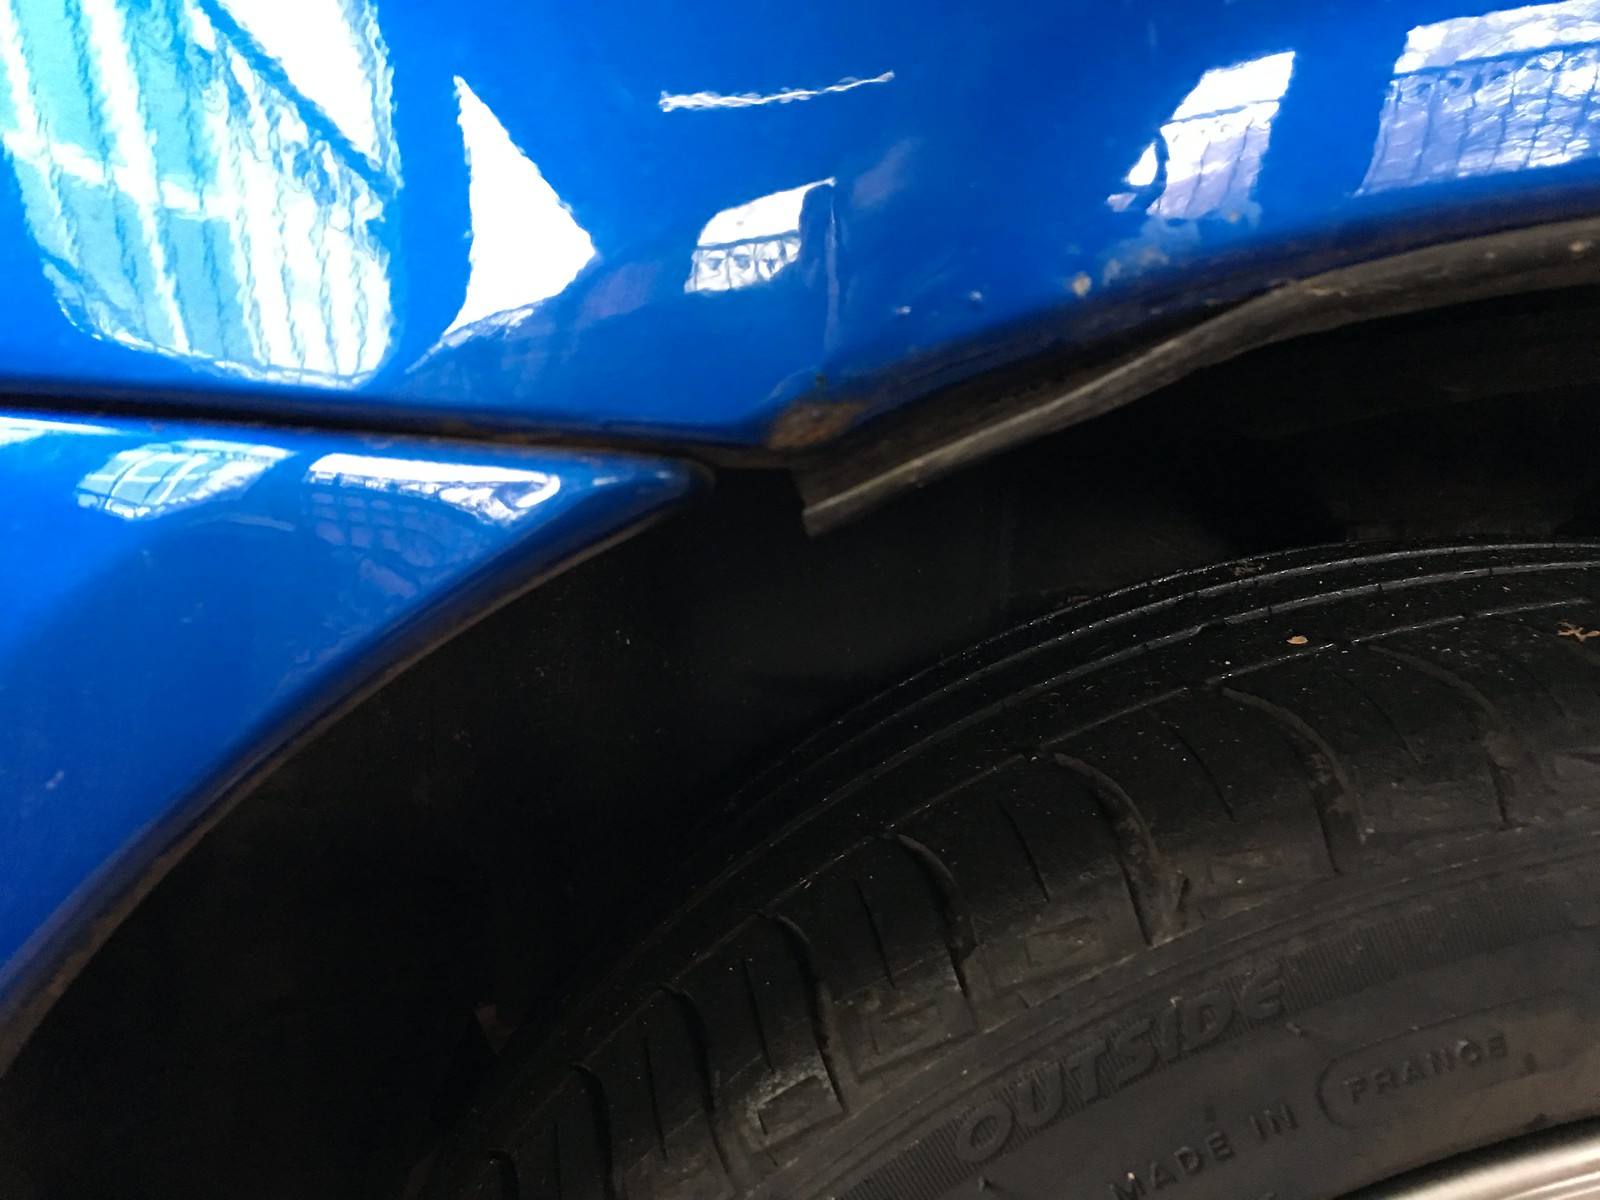
Anyway to not get abstracted from the actual question too much, car has 3 extremely small patches of rust (one with bubbles the other ones on the arches not even that far yet) so definetely not even a bit as worse as my old one. Plan is to, well, paint the sideskirts, remove rust, apply undercoat, get the STI Wing and Scoop and when the car is standing there in new car condition (the inside still has the fancy factory stickers) I will probably apply the Subaru WRT Design. Thats the plan. Will be a pleasant journey here in this thread, I promise
Anyway to not get abstracted from the actual question too much, car has 3 extremely small patches of rust (one with bubbles the other ones on the arches not even that far yet) so definetely not even a bit as worse as my old one. Plan is to, well, paint the sideskirts, remove rust, apply undercoat, get the STI Wing and Scoop and when the car is standing there in new car condition (the inside still has the fancy factory stickers) I will probably apply the Subaru WRT Design. Thats the plan. Will be a pleasant journey here in this thread, I promise
15 December 2016, 11:54 AM
#36
Scooby Regular
Thread Starter
Join Date: May 2016
Location: South Germany
Posts: 91
Likes: 0
Received 0 Likes
on
0 Posts
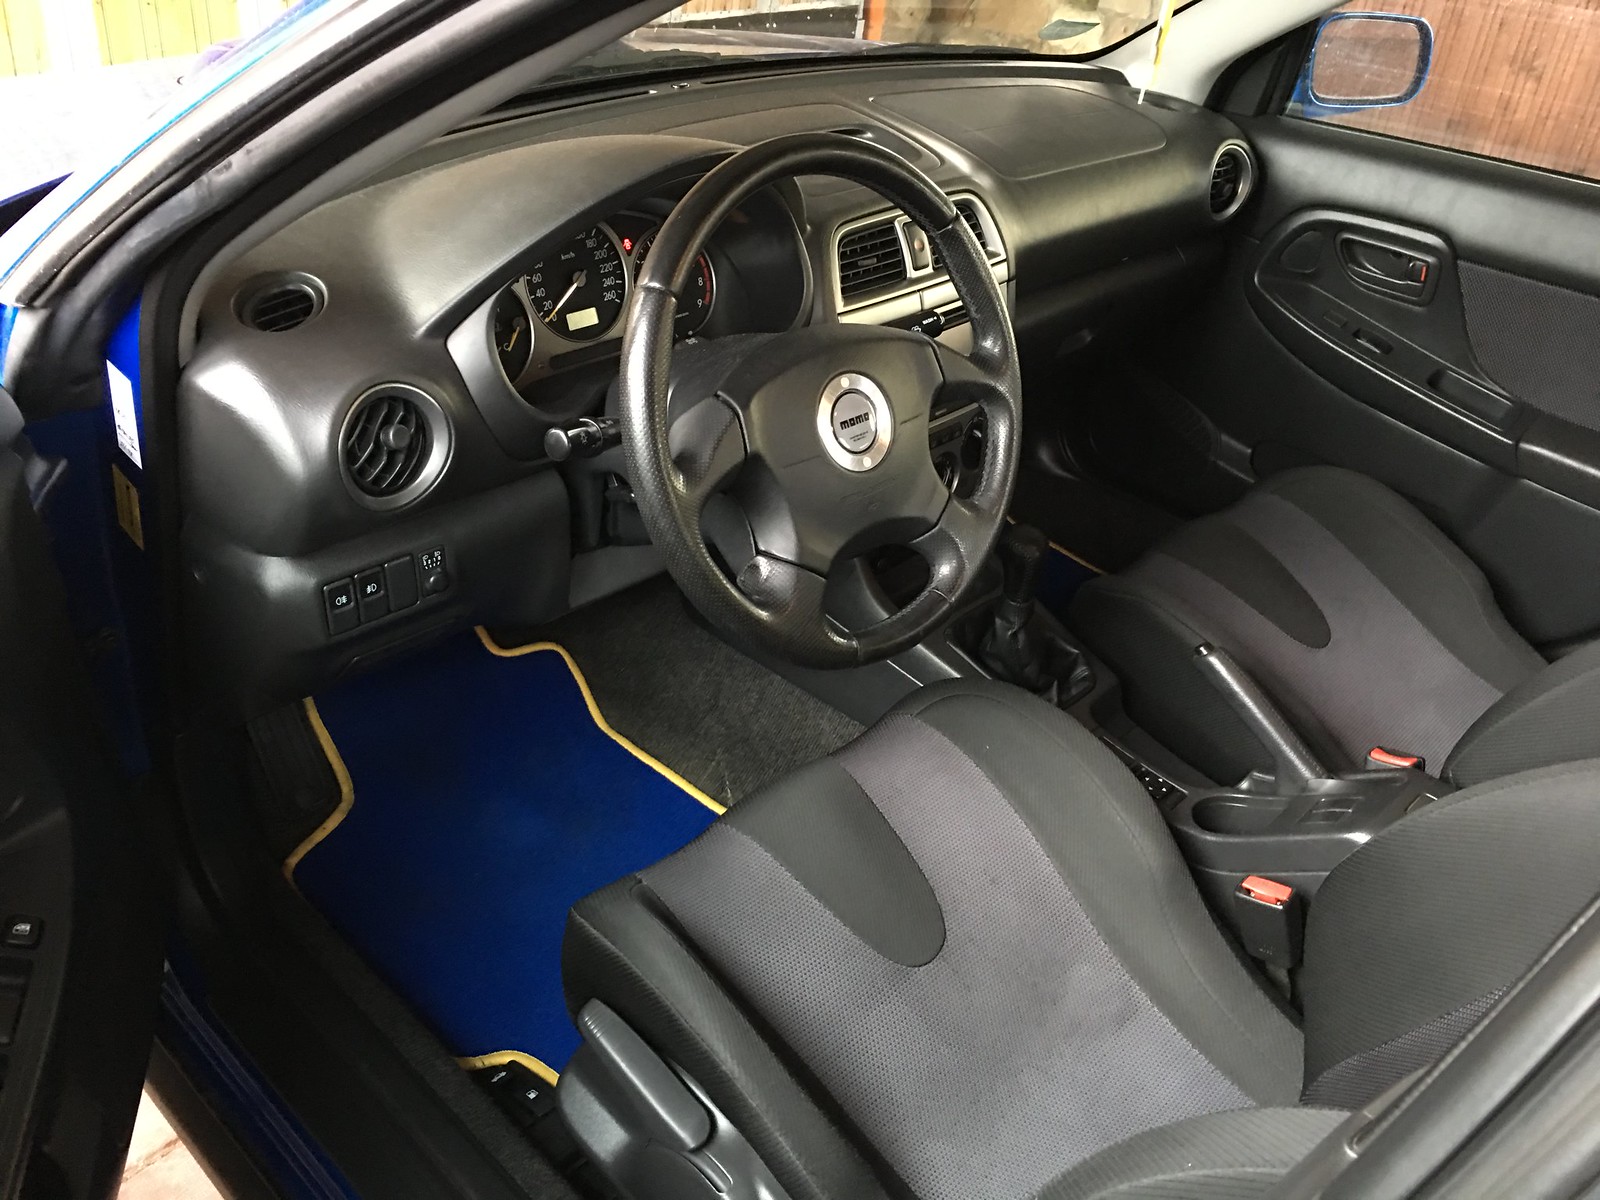
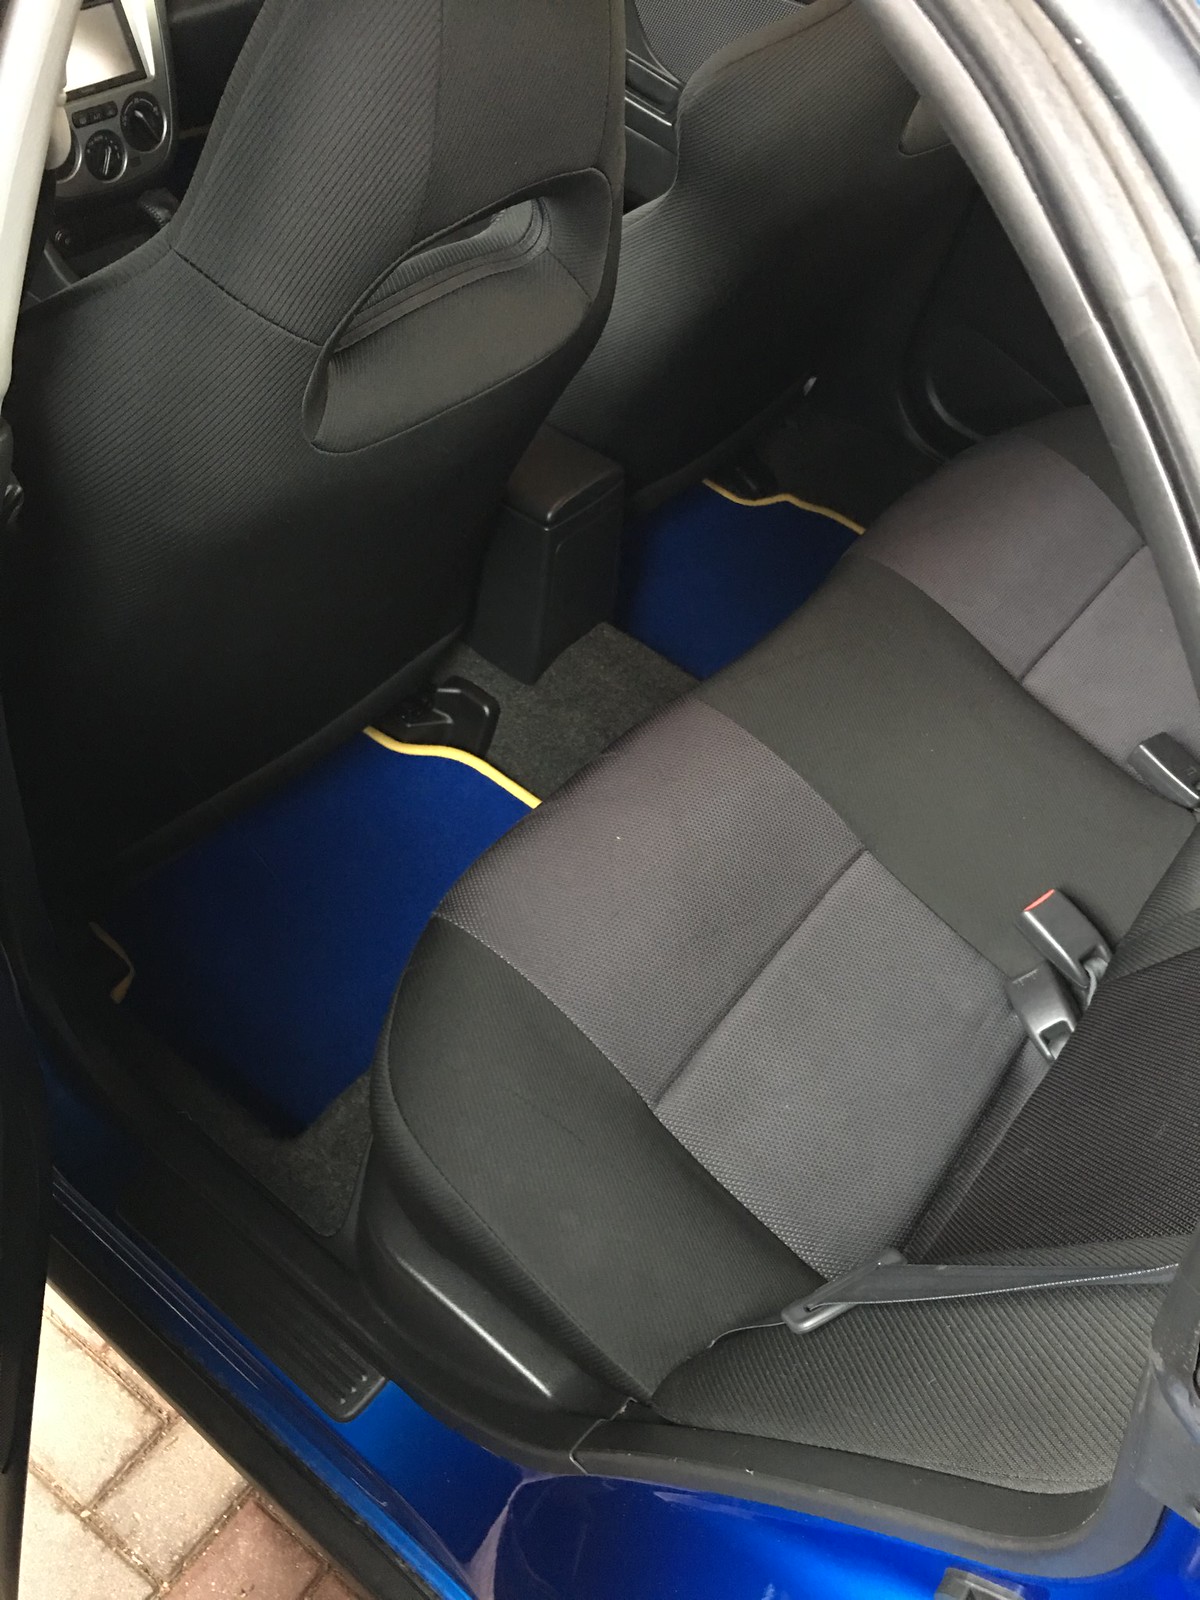


Got the car now
You see on the pictures besides those 3 corroded patches it is in very clean condition. First things to get mounted on will be the exhaust and the old mudflaps.Oh and I'm gonna give it a good wash soon.
Stay tuned...
03 January 2017, 05:53 PM
#37
Scooby Regular
Thread Starter
Join Date: May 2016
Location: South Germany
Posts: 91
Likes: 0
Received 0 Likes
on
0 Posts
Did the first work to the car today.
As the services are due I started with changing the spark plugs today.
NGK PFR6G out and NGK PFR6B in.
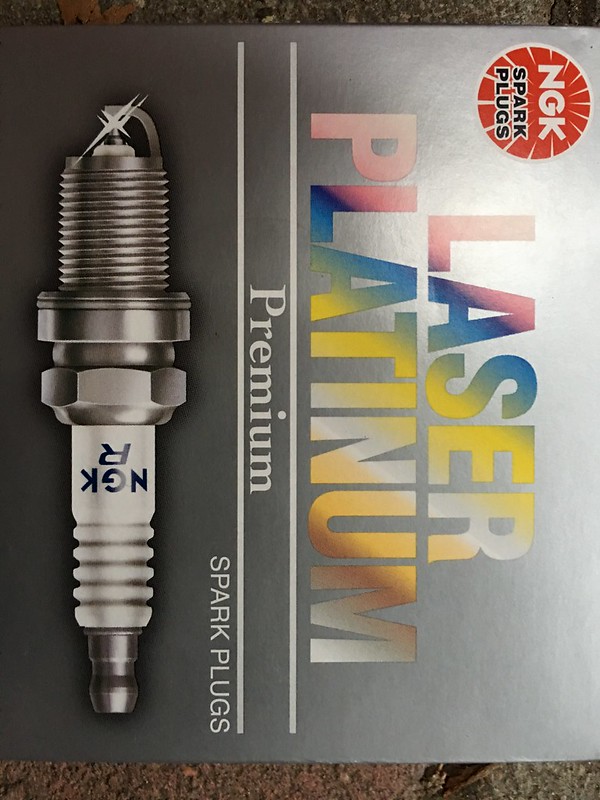
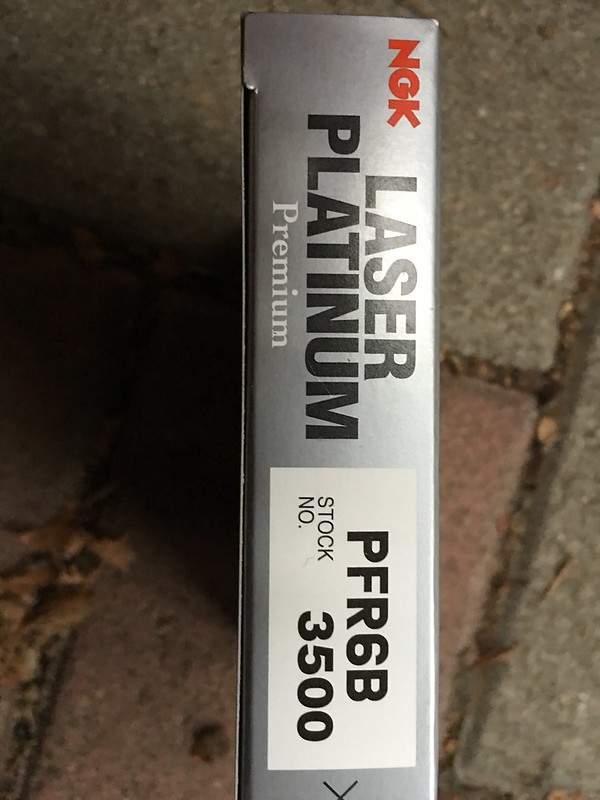
As probably everyone knows changing plugs on a Subaru isn't that much fun and I experienced it today first hand...
Ok, I'm exaggerating, it is actually doable, the Driver side plugs are a pain in the a** tough, as you don't have any space at all... The Passenger side is way easier.
I removed the battery and wiper water tank for the driver side spark plugs, and for the passenger side I removed the air intake for the air filter and the air filter itself with the plastic box around it.
Here is a video I watched where you basically see everything you need to do in order to get it right.
Thats it for today, tomorrow I'll do the oil change and maybe mount the new exhaust system. In the next days I'll get a new air filter, the old one is pretty messed up.
Have a good evening guys.
As the services are due I started with changing the spark plugs today.
NGK PFR6G out and NGK PFR6B in.
As probably everyone knows changing plugs on a Subaru isn't that much fun and I experienced it today first hand...
Ok, I'm exaggerating, it is actually doable, the Driver side plugs are a pain in the a** tough, as you don't have any space at all... The Passenger side is way easier.
I removed the battery and wiper water tank for the driver side spark plugs, and for the passenger side I removed the air intake for the air filter and the air filter itself with the plastic box around it.
Here is a video I watched where you basically see everything you need to do in order to get it right.
Thats it for today, tomorrow I'll do the oil change and maybe mount the new exhaust system. In the next days I'll get a new air filter, the old one is pretty messed up.
Have a good evening guys.
Last edited by colinLWRX; 18 February 2017 at 09:32 PM.
05 January 2017, 03:46 PM
#41
Scooby Regular
Thread Starter
Join Date: May 2016
Location: South Germany
Posts: 91
Likes: 0
Received 0 Likes
on
0 Posts
24 January 2017, 05:48 PM
#42
Scooby Regular
Thread Starter
Join Date: May 2016
Location: South Germany
Posts: 91
Likes: 0
Received 0 Likes
on
0 Posts
As in the title, I've got a little secret I've not told here on the forum yet...
Santa brought me something called STi wing...
But before that a little report of a problem.
After doing the service and taking the car for a test drive the check engine light gone on. "Oh f*ck", I tought. Okay, car is still running, can't be an immediate emergency. So, parked the car up, connected to the ECU via ECUViewer and then that:

Ok... What could that be. Opened the hood, took out the washer reservoir, and something looked loose. The cable on the coil was loose, not plugged in correctly onto the coil. Took out the coil, cleaned the plug and everything, fitted back in, plugging the cable in (this time correctly) and starting the car again. CEL light still on. "Ok, problem still there." I tought. But that was wrong. Plugged in the LapTop again and cleared the CEL out.

Now it's just history. (Alright I'll see myself out)
Since that (been about 3 weeks since that) the car is running completely fine, no CEL light, nothing. Just waiting for a new airfilter.
But yeah, back onto the main thing now.
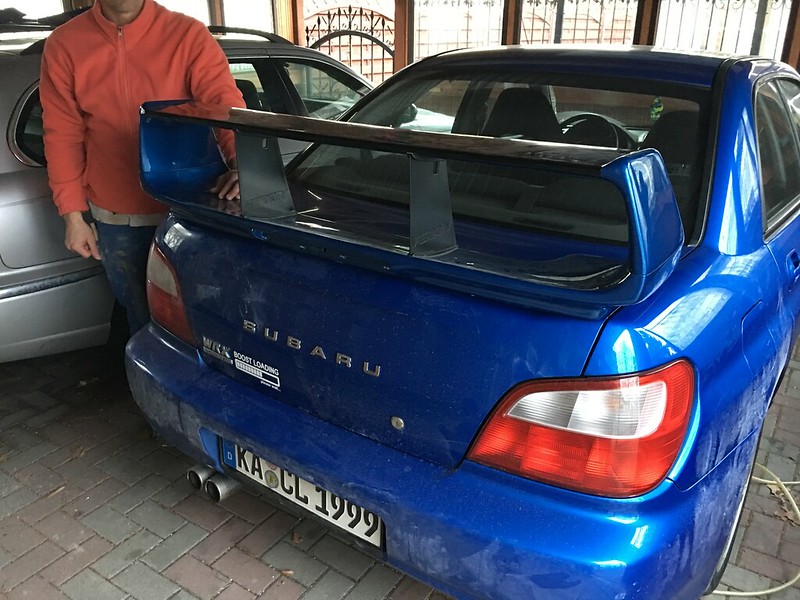
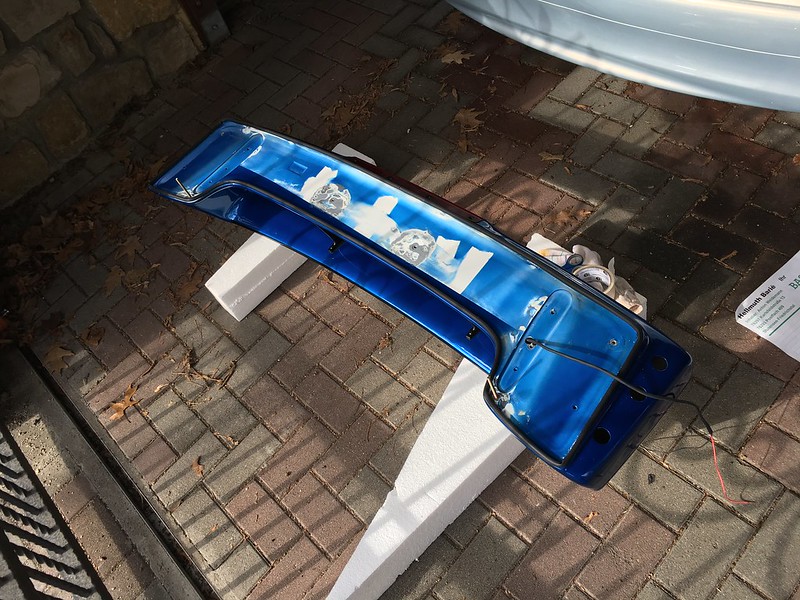
The STi wing:
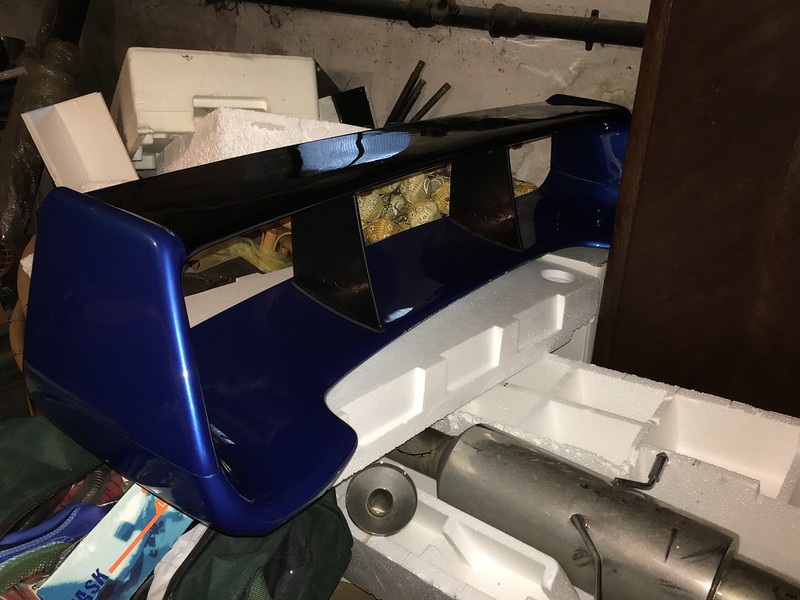
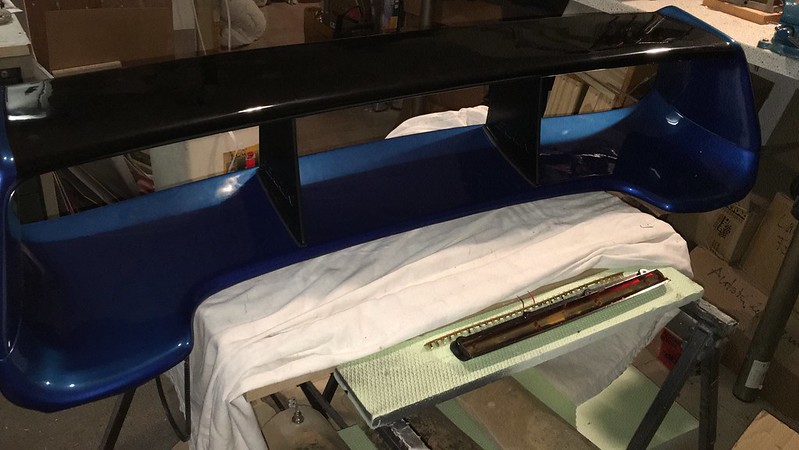
Well, it needs work to do. Before taking the pictures I had it repainted, as it is second hand and the paint got damaged when it was taken off.
And as you can see on the second picture the brake light is, well, gone.
So I'll make myself a new brakelight in the next few days.
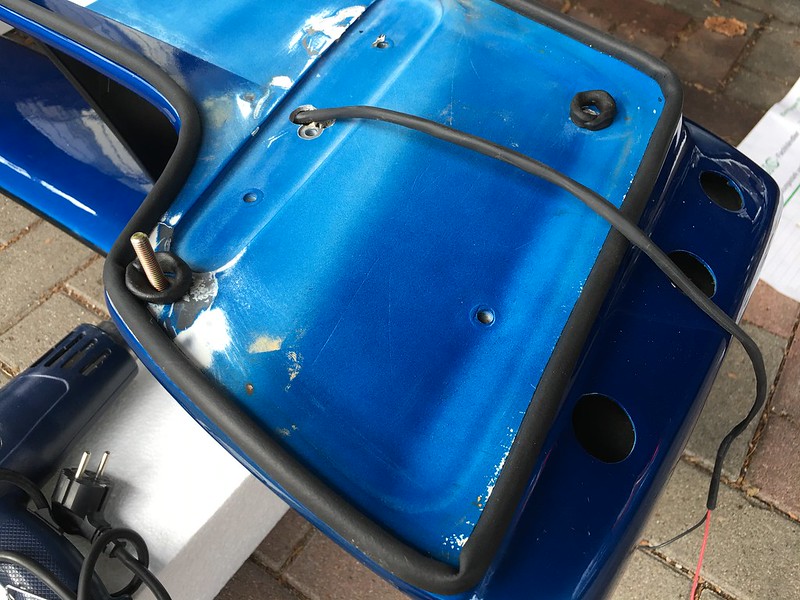
In the last couple weeks I removed the last bits of glue from the wing.
Now the underside is at least "tidied up".
When having the brakelight done and rewired I'll plan on fitting it (logically, not buying it to have it laying around ), I want to glue some foam rubber around the outline of the spoiler, so that water can't come below it and start eating the boot lid away like on the old car. Also around the screws I wanna glue it down with bodywork-glue. At the moment planning on using a plasticine like, black material which I will heat up and then it should stick very good, hopefully not having so much trouble with it when maybe removing the wing again in the future like I would have with sikaflex or anything like that (like the wing on the old car was glued down).
But I'm not sure on that. I'd need some advice. I also tought about just screwing it down, but I'll need something to seal the screws with, in case water comes there. So, yeah, how should I mount it on the car? Any advice is highly appreciated!
I'm pretty sure this is it, just put a "BOOST LOADING" sticker on the car a hour ago, but I guess it isn't worth a mention in the thread. (You'll see it anyway when I'll upload pictures of the car)
Thanks for reading if you've made it until here.
Have a nice evening folks.
Santa brought me something called STi wing...
But before that a little report of a problem.
After doing the service and taking the car for a test drive the check engine light gone on. "Oh f*ck", I tought. Okay, car is still running, can't be an immediate emergency. So, parked the car up, connected to the ECU via ECUViewer and then that:
Ok... What could that be. Opened the hood, took out the washer reservoir, and something looked loose. The cable on the coil was loose, not plugged in correctly onto the coil. Took out the coil, cleaned the plug and everything, fitted back in, plugging the cable in (this time correctly) and starting the car again. CEL light still on. "Ok, problem still there." I tought. But that was wrong. Plugged in the LapTop again and cleared the CEL out.
Now it's just history. (Alright I'll see myself out)
Since that (been about 3 weeks since that) the car is running completely fine, no CEL light, nothing. Just waiting for a new airfilter.
But yeah, back onto the main thing now.
The STi wing:
Well, it needs work to do. Before taking the pictures I had it repainted, as it is second hand and the paint got damaged when it was taken off.
And as you can see on the second picture the brake light is, well, gone.
So I'll make myself a new brakelight in the next few days.
In the last couple weeks I removed the last bits of glue from the wing.
Now the underside is at least "tidied up".
When having the brakelight done and rewired I'll plan on fitting it (logically, not buying it to have it laying around
), I want to glue some foam rubber around the outline of the spoiler, so that water can't come below it and start eating the boot lid away like on the old car. Also around the screws I wanna glue it down with bodywork-glue. At the moment planning on using a plasticine like, black material which I will heat up and then it should stick very good, hopefully not having so much trouble with it when maybe removing the wing again in the future like I would have with sikaflex or anything like that (like the wing on the old car was glued down).But I'm not sure on that. I'd need some advice. I also tought about just screwing it down, but I'll need something to seal the screws with, in case water comes there. So, yeah, how should I mount it on the car? Any advice is highly appreciated!
I'm pretty sure this is it, just put a "BOOST LOADING" sticker on the car a hour ago, but I guess it isn't worth a mention in the thread. (You'll see it anyway when I'll upload pictures of the car)
Thanks for reading if you've made it until here.
Have a nice evening folks.
24 January 2017, 05:50 PM
#43
Scooby Regular
Thread Starter
Join Date: May 2016
Location: South Germany
Posts: 91
Likes: 0
Received 0 Likes
on
0 Posts
Oh and I just wanted to throw in a video I uploaded of my old WRX:
https://www.youtube.com/watch?v=eIVP7XR-zGs
https://www.youtube.com/watch?v=eIVP7XR-zGs
24 January 2017, 10:38 PM
#44
I'm not sure what size screw you need for the wing but something like this should stop the water
http://www.ebay.co.uk/itm/192051521181
Ps. Nice wing. You just have been good!
http://www.ebay.co.uk/itm/192051521181
Ps. Nice wing. You just have been good!
25 January 2017, 12:01 PM
#45
Scooby Regular
Thread Starter
Join Date: May 2016
Location: South Germany
Posts: 91
Likes: 0
Received 0 Likes
on
0 Posts
Hey Stuart, I rather tought about screwing it in normally, but doing some kind of glue around the screws... with the screw you showed me, water could theoretically still come trough the hole, but would stop from entering the trunk itself, so the water would "stand" in the hole, and as the holes will be drilled by me there is no paint, so I think that the collected water there might start rust. Do you get what I mean?
not sure if I am right tough...
not sure if I am right tough...
25 January 2017, 01:24 PM
#46
Hey Stuart, I rather tought about screwing it in normally, but doing some kind of glue around the screws... with the screw you showed me, water could theoretically still come trough the hole, but would stop from entering the trunk itself, so the water would "stand" in the hole, and as the holes will be drilled by me there is no paint, so I think that the collected water there might start rust. Do you get what I mean?
not sure if I am right tough...
not sure if I am right tough...
http://www.wixroyd.com/en/pageid/wix...sealing-screw#
You can also use a flat rubber or plastic seal seal or an O ring to prevent water ingress. Lots of hardware shops sell flat sealing washers for very little.
You should also touch up any bare metal after drilling holes, or you will get rust issues.
However, while I know a bit about IP rated seals used in industrial applications, I'm not expert on body work, so don't take my advice as gospel!
05 February 2017, 12:32 PM
#48
Scooby Regular
Thread Starter
Join Date: May 2016
Location: South Germany
Posts: 91
Likes: 0
Received 0 Likes
on
0 Posts
So the day has come...
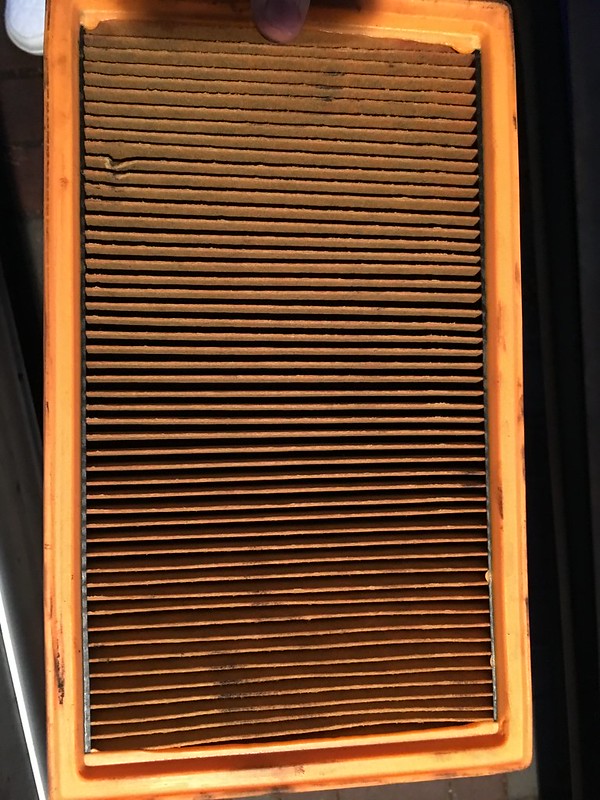
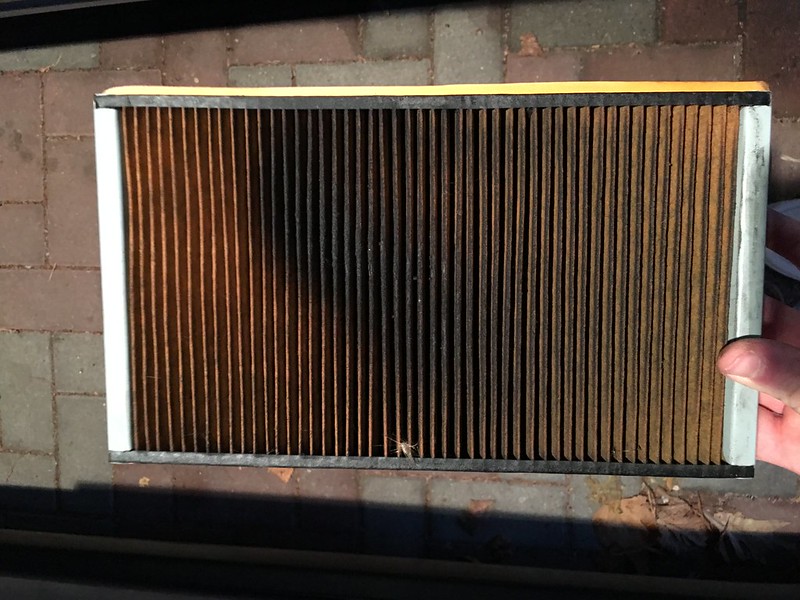
Well before that I changed the OEM airfilter to a K&N Sport Airfilter..
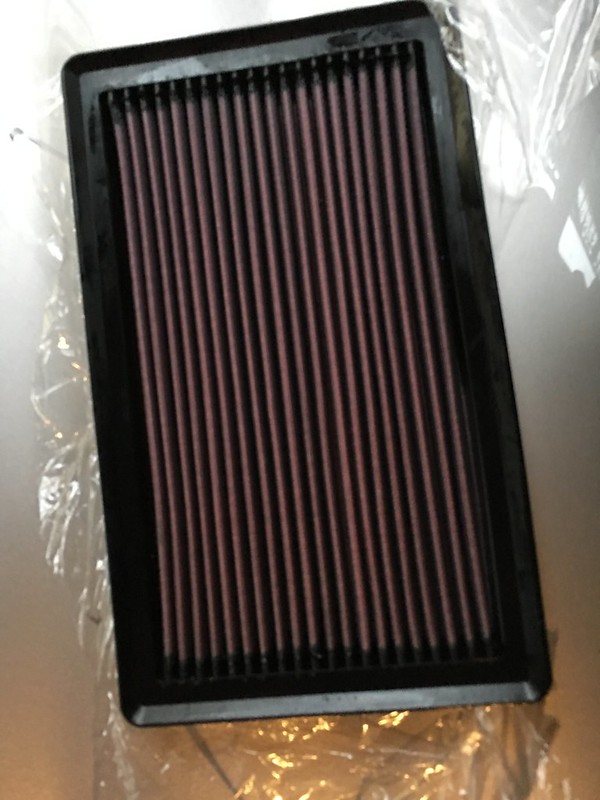
And I'm glad I did:
But now to the better part of the post.
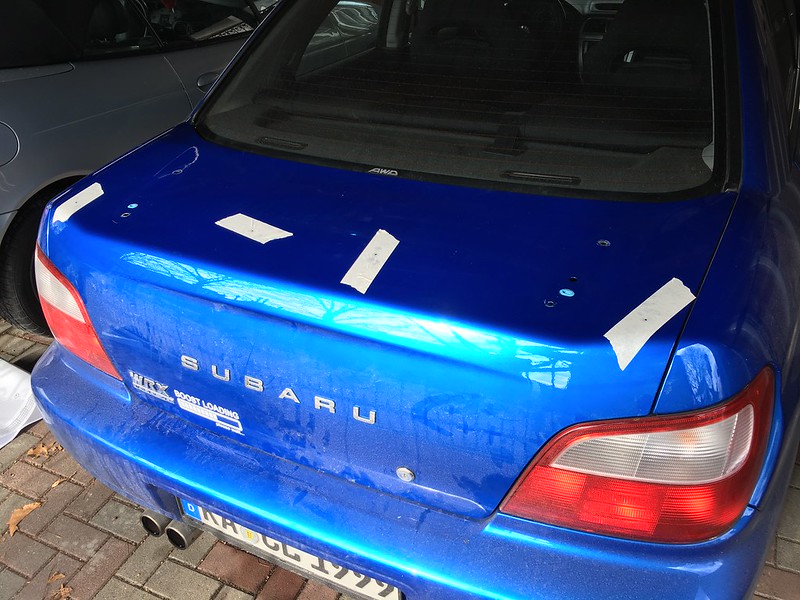
I finally removed the standard wing to see how the new one will fit.
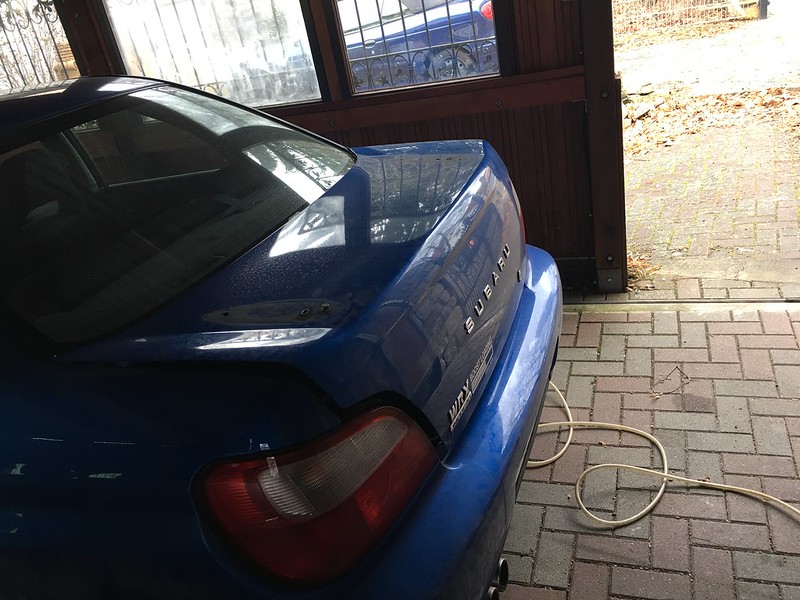
I don't know, but I just don't like the looks of the car without wing...
But here we go:
Really can't wait until it is actually fitted... Just need to sort out the brakelight and the wiring of the wing. And then actually mount it... But I'm pretty sure it'll look beastly when its done.
Have a nice sunday guys!
Well before that I changed the OEM airfilter to a K&N Sport Airfilter..
And I'm glad I did:
But now to the better part of the post.
I finally removed the standard wing to see how the new one will fit.
I don't know, but I just don't like the looks of the car without wing...
But here we go:
Really can't wait until it is actually fitted... Just need to sort out the brakelight and the wiring of the wing. And then actually mount it... But I'm pretty sure it'll look beastly when its done.
Have a nice sunday guys!
18 February 2017, 09:31 PM
#49
Scooby Regular
Thread Starter
Join Date: May 2016
Location: South Germany
Posts: 91
Likes: 0
Received 0 Likes
on
0 Posts

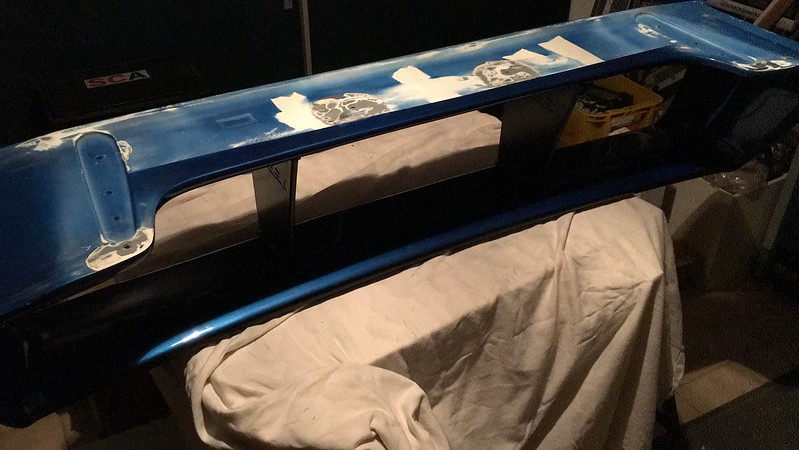
Finally found time to mount the spoiler.
After fiddling around with the brakelight the last few weeks today finally was the time.
(Brakelight was not working, bought a circuit board and some LEDs and made myself one)
Prepped the new wing...
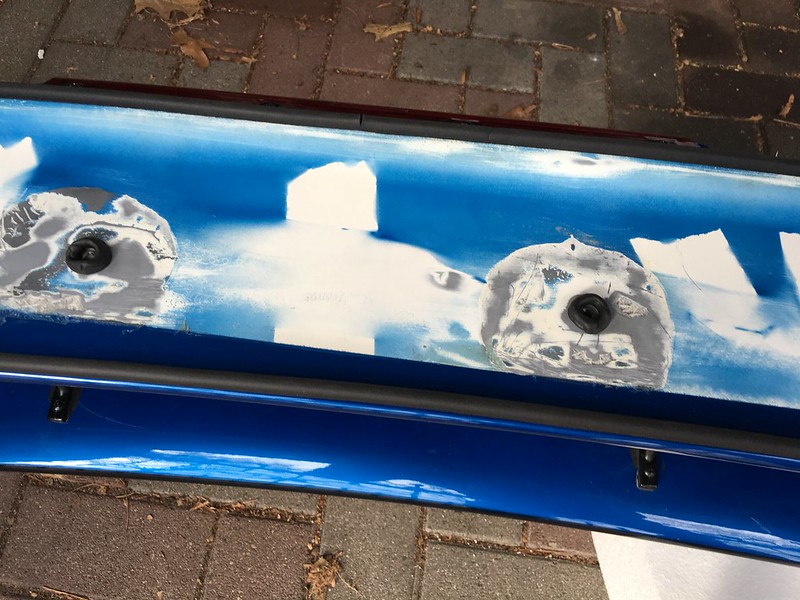
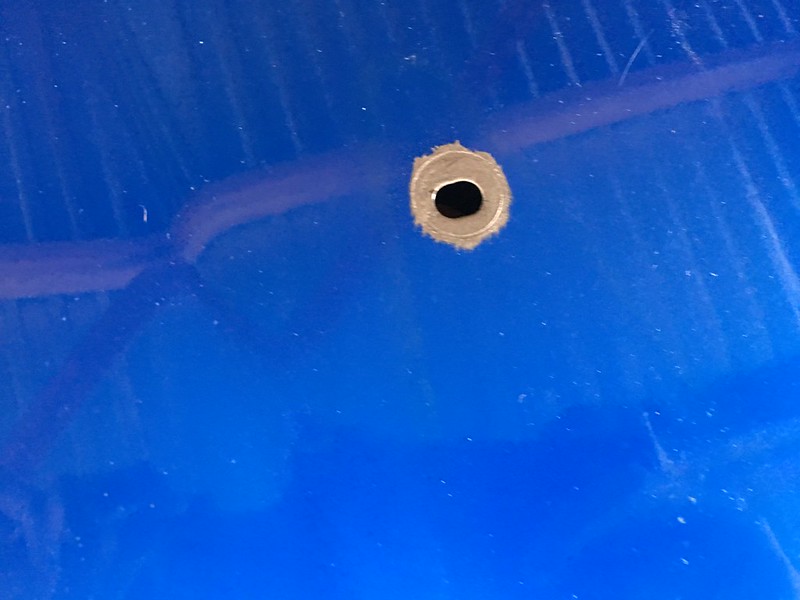
Applied sealing tape all around the wing and sealed the holes of the wing.
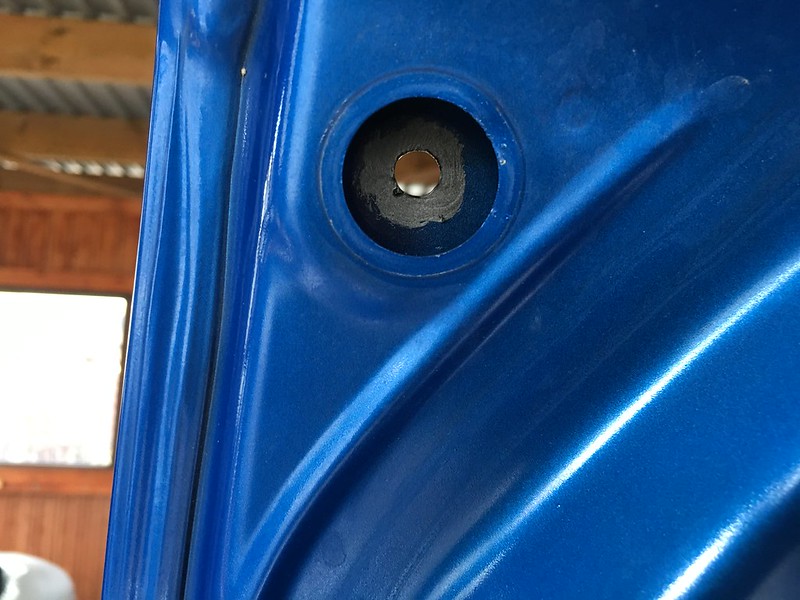
Then I went on to drill the holes into the boot:
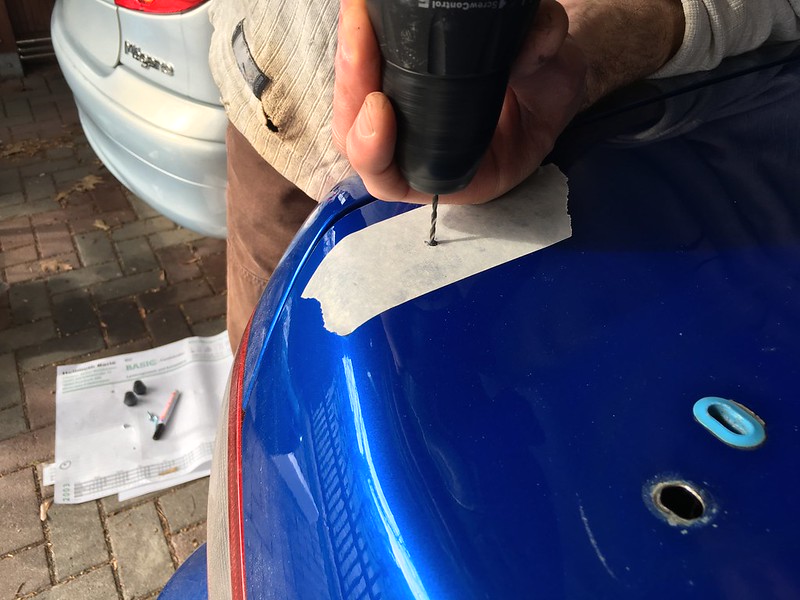
In the background you can see the paper I used as model.
After drilling the holes I painted them to not let corrosion anywhere near my car...

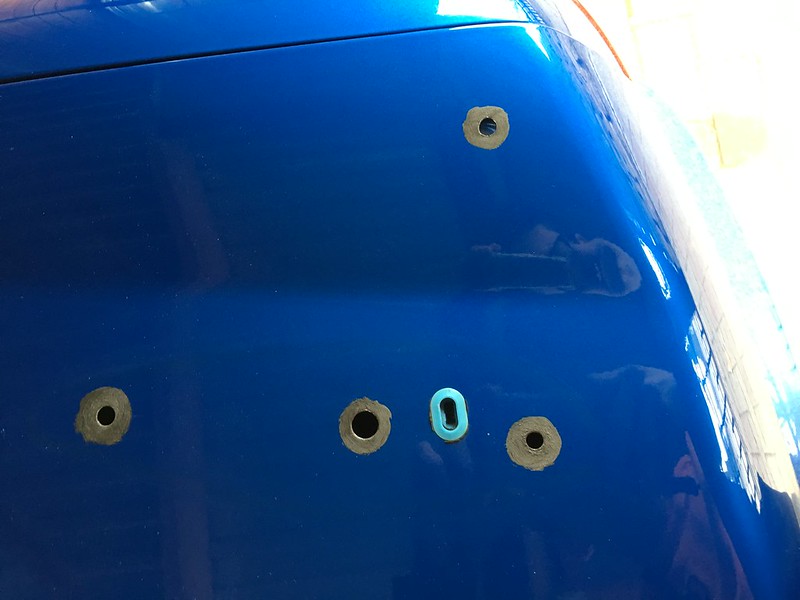
Letting it dry for some minutes and then...
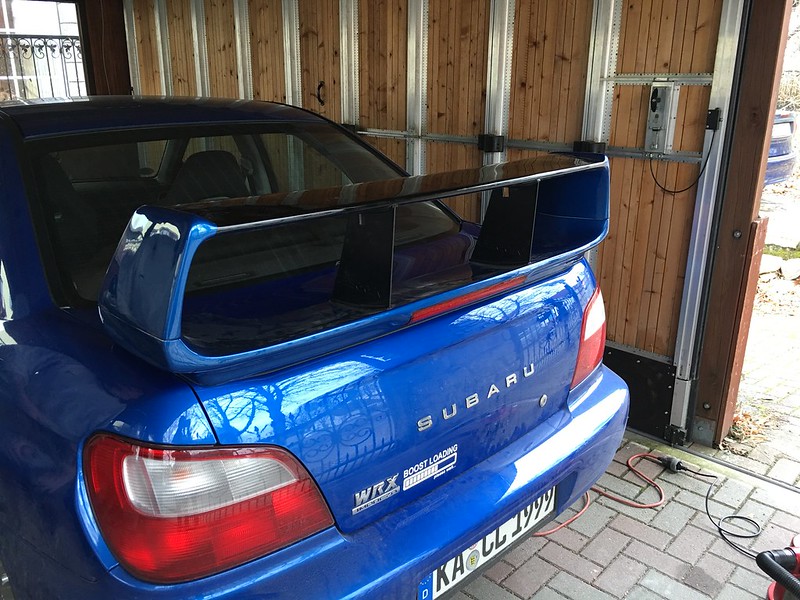
Looking better than I expected. Only the brakelight is a bit quite big. (Not an original STi Wing of course). Would really prefer the brakelight of a STi Wing though...
Anyway I really love it. Need to mount the mudflaps in the near future...
Good night @ all!
28 February 2017, 07:05 PM
#52
Scooby Regular
Thread Starter
Join Date: May 2016
Location: South Germany
Posts: 91
Likes: 0
Received 0 Likes
on
0 Posts
Refitted the Mudflaps from the old one today.
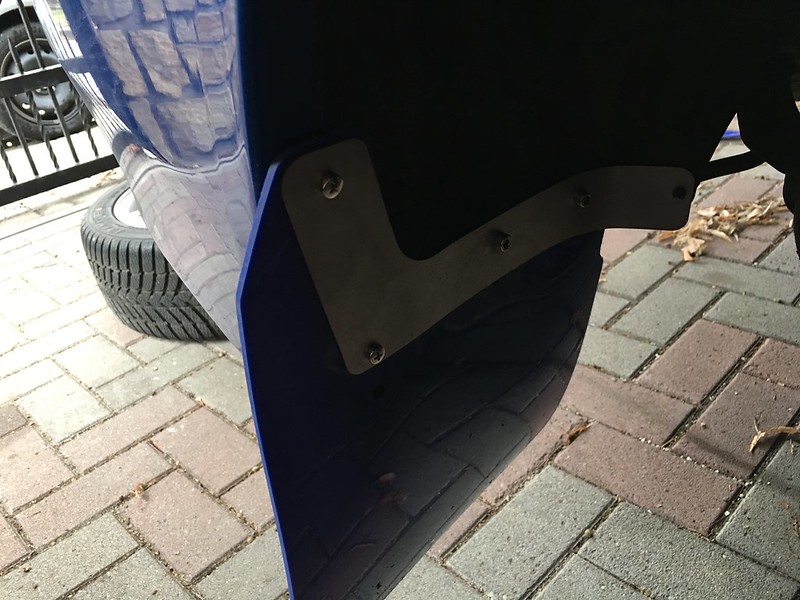

Nothing much to say about that, appreciate the look!
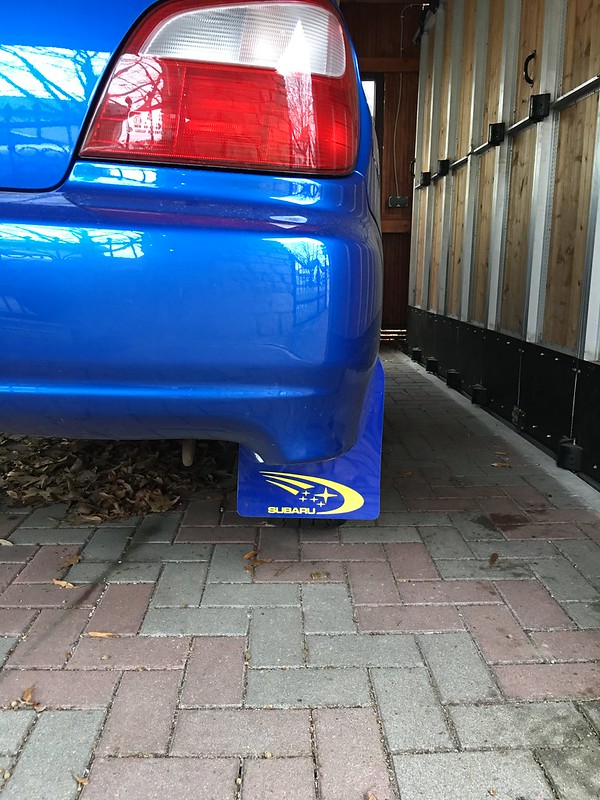
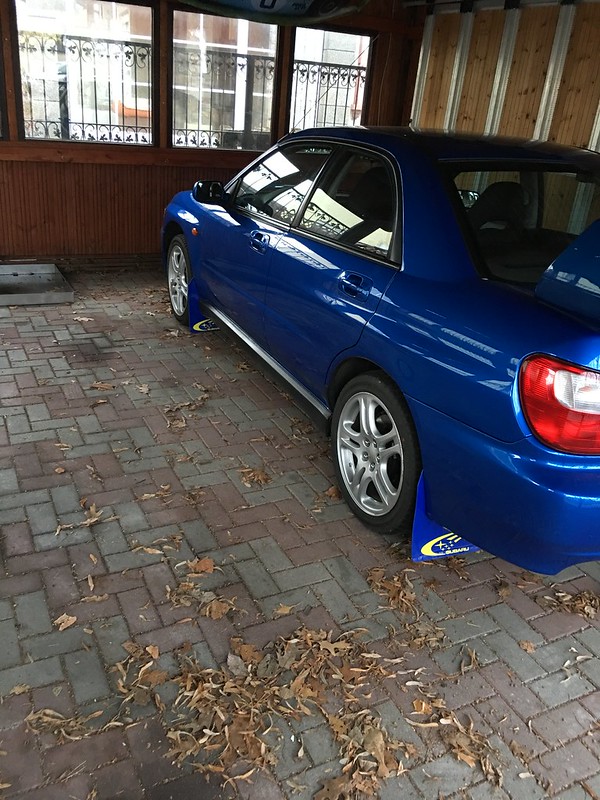
And it sure as hell looks good! Even better when there will be some gold wheels on the car.. Sometime...
Stay tuned...
Nothing much to say about that, appreciate the look!
And it sure as hell looks good! Even better when there will be some gold wheels on the car.. Sometime...
Stay tuned...

Thread
Thread Starter
Forum
Replies
Last Post
Steve Cranfield
Non Car Related Items For sale
0
18 March 2016 04:49 PM

