Classic Impreza Track Car Restoration / Building an Impreza from scratch
 21 June 2015, 05:54 AM
#31

Thank you :-)
The classics have a lot of seams which are bare metal covered in just a bit of seam sealer. This ages and absorbs moisture.
Not normally too much of an issue I guess but in the winter in the UK our roads are heavily salted which is highly corrosive.
The suspension turret has a poor design where one of the seems allows water to run into the quarter panel which causes all the rusty arches. If that seam overlapped instead of under lapping it wouldn't be such an issue.

 22 June 2015, 11:08 PM
#33
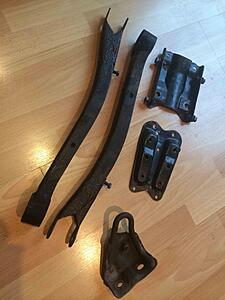
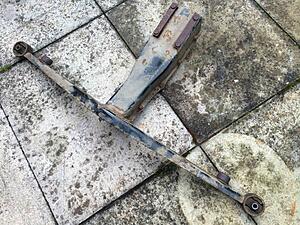
Random old parts ready for shot blasting and powder coating.
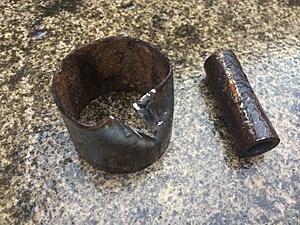
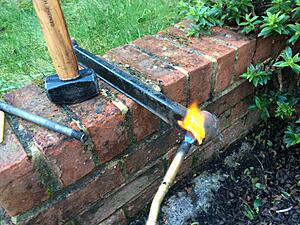
First the old suspension bushes had to be removed from the trailing arms... Now you may be able to make them budge with a nice big industrial press but I don't have one of those. No amount of hammering would ever shift them. So it's a combination of using a hack saw to cut the metal parts and then setting fire to the rubber so that you can part it from the metal and hammer/chisel them out. Generally if you can break the tension by making a cut in the steel part of a bush you can then knock it out with a screw driver/chisel and hammer combo. But you need fire to get the rubber out of your the way first.
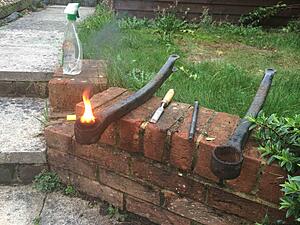
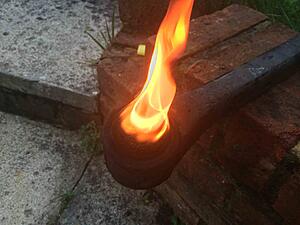
So when people say "I fancy fitting a whole set of poly bushes. How easy are they to fit?" I always say not easy!
This was only the front bush of the trailing arm. There are still plenty more to remove after this.
Parts back from the powder coaters. Cost me �200 for these parts.

First the old suspension bushes had to be removed from the trailing arms... Now you may be able to make them budge with a nice big industrial press but I don't have one of those. No amount of hammering would ever shift them. So it's a combination of using a hack saw to cut the metal parts and then setting fire to the rubber so that you can part it from the metal and hammer/chisel them out. Generally if you can break the tension by making a cut in the steel part of a bush you can then knock it out with a screw driver/chisel and hammer combo. But you need fire to get the rubber out of your the way first.
So when people say "I fancy fitting a whole set of poly bushes. How easy are they to fit?" I always say not easy!
This was only the front bush of the trailing arm. There are still plenty more to remove after this.
Parts back from the powder coaters. Cost me �200 for these parts.
Last edited by FMJ; 02 October 2017 at 01:26 AM.
30 June 2015, 08:37 PM
#34
Had a few busy days but I'm back.
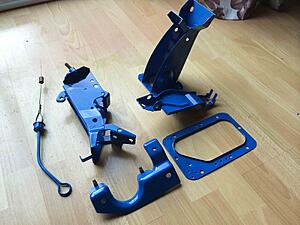
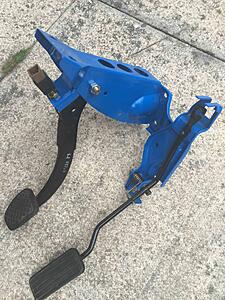
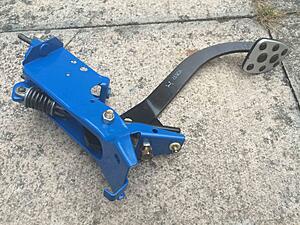
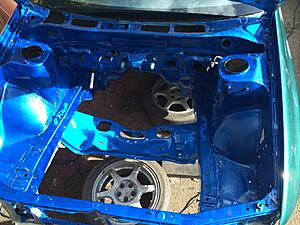
The interior starting to look a bit more car like again.
Restored pedals, ecu mount bracket, hand brake cable bracket and steering column along with a 99-00 dash fitted. The dash was not a direct fit as the mounting points were not compatible with the 98 car. So I had to customise the mounts.

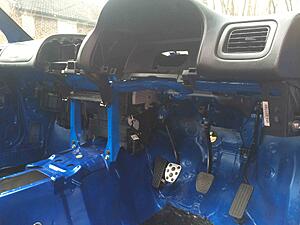
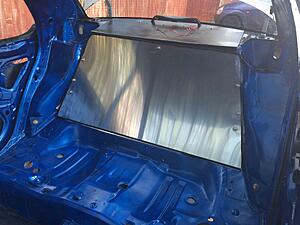
Also made a 2mm ali sheet firewall which is bolted to existing bolt holes in the rear. The mating faces are backed with foam tape to stop rattles. The parcel shelf is also made from folded 2mm ali which is bolted down through existing holes. Generic high level led brake light from ebay for about �6.
The interior starting to look a bit more car like again.
Restored pedals, ecu mount bracket, hand brake cable bracket and steering column along with a 99-00 dash fitted. The dash was not a direct fit as the mounting points were not compatible with the 98 car. So I had to customise the mounts.
Also made a 2mm ali sheet firewall which is bolted to existing bolt holes in the rear. The mating faces are backed with foam tape to stop rattles. The parcel shelf is also made from folded 2mm ali which is bolted down through existing holes. Generic high level led brake light from ebay for about �6.
Last edited by FMJ; 01 November 2017 at 10:56 PM.
The following users liked this post:
 07 July 2015, 05:22 PM
#37
Thanks chaps 
Some more pics:
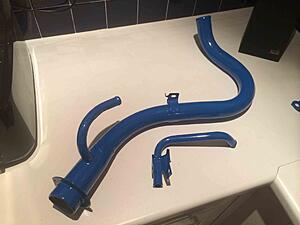
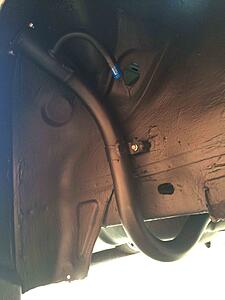
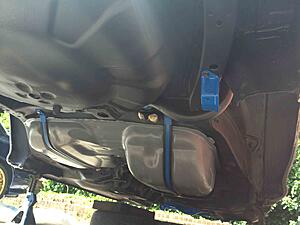
Fuel tank fitted in place
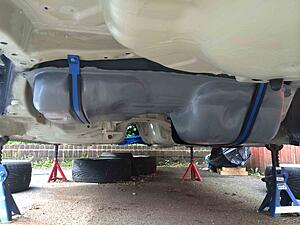
The fuel filler pipe now with a layer of DINITROL 445 which is a very good stone chip paint. It forms a plastic layer over things and looks very tidy. It also dries solid so can be painted over if you wish. I just wanted to add to the powder coating on this piece as I am not going to use the plastic guard that should be attached to it as this traps mud and crap causing rust. As it will get pelted by stones I wanted to add as much protection as I could. The arches have also been sprayed with DINITROL 445.
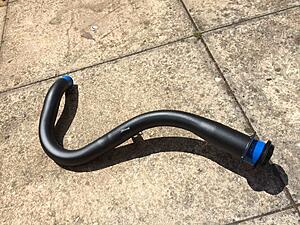
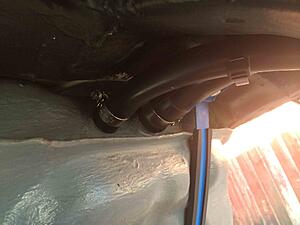
The fuel filler pipe fitted with stainless fittings.
The plastic neck piece, metal plate and rubber seal all fitted with stainless bolts and washers. I sealed this with a flexible non setting screen sealer so it was water tight but can still be removed later. If you use something like sikaflex it will seal well but getting it out later would be a nightmare.
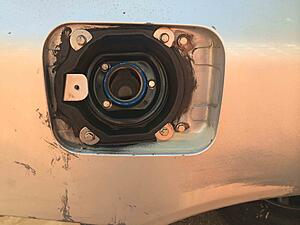
Note that I have added a ali bracket that isn't normally there. Also a lockable fuel filler cap.
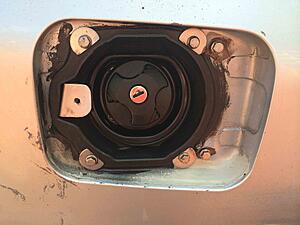
The reason for this is that the boot, fuel filler cap and bonnet release levers and cables will not be refitted. The way I am approaching the filler cap is to have it latch shut using a magnet. It can then be opened by pressing it to one side. Obviously I didn't then want people to have access to the fuel hence fitting the lockable cap for �10 on ebay.
Some more pics:
Fuel tank fitted in place
The fuel filler pipe now with a layer of DINITROL 445 which is a very good stone chip paint. It forms a plastic layer over things and looks very tidy. It also dries solid so can be painted over if you wish. I just wanted to add to the powder coating on this piece as I am not going to use the plastic guard that should be attached to it as this traps mud and crap causing rust. As it will get pelted by stones I wanted to add as much protection as I could. The arches have also been sprayed with DINITROL 445.
The fuel filler pipe fitted with stainless fittings.
The plastic neck piece, metal plate and rubber seal all fitted with stainless bolts and washers. I sealed this with a flexible non setting screen sealer so it was water tight but can still be removed later. If you use something like sikaflex it will seal well but getting it out later would be a nightmare.
Note that I have added a ali bracket that isn't normally there. Also a lockable fuel filler cap.
The reason for this is that the boot, fuel filler cap and bonnet release levers and cables will not be refitted. The way I am approaching the filler cap is to have it latch shut using a magnet. It can then be opened by pressing it to one side. Obviously I didn't then want people to have access to the fuel hence fitting the lockable cap for �10 on ebay.
Last edited by FMJ; 06 November 2017 at 07:32 PM.
07 July 2015, 11:01 PM
#38
If you can get hold of a second supply pipe for the fuel and instal it while the car is stripped, if you ever need to uprate your lines you can use the two pipes for supply and one for return. That's what I have done its lighter and cheaper than braided lines.
 08 July 2015, 02:45 PM
#40
Thanks for all the positive comments. It makes it worth posting all the pics
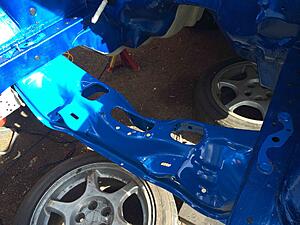
Next up a pic showing that I have gone over the original Epoxy 121 mastic chassis paint with a layer of Dinitrol 445.
Then onto rear diffs. I had three rear diffs in my shed. The original Sport rear diff and two other unknown rear diffs that should be turbo models.
As you really cannot tell externally what they are I popped the rear covers off and looked inside. Here you can see the teeth number stamped on the gear. Divide these numbers to get your ratio. As suspected the Sport one was the wrong ratio and was binned.
The other two were all good so I kept them. This is the state they were in which is mainly surface rust.
A going over with a angle grinder wire brush, a clean up with de-greaser and brake cleaner to remove residue. A coat of Bilt Hamber Hydrate 80 rust converter and then a coat of Dinitrol 445. Top tip: The cap on the 445 fits well over the drive shaft hole when you are spraying to avoid getting the spray in the diff of on the rubber seal.
Clean diffs.
Last edited by FMJ; 06 November 2017 at 07:57 PM.
08 July 2015, 03:27 PM
#41
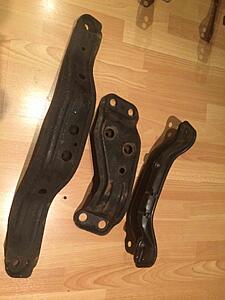
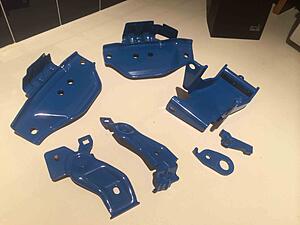
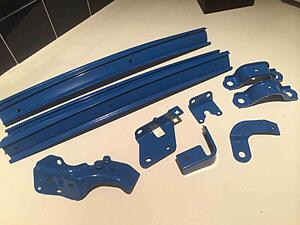
Next lots of things to be prepped for the powder coater's. I only took pic of a few parts as I prepped them but here they are.
Rear cross member before the bushes were removed. They were drilled, cut, burnt, chiselled and hammered out.... Pics of them removed does not do the process justice. It is a massively annoying job to do.
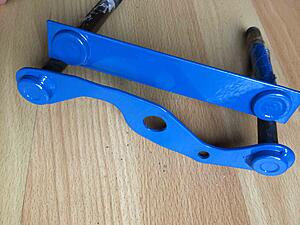
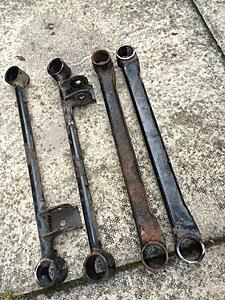
Lateral link having it's bushes removed. These are the easiest to do.
All done.
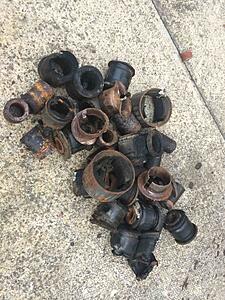
This pile of crap represents a couple of days hard work.
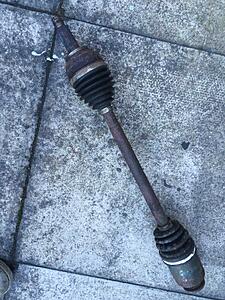
A driveshaft. I didn't document the process of striping the two sets of drive shafts I have. But I striped them down and am having some of the parts powder coated too.
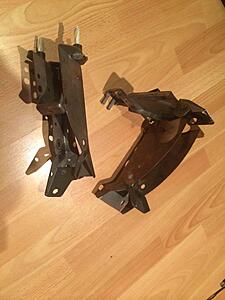
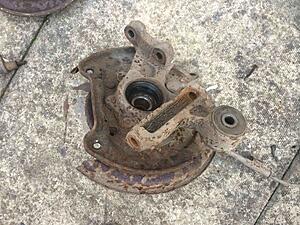
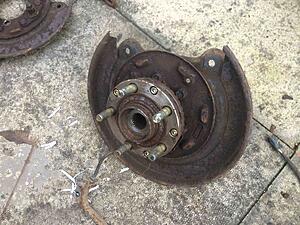
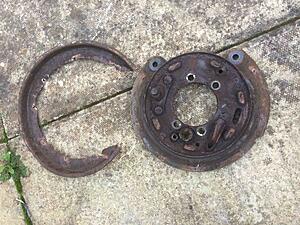
A rear hub carrier. The actual front and rear carriers on the Sport are the same as turbo models. But the rear brake backing plate is different. This is due to the drum brakes on the sport. So I did keep the carriers from the Sport as spares but binned the backing plates. These pics are of a second hand set of Turbo hub carriers.
The hub was knocked out from inside with a hammer and socket. Then the backing plate unbolted. The outer stone shield was then cut off as I will be fitting rear two pot brakes and this shield would be in the way.
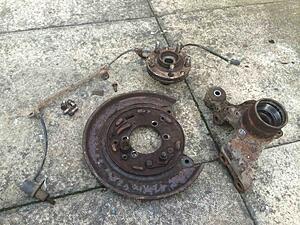
The largest pile of stuff for the powder coater's yet. Will cost �200 to do.
In the pic we have:
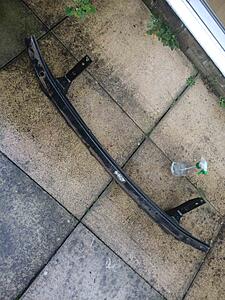
Rear bumper support beam
Rear crossmember
Two rear diff mounting brackets
Rear brake backing plates
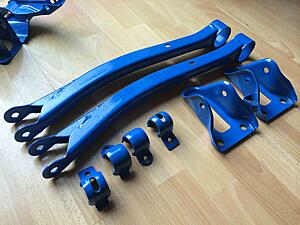
Rear lateral link arms
Two sets of drive shafts
Silver Project engine and gearbox mount set
Rear crossmember bush plates
Gearbox bush mount
Engine bay sensor bracket
A custom made ali bar bracket for my relocated header tank.
Not in the pic were the some gear linkage parts that also went off with this lot.
Rear cross member before the bushes were removed. They were drilled, cut, burnt, chiselled and hammered out.... Pics of them removed does not do the process justice. It is a massively annoying job to do.
Lateral link having it's bushes removed. These are the easiest to do.
All done.
This pile of crap represents a couple of days hard work.
A driveshaft. I didn't document the process of striping the two sets of drive shafts I have. But I striped them down and am having some of the parts powder coated too.
A rear hub carrier. The actual front and rear carriers on the Sport are the same as turbo models. But the rear brake backing plate is different. This is due to the drum brakes on the sport. So I did keep the carriers from the Sport as spares but binned the backing plates. These pics are of a second hand set of Turbo hub carriers.
The hub was knocked out from inside with a hammer and socket. Then the backing plate unbolted. The outer stone shield was then cut off as I will be fitting rear two pot brakes and this shield would be in the way.
The largest pile of stuff for the powder coater's yet. Will cost �200 to do.
In the pic we have:
Rear bumper support beam
Rear crossmember
Two rear diff mounting brackets
Rear brake backing plates
Rear lateral link arms
Two sets of drive shafts
Silver Project engine and gearbox mount set
Rear crossmember bush plates
Gearbox bush mount
Engine bay sensor bracket
A custom made ali bar bracket for my relocated header tank.
Not in the pic were the some gear linkage parts that also went off with this lot.
Last edited by FMJ; 06 November 2017 at 08:08 PM.
08 July 2015, 07:03 PM
#42
Unmapped 12.4s @ 105
iTrader: (29)
Join Date: Apr 2005
Location: Newcastle. 330bhp-289lb/ft @ 1bar boost - 12.4s @ 105mph
Posts: 11,776
Likes: 0
Received 4 Likes
on
4 Posts

Will that not make a racket anyway when it flexes? Sure I remember Arch saying something to that effect on his project thread.

Sterling work by the way, top effort.
 Only sort of criticism, there's too much blue powder coating for my liking.
09 July 2015, 03:29 AM
Only sort of criticism, there's too much blue powder coating for my liking.
09 July 2015, 03:29 AM
#43
Yeah the blue is partly because I always just say do it the same blue and secondly because black would kinda make me feel like I hadn't got my money's worth to make it look stock again. Bushes are different colours so it's going to clash underneath too.
16 July 2015, 09:18 PM
#45
Top job so far mate , best build I've seen so far and that does include silver sports , mainly because this is done by yourself on a drive and done to high standard ,
I've got 121 epoxy mastic , should I be looking at getting that dinitrol stuff for the arches ?
Just had a look on there site , �30 for 4 x 1 litre cans plus a trigger attachment thing , did you use the attachment ?
I've got 121 epoxy mastic , should I be looking at getting that dinitrol stuff for the arches ?
Just had a look on there site , �30 for 4 x 1 litre cans plus a trigger attachment thing , did you use the attachment ?
Last edited by gary77; 16 July 2015 at 09:29 PM.
03 August 2015, 12:13 AM
#46
Sorry had a little break!
It's personal choice mate not essential and there are so many products to choose from.... I really like the dinitrol but the epoxy should be ok on it's own. I go a bit OTT sometimes.
I got my spray in aerosol from ebay for about 38 for 4 cans.
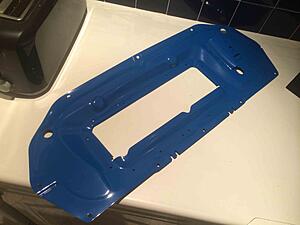
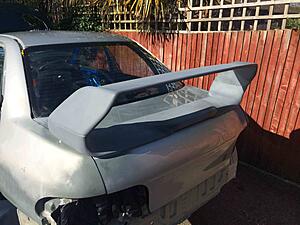
So next up is a GRP STI 5 style spoiler. It was cracked in a couple of places. I stripped it into it's two halves and filled the cracks with some resin, filed and sanded.
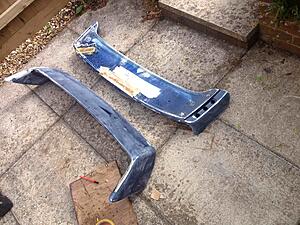
Fitted with stainless bolts and some sikaflex, a coat of primer and its good as new and very light.
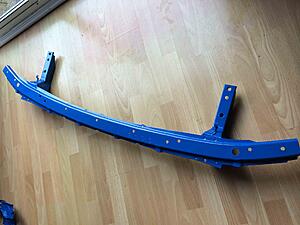
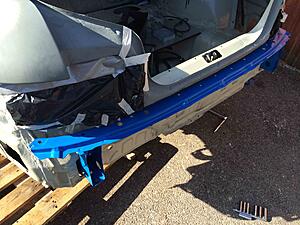
Powder coated rear bumper support beam fitted.
It's personal choice mate not essential and there are so many products to choose from.... I really like the dinitrol but the epoxy should be ok on it's own. I go a bit OTT sometimes.
I got my spray in aerosol from ebay for about 38 for 4 cans.
So next up is a GRP STI 5 style spoiler. It was cracked in a couple of places. I stripped it into it's two halves and filled the cracks with some resin, filed and sanded.
Fitted with stainless bolts and some sikaflex, a coat of primer and its good as new and very light.
Powder coated rear bumper support beam fitted.
Last edited by FMJ; 07 November 2017 at 05:28 PM.
03 August 2015, 12:20 AM
#47
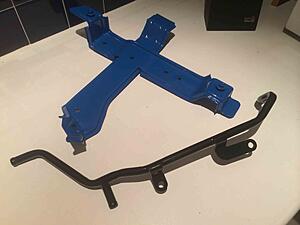
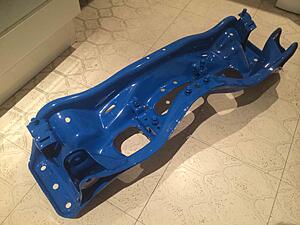
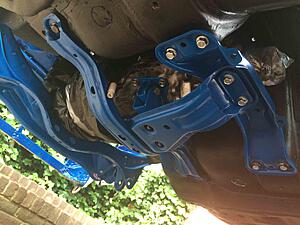
Powder coated front subframe and brackets fitted to front of the car:
Rear anti roll bar brackets fitted:
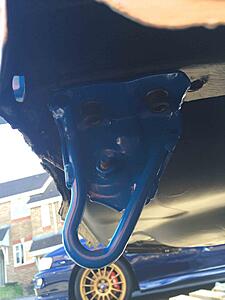
Rear tow hook fitted:
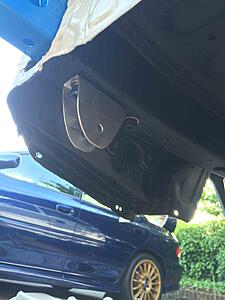
I realised that I didn't have a rear exhaust hanger bracket so half an hour in the shed and I had one knocked up from aluminium:
Rear anti roll bar brackets fitted:
Rear tow hook fitted:
I realised that I didn't have a rear exhaust hanger bracket so half an hour in the shed and I had one knocked up from aluminium:
Last edited by FMJ; 07 November 2017 at 05:37 PM.
 08 February 2016, 01:01 PM
#50
I'm still here Unfortunately life got in the way for a few months and then the weather has stopped me for another two months as it hasn't stopped bloody raining! I have made a bit more progress and have quite a few more pics to upload (it takes me a while) but will put some a couple on now and upload the rest over the next few days Glad there is still interest!
Unfortunately life got in the way for a few months and then the weather has stopped me for another two months as it hasn't stopped bloody raining! I have made a bit more progress and have quite a few more pics to upload (it takes me a while) but will put some a couple on now and upload the rest over the next few days Glad there is still interest!
08 February 2016, 01:21 PM
#52
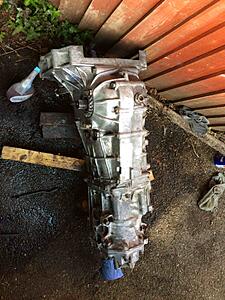
The gearbox. No sadly it's not a 6 speed. I do have some financial limits... It's what shoud be a sound (fingers crossed) 5 speed. I used some Gunk to clean off the casing (I actually got it quite clean but didn't take any final pics). Of course the problem with ali is that no matter how much you clean it it will oxidise white unless it's coated with something.
A set of Hamur plates fitted (purchased from this very forum ) they look good and will hopefully make a bit of difference in regards to reliability.

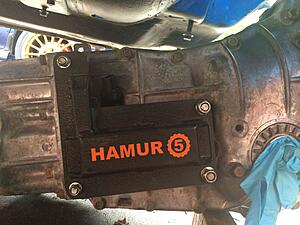
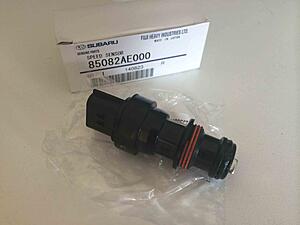
New speed sensor fitted cost about �80 from Import Car Parts. I broke the original one as I caught it on something and the old brittle plastic meant that the top split off. Be careful with these sensors they are quite fragile. Getting the old one out was also difficult as its a plastic item in a metal thread with thread lock. Any pressure just splits and breaks the plastic. It's a poor design if you ask me. A bit of heat and careful work with pliers for the old one out.
Next up (when I get home from work) I will put up pics of the box being mounted and the gear linkage.
A set of Hamur plates fitted (purchased from this very forum
) they look good and will hopefully make a bit of difference in regards to reliability. New speed sensor fitted cost about �80 from Import Car Parts. I broke the original one as I caught it on something and the old brittle plastic meant that the top split off. Be careful with these sensors they are quite fragile. Getting the old one out was also difficult as its a plastic item in a metal thread with thread lock. Any pressure just splits and breaks the plastic. It's a poor design if you ask me. A bit of heat and careful work with pliers for the old one out.
Next up (when I get home from work) I will put up pics of the box being mounted and the gear linkage.
Last edited by FMJ; 07 November 2017 at 06:02 PM.
09 February 2016, 01:19 AM
#54
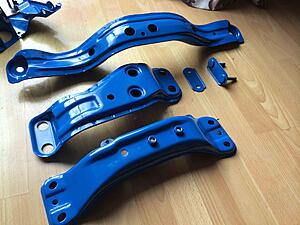
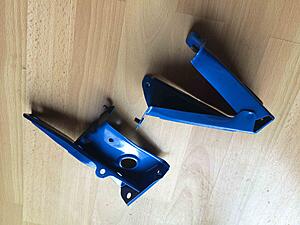
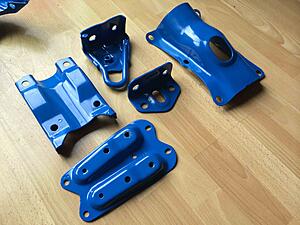
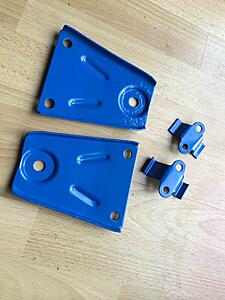
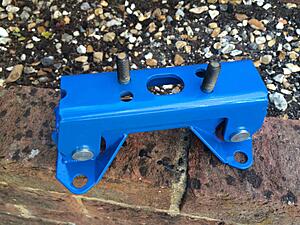
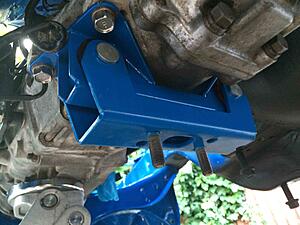
So here we have the heavy duty gearbox mount which was stripped of its flimsy gold paint and re-coated with powder coat. Reassembled with its poly bushes and ready to go.
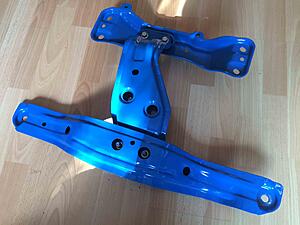
The gearbox cross-member in pieces after if returned from the powder coater's with Poly bushes and new nuts/bolts used to reassemble.

Ready to go.
The gearbox lifted into place with the jack.
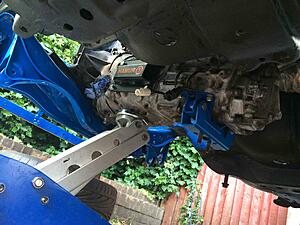
Mount fitted to box with new bolts.
Gearbox bolted on with new bolts brought from Subaru via a company in Germany who sell genuine Subaru parts cheaper then Subaru UK even with postage added on...
The gearbox cross-member in pieces after if returned from the powder coater's with Poly bushes and new nuts/bolts used to reassemble.
Ready to go.
The gearbox lifted into place with the jack.
Mount fitted to box with new bolts.
Gearbox bolted on with new bolts brought from Subaru via a company in Germany who sell genuine Subaru parts cheaper then Subaru UK even with postage added on...
Last edited by FMJ; 07 November 2017 at 06:06 PM.
09 February 2016, 01:33 AM
#55
While I am at it for reference these are the sites I get the genuine Subaru Parts from. For years I ordered direct from UK dealers but after consistent poor service I started using Import car parts more and more.
http://www.importcarparts.co.uk/
A great place for Genuine parts in the UK, they hold a good selection and are priced reasonably in-line with Subaru UK for the most part. Customer service and delivery is top notch every time.
The issue I then had was parts not listed on their site and that I didn't know the part number. Now I know I could phone Subaru and go through the process of giving a VIN and describing what I wanted. I also know I could have asked ICP to source the parts.
But my preferred option is to use this site to find part numbers:
http://opposedforces.com/parts/impreza/
Then this site to order the parts:
http://www.carparts-pros.com/page_1_3.php#oeformo
Seriously you put any genuine Subaru part number into that site and it comes up with either that part or one that has since superseded it. Prices are in Euros and postage is about 16 Euros. It takes about 2 weeks (about the same time as out of stock parts at a UK dealer) There is obviously no VAT to pay and prices are a bit cheaper then UK dealers.
If its just s single bolt you want its not a cheap way to do things but I just like the way I can find part numbers and select and order them without having to try to explain what I want and hoping I get the right bit.
This is the site I used to get all the replacement bolts and nuts for the suspension components and underside mounts etc.
09 February 2016, 12:20 PM
#57
The stainless bolts are just an ebay job. There are plenty of sellers on there that sell bolts in any quantity. But you can only use stainless on parts that are not subject to stress. You cannot use stainless on suspension, brakes, braces, steering parts etc. Only really on parts that are non load bearing. This is because stainless bolts are not as strong and have much lower torque values.
Also most of the suspension and bolts under the car are in weird and wonderful sizes and you won't find them anywhere but Subaru as they have been made and ordered in exactly the right size for the job.
There is however the option of having old bolts zinc plated. I will do some pics later of the results of this and they actually come up very well considering how rusty they were!
With powder coating they shot blast all the old crap off and then the paint and rust right down to bare shiny metal. This leaves a very clean and slightly rough surface which is great for the powder to be sprayed on. As I understand it the powder sticks to the metal surface due to static and the parts are then heated in an oven which causes the powder to melt and become a single solid layer of coating which is almost a plastic. It is far far harder then any paint.
Again its amazing how much can be restored with this process. As long as the parts are still structurally sounds any amount of surface rust can be gotten rid of and it stays away too.
09 February 2016, 01:01 PM
#58
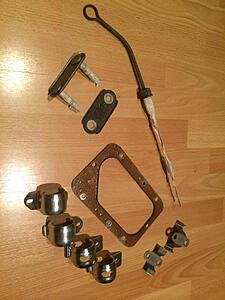
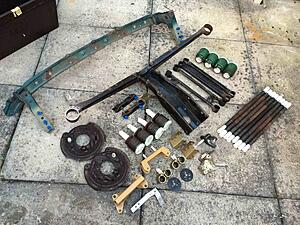
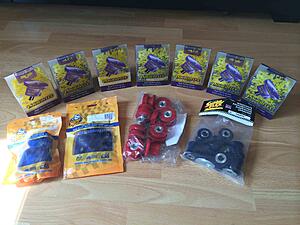
The bolts used in the suspension components and under body parts. Please note most of them are shown but there may be a bolt or nut missing somewhere from the pics. Almost all are genuine parts from the site mentioned above. A whole set of new bolts like this will cost about �200-�250. The full set of poly bushes I think cost about �500 (there are "full kits" for sale for less but they often don't include everything).
The bushes used for the rebuild. All are poly bushes and I only use ones with stainless crush tubes. Don't be tempted to use cheap non branded ones from ebay as the poly can fail early and can do so quite alarmingly.
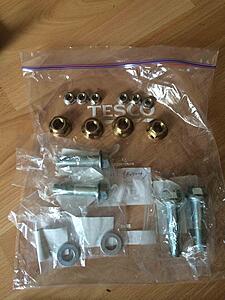
Engine mount bolts
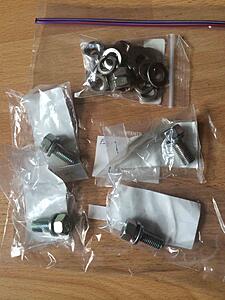
Front wishbone and ARB bolts
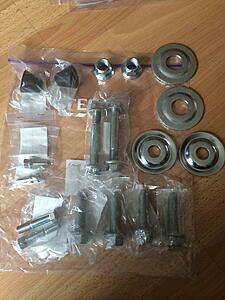
Gearbox cradle and mount bolts
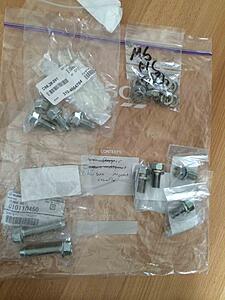
Rear diff mount bolts
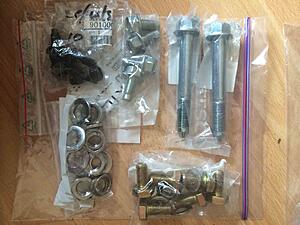
Rear trailing arm and lateral link bolts
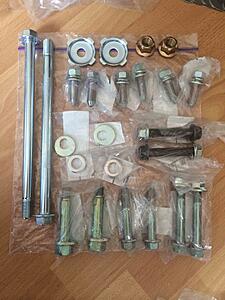
Rear ARB bolts

Rear subframe bolts and rear diff to subframe studs.
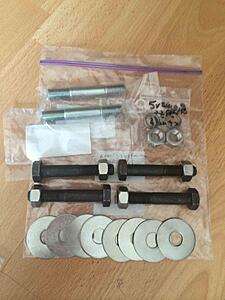
Rear strut bolts
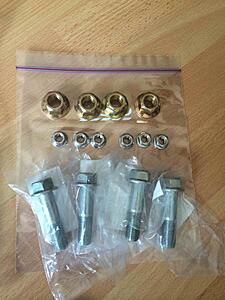
Front strut bolts
The bushes used for the rebuild. All are poly bushes and I only use ones with stainless crush tubes. Don't be tempted to use cheap non branded ones from ebay as the poly can fail early and can do so quite alarmingly.
Engine mount bolts
Front wishbone and ARB bolts
Gearbox cradle and mount bolts
Rear diff mount bolts
Rear trailing arm and lateral link bolts
Rear ARB bolts
Rear subframe bolts and rear diff to subframe studs.
Rear strut bolts
Front strut bolts
Last edited by FMJ; 08 November 2017 at 05:54 PM.
