The Four and the Rotary


 03 May 2014, 08:56 AM
#62
Scooby Regular
Thread Starter

Thanks guys.
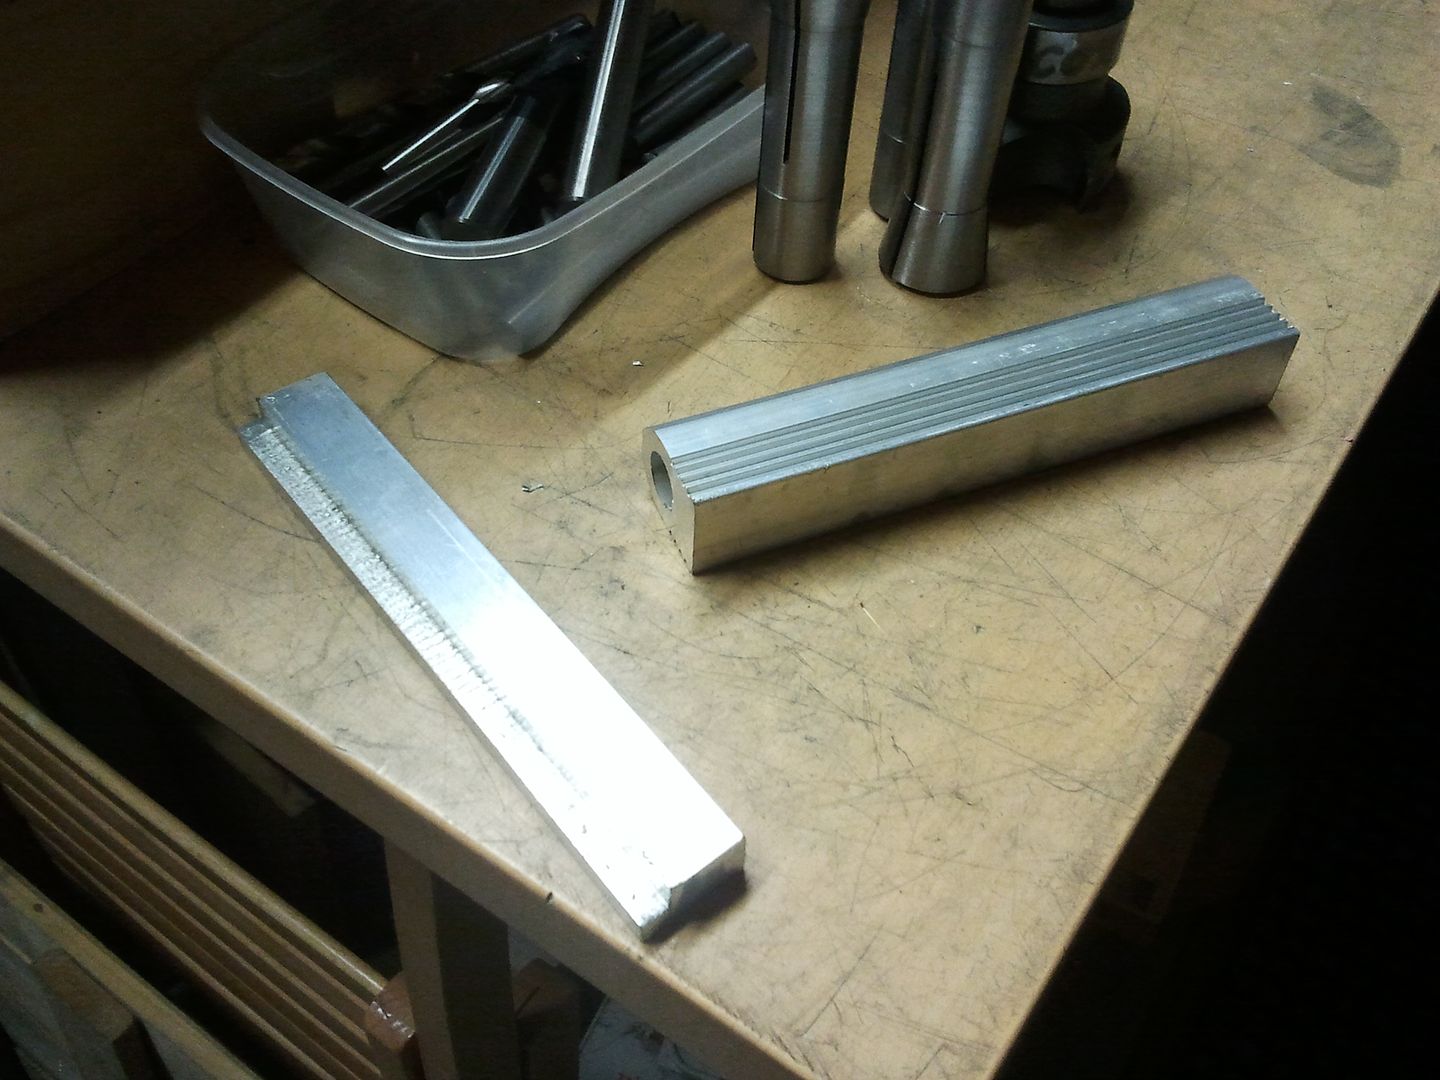
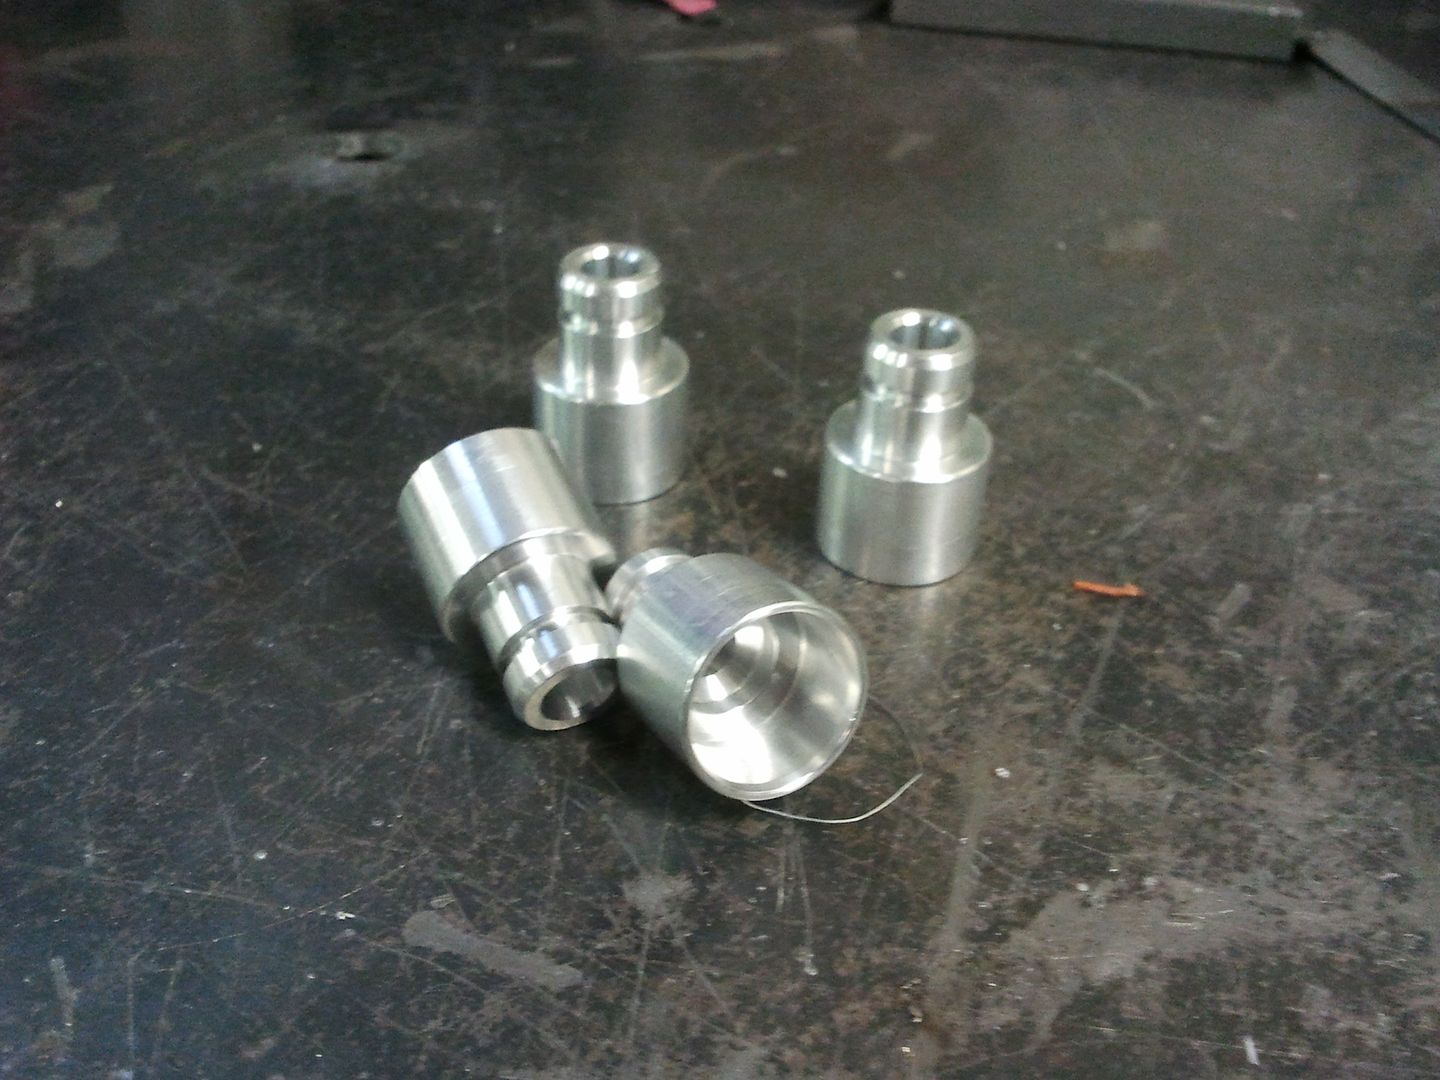
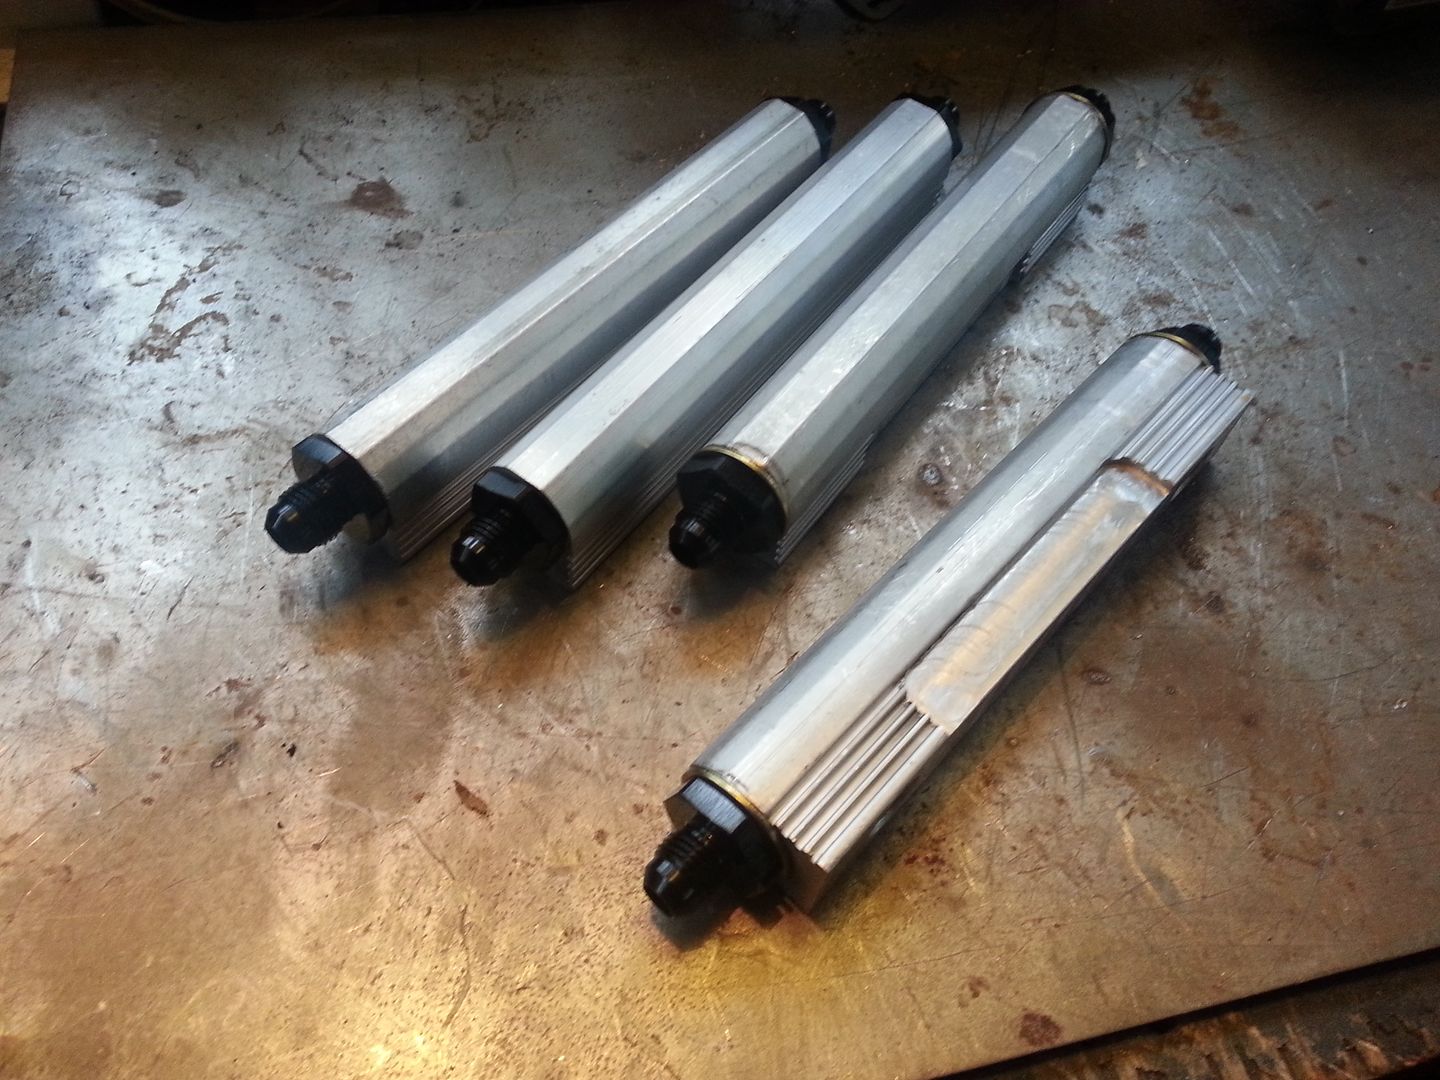
Got in a little early today to get the parts for the fuel rail done so i can finish off at home over the weekend. I'm using the Aeromotive Billet fuel rails as they look big and chunky. I have machined a bit of ally flat bar for the bolt points which i will then buzz on. Ive also turned some ally spigoty type jobbies for the top feed Injectors that i'll be using at this stage.
Rails and flat bar:
which fits like so:
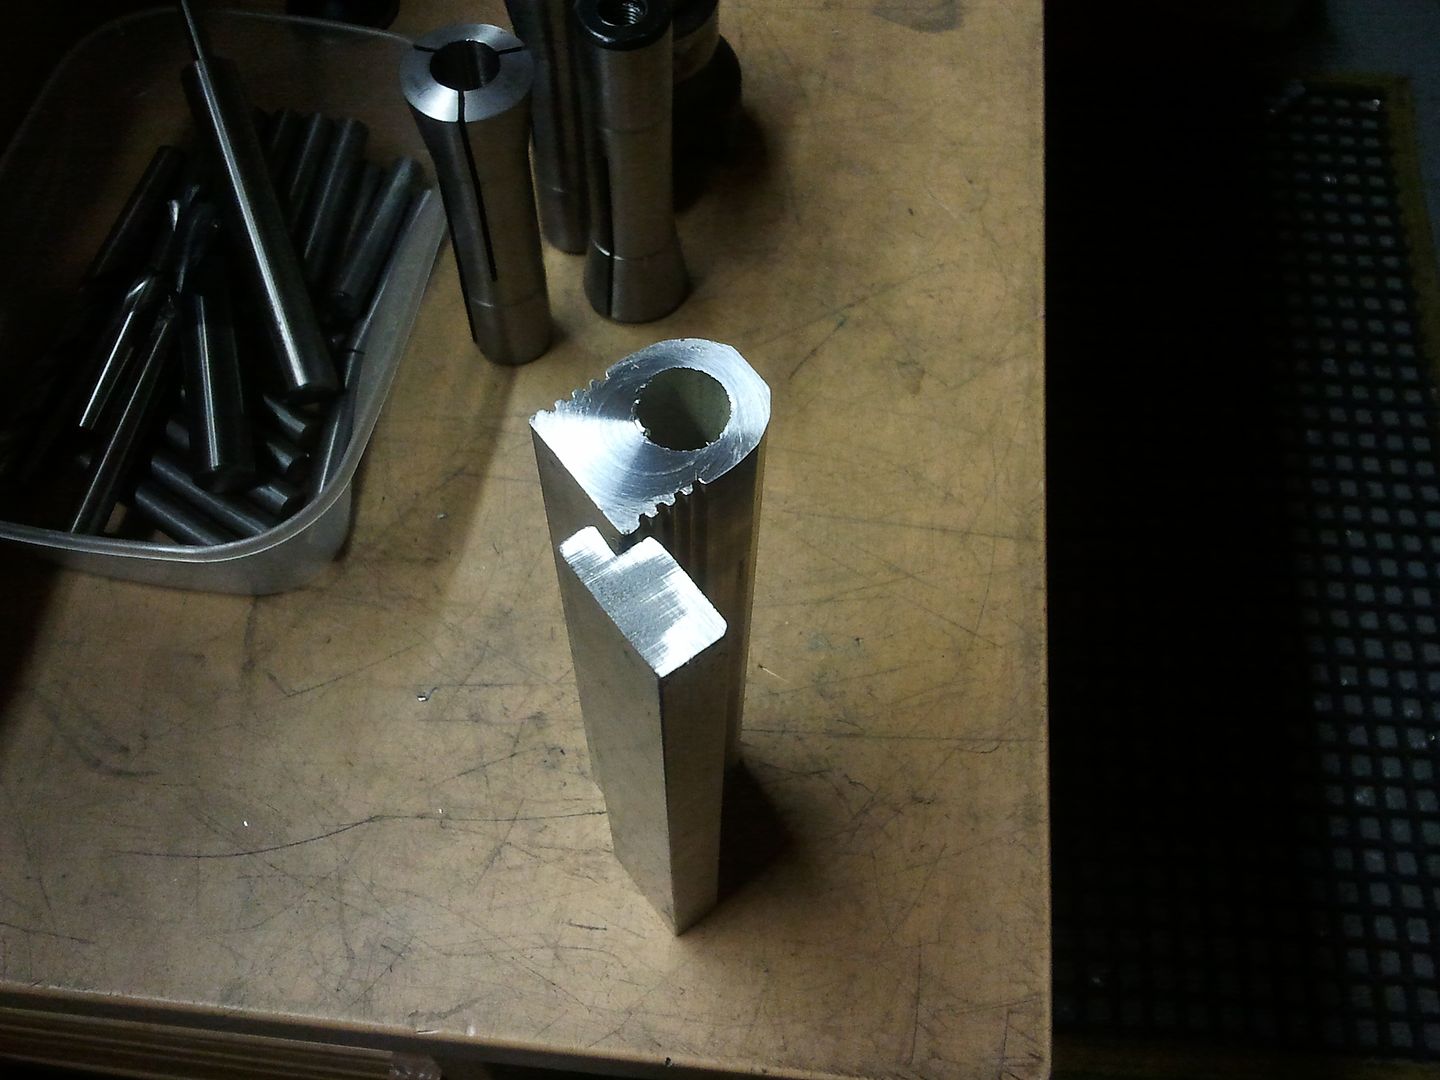
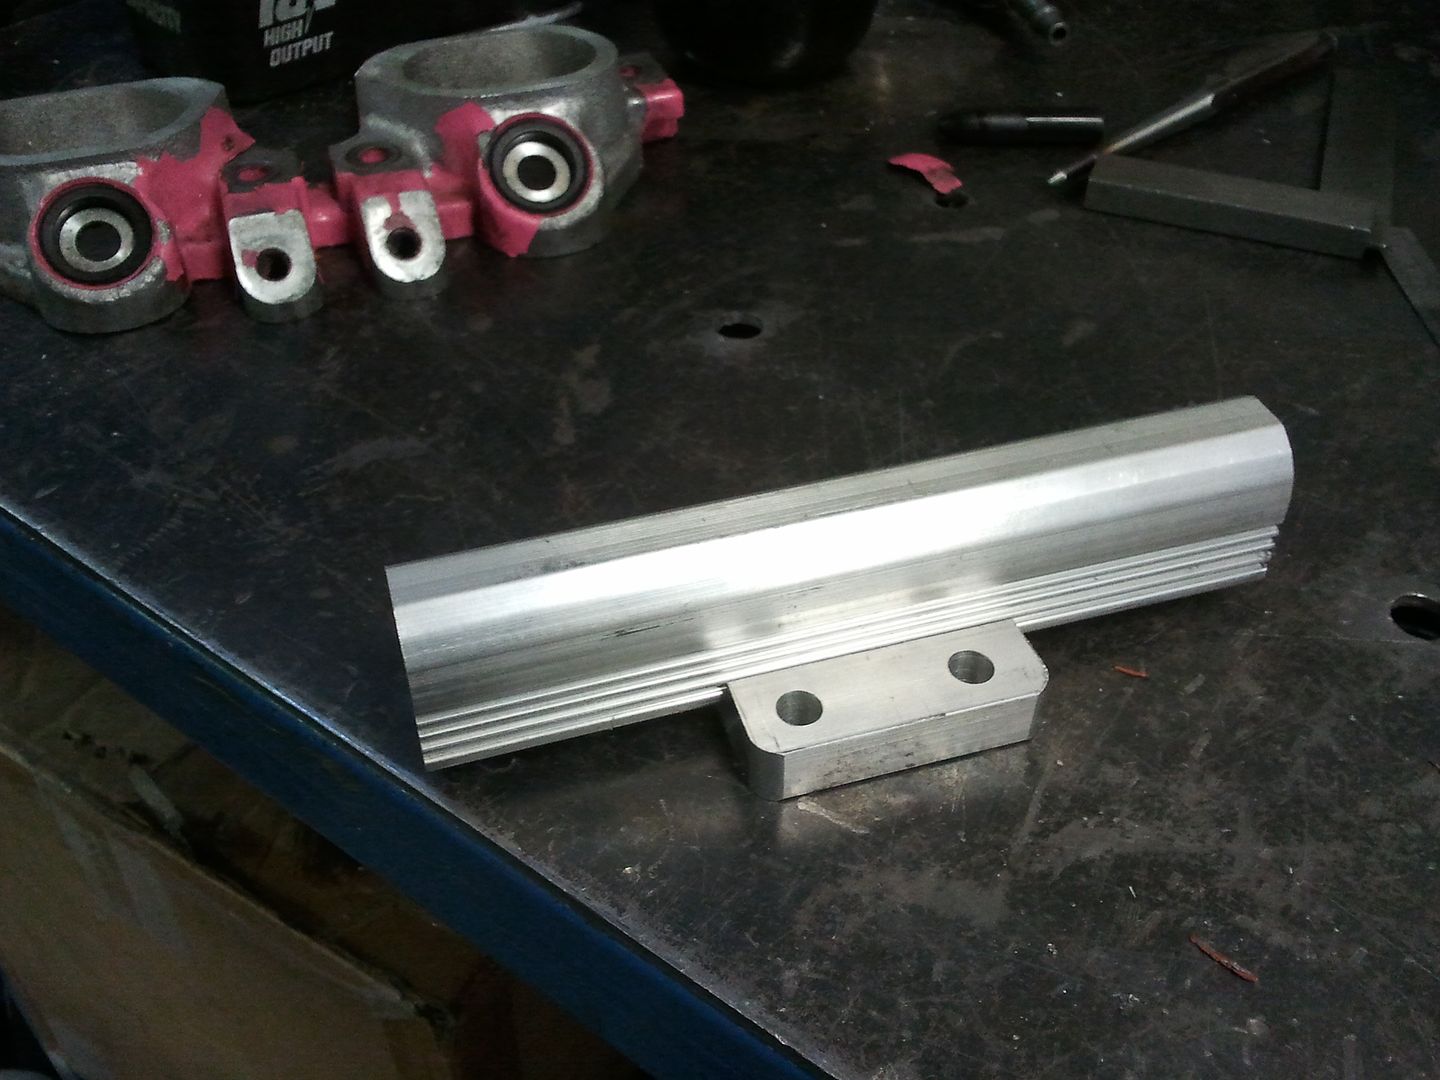
Then machined a little more and will go together like this:
And these are the injector cups
Got in a little early today to get the parts for the fuel rail done so i can finish off at home over the weekend. I'm using the Aeromotive Billet fuel rails as they look big and chunky. I have machined a bit of ally flat bar for the bolt points which i will then buzz on. Ive also turned some ally spigoty type jobbies for the top feed Injectors that i'll be using at this stage.
Rails and flat bar:

which fits like so:

Then machined a little more and will go together like this:

And these are the injector cups

Last edited by seventune; 02 June 2015 at 10:56 PM.
24 June 2014, 08:29 PM
#63
Scooby Regular
Thread Starter
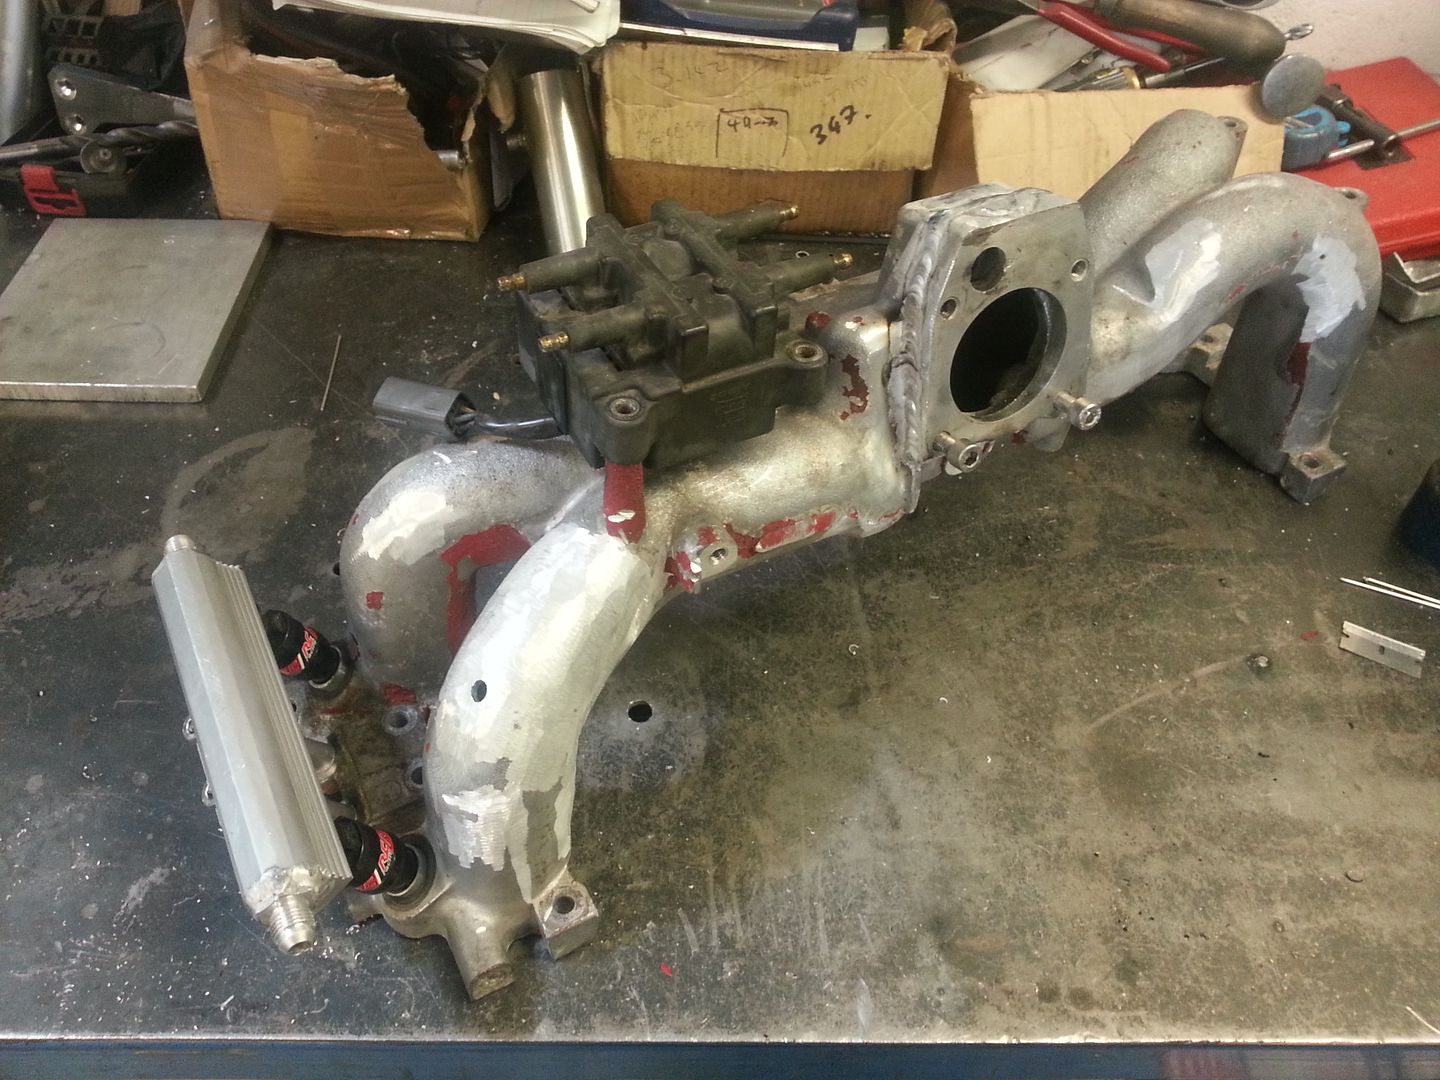
Stage one of the inlet manifold is under way now. I got a second hand stock STI 5 inlet manifold which I'll be making a few alterations too to suite my needs. Bit of a tidy and trimming off the unused knobbly bits. The welding a few on for things like the coil pack, extra injectors and so on. The reason for using the stock item first is so I have a baseline to build the custom one from. Without that baseline I would have no idea whether or not the custom one is more or less efficient than stock. With the old one chopped so I could use the flanges I got another off ebay for �35 with the TB on. Can't be bad. Using the mounting face from the old inlet I have machined it into a wedge shape which will help lower the angle that the intercooler pipes comes in. Main reason for this is that with the 10mm thermal spacer under the mani and the angle of the TB in stock position the bloody thing rubbed on the bonnet. Hopefully problem solved!
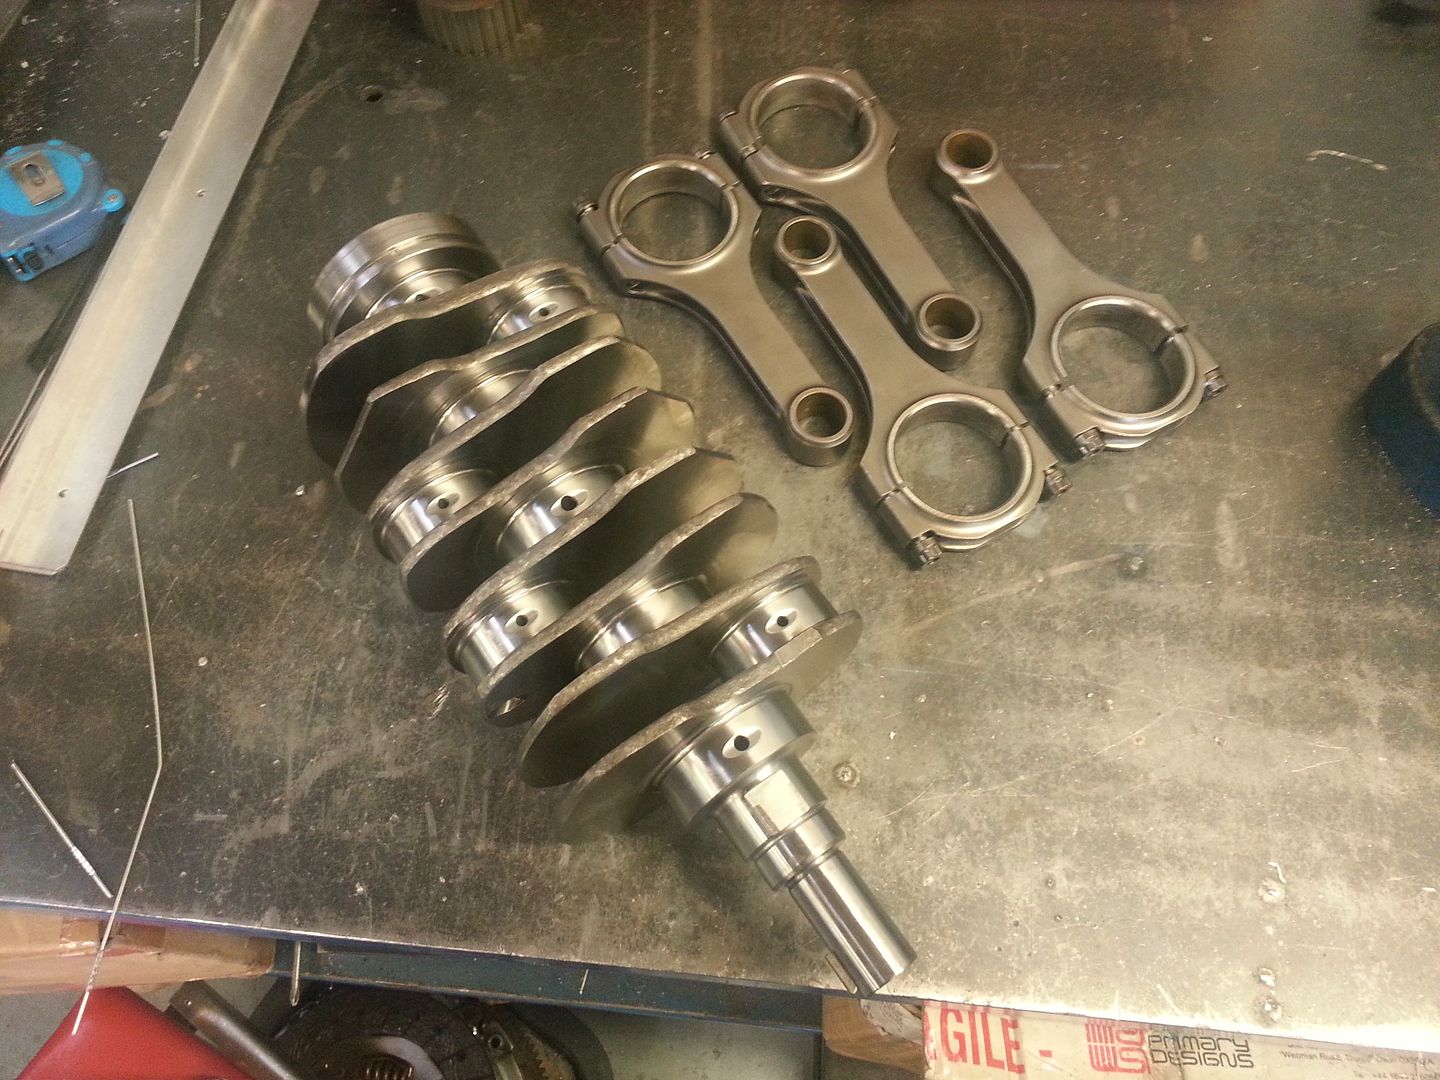
I have sent the Crank and rods off to SEP to have the checked. Although I do believe they are fine I have had that niggley echo in my mind for ages just going "what if". So for piece of mind I'm getting them checked. Heads are nearly built up should finish those this week just waiting on a couple of shims. Then with the crank etc back I can get the build in 6th gear and crack on.... will get some pics up
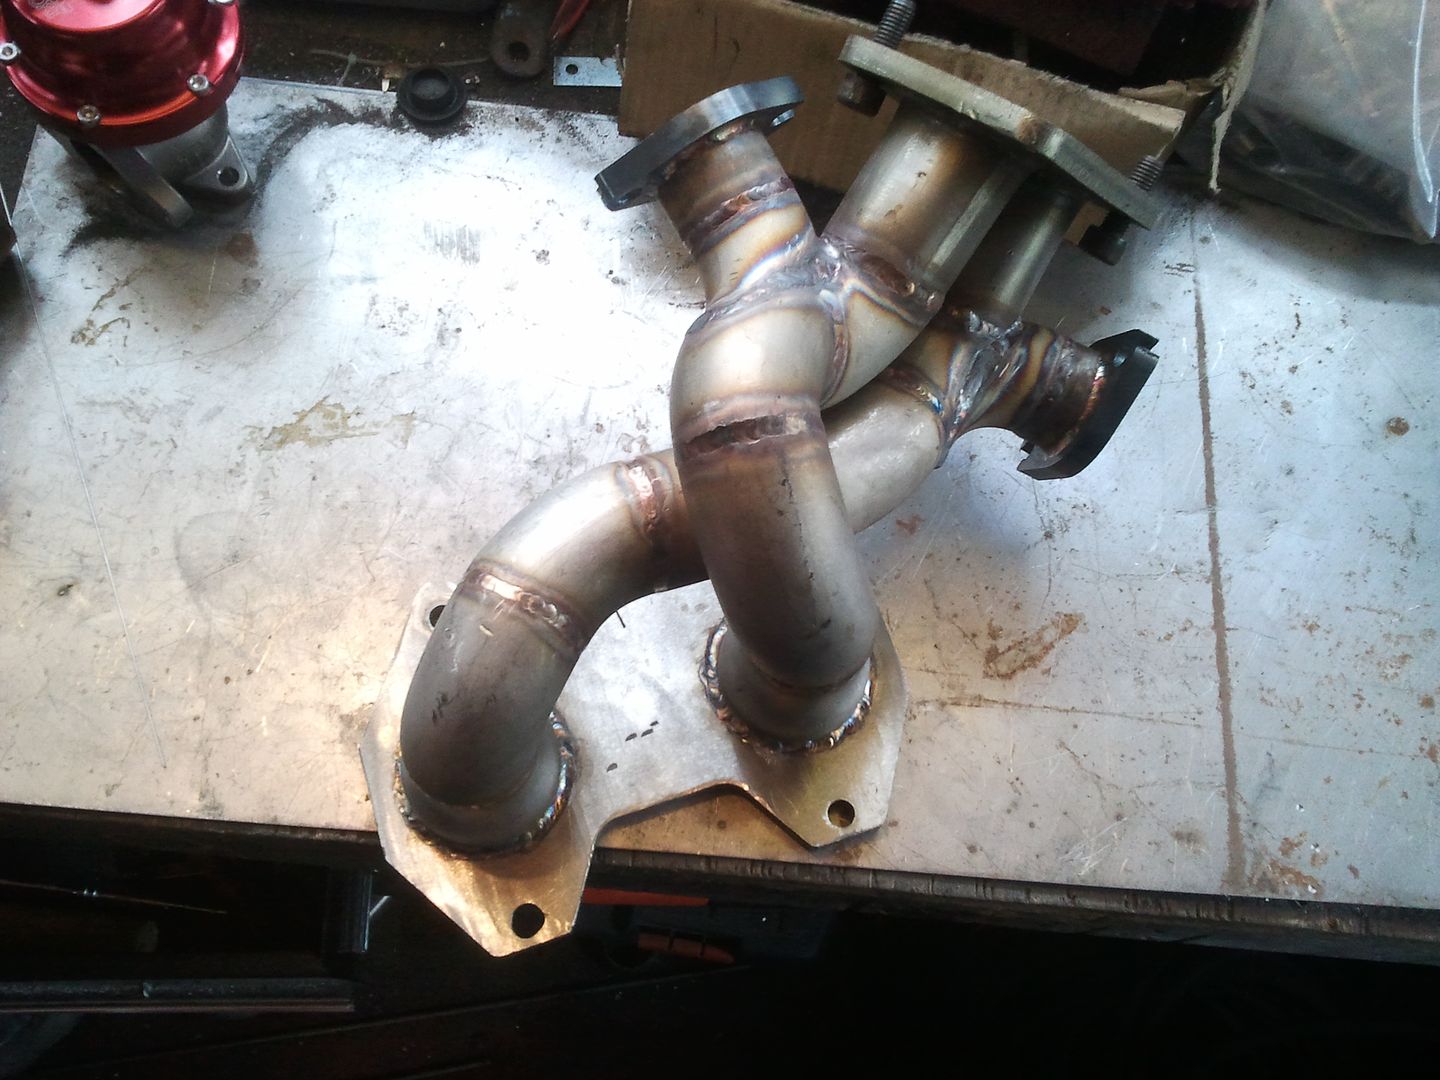
Few bits in the FC done too. Had to change a few bits on the header because I didn't take into account the peripheral port inlet in the fit of excitement of getting it done and the turbo mounted.
Header:
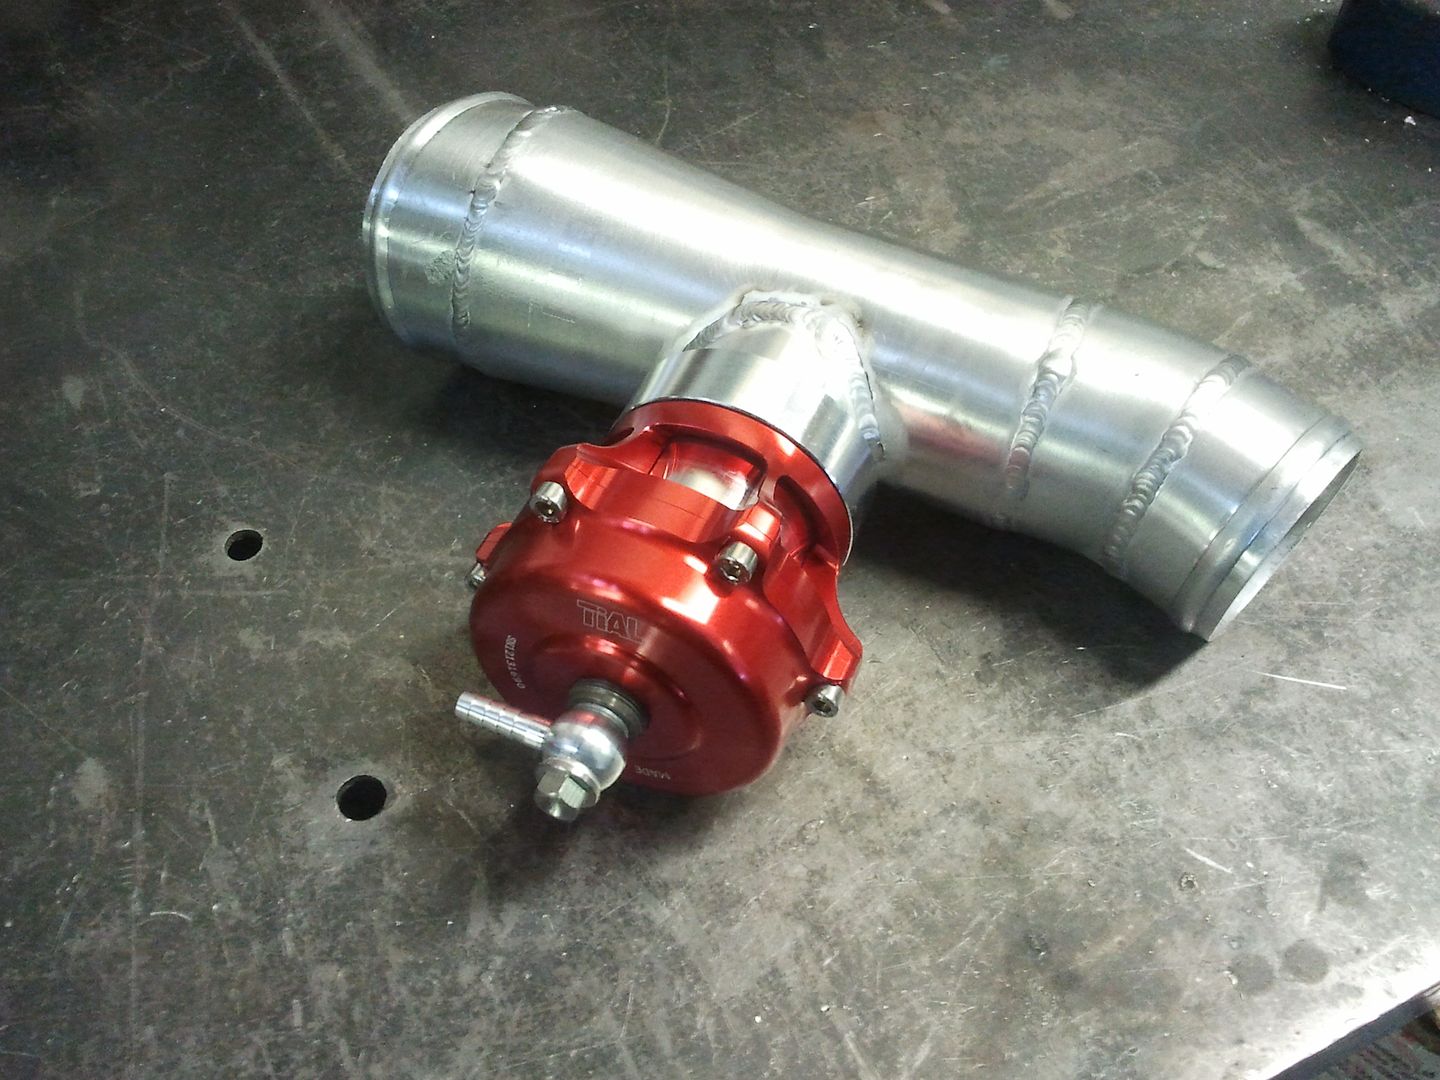
Tial BOV pipe.
Here it is all fitted up. you can see the downpipe has a nasty angle on it as I initially did it out of left over bits I ha. BUT couldn't live with it so I re did that. You can see how it all sits in there though.
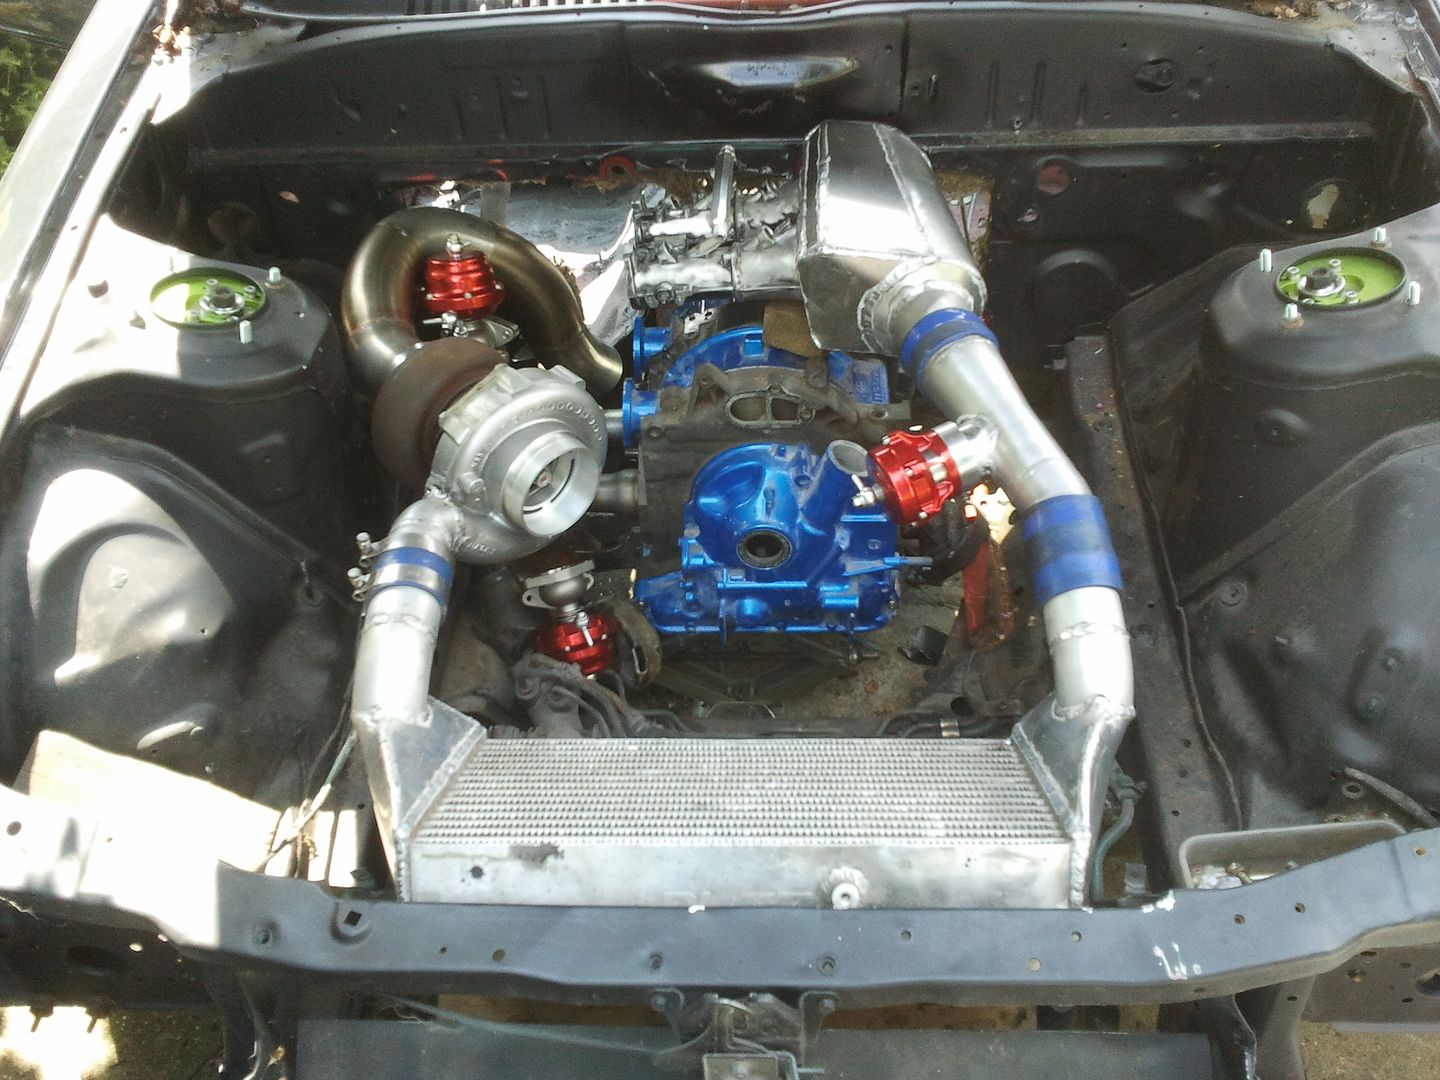
After the downpipe was re made with the turbo and gates:
More to follow of the scoob though.
I have sent the Crank and rods off to SEP to have the checked. Although I do believe they are fine I have had that niggley echo in my mind for ages just going "what if". So for piece of mind I'm getting them checked. Heads are nearly built up should finish those this week just waiting on a couple of shims. Then with the crank etc back I can get the build in 6th gear and crack on.... will get some pics up
Few bits in the FC done too. Had to change a few bits on the header because I didn't take into account the peripheral port inlet in the fit of excitement of getting it done and the turbo mounted.
Header:

Tial BOV pipe.

Here it is all fitted up. you can see the downpipe has a nasty angle on it as I initially did it out of left over bits I ha. BUT couldn't live with it so I re did that. You can see how it all sits in there though.

After the downpipe was re made with the turbo and gates:


More to follow of the scoob though.
 25 June 2014, 09:15 PM
#66
Scooby Regular
Thread Starter
Thanks. And yes it will support as will the gt40 on the impreza. Lack of support on most turbo headers is the ma in cause of pipe failure. Once more of the ancillaries are in the engine bay I'll brace it up.
03 July 2014, 10:22 PM
#67
Scooby Regular
Thread Starter
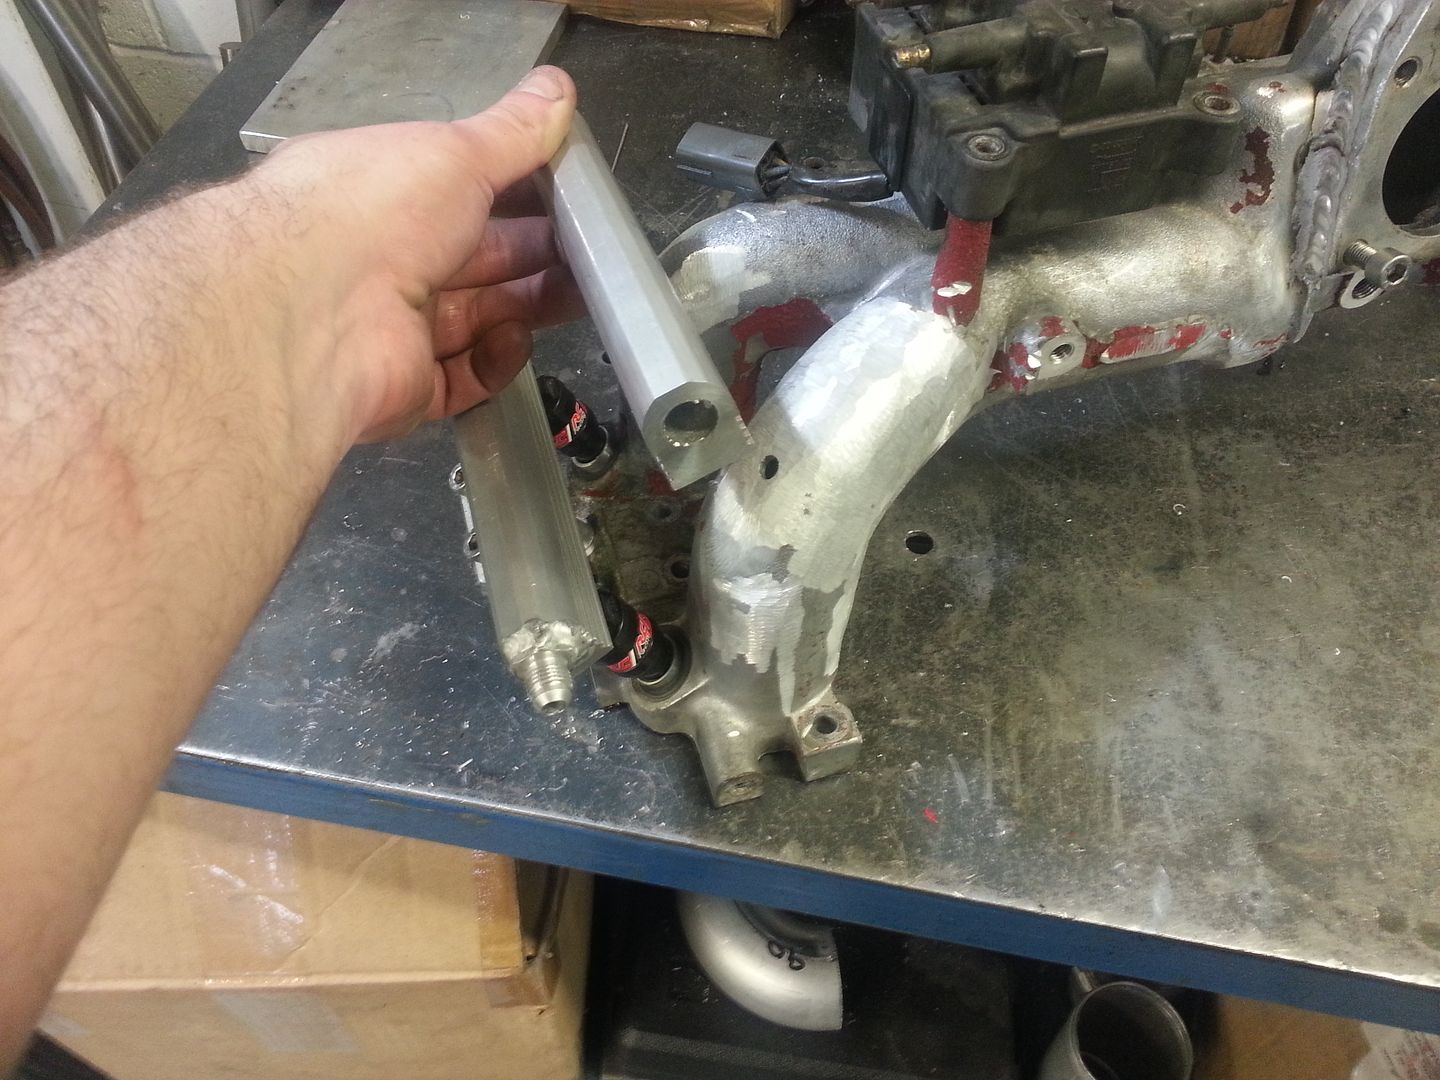
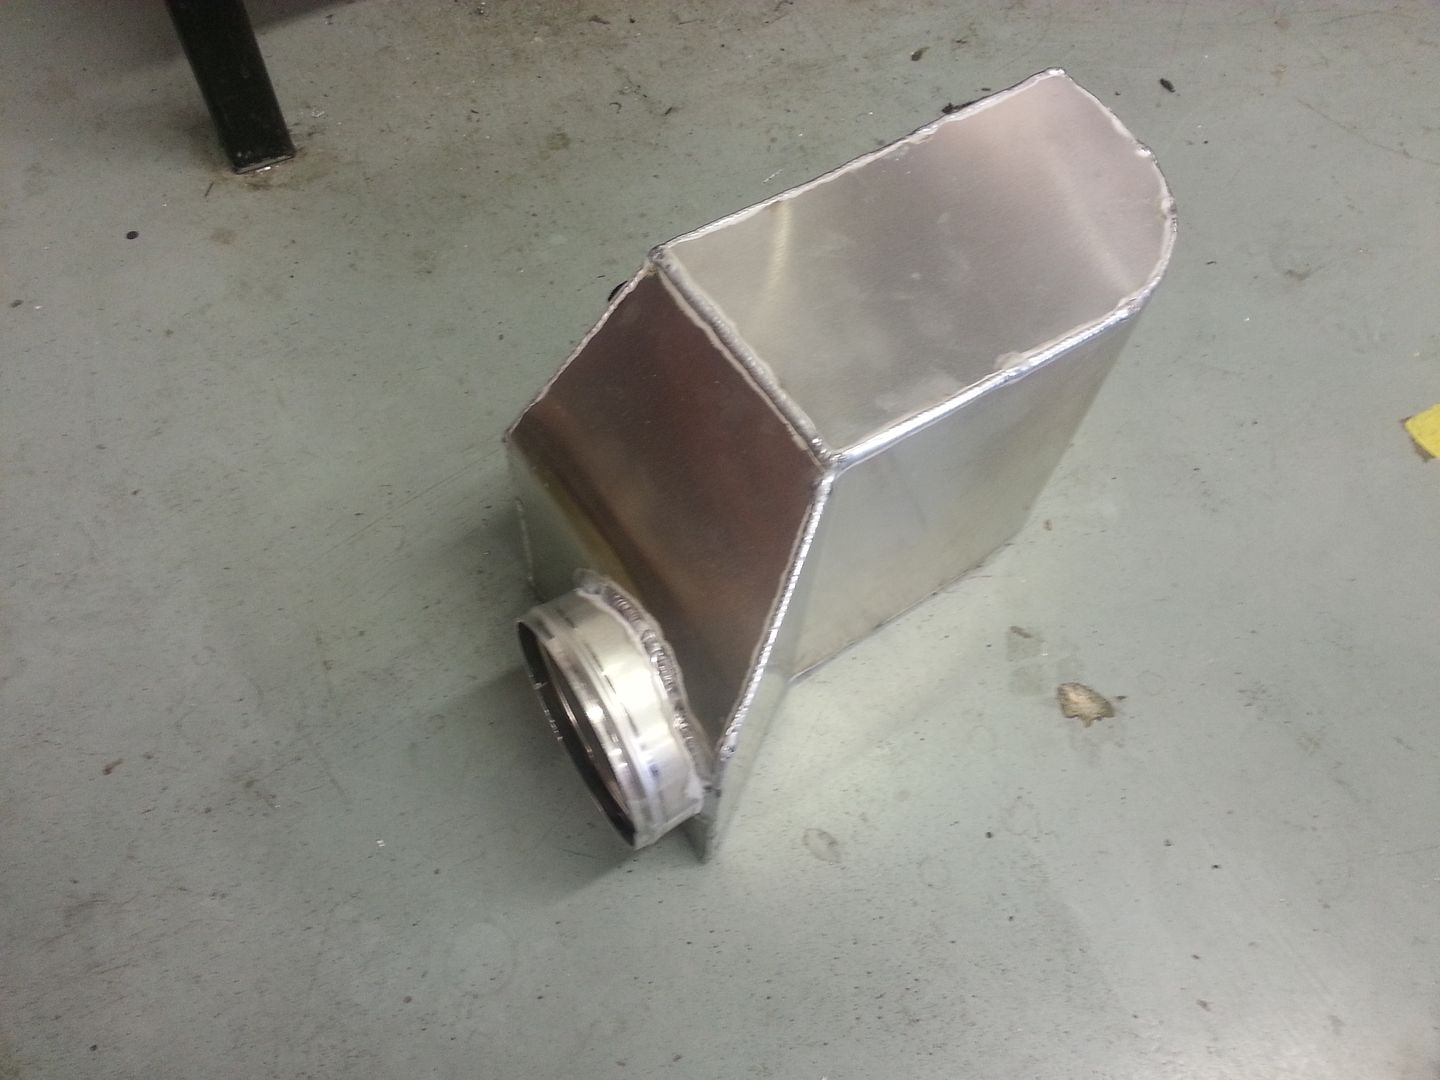
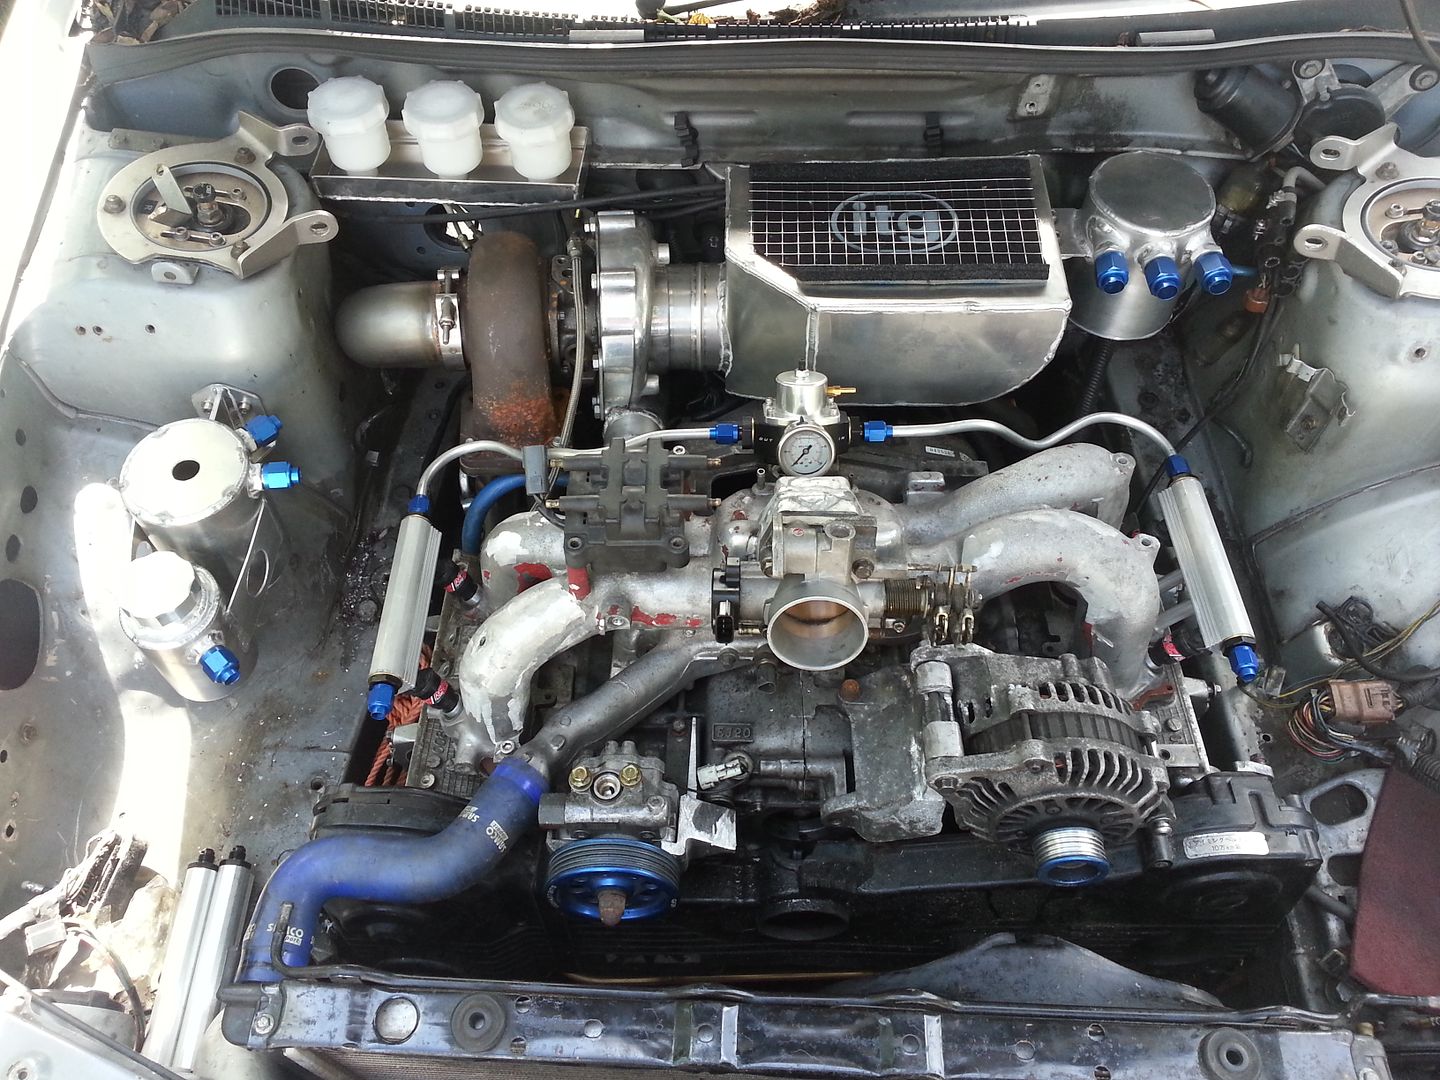
He's a couple of bits of the inlet manifold. wedge on the front, Injectors mocked in on the primary rails. I've just not had a chance to the machine in the second set but holding it where it live.
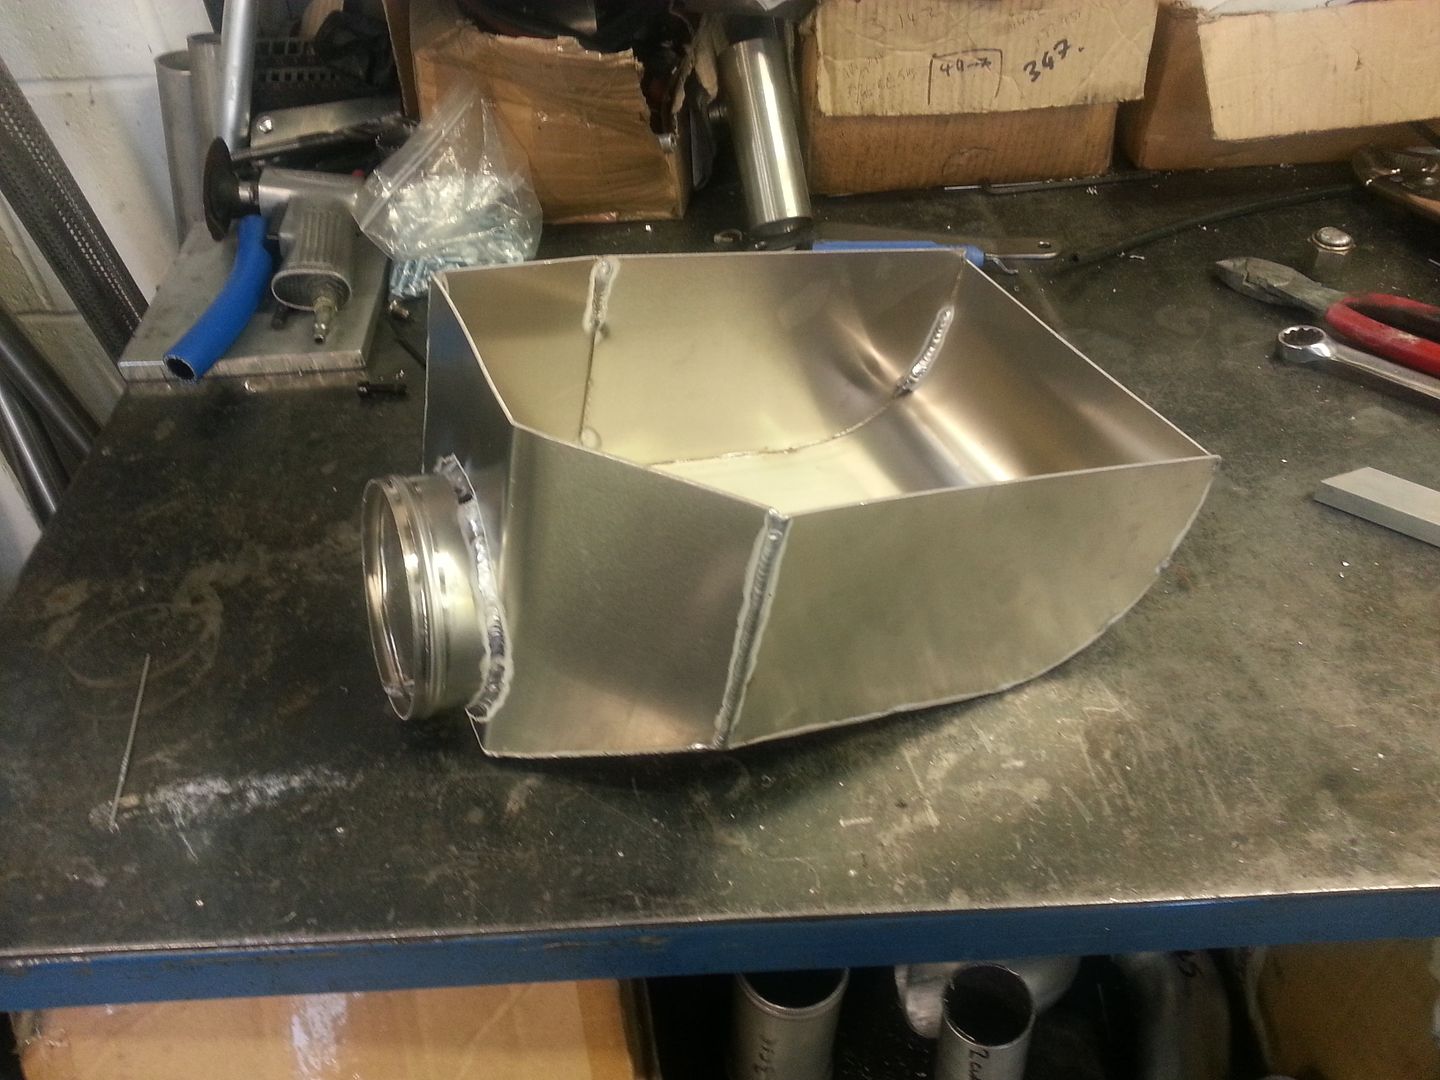
Couple of pics of the air box. Need a little shave at the rear just to clear the pitch mount. but you can see how its going to work. I'll be making a crank case breather that will sit to the right of it.
The wedge:

The air box part way through:
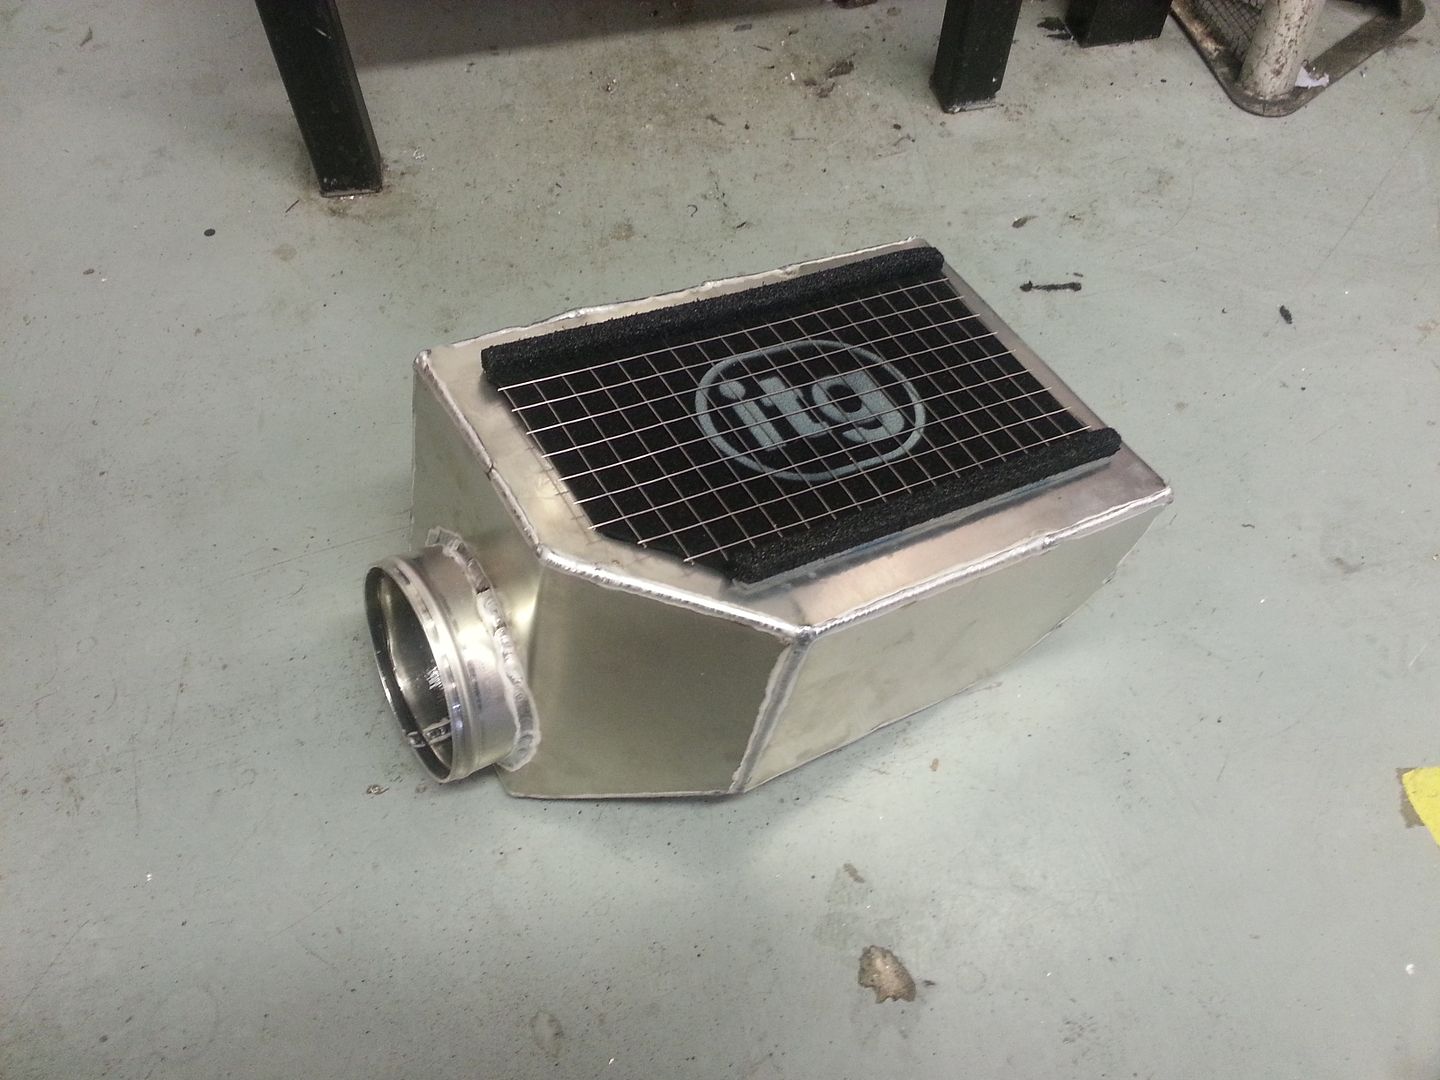
With the panel filter in. Its actually an ITG filter I had made for a Honda Accord ages ago. So I chopped it about a bit and it fits!!!!
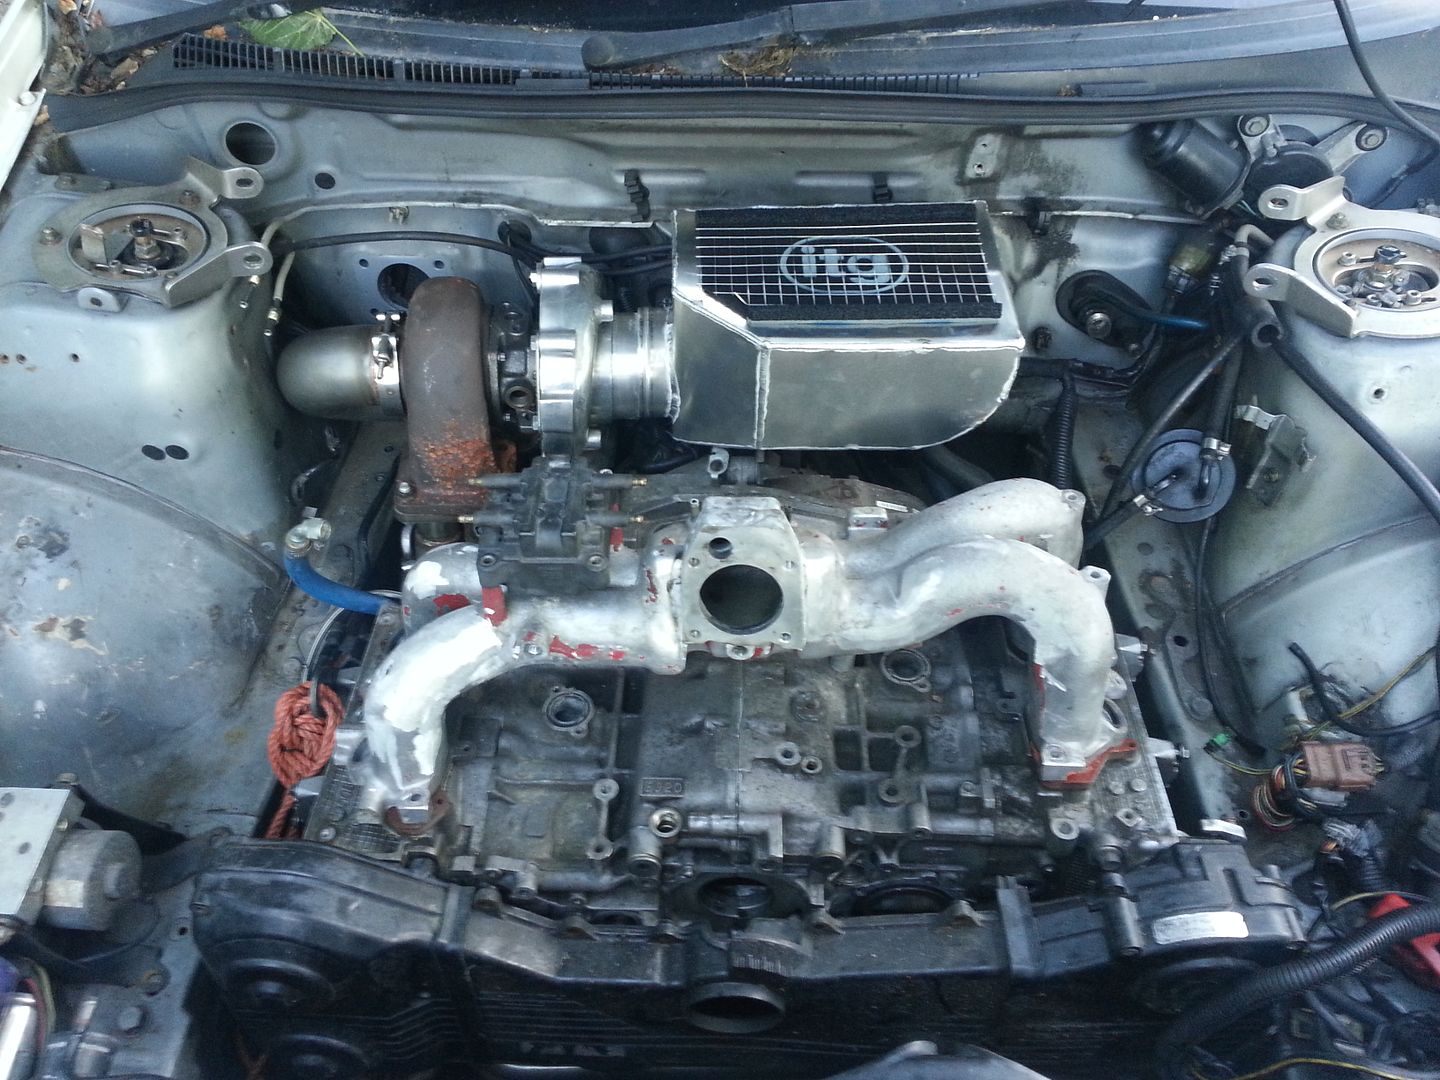
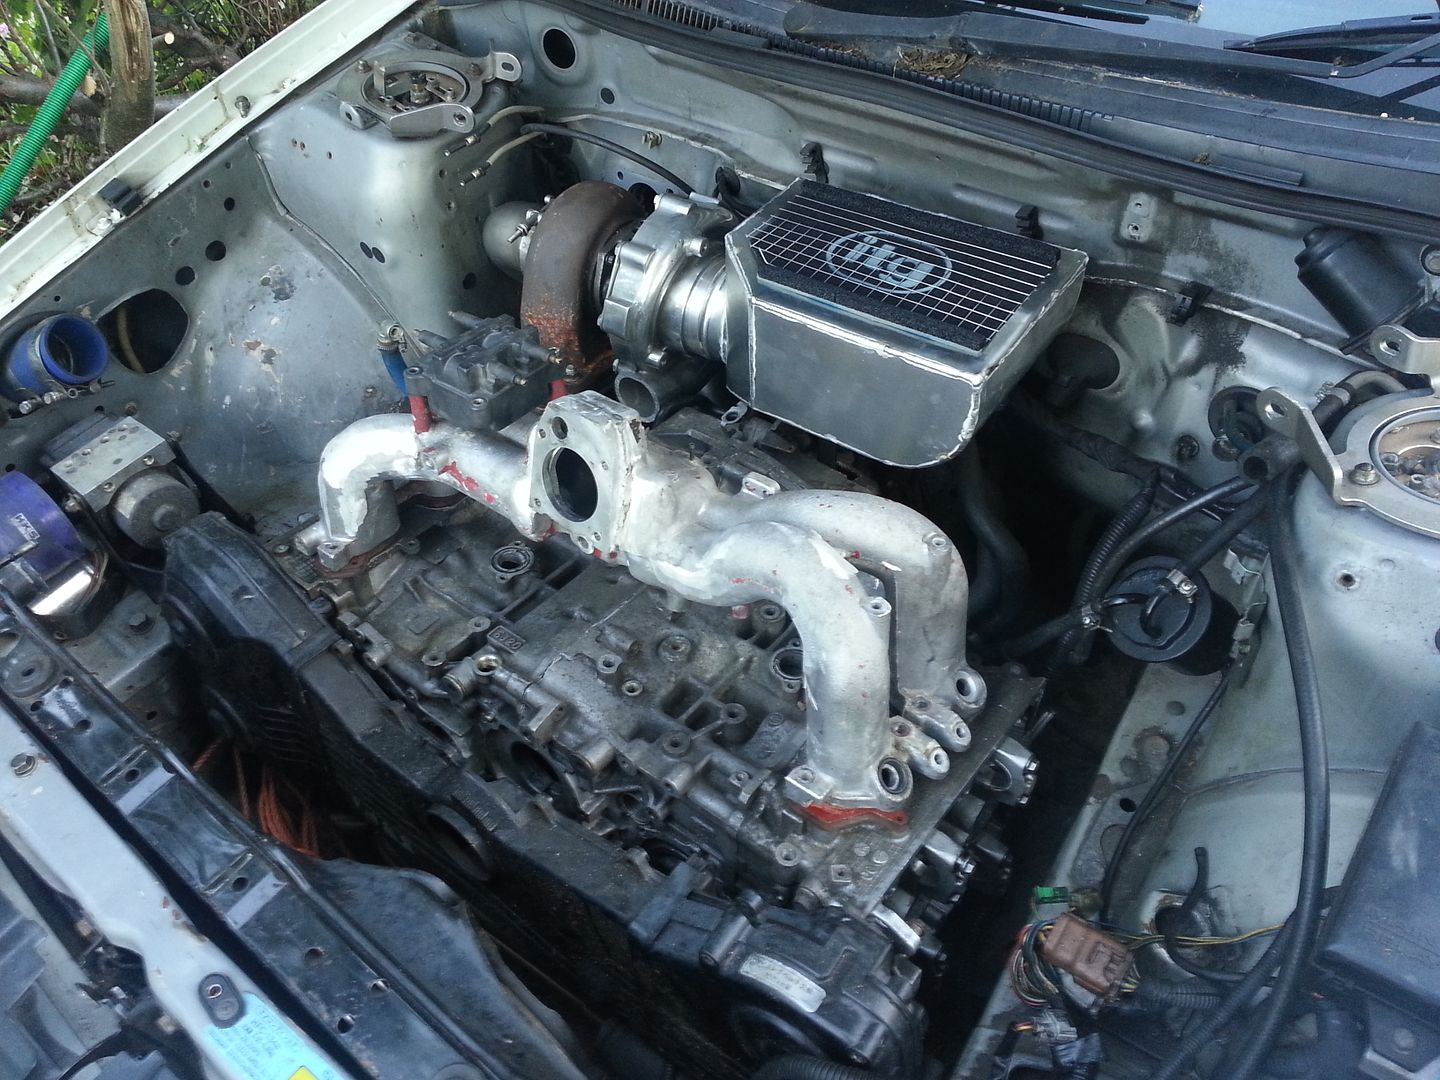
In the car:
Couple of pics of the air box. Need a little shave at the rear just to clear the pitch mount. but you can see how its going to work. I'll be making a crank case breather that will sit to the right of it.
The wedge:


The air box part way through:

With the panel filter in. Its actually an ITG filter I had made for a Honda Accord ages ago. So I chopped it about a bit and it fits!!!!


In the car:


Last edited by seventune; 02 June 2015 at 10:57 PM.
04 July 2014, 10:40 AM
#69
Just be mindful it may sound daft but you'll have water induction issues when its raining.
I had this with a rotated Gt35R and the vent cover removed on the right hand side of the bonnet. Ok for normal driving but when on boost and its raining heavy it would cause a misfire. Just a heads up.
I had this with a rotated Gt35R and the vent cover removed on the right hand side of the bonnet. Ok for normal driving but when on boost and its raining heavy it would cause a misfire. Just a heads up.
 09 July 2014, 03:17 PM
#71
Scooby Regular
Thread Starter
-- I'm aware that you can get water issues but I've had filters in open positions before and not had problems. We'll have to wait and see what happens.
-- I hadn't considered the individual coil packs. Definitely something to look into. Is much needed to make the changes?
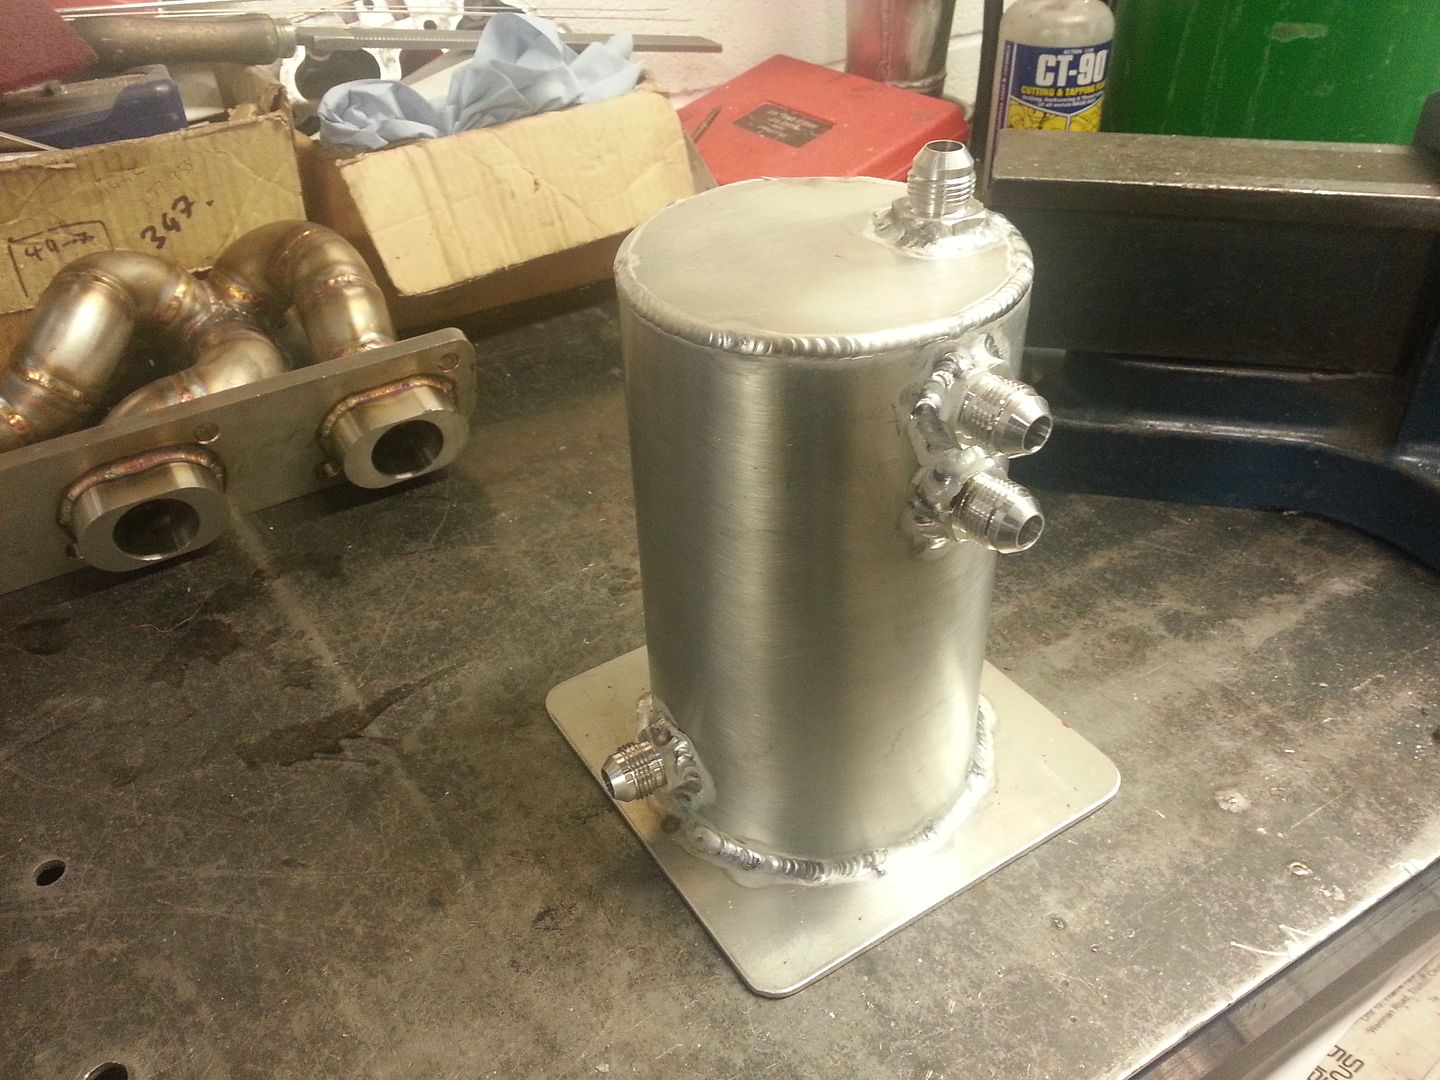
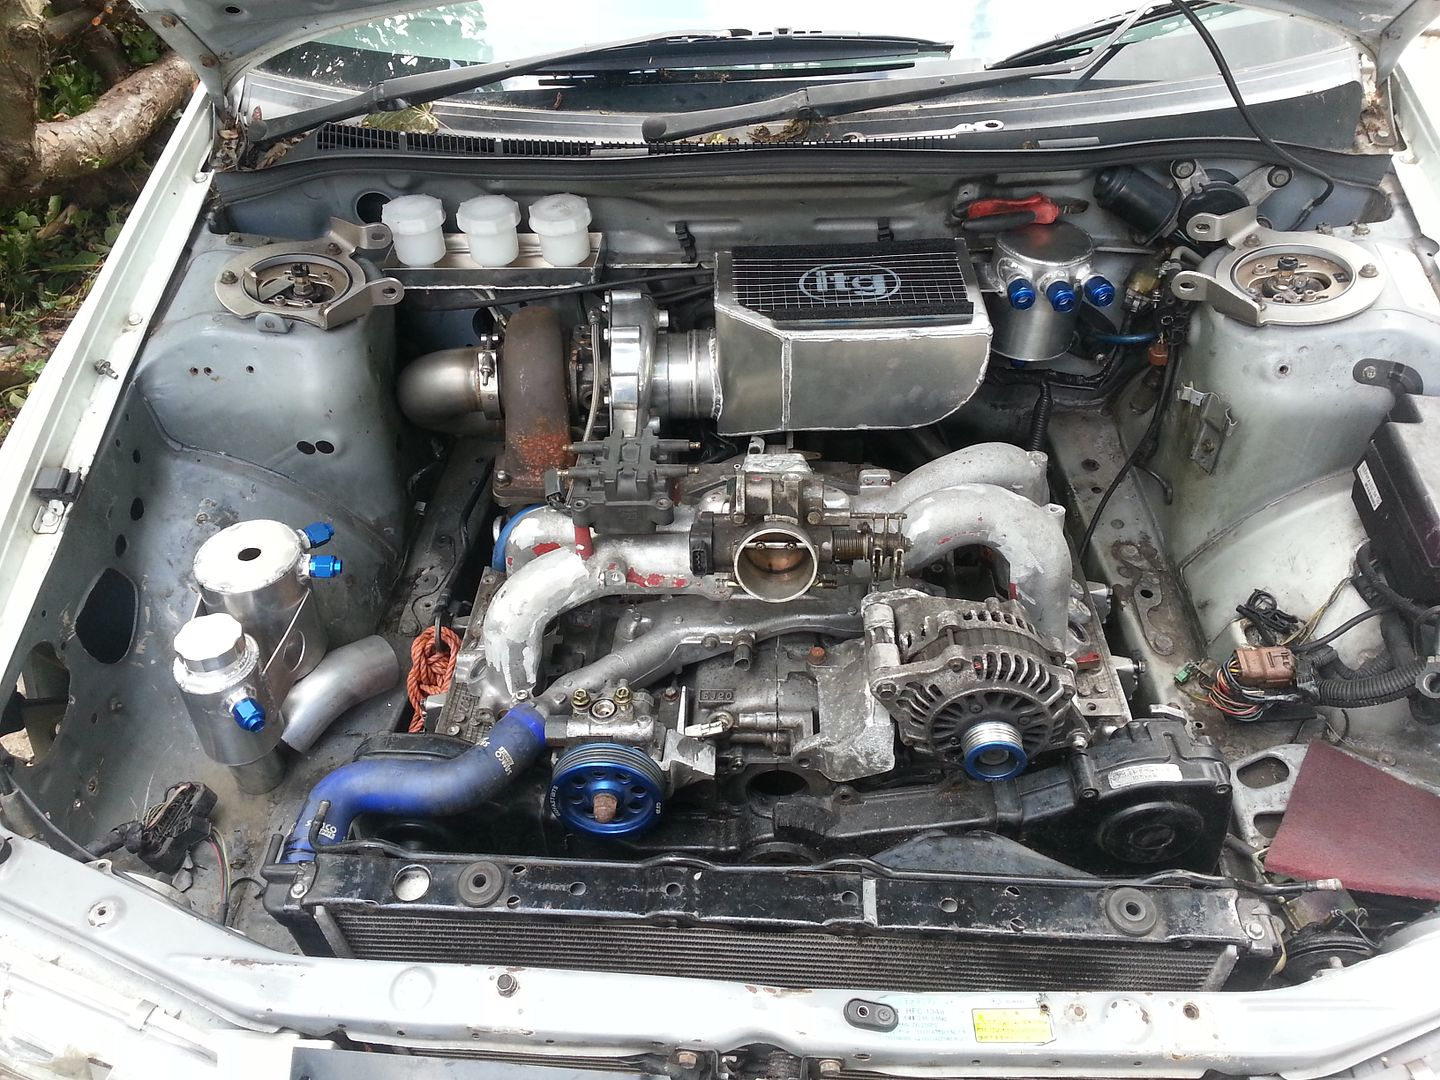
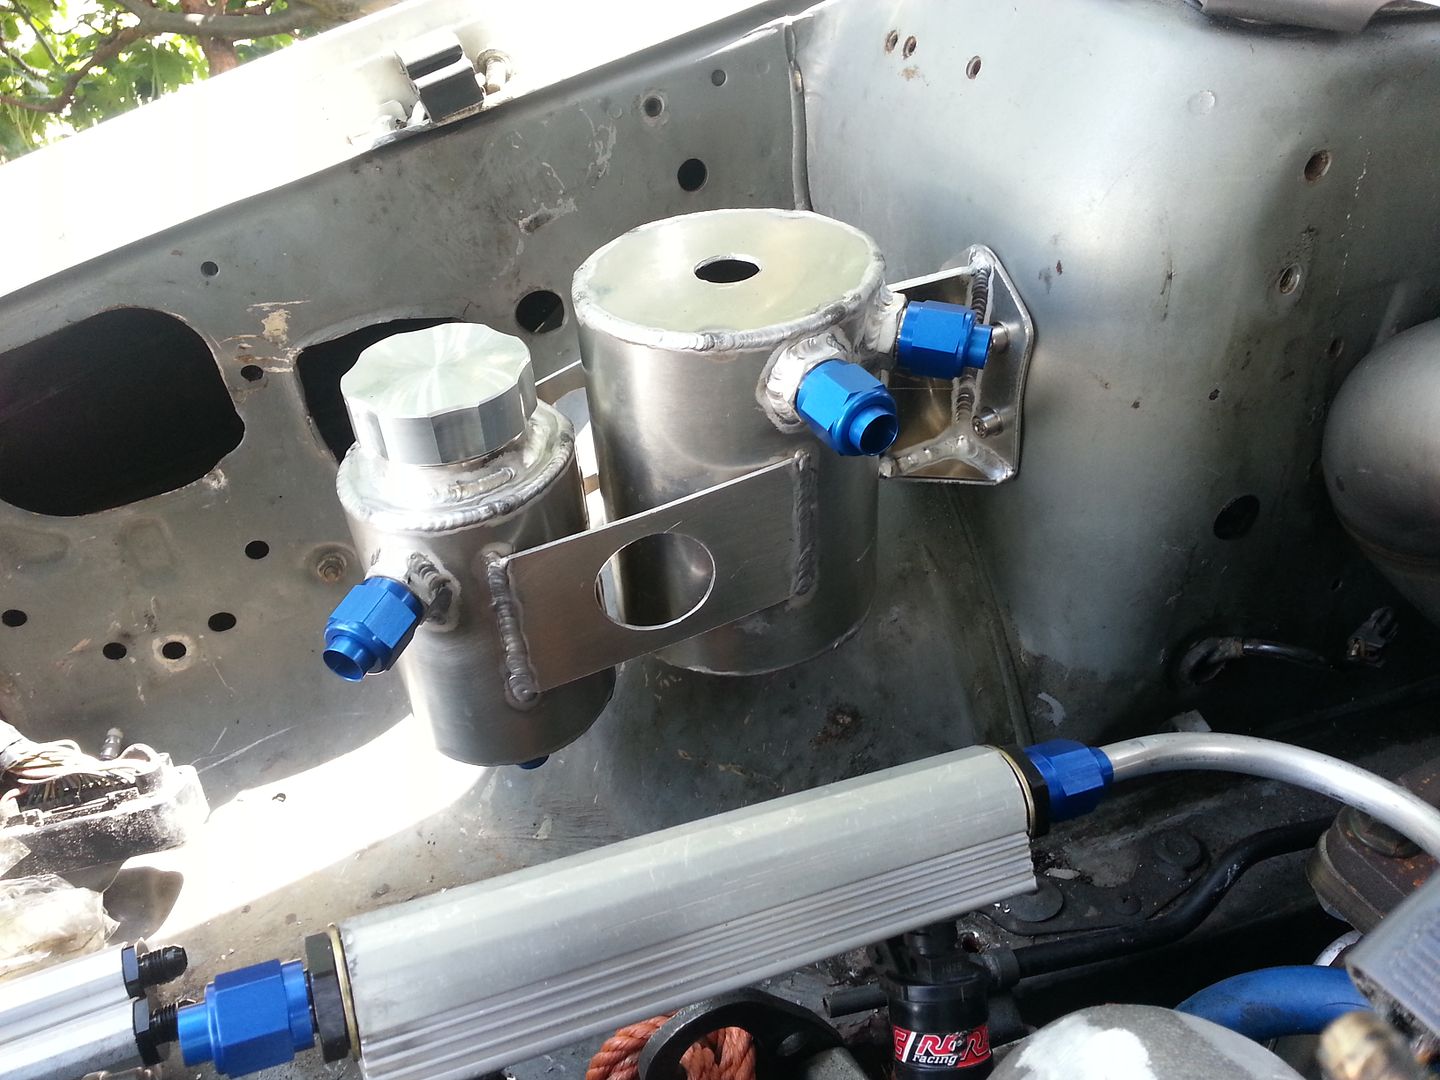
Few ally bits. Also started to build the engine bay back up with the mock up engine just to be sure that bottles/pipes and filter etc will all fit. Its all needs removing and cleaning as its all very tired looking. But it actually gives you an idea on how the engine bay will start to come together once the 2.35ltr engine goes in over the next few of weeks.
Swirl pot for the boot:
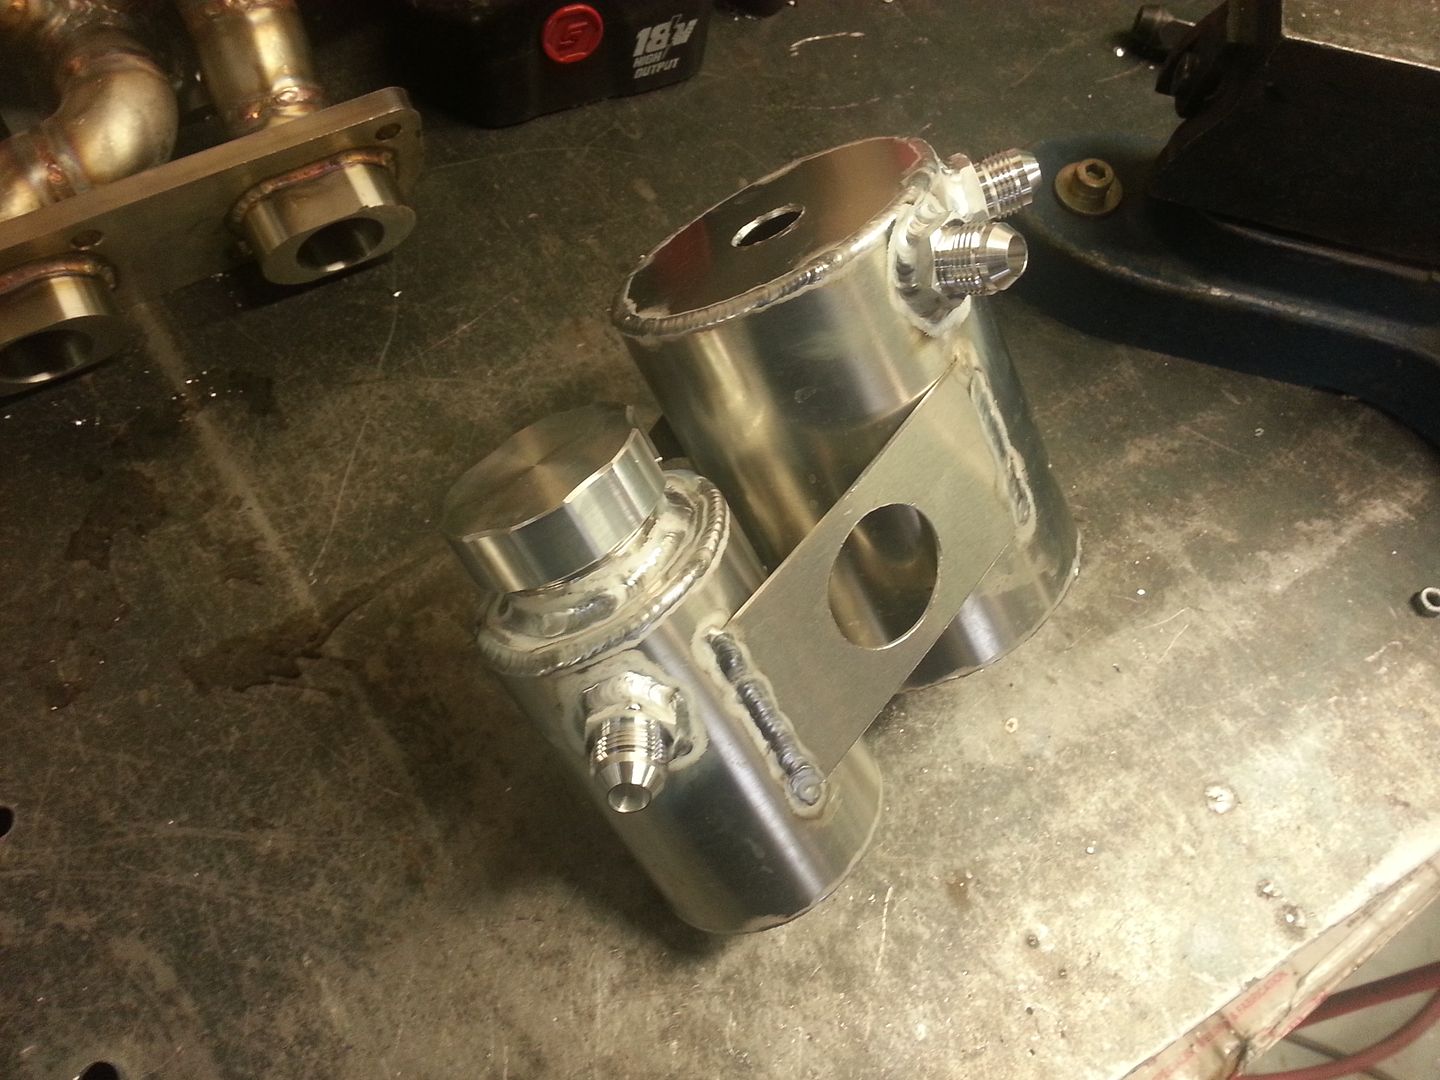
Water header tank and power steering reservoir. PS is the smaller front can.
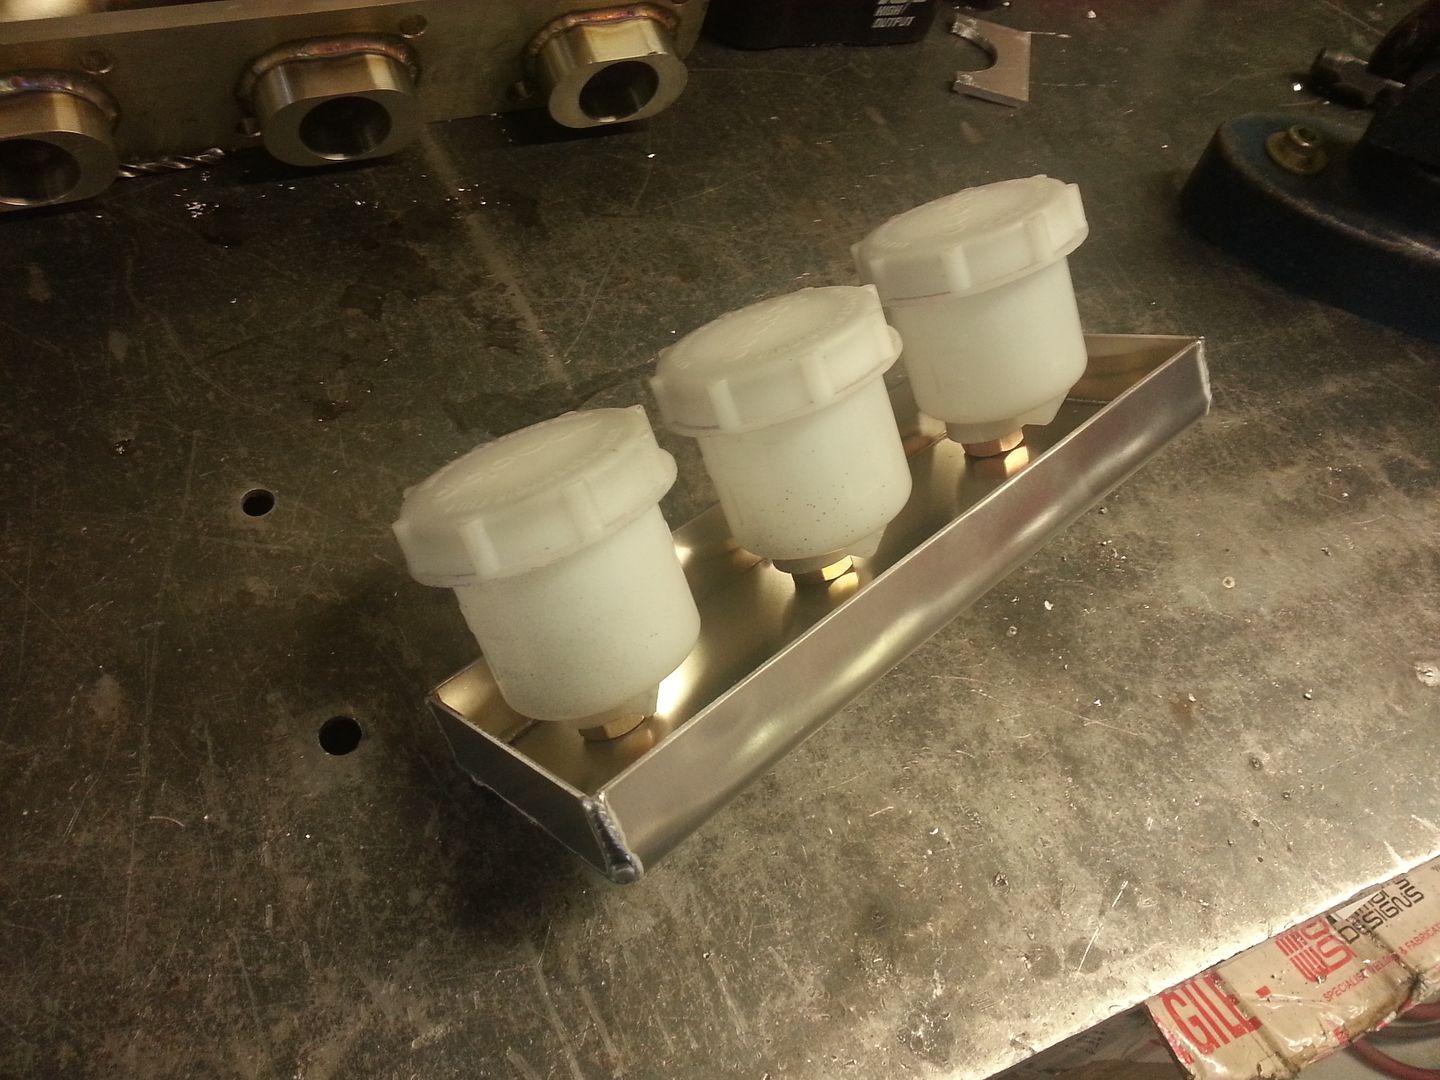
The three pots for brakes and clutch:
And a test fit with the PS pump/alternator and other bits. I've not made the bracket for the header and PS tank to they will mount in the suspension tower. Made a new crank case breather up by the air box too.
-- I hadn't considered the individual coil packs. Definitely something to look into. Is much needed to make the changes?
Few ally bits. Also started to build the engine bay back up with the mock up engine just to be sure that bottles/pipes and filter etc will all fit. Its all needs removing and cleaning as its all very tired looking. But it actually gives you an idea on how the engine bay will start to come together once the 2.35ltr engine goes in over the next few of weeks.
Swirl pot for the boot:

Water header tank and power steering reservoir. PS is the smaller front can.

The three pots for brakes and clutch:

And a test fit with the PS pump/alternator and other bits. I've not made the bracket for the header and PS tank to they will mount in the suspension tower. Made a new crank case breather up by the air box too.

Last edited by seventune; 02 June 2015 at 10:58 PM.
 11 July 2014, 11:51 AM
#73
Scooby Regular
iTrader: (3)

Join Date: Jan 2003
Location: Oss, The Netherlands
Posts: 749
Likes: 0
Received 0 Likes
on
0 Posts
The air filter placement on this setup cleans out the engine bay nicely.
Lots of room for various tanks and bottles where the air filter and conector pipe usually sit on a rotated setup.
Might have a stab at a setup like this myself.
Lots of room for various tanks and bottles where the air filter and conector pipe usually sit on a rotated setup.
Might have a stab at a setup like this myself.
21 July 2014, 08:31 PM
#74
Scooby Regular
Thread Starter
Cheers guys,
Few more bits turned up and a little bit more done.
Pair of 044's and holley reg:
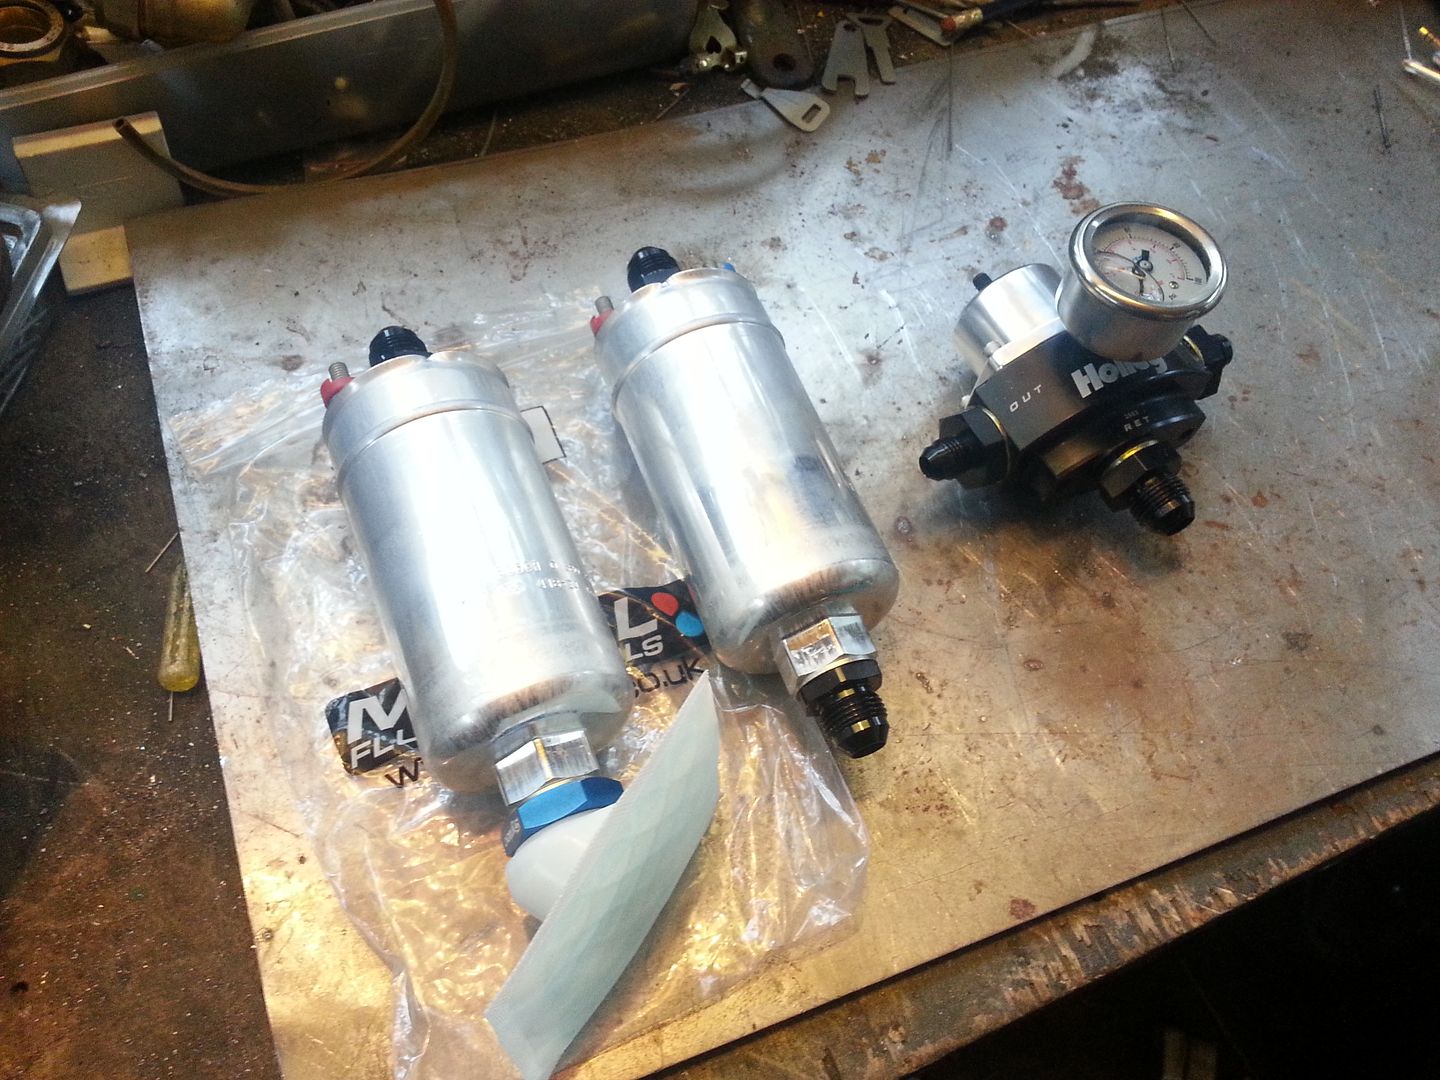
Header tank fitted up. Still waiting on the pressure caps....
machined off the -6 fittings on the fuel rails as the weld ons made them look tatty. Tapped the ends of the rails and used M18 to -6 screw fittings instead. Looks much cleaner:
Rails and pressure reg in:
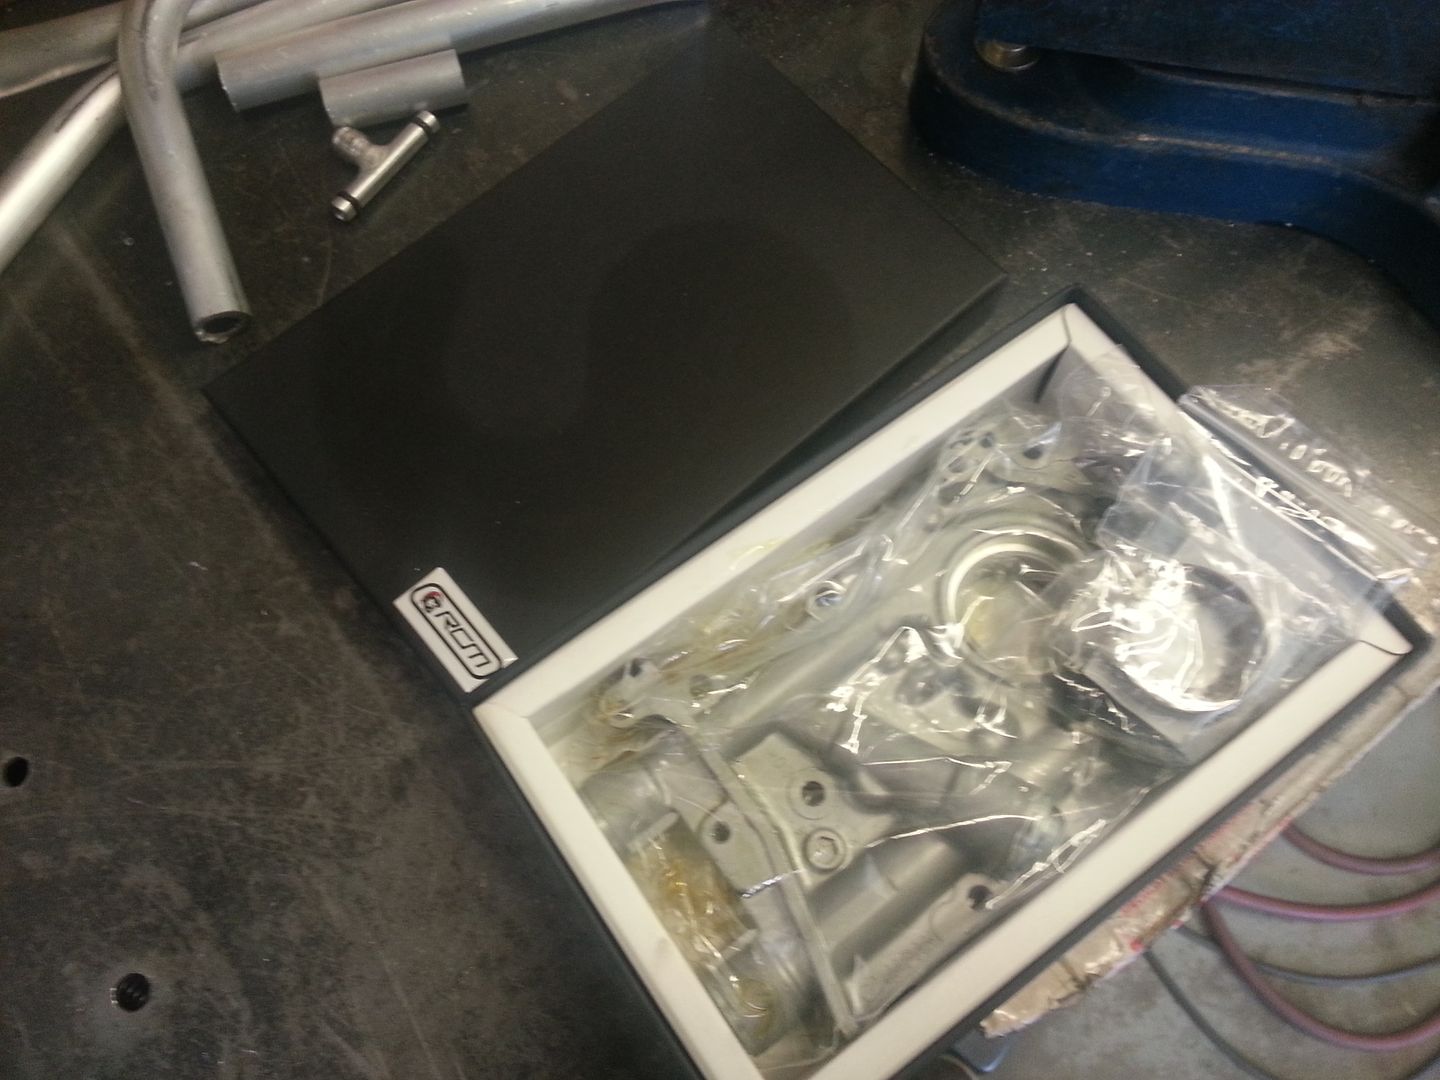
12mm RCM oil pump
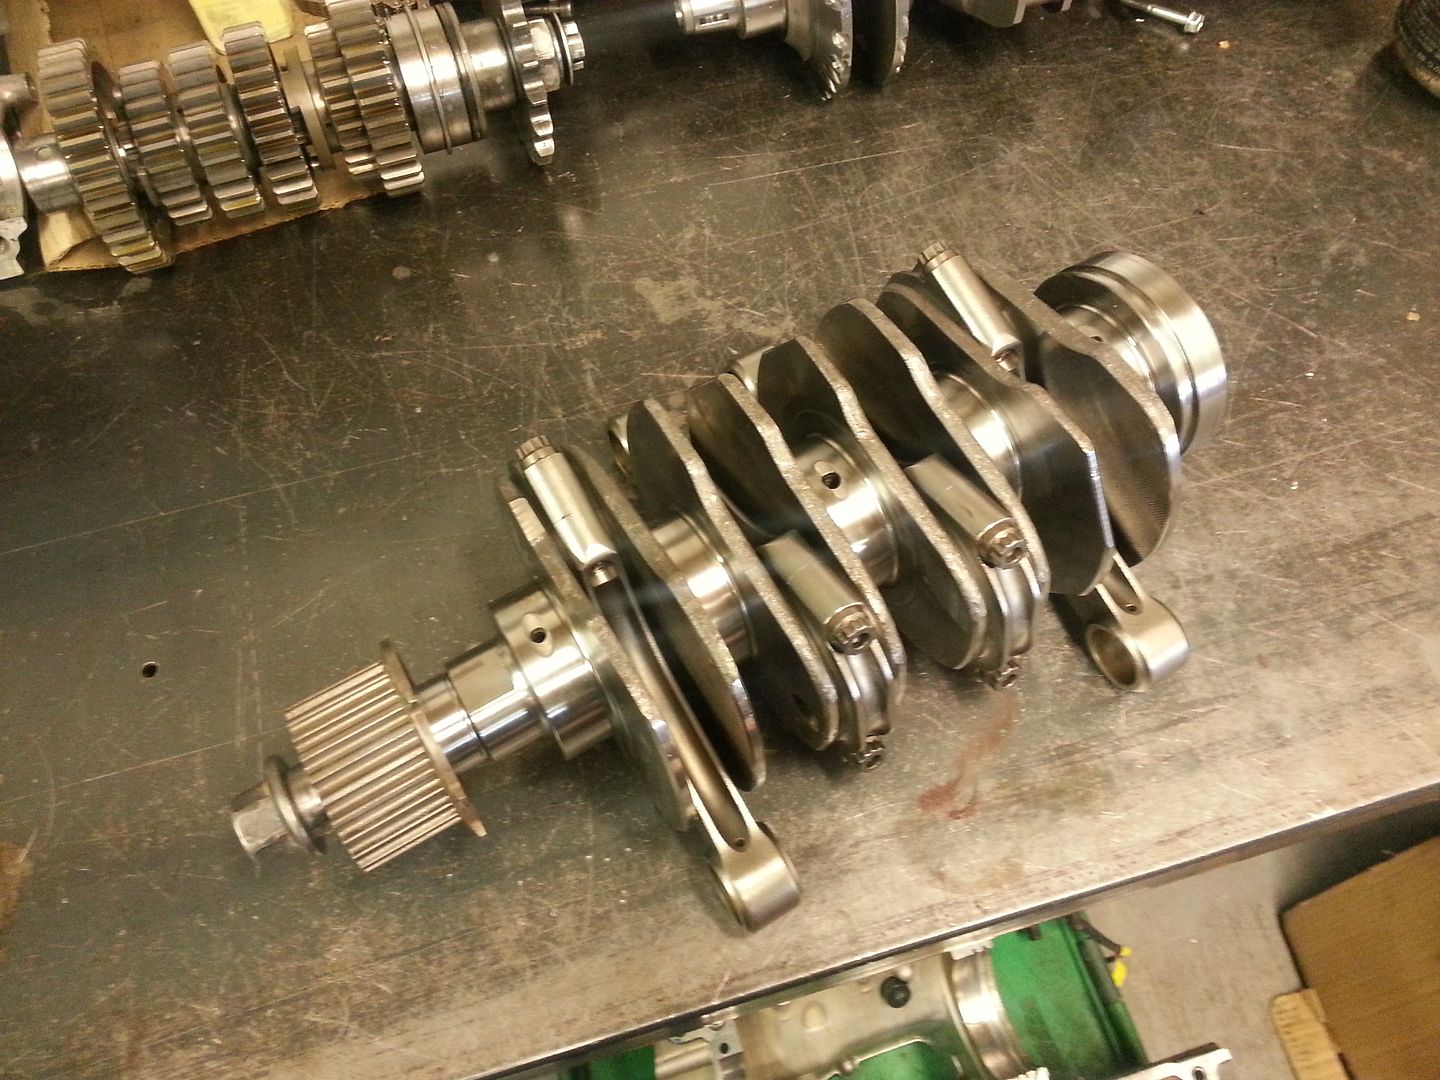
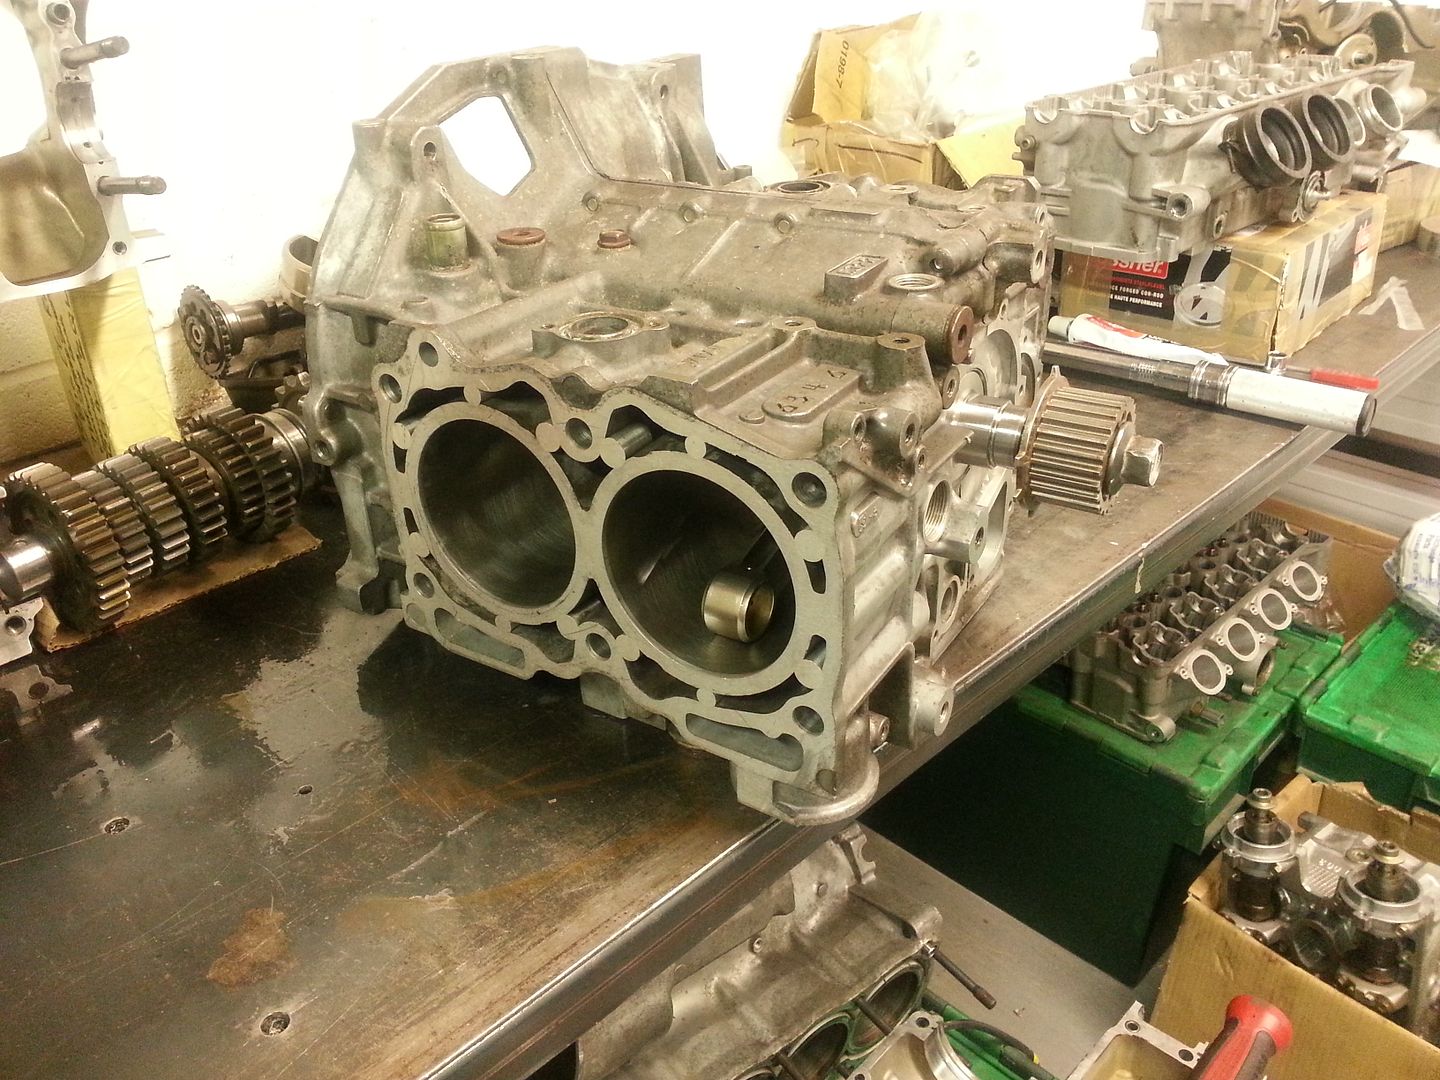
Also got the crank and rods back from SEP after the inspection and cleaning. All just fine after the engine let go. They dressed the rods and re polished the crank so I can now start getting the motor back together.
Hopefully the clutch will be with me soon. Ordered the flywheel today too. I should see a 12kg weight lose to the rotating assembly on the clutch side.
Few more bits turned up and a little bit more done.
Pair of 044's and holley reg:

Header tank fitted up. Still waiting on the pressure caps....

machined off the -6 fittings on the fuel rails as the weld ons made them look tatty. Tapped the ends of the rails and used M18 to -6 screw fittings instead. Looks much cleaner:


Rails and pressure reg in:

12mm RCM oil pump

Also got the crank and rods back from SEP after the inspection and cleaning. All just fine after the engine let go. They dressed the rods and re polished the crank so I can now start getting the motor back together.

Hopefully the clutch will be with me soon. Ordered the flywheel today too. I should see a 12kg weight lose to the rotating assembly on the clutch side.
Last edited by seventune; 02 June 2015 at 11:00 PM.
 23 July 2014, 07:49 PM
#76
Scooby Regular
Thread Starter
Thanks, fella.
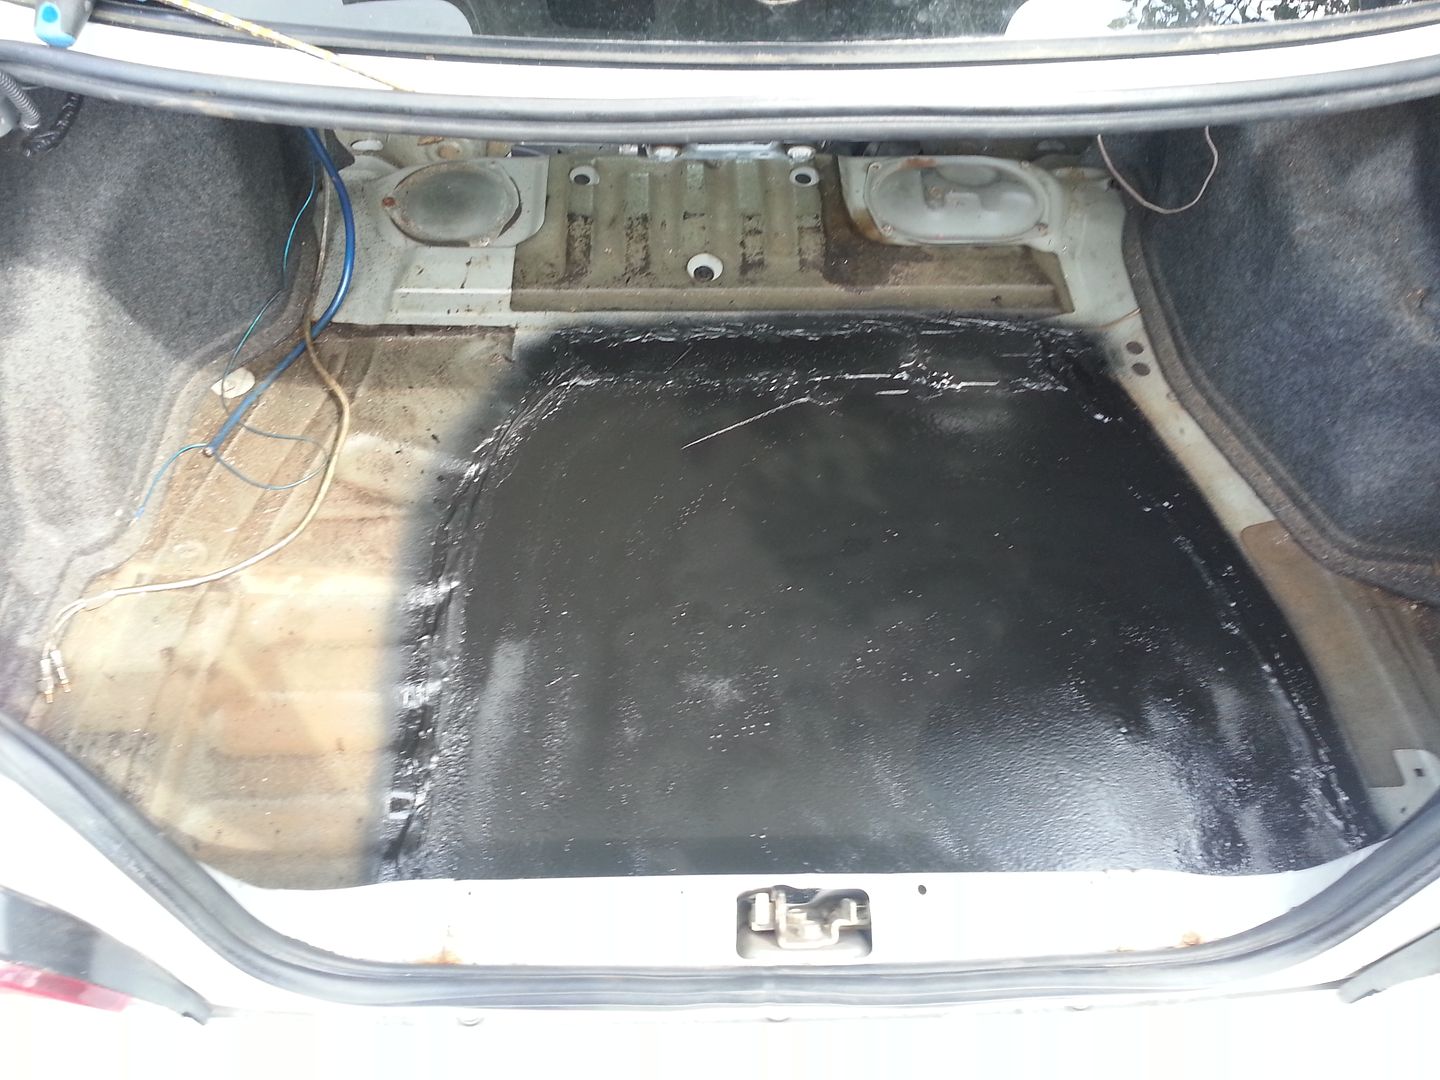
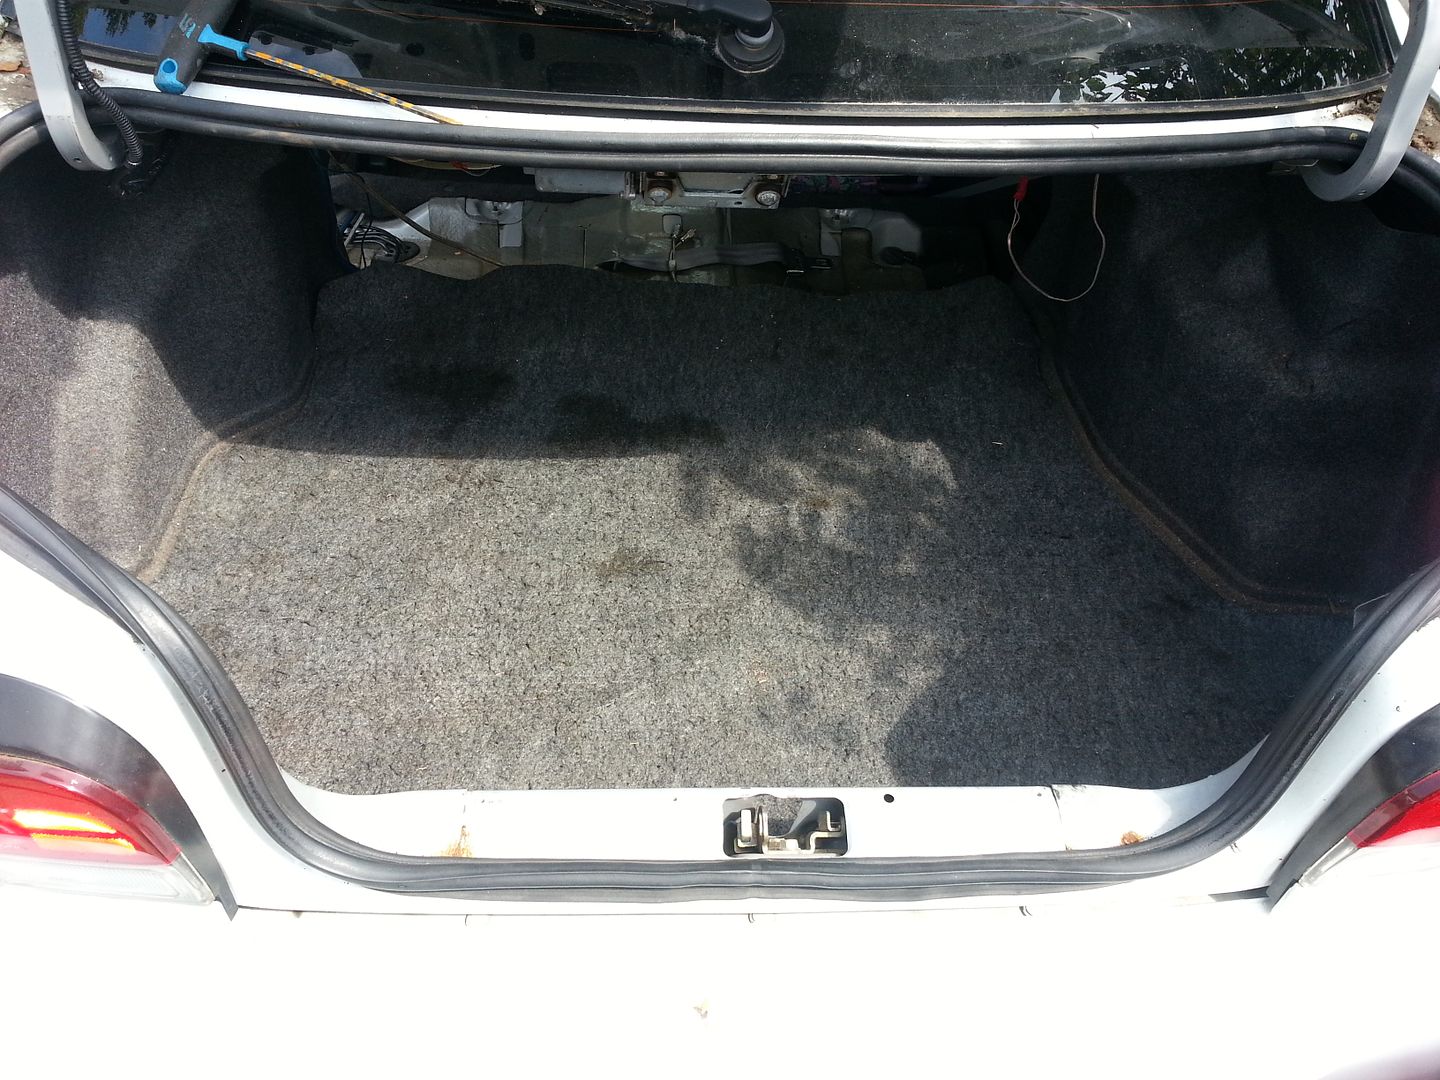
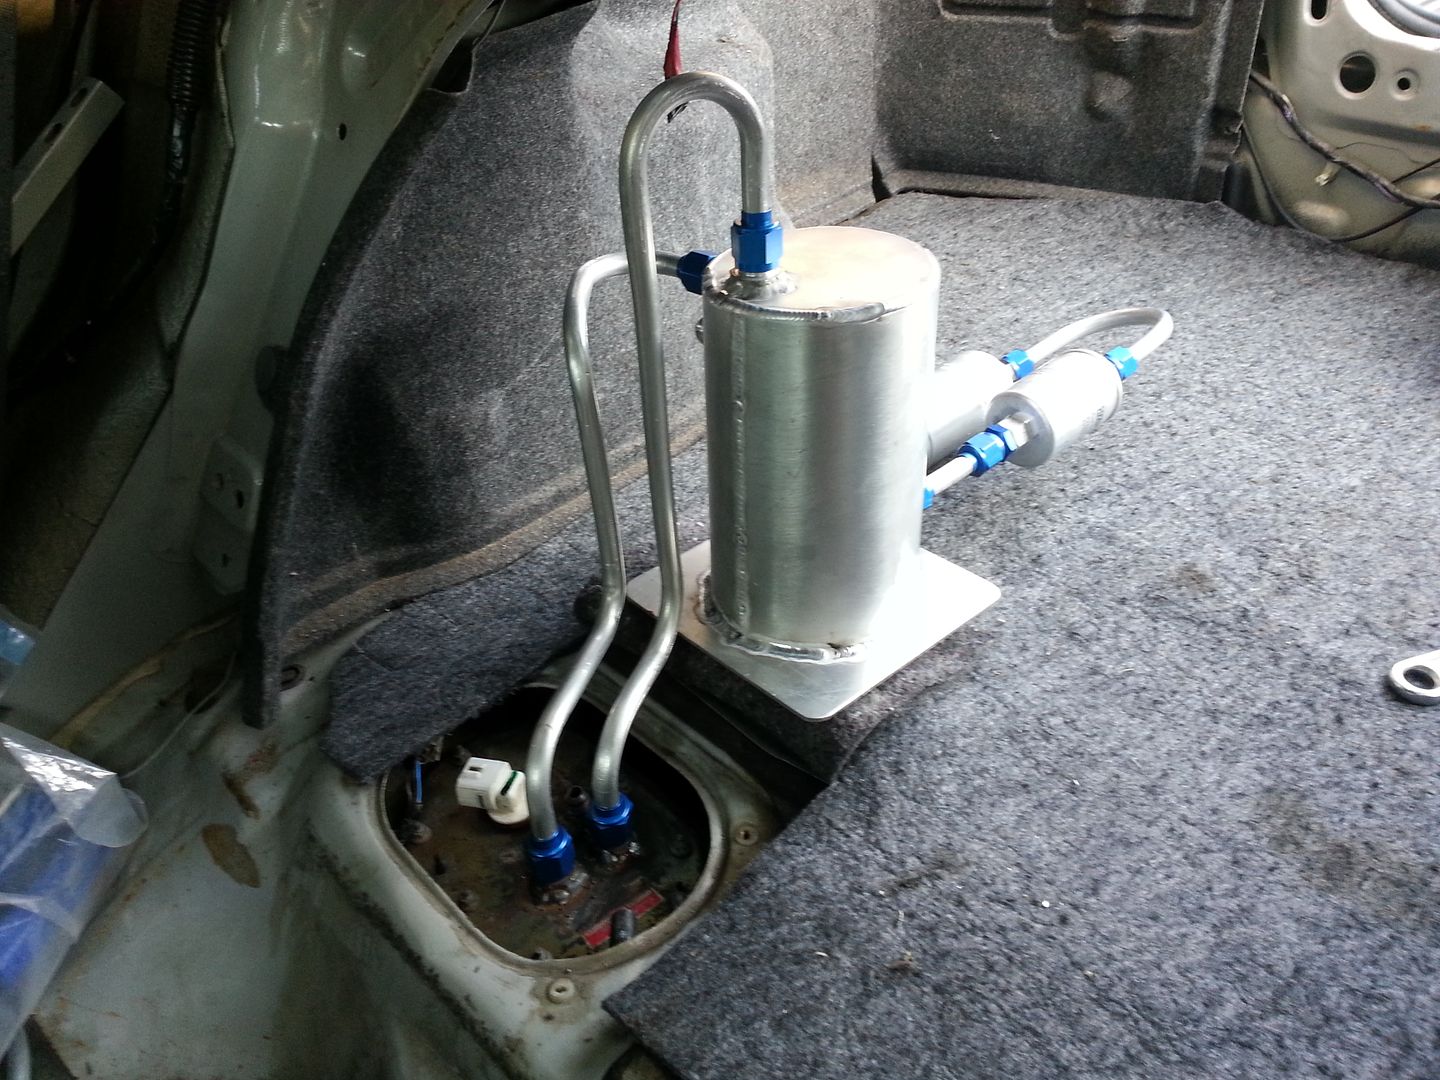
Few bits sorted in the boot today. Need a few extra fittings to finish it up. Will be making a ally tray for it all to sit in.
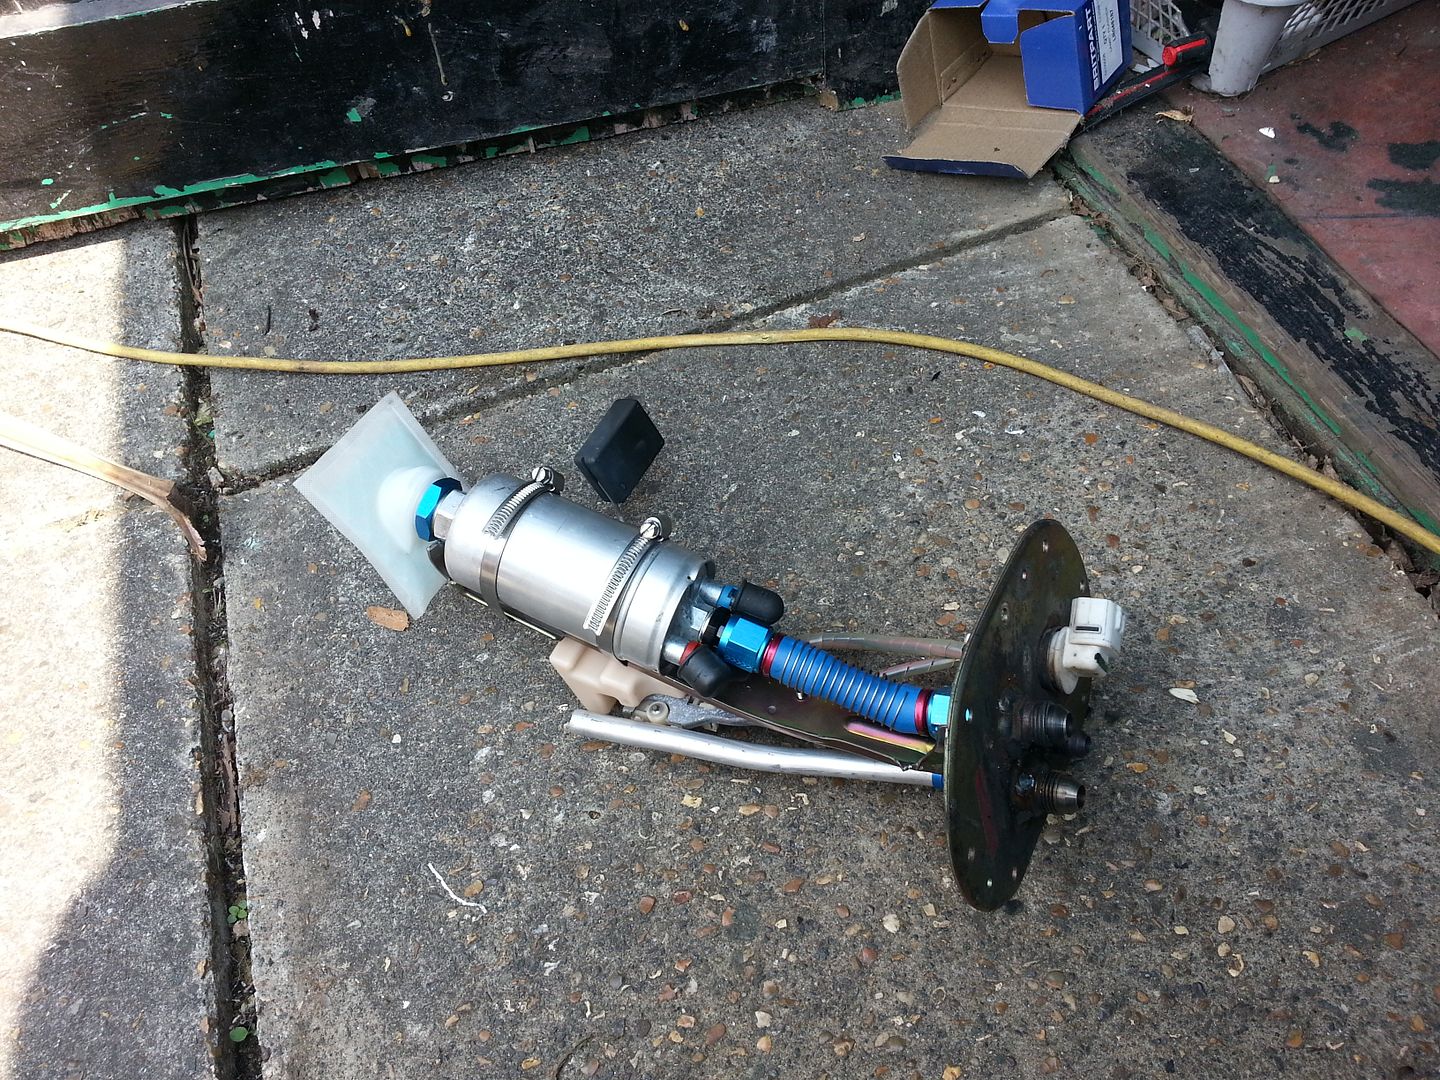
In Tank 044. Also modded to top plate with 2x -8 fittings and -6 breather.
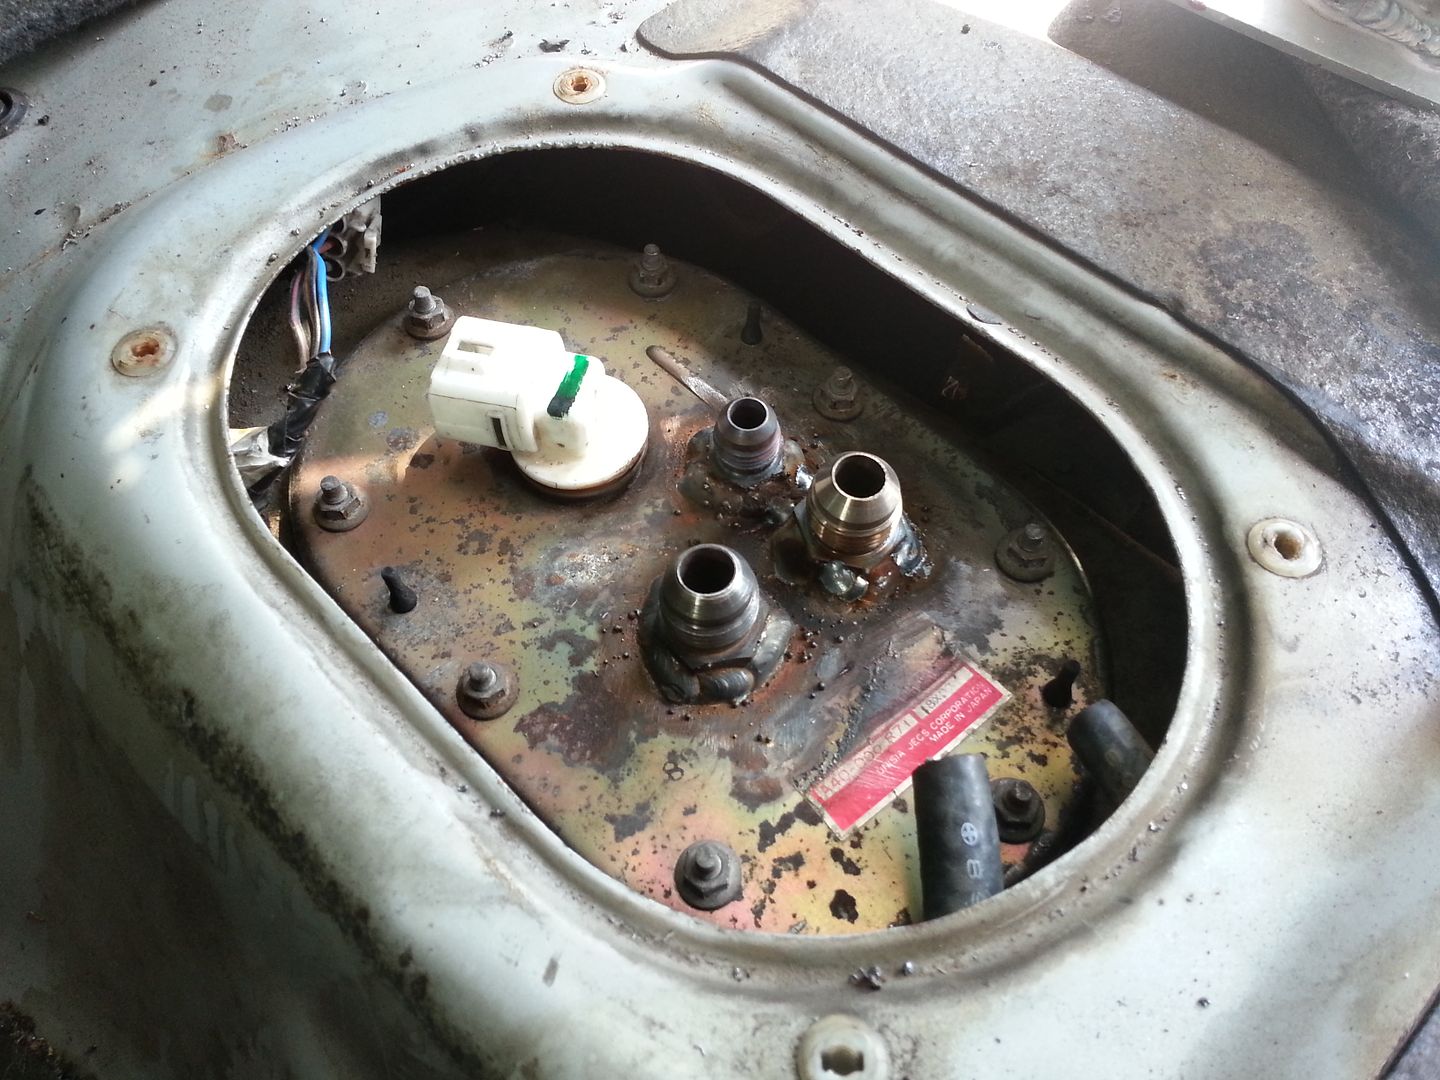
Removed the wheel well for body mods that will come at a later date:
Started getting the swirl pot in:
Few bits sorted in the boot today. Need a few extra fittings to finish it up. Will be making a ally tray for it all to sit in.
In Tank 044. Also modded to top plate with 2x -8 fittings and -6 breather.


Removed the wheel well for body mods that will come at a later date:


Started getting the swirl pot in:

Last edited by seventune; 02 June 2015 at 11:01 PM.
24 July 2014, 09:11 AM
#77
Scooby Regular
Thread Starter
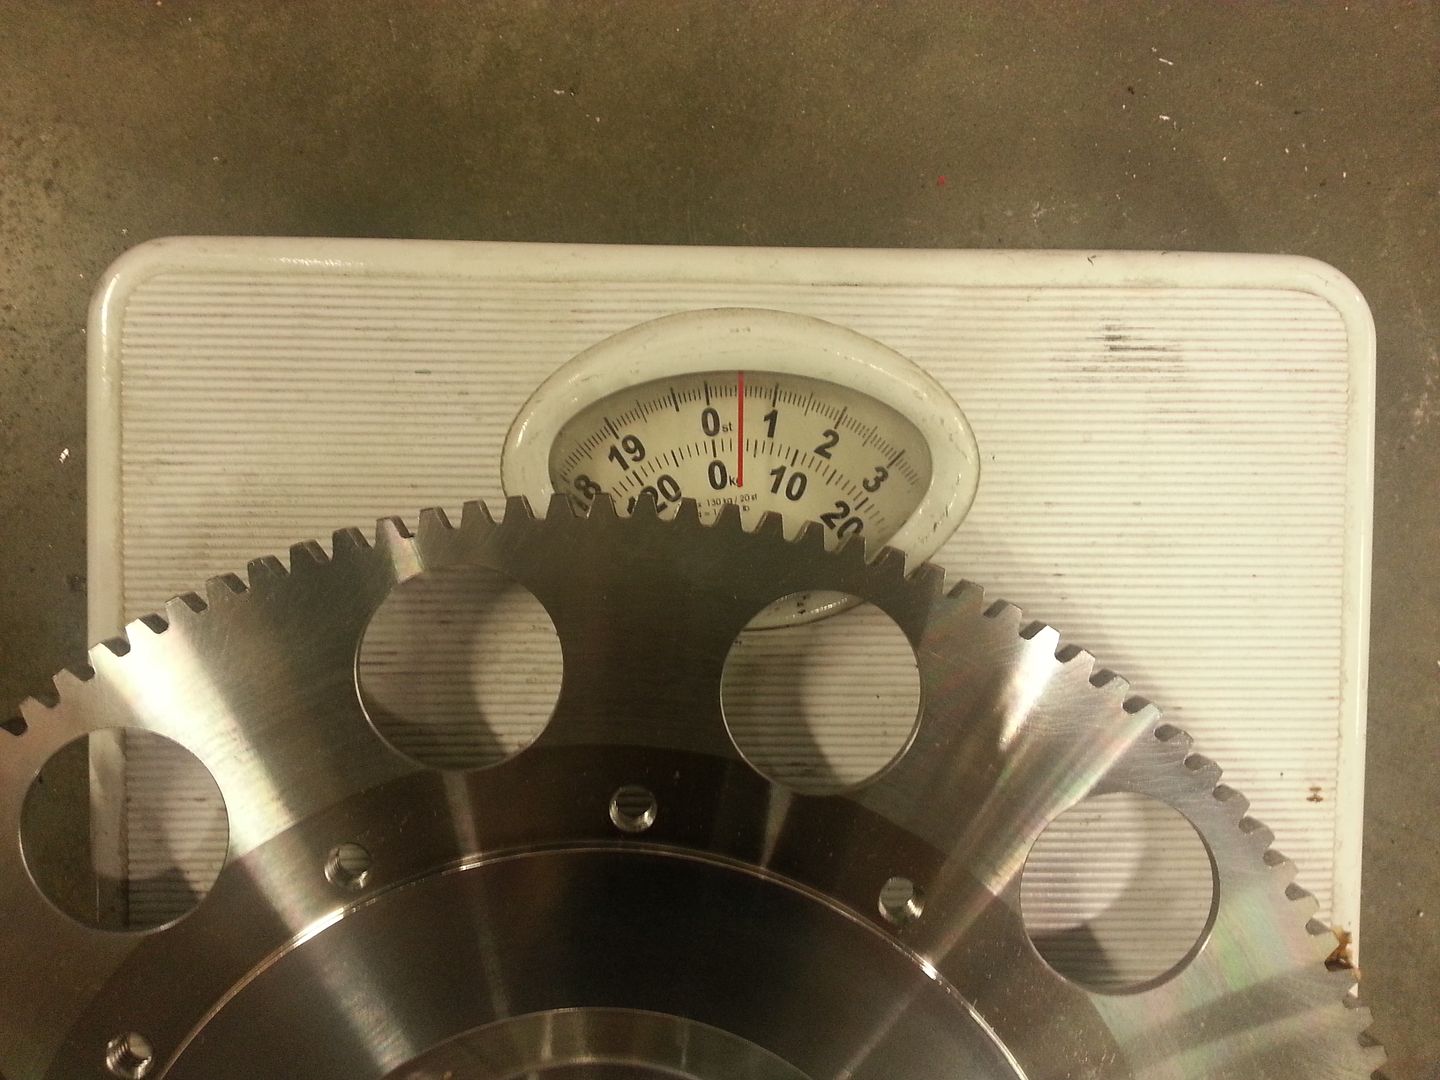
New flywheel for 7 1/2" clutch next to the old one
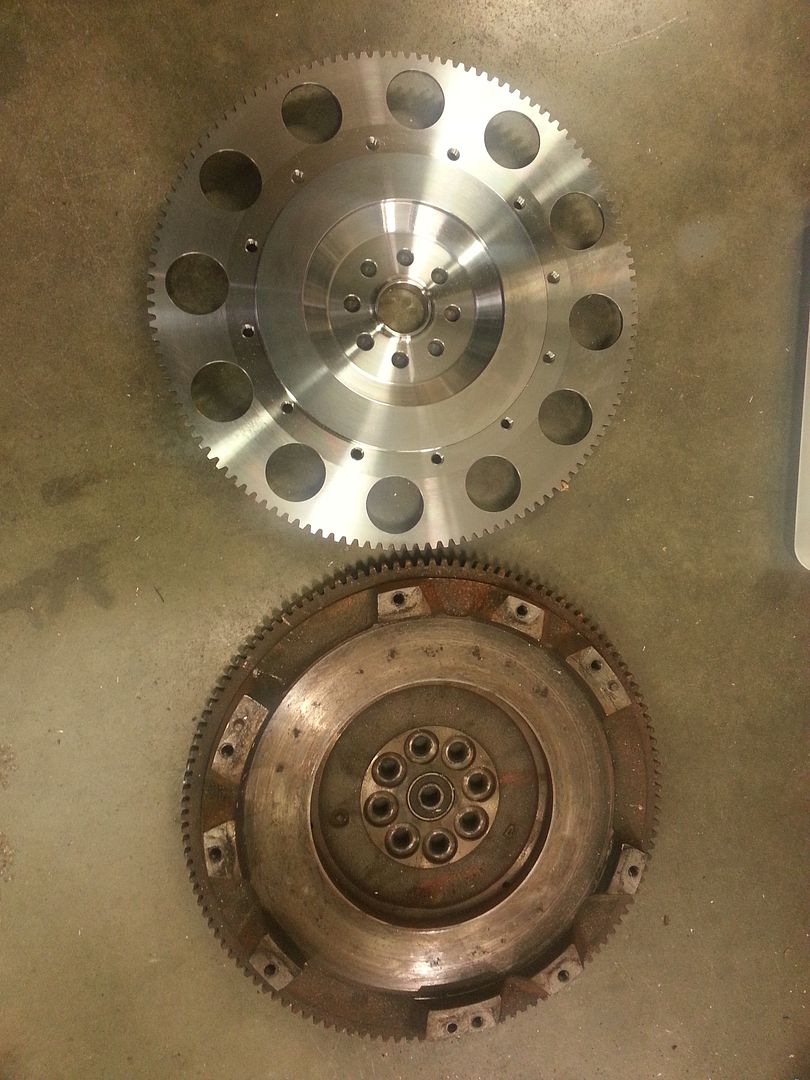
Stock one comes in at 9KG
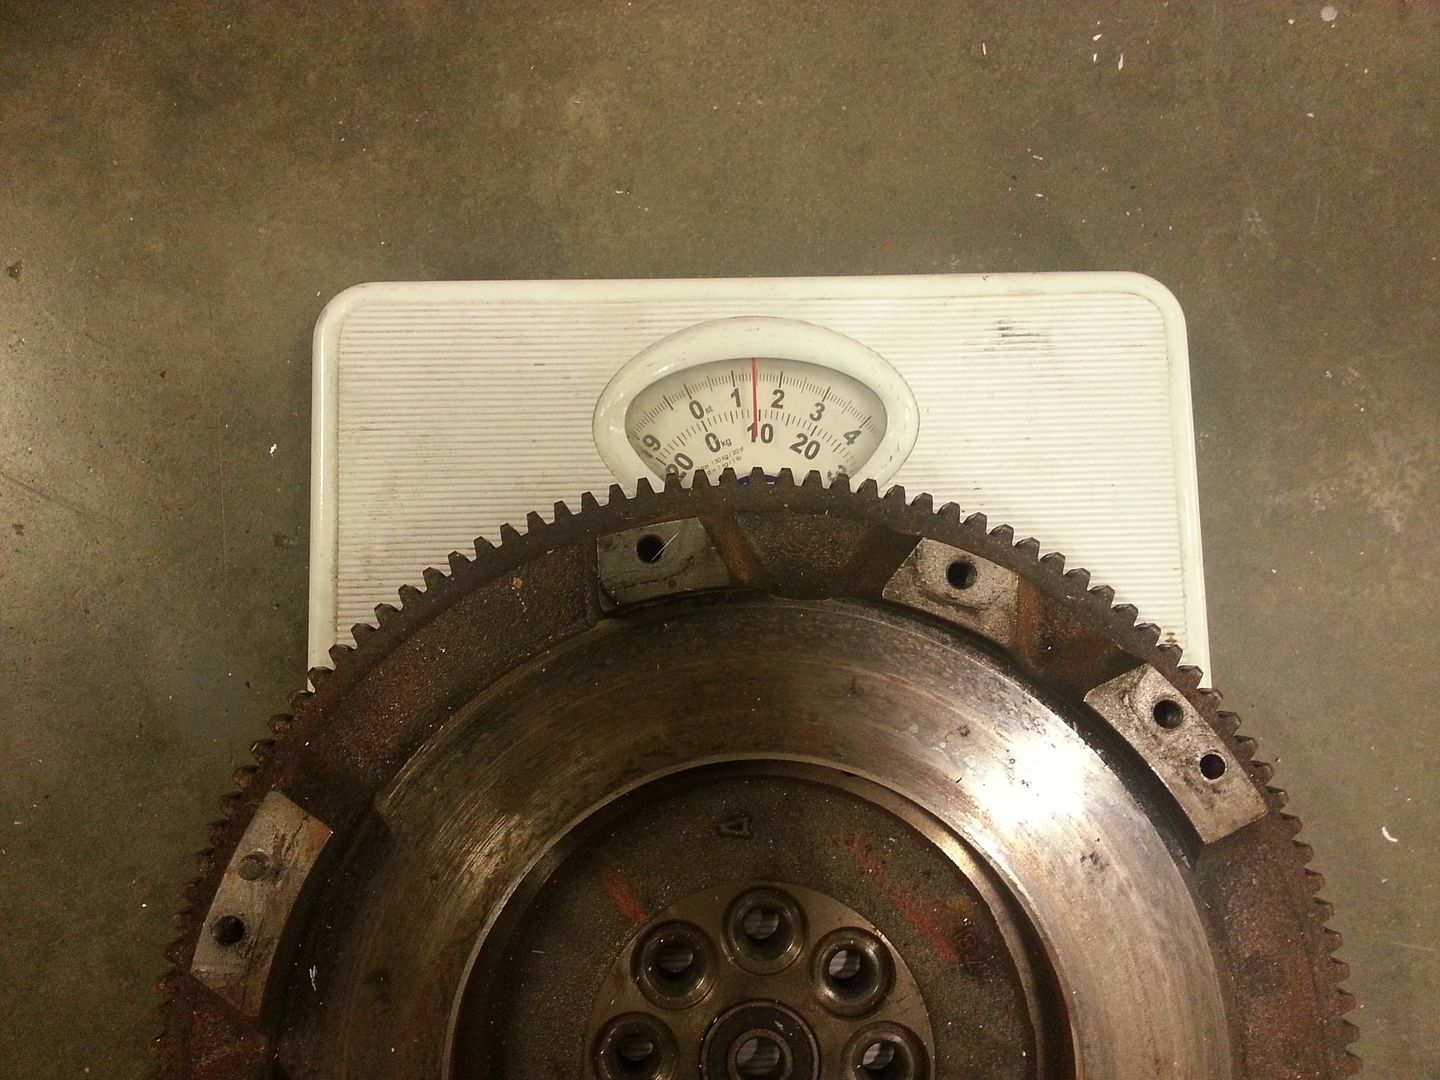
New one is 3KG. A 6KG saving!
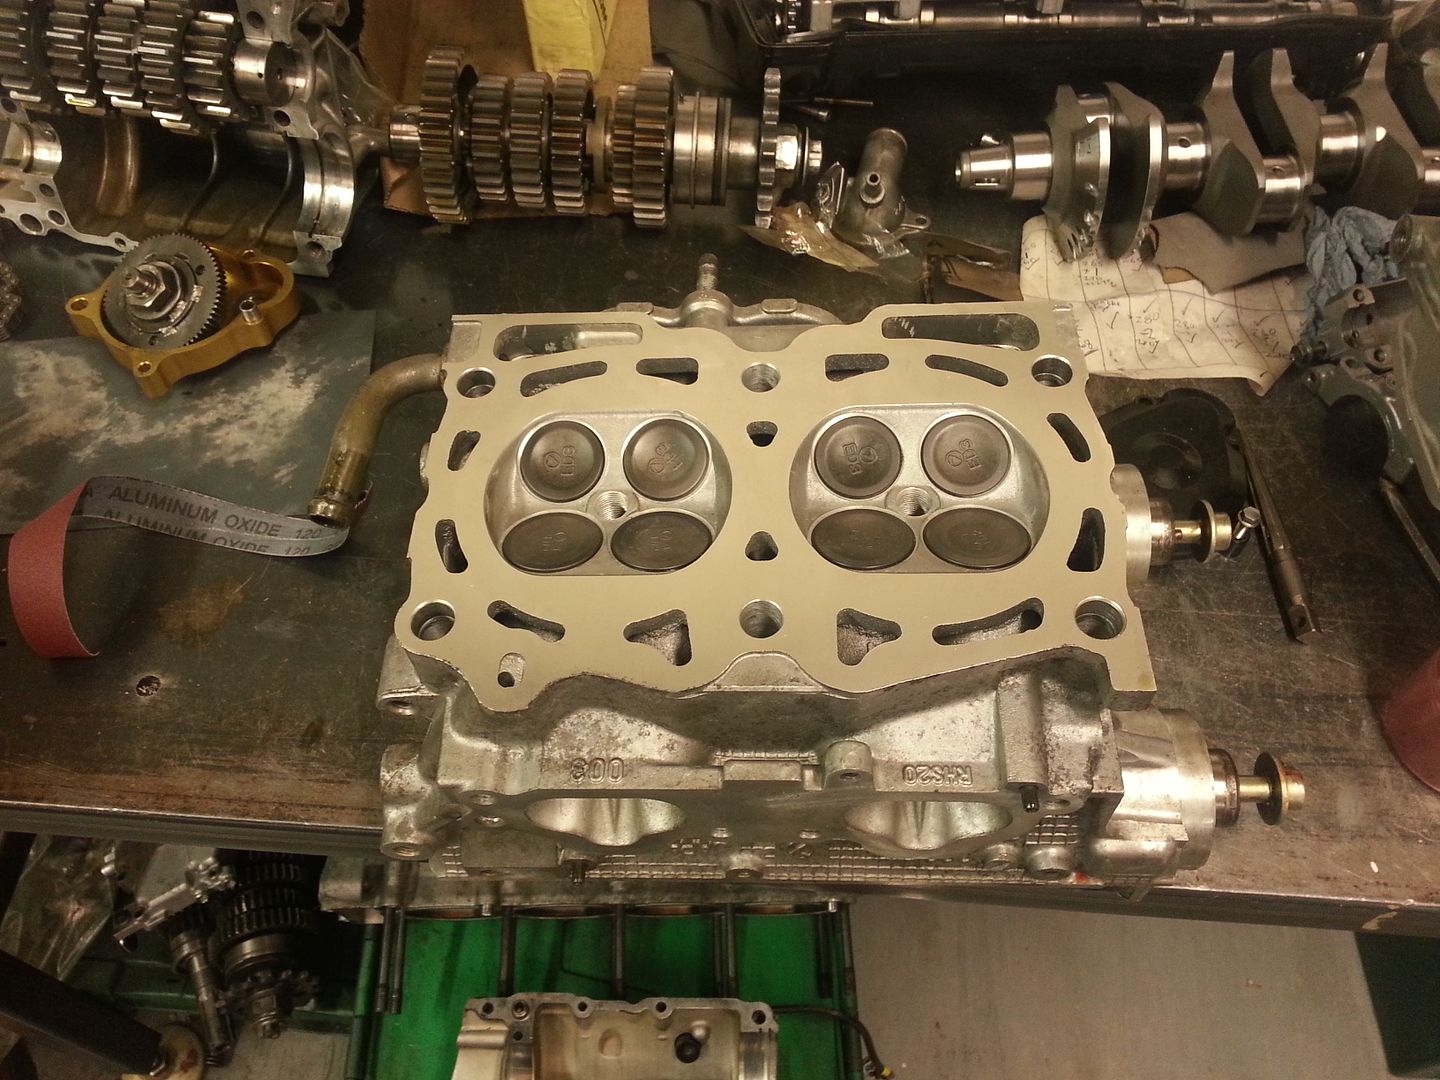
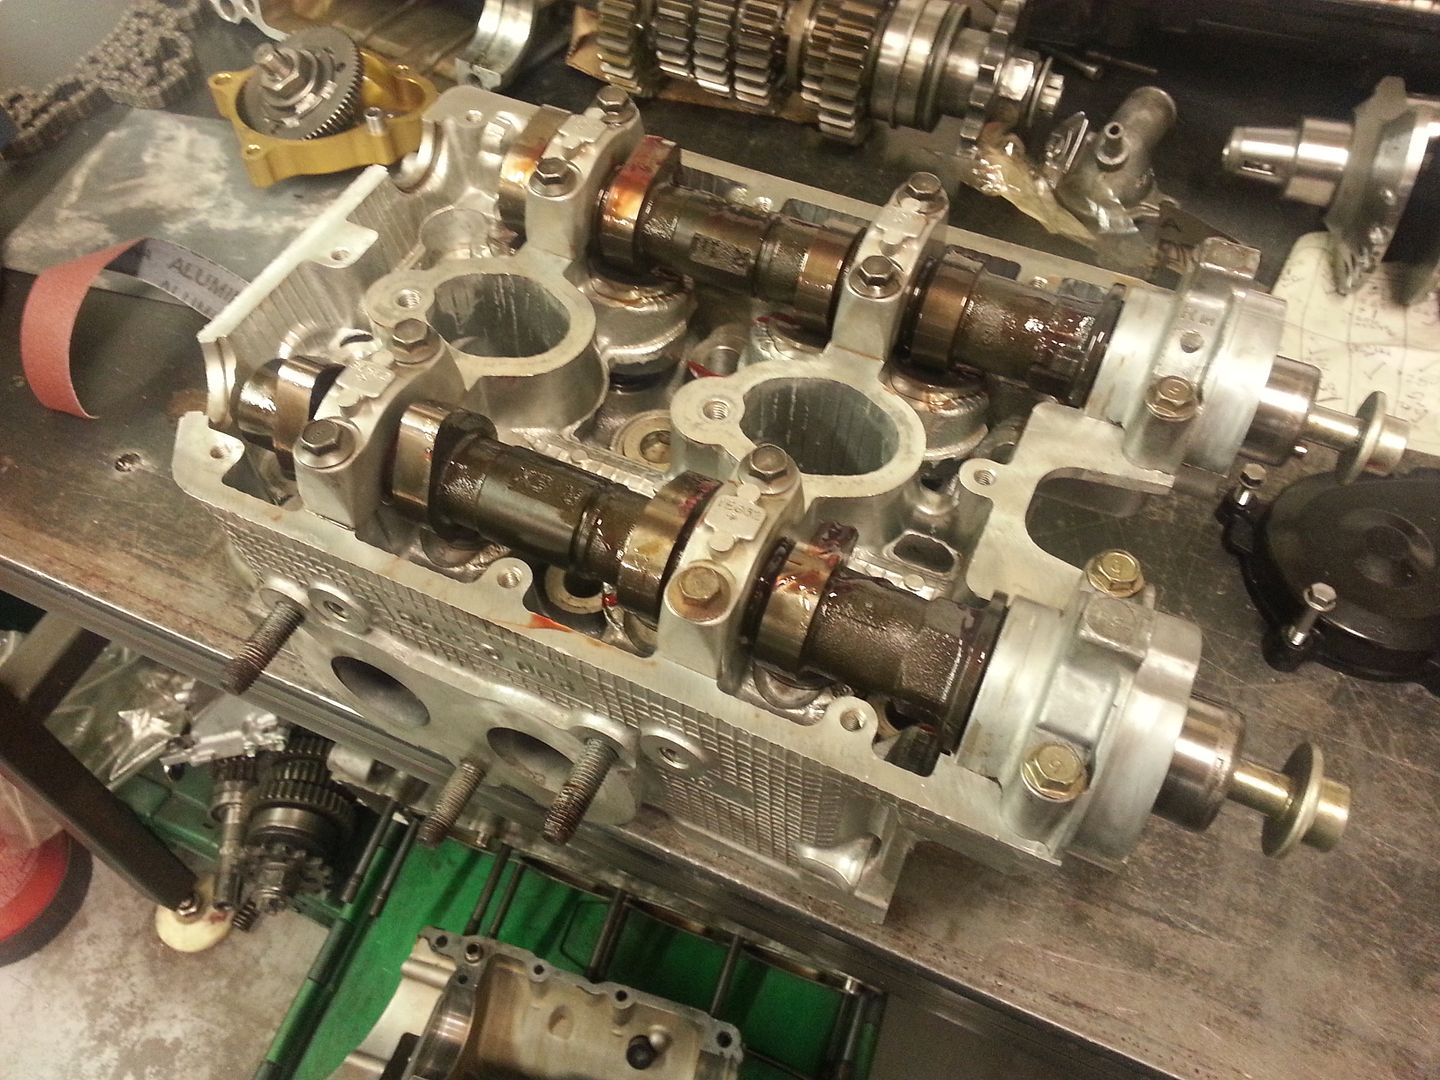
Also got the first of two heads built. Drilled for 14mm studs and dowls.

Stock one comes in at 9KG

New one is 3KG. A 6KG saving!

Also got the first of two heads built. Drilled for 14mm studs and dowls.


Last edited by seventune; 02 June 2015 at 11:02 PM.
 27 July 2014, 10:37 AM
#79
Sorry just saw you asked what was involved in swapping to newage coil packs.
See the attached for a pretty good description
http://www.jamessimpson.co.uk/classi...ck-conversion/
Good luck with the project - lots of nice ideas
See the attached for a pretty good description
http://www.jamessimpson.co.uk/classi...ck-conversion/
Good luck with the project - lots of nice ideas
27 July 2014, 12:25 PM
#80
Scooby Regular
Thread Starter
Sorry just saw you asked what was involved in swapping to newage coil packs.
See the attached for a pretty good description
http://www.jamessimpson.co.uk/classi...ck-conversion/
Good luck with the project - lots of nice ideas
See the attached for a pretty good description
http://www.jamessimpson.co.uk/classi...ck-conversion/
Good luck with the project - lots of nice ideas
 31 July 2014, 11:04 PM
#81
Scooby Regular
Thread Starter
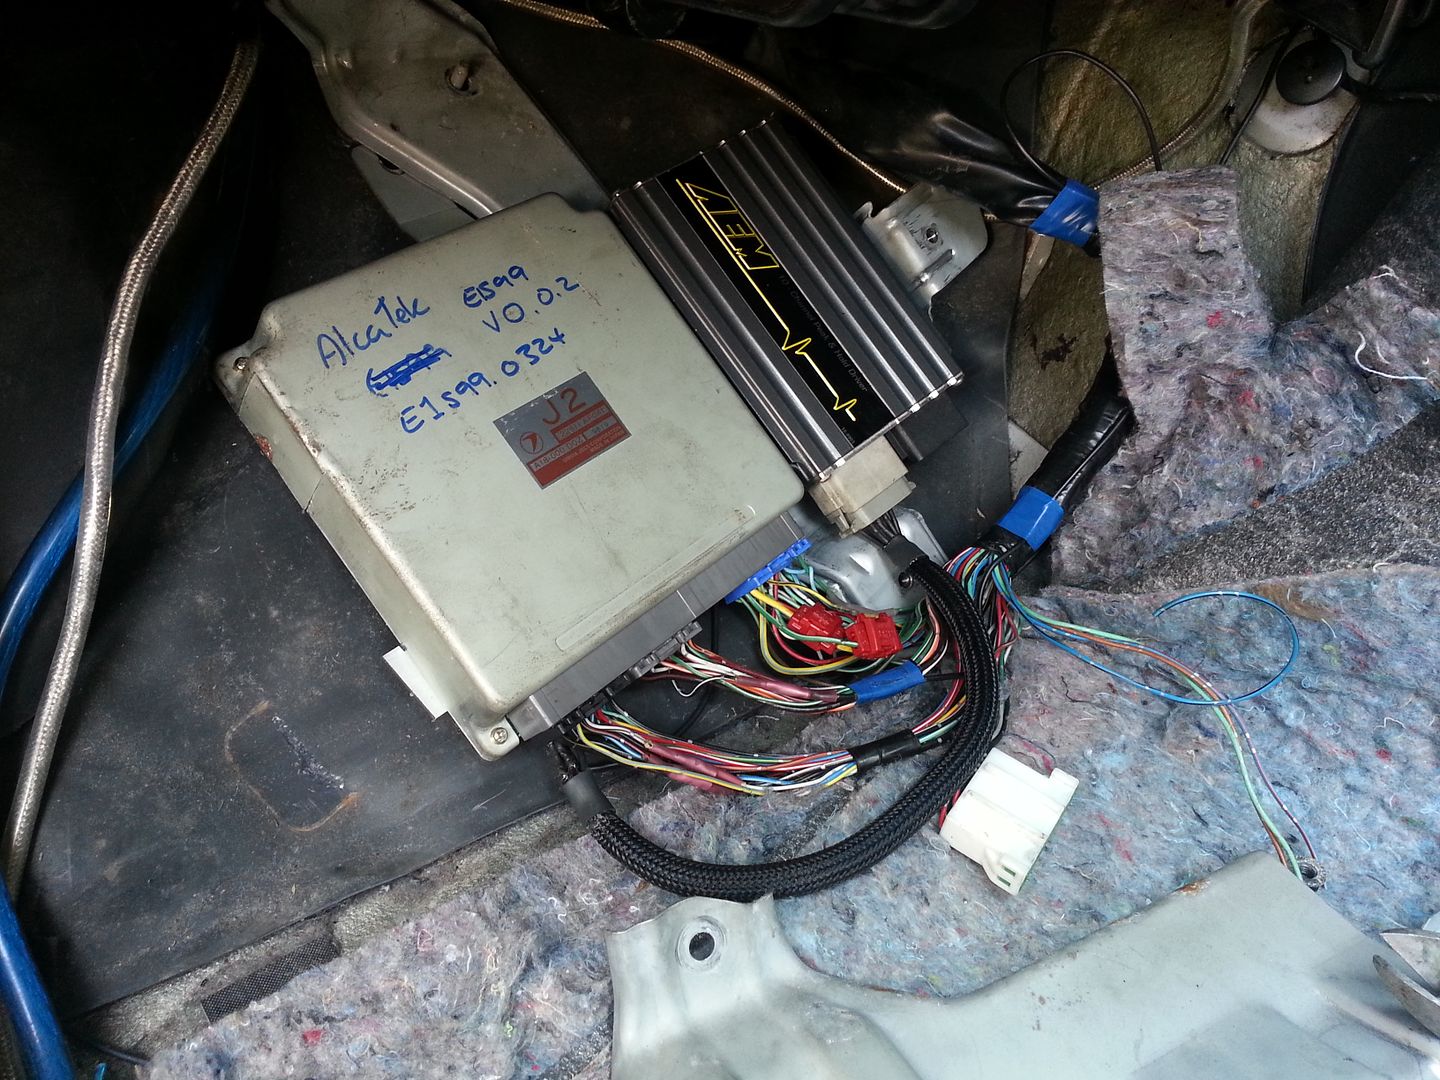
The injector driver is in. Still got to pull the wires back through the loom from the engine side. Turns out looking at the plugs across the majority of the loom a lot of the connects need lopping off and re fitting. Lots bare cables and split insulation so another job to do. Anyway pulled the original wires out the ecu to run a new short loom into the AEM. Then i'll hope another new section up to the injectors.
Did all the clearancing on the crank bearings and rods etc. Got the cases together and sealed up. Will get the pistons in tomorrow along with the head studs.
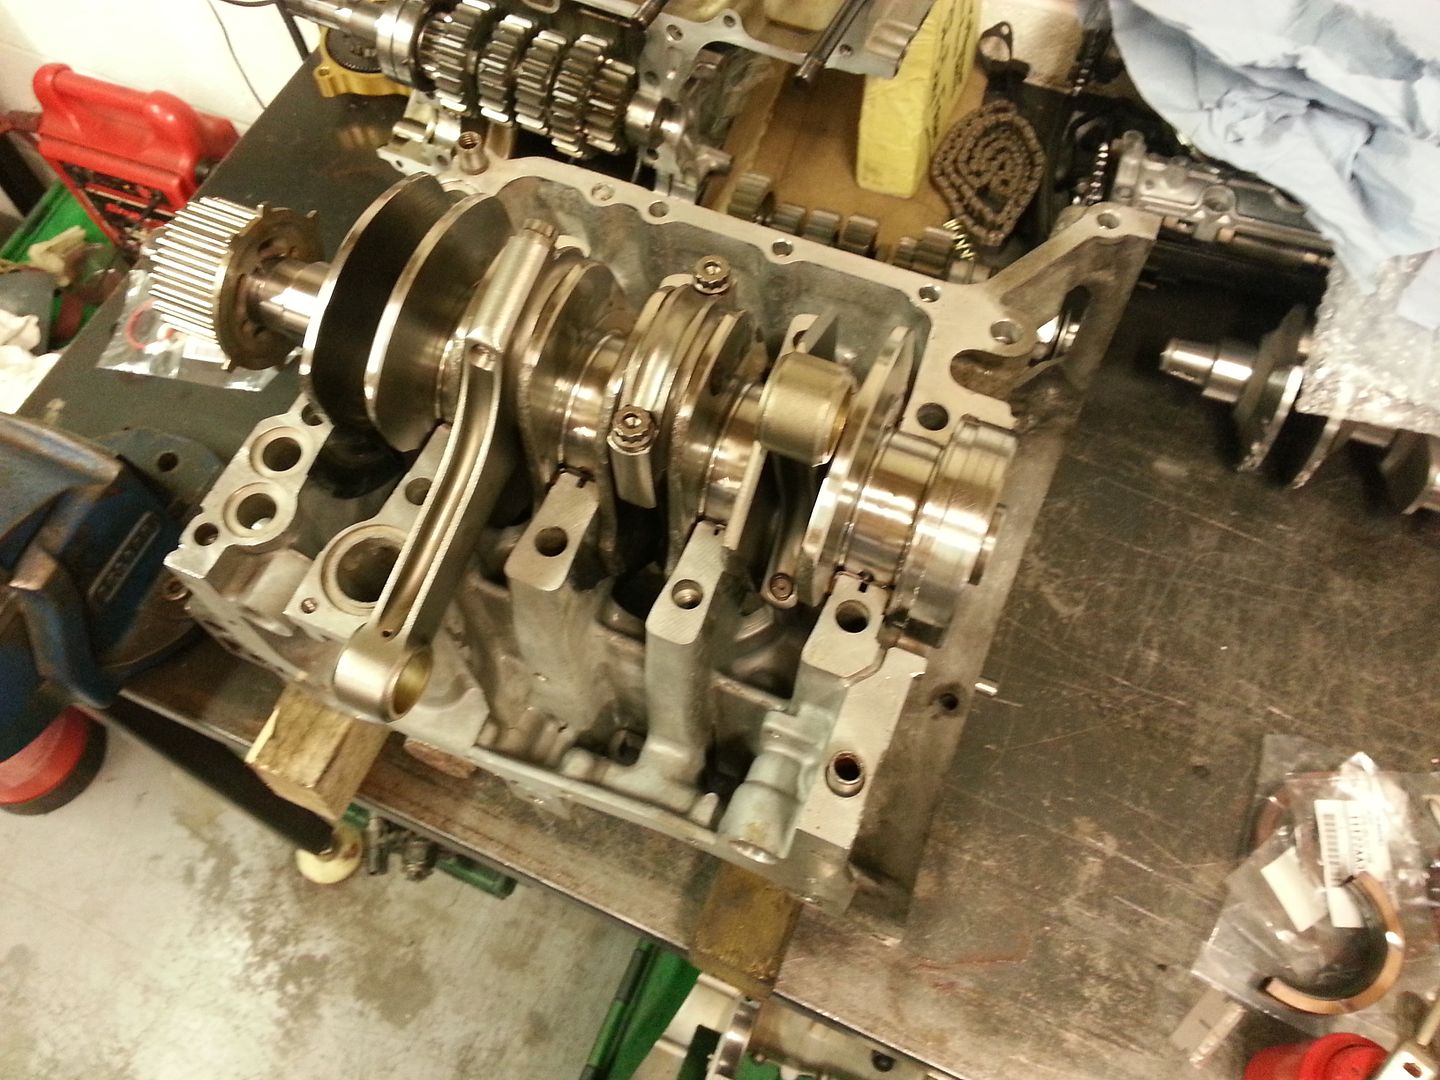
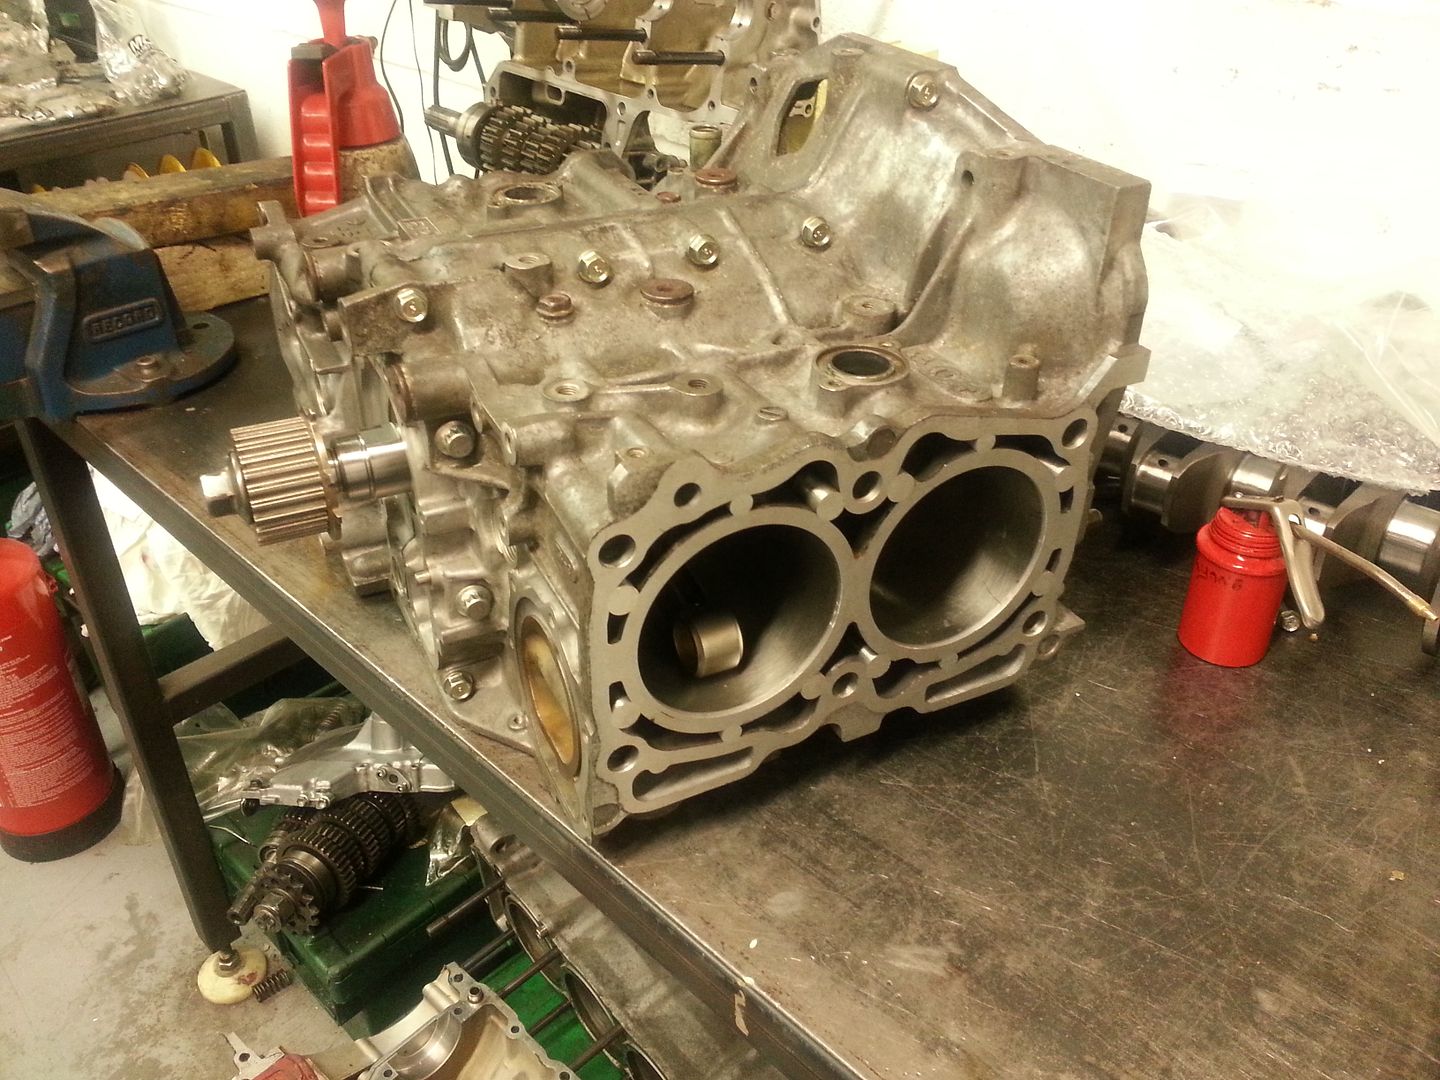

Did all the clearancing on the crank bearings and rods etc. Got the cases together and sealed up. Will get the pistons in tomorrow along with the head studs.


Last edited by seventune; 02 June 2015 at 11:03 PM.
10 August 2014, 11:52 PM
#82
Scooby Regular
Thread Starter
Righty well piston rings are on route. I've also changed the head gasket for a thicker 1.5mm item which will drop the compression a little to 8.25:1. So waiting for those to come before I can finish the motor off. Clutch has been delayed until the second week in September as it didn't go out the last US shipment.
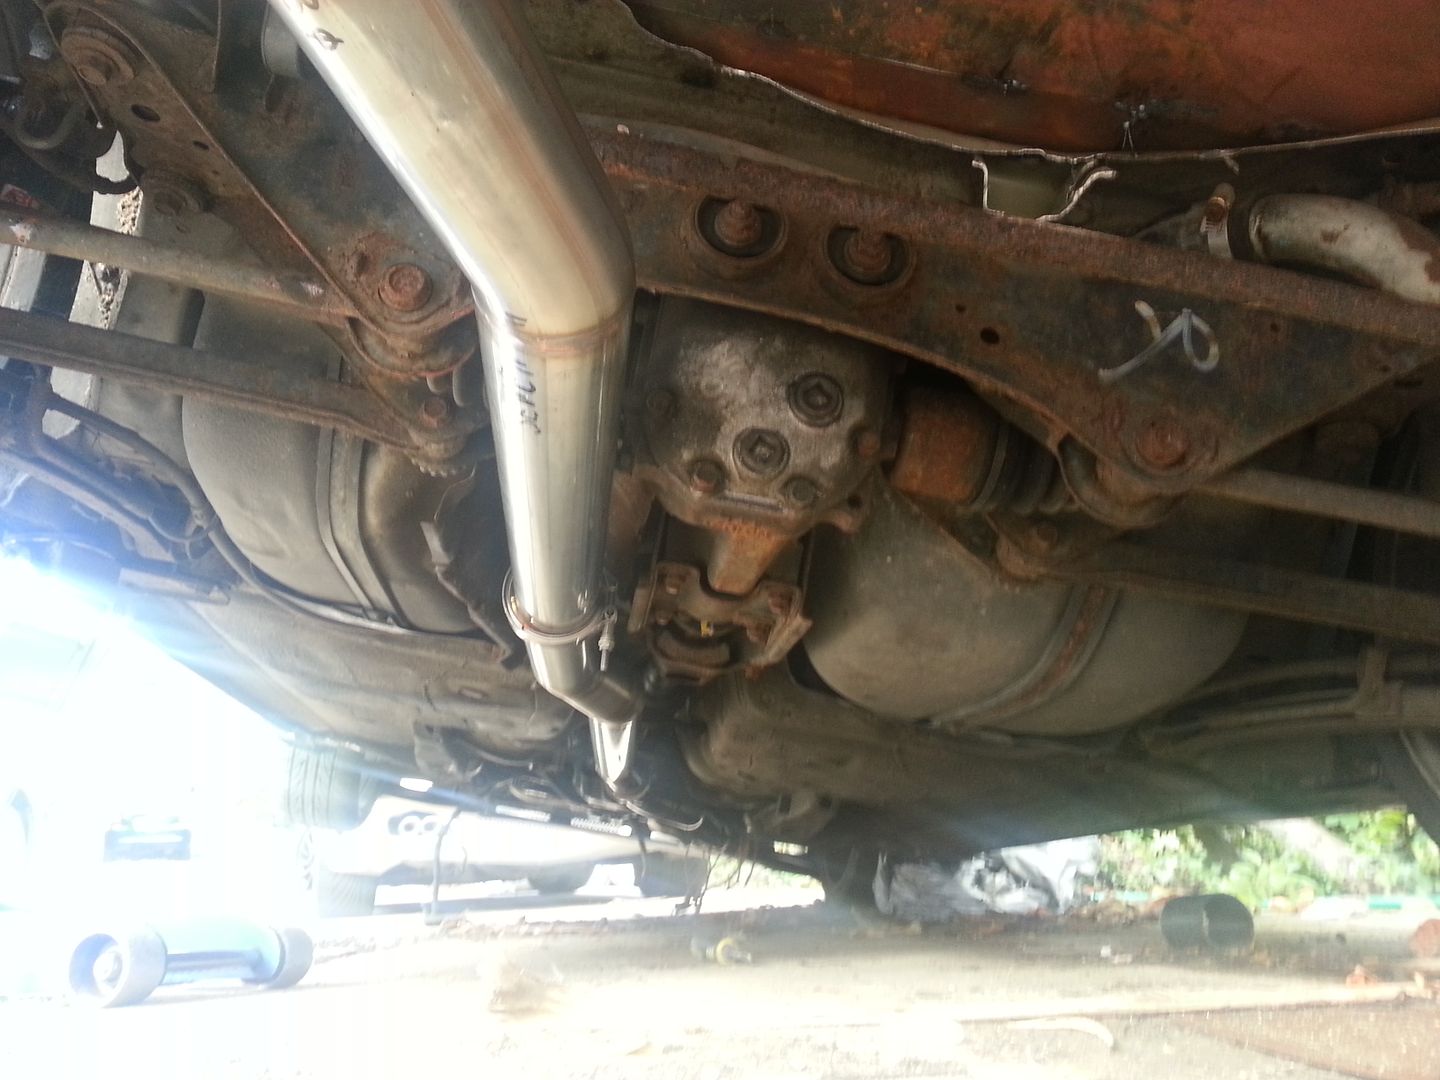
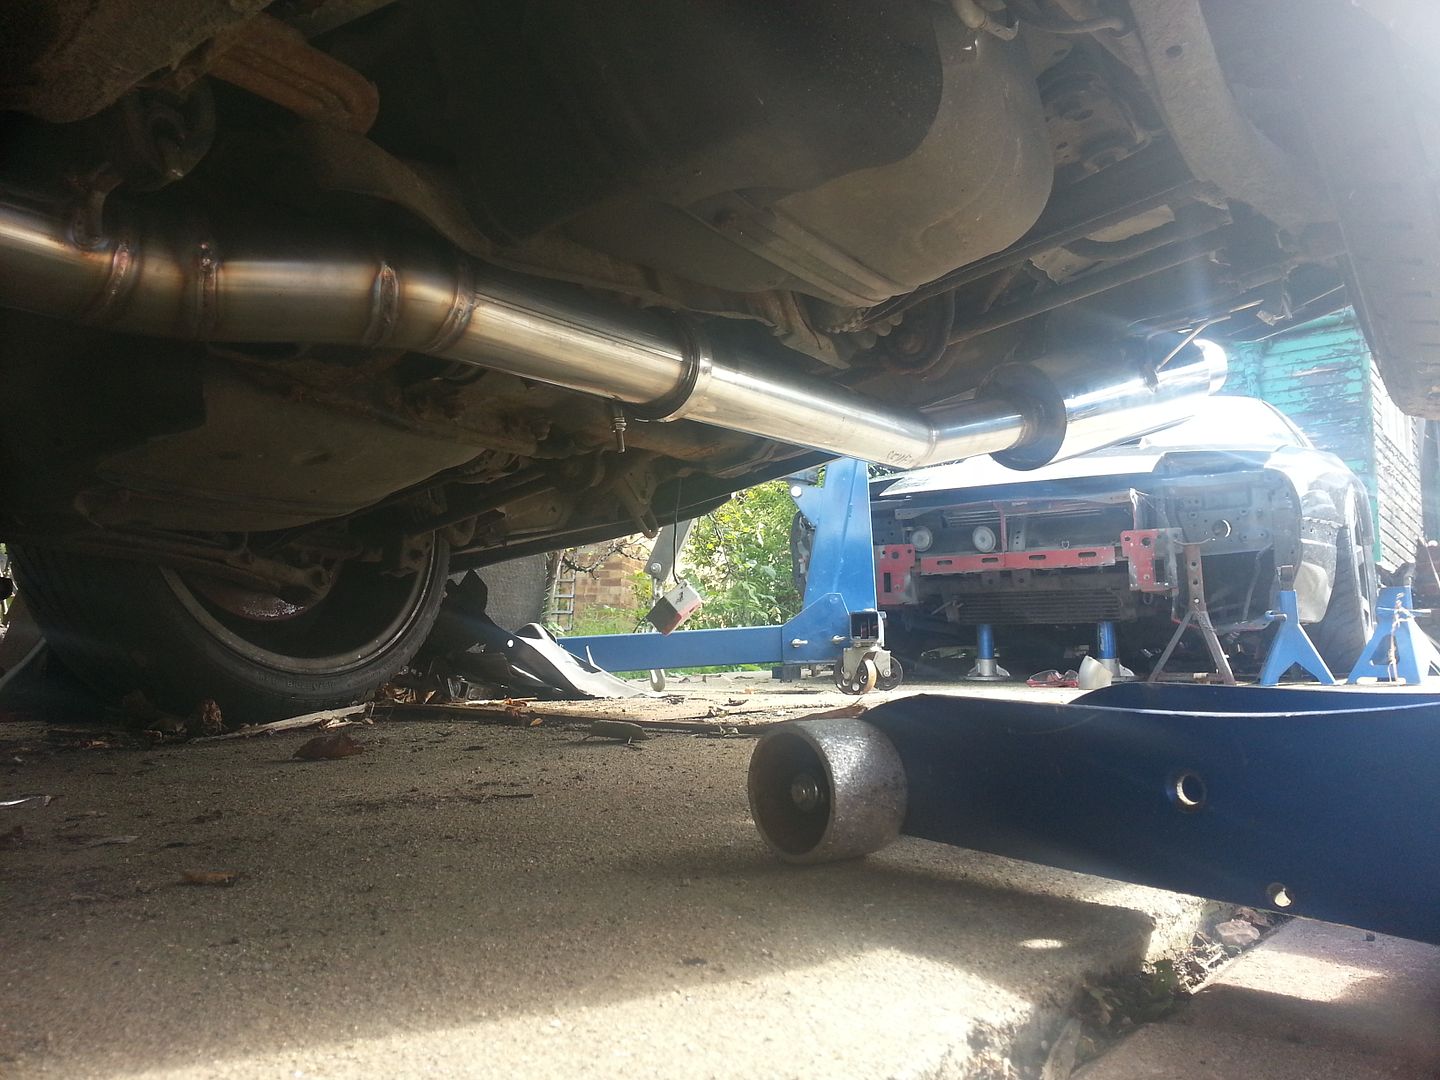
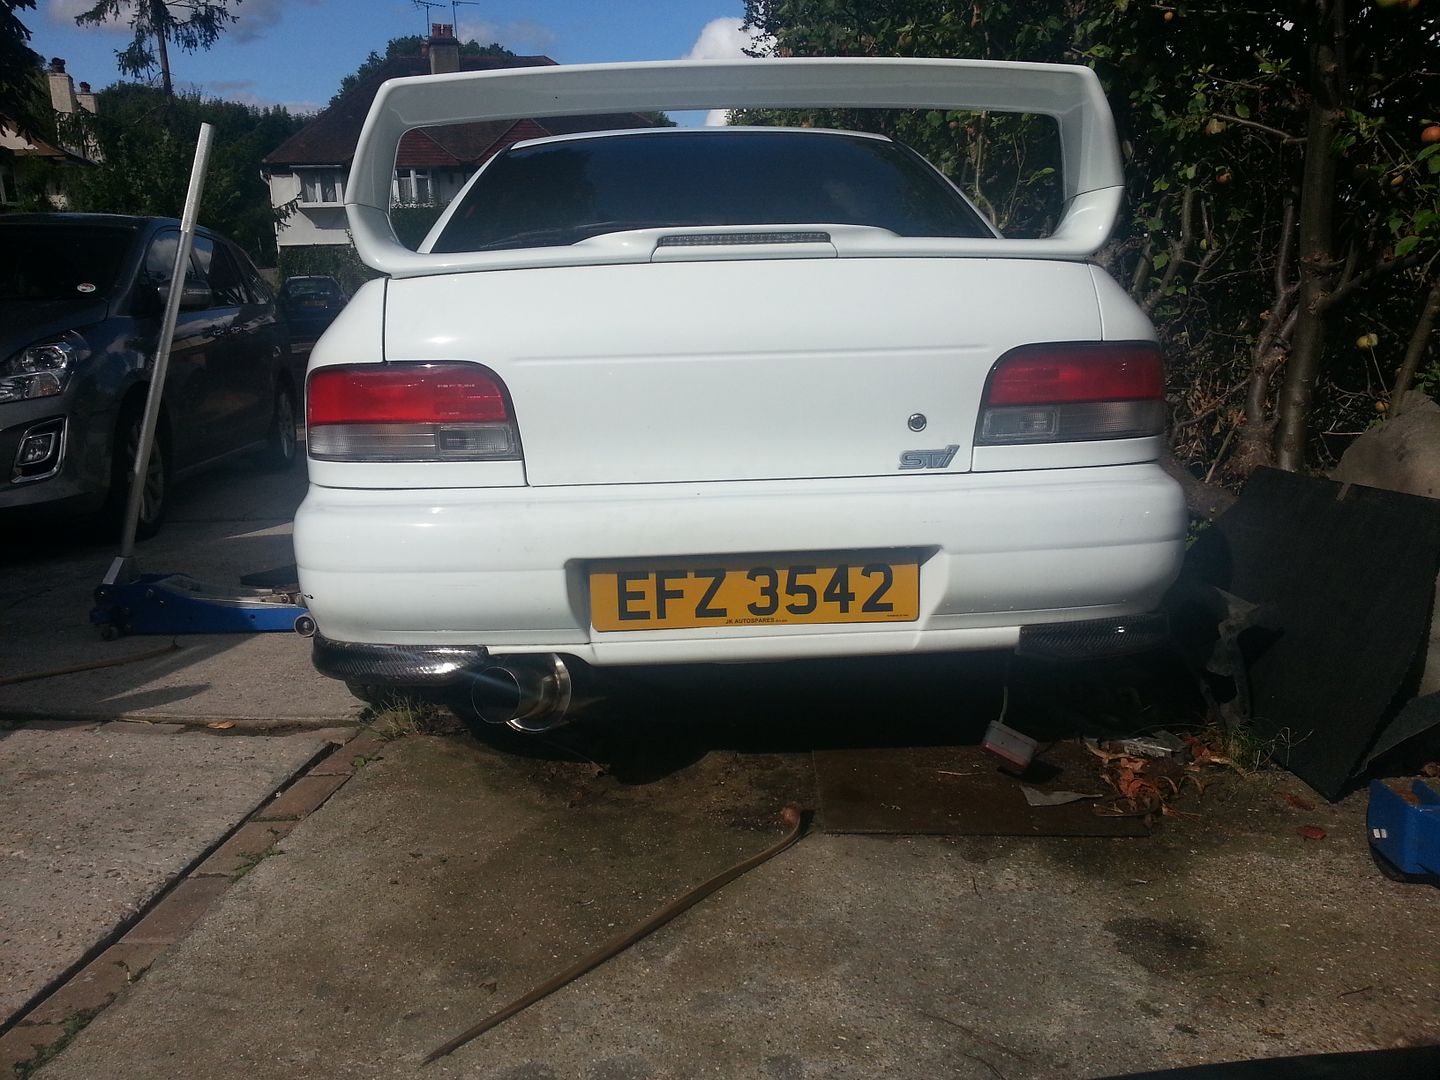
Got a few other bits done today. Finished the down pipe off and then re built the rest of the exhaust in 3" stainless and completed with V Bands for ease or removal. I think they look a lot cleaner than bolted flanges too. I've tried to keep it a straight as possible all the way through.
Mid pipe
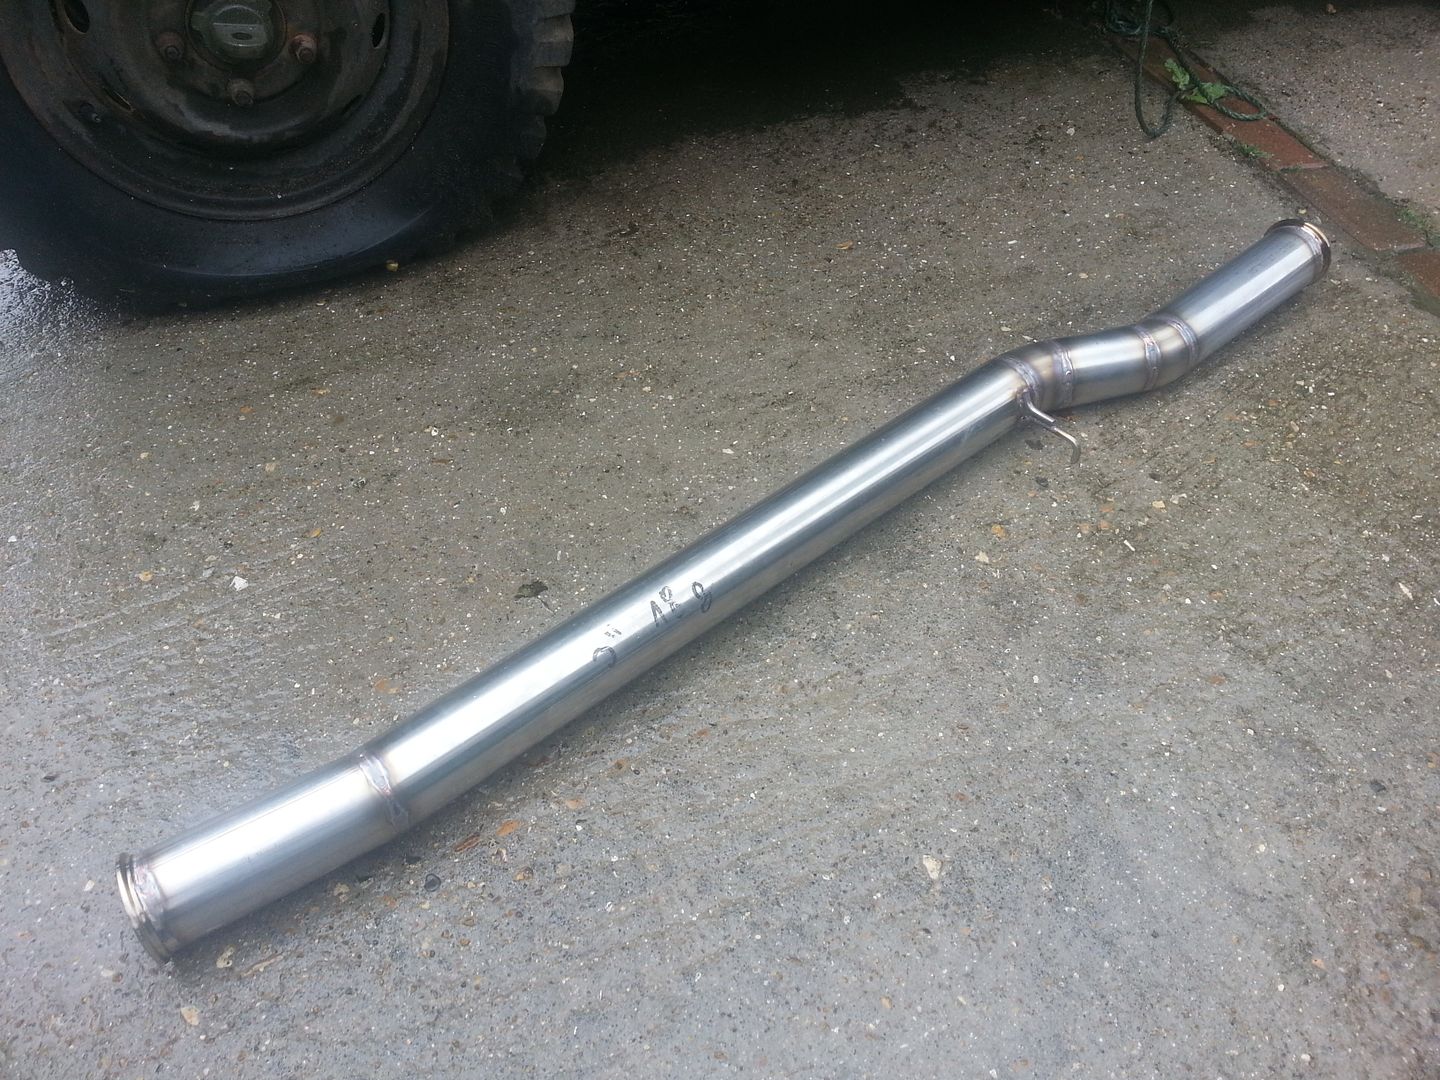
Rear section
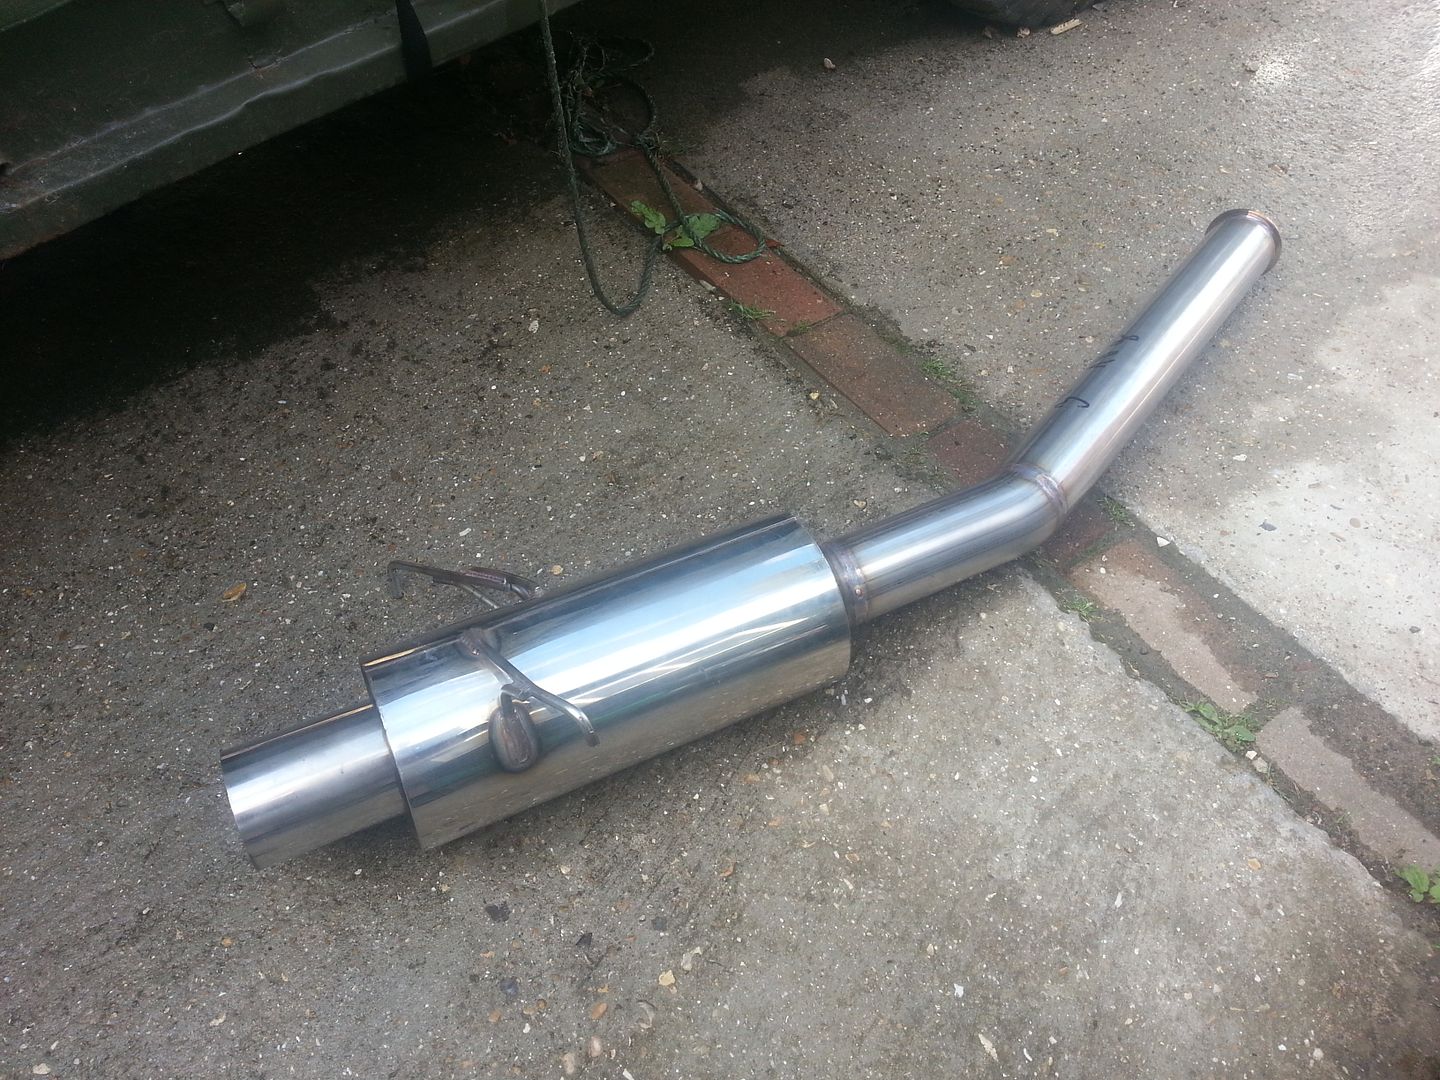
On:
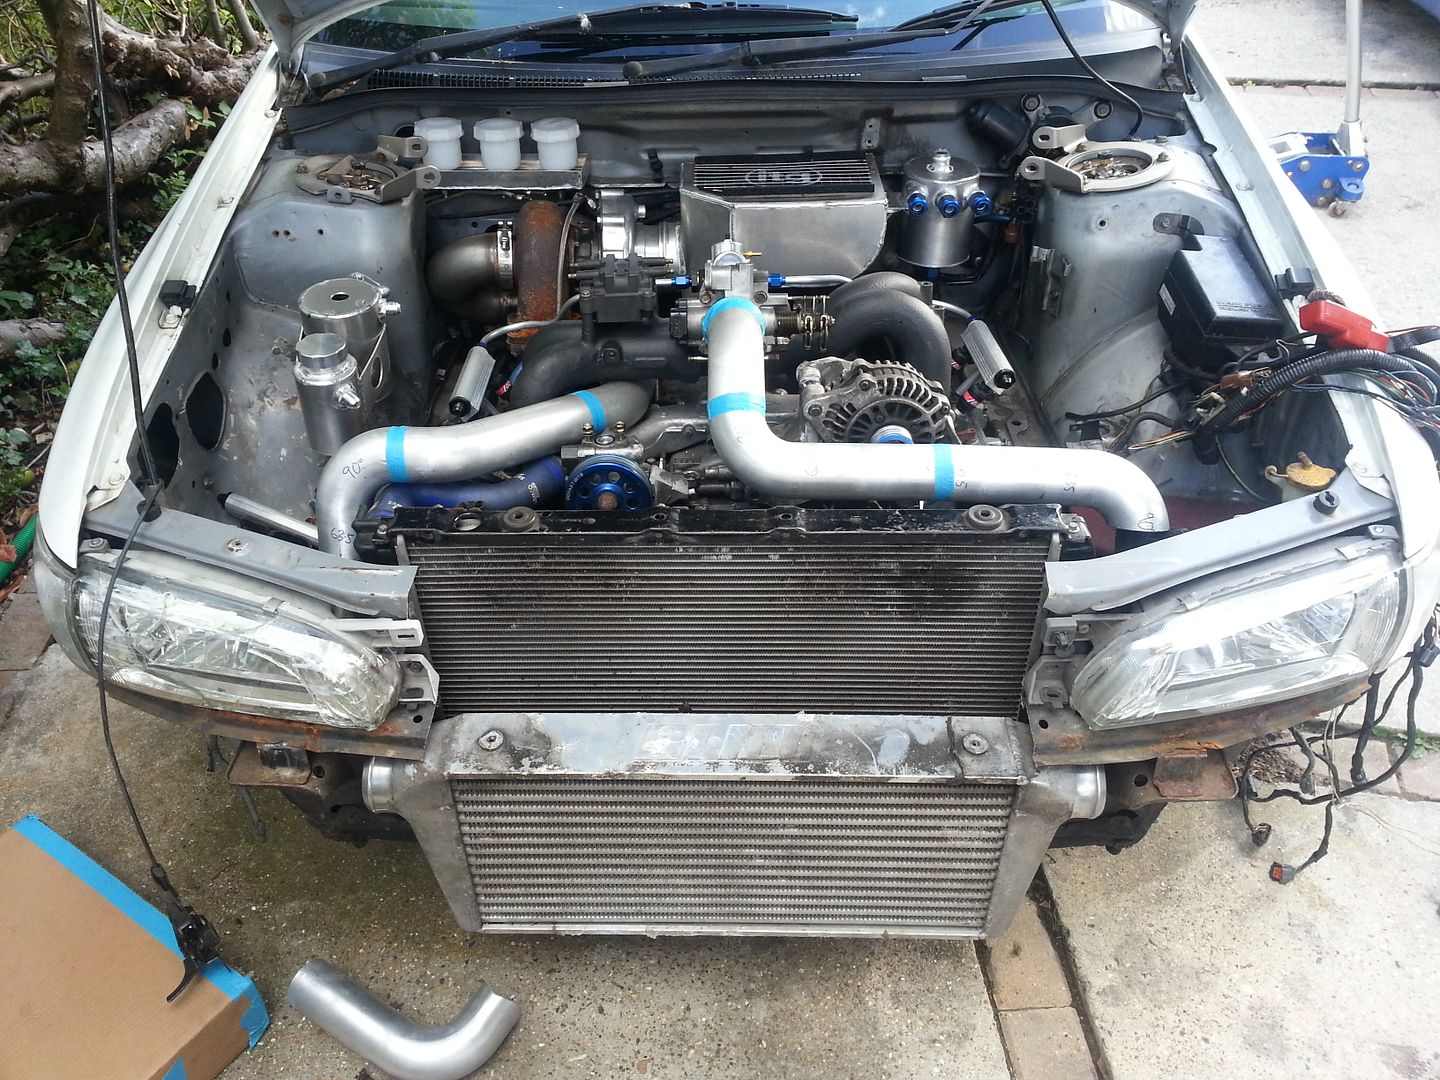
The intercooler is something I've been trying to hold out on doing as I want to go V mount. With core sizes determined and the front of the car provisionally chopped to suite the order went in for the core, new rad core as well, but unfortunately Pace don't have the core I need currently stocked. Order in but just need to wait for them too make the cores so will be a few weeks. In the mean time I'm going to chop the current intercooler about a bit and do the pipe work.
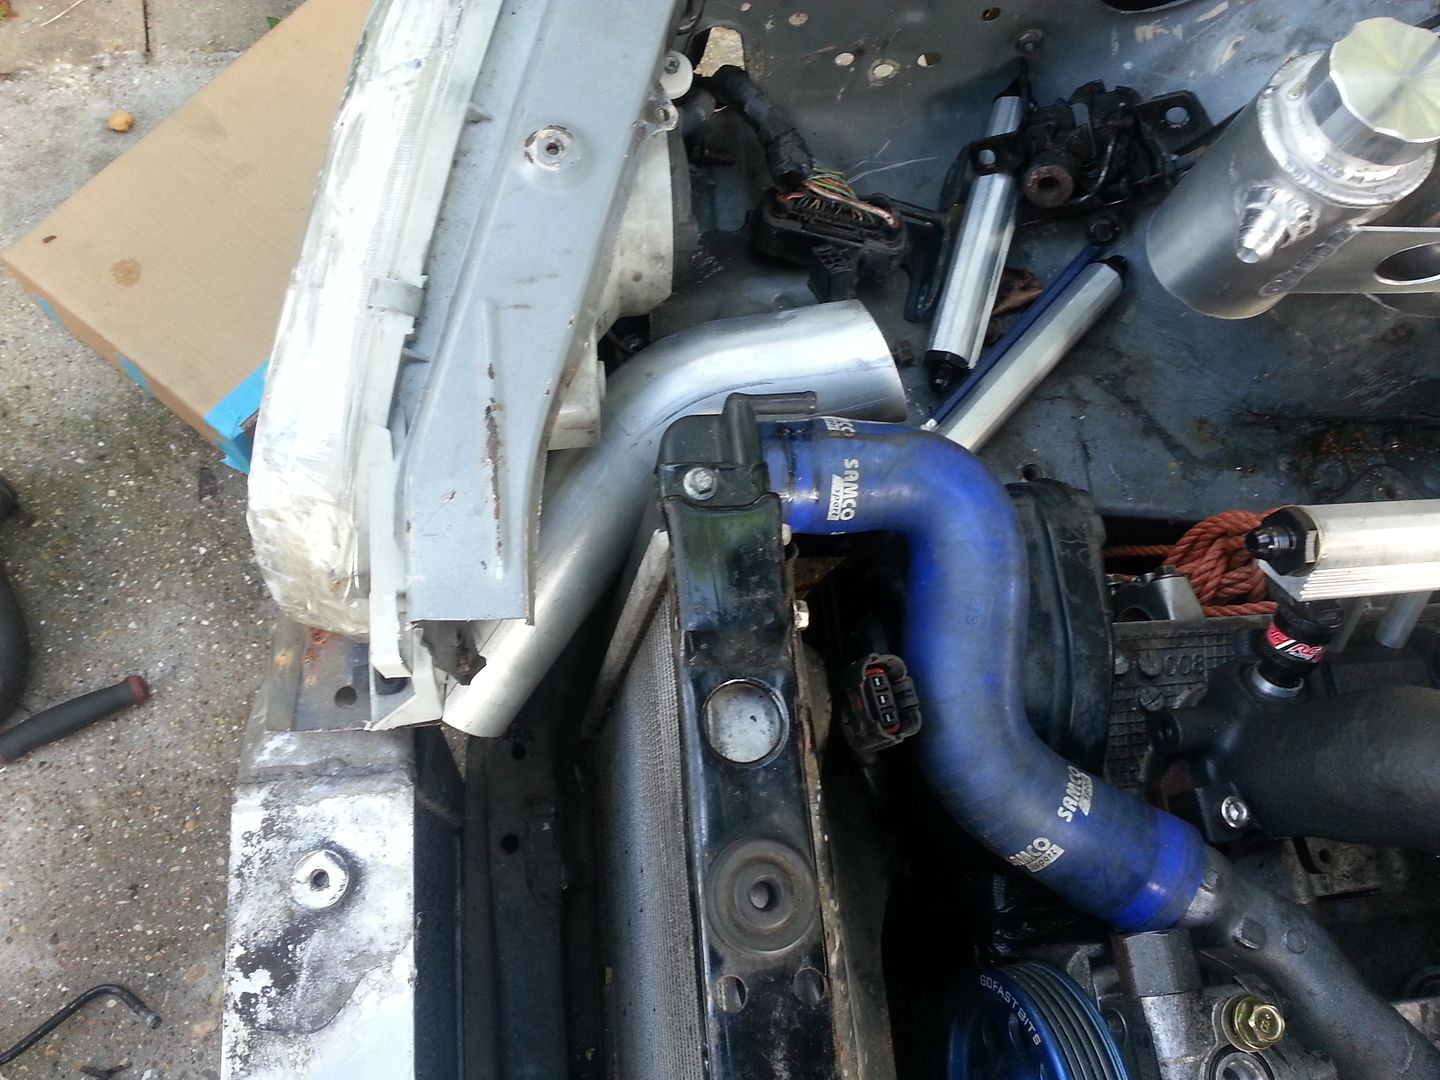
I have cut away some of the metal behind the headlight to make space for the intercooler pipe. Its just shoved in the gap between the light and the rad at the moment but you get the jist.
I cut the slam panel out in readiness for the V mount set up. Need to make some braces up for a few bits. I've got some aero catches for the bonnet as I've removed the latch.
The chop
The intended plan for the run into the cooler end tanks
Mock up of the pipes

Got a few other bits done today. Finished the down pipe off and then re built the rest of the exhaust in 3" stainless and completed with V Bands for ease or removal. I think they look a lot cleaner than bolted flanges too. I've tried to keep it a straight as possible all the way through.
Mid pipe

Rear section

On:


The intercooler is something I've been trying to hold out on doing as I want to go V mount. With core sizes determined and the front of the car provisionally chopped to suite the order went in for the core, new rad core as well, but unfortunately Pace don't have the core I need currently stocked. Order in but just need to wait for them too make the cores so will be a few weeks. In the mean time I'm going to chop the current intercooler about a bit and do the pipe work.
I have cut away some of the metal behind the headlight to make space for the intercooler pipe. Its just shoved in the gap between the light and the rad at the moment but you get the jist.
I cut the slam panel out in readiness for the V mount set up. Need to make some braces up for a few bits. I've got some aero catches for the bonnet as I've removed the latch.
The chop

The intended plan for the run into the cooler end tanks

Mock up of the pipes


Last edited by seventune; 02 June 2015 at 11:06 PM.
14 August 2014, 06:10 PM
#83
Scooby Regular
Thread Starter

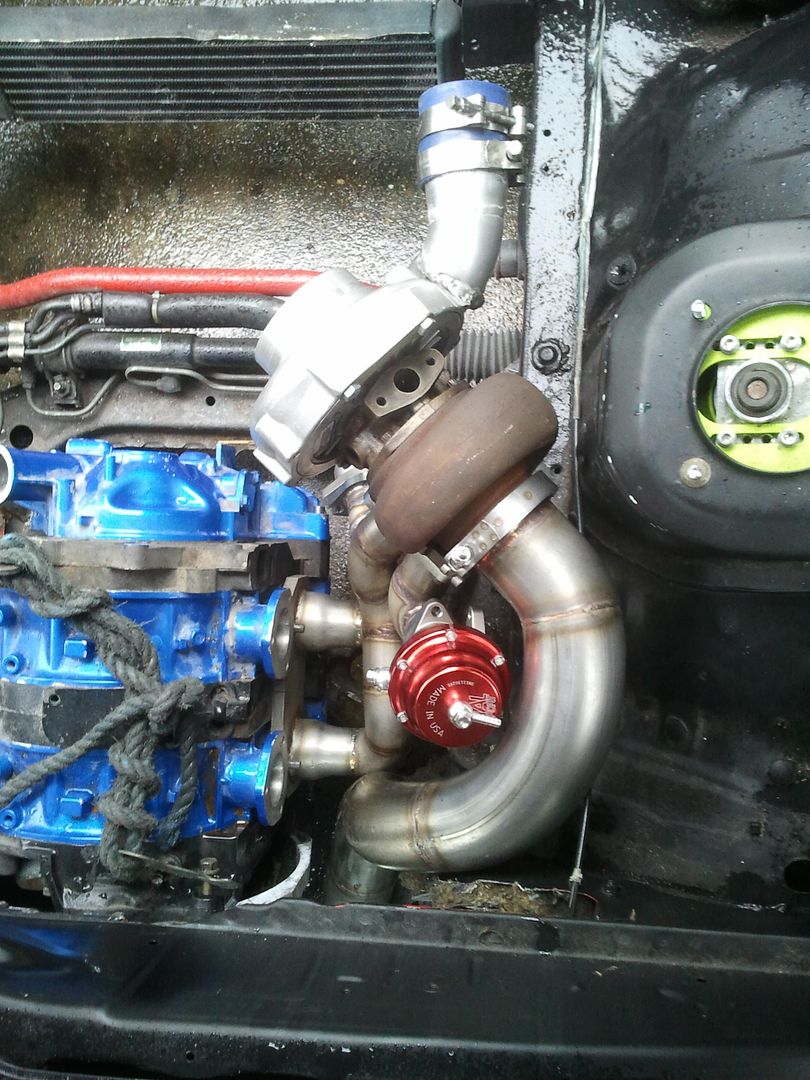
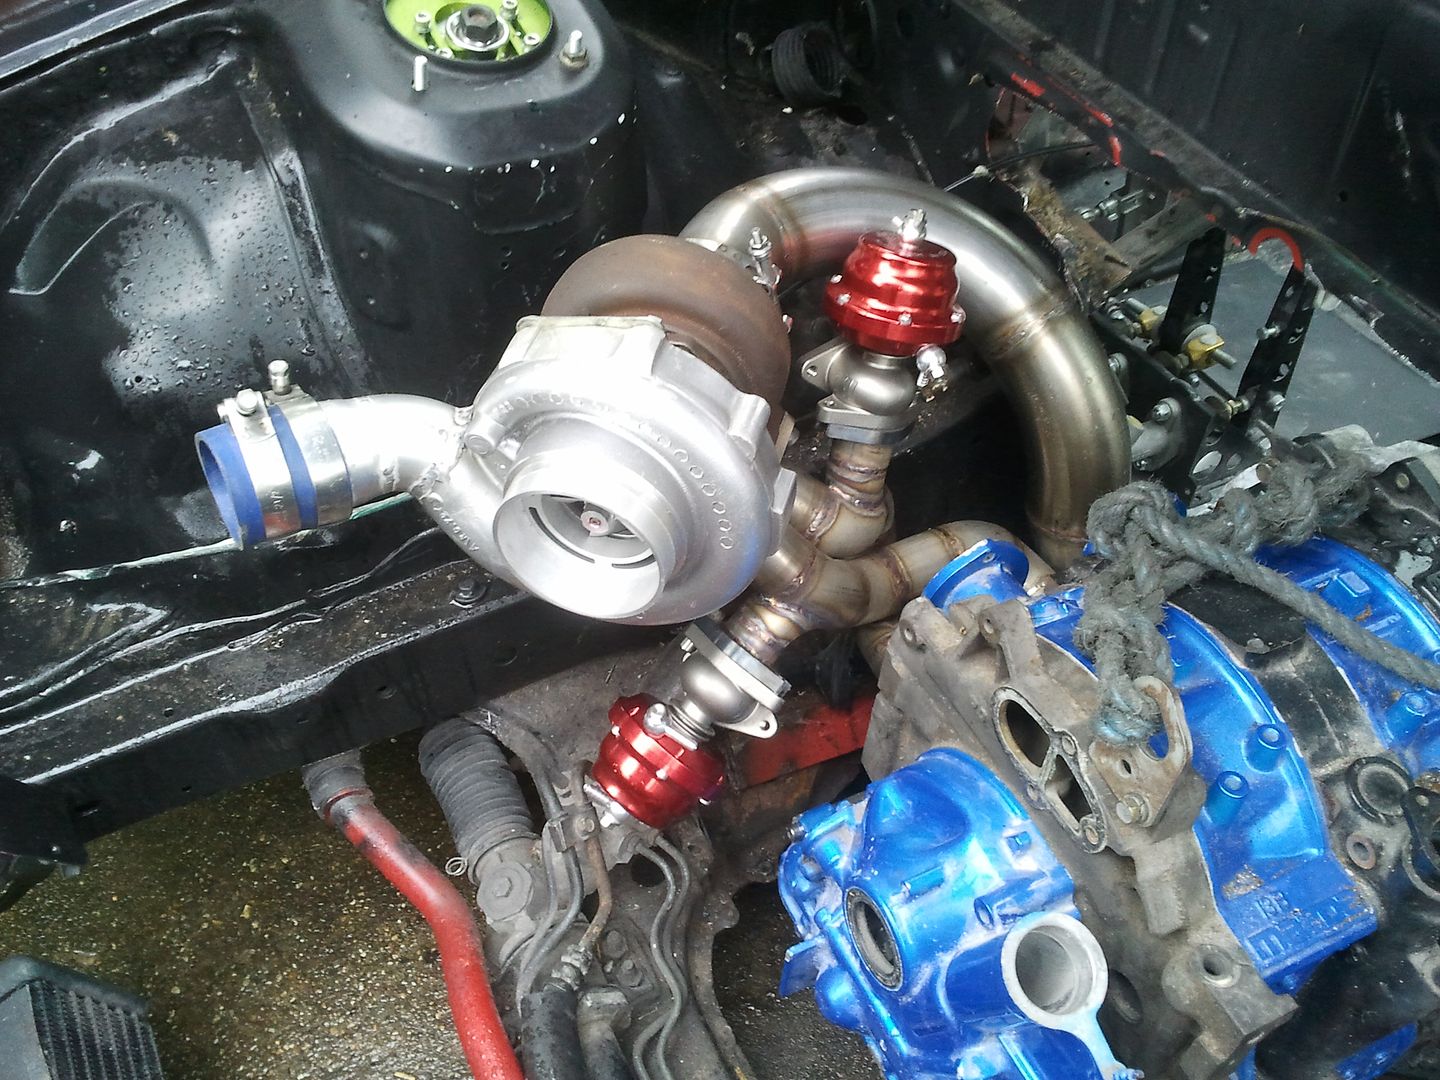
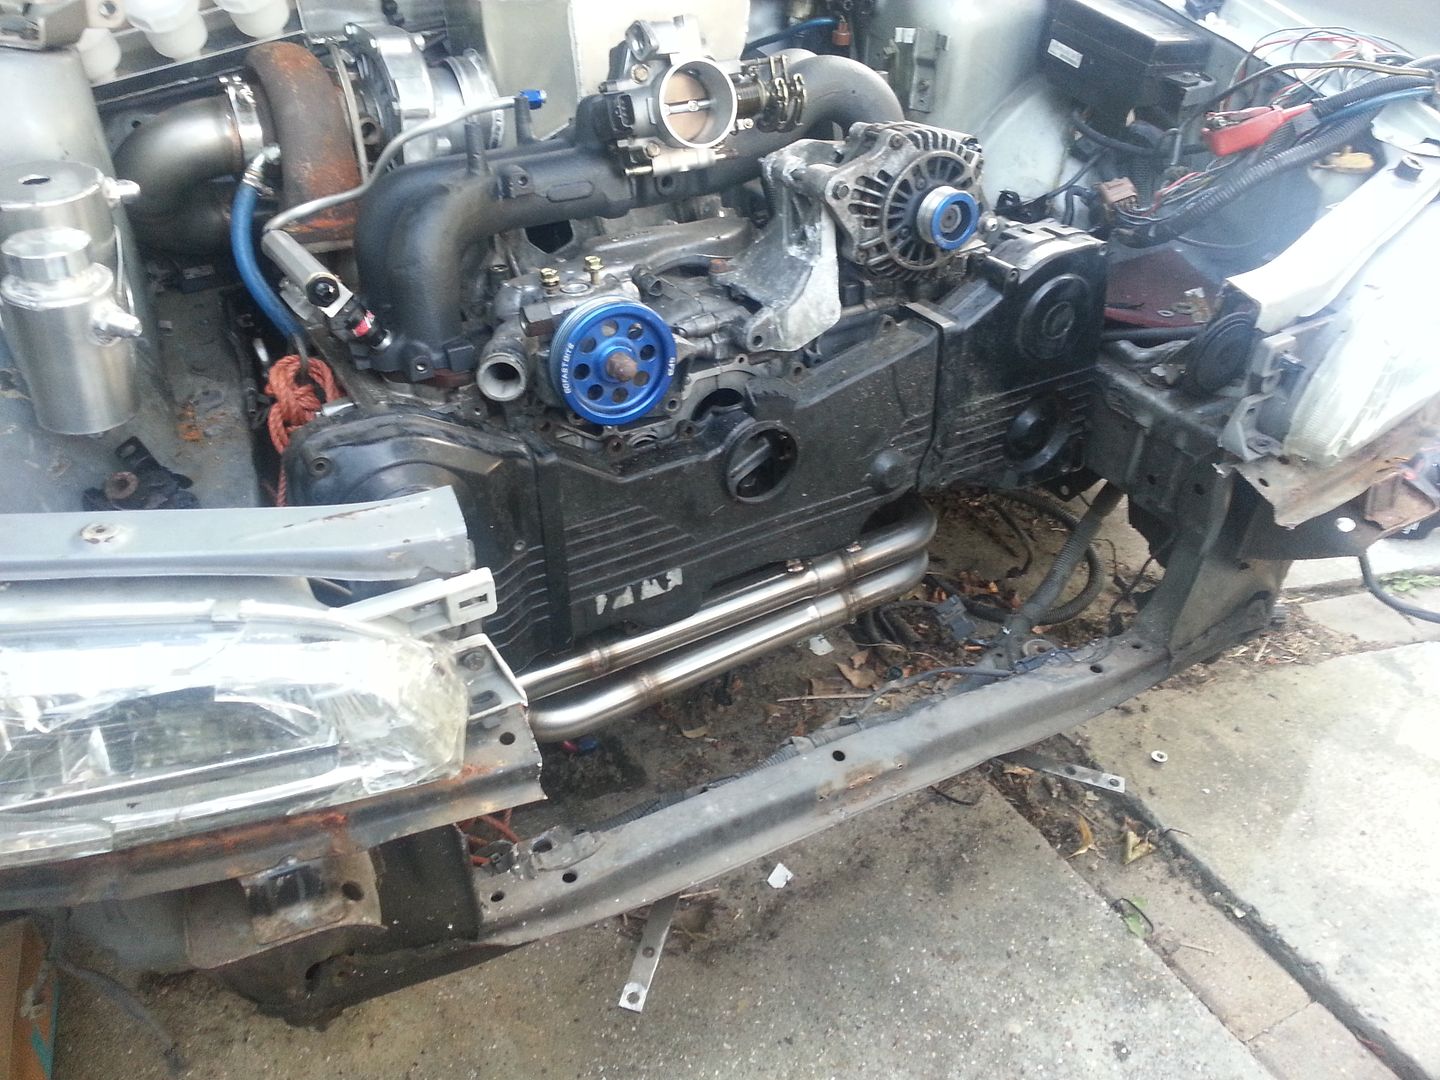
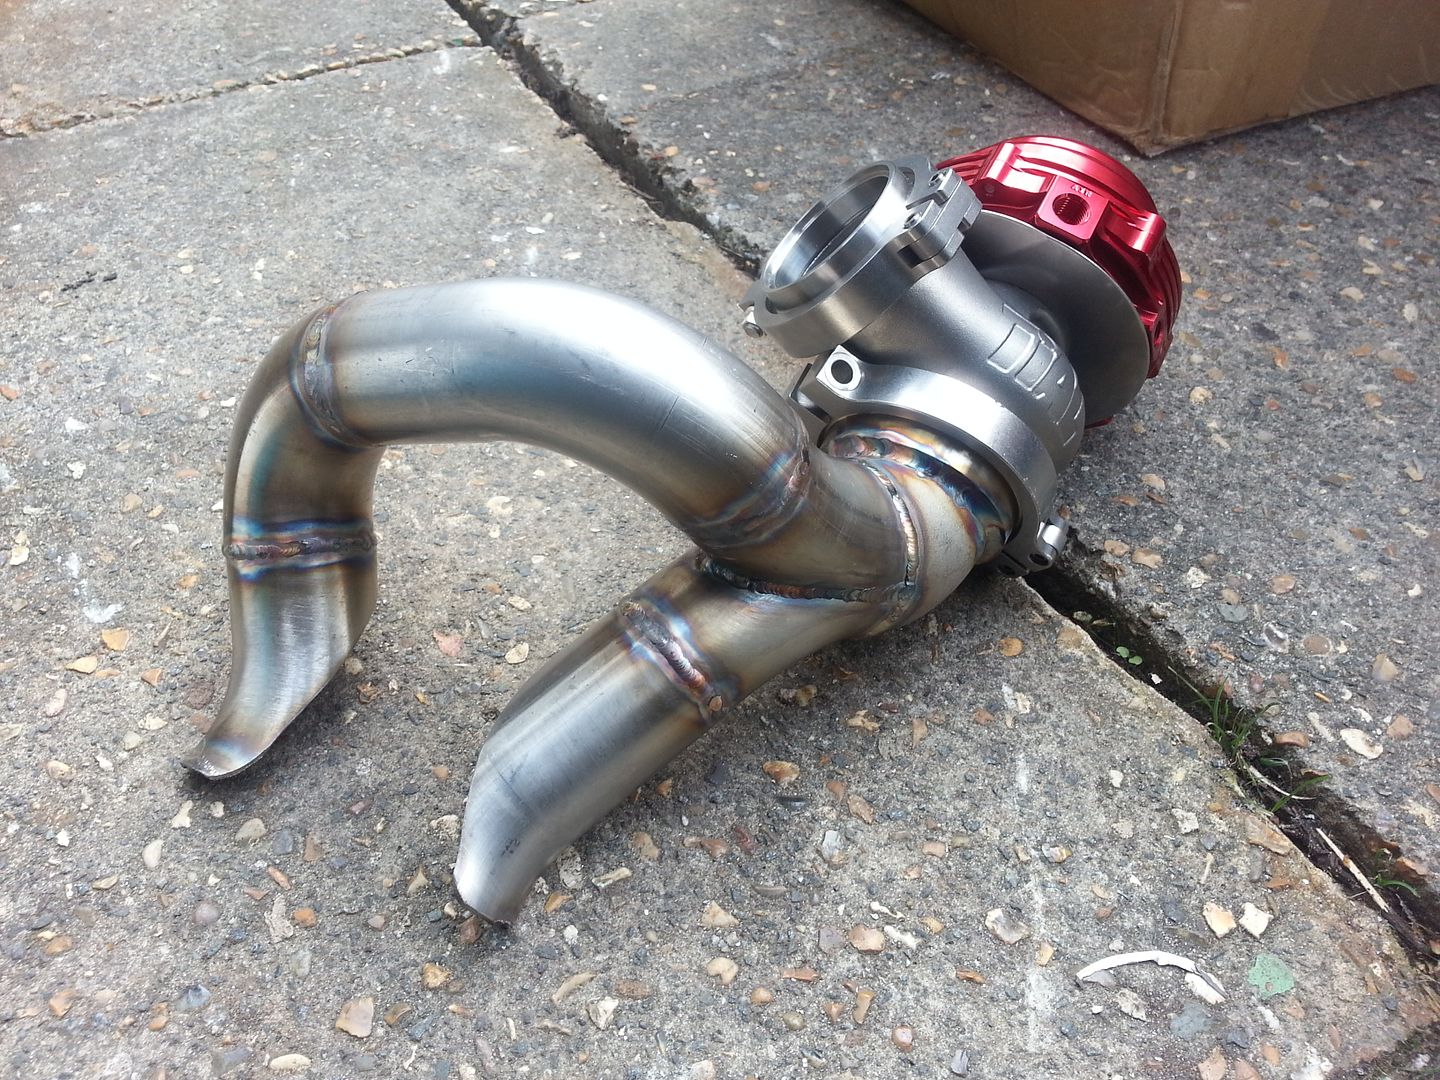
After having a big long look at the space left with the twin scroll headers/ turbo etc etc I've been trying to squeeze in the two Tial F38 gates. I've ultimately decided against the twin gate set up and have bought a single MV-R gate instead. I'll do a 2-1 tee off the dual up pipe and into the one gate. Will make the packaging easier and neater. Also make life easier getting the wastgate dump pipe past the down pipe/ steering arm and subframe before feeding back into the base of the down pipe.
Last edited by seventune; 02 June 2015 at 11:07 PM.
17 August 2014, 12:22 AM
#84
Scooby Regular
Thread Starter
Finally got the turbo system finished. Wastegate installed. Not had a chance to get the whole lot back in the car yet. Will do that tomorrow and get the intercooler mods finished up.
The MVR 2-1 section:
The finished article:
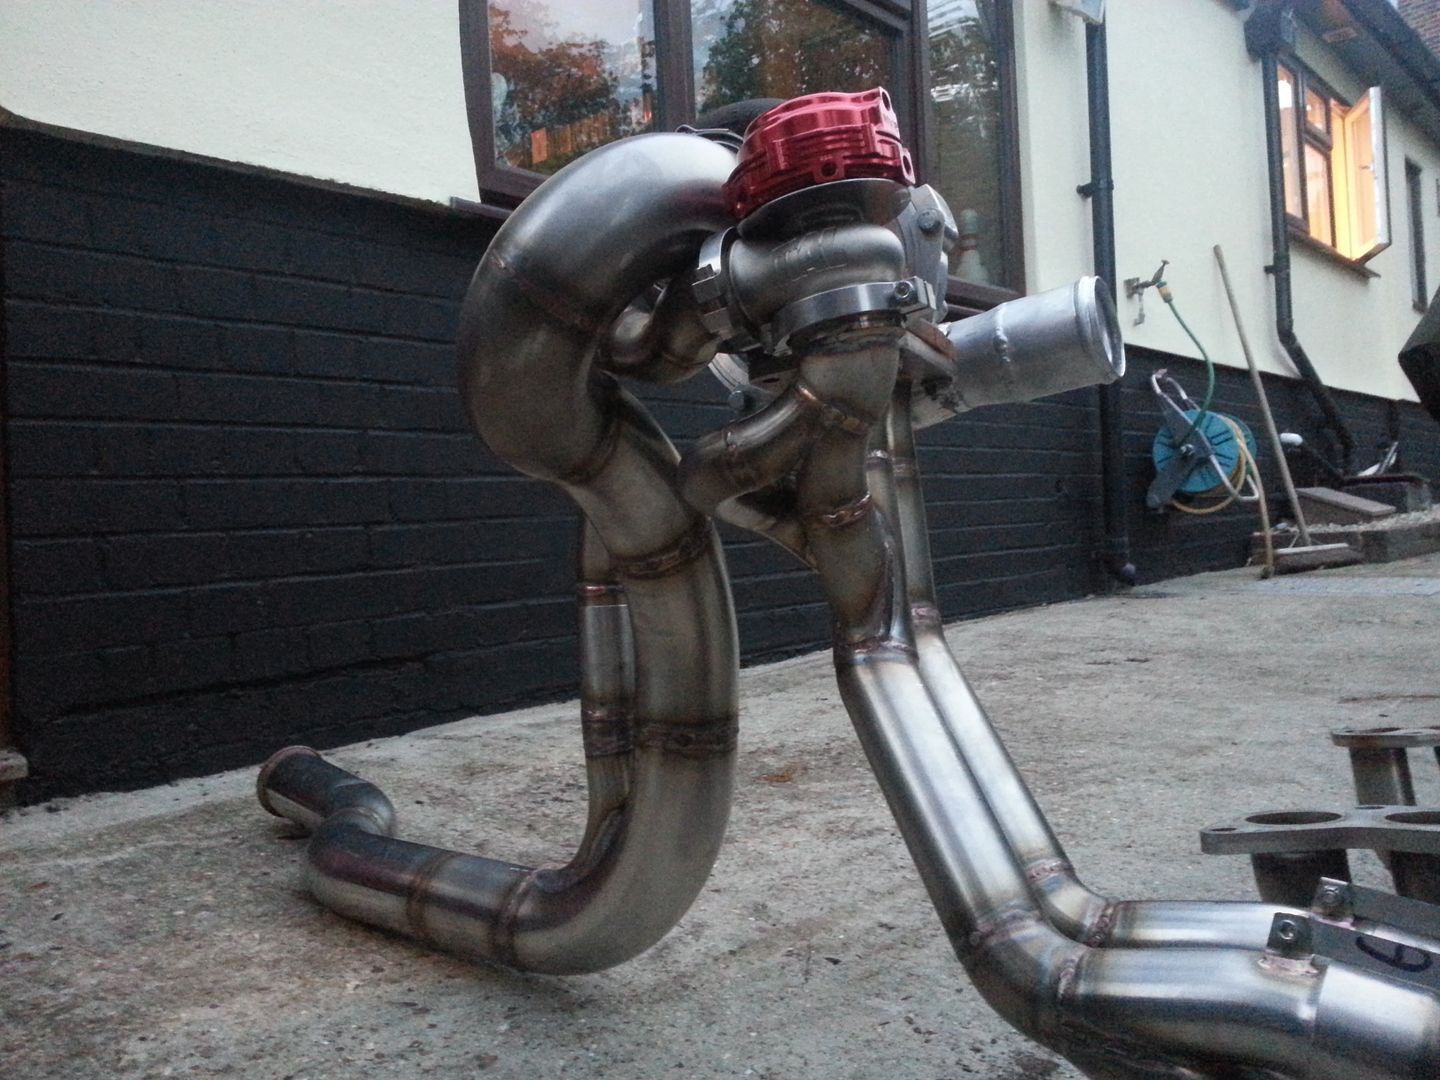
The MVR 2-1 section:

The finished article:


Last edited by seventune; 02 June 2015 at 11:08 PM.
17 August 2014, 11:12 AM
#86
Scooby Regular
iTrader: (6)

Join Date: Jul 2013
Location: Colchester
Posts: 665
Likes: 0
Received 0 Likes
on
0 Posts
Awesome!! always love seeing the work of someone who really knows how to fabricate, certainly not something i could do myself! Love your exhaust system with the V Bands, looks very clean as you say and serious quality.. don't suppose you'd consider making another to order? ;-)

 17 August 2014, 02:59 PM
#88
Scooby Regular
Thread Starter
Awesome!! always love seeing the work of someone who really knows how to fabricate, certainly not something i could do myself! Love your exhaust system with the V Bands, looks very clean as you say and serious quality.. don't suppose you'd consider making another to order? ;-)
Yes i would. It would be far from cheap to so though. This is a 321 stainless which is considerably more expensive than 304 but far stronger and better with the heat from that of a turbo car. To give you an idea the material alone in this turbo system is more than that of an off the shelf GT spec header.
17 August 2014, 06:12 PM
#89

Thanks for the comments....
Yes i would. It would be far from cheap to so though. This is a 321 stainless which is considerably more expensive than 304 but far stronger and better with the heat from that of a turbo car. To give you an idea the material alone in this turbo system is more than that of an off the shelf GT spec header.
Yes i would. It would be far from cheap to so though. This is a 321 stainless which is considerably more expensive than 304 but far stronger and better with the heat from that of a turbo car. To give you an idea the material alone in this turbo system is more than that of an off the shelf GT spec header.
Id be interested for some bits for my car, will bei n touch shortly
