MY 2011 Saloon / Hatch, show yourselves! Pics & chat


 26 September 2012, 10:14 PM
#273
Scooby Regular
iTrader: (4)
Join Date: Sep 1999
Location: MY99UK-MY02STi-MY99Type R-MY06 T20-MY11 340R-MY05 TYPE25
Posts: 11,468
Received 22 Likes
on
19 Posts
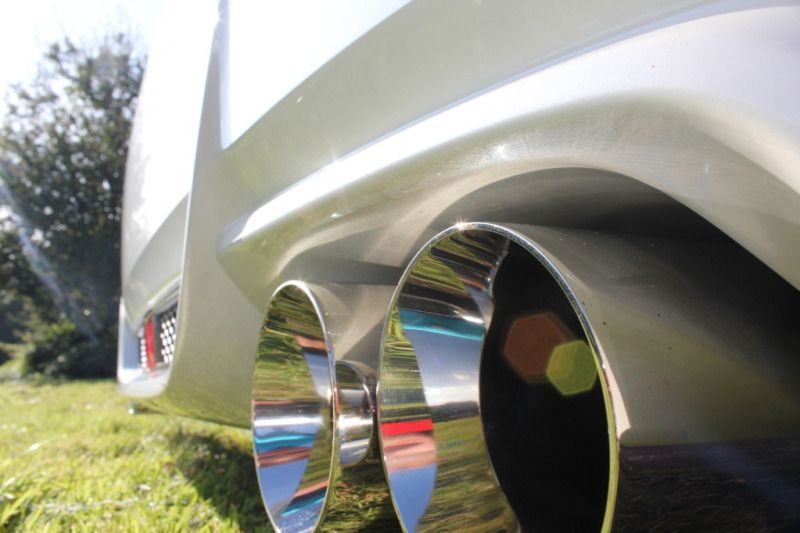
Diffuser fitted took about 2hours 
Tips
Get car as high as poss and on axle stand as it will make it eaiser to tighten bolts
if fitting exhaust top covers (if bought them) use a couple of self tappers on each to hold in place.
Don't take off Black grill's either side of fog light to access the one nut each side. (you won't get them) get them with reaching over diffuser in from diff side.
Remove spare wheel prior to drilling the two bolts holding middle section (back) that drills into boot well. The put bolts down the from inside the boot after holes are drilled and fitt washers and nut on underside. I managed then to fit it single handed.
TBH I may invest in a dozen M5 Nyloc nuts as I'd have prefered them to Plain M5 nuts
Tony


 30 September 2012, 09:59 PM
#277
Scooby Senior
not sure i like the rear defuser, looks a bit cluttered .


 10 October 2012, 08:15 PM
#281
Scooby Regular

...............and the rest of us tucked up around the back


 30 October 2012, 02:22 AM
#284
Scooby Regular
iTrader: (4)
Join Date: Sep 1999
Location: MY99UK-MY02STi-MY99Type R-MY06 T20-MY11 340R-MY05 TYPE25
Posts: 11,468
Received 22 Likes
on
19 Posts
Otherwise fairly easy.
30 October 2012, 08:34 AM
#285
Scooby Regular
It's fairly straight forward, the only difference with a UK car is that we have double locking door locks which requires a different trigger feed to that on page 10 of the instructions. (connector E under driverside kick panel)

You will have to search out the green wire from the centre of the bundle.
Power and earth are taken from the OP connector located behind the Fuse board in the dash. (connector D)
If undisturbed it will be taped up with pink tape.


If you have an upgraded Satnav it will already have one of these connected to it so adding connections is easier........

PM me if you need any further help.
A useful thread for getting to the back of the fuse board...........
http://www.iwsti.com/forums/gr-inter...l-08sti-5.html
Posts 46/47
Last edited by Don Clark; 30 October 2012 at 05:39 PM.
30 October 2012, 10:32 AM
#287
Scooby Regular
30 October 2012, 01:42 PM
#288
Scooby Regular
iTrader: (4)
Join Date: Sep 1999
Location: MY99UK-MY02STi-MY99Type R-MY06 T20-MY11 340R-MY05 TYPE25
Posts: 11,468
Received 22 Likes
on
19 Posts
As Don said I'm very simple and I managed it
As said and hopefully not telling you how to suck eggs
the only thing you may not be used to is swapping harness pins. About 2 pins from either side of a mufti plug need the new link module pins in. They are "barbed" so push in and won't pull out. So Maybe worth buying a Maplin do IC/harness pin extraction tool or jewelers tweezers if not used to doing it about �2.29p
Tony
and I managed it As said and hopefully not telling you how to suck eggs
the only thing you may not be used to is swapping harness pins. About 2 pins from either side of a mufti plug need the new link module pins in. They are "barbed" so push in and won't pull out. So Maybe worth buying a Maplin do IC/harness pin extraction tool or jewelers tweezers if not used to doing it about �2.29p
Tony
Last edited by T5NYW; 30 October 2012 at 01:43 PM.
30 October 2012, 07:17 PM
#289
Scooby Regular
iTrader: (2)
Join Date: Apr 2003
Location: NESF - IDDYSTI
Posts: 203
Likes: 0
Received 0 Likes
on
0 Posts
while I have been getting the auto mirror kit fitted, I thought I would install a boost gauge (there is not much choice on pods available). But I decided to go for the zero sports which mounts on the side of the dash.

The defi gauge matches in well with the original clocks.
The defi gauge matches in well with the original clocks.
10 November 2012, 09:44 PM
#291
Scooby Regular
iTrader: (2)
Join Date: Apr 2003
Location: NESF - IDDYSTI
Posts: 203
Likes: 0
Received 0 Likes
on
0 Posts
got the auto mirror kit working, it's class
thanks again for the pointers
Don is it worth fitting the auto wipers and lights, how easy where they to fit.
thanks again for the pointers
Don is it worth fitting the auto wipers and lights, how easy where they to fit.

 10 November 2012, 11:20 PM
#293
Scooby Regular
10 November 2012, 11:30 PM
#294
Scooby Regular
The only annoyance is that the UK version of the OP connector only has 8 of the 15 outputs.
The auto wipers and lights require a sidelight and headlight feed which I fed back to the OP connector from the light switch on the column. Part of the AW&L harness plugs into the vacant end connector on the OP connector hence the need to feed back.
Apart from that it's a case of following the picture instructions again, although can supply any additional pointers if needed.
 11 November 2012, 08:41 AM
#295
Scooby Regular
11 November 2012, 01:19 PM
#296
Scooby Regular
iTrader: (4)
Join Date: Sep 1999
Location: MY99UK-MY02STi-MY99Type R-MY06 T20-MY11 340R-MY05 TYPE25
Posts: 11,468
Received 22 Likes
on
19 Posts
After a disaster with some alloy valve caps that seized on. I had to cut them off the vavle but that damaged it and couldn't blow up the tyres 
Anyway fitted some wheels i had kicking around and nearly sold.


Just need to sort the wing Sti badges out in black
Tony
Anyway fitted some wheels i had kicking around and nearly sold.
Just need to sort the wing Sti badges out in black
Tony
11 November 2012, 02:25 PM
#297

I think maybe a gloss black vinyl wrap on the roof.
11 November 2012, 05:27 PM
#298
Scooby Regular
11 November 2012, 07:17 PM
#299
Scooby Regular
iTrader: (4)
Join Date: Sep 1999
Location: MY99UK-MY02STi-MY99Type R-MY06 T20-MY11 340R-MY05 TYPE25
Posts: 11,468
Received 22 Likes
on
19 Posts
I'll have to find the part numbers of the black window and wing trims? I doubt if you'll know them LOL
Tony
11 November 2012, 07:41 PM
#300
Scooby Regular
http://www.avojdm.com/product_info.p...roducts_id=187
http://www.japanparts.com/db/parts_d...1&SEARCH_page=
Window trim chrome can be painted,wrapped or replaced with 2008/10 hatch trim at a cost of �300 + for the 4 doors Reaer quarter light would still need treatment.
Last edited by Don Clark; 11 November 2012 at 07:50 PM.

