Classic Impreza Track Car Restoration / Building an Impreza from scratch
 12 February 2016, 10:20 PM
#61

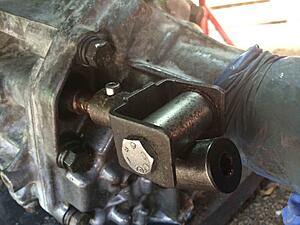
Refurbed gear linkage UJ from AS Performance.
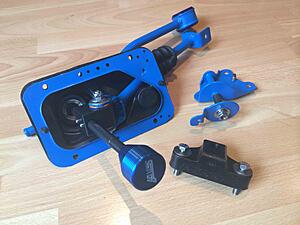
OE parts cleaned, powder coated and restored. New Poly bush and CDF Racing Short Shifter.

All together. Note I found that I could get a Perrin Rear Linkage bush so didn't bother making my own in the end.
OE parts cleaned, powder coated and restored. New Poly bush and CDF Racing Short Shifter.
All together. Note I found that I could get a Perrin Rear Linkage bush so didn't bother making my own in the end.
Last edited by FMJ; 08 November 2017 at 05:43 PM.
 10 March 2016, 12:39 PM
#62
Scooby Newbie

Join Date: Mar 2016
Location: singapore
Posts: 6
Likes: 0
Received 0 Likes
on
0 Posts
[QUOTE=FMJ;11698577]Ok so before the bay here is the bonnet. Picked up for �60 delivered. The paint was in crap order but that hardly matters.

As is a fairly daily routine for me I had a lot of packaging to get rid of.

Cleaned up and vents removed.
Now I want my project to have some individual features... not sure if people will approve but it's my project so here we go. The start of some WRC bonnet vents from the 2000 WRC Car.


Cut out and started to be primed.

Fitted and also a couple of front wings added. Picked up for �20 each. Inside the wings were striped back and then epoxy coated before bolting them on.
Worth noting is that these are genuine Subaru wings. NEVER bother with the �45 pattern ones on ebay. They look ok until you fit them and then you realise they don't line up at all. I fitted a pair to my other classic before and had to sloth all the bolt holes to make them fit and even then you had to choose which panel gap to have lined up... Genuine only!
Masked up.

Primed with epoxy primer and then colour and clear coat.


That's all for tonight but next up some interior parts refurbed and refitted.
beauty!

As is a fairly daily routine for me I had a lot of packaging to get rid of.

Cleaned up and vents removed.

Now I want my project to have some individual features... not sure if people will approve but it's my project so here we go. The start of some WRC bonnet vents from the 2000 WRC Car.


Cut out and started to be primed.

Fitted and also a couple of front wings added. Picked up for �20 each. Inside the wings were striped back and then epoxy coated before bolting them on.
Worth noting is that these are genuine Subaru wings. NEVER bother with the �45 pattern ones on ebay. They look ok until you fit them and then you realise they don't line up at all. I fitted a pair to my other classic before and had to sloth all the bolt holes to make them fit and even then you had to choose which panel gap to have lined up... Genuine only!
Masked up.

Primed with epoxy primer and then colour and clear coat.


That's all for tonight but next up some interior parts refurbed and refitted.
beauty!
15 March 2016, 02:02 AM
#63
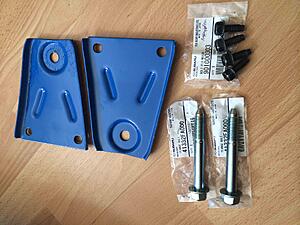
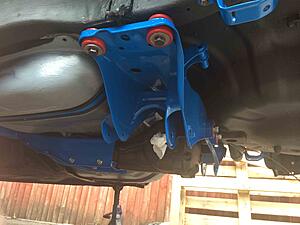
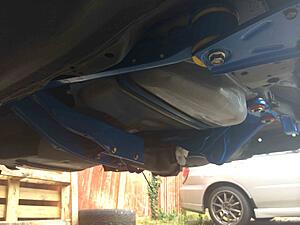
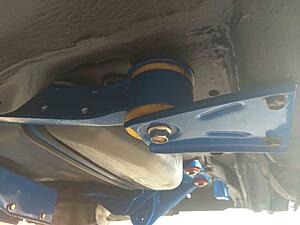
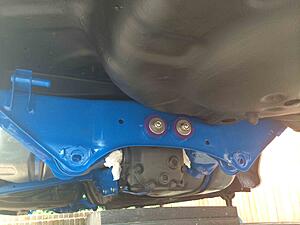
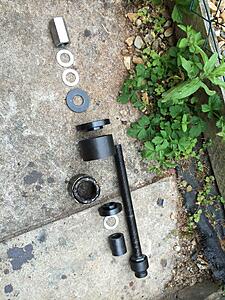
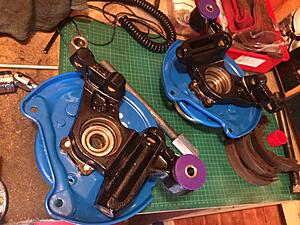
Ok onto fitting the Rear Diff.
First the parts used, powder coated, new fittings and poly bushes as normal:
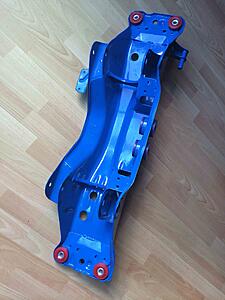
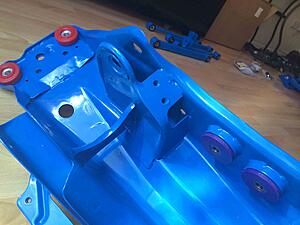
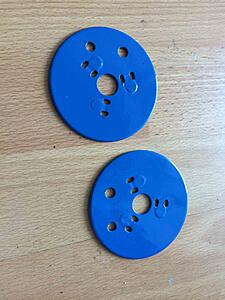
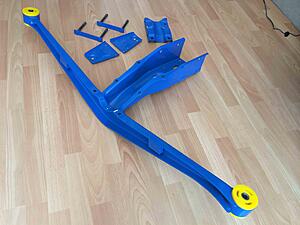
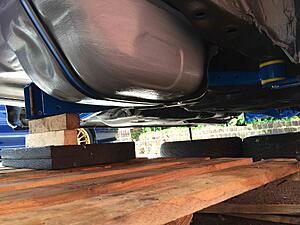
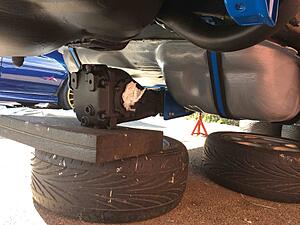
Rear diff fitted with the help of a jack, spare wheel, some foam and a pallet (this stuff is awkward on your own but not as hard as the gearbox.
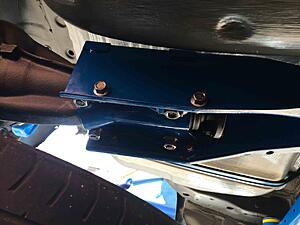
All bolted up. Kitchen roll in the shaft holes to prevent dirt getting in.

Will try to do some more uploads tomorrow.
First the parts used, powder coated, new fittings and poly bushes as normal:
Rear diff fitted with the help of a jack, spare wheel, some foam and a pallet (this stuff is awkward on your own but not as hard as the gearbox.
All bolted up. Kitchen roll in the shaft holes to prevent dirt getting in.
Will try to do some more uploads tomorrow.
Last edited by FMJ; 17 November 2017 at 06:46 PM.
 15 March 2016, 02:54 PM
#65
You can get a set of group N original items from ICP for �80. But they may need to be machine pressed in (just a guess as they have a steel outer).
15 March 2016, 09:41 PM
#66
Unmapped 12.4s @ 105
iTrader: (29)
Join Date: Apr 2005
Location: Newcastle. 330bhp-289lb/ft @ 1bar boost - 12.4s @ 105mph
Posts: 11,776
Likes: 0
Received 4 Likes
on
4 Posts
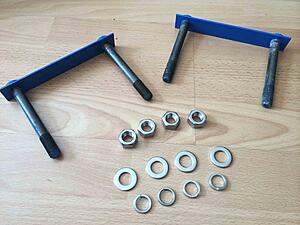
Genuine Subaru ones need pressed in, paid �100 for the 4 of them from Alyn @ ASP last summer.
Have you priced the bolts that go though the bottom of the hubs/trailing arms yet? Or were yours ok?
Have you priced the bolts that go though the bottom of the hubs/trailing arms yet?
Or were yours ok?
16 March 2016, 12:03 AM
#67
The long bolts on the rear hub carriers that hold the front and rear lateral links are stupid money. Like �22 each or something and not a bolt type/size you will find anywhere else. I have had four or them stripped and plated for a few quid and they are good as new  Deffo worth trying to save these bolts but sadly the steel collars of the OE bushes corrode around them and cause massive issues getting them out intact.
Deffo worth trying to save these bolts but sadly the steel collars of the OE bushes corrode around them and cause massive issues getting them out intact.
16 March 2016, 12:14 AM
#68
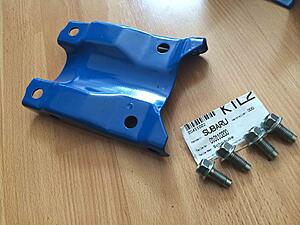
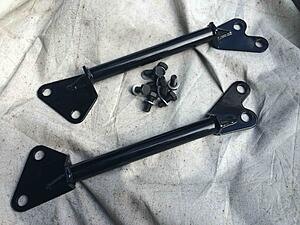
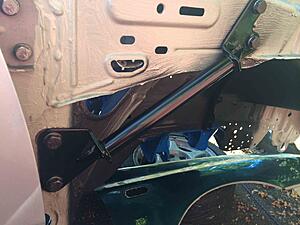
School boy error. I forgot to add the front wing braces before the front wings. I couldn't get enough room to fit the bolts for the braces with the wings on so had to take the wings off again to fit these. They were jap aftermarket ones I got second hand and had powder coated for a change they were black not blue (changed powder coaters).
Last edited by FMJ; 04 December 2017 at 06:03 PM.
16 March 2016, 01:05 AM
#70
Cheers
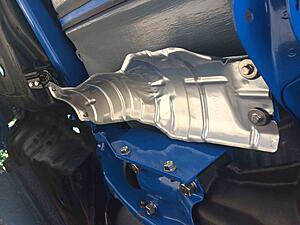
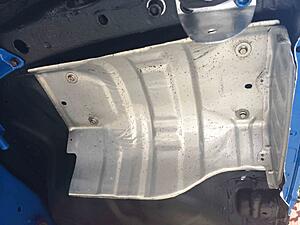
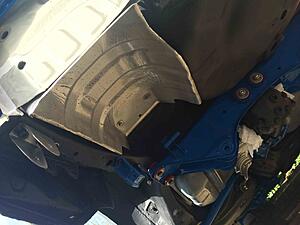
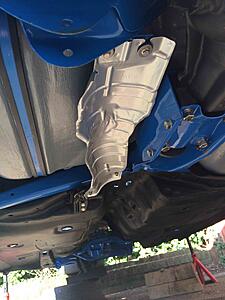
Exhaust heat shields added. These were stripped back and powder coated but due to how thin the rear one is it was hard to get it perfect. So as you can see it's a little bit speckled. But a clear powder coat should stop any further corrosion. Fitted with stainless fittings as they are not load bearing so I can get away with using them here.
There is sometimes a heat shield further down the system but my Turbo car has never had one in the last ten years and has been fine so I am not bothering with this one.
Last edited by FMJ; 04 December 2017 at 06:05 PM.
16 March 2016, 02:41 AM
#71
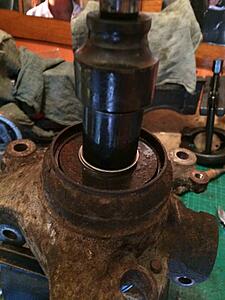
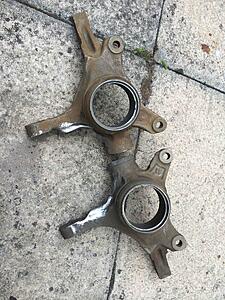
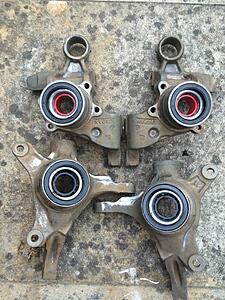
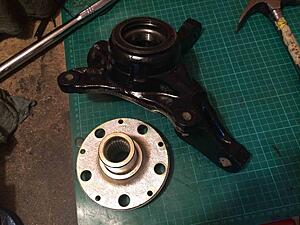
Onto the hubs and carriers.
Warning lots of pics on this update!
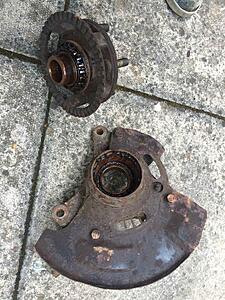
Remember these? Turns out sport versions are the same as Turbo versions so I used the old sport ones.
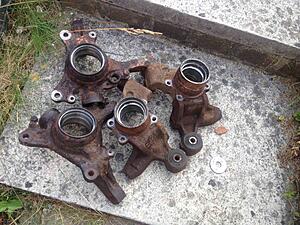
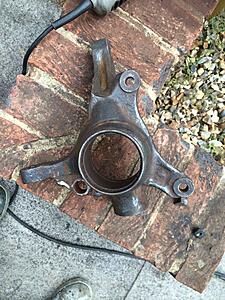
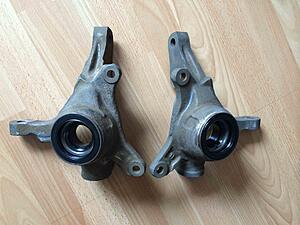
Front hub carriers very rusty.
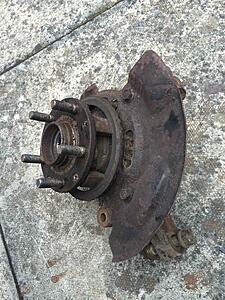
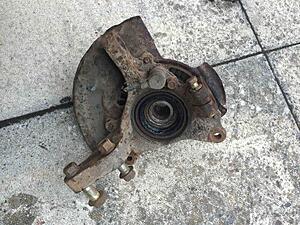
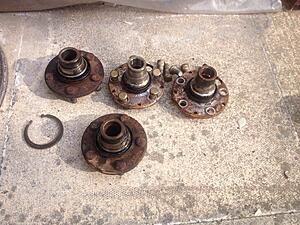
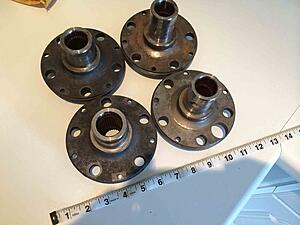
Parts I don't want binned.
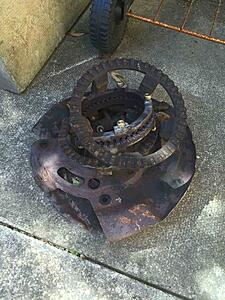
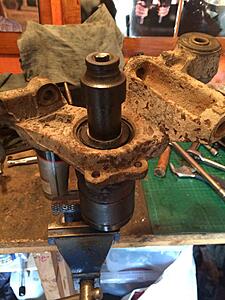
Front and rear hubs bashed out.
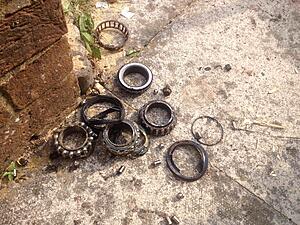
Bits of old bearings.
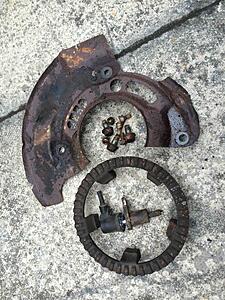
All the parts binned from the rear carriers (Sport had drums so it was all thrown away).
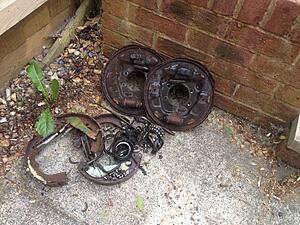
A nice pile of parts for the bin. I don't want ABS, stone guards or drum brakes.
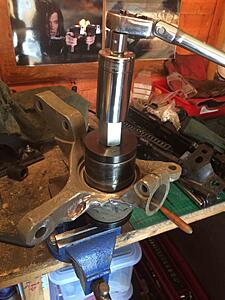
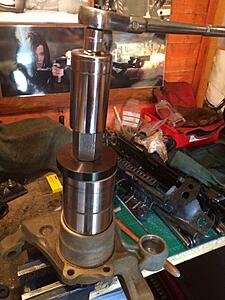
Next came lots of messing around with pressing bearings out. I won't document this because it would take loads of boring pics and this isn't a how to. I used stuff like this (I love my electric impact gun):

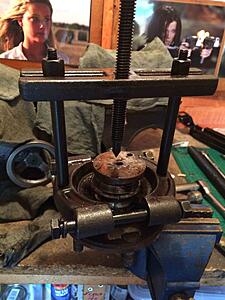
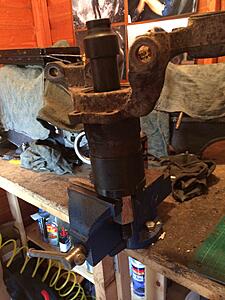
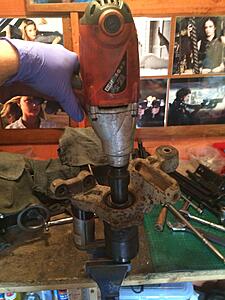
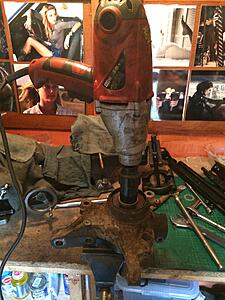
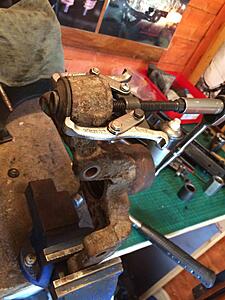
To achieve this:
Rusty hub carrier with no bearings
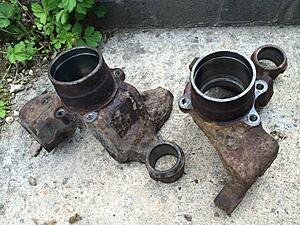
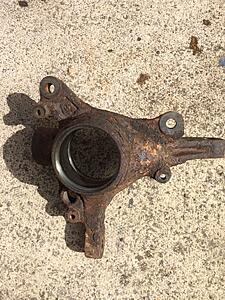
I removed the worst of the rust with a sanding wheel on an angle grinder and then a load of brake cleaner.
I then used a cutting disc on the front carriers to remove several threaded bolt nubs which were for the front stone guards (don't want them and want to improve cooling) and then housing for the ABS sensor as again I don't want ABS. It makes the hubs look cleaner, was easier to work with them and also saved a small bit of unsprung weight. Then a bath in Deox-C. A dremel was used to clean up the bearing surfaces front and rear (soft brass brush).
Soaked in Deox-C to remove the rust.
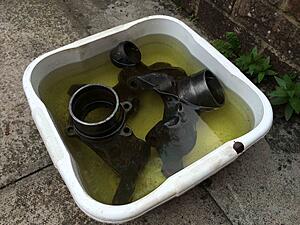
To stop the fine layer of surface rust here that happens after the deox process you need to either heat the hubs really quickly to dry them or rinse in IPA. Here you can see I cut off the hole for the ABS sensor too. It all adds up....
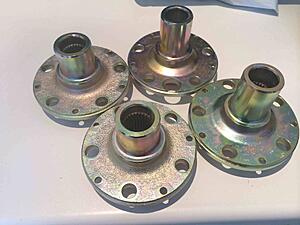
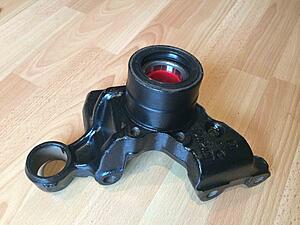
Hubs sent away to be plated.
Returned
Back to the carriers.
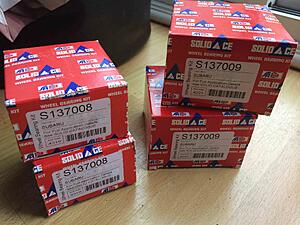
New bearings were fitted.
Front
.
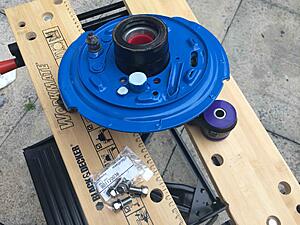
Rear
Done
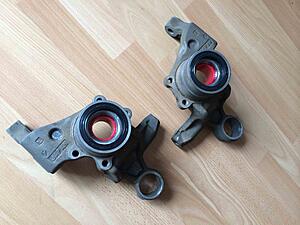
Painted with Bilt Hamber rust converter then Bilt Hamber Epoxy Mastic.
Trailing arm poly bush added to rear.
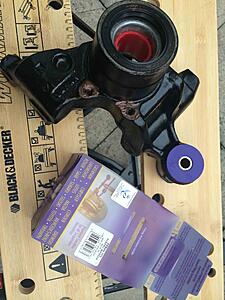
Rear brake backing plate added. Brown stuff is copper slip to prevent corrosion.
Bolted on with new genuine bolts. Not the holes for the ABS sensors have been filled with liquid metal putty. This is so that dirt and water do not enter the handbrake mechanism through the large hold for the sensor.
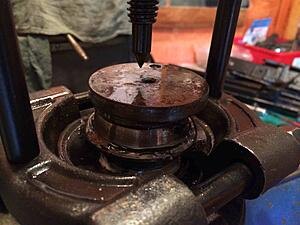
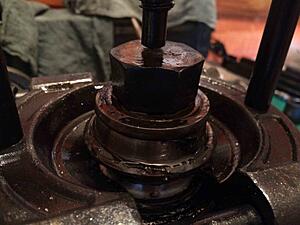
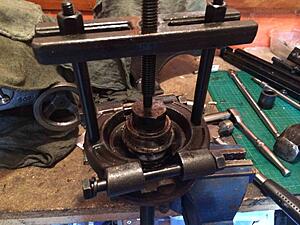
Lastly the hub is pressed in.
Done.
Front carrier and hub.
Pressing hub in.
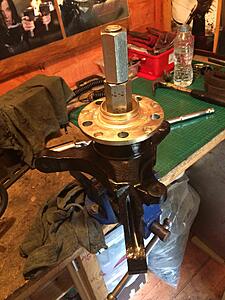
Done.

Warning lots of pics on this update!
Remember these? Turns out sport versions are the same as Turbo versions so I used the old sport ones.
Front hub carriers very rusty.
Parts I don't want binned.
Front and rear hubs bashed out.
Bits of old bearings.
All the parts binned from the rear carriers (Sport had drums so it was all thrown away).
A nice pile of parts for the bin. I don't want ABS, stone guards or drum brakes.
Next came lots of messing around with pressing bearings out. I won't document this because it would take loads of boring pics and this isn't a how to. I used stuff like this (I love my electric impact gun):
To achieve this:
Rusty hub carrier with no bearings
I removed the worst of the rust with a sanding wheel on an angle grinder and then a load of brake cleaner.
I then used a cutting disc on the front carriers to remove several threaded bolt nubs which were for the front stone guards (don't want them and want to improve cooling) and then housing for the ABS sensor as again I don't want ABS. It makes the hubs look cleaner, was easier to work with them and also saved a small bit of unsprung weight. Then a bath in Deox-C. A dremel was used to clean up the bearing surfaces front and rear (soft brass brush).
Soaked in Deox-C to remove the rust.
To stop the fine layer of surface rust here that happens after the deox process you need to either heat the hubs really quickly to dry them or rinse in IPA. Here you can see I cut off the hole for the ABS sensor too. It all adds up....
Hubs sent away to be plated.
Returned
Back to the carriers.
New bearings were fitted.
Front
.
Rear
Done
Painted with Bilt Hamber rust converter then Bilt Hamber Epoxy Mastic.
Trailing arm poly bush added to rear.
Rear brake backing plate added. Brown stuff is copper slip to prevent corrosion.
Bolted on with new genuine bolts. Not the holes for the ABS sensors have been filled with liquid metal putty. This is so that dirt and water do not enter the handbrake mechanism through the large hold for the sensor.
Lastly the hub is pressed in.
Done.
Front carrier and hub.
Pressing hub in.
Done.
Last edited by FMJ; 04 December 2017 at 07:46 PM.
16 March 2016, 09:13 AM
#72
I'm considering buying a cheap bottle Jack for pressing bushes in , can buy a 5 tonne one from machine Mart for about 20 , is that a good or bad idea?
What are the limits of zinc coating , could cast parts like the hub carrier be zinc plated?
Do you have any links to how tos for doing the hubs , ?
What are the limits of zinc coating , could cast parts like the hub carrier be zinc plated?
Do you have any links to how tos for doing the hubs , ?
16 March 2016, 01:55 PM
#73
It would probably get new ones in but getting old bushes out usually involves cutting and burning them plus brute force.
You could just get a garage to remove any tough ones which may be easier/cheaper.
As for plating you can do the hub carriers no problem. It would cost a bit... For example the four hubs shown above plus four long bolts for the rear carriers plus some washers and nuts was about �80. You could probably get it cheaper I just wanted to use a place that did mail order.
I didn't do powder coating due to the amount of masking it would involve (the coater isn't great at this).
I chose to use epoxy for the carriers for a few reasons:
I already had the mastic and rust converter so it saved me maybe �100?
Posting the carriers to the plating place would cost a bit as they are heavy.
The plating is good for corrosion but not invincible. I thought the mastic option may be better for protecting them.
If you search something like "impreza wheel bearing DIY" or "impreza wheel bearing how to" you should get some good threads, mainly from US forums.
I'm considering buying a cheap bottle Jack for pressing bushes in , can buy a 5 tonne one from machine Mart for about 20 , is that a good or bad idea?
What are the limits of zinc coating , could cast parts like the hub carrier be zinc plated?
Do you have any links to how tos for doing the hubs , ?
What are the limits of zinc coating , could cast parts like the hub carrier be zinc plated?
Do you have any links to how tos for doing the hubs , ?
17 March 2016, 05:49 PM
#74
I think I'll be doing exactly as you've done ,considering the costs
I don't want to freak you out but I've read in a couple of places that burning the rubber out is really not a good idea , the burnt rubber is very toxic and apparently could mean having to have limbs amputated , that seems unbelievable but it's put me off burning them
I don't want to freak you out but I've read in a couple of places that burning the rubber out is really not a good idea , the burnt rubber is very toxic and apparently could mean having to have limbs amputated , that seems unbelievable but it's put me off burning them
Last edited by gary77; 17 March 2016 at 05:52 PM.
17 March 2016, 08:04 PM
#75
It's definitely not pleasant and I have no doubts it's bad for you. But the amount of burnt rubber people breath in at race tracks is probably just as much as melting a bush. Also I have been doing these things for 15years and am ok so far... Of course many many things are bad for you such as paint fumes, lead (I shoot and reload my own ammo which involves melting lead) you just have to take precautions such as working outside and wearing a mask.
You can use a hole saw on the bushes but it will still melt and make fumes from the rubber. It may also kill the drill. But once you try getting them out you will see how tough they are, burning was my last option and is what every garage I asked said they would do.
I am far more careful then I used to be but ultimately working on cars to this degree is always going to be hazardous. Unless you are very disciplined with PPE.
I think I'll be doing exactly as you've done ,considering the costs
I don't want to freak you out but I've read in a couple of places that burning the rubber out is really not a good idea , the burnt rubber is very toxic and apparently could mean having to have limbs amputated , that seems unbelievable but it's put me off burning them
I don't want to freak you out but I've read in a couple of places that burning the rubber out is really not a good idea , the burnt rubber is very toxic and apparently could mean having to have limbs amputated , that seems unbelievable but it's put me off burning them
Last edited by FMJ; 04 December 2017 at 07:48 PM.
24 March 2016, 01:25 AM
#76
Drive shafts next.
First never assume anything about Subaru drive shafts. Even if you get a set that have the correct spline count and diameter when you strip them down you find that there are varying lengths and joint cup styles etc under the boots... I had a nightmare trying to work out if the ones I had would be compatible and I am still not 100% sure.
These are the selection and as you can see they have been used before.

I cut off all the old boots, stripped down the joints and cleaned out all the old grease. The shafts and inner cups were then sent away for powder coating.
When they were returned I rebuilt the shafts with new grease, boots and
stainless bands.

I tried the crimp type boot clamps initially and they were crap, then i tried to cheat and use JCS type stainless screw clamps and despite people saying they were good in this application I wasn't happy with them. I tried cable ties but again I didn't like them. Eventually I bit the bullet and spent �60 on a proper real of stainless band and fittings with a roller type fitting tool. This was miles better then any of the other options and I wouldn't recommend anything else.
I replaced the front outer CV's with new ones which had the part exposed to the elements painted with black epoxy paint so the metal will not rust. Make sure to clean the metal first as it's greasy from the factory. The rears I could not replace and nowhere sells rear outer or inner CV's. You can only get them as a complete new rear shaft which is very expensive. So I cleaned out the old ones and re-greased them (you need a grease gun for this). Cleaned off the rust and painted with epoxy mastic. All good.
 24 March 2016, 01:43 AM
#77
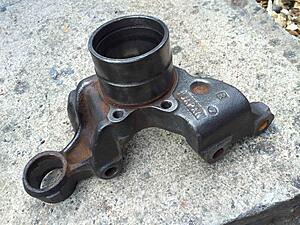
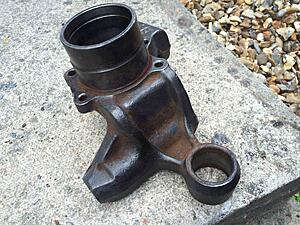
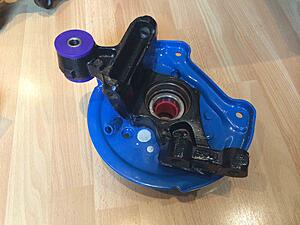
Remember this old power steering rack?

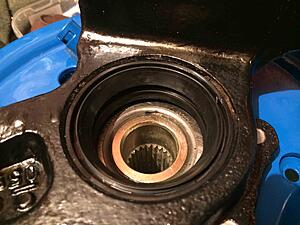
I kept it, and with a bit of work it cleaned up quite nicely. I binned the track rods and boots and cleaned the rack up with a lot of Gunk degreaser and a Dremel.
Pic of the rack part way through cleaning.

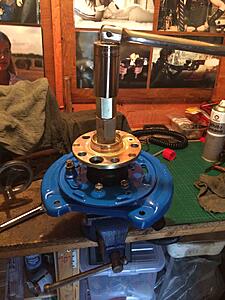
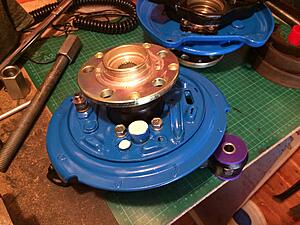
Ready to fit after being painted with Dinitrol 445 plastic coating. Powder coated brackets and new bolts used with poly bushes.


I kept it, and with a bit of work it cleaned up quite nicely. I binned the track rods and boots and cleaned the rack up with a lot of Gunk degreaser and a Dremel.
Pic of the rack part way through cleaning.

Ready to fit after being painted with Dinitrol 445 plastic coating. Powder coated brackets and new bolts used with poly bushes.

Last edited by FMJ; 24 March 2016 at 01:45 AM.
 05 May 2016, 12:41 AM
#80
Another month away and I got distracted buying this....

Anyway back on topic
Rack fitted:

STI alloy wishbones were stripped down and powder coated clear. I removed the small bushes myself but left the larger ones to a garage as I fancied a break from fighting them. They used a lathe to cut them out apparently! They also said it wasn't easy. �40 Well spent then! There are obviously two sets here as I was prepping two sets of arms.
I had the hardware plated and then reassembled with poly bushes. Steel parts were coated with stone chip coating.


 05 May 2016, 02:16 AM
#81
Parts ready to start making the front end work:
Steering tie rods, track rod ends and lower ball joints.

Wishbones and bolts


HSD coilovers


Strut mounting bolts and nuts.

Front hub carriers and hubs

Complete track rod with stainless nut and all exposed parts coated with stone chip coating.

Wishbone fitted

Strut fitted


Drive shaft fitted also note the steel collar fitted in wishbone for ball joint. These are stupidly expensive...

Hub and carrier ready to go

Fitted

Track rod connected

Disc and new set of studs fitted. Note the inner part of the disc is painted with stone chip to stop it looking rusty. The actual disc is slightly green as it's been coated in part protector which will be cleaned off before pads are fitted. This will just stop surface rust is it will be a while before the car is used.

Wheel fitted!

Yes I know I have missed out the brakes and arch liners for now. The reason I am using space savers is due to having to push the car around and dry steer which is easier on skinny tyres.
All done

Last edited by FMJ; 05 May 2016 at 02:21 AM.

 09 May 2016, 05:21 PM
#86
 10 May 2016, 10:42 PM
#88
Thank you chaps
The powder coating was by a company in South Newton, Salisbury its actually a branch of flowplant, but I wouldn't recommend them. The work slowly started to go down hill and the waiting times were crazy long.
I now use Wessex Metal Finishers in Wilton near Salisbury who give a better finish and far far quicker turn around times.
More progress to come, it's just so slow uploading pics on my laptop.
10 May 2016, 11:53 PM
#89
Scooby Newbie

Join Date: May 2016
Location: UK
Posts: 1
Likes: 0
Received 0 Likes
on
0 Posts
Excellent post and eagerly waiting for the next set of photos and comments on the build.
I have a MY99 STi5 that has been off the road for 10 years and looking to get that back on the road. It is going to need a lot of TLC to get to back to the state it was...
Keep the posts coming FMJ !
I have a MY99 STi5 that has been off the road for 10 years and looking to get that back on the road. It is going to need a lot of TLC to get to back to the state it was...
Keep the posts coming FMJ !
11 May 2016, 08:22 AM
#90

Nice progress, I would consider doing something with the HSD's though. They start to show wear and corrosion on the locking collars and threads very quickly. I had the same on both my Evo 6 and Widetrack STI. Probably within the first month or so of been on the road. Be such a shame for them to ruin how much time you've spent getting it looking like it does!